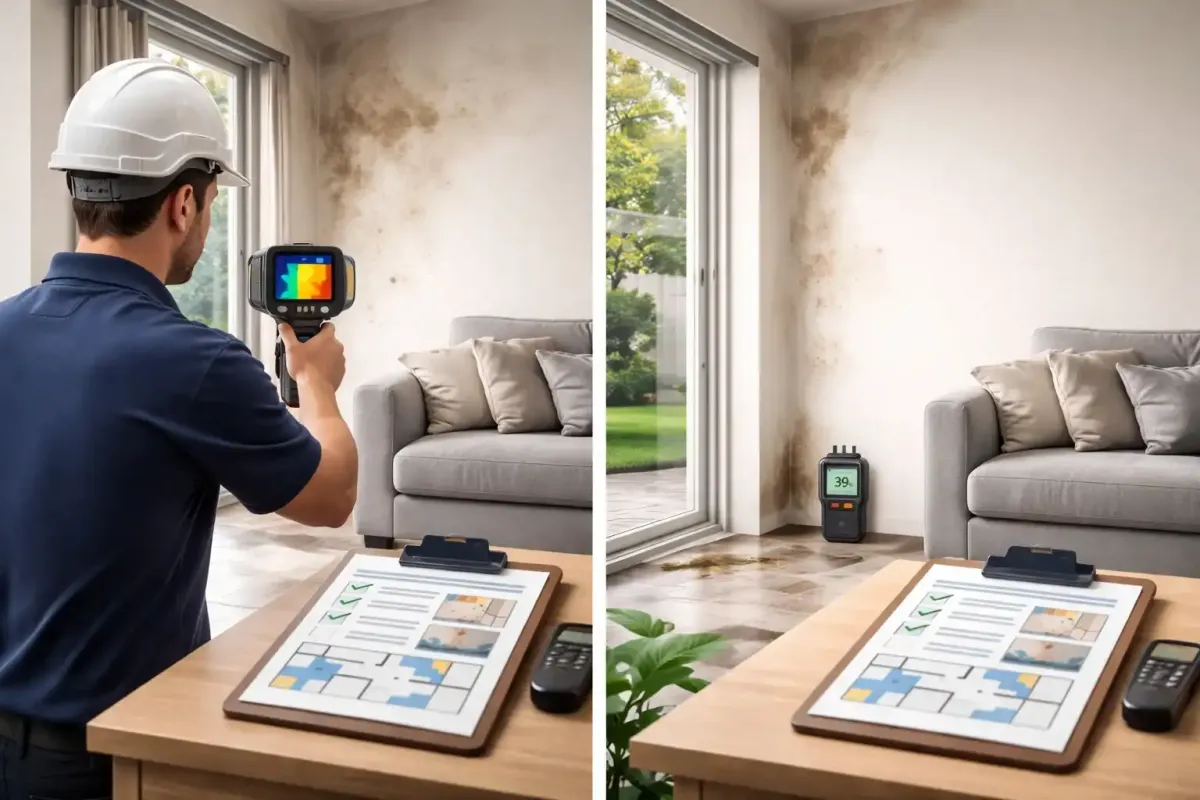
A water damage inspection report is a professional assessment that identifies the source, location, extent, and severity of water damage within a residential or commercial property. In Australia, qualified building inspectors use moisture meters, thermal imaging cameras, and visual inspection techniques to detect hidden leaks, rising damp, condensation issues, and waterproofing failures. The report outlines damage findings, rates their severity, and provides recommendations for repair and prevention. Costs for a water damage inspection typically range from $300 to $700 depending on the property size and location.
Water damage is one of the most common and costly defects found in Australian homes. According to the Insurance Council of Australia, water-related claims account for a significant share of all residential building insurance payouts each year. Left undetected, even a small leak can lead to structural weakening, mould growth, and thousands of dollars in repair bills. Whether you are buying a property, managing a rental, or investigating a persistent damp patch in your own home, understanding what a water damage inspection report contains and how to act on its findings is a practical step toward protecting your investment.
For a complete overview, see our guide to insurance claim assessments.
What Is a Water Damage Inspection Report?
A water damage inspection report is a documented assessment produced by a licensed building inspector after examining a property for water-related defects. The purpose of the report is to identify where water has entered or accumulated, determine the cause, measure the severity, and recommend a course of action.
Unlike a general building inspection, a water damage inspection focuses specifically on moisture-related issues. Inspectors use specialised equipment such as pin and pinless moisture meters, thermal imaging (infrared) cameras, and hygrometers to detect moisture hidden behind walls, under flooring, and within ceiling cavities.
The report serves multiple purposes:
- It provides evidence for insurance claims related to water damage events
- It supports buyers in negotiating property prices when water damage is discovered during a pre-purchase inspection
- It gives homeowners a clear picture of the problem so they can plan targeted repairs
- It documents the condition of a property at a specific point in time for legal or strata management purposes
Common Causes of Water Damage in Australian Properties
Water damage rarely appears without a traceable cause. Understanding the most frequent sources helps property owners recognise risks early and take preventive action.
| Description | Common Location | |
|---|---|---|
| Leaking Pipes | Burst, corroded, or poorly connected plumbing pipes hidden in walls, floors, or ceilings | Kitchen, bathroom, laundry, subfloor areas |
| Roof Leaks | Damaged or missing roof tiles, deteriorated flashing, or blocked roof valleys allowing rainwater entry | Ceiling cavities, upper-level walls, around skylights |
| Failed Waterproofing | Breakdown of waterproofing membranes in wet areas, often due to age, poor installation, or structural movement | Bathrooms, showers, balconies, planter boxes |
| Rising Damp | Ground moisture drawn upward through masonry walls by capillary action, usually where a damp-proof course is missing or damaged | Lower external walls, subfloor areas, older brick homes |
| Condensation | Moisture build-up from poor ventilation, causing water to collect on cold surfaces such as windows and internal walls | Bathrooms, kitchens, poorly ventilated rooms, wall cavities |
| Storm and Flood Damage | Direct water ingress from severe weather events including heavy rainfall, flooding, and storm surge | Ground-level rooms, subfloor, external walls, roof spaces |
| Blocked Gutters and Downpipes | Leaf litter and debris preventing stormwater drainage, causing overflow into wall cavities and fascia boards | Eaves, fascia, external walls adjacent to gutters |
In coastal and high-rainfall regions such as Far North Queensland, the Northern Rivers of NSW, and parts of Victoria, water damage from storms and flooding is particularly common. Properties in these areas benefit from more frequent inspections.
Warning Signs That You Need a Water Damage Inspection
Not all water damage is immediately visible. Some issues develop slowly behind walls or beneath flooring and only become apparent once they have caused significant harm. Recognising early warning signs can save you from expensive repairs.
- Discolouration, staining, or watermarks on walls or ceilings
- Peeling, bubbling, or blistering paint or wallpaper
- A persistent musty or damp smell, particularly in enclosed spaces
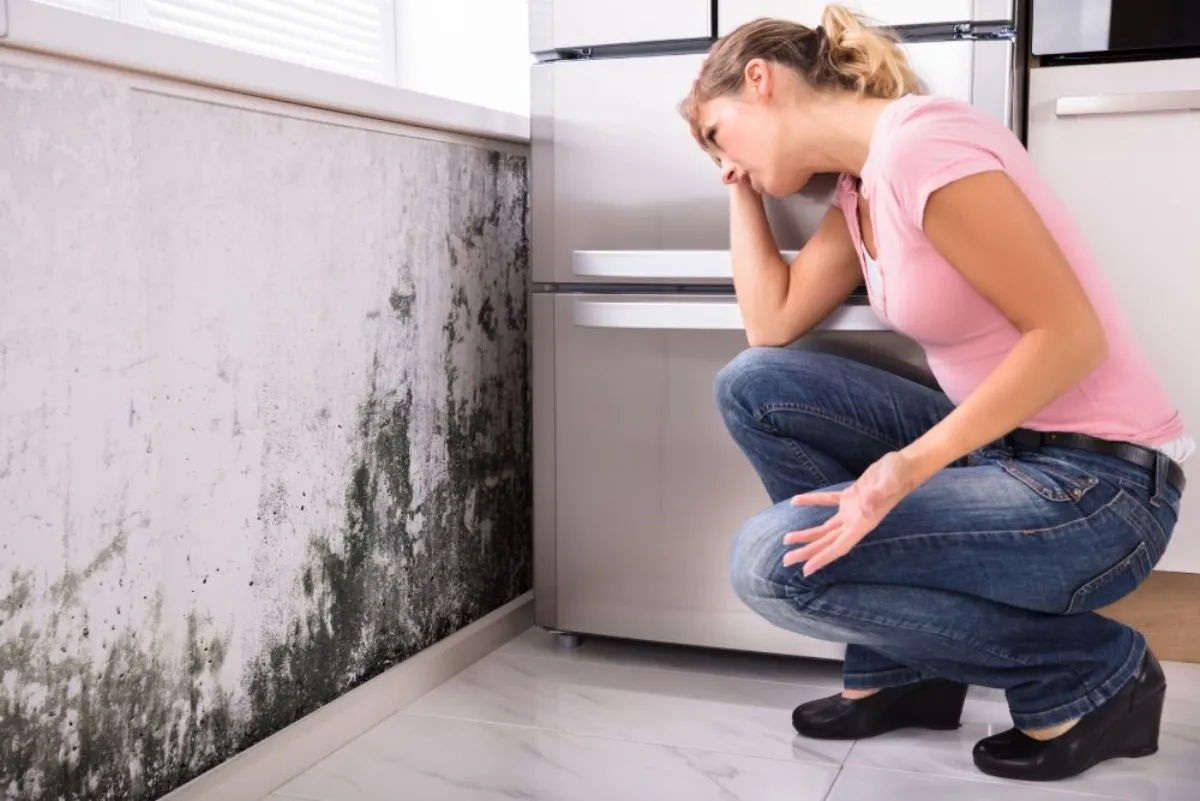
- Visible mould or mildew growth on surfaces or in corners
- Warped, buckled, or soft flooring (timber, laminate, or carpet)
- Swollen or deteriorating skirting boards and architraves
- Higher than expected water bills with no change in usage
- Cracked or deteriorating grout in bathrooms and wet areas
- Damp patches on external walls, particularly at ground level
- Efflorescence (white salt deposits) on brick or masonry surfaces
If you notice mould spreading across more than one square metre, or if the musty smell persists after cleaning, a professional inspection should be arranged without delay. Mould exposure can affect respiratory health, and the underlying moisture source needs to be identified and addressed.
How a Water Damage Inspection Is Carried Out
A professional water damage inspection follows a structured process designed to locate moisture, trace its source, and assess the damage it has caused.
Visual assessment of the property
The inspector walks through the entire property, examining all internal and external surfaces for visible signs of water damage. This includes walls, ceilings, floors, wet areas, subfloor spaces, roof cavities, and external drainage.
Moisture meter testing
Using pin-type and pinless moisture meters, the inspector measures moisture levels in building materials including timber, plasterboard, and masonry. Readings above normal thresholds indicate active or recent water intrusion.
Thermal imaging scan
An infrared camera detects temperature differences across surfaces. Wet or damp areas appear as cooler zones on the thermal image, revealing hidden moisture behind walls, under tiles, and within ceiling voids that cannot be seen with the naked eye.
Humidity and ventilation check
The inspector uses hygrometers to measure relative humidity levels in different rooms and assesses airflow patterns. High humidity combined with poor ventilation is a common contributor to condensation-related water damage.
Source identification
Based on the data collected, the inspector traces the moisture back to its source. This could be a leaking pipe, failed waterproofing membrane, roof defect, rising damp, or an external drainage problem.
Report compilation
All findings are compiled into a detailed report with photographs, thermal images, moisture readings, severity ratings, and recommendations for remediation.
The inspection typically takes between one and three hours depending on the size of the property and the extent of damage being investigated.
What the Report Includes
A thorough water damage inspection report provides clear, actionable information. While formats vary between inspection companies, a quality report should contain all of the following sections.
- Property details: Address, property type, date of inspection, weather conditions at the time, and names of parties present
- Scope of inspection: A description of the areas inspected and any areas that were inaccessible or excluded
- Findings summary: An overview of all water damage identified, grouped by location within the property
- Photographic evidence: High-resolution photos and thermal images showing each defect and its precise location
- Moisture readings: Recorded measurements from moisture meters, including a comparison against normal baseline levels for the material type
- Severity ratings: Each finding rated by severity (minor, moderate, major, or safety concern) to help prioritise repairs
- Source identification: The inspector's professional opinion on the likely cause of each instance of water damage
- Recommendations: Specific repair actions, further investigations (such as a plumber's camera inspection), and preventive measures
- Limitations and disclaimers: Areas that could not be accessed, conditions that may have affected results, and the scope boundaries of the inspection
Tip
When reviewing a water damage inspection report, pay close attention to the recommendations section. This is where the inspector outlines what needs to be done and in what order. Addressing the source of water ingress should always come before cosmetic repairs.
Understanding Severity Ratings
Inspectors assign severity ratings to each defect based on the risk it poses to the property's structure, the health of occupants, and the estimated cost of repair.
| Description | Action Required | |
|---|---|---|
| Minor | Surface-level damage such as small stains, minor discolouration, or low moisture readings in non-structural elements | Monitor and address during routine maintenance. Typical repair cost under $500. |
| Moderate | Damage affecting finishes and fittings, including warped timber, failing grout, early-stage mould, or consistently high moisture readings | Investigate the source and repair within 1 to 3 months. Typical repair cost $500 to $5,000. |
| Major | Structural impact including rotting framing, significant mould contamination, compromised waterproofing membranes, or large areas of saturated building materials | Arrange specialist repairs as a priority. Typical repair cost $5,000 to $30,000 or more. |
| Safety Concern | Active water ingress near electrical systems, severe structural compromise, or extensive toxic mould growth posing an immediate health risk | Immediate action required. May need evacuation, emergency repairs, and specialist remediation. |
Common Areas Where Water Damage Is Found
Certain parts of a property are more vulnerable to water damage than others. Inspectors pay extra attention to these high-risk zones during an assessment.
Bathrooms and Wet Areas
Bathrooms are the most common location for water damage in Australian homes. Failed shower waterproofing, cracked tiles, and deteriorated silicone seals allow water to seep into wall and floor cavities. Over time, this causes timber framing to rot, subfloor structures to weaken, and mould to grow in hidden spaces.
Australian Standard AS 3740 sets out the requirements for waterproofing in domestic wet areas. A property that does not meet these standards is at higher risk of ongoing water damage.
Subfloor and Foundation
Properties with timber subfloors or pier-and-beam construction are susceptible to moisture accumulation beneath the building. Poor drainage, inadequate ventilation, and high water tables can all contribute. Rising damp in older homes with compromised or missing damp-proof courses is a frequent finding in inspection reports across Sydney, Melbourne, and Adelaide.
Roof and Ceiling Spaces
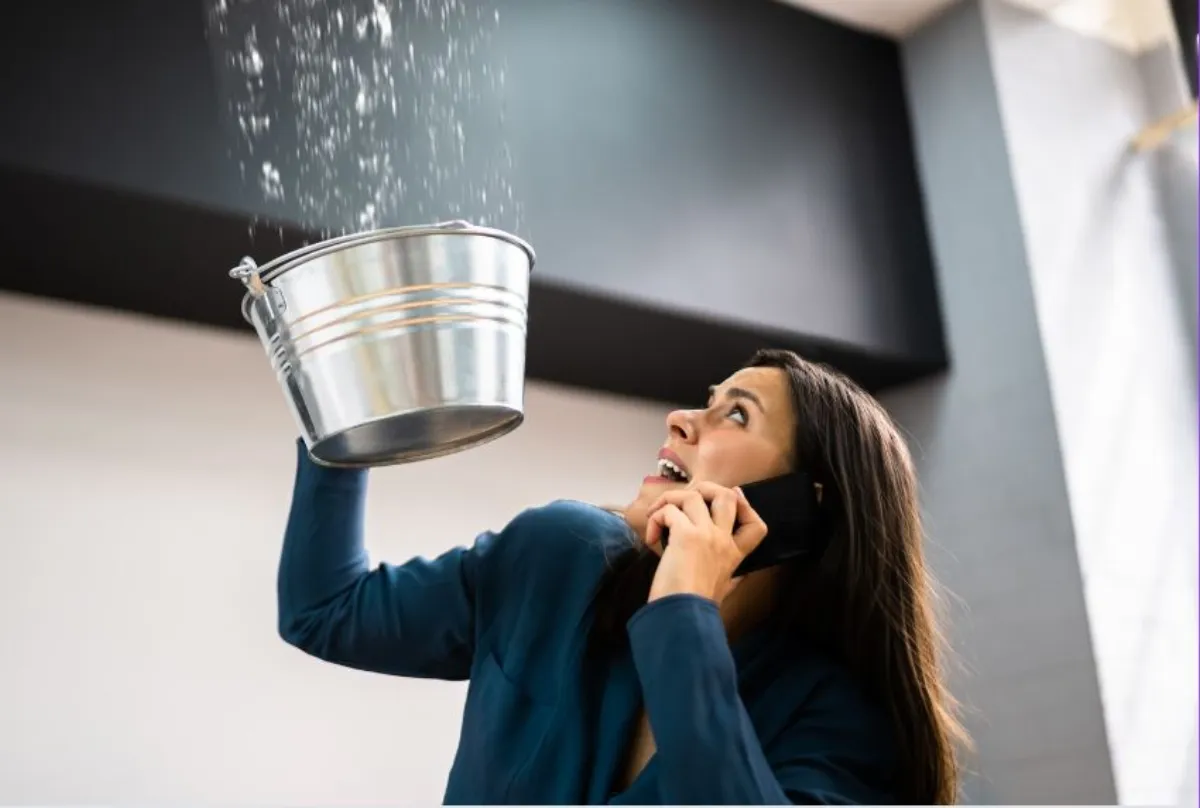
Roof leaks caused by cracked tiles, damaged flashing, or blocked gutters allow rainwater to enter the ceiling cavity. Damage may go unnoticed for months, with the first visible sign often being a brown stain on the ceiling or a sagging section of plasterboard.
Balconies and External Areas
Balcony waterproofing failures are one of the most reported defects in apartment buildings and multi-storey homes across Australia. Water penetrating through a balcony slab can damage the rooms below, corrode structural steel reinforcement, and create conditions for concrete cancer.
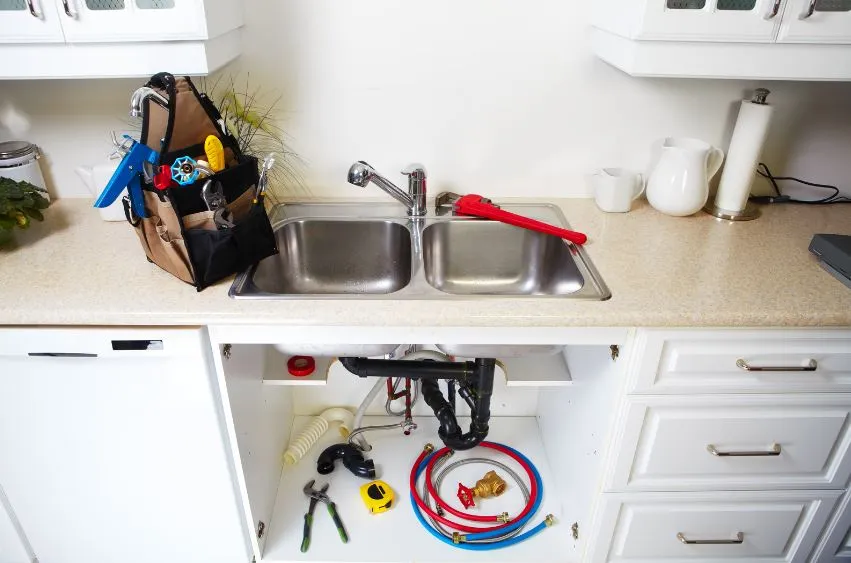
Laundry and Kitchen
Leaking taps, dishwasher connections, and washing machine hoses are common culprits. Water pooling behind or beneath appliances often goes unnoticed until the damage becomes visible on adjacent walls or flooring.
Water Damage and Australian Building Standards
Several Australian Standards and regulations govern building practices related to water management and waterproofing.
- AS 3740 (Waterproofing of domestic wet areas): Sets minimum requirements for waterproofing membranes in bathrooms, laundries, and other wet areas in residential buildings
- National Construction Code (NCC): Contains performance requirements for weatherproofing, damp-proofing, and drainage in all building classes
- AS 4349.1 (Inspection of buildings): Provides the standard framework for conducting building inspections, including the identification and reporting of moisture-related defects
- AS 2870 (Residential slabs and footings): Addresses site classification and drainage considerations that affect moisture exposure to building foundations
State regulators including NSW Fair Trading, the Victorian Building Authority (VBA), and the Queensland Building and Construction Commission (QBCC) enforce compliance with these standards. If your property was built or renovated in breach of these codes, you may have grounds for a building defect claim.
Under the Home Building Act 1989 (NSW), statutory warranties cover waterproofing defects in new residential building work for up to six years from the date of completion. Similar protections exist under the Domestic Building Contracts Act 1995 (VIC) and the Queensland Building and Construction Commission Act 1991 (QLD).
What to Do After Receiving Your Report
Receiving a water damage inspection report is only the first step. Acting on the findings quickly and in the right order is what prevents the damage from worsening.
Review the findings carefully
Read through the entire report, paying close attention to the severity ratings and the source identification for each defect. If anything is unclear, contact the inspector for clarification.
Prioritise by severity
Address safety concerns and major defects first. Minor and moderate issues should be scheduled into a maintenance plan within a reasonable timeframe.
Engage qualified tradespeople
For plumbing issues, engage a licensed plumber. For waterproofing failures, use a waterproofing specialist. For structural damage, consult a structural engineer. Always use licensed professionals who hold the appropriate state licences.
Fix the source before the symptoms
Repainting a water-stained ceiling without fixing the leaking pipe above it will only result in the problem returning. Always resolve the cause of water ingress before carrying out cosmetic repairs.
Document all repairs
Keep records of all work carried out including invoices, photos, and compliance certificates. This documentation is valuable for insurance claims, warranty disputes, and future property sales.
Schedule a follow-up inspection
After repairs are completed, a follow-up moisture inspection confirms that the issue has been fully resolved and moisture levels have returned to normal.
Using the Report for Insurance Claims
If the water damage was caused by a sudden and accidental event such as a burst pipe or storm, your building insurance policy may cover the repair costs. The inspection report provides the documented evidence your insurer will need to assess the claim.
- Submit the full inspection report along with your claim
- Include all photographic and thermal imaging evidence from the report
- Obtain repair quotes from licensed tradespeople to compare against the insurer's assessment
- Be aware that insurers generally do not cover gradual damage, wear and tear, or maintenance-related defects
Using the Report for Property Purchases
If a water damage inspection is conducted as part of a pre-purchase building inspection, the findings can be used to:
- Negotiate a reduction in the purchase price to account for repair costs
- Request the vendor complete specific repairs before settlement
- Withdraw from the purchase if the damage is too extensive or too costly to remediate
- Plan a realistic renovation budget that includes water damage remediation
Preventing Future Water Damage
Prevention is always less expensive than repair. A proactive approach to moisture management can significantly reduce the risk of water damage in your property.
- Schedule annual inspections of the roof, gutters, downpipes, and external drainage systems
- Clean gutters and downpipes at least twice a year, more frequently if surrounded by trees
- Check bathroom and laundry waterproofing every 5 to 10 years and re-seal as needed
- Fix dripping taps, running toilets, and leaking pipe connections promptly
- Ensure adequate ventilation in bathrooms, kitchens, and subfloor areas to reduce condensation
- Direct stormwater drainage away from the building foundation
- Inspect appliance hoses (washing machines, dishwashers, refrigerators) annually and replace them if they show signs of wear
- Monitor your water meter for unexplained increases in usage that may indicate a hidden leak
Pros
- Catches leaks and moisture problems before they cause structural damage
- Reduces the risk of mould growth and associated health issues
- Preserves the property's market value and structural integrity
- Provides documentation that supports insurance claims and warranty disputes
- Saves money by addressing small repairs before they become major remediation projects
Cons
- Structural timber rot and framing deterioration that weakens the building
- Mould growth that poses respiratory and allergy health risks to occupants
- Damaged waterproofing allowing water to spread to adjacent rooms and levels
- Significantly higher repair costs when damage is discovered late
- Reduced property value and difficulty selling due to visible or documented water damage
Key Takeaways
- A water damage inspection report identifies the source, location, severity, and recommended repairs for moisture-related defects in a property.
- Professional inspectors use moisture meters, thermal imaging cameras, and hygrometers to detect hidden water damage behind walls, under floors, and within ceiling cavities.
- Common causes of water damage in Australian homes include leaking pipes, failed waterproofing, roof defects, rising damp, condensation, and storm events.
- Severity ratings in the report (minor, moderate, major, safety concern) help property owners prioritise repairs and allocate budgets effectively.
- Australian Standard AS 3740 governs waterproofing in wet areas, and compliance failures can be grounds for a building defect claim under state legislation.
- The inspection report provides documented evidence for insurance claims, pre-purchase negotiations, and strata management decisions.
- Always fix the source of water ingress before carrying out cosmetic repairs to prevent the problem from recurring.
- Regular preventive maintenance, including annual roof and plumbing checks, is the most cost-effective way to avoid serious water damage.
Frequently Asked Questions
QWhat does a water damage inspection report include?
A water damage inspection report includes a summary of all moisture-related defects found in the property, supported by photographic evidence and thermal imaging. It contains moisture meter readings for affected areas, severity ratings for each defect, identification of the likely source of water ingress, and specific recommendations for repair and prevention. The report also notes any areas that were inaccessible during the inspection.
QHow much does a water damage inspection cost in Australia?
A water damage inspection in Australia typically costs between $300 and $700. The price depends on the size of the property, the extent of damage being investigated, the location, and whether specialist equipment such as thermal imaging is used. Properties in metropolitan areas such as Sydney and Melbourne tend to be at the higher end of this range. Some inspectors offer combined building and moisture inspection packages at a reduced rate.
QHow long does a water damage inspection take?
A typical water damage inspection takes between one and three hours. Smaller properties with a localised area of concern may be completed in around an hour. Larger homes, multi-storey buildings, or properties with widespread damage can take three hours or more. The inspector needs sufficient time to conduct visual assessments, take moisture readings, and complete thermal imaging scans across all affected and at-risk areas.
QWhat tools do inspectors use to detect water damage?
Professional water damage inspectors use a combination of tools including pin-type moisture meters (which penetrate the surface to measure moisture content in timber and plasterboard), pinless or non-invasive moisture meters (which scan materials without causing damage), infrared thermal imaging cameras (which detect temperature differences indicating hidden moisture), and hygrometers (which measure relative humidity levels in rooms and cavities). Some inspectors also use borescopes to view inside wall and ceiling cavities without opening them up.
QCan a water damage inspection detect mould?
A water damage inspection can identify conditions that promote mould growth, such as high moisture levels and poor ventilation, and the inspector will note any visible mould observed during the assessment. However, identifying mould species or assessing airborne mould spore concentrations requires a dedicated mould inspection with laboratory testing. If the inspector suspects significant mould contamination, they will recommend a specialist mould assessment.
QIs a water damage inspection covered by insurance?
The inspection itself is generally not covered by standard home insurance. However, if the water damage was caused by a sudden and accidental event (such as a burst pipe or storm), the cost of repairs identified in the report may be claimable. Some insurers accept an independent inspection report as supporting evidence for a claim. Check your Product Disclosure Statement or contact your insurer to confirm what documentation they require.
QWhat is the difference between a water damage inspection and a building inspection?
A standard building inspection covers the overall condition of a property including structural elements, roofing, plumbing, electrical, and external areas. It follows AS 4349.1 and provides a broad assessment. A water damage inspection is a focused, specialist assessment that targets moisture-related defects specifically. It uses additional equipment like thermal imaging and detailed moisture mapping to investigate water ingress in depth. A building inspection may flag water damage as a concern, but a dedicated water damage inspection provides a more thorough analysis of the issue.
QWhen should I get a water damage inspection done?
You should arrange a water damage inspection whenever you notice signs of moisture intrusion such as stains on walls or ceilings, musty odours, warped flooring, or visible mould. It is also recommended before purchasing a property (especially older homes), after a storm or flooding event, when investigating unexplained increases in water bills, and as part of a strata building's maintenance program. Annual preventive inspections are advisable for properties in high-rainfall areas or those with a history of water issues.
QWhat happens if water damage is found during a pre-purchase inspection?
If water damage is identified during a pre-purchase inspection, the buyer has several options. They can negotiate a lower purchase price to account for the estimated repair costs, request the vendor arrange repairs before settlement, include a special condition in the contract requiring remediation to a specified standard, or decide to withdraw from the purchase if the damage is too severe. The inspection report provides the documented evidence needed to support any of these actions.
QHow can I tell the difference between rising damp and condensation?
Rising damp and condensation both cause moisture on walls, but they have distinct characteristics. Rising damp typically appears at ground level and extends upward to a height of around one metre, leaving a visible "tide mark" and often producing salt deposits (efflorescence) on the wall surface. Condensation tends to appear on upper walls, windows, and ceilings, and is worse in cooler months when warm indoor air meets cold surfaces. An inspector can distinguish between the two using moisture meter readings at different wall heights and by assessing ventilation conditions.
QDo I need a water damage inspection for a strata property?
Yes, water damage inspections are particularly important for strata properties. Water damage in one unit can affect neighbouring units, common areas, and shared structural elements. In apartment buildings, waterproofing failures in bathrooms and balconies are among the most common defect claims. Strata committees should include regular moisture assessments in their maintenance plans, and individual owners should arrange inspections if they notice signs of water intrusion in their lot.
QWhat Australian standards apply to waterproofing in homes?
The primary standard is AS 3740 (Waterproofing of domestic wet areas), which sets minimum requirements for waterproofing membranes in bathrooms, showers, laundries, and other wet areas. The National Construction Code (NCC) contains performance requirements for weatherproofing, damp-proofing, and drainage across all building types. AS 4349.1 provides the framework for building inspections, including the reporting of moisture-related defects. State legislation such as the Home Building Act 1989 (NSW) and the Domestic Building Contracts Act 1995 (VIC) provide statutory warranty protections for waterproofing work.
References and Resources
- NSW Fair Trading - Home Building - Information on building warranties, defect claims, and homeowner rights in NSW
- Victorian Building Authority (VBA) - Building regulations, practitioner registration, and compliance standards in Victoria
- Queensland Building and Construction Commission (QBCC) - Licensing, defect resolution, and building standards in Queensland
- Australian Building Codes Board - NCC - National Construction Code requirements for weatherproofing and moisture management
- Services Australia - Home and Property - Government support and information for Australian property owners
Related Articles
Waterproofing Inspections: Prevent Water Damage and Save Costs
Waterproofing inspections are one of the most effective ways to protect your property from water damage. By identifying vulnerabilities early, you can avoid costly repairs, prevent mould growth, and maintain the structural integrity of your building. This guide covers the benefits, what to expect, and how to find a qualified inspector.
Understanding Mould Inspection Reports: A Buyer's Guide
Mould inspection reports are an essential tool for property buyers in Australia. This guide explains how Australia's climate influences mould growth, common moisture sources, what a professional mould inspection involves, and how to interpret the findings in a mould inspection report.
Understanding the Basics of Home Plumbing: Tips and Tricks
A working knowledge of your home plumbing system can save you thousands of dollars in emergency repairs. This guide covers how Australian residential plumbing works, how to spot problems early, and when a job needs a licensed plumber rather than a DIY fix.
Concerned about water damage in your property? Owner Inspections provides detailed, independent water damage inspection reports using moisture meters and thermal imaging technology. Our licensed building inspectors identify the source, extent, and severity of water damage so you can take informed action. Request a quote today or call us on 1300 471 805.
For a complete overview, see our guide to insurance claim assessments.
Need an Insurance Claim Assessment?
Our independent assessors cover Sydney, Melbourne, and all major Australian cities.