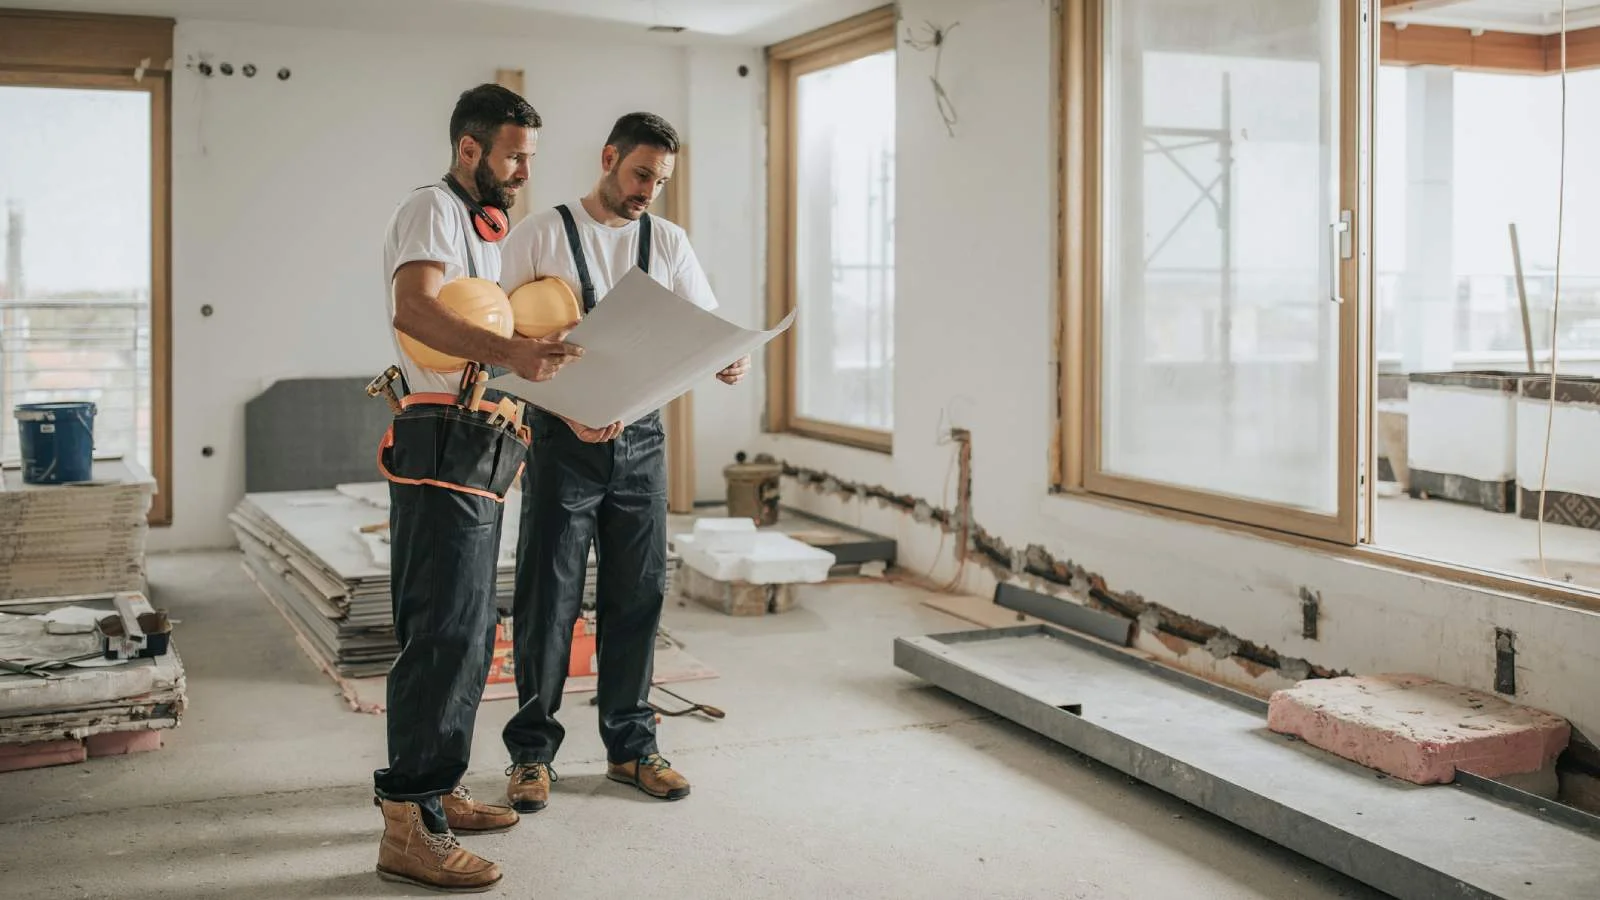
The lock up stage represents one of the most critical phases in new home construction. At this point, your home has taken shape with walls, roof, windows, and doors installed, but the internal walls remain open without plaster. This creates a unique window of opportunity to inspect the structural frame, plumbing, electrical wiring, and other essential components before they become permanently concealed.
Understanding what happens during the lock up stage and why a pre plaster inspection is essential can save you thousands of dollars in potential rectification costs. Once plasterboard is installed, accessing and repairing defects becomes significantly more expensive and disruptive to the construction timeline.
This comprehensive guide explains what the lock up stage involves, what inspectors look for during a pre plaster inspection, common issues that are identified, and why timing your inspection correctly is crucial for protecting your investment in your new home.
The lock up pre plaster stage is your last opportunity to see the skeleton of your home before it is covered forever. Defects identified now can be fixed at minimal cost. The same defects discovered after completion can cost tens of thousands of dollars to rectify.
What is the Lock Up Stage?
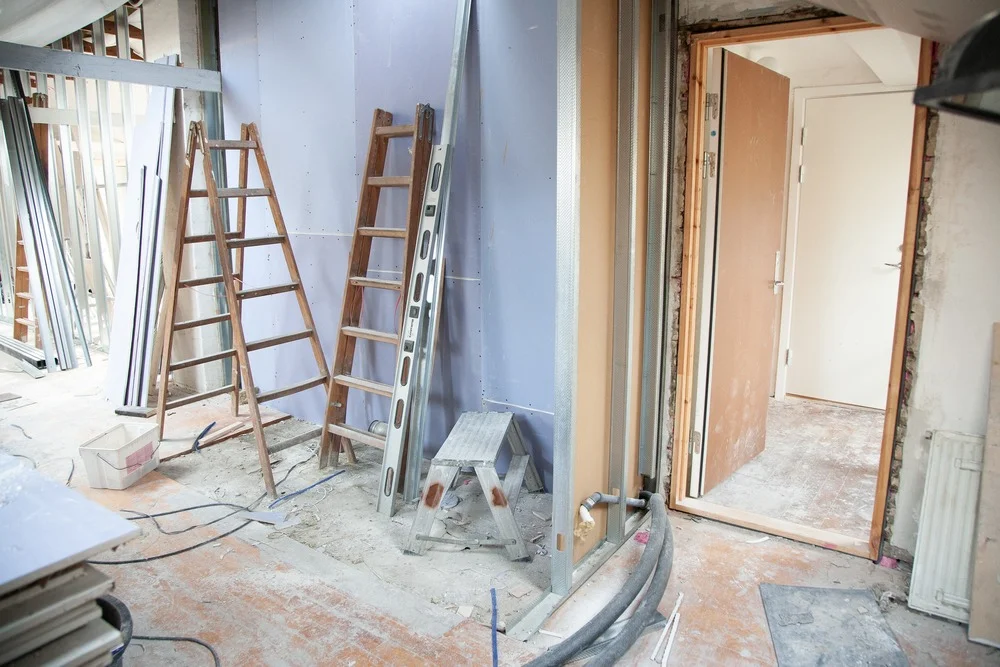
The lock up stage, also known as the enclosed stage, occurs when the building envelope is complete and the structure can be secured. At this point, the external walls, roof covering, windows, and external doors are installed, making the building weather tight and capable of being locked.
During this phase, the internal walls remain open without plaster, which exposes the timber or steel frame and allows full visibility of the structural elements, plumbing rough in, electrical wiring, insulation, and other services. This stage typically requires approximately four weeks to complete, depending on the size and complexity of the build.
Key Components at Lock Up Stage
At the lock up stage, the following elements should be in place and ready for inspection:
- External walls and cladding: Brickwork, render, weatherboards, or other external cladding materials installed
- Roof structure and covering: Roof trusses, battens, and roof covering (tiles, metal sheets, or other materials) complete
- Windows and external doors: All window frames and external doors fitted and operational
- Internal wall framing: Timber or steel studs, noggins, and top and bottom plates erected but not yet lined
- Plumbing rough in: Water supply pipes, drainage, and gas lines installed within the frame
- Electrical rough in: Wiring, conduits, switch boxes, and power point locations installed
- Sarking and building wrap: Weather resistant membrane installed behind external cladding
- Insulation: Wall and ceiling insulation installed ready for lining
Timing of the Lock Up Stage
In a typical residential construction timeline, the lock up stage occurs after the frame stage and before the fixing stage. The progression generally follows this sequence:
| Construction Stage | Key Activities | Typical Duration |
|---|---|---|
| Slab Stage | Foundation preparation and concrete slab pour | 2 to 4 weeks |
| Frame Stage | Wall and roof frame erection | 2 to 4 weeks |
| Lock Up Stage | External cladding, roof, windows, doors, services rough in | 4 to 6 weeks |
| Fixing Stage | Plasterboard, internal fixtures, cabinetry | 4 to 6 weeks |
| Practical Completion | Final finishes, painting, floor coverings | 2 to 4 weeks |
Why Pre Plaster Inspection Matters
The pre plaster inspection is conducted specifically during the lock up stage while walls are still open. This is a critical inspection point because:
- All structural framing is visible and accessible for assessment
- Plumbing and electrical rough in can be checked before concealment
- Frame alignment and integrity can be verified with precision instruments
- Any defects can be rectified without the need to remove plasterboard
- Building code compliance can be confirmed before the next stage
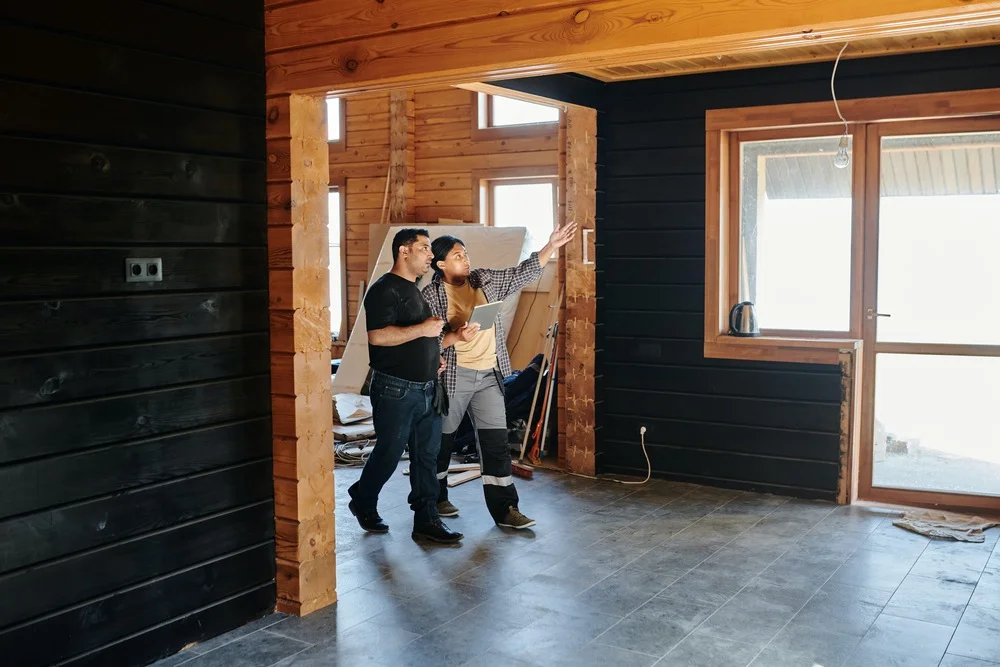
Pre Plaster Inspection Checklist
A thorough pre plaster inspection covers multiple building systems and components. Each area requires careful examination to identify defects that could cause problems if left unaddressed. The following checklist outlines the key areas that professional inspectors assess.
Structural Integrity Assessment
The structural frame forms the skeleton of your home and must be correctly constructed to ensure long term stability and safety. Inspectors examine:
- Frame alignment: Using laser levels and plumb bobs to verify walls are straight and true
- Stud spacing: Confirming studs are correctly spaced according to engineering specifications
- Noggin installation: Checking horizontal bracing members are correctly positioned
- Top and bottom plates: Verifying plates are correctly fixed and aligned
- Bracing compliance: Ensuring structural bracing meets wind load requirements
- Tie down connections: Checking cyclone and wind ties are properly installed
- Lintel installation: Verifying lintels over openings are correctly sized and supported
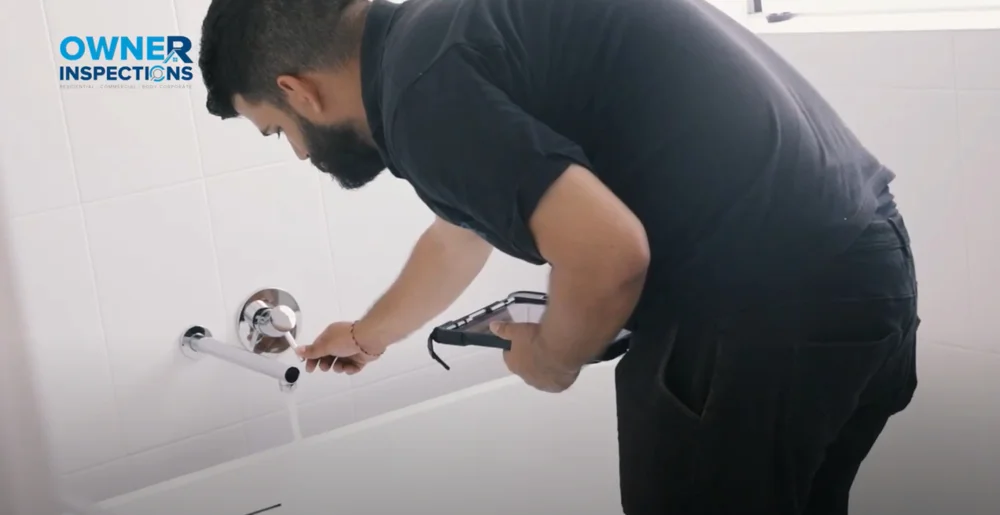
Plumbing System Verification
The plumbing rough in must be correctly installed before walls are closed. Inspectors verify:
- Pipe installation: Checking water supply and drainage pipes are correctly positioned and secured
- Pipe protection: Ensuring pipes are adequately protected where they pass through framing
- Fall and grade: Verifying drainage pipes have correct fall for effective waste removal
- Connection integrity: Examining joints and connections for potential leak points
- Valve accessibility: Confirming isolation valves will be accessible after lining
- Hot water positioning: Checking hot water outlets are positioned on the correct side
Electrical Safety Inspection
Electrical rough in represents a critical safety element that must comply with Australian Standards. Inspectors assess:
- Cable installation: Verifying cables are correctly secured and protected
- Switch and outlet positions: Checking locations match plans and are at correct heights
- Cable protection: Ensuring cables are protected where they pass through framing
- Downlight clearances: Verifying adequate clearance around downlight positions for heat dissipation
- Earth bonding: Checking earth connections to metal frames and services
- Smoke alarm locations: Confirming smoke alarm positions comply with regulations
Moisture Assessment
Moisture control is essential for preventing future problems including mould and structural deterioration. Inspectors check:
- Sarking installation: Verifying weather resistant membrane is correctly installed
- Flashing details: Examining window and door flashings for correct installation
- Moisture readings: Taking moisture meter readings on frame timbers
- Drainage provisions: Checking weep holes and drainage pathways are clear
- Ventilation: Verifying adequate ventilation provisions in roof and subfloor spaces
Seal and Weather Protection Verification
The building envelope must provide effective protection against weather penetration. Inspectors examine:
- Window seals: Checking windows are correctly sealed and flashed
- Door seals: Verifying external door seals and weather strips are effective
- Penetration sealing: Examining seals around service penetrations
- Roof penetrations: Checking flashings around roof penetrations for pipes and vents
- Wall cavity drainage: Verifying cavity flashings direct water to weep holes
Detailed Inspection Areas
The following table provides a comprehensive overview of inspection areas and specific items to verify during a pre plaster inspection.
| Inspection Area | Items to Check | Common Defects |
|---|---|---|
| Wall Framing | Stud alignment, spacing, noggin placement, plate fixing | Misaligned studs, missing noggins, twisted timber |
| Roof Structure | Truss installation, bracing, tie downs, sarking | Insufficient bracing, damaged trusses, poor sarking laps |
| Plumbing Rough In | Pipe positions, securing, protection, fall grades | Incorrect positions, inadequate support, poor fall |
| Electrical Wiring | Cable routes, protection, outlet positions, clearances | Exposed cables, incorrect clearances, missing protection |
| Insulation | Installation quality, coverage, R value compliance | Gaps, compression, incorrect rating, missing areas |
| Windows and Doors | Installation, sealing, flashing, operation | Poor sealing, missing flashings, incorrect installation |
| External Cladding | Installation quality, joints, flashings, weep holes | Cracked brickwork, blocked weep holes, poor joints |
| Roof Covering | Tile or sheet installation, flashings, ridge capping | Damaged tiles, poor flashings, inadequate overlap |
Common Issues Found at Lock Up Stage
Professional inspectors regularly identify specific issues during pre plaster inspections. Understanding these common defects helps homeowners know what to look for and why professional inspection is valuable.
Frame Misalignment
Frame misalignment is one of the most frequently identified issues during pre plaster inspections. When wall studs, plates, or noggins are not correctly aligned, several problems can result:
- Uneven plasterboard installation leading to visible imperfections
- Difficulty installing doors that open and close properly
- Problems with cabinetry and joinery fitting correctly
- Long term structural concerns if load paths are compromised
Inspectors use laser levels and precision instruments to detect misalignment that may not be visible to the naked eye. Even small variations of a few millimetres can cause significant problems when finishes are applied.
Roof Defects
Roof defects identified at lock up stage include issues with both the structure and covering:
- Truss damage: Cracked or damaged trusses from transport or installation
- Inadequate bracing: Missing or incorrectly installed roof bracing
- Sarking problems: Tears, gaps, or incorrect laps in the sarking membrane
- Flashing defects: Poor installation of valley, ridge, and penetration flashings
- Tile or sheet issues: Damaged, cracked, or incorrectly installed roof covering
Clearance Problems Around Downlights
Inadequate clearance around downlight positions is a significant safety concern that inspectors regularly identify. Insufficient clearance can lead to:
- Fire risk from heat buildup against insulation and framing
- Premature failure of downlight fittings
- Reduced energy efficiency of insulation
- Non compliance with Australian electrical standards
The National Construction Code and Australian Standards specify minimum clearances around recessed light fittings. Inspectors verify these clearances are maintained before insulation is compressed or covered.
Ceiling Cracking Potential
While ceiling cracking typically manifests after plasterboard installation, conditions that lead to cracking can be identified at the pre plaster stage:
- Truss spacing: Incorrect spacing between trusses can cause plasterboard deflection
- Inadequate fixing: Insufficient ceiling battens or incorrect batten spacing
- Roof movement: Lack of roof space ventilation can cause heat buildup and truss movement
- Cornice junction detail: Incorrect framing at wall and ceiling junctions
Plumbing Position Errors
Plumbing rough in positioned incorrectly is a costly defect to rectify after walls are lined. Common issues include:
- Water outlets positioned on wrong side of studs for fixture installation
- Drainage points not aligned with planned fixture positions
- Hot and cold water supplies reversed or incorrectly positioned
- Insufficient or excessive pipe projections from wall face
Electrical Installation Defects
Electrical rough in issues identified at pre plaster stage include:
- Switch and power point boxes not at specified heights
- Cables running through fire rated construction without protection
- Inadequate cable support and securing
- Missing or incorrectly positioned lighting outlet points
Benefits of Timely Pre Plaster Inspections
Scheduling your pre plaster inspection at the right time provides significant benefits for homeowners. Understanding these benefits highlights why this inspection stage is so important.
Cost Control
Identifying and rectifying defects before plasterboard installation dramatically reduces repair costs:
- No demolition required: Defects can be accessed directly without removing finished surfaces
- Simpler repairs: Frame straightening, pipe repositioning, and cable adjustment are straightforward
- No refinishing costs: No need to repair or replace plasterboard, paint, or other finishes
- Avoid consequential damage: Prevent defects from affecting subsequent work
| Defect Type | Cost to Fix Pre Plaster | Cost to Fix Post Completion |
|---|---|---|
| Frame misalignment | $200 to $500 | $2,000 to $5,000+ |
| Plumbing position error | $300 to $800 | $1,500 to $4,000+ |
| Electrical relocation | $150 to $400 | $800 to $2,500+ |
| Missing insulation | $100 to $300 | $1,000 to $3,000+ |
| Sarking repair | $50 to $200 | $500 to $2,000+ |
Early Problem Detection
Beyond cost savings, early detection of defects provides additional benefits:
- Prevents cascading defects: Problems with frame alignment can affect door installation, cabinetry, and finishes
- Maintains construction timeline: Addressing defects now avoids delays at later stages
- Protects warranty rights: Documented defects provide evidence for warranty claims
- Ensures compliance: Verifies work meets Australian Standards and the National Construction Code
Peace of Mind
A thorough pre plaster inspection provides homeowners with confidence that their home is being built correctly:
- Independent verification of construction quality separate from builder
- Documented evidence of the condition at this critical stage
- Professional assessment of compliance with plans and specifications
- Identification of items requiring attention before proceeding
Comprehensive 11 Point Pre Plaster Checklist
Professional inspectors follow a systematic approach to ensure no critical elements are overlooked. The following 11 point checklist covers the essential areas examined during a thorough pre plaster inspection.
1. Frame Rectifications
Inspectors verify that any frame issues identified at the frame stage inspection have been correctly rectified:
- Confirmation that previously identified defects have been addressed
- Verification of remedial work quality
- Assessment of any new issues that may have developed
2. Wall Straightness and Plumb
Using laser levels and traditional methods, inspectors assess wall alignment:
- Vertical alignment (plumb) of all wall frames
- Horizontal alignment of plates and noggins
- Overall straightness of wall surfaces
- Corner angles and junction details
3. Structural Bracing
Structural bracing must be correctly installed to resist lateral forces from wind:
- Bracing ply or metal strap installation
- Fixing patterns and nail or screw compliance
- Location compliance with engineering specifications
- Connection to top and bottom plates
4. Roof Space Inspection
The roof space is examined for structural and installation quality:
- Truss condition and installation
- Roof bracing adequacy
- Sarking installation and laps
- Ventilation provisions
- Access provisions for maintenance
5. Electrical Rough In
Electrical installation is assessed for safety and compliance:
- Cable installation and protection
- Switch and outlet positions matching plans
- Downlight clearance requirements
- Smoke alarm positions
- Earth bonding installation
6. Plumbing Rough In
Plumbing installation is verified against plans and standards:
- Water supply pipe positions
- Drainage positions and falls
- Pipe securing and protection
- Hot water outlet positions
- Gas pipe installation if applicable
7. Insulation Installation
Insulation must be correctly installed for thermal performance:
- Wall insulation R value compliance
- Coverage without gaps or compression
- Correct installation around services
- Ceiling insulation preparation
8. Window and Door Installation
Window and external door installation quality affects weather protection:
- Frame installation and fixing
- Flashing installation
- Sealing to frame
- Operation and closing
- Hardware installation
9. External Cladding
External cladding installation is assessed for quality and weather protection:
- Brickwork quality and mortar joints
- Weep hole installation and clearance
- Cavity flashings
- Junction details at windows and doors
- Damp proof course installation
10. Roof Covering
The roof covering must provide effective weather protection:
- Tile or sheet installation quality
- Ridge and hip capping
- Valley and flashing installation
- Gutter and downpipe installation
- Penetration flashings
11. Ventilation Requirements
Adequate ventilation prevents moisture problems and improves air quality:
- Roof space ventilation provisions
- Subfloor ventilation if applicable
- Exhaust fan ducting provisions
- Combustion air provisions for gas appliances
Pre Plaster Inspection Cost
A professional pre plaster inspection represents excellent value when compared to the cost of rectifying defects after completion. At Owner Inspections, our lock up pre plaster inspection service starts at $490.
The inspection cost varies depending on factors including:
- Property size and complexity
- Location and travel requirements
- Scope of inspection required
- Additional services such as thermal imaging
When compared to the potential cost of rectifying defects after plasterboard installation, which can easily reach thousands or tens of thousands of dollars, the inspection fee provides significant return on investment. A single identified defect often saves more than the cost of the entire inspection.
Frequently Asked Questions
QWhat is a lock up pre plaster inspection?
Short answer: A professional inspection conducted when your home reaches lock up stage but before plasterboard is installed, allowing examination of frame, services, and installation quality.
The lock up pre plaster inspection is conducted at a critical point in construction when the building envelope is complete and the structure can be locked, but internal walls remain open. This allows inspectors to examine the timber or steel frame, plumbing and electrical rough in, insulation, and other elements that will be permanently concealed once plasterboard is installed. The inspection verifies construction quality, compliance with plans and Australian Standards, and identifies defects that can be rectified before they become costly to fix.
When should I book my pre plaster inspection?
Short answer: Book your inspection as soon as your builder notifies you that lock up stage is approaching, ideally giving the inspector a few days notice.
Timing is critical for pre plaster inspections. The inspection must occur after all services rough in is complete (plumbing, electrical, insulation) but before plasterboard installation begins. This window may only be a few days, so communicate with your builder about the construction timeline and book your inspection in advance. Most builders will provide notice before each stage is complete. If you miss the pre plaster window, defects will be concealed and significantly more expensive to identify and rectify.
What is the difference between frame stage and lock up stage inspections?
Short answer: Frame stage inspection occurs when the structural frame is complete but before cladding, while lock up inspection occurs when the building is enclosed with services rough in complete.
The frame stage inspection focuses primarily on the structural frame itself, including wall studs, roof trusses, floor joists, bracing, and tie downs. It occurs before external cladding is installed. The lock up or pre plaster inspection occurs later when the building is enclosed (cladding, roof, windows, doors installed) and includes examination of the frame plus plumbing rough in, electrical rough in, insulation, and other services. Both inspections are important as they examine different elements and occur at different construction stages.
How much does a pre plaster inspection cost?
Short answer: Pre plaster inspections typically start at $490 and vary based on property size, location, and scope of inspection required.
The cost of a pre plaster inspection is minimal compared to the potential cost of rectifying defects after completion. A single identified defect, such as a mispositioned plumbing rough in or frame misalignment, can cost thousands of dollars to fix once walls are lined. The inspection fee provides excellent value by identifying these issues while they can be easily and cheaply corrected. Many inspection companies offer packages covering multiple construction stages at reduced total cost.
What happens if defects are found during the inspection?
Short answer: You receive a detailed report documenting all defects, which you present to your builder for rectification before plasterboard installation proceeds.
When defects are identified, the inspector documents them in a comprehensive report including descriptions, photographs, locations, and recommendations. You then provide this report to your builder and request rectification before the next stage payment or before plasterboard installation begins. Most building contracts include provisions for defect rectification during construction. It is reasonable to expect the builder to address identified defects before work proceeds, as this is far preferable to discovering problems after completion.
QCan I attend the pre plaster inspection?
Short answer: Yes, attending the inspection is encouraged as it allows you to see any issues firsthand and ask questions about construction quality.
Most inspection companies welcome owner attendance at inspections. Being present allows you to understand the construction process, see any defects firsthand, and ask questions about what the inspector is examining. However, ensure you have appropriate permission from your builder to be on the construction site and follow all safety requirements including wearing appropriate footwear and any required safety equipment. Even if you cannot attend, you will receive a detailed written report with photographs documenting all findings.
Is the pre plaster inspection the same as the council inspection?
Short answer: No, council or certifier inspections focus on code compliance, while independent pre plaster inspections assess overall construction quality and workmanship.
Mandatory inspections by council or private certifiers verify that construction complies with the building approval, National Construction Code, and relevant Australian Standards. However, these inspections have limited scope and time constraints. They confirm minimum code compliance but do not comprehensively assess workmanship quality or identify all defects. Independent pre plaster inspections provide a more thorough examination of construction quality, looking for issues that may not cause code non compliance but still affect the building quality, durability, and value. Both types of inspection serve important but different purposes.
What qualifications should a pre plaster inspector have?
Short answer: Look for inspectors with building or construction qualifications, relevant licensing, practical experience, and professional indemnity insurance.
Qualified inspectors should hold relevant building industry qualifications such as a builder licence, building inspection certification, or relevant trade qualifications. They should have practical experience in construction and be familiar with Australian Standards and the National Construction Code. Professional indemnity insurance protects you if the inspector fails to identify a significant defect. Membership in professional associations and positive reviews from previous clients are also good indicators of competence and reliability.
How long does a pre plaster inspection take?
Short answer: A thorough pre plaster inspection typically takes 1.5 to 2.5 hours depending on property size and complexity.
The duration depends on the property size, construction type, and number of rooms and wet areas. Larger homes, two storey constructions, and properties with complex designs take longer to inspect thoroughly. The inspector needs adequate time to examine all framing, check plumbing and electrical rough in, assess insulation installation, inspect the roof space, and verify external cladding and roof covering. A rushed inspection is likely to miss important issues, so ensure your inspector allocates sufficient time. The written report is usually delivered within 24 to 48 hours after the inspection.
Should I withhold my lock up payment if defects are found?
Short answer: Building contracts typically require satisfactory completion before stage payment, so you have grounds to request defect rectification before paying.
Most building contracts in Australia tie stage payments to satisfactory completion of each stage. If your independent inspection identifies defects, you have grounds to request rectification before releasing the lock up stage payment. Document all defects in writing with photographs and provide the report to your builder. Be reasonable about minor issues that can be addressed promptly, but stand firm on significant defects that could affect subsequent work or the building quality. Consult your building contract and consider seeking legal advice if the builder refuses to address legitimate defects.
QWhat if I missed the pre plaster window?
Short answer: If plasterboard is already installed, a fixing stage inspection can still identify visible defects, but concealed elements can no longer be directly assessed.
If you have missed the pre plaster inspection window, it is still valuable to conduct inspections at subsequent stages. A fixing stage inspection can identify issues with plasterboard installation, door and window fitting, cabinetry, and visible services. Some concealed defects may manifest as visible symptoms such as cracks, uneven surfaces, or moisture staining. However, problems with frame alignment, plumbing positions, and electrical installation can no longer be directly verified. For future builds, ensure you communicate with your builder about inspection timing and book inspections as early as possible once each stage is approaching completion.
Does the builder need to be present during the inspection?
Short answer: The builder does not need to be present, but site access must be arranged and safety requirements must be met.
Your independent inspector does not require the builder to be present during the inspection. However, you need to arrange site access with your builder and ensure the inspector can safely access all areas including the roof space and any scaffolding. Some builders prefer to be present to discuss any issues directly, which can be helpful for understanding their perspective and facilitating quick rectification. Regardless of builder presence, the inspector works independently and provides an unbiased assessment of construction quality.
Key Takeaways
- The lock up stage occurs when your home is weather tight with external cladding, roof, windows, and doors installed, but internal walls remain open without plaster.
- Pre plaster inspection is your last opportunity to examine the structural frame, plumbing and electrical rough in, and other elements before they are permanently concealed.
- Common issues found at this stage include frame misalignment, roof defects, inadequate downlight clearances, and plumbing or electrical positioning errors.
- Defects identified before plasterboard installation can be rectified at minimal cost, while the same defects after completion can cost thousands of dollars to fix.
- Professional inspectors use laser levels, moisture meters, and systematic checklists to identify defects that may not be visible to untrained eyes.
- The inspection window is limited, so communicate with your builder and book your inspection as soon as lock up stage approaches.
- Pre plaster inspections starting at $490 provide excellent value compared to potential rectification costs.
- Independent pre plaster inspections are separate from and more thorough than mandatory council or certifier inspections.
References and Resources
- National Construction Code (NCC)
- Standards Australia
- NSW Fair Trading
- Queensland Building and Construction Commission (QBCC)
- Victorian Building Authority (VBA)
- Consumer and Business Services South Australia
Related Articles
Cost-Saving Strategies for the Lock Up Stage in Construction
The lock up phase involves substantial expenses for windows, doors, and insulation. Learn proactive planning strategies and cost reduction tactics.
All You Need to Know About Fixing Inspections
A fixing stage inspection evaluates internal components before they are concealed, including cladding, architraves, doors, and built-in shelves. Learn what to expect.
Lock Up vs. Fixing Stage: Distinguishing the Differences in Construction
The lock up stage creates a secure, weatherproof environment while the fixing stage focuses on addressing defects and completing finishes. Learn the key differences.
For a complete overview, see our guide to construction stage inspections.
Need Construction Stage Inspections?
Our licensed inspectors cover Sydney, Melbourne, and all major Australian cities.