A dilapidation report serves as a detailed baseline documentation of a property's condition before nearby construction or demolition activities commence. These reports shield property owners from potential legal disputes and help preserve property value while strengthening legal positions. Understanding the systematic process behind creating these reports ensures you receive a comprehensive document that will stand up to scrutiny in any dispute resolution scenario.
The dilapidation report process follows a structured methodology that has evolved over decades of building inspection practice in Australia. Each step builds upon the previous one to create a complete and defensible record of property condition. Whether you are a property owner seeking protection, a builder demonstrating due diligence, or a developer meeting council requirements, understanding this process helps you maximise the value of your investment in professional documentation.
This comprehensive guide walks you through each stage of the dilapidation report process, from initial consultation through to final delivery. You will learn what to expect, how to prepare, and what questions to ask to ensure your report meets the highest professional standards.
A well-executed dilapidation report process is the foundation of effective property protection. Cutting corners at any stage can compromise the entire document's usefulness when you need it most.
Australian Legal Framework for Dilapidation Reports
Understanding the legal framework governing dilapidation reports in Australia helps stakeholders appreciate their importance and ensure compliance with regulatory requirements. Different states and territories have varying requirements, but several common principles apply nationally.
Environmental Planning and Assessment Act (NSW)
In New South Wales, the Environmental Planning and Assessment Act 1979 (EP&A Act) provides the primary legislative framework for development approval conditions. Under this Act, local councils have the authority to impose conditions on development consent requiring dilapidation reports for neighbouring properties. Section 4.17 of the Act empowers consent authorities to impose conditions they consider appropriate, which commonly includes pre-construction documentation of adjacent property conditions.
The EP&A Regulation 2021 further supports these requirements by establishing procedures for development applications and consent conditions. Councils frequently require dilapidation reports as standard conditions for developments involving excavation, demolition, or construction activities that could affect neighbouring properties.
Local Council Development Approval Conditions
Local councils throughout Australia impose dilapidation report requirements through Development Approval (DA) conditions. These conditions typically specify:
- Survey radius: The distance from the construction site within which properties must be surveyed (commonly 15 to 50 metres)
- Timing requirements: When reports must be prepared and submitted (usually before construction commencement)
- Inspector qualifications: Minimum qualifications required for the inspector preparing the report
- Report content: Specific elements that must be included in the documentation
- Post-construction requirements: Whether comparison inspections are required after construction completion
State Building Regulations
Each Australian state and territory has building regulations that may reference dilapidation requirements:
| State/Territory | Primary Legislation | Regulatory Body |
|---|---|---|
| New South Wales | Environmental Planning and Assessment Act 1979, Home Building Act 1989 | NSW Fair Trading |
| Victoria | Building Act 1993, Domestic Building Contracts Act 1995 | Victorian Building Authority (VBA) |
| Queensland | Planning Act 2016, Queensland Building and Construction Commission Act 1991 | QBCC |
| South Australia | Planning, Development and Infrastructure Act 2016 | Consumer and Business Services |
| Western Australia | Building Act 2011, Planning and Development Act 2005 | Building and Energy |
| Tasmania | Building Act 2016, Land Use Planning and Approvals Act 1993 | Consumer, Building and Occupational Services |
| ACT | Building Act 2004, Planning and Development Act 2007 | Access Canberra |
| Northern Territory | Building Act 1993, Planning Act 1999 | NT Building Advisory Services |
What is Included in a Dilapidation Report
A comprehensive dilapidation report documents all elements of a property that could potentially be affected by nearby construction activities. The scope and detail of documentation directly impacts the report's usefulness in any subsequent dispute resolution.
Interior Elements
Internal documentation covers all accessible areas within the building structure. Inspectors systematically record conditions room by room, ensuring nothing is overlooked:
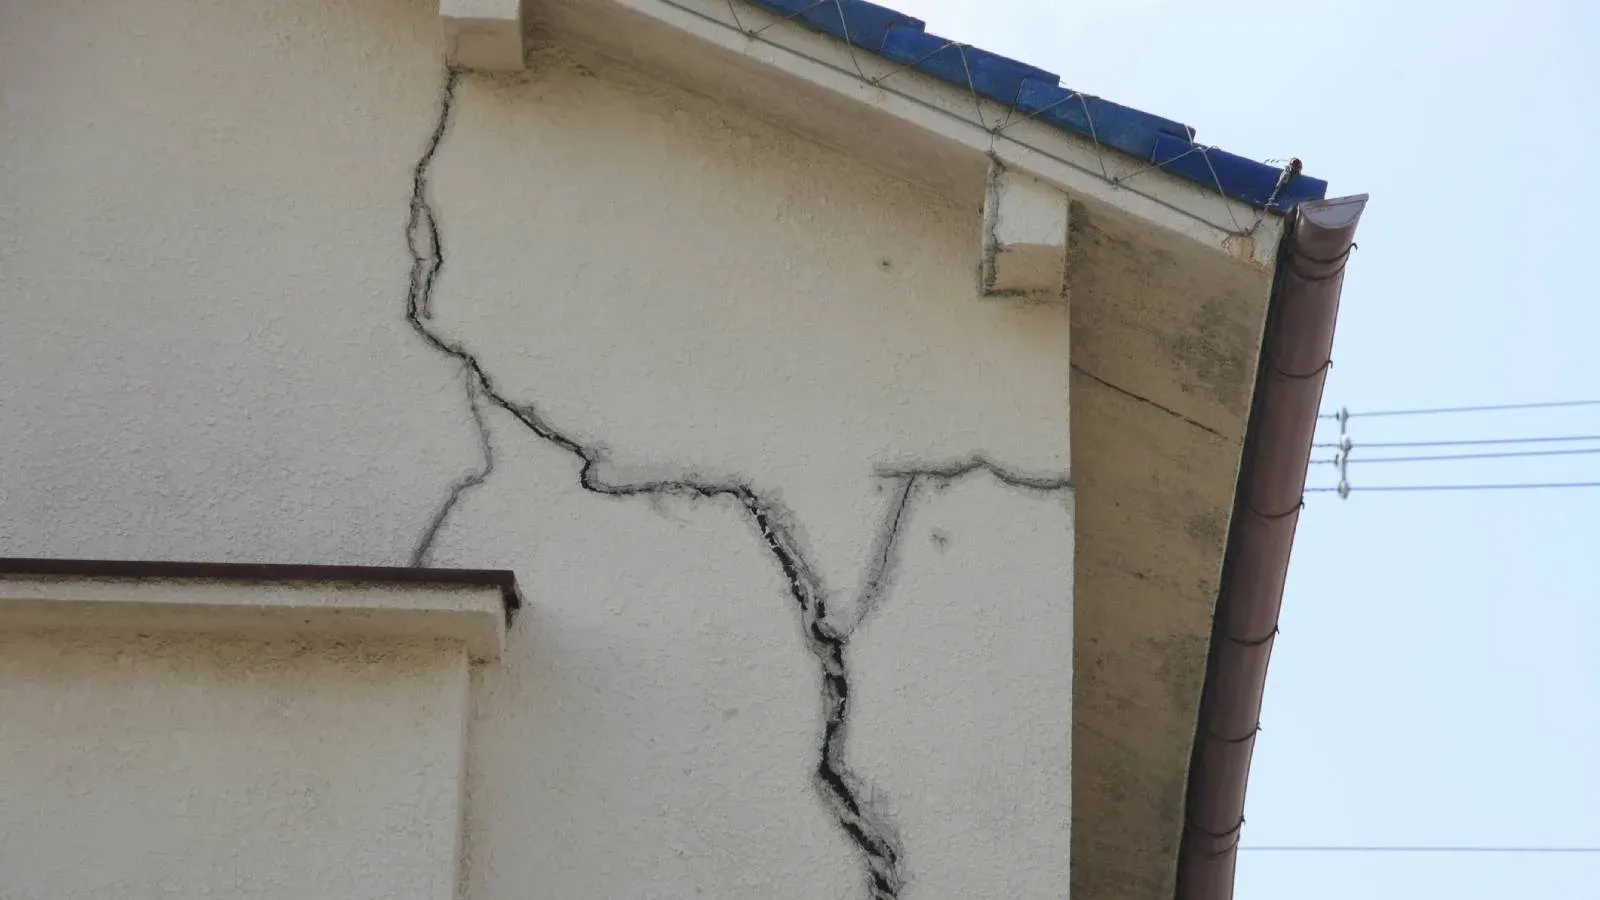
- Walls: Plasterboard, brick, render, and other wall finishes including paint condition, cracks, nail pops, and water damage
- Ceilings: Plaster condition, cornices, ceiling roses, junction cracks, and any signs of settlement or movement
- Floors: Tiles, timber, carpet, vinyl, and concrete including levelness, cracks, squeaking, and wear patterns
- Doors and windows: Frames, hardware, operation, seals, and alignment issues
- Wet areas: Bathrooms, laundries, and kitchens including waterproofing indicators and fixture conditions
Roof Components
Roof inspection covers both the external roofing materials and any accessible roof spaces:
- Roof cladding condition including tiles, metal sheeting, or other materials
- Gutters, downpipes, and drainage system functionality
- Flashings around penetrations and junctions
- Ridge capping and hip tiles
- Roof structure condition where accessible from roof space
- Roof insulation and sarking condition
External Features
External documentation extends beyond the main building structure to include all site improvements:
- Driveways and carport surfaces
- Pathways, steps, and ramps
- Verandahs, pergolas, and outdoor structures
- Balustrades, handrails, and safety barriers
- External wall finishes and cladding
- Foundation and slab edges where visible
Landscaping and Site Features
Landscaping elements often sustain damage during construction and require thorough documentation:
- Trees, shrubs, and garden beds
- Fencing including all boundary fencing
- Retaining walls and their structural condition
- Swimming pools and associated equipment
- Irrigation systems and garden lighting
- Outdoor furniture and fixed installations
Neighbouring Properties
For builders and developers, documenting adjacent property conditions protects against unfounded damage claims:
- Pre-existing cracks in boundary walls
- Condition of shared or boundary fencing
- Neighbouring retaining walls that may be affected
- Any visible pre-existing damage to adjacent structures
When Dilapidation Reports Are Necessary
Understanding when dilapidation reports are required helps property owners and builders plan appropriately and ensure compliance with regulatory requirements.
| Construction Type | Risk Level | Typical Survey Radius | Report Priority |
|---|---|---|---|
| Demolition Projects | High | 25 to 50 metres | Essential |
| Deep Excavation | High | 30 to 100 metres | Essential |
| Piling and Foundation Work | High | 50 to 100 metres | Essential |
| New Home Construction | Medium to High | 15 to 30 metres | Highly Recommended |
| Home Extensions | Medium | 10 to 20 metres | Recommended |
| Major Renovations | Medium | 10 to 15 metres | Recommended |
| Civil Infrastructure | Very High | 50 to 200 metres | Mandatory |
| Tunnel Construction | Very High | 100 to 500 metres | Mandatory |
Who Conducts Dilapidation Reports
The qualifications and credentials of the inspector directly impact the report's reliability and acceptance in dispute resolution. Certified building inspectors with relevant construction credentials typically prepare dilapidation reports.
Essential Qualifications
A qualified dilapidation report inspector should possess:
- Formal qualifications: Diploma of Building and Construction (Building) or equivalent tertiary qualification in building surveying, construction management, or related fields
- State licensing: Current registration with the relevant state building authority (NSW Fair Trading, VBA, QBCC, etc.)
- Professional indemnity insurance: Adequate coverage to protect both inspector and client against errors or omissions
- Public liability insurance: Coverage for any incidents during site inspections
- Continuing professional development: Ongoing education to maintain current knowledge of standards and practices
Professional Affiliations
Membership in professional organisations demonstrates commitment to industry standards. Look for inspectors affiliated with:
- Australian Institute of Building Surveyors (AIBS)
- Australian Society of Building Consultants (ASBC)
- Master Builders Association (MBA)
- Housing Industry Association (HIA)
The inspector's qualifications and experience are your first line of defence. A report prepared by an unqualified individual may be challenged and rejected when you need it most.
The Five-Step Dilapidation Report Process
The dilapidation report process follows a systematic methodology designed to ensure comprehensive documentation and defensible results. Understanding each step helps clients prepare appropriately and ensures nothing is overlooked.
Step 1: Initial Consultation and Scope Definition
The process begins with a thorough consultation between the inspector and the client to establish the scope and requirements of the inspection. This critical first step sets the foundation for a successful report.
Discussion Points
- Purpose of the report and how it will be used
- Properties to be inspected and access arrangements
- Specific concerns or areas requiring particular attention
- Development consent conditions that must be satisfied
- Timeline requirements and construction commencement dates
- Budget considerations and service level options
Pre-Inspection Checklist
- Review development consent conditions for specific requirements
- Identify all properties within the required survey radius
- Arrange access with property owners and occupants
- Notify affected parties of the inspection schedule
- Gather relevant documentation such as previous reports or surveys
- Confirm the inspector has appropriate qualifications and insurance
| Consultation Element | Purpose | Typical Duration |
|---|---|---|
| Scope Discussion | Define inspection boundaries and requirements | 15 to 30 minutes |
| Document Review | Examine DA conditions and previous reports | 30 to 60 minutes |
| Access Coordination | Arrange property access with all parties | Variable (1 to 7 days) |
| Quote Preparation | Provide detailed cost estimate | 1 to 2 business days |
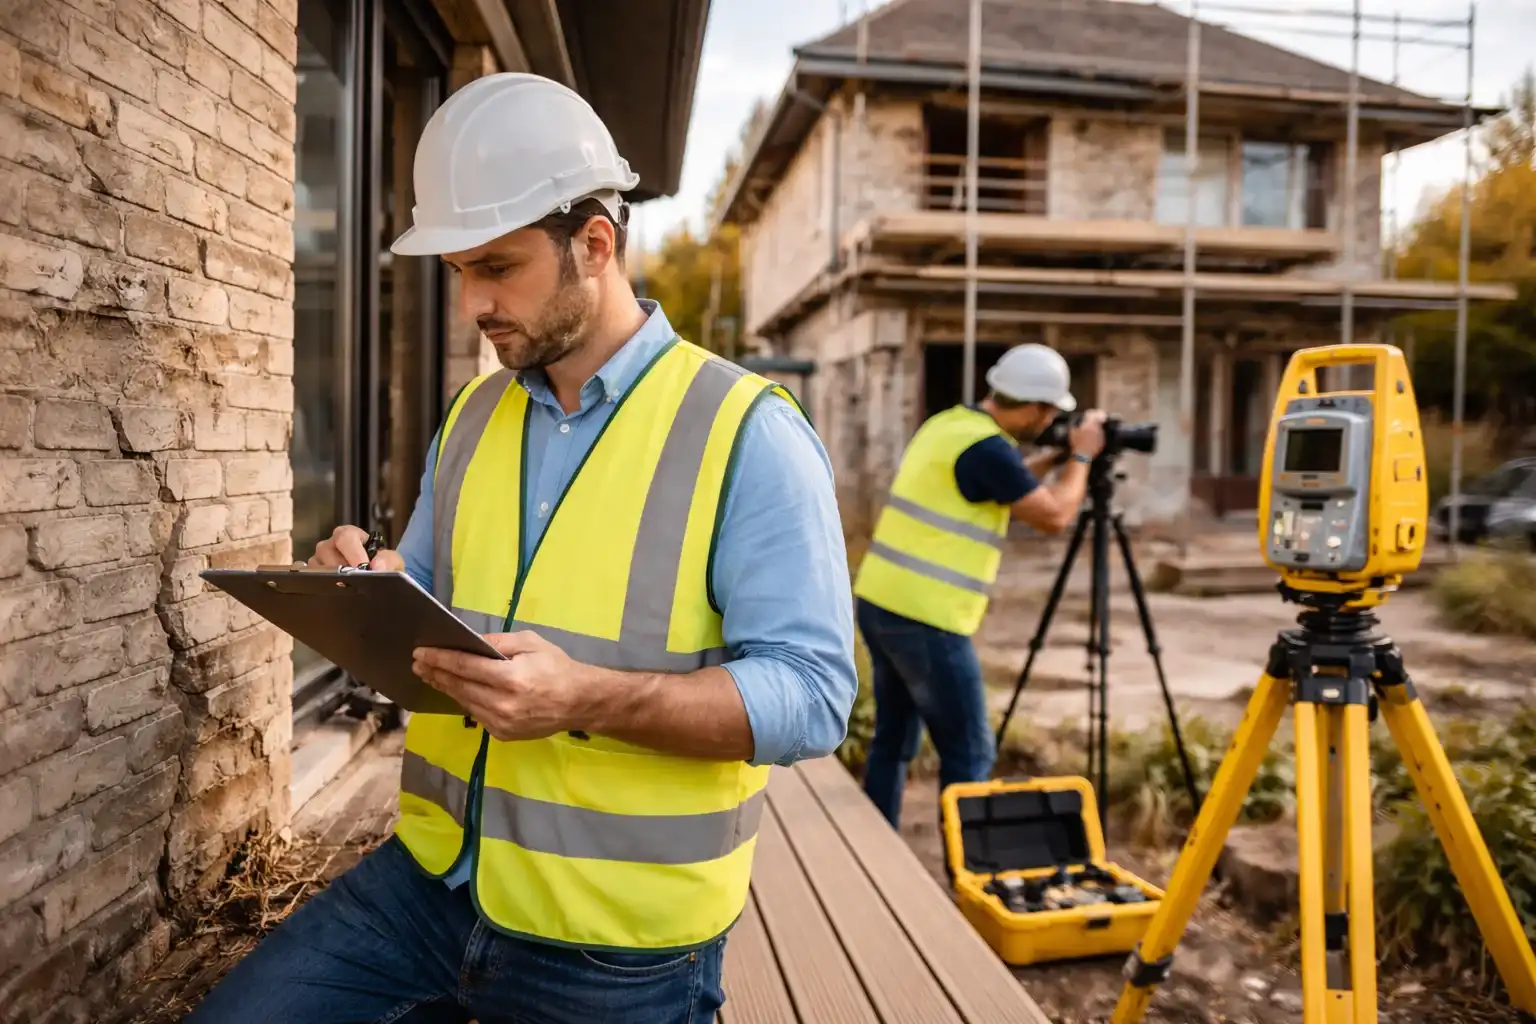
Step 2: Comprehensive Site Inspection
The site inspection is the core of the dilapidation report process. During this phase, the inspector conducts a systematic evaluation of all property components, documenting existing conditions with meticulous attention to detail.
Inspection Methodology
Professional inspectors follow a systematic approach to ensure complete coverage:
- Exterior first: Begin with external elevations, working clockwise around the building to ensure nothing is missed
- Top-down interior: Inspect internal areas from roof space (where accessible) through to subfloor areas
- Room-by-room documentation: Systematically record conditions in each room before moving to the next
- Site features last: Document driveways, landscaping, and boundary features after completing the building inspection
Equipment Used
- High-resolution digital camera with wide-angle and macro capabilities
- Laser distance measurer for accurate dimensional recording
- Crack width gauge and measuring scales
- Spirit level and plumb bob for alignment assessment
- Moisture meter for detecting dampness issues
- Torch for inspecting dark areas and cavities
- Tablet or laptop for on-site notation and photo management
Typical Inspection Timeframes
| Property Type | Typical Inspection Time | Photos Expected |
|---|---|---|
| Small Unit or Apartment | 1 to 1.5 hours | 50 to 100 photos |
| Standard 3 Bedroom House | 1.5 to 2.5 hours | 100 to 200 photos |
| Large Family Home | 2.5 to 4 hours | 200 to 400 photos |
| Commercial Property | 3 to 8 hours | 300 to 1000+ photos |
| Heritage Building | 4 to 8 hours | 400 to 800+ photos |
Step 3: Detailed Data Collection and Measurement
Beyond visual inspection, the data collection phase involves gathering precise measurements and detailed documentation that enables objective comparison after construction is complete.
Photographic Documentation Standards
- Context shots: Wide-angle photographs showing the overall condition of each area
- Detail shots: Close-up photographs of specific defects with scale references
- Sequence photography: Multiple angles of significant areas to establish comprehensive records
- Measurement references: Include rulers or measuring devices in photos of cracks and defects
- Date and time stamping: All photographs should include metadata establishing when they were taken
Measurement Requirements
- Crack widths measured at multiple points along their length
- Crack lengths documented with start and end points identified
- Floor level variations recorded with reference points
- Wall alignment measurements where deviations are observed
- Settlement markers placed for ongoing monitoring if required
Documentation Checklist
- Property address and legal description confirmed
- Weather conditions at time of inspection recorded
- All rooms and areas systematically photographed
- Every visible defect documented with measurements
- Areas of particular concern highlighted
- Access limitations or areas not inspected noted
- Property owner or representative sign-off obtained where possible
Step 4: Professional Report Preparation
The report preparation phase transforms raw inspection data into a professional document suitable for legal and regulatory purposes. This stage requires significant expertise to present information clearly and comprehensively.
Report Structure
A professional dilapidation report typically includes the following sections:
- Executive summary: Brief overview of key findings and property condition
- Property details: Address, description, age, construction type, and general characteristics
- Inspection methodology: Description of inspection process, equipment used, and any limitations
- Detailed findings: Room-by-room and area-by-area documentation of conditions
- Photographic appendix: Organised collection of all photographs with captions
- Measurement records: Tabulated measurements of defects for future comparison
- Inspector credentials: Qualifications, licensing, and insurance details
- Declarations and limitations: Scope boundaries and standard disclaimers
Quality Assurance
Professional inspectors implement quality assurance procedures to ensure report accuracy and completeness:
- Cross-referencing of photographs with written descriptions
- Verification of all measurements and calculations
- Proofreading for errors and inconsistencies
- Technical review by senior inspectors for complex properties
- Compliance check against DA conditions or client requirements
| Report Element | Standard Requirement | Best Practice |
|---|---|---|
| Photographs | 50+ images with captions | 150+ organised with room codes |
| Written Descriptions | Basic condition notes | Detailed narrative for each area |
| Measurements | Major cracks measured | All defects quantified where possible |
| Floor Plans | Optional | Annotated plans showing defect locations |
| Delivery Format | PDF document | PDF with full-resolution photo archive |
Step 5: Report Delivery and Client Discussion
The final stage involves delivering the completed report and ensuring the client understands its contents and how to use it effectively. This step is often overlooked but is crucial for maximising the report's value.
Delivery Methods
- Digital delivery: Secure PDF format via email or file sharing platform
- Physical copies: Bound hard copies for official records where required
- Council submissions: Direct lodgement with council where required by DA conditions
- Photo archive: Full-resolution images provided separately for detailed examination
Client Briefing Topics
- Explanation of key findings and areas of concern
- Guidance on monitoring property during construction
- Process for arranging post-construction comparison inspection
- Steps to take if damage is observed during construction
- Report retention and storage recommendations
- Questions and clarifications about report content
Distribution Requirements
Copies of the report should be provided to:
- Property owner or their representative
- Builder or developer commissioning the report
- Local council where required by DA conditions
- Principal certifying authority if applicable
- Insurance providers if required by policy conditions
A dilapidation report is only valuable if it is properly retained and accessible when needed. Store copies securely and ensure all relevant parties have access to the documentation.
Financial and Legal Benefits
Investing in a professional dilapidation report provides significant financial protection and legal advantages for all parties involved in construction projects.
Protection for Property Owners
- Evidence for compensation claims: Documented baseline enables accurate assessment of construction-related damage
- Insurance support: Provides evidence required by insurers to process property damage claims
- Legal standing: Professional reports are admissible evidence in tribunal and court proceedings
- Peace of mind: Knowledge that property condition is documented regardless of construction outcomes
Protection for Builders and Developers
- Defence against false claims: Pre-existing defects are documented, preventing attribution to construction activities
- Regulatory compliance: Satisfies DA conditions and demonstrates due diligence
- Insurance protection: Supports defence against third-party liability claims
- Professional reputation: Demonstrates commitment to responsible construction practices
Cost-Benefit Analysis
| Scenario | Report Cost | Potential Dispute Cost Without Report |
|---|---|---|
| Minor Wall Cracks Claim | $400 to $800 | $5,000 to $15,000 |
| Foundation Settlement Claim | $400 to $800 | $50,000 to $200,000+ |
| Pool Damage Claim | $400 to $800 | $20,000 to $80,000 |
| Multi-Property Dispute | $2,000 to $5,000 (multiple reports) | $100,000 to $500,000+ |
Owner Inspections Credentials
Owner Inspections provides professional dilapidation reports across eastern Australia, backed by extensive qualifications and industry recognition.
Licensing and Registration
The company holds licences from:
- Victorian Building Authority (VBA)
- NSW Fair Trading
- Queensland Building and Construction Commission (QBCC)
Professional Memberships
- Australian Society of Building Consultants NSW
- Housing Industry Association (HIA)
Insurance Coverage
- Professional indemnity insurance
- Public liability insurance
- Workers compensation coverage
Frequently Asked Questions
How long does the dilapidation report process take from start to finish?
Short answer: The complete process typically takes 5 to 10 business days from initial consultation to final report delivery.
The timeline depends on several factors including property size, access arrangements, and current demand. Initial consultation and scope definition usually takes 1 to 2 days. The site inspection itself ranges from 1 to 4 hours depending on property complexity. Report preparation requires 3 to 5 business days for standard residential properties, with complex or commercial properties requiring longer. Expedited services are available for urgent requirements, with some inspectors offering 24 to 48 hour turnaround for an additional fee. Plan ahead and engage an inspector at least two weeks before construction is scheduled to commence.
What happens if a neighbour refuses to allow inspection of their property?
Short answer: Document the refusal in writing and conduct the most comprehensive external assessment possible from public areas.
Property owners cannot be compelled to allow interior inspection of their property. However, external areas visible from public spaces can be documented without owner cooperation. The inspector should photograph all visible external elements including walls, roofing, fencing, and driveways. Written correspondence documenting the offer of inspection and the owner's refusal should be retained. Some development consent conditions require evidence that neighbours were offered the opportunity to participate, regardless of their response. The refusal and limited external assessment should be clearly documented in the report. Consider having your solicitor send a formal letter offering the inspection to create a clear paper trail.
Are dilapidation reports required by law in Australia?
Short answer: While not universally mandated by legislation, they are frequently required through local council DA conditions and are considered industry standard practice.
Australian building legislation does not universally mandate dilapidation reports. However, local councils commonly impose requirements through development consent conditions under state planning legislation such as the Environmental Planning and Assessment Act 1979 in NSW. Council conditions typically require reports for developments involving excavation, demolition, or construction near property boundaries. Major infrastructure projects almost always require extensive dilapidation surveys as a condition of approval. Even where not legally required, dilapidation reports are strongly recommended as prudent risk management. The cost of a professional report is minimal compared to potential dispute costs without baseline documentation.
QHow much does a dilapidation report cost?
Short answer: Residential reports typically cost between $400 and $1,200, with commercial properties varying based on size and complexity.
Pricing depends on property type, size, location, and the level of detail required. Standard residential properties (3 to 4 bedrooms) typically cost $400 to $800 for a comprehensive interior and exterior survey. Larger homes, heritage properties, or those with complex features may cost $800 to $1,200. Commercial and industrial properties are priced individually based on floor area and complexity, typically ranging from $1,000 to $5,000 or more. When obtaining quotes, ensure you compare like for like services. Check that quotes include both interior and exterior inspection, high-resolution photographs, detailed written descriptions, and measurements of defects. The cheapest quote may not represent the best value if the report is inadequate for your needs.
Can I use my own photographs as a dilapidation record instead of hiring a professional?
Short answer: Personal photographs are better than nothing but lack the professional credibility and systematic documentation needed for dispute resolution.
While personal photographs can supplement a professional report, they are unlikely to be accepted as primary evidence in formal dispute resolution. Professional dilapidation reports carry weight because they are prepared by qualified, independent inspectors following established methodologies. Personal photographs may be challenged on grounds of selectivity, lack of expertise in identifying relevant defects, absence of proper measurements, and potential bias. Courts and tribunals generally prefer evidence from independent professionals. If budget constraints are a concern, some inspectors offer scaled services or can focus on high-priority areas. However, investing in a proper professional report is almost always more cost-effective than facing a dispute without adequate documentation.
What should I do if I notice damage during construction before the comparison inspection?
Short answer: Document the damage immediately with dated photographs, notify the builder in writing, and arrange an interim inspection as soon as possible.
Early identification of damage is crucial for several reasons. Take dated photographs immediately using a smartphone or camera with date stamping enabled. Note the date, time, and any construction activities occurring nearby. Send written notification to the builder or developer, ideally by email to create a dated record. Contact your building inspector to discuss whether an interim inspection is warranted. An interim inspection documents the damage and establishes a timeline linking it to specific construction activities. This is particularly important if you observe progressive damage such as cracks that are expanding. Prompt action also supports requests for the builder to modify their methods to prevent further damage and strengthens any subsequent compensation claims.
How long should I keep my dilapidation report?
Short answer: Retain the report indefinitely or for at least 10 years after construction completion, as building defects may take years to manifest.
Building defects resulting from construction activities do not always appear immediately. Settlement, subsidence, and structural issues may develop over months or years following construction. In some Australian states, limitation periods for building defect claims extend to 10 years or more from completion of construction. Keep both digital and physical copies of the report in secure locations. Store digital copies in multiple locations including cloud storage. If you sell the property, consider providing a copy to the purchaser as part of the property records. The report may also be valuable for insurance claims or if neighbouring properties undertake future construction projects. Treat the dilapidation report as a permanent property record similar to titles and contracts.
Who is responsible for paying for dilapidation reports?
Short answer: Typically the builder or developer pays for reports required by DA conditions, while property owners may choose to commission their own independent reports.
Development consent conditions usually require the applicant (builder or developer) to arrange and pay for dilapidation reports for neighbouring properties. This is considered a standard cost of development. However, property owners may choose to commission their own independent report if they want assurance of truly independent documentation. Having your own report can be valuable if disputes arise about the builder-commissioned report's accuracy or completeness. In some cases, construction contracts specify responsibility for dilapidation survey costs. Major infrastructure projects typically include comprehensive dilapidation surveys as part of the project budget. If you are offered a free report by a builder, consider whether you also want an independent assessment for added protection.
What qualifications should I look for in a dilapidation report inspector?
Short answer: Look for state licensing, relevant qualifications (minimum Diploma level), professional indemnity insurance, and membership in recognised industry bodies.
Essential qualifications include current registration with the relevant state building authority. In NSW, check registration with NSW Fair Trading. In Victoria, verify registration with the Victorian Building Authority. In Queensland, confirm QBCC licensing. The inspector should hold a minimum Diploma of Building and Construction or equivalent qualification in building surveying or construction management. Professional indemnity insurance is essential and should be verified. Membership in professional organisations such as the Australian Institute of Building Surveyors (AIBS) or Australian Society of Building Consultants (ASBC) indicates commitment to professional standards. Ask for sample reports to assess quality. Request references from recent clients. Verify that the inspector has specific experience with dilapidation reports rather than just general building inspections.
Can dilapidation reports be used as evidence in court?
Short answer: Yes, professionally prepared dilapidation reports are admissible as evidence and carry significant weight in tribunal and court proceedings.
Dilapidation reports prepared by qualified professionals are admissible evidence in courts, tribunals (such as NCAT in NSW or VCAT in Victoria), and other dispute resolution forums. The report provides objective, dated documentation of property condition that can be compared with post-construction evidence. For maximum evidentiary weight, reports should be prepared by appropriately qualified and licensed inspectors, follow accepted professional standards, and include comprehensive documentation with photographs and measurements. The inspector may be called to provide expert witness testimony explaining their findings and methodology. Courts prefer documentary evidence over verbal testimony alone, making professionally prepared dilapidation reports valuable evidence in property damage disputes. Reports prepared by unqualified individuals may be challenged or given less weight.
Key Takeaways
- The dilapidation report process follows five systematic steps: initial consultation, site inspection, data collection, report preparation, and delivery with client discussion.
- Australian legal requirements for dilapidation reports vary by state but are commonly imposed through local council DA conditions under legislation such as the Environmental Planning and Assessment Act 1979 (NSW).
- Qualified inspectors must hold state licensing, relevant qualifications, professional indemnity insurance, and ideally membership in recognised industry bodies.
- Comprehensive reports document interior elements, roof components, external features, landscaping, and neighbouring property conditions visible from public areas.
- The complete process typically takes 5 to 10 business days from consultation to delivery, with expedited services available for urgent requirements.
- Report costs range from $400 to $1,200 for residential properties, representing minimal investment compared to potential dispute costs without documentation.
- Dilapidation reports should be retained for at least 10 years as building defects may take years to manifest following construction activities.
- Professionally prepared reports are admissible as evidence in court and tribunal proceedings and carry significant weight in construction damage disputes.
- If damage is observed during construction, document it immediately with dated photographs, notify the builder in writing, and arrange an interim inspection promptly.
References and Resources
- Environmental Planning and Assessment Act 1979 (NSW)
- National Construction Code (NCC)
- Australian Building Codes Board (ABCB)
- NSW Fair Trading
- Queensland Building and Construction Commission (QBCC)
- Victorian Building Authority (VBA)
- Consumer and Business Services South Australia
- Standards Australia
- Australian Institute of Building Surveyors (AIBS)
Related Articles
Dilapidation Report Cost: Factors That Affect Pricing
Dilapidation report costs vary based on property size, location, scope, and urgency. This guide breaks down pricing factors across Australian cities and helps you budget for pre-construction property documentation.
Independent Dilapidation Report Services: Why You Need One
Independent dilapidation reports provide unbiased, third-party assessment of property condition before and after construction, preventing legal and financial conflicts.
Ultimate Guide to Dilapidation Reports
Dilapidation reports document a property