
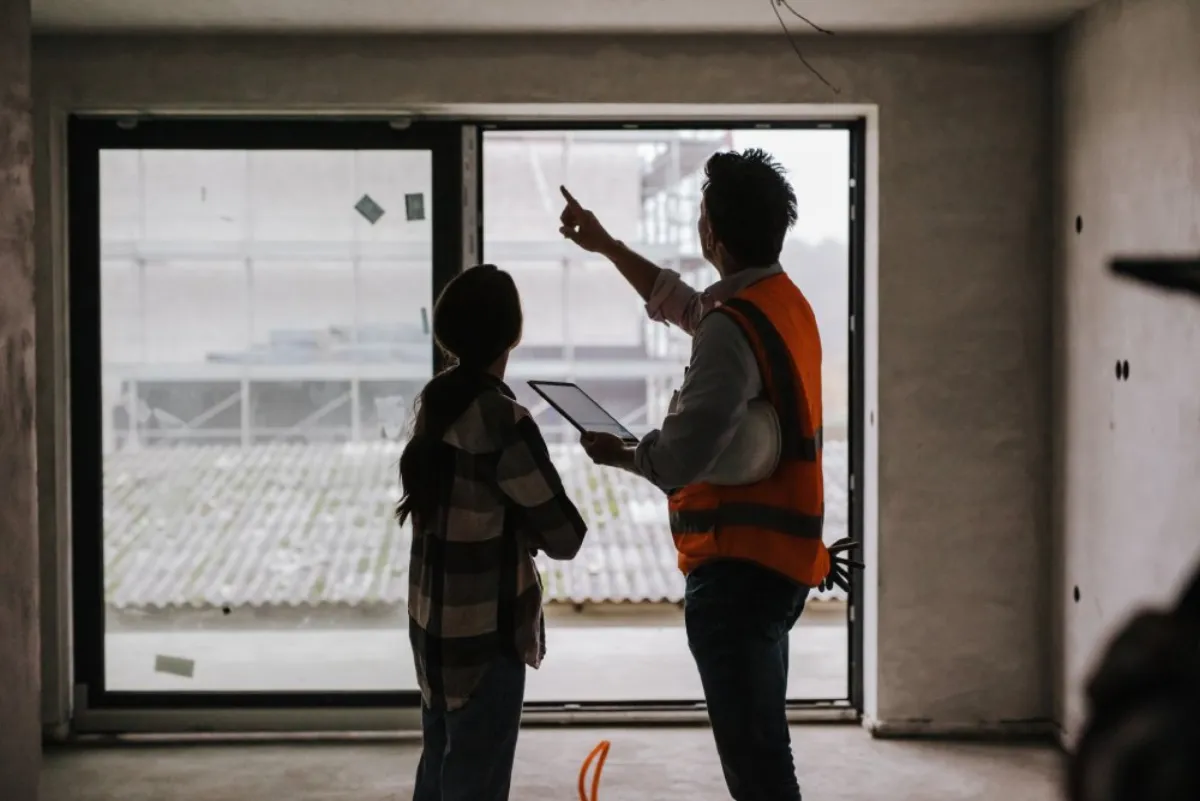
Your apartment pre-settlement final walkthrough is the last opportunity to check that the property matches the contract of sale before ownership transfers to you. In Australia, this walkthrough covers the interior condition of every room, all fixtures and fittings, appliances, plumbing, electrical systems, balconies, car spaces, and common areas. Defects found during the walkthrough should be documented with photos and raised in writing with the builder or vendor before settlement proceeds. While not a legal requirement, most contracts allow it, and skipping this step can leave you financially responsible for issues that should have been the builder's or seller's responsibility.
Apartment purchases account for a growing share of property transactions across Australian capital cities. According to the Australian Bureau of Statistics, apartments made up roughly 30% of all dwelling approvals in 2024. With construction timelines under pressure and trades stretched thin, quality control issues in new apartment builds have become more common. Even for established apartments, the condition can change between exchange and settlement due to tenant damage, weather events, or deferred maintenance.
This guide provides a practical, room-by-room final walkthrough checklist designed for Australian apartment buyers. Whether your apartment is brand new or an established unit, this checklist will help you identify defects, protect your rights, and settle with confidence.
What to Bring to Your Final Walkthrough
Walking into your final inspection unprepared is one of the biggest mistakes apartment buyers make. Having the right documents and tools on hand turns a casual walkthrough into a thorough assessment.
- Contract of sale with inclusions and fixtures listed
- Floor plans, specifications, and colour/materials schedule
- Phone or camera for timestamped photos
- Torch for checking dark corners, under sinks, and inside cupboards
- Spirit level for walls, benchtops, and floors
- Phone charger to test power points
- Tennis ball or marble to roll across floors for unevenness
- Measuring tape to verify room dimensions
- Notebook and pen for recording defects
- A friend or family member as a second pair of eyes
Tip
Schedule your walkthrough during daylight hours. Natural light reveals surface defects such as paint imperfections, scratches, and uneven finishes far better than artificial lighting. If possible, visit a second time after dark to test all lighting and check for light leaks around blinds and curtains.
Entry and First Impressions
Start your walkthrough at the front door. Check the door for smooth operation, proper alignment, and a secure deadlock that engages without force. Inspect the door frame for chips, dents, and clean paint lines. Test the doorbell or intercom to confirm it connects to the building's security system.
Look at the entry hallway with fresh eyes. Walls should be free of scuffs and construction marks. Skirting boards should sit flush against the floor and wall with neat, consistent joins. Light switches at the entry should control the correct fittings.
- Front door opens and closes smoothly with no scraping or sticking
- Deadlock, handle, and hinges all function correctly
- Intercom or buzzer connects to the building entry system
- Entry flooring is clean, undamaged, and matches the specification
- Skirting boards and architraves are secure and neatly finished
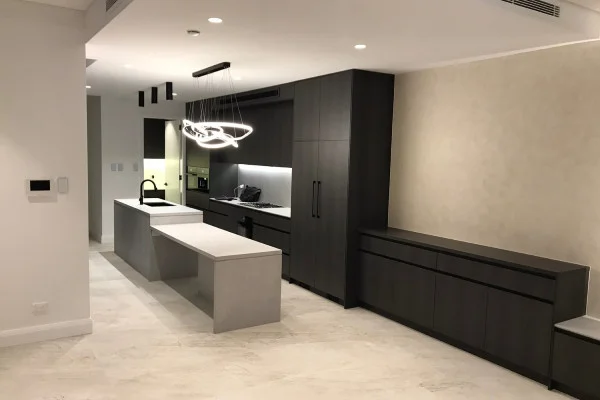
Kitchen Walkthrough
The kitchen is typically the most expensive room per square metre in any apartment. Defects here tend to be costly and disruptive to fix once you have moved in.
Benchtops and Splashbacks
Run your hands along every benchtop edge. Feel for chips, rough spots, and unfinished areas that might cut or snag. Examine stone and engineered surfaces from several angles because cracks and discolouration sometimes only show under certain light.
Check that joins are tight, level, and colour-matched. Gaps where the benchtop meets the wall or sink cutout will let water in, leading to swelling, mould, and early deterioration.
Inspect the splashback for cracks, chips, and uneven tile lines. Grout should be consistent and fully filled. Where the splashback meets the benchtop, silicone sealant should be neatly applied with no gaps or bubbling.
Cabinetry and Drawers
Open every cupboard door and drawer. Soft-close mechanisms should work without sticking or bouncing back. Drawers should glide on their runners with no wobble. Check hinges for proper alignment and tighten any loose handles.
Look inside cabinets with your torch. Construction debris, sawdust, and unfinished edges are common findings in new apartments.
Appliances
- Turn on the oven and verify it heats to the set temperature
- Test all cooktop burners or induction zones
- Run the rangehood fan on every speed setting and check the light
- Start the dishwasher on a short cycle and watch for leaks
- Verify each appliance brand and model matches the contract specifications
Builders sometimes substitute appliances with different brands or models. You are entitled to receive exactly what was specified in your contract. If substitutions have been made without your written approval, raise this as a defect item.
Tapware and Sink
Run both hot and cold water through the mixer tap. Check water pressure and confirm smooth operation across the full range of movement. Look under the sink for drips at pipe connections and the tap base. Plug the sink, fill it, and confirm the drain empties quickly when released.
Bathroom and Ensuite Walkthrough
Bathrooms are high-moisture environments where construction defects can cause serious long-term damage. Waterproofing failures, poor drainage, and inadequate ventilation are among the most expensive defects to fix in apartments.
Tiles and Waterproofing Signs
Tap tiles gently with your knuckle or a coin. A hollow sound means the tile may not be properly bonded to the substrate, which can lead to cracking and water penetration behind the surface. This is a defect that must be addressed before settlement.
Check grout lines for completeness, consistency, and colour uniformity. Missing or cracked grout allows moisture behind tiles and compromises the waterproofing membrane beneath. Pay close attention to corners, edges, and around fixtures.
| How to Test | Warning Signs | |
|---|---|---|
| Tile adhesion | Tap with knuckle or coin across every tile | Hollow sound, movement under pressure |
| Grout quality | Visual inspection of all grout lines | Gaps, cracks, colour inconsistency, crumbling |
| Waterproofing | Check walls and ceiling below for damp patches | Stains, peeling paint, musty smell, efflorescence |
| Drainage fall | Pour water and observe flow direction | Ponding in corners, water flowing away from drain |
Fixtures, Fittings, and Ventilation
Test the shower, basin taps, and toilet. Flush the toilet several times to confirm it fills correctly and stops at the right level. Run the shower to check water pressure and temperature control. Inspect towel rails, toilet roll holders, mirrors, and soap dishes for secure mounting.
Test the exhaust fan by holding a tissue near the grille. The tissue should be pulled towards the fan, confirming air is being extracted. Poor bathroom ventilation leads directly to mould growth, which is a persistent problem in Australian apartments. Waterproofing matters throughout the apartment, and our guide on common issues in pre-settlement inspections covers waterproofing defects in detail.
Living Areas and Bedrooms
Walls, Ceilings, and Paintwork
Use your torch to cast light at a low angle across wall and ceiling surfaces. This raking light technique reveals dents, bumps, cracks, roller marks, and poor plaster finishing that standard overhead lighting hides completely.
- Check corners for straight, consistent lines
- Look where walls meet ceilings for gaps or uneven cornice joins
- Inspect for paint drips, runs, missed spots, and touch-up patches that do not match
- Verify paint colour and finish (matt, satin, or gloss) match the selections schedule
- Look for scuff marks and scratches left from construction activity
Paint quality is one of the most frequently reported defects in new apartment builds. Builders often rush painting during the final stages, and the results show under proper inspection.
Flooring
Walk slowly across every floor surface. Feel for squeaks, soft spots, and unevenness. For timber and laminate, check for gaps between boards, scratches, and lifting edges. For carpet, look for ripples, poor stretching, and visible seams. For tiles, repeat the tap test.
Roll a tennis ball or marble across hard floors. It should travel in a relatively straight line. If it veers consistently to one side, the floor may not be level.
Windows and Doors
Open and close every window and door in the apartment. They should operate smoothly without sticking, scraping, or requiring excessive force.
- Window locks engage and disengage on all windows
- Sliding doors track smoothly without jumping off the rail
- Window seals and weatherstripping have no visible gaps
- Glass is free of scratches and cracks
- Double glazing shows no condensation between panes
- Flyscreens are present where specified and fit correctly
- Blinds or curtains operate smoothly and block light as expected
Built-in Wardrobes
Open every wardrobe door and drawer in each bedroom. Sliding doors should run smoothly on their tracks without derailing. Shelving should be stable and correctly spaced. Hanging rails need to be level and firmly fixed.
Check inside with your torch for unfinished edges, missing paint, and leftover construction debris.
Laundry Area
Apartment laundries are compact but still need careful checking. Test taps for pressure and smooth operation. Confirm hot and cold connections are correctly labelled. Check washing machine tap connections for leaks.
Run water through the laundry trough and floor waste. Drainage should be fast with no gurgling, which could signal a venting problem in the waste plumbing.
Confirm the laundry has proper ventilation through either an openable window or a mechanical exhaust fan. Poor laundry ventilation contributes to moisture problems throughout the entire apartment.
Balcony and Outdoor Spaces
Balconies are exposed to weather year-round and are one of the most common sources of water ingress in apartment buildings.
Balustrade Safety
Australian Standard AS 1170.1 requires balustrades on balconies above one metre to be at least one metre high. Push firmly against the balustrade to check for excessive movement or flex. Inspect glass panels for scratches, chips, and secure base fixings. Metal balustrades should be free of rust, dents, and sharp edges.
Drainage and Surface Condition
Pour water on the balcony floor and watch the flow pattern. Water should move towards the drain or scupper without pooling anywhere. Ponding water on a balcony eventually leads to waterproofing failure.
Inspect the junction between the balcony floor and the external wall. This is a critical waterproofing point. Look for proper flashing and sealant. If you can access the ceiling of the balcony below, check for water stains or efflorescence, both signs of moisture penetration.
| Requirement | How to Check | |
|---|---|---|
| Balustrade height | Minimum 1 metre above finished floor level | Measure from floor to top of balustrade |
| Balustrade stability | No excessive movement when pushed firmly | Apply lateral force and observe |
| Floor drainage | Water flows to drain with no ponding | Pour water and observe flow direction |
| Wall junction | Properly flashed and sealed | Visual inspection for gaps, cracking, or missing flashing |
Electrical and Safety Systems
Electrical defects in apartments are surprisingly common. Test every power point by plugging in your phone charger. Flick every light switch and dimmer to confirm each one controls the correct fitting.
Test all power points and USB outlets
Plug a charger into every power point and USB outlet throughout the apartment. Dead outlets are a common defect.
Check the switchboard
Open the meter board and confirm all circuits are clearly labelled. RCDs (safety switches) should be present. Press the test button on each RCD to verify it trips, then reset it.
Test smoke alarms
Australian building regulations require interconnected smoke alarms in all bedrooms, hallways connecting bedrooms, and on each level. Press the test button on every alarm.
Test air conditioning
If ducted or split system air conditioning is installed, run it in both heating and cooling modes. Check airflow from every vent and confirm the remote control works.
Check data and TV outlets
Test data points, TV outlets, and any integrated smart home systems specified in the contract.
Plumbing and Water Systems
Plumbing problems rank among the most disruptive defects to fix after settlement because they often require access through walls and ceilings.
Run every tap in the apartment at the same time. Low water pressure when multiple taps are open may point to undersized supply pipes. Check the hot water system type and location against the specifications. Note how long hot water takes to reach taps furthest from the system.
- Slow drainage when multiple fixtures run at the same time
- Gurgling sounds from waste pipes indicating venting issues
- Water stains on ceilings below bathrooms or laundries
- Drips or damp patches at visible pipe connections under sinks
- Hot and cold supply lines connected to the wrong taps
Car Parking and Storage
Visit your allocated car space during the walkthrough. Confirm the space number matches your contract. Check for adequate width, ceiling height, and any obstructions such as columns or pipes that could restrict access for your vehicle.
Test the garage door remote or access fob. Locate your storage cage and verify its size, condition, and lock. These details are easy to overlook but become frustrating problems once you move in.
Common Areas
Your apartment purchase includes shared facilities managed by the owners corporation (body corporate). While a full strata inspection covers the financial and maintenance records, you should visually assess common areas during your walkthrough.
- Lobby finishes, lighting, intercom system, and mailbox access
- Corridor walls, carpet condition, and fire safety equipment including extinguishers, hose reels, and exit signs
- Lift operation, interior condition, and floor levelling
- Bin room access and cleanliness
- Garden, pool, or gym facilities if included in the building
Formal defect claims for common areas are typically managed by the strata manager on behalf of all owners. However, documenting issues you observe gives the body corporate a head start on raising claims with the developer during the defect liability period.
What to Do When You Find Defects
Once you have completed your walkthrough, compile your defect list with clear photographs and written descriptions for each item. Submit this list to the builder or the vendor's agent in writing. Email is acceptable and creates a paper trail.
For new builds, the builder is required to rectify defects before settlement under most Australian state legislation. In New South Wales, the Home Building Act 1989 provides statutory warranties that protect buyers. In Victoria, the Domestic Building Contracts Act 1995 provides similar protections. In Queensland, the QBCC administers warranty and insurance requirements under the Queensland Building and Construction Commission Act 1991.
Minor cosmetic defects can often be addressed through a post-settlement rectification period agreed in writing. Major structural or safety defects may justify delaying settlement altogether. Always consult your solicitor or conveyancer before deciding to delay. For more about your options, read our guide on what you need to know about pre-settlement inspections.
Why a Professional Inspector Makes a Difference
While this checklist is thorough, a licensed building inspector brings training, experience, and specialised tools that most buyers simply do not have.
Pros
- Thermal imaging cameras detect hidden moisture behind walls
- Laser levels provide precise measurements for floor and wall levels
- Moisture metres give quantitative readings for damp areas
- Independent written report carries weight in builder negotiations
- Experienced eye catches subtle defects that untrained buyers miss
Cons
- Limited to visual inspection without specialised equipment
- Hidden defects behind walls and under floors go undetected
- No formal report to present in a dispute or warranty claim
- Emotional attachment to the property can cloud objectivity
- Technical building knowledge gaps mean some defects go unrecognised
For apartments built during high-volume construction periods, where quality control can vary significantly between units, professional inspection is strongly recommended. A qualified inspector following Australian Standard AS 4349.1 will produce a report that documents every defect with photographic evidence and technical descriptions.
Key Takeaways
- Your apartment pre-settlement final walkthrough is the last chance to identify defects before ownership and financial responsibility transfer to you.
- Bring the right documents and tools including your contract, floor plans, spirit level, torch, and phone charger to conduct a thorough inspection.
- Check every room systematically covering kitchens, bathrooms, living areas, bedrooms, laundry, balcony, and common areas.
- Bathrooms and balconies require extra attention because waterproofing and drainage defects are among the most expensive to fix after settlement.
- Test all electrical systems including power points, light switches, RCDs, smoke alarms, and air conditioning during your walkthrough.
- Document every defect with timestamped photographs and written descriptions, and submit the list to the builder or vendor in writing before settlement.
- Statutory warranty periods in most Australian states cover major defects for six years and minor defects for two years from completion.
- Engaging a licensed building inspector provides independent evidence and specialised detection of hidden defects that a visual walkthrough alone cannot reveal.
Frequently Asked Questions
QHow long should a pre-settlement final walkthrough take for an apartment?
A thorough apartment walkthrough typically takes 60 to 90 minutes for a standard two-bedroom unit. Larger apartments with multiple bathrooms, balconies, or additional storage areas may require up to two hours. Rushing through the process increases the chance of missing defects that could cost thousands to repair after settlement. Allow enough time to test every fixture, fitting, and system properly.
QCan I bring a professional building inspector to my final walkthrough?
Yes. You are entitled to bring anyone you wish to the walkthrough, including a licensed building inspector. A professional inspector will use specialised equipment such as thermal imaging cameras and moisture metres to detect issues hidden behind walls, under floors, and in ceiling cavities. Their independent report also serves as documented evidence if you need to negotiate with the builder or pursue a formal dispute.
QWhat should I do if the builder refuses to fix defects before settlement?
If defects are minor and cosmetic, you may agree to a written post-settlement rectification timeline with the builder. For major defects affecting safety or structural integrity, you may have grounds to delay settlement. Contact your solicitor or conveyancer before making this decision, as the legal position depends on your contract terms and the relevant state legislation. In NSW, the Home Building Act 1989 provides statutory protections. In Queensland, the QBCC oversees similar consumer safeguards.
QIs an apartment pre-settlement walkthrough a legal requirement in Australia?
It is not a legal requirement in any Australian state or territory. However, most contracts of sale include a clause that allows the buyer to conduct a final inspection before settlement. You should always exercise this right. Waiving the walkthrough means you accept the property in its current condition, making it much harder to hold the builder or vendor accountable for defects discovered later.
QWhat is the difference between a pre-settlement walkthrough and a defect inspection?
A pre-settlement walkthrough is a general visual check conducted by the buyer to confirm the property matches the contract. A defect inspection is a detailed, technical assessment carried out by a qualified building inspector who produces a formal written report documenting all construction defects, their severity, and recommended rectification. The defect inspection report is a professional document that carries weight in negotiations and legal proceedings.
QWhat are the most common defects found during apartment walkthroughs?
The most frequently identified defects in new apartments include poor paintwork (drips, roller marks, missed spots), hollow or poorly adhered tiles, scratched glass and flooring, misaligned cabinetry doors and drawers, incomplete grouting, faulty plumbing connections, dead power points, and drainage issues on balconies. In established apartments, common findings include damaged fixtures, worn flooring, leaking taps, and deteriorated window seals. For a deeper look at typical issues, see our guide on common issues in pre-settlement inspections.
QCan I delay settlement if I discover major defects?
This depends on the severity of the defects and the terms of your contract. Minor cosmetic issues such as paint touch-ups or scratched surfaces generally do not justify delaying settlement. Major defects that affect structural integrity, safety, or habitability may give you grounds to delay or negotiate a price adjustment. Always seek legal advice from your solicitor before taking this step, as an unjustified delay can put you in breach of contract.
QWhat tools do professional inspectors use that I would not have?
Licensed building inspectors use thermal imaging cameras to detect hidden moisture and thermal anomalies behind walls, moisture metres for precise dampness readings, laser levels for accurate measurement of floor and wall levels, borescopes for inspecting inside wall cavities and ceiling spaces, and electrical testing equipment. These tools identify problems that a standard visual inspection cannot detect, including concealed water leaks, poor insulation, and electrical faults.
QHow do I properly document defects during my walkthrough?
Photograph each defect with your phone camera, ensuring timestamps are enabled. Take wide shots showing the defect location within the room and close-up shots showing the defect detail. Write a description for each defect including the room, the exact location within the room, and what the issue is. Compile everything into a numbered defect list and send it via email to the builder or vendor's agent. Keep a copy for your own records. This documentation also supports any warranty claims you may need to lodge later.
QWhat if I discover defects after settlement has been completed?
For new builds, statutory warranty periods apply in every Australian state and territory. In New South Wales, major defects are covered for six years and minor defects for two years from the date of completion. Victoria, Queensland, and other states have similar warranty frameworks. Lodge your defect claim in writing with the builder as soon as possible. Include photographs and a clear description of each issue. If the builder does not respond, you can escalate through the relevant state authority such as NSW Fair Trading or the QBCC.
QAre common areas included in my apartment walkthrough?
Common areas such as lobbies, corridors, lifts, and shared facilities belong to the owners corporation, not individual lot owners. You can and should visually assess them during your walkthrough, but formal defect claims for common areas are managed by the strata manager on behalf of all owners. Documenting issues you notice gives the body corporate useful evidence for pursuing claims with the developer during the defect liability period.
QCan I conduct a second walkthrough if defects are found and the builder fixes them?
Yes. If the builder agrees to rectify defects before settlement, you are entitled to a follow-up inspection to verify the work has been completed properly. This re-inspection is standard practice and should be agreed upon in writing along with the rectification timeline. Do not settle until you are satisfied that all agreed defects have been addressed or a clear written plan is in place for post-settlement rectification.
References and Resources
- NSW Fair Trading - Home Building - Consumer protections for residential building work in NSW
- Victorian Building Authority (VBA) - Building regulations and consumer guidance in Victoria
- Queensland Building and Construction Commission (QBCC) - Licensing, insurance, and defect resolution in Queensland
- Home Building Act 1989 (NSW) - Statutory warranties and homeowner protections
- Australian Bureau of Statistics - Building Approvals - Dwelling approval data including apartments
Related Articles

Common Issues Found in Pre-Settlement Inspections
Pre-settlement inspections are a critical step before finalising a property purchase. This guide covers the most common issues found during these inspections, including structural defects, plumbing and electrical problems, cosmetic issues, and what to do if problems are identified.
What You Need to Know About Pre-Settlement Inspections
A pre-settlement inspection is your final opportunity to verify that a property is in the agreed condition before you complete the purchase. This guide covers what to check, who should conduct it, and a comprehensive checklist to follow.
Understanding Pre-Handover Inspections: A Guide for Homebuyers
Pre-handover inspections are your final opportunity to ensure your new house meets agreed standards and safety requirements before taking possession.
Planning your apartment pre-settlement walkthrough? Owner Inspections provides independent, professional apartment inspections with detailed defect reports and photographic evidence. Our licensed building inspectors identify issues that buyers commonly miss, giving you the documentation to hold builders accountable. Get a quote today or call us on 1300 471 805.