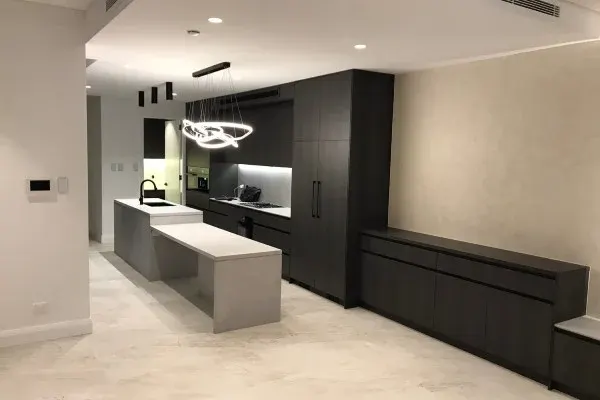
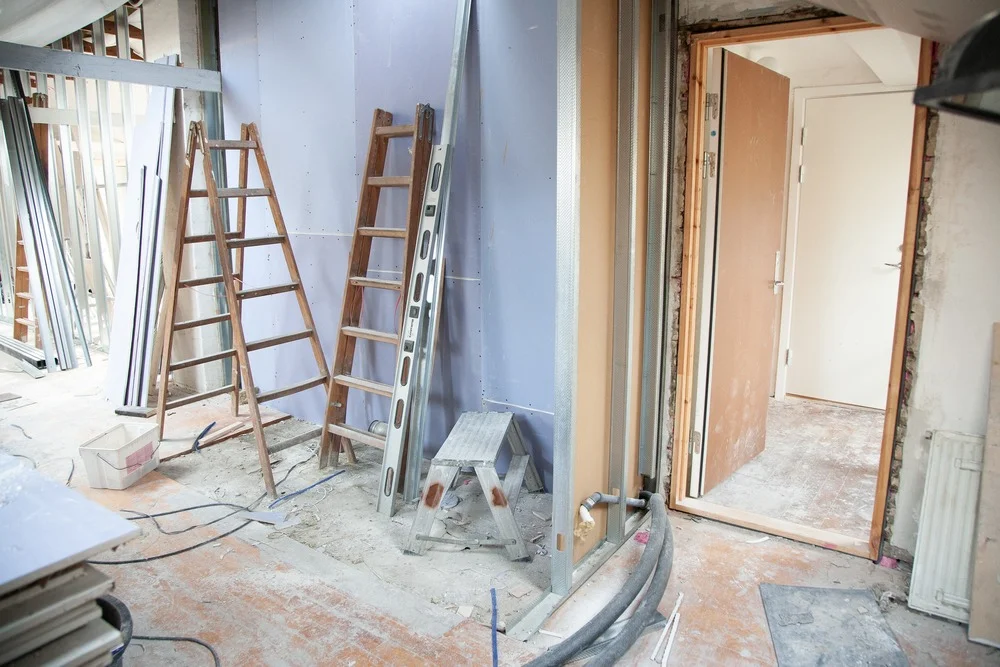
Building a new home should feel exciting, but the final weeks before handover can be stressful. The paint looks finished, the keys are nearly ready, and the builder may be asking for the final payment. This is exactly when a pre handover inspection matters most.
This critical inspection occurs at practical completion, the stage when construction is essentially finished and the home is ready to be handed over to the owner. Understanding the legal framework, knowing what to look for, and engaging the right professionals can mean the difference between a smooth handover and years of costly disputes with your builder.
Whether you are building a custom home, purchasing a house and land package, or buying an off-the-plan property, this comprehensive guide covers everything you need to know about pre-handover inspections in Australia, including your legal rights, what gets inspected, and how to ensure defects are properly rectified before settlement.
The pre-handover inspection is not just a formality. It is your legal right and your last line of defence before accepting responsibility for a property that may contain defects costing tens of thousands of dollars to repair. Do not sign off on practical completion until you are satisfied.
Need a Defect Report for Your Claim?
Get an independent defect investigation report that documents the issue, likely cause, and supporting evidence before the dispute escalates.
Investigation Report
What is a Pre-Handover Inspection?
A pre handover inspection is a final inspection of a newly built home before the buyer accepts handover. It is usually booked when the builder says the home has reached practical completion.
The aim is simple: check the finished home before you collect the keys, make final payment, or sign off on practical completion.
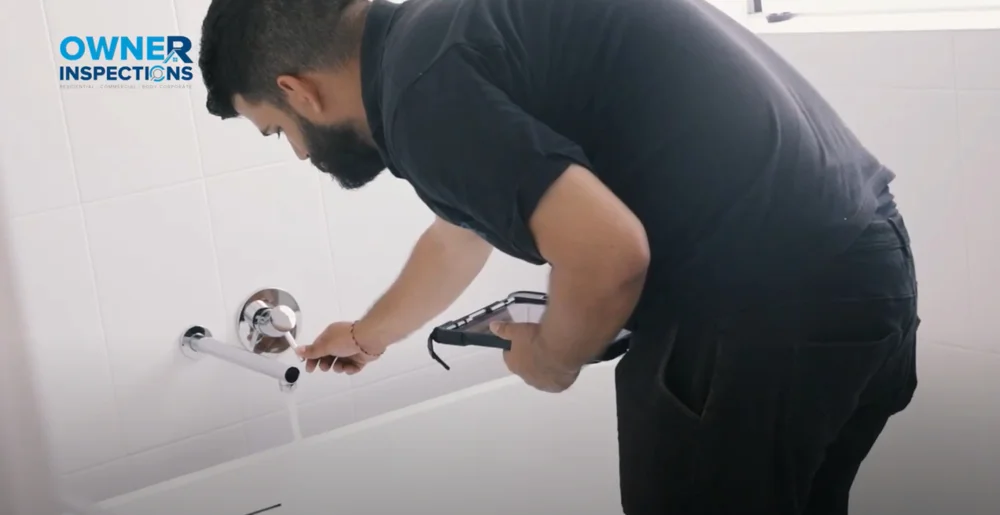
During a new home handover inspection, the inspector checks visible and accessible areas of the property, including workmanship, finishes, fittings, fixtures, wet areas, roofing, external areas, and items listed in the contract.
In Queensland, the QBCC says owners can engage a building inspector to check building work on their behalf, at their own cost.
A pre handover building inspection does not replace mandatory council or certifier inspections. Instead, it gives the buyer an independent condition report that can be shared with the builder before final handover.
Legal Framework Across Australian States
Pre-handover inspections are governed by different legislation depending on your state or territory. Understanding the applicable laws helps you know your rights and the builder's obligations.
| State | Governing Legislation | Key Provisions |
|---|---|---|
| NSW | Home Building Act 1989 | Statutory warranties, defect rectification periods, home warranty insurance |
| VIC | Domestic Building Contracts Act 1995 | Implied warranties, dispute resolution through Domestic Building Dispute Resolution |
| QLD | Queensland Building and Construction Commission Act 1991 | QBCC licensing, statutory warranties, home warranty insurance scheme |
| SA | Building Work Contractors Act 1995 | Building indemnity insurance, statutory warranties for domestic building work |
| WA | Home Building Contracts Act 1991 | Building Commission regulation, implied warranties, dispute resolution |
| TAS | Housing Indemnity Act 1992 | Building permits, housing indemnity insurance, Consumer Building and Occupational |
| ACT | Building Act 2004 | Building certifiers, rectification orders, statutory warranties |
| NT | Building Act 1993 | Building permits, compliance certificates, dispute resolution |
PCI Inspection Meaning: What Does PCI Mean in Building?
PCI stands for Practical Completion Inspection. A PCI inspection is another name for a pre handover inspection.
People search for this in different ways, including:
| Meaning | |
|---|---|
| PCI inspection | Practical Completion Inspection before handover |
| PCI checklist | A checklist of defects and unfinished items to check before handover |
| PCI inspection meaning | A search for what PCI means in building or construction |
| PCI checklist for new house | A buyer checklist for a new home before final payment |
| Practical completion inspection checklist | A checklist used at practical completion stage |
A PCI inspection should confirm whether the home is complete enough for handover and whether there are defects that should be fixed before the buyer accepts the property.
The QBCC says handover usually happens after practical completion, once major work is done and any agreed minor defects are listed with a plan to fix them.
Why a New Home Handover Inspection Can Protect Your Final Payment
A new home handover inspection gives you a written list of defects before the builder has fully closed out the job.
This matters because many buyers only notice issues after moving in. At that point, access, urgency, and builder response times can become harder to manage.
The QBCC recommends arranging an on-site inspection about a week before the handover inspection, giving owners a final chance to deal with remaining issues before handover. For buyers, the report can help with:
| Buyer concern | How the inspection helps |
|---|---|
| Final payment pressure | Gives a written defect list before payment discussions |
| Missed workmanship issues | Records visible defects with photos |
| Builder disagreement | Creates a clearer record of what was found |
| Warranty claims later | Shows the condition of the home at handover |
| Contract inclusions | Helps compare the finished home with plans and specifications |
Statutory Warranty Periods in Australia
One of the most important aspects of the pre-handover inspection is establishing the baseline condition of your property for warranty purposes. Australian law provides statutory warranties that protect homeowners from defective building work. These warranties commence from the date of practical completion, making thorough documentation at handover essential.
| Warranty Type | Period | Coverage | Examples |
|---|---|---|---|
| Minor defects warranty | 2 years from completion | Non-structural defects and minor building defects | Paintwork issues, minor cracking, fixture problems, door and window adjustments |
| Major defects warranty | 6 years from completion | Structural defects and major building defects | Foundation issues, structural frame defects, waterproofing failures, major roof defect |
| Implied statutory warranties | Varies by state | Work performed with due care, materials suitable, compliance with plans and regulations | NCC compliance, Australian Standards compliance, fit for purpose |
Under the Home Building Act 1989 (NSW), a major defect is defined as a defect in a major element of a building that is attributable to defective design, defective or faulty workmanship, defective materials, or a failure to comply with structural performance requirements of the National Construction Code. Major elements include internal and external load-bearing components, fire safety systems, waterproofing, and any element whose failure would likely cause destruction of the building or threat to life.
Professional Inspection vs DIY Approach
While homeowners have the right to conduct their own pre-handover inspection, the complexity of modern construction and the technical knowledge required to assess compliance with the National Construction Code make professional inspection highly advisable. Understanding the differences helps you make an informed decision.
Advantages of Professional Building Inspectors
- Technical expertise: Professional inspectors understand the National Construction Code, Australian Standards (AS), and state-specific building requirements. They can identify defects that untrained eyes would miss.
- Contract interpretation: They can review your building contract, specifications, and plans to ensure the builder has met their contractual obligations.
- Specialised equipment: Professionals use thermal imaging cameras, moisture meters, levels, and other tools to detect hidden defects such as water ingress, inadequate insulation, or structural irregularities.
- Documentation: A professional report provides legally admissible evidence should disputes arise, documenting defects with photographs, measurements, and references to relevant standards.
- Builder communication: Experienced inspectors know how to communicate effectively with builders and can advocate for proper rectification.
- Independence: Unlike the builder's site supervisor, an independent inspector has no conflict of interest and will report all defects objectively.
DIY Inspection Limitations
- Lack of technical knowledge to assess compliance with building codes and standards
- Inability to identify hidden defects without specialised equipment
- Difficulty interpreting contract documents and specifications
- Limited leverage when negotiating with builders
- Documentation may not be sufficient for legal proceedings
- May miss defects that become major issues after warranty periods expire
Key advantage of early inspections: Having an inspector present during construction when structural components are exposed allows for addressing issues before they are concealed behind plasterboard and cladding. Stage inspections during frame, lock-up, and fixing stages can prevent costly rectification work later.
Comprehensive Pre-Handover Inspection Checklist
A thorough pre-handover inspection examines every aspect of the property to ensure compliance with the contract, the National Construction Code, and relevant Australian Standards. The following checklist covers the key areas that should be assessed.
| Area | What to check | Common defects |
|---|---|---|
| Walls and ceilings | Paint finish, plaster joins, cornices, cracks | Uneven paint, nail pops, visible plaster joins |
| Floors and tiles | Tile finish, grout, carpet joins, timber gaps | Hollow tiles, lippage, loose flooring |
| Doors and windows | Operation, locks, seals, alignment | Sticking doors, scratched glass, poor seals |
| Kitchen and cabinetry | Bench joints, drawers, doors, appliances | Poor alignment, chipped surfaces, missing fittings |
| Bathrooms and wet areas | Falls to waste, silicone, grout, fixtures | Ponding water, poor sealing, loose fittings |
| Plumbing | Taps, toilets, drains, hot water | Leaks, slow drainage, poor water pressure |
| Electrical | Switches, lights, power points, safety switches | Missing fittings, poor labelling, faulty outlets |
| External areas | Render, cladding, paving, drainage | Cracks, poor falls, incomplete finishes |
| Roof and gutters | Visible roof covering, downpipes, flashing | Poor gutter falls, loose downpipes, gaps |
| Safety items | Smoke alarms, balustrades, glazing | Missing alarms, loose rails, unsafe glass |
Structural Elements
The structural integrity of your new home is paramount. These elements are covered by the 6-year major defects warranty.
- Foundation and slab: Check for visible cracks greater than 0.5mm, uneven surfaces, moisture penetration, and compliance with AS 2870 Residential Slabs and Footings. Verify slab edge exposure meets engineering specifications.
- Structural frame: Inspect visible framing for straightness, proper connections, and compliance with AS 1684 Residential Timber-Framed Construction or relevant steel framing standards.
- Roof structure: Verify truss connections, bracing, and tie-downs comply with engineering specifications and wind load requirements for your location.
- Load-bearing walls: Check for plumb alignment, proper lintels above openings, and adequate bracing.
- Subfloor (if applicable): Inspect for adequate ventilation, moisture barriers, and structural support.
Exterior Envelope
The building envelope protects the structure from weather and must be watertight and properly finished.
- Roof covering: Inspect tiles or metal roofing for proper installation, bedding, pointing, and flashing. Check valleys, ridges, and penetrations for weathertight sealing.
- Gutters and downpipes: Verify falls are correct, joints are sealed, overflows are present, and stormwater connections comply with AS/NZS 3500.3.
- External cladding: Check for proper installation, adequate clearances from ground level (minimum 75mm for masonry, 150mm for timber), and weathertight sealing around penetrations.
- Weep holes: Ensure weep holes are present at the base of masonry veneer walls and are not blocked by mortar droppings or landscaping.
- Flashing: Inspect all flashings at wall-roof junctions, windows, doors, and penetrations for proper installation and weathertight sealing.
- Windows and external doors: Test operation, check weatherseals, verify compliance with energy efficiency requirements (WERS ratings where specified), and ensure proper flashing installation.
- External finishes: Assess render, paint, or other finishes for consistency, coverage, and quality.
Waterproofing
Waterproofing failures are among the most common and costly defects in new homes. Waterproofing is considered a major element under the Home Building Act 1989 (NSW).
- Wet areas: Verify waterproofing membrane installation in bathrooms, laundries, and toilets complies with AS 3740. Check for proper overlap at junctions and penetrations.
- Shower recesses: Inspect falls to waste (1:80 minimum), grout condition, silicone sealing at junctions, and hob heights.
- Balconies and external areas: Check drainage falls, membrane termination, and flashing to adjacent walls.
- Subfloor moisture barriers: Where visible, verify vapour barriers are continuous and properly sealed.
Internal Finishes
Internal finishes affect both aesthetics and functionality. These items are typically covered by the 2-year minor defects warranty.
- Walls and ceilings: Check plasterboard for smooth finish, proper cornices, no visible joins or nail pops, and consistent paint coverage. Inspect for cracking, particularly at door and window frames.
- Flooring: Assess carpet for proper installation and no visible joins, tiles for lippage and grout consistency, timber floors for gaps and finish quality, and vinyl for adhesion and seam quality.
- Internal doors: Test operation, check for proper clearances, verify hardware installation, and assess finish quality.
- Joinery and cabinetry: Inspect alignment, operation of doors and drawers, soft-close mechanisms, benchtop joints, and finish quality.
- Skirting and architraves: Check for consistent installation, mitred corners, and paint finish.
Plumbing Systems
Plumbing must comply with the Plumbing Code of Australia and AS/NZS 3500 series standards.
- Hot and cold water supply: Test all taps for flow rate, temperature, and operation. Check for leaks at connections and under fixtures.
- Drainage: Test all fixtures for proper drainage, check traps are installed correctly, and verify no blockages or slow draining.
- Hot water system: Verify correct installation, adequate capacity, proper pressure and temperature relief valve installation, and compliance with energy efficiency requirements.
- Gas installations: Check gas meter location, pipework installation, and appliance connections comply with AS/NZS 5601.
- Sanitary fixtures: Inspect toilets, basins, baths, and showers for proper installation, sealing, and operation.
- Stormwater drainage: Verify downpipes are connected, surface drains are functional, and drainage complies with council requirements.
Electrical Systems
Electrical work must comply with AS/NZS 3000 Wiring Rules and be certified by a licensed electrician.
- Switchboard: Verify proper labelling, safety switch (RCD) installation, and adequate circuit protection.
- Power points and lighting: Test all power points and light fittings for correct operation. Verify placement matches contract specifications.
- Smoke alarms: Confirm hardwired, interconnected smoke alarms are installed in accordance with AS 3786 and NCC requirements for new builds.
- Exhaust fans: Test operation and verify proper ducting to external atmosphere in bathrooms, toilets, and rangehoods.
- Data and communication: Test TV, phone, and data outlets where specified.
- External lighting: Verify operation and weatherproof installation.
HVAC Systems
Heating, ventilation, and air conditioning systems should be tested and commissioned before handover.
- Air conditioning: Test cooling and heating modes, verify adequate airflow from all outlets, check condensate drainage, and confirm outdoor unit installation complies with manufacturer specifications.
- Ducted systems: Inspect visible ductwork for insulation, sealing, and proper connections. Verify zoning operation if applicable.
- Ventilation: Confirm adequate ventilation to all habitable rooms and wet areas as required by NCC.
- Heating systems: Test operation of gas or electric heating, verify thermostat controls, and check safety compliance.
External Areas
External works should be completed to contract specifications and council requirements.
- Driveway and paths: Check concrete or paver installation for falls, finish quality, and control joints. Verify connection to public footpath meets council requirements.
- Fencing: Confirm boundary fencing is installed as specified, gates operate correctly, and pool fencing (if applicable) complies with AS 1926.1.
- Landscaping: Verify turf, garden beds, and planting are complete as per contract. Check irrigation systems where specified.
- Retaining walls: Inspect for structural adequacy, drainage provisions, and finish quality.
- Letterbox and house number: Confirm installation as specified.
- Clothesline: Verify installation location and operation.
Safety and Compliance
Safety systems and compliance documentation are essential for legal occupation.
- Smoke alarms: Test all alarms for correct operation and interconnection.
- Safety glazing: Verify glazing in hazardous locations (doors, low windows, wet areas) is safety glass with appropriate markings.
- Handrails and balustrades: Check installation height (minimum 1000mm), baluster spacing (maximum 125mm), and structural fixing.
- Pool barriers: If applicable, confirm compliance with AS 1926.1 and local council requirements.
- Bushfire compliance: In designated areas, verify BAL (Bushfire Attack Level) construction requirements are met.
- Termite management: Confirm termite management system is installed and documented as per AS 3660.1.
- Energy efficiency: Verify insulation, glazing, and other elements meet NatHERS or equivalent energy rating requirements.
Preparing for a Tribunal or Legal Dispute?
If your building defect matter needs stronger technical evidence, an expert witness report can help support your position.
Witness Reports
PCI Checklist for New House Handover
A PCI checklist for new house handover should focus on finished quality, safety, and whether the home matches what the buyer paid for.
Bring these items to the inspection:
| Item to bring | Why it helps |
|---|---|
| Building contract | Confirms inclusions and exclusions |
| Plans and specifications | Helps compare the finished home with approved details |
| Colour selections | Checks finishes, fixtures, tiles, paint, and cabinetry |
| Variation documents | Confirms agreed changes |
| Appliance list | Checks model numbers and installed items |
| Phone or camera | Records visible issues |
| Torch | Helps inspect cupboards, ceiling spaces, and dark corners |
| Tape measure | Checks clearances and layout concerns |
It is a good idea to bring a copy of your contract and plans to the practical completion inspection so agreed finishes and fixtures can be checked.
Handover Inspection vs Practical Completion Inspection
A handover inspection, hand over inspection, pre handover inspection, and practical completion inspection are often used to describe the same final check before the buyer takes possession.
The difference is usually wording, not purpose.
| Term | Common use |
|---|---|
| Pre handover inspection | Buyer-friendly term used before keys are handed over |
| Handover inspection | Final walk-through with builder or inspector |
| Hand over inspection | Search variation of handover inspection |
| Practical Completion Inspection | Contract and building industry term |
| PCI inspection | Short version of Practical Completion Inspection |
During the handover inspection, the contractor and property owner walk through the property and complete the defects document.
Common Defects Found in Pre-Handover Inspections
Understanding the most common defects helps you know what to look for and ensures your inspector covers all critical areas. The following table shows defects frequently identified during pre-handover inspections.
| Category | Common Defects | Warranty Period | Severity |
|---|---|---|---|
| Waterproofing | Inadequate membrane, poor falls, failed seals, missing hobs | 6 years (major) | High |
| Roofing | Cracked tiles, poor flashing, inadequate sarking, gutter falls | 6 years (structural) | High |
| Plasterboard | Visible joins, nail pops, corner cracks, uneven surfaces | 2 years (minor) | Low |
| Tiling | Lippage, hollow tiles, inconsistent grout, cracked tiles | 2 years (minor) | Medium |
| Joinery | Door alignment, drawer operation, soft-close failure, bench gaps | 2 years (minor) | Low |
| Paintwork | Inconsistent coverage, runs, brush marks, colour variation | 2 years (minor) | Low |
| Windows and Doors | Poor operation, damaged seals, scratched glass, misaligned frames | 2 years (minor) | Medium |
| Concrete | Slab cracks, poor finish, inadequate falls, missing control joints | 6 years (structural) | High |
| Plumbing | Leaking fixtures, poor drainage, low pressure, cross connections | 6 years (major systems) | High |
| Electrical | Missing circuits, inadequate power points, poor workmanship, safety switch issues | 6 years (major systems) | High |
Builder's Defect Rectification Obligations
Under Australian building legislation, builders have clear obligations to rectify defects identified during pre-handover inspections. Understanding these obligations helps you negotiate effectively and ensures proper outcomes.
Classification of Defects
| Defect Classification | Definition | Builder's Obligation | Impact on Handover |
|---|---|---|---|
| Major structural defects | Defects in major elements affecting structural integrity or habitability | Must rectify before handover | May delay practical completion |
| Major non-structural defects | Significant defects not affecting structure but impacting use | Should rectify before handover | May negotiate timeline |
| Minor defects | Cosmetic or minor issues not affecting habitability | Rectify within reasonable time after handover | Should not delay practical completion |
| Incomplete work | Work not completed as per contract specifications | Must complete before handover | Prevents practical completion |
Rectification Timeline Guidelines
- Critical defects (safety hazards): Must be rectified immediately before occupation is permitted
- Major defects: Typically 14 to 28 days depending on complexity
- Minor defects: Usually 30 to 90 days after handover under warranty
- Warranty claims: Builder must respond within 14 days and rectify within reasonable timeframe
Under the Home Building Act 1989 (NSW), if a builder fails to comply with a rectification order, the homeowner may apply to NSW Fair Trading for a work order. The QBCC in Queensland can issue directions to rectify and has the power to suspend or cancel builder licences for non-compliance.
What Happens If Defects Are Found?
If defects are found, do not rely on memory or verbal promises. Ask for the defect list to be recorded in writing with photos, locations, and agreed rectification steps.
In Queensland, the defects document should list agreed minor defects and minor omissions, state when the contractor will attend to them, separately list items only the owner believes exist, and be signed by the owner and contractor where possible.
The QBCC also states that a contractor must repair defects noticed at handover or within 12 months of when the work is finished, and the owner must notify the contractor within 12 months of noticing them.
A simple process is:
- Review the inspection report.
- Send the report to the builder in writing.
- Ask the builder to confirm which items they agree to fix.
- Ask for dates for rectification.
- Reinspect the work before signing off.
- Keep copies of all emails, photos, reports, and certificates.
Cost Considerations for Pre-Handover Inspections
Investing in a professional pre-handover inspection is one of the best decisions you can make when building a new home. The cost is minimal compared to the potential savings from identifying defects before taking possession.
| Property Type | Typical Cost Range | Inspection Duration | Report Turnaround |
|---|---|---|---|
| Standard house (up to 250sqm) | $550 to $750 | 2 to 3 hours | 24 to 48 hours |
| Large house (250 to 400sqm) | $750 to $1,000 | 3 to 4 hours | 24 to 48 hours |
| Luxury or custom home (400sqm+) | $1,000 to $1,500+ | 4 to 6 hours | 48 to 72 hours |
| Townhouse or duplex | $500 to $700 | 1.5 to 2.5 hours | 24 to 48 hours |
| Unit or apartment (new build) | $400 to $600 | 1 to 2 hours | 24 hours |
Additional services may include thermal imaging inspection (additional $150 to $300), reinspection after defect rectification ($200 to $400), and expert witness services for disputes (hourly rates apply).
Documentation You Should Receive at Handover
At practical completion, the builder should provide comprehensive documentation for your records. This documentation is important for warranty claims, insurance, and future maintenance or renovations.
- Occupancy Certificate (or Certificate of Final Inspection): Issued by the building certifier confirming the building is suitable for occupation and complies with the approved plans and the Building Code of Australia.
- Compliance certificates: For plumbing, electrical, gas, and waterproofing work as required by state legislation.
- Home warranty insurance certificate: Required for residential building work over certain thresholds (varies by state) providing protection if the builder dies, disappears, or becomes insolvent.
- Termite management system documentation: Details of the termite management system installed, maintenance requirements, and warranty information.
- Appliance manuals and warranties: Operating instructions and warranty registration for all appliances included in the build.
- As-built drawings: Final drawings showing the building as constructed, including any variations from original plans.
- Energy efficiency assessment: NatHERS certificate or equivalent documentation.
- Survey plan: Final survey showing the building footprint and boundaries.
- Maintenance schedules: Recommendations for ongoing maintenance of various building elements.
- Keys, remotes, and access devices: All keys to doors and locks, garage remotes, security system codes, and similar items.
What To Do After Your PCI Inspection Report
After receiving your PCI inspection report, act quickly.
| Step | Action |
|---|---|
| 1 | Read the report and highlight major defects, safety issues, and incomplete work |
| 2 | Send the report to the builder by email |
| 3 | Ask for a written rectification plan |
| 4 | Confirm which items must be fixed before handover |
| 5 | Keep all replies, photos, and documents |
| 6 | Book a reinspection if defects were serious or numerous |
| 7 | Do not sign off until agreed items are properly recorded |
If a dispute arises in Victoria, Consumer Affairs Victoria recommends trying to resolve the issue with the builder and keeping copies of contracts, invoices, and written communications.
If a dispute arises in NSW, Building Commission NSW says homeowners should try to resolve the matter with the contractor or builder before making a complaint.
Your Rights and Dispute Resolution Options
If disputes arise regarding defects or the builder's refusal to rectify issues, Australian homeowners have several avenues for resolution.
Step 1: Direct Negotiation
Always attempt to resolve issues directly with the builder first. Document all communications in writing and keep copies of all correspondence. Clearly identify defects, reference contract specifications and relevant standards, and request rectification within a reasonable timeframe.
Step 2: State Building Authority Complaint
If direct negotiation fails, lodge a complaint with your state's building authority:
- NSW: NSW Fair Trading
- VIC: Domestic Building Dispute Resolution Victoria (DBDRV)
- QLD: Queensland Building and Construction Commission (QBCC)
- SA: Consumer and Business Services
- WA: Building Commission
- TAS: Consumer, Building and Occupational Services
- ACT: Access Canberra
- NT: Building Advisory Services
Step 3: Tribunal or Court Proceedings
For unresolved disputes, you may need to pursue formal proceedings through:
- NSW Civil and Administrative Tribunal (NCAT)
- Victorian Civil and Administrative Tribunal (VCAT)
- Queensland Civil and Administrative Tribunal (QCAT)
- South Australian Civil and Administrative Tribunal (SACAT)
- State Administrative Tribunal (WA)
- Magistrates Court or local courts for smaller claims
Time limits apply to building disputes. In NSW, you generally have 6 years from completio to make a claim for major defects and 2 years for minor defects. Seeking legal advice early is essential to protect your rights.
Statutory Warranties and Defect Timeframes
Warranty rules vary across Australia, so buyers should check the rules in their state or territory.
In NSW, homeowners have statutory warranties of 6 years for major defects and 2 years for other defects. NSW Building Commission says a major defect can include defective design, workmanship, materials, or failure to comply with National Construction Code structural performance requirements for a major building element.
In Victoria, Consumer Affairs Victoria says implied warranties automatically apply to all domestic building work and can transfer to a new owner for up to 10 years from completion. Consumer Affairs Victoria also says consumer guarantees and implied warranties apply by law and cannot be signed away.
Should You Use an Independent Building Inspector?
A buyer can attend the handover inspection, but an independent building inspector brings technical knowledge, inspection tools, and reporting experience.
A professional pre handover building inspection can help identify issues that buyers may miss, especially around wet areas, drainage, roof details, door and window alignment, and workmanship tolerances.
NSW Building Commission says that where a homeowner needs a technically qualified person to do a general inspection of building work, they should arrange this through an appropriately qualified private consultant.
When Should You Book a Pre Handover Inspection?
Book your pre handover inspection once the builder says practical completion is approaching, but before the final handover date.
As a guide, aim for around 7 to 14 days before the expected handover. This gives you enough time to receive the inspection report, send it to the builder, and request rectification before final payment or sign-off.
Arranging an on-site inspection about a week before the nominated handover inspection date. Do not wait until the morning of handover unless there is no other choice. A rushed inspection leaves less time for the builder to fix defects.
Getting the Most Value from Your Home and Building Investment
A new home should be handed over clean, safe, complete, and built to the agreed standard. A pre handover inspection helps you check that before final payment, not after you have already moved in.
The strongest way to protect yourself is to book the inspection early, bring your contract and plans, use a clear pre handover inspection checklist, and keep all defect records in writing.
If you are close to handover, Owner Inspections can complete an independent new home handover inspection and provide a detailed report you can send to your builder.
Ready to Document Your Building Defects Properly?
Speak with Owner Inspections about the right report for your defect issue, dispute stage, and next steps.
Inspections
Frequently Asked Questions
What is a pre handover inspection?
What is included in a pre handover inspection checklist?
What does PCI inspection mean?
When should I book a new home handover inspection?
Can I do my own handover inspection?
What happens if defects are found before handover?
Is a pre handover inspection required by law?
What is the difference between a PCI checklist and a new build handover checklist?
Can I delay handover if defects are found?
Related Articles
Cost-Saving Strategies for the Lock Up Stage in Construction
The lock up phase involves substantial expenses for windows, doors, and insulation. Learn proactive planning strategies and cost reduction tactics.
All You Need to Know About Fixing Inspections
A fixing stage inspection evaluates internal components before they are concealed, including cladding, architraves, doors, and built-in shelves. Learn what to expect.

Understanding Lock Up Pre Plaster Stage Inspection
The lockup stage is a critical phase where structures are secured with windows, doors, and external cladding before plastering begins. Learn what inspectors check.