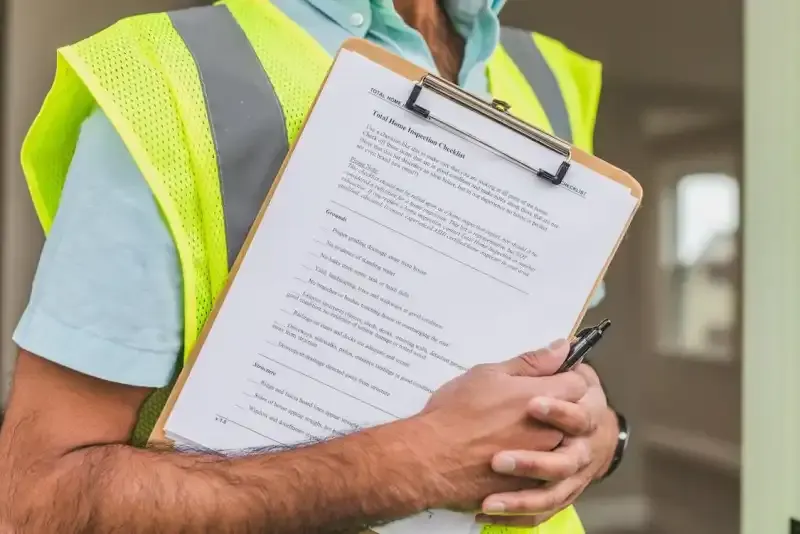
Buying an apartment? Your pre settlement inspection checklist is the last practical check before settlement, so it needs to be clear, structured and focused on the items that can cost money after handover. In Victoria, buyers are entitled to inspect the property at any reasonable time during the week before settlement, and the seller must hand over the property in the same condition as when it was sold.
This apartment inspection checklist helps buyers check the unit against the contract, inclusions, agreed repairs, fixtures, fittings, appliances, plumbing, electrical items, balconies, car spaces and storage areas. Queensland Government guidance also recommends inspecting the property 2 to 3 days before settlement and checking anything specifically included in the contract.
A pre-settlement inspection checklist is not the same as a full pre-purchase building inspection. It is a final walkthrough to confirm the apartment is in the expected condition, that agreed items remain in place, and that no new defects have appeared before ownership changes hands. NSW Government guidance recommends checking for defects, damp, mould, windows, doors, taps, toilets, plumbing, lights, circuitry, fixtures, fittings and storage during property inspections.
Found Defects Before Settlement?
Start documenting issues early with photos, notes and a clear inspection record before small problems become harder to prove.
Pre-Settlement Inspection
What Is a Pre Settlement Inspection Checklist?
A pre settlement inspection checklist is a step-by-step list used before settlement to check the apartment’s condition against the contract of sale, inclusions list, floor plan, finishes schedule and any agreed repairs.
It should help you answer three questions:
| Question | What it means |
|---|---|
| Is the apartment in the same condition as when it was sold? | Check for new damage, missing items or unfinished work |
| Are the agreed inclusions still there? | Check appliances, blinds, light fittings, remotes, storage cages and car spaces |
| Are fixtures and systems working? | Test taps, toilets, power points, lights, doors, windows and appliances |
This is why a written pre settlement checklist is better than walking through the apartment from memory. A checklist keeps the inspection focused and helps you create a clear defect list if something needs to be raised before settlement.
What to Bring to Your Apartment Pre-Settlement Inspection
Arriving prepared makes the inspection faster and more useful. Bring the documents and basic tools you need to compare the apartment with what was promised.
| Item | Why you need it |
|---|---|
| Contract of sale | To confirm fixtures, fittings and inclusions |
| Floor plan | To check layout, room sizes, car space and storage area |
| Finishes or colour schedule | To compare tiles, paint, flooring, benchtops and fittings |
| Phone or camera | To photograph defects and create a visual record |
| Phone charger | To test power points |
| Torch | To inspect cupboards, under sinks and dark corners |
| Measuring tape | To check key dimensions against the plan |
| Notebook or checklist | To record defect location and description |
| Blue painter’s tape | To mark visible defects if the builder allows it |
A second person can also help. One person can test items while the other records photos, locations and notes.
Apartment Inspection Checklist Before Settlement
This apartment inspection checklist for buyers focuses on items that are easy to miss during a short walkthrough. Start at the front door and move through the apartment in the same order every time.
| Area | What to check | Evidence to capture |
|---|---|---|
| Entry | Door alignment, locks, keys, intercom, doorbell | Photo or short video of operation |
| Kitchen | Appliances, taps, sink, cabinets, benchtops, splashback | Photos of defects, model numbers and leaks |
| Bathrooms | Tiles, grout, toilet, shower, drainage, exhaust fan | Photos of cracks, ponding water or leaks |
| Living area | Walls, ceilings, floors, lights, power points | Photos under natural light and torchlight |
| Bedrooms | Wardrobes, windows, blinds, flooring, power points | Photos of scratches, gaps or poor finishes |
| Laundry | Taps, drainage, ventilation, dryer duct if included | Video of water flow and drainage |
| Balcony | Balustrade, drainage, tiles, waterproofing signs | Photos of ponding, cracks or staining |
| Common areas | Lobby, lift, corridor, mailbox, access system | Photos of unfinished or damaged items |
| Car space | Number, access, dimensions, storage cage | Photo of car space and storage cage number |
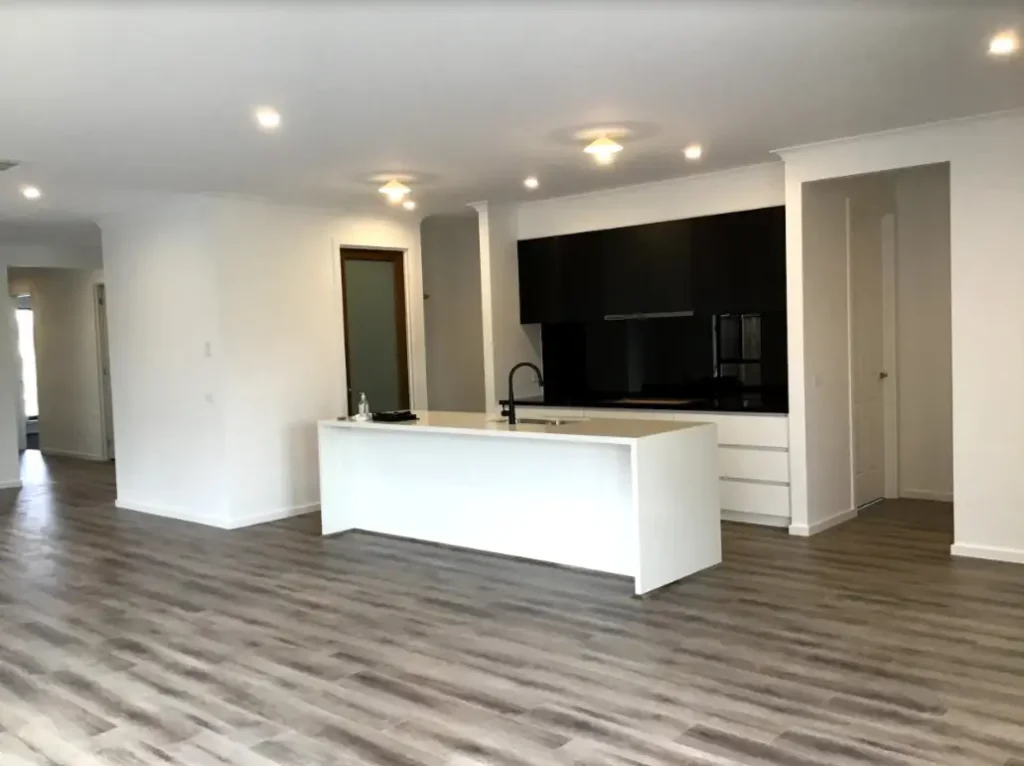
Kitchen Checklist
The kitchen is typically the most expensive room per square metre in any apartment. Defects here can be costly and disruptive to fix after settlement.
| Kitchen item | What to look for |
|---|---|
| Benchtops | Chips, cracks, uneven joins, poor sealing |
| Cupboards | Loose hinges, poor alignment, scratched panels |
| Drawers | Smooth runners, correct handles, no wobbling |
| Appliances | Correct model, working controls, no visible damage |
| Sink | Good drainage, no leaks, plug seals properly |
| Splashback | Cracked tiles, missing grout, poor silicone |
| Power points | Working outlets, correct locations |
Benchtops
Inspect every benchtop surface carefully. Run your hands along the edges to feel for chips, rough spots, or unfinished sections. Look at stone or engineered benchtops from multiple angles to catch cracks or discolouration that only appear under certain lighting.
Check that benchtop joins are tight, level, and properly sealed. Any gaps at the wall junction or around sink cutouts could allow water ingress that leads to swelling or mould.
| Check | What to Look For |
|---|---|
| Surface condition | Chips, scratches, cracks, discolouration |
| Joins and seams | Gaps, unevenness, poor colour matching |
| Edge profiles | Consistent finish, no rough or sharp spots |
| Wall junction | Sealed properly, no gaps |
| Level | Use spirit level across the surface |
| Overhang | Consistent and matches specifications |
Cabinetry
Open and close every drawer and cupboard door in the kitchen. Soft-close mechanisms should operate smoothly without sticking or bouncing. Drawers should glide on their runners without wobbling or catching.
Inspect the interior of cabinets for unfinished edges, sawdust, or construction debris. Look at hinges to confirm they are properly aligned and tightened. Check that all handles and knobs are firmly attached and positioned consistently.
Appliances
Turn on every appliance. Run the oven, cooktop burners, rangehood, and dishwasher through a short cycle. Check that the rangehood fan and light both work. Open the oven door to confirm hinges hold it in position.
Verify that the model and brand of each appliance matches what was specified in the contract. Builders sometimes substitute appliances, and you are entitled to receive exactly what was agreed upon. For more on your rights, see our article about builder obligations in pre-settlement inspections.
| Appliance | Checks |
|---|---|
| Oven | Heats up, door seals, hinges hold, correct model |
| Cooktop | All burners/zones ignite or heat, controls respond |
| Rangehood | Fan operates on all speeds, light works, filters present |
| Dishwasher | Runs full cycle, no leaks, correct model |
| Microwave (if included) | Heats, turntable rotates, door latches |
Tapware and Sink
Run both hot and cold water. Check water pressure and confirm that the mixer tap operates smoothly through its full range. Look under the sink for any signs of leaking at pipe connections or the base of the tap.
Plug the sink and fill it to check drainage speed and confirm the plug seals properly. While water is running, inspect the overflow outlet to ensure it drains correctly.
Splashback
Examine the splashback for chips, cracks, or uneven tiling. Grout lines should be consistent, fully filled, and free of gaps. If the splashback is glass, check for scratches and confirm the colour matches your selections.
Pay close attention to where the splashback meets the benchtop. Silicone sealant should be neatly applied with no gaps or bubbling.
Bathroom Checklist
Bathrooms are high-risk areas because water leaks, poor drainage and failed seals can lead to bigger problems later.
| Bathroom item | What to check |
|---|---|
| Shower | Water pressure, screen seals, drainage, fall to waste |
| Toilet | Flush, refill, leaks, loose pan |
| Vanity | Tap function, basin drainage, cabinet damage |
| Tiles | Chips, cracks, hollow sounds, uneven edges |
| Grout and silicone | Gaps, cracks, missing sections, mould staining |
| Exhaust fan | Air extraction and switch operation |
| Accessories | Towel rails, mirror, toilet roll holder, robe hooks |
Tiles and Grouting
Tap tiles gently with your knuckle or a coin. A hollow sound indicates the tile may not be properly adhered to the substrate, which can lead to cracking or water penetration over time.
Check grout lines for consistency, completeness, and colour uniformity. Missing or cracked grout allows water behind tiles, which compromises waterproofing and can cause structural damage. Inspect corners and edges where tiles meet walls, floors, and fixtures.
| Check | What to Look For |
|---|---|
| Tile adhesion | Tap test for hollow sounds |
| Grout lines | Gaps, cracks, inconsistent colour |
| Tile alignment | Lippage (uneven edges between adjacent tiles) |
| Cuts and edges | Neat cuts around fixtures and at borders |
| Silicone joints | Movement joints properly sealed |
| Surface condition | Chips, scratches, stains |
Waterproofing Indicators
While you cannot see the waterproofing membrane directly, you can look for signs of problems. Check for any damp patches on walls or ceilings below bathrooms (if accessible). Examine the base of shower screens and around the bath for proper sealing.
Fill the shower recess and let water sit for a few minutes if possible. Watch for any water escaping beyond the shower area. The shower floor should fall towards the drain with no ponding in corners.
Fixtures and Fittings
Test the shower, basin taps, and toilet. Flush the toilet multiple times and check that it fills and stops correctly. Run the shower to check water pressure and temperature control.
Inspect towel rails, toilet roll holders, soap dishes, and any other accessories. Confirm they are firmly fixed and level. Check the mirror for scratches and confirm it is securely mounted.
Drainage and Ventilation
Pour water directly over the floor waste to confirm drainage is clear and fast. Slow drainage can indicate a blockage or incorrect fall in the waste pipe.
Test the exhaust fan. It should activate with the light switch or its own switch, depending on the design. Hold a piece of tissue near the fan grille to confirm air is actually being extracted. Poor bathroom ventilation leads to mould growth, which is a serious issue in Australian apartments.
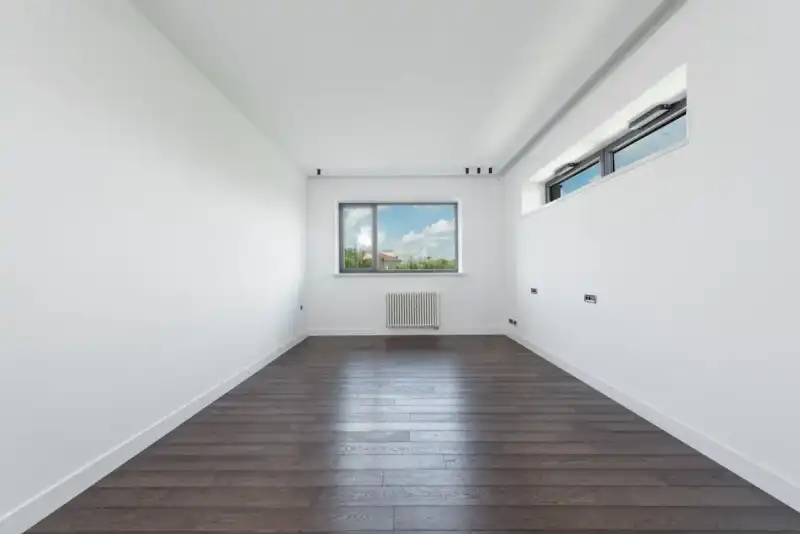
Living Area Checklist
Living areas are where you will spend most of your time. Defects in walls, floors, and windows are not just cosmetic; they can indicate deeper structural or construction issues.
| Bathroom item | What to check |
|---|---|
| Shower | Water pressure, screen seals, drainage, fall to waste |
| Toilet | Flush, refill, leaks, loose pan |
| Vanity | Tap function, basin drainage, cabinet damage |
| Tiles | Chips, cracks, hollow sounds, uneven edges |
| Grout and silicone | Gaps, cracks, missing sections, mould staining |
| Exhaust fan | Air extraction and switch operation |
| Accessories | Towel rails, mirror, toilet roll holder, robe hooks |
Walls and Ceilings
Stand at various angles and use your torch to cast light across wall and ceiling surfaces. This raking light technique reveals dents, bumps, cracks, and poor plaster finishing that are invisible under normal overhead lighting.
Check corners for straight, consistent lines. Look where walls meet ceilings for gaps or uneven cornice joins. Examine any feature walls or bulkheads for quality of finish.
| Defect Type | Where to Look |
|---|---|
| Cracks | Corners, around windows, ceiling joins |
| Dents and bumps | Flat wall surfaces under raking light |
| Paint defects | Drips, missed spots, colour variation |
| Cornice gaps | Wall-ceiling junctions |
| Nail pops | Plasterboard surfaces |
Floors
Walk slowly across every floor surface. Feel for squeaks, soft spots, or unevenness underfoot. If the apartment has timber or laminate flooring, check for gaps between boards, scratches, or lifting edges.
For carpeted areas, look for ripples, poor stretching, or visible seams. Pull back the edge at a doorway if possible to check the underlay quality.
For tiled living areas, perform the same tap test described in the bathroom section. Grout should be consistent and tiles level with minimal lippage.
Windows and Doors
Open and close every window and door. They should operate smoothly without sticking, scraping, or excessive force. Check that locks engage and disengage properly on all windows and sliding doors.
Inspect window seals and weatherstripping. Look for gaps that could allow water or air infiltration. Check glass for scratches, cracks, or failed double-glazing (condensation between panes).
Test sliding door tracks for smooth operation. Ensure flyscreen doors and windows are present where specified, undamaged, and fit correctly within their frames.
Power Points and Switches
Bring your phone charger and test every power point by plugging it in. Confirm the USB charging outlets work if they were included in the specification.
Flick every light switch and dimmer. Confirm each switch controls the correct fitting. Check that all downlights and pendant lights are working and are the correct colour temperature.
Test data points, TV outlets, and any integrated smart home systems specified in the contract.
Need to Record Defects Properly?
Learn how to photograph defects, keep written records and build a clear evidence trail if the issue needs to be raised later.
Documentation Guide
Bedroom Checklist
Living areas and bedrooms can hide cosmetic defects, poor finishes and operational issues.
| Room item | What to look for |
|---|---|
| Walls | Cracks, dents, patchy paint, poor plaster finish |
| Ceilings | Sagging, stains, cracks, gaps around fittings |
| Floors | Scratches, lifting boards, uneven tiles, carpet ripples |
| Doors | Rubbing, loose handles, poor latch alignment |
| Windows | Smooth operation, locks, seals, scratches |
| Wardrobes | Sliding tracks, shelving, handles, internal finish |
| Lights | Working fittings, correct switch control |
| Power points | Working outlets and safe placement |
Built-in Wardrobes
Open every wardrobe door and drawer. Check that sliding doors run smoothly on their tracks without derailing. Inspect shelving for stability and correct positioning. Examine hanging rails to confirm they are firmly fixed and level.
Look inside the wardrobe with your torch. Check for unfinished edges, poor paintwork, or construction debris left behind. Confirm the wardrobe configuration matches your selections.
| Wardrobe Check | Details |
|---|---|
| Doors | Smooth operation, alignment, handles firm |
| Drawers | Runners smooth, soft-close works, aligned |
| Shelving | Level, secure, correct spacing |
| Hanging rails | Firm, level, correct height |
| Interior finish | Clean, no rough edges, paint complete |
| Lighting | Internal wardrobe light works (if fitted) |
Windows
Bedroom windows require the same checks as living area windows, with extra attention to acoustic performance. Close the window and listen for traffic noise or other external sounds. If acoustic glazing was specified, confirm the glass type matches the specification.
Check that blinds or curtains (if included) operate smoothly and block light effectively. Blackout blinds should leave no significant light gaps around the edges.
Carpet and Flooring
Inspect carpet for consistent colour, proper stretching, and neat joins. Look at the transition strips where carpet meets hard flooring at doorways. These should be firmly fixed and present no tripping hazard.
For hard flooring, check for scratches that may have occurred during construction. Builders sometimes lay flooring before completing other work, leaving it exposed to damage from tradesperson traffic.
Laundry Checklist
The laundry is often a compact space in apartments, but it still requires careful inspection.
Taps and Connections
Test laundry taps for water pressure and smooth operation. Confirm hot and cold connections are correctly labelled and plumbed. Check washing machine tap connections for leaks.
If a dryer is included, verify the exhaust vent is connected and clear. Confirm the dryer matches the specified model.
Drainage
Run water through the laundry trough and floor waste. Check that drainage is fast and there is no gurgling, which could indicate a venting problem in the waste plumbing.
Ventilation
Confirm the laundry has adequate ventilation, whether through an openable window or a mechanical exhaust fan. Test the exhaust fan if fitted. In apartments, poor laundry ventilation contributes to moisture problems throughout the unit.
Balcony and Exterior Apartment Checks
Balconies are exposed to weather and are common sources of water ingress into apartments. Inspect this area carefully.
| Balcony item | What to check |
|---|---|
| Balustrade | Stable, secure, no cracked glass or loose fixings |
| Floor | Proper fall, no ponding, no loose tiles |
| Drainage | Clear drain, no blockage, no overflow marks |
| Door threshold | Sealed, no water entry signs |
| Walls and soffit | Staining, cracks, peeling paint |
| Lighting | Working external lights if included |
Balustrades
Check balustrade height and stability. Australian Standard AS 1170.1 requires balustrades on balconies above one metre to be at least one metre high. Give the balustrade a firm push to check it does not move or flex excessively.
Inspect glass balustrades for scratches, chips, and secure fixing at the base. Metal balustrades should be free of rust, dents, and sharp edges.
Drainage and Waterproofing
Pour water on the balcony floor and observe the drainage pattern. Water should flow towards the drain or scupper without pooling. Ponding water on a balcony can lead to waterproofing failure over time.
Check the junction between the balcony floor and the external wall. This is a critical waterproofing detail. Look for proper flashing and sealant.
Inspect the underside of the balcony slab from the apartment below (if accessible) for water stains or efflorescence, which indicate moisture penetration.
| Balcony Check | Details |
|---|---|
| Balustrade height | Minimum 1m above finished floor level |
| Balustrade stability | No excessive movement when pushed |
| Floor drainage | Water flows to drain, no ponding |
| Wall junction | Properly flashed and sealed |
| Tile/surface condition | No cracks, chips, or loose tiles |
| Ceiling (soffit) | No water stains or peeling paint |
Buying a Unit Checklist: Extra Apartment Checks
A buying a unit checklist needs to cover more than the inside of the apartment. You are also buying into shared spaces, access systems and strata-managed areas.
| Unit-specific item | Why it matters |
|---|---|
| Car space | Must match the contract and be usable |
| Storage cage | Should match the allocated lot or entitlement |
| Access fobs | Needed for entry, lifts, garage and facilities |
| Intercom | Confirms visitor access works |
| Mailbox | Check number, key and condition |
| Lift | Check operation, levelling and damage |
| Common corridors | Look for unfinished works or damage |
| Fire doors and exits | Do not block or alter, record visible issues |
Lobby and Corridors
Check the condition of hallway walls, flooring, and lighting. Note any damage or unfinished work. Fire safety equipment, including extinguishers, hose reels, and exit signage, should be present and current.
Verify that intercom and security access systems work correctly from both the lobby and your apartment.
Lifts
Test the lift. Confirm it arrives promptly, opens and closes smoothly, and stops level with the floor. Check the interior for damage or incomplete finishes.
Car Parking and Storage
Visit your allocated car space. Confirm the space number matches your contract. Check for adequate width, ceiling height, and any obstructions such as pipes or columns that restrict access. Test the garage door remote or access system.
Locate your storage cage and verify its size and condition. Confirm the lock works and the cage is structurally sound.
| Common Area | Key Checks |
|---|---|
| Lobby | Finishes, lighting, intercom, mailbox |
| Corridors | Walls, carpet, fire safety equipment |
| Lifts | Operation, interior condition, levelling |
| Car space | Number matches, dimensions, access |
| Storage cage | Size, lock, structural condition |
| Bin room | Access, cleanliness |
| Garden/pool (if applicable) | Condition, safety compliance |
Electrical Systems
Electrical defects in apartments are surprisingly common and can pose safety risks.
- Test every power point, light switch, and data outlet as described earlier. Check the switchboard (meter board) to confirm all circuits are labelled correctly. RCDs (residual current devices) should be present and functional. Press the test button on each RCD to verify it trips, then reset it.
- Check smoke detectors are installed in the correct locations. Australian building regulations require interconnected smoke alarms in all bedrooms, hallways connecting bedrooms, and on each level. Press the test button to confirm they sound.
If the apartment includes a ducted air conditioning system, test heating and cooling modes. Check that air flows from every vent. Split system units should respond to the remote control and reach the set temperature.
Plumbing
Plumbing problems can be among the most disruptive defects to fix after settlement.
- Run every tap in the apartment simultaneously to check water pressure under load. Low pressure when multiple taps are open may indicate undersized supply pipes.
- Check the hot water system location and type. Confirm it matches the specifications. Note the time hot water takes to reach distant taps; excessively long wait times can indicate poor pipe routing.
- Inspect visible pipework under sinks and in the laundry for leaks, corrosion, or incomplete connections. Look at ceiling penetrations in bathrooms and the laundry for signs of water staining, which can indicate leaking pipes in the unit above.
- Flush toilets, run showers, and fill basins simultaneously to stress-test the drainage system. Listen for gurgling sounds that might indicate blocked or poorly vented waste pipes.
Paintwork
Paint quality is one of the most frequently reported defects in new apartment builds. Use your torch to examine walls and ceilings under raking light.
Look for:
- Roller marks and brush strokes
- Drips and runs
- Uneven coverage or missed spots
- Touch-up patches that do not match the surrounding colour
- Paint on window frames, floor surfaces, or fixtures
- Scuff marks and scratches from construction
Check that the paint colour and finish (matt, satin, or gloss) match the selections schedule. Feature walls should have clean, straight lines where colours change.
External paintwork on balconies and building facades should also be inspected for consistency and coverage.
Final Inspection Checklist Before Settlement
Some buyers search for a final inspection checklist before settlement rather than a pre settlement inspection checklist. The intent is almost the same: check the apartment shortly before settlement and raise problems before the transaction completes.
Consumer Affairs Victoria says the seller must hand over the property in the same condition as when it was sold, and buyers can request a repair if something is damaged or not working as it was on the day of sale.
Use this final inspection checklist before settlement:
| Final inspection item | Checked |
|---|---|
| Property is clean and free of builder rubbish | ☐ |
| No new damage since contract signing | ☐ |
| Agreed repairs are complete | ☐ |
| Fixtures and inclusions remain in place | ☐ |
| Appliances turn on and match the contract | ☐ |
| Lights and power points work | ☐ |
| Taps, showers and toilets work | ☐ |
| No visible leaks under sinks or vanities | ☐ |
| Doors, windows and locks work | ☐ |
| Keys, remotes and access fobs are supplied | ☐ |
| Car space and storage cage match the contract | ☐ |
| Defects are photographed and sent in writing | ☐ |
What to Look for in a Pre Settlement Inspection
If you are wondering what to look for in a pre settlement inspection, focus on changes, defects and contract mismatches.
Look for new damage, missing inclusions, poor finishes, leaks, blocked drainage, damaged appliances, power issues, window or door problems, and items that do not match the contract.
A professional inspection can also help where defects are not obvious. Queensland Government guidance says buyers can get building and pest inspections and should make sure the inspector holds a current licence from the Queensland Building and Construction Commission when buying in Queensland.
What to Do After the Inspection
Once the inspection is complete, compile your defect list with photos, locations and clear descriptions. Send it to the builder, developer, vendor representative or agent in writing.
If the issue is technical, repeated, hidden or disputed, a defect investigation report can help identify the defect, document the evidence and explain the likely next step. Owner Inspections’ defect investigation reports can include visual defects, safety defects, water leaks, moisture readings, thermal imaging and repair recommendations.
If the builder agrees to fix items before settlement, book a reinspection after the repair work is complete. This gives you written evidence that the defects were checked again before you proceed.
| Defect record | Example |
|---|---|
| Location | Bathroom 1, shower floor |
| Issue | Water ponding near corner |
| Evidence | Photo 12 and video 3 |
| Requested action | Review fall to waste and rectify |
| Sent to | Builder representative by email |
| Date sent | Add date |
Should You Hire a Professional Inspector?
A DIY apartment inspection checklist can help you stay organised, but it does not replace an experienced inspector for technical defects.
A professional inspector can check visible building defects, moisture risk, poor finishes, drainage, balcony issues, waterproofing signs and safety concerns. In Victoria, the Building and Plumbing Commission is now the state’s building and plumbing regulator, bringing together the former VBA, Domestic Building Dispute Resolution Victoria and domestic building insurance functions.
Owner Inspections can provide a written report with photos, clear defect descriptions and practical next steps, which is useful when you need to raise items with the builder, vendor, agent, solicitor or conveyancer.
Get Professional Support for Your Apartment Inspection
A pre settlement inspection checklist gives apartment buyers a clear way to check the property before settlement. It helps you confirm inclusions, test fixtures, record defects and avoid relying on memory during a short walkthrough.
A pre-settlement inspection conducted by a licensed building inspector gives you confidence that your new apartment meets the required standards. Our team at Owner Inspections provides detailed defect reports with photographic evidence, giving you the documentation you need to hold builders accountable and protect your investment.
Get Professional Support Before Settlement
If you have found defects or want a clearer report before settlement, speak with Owner Inspections about the next best step.
Inspections
Frequently Asked Questions
What should I check in a pre settlement inspection checklist?
What is the difference between a pre settlement inspection and a final inspection?
When should I do a pre settlement inspection?
Can I use a pre settlement inspection checklist PDF?
What should apartment buyers check before settlement?
Is a pre settlement inspection checklist the same as a building inspection?
Can I delay settlement if defects are found?
What should I do if I find defects?
Related Articles
Common Mistakes to Avoid at Your Apartment Pre-Settlement Inspection
Pre-settlement inspections are your last chance to verify your new apartment meets contractual standards. Avoid these common mistakes that could cost you thousands after settlement.
Builder Obligations in Pre-Settlement Inspections
Pre-settlement inspections verify builders have fulfilled contractual and statutory obligations. Learn about defect rectification, timelines, and warranty coverage.

How to Resolve Pre-Settlement Disputes Effectively
Pre-settlement disputes create significant challenges for property buyers. Learn how to navigate construction defects, delays, and contractual issues with effective resolution strategies.