# Owner Inspections — Complete Site Content
> Australia's trusted building and pest inspection company providing professional property inspections across NSW, VIC, QLD, SA and ACT. Licensed and insured inspectors delivering same-day digital reports.
This file contains the complete content from ownerinspections.com.au for AI model consumption.
For a concise overview, see: https://ownerinspections.com.au/llms.txt
---
## Company Overview
Owner Inspections is a professional building and pest inspection company operating across Australia. We provide comprehensive property inspection services for home buyers, property investors, builders, strata managers, legal professionals and insurance companies. Our qualified inspectors use advanced tools including thermal imaging cameras, moisture meters, termite radar detection and drones.
Founded in 2014 by a family with over 20 years of experience in the building and inspection industry, Owner Inspections has grown to become one of Australia's most trusted building inspection companies, serving thousands of clients across NSW, Victoria, Queensland, South Australia and the ACT.
### Licensing and Credentials
- Victoria Building Authority (VBA) License: CDB-U 53425
- NSW Fair Trading License: 366177C
- Queensland Building and Construction Commission (QBCC) License: 15249792
- Australian Society of Building Consultants (ASBC) Member: SIP 141
- Fully insured with professional indemnity and public liability insurance
### Office Locations
- Sydney: Level 8, 97 Pacific Highway, North Sydney NSW 2060
- Melbourne: Level 14, 380 St Kilda Rd, Melbourne VIC 3004
- Brisbane: Level 22, 69 Ann St, Brisbane QLD 4000
### Contact
- Website: https://ownerinspections.com.au
- Phone: 1300 471 805
- Email: enquiries@ownerinspections.com.au
- Operating Hours: Monday to Friday 8:30am-5:30pm (AEST)
---
## Pricing
- Every inspection is quoted individually, on the property: size, type, location, access and scope all move the price.
- Quotes are fixed-price and given before booking — no hidden fees, no travel charges, no estimate that changes afterwards.
- Combined inspections (building with timber pest, or neighbouring properties documented together) cost less than booking each separately.
- For a price, request a quote: https://ownerinspections.com.au/contact
- All inspections include same-day digital report delivery
---
## Services
### Pre-Purchase Building Inspections
Source: https://ownerinspections.com.au/pre-purchase-inspections
Comprehensive inspections for property buyers to identify structural defects, safety hazards, and maintenance issues before purchase. Covers all accessible areas including foundations, roof space, walls, plumbing, and electrical systems in accordance with Australian Standard AS 4349.1. Essential for making informed buying decisions and negotiating on price.
### Building and Pest Inspections
Source: https://ownerinspections.com.au/building-and-pest-inspections
Combined building and timber pest inspection providing a complete assessment of a property's structural condition and pest activity. Identifies active termite infestations, past termite damage, borers, wood decay fungi, and conducive conditions alongside standard building defects. The most popular inspection for property buyers in Australia.
### Pre-Sale Building Inspections
Source: https://ownerinspections.com.au/pre-sale-inspections
Inspections for property sellers to identify and address defects before listing. Helps sellers present their property with confidence, avoid last-minute surprises during buyer inspections, and potentially achieve a higher sale price by demonstrating transparency about the property's condition.
### Apartment Pre-Settlement Inspections
Source: https://ownerinspections.com.au/apartment-pre-settlement
Inspections for off-the-plan apartment buyers before settlement to identify construction defects, incomplete works, and variations from the contract specifications. Covers internal finishes, fixtures, appliances, balconies, and car spaces. Critical for documenting defects within the defect liability period.
### Pre-Handover Inspections
Source: https://ownerinspections.com.au/pre-handover-inspections
Also known as practical completion inspections (PCI), these are conducted on new builds before the builder hands over the property to the owner. Identifies construction defects, incomplete works, and items not built to plan or Australian Standards. Creates a formal defect list for the builder to rectify.
### New Construction Stage Inspections
Source: https://ownerinspections.com.au/new-construction-stage-inspections
Independent inspections at key stages of new home construction: base/slab, frame, lock-up, fixing, and practical completion. Each stage inspection verifies the work complies with approved plans, Australian Standards, and the National Construction Code before it is concealed by subsequent work.
### Timber Pest Inspections
Source: https://ownerinspections.com.au/timber-pest-inspections
Specialist inspections for termites, borers, and wood decay fungi in accordance with AS 4349.3. Uses advanced detection equipment including thermal imaging and termite radar. Identifies active infestations, evidence of past damage, and conditions that make the property susceptible to future attack.
### Mould Inspections
Source: https://ownerinspections.com.au/mould-inspections
Assessment of visible mould growth, moisture sources, and conditions conducive to mould proliferation. Identifies affected areas, likely causes such as water leaks or poor ventilation, and provides recommendations for remediation. Important for properties with health concerns or water damage history.
### Swimming Pool Inspections
Source: https://ownerinspections.com.au/swimming-pool-inspections
Inspection of pool and spa structural condition, equipment, surrounds, and general safety. Covers the pool shell, coping, tiling, filtration systems, pumps, and visible plumbing. Notes obvious pool barrier deficiencies, though formal compliance certification requires a licensed pool safety inspector.
### Roof Inspections
Source: https://ownerinspections.com.au/roof-inspection
Detailed assessment of roof condition including tiles, metal sheeting, flashing, gutters, downpipes, fascia, and roof structure. Uses drone technology for inaccessible or high roofs. Identifies leaks, storm damage, deterioration, and maintenance requirements to extend roof lifespan.
### Dilapidation Reports
Source: https://ownerinspections.com.au/dilapidation-reports
Photographic documentation of a property's existing condition before nearby construction, demolition, or excavation work begins. Protects property owners by establishing a baseline condition record that can be used to identify and claim for any damage caused by adjacent works. Often required by local councils.
### Defect Investigation Reports
Source: https://ownerinspections.com.au/defect-investigation-reports
Detailed investigation and documentation of specific building defects, their causes, extent, and recommended remediation. Used for warranty claims, builder disputes, insurance claims, and tribunal proceedings. Includes photographic evidence, reference to relevant standards, and estimated rectification costs.
### Condition Reports
Source: https://ownerinspections.com.au/condition-reports
A dated, photographed record of the overall condition of an existing property, for owners, landlords and sellers, before renovations or leasing, and for maintenance planning. Includes structural observations on cracking, movement, sagging, uneven floors and dampness, and advises when further investigation or a structural engineer is needed. A visual inspection by a building inspector with a written report and photos.
### Expert Witness Reports
Source: https://ownerinspections.com.au/expert-witness-reports
Professional expert witness reports and testimony for building disputes at VCAT, NCAT, QCAT, and other tribunals or courts. Our accredited expert witnesses prepare detailed reports with Scott Schedules, attend mediations, and provide oral testimony. Covers residential and commercial construction disputes.
### Insurance Claim Assessments
Source: https://ownerinspections.com.au/insurance-claim-assessments
Independent assessment of property damage for insurance claims including storm damage, water damage, fire damage, and structural failure. Documents the extent of damage, probable cause, and estimated repair costs. Provides an independent report to support your insurance claim alongside the insurer's assessment.
### Drug Residue Testing
Source: https://ownerinspections.com.au/drug-residue-testing
Testing for methamphetamine and other drug residues in residential and commercial properties. Identifies contamination levels and whether they exceed Australian guidelines. Important for property buyers, landlords, and anyone concerned about potential clandestine drug manufacturing or use in a property.
### Maintenance Inspections
Source: https://ownerinspections.com.au/maintenance-inspections
Routine inspection of established properties to identify maintenance requirements, safety hazards, and deterioration before they become major defects. Provides a prioritised maintenance schedule with estimated costs. Suitable for homeowners, landlords, property managers, and body corporate committees.
### Reinspections
Source: https://ownerinspections.com.au/reinspection
Follow-up inspections to verify that defects identified in a previous inspection report have been properly rectified by the builder or tradesperson. Focuses specifically on the items previously documented. Available at a reduced rate. Essential for confirming works are completed to an acceptable standard.
### Tax Depreciation Schedules
Source: https://ownerinspections.com.au/depreciation-schedule
ATO-compliant tax depreciation schedules prepared by qualified quantity surveyors to maximise your property investment tax deductions. Covers both capital works (Division 43) and plant and equipment (Division 40) depreciation. Available for residential and commercial investment properties.
### Commercial Property Inspections
Source: https://ownerinspections.com.au/commercial-property-inspections
Building inspections for commercial, retail, and industrial properties. Covers structural elements, building services, fitout condition, compliance issues, and maintenance requirements. Suitable for purchasers, tenants, landlords, and investors conducting due diligence on commercial real estate.
### Strata Reports
Source: https://ownerinspections.com.au/strata-reports
Inspection and reporting on strata-titled properties including assessment of common property condition, building defects, and maintenance issues relevant to owners corporations and strata managers.
### Strata Building Bond Inspection Scheme (SBBIS)
Source: https://ownerinspections.com.au/strata-building-bond-inspection-scheme
Inspections under the NSW Strata Building Bond and Inspection Scheme for new strata buildings. Covers interim and final inspections to identify defects in building work before the developer's building bond is released. Protects owners corporations from inheriting unresolved construction defects.
### 137B Owner Builder Reports
Source: https://ownerinspections.com.au/137b-owner-builder-reports
Section 137B defect reports required under the Victorian Building Act when an owner builder sells a home within six years and six months of the building work being completed. Prepared by a registered building practitioner, the report lists defects in the owner-built work so the vendor can meet their disclosure obligations before sale.
### VCAT Witness Reports
Source: https://ownerinspections.com.au/vcat-witness-report
Expert witness reports and testimony specifically for the Victorian Civil and Administrative Tribunal (VCAT) in building dispute matters.
### NCAT Witness Reports
Source: https://ownerinspections.com.au/ncat-witness-report
Expert witness reports and testimony specifically for the NSW Civil and Administrative Tribunal (NCAT) in building dispute matters.
### QCAT Witness Reports
Source: https://ownerinspections.com.au/qcat-witness-report
Expert witness reports and testimony specifically for the Queensland Civil and Administrative Tribunal (QCAT) in building dispute matters.
---
## Sample Reports
Downloadable sample inspection reports demonstrating our report format and level of detail:
- [Pre-Purchase Inspection Sample Report](https://ownerinspections.com.au/reports/pre-purchase-inspection-sample-report.pdf)
- [Apartment Pre-Settlement Sample Report](https://ownerinspections.com.au/reports/apartment-pre-settlement-sample-report.pdf)
- [Construction Stage Sample Report](https://ownerinspections.com.au/reports/construction-stage-sample-report.pdf)
- [Defect Investigation Sample Report](https://ownerinspections.com.au/reports/defect-investigation-sample-report.pdf)
- [Dilapidation Sample Report](https://ownerinspections.com.au/reports/dilapidation-sample-report.pdf)
- [Insurance Claim Sample Report](https://ownerinspections.com.au/reports/insurance-claim-sample-report.pdf)
- [Stage 1 Bored Piers Sample](https://ownerinspections.com.au/reports/stage1-bored-piers-sample.pdf)
- [Stage 2 Slab Pre-Pour Sample](https://ownerinspections.com.au/reports/stage2-slab-prepour-sample.pdf)
- [Stage 3 Frame Sample](https://ownerinspections.com.au/reports/stage3-frame-sample.pdf)
- [Stage 4 Lock-Up Sample](https://ownerinspections.com.au/reports/stage4-lockup-sample.pdf)
- [Stage 5 Fixing Sample](https://ownerinspections.com.au/reports/stage5-fixing-sample.pdf)
- [Roof Inspection Sample Report](https://ownerinspections.com.au/sample-roof-inspection-report.pdf)
- [Expert Witness Sample Report](https://ownerinspections.com.au/sample-expert-witness-report.pdf)
- [Maintenance Inspection Sample Report](https://ownerinspections.com.au/sample-maintenance-report.pdf)
---
## Service Areas
### New South Wales
#### Sydney
Source: https://ownerinspections.com.au/nsw/building-inspections-sydney
Suburbs served: Sydney, Sydney CBD, Haymarket, Pyrmont, Ultimo, Chippendale, Surry Hills, Darlinghurst, Newtown, Glebe, Redfern, Camperdown, Erskineville, Alexandria, Waterloo, Zetland
Sydney, Australia's largest and most iconic city, serves as the economic and cultural heart of New South Wales. The Sydney CBD and its surrounding inner-city suburbs like Chippendale, Newtown, Pyrmont, and Surry Hills offer a diverse mix of heritage buildings, modern high-rises, and renovated terraces. This architectural diversity makes building inspections essential for both buyers and sellers in the area.
The inner-city property market features everything from Federation-era terraces to contemporary apartment complexes. Common defects in this area include structural issues in older buildings, waterproofing problems in apartments, and compliance issues with renovated heritage properties. Our inspectors are well-versed in the unique challenges presented by Sydney's varied building stock.
Sydney continues to attract significant investment and development, making it a prime location for property investment. Whether you're purchasing a character-filled terrace in Newtown or a modern apartment in Pyrmont, a thorough building inspection is crucial to understanding your property's condition and potential issues.
#### Bondi
Source: https://ownerinspections.com.au/nsw/building-inspections-bondi
Suburbs served: Bondi, Bondi Beach, Bondi Junction, Coogee, Double Bay, Maroubra, Point Piper, Randwick, Vaucluse, Watsons Bay, Bronte, Tamarama, Rose Bay, Bellevue Hill
Bondi and Sydney's Eastern Suburbs represent some of Australia's most prestigious and sought-after real estate. From the iconic Bondi Beach to the exclusive harbourside enclaves of Point Piper, Double Bay, and Vaucluse, this region attracts discerning buyers seeking premium coastal and harbour living. The area encompasses diverse suburbs including Coogee, Maroubra, Randwick, and Rose Bay.
The Eastern Suburbs feature a mix of grand heritage homes, Art Deco apartments, and contemporary luxury residences. Due to the coastal environment, properties in this area are particularly susceptible to salt air corrosion, moisture ingress, and structural issues related to the sandy soils. Building inspections are essential to identify these climate-specific defects before purchase.
With property values consistently among the highest in Australia, a comprehensive building inspection in the Eastern Suburbs is a wise investment. Our experienced inspectors understand the unique challenges of coastal properties and can identify issues that may not be apparent to the untrained eye, protecting your significant investment.
#### Chatswood
Source: https://ownerinspections.com.au/nsw/building-inspections-chatswood
Suburbs served: Chatswood, Cremorne, Gordon, Hornsby, Macquarie Park, Mosman, North Sydney, St Leonards, Willoughby, Artarmon, Lane Cove, Roseville, Lindfield, Killara, Turramurra, Wahroonga
Chatswood and the North Shore represent one of Sydney's most established and desirable residential areas. This leafy region encompasses prestigious suburbs including Mosman, North Sydney, Gordon, Hornsby, and the upper North Shore communities of Killara, Turramurra, and Wahroonga. The area is known for its tree-lined streets, quality schools, and convenient access to the CBD.
The North Shore features a diverse range of properties from grand Federation homes and California bungalows to modern apartments and townhouses. Common issues in this area include termite activity due to the bushland proximity, drainage problems on sloping blocks, and structural issues in older homes. Our building inspections are tailored to identify these region-specific concerns.
With strong demand from families and professionals, North Shore properties command premium prices. A thorough building inspection provides essential information about the property's condition, helping buyers make informed decisions and negotiate fair prices. Our inspectors have extensive experience with the building types common to this prestigious region.
#### Manly
Source: https://ownerinspections.com.au/nsw/building-inspections-manly
Suburbs served: Manly, Brookvale, Mona Vale, Narrabeen, Palm Beach, Dee Why, Freshwater, Curl Curl, Collaroy, Avalon, Newport, Warriewood, Frenchs Forest, Beacon Hill
Manly and the Northern Beaches offer an enviable coastal lifestyle just a short ferry ride from Sydney's CBD. This stunning peninsula stretches from Manly to Palm Beach, encompassing beloved beachside communities including Dee Why, Freshwater, Curl Curl, Narrabeen, Mona Vale, Newport, and Avalon. The area attracts buyers seeking a relaxed beach lifestyle without sacrificing urban conveniences.
Properties on the Northern Beaches range from charming beach cottages and mid-century homes to contemporary coastal residences. The salt air environment presents unique challenges including accelerated corrosion of metal fixtures, weathering of external surfaces, and moisture-related issues. Building inspections in this area must account for these coastal-specific factors.
The Northern Beaches property market remains consistently strong, driven by the area's exceptional lifestyle appeal and limited supply. Whether purchasing a beachfront apartment in Manly or a family home in Mona Vale, a comprehensive building inspection helps protect your investment and ensures you understand any coastal-related maintenance requirements.
#### Parramatta
Source: https://ownerinspections.com.au/nsw/building-inspections-parramatta
Suburbs served: Parramatta, Annandale, Ashfield, Auburn, Burwood, Five Dock, Ryde, Granville, Homebush, Strathfield, Concord, Drummoyne, Leichhardt, Marrickville, Pemulwuy
Parramatta claims the prestigious title of Australia's oldest inland European settlement. Situated in the heart of Greater Western Sydney, it acts as the region's economic hub, surrounded by suburbs such as Northmead, Harris Park, Rosehill, Granville, Oatlands, Westmead, and others. Parramatta has undergone significant evolution over the years, spurred by the relocation of key government bodies such as the New South Wales Police Force and Sydney Water from Central Sydney.
In this dynamic locale, building inspections are of utmost importance, not only to ensure the safety and regulatory compliance of properties but also to tackle common defects, which predominantly include structural issues, dampness problems, and roof damage, due to a mix of ageing properties and newer constructions. The area features everything from heritage buildings to modern apartment towers.
Despite its rapid growth, Parramatta continues to hold strong appeal, boasting a well-integrated city framework, a robust economy, and a high living standard. These elements work in synergy, contributing to the long-term stability and allure of Parramatta's real estate market. As such, Parramatta represents an ideal habitat and a promising investment opportunity, attracting both homeowners and property investors alike.
#### Blacktown
Source: https://ownerinspections.com.au/nsw/building-inspections-blacktown
Suburbs served: Blacktown, Box Hill, Seven Hills, Mount Druitt, Rooty Hill, Doonside, Quakers Hill, Stanhope Gardens, The Ponds, Schofields, Riverstone, Marsden Park, Tallawong
Blacktown is one of Sydney's largest and fastest-growing local government areas, serving as a major hub in Western Sydney. The region encompasses established suburbs like Seven Hills, Mount Druitt, and Rooty Hill, alongside rapidly developing communities such as Marsden Park, Schofields, The Ponds, and Stanhope Gardens. This diversity creates a unique property landscape requiring specialised inspection expertise.
The Blacktown area features a mix of established homes from the 1960s onwards and brand-new constructions in the growth corridors. Common issues include structural settling in newer builds, asbestos in older properties, and drainage problems. For new constructions, our inspections focus on identifying defects before handover, while older homes require attention to ageing infrastructure.
With affordable entry prices and strong capital growth potential, Blacktown continues to attract first-home buyers and investors alike. A thorough building inspection is essential whether you're purchasing an established home or a brand-new property, ensuring you understand the true condition and any immediate or future maintenance requirements.
#### Castle Hill
Source: https://ownerinspections.com.au/nsw/building-inspections-castle-hill
Suburbs served: Castle Hill, Kellyville, Baulkham Hills, Bella Vista, The Gables, Rouse Hill, Norwest, Glenhaven, Dural, Cherrybrook, West Pennant Hills
Castle Hill and the Hills District represent one of Sydney's most desirable family-oriented regions. Known for its spacious properties, excellent schools, and leafy streetscapes, the area encompasses prestigious suburbs including Kellyville, Baulkham Hills, Bella Vista, Rouse Hill, Cherrybrook, and Dural. The recent Metro Northwest extension has further enhanced the area's connectivity and appeal.
The Hills District features predominantly larger family homes on generous blocks, ranging from established brick homes to modern executive residences. Common issues in this area include termite activity due to the semi-rural fringes, reactive clay soils causing foundation movement, and ageing roofs in established properties. Our inspectors understand these local challenges intimately.
Property values in the Hills District reflect the area's premium lifestyle offerings. A comprehensive building inspection provides peace of mind for buyers investing in this sought-after region, identifying any issues that could affect the property's value or require future expenditure.
#### Penrith
Source: https://ownerinspections.com.au/nsw/building-inspections-penrith
Suburbs served: Penrith, Richmond, Windsor, Emu Plains, Glenmore Park, Kingswood, St Marys, Werrington, Jordan Springs, Cranebrook, Mulgoa
Penrith serves as the gateway to the Blue Mountains and the major centre for Sydney's far west. This growing region includes established suburbs like Kingswood, St Marys, and Emu Plains, alongside newer developments such as Glenmore Park, Jordan Springs, and Cranebrook. The area also encompasses the historic Hawkesbury towns of Richmond and Windsor.
Properties in the Penrith region range from post-war fibro homes to contemporary estates in master-planned communities. The area's proximity to bushland increases termite risk, while older properties may contain asbestos materials. Flood-prone areas near the Nepean River require particular attention during inspections. Our local knowledge ensures thorough assessments tailored to these regional factors.
Penrith offers excellent value compared to Sydney's inner suburbs while providing strong infrastructure and amenities. As the region continues to grow with the Western Sydney Airport development, property demand remains strong. A detailed building inspection helps buyers understand exactly what they're purchasing in this evolving market.
#### Liverpool
Source: https://ownerinspections.com.au/nsw/building-inspections-liverpool
Suburbs served: Liverpool, Austral, Bankstown, Fairfield, Cabramatta, Wetherill Park, Bonnyrigg, Green Valley, Hoxton Park, Prestons, Leppington, Edmondson Park
Liverpool is a major commercial and residential centre in South West Sydney, experiencing significant transformation as part of the Western Sydney growth corridor. The region includes established suburbs like Bankstown, Fairfield, and Cabramatta, alongside rapidly developing areas such as Austral, Leppington, and Edmondson Park near the new Western Sydney Airport.
The Liverpool area presents a diverse property landscape, from older fibro and brick homes in established suburbs to brand-new housing estates in the growth areas. Common inspection concerns include asbestos in older properties, construction defects in new builds, and drainage issues on former agricultural land. Our inspectors have extensive experience with both property types.
With the Western Sydney Airport and Aerotropolis driving unprecedented growth, Liverpool offers excellent investment potential. Whether purchasing an established home or a new construction, a comprehensive building inspection ensures you understand the property's true condition and any issues requiring attention.
#### Campbelltown
Source: https://ownerinspections.com.au/nsw/building-inspections-campbelltown
Suburbs served: Campbelltown, Camden, Minto, Oran Park, Picton, Tahmoor, Menangle Park, Narellan, Mount Annan, Harrington Park, Gregory Hills, Leumeah, Ingleburn
Campbelltown and the broader Macarthur region represent one of Australia's fastest-growing residential areas. From the established centre of Campbelltown to the historic charm of Camden and the master-planned communities of Oran Park, Gregory Hills, and Harrington Park, this region offers diverse housing options for families and investors alike.
The Macarthur region features everything from 1970s brick homes in established suburbs to contemporary houses in new estates. Common issues include construction defects in newer properties, reactive clay soils causing foundation movement, and termite activity in areas bordering bushland. Pre-handover inspections for new builds are particularly important in this high-growth area.
With continued population growth and infrastructure investment, including the future Macarthur Metro extension, the region offers strong long-term prospects. A thorough building inspection provides essential information for buyers entering this dynamic market, whether purchasing established or new construction.
#### Sutherland
Source: https://ownerinspections.com.au/nsw/building-inspections-sutherland
Suburbs served: Sutherland, Cronulla, Hurstville, Miranda, Rockdale, Botany, Mascot, Kogarah, Sans Souci, Caringbah, Engadine, Menai, Gymea, Sylvania
The Sutherland Shire, affectionately known as "The Shire," offers a unique blend of coastal lifestyle and suburban convenience. From the beaches of Cronulla to the bushland-fringed suburbs of Engadine and Menai, the area provides diverse living options. The region also includes the St George area suburbs of Hurstville, Kogarah, and Rockdale.
Properties in the Sutherland Shire range from beachside apartments and townhouses to family homes on generous blocks. Coastal properties face salt air corrosion challenges, while homes near the Royal National Park have increased termite risk. The area's varied topography means drainage and retaining wall issues are common inspection findings.
The Shire's strong community feel and lifestyle appeal ensure consistent property demand. A comprehensive building inspection helps buyers understand any coastal or bushland-related maintenance requirements, protecting their investment in this desirable region.
#### Central Coast
Source: https://ownerinspections.com.au/nsw/building-inspections-central-coast
Suburbs served: Gosford, Woy Woy, Copacabana, Cooranbong, Terrigal, Erina, Umina Beach, Wyong, Tuggerah, The Entrance, Bateau Bay, Toukley, Kariong, Point Clare
The Central Coast offers a relaxed coastal lifestyle just an hour north of Sydney. This diverse region stretches from Gosford and Woy Woy in the south to Wyong and The Entrance in the north, encompassing beautiful beaches at Terrigal, Copacabana, and Umina, alongside lakeside communities around Tuggerah Lakes.
Properties on the Central Coast range from waterfront homes and beach houses to suburban family residences and rural acreages. The coastal environment presents challenges including salt air corrosion, moisture ingress, and termite activity in bushland-adjacent areas. Many older properties in the region were built as holiday homes and may require upgrades for permanent living.
The Central Coast continues to attract Sydney buyers seeking better value and lifestyle. With improved transport links and growing local employment, the region offers compelling opportunities for owner-occupiers and investors. A thorough building inspection ensures buyers understand any coastal or age-related issues before committing to purchase.
#### Wollongong
Source: https://ownerinspections.com.au/nsw/building-inspections-wollongong
Suburbs served: Wollongong, Albion Park, Dapto, Kiama, Shellharbour, Warrawong, Figtree, Corrimal, Fairy Meadow, Thirroul, Austinmer, Bulli, Port Kembla, Unanderra
Wollongong and the Illawarra region offer stunning coastal living between the Illawarra Escarpment and the Pacific Ocean. From the vibrant city centre to charming coastal villages like Thirroul, Austinmer, and Kiama, the region provides diverse lifestyle options. The area also includes growing suburbs such as Dapto, Albion Park, and Shellharbour.
The Illawarra's unique geography creates specific building challenges. Properties near the escarpment face drainage issues and landslip risks, while coastal homes experience salt air exposure. The region's industrial heritage means some areas require attention to potential contamination. Our inspectors understand these local factors and provide thorough assessments.
With more affordable prices than Sydney and excellent lifestyle amenities, Wollongong attracts both sea-changers and investors. The University of Wollongong and local industries provide economic stability. A comprehensive building inspection helps buyers navigate the region's unique property considerations with confidence.
#### Newcastle
Source: https://ownerinspections.com.au/nsw/building-inspections-newcastle
Suburbs served: Newcastle, Belmont, Cessnock, Rutherford, Toronto, Weston, Maitland, Charlestown, Wallsend, Lambton, Mayfield, Hamilton, Merewether, Adamstown, Cardiff
Newcastle, Australia's second-oldest city, has transformed from an industrial centre into a thriving coastal metropolis. The region encompasses the revitalised city centre, beachside suburbs like Merewether and Bar Beach, established areas including Charlestown and Wallsend, and the Hunter Valley communities of Maitland and Cessnock.
Newcastle's diverse building stock includes heritage workers' cottages, post-war homes, and modern developments. Common inspection issues include subsidence in former mining areas, asbestos in older properties, and structural issues in heritage buildings. The coastal suburbs also face salt air corrosion challenges similar to Sydney's beachside areas.
Newcastle offers excellent value with strong growth potential as the city continues its renaissance. The harbour foreshore redevelopment and light rail have enhanced the city's appeal. A thorough building inspection is essential for buyers entering this evolving market, particularly in areas with mining history.
#### Blue Mountains
Source: https://ownerinspections.com.au/nsw/building-inspections-blue-mountains
Suburbs served: Katoomba, Blackheath, Springwood, Leura, Wentworth Falls, Blaxland, Glenbrook, Faulconbridge, Lawson, Hazelbrook, Woodford, Mount Victoria
The Blue Mountains offers a unique lifestyle combining natural beauty with village charm, just 90 minutes from Sydney. From the lower mountains villages of Glenbrook and Blaxland to the iconic townships of Katoomba, Leura, and Blackheath, the region attracts those seeking a tree-change without sacrificing connectivity.
Blue Mountains properties present distinct challenges related to the mountain environment. The cooler, wetter climate increases moisture-related issues including mould, timber rot, and drainage problems. Bushfire risk is significant throughout the region, and many properties are built on sloping blocks requiring careful assessment of retaining walls and foundations.
The Blue Mountains offers a lifestyle that Sydney cannot match, with strong community spirit and natural surroundings. Property values reflect this appeal. A comprehensive building inspection by inspectors familiar with mountain conditions is essential for buyers to understand the specific maintenance requirements of living in this beautiful region.
#### Byron Bay
Source: https://ownerinspections.com.au/nsw/building-inspections-byron-bay
Suburbs served: Byron Bay, Ballina, Tweed Heads, Bangalow, Mullumbimby, Brunswick Heads, Lennox Head, Suffolk Park, Ocean Shores, Murwillumbah, Coolangatta
Byron Bay and the Northern Rivers region represent one of Australia's most desirable lifestyle destinations. From the iconic beachside town of Byron Bay to the charming hinterland villages of Bangalow and Mullumbimby, and coastal communities including Lennox Head, Brunswick Heads, and Ballina, the region attracts buyers seeking an alternative lifestyle.
The Northern Rivers features diverse property types from beach houses and rural retreats to village homes and eco-friendly builds. The subtropical climate creates specific challenges including high humidity, termite activity, and storm damage risk. Many properties feature alternative construction methods that require specialised inspection knowledge.
Byron Bay property values have soared in recent years, making thorough due diligence essential. Whether purchasing a beachfront apartment, a hinterland acreage, or a village cottage, a comprehensive building inspection helps buyers understand the property's condition and any climate-related maintenance requirements unique to this beautiful region.
#### Queanbeyan
Source: https://ownerinspections.com.au/nsw/building-inspections-queanbeyan
Suburbs served: Queanbeyan, Googong, Crestwood, Jerrabomberra, Karabar, Bungendore, Murrumbateman
Queanbeyan sits on the NSW-ACT border, offering proximity to Canberra with NSW advantages. The region includes established Queanbeyan suburbs, the growing township of Googong, and surrounding communities such as Jerrabomberra, Bungendore, and Murrumbateman. This strategic location attracts government workers and those seeking larger properties than Canberra offers.
Properties in the Queanbeyan region range from established homes in the town centre to brand-new constructions in Googong and rural properties in surrounding areas. The cold winters and hot summers create thermal movement challenges, while new developments require careful pre-handover inspection. The region's reactive soils can cause foundation issues.
With Canberra's strong employment market and Queanbeyan's relative affordability, the region continues to attract buyers. Whether purchasing an established home or a new build in Googong, a thorough building inspection ensures you understand the property's condition and any issues specific to this climate zone.
#### Port Macquarie
Source: https://ownerinspections.com.au/nsw/building-inspections-port-macquarie
Suburbs served: Port Macquarie, Wauchope, Laurieton, Lake Cathie, Bonny Hills, Kempsey, Crescent Head, South West Rocks
Port Macquarie and the Mid North Coast offer an enviable coastal lifestyle with a more relaxed pace than Sydney. The region encompasses the thriving town of Port Macquarie, beach communities like Lake Cathie and Bonny Hills, the hinterland centre of Wauchope, and coastal villages including Crescent Head and South West Rocks.
The Mid North Coast property market features beach houses, established family homes, and newer developments. The coastal subtropical climate increases termite activity and creates moisture-related challenges. Properties built during the region's various growth periods may have era-specific issues requiring inspection expertise.
Port Macquarie's appeal continues to grow with retirees and sea-changers, as well as remote workers seeking lifestyle benefits. A comprehensive building inspection helps buyers understand any coastal or climate-related issues, ensuring informed decisions in this popular market.
#### Coffs Harbour
Source: https://ownerinspections.com.au/nsw/building-inspections-coffs-harbour
Suburbs served: Coffs Harbour, Sawtell, Woolgoolga, Toormina, Korora, Moonee Beach, Emerald Beach, Nambucca Heads, Bellingen
Coffs Harbour serves as the major centre of the Coffs Coast, midway between Sydney and Brisbane. The region includes the city itself, charming beach villages like Sawtell and Woolgoolga, and the artistic hinterland community of Bellingen. The combination of beaches, rainforest, and mountains creates a unique lifestyle destination.
Properties in the Coffs Coast region range from beachfront homes to rural retreats in the hinterland. The subtropical climate with high rainfall creates challenges including termite activity, moisture ingress, and mould. Older properties may feature construction methods suited to the climate that require knowledgeable assessment.
The Coffs Coast offers excellent value compared to other coastal regions, attracting retirees, families, and investors. Whether purchasing near the beach or in the beautiful hinterland, a thorough building inspection ensures you understand the property's condition and any regional factors affecting maintenance.
### Victoria
#### Melbourne
Source: https://ownerinspections.com.au/vic/building-inspections-melbourne
Suburbs served: Melbourne, Melbourne CBD, Prahran, Richmond, South Yarra, St Kilda, Fitzroy, Carlton, Collingwood
Melbourne, Australia's cultural capital, offers diverse inner-city living across iconic suburbs like Fitzroy, Carlton, South Yarra, and Richmond. The inner suburbs feature a mix of Victorian terraces, Edwardian homes, Art Deco apartments, and modern developments, each with unique characteristics requiring expert inspection knowledge.
Inner Melbourne properties often feature heritage architecture with period-specific issues including rising damp, outdated wiring, and structural settling. The city's famous laneways and converted warehouses present unique inspection challenges. Apartment buildings require assessment of common areas and building compliance matters.
Melbourne's inner suburbs remain highly sought after for their lifestyle, culture, and connectivity. With significant investment involved in purchasing inner-city property, a thorough building inspection provides essential information about the property's condition and any heritage or structural issues requiring attention.
#### Dandenong
Source: https://ownerinspections.com.au/vic/building-inspections-dandenong
Suburbs served: Dandenong, Belgrave, Box Hill, Camberwell, Clyde, Cranbourne, Croydon, Doncaster, Eltham, Glen Waverley, Hastings, Kew, Lilydale, Mount Martha, Narre Warren, Nunawading, Philip Island, Ringwood, Springvale, Wantirna, Warragul
Dandenong and Melbourne's south-eastern suburbs form a diverse residential corridor extending from established areas to the growth suburbs of the Casey and Cardinia regions. The area includes Springvale, Noble Park, Keysborough, Berwick, Narre Warren, and the rapidly developing Clyde and Cranbourne areas.
This region features everything from post-war homes in established suburbs to brand-new constructions in growth corridors. Common inspection issues include construction defects in new builds, asbestos in older properties, and reactive clay soil movement. Pre-handover inspections for new homes are particularly important in high-growth areas.
The south-east corridor offers diverse price points and continues to attract families and investors. With excellent transport links and growing infrastructure, demand remains strong. A comprehensive building inspection ensures buyers understand the true condition of their property, whether established or newly built.
#### Pakenham
Source: https://ownerinspections.com.au/vic/building-inspections-pakenham
Suburbs served: Pakenham, Officer, Lang Lang, Beaconsfield, Nar Nar Goon, Koo Wee Rup, Cardinia
Pakenham and the Cardinia region represent one of Melbourne's fastest-growing residential areas. From the established town centre to newer developments in Officer and Beaconsfield, and semi-rural communities further east, the region offers diverse housing options for families seeking space and value.
The Pakenham area features predominantly newer constructions, with many properties less than 20 years old. Common inspection concerns include construction defects, incomplete works, and issues related to the region's clay soils. Pre-handover inspections for new builds help identify defects before final settlement.
With continued population growth and improving infrastructure including the rail duplication, Pakenham offers strong potential for capital growth. A thorough building inspection is essential for new constructions to ensure builders have met their obligations and the property is defect-free at handover.
#### Frankston
Source: https://ownerinspections.com.au/vic/building-inspections-frankston
Suburbs served: Frankston, Mornington, Mount Eliza, Langwarrin, Seaford, Carrum Downs, Karingal, Frankston South
Frankston serves as the gateway to the Mornington Peninsula, offering bayside living with excellent amenities and transport connections. The region encompasses the revitalised Frankston city centre, prestigious Mount Eliza, family-friendly Langwarrin, and beach suburbs including Seaford and Mornington.
Properties in the Frankston region range from older beach houses requiring renovation to modern family homes and luxury residences in Mount Eliza. Coastal properties face salt air exposure, while older homes may contain asbestos or have outdated services. The varied topography creates drainage considerations on sloping blocks.
The Frankston area offers excellent lifestyle appeal with beaches, Peninsula access, and improving urban amenities. A comprehensive building inspection helps buyers understand any coastal or age-related issues, ensuring informed purchasing decisions in this diverse market.
#### Werribee
Source: https://ownerinspections.com.au/vic/building-inspections-werribee
Suburbs served: Werribee, Altona, Donnybrook, Footscray, Melton, Sunshine, Tarneit, Truganina, Aintree, Bacchus Marsh, Ballan, Lara
Werribee and the Wyndham region comprise Melbourne's fastest-growing municipality. From established Werribee and Hoppers Crossing to the newer master-planned communities of Point Cook, Tarneit, Truganina, and Williams Landing, the area attracts first-home buyers and families seeking value and modern amenities.
The western suburbs feature predominantly new construction, with many properties built within the last 15 years. Common issues include construction defects, incomplete landscaping, and problems related to the region's reactive clay soils. Pre-handover and warranty inspections are particularly valuable in this high-volume construction market.
With excellent value compared to eastern suburbs and improving infrastructure including rail electrification, the west offers strong growth potential. A thorough building inspection ensures new home buyers identify any defects before settlement, protecting their investment in this booming region.
#### Donnybrook
Source: https://ownerinspections.com.au/vic/building-inspections-donnybrook
Suburbs served: Donnybrook, Lollypop Creek, Manor Lakes
Donnybrook is one of Melbourne's newest and fastest-growing suburbs in the City of Wyndham, located between Werribee and Geelong along the western growth corridor. Almost every property in Donnybrook is new construction, making construction stage inspections the most critical service for homeowners building in this estate.
Our inspectors specialise in construction stage inspections across Donnybrook's many active developments. From slab pre-pour and frame stage through to lock-up, fixing, and final handover (PCI), we ensure your builder meets the required standards at every milestone. Reactive clay soils in Donnybrook demand particular attention at the slab and footing stage, where improper preparation can lead to cracking and structural movement down the track.
Whether you are building with a volume builder or a custom home builder in Donnybrook, independent stage inspections protect your investment by catching defects early, before they are covered up by the next trade. We provide same-day reports with photographic evidence so you can raise issues with your builder promptly and keep your build on track.
#### Geelong
Source: https://ownerinspections.com.au/vic/building-inspections-geelong
Suburbs served: Geelong, Armstrong Creek, Lara, Mount Duneed, Ocean Grove, St Leonards, Torquay
Geelong, Victoria's second-largest city, has undergone remarkable transformation from an industrial centre to a thriving regional hub. The region includes the revitalised waterfront, established suburbs like Newtown and Highton, growth areas in Armstrong Creek, and surrounding communities including Lara and the Bellarine Peninsula gateway.
Geelong's diverse property market features everything from heritage homes in established suburbs to contemporary houses in new estates. Older properties may have issues including asbestos, outdated wiring, and structural settling, while new builds require attention to construction quality and compliance.
With Melbourne's population growth and improved transport links, Geelong has emerged as a genuine alternative offering excellent lifestyle and value. A comprehensive building inspection ensures buyers understand any age-related issues in established properties or construction defects in new builds.
#### Craigieburn
Source: https://ownerinspections.com.au/vic/building-inspections-craigieburn
Suburbs served: Craigieburn, Beveridge, Brunswick, Doreen, Epping, Essendon, Kalkallo, Kilmore, Mickleham, Preston, South Morang, Sunbury, Wallan, Whittlesea
Craigieburn and Melbourne's northern growth corridor represent one of Australia's fastest-growing residential regions. From established Epping and Broadmeadows to the newer communities of South Morang, Mernda, Doreen, and Mickleham, the area offers affordable entry points for families and first-home buyers.
The northern suburbs feature a mix of established homes from the 1970s-90s and extensive new construction in growth areas. Common inspection issues include construction defects in new builds, asbestos in older properties, and reactive soil movement. Pre-handover inspections are crucial for new home purchases in this high-volume market.
With the South Morang rail extension and continued infrastructure investment, the northern corridor offers strong growth potential. A thorough building inspection ensures buyers in this dynamic market understand their property's condition, whether established or newly constructed.
#### Ballarat
Source: https://ownerinspections.com.au/vic/building-inspections-ballarat
Suburbs served: Ballarat, Bonshaw, Brown Hill, Lucas, Redan, Winter Valley
Ballarat, Victoria's third-largest city, combines rich gold rush heritage with modern regional living. The city features stunning Victorian architecture in the central areas, established suburbs like Wendouree and Sebastopol, and newer developments in Alfredton and Delacombe. The University of Ballarat and strong local economy support a diverse property market.
Ballarat's heritage properties require specialised inspection knowledge, with issues including rising damp, outdated services, and structural concerns in older buildings. The cold winters create thermal movement challenges, while newer estates face typical construction defect issues. The region's mining history means some areas require attention to land stability.
With improved rail services to Melbourne and excellent regional lifestyle, Ballarat attracts both tree-changers and investors. A comprehensive building inspection helps buyers understand any heritage or climate-related issues specific to this beautiful regional city.
#### Bendigo
Source: https://ownerinspections.com.au/vic/building-inspections-bendigo
Suburbs served: Bendigo, Eaglehawk, Junortoun, Kangaroo Flat, Maiden Gully, Spring Gully
Bendigo, one of Victoria's largest regional cities, boasts a rich gold rush heritage evident in its stunning Victorian architecture. The city encompasses established areas like Eaglehawk and Kangaroo Flat, as well as growing suburbs including Junortoun, Maiden Gully, and Spring Gully. Bendigo's strong economy, arts scene, and lifestyle appeal attract both families and investors.
The Bendigo property market features magnificent heritage homes requiring specialised inspection knowledge, alongside modern developments in growth areas. Common issues include rising damp in older buildings, outdated electrical and plumbing systems, and structural concerns related to the region's mining history. Newer properties may have typical construction defects.
With excellent regional amenities, a thriving arts and cultural scene, and improved transport links to Melbourne, Bendigo offers compelling lifestyle and investment opportunities. A thorough building inspection ensures buyers understand any heritage-specific or regional issues before committing to purchase.
#### Shepparton
Source: https://ownerinspections.com.au/vic/building-inspections-shepparton
Suburbs served: Shepparton, Congupna, Kialla, Mooroopna, Shepparton East, Tatura
Shepparton serves as the major centre of the Goulburn Valley, one of Australia's most productive agricultural regions. The city and its surrounding communities including Mooroopna, Kialla, Tatura, and Congupna offer affordable housing options with a strong regional lifestyle. The area's economy is anchored by agriculture, food processing, and regional services.
Properties in the Shepparton region range from character homes in established areas to newer developments on the urban fringe. The hot summers and cold winters create thermal movement challenges, while older properties may have outdated services or structural issues. Irrigation infrastructure in surrounding areas can affect drainage and soil conditions.
With affordable property prices and a growing regional economy, Shepparton attracts first-home buyers and investors seeking value. A comprehensive building inspection helps buyers understand any climate or age-related issues specific to properties in this productive regional centre.
### Queensland
#### Brisbane
Source: https://ownerinspections.com.au/qld/building-inspections-brisbane
Suburbs served: Brisbane CBD, Camp Hill, Chermside, Indooroopilly, New Farm
Brisbane, Queensland's vibrant capital, offers diverse inner-city living from the bustling CBD to character-filled suburbs like New Farm, Camp Hill, and Indooroopilly. The city's subtropical climate and lifestyle appeal attract both local and interstate buyers seeking Queensland's unique blend of urban convenience and outdoor living.
Brisbane properties range from classic Queenslanders on stumps to modern apartments and townhouses. Common inspection issues include timber pest activity, subfloor ventilation in older homes, storm damage, and moisture-related problems due to the humid climate. Understanding these subtropical building challenges is essential for informed purchasing.
With the 2032 Olympics driving significant investment and infrastructure development, Brisbane's property market continues to strengthen. A comprehensive building inspection helps buyers navigate the unique considerations of Queensland construction, ensuring informed decisions in this growing market.
#### Brisbane East
Source: https://ownerinspections.com.au/qld/building-inspections-brisbane-east
Suburbs served: Camp Hill, Capalaba, Cleveland, Eagle Farm, Victoria Point
Brisbane's eastern suburbs stretch from inner-city Camp Hill to the bayside communities of Cleveland and Victoria Point. This diverse region offers everything from character homes close to the CBD to waterfront living along Moreton Bay. The area attracts families and professionals seeking lifestyle and convenience.
Properties in Brisbane East range from renovated Queenslanders to modern homes and waterfront apartments. The bayside location creates specific considerations including salt air exposure, storm surge risk in low-lying areas, and the standard Queensland concerns of timber pest activity and moisture management.
Brisbane's eastern corridor offers strong lifestyle appeal with bay access, quality schools, and improving infrastructure. A thorough building inspection ensures buyers understand any coastal or climate-related issues specific to properties in this popular region.
#### Brisbane North
Source: https://ownerinspections.com.au/qld/building-inspections-brisbane-north
Suburbs served: Caboolture, Mango Hill, Narangba, Redcliffe, Sunshine Coast
Brisbane's northern corridor extends from established suburbs to the rapidly growing Moreton Bay region, including Caboolture, Mango Hill, Narangba, and the coastal community of Redcliffe. This growth area offers affordable entry points and family-friendly communities with improving infrastructure.
The northern suburbs feature a mix of established homes and extensive new construction in master-planned communities. Common inspection issues include construction defects in new builds, termite activity, and the standard Queensland concerns of moisture and storm damage. Pre-handover inspections are particularly important in high-growth areas.
With continued population growth and infrastructure investment including rail extensions, Brisbane North offers excellent value and growth potential. A comprehensive building inspection ensures buyers understand their property's condition, whether purchasing established or new construction.
#### Brisbane West
Source: https://ownerinspections.com.au/qld/building-inspections-brisbane-west
Suburbs served: Bellbird Park, Indooroopilly, Ipswich, Paddington, Redbank, Ripley, Springfield
Brisbane's western suburbs range from prestigious inner-west areas like Paddington and Indooroopilly to the rapidly developing corridors of Springfield, Ripley, and the historic city of Ipswich. This diverse region caters to all budgets, from character homes to affordable new estates.
Properties in Brisbane West include classic Queenslanders in established areas and modern constructions in growth suburbs. The region experiences specific challenges including reactive soils in some areas, timber pest activity, and construction defects in new developments. Understanding these local factors is essential.
With major infrastructure projects and continued expansion of the western corridor, this region offers diverse opportunities for buyers. A thorough building inspection helps navigate the varied property types and identify any issues specific to your chosen location.
#### Brisbane South
Source: https://ownerinspections.com.au/qld/building-inspections-brisbane-south
Suburbs served: Beenleigh, Coomera, Jimboomba, Logan, Ormeau, Oxley, Springwood, Sunnybank
Brisbane's southern suburbs extend from established areas like Sunnybank and Springwood through the Logan region to the northern Gold Coast fringe. This corridor offers diverse housing options from character homes to new estates, catering to families and first-home buyers seeking value.
Properties in Brisbane South range from 1970s-80s brick homes to contemporary constructions in growth areas. Common inspection concerns include asbestos in older properties, termite activity throughout the region, and construction defects in newer developments. The subtropical climate creates ongoing moisture management considerations.
The southern corridor benefits from major road and rail infrastructure, providing excellent connectivity. A comprehensive building inspection ensures buyers understand any age or construction-related issues, protecting their investment in this diverse market.
#### Gold Coast
Source: https://ownerinspections.com.au/qld/building-inspections-gold-coast
Suburbs served: Broadbeach, Coomera, Gold Coast, Hope Island, Pimpama
The Gold Coast is Australia's premier coastal lifestyle destination, stretching from the northern suburbs of Coomera and Pimpama to the iconic beaches of Broadbeach and Surfers Paradise. The region offers diverse property options from high-rise apartments to canal-front homes and family estates.
Gold Coast properties face unique challenges including salt air corrosion, storm and cyclone damage risk, high humidity, and significant termite pressure. High-rise apartments require assessment of common property and compliance matters. The region's rapid growth means construction defect inspections remain important for newer properties.
With sustained population growth and continued investment in infrastructure, the Gold Coast property market remains strong. A thorough building inspection by inspectors familiar with coastal Queensland conditions is essential for buyers in this popular market.
#### Sunshine Coast
Source: https://ownerinspections.com.au/qld/building-inspections-sunshine-coast
Suburbs served: Maroochydore, Moffat Beach, Noosa Heads, Caloundra
The Sunshine Coast offers a relaxed coastal lifestyle from the boutique beaches of Noosa to the family-friendly communities of Caloundra and Maroochydore. The region attracts sea-changers seeking Queensland's best beaches combined with growing urban amenities and employment opportunities.
Sunshine Coast properties range from beachfront apartments to hinterland acreages. The coastal environment presents challenges including salt air exposure, humidity-related issues, timber pest activity, and storm damage risk. Understanding these subtropical coastal factors is essential for informed purchasing decisions.
With strong population growth and improving infrastructure, the Sunshine Coast has emerged as one of Australia's most desirable regions. A comprehensive building inspection helps buyers navigate the unique considerations of coastal Queensland living, ensuring protection of their lifestyle investment.
#### Townsville
Source: https://ownerinspections.com.au/qld/building-inspections-townsville
Suburbs served: Townsville, Bohle Plains, Burdell, Cosgrove, Mount Low, Rasmussen
Townsville serves as the major centre of North Queensland, offering affordable housing options with a tropical lifestyle. The city encompasses established suburbs, growth areas like Burdell and Mount Low, and surrounding communities. The region's economy is supported by defence, education, health services, and resources.
Properties in Townsville face tropical climate challenges including cyclone risk, intense humidity, significant termite pressure, and corrosion from coastal exposure. Understanding these North Queensland specific issues is essential. Building inspections must account for cyclone compliance and tropical construction requirements.
Townsville offers excellent value compared to southern capitals, attracting first-home buyers and investors. A thorough building inspection by inspectors experienced in tropical conditions ensures buyers understand the specific maintenance requirements of North Queensland properties.
#### Toowoomba
Source: https://ownerinspections.com.au/qld/building-inspections-toowoomba
Suburbs served: Toowoomba, Highfields, Kearneys Spring, Middle Ridge
Toowoomba, the Garden City, sits atop the Great Dividing Range offering a cooler climate alternative to coastal Queensland. The city features heritage architecture, established suburbs, and growing areas like Highfields. Its economy is supported by agriculture, education, health services, and logistics.
Toowoomba properties range from character Queenslanders to modern family homes in growth areas. The elevated location creates unique considerations including higher exposure to weather extremes, while maintaining lower termite pressure than coastal areas. Older properties may have heritage-specific issues requiring attention.
With affordable prices compared to Brisbane and excellent lifestyle appeal, Toowoomba attracts families and tree-changers. A comprehensive building inspection helps buyers understand any climate or age-related issues specific to properties in this attractive regional city.
### South Australia
#### Adelaide
Source: https://ownerinspections.com.au/sa/building-inspections-adelaide
Suburbs served: Adelaide CBD, Hectorville, Henley Beach, Prospect, Torrensville
Adelaide, South Australia's elegant capital, offers a relaxed lifestyle with excellent amenities and affordability compared to eastern capitals. The inner suburbs feature diverse architecture from heritage villas to modern apartments, surrounding the planned city centre with its parklands belt.
Adelaide properties present specific inspection considerations including reactive clay soils causing foundation movement, ageing services in heritage properties, and standard termite risk. The Mediterranean climate creates summer heat stress on buildings. Understanding these local factors ensures informed purchasing decisions.
Adelaide's combination of lifestyle, affordability, and economic development continues to attract buyers. A comprehensive building inspection helps navigate the unique considerations of South Australian construction, protecting your investment in this increasingly popular market.
#### Adelaide North
Source: https://ownerinspections.com.au/sa/building-inspections-adelaide-north
Suburbs served: Elizabeth, Gawler, Golden Grove, Salisbury, Two Wells, Virginia
Adelaide's northern suburbs extend from established areas like Salisbury and Golden Grove to the historic township of Gawler and growth areas like Two Wells and Virginia. This corridor offers affordable housing options with good transport links to the CBD.
Properties in Adelaide North range from post-war homes in established suburbs to contemporary constructions in growth areas. Common inspection issues include reactive soil movement, asbestos in older properties, and construction defects in newer developments. The region's varied topography creates drainage considerations in some areas.
The northern corridor offers excellent value with improving infrastructure and employment opportunities. A thorough building inspection ensures buyers understand any age or construction-related issues, protecting their investment in this affordable region.
#### Adelaide South
Source: https://ownerinspections.com.au/sa/building-inspections-adelaide-south
Suburbs served: Aldinga Beach, Christies Beach, Seaford, Somerton Park, Woodcroft
Adelaide's southern suburbs offer coastal and suburban living from established beachside communities to the Fleurieu Peninsula gateway. Areas like Christies Beach, Seaford, and Aldinga Beach provide beach lifestyle at more affordable prices than eastern capitals.
Properties in Adelaide South range from beachfront homes to suburban family residences. Coastal properties face salt air exposure and associated maintenance requirements, while the region's reactive soils create foundation considerations throughout. Standard termite risk applies across the area.
The southern suburbs offer excellent lifestyle appeal with beach access and growing amenities. A comprehensive building inspection helps buyers understand any coastal or soil-related issues specific to properties in this popular region.
### Australian Capital Territory
#### Canberra
Source: https://ownerinspections.com.au/act/building-inspections-canberra
Suburbs served: Canberra, Conder, Denman Prospect, Gungahlin, Jacka, Macnamara, Mawson, Molonglo Valley, Narrabundah, Strathnairn, Taylor, Throsby, Watson, Whitlam
Canberra, Australia's planned capital, offers diverse housing from established inner suburbs to rapidly developing areas like Molonglo Valley, Gungahlin, and the new suburbs of Whitlam, Strathnairn, and Taylor. The city's strong employment market and excellent amenities attract families and professionals.
Canberra properties face specific challenges related to the cold winters and hot summers, creating significant thermal movement. Newer suburbs in growth areas require attention to construction defects, while established areas may have older homes with outdated services. The ACT's building regulations differ from surrounding NSW.
With strong government employment and growing private sector opportunities, Canberra's property market remains robust. A comprehensive building inspection by inspectors familiar with ACT conditions and regulations ensures buyers understand their property's condition and any climate-related maintenance requirements.
---
## Frequently Asked Questions
### Is Owner Inspections registered?
Yes! Owner Inspections is one of only a few home inspection companies fully registered in each state we service. We hold licences in:
• Victoria (VBA CDB-U 53425)
• NSW (Fair Trading 366177C)
• Queensland (QBCC 15249792)
• ASBC membership (SIP 141)
### Is Owner Inspections insured?
Yes, Owner Inspections maintains comprehensive professional indemnity and public liability insurance coverage to protect our clients.
### How soon will I receive my report?
Our promise is a full report within 24 hours of your inspection's completion - guaranteed satisfaction.
### Are your inspectors qualified?
We carefully select inspectors with extensive qualifications and experience in line with your particular property and specific service needs.
### What documents do I need to provide for inspection?
An individualised checklist is provided when booking. The more documents you can provide, the more accurate our assessment will be.
### Do I need to be at the inspection?
Our inspectors work independently, though you can submit questions 24 hours ahead. Your presence is optional but welcome if OHS requirements are met.
### How can I make a payment?
We offer multiple convenient payment options:
• All major credit and debit cards (Visa, Mastercard, American Express)
• Apple Pay
• PayID
• PayTo
• Direct bank transfer
All online payments are securely processed through Stripe. Payment is required prior to the inspection unless otherwise arranged.
### How do I receive the report?
Reports arrive via online link, PDF email, and SMS link for convenient access.
### How long does the inspection take?
Our inspections can take anywhere from 1 to 2 hours, with extra time possible for more complex properties.
### Will I be charged if the inspection takes longer?
No additional charges apply for standard inspections exceeding the estimated time.
### Do I need to pay travel costs?
No, travel expenses are fully included in our fixed fees.
### Are there any additional charges or costs?
No additional or hidden costs will be incurred upon agreement with your quotation.
### Are the inspection fees tax deductible?
Yes, we provide comprehensive ATO-acceptable invoices and receipts for your records.
### Can I reschedule the inspections for free?
Yes, we provide a free rescheduling service with 24-hour notice required.
### How much is the inspection fee?
Pricing varies by property size, inspection type, and complexities. Please contact us for a personalised quote.
### How can I book an inspection?
Simply complete the online form provided in your quotation for scheduling, or contact us directly to book your inspection.
### What does a building inspection cover?
Our building inspections cover all accessible areas of the property, including:
• Structural elements (foundations, walls, floors, ceilings)
• Roof and roof space
• External areas (drainage, driveways, fencing)
• Wet areas (bathrooms, laundry, kitchen)
• Doors, windows and fixtures
• Electrical and plumbing (visual assessment)
• Safety hazards and compliance issues
Each inspection follows Australian Standard AS 4349.1 for pre-purchase inspections.
### What is NOT included in a standard building inspection?
Standard inspections are non-invasive and visual only. The following are not included:
• Areas concealed behind walls, floors or ceilings
• Furniture, stored items or personal belongings
• Specialised testing (asbestos sampling, structural engineering)
• Pest and termite inspections (available as separate service)
• Swimming pool compliance certificates
• Soil testing or geotechnical assessments
We clearly outline all inclusions and exclusions in your quote.
### Do you inspect for asbestos?
Our inspectors identify materials that may contain asbestos based on visual assessment and the property's age. Properties built before 1990 commonly contain asbestos in areas such as eaves, wet area linings, and floor tiles. If suspected asbestos-containing materials are identified, we recommend laboratory testing by a licensed assessor. We can arrange specialist asbestos testing as an additional service upon request.
### Do you conduct pest and termite inspections?
Yes, we offer comprehensive timber pest inspections in accordance with Australian Standard AS 4349.3. This includes assessment for:
• Active termite infestations
• Evidence of past termite damage
• Termite-conducive conditions
• Borers and wood decay fungi
Pest inspections can be booked separately or combined with your building inspection for a discounted rate.
### Do you inspect swimming pools and spas?
Yes, we provide pool and spa inspections covering structural condition, equipment, and surrounds. Please note that pool barrier compliance certificates are a separate requirement under state legislation and must be issued by a licensed pool safety inspector. We can assess the general condition of pool fencing and identify obvious non-compliance issues, but formal certification requires a dedicated pool safety inspection.
### Can you inspect apartments and strata properties?
Yes, we regularly inspect apartments, units, and townhouses within strata schemes. Our inspection covers your individual lot including internal areas, balconies, and car spaces. Common property areas are the responsibility of the owners corporation, but we note any visible issues that may affect your unit. We recommend reviewing the strata records and building reports separately for a complete picture of the property.
### Do you check for combustible cladding?
Yes, our inspectors assess external cladding and identify materials that may be of concern, particularly aluminium composite panels (ACP) on buildings constructed between 2000 and 2020. If potentially combustible cladding is identified, we recommend further investigation by a fire safety engineer. For apartments, check with the owners corporation whether a cladding audit has been conducted as required under state rectification programmes.
### Do you assess bushfire or flood risk?
Our inspectors note observable site conditions relevant to bushfire and flood exposure, such as vegetation proximity, drainage, and floor height. However, formal bushfire attack level (BAL) assessments and flood risk reports require specialist consultants and council records. We recommend checking your local council planning maps and obtaining a property planning certificate for definitive risk classifications before purchase.
### Do you check compliance with the National Construction Code (NCC)?
Our inspections identify visible defects and workmanship issues that may indicate non-compliance with building standards. However, we do not provide formal NCC compliance certification, which requires assessment by a registered building surveyor with access to approved plans. For new builds or properties with recent renovations, we recommend verifying that all required occupancy permits and compliance certificates have been issued.
### Do you inspect for mould?
Yes, we identify visible mould growth and conditions conducive to mould, such as water damage, poor ventilation, and moisture ingress. Our report notes affected areas and likely causes. For properties with significant mould issues or where occupants have health concerns, we recommend engaging a specialist mould assessor who can conduct air quality testing and provide a remediation plan.
### Do you use thermal imaging or drones?
Yes, we utilise thermal imaging cameras to detect moisture intrusion, electrical hotspots, and insulation deficiencies not visible to the naked eye. Drone inspections are available for properties with inaccessible roofs or large sites, subject to CASA regulations and site conditions. These advanced inspection methods are included in our comprehensive inspection packages or available as add-on services.
### How long is my inspection report valid?
Our inspection reports reflect the property condition at the time of inspection only. Building conditions can change due to weather, occupant activity, or concealed defects becoming apparent. For property purchases, we recommend using the report within the cooling-off or due diligence period. Reports older than 3 months should be considered outdated, and a new inspection may be warranted if circumstances have changed.
### Can I get a verbal summary on the day of inspection?
Yes, if you attend the inspection, our inspector can provide a verbal overview of key findings on-site. This is helpful for understanding significant issues before receiving the full written report. Please note that the comprehensive written report remains the official record of our inspection findings and should be relied upon for any negotiations or decisions.
### What if I have questions after receiving my report?
We offer complimentary post-report consultations to discuss our findings and answer any questions. Simply contact us via phone or email, and we will arrange a time to speak with your inspector. We want you to fully understand the condition of the property and the implications of any defects identified.
### Can you provide a re-inspection after repairs?
Yes, we offer re-inspection services to verify that defects identified in our original report have been properly rectified. This is particularly valuable for new builds at practical completion or when negotiating repairs as a condition of sale. Re-inspections are charged at a reduced rate and focus specifically on the items previously identified.
### What should I do if major defects are found?
If our inspection reveals major defects, we recommend:
• Obtaining quotes from licensed tradespeople for repair costs
• Engaging specialist consultants if structural or safety issues are identified
• Discussing findings with your solicitor or conveyancer
• Considering negotiation on price or requesting repairs before settlement
• In serious cases, exercising your cooling-off rights if applicable
Our team can provide guidance on appropriate next steps based on the specific issues found.
### Can I use the report to negotiate the purchase price?
Yes, our detailed inspection reports are designed to support informed decision-making, including price negotiations. The report clearly categorises defects by severity and provides descriptions that can be shared with vendors, agents, or your legal representative. Many clients successfully use our findings to negotiate price reductions or request repairs as a condition of sale.
### What is the difference between a pre-purchase and defect inspection?
A pre-purchase inspection assesses the overall condition of an established property you are considering buying, covering all accessible areas and identifying defects, maintenance issues, and safety concerns.
A defect inspection is typically conducted on new or recently built properties to identify construction defects, incomplete work, and non-compliance with approved plans and standards. Defect inspections are commonly performed at practical completion stage, during the defect liability period, or when disputing builder workmanship.
### How long has Owner Inspections been in business?
Owner Inspections was founded in 2014 by a family with over 20 years of experience in the building and inspection industry. Since then, we have grown to become one of Australia's most trusted building inspection companies, serving thousands of clients across NSW, Victoria, and Queensland.
### What areas does Owner Inspections service?
We operate across three Australian states:
• New South Wales: Sydney metropolitan area, Central Coast, Newcastle, Wollongong, and Blue Mountains
• Victoria: Melbourne metropolitan area and surrounding regions
• Queensland: Brisbane metropolitan area and surrounding regions
Contact us to confirm coverage for your specific location.
### Where are your offices located?
We have offices in three major cities:
• Sydney: Level 8, 97 Pacific Highway, North Sydney NSW 2060
• Melbourne: Level 14, 380 St Kilda Rd, Melbourne VIC 3004
• Brisbane: Level 22, 69 Ann St, Brisbane QLD 4000
You can reach us on 1300 471 805 or via our 24/7 online booking system.
### Why should I choose Owner Inspections?
Owner Inspections stands out for several reasons:
• Fully licensed in every state we operate
• Comprehensive professional indemnity and public liability insurance
• Team of 17+ qualified specialists with decades of combined experience
• Reports delivered within 24 hours, guaranteed
• Fixed pricing with no hidden costs or travel fees
• Free post-inspection consultations
• Modern inspection technology including thermal imaging
• 24/7 booking system for your convenience
### What types of inspections do you offer?
We offer over 20 inspection services, including:
• Pre-purchase and pre-sale inspections
• Building and pest inspections
• New construction stage inspections
• Pre-handover and practical completion inspections
• Defect investigation reports
• Dilapidation reports
• Expert witness reports
• Mould and drug residue testing
• Roof inspections
• Tax depreciation schedules
• Commercial property inspections
Contact us to discuss your specific requirements.
### Do you offer free consultations?
Yes, we offer free initial consultations to discuss your property and inspection needs. Our team can help determine the most appropriate inspection type for your situation and provide a no-obligation quote. Contact us on 1300 471 805 or submit an enquiry through our website.
### Do you offer any guarantees?
Yes, Owner Inspections is committed to your complete satisfaction. We guarantee:
• Thorough inspections conducted by qualified professionals
• Detailed, easy-to-understand reports delivered within 24 hours
• Fixed pricing with no hidden fees
• Complimentary post-inspection support to answer your questions
Our comprehensive insurance coverage provides additional peace of mind for all our clients.
### What qualifications do your inspectors hold?
Our inspectors hold a range of professional qualifications including:
• Licensed builders and building practitioners
• Structural and civil engineers
• Certified building inspectors
• Timber pest inspection licences
• Building biology certifications
• Expert witness accreditation
All inspectors maintain current licences and undertake ongoing professional development to stay current with building codes and inspection standards.
### How experienced are your inspectors?
Our team includes inspectors with 15 to 30+ years of experience in the building industry. Many have backgrounds as registered builders, structural engineers, or building surveyors. This depth of experience means they can identify issues that less experienced inspectors might miss and provide practical advice on remediation options.
### Do you have specialist inspectors?
Yes, our team includes specialists in various fields:
• Structural engineers for complex structural assessments
• Building biologists for mould and indoor air quality
• Facade engineers for cladding and waterproofing issues
• Expert witnesses for tribunal and court matters
• Pest specialists for timber pest inspections
We match the right inspector to your property type and specific concerns.
### How do you assign an inspector to my property?
We carefully match inspectors to properties based on several factors:
• Property type (house, apartment, commercial)
• Inspection requirements (building, pest, structural)
• Location and inspector availability
• Any specific concerns you have raised
For complex properties or specialist requirements, we may assign multiple inspectors or a senior team member with relevant expertise.
### Can I meet the inspector before booking?
While we do not typically arrange pre-inspection meetings, you are welcome to attend the inspection and meet your inspector on-site. Our team can also arrange a phone call with the assigned inspector beforehand if you have specific questions or concerns you would like to discuss.
### Are your inspectors independent?
Yes, our inspectors operate with complete independence and integrity. We have no affiliations with real estate agents, builders, or trades, ensuring our reports are unbiased and solely in your interest. Our inspectors are paid a fixed fee regardless of what they find, so there is no incentive to overlook or exaggerate issues.
---
## Articles
Owner Inspections publishes educational articles about building inspections, property buying, construction defects, and related topics across Australia. Below are all 333 articles with full content.
### Pest Inspection Missed Termites: What Can I Do?
Source: https://ownerinspections.com.au/articles/pest-inspection-missed-termites-what-can-i-do
Published: 2026-09-14 | Category: Pest Inspections
Author: Maison Azdari
Start with a second, independent inspection that documents the damage and its likely age, then put the original inspector on written notice. Whether they are liable depends on what their report's scope and limitations pages excluded, because an Australian timber pest inspection covers visible and accessible areas only. Do not repair or treat anything first.
That last point is the one people get wrong, and it is the one that costs them. The moment a pest controller drills a barrier or a carpenter cuts out a damaged stud, the evidence of how long the termites had been there goes in a skip bin. The age of the damage is the hinge of everything that follows.
## What happens if a building inspector misses something?
Before you do anything else, find the scope and limitations pages of your report and read them properly. Most people read the findings and skip the rest, and the rest is where the answer lives.
Australian timber pest inspections are carried out to **AS 4349.3**, the standard for timber pest inspections. It is a visual, non-invasive inspection of accessible areas. The inspector does not cut open wall linings, lift floor coverings or dismantle built-in cabinetry. If your report recorded the subfloor as restricted access, noted a room full of stored boxes, or recommended further investigation of an area, that is a **documented exclusion** rather than a miss, and a claim built on it will be hard work.
The opposite pattern is the one that matters. If the second inspector photographs active mud leads on an accessible pier, or damaged skirting in a room that was empty and open on the day, in an area the original report did not flag at all, that is the fact pattern a claim needs. Under the Australian Consumer Law, services must be supplied with due care and skill, and an inspection that misses something plainly visible can fall short of that guarantee.
The mechanics of proving it, the elements you have to establish and the limitation periods that quietly close the door, are covered in our guide to [pursuing a negligence claim against the inspector](/articles/can-i-sue-a-building-inspector-for-negligence). What matters today is sequence.
If a tradesperson has already opened the area up, that is not fatal. Photograph the opened work immediately and keep every offcut of damaged timber. Our write-up of a [renovation that uncovered termite damage](/articles/renovation-uncovered-termite-damage) shows what that documentation looks like when it is done well.
## Do building inspectors check for termites?
Not by default, and this catches people out after settlement. A standard pre-purchase building inspection is carried out to AS 4349.1 and covers structural and safety defects. Timber pests are a separate scope under a separate standard, delivered either as a combined building and pest inspection or as a standalone [timber pest inspection](/timber-pest-inspections).
So the first thing to check is what you actually bought. If you paid for a building inspection only, there was never a termite scope to miss.
A timber pest report from [Owner Inspections](https://ownerinspections.com.au/) records which areas were accessed and which were not, area by area, precisely so this question can be answered later from the document rather than from memory.
Where the inspection did include timber pests, the question becomes what it could reasonably reach. [What a professional timber pest inspection actually covers](/articles/diy-vs-professional-timber-pest-inspections) is the subfloor, roof void, interior and exterior, plus the timber structures, fences and trees on the property up to about 50 metres from the main building, using moisture meters and often thermal imaging. It does not include the inside of a closed wall cavity.
## Do you have to disclose termites when selling a house in Australia?
There is no single national answer, and anyone who gives you one is guessing. Vendor disclosure duties are set state by state, and what counts as a defect you knew about turns on what you actually knew and when.
What is safe to say is that a known, active infestation is not something to leave out of a conversation with your conveyancer or solicitor. Ask them what your state's disclosure regime requires in your situation, before the contract is drafted. This article is general information rather than legal advice, and disclosure is exactly the question that needs the advice.
## What are the first signs of termites in a house?
The early signs are subtle and easy to explain away.
None of these prove termites on their own. Blistered paint is just as often moisture, and a sticking door is just as often seasonal movement in the frame. That is why an inspection reads the signs together with moisture readings and the building's construction type, rather than treating any one of them as a verdict. For telling termite damage apart from rot and borer damage, see [what termite damage actually looks like](/articles/what-does-termite-damage-look-like).
## Will termites go away on their own?
No. An established colony keeps foraging outward into new timber, and nothing about a house makes it decide to leave. Activity can appear to stop if the colony shifts to a food source you cannot see, which is not the same thing at all.
## Which smell do termites hate?
Some essential oils, orange oil and clove oil among them, show mild repellency in laboratory conditions. There is no reliable field evidence that any of them control an established colony inside a structure, and repelling termites from one timber member simply moves them to another.
## What kills termites immediately?
Nothing you can buy over the counter kills a colony immediately. Effective treatment means a licensed pest controller applying a termiticide registered with the APVMA, as a chemical soil barrier or through a baiting system, and both work through the colony over weeks. Spraying an accessible nest yourself tends to scatter the colony into parts of the house you cannot see.
## What is a termite's worst enemy?
Not predators. Some ant species raid termite workings, but nothing in the garden meaningfully controls a colony already inside a house. What keeps termites out of a building is unglamorous: fixing leaking taps, shower recesses and downpipes, keeping garden beds and mulch below the weep hole line, clearing stored timber from under the house, and maintaining the barrier at the intervals its installer specifies.
## Do coffee grounds repel termites?
There is no good evidence for it. Coffee grounds appear in informal tests as a possible mild deterrent at best, and a deterrent is not a treatment.
If you are searching for household remedies, you almost certainly have activity worth a professional opinion. The path has not changed: document it, get an independent inspection that speaks to the age of the damage, notify the original inspector in writing, and only then treat and repair.
### Is a Termite Gap at the Slab Edge Normal?
Source: https://ownerinspections.com.au/articles/termite-gap-at-slab-edge
Published: 2026-09-11 | Category: Construction Inspections
Author: Maison Azdari
Yes, a visible gap at the slab edge is normal on most Australian homes, because it is put there on purpose. AS 3660.1 and the National Construction Code expect a strip of bare concrete to stay exposed between the bottom of the wall and the finished ground, so that any termite mud lead travelling up from the soil has to be built across a surface a person can see. What is not normal is a gap that runs *through* the building envelope: a crack wider than about 1mm in the slab edge, an unsealed service penetration, or a void behind render or paving that gives termites a concealed route inside.
So the question is really two questions. Is the exposed slab edge meant to be there, and is the particular gap you are looking at the inspection zone or a defect. They look similar from a metre away and they are not remotely the same thing.
## What Is the Termite Inspection Zone at the Slab Edge?
The termite inspection zone is a band of slab edge deliberately left uncovered so termite activity cannot reach the building without becoming visible. AS 3660.1 sets it at a minimum of 75mm of exposed concrete measured down from the top of the slab, which is roughly the height of one house brick. The slab edge inside that band must not be rendered, tiled, clad or covered by paving, soil or flashing.
Termites do not like open air and light, so they build shelter tubes of mud and saliva to travel over hard surfaces. A 75mm hurdle of bare concrete does not stop them. It forces them to build a lead across it, and that lead is what an inspector, or an owner with a torch, can actually find. Remove the hurdle and the termites still get in, but nobody sees them until the damage is done.
Some proprietary systems permit a reduced horizontal zone in specific detailing, and where the 75mm exposure genuinely cannot be achieved, the designer is expected to carry a durable, inspectable barrier up past the obstruction instead. That is a design decision made before the pour, not something to improvise on site afterwards.
## Can Termites Get Through a Concrete Slab?
Termites cannot chew through sound concrete, but they routinely get past a slab rather than through it. The common routes are shrinkage cracks in the slab, gaps around plumbing and conduit penetrations, cold joints between separate pours, and the perimeter where the slab meets the brickwork or cladding above.
This is the single most persistent myth in Australian residential building. A slab on ground is a component of a termite management system, not a system by itself. The NCC treats it that way: a concrete slab only forms part of a compliant approach when the penetrations, joints and perimeter are managed as well, which is why the [NCC Housing Provisions Part 3.4 on termite risk management](https://ncc.abcb.gov.au/editions/ncc-2022/adopted/housing-provisions/3-site-preparation/part-34-termite-risk-management) deals with those details separately.
Penetrations are the part most often missed. Every pipe and conduit coming up through the slab is a gap around a fixed object, and it needs a collar, a sealant or a physical barrier sleeve. A pre-pour inspection is the last easy chance to see all of them at once, which is covered in our guide to [a successful slab pre-pour inspection process](/articles/tips-for-a-successful-slab-pre-pour-inspection-process).
## Which Slab Edge Gaps Are Normal and Which Are Defects?
A normal slab edge gap is an intentional, clean, visible strip of concrete with nothing bridging it. A defective one is anything that creates a concealed path, holds moisture against the slab, or hides the zone from view. The test is not the size of the gap, it is whether a termite could cross it without being seen.
## What Is the Australian Standard for Termite Barriers?
AS 3660.1 is the standard for termite management in new building work, and AS 3660.2 covers the management of existing buildings. The NCC references AS 3660.1 and requires a termite management system for new Class 1 buildings in areas subject to termite attack, which is most of mainland Australia.
The standard recognises physical barriers such as stainless steel mesh and graded stone, chemical barriers including reticulation systems, and combinations of both. None of them is maintenance free. Chemical systems have a service life stated on the APVMA label, and physical barriers rely on staying uncovered and undisturbed.
There is also a paperwork requirement that most owners never look at. A durable notice must be fixed in a prominent place, usually the electrical meter box, recording the method used, the date, the expected life of any chemical, and how often the system should be inspected. The [QBCC guidance on protecting against termites](https://www.qbcc.qld.gov.au/home-maintenance/protecting-against-termites) explains what the notice must state and why annual inspection by a licensed pest manager is the baseline recommendation.
## What Happens When Paving or Landscaping Covers the Slab Edge?
Covering the slab edge does not void a warranty by itself, but it removes the only early warning the building had. Once a path, deck, planter or render coat sits above the top of the slab, termites can travel from soil to wall frame entirely out of sight, and the first evidence is usually damaged skirting, a bubbled architrave or a hollow door jamb inside the house.
This is a very common sequence in homes five to fifteen years old. The builder installs a compliant barrier, the owner or a later landscaper adds paving and garden beds against the wall, and nobody connects the two events. If you are buying, that landscaping is worth more attention than the kitchen. Our article on [what termite damage looks like](/articles/what-does-termite-damage-look-like) covers the interior signs that follow.
## What Should You Do if the Slab Edge Is Concealed?
Expose the zone where you can, and get the property inspected before assuming it is fine. Cutting back a garden bed, lifting a row of pavers or grinding off render at the base of a wall is often enough to restore a visible strip. Where the obstruction is structural, such as an attached slab or a bonded path, the fix is a design question for the builder rather than a weekend job.
Owner Inspections reports what is visible and accessible on the day, and records concealed areas as limitations rather than pretending they were checked. Where active termites or damage are suspected, a licensed timber pest inspection is the right next step, and a [timber pest inspection](/timber-pest-inspections) can be booked alongside a construction stage or pre-purchase report. Where a builder has covered a barrier during construction, that is a defect to raise in writing with the builder, and a dispute over rectification may need advice from a solicitor rather than an inspector.
### Insurer Voided My Policy After a Hail Damage Claim
Source: https://ownerinspections.com.au/articles/insurer-voided-my-policy-after-hail-damage-claim
Published: 2026-09-09 | Category: Insurance Claims
Author: Owner Inspections
If your insurer voided your home policy instead of just declining your hail claim, it is alleging you failed to disclose or misrepresented something when you took the policy out or renewed it. Under the Insurance Contracts Act 1984 (Cth), fully voiding a policy requires that failure to have been fraudulent. Ask for the insurer's reasons in writing, use internal dispute resolution, then take it to the Australian Financial Complaints Authority free of charge.
## What does it mean when an insurer voids your home policy?
Voiding, which the legislation calls avoidance, treats the policy as though it never existed. That is far heavier than declining one claim while the policy stays in force, and it is not a decision about your roof. It is a decision about what you said on the application or at renewal.
The rules sit in [section 28 of the Insurance Contracts Act 1984 (Cth)](https://www.legislation.gov.au/C2004A02944/latest/text), and they are narrower than most insurers' letters make them sound:
- **Section 28(2): only fraud allows full avoidance.** If the non-disclosure or misrepresentation was fraudulent, the insurer may avoid the contract.
- **Section 28(3): if it was not fraudulent, the remedy operates on the claim, not on the policy.** The insurer's liability "in respect of a claim" is reduced to the amount that would put it in the position it would have been in had the failure not occurred. Be clear-eyed about what that can mean: if the insurer would not have written the policy at all had it known, the reduction can be to nil. But it is still an adjustment to a claim. It does not authorise wiping out the policy.
- **Section 28(1): if nothing would have changed, nothing happens.** The section does not apply at all if the insurer would have entered into the contract for the same premium and on the same terms anyway.
So if the insurer has voided the whole policy rather than adjusting what it pays, and the letter does not allege fraud, that gap is the first thing to raise. Check which duty you are said to have breached, too. A policy taken out wholly or predominantly for personal, domestic or household purposes is a consumer insurance contract, so the duty that applies is the duty to take reasonable care not to make a misrepresentation (section 20B), not the older duty of disclosure. The question is what you were actually asked and how you answered, not what you should have volunteered.
## Is voided the same as cancelled?
No, and the difference is financial. Cancellation is prospective: cover ends from a notice date forward, under the cancellation regime in the Act, which has its own notice requirement (section 59) and a right to written reasons on request (section 75). You were insured up until that date. Voidance is retrospective, meaning there was no cover at all for some or all of the policy period, which puts every claim in that window at risk rather than only the hail one.
Do not read the fraud requirement as meaning an honest mistake costs you nothing. Section 60(1)(b) lets an insurer cancel a general insurance contract going forward where there has been a relevant failure, fraudulent or not. What it cannot do without fraud is reach backwards and undo cover you have already had.
A third and much less severe outcome is a claim denied while the policy stays alive. If that is what has happened to you, the steps are simpler and they are set out in our guide to [challenging a denied insurance claim](/articles/insurance-claim-denied-steps-to-challenge). Read your letter closely before assuming which of the three you have, because "declined", "cancelled" and "avoided" get used loosely in correspondence and precisely in the file notes.
## Why would an insurer void a policy after a hail damage claim?
Because a large claim is what makes a full underwriting review worth the cost. Insurers rarely re-examine your application while you are quietly paying premiums; a claim on a whole roof is what sends someone back through the file. What gets alleged is usually one of a short list: undisclosed prior claims history, pre-existing damage to the roof, the property being tenanted or unoccupied when the application implied otherwise, or renovations not declared at renewal.
The hail event is the trigger, not the legal reason. The legal reason is always the disclosure question. Big storm and structural claims attract this kind of scrutiny generally, which we cover in [common issues in structural insurance claims](/articles/common-issues-in-structural-insurance-claims).
## Can an insurer void a policy for something unrelated to the hail damage?
In principle yes, and this surprises most people. The test is not whether the thing you left out caused the hail damage. Section 28(1) asks whether the insurer would have entered into the contract for the same premium and on the same terms had it known, so a misrepresentation about something with no connection to your roof can still matter if it would have changed the underwriting decision. The reverse is just as true and more useful to you: something that would not have changed the decision gets the insurer nowhere, however awkward it looks on the form.
A second argument usually runs alongside the first, and it is the one worth watching. Insurers also contend the damage is not hail damage at all: that the corrosion, lifted sheets, cracked tiles or crazed roof coating predate the storm and are ordinary wear or age being recharacterised after the fact. That is a factual dispute about the building, separate from the disclosure argument, and independent evidence can settle it.
Insurers decline and void under a specific clause rather than issuing a blanket refusal, which is why the exact wording of the letter matters. Our piece on an [insurer denying a claim over asbestos](/articles/insurer-denied-claim-asbestos) shows how narrow those grounds usually are.
## What happens to your premiums and your cover when a policy is voided?
Cover ends retrospectively, so any other claim you made during the disputed period is exposed as well. Practically, you are uninsured from the moment the letter lands. If your roof is open and unrepaired, that is the most urgent fact here: arranging replacement cover and making the building weathertight cannot wait for the dispute to resolve.
Premium refund practice varies between insurers and depends on whether the non-disclosure is treated as fraudulent. Some refund premiums paid for the avoided period, some do not. Ask in writing, in the same letter in which you ask for reasons.
## How do you challenge a voided policy or a denied hail claim?
Three steps, in order, because the later stages expect the earlier ones to have happened.
1. **Ask for the reasons and the evidence in writing.** You want the specific ground relied on, the section or policy clause, the documents the decision rests on including any assessor's report, and your original application record showing the questions asked and the answers recorded. This is a right, not a favour: section 75 of the Act requires an insurer to give a written statement of its reasons where it cancels a policy, refuses to insure you or refuses to renew, but only if you request it in writing. So put the request in writing, and say you are making it under section 75.
2. **Lodge an internal dispute resolution (IDR) complaint.** Every general insurer must run one, to the standard in ASIC's Regulatory Guide 271, which sets the maximum time the insurer has to respond in writing. Check the current timeframe on [ASIC's RG 271 page](https://asic.gov.au/regulatory-resources/find-a-document/regulatory-guides/rg-271-internal-dispute-resolution/) rather than a figure quoted in any article, including this one. In the letter, put the section 28 point squarely: if fraud is not alleged, ask on what basis the whole policy has been avoided rather than the claim adjusted.
3. **Take it to AFCA.** If IDR does not resolve it, or the insurer misses its deadline, the [Australian Financial Complaints Authority](https://www.afca.org.au/) will consider the dispute at no cost to you, and its determinations bind the insurer if you accept them. There are [monetary limits on what AFCA can award](https://www.afca.org.au/what-to-expect/outcomes-afca-provides), so check the current figure on its site, as it is indexed and changes.
The [Financial Rights Legal Centre](https://financialrights.org.au/) runs a free national Insurance Law Service, and it is the right first port of call if the letter alleges fraud, which is a serious allegation with consequences well beyond this claim.
None of this guarantees an outcome, and nobody should tell you a voidance was unlawful without having read the file. What can be said is that the legal test is narrow and evidence is what moves it.
## What evidence actually changes the outcome?
This is where most people lose it, avoidably. The insurer's decision rests on its assessor's report, and an objection made of disagreement does not displace a report. Another report does.
**A dated, independent assessment of the damage.** Not the insurer's assessor, and not the roofer quoting for the repair. You need a written assessment that identifies the damage, explains its mechanism and addresses timing: whether the pattern is consistent with hail impact on or around a specific date, or with progressive deterioration over years. That distinction is the whole argument in a recharacterisation dispute, and it has to be made in a document a dispute body will accept. That is what an [insurance claim assessment](/insurance-claim-assessments) is for.
**Photographs that separate impact from wear.** Hail leaves a signature, and it looks different on the roof types actually used here. On Colorbond or zincalume sheeting, look for dimples and dents in the pans and in soft metals such as gutters, flashings, vents, whirlybirds and air conditioning fins. On concrete or terracotta tile, look for fresh chips and cracks whose broken edges are lighter and unweathered, because an old break has dirtied and dulled and a new one has not. Across both, look for spatter marks where oxidation, moss or dirt has been knocked off in a scattered pattern. Wear does not do any of that, and it does not concentrate on the storm-facing side. Photograph the undamaged elevations too, because the contrast is itself evidence. Date everything, keep the originals with their metadata intact, and add any Bureau of Meteorology record or news report of hail in your suburb that day.
**A paper trail on the non-disclosure allegation.** Retrieve the application or renewal record and read the actual question wording. Often the fact you supposedly concealed was never asked about, or was asked in terms your answer did satisfy, or was already known to the insurer from an earlier claim or inspection. Any of those undercuts the allegation at its base.
**Anything showing the insurer would have covered you anyway.** Comparable policies, evidence the undisclosed matter is routinely accepted at standard rates, or the insurer's own underwriting guidance if it is produced during the dispute. That goes straight to the section 28(1) test.
Get the independent assessment before you write your substantive response, not after. Once you have argued a position without evidence, you are defending that position instead of presenting a case.
## Do insurers check whether you have had a policy cancelled or voided before?
Some do, and you should assume yours will. The Financial Rights Legal Centre warns that being refused insurance can make it harder to get cover elsewhere, because [some insurers ask whether you have previously been refused insurance or refused a renewal](https://financialrights.org.au/factsheet/high-insurance-premiums-or-cover-refused/). The wording is not uniform across the market, and your duty to answer accurately applies both when you take out a policy and when you renew it.
That creates a compounding risk. Not disclosing a prior voidance on a new application is a fresh misrepresentation, which can put the new policy in the same position as the old one. If you are arranging replacement cover while the dispute is still running, describe it accurately: a voidance you are disputing is a voidance that has occurred. Our guide to [filing a building insurance claim after storm damage](/articles/building-insurance-claim-storm-damage) covers what a new insurer will want to know.
## How long does a cancellation or voidance stay on your record?
There is no single answer, and we would rather say so than invent one. Australian home insurers word the question differently: some ask about a defined window such as the last five years, others ask whether it has ever happened. No central industry register with a fixed retention period settles it, and we have not found a primary source setting a uniform lookback for home insurance.
The safe approach does not need the number. Answer the question the application actually asks, exactly as worded, every time. Never assume a past event has expired, and where the wording is ambiguous, disclose and let the insurer decide what to do with it. A disclosed fact that raises your premium is a better outcome than an undisclosed one that surfaces during a claim.
## Common questions
### Can my insurer void my home policy for an innocent mistake on the application?
Not under section 28. Full avoidance requires the failure to have been fraudulent. Where it was not fraudulent, the insurer's remedy is to reduce what it pays on the claim to the amount it would have been liable for had it known the truth. If you have received a full voidance and fraud is not alleged, that is the first thing to put to the insurer and then to AFCA.
### The insurer says my roof damage is old, not from the hailstorm. What do I do?
Get an independent assessment that dates and characterises the damage, and photograph the storm-facing and sheltered elevations for comparison. This is a factual dispute about the building, not an argument about the policy, and it turns on evidence.
### Am I still covered while I dispute the voidance?
Assume you are not. Voidance is retrospective, so treat the property as uninsured from the date of the letter, arrange replacement cover and make the building weathertight. Disputing the decision does not reinstate cover in the meantime.
### What Can You Do If the Vendor Skips Agreed Repairs Before Settlement?
Source: https://ownerinspections.com.au/articles/vendor-skipping-agreed-repairs-before-settlement
Published: 2026-09-07 | Category: Pre-Purchase Inspections
Author: Maison Azdari
If the vendor has skipped repairs they agreed to complete before settlement, your position depends almost entirely on whether that promise was written into the contract as a special condition. If it was, the vendor is in breach and you can ask for the work to be completed, for money to be held back at settlement, or for a price adjustment. If the promise only ever lived in an email or a conversation with the agent, it may not bind the vendor at all. Either way, document the property before you settle, because access and leverage both disappear the moment the transfer goes through.
This is a common and stressful discovery, usually made at the final inspection with days or hours left on the clock. The sections below cover how to work out where you stand, what your realistic options are, and what evidence makes any of them work.
## Are the Agreed Repairs Actually in Your Contract?
Agreed repairs are enforceable when they appear in the contract as a written special condition naming the work and the deadline. A promise made by phone, in a text from the agent, or noted on an inspection report is far weaker, because the signed contract is generally treated as the complete agreement between the parties. Check the contract first, before you argue with anyone.
Ask your conveyancer or solicitor to point you to the exact clause. What you are looking for is a condition that says what work will be done, to what standard, by when, and what happens if it is not. The Queensland Government makes this point in its guidance for buyers: at the [pre-settlement inspection](/apartment-pre-settlement) you should check the property is in the same condition as when you signed, and in particular [check anything you specifically included in your contract](https://www.qld.gov.au/law/housing-and-neighbours/buying-and-selling-a-property/buying-a-home/tips-for-new-home-owners/settlement-day).
Separately from any repair promise, most standard contracts require the vendor to hand the property over in essentially the same condition as at the contract date, fair wear and tear excepted. That is what the final walkthrough exists to confirm, and it is why the same Queensland guidance tells buyers to check the property is still in the condition it was in when they signed. Note what that obligation does and does not do. It covers new damage. It does not, by itself, force a vendor to improve the property beyond the condition you agreed to buy it in.
## What Are Your Options If the Vendor Has Not Done the Repairs?
There are four practical routes: have the vendor complete the work before settlement, agree a retention of funds held in trust until the work is done, negotiate a price adjustment at settlement, or settle on time and pursue the vendor afterwards. A retention is the most common commercial outcome because it keeps the settlement date intact while protecting your money.
| Option | How it works | Main risk |
| --- | --- | --- |
| Vendor completes the work | Settlement is delayed by agreement while the trade attends | Rushed work, and the vendor may refuse |
| Retention of funds | An agreed sum is held in a solicitor's trust account until the work is verified | Both solicitors must agree the terms in writing |
| Price adjustment | The purchase price is reduced by the cost of the outstanding work | You need a defensible repair figure, not a guess |
| Settle and pursue later | You complete on time and claim the cost afterwards | Slow, and you carry the cost in the meantime |
Whichever route you take, you need a number. A written quote from a licensed trade for the outstanding work, sitting alongside a dated report showing the work was not done, is what moves a vendor's solicitor. An assertion that the repairs "were not finished properly" does not.
Above is the pattern that causes most of these disputes. A trade has attended, started the work, and left it part-done. The vendor's position is that the repair was actioned. The buyer's position is that nothing has been fixed. Only a dated photograph of the actual state of the work settles that argument.
## Can You Delay Settlement Until the Repairs Are Done?
You can ask, and vendors often agree, but you generally cannot unilaterally refuse to settle because repairs were skipped. Withholding settlement without a contractual right puts you in breach instead of the vendor, which can expose you to penalty interest and a notice to complete. Get advice from your solicitor before you miss a settlement date.
The Queensland Government's guidance to sellers acknowledges the practical reality here: if the property is not in good condition at the buyer's pre-settlement inspection, the buyer [can ask their lawyer to delay settlement until you fix the problem](https://www.qld.gov.au/law/housing-and-neighbours/buying-and-selling-a-property/selling-a-home/settlement-day-when-selling-your-home). Note the wording. The buyer asks. A delay that both sides agree to is very different from a buyer simply not turning up.
## How Do You Prove the Repairs Were Not Done?
You prove it with an independent, dated inspection carried out before settlement, comparing the current condition against the agreed scope of works. The report needs photographs, locations, and a plain statement of what was and was not completed. Once you settle, you lose the ability to show the property in the condition the vendor handed it over in.
This is the step buyers most often skip, and it is the one that decides the outcome. Two or three phone photos taken in a hurry rarely establish anything, because they show a defect without showing that it falls inside the agreed scope. A [defect investigation report](/defect-investigation-reports) does the comparison explicitly, item by item against the contract condition.
Bring the original [pre-purchase inspection](/pre-purchase-inspections) report to the re-inspection. The defect list that triggered the repair agreement in the first place is the scope your inspector should be checking against, and having both reports from the same period makes the comparison far harder to dispute. NSW Fair Trading notes that beyond inspecting a property yourself you can [arrange property inspection reports](https://www.fairtrading.nsw.gov.au/housing-and-property/buying-and-selling-property/buying-a-property/property-inspections) such as a building inspection report, and that the agent must tell you about previous reports on the property.
## What If the Repairs Were Done But Done Badly?
Poor workmanship on an agreed repair is still a failure to meet the condition, provided the condition specified a standard or the work is obviously not fit for purpose. A patched crack that has been filled and painted over without addressing the movement behind it has not been repaired, it has been concealed. An inspector can usually tell the difference; a buyer standing in the room on settlement morning usually cannot.
This is unfinished external work of the kind that gets signed off as complete because it is out of sight from the ground. Cosmetic repairs are easy to verify at a walkthrough. Roof, subfloor, drainage and wet area work are not, which is why they account for a disproportionate share of post-settlement disputes.
## Should You Settle and Chase It Afterwards?
Often yes, if the outstanding amount is small relative to the risk of losing the property or paying penalty interest. Settling on time protects your position on the purchase itself, and a documented claim can still be pursued afterwards. The trade-off is that recovery gets slower and harder once the vendor has your money and no reason to cooperate.
Consumer Affairs Victoria sets out what buyers should attend to [before property settlement](https://www.consumer.vic.gov.au/housing/buying-and-selling-property/buying-property/property-settlement/before-property-settlement), and separately covers the more difficult territory of [building problems found after settlement](https://www.consumer.vic.gov.au/housing/buying-and-selling-property/buying-property/property-settlement/building-problems-after-property-settlement). The gap between those two pages is the whole argument for doing the work now. Before settlement you have access, leverage and an unpaid balance. After settlement you have a letter of demand.
If you do settle with the matter unresolved, make sure your solicitor records the reservation of rights in writing and that you hold a dated report and a repair quote. Those three documents are what a later claim rests on. For a broader view of how these disagreements typically play out, see our guide on [resolving pre-settlement disputes](/articles/pre-settlement-disputes-and-resolution) and on [your legal rights at a pre-settlement inspection](/articles/legal-rights-in-pre-settlement-inspections).
## Frequently Asked Questions
### Builder insolvent, can I still claim for defects?
Source: https://ownerinspections.com.au/articles/builder-insolvent-can-i-claim-defects
Published: 2026-09-02 | Category: Insurance
Author: Maison Azdari
Yes, in most cases you can still claim for defects after your builder becomes insolvent, but the claim moves off the builder and onto an insurance policy. Every mainland state runs a compulsory home warranty scheme, and builder insolvency is one of the events that triggers it: Domestic Building Insurance in Victoria, the Home Building Compensation Fund in NSW, and the Queensland Home Warranty Scheme in Queensland. What decides your outcome is whether a policy was actually issued for your contract, whether you are still inside the cover period, and how fast you lodge once you know the builder has failed.
## What Happens to a Defect Claim When a Builder Goes Into Liquidation?
When a builder goes into liquidation the company still owes you the rectification work, but there is rarely anything left to collect. Homeowners sit near the back of the queue as unsecured creditors, behind employees and secured lenders, so lodging a proof of debt with the liquidator usually returns nothing. The claim that actually pays is the home warranty policy taken out for your job.
This changes what you should be doing with your time. Chasing directors or waiting for a tribunal order against a company with no assets is a dead end once liquidation is confirmed. Do two things instead: confirm the insolvency through the ASIC published notices register or the appointed liquidator, and find your certificate of insurance, which should have been given to you before you paid a deposit.
If the builder is struggling but not yet formally insolvent, the ordinary dispute path still applies. Our guide on what to do when a [builder will not fix defects in NSW and Victoria](/articles/builder-wont-fix-defects-options-nsw-vic) covers that road.
This separation crack runs the full height of the wall and continues below ground level, the pattern that separates structural movement from surface shrinkage. Insurers scope claims off findings like this, not off a homeowner's description.
## Which Insurance Covers Defects When the Builder Is Insolvent?
Defects after builder insolvency are covered by the compulsory home warranty scheme in your state, not by your home and contents policy. Victoria uses Domestic Building Insurance, NSW uses the Home Building Compensation Fund, and Queensland uses the Queensland Home Warranty Scheme. All three are last resort policies, meaning they only respond once the builder has died, disappeared or become insolvent.
| | Victoria (DBI) | NSW (HBCF) | Queensland (Home Warranty Scheme) |
| --- | --- | --- | --- |
| Required when the contract exceeds | $16,000 | $20,000 | $3,300 |
| Maximum payable per policy | $300,000 for policies issued from 1 July 2014 | $340,000 | $200,000 |
| Structural or major defects covered for | 6 years from completion or termination | 6 years from completion | 6 years and 6 months |
| Other defects covered for | 2 years | 2 years | 6 months |
| Who you lodge with | VMIA or the private insurer named on the certificate | icare HBCF | QBCC |
Two details catch people out. The cap is per policy, not per defect, so one large structural rectification can exhaust it. And for incomplete work, NSW pays a maximum of 20 per cent of the contract price toward non completion, which is often far less than the shortfall on a job abandoned at lock up.
[Consumer Affairs Victoria](https://www.consumer.vic.gov.au/housing/building-and-renovating/defects-delays-and-insolvency/insurance-and-insolvency) sets out the Victorian triggers, [icare explains what HBCF covers](https://www.icare.nsw.gov.au/builders-and-homeowners/homeowners/hbcf-what-am-i-covered-for) in NSW, and the QBCC publishes both the [time limits for cover and claims](https://www.qbcc.qld.gov.au/your-property/queensland-home-warranty-scheme/time-limits-cover-claims) and the [rules for non completion claims](https://www.qbcc.qld.gov.au/complaints-disputes/building-work-issue/non-completion-building-work/home-warranty-non-completion) in Queensland.
## How Long Do You Have to Lodge the Claim?
The deadline is set by the scheme and it runs on its own clock, not on how long the liquidation takes. Victoria expects a claim within 180 days of becoming aware of the loss. NSW allows 6 years for major defects and 2 years for other loss, plus up to 6 extra months if you only become aware in the final 6 months. Queensland gives 3 months from noticing a structural defect.
Waiting for the liquidator to finish is the single most common way homeowners lose a valid claim, because a liquidation can run for years. Lodge on the insurance timeline and let the two processes run in parallel.
NSW has one useful extension. If you have been actively pursuing the builder through Building Commission NSW dispute resolution, NCAT or a court, you can make a delayed claim up to 10 years after completion. That only helps with a documented paper trail, so keep every application, direction and tribunal file number.
## What If the Defect Appears Years After the Builder Disappeared?
If the defect surfaces after the cover period has closed, the home warranty policy will not respond and the builder no longer exists to sue. This is the hardest version of the problem and it is common with waterproofing failure and slab movement, both of which can take most of a decade to show themselves. A few options remain, and none of them are certain.
Be realistic. Where the cover period has expired, no other practitioner was negligent and the builder is deregistered, there is often no recoverable party and the cost falls on the owner. Owner Inspections is an inspection company, not a law firm. We can establish what the defect is, what caused it and what rectification costs, but whether a party remains liable is a question for a solicitor.
Concealed damage like this is why latent defects arrive late. Nothing was visible until the lining was opened, by which point staining covered most of the boarding and several rafters. A defect that takes eight or nine years to become obvious has usually been progressing since the day the work was done.
## What Evidence Does the Insurer Need?
Insurers assess these claims on documents, so the quality of your evidence largely determines the outcome. At a minimum they will want the contract, the certificate of insurance, proof of what you paid, evidence of the insolvency, and an independent report that identifies each defect, its cause, and the cost to put it right.
A builder's own defect list is not evidence for this purpose, and nor is a general pre-purchase style report, which is written to a different scope. What moves an insurance claim is a targeted report that ties each item to a requirement it fails.
## What Is Not Covered When a Builder Becomes Insolvent?
Home warranty schemes are narrower than most people expect. They do not cover work below the state contract threshold, work where no policy was ever issued, owner builder work you carried out yourself, normal wear and tear, or your own consequential losses such as rent while the house sits unfinished.
The gap that hurts most is the missing policy. If your builder took your deposit without taking out the required insurance, there is usually nothing to claim against, because the schemes attach to the policy rather than to the licence. Check the certificate of insurance on the day you sign, not the day the builder collapses. The same principle applies to [confirming the work you have paid for actually exists](/articles/builder-obligations-in-pre-settlement-inspections) before releasing the next progress payment.
## FAQs
### Builder says not our scope: who is liable for new build defects?
Source: https://ownerinspections.com.au/articles/builder-says-not-our-scope-new-build-defects
Published: 2026-08-31 | Category: New Construction
Author: Maison Azdari
If your builder says a defect is "not our scope", they are only right when the item genuinely falls outside the contract they signed and the building permit they are named on. Work carried out by their own subcontractors is still their responsibility, because the head builder warrants the whole of the contracted work, not just the parts their own staff touched. The way to settle it is documentary: match the defect against the contract scope, the plans, the specification, the signed variations and the permit. If it appears in any of those, "not our scope" does not stand.
## What does "not our scope" actually mean?
"Not our scope" is a claim that a particular item was never part of the work the builder agreed to carry out. It is a contractual argument, not a technical one, so it is answered by documents rather than by opinion. The contract scope of works, the architectural and engineering drawings, the specification, the signed variations and the building permit together define the boundary. A defect inside that boundary is the builder's problem regardless of which trade created it.
The phrase gets used in three quite different situations, and they do not carry the same weight:
## Is a builder liable for work done by their subcontractors?
Yes. The head builder is the party you contracted with, and the statutory warranties attach to that contract, so defective work by a plumber, a bricklayer, a waterproofer or a roof plumber they engaged remains their liability to you. You have no contract with those trades and are not expected to pursue them. The builder may have a claim against the subcontractor, but that is their claim, not yours.
In Victoria this comes from the implied warranties in the [Domestic Building Contracts Act 1995](https://www.legislation.vic.gov.au/in-force/acts/domestic-building-contracts-act-1995), which require the builder to carry out the work in a proper and workmanlike manner, with reasonable care and skill, using good and suitable materials, and in compliance with all laws including the National Construction Code. In New South Wales the equivalent obligations sit in the [statutory warranties under the Home Building Act](https://www.fairtrading.nsw.gov.au/housing-and-property/building-and-renovating/during-the-build-or-reno/statutory-warranties). In Queensland the QBCC assesses whether work is [defective building work](https://www.qbcc.qld.gov.au/complaints-disputes/building-work-issue/defective-work-dispute/what-defective-work) by the licensed contractor who carried it out.
A frame stage defect like this one is typical. The bracket was installed by a framing subcontractor rather than the builder's own carpenters, but it sits squarely inside the contracted works and the engineer's drawings, so the builder answers for it.
## When is "not our scope" actually correct?
The claim holds when the item was never inside the builder's contract in the first place. That happens more often than owners expect on sites where several parties are working, and it is worth checking honestly before escalating, because a demand aimed at the wrong party wastes time you may need.
## How do you prove a defect sits inside the builder's scope?
You prove it by putting the defect next to the documents and showing that it appears in them. That is a paperwork exercise and a technical one, and the pair together is what a regulator or a tribunal will look at. An independent inspection report supplies the technical half by describing the defect, its location, its likely cause and the standard or code clause it fails.
Defects like uneven tile laying at lock-up are easy for a builder to attribute to a roofing subcontractor. Recording them against the relevant clause of the standard, at the stage they occur, removes the argument later.
## How long is a builder liable for defects in Australia?
A builder's liability for defects runs far longer than the contractual maintenance period in most domestic contracts. The three to twelve month "defects liability period" written into a building contract is the window in which the builder agrees to come back and fix things, not the limit of what they owe you. Statutory warranty and limitation periods sit behind it and run for years.
The Victorian outer limit comes from the [Building Act 1993](https://www.legislation.vic.gov.au/in-force/acts/building-act-1993), which requires a building action to be brought within ten years of the occupancy permit or the final inspection date. These are limitation and complaint windows, not a promise that a claim made inside them will succeed, and a specific matter can be time barred earlier for other reasons.
## What to do if the builder still refuses
If the builder maintains the item is out of scope after you have shown them where it sits in the documents, the next move is a regulator, not a longer email chain. Each state has a free or low cost pathway before a tribunal, and all of them expect independent evidence rather than an owner's photographs alone.
If that does not resolve it, the matter goes to VCAT, NCAT or QCAT, where an [expert witness report](/expert-witness-reports) carries the technical case. Owner Inspections prepares [defect investigation reports](/defect-investigation-reports) for owners in exactly this position, and a solicitor should handle the contractual argument itself.
## Frequently asked questions
### Can I Withhold Payment From My Builder if Work Is Incomplete?
Source: https://ownerinspections.com.au/articles/can-i-withhold-payment-from-my-builder-if-work-is-incomplete
Published: 2026-08-28 | Category: Defect Investigation
Author: Maison Azdari
Usually yes, but only for the part of the work that is genuinely incomplete or defective. Two things have to be in place first: a payment clause in your contract that allows it, and written notice sent before the payment falls due, setting out exactly what is outstanding and how much you are holding back. Withholding the entire payment because you are unhappy is itself a breach of contract, and it can give the builder grounds to suspend work or terminate. What decides who is right in the end is documented evidence of what was built and what was not.
Owner Inspections is an inspection company, not a law firm. Whether a particular defect justifies withholding a particular progress claim turns on your contract wording, so take that question to your state building authority or a construction solicitor. What follows is how the process usually runs and what evidence decides it.
## Can I Withhold Payment From My Builder if Work Is Incomplete?
Your contract governs this, not a general sense of fairness. A stage claim is only payable once the work described for that stage has actually been done. In NSW, section 8A of the [Home Building Act 1989](https://www.legislation.nsw.gov.au/view/html/inforce/current/act-1989-147) requires progress payments to be for a specified stage or for work actually performed. Victoria is more prescriptive: the Domestic Building Contracts Act 1995 caps the deposit at 5 per cent on contracts of $20,000 or more, and for a standard new home the regulations set maximum stage claims of 10 per cent at base, 15 at frame, 35 at lock-up and 25 at fixing, with the balance on completion. A claim that asks for more than its stage allows is worth querying on its own, separately from any argument about quality.
The safe position is proportionality. Holding back an amount that matches the value of the unfinished work, or the cost of rectifying the defect, is something you can explain in writing. Holding the whole claim because the site is messy and you have lost confidence is not, and it exposes you to a suspension of works notice or termination.
## What Should I Do if the Builder Wants Final Payment Before Completion?
Compare the claim against the contract before you do anything else. Take the stage description, walk the site with it, and list what is not there. Final claims often arrive when the house looks finished from the driveway but the cabinetry is unfinished, the balustrade is missing, or the waterproofing certificate has not been issued.
Handover is a paperwork event as much as a physical one. Before the final claim is paid you would normally expect the occupancy permit or final inspection certificate, waterproofing and termite protection documentation, electrical and plumbing compliance certificates, and the home warranty insurance certificate. Missing paperwork is a legitimate reason to hold the final claim, and it is far easier to prove than a disputed finish.
Write the objection the way an inspector would write it: item, location, what the contract or the standard requires, and the amount held against that item. "Ensuite, waterproofing to AS 3740 not installed, $3,200 withheld" can be tested by somebody else. "The bathroom isn't finished" cannot. Going silent is the worst option, because unexplained non-payment looks like repudiation, while an itemised objection sent with payment of the undisputed balance looks like a homeowner exercising a contractual right.
## What Counts as Incomplete Work Versus Defective Work?
The two are treated differently, and the distinction changes the number you are entitled to hold.
| Test | Incomplete work | Defective work |
| --- | --- | --- |
| What it means | Contract scope that has not been done yet | Scope that has been done, but not to the required standard |
| Measured against | The contract scope and stage schedule | The contract, the National Construction Code and the relevant Australian Standards |
| What you can hold | The value of the unfinished work | The cost of rectification, which can exceed the item's contract value |
That last row is the part people get wrong. A shower might be worth $2,500 in the contract, but if the waterproofing membrane beneath it has failed in a second storey bathroom, rectification means lifting tiles, screed and sometimes the sheeting below, which commonly runs to $8,000 to $15,000. For a defect, the argument is about rectification cost, not the line item.
Work at this stage is incomplete rather than defective: nothing here has failed a standard yet, because most of it has not been finished. A [construction stage defect assessment](/articles/construction-stage-defect-assessment) separates the two categories item by item, while the trades are still on site.
## What to Do if a Tradesman Does a Bad Job in Australia
The escalation ladder is the same whether it is the builder or a subcontractor.
Australian Consumer Law guarantees also apply to trade services: work must be carried out with due care and skill and be fit for purpose. The ACCC sets out these [consumer rights and guarantees](https://www.accc.gov.au/consumers/consumer-rights-guarantees). Keep everything in writing from here on, because verbal-only complaints are the most common reason a homeowner arrives at a tribunal with nothing to show.
## How Long Is a Builder Liable for Their Work in Australia?
It depends on the state and on whether the defect is structural. Broadly, structural or major defects sit around six to ten years and non-structural defects around two years. NSW gives six years for major defects and two for other defects. In Victoria, action can generally be brought for up to ten years from the occupancy permit or final inspection date. In Queensland, the QBCC generally accepts complaints about structural defective work up to six years and six months after completion and about non-structural work within twelve months, with the home warranty scheme running to its own separate cover periods. The clock usually runs from completion, not from the day you noticed the problem, so confirm the current period with your state authority before relying on it.
That window is a different clock from the payment dispute. A six year warranty does not mean you can hold a progress payment for six years. The payment argument is decided on the contract and on notice, and normally has to be resolved in weeks.
## What Should You Not Say to a Builder During a Payment Dispute?
Keep the tone factual and specific: the item, the location, the clause or standard, the amount.
## How an Independent Defect Report Is Used as Evidence
This is the part the legal explainers skip. Everyone tells you that you have a right to withhold. Almost nobody tells you how to prove the work is incomplete.
An independent report is not an email with a few phone photos attached. It sets out each item against the contract scope and the applicable standard, with dated photographs and locations, and gives a rectification cost. That turns "the kitchen isn't finished" into a schedule and a dollar figure a builder's insurer, a conciliator or a tribunal member can act on. It also fixes the condition of the work at a date, which matters when the builder later argues the damage happened after they left. To start the record yourself, our guide on [how to document building defects for a legal claim](/articles/document-building-defects-legal-claim) covers the photography and correspondence side.
## Where to Lodge the Dispute in Your State
**NSW.** Lodge a [building defect complaint](https://www.nsw.gov.au/departments-and-agencies/building-commission/about-us/building-defect-complaints) with Building Commission NSW, which took over the Fair Trading process. Most home building disputes must go through that process before [NCAT](/articles/understanding-nsw-civil-and-administrative-tribunal-ncat) will hear them.
**VIC.** Use the free domestic building dispute resolution service now run by the Building and Plumbing Commission, previously DBDRV. Consumer Affairs Victoria explains the pathway for [disputes, defects and delays](https://www.consumer.vic.gov.au/housing/building-and-renovating/defects-delays-and-insolvency/disputes-defects-and-delays). Conciliation comes before [VCAT](/articles/avoiding-common-triggers-of-building-disputes-at-vcat) in most cases.
**QLD.** Lodge a defective work complaint with the QBCC, which publishes what it treats as [defective work](https://www.qbcc.qld.gov.au/complaints-disputes/building-work-issue/defective-work-dispute/what-defective-work) and can issue a direction to rectify. QCAT is the step after that.
### Bought a Home? 9 Things To Do Before Moving In
Source: https://ownerinspections.com.au/articles/things-to-do-before-moving-into-a-new-house
Published: 2026-08-28 | Category: Pre-Purchase Inspections
Author: Maison Azdari
Before you move in, re-read your building inspection report and act on anything flagged as a safety issue, book the trades for electrical, plumbing and drainage work while the rooms are still empty, change the locks, clear out anything the previous owner left, deep clean, transfer the utilities into your name, and do a final photographed walk-through before the first box comes through the door. The empty house is the cheapest version of the house to work on, and that window only lasts a few days.
As a buyer, you never forget signing the last contracts and taking the keys. The days in between settlement and moving day tend to escape your attention. That stretch will pass in a blur, but it is the best time to set the house up, because you can reach every room, every cupboard and every wall cavity access point without furniture in the way.
Here are nine things worth doing before a single piece of furniture is moved in.
## Why Should You Read Your Building Inspection Report Again?
Because the first read was about whether to buy, and the second read is about what to fix. Most buyers open the report once, at offer stage, and never look at it again. Now that the house is legally yours, the report stops being a negotiating document and becomes a work list with the jobs already sorted by urgency.
Building inspectors group findings into categories: major defects, safety hazards, minor defects and items needing further investigation by a specialist. Those categories are your sequence. Anything recorded as a safety hazard, exposed wiring, a failed balustrade, a rotted step, a gas appliance flagged for testing, needs dealing with before you occupy the house, not after. Items marked as needing prompt attention should not wait until you have settled in and stopped noticing them.
If you bought without one, or only ever saw the seller's copy, a [pre-purchase building inspection](/pre-purchase-inspections) after the fact still gives you an independent list of what the house actually needs, sorted by urgency.
Keep the report on hand while you make the calls. It tells you which trade to ring first, and it gives each one a photograph and a location rather than a vague description over the phone. If your report recommended a specialist follow-up, an electrician, a plumber, a structural engineer, that referral is the first call, not the last.
If you have not read a report in this level of detail before, our [pre-purchase inspection checklist for buyers](/articles/pre-purchase-inspection-checklist-for-buyers) sets out what each section covers and what the category labels actually mean.
## Which Repairs Should You Do While the Property Is Empty?
Do the structural, electrical, plumbing and drainage work now, and leave cosmetic work for later. An empty house is the easiest version of itself to repair. Trades can reach subfloors, switchboards, wall cavities and under-sink spaces without moving furniture, lifting rugs or laying drop sheets over your belongings, which cuts both the labour hours and the risk of damage to your things.
Go through the report and pull out every item in those four groups. Those are the jobs to schedule for the week of settlement, or the first week after it at the very latest. Wall patching, door adjustments, re-grouting and painting can all be done around furniture later without much penalty. If you are not sure which category a finding belongs to, our rundown of [Australia's most common building defects](/articles/australias-top-10-most-common-building-defects) covers what each one typically costs to put right.
Book the trades as soon as settlement is confirmed rather than after you have the keys. Lead times on licensed trades are the single most common reason this whole window collapses, and a plumber who cannot come until the following month pushes the cleaner, the carpet steam and the removalists with them.
Book a Defect
Investigation
}
buttonHref="/defect-investigation-reports"
variant="secondary"
/>
## Should You Change the Locks on a House You Just Bought?
Yes, and it is worth doing on day one. You have no way of knowing how many keys are in circulation. Previous owners hand copies to family, neighbours and house sitters, tradespeople keep them after a job, and agents often still hold a set after the settlement date. Handing over the keys at settlement is not the same as accounting for every key ever cut.
Rekeying is usually cheaper than replacing hardware, so ask the locksmith for both prices. While they are on site, have them check every entry point rather than just the front door.
This is also the right moment to test the smoke alarms and check they meet current requirements, because the empty house makes ceiling access straightforward. Alarm type, placement and interconnection rules vary by state and by when the house was built. [NSW Fair Trading sets out the alarm requirements for existing homes](https://www.fairtrading.nsw.gov.au/housing-and-property/building-and-renovating/before-you-start/smoke-alarms), and Queensland's rules for interconnected photoelectric alarms are stricter again.
## What Do You Do With Rubbish and Items Left Behind?
Clear everything out before your own belongings arrive. It is common for previous owners to leave things behind. Occasionally it is useful, shelving, a mower, garden tools. More often it is leftover renovation material, paint tins, offcuts and items that were not worth the cost of moving.
Getting it out first is not just tidiness. It keeps the path from the truck to the rooms clear, removes a trip hazard for removalists carrying heavy loads, and lets you see the true condition of floors, cupboards and storage spaces before you cover them up again.
For a small volume, a council hard rubbish collection may be enough, though most councils cap the number of collections a year and exclude paint, chemicals and building waste. For a larger volume, or where you want rubbish removal, cleaning and a handyman on the same day, it is usually simpler to book through a home services platform that coordinates all of it in one place rather than chasing four separate bookings around one another.
## Why Is It Easier to Deep Clean an Empty House?
Because every surface is reachable and nothing has to be worked around. You can get inside every cupboard, behind every door, along skirting boards and window tracks, and into the oven, rangehood and bathroom fittings properly. The same clean done around furniture takes longer and misses more.
Work top down and in the right order, or you will clean the same surface twice.
Professional cleaning is worth considering for this one job even if you normally clean yourself, mainly because steam extraction needs equipment most people do not own. Schedule it after the trades have finished and before anything is moved in. A cleaner who arrives before the plumber has left will be cleaning up after them for free, and neither of you will be happy about it.
## Which Small Repairs Are Worth Doing Before You Move In?
The ones that are quick, cheap and annoying to do later. Once the major report items are closed out, the small jobs become obvious. These are the ordinary irritations every house carries, and they are far easier to knock over in one visit while the rooms are clear.
A handyman doing a room-by-room pass is almost always cheaper than booking a separate trade for each individual job, because you are paying one call-out fee instead of five. Walk the house with a list before they arrive so nothing gets missed and you are not calling them back a fortnight later.
## When Should You Arrange Utilities and Internet?
Start as soon as the settlement date is confirmed, not on moving day. Water, electricity and gas all need to be connected in your name before you arrive, and internet takes the longest of the four by a wide margin.
Contact the retailers once you have a confirmed date. The [Australian Energy Regulator's comparison service](https://www.energymadeeasy.gov.au/) lets you check plans for the address rather than defaulting to whoever supplied the previous owner. Gas is the one that catches people out: if the supply has been off for an extended period, the connection may need a technician on site and a safety check before it can be turned back on.
Internet is almost always the forgotten one, and buyers discover it while sitting in an empty house with no service. Place the order immediately after settlement rather than after the move. Providers commonly quote a lead time of a couple of weeks, and longer where a technician appointment is needed. Check what technology and infrastructure the address already has on the [nbn residential site](https://www.nbnco.com.au/residential) before you order, because a property with no existing connection point will need an installation appointment on top of the activation.
## How Do You Plan the Actual Move?
Measure first, plan the placement second, and sort out truck access third. Moving day is chaotic by nature, and most of the chaos is avoidable with an hour of planning.
Measure your largest pieces, the fridge, the couch, the bed bases, the wardrobe, and check them against hallway widths, doorway heights and the turn at the top of any staircase. A couch that will not make the turn is a problem worth discovering on paper rather than with four people holding it.
Draw a simple floor plan showing where each large item goes and give a copy to everyone helping. It stops the same heavy item being moved three times, and it means you are not directing traffic all day.
If you are moving a long distance or emptying a large house, professional removalists earn their fee. They protect walls, door frames and floors, which matters more than usual in a house you have just had repaired and cleaned, and they take the physical risk out of the day. Friends and a hired van cost less and go wrong more.
## What Should You Check in a Final Walk-Through?
Walk every room with the inspection report and your trades list in hand before the first box comes in, and photograph the condition of everything. This is the last time you will see the house empty, so it is the only chance to record its true starting condition.
Date-stamped photographs of each room, including scuffs, cracks and completed repair areas, give you a clear record of the property's condition at the point you took possession. That record is useful if a repair fails later, if a dispute arises over work you paid for, or if you need to distinguish pre-existing damage from something caused during the move. Consumer Affairs Victoria's guidance on [buying and selling property](https://www.consumer.vic.gov.au/housing/buying-and-selling-property) is a useful reference for what settlement does and does not resolve.
A home purchase is one of the largest financial commitments most people ever make. The week before moving in is a short window, but it is the one where problems are cheapest to find and cheapest to fix, because nothing is in the way and nothing has to be moved twice. Work through the list properly and you move into a house that is genuinely ready, rather than one you spend the next two years catching up on.
### What is a dilapidation survey? A complete guide
Source: https://ownerinspections.com.au/articles/dilapidation-survey
Published: 2026-08-27 | Category: Dilapidation Reports
Author: Maison Azdari
A dilapidation survey is an independent, photographed record of a property's existing condition, taken before nearby construction, excavation or demolition begins. It is usually commissioned by the builder or developer doing the work, and sometimes by a neighbour who wants their own record, and it is carried out before work starts, with a second survey after completion for comparison. If cracking, movement or other damage appears later, that before and after pair is the dated evidence that decides who is responsible for it.
Most people reading this have just been told they need one. A council condition, a builder's contract or a letter from the developer next door has landed, and the real questions are what it will cost, whether it can be refused, and what the document actually has to contain to be worth anything later. That is what the rest of this guide covers.
## What is a dilapidation survey?
A dilapidation survey is a condition record, not an assessment. The inspector is not grading the property, valuing it, or telling you whether it is a good buy. The job is narrower and more literal: to document what is there on a given date, in enough detail that the same features can be found and compared later.
In practice that means dated photographs of every relevant surface, written descriptions keyed to those photographs, measurements of any existing cracks, and coverage of both the inside and the outside of the building. On a typical residential job it also extends past the house itself to driveways, paths, fences, retaining walls, and any council assets on the frontage such as kerbs, footpaths and stormwater pits.
This is a different exercise from a [pre-purchase building inspection](/pre-purchase-inspections). A pre-purchase inspection is about whether you should buy a property and what it is going to cost you to own. A dilapidation survey is about establishing a baseline for a possible future damage claim, so it records things a pre-purchase report would not bother with, such as a hairline crack in a garden wall or a chip in a neighbour's driveway. If you want the full breakdown of what a report contains section by section, our [ultimate guide to dilapidation reports](/articles/ultimate-guide-to-dilapidation-reports) goes through each component. This page covers the broader picture, including the questions about obligation, refusal and cost that guide does not answer state by state.
## What is the purpose of a dilapidation survey?
The purpose is to make causation provable. That sounds abstract until you are the person arguing it.
Without a baseline, a homeowner who finds a new crack in the render six months into the excavation next door has to prove three things at once: that the crack was not there before, that it appeared during the works, and that the works caused it rather than normal seasonal soil movement. Reactive clay soils across much of Sydney and Melbourne move enough to open and close cracks with the weather, and a builder's insurer will say so. Without dated photographs from before the work started, that argument is hard to win, and the cost of losing it is the repair bill.
The survey protects the builder or developer just as much. Older properties near a construction site are full of pre-existing cracking, and once machinery arrives, every one of them becomes a candidate claim. A baseline that already records those cracks, with widths, is the cheapest possible defence against a claim for damage that was there all along.
There is a third effect that nobody puts in writing. Site crews behave differently when they know the neighbouring properties have been documented. Vibration monitoring, piling method and load routes all get more thought when there is a record to be compared against at the end.
Excavation next to an existing dwelling is the classic trigger for a dilapidation survey. The risk is not usually the digging itself but the removal of lateral support and the vibration from piling and rock breaking, both of which can show up as cracking in a neighbouring building weeks after the plant has left the site.
## What is the difference between a dilapidation survey and a dilapidation report?
In everyday Australian practice the two terms are used interchangeably, and nobody in the industry will misunderstand you if you use the wrong one. Strictly speaking, the survey is the inspection, meaning the time on site with a camera and a crack gauge, and the report is the document that inspection produces.
The only place the distinction matters is in a quote. If a price is given for a "survey", check whether it includes the written report and the photographic schedule, or whether those are billed separately. Reputable providers quote the whole thing as one deliverable. Ask, and get the answer in writing.
## Do neighbours have to get a dilapidation report survey?
This question has two different answers depending on who "have to" refers to, and mixing them up is the single most common source of conflict on these jobs.
**The party doing the construction is often obliged to arrange one.** In NSW this is routine: dilapidation reports appear as a standard condition of development consent. NSW Planning's standard residential conditions of consent require a dilapidation report before site work starts, prepared by a suitably qualified engineer, recording adjoining buildings, structures, works and public land, with a copy given to adjoining owners before work begins. If your development consent carries that condition, arranging the survey is not optional and the cost sits with the applicant. In Victoria the obligation more often arrives through the protection work provisions of the [Building Act 1993 (Vic)](https://www.legislation.vic.gov.au/in-force/acts/building-act-1993), through a council permit condition, or through a term in the build contract, rather than through a single statewide standard condition. Queensland is similar, with the requirement usually coming from the council approval or the contract.
**The neighbour being asked for access generally does not have to agree.** A neighbouring owner cannot simply be compelled to let an inspector walk through their house. Access to private property requires the owner's consent. This is why builders send letters rather than turning up, and why a refusal is so awkward for the developer: the consent condition says the report must be done, and the person whose property needs recording has no obligation to cooperate.
### What to do when a neighbour refuses access
If you are the builder or developer and the neighbour says no, do not treat that as the end of it. Do three things instead.
If you are the neighbour, the calculation runs the other way. Refusing feels like protecting your privacy, but it removes the dated record that would prove your case if damage does occur. You are entitled to say no. You are usually better off saying yes, on the condition that you receive a full copy of the report, which the NSW standard condition requires in any case. For more on where the council requirement comes from and what it obliges, see our guide to [council requirements for dilapidation reports](/articles/council-requirement-for-dilapidation-reports).
### Who pays if damage actually happens?
The consent condition names the developer, but the damage lands on the neighbour, and those are two different questions. The condition obliges the developer to produce a report. It does not decide liability for damage, and it does not create an automatic entitlement to a repair.
If damage does occur, the usual route is a claim against the builder or developer, most often through their public liability insurance, with the pre-construction and post-construction reports as the evidence of change. Where that is refused or ignored, the next steps depend on the amount and the state: a claim in the local court, a tribunal application, or in NSW a matter that may fall under [NSW Fair Trading](https://www.fairtrading.nsw.gov.au/housing-and-property/building-and-renovating) complaint processes if a licensed builder is involved. Some homeowners also claim on their own building insurance and let their insurer pursue recovery.
Two practical points. First, the neighbour is not obliged to accept the developer's report as the last word. If the developer's report is thin, an independent survey commissioned by the neighbour is worth the fee, and it is one of the more common reasons people call us. Second, take your own dated photographs regardless. They cost nothing, and a homeowner's own timestamped photo set has settled more of these arguments than most people expect.
We are inspectors, not solicitors. We can establish and document what changed and when. Whether that gives you a cause of action, and against whom, is a question for a solicitor.
## Who can do a dilapidation report in NSW?
There is no licence category in NSW called "dilapidation surveyor". Nobody is registered specifically for this work, which is why the question comes up so often and why the answers online conflict.
What matters is the wording of the document creating the obligation. NSW Planning's standard residential consent condition specifies a report prepared by a suitably qualified engineer. Other consents, and most building contracts, use broader wording that a licensed building inspector or a building consultancy can satisfy. Read the exact clause before you engage anyone, because a report from the wrong category of professional can be rejected by the certifier and has to be done again at your cost.
Whoever prepares it, check three things before you commit:
Interstate the framing shifts. Victoria works largely through the building surveyor and the protection work process under the Building Act 1993, so the relevant professional is often nominated through that process rather than chosen freely. In Queensland the practical answer is a licensed building inspector for standard residential work, with a registered structural engineer brought in where deep excavation or piling raises the structural risk. Whoever you engage in Queensland, their licence can be checked on the [QBCC](https://www.qbcc.qld.gov.au/) register before you pay a deposit, and QBCC's guidance on [damage to your property from neighbouring building work](https://www.qbcc.qld.gov.au/complaints-disputes/building-work-issue/damage-your-property-neighbouring-work) explains how such claims are treated once damage is alleged.
## How much does a dilapidation report cost in Sydney and Melbourne?
Costs move, so treat these as indicative ranges as at August 2026 and get a written quote for your property. Every figure below depends on three things: the size and complexity of the property, the number of adjoining properties that have to be recorded, and whether the post-construction comparison survey is included in the price or billed separately.
| City | Residential | Commercial |
|---|---|---|
| Sydney | $800 to $1,500+ | $1,800 to $2,500+ |
| Melbourne | $750 to $1,400+ | $1,700 to $2,300+ |
**Sydney.** A standard residential dilapidation report often starts around $800 and rises above $1,500 where the property is large, access is difficult, or both internal and external coverage is needed. Commercial sites commonly start around $1,800 and climb where there are multiple tenancies, car parks, loading areas or public assets to document. Sydney sits at the top of the national range, driven by demand from infrastructure work and dense infill development.
**Melbourne.** Pricing runs slightly below Sydney, typically $750 to $1,400 or more for residential and $1,700 to $2,300 or more for commercial. Heritage overlays are the most common reason a Melbourne job lands well above the range, because heritage fabric needs far more documentation per square metre than modern construction.
Two traps are worth knowing about. First, an exterior-only report is cheaper by roughly $200 to $400 on a house, and it is a false economy if the risk is vibration or loss of lateral support, because that damage shows up internally first. Second, if the pre-construction survey is quoted alone, the post-construction survey is a second fee, and without it the first one has done half a job. Ask for both prices up front. Our full guide to [dilapidation report cost](/articles/dilapidation-report-cost) breaks down every pricing factor, including express turnaround surcharges and the cost of return visits where access fails the first time.
## How long does a dilapidation report take?
Two separate timeframes, and people usually conflate them.
The site inspection itself is quick. A small unit takes one to one and a half hours. A standard three bedroom house takes one and a half to two and a half hours and produces somewhere between 100 and 200 photographs. A large family home runs two and a half to four hours. Commercial and heritage properties can take a full day.
The written report takes longer than people expect, because every photograph has to be indexed, described and cross-referenced to a location. Across the industry, five to ten business days from inspection to delivered report is the standard turnaround, and allowing that much again for quoting and scheduling is realistic. Express turnaround inside 24 to 48 hours is usually available elsewhere and usually carries a surcharge of 25 to 50 percent. Owner Inspections delivers within 24 hours as standard rather than as a paid extra, which matters when a start date on site moves forward without notice.
The practical point is to book early. A consent condition that says the report must be complete before site work starts means the clock is already running, and a rushed survey is exactly the kind that turns out to be thin when it matters. The full [dilapidation report process](/articles/dilapidation-report-process-a-walkthrough-of-key-steps) walks through each stage from consultation to delivery.
## How detailed is a dilapidation report?
This is where dilapidation surveys quietly separate into two categories: records that decide a dispute, and records that turn out to be worthless when someone finally needs them.
Owner Inspections prepares [expert witness reports](/expert-witness-reports) and [insurance claim assessments](/insurance-claim-assessments), which means we regularly read other people's dilapidation reports years after they were written, at the point where money turns on them. The difference between the useful ones and the useless ones is consistent enough to list.
That is what a properly recorded defect looks like. The crack is circled so it can be found again by someone who was never there, and it carries a reference code tying the photograph to a written description elsewhere in the report. Two years later, that reference is what allows an inspector to return to the same brick and measure whether anything has moved.
The single most common failure, though, is not a bad pre-construction survey. It is a pre-construction survey with nothing to compare it against, because nobody booked the second one when the scaffolding came down.
A dilapidation record is a matched pair. The pre-construction survey establishes what was there, and the post-construction survey establishes what changed. Booking only the first is the most expensive mistake on this page, because it costs the full fee and delivers none of the protection.
### What a report needs to contain to be worth anything later
### What makes a report weak or unusable in a dispute
### Why millimetres matter more than adjectives
The reference point used across the Australian industry is the damage classification in AS 2870, the Australian Standard for residential slabs and footings, which sorts wall cracking into categories from 0 to 4. Category 0 is hairline cracking below 0.1 mm and category 1 is fine cracking below 1 mm, both of which are ordinary in Australian housing and expected in almost any property over a few years old. Category 2 covers noticeable cracks up to 5 mm, category 3 covers 5 mm to 15 mm, and category 4 covers 15 mm to 25 mm and is treated as severe.
The point of recording a width is that categories can be compared. A report that says a crack to the north elevation brickwork was 1.5 mm at its widest lets a later inspection say whether that crack has moved into a different category. A report that says "minor cracking noted throughout" cannot support any conclusion at all, in either direction, which is why it helps nobody.
None of this is exotic. It is the difference between an inspector documenting a property and an inspector documenting a property with the later argument in mind. When you review that sample report, look for the crack gauge in the photographs and the millimetre figures in the text. Together they tell you which kind of provider you are dealing with.
## What are the benefits of getting a dilapidation report?
Three, and they are worth stating plainly.
**It settles causation before it becomes a fight.** Most disputes about construction damage are not really about the repair. They are about whether the damage is new. A dated baseline answers that in an afternoon rather than through months of correspondence between insurers.
**It supports an insurance claim.** If damage does occur, an insurer or a builder's public liability policy will ask for evidence of prior condition. Having it makes a claim assessable. Not having it can be the reason a legitimate claim stalls.
**It satisfies the condition that required it.** Where a development consent or contract term names a dilapidation report, a compliant report removes an obstacle to an occupation certificate. Where a post-construction report is also required, missing it can delay certification at the worst possible moment.
Owner Inspections prepares independent [dilapidation reports](/dilapidation-reports) across NSW, Victoria and Queensland, for developers meeting a consent condition and for neighbours who want their own record. We are building consultants, not solicitors: we establish and document condition, and where a dispute needs legal advice, that is a matter for your solicitor.
### Owner Builder Coordination: How to Manage Trades, Quotes and Site Records Across a Build
Source: https://ownerinspections.com.au/articles/owner-builder-coordination-trades-quotes-site-records
Published: 2026-08-26 | Category: New Construction
Author: Maison Azdari
Owner builder coordination comes down to four systems: a permit and approvals file opened before any work starts, written quotes that all price the same scope, a staged schedule that respects trade dependencies, and one central set of site records covering permits, quotes, invoices, inspection reports and warranties. Get those four right and the build is manageable. Get the records wrong and the problem surfaces years later, when you try to sell.
You only have to watch television shows like The Block to understand that taking on an owner builder project can be an exciting and potentially rewarding proposition.
To start with, you get to build something exactly how you want it. You have more control over your budget, your timescale, the decisions that need to be made, and the quality of the work completed.
However, you are also the person responsible for keeping everything moving smoothly. There are a lot of moving parts: organising tradies, comparing quotes, managing paperwork, and making sure each stage of the build happens in the right order.
It sounds like a lot, and it is. Some people do bite off more than they can chew. But with a bit of planning and a good system in place, it is far more manageable than you might expect. Here is how to manage everything from trades and quotes to site records, across the entire build.
## What Permits and Approvals Do You Need Before You Start?
An owner builder permit or certificate of consent is required in NSW, Victoria and Queensland once the value of work passes a state threshold, and it has to be in hand before work begins. The thresholds are more than $10,000 in NSW, more than $16,000 in Victoria and more than $11,000 including GST in Queensland, counting both labour and materials.
Before any of the coordination matters, you need to be legally allowed to coordinate at all.
The course requirement is where people most often assume the states are the same when they are not. Queensland requires an approved owner builder course from every applicant before the permit is issued. NSW only requires the approved education once the cost of the work reaches $20,000, which means a smaller job can need a permit without needing the course. Victoria does not mandate an equivalent course for the certificate of consent at all, though construction induction training may still apply to you on site.
There is also a limit on how often you can do this. Queensland allows one owner builder permit every six years in most cases. NSW applies a five year restriction, and holding a permit inside that window requires special circumstances to be evidenced and assessed. A second project sooner than that is not automatically available to you in either state.
The official starting points are [NSW Fair Trading on becoming an owner builder](https://www.fairtrading.nsw.gov.au/housing-and-property/building-and-renovating/becoming-an-owner-builder), [Consumer Affairs Victoria on owner builders](https://www.consumer.vic.gov.au/housing/building-and-renovating/owner-builders), and the [QBCC's owner builder permit application page](https://www.qbcc.qld.gov.au/home-owner-hub/owner-build/apply-owner-builder-permit).
The point people miss is what the permit actually does. It does not just authorise you to build. It transfers to you the legal responsibility a licensed builder would otherwise carry, including defect liability and the statutory warranty obligations that follow the property when you sell it. You are not only the project manager. You are the builder, in the eyes of the law.
## What Does an Owner Builder Actually Coordinate?
An owner builder coordinates people and paperwork far more than tools. The role covers hiring and sequencing trades, ordering materials, booking inspections, tracking a budget against incoming invoices, applying for permits and approvals, and storing the records that prove the work was done properly.
When people think about an owner builder, it is natural to picture someone swinging a hammer or laying bricks. In reality, a large part of the role is organising people and keeping the project on track.
You need to hire tradies, order materials, book inspections and make sure everyone knows when they are expected on site. You need to keep an eye on your budget and store important paperwork.
On top of that there are building permits and approvals to apply for, quotes and contracts to draw up, site inspections to complete, invoices and receipts to follow up, and warranties and manuals to collect.
Effectively, you are doing a lot of project management work as well as the physical work.
## How Do You Plan Your Build Before Trades Arrive?
Map the major stages of the build before anyone starts work, because trade dependencies decide the order. An electrician cannot rough in until the frame is complete, and a plasterer cannot start until plumbing and electrical rough-ins are signed off. Have a timeline, material delivery dates, trade contacts, a budget with contingency, and your permit and insurance certificates ready first.
In the excitement of getting started, a common mistake first-time owner builders make is jumping straight into construction without spending enough time on planning.
If you know what needs to happen first and when, it becomes much easier to organise your tradies and avoid unnecessary delays.
It can be difficult to keep up, especially for those new to coordinating builds. That is why many professionals use job management software to help them stay on track. It provides a centralised place to keep quotes, schedules, invoices and site notes, so instead of searching through emails or paperwork, everything is easy to find when you need it.
Before you give the green light for work to begin, try to have the following ready:
Generally speaking, the more organised you are at the start, the smoother the rest of the project will be.
## How Can You Get and Compare Quotes Effectively?
Ask every contractor for a written quote covering labour, materials, estimated completion time, payment terms and exclusions, then check they are all pricing the same scope. Price alone is a poor comparison, because the cheapest quote is often the one that excludes rubbish removal, site clean or making good. Verify licence and insurance before any work begins.
Human nature dictates that you will naturally be drawn to the company giving you the cheapest quote, especially when you are trying to stick to a budget. But price is only one factor when deciding which tradies to hire and which materials to buy.
A good quote should cover:
When comparing quotes, make sure everyone is pricing the same job. If they are not, you may find one contractor includes rubbish removal while another does not, which is the only reason they look cheaper.
Check that your contractor holds the right licence and insurance before any work begins. Licence status can be checked free on your state regulator's public register, and it takes two minutes. If you are unsure about something in a quote, ask. You are better off knowing before you start than assuming and discovering later that it was not what you anticipated.
## What Is the Best Way to Schedule Multiple Trades?
Break the project into sequential stages and leave deliberate buffer between them. Most trades depend on someone else finishing first, so a single delay propagates through every downstream booking. The workable order runs site preparation, foundations, framing, roofing, rough-ins, insulation, plastering, painting, flooring and final fit-off.
One of the trickiest parts of being an owner builder is getting the timing right. Any delay or misunderstanding quickly affects the rest of your schedule.
The simplest way to stay organised is to break the project into stages:
Leave yourself breathing room between trades for the things that will go wrong: bad weather, supply chain issues, delays in site inspections, or unexpected repairs.
## Which Inspections Do You Need to Book, and When?
Two different kinds of inspection happen on an owner builder site. Mandatory inspections are carried out by your building surveyor or certifier at the hold points named in your building permit, and work cannot legally continue past a hold point until it is signed off. Independent [stage inspections](/new-construction-stage-inspections) are booked by you to check the quality of the work before it is covered up.
Confusing the two is a costly mistake.
Mandatory inspections confirm compliance with the permit and the National Construction Code. They are not a quality check, and the certifier is not acting for you.
Independent stage inspections are at your discretion. The critical windows are the same on almost every build:
As an owner builder you carry the defect liability yourself, which flips the maths on independent inspections. A licensed builder's client can pursue the builder for defective work. You have no builder to pursue, only the individual trade, and only if you can show what they did and when. A written, photographed inspection report at each stage is the evidence that makes that possible.
For the full sequence and how much lead time each booking needs, see our guide on [when to book each stage inspection](/articles/when-to-book-stage-inspections-timeline).
Book a Construction
Stage Inspection
}
buttonHref="/new-construction-stage-inspections"
variant="secondary"
/>
## How Can You Keep Your Build on Time and Within Budget?
Check in weekly rather than waiting for something to go wrong. Compare progress against the original timeline so you can see which downstream bookings need to move when a stage slips, and check every invoice against the original quote as it arrives. A variation is not a problem in itself. An undocumented variation is.
The most successful projects finish on time and within budget, and the easiest way to make that happen is to review both on a fixed cadence.
Doing this weekly is how you avoid a domino effect, where one slipped stage quietly pushes five trades out of sequence before anyone notices.
Do the same with your budget. As invoices arrive, compare each one against the original quote so there are no nasty surprises. Where the scope genuinely changed, get the change in writing, with a price, before the work happens.
## What Site Records Do You Need to Keep, and for How Long?
Keep one central, backed-up file containing your permit, approved plans, every quote and contract, all invoices and receipts, trade licence and insurance certificates, certifier sign-offs, independent inspection reports, warranties and compliance certificates, and dated progress photographs. Keep it for at least your state's statutory warranty period, which is six years for structural defects in NSW and Queensland and ten years in Victoria.
This is the part owner builders most often get wrong, because the consequences do not arrive during the build. They arrive at sale.
## What Happens When You Sell an Owner Builder Home?
Selling is where the paperwork gets audited. Victoria requires a defects report from a registered building practitioner, no more than six months old, before an owner builder sells within six years and six months of completion. NSW requires a consumer warning in the contract of sale if you sell within seven years and six months of the permit being issued. Queensland requires notice to the buyer.
This is where owner builders discover what they failed to keep.
In Victoria, the obligation sits in section 137B of the [Building Act 1993](https://www.legislation.vic.gov.au/in-force/acts/building-act-1993). The defects report is required for all the work regardless of its value, and domestic building insurance is separately required where the work exceeded $16,000. This is a genuine stop-sign: without the report, the sale cannot properly proceed. Our guide to [the S137B Building Act and its importance](/articles/importance-of-s137b-building) covers what that report has to establish.
In NSW, the contract for sale must carry a consumer warning stating that an owner builder permit was issued for the land, and the date it was issued, where the sale falls within seven years and six months of that date. Leaving it out is a breach that can expose you to penalties and can allow the buyer to rescind. The warning exists because work done by an owner builder is not covered by home building compensation insurance, and the buyer is entitled to know that. Statutory warranties still apply to the work as they would to a licensed builder, running six years for major defects and two years for other defects.
In Queensland, the buyer must be given notice of the owner builder work. In all three states, the warranty obligations follow the property, not your intentions.
The practical implication is simple. The site records you keep during the build are the same records that let you sell cleanly at the end of it. Requirements differ by state, and our breakdown of [owner builder inspection requirements by state](/articles/owner-builder-inspection-requirements-by-state) sets out what each regulator expects.
### The apartment above flooded my ceiling, who pays?
Source: https://ownerinspections.com.au/articles/upstairs-apartment-flooded-my-ceiling
Published: 2026-08-26 | Category: Insurance Claims
Author: Maison Azdari
Whoever the water came from pays, not whoever it landed on. If the leak started inside the lot above, from their shower, their flexible hose or their appliance, that owner and their insurer are on the hook. If it started in something the owners corporation or body corporate is responsible for, such as a shared pipe, a slab, a boundary structure or the original waterproofing membrane, the scheme pays. Almost every fight about a ceiling leak is really a fight about that one question, and it is answered by finding the source rather than by arguing about the stain on your ceiling.
## Who Pays for a Leak From the Apartment Above?
Responsibility follows the source of the water, not the ceiling it ruined. Three parties can end up paying: the owner of the lot above, the owners corporation or body corporate, or an insurer standing behind one of them. Which one it is depends on whether the failed component sits inside the upstairs lot or forms part of common property, and that is a question of fact rather than opinion.
The three most common sources in Australian apartments behave quite differently.
## Is the Leak Common Property or the Lot Above?
The boundary between the upstairs lot and common property is set by the state's strata law and by the registered plan, and it decides who repairs the source. The three east coast states draw that line in genuinely different places, so the same shower failure can be the owner's problem in one state and the scheme's in another.
In NSW, the owners corporation's duty to maintain and repair common property sits in section 106 of the Strata Schemes Management Act 2015, and NSW Fair Trading publishes a [common property memorandum](https://www.nsw.gov.au/sites/default/files/2022-03/common-property-memorandum.pdf) that lists component by component who repairs what. Victoria's split is set out by Consumer Affairs Victoria across its guidance on [maintaining common property](https://www.consumer.vic.gov.au/housing/owners-corporations/property-maintenance/maintaining-and-improving-common-property) and on [maintaining individual lots](https://www.consumer.vic.gov.au/housing/owners-corporations/property-maintenance/maintaining-and-renovating-individual-lots). Queensland publishes the clearest diagrams of the three, for [building format plans](https://www.qld.gov.au/law/housing-and-neighbours/body-corporate/maintenance/format-plan/building) and separately for [utility infrastructure](https://www.qld.gov.au/law/housing-and-neighbours/body-corporate/maintenance/utility).
Cracked tiles running out from a floor waste, like the ones marked above, are one of the ordinary ways a bathroom above starts leaking into the ceiling below. The tile is rarely the real problem. What matters is whether the membrane underneath has failed with it, because that is the layer the boundary rules are actually about.
## Are Water Leaks Covered by Strata Insurance?
Usually yes for the building itself, and this surprises people who assume they need to claim on their own policy. Strata insurance covers the building and common property, which includes the ceiling lining, cornices and paintwork the water destroyed. Your own contents insurance covers your possessions, so a soaked sofa, rug or television is your claim rather than the scheme's.
Two practical points decide how smoothly it runs.
## What Should I Do if Water Is Coming Through My Ceiling?
Act in the first hour, because the evidence disappears as the ceiling dries. The order below protects both the building and your position if the claim is later disputed.
## How Much Does It Cost to Repair a Ceiling After Water Damage?
There is no single figure, because the cost is driven by how far the water travelled rather than by the size of the stain. A cosmetic stain on an otherwise sound ceiling is a paint job. A ceiling where the plasterboard has lost its strength, the insulation is saturated and the light fittings have been wet is a strip out, a dry out and a rebuild.
The variables that actually move the number are the extent of saturated lining and insulation, whether electrical work is involved, whether mould has established in the cavity, and whether you have to move out while the space dries. That last one is often the largest single item and the one people forget to claim.
Once a damaged ceiling is opened up, the affected area is routinely larger than the visible stain suggested. This is the practical reason not to settle a figure before the extent has been established.
## Can Strata Make Me Pay for the Repairs?
Yes, if the source of the water is inside your lot and is your responsibility to maintain. A scheme can pursue you for the repair of the building and commonly for the policy excess as well, and a burst flexible hose or a failed shower screen inside your own bathroom is the standard example.
The obligation runs the other way too. In NSW, where the leak came from common property and the owners corporation failed in its repair duty, section 106 of the Strata Schemes Management Act 2015 lets an affected owner recover reasonably foreseeable loss as damages for breach of statutory duty, subject to a time limit that runs from when the owner first became aware of the loss. Missing that window is a real risk in slow moving strata disputes, so get advice on timing early rather than late.
Where a leak persists and the scheme will not act, the escalation path is the state tribunal: NCAT in NSW, VCAT in Victoria, and the Body Corporate and Community Management Commissioner's dispute resolution service in Queensland. Owner Inspections produces the evidence those bodies rely on. Whether to bring the application, and under which section, is a question for a solicitor.
## Where an Independent Report Changes the Outcome
Most ceiling leak disputes stall because nobody has proven the source, and everybody has an opinion. The strata manager suspects your neighbour, your neighbour blames the building, and the insurer's assessor writes a conclusion without the moisture readings that would support it.
An independent inspection settles the three things the argument is actually about. It identifies where the water entered, using moisture mapping and thermal imaging rather than assumption. It separates the failed component from the damage it caused, so the boundary rules can be applied to the right item. And it records the full extent with measurements and dated photographs, which is what stops a scope being negotiated down to the visible stain. A [strata report](/strata-reports) covering the building's condition is a different product from a targeted [insurance claim assessment](/insurance-claim-assessments) of one event, and for a live leak it is the second one you want.
### Guiding High-Net-Worth Clients Through Complex Commercial Real Estate Acquisitions
Source: https://ownerinspections.com.au/articles/guiding-high-net-worth-clients-through-commercial-real-estate-acquisitions
Published: 2026-08-24 | Category: Building Inspections
Author: Maison Azdari
Guiding a high-net-worth client through a commercial acquisition comes down to three things: speaking in numbers rather than adjectives, surfacing problems before the buyer's own advisers find them, and running due diligence, finance and settlement in the right order. Commercial buyers at this level are analytical, time-poor, and surrounded by professionals who will check every claim you make. The agent who wins the mandate is the one who behaves like a member of that advisory team rather than a salesperson.
Commercial real estate acquisitions are a high-stakes endeavour. Something as ordinary as a signed contract and a handshake can be the guiding hand that moves millions of dollars from one account to another.
With that being the case, agents and commercial vendors need to become exceptional at helping high-net-worth clients reach a purchasing decision and close the deal. This is easier said than done. From sales psychology to the nitty-gritty of the acquisition process, there is a lot to internalise before you become a genuinely capable commercial operator.
This article is a guide to navigating that world: how these clients think, how you earn their trust, what due diligence a commercial deal actually requires in Australia, and the order in which the steps need to happen.
## How Do High-Net-Worth Commercial Buyers Make Decisions?
High-net-worth commercial buyers decide on logic and analytical soundness, not emotion. They expect a quantifiable, data-driven case built on cash flow projections, occupancy, WALE, net versus gross yield and comparable transactions, delivered by someone who respects their time. Match that register and they treat you as an adviser rather than a counterparty.
High-net-worth clients are some of the busiest and most discerning people you will ever meet. Whether they have a friendly demeanour or a cold one, it is in your interest to treat them with the same professional standard either way.
They expect you to uphold that standard and not waste their time. They also do not lead with emotion. They lead with logic and analytical soundness. So present your case in a quantifiable, data-driven way.
For instance, instead of asserting that the property is in a prime location, explain how that location is positioned to keep appreciating, or how it delivers higher rental yields and lower vacancy rates than comparable stock nearby. Support the case with established financial metrics: cash flow projections, occupancy rates, WALE, net versus gross yield, and historic transactions of similar commercial buildings.
If liquidity is the constraint rather than conviction, point them toward finance early rather than late. Ardent Capital's commercial property loan services in Australia are trusted providers in that regard, and having a finance path mapped before the offer stage prevents the most common cause of a late collapse.
In short, get into the mind of these clients and match their register. Do that and they stop treating you as a counterparty and start treating you as an adviser, which is what gives them the confidence to commit.
### Speak in the Buyer's Units
## How Do You Build Trust With a High-Net-Worth Client?
You build trust with a high-net-worth client by demonstrating deep knowledge of the market and the asset, presenting openly and truthfully including the problems, and being accountable when something slips. These buyers read people well beyond the words, so evasiveness costs more than any defect you might be tempted to gloss over.
Buyers with the appetite and the balance sheet for commercial property are rare. Because this demographic appears so infrequently, every genuine lead has to be handled properly to improve your odds of getting the property off your hands and into theirs.
### Demonstrate In-Depth Knowledge
These clients only want to deal with people competent enough to get them what they want, and quickly. They do not have the time to sit through a junior's wordy slide deck. They want to talk to the person who can actually answer, and you have to be that person.
So understand the market and the state of the asset deeply before you are in the room. Learn the historic and present market conditions, rental trends and local economic developments. Know the building: its structure, its services, its plans, and what the inspection and condition reports actually found. Back all of it with data you can hand over.
When you show that level of command, the client can stop auditing you and start absorbing the information. They no longer have to doubt your expertise, which makes them far more likely to reach a decision.
### Practise Authenticity and Transparency
Another way onto these buyers' good side is to be open in how you present. Senior executives read people well beyond the words. Acting evasive or uneasy triggers alarm bells. Present information in a realistic, grounded and truthful way instead.
If they ask about a problem with the property, do not deflect to a different feature. Answer it. The last thing you want is a reputation ruined because you failed to disclose something the buyer needed to know before purchasing.
The practical answer is not to hope the problem goes unnoticed. It is to get the condition of the building independently established, disclose it, and price it. A buyer who is told about a defect up front, with a costed remediation figure attached, will usually proceed. A buyer whose own consultant discovers the same defect during due diligence will re-trade the price at best and walk at worst. If a particular problem is becoming a repeat dealbreaker, the right move is to fix it or price it properly rather than keep taking it to market untouched.
### Be Accountable
Finally, hold space to be accountable through the selling process. Show that you are reliable, and own the mistakes you will inevitably make along the way.
It is normal to slip or to fall short of something you promised. Rather than brushing it aside, acknowledge it, then rectify it on your own terms.
Remember they are putting a great deal of money on the line. It is normal for their emotions to run high at points. You should be the calm baseline by comparison. That is what makes you look dependable and professional over time, and it is how relationships get repaired and rebuilt across a career.
## What Due Diligence Does a Commercial Acquisition Actually Need?
A commercial acquisition in Australia needs due diligence across building condition, title and planning, tenancy and income, compliance, environmental history, and tax structure, all completed before contracts are exchanged. Commercial property is largely buyer-beware: the statutory protections and cooling-off rights of residential sales generally do not apply, so the investigation cannot wait until after exchange.
This is where most first-time commercial buyers, including very wealthy ones, are exposed, and where a good agent adds the most defensible value.
Commercial property in Australia is largely a buyer-beware market. The statutory warranties and disclosure regimes that protect residential purchasers are much thinner on the commercial side, and the cooling-off rights that apply to residential sales generally do not extend to commercial transactions. In practice that means the investigation has to be finished before contracts are exchanged, not after.
A defensible due diligence file usually covers:
Book a Commercial
Property Inspection
}
buttonHref="/commercial-property-inspections"
variant="secondary"
/>
## What Is the Process for Guiding a Client to a Commercial Purchase?
Guiding a client to a commercial purchase runs from clarifying their objective, through shortlisting, independent inspection and adviser coordination, to offer, finance approval and post-settlement handover. Finance is scoped at the first step, not the last, because valuation shortfalls and slow credit are among the most common late-stage killers.
Behaviour and first impressions are one thing. Actually moving a client to a completed purchase is a different skill set, spanning legal, financial and regulatory ground.
## Why Do Commercial Deals Fall Over Late?
Commercial deals fall over late because of undisclosed defects found in the buyer's own due diligence, valuations that land under the contract price, leases that do not match the rent roll, compliance surprises such as cladding and essential safety measures, and use rights that do not support the plan. Every one of these is findable before exchange.
Late-stage collapse is expensive for everyone, and the causes are repetitive:
### What does termite damage look like?
Source: https://ownerinspections.com.au/articles/what-does-termite-damage-look-like
Published: 2026-08-24 | Category: Pest Inspections
Author: Maison Azdari
Termite damage usually looks like nothing at all from the outside, because the surface is the last thing to go. Cut into affected timber and you find it hollowed out along the grain, layered like the pages of a wet book, with the galleries packed with a grey brown mix of soil and faecal material. From the room side, the giveaways are rippled or blistered paint, a plasterboard wall with a shallow sunken patch, a skirting that dents under thumb pressure, and a papery, hollow note when you tap the timber.
That gap between what the timber looks like and what it actually is explains almost every termite story in Australia. It gets found during a renovation, a bathroom refit or a [pre-purchase inspection](/pre-purchase-inspections), and by then the eaten section is well beyond the one board anyone noticed.
## What are the first visible signs of termites in a house?
The first visible signs are almost never the insects. They are mud tubes on a pier or foundation wall, paint that has gone rippled or blistered over a section of skirting or architrave, a soft or sunken patch in a plasterboard wall, a door or window that has started to stick, and small piles of discarded wings near a window in warm humid weather.
None of those are proof on their own. Blistered paint can be moisture. A sticking door can be seasonal movement. What makes them worth acting on is that they all sit in the same category: something has changed in a piece of timber you cannot see into.
## What do termite mud tubes and mud leads look like?
Mud tubes look like narrow, irregular ridges of dried soil stuck to a hard surface, running vertically up a pier, a stump, a foundation wall or the face of a slab edge. They range from pencil thickness to a flattened band several centimetres wide, and their colour matches the soil around the building, so they read as dirt smears until you look closely.
Subterranean termites build them because they need to stay in a humid, dark environment. The tube is a covered road between the nest in the soil and the timber they are eating. Where a tube crosses an obstacle it cannot tunnel through, such as a concrete stump cap, an ant cap or a slab edge, it gets built over the top. That is exactly why those elements exist: an ant cap does not stop termites, it forces them into the open where an inspector can see the bridging.
Heavy infestations go further than tubes. Once a colony is established inside a wall cavity or against a beam, it packs the void with mud rather than running a single lead, and the result is a solid crust of workings over the timber.
The beam above was opened up during works. The dense, honeycombed crust across the face is termite workings, not render or old mortar, and the timber underneath has lost a substantial part of its section. From the finished side of that wall, none of this was visible.
## What does termite damage look like on a wall or ceiling?
On a plasterboard wall, termite damage looks like a shallow depression or a soft patch that gives under light finger pressure, sometimes with faint raised lines where tunnels run behind the paper. On a ceiling it shows as a sagging line along a joist, staining that does not behave like a water leak, or a cornice that has pulled away in one section.
Plasterboard is a useful early indicator precisely because it is weak. Termites eat the paper lining and the timber behind it, so the sheet loses its support and dimples before anything structural announces itself. The trap is that all of this reads as moisture damage, and plenty of it gets patched and repainted as exactly that.
The distinction that matters is what is underneath. Water damage softens the plaster core itself and usually has a traceable source, such as a shower, a roof penetration or a failed flashing. Termite damage leaves the plaster core dry, and the softness comes from what has happened to the timber behind it.
## What does termite damage look like on a door frame, skirting or architrave?
On joinery, termite damage looks like a section of timber that has become a thin shell. The painted or veneered face survives because termites avoid open air, so they eat right up to the coating and stop. Push a fingernail into it and it collapses into layered fibres and mud rather than splintering.
Door jambs, architraves, skirting boards and window reveals are the most commonly reported findings in Australian homes for a simple reason: they sit at the bottom of a wall, close to the floor, right where a subterranean colony arrives, and they are softer than structural framing. They are also the elements most people can actually inspect without pulling anything apart.
Two cautions. First, if a section does break through, stop. An open gallery lets an active colony disperse. Second, a hollow note tells you the timber has lost section, not what caused it, and not whether the loss matters structurally.
## What does termite damage look like in a subfloor or roof space?
In a subfloor, termite damage shows as mud leads climbing piers and stumps, mud packing at the point where a bearer sits on a pier, and bearers or joists that look sound from below but sound hollow and collapse under a probe. In a roof space it shows as mud crusting along a truss bottom chord or a wall plate, usually where a wall cavity meets the ceiling.
These two spaces are where an inspection earns its money, because they are the only places in a finished house where structural timber is directly visible. They are also where damage runs for the longest before anyone notices, since nobody goes in there.
Roof spaces surprise people. Termites are associated with the ground, but subterranean species will travel the full height of a wall cavity to reach roof timbers, and in a two storey house the first evidence can be at ceiling level with nothing visible downstairs at all.
## Is it termite damage, rot, or borers?
Termite damage is layered along the grain with mud packed galleries. Fungal decay, which most Australians call rot, is dark, crumbly and cracks into cubes, and it always comes with a moisture source. Borer damage leaves round exit holes and fine powder. Confusing them matters, because each one points at a different repair and a different specialist.
The two most expensive mistakes here run in opposite directions. Treating termite damage as rot means chasing a leak that does not exist while a colony keeps eating. Treating rot as termites means paying for a chemical treatment that solves nothing, because the water is still coming in.
A fourth possibility gets missed entirely. Roof timbers can suffer chemical delignification, where the surface fibres break down and the member loses strength with no insect involvement at all.
## What do Australian termites actually look like?
Australian subterranean termites are pale, soft bodied insects roughly 3mm to 7mm long, often mistaken for white ants, though they are not ants at all. Workers are creamy white and blind. Soldiers have larger, harder, darker heads, and the shape of the soldier head is what a technician uses to identify the species.
The pale bodies and orange brown soldier heads in the photo above are typical of the destructive subterranean species. Termites differ from flying ants in three visible ways: a thick waist rather than a pinched one, straight beaded antennae rather than elbowed ones, and, in the winged forms, two pairs of wings of equal length.
The Australian Museum is a reliable public reference for identification if you want to compare what you have found against clear species photographs.
## How can you tell if termite damage is old or active?
You often cannot tell by looking, which is the honest answer. The indicators that suggest an active colony are damp, intact mud leads that rebuild within days of being broken, moisture inside hollow timber, live workings when a gallery is opened, and swarmers in warm humid weather. Dry, crumbling, abandoned galleries that stay broken suggest old damage.
Those indicators are suggestive rather than conclusive, and the distinction changes the size of the job completely. Old, treated damage is a carpentry problem. An active colony is a carpentry problem plus a management programme, and new timber put back into an untreated wall is simply more food.
This is where equipment earns its place. A [timber pest inspection](/timber-pest-inspections) under AS 4349.3 is visual and non invasive, so the inspector cannot cut walls open, but they can use moisture meters, thermal imaging, borescopes and microwave or radar detection to find activity inside timber and behind linings that stay closed. If a previous treatment was done, ask for the paperwork and check the warranty. Our guide to warning signs a termite treatment has not worked covers what a failed job looks like.
## How much damage is usually behind what you can see?
Almost always more than the visible area suggests, because what you can see is the point where the damage finally broke through a surface, not where it started. A dimpled patch of plasterboard the size of a hand routinely sits over a stud that has been eaten for most of its length, and the galleries commonly continue into the plate, the noggings and the adjacent studs.
That is why an assessment comes before a repair, not after. The remaining capacity of a structural member depends on the section that is left, which cannot be judged from the face, and load bearing elements need to be measured rather than eyeballed.
Where the damage is structural, a defect investigation records the extent, the affected members and the remedial scope, which the builder then prices and works to. Replacing a stud is trivial. Replacing a stud that was carrying a roof beam, without propping first, is not.
## Should you be worried about termite damage in a house you are buying?
You should treat it as a pricing and scope question rather than an automatic reason to walk away, but only once you know whether the colony is active and whether the damage is structural. A pre-purchase building and pest inspection is the mechanism for finding that out before the contract becomes unconditional.
Timber pest inspections are visual and non invasive by standard, so concealed damage inside a wall cavity is usually outside scope. That is a limitation to plan around, not a reason to skip the inspection: an inspector who finds mud leads in an accessible subfloor has told you something a builder walking through the house will not. The article on DIY versus professional timber pest inspections sets out what the two actually differ on.
New construction has its own protections. Termite risk management is a requirement of Volume Two of the National Construction Code, and the relevant standard for new buildings is AS 3660.1. A management system, whether chemical, physical or a combination, is not optional in most of the country, and it needs a durable notice recording what was installed.
## Is termite damage covered by insurance?
Almost never. Australian home building policies routinely exclude damage caused by insects, vermin and gradual deterioration, on the basis that termite damage is a maintenance issue rather than a sudden accidental event. Read your own product disclosure statement rather than relying on a general statement, but do not build a repair plan around a claim.
Where a dispute does arise it is usually about a recent build, inspection or treatment rather than about the insurer, and state consumer bodies run complaint and conciliation processes for building work, including NSW Fair Trading and Consumer Affairs Victoria.
Owner Inspections is an inspection company, not a law firm. We can establish what the damage is, how old it appears to be, whether it was reasonably detectable and what a proper repair involves. Whether anyone is legally liable for it is a question for a solicitor.
## What should you do if you think you have found termite damage?
Leave it alone, photograph it, and book a timber pest inspection before anyone touches the timber. Those three steps in that order protect both the evidence and the house. Spraying, scraping or opening up the damage scatters an active colony and removes the information a technician needs.
The order is the point. Repairing before the extent is established means paying twice when more damage turns up behind the next sheet.
## Frequently asked questions
### No fire separation between garage and roof space: is it a defect?
Source: https://ownerinspections.com.au/articles/no-fire-separation-garage-roof-space
Published: 2026-08-19 | Category: Defect Investigation
Author: Maison Azdari
In a standalone house, usually not. The National Construction Code does not require a fire rated wall or ceiling between a Class 1a dwelling and its own attached garage, so a roof space that runs unbroken from over the garage into the rest of the house is normally compliant, however wrong it looks from the manhole. It becomes a defect in three situations: where that wall is a separating wall between two attached dwellings, where the garage underneath belongs to a different dwelling, and where the building is a Class 2 apartment block. In those cases the separation is required, and an open roof space is a serious fire safety defect rather than a cosmetic one.
## Does the NCC Require Fire Separation Between a Garage and the House?
Not between a house and its own attached garage. A private garage is a Class 10a building, the house is Class 1a, and where the garage is associated with that dwelling the [Class 1 and 10 fire safety provisions](https://ncc.abcb.gov.au/editions/ncc-2022/adopted/volume-two/h-class-1-and-10-buildings/part-h3-fire-safety) do not call for a fire resistance level between the two. The plasterboard on the garage side of that wall is there for lining and thermal reasons, not as a fire barrier.
That surprises people, so it is worth being precise about what the code is actually protecting against. The fire separation rules in NCC Volume Two run in three directions, and none of them point at your own garage:
Read the [scope of Section 9](https://ncc.abcb.gov.au/editions/ncc-2022/adopted/housing-provisions/9-fire-safety/part-91-scope-and-application-section-9) and the pattern is clear enough: every fire separation provision in it is about protecting one building or one dwelling from another, and a Class 1a does not need protecting from its own associated private garage. The code treats the house and its garage as a single occupancy with one set of occupants, all of whom leave through the same doors.
## When Is an Open Roof Space Above a Garage an Actual Defect?
When more than one dwelling shares that roof space. The moment a second household is on the other side of the wall, the code requires a continuous fire barrier from the footings to the roof, and a roof space that runs over the top of it defeats the entire wall beneath. Three configurations trigger it.
Building Commission NSW lists this failure in its [Building Defects Library](https://www.nsw.gov.au/departments-and-agencies/building-commission/building-and-construction-resources/building-defects-library), where walls that are meant to separate fire compartments but do not extend to the underside of the floor or roof above are recorded as a recognised defect type. Fire safety sits behind only waterproofing in the Commission's research on serious defects in NSW strata buildings, so this is not a rare or theoretical failure.
## What Should a Separating Wall Look Like in the Roof Space?
It should be a solid, unbroken wall that carries on past the ceiling and finishes hard against the roof itself. [Part 9.3 of the ABCB Housing Provisions](https://ncc.abcb.gov.au/editions/ncc-2022/adopted/housing-provisions/9-fire-safety/part-93-fire-protection-separating-walls-and-floors) requires a separating wall between Class 1 buildings to have an FRL of 60/60/60 and to extend to the underside of a non-combustible roof covering, or to at least 450 mm above a combustible one. Stopping at ceiling height is not an option the code offers.
Once you are in the roof space with a torch, these are the details that decide whether it was built properly:
The last two are where most real failures sit. A wall built correctly at frame stage is often breached weeks later by an electrician, an antenna installer or an air conditioning contractor who needed to get a cable across and had no reason to know what the wall was for.
## What if the Dwelling Sits Above Someone Else's Garage?
Then the floor between you and that garage has to be rated, and this is one of the few places the code protects a dwelling from a garage directly. [Part 9.4](https://ncc.abcb.gov.au/editions/ncc-2022/adopted/housing-provisions/9-fire-safety/part-94-fire-protection-garage-top-dwellings) applies where a Class 1a dwelling sits above a Class 10a private garage that is not associated with it, a common arrangement in tandem townhouse developments and in older flats built over a row of lock up garages.
The floor separating the two must do one of three things: incorporate a ceiling or soffit with a resistance to the incipient spread of fire of at least 60 minutes, achieve an FRL of at least 30/30/30 when tested from the underside, or carry a fire protective covering on its underside including any beams within it. Where the dwelling sits above both its own garage and someone else's, the two garages must be separated from each other by a wall with an FRL of 60/60/60 tested from the non-associated side.
## Are You Thinking of the American Rule?
Quite possibly, and it is worth naming because it drives most of the confusion online. The American residential code requires a garage attached to a dwelling to be separated by gypsum board on the garage side, with a heavier fire rated board where habitable rooms sit above, plus a self closing door. Australia has no equivalent requirement for a garage associated with its own dwelling.
That distinction matters when you are reading advice on forums. Half the answers about garage ceilings, fire rated linings and self closing doors are describing a code that does not apply here, and following them will have you chasing a builder over something the NCC never asked for. The Australian question is not whether the garage is lined, it is whether a second dwelling is on the other side of that wall.
## How an Inspector Checks It, and What to Do if Yours Is Missing
An inspector opens the manhole, gets into the roof space and follows the line of the wall below to see whether anything continues above the ceiling. On a duplex or townhouse that is a standard part of a pre-purchase or handover inspection, because the wall is either there or it is not and no amount of finished plasterwork downstairs tells you which. The report should record the location, what was found and a photograph, because that photograph is what a builder, a certifier or a tribunal will actually respond to.
If the separation is missing on an attached dwelling, do not let it be argued about verbally.
Owner Inspections carries out the inspection and produces the report. Whether a builder is legally obliged to rectify at their cost, and what happens if they refuse, is a question for a construction solicitor once the evidence exists.
### Can I walk away from a new build during cooling off?
Source: https://ownerinspections.com.au/articles/walk-away-from-new-build-cooling-off
Published: 2026-08-17 | Category: New Construction
Author: Maison Azdari
Yes, if you are still inside the cooling off period on the right contract. A new build normally involves two separate contracts, the land contract and the building contract, and each runs its own cooling off clock on its own dates. On the building contract you get five business days in Victoria, New South Wales and Queensland, and it starts when you receive the signed copy back from the builder, not on the day you signed. Most people asking this question are either past that window already or looking at a preliminary agreement that never carried a cooling off right in the first place.
## How Long Is the Cooling Off Period on a New Build Contract?
Five business days on the domestic building contract, in Victoria, New South Wales and Queensland alike. The contract value threshold is where the states differ. Victoria attaches the right to a [major domestic building contract](https://www.consumer.vic.gov.au/housing/building-and-renovating/plan-and-manage-your-building-project/contracts), meaning multi-trade work worth more than $10,000. New South Wales applies it to [contracts valued over $20,000](https://www.nsw.gov.au/housing-and-construction/compliance-and-regulation/your-obligations-to-your-customers/guide-to-providing-home-building-contracts). Queensland requires cooling off advice in any contract for building work over $3,300.
A build almost never fails inside five days. That is the honest problem with cooling off as a safety net: the window closes long before the slab is poured, and by then it is the contract, not the statute, that decides what you can do.
## When Does the Cooling Off Clock Actually Start?
It starts when you receive the signed copy back from the builder, not on the day you signed. Consumer Affairs Victoria puts it directly in its [checklist for getting out of a building contract](https://www.consumer.vic.gov.au/housing/building-and-renovating/checklists/getting-out-of-a-building-contract): the period runs from the date you received the copy signed by the builder, regardless of when you signed it. Queensland starts the count the day after you receive the entire contract.
Two things can extend that window, and both are worth checking before you assume you are out of time.
That last point is a trade rather than a trap. You swap five days of hindsight for a proper review before you sign, which is usually the better deal.
## Does Cooling Off Apply to the Tender I Signed First?
Often not, and this is where most new build owners lose the right without knowing it. Volume builders commonly take a deposit against a tender, preliminary agreement or authorised tender acceptance months before the real building contract appears. Consumer Affairs Victoria treats a [pre-construction contract](https://www.consumer.vic.gov.au/housing/building-and-renovating/plan-and-manage-your-building-project/pre-construction-contracts) covering only a soil report as something short of a building contract, but says that once it covers design, specifications, permits or other building work, it is a building contract.
That distinction decides everything. If your document is genuinely only a soil test authority, there is no statutory cooling off right in it. If it went further and the price is above the state threshold, it may already be a major domestic building contract whose five day clock started and finished months ago.
A preliminary agreement is signed long before anything like this exists on the block, which is exactly why owners assume it cannot count as a building contract. Read what the document authorises, not what it is called.
## What Does It Cost to Walk Away During Cooling Off?
Very little, compared with walking away at any later point. Victoria and Queensland both fix the figure at $100 plus the builder's out of pocket expenses, and the rest of your deposit must be refunded. New South Wales does not set a flat fee: the builder may keep reasonable out of pocket expenses and is entitled to a reasonable price for any work actually carried out before you rescinded.
Beyond that, you are not exposed. Consumer Affairs Victoria states that a building owner who withdraws during the cooling off period is not liable to the builder in any way for withdrawing, which rules out claims for the builder's lost profit on the job.
## Does the Land Contract Have Its Own Cooling Off Period?
Yes, on different dates and with a different penalty, which is why house and land buyers need to track two clocks. Victoria gives [three clear business days](https://www.consumer.vic.gov.au/housing/buying-and-selling-property/buying-property/buying-property-by-private-sale) on a private sale, and the vendor keeps $100 or 0.2 per cent of the purchase price, whichever is greater. New South Wales gives five business days, or [ten business days off the plan](https://www.nsw.gov.au/housing-and-construction/buying-and-selling-property/buying-property-nsw/buying-property-off-plan), forfeiting 0.25 per cent. Queensland gives [five business days](https://www.qld.gov.au/housing/buying-owning-home/advice-buying-home/making-an-offer-on-a-home/cooling-off-period) with a 0.25 per cent termination penalty.
None of them apply to a purchase at auction. In Victoria the exclusion also covers a contract signed within three clear business days either side of a public auction, so passing in at auction and signing the next morning leaves you with no cooling off right on the land at all.
## What if the Cooling Off Period Has Already Passed?
Then cooling off is no longer the mechanism, and what you have is whatever the contract and the general law give you. Victoria provides one statutory route: under section 41 of the Domestic Building Contracts Act 1995, an owner may end a major domestic building contract where the price rises by 15 per cent or more, or the build takes 1.5 times the agreed period, and the cause was something the builder could not have foreseen when the contract was signed.
Outside a provision like that, ending a build contract is a legal decision with real exposure. Terminating without a right to do so can itself be a repudiation, which is how owners who felt they were the wronged party end up defending a claim. That is a question for a construction solicitor.
What an inspection contributes at that point is evidence. The photograph above records reinforcement out of position before a pour, dated and located, which is a defect that becomes invisible and expensive the moment the concrete goes in.
## How Do I Give Notice That I Am Cooling Off?
In writing, delivered the way the legislation and your contract require, before the deadline. Victoria requires you to give the notice to the builder in person, leave it at the builder's address, send it by registered post, or serve it in the way stated in your contract. Queensland requires a written and signed withdrawal notice stating that you are withdrawing under section 35 of Schedule 1B of the QBCC Act.
## Where an Inspection Changes What You Do Next
An inspection does not extend a cooling off period and nothing found on site reopens one. What it changes is the question you are actually facing, from whether you want out to whether you have grounds and what those grounds are worth. A documented defect list is something a builder, a tribunal or a solicitor can act on. A bad feeling is not.
Owner Inspections carries out the inspection and produces the report, at slab, frame, lock up, fixing and completion. Whether a contract can lawfully be ended is a question for a solicitor, and every state runs a free building dispute service worth using before anyone pays for litigation.
### Insurer denied my claim because of asbestos: what now?
Source: https://ownerinspections.com.au/articles/insurer-denied-claim-asbestos
Published: 2026-08-12 | Category: Insurance Claims
Author: Maison Azdari
An insurer almost never denies a claim because your home contains asbestos. It denies under a specific clause, and there are four common ones: an asbestos or contamination exclusion, a removal sub-limit that caps the payout rather than refusing it, a non-disclosure or reasonable-precautions argument, or a finding that the damage was gradual deterioration rather than a sudden insured event. Ask for the denial in writing with the exact clause quoted. Which of the four you are facing decides whether the decision is worth challenging, because two of them are frequently arguable and two are usually not.
## The Four Reasons an Asbestos Claim Gets Denied
The wording on your denial letter matters more than the word "asbestos" appearing in it. These four grounds behave very differently once you push back.
The bottom two are where claims are won. Both are findings of fact rather than pure policy wording, which means they can be met with better evidence than the insurer has.
## Does Home Insurance Cover Asbestos Removal in Australia?
Usually not on its own, and this is the part homeowners are most often surprised by. The Asbestos Safety and Eradication Agency, the federal body responsible for asbestos policy, puts it plainly: [insurance policies may have exclusions for asbestos](https://www.asbestossafety.gov.au/about-asbestos/understanding-asbestos/asbestos-liabilities-and-insurance), or the level of cover may not be enough to meet your actual expenses if asbestos materials are accidentally damaged or disturbed during renovations, in a house fire or in a storm.
There is one important exception. Where a separate, accepted claim requires repairs to an area that happens to contain asbestos, the safe removal of asbestos in that area is normally part of making good the damage. The practical limit is that the insurer will pay to remove asbestos from the damaged area only, not to clear the rest of the house while the removalists are on site.
## Get the Denial in Writing, With the Clause
Before anything else, ask the insurer for three things in writing: the specific policy clause relied on, a copy of the product disclosure statement that applied when the policy was taken out, and any report the insurer's own assessor produced.
That last one matters more than people expect. The assessor's report is the document the denial rests on, and it is frequently where the weakness lies, because it may record a conclusion about cause without the measurements or sampling that would support it.
## Check Whether the Exclusion Actually Fits Your Damage
An asbestos exclusion removes cover for asbestos-related loss. It does not convert every claim on a house containing asbestos into an uninsured one. The question is whether the damage you are claiming for is asbestos-related, or whether asbestos is simply present in the building.
If a storm lifted roof sheeting and rain damaged ceilings, cabinetry and flooring, most of that loss is storm damage. The asbestos component is the additional cost of handling contaminated material safely. Those are separable, and they should be separated in your claim rather than allowed to sink it as a single item.
The same logic applies to the reasonable-precautions argument. Insurers can require policyholders to take reasonable steps to manage risk to the property, and the ASEA guidance notes there is also an expectation that a known risk such as asbestos is declared to the insurer when the policy is taken out. But "reasonable" is measured against what you knew. A homeowner who was never told the eaves were fibro is in a different position from one who had a report saying so and ignored it.
Where a third party caused the damage, the analysis changes again. In a determination published in October 2025, AFCA required RACQ to accept a claim after a contractor cut asbestos sheeting during reblocking work and spread contamination through the home. The insurer argued the vandalism cover did not apply because the contractor had entered with consent. AFCA found [the homeowner's consent was limited to the terms of engagement](https://www.insurancenews.com.au/daily/cowboy-builder-s-asbestos-trail-an-act-of-vandalism-afca-finds) and did not extend to what the contractor actually did, and that given industry knowledge of asbestos, the conduct was reckless enough to count as intentional damage.
## What Licensed Removal Costs, and Why Insurers Fight It
Understanding the cost explains the resistance. Asbestos work is regulated, and the regulation is what makes contamination expensive.
This is why ASEA's guidance emphasises that cleaning up contamination after accidental damage is significantly more hazardous and more expensive than removing the material safely beforehand. It is also why the sub-limit in many policies sits well below what a real contamination event costs.
## How to Challenge: IDR, Then AFCA
The escalation path is fixed and free, and you do not need a lawyer to start it.
Delay is the more common problem than outright refusal. The Financial Rights Legal Centre publishes practical guidance on [what to do when a claim is being delayed](https://financialrights.org.au/factsheet/insurance-claim-delay/) rather than decided, which is worth reading if your claim has stalled instead of being denied.
## Where an Independent Assessment Changes the Outcome
A denial based on causation is a denial based on an opinion about how the damage happened. The way to contest an opinion is with a better documented one.
An independent assessment does three things the insurer's report often does not. It records the damage with measurements and dated photographs rather than descriptions. It separates the asbestos-related component of the loss from the rest, so an exclusion cannot be applied to the whole claim. And it states the cause in terms that can be tested, which is what an AFCA case manager needs in order to prefer your account over the insurer's.
Owner Inspections carries out the inspection and produces the report. Where a dispute turns on the meaning of a policy clause rather than on the condition of the building, that is a question for a solicitor or a financial counsellor, and the Financial Rights Legal Centre runs a free national insurance law service.
### Won at VCAT or QCAT but the builder won't pay, what now?
Source: https://ownerinspections.com.au/articles/enforcing-a-tribunal-order-against-a-builder
Published: 2026-08-10 | Category: Expert Witness
Author: Maison Azdari
If you won at VCAT or QCAT and the builder has not paid, the next step is to take the order to a court and have it enforced as a judgment of that court. Neither tribunal collects money for you. Once the order is filed, you get access to the ordinary debt recovery tools: seizure and sale of property, redirection of wages or bank accounts, and an examination of the builder's finances. Before you spend anything on that, check whether the builder still has a company, a licence and any assets, because enforcement against an empty shell costs money and returns nothing.
That last point is the one people find out too late. Winning proves you were right. Getting paid is a separate contest, and it is decided by whether there is anything left to take.
## Does VCAT or QCAT chase the money for you?
No. Both tribunals decide the dispute and then stop. [VCAT states plainly that it does not enforce its own orders](https://www.vcat.vic.gov.au/steps-to-resolve-your-case/what-to-expect-after-the-final-hearing/enforcing-vcat-orders), and [QCAT directs successful parties to the courts](https://www.qcat.qld.gov.au/qcat-decisions/enforcing-a-qcat-decision) to enforce a monetary decision. The order is a debt. You are now a creditor, and you have to act like one.
## How to enforce a VCAT order in Victoria
Under section 121 of the Victorian Civil and Administrative Tribunal Act 1998, a person who has a monetary order in their favour can file a certified copy of it in a court of competent jurisdiction, after which it is enforceable as an order of that court.
Non-monetary orders work differently. Section 122 of the same Act treats a non-monetary VCAT order as an order of the Supreme Court for enforcement purposes, which puts a builder who ignores it in contempt territory. That is a serious remedy and a slow, expensive one.
## How to enforce a QCAT decision in Queensland
The Queensland process is close in substance and different in paperwork. You take a certified copy of the QCAT decision plus a sworn affidavit stating how much of the decision remains unpaid, and you file both in the court that matches the amount.
Section 131 of the [Queensland Civil and Administrative Tribunal Act 2009](https://www.legislation.qld.gov.au/view/html/inforce/current/act-2009-023) is the provision that makes this work. Once filed, the decision is treated as an order of that court, and you can apply for an enforcement warrant authorising seizure and sale of the debtor's property, or the redirection of earnings or debts owed to them. You can also require the debtor to complete a statement of financial position, which is the cheapest way to find out whether pursuing them is worth it.
## Check whether the builder still exists before you spend a cent
This is the step that saves people thousands. Search the builder's company on [ASIC's registers](https://asic.gov.au/online-services/search-asics-registers/) and check whether it is in liquidation or administration, and check the licence status with the state regulator. If the company has been wound up, an enforcement warrant achieves nothing, because you join the queue of unsecured creditors behind the ATO and the secured lenders.
Defects like this one are why the order exists. They are also why the wording of the order matters so much, which is the next problem.
## What if the order said fix it, not pay me?
A rectification order is harder to enforce than a money order, and homeowners are often surprised by that. If the builder does nothing, you have to go back to court to enforce a non-monetary order. If the builder comes back and does the work badly, you are in an argument about whether the order was complied with, and that argument needs evidence.
Where you can, ask the tribunal for a money order supported by a costed scope of works rather than an order that the builder return to site. A number is enforceable. A promise to rectify is a second dispute waiting to happen, and by that point most homeowners have lost all confidence in the builder anyway.
## The insurance route, and why the clock may already have run
Both states have a last resort insurance scheme, and neither is a simple substitute for enforcement.
In Victoria, domestic building insurance is compulsory for domestic building work above $16,000, and it is last resort cover. Consumer Affairs Victoria explains [domestic building insurance and insolvency](https://www.consumer.vic.gov.au/housing/building-and-renovating/defects-delays-and-insolvency/insurance-and-insolvency), including that a policy issued on or after 1 July 2015 can also respond where the builder has failed to comply with a tribunal or court order after 28 days, on top of the death, disappearance and insolvency triggers. That is the one insurance path aimed squarely at the situation this article is about. The scheme is now administered by the Building and Plumbing Commission, which took over the domestic building insurance function along with the roles of the Victorian Building Authority and Domestic Building Dispute Resolution Victoria on 1 July 2025.
In Queensland, the Queensland Home Warranty Scheme is run by the QBCC, and you [claim under it through the QBCC](https://www.qbcc.qld.gov.au/complaints-disputes/building-work-issue/claim-home-warranty-insurance) rather than through the tribunal. The catch is the timing. Non-completion claims must be lodged within three months of the contract ending, and defect claims run from when the work was completed and when the defect was noticed, not from the date you won at QCAT. A dispute that took a year to get to hearing can outlive the claim window entirely.
Insurers assess the defects themselves. A report that already itemises each item with photographs, dates and costs shortens that assessment considerably.
## Can the regulator make the builder pay?
Not directly, but regulator pressure is real and it is free to trigger.
A builder who wants to keep working has a strong reason to settle before that lands. It is worth lodging in parallel with enforcement rather than instead of it.
## What actually makes an order collectable
Looking back at the disputes that end well, the difference is usually decided long before the hearing.
## Frequently asked questions
### Renovation uncovered termite damage, what now?
Source: https://ownerinspections.com.au/articles/renovation-uncovered-termite-damage
Published: 2026-08-05 | Category: Pest Inspections
Author: Maison Azdari
Stop work in that area, leave the mud workings exactly where they are, and get a [timber pest inspection](/timber-pest-inspections) plus a structural assessment before anything is repaired, sprayed or closed back up. Two questions decide what happens next: whether the colony is still active, and whether the eaten timber is carrying load. If you get both answered while the wall is open, the repair is usually far cheaper and far simpler than the worst case running through your head right now.
The wall being open is the good news. Most termite damage in Australian homes is found years late, after it has spread through framing that nobody could see. You are looking at yours at the one moment it can be assessed properly, priced accurately and fixed once.
## What to do in the first 24 hours
If your builder or trades want to press on and replace the timber immediately, that is understandable but it is the wrong order. Repairing before the extent is established means paying twice when more damage turns up behind the next sheet.
## Is it termite damage, or rot, or borers?
The three get confused constantly, and they lead to completely different repairs.
**Termite damage** follows the soft grain of the timber and leaves the harder growth rings behind, so the surface looks layered or honeycombed. Galleries are usually packed with a mud and faecal mix. The paint or veneer often stays intact over the top, which is why a wall can look perfectly normal until you open it.
**Fungal decay, what most people call rot,** comes with moisture. The timber goes dark, soft and crumbly, often in cube shaped blocks, and it is concentrated where water has been getting in. No mud, no galleries.
**Borer damage** leaves round exit holes and fine powder, and in seasoned hardwood it is frequently old and inactive.
The door frame above is the classic presentation. The termites worked upward inside the timber and left the painted face standing, so from a metre away the door looked fine. That is the same reason renovation is when this gets found: the finish was doing the hiding.
## Are the termites still active?
This is the question that changes the size of the problem, and it is the one you cannot answer by looking.
Old, treated, abandoned damage is a repair job. An active colony is a repair job plus a management programme, and until the colony is dealt with, new timber put back in the same wall is just more food.
Even those are indicative rather than conclusive. A technician uses moisture meters, thermal imaging and sometimes microwave or radar detection to find activity inside timber and behind linings that are still closed. If the previous owner had a treatment done, ask for the paperwork and check whether the warranty is still running. Our guide to warning signs a termite treatment has not worked covers what a failed job looks like.
## Is the damaged timber structural?
A chewed out architrave is a nuisance. A chewed out bearer, stud, lintel or bottom plate is a different conversation, and it needs someone qualified to say which one you have.
The elements that matter most:
The timber above shows why this needs measuring rather than eyeballing. The visible face gives almost no indication of how much section has been lost inside, and the remaining capacity of a member depends on what is left, not on what you can see from below.
Where damage is structural, the repair is designed rather than guessed. That usually means a [defect investigation](/defect-investigation-reports) that records the extent, the affected members and the remedial scope, which the builder then prices and works to. Replacing a stud is trivial. Replacing a stud that was holding up a roof beam, without propping first, is not.
## Who pays for it?
This is where most people are surprised, so here it is plainly.
**Home insurance almost never covers termite damage.** Australian building policies routinely exclude damage caused by insects, vermin and gradual deterioration, on the basis that it is a maintenance issue rather than a sudden event. Read your own product disclosure statement rather than relying on this, but do not build your plans around a claim.
**If you bought recently and had a pre-purchase timber pest inspection,** the question becomes whether the evidence was visible and accessible on the day. Inspections under the relevant Australian Standard are visual and non invasive. An inspector does not cut open walls or lift flooring, so damage concealed inside a wall cavity is usually outside scope. Damage with visible mud leads in an accessible subfloor is a different matter.
**If you are mid build or the damage relates to recent work,** the builder may be responsible, and state consumer bodies such as NSW Fair Trading and Consumer Affairs Victoria both run complaint and conciliation processes. In Queensland the equivalent is the QBCC.
**Most often, the owner pays,** because the damage predates everyone involved and nobody breached anything. That is worth knowing early so the money goes into fixing it properly rather than into chasing someone.
Owner Inspections is an inspection company, not a law firm. We can establish what the damage is, how old it appears to be and whether it was reasonably detectable. Whether anyone is liable for it is a question for a solicitor.
## Does the repair need a permit?
It depends on the state and the scope. Replacing like for like non structural timber generally does not. Replacing structural members, altering framing, or any work that changes how load is carried usually does, and it needs to comply with the National Construction Code.
New timber going back into a termite affected area should also be protected. Australian practice is to reinstate a termite management system to AS 3660, which may mean treated timber, a physical barrier, a chemical soil treatment, or a combination, depending on the construction. A licensed pest manager specifies this, not the carpenter putting the timber back.
## What does it cost?
Ranges vary enormously with access, extent and location, but the shape is consistent:
The reason to spend on the assessment first is arithmetic. Guessing at the extent means either over specifying, and paying to replace sound timber, or under specifying, and reopening the wall in two years. The article on the economic cost of termite infestation goes through how the numbers usually break down.
## What to do so it does not happen again
There is a reason a proper inspection is not the same as a look around. Our comparison of DIY versus professional timber pest inspections covers what the equipment finds that eyes do not, and a full building and pest inspection is what most owners book once a renovation has turned up something like this.
### Can I Sue a Building Inspector for Negligence?
Source: https://ownerinspections.com.au/articles/can-i-sue-a-building-inspector-for-negligence
Published: 2026-08-03 | Updated: 2026-09-11 | Category: Expert Witness Reports
Author: Maison Azdari
Yes, you may be able to sue a building inspector for negligence in Australia, but only if you can show three things: the inspector owed you a duty of care, they failed to meet the standard a reasonably competent inspector would have met, and that failure caused you a financial loss. A missed defect is not negligence on its own. The question is whether the defect was reasonably detectable on the day, within the scope of the inspection you paid for.
Under the Australian Consumer Law, services must be provided with due care and skill. An inspection that falls below that standard can breach the guarantee. In practice, almost every one of these disputes turns on a single question: was the defect visible, and should a competent inspector have reported it?
That is a technical question, not a legal one, which is why these claims usually start with an independent defect investigation report rather than a letter from a solicitor. Finding the problem months after you moved in does not close the door by itself, but a clock is already running.
## What counts as negligence, and what does not
Inspectors are not insurers. A standard [pre-purchase inspection](/pre-purchase-inspections) is visual and non-invasive. The inspector does not lift carpet, cut open walls, move heavy furniture or dismantle anything.
Read your report's limitations section before anything else. If it recorded an area as inaccessible and recommended further investigation, and you proceeded anyway, a claim becomes much harder. It cuts both ways, though. A report that skipped an accessible roof space or subfloor without saying why, that carries no photographs of the defects it names, or that omits its limitations section entirely is one the inspector will struggle to defend as meeting the standard.
## What do you actually have to prove?
These claims are generally assessed in four parts, and each part needs its own evidence.
Breach and causation are where these claims are won and lost, and both sit inside the expert report rather than in anything you can argue yourself.
## What is considered a major defect?
Australian Standard AS 4349.1, which governs pre-purchase property inspections, treats a **major defect** as one of sufficient magnitude that rectification has to be carried out to avoid unsafe conditions, loss of utility, or further deterioration of the property.
In practice that means structural movement, unsafe electrical work or balustrading, active water penetration, significant timber pest damage, or anything that will worsen without intervention. A scuffed skirting board is not a major defect. A stepped crack through brickwork with displacement almost certainly is, and the seriousness of what was missed decides whether there is a recoverable loss at all.
The brickwork above is a major defect. The mortar joints have opened, individual bricks have displaced, and the steel lintel carrying the load has corroded and expanded. None of that is subtle and none of it is concealed. Obvious and accessible together is what a negligence claim is usually built on.
## The evidence that actually decides these cases
You cannot win by saying the defect exists now. You have to establish it existed, and was visible, on the day of the inspection. That is the whole battleground.
The age question is the one people underestimate. Cracking, rot and termite damage progress at rates a consultant can reason about, so an expert can often say whether a defect is months or years old, which either supports the claim or destroys it. The staining above did not appear in a week, and where a defect is that advanced and that visible from ground level, the argument shifts from whether it existed to why it was not reported.
## Can I sue a building surveyor?
Building surveyors and building inspectors do different jobs, and it matters for who you pursue.
A **building surveyor** issues permits and inspects for compliance with the National Construction Code at set stages of a build, so their duty is largely about statutory compliance. A **building inspector** carries out a private inspection under contract with you, and their duty runs to you directly.
If a new build has code defects, the surveyor may be relevant, and complaints usually go to the state regulator, such as the Building and Plumbing Commission in Victoria or the QBCC in Queensland. If you paid privately for a pre-purchase inspection, your claim is against the inspector.
## Where do I file a claim, and what does it cost?
Where you file depends on the state and on the size of the claim, and not every state uses a tribunal for this. New South Wales, Victoria, Queensland, the ACT and the Northern Territory route homeowner sized consumer claims to [NCAT](/articles/understanding-nsw-civil-and-administrative-tribunal-ncat), VCAT, QCAT, ACAT and NTCAT respectively. In South Australia, Western Australia and Tasmania the equivalent claims are heard in the minor civil or small claims stream of the **Magistrates Court** instead. The ACCC keeps a current list of the right forum in each state, and it is worth checking before you lodge anything, because filing in the wrong place costs you time you may not have.
Filing fees and the monetary limits on what each forum can hear vary by state, are revised regularly, and change with the size of the claim, so read the current schedule on your own court or tribunal's site rather than trusting a figure you read somewhere. Procedure varies too. [How the process differs between states](/articles/ncat-vs-vcat-process-differences) affects what you have to file and when, and [how long a tribunal dispute usually takes](/articles/how-long-tribunal-building-disputes-take) is measured in months, not weeks. Before any of that, NSW Fair Trading and Consumer Affairs Victoria both run complaint and conciliation processes that cost you nothing to use.
Most of these matters never reach a hearing. Once a credible independent report is in front of the inspector's insurer, the argument usually turns from whether there is liability to how much it is worth.
## How long do I have to make a claim?
This is where most claims quietly die.
Limitation periods vary by state, and they generally run from when the loss occurred rather than from the day you found out about it. In most states the period for a negligence claim is six years, for example section 14 of the Limitation Act 1969 (NSW), which runs from the date the cause of action first accrues. The Northern Territory is the outlier at three years, under section 12 of its Limitation Act 1981.
Six jurisdictions also set a separate long stop for **building actions**, and where it exists it runs longer than six years rather than shorter. In New South Wales that is ten years under section 6.20 of the Environmental Planning and Assessment Act 1979, measured from the date the work was completed. In Victoria it is also ten years, under section 134 of the Building Act 1993, but it runs from the date the occupancy permit was issued, or from the certificate of final inspection where no occupancy permit was issued. That difference in starting point has been fought out in the Victorian Court of Appeal more than once, which tells you how little it pays to assume. Queensland and Western Australia have no building long stop at all.
Which period applies to you depends on who you are suing and for what. Treat six years as the assumption to check with a solicitor, not the answer.
The practical point is simple: **the clock is already running.** Get the defect independently documented early, even if you have not decided whether to pursue anything. Evidence degrades, repairs destroy it, and inspectors change insurers.
## What about the contract you signed?
Most inspection agreements contain limitation of liability clauses, and many cap liability at the fee you paid. Those clauses are not automatically enforceable, particularly where they conflict with consumer guarantees, but they do shape what is realistically recoverable.
Check whether your inspector carries **professional indemnity insurance**. A claim against an uninsured sole trader may be unrecoverable even if you are entirely right on the facts.
## What to do first
Nothing here is legal advice, and an inspection report is not a substitute for it. What an independent report can establish is whether the defect was there, how old it is, and whether a competent inspector should have seen it, which is usually the single fact the rest of the claim rests on.
### House On Stilts: Termite Risk Around Posts and Bearers
Source: https://ownerinspections.com.au/articles/house-on-stilts-termite-risk-posts-bearers
Published: 2026-07-21 | Category: Building Inspections
Author: Maison Azdari
House on stilts can feel like a safer buy because everything is up off the ground. So why do so many termite issues still start under raised homes?
A raised home has a clear underfloor story: posts or stumps hold up bearers, bearers support joists, and joists carry the floor. That subfloor zone is also one of the most common places for concealed termite entry and moisture-related timber deterioration to begin. The Queensland Building and Construction Commission (QBCC) calls the area beneath a suspended floor one of a building’s most susceptible areas for termite activity, and notes these systems rely heavily on access for inspection and treatment.
This guide explains how termites reach a highset house, what buyers can check at an open inspection, and what a professional report should cover. Buyers considering an older Queenslander or house on stumps should arrange a [combined building and pest inspection](/building-and-pest-inspections) before committing to the purchase.
Read the Defect
Report Guide
}
buttonHref="/articles/what-is-defect-investigation-report"
variant="secondary"
/>
## What Counts as a House on Stilts in Australia?
In Australia, house on stilts usually means a suspended timber floor supported above ground on:
- Stumps (often timber or concrete)
- Posts or piers (timber, steel, masonry, concrete)
- A pier-and-bearer system (common in older housing stock)
You will also hear: highset house, Queenslander, house on stumps, stumped house, elevated home.
Simple diagram description (visualise this stack from the ground up):
***Ground*** **→** ***stump/post*** **→** ***ant cap (if present)*** **→** ***bearer*** **→** ***joists*** **→** ***floor***
Raised homes are common in coastal and sub-tropical areas and on sloping or flood-prone sites because lifting the structure can improve airflow, manage water flow, and help suit uneven ground.
## Are Houses on Stilts More or Less Termite-prone?
It is not safe vs unsafe. It is about visibility, access, and whether termite entry paths are being forced into the open or being hidden.
Australia’s building rules are also clear on the intent. The National Construction Code (NCC) [termite provisions](https://ncc.abcb.gov.au/editions/2019-a1/ncc-2019-volume-two-amendment-1/part-31-site-preparation/part-314-termite-risk) aim to deter concealed entry. They do not claim to stop termite activity on the site.
Raised homes can help in one way: you may be able to see more of the underfloor framing, which improves the chance of early detection.
Raised homes can increase risk in another way: there are more joins, penetrations, and hiding spots under the floor, and if access is poor, inspection quality drops fast.
A common misunderstanding is ant caps mean termite proof. The QBCC explains ant caps do not [prevent termites getting into the building](https://www.qbcc.qld.gov.au/sites/default/files/documents/publication-termite-management-systems-homeowners-builders.pdf). They act as a barrier to concealed entry and encourage termites into the open where they can be noticed.
## How Termites Reach Posts, Stumps, and Bearers (The 5 Common Routes)
Below are five routes inspectors repeatedly see in stumped and highset homes.
**1. Mud leads up posts or stumps**
Subterranean termites often build mud “leads” (tubes) to travel from soil to timber while staying protected. Stumps and posts are direct vertical highways when inspection zones are hidden.
**2. Bypassing or bridging ant caps and inspection zones**
Ant caps help when the top edge stays visible. Debris, cladding, render lines, add-on structures, and even stored items can create a concealed bridge around the inspection zone. The QBCC notes bridging or breaching of a perimeter system is a frequent cause of termite infestation.
**3. Concealed entry where stump tops are embedded or hidden**
If stump tops disappear behind cladding, stairs, decks, or landscaping, termites can travel unseen and attack bearers or joists before anyone notices.
**4. Perimeter paths and service penetrations**
Pipes and services can provide hidden routes into subfloor timbers. The NCC termite rules focus on concealed routes for exactly this reason.
**5. Moisture-driven foraging in damp subfloors**
Termites and timber decay risks rise when moisture is high and ventilation is poor. The QBCC links cross-flow subfloor ventilation to discouraging termite activity and reducing fungal attack on subfloor members.
### What this means for buyers
If the subfloor is cluttered, damp, or hard to access, a raised house advantage can flip into a raised house risk. The structure may still be fine, but you want a report that clearly states what could and could not be inspected, and why.
### Entry route to check under a stumped or highset home
| Entry route | What to look for | Why it matters | Typical buyer action |
| --------------------------------- | ------------------------------------------------------------------- | -------------------------------------------------------- | -------------------------------------------------------------- |
| Mud leads on stumps/posts | Mud tubes on vertical faces, near joins, near bearer seats | Can indicate concealed access to framing | Further investigation, targeted pest treatment advice |
| Bridged ant caps/inspection zones | Soil or debris touching bearer level, attachments creating a bridge | Bypasses “into the open” protection | Remove bridging, reinstate inspection zone visibility |
| Hidden stump tops | Cladding/decking hiding tops of stumps | Removes early warning opportunity | Ask for access notes and inspection limitations |
| Penetrations and services | Pipes, conduits, drains entering subfloor | Hidden pathway from soil to timber | Assess sealing, inspection zones, moisture around penetrations |
| Damp subfloor / poor drainage | Wet soil, puddling, musty smell, mouldy timbers | Encourages timber decay and can support termite activity | Fix drainage and ventilation, monitor moisture |
| Stored timber and debris | Timber stacked under house, offcuts, formwork | Attracts termites and hides activity | Clear subfloor, maintain visibility |
| Landscaping against perimeter | Garden beds, paving tight to walls/structure | Bridges inspection zones and hides termite movement | Create separation, restore clear lines |
| Previous treatments disturbed | Evidence of past barrier or baiting, but no maintenance records | Systems need ongoing inspection | Request treatment records and inspection schedule |
## The Conducive Conditions Checklist for Stumped and Highset Homes
A buyer-friendly way to think about termite risk is this: termites need hidden access and favourable conditions. Remove those, and detection improves.
### 1. Ventilation and damp subfloors
The NCC sets requirements around subfloor ventilation and clearance, including specific clearance guidance where termite inspection is required. It shows 400 mm clearance in certain situations, with allowances on sloping sites.
Cross-flow ventilation must be provided under suspended floors to discourage termite activity and reduce fungal attack risk in subfloor members.
Buyer check:
- Are vents present and not blocked?
- Is air able to move from one side to the other?
- Does the subfloor smell damp or musty?
- Is there visible ponding, wet soil, or leaking plumbing?
#### Mini case example
A highset home presents well upstairs, but the subfloor has blocked vents and a slow leak near the laundry waste. The first visible damage shows up as softness in a bearer near the wet area, not at the perimeter.
### 2. Clearance and access
Clearance and access decide whether an inspection is meaningful. The QBCC states a minimum clearance of 400 mm is generally necessary between finished ground level, structural components and obstructions (bearers, joists, pipes), with a reduction possible to 150 mm under certain sloping conditions.
If there is no workable access door or the subfloor is too tight to enter, risk is harder to quantify. The QBCC notes access to the subfloor area should be provided.
Buyer check:
- Is there an access hatch or door?
- Can an inspector physically view the bearer lines and stump tops?
- Are parts of the subfloor fenced off or packed with stored items?
### 3. Bridging and concealment
Bridging is anything that lets termites travel from soil to timber without being seen.
The QBCC provides clear examples of risk-increasing practices: turf, paving, paths, bark, garden beds against walls, loose timber leaning against the house, water tanks installed against the dwelling, pergolas, and attachments that can compromise termite systems.
Buyer check:
- Garden beds or paving right up to the structure
- Decks and stairs attached without a visible inspection zone
- Timber stored under or against the house
- New services installed with no mention of termite system reinstatement
## What an Inspection Should Include For a House on Stilts (AS 4349.3 Mindset)
A [timber pest inspection](/timber-pest-inspections) is not a quick glance. Done properly, it is structured, systematic, and honest about limitations.
[AS 4349.3](https://ablis.business.gov.au/service/act/as-4349-3-2010-inspection-of-buildings-timber-pest-inspections/3925) sets minimum acceptable requirements for visual inspection and reporting on timber pest activity.
[AS 4349.1](https://ablis.business.gov.au/service/act/as-4349-1-2007-inspection-of-buildings-pre-purchase-inspections-residential-buildings/3924) sets recommendations for the visual inspection of residential buildings and preparation of reports for [pre-purchase building inspections](/pre-purchase-inspections).
The QBCC also describes what a non-invasive pre-purchase timber pest inspection includes: a visual inspection, non-marking sounding of elements, and moisture assessment of materials.
### What we check (highset and stumped homes)
#### Subfloor access and inspection limits
- Is access available and safe?
- Are there tight clearances, stored goods, or areas that cannot be entered?
- Clear statement of what could not be inspected and why
The QBCC notes inspections can be affected by impediments such as concealment, inaccessible areas, weather conditions, and information quality.
#### Posts, stumps, piers, and bearer seats
- All accessible faces of timber posts or stumps
- Stump tops and bearer connections
- Ant caps present, missing, corroded, or bridged
#### Bearers and joists
- Visual scanning along full bearer lengths where visible
- Non-marking sounding and probing where appropriate (to check hollowness)
- Attention near wet areas (bathroom, laundry, kitchen waste lines)
#### Perimeter and penetrations
- Pipes, drains, conduits, and entry points
- Signs of bridging from landscaping, paths, and attachments
#### Signs of termite activity or past treatment
- Mud leads, damaged timber, frass-like deposits (depending on pest type)
- Evidence of past barriers, bait stations, or chemical reticulation
- Whether maintenance appears current or unknown
#### Actionable outcomes
- Severity rating
- Likely contributing causes (moisture, bridging, access constraints)
- Next steps: monitoring, rectification, or specialist pest treatment advice
### Inspection focus areas for houses on stilts
| Focus area | What an inspector looks for | Why it matters for buyers |
| ----------------------------- | ------------------------------------------------------- | -------------------------------------------------------- |
| Stumps/posts/piers | Damage at tops and joins, concealed faces, mud leads | Early warning zone for concealed entry |
| Ant caps and inspection zones | Missing caps, bridged caps, hidden inspection edges | Caps help detection only when visible |
| Bearers | Softness, cracking, hollowness, wet-area risk points | Bearers are load-carrying, repairs can be costly |
| Joists | Attack near moisture sources, sagging, localised damage | Can explain springy floors and movement |
| Subfloor ventilation | Cross-flow vents, blocked openings, damp signs | QBCC links ventilation to discouraging termite activity |
| Penetrations and perimeter | Pipes, services, landscaping bridges | Common concealed routes to framing |
| Access limitations | Where inspection could not reach | Limits confidence and affects decision-making |
View Defect Investigation
Report Services
}
buttonHref="/defect-investigation-reports"
variant="secondary"
/>
## Buyer Red Flags You Can Spot at an Open Inspection (Non-invasive)
These are not proof of termites. They are reasons to slow down, ask better questions, and book a combined building and timber pest inspection early.
**- Cladding, decking, or garden beds hiding stump tops**
If you cannot see the stump tops or inspection zones, termites may not need to reveal themselves.
**- Soft or springy floors**
Can indicate bearer or joist issues, moisture-related decay, or movement from uneven support.
**- Out-of-level corners and doors that swing**
May point to stump movement, bearer settlement, or localised structural changes.
**- Wet-area clues above the subfloor**
Musty smell, staining, older plumbing, or bathrooms over the subfloor.
**- DIY attachments that bridge inspection zones**
Pergolas, stairs, planters, paths, and water tanks tight to the structure can compromise termite systems.
## Prevention and Maintenance for Termite-risk Reduction
A house on stilts stays lower-risk when inspection zones remain visible and the subfloor stays dry and accessible.
### Keep inspection zones visible and avoid bridging
The most frequent cause of termite infestation is when a perimeter system has been bridged or breached, making it ineffective.
Buyer and owner habits that help:
- Keep garden beds and paving from contacting inspection zones
- Do not store timber under the house or lean it against posts or cladding
- Be cautious with new services and attachments (tanks, pergolas, fences) that can span or cover termite management zones
### Manage moisture and ventilation
- Maintain cross-flow ventilation openings
- Fix plumbing leaks quickly
- Improve drainage so water does not pond under the home
- Keep vents clear of soil build-up and stored items
### Regular inspections
Have the building inspected at least annually by a suitably qualified termite management contractor, with more frequent checks in higher risk areas.
## Compliance in Australia (NCC and AS 3660.1)
Termite risk management requirements apply where a Class 1 or 10 building is in an area where subterranean termites present a potential risk, and where primary building elements are susceptible.
It also provides state notes and variations, and in the 2019 provisions includes design life expectations for termite management systems in some cases (often discussed in Queensland contexts), including a 50-year design life requirement for certain Class 1 buildings.
### AS 3660.1: what it covers
[AS 3660.1:2014](https://hia.com.au/resources-and-advice/building-it-right/australian-standards/articles/termite-management-for-new-building-work?srsltid=AfmBOopHlbh30JlKJN0gt4mK9MEe2tO3JTcW6MRTxy_Aqk6yYvz0qnU9) sets requirements for the design and construction of subterranean termite management systems for new buildings and new building work, including physical and chemical systems, and includes methods to deter concealed entry from soil to the building above the termite management inspection zone.
### Termite management options
| Option type | Pros | Cons | Maintenance notes |
| ------------------------------------------------------------------------------------ | ----------------------------------------------------------------------------------- | ---------------------------------------------------------- | ----------------------------------------------- |
| Physical barriers (mesh, graded stone, shields) | Can force termites into the open if inspection zone stays visible | Can be compromised by bridging and later works | Keep zones visible, do not cover edges |
| Chemical perimeter systems | Can reduce concealed entry risk when installed correctly | Can be breached by digging, landscaping, paths | Rechecks and reapplication may be needed |
| Baiting and monitoring | Can detect and manage colonies over time | Needs ongoing monitoring, not a set-and-forget fix | Maintain stations, follow schedule |
| Termite-resistant materials (treated or naturally resistant timber where applicable) | Can lower susceptibility of key elements | Does not remove the need for inspection in many situations | Keep records of treatment type and hazard level |
| Subfloor ventilation and drainage improvements | Reduces damp conditions linked to timber deterioration and can discourage activity | May require carpentry or drainage works | Keep vents clear, fix leaks fast |
## Buying a Highset or Stumped Home?
[Book an independent building and pest inspection](/building-and-pest-inspections) with Owner Inspections to check subfloor access, posts and stumps, bearers and joists, termite evidence and moisture-related conditions before you commit.
Contact Owner
Inspections
}
buttonHref="/contact"
variant="primary"
/>
## Key Takeaways
- A house on stilts is not automatically safer. It is safer when subfloor access and inspection zones are maintained.
- Termite management aims to deter concealed entry. Termites can still be active on the site.
- The subfloor under suspended floors is a high-susceptibility zone and relies heavily on access for inspection and treatment.
- Ant caps help by pushing termites into view. They do not “termite proof” the home.
- Bridging and moisture are repeat offenders. Landscaping, paths, tanks, pergolas, and stored timber can compromise systems.
- Look for clear reporting aligned to AS 4349.1 (building) and AS 4349.3 (timber pest), including access limits and next steps.
### Do Property Investors Need a Business Bank Account in Australia?
Source: https://ownerinspections.com.au/articles/property-investor-bank-account
Published: 2026-07-16 | Category: New Construction
Author: Maison Azdari
Should rent arrive in the same account as salary and household bills? It may be allowed, but it often makes rental property bookkeeping harder.
A separate account is usually sensible for Australian property investors. A formal business bank account is not automatically required for every residential landlord. The right setup depends on the property’s legal owner, whether the activity is an investment or business, the bank’s terms and the investor’s operating needs.
### The Short Answer
Most Australian property investors benefit from a dedicated account for rental income and expenses. An individual may not need a formal business account or ABN, while companies, trusts and partnerships generally require separate banking.
The main benefit is separation. Correct ownership, bank terms and record keeping matter more than the account label.
The Australian Business Register also states that [residential property investors may not need an ABN](https://www.abr.gov.au/business-super-funds-charities/applying-abn/abn-entitlement). Not everyone is entitled to register for one.
The account label matters less than:
- Correct account ownership
- Compliance with the bank’s terms
- Clear rental income tracking
- Reliable supporting records
- Separation between personal and entity money
Confirm the ownership structure with a registered tax agent or accountant before opening or changing an account.
Request a Defect
Investigation Report
}
buttonHref="/defect-investigation-reports"
variant="secondary"
/>
## Business Bank Account vs Dedicated Personal Account
### What is a business bank account?
A business bank account is offered for business or entity use. Depending on the product, it may support an entity name, authorised users, bank feeds, payment approvals, higher transaction limits and business cards.
Features vary. Some accounts charge fees or include tools a small residential investor will not use.
### What is a dedicated property account?
A dedicated property account is used only for rent, property-manager disbursements and property costs such as rates, insurance, management fees, inspections, repairs and maintenance. An individual investor may use a suitable personal transaction account if the bank permits that use.
A property manager’s trust account is different. Agents may need to place rent and other client money into a regulated trust account before transferring the investor’s net disbursement. It is not the investor’s operating account.
| Account type | Most suitable for | Main limitation |
| -------------------------------------- | --------------------------------------------------------------------- | --------------------------------------------------------------------------------- |
| Dedicated personal transaction account | Individual investors with straightforward residential rental activity | May lack business integrations, entity naming or authorised-user controls |
| Business transaction account | Sole traders or investors with business-like operations | May include fees, eligibility requirements or features the investor does not need |
| Company, partnership or trust account | Property owned or operated through the relevant legal entity | Requires correct entity documents, account ownership and authorised operators |
| Separate account for each property | Investors who want direct property-level cash-flow visibility | Creates more accounts, transfers and reconciliation work |
## Is a Business Account Legally Required?
### Individual residential property investors
The ATO says most rental activities are investments, though extensive and business-like operations may be treated differently. An individual may therefore be able to use a dedicated personal account, subject to bank terms.
### Sole traders
A sole trader and the individual are not separate legal entities. Business.gov.au says a business account is not compulsory for a sole trader, though separate banking is recommended. Opening an account does not create asset protection.
Do not register as a sole trader merely to obtain an account without checking whether the activity is an enterprise.
### Companies, trusts and partnerships
These structures need stronger separation. Hold the account in the correct entity name and follow the company rules, trust deed or partnership arrangement. Business.gov.au says partnerships, companies and trusts must have a separate bank account for tax purposes.
### Does a property investor need an ABN?
Not automatically. The Australian Business Register says residential property investors may not need an ABN and that not everyone is entitled to one. Eligibility depends on whether an enterprise is being carried on or started.
| Ownership or operating structure | General account position |
| ---------------------------------------------- | ------------------------------------------------------------------------------------------------------- |
| Individual investor not carrying on a business | A dedicated separate account is advisable but not automatically compulsory |
| Sole trader carrying on a business | A separate business account is recommended but generally not compulsory |
| Partnership | A separate account is required for tax purposes |
| Company | A separate account is required, and company money must remain distinct from personal money |
| Trust | A separate account is required for tax purposes and should be operated according to the trust structure |
## Seven Benefits of Separating Property Finances
### 1. A Clear Separation Between Personal and Property Finances
A dedicated account keeps rental income away from salary, groceries and household bills.
This makes it easier to see how much money is available for:
- Loan repayments
- Council rates
- Insurance
- Strata charges
- Repairs
- Planned maintenance
- Unexpected work
It also reduces the number of transactions that need to be manually classified.
Separation can support financial discipline, but it does not create legal asset protection by itself. If you’re keen to scale your property investing pursuits, consider [comparing business bank accounts for property investors](https://www.westpac.com.au/business-banking/bank-accounts/compare-all/) and selecting the one that best fits your high set of standards.
### 2. Easier Tax Preparation and Record Keeping
Clean statements can help an investor or registered tax agent reconcile:
- Rental income
- Property-manager disbursements
- Contractor payments
- Rates and insurance
- Loan interest
- Repairs and maintenance
The ATO expects rental-property owners to [keep supporting evidence](https://www.ato.gov.au/individuals-and-families/investments-and-assets/property-and-land/residential-rental-properties/records-for-rental-properties-and-holiday-homes) such as bank statements, loan documents, invoices, receipts and property records. A bank statement supports the record trail but does not replace source documents.
Paying an expense from a dedicated account does not automatically make it tax deductible. The expense’s nature, purpose and timing still determine its treatment.
Investors reviewing their broader property records may also consider whether a tax depreciation schedule is relevant to the property. This should be discussed with a qualified tax adviser before relying on any depreciation claim. Owner Inspections lists [tax depreciation schedules](/depreciation-schedule) among its available property services.
### 3. More Organised Rent Collection
Self-managed rental property
A self-managed landlord can assign a clear rental payment reference to each tenant or property.
For example:
- SMITH-12KING
- UNIT4-BRISBANE
- PROPERTY02-RENT
This makes it easier to identify deposits and match them to the tenancy ledger.
#### Property managed by an agent
Where an agent collects the rent, the investor will often receive a net disbursement after fees, repairs and other deductions.
Match the deposit to the monthly owner statement instead of recording it as unexplained income. The statement should show gross rent, management charges and other disbursements.
### 4. Better Cash-Flow and Property Performance Visibility
A separate account can show:
- Monthly net cash movement
- Seasonal expenses
- Maintenance spikes
- Insurance and council-rate payments
- Property-management costs
- The available repair buffer
It may also reveal whether a property regularly produces cash or needs support from the investor’s personal income.
Investors should plan for more than the mortgage. The Owner Inspections guide to [property costs beyond the home loan](/articles/costs-beyond-mortgage-buyers) explains why buyers should allow for inspections, insurance, rates, maintenance and other ownership costs.
The account balance alone is not a complete measure of profit, rental yield or tax position. It may not reflect depreciation, capital expenses or loan-principal movements.
### 5. Easier Accounting-Software Integration
Some accounts support:
- Bank feeds
- Transaction rules
- Property tracking categories
- Receipt capture
- Data exports
- Accountant or bookkeeper access
- Monthly reconciliation
Check the exact bank-account and software connection before opening an account. Not every product connects to every accounting platform.
Investors with several properties can use consistent property codes or tracking categories to separate income and expenses without opening an account for every asset.
### 6. More Professional Administration
An account held in the correct individual or entity name can simplify dealings with:
- Property managers
- Contractors
- Accountants
- Joint owners
- Commercial tenants
- Business partners
Multiple-user features may also allow an accountant to view transactions without giving them unrestricted payment authority.
A business account does not guarantee loan approval, better creditworthiness or easier refinancing.
### 7. A Scalable System for Multiple Properties
A structured banking system can make it easier to add another property without rebuilding the investor’s bookkeeping process.
Useful controls include:
- A code for each property
- Separate maintenance budgets
- Consistent expense categories
- Authorised-user permissions
- Monthly property reports
- Digital receipt storage
Investors who already own rental property can combine clear banking records with regular [building maintenance inspections](/maintenance-inspections). These inspections can help owners identify visible defects and maintenance concerns before smaller problems develop into larger repair costs.
Clean records may support a loan or refinancing application, but approval still depends on lender policy, income, liabilities, credit history and serviceability.
Compare Building
Inspection Reports
}
buttonHref="/articles/defect-investigation-vs-building-inspection-report"
variant="secondary"
/>
## Should You Open One Account for Every Property?
Not every investor needs a different bank account for every property.
### One account for the whole portfolio
One portfolio account may suit an investor where:
- The portfolio is small
- The same legal owner holds every property
- Accounting software tracks each asset
- Transaction volume is manageable
- The investor wants fewer reconciliations
Each transaction should still have a property code or tracking category.
### One account per property
A separate account for each property may be suitable where:
- Properties have different owners
- Joint ownership differs between assets
- Different companies or trusts hold the properties
- The investor wants immediate asset-level visibility
- Transaction volume is high
- A lender or governing document requires separation
| Situation | Likely starting point |
| ------------------------------------------- | ------------------------------------------------------------------------------- |
| One property owned personally | One dedicated property account |
| Several properties under the same ownership | One account with property tracking, or one account for each property |
| Properties with different legal owners | Separate account for each owner or entity |
| Company or trust ownership | Account held in the correct entity name |
| Different joint-ownership arrangements | Separate accounts or records that accurately reflect each ownership arrangement |
| High transaction volume | Separate accounts or stronger accounting automation |
| Large or growing portfolio | Property-level accounts, sub-accounts or detailed tracking categories |
## What Features Should Property Investors Compare?
Compare the functions you will use rather than choosing an account because it carries a business label.
| Feature | What to compare |
| ------------------------------- | --------------------------------------------------------------------------------------------- |
| Account ownership | Whether the account can be held by an individual, joint owners, company, trust or partnership |
| Eligibility | Whether an ABN, ACN, trust deed or other entity documents are required |
| Monthly fees | Fixed account-keeping charges |
| Transaction costs | Electronic, assisted, cash, cheque and international payment fees |
| Transaction limits | Daily transfer limits, batch payments and payment approvals |
| Bank feeds | Compatibility with the investor’s accounting software |
| Transaction exports | CSV, PDF or accounting-format downloads |
| Authorised users | Access for joint owners, accountants, bookkeepers or finance staff |
| Access controls | Read-only access, payment approvals and user limits |
| Property tracking | Account nicknames, sub-accounts, property codes and payment references |
| Scheduled payments | Automatic payments for rates, insurance, strata and contractors |
| Notifications | Alerts for deposits, low balances, failed payments and large transactions |
| Property-manager reconciliation | Ease of matching net disbursements to owner statements |
| Linked savings accounts | Separate reserves for rates, insurance, repairs and maintenance |
| Customer support | Help with entity documentation, access changes and disputed transactions |
| Deposit protection | Whether the account is eligible under the Financial Claims Scheme and which ADI holds it |
Eligible Australian-dollar deposit accounts with an Australian authorised deposit-taking institution may be protected by the Financial Claims Scheme up to $250,000 per account holder per ADI. Multiple accounts and different brands may still sit under the same ADI, so check the underlying institution and product terms.
## How to Set Up a Property Investment Bank Account
### Step 1: Confirm the legal owner
Check whether the property is held:
- Individually
- Jointly
- Through a company
- Through a trust
- Through a partnership
The bank account should match the legal ownership and operating structure.
### Step 2: Ask what must remain separate
Speak with an accountant or registered tax agent, especially where:
- Different people own different properties
- A trust or company holds the property
- A partnership is involved
- Private and investment borrowing are mixed
### Step 3: Confirm the product type
Ask the bank which accounts suit the owner and intended use. Check whether a personal product permits rental activity. Do not apply for an ABN only because a product page suggests it.
### Step 4: Prepare the documents
Depending on the structure, the bank may request:
- Personal identification
- Business or entity name
- ABN or ACN where applicable
- Trust deed
- Partnership information
- Director or trustee details
- Authorised-user details
- Business or correspondence address
Requirements vary between institutions.
### Step 5: Redirect transactions
Update the payment details held by:
- The property manager
- The tenant, where self-managed
- Council
- The insurer
- The strata manager
- Utility providers
- Contractors
Confirm any change to loan repayments with the lender and adviser.
### Step 6: Reconcile regularly
A simple property may only need monthly reconciliation. A high-volume portfolio may need weekly reviews.
Match:
- Rent to tenancy records
- Agent deposits to owner statements
- Contractor payments to invoices
- Rates and insurance to notices
- Loan interest to lender statements
## Common Mistakes to Avoid
1. **Assuming every landlord needs an ABN.** Residential property investors may not need one.
2. **Registering as a sole trader without checking eligibility.** An ABN should reflect a genuine enterprise.
3. **Using company or trust money for personal spending.** Keep entity and private transactions separate.
4. **Assuming the payment account controls deductibility.** The expense itself and its purpose determine the tax treatment.
5. **Keeping statements but discarding invoices.** Retain both financial records and source documents.
6. **Mixing properties with different legal ownership.** Separate records according to the actual owners and structure.
7. **Using unclear payment references.** Assign consistent codes to each tenant and property.
8. **Ignoring fees and restrictions.** A paid business account may offer features the investor does not need.
9. **Giving unrestricted access.** Use approval controls and read-only access where available.
10. **Mixing private and investment borrowing.** The ATO says interest claims depend on how borrowed funds are used. Where a loan has private and income-producing purposes, interest may need to be apportioned.
## A Bank Account Organises Costs, an Inspection Helps Identify Them
A dedicated account shows what a property has already cost. A [pre-purchase building inspection](/pre-purchase-inspections) can help identify defects and possible expenditure before the investor commits.
Owner Inspections states that its pre-purchase reports can document major defects, minor defects, safety hazards, structural concerns, photographs and recommendations across accessible areas.
An inspection may also reveal signs linked to [hidden building defects](/articles/hidden-building-defects-protection-steps), including concealed moisture, failed waterproofing, structural cracking, termite damage and defective services.
Not every concealed defect can be confirmed through a visual inspection. However, visible warning signs can show where specialist investigation may be needed.
| Investor concern | Inspection feature that addresses it |
| ------------------------------------------ | ------------------------------------------------------------------------ |
| Hidden defects creating unexpected costs | Comprehensive visual building inspection of accessible areas |
| Termite or timber-pest risk | Combined [building and pest inspection](/building-and-pest-inspections) |
| Uncertainty about structural condition | Structural observations and specialist recommendations where required |
| Difficulty understanding defects | Detailed report with photographs and clear explanations |
| Limited time during the purchase process | Prompt booking and report turnaround |
| Concern about biased property information | Independent inspection without a selling-agent conflict |
| Need to budget for future work | Prioritised findings and actionable recommendations |
| Concern about repair and maintenance costs | Inspection findings that can support a more realistic contingency budget |
[Owner Inspections](/) states that its pre-purchase reports cover major and minor defects, safety hazards, structural defects and recommendations. Its building and pest service also assesses termite activity, moisture and pest-conducive conditions.
A dedicated account can help track costs after purchase. An independent inspection can help show the property’s condition and possible repair costs before purchase. Arrange a pre-purchase building and pest inspection with Owner Inspections for clear findings that support an informed decision.
### Planning for Inspection Costs
Inspection fees form part of the acquisition budget.
Pricing varies according to location, property size, access, building type and inspection scope. The Owner Inspections guide to [pre-purchase house inspection costs](/articles/pre-purchase-house-inspection-cost) explains the factors that may affect the quote.
### Inspection Services for Different Investments
| Investor concern | Relevant Owner Inspections resource |
| ------------------------------- | ------------------------------------------------------------------------------------------------- |
| Buying a residential investment | [Pre-purchase building inspection](/pre-purchase-inspections) |
| Building and termite concerns | [Building and pest inspection](/building-and-pest-inspections) |
| Existing property maintenance | [Maintenance inspection](/maintenance-inspections) |
| Commercial investment | [Commercial property inspection](/commercial-property-inspections) |
| Suspected building defect | [Defect investigation report](/defect-investigation-reports) |
| Roof condition concerns | [Roof inspection](/roof-inspection) |
| Timber pest concerns | [Timber pest inspection](/timber-pest-inspections) |
## Getting More Value From Your Property Investment
The best account is not always the one labelled “business”. It is the account that matches the legal owner, keeps property transactions separate, supports reliable records and avoids unnecessary fees.
Clear banking can show where money has gone. Independent property due diligence can show where money may need to go next. Before adding another property to the portfolio, request an independent pre-purchase building and pest inspection so repair risks can be considered before the contract is unconditional.
Contact Owner
Inspections
}
buttonHref="/contact"
variant="primary"
/>
## Key Takeaways
- A dedicated property account is generally good practice.
- It does not have to be a formal business account in every situation.
- Residential property investors may not need an ABN.
- Companies, partnerships and trusts require stronger financial separation.
- Account separation helps record keeping but does not determine tax deductibility.
- Transactions for different legal owners should not be combined without qualified advice.
- Compare fees, integrations, access controls, limits and deposit protection.
- Combine organised finances with independent property due diligence.
### Home Inspection: Defects That Can Affect Insurance
Source: https://ownerinspections.com.au/articles/home-inspection-defects-affect-insurance
Published: 2026-07-09 | Category: Insurance
Author: Maison Azdari
Could a house look fine on a Saturday open home, then turn into a claim headache later? It happens when a future problem gets classed as wear and tear, lack of maintenance, gradual deterioration, existing damage, or faulty workmanship. Those themes show up again and again in Australian insurer guidance.
For buyers concerned about hidden problems, an independent [pre-purchase building inspection](/pre-purchase-inspections) can document visible defects and condition issues before they commit to a property. Owner Inspections has a dedicated pre-purchase service for identifying potential property issues before purchase.
*This article is general information, not financial or legal advice.* Always read your insurer’s Product Disclosure Statement (PDS) and Key Fact Sheet (KFS), and ask your insurer about your situation before you rely on cover.
What this guide will help with:
- Which defect types most often lead to insurance disputes, exclusions, or reduced payouts.
- What a home inspection can document, and what it cannot confirm without specialist checks.
- Practical next steps to reduce future claim friction, using evidence, photos, and maintenance records.
Learn How to
Document Defects
}
buttonHref="/articles/document-building-defects-legal-claim"
variant="secondary"
/>
## How Home Insurance Exclusions Work in Australia
Most home insurance policies are built around insured events. These are sudden incidents like storm damage, fire, or some types of water damage. What they usually do not do is pay to fix the thing that made the damage more likely in the first place, like an old roof leak, failed grout, or long-term damp. Allianz puts it plainly: insurance is for unexpected events, and it “doesn’t usually cover normal wear and tear or poor maintenance”.
Here are the terms that matter when reading a PDS and KFS:
- **Exclusion:** something the policy will not cover (or will cover only in limited cases).
- **Condition:** something you must do to keep cover valid, like taking reasonable care or notifying the insurer of certain changes.
- **Maintenance obligation:** the idea that routine upkeep is the owner’s job, not the insurer’s. CommBank’s guidance says policies do not cover general wear and tear or insufficient maintenance.
- **Existing damage:** problems already there, or damage that began before the event you are claiming for. CommBank warns that if existing problems contributed, cover is unlikely.
## Defect vs Insured Event: The Difference That Drives Claim Outcomes
A useful mental test is: did the damage happen suddenly, or did it build up over weeks, months, or years?
**Scenario:** storm plus cracked tiles
A storm hits and water gets in.
The roof also has cracked tiles, rusted flashing, and blocked gutters that have been that way for a long time.
What can happen in practice is a split argument: the storm is sudden, but the insurer may say part of the loss links to poor maintenance or existing damage. This is one reason buyers should take visible defects seriously before settlement. Owner Inspections’ guide to [hidden building defects and property protection](/articles/hidden-building-defects-protection-steps) explains how concealed or overlooked problems can affect buyers, owners and maintenance decisions.
If you think a denial is wrong, you can challenge it. The Financial Rights Legal Centre outlines dispute options, including internal dispute resolution and escalating to AFCA if needed.
## Home Inspection Defects That Can Affect Insurance
To make this practical, each defect below follows the same template: what it looks like, why it matters to insurance, what an inspection can and cannot confirm, and what to do next.
## 1. Water Ingress, Leaks, and Moisture Damage
What it looks like (signs)
- Staining on ceilings or cornices, bubbling paint, swollen skirting boards
- Musty smells, damp carpets, mould patches
- Efflorescence (white salts) on brickwork, damp subfloor timbers
- Rusting around wet areas, loose tiles, cracking grout or failed silicone
### Why it matters to insurance
Water claims are common, but disputes often centre on whether the cause was sudden or gradual. Allianz reported [managing 78,066 home-related claims](https://www.allianz.com.au/about-us/media-hub/two-in-five-aussie-homeowners-neglect-regular-maintenance.html) in 2024 excluding natural catastrophes, and recorded over 19,000 claims involving burst pipes and water damage.
### What a home inspection can and cannot confirm
- **Can:** document visible water staining, damp indicators, poor drainage and run-off, roof and gutter issues that let moisture in, and likely entry points.
- **Cannot:** confirm concealed plumbing leaks, waterproof membrane failure behind tiles, or pipe condition inside walls without invasive or specialist checks.
### Action
- Fix moisture entry points early, before they become “long-term”.
- Get specialist checks where needed: plumber (leak detection), waterproofing assessment, drain camera, mould specialist.
- Keep receipts and photos of repairs and servicing, so you can show reasonable maintenance later.
## 2. Roof Condition and Rainwater Disposal Defects
### What it looks like (signs)
- Cracked roof tiles, missing ridge capping pointing, rusted metal sheets
- Deteriorated flashings, blocked gutters, downpipes discharging too close to footings
- Poor fall to gutters, water ponding, overflow marks
### Why it matters to insurance
Roof issues sit right at the intersection of storm claims and maintenance exclusions. Allianz’s guidance uses examples like cracked roof tiles or gutters causing leaks over time and links it to poor maintenance and denied claims.
### What a home inspection can and cannot confirm
- **Can:** visually assess accessible roof exterior areas, gutters, downpipes, and signs of overflow or past patch repairs. NSW Government lists roof exterior and stormwater run-off as typical accessible items.
- **Cannot:** guarantee watertightness in future storms, or detect every concealed roof leak.
### Action
- Clean gutters and confirm downpipe discharge and drainage.
- Repair cracked tiles, flashings, and rust before the next weather event.
- Photograph roof condition before and after repairs and keep invoices.
## 3. Structural Movement, Cracking, and Subsidence Red Flags
What it looks like (signs)
- Stair-step cracking in brickwork, widening cracks around doors/windows
- Doors or windows sticking, uneven floors, sloping verandahs
- Gaps at skirtings or cornices, fresh patching in crack zones
### Why it matters to insurance
Some policies exclude subsidence or ground movement, or require specific cover. Even where cover exists, disputes can arise if cracking is ongoing deterioration rather than a sudden event. The safest approach is to treat structural movement as a risk area that needs clarity from the PDS and insurer.
### What a home inspection can and cannot confirm
- **Can:** document visible cracking patterns and other movement indicators, and recommend further assessment where needed. NSW Government notes the report should list significant problems and may recommend a structural engineer.
- **Cannot:** confirm cause (soil movement, footing failure, drainage issues) without engineering or geotechnical input.
### Action
- Get an engineer or geotechnical opinion where red flags exist.
- Improve drainage and stormwater run-off control where water is contributing.
- Keep an “evidence pack” of crack photos with dates so changes are clear.
## 4. Mould and Ventilation-related Deterioration
What it looks like (signs)
- Black spotting on ceilings and window frames, peeling paint, condensation
- Musty smell in wardrobes or bedrooms, soft plaster, damp insulation
### Why it matters to insurance
Mould is usually a symptom. If the moisture source is long-term condensation, a chronic leak, or poor ventilation, insurers may treat it as gradual deterioration or maintenance related. Allianz lists mould and mildew damage from condensation over time as an example of a wear and tear style issue.
### What a home inspection can and cannot confirm
- **Can:** identify visible mould, likely moisture sources, and ventilation gaps such as exhaust fans not vented correctly.
- **Cannot:** confirm hidden mould inside wall cavities without specialist inspection.
### Action
- Treat mould as a “find the source” job, not just a clean-up.
- Improve bathroom and laundry ventilation, fix leaks, and address subfloor damp.
- Keep records of remediation and repairs.
Explore Defect
Investigation Reports
}
buttonHref="/defect-investigation-reports"
variant="secondary"
/>
## 5. Faulty Workmanship and Unapproved Renovations
What it looks like (signs)
- DIY wet areas, uneven tiling, missing waterproofing details
- Decks or handrails that look unstable, poorly fixed pergolas
- Patch repairs that hide repeated leaks, mismatched materials
### Why it matters to insurance
Defective workmanship often becomes the argument behind “this is not an insured event”. CommBank points out renovations can affect cover and insurers may not cover damage connected with renovation work.
On the building defects side, ABCB notes that major defect categories tied to regulatory non-compliance include waterproofing, weatherproofing, structural, and fire safety.
### What a home inspection can and cannot confirm
- **Can:** flag workmanship red flags and recommend specialist review if compliance looks doubtful.
- **Cannot:** certify compliance with building codes, approvals, or waterproof membrane installation without specific documentation and specialist checks.
### Action
- Ask for approvals, warranties, and invoices, especially for wet areas and structural changes.
- Use a specialist where risk is high: engineer, waterproofing assessment, licensed trades.
## 6. Safety Hazards (Electrical and Fire) That Insurers Care About Indirectly
What it looks like (signs)
- Aging switchboards, visible wiring issues, scorch marks
- Missing smoke alarms, no visible safety switch, damaged power points
### Why it matters to insurance
Insurers often focus on cause and reasonableness. Poor safety setup can increase loss severity and increase disputes about maintenance and reasonable care. NSW Government notes you can ask for checks like an operable electrical safety switch and operable smoke alarms as part of pre-purchase reporting requests.
### What a home inspection can and cannot confirm
- **Can:** note visible hazards and whether common safety items appear present, where accessible.
- **Cannot:** confirm electrical compliance without a licensed electrician’s inspection. NSW Government lists electrical wiring as something inspectors would not normally check.
### Action
- Book an electrician for compliance and safety checks when risk markers are present.
- Replace missing or outdated alarms and safety devices through licensed trades.
## 7. Hazardous Materials (Asbestos) and Disclosure Limits
What it looks like (signs)
- Fibro sheeting in older homes, old eaves/soffits, older wet area linings
- Renovation debris that may include suspect material
### Why it matters to insurance
Asbestos is not just a safety issue. It affects renovation costs, repair planning, and what you disclose when buying or selling. The Asbestos Safety and Eradication Agency fact sheet says sellers should disclose asbestos to buyers if the home contains asbestos, and agents must not provide false or misleading information.
### What a home inspection can and cannot confirm
- **Can:** note visible signs that suggest asbestos may be present, where accessible. NSW Government says you may ask for visible signs of asbestos to be inspected.
- **Cannot:** confirm asbestos without sampling and a specialist asbestos assessment.
### Action
If the building age and materials suggest risk, get a specialist asbestos assessor before any renovation or disturbance.
## 8. Strata and Apartments: Common Property Defects and Disclosure
What it looks like (signs)
- Balcony leaks, membrane failures, cracking in common areas
- Water staining in basements, car parks, and shared walls
- Fire safety or access issues in shared areas
### Why it matters to insurance
Strata insurance decisions often hinge on defect severity and whether there is a remediation plan. CHU says insurers assess the risk using factors like defect severity, building age, legal action, and remediation plans, and that premiums and excess can be affected. CHU also highlights that defects may be excluded in property cover, while liability exposure can still exist.
Waterproofing defects are a known problem area at a national level. ABCB’s [waterproofing impact analysis](https://www.abcb.gov.au/sites/default/files/resources/2024/Waterproofing-CBA-final-revised.pdf) notes evidence of high prevalence of waterproofing defects and summarises literature that places Class 2 waterproofing defect prevalence between 20% and 40%.
### What a home inspection can and cannot confirm
- **Can:** inspect the unit interior and immediate exterior, and document visible issues. NSW Government notes strata inspections usually focus on the unit unless you request a special-purpose report for common property.
- **Cannot:** fully assess common property defects, capital works plans, or building-wide waterproofing without body corporate records and specialist reporting.
### Action
- Ask for strata records, defect reports, and rectification plans where available.
- If defects exist, document them clearly and confirm what is disclosed to the insurer.
## Defect to Insurance Risk Theme: What To Do
| Defect type | What insurers often argue | What a home inspection can document | Next step |
| -------------------------------- | -------------------------------------------- | ------------------------------------------------------------- | ----------------------------------------------------------------------------- |
| Roof leak or overflow gutters | Wear and tear, lack of maintenance | Cracked tiles, blocked gutters, overflow marks, patch repairs | Consider a [roof inspection](/roof-inspection), repair defects and keep maintenance records |
| Shower waterproofing leak | Gradual deterioration, defective workmanship | Failed grout, cracked tiles, moisture signs | Waterproofing assessment, plumber, keep invoices |
| Rising damp or subfloor moisture | Gradual moisture, poor drainage | Subfloor damp, drainage and run-off issues | Drainage fix, ventilation, specialist where needed |
| Structural cracking | Movement exclusion, ongoing deterioration | Crack patterns, doors/windows sticking | Review the [structural integrity inspection guide](/articles/structural-integrity-inspection) and seek engineering advice where required |
| Mould | Condensation over time, maintenance | Visible mould, likely moisture drivers | Consider a [professional mould inspection](/mould-inspections) |
| Complex recurring defect | Cause disputed or unclear | Visible evidence, photos and severity observations | Consider a [defect investigation report](/defect-investigation-reports) |
## What a Home Inspection Should Cover (and What it Will Not)
A standard pre-purchase inspection is visual and non-invasive. NSW Government says the inspector should check all accessible parts of the property, including interior, exterior, roof space, under-floor space, roof exterior, surface water drainage, stormwater run-off, and more. It also lists optional requests like visible signs of asbestos, an operable electrical safety switch, and operable smoke alarms.
It also has limits. NSW Government explains a building inspection report identifies major problems visible at the time and does not generally include things like termite detection, and inspectors would not normally check concealed damp-proofing, wiring, plumbing/drainage/gasfitting, or hazards in a comprehensive way.
AS 4349.1 context
- ABLIS describes AS 4349.1 as setting recommendations for visual inspection of residential buildings and preparation of inspection reports.
- QBCC’s licensing scope also references report preparation in accordance with Australian Standard 4349.1 for completed residential building inspections.
### Home inspection scope vs specialist checks
| Check type | What it usually covers | When it helps most |
| -------------------------------- | ---------------------------------------------------------------------------------------------------------- | -------------------------------------------------------------------------------- |
| Home inspection | Visual, accessible areas, major visible defects, evidence photos and recommendations ([NSW Government][1]) | Pre-purchase risk scan, prioritising repairs, documenting condition |
| Pest inspection | Timber pests, termite activity and risk | When timber damage risk is high or region is termite-prone |
| Electrical compliance inspection | Switchboard, wiring safety, testing by electrician | When safety switch or wiring is uncertain |
| Plumbing camera or drain check | Pipe condition, blockages, stormwater issues | Recurring damp, blocked drains, older plumbing |
| Asbestos assessment | Sampling and risk assessment | Older homes, fibro materials, renovation plans |
## How to Use Your Inspection Report to Reduce Future Claim Friction
A good report is not just for negotiation on purchase day. It becomes a baseline record that can help later when the argument is pre-existing versus sudden.
Steps that tend to help
- Fix urgent moisture entry points fast: roof leaks, overflowing gutters, failed wet area seals. Allianz links preventable water and burst pipe claims to maintenance like replacing flexi hoses and checking seals.
- Keep a simple maintenance log: date, work done, photos, receipts. This supports a reasonable maintenance story if wear and tear is raised.
- Disclose known defects accurately when seeking cover or renewing. Financial Rights notes non-disclosure and misrepresentation can be reasons a claim is refused.
- When an insured event happens, separate what was sudden from what was already there. Document the event timing, damage spread, and prior condition evidence.
## If Your Claim is Refused: Practical Steps
A refusal is not always the end of the road. Start with calm documentation and process.
Checklist
- Ask for the insurer’s reasons in writing and what evidence they relied on.
- Gather your inspection report, photos, maintenance records, and receipts.
- Consider an independent expert opinion where the dispute is technical (engineer, plumber, remedial builder).
- Use internal dispute resolution (IDR) first, then AFCA if unresolved. Financial Rights sets out that pathway and notes AFCA is free and independent.
- Keep an eye on complaint timeframes. ASIC reporting on general insurance complaints references that a written IDR response is generally required within 30 calendar days, with some exceptions for complexity.
## Getting the Most Value from Your Home and Building Investment
A risk-aware homebuyer is not trying to predict the future. The goal is to reduce nasty surprises by spotting defects that often turn into wear and tear debates, existing damage disputes, and gradual deterioration arguments. Use the inspection report as a baseline record, act fast on moisture entry points, keep a maintenance trail, and be accurate with disclosures when arranging cover.
If you’re buying, renewing insurance, or planning repairs, a professional home inspection helps you spot high-risk defects early, especially moisture entry points, roofing issues, and safety hazards, so you can prioritise fixes and document the property’s condition. [Book an independent home inspection with Owner Inspections](/) for a clear, evidence-based report you can act on.
Contact Owner
Inspections
}
buttonHref="/contact"
variant="secondary"
/>
### Inspector Missed Black Mould After Settlement, What To Do?
Source: https://ownerinspections.com.au/articles/inspector-missed-mould-after-settlement
Published: 2026-07-07 | Category: Mould Inspections
Author: Maison Azdari
Black mould behind a built-in robe. A musty smell that will not quit. A roof void you never thought to check until a ceiling stain appears. If you have already settled and moved in, it can feel like the worst kind of surprise: you did the responsible thing and paid for a [pre-purchase building inspection](/pre-purchase-inspections), yet the mould is now your problem.
Mould is often hidden, moisture-related, and sometimes sits in the exact places a standard inspection may not fully access.
This guide is NSW-focused with Australia-wide notes. It walks you through what to do in the first 48 hours, how to work out the moisture cause, how to check whether the inspector was reasonably expected to find it, and what positive outcomes can look like when you complain or escalate.
Explore Defect
Investigation Reports
}
buttonHref="/defect-investigation-reports"
variant="secondary"
/>
## What This Situation Usually Means
### Mould is the symptom; moisture is the cause
Mould is rarely the real problem. Moisture is. NSW Health notes mould needs moisture to grow, and it is likely to return unless you deal with the cause of dampness.
In NSW homes, major mould behind a BIR or in a roof void often traces back to one or more of these:
- Roof leaks (flashings, valleys, cracked tiles, gutter overflow, downpipe issues)
- Condensation (poor ventilation, cold surfaces, high indoor humidity)
- Plumbing leaks (wall cavities, bathrooms, laundry)
- Subfloor damp or rising/lateral damp (less common for roof-void scenarios, but possible)
Your job is to separate cause fix from clean-up. Cleaning without stopping moisture is where money gets wasted.
### Why mould is commonly missed in pre-purchase inspections
Many pre-purchase inspections are visual, non-invasive, and limited to reasonably accessible areas. NSW Fair Trading explains that reports are based on what can be seen at the time of inspection, and inspectors may not be able to access concealed areas.
Industry scope statements that reference AS 4349.1 commonly spell this out in plain language: a visual assessment of [reasonably accessible parts](https://www.archicentreaustralia.com.au/resources/property-assessment/) will not disclose defects in inaccessible or concealed areas.
Common blind spots in real houses include:
- Roof voids without safe manhole access, safe flooring, or safe ladder positioning
- Built-in robes with packed contents, fixed backing panels, or limited visibility behind shelving
- Furniture against walls hiding staining, skirting swelling, or musty odours
- Recently painted areas masking stains (paint can hide evidence, not stop moisture)
## First 48 Hours: Health + Damage Control Steps
### When to limit exposure and who shouldn’t clean it
NSW Health notes mould spores can affect people who are sensitive, especially those with asthma, allergies, or certain medical conditions. If anyone in the home is high-risk, treat exposure like a health issue as well as a building issue.
Better Health Channel (Vic Government) is very clear about [who should not be present](https://www.betterhealth.vic.gov.au/health/conditionsandtreatments/mould-removal-at-home) during mould removal, including pregnant women, children, and people with weakened immune systems or chronic lung disease.
If the affected area is large, inside porous materials (plasterboard, carpet underlay, robe linings), or the smell is strong through multiple rooms, it can be safer to keep people out of that room until containment and drying are underway.
### Basic safety steps (ventilation, PPE, isolating the area)
If you are doing a small, surface-level clean while you organise proper help:
- **Ventilate well.** Better Health Channel recommends good ventilation during mould removal.
- **Wear protective gear.** Better Health Channel includes a P1 or P2 mask, gloves and eye protection as part of protective clothing for mould removal.
- **Do not dry brush.** It can flick spores into the air.
- Use HEPA filtration if vacuuming. Better Health Channel recommends only vacuuming mould-affected areas with a HEPA filter.
- **Isolate the area.** Close doors, seal gaps if you can, and avoid running fans that blow mould dust into clean areas.
NSW Health provides practical cleaning guidance, including mild detergent or diluted vinegar for routine clean-up, and a diluted bleach option for items that can’t be discarded and are hard to clean, with protective equipment and ventilation.
## Step-by-step Action Plan
### Document everything (photos, moisture readings, trades notes)
Before you scrub, rip out linings, or throw materials away, build an evidence bundle. Keep it simple and factual.
Evidence checklist table
| Item | What “good” looks like |
| ------------------ | ------------------------------------------------------------------------------------------------------------------ |
| Photos/video | Dated, wide + close shots, show the room context, the BIR/roof void entry, and any staining line on ceilings/walls |
| Trade findings | Written note identifying likely moisture entry path (example: flashing defect, gutter overflow, broken tile) |
| Moisture readings | Location-mapped readings, note date/time, and repeat after drying if possible |
| Quotes/scope | Itemised, split into “cause fix” (roof/plumbing) vs “internal remediation/replacement” |
| Report + agreement | Full inspection report, terms/conditions, and any notes about inaccessible areas (roof void/BIR) |
### Confirm source (roof leak vs condensation)
Start with the fastest cause checks:
- **Roof leak clues:** ceiling stain that grows after rain, damp insulation in roof void, wet rafters/battens, water tracks from penetrations, gutters overflowing.
- **Condensation clues:** mould on cold corners, behind furniture, on south-facing walls, bathrooms without exhaust, indoor clothes drying, no obvious rain link.
WorkSafe Queensland notes mould is often detected by visible growth or musty odour, and it can be in wall cavities or ceiling spaces. It also points out that building materials that become wet from leaks will deteriorate if not dried out quickly.
For a roof scenario, a roof plumber report with photos is often the quickest way to confirm cause and scope. For condensation scenarios, you may need ventilation and humidity assessment alongside building checks.
### Get an independent assessment + written scope/costs
If you are considering a complaint to the inspector, an independent written assessment helps keep the conversation grounded.
A good independent assessment usually includes:
- Moisture mapping (moisture meter readings across the affected wall/ceiling and adjacent areas)
- Where useful, thermal imaging to identify damp patterns (it is not a mould detector, it is a moisture pattern tool)
- Photos of entry points (flashings, gutters, penetrations, valleys, box gutters)
- A clear separation between:
- Cause removal (roof/plumbing/condensation drivers)
- Remediation (containment, cleaning, HEPA filtration, removal of contaminated porous materials)
- Reinstatement (plaster, paint, joinery repairs)
NSW Health notes that if you think you have mould but can’t find the source, you can employ an occupational hygienist for specialist mould testing and consultancy services.
View Expert Witness
Report Services
}
buttonHref="/expert-witness-reports"
variant="secondary"
/>
## Was the Inspector Actually Expected to Find it?
A practical way to judge this is to ask: was the mould in a place an inspector could reasonably and safely view at the time?
NSW Fair Trading explains that inspectors may not be able to access concealed areas and that reports are based on what is visible at the time.
Many AS 4349.1-aligned scope statements define “reasonably accessible” as areas that can be accessed without removing fixed items, stored belongings, or linings, and where safety conditions allow access.
NSW reality examples
- A roof void with no safe manhole or unsafe access: often “not inspected” and should be noted as a limitation.
- A BIR packed to the brim at inspection: the internal wall behind items may not be meaningfully visible.
- A BIR with a removable panel that was not removed: a standard inspection typically does not dismantle joinery.
### What the report should disclose (limitations + recommendations)
NSW Fair Trading advises using a suitably qualified person and checking they carry adequate insurance, particularly professional indemnity insurance, and it stresses understanding what the inspection covers.
A helpful report should make it clear:
- What was inspected and what was not
- Why access was limited (locked area, stored items, safety risk, no manhole)
- Any indicators that suggest further investigation (staining, musty odour, dampness, poor ventilation)
If you are unsure how to interpret defect descriptions, photographs, recommendations or limitation notes, read this guide on [understanding your property inspection report](/articles/understanding-your-property-inspection-report) before writing your complaint.
The key questions are:
- Did the report clearly state whether the roof space was accessed?
- Did it explain why any area was not inspected?
- Did it identify visible moisture indicators?
- Did it recommend further investigation where warning signs were present?
### Red flags in reports (no access notes, vague “no issues observed”)
Red flags that can matter in a dispute:
- The report says “roof void inspected” but there is no photo, no note of access point, and no description.
- The report claims “no evidence of dampness” but you later discover obvious staining that appears older than settlement.
- The report has broad disclaimers but fails to document obvious access limits (example: BIRs not opened, roof void not accessed).
### Inspection scope comparison table
| Service type | Typical inclusions | Best for |
| ---------------------------------- | ------------------------------------------------------------------------------------ | ---------------------------------------------------------------------- |
| Standard pre-purchase inspection | Visual, non-invasive, reasonably accessible areas, written report | General defect screening and risk reduction |
| Moisture/leak investigation add-on | Moisture mapping, targeted investigation, roof/plumbing focus, evidence photos | Suspected leaks, staining, musty odours, prior water issues |
| Mould assessment | Containment advice, remediation scope, verification approach, hygiene considerations | Visible mould, strong odours, health concerns, porous material impacts |
## Your Options With the Inspector
A complaint does not always end in a fight. “Positive” can mean:
- A clear explanation of access limits, with evidence from the original inspection
- A re-inspection to confirm whether the issue was visible at the time (sometimes at low or no cost)
- A negotiated partial refund if documentation was poor or a visible issue appears to have been missed
- A pathway to the inspector’s insurer, if liability is accepted (professional indemnity insurance exists for this reason)
NSW Government information for selling agents also highlights that when a report is included in a contract for sale, it must indicate whether the author has professional indemnity insurance.
### How to write the complaint (facts, timeline, remedy request)
Keep the complaint calm and structured. Focus on facts, not feelings. You can use this format.
**Subject line:** Pre-purchase inspection at [address] on [date] – significant mould discovered after settlement
Include:
- Inspection date, report date, settlement date, move-in date
- Where the mould is (example: behind built-in robe in main bedroom, and dampness in roof void above that room)
- What you found (photos, odour, damaged plaster, swollen skirting)
- What a trade/independent assessor found (written diagnosis and photos)
- What the report says about:
- roof void access
- wardrobes/BIRs access
- any dampness or staining observations
- limitations and recommendations
Ask direct questions:
Was the roof void accessed? If not, why not, and where is that recorded?
Were BIRs opened and internally inspected as far as practicable?
Were any moisture indicators noted near that wall/ceiling?
Request a clear outcome:
- Written response addressing access and observations
- Re-inspection or file review
- Proposed resolution steps, including whether the matter is referred to insurance
NSW Fair Trading notes that if you are not happy with the report, you should try to resolve it with the consultant, and you can also access free advice and complaint services through NSW Fair Trading.
## Other Responsible Parties You May Need to Check
### Seller/agent (misrepresentation vs “as-is” risks)
Property purchases are often effectively “as-is”, but that does not mean everything is fair game. If you suspect a known leak or mould issue was actively concealed, or you relied on a specific representation, speak with a solicitor about your options and evidence thresholds. Keep your expectations realistic: this is often harder than it feels, and proof matters.
### Builder/warranty (if newer build)
If the home is relatively new, there may be statutory warranty or defect pathways, depending on build type and timing. NSW strata guidance notes that some defects in residential buildings may be covered by statutory warranty periods and points to Building Commission NSW pathways for serious defects in certain newer buildings.
### Strata/body corporate (common property water ingress)
If you are in an apartment, townhouse, villa, or strata duplex, water ingress can involve common property. NSW Government strata guidance states the owners corporation is responsible for common property maintenance and repair, including roof and gutters, and water damage coming from common property.
### Who might be responsible?
| Scenario | Likely pathway to check first | Why |
| --------------------------------------------------------------------------------- | ------------------------------------------ | ------------------------------------------------------------------------------------- |
| Leak is from roof flashing/gutters | Roof plumber report + photos | Confirms cause and rectification scope fast |
| Mould was in an area the inspector couldn’t access (locked BIR, unsafe roof void) | Check report limitations | Standard inspections are often non-invasive and access-limited |
| Mould was plainly visible and accessible | Written complaint to inspector | Raises the “should have been identified” question |
| Strata property; leak may be common property | Strata manager/owners corporation | Roof and gutters are commonly owners corporation responsibility |
| Health symptoms or heavy contamination | Health guidance + professional remediation | PPE and exposure advice exists |
## NSW Pathways If It Doesn’t Resolve
### Consumer Rights for Services (ACL)
Australian Consumer Law provides consumer guarantees for services, including that services are provided with due care and skill. Consumer-facing regulator guidance explains that if you cannot resolve a problem with a business, you can take the complaint further through your state consumer protection agency.
This is where evidence becomes the whole game. The more you can show that something was visible, accessible, and should have been noted within the stated scope, the stronger your position tends to be.
### NSW Fair Trading and NCAT
If you cannot resolve it directly, NSW Fair Trading is a standard next step for complaint pathways.
For formal consumer disputes, NCAT can hear and decide consumer claims up to $100,000. NCAT also sets out evidence examples to gather, including quotes, photos, and relevant documents, and notes time limits can apply.
### How to Prepare Your NCAT-ready Bundle
- 1-page timeline (inspection, settlement, discovery, trades, costs)
- Photos with captions (what, where, when)
- Independent findings (roof plumber, building consultant, hygienist if used)
- Moisture mapping results (if available)
- The inspection report, terms, and any email communications
- Itemised quotes split into cause-fix vs remediation vs reinstatement
## Preventing Recurrence After Repairs
### Drying, containment, verification (clearance checks)
Mould remediation works best when it follows a sequence:
1. Fix the moisture source
2. Dry the structure and materials properly
3. Remove or remediate contaminated materials
4. Verify that moisture levels are back to normal before closing walls or reinstalling joinery
A public health guideline warns against sealing or covering surfaces until they are dry, and it outlines that drying may take days and may need dehumidifiers, fans, and controlled airflow.
If you are paying for remediation, ask what “done” looks like. A basic completion check often includes:
- Visible cleanliness with no dust and no musty odour
- Moisture readings returning to acceptable range for the material
- Confirmation that porous materials that cannot be cleaned were removed and replaced, where appropriate
>**A note on fogging:** fogging can be marketed as a quick fix. Treat it cautiously. If the moisture source is not fixed and materials are still damp, fogging can become a temporary deodoriser rather than a solution.
### Ventilation + Moisture Control Basics
Practical household habits that help once repairs are complete:
- Run bathroom and kitchen exhaust during and after use
- Keep furniture slightly off external walls in colder rooms
- Avoid drying clothes indoors without ventilation
- Use a dehumidifier during wet weeks if indoor humidity stays high
- Keep gutters clean and ensure downpipes discharge correctly
## Request an Independent Moisture and Mould Assessment
If you need a clearer picture of the affected area, moisture indicators and next steps, [request a professional mould inspection](/mould-inspections) from Owner Inspections.
Contact Owner
Inspections
}
buttonHref="/contact"
variant="primary"
/>
### Can My Builder Charge Extra or Delay the Build if I Hire My Own Independent Inspector?
Source: https://ownerinspections.com.au/articles/builder-charge-delay-independent-inspector-australia
Published: 2026-07-03 | Category: Building Inspections
Author: Maison Azdari
If your builder is pushing back on [independent construction stage inspections](/new-construction-stage-inspections), you’re not being paranoid. It’s a common pressure point in residential builds, especially for first-time owners and time-sensitive investors. The builder controls the site and the schedule, so they may try to control who enters, when, and what gets written down.
The reality is more balanced than the threats often sound.
In most cases, you can choose your own independent building consultant during a build, but the builder can still set reasonable site rules for safety and scheduling. Fees and time extensions can be legitimate in some situations, but blanket *“pay up or we’ll delay you”* conditions are a red flag unless the builder can link them to real costs and real delay.
View Stage
Inspections
}
buttonHref="/new-construction-stage-inspections"
variant="secondary"
/>
## What This Situation Usually Means
Builders push back on independent inspections for three main reasons.
**One reason is safety and compliance.** A residential site is a workplace. The builder has duties to manage risks, control access, and make sure visitors are inducted and supervised where needed. Safe Work Australia guidance commonly expects visitors to be supervised and, in some cases, given a workplace induction relevant to the hazards.
**Another reason is scheduling control.** Stage inspections like slab inspection, frame inspection, pre-plaster inspection, waterproofing inspection, and handover inspection often need to happen in a tight window. If the inspection is booked late, or the inspector needs re-entry, it can clash with trades.
**The last reason is contractual leverage.** Many domestic building contracts give the builder “possession” or control of the site during construction and require owner visits to be by appointment. That’s not automatically unfair. It becomes a problem when “site control” is used as a deterrent to scrutiny.
### Reasonable site controls vs punitive deterrents
Reasonable controls usually look like:
- A booked time window
- PPE requirements
- Induction paperwork
- A supervisor on site
- A rule that the inspector does not direct trades on site
Punitive deterrents usually look like:
- A fixed “inspection fee” that doesn’t match any real process
- Automatic time added for any inspection, even when no work is affected
- “You can inspect only if you use our inspector”
- Refusal without offering any workable method to comply with safety rules
## Do You Have to Use the Inspector Introduced by the Builder?
In most scenarios, no. You can engage a truly independent inspector, and it is usually a smart risk-control step for an owner-occupier worried about defects and for an investor sensitive to cost blowouts and extension of time tactics.
What matters is how the site access is handled and what your contract says about visits and third-party attendance.
### What Independent Should Mean in Practice
An independent inspector is independent from the builder in a way that a reasonable person would trust.
That usually means:
- You engage them, you pay them, and they report to you
- No referral fees, commissions, or ongoing “preferred supplier” arrangement with the builder
- They’re willing to state any conflicts of interest upfront
- Their engagement letter and report are addressed to you, not the builder
Builder-introduced inspectors aren’t automatically “bad”, but they can create a perceived conflict. If the builder recommends the inspector, ask how that recommendation works. Is it just a name they’ve seen before, or is it a pipeline relationship?
### Simple checks to verify independence fast
Ask the inspector, in writing:
- Do you receive any referral fee or benefit from the builder or site supervisor?
- How many inspections have you done for this builder in the last 12 months?
- Will the report be issued to the owner only?
- Will you attend under a “non-interference” protocol (observe, document, report)?
If answers are vague, treat that as useful information.
## Site Access Rules, and Why Builders Often Control Who Enters
Builders often control who enters because they’re running a workplace. That means WHS and safety systems matter, and they can set entry requirements.
Safe Work Australia guidance for construction inductions commonly expects visitors to be supervised and, where visitors may enter operational areas, provided with relevant site induction information.
So it is normal for a builder to require:
- A booked inspection time
- Site-specific induction sign-on
- PPE such as boots, hi-vis, and hard hat where required
- Proof of the inspector’s insurance and licences (where applicable)
- Supervision by a site supervisor
What is not normal is using WHS as a blanket “no” when a safe pathway exists.
## When Inspection Fees Can be Legitimate
Builders sometimes charge a fee for owner-arranged inspections. Whether that fee is fair depends on what it’s covering, and whether the contract allows it.
Legitimate cost categories often include:
- Site supervisor time to escort and manage access
- Admin time for induction, sign-in, and safety paperwork
- Any genuine rework to sequencing if you changed an agreed access plan
A useful reasonableness test is this: *does the fee map to a real cost and a real process, or does it look like a penalty?*
If the builder can’t explain what the fee covers, or the fee is the same regardless of how the inspection is run, it’s worth challenging.
### Certifier vs Builder QA vs Independent Inspector
| Role | Purpose | What they look at | Limitations | Output |
| --------------------------------------------------- | ------------------------------------------------------------- | ---------------------------------------------------------------------- | ---------------------------------------------------------- | ------------------------------------------------------------------ |
| **Building certifier / building surveyor** | Regulatory compliance checks required by the approval process | Mandatory stages and compliance items | Often not a full quality audit of workmanship | Certificates / inspection records |
| **Builder internal QA** | Builder’s own quality control | Items they choose to check | Not independent | Internal checklists |
| **Independent building consultant (owner’s inspector)** | Owner-focused quality review and defect risk control | Workmanship, visible defects, evidence-based issues, build-stage risks | Not a substitute for certification; must follow site rules | Written report, photos, defect list, rectification recommendations |
## When Delays and Extension of Time Claims Can be Legitimate
Builders can only claim an Extension of Time (EOT) if the contract allows it and if the claimed event actually delays the works.
Queensland’s QBCC new home contract conditions, for example, set out a structured process where the builder must make the claim in writing with particulars, within set timeframes, and take reasonable steps to lessen the delay.
The specifics differ by contract and state, but the same common-sense logic applies across Australia: an EOT should relate to real delay, not a theoretical one.
### Legit delay scenarios
Delays can be legitimate when:
- The inspection physically blocks trades from working in an area
- Your inspector demands destructive testing or re-entry that wasn’t planned
- The builder agrees to pause at a “hold point” while defects are assessed and rectified
- The owner refuses reasonable access for rectification work that needs to occur
On that last point, QLD’s dispute and rectification pathways show why “access” becomes a big deal once defects are formally in play. The QBCC may issue a direction to rectify after a site inspection, and reasonable access must be provided for rectification work.
### Red flag delay scenarios
Delay threats look like leverage when:
- Time is added automatically for any inspection regardless of impact
- The builder refuses to explain the delay calculation
- The builder can’t identify what work is actually being delayed
- The builder claims an EOT even when the inspection was done in a builder-approved window and no trades were affected
### Delay scenarios and how to prevent them
| Scenario | Does it usually cause delay? | Why | Prevention step |
| --------------------------------------------------------- | ---------------------------: | --------------------------------- | -------------------------------------------------- |
| Inspection during a scheduled quiet period | Usually no | No trade clash | Book a builder-approved window |
| Inspector attends, observes, documents only | Usually no | No interference | Non-interference protocol |
| Inspector blocks access to a work zone during trade hours | Sometimes | Trades can’t work | Inspect outside peak trade times |
| Inspection identifies defects requiring rectification | Sometimes | Rectification may change sequence | Fast report turnaround so decisions happen quickly |
| Owner insists on unplanned re-entry multiple times | Often | Schedule uncertainty | Stage prioritisation plan, fewer visits |
| Builder claims “automatic EOT for any inspection” | Red flag | Not linked to real delay | Ask for clause + critical path explanation |
See Booking
Timeline
}
buttonHref="/articles/when-to-book-stage-inspections-timeline"
variant="secondary"
/>
## State Reality Check (What Changes by Location)
Rules and dispute pathways vary. Here are practical differences that matter for inspections, access, and leverage.
### Victoria: Reasonable access is backed by law
In Victoria, the [builder must permit the building owner](https://classic.austlii.edu.au/au/legis/vic/consol_act/dbca1995275/s19.html) or a person authorised by the owner to have reasonable access to the site and view the work. Consumer Affairs Victoria also states owners and their agents have rights to visit and that this applies even if the contract says otherwise.
This is why “you can’t bring your inspector” is harder for a builder to sustain in VIC if the owner is willing to comply with safety and scheduling rules.
If disputes escalate in Victoria, domestic building disputes generally need to go through the dispute resolution body before VCAT will accept the matter. DBDRV guidance spells out that eligible disputes must be lodged there first and VCAT requires the certificate of conciliation.
Victoria’s regulator landscape has also shifted, with the Building and Plumbing Commission providing dispute resolution services that were previously known as DBDRV.
### New South Wales: Contract-driven, with regulator pathways
In NSW, access arrangements tend to be contract-driven, so your paper trail matters. NSW guidance on [resolving building disputes](https://www.nsw.gov.au/housing-and-construction/building-or-renovating-a-home/resolving-building-disputes) starts with reviewing the contract, raising issues early, and putting concerns in writing.
If quality disagreements blow up, NSW also points owners to the NSW Guide to Standards and Tolerances as a reference for minimum technical standards and quality of work, while noting it’s general guidance rather than strict rules.
For escalation pathways, the NSW Building Commission describes a complaint inspection process where an inspector assesses the complaint and evidence, decides if an onsite inspection is warranted, meets parties on site, and produces a complaint inspection report.
### Queensland: Separate “mandatory certifier inspections” from owner quality checks
In Queensland, certification inspections are part of the statutory approval process and are different from owner-arranged quality inspections.
Queensland guidance documents explain that inspection responsibilities sit within the [Building Act and Building Regulation framework](https://www.housing.qld.gov.au/__data/assets/pdf_file/0016/34234/inspection-guideline-class-1and10-29March2023.pdf), and refer to inspecting persons such as building certifiers and competent persons.
That does not stop an owner commissioning additional inspections. It does mean you should avoid confusing the roles. Your independent inspector is there to help you spot defects and document issues early, not to replace the certifier’s statutory function.
Queensland contracts also tend to be process-heavy around time claims. QBCC contract conditions show EOT claims should be made in writing with particulars and within set timeframes.
### Other states and territories in one minute
If you’re outside VIC, NSW, or QLD, the same pattern still helps: check your contract’s access clause, comply with safety rules, and use your state’s consumer [building dispute pathway](https://www.wa.gov.au/government/multi-step-guides/building-dispute-resolution) early if refusal becomes unreasonable. WA’s Building and Energy outlines a building dispute resolution avenue for home building work contracts, for example.
## How to Get an Independent Inspection Without Triggering Fees or Delays
The best strategy is to remove the builder’s two favourite arguments: safety risk and schedule uncertainty.
A “no disruption” protocol that works on most sites
**1. Book a builder-approved window**
Ask for a nominated time when the stage is ready and trades won’t be blocked.
**2. Confirm induction, PPE, and supervision requirements**
Safe Work guidance supports visitor induction and supervision expectations.
**3. Keep the inspector in observe-and-report mode**
No directing trades, no arguing on site. The inspector documents and reports to the owner.
**4. Fast report turnaround**
Aim for 24–48 hours so the builder can respond without claiming uncertainty.
**5. One clear communication channel**
Owner sends the report to the builder with a short list of items to confirm, clarify, or rectify.
### What to put in writing before the visit (paper trail)
Send one email that:
- Names the inspector as your authorised representative
- Requests a time window for the inspection
- Confirms the inspector will comply with induction, PPE, and supervision rules
- Confirms no interference with works
- Requests any fee breakdown in advance if the builder says charges apply
### Email script you can copy
Subject: Request for site access for independent stage inspection
Hello [*Site Supervisor/Client Liaison Name*],
I’m booking an independent stage inspection for the build at [*Address*] at the [*Stage, e.g. frame / pre-plaster*] stage.
Please confirm a suitable time window that avoids disruption to trades. My inspector, [*Name, Business*], will attend as my authorised representative and will comply with site induction, PPE, and supervision requirements. The inspection will be observe-and-report only and will not direct workers on site.
If you believe any supervision or admin fee applies, please point me to the relevant contract clause and provide a breakdown of the actual cost items covered.
Thank you,
[*Your Name*]
## What to Do if the Builder Refuses or Attaches Unreasonable Conditions
When a builder says “no” or adds big fees and time, move the conversation from emotion to evidence.
Ask for three things:
**1. The clause**
Which contract clause allows refusal, fees, or EOT?
**2. The breakdown**
If there’s a fee, what work is being charged and at what hourly rate?
**3. The delay method**
If there’s an EOT threat, what work is delayed and how is the number of days calculated?
If you’re in Victoria, remind them that reasonable access for the owner or the owner’s agent is a legal requirement and ask them to propose a safe, workable time.
If you’re in NSW or QLD, keep it contract-first and dispute-pathway aware. NSW recommends reviewing the contract and putting issues in writing early.
If it escalates, NSW Building Commission and QBCC processes both involve formal assessment and, where warranted, site inspections.
## Fees Reasonableness Checklist
| If the builder charges for… | Often reasonable when… | Red flag when… |
| ----------------------------- | ---------------------------------------------------------------- | --------------------------------------------------- |
| Supervisor attendance | A supervisor must escort visitors and the time is clearly stated | A flat fee applies even when no escort is provided |
| Induction and safety admin | There’s a documented induction process | The builder can’t explain the process or records |
| After-hours access request | You requested unusual timing | The builder refuses normal business-hour access too |
| “Inspection admin fee” | It’s small and itemised | It’s large, unexplained, and repeated each visit |
| “Delay fee” or automatic time | The inspection actually stopped work | Time is added regardless of impact |
## Getting the Most Value from Your Home and Building Investment
Independent inspections during a build are meant to reduce defect risk, not start a fight. The safest approach is to be firm on your right to independent advice, while being easy to work with on site safety and scheduling.
If a builder claims fees or delays, treat it like any other contract claim. Ask for the clause, the breakdown, and the delay calculation. When you remove uncertainty and keep everything written, a lot of leverage tactics lose power.
If you want independent stage inspections that are induction-ready, non-disruptive, and report fast, speak with Owner Inspections about a stage prioritisation plan so you get maximum coverage with fewer site visits.
Contact Owner
Inspections
}
buttonHref="/contact"
variant="primary"
/>
### Practical Completion Inspection: What if the Builder’s Defect List has Missing Items?
Source: https://ownerinspections.com.au/articles/practical-completion-inspection-defect-list-has-missing-items
Published: 2026-06-30 | Category: Pre-Settlement Inspections
Author: Maison Azdari
What happens if you turn up to your Practical Completion Inspection (PCI) and the builder’s defects list is missing items from your independent inspector report? Do you sign anyway, pay the final invoice, and hope it sorts itself out later?
This is a high-stakes moment for homeowners and investors because PCI often links to handover, final payment, and the start of key timeframes. If a defect is missing from the builder’s defect list (snag list, punch list, defects schedule), it can become harder to enforce later, even when the issue is real and clearly documented.
This guide is for owners at PCI or handover who already have an independent report, or who are preparing for a [pre-handover inspection](/pre-handover-inspections), and want a practical way to protect their position before signing paperwork or making final payment.
Read the Defect
Documentation Guide
}
buttonHref="/articles/document-building-defects-legal-claim"
variant="secondary"
/>
## What is a Practical Completion Inspection (PCI) and What Gets Signed?
PCI is the handover-stage inspection where the builder says the home is complete enough to meet the contract standard for “practical completion” (wording varies by contract). In Queensland, the QBCC describes practical completion as work completed to the contract, plans and specifications, with only minor defects or omissions, and suitable for habitation and compliant with statutory requirements.
At PCI, the builder usually presents paperwork such as:
- Notice of Practical Completion (or similar contract notice)
- Builder’s defect list (often a short checklist)
- Handover pack items (manuals, warranties, keys, compliance certificates)
- Final payment claim (or confirmation of the balance due)
### PCI vs Final Completion (Why defects still exist at PCI)
Practical completion does not mean perfect finish. It usually means the home can be used for its intended purpose, with remaining items limited to minor defects or minor incomplete work. That is why paint touch-ups, silicone gaps, door adjustments, or hardware alignment often appear on PCI lists.
The risk is not that defects exist. The risk is that your independent inspector has flagged defects that are not recorded anywhere in the builder’s defect list, and the builder later treats them as “new”, “out of scope”, or “not raised at PCI”.
## Why a Builder’s Defect List Can Miss Items From an Inspector Report
Missing items do not always mean the builder is acting in bad faith. Common reasons include scope differences, admin shortcuts, and version mismatches.
### Different definitions (defect vs finish vs tolerance)
Independent reports often describe issues using building terms that can be argued about:
- **Defect** (non-compliant or not per contract/spec)
- **Finish issue** (cosmetic, but still contract-relevant if the specification sets a standard)
- **Within tolerance** (builder may argue it is acceptable)
The fix is to tie each item back to something objective: the contract, drawings, specifications, manufacturer installation requirements, or a clear functional issue (water ingress risk, safety, operation).
### Admin Process (Builder uses a short checklist)
Many builders run PCI using an internal checklist designed for speed. It may miss room-by-room details that a thorough independent inspection captures, especially when the inspector uses a structured report format with photos, location notes, and risk-based wording.
### Timing/Version Mismatch
Your report might be:
- Completed earlier than the builder’s current version of works
- Based on a different revision of plans/finishes
- Missing the builder’s last-minute changes or as built adjustments
A quick reconciliation step fixes most of this.
## Is it Okay to Sign PCI Paperwork if the Defect List is Missing Items?
Sometimes yes, sometimes no. The safer question is: what does signing trigger in your contract, and what written record exists for the missing items before you sign?
### What Signing Typically Triggers (Handover + Final payment + Timelines)
Depending on your contract, signing PCI or accepting practical completion may trigger:
- Handover and keys
- The builder’s right to claim final payment
- The start of contract defect periods (often called the defects liability period)
- A countdown to raise issues in writing under the contract process
Even if your contract defects period starts, you still want the largest possible defect list clearly acknowledged at PCI, because it reduces arguments about timing and responsibility.
### Risk: Missing Items Become Harder to Enforce Without Written Acknowledgement
If it is not on the builder’s list and not acknowledged in writing, the builder may later claim:
- It was not raised at PCI
- It was caused after handover
- It is maintenance, not a defect
- It is “normal settlement” or “owner damage”
In Queensland, the QBCC notes [owners should notify contractors](https://www.qbcc.qld.gov.au/home-owner-hub/build-renovate/finalising-work/practical-completion-inspection) of defects noticed at handover or within relevant periods and that defects need to be raised with the contractor. The practical lesson is the same everywhere: get it in writing with evidence.
## What to Do Next (Step-by-step)
This is the process Owner Inspections uses to convert an independent report into a builder-ready defects schedule with a paper trail.
### Step 1: Reconcile Lists Line-by-line (Create “missing items” schedule)
Take your inspector report and the builder’s defect list and reconcile every item. The goal is a single table that shows:
- What your inspector noted
- Whether it appears on the builder’s list
- Evidence references (photos)
- Location and severity
- Builder acknowledgement status
- Agreed rectification date and status
### Inspector Report vs Builder Defect List Reconciliation
| Item | In inspector report? | In builder defect list? | Photo ID | Location | Severity | Builder acknowledged (Y/N) | Agreed fix date | Status |
| ----------------------------------------- | -------------------- | ----------------------- | -------- | -------------- | -------- | -------------------------- | --------------- | ----------- |
| Example: Shower screen leaks at corner | Yes | No | P-014 | Ensuite | Major | N | TBC | Open |
| Example: Front door not latching smoothly | Yes | Yes | P-022 | Entry | Minor | Y | 10 Feb 2026 | In progress |
| Example: Brick weep holes blocked | Yes | No | P-031 | Rear elevation | Moderate | N | TBC | Open |
### Step 2: Email the Builder: Request the Missing Items be Added/acknowledged
Send a clear email the same day as PCI (or immediately after). Attach:
- The independent report (PDF)
- Your “missing items schedule” (PDF or spreadsheet export)
- A photo pack (optional but strong)
***Email Template***
Subject: PCI defects list missing items – request acknowledgement and rectification dates
Body:
Hello [*Builder/Site Supervisor Name*],
Following today’s Practical Completion Inspection at [*Address*] on [*Date*], the builder’s defects list provided at PCI does not include several items documented in our independent inspection report.
Please find attached:
1. Independent inspection report dated [*Date*]
2. Missing items defects schedule (items not currently listed on the builder’s PCI defects list)
3. Photo references (Photo IDs listed in the schedule)
Please confirm in writing by [*set a short deadline, e.g., 2 business days*] that:
a. These missing items are acknowledged for rectification, and
b. A target rectification date is agreed for each item (or a proposed schedule).
If you believe any listed item is not a defect or is outside scope, please reply against each line item with your reason so it can be addressed promptly.
Regards,
[*Owner name*]
[*Mobile*]
### Step 3: Get Written Acknowledgement + Target Rectification Date
A builder does not need to rewrite their entire form on the spot. The key is written acknowledgement that is:
- Item-by-item (not vague)
- Dated
- Tied to a schedule
Best outcomes:
- Builder updates their defects list to include your missing items, OR
- Builder replies by email confirming the missing items schedule is accepted, with dates
### Step 4: If Pressured to Sign: Document Conditions/notes (Contract-dependent)
If you are under pressure to sign at PCI:
- Ask for time to review the defect list against your report before you sign
- If you must sign, add written notes where the form allows, such as:
*“Owner notes additional defects per independent report dated [date] and attached missing items schedule emailed to builder on [date].”*
- Keep photos of every page you sign on the day
Do not write anything that contradicts your contract. If the contract language is strict, get advice before signing.
### Step 5: Maintain a Defect Register (Photo + Location + Date + Status)
A defect register wins disputes because it is simple, dated, and consistent.
Minimum standard for each entry:
- Date observed
- Exact location (room, wall, elevation)
- Photo ID(s)
- Description in plain language
- Impact (leak risk, safety, functional issue)
- Builder response and dates
### Step 6: Re-inspect After Rectification
Rectification quality varies. A re-inspection checks whether:
- The defect is fixed, not just covered
- The fix did not create a new problem (common with paint patching, silicone, and drainage adjustments)
- The issue is still within specification and functioning
### Step 7: Escalate Via State Pathway if Needed
Escalation works best when you can show:
- You raised the missing items in writing
- You gave access and reasonable time to rectify
- The builder refused, delayed, or disputed without basis
- You kept evidence and a clear defect register
Book a PCI
Reinspection
}
buttonHref="/reinspection"
variant="secondary"
/>
## Defect Severity Triage (So you focus on the right items at PCI)
| Severity | Examples | Risk | Priority | Evidence needed |
| ---------------------------- | --------------------------------------------------------------------------- | ------------------------ | ------------- | ----------------------------------------------------------- |
| Safety | Exposed wiring, trip hazards, unstable balustrade | Injury, non-compliance | Immediate | Photos, location, notes, request urgent fix |
| Water ingress | Leaking showers, window leaks, missing flashings, ponding near slab | Mould, structural damage | High | Photos/video, moisture readings if available, weather notes |
| Structural or movement signs | Cracking with movement indicators, significant slab issues | Long-term damage | High | Photos with scale, location map, inspector notes |
| Functional | Doors/windows not operating, poor drainage fall to wastes, HVAC not working | Usability issues | Medium | Video proof, repeatable test results |
| Finish/cosmetic | Paint touch-ups, minor chips, silicone neatness | Visual quality | Medium to low | Photos, clear expectations from spec |
In NSW, statutory warranties are longer for major defects than other defects, so documenting severity and impact early is useful even when you are still trying to resolve informally.
## State-by-State Guidance
This section is not a full legal guide. It shows the main regulator touchpoints and why your paper trail matters.
### Queensland (QBCC Practical Completion Inspection Expectations)
QBCC provides homeowner guidance on the practical completion inspection and stresses notifying the contractor about defects noticed at handover or within the relevant period.
If defects are not resolved, the QBCC defective work pathway can include inspection and enforcement steps. QBCC may issue a Direction to Rectify to a contractor to rectify defective building work, and notes that in most cases the rectification period will be 35 days.
Be careful with time limits. The QBCC warns not to delay lodging a defective work complaint and lists eligibility timeframes, including lodging within 3 months of noticing structural defects and 7 months of completion for non-structural defects (as described on its guidance pages).
Practical completion itself is described by the QBCC as work completed to the contract, plans and specifications, with only minor defects or omissions, suitable for habitation and compliant with statutory requirements.
***Practical takeaway in QLD***: missing items should be raised in writing immediately, then tracked. If the builder stalls, know the complaint time limits and keep evidence ready.
### New South Wales (Statutory Warranties + Dispute Steps)
NSW government guidance explains statutory warranty time limits: for contracts signed on or after 1 February 2012, the statutory warranty period is 6 years for major defects and 2 years for other defects, with a further 6 months to enforce in some circumstances when loss becomes apparent near the end of the period.
The NSW Building Commission’s defect complaints page also summarises statutory warranty coverage and points homeowners to first try to resolve directly with the builder before lodging a complaint.
If you need to escalate, Service NSW provides the process to lodge a home building complaint with Building Commission NSW.
***Practical takeaway in NSW***: your strongest position comes from a clean sequence: notify in writing, give a chance to fix, re-inspect, then escalate with a complete evidence pack if needed.
### Victoria (Completion Docs + Implied Warranties)
Consumer Affairs Victoria provides a “when building work is complete” checklist. For handover documentation, it highlights the need for an Occupancy Permit (for new homes) or a Certificate of Final Inspection (for extensions and renovations), plus other required certificates.
The Victorian Building Authority also notes your building permit will state whether you need an occupancy permit or a certificate of final inspection.
For rights around workmanship, Consumer Affairs Victoria explains implied warranties on home building work under the Domestic Building Contracts Act 1995, including requirements such as work carried out in a workman-like manner, with reasonable care and skill, and using suitable materials.
If a dispute escalates beyond direct negotiation, the Victorian Building and Plumbing Commission (BPC) outlines its dispute resolution process, including eligibility checks, assessment, and conciliation steps.
***Practical takeaway in VIC***: do not confuse PCI with regulatory approval. Make sure the right occupancy or final inspection certificate is in your handover pack, and keep your defects register aligned to the contract and implied warranty expectations.
## Handover Paperwork Checklist (What You Should Have)
Bring this checklist to PCI and tick off what you actually receive.
Core handover pack:
- Copy of signed contract, plans, specifications, variations, and selections
- PCI defects list (builder)
- Your independent report and the reconciled defects schedule
- Keys, remotes, codes, and access devices
- Appliance manuals and warranties
- Waterproofing, glazing, termite protection and other compliance certificates where applicable
- Final payment claim and a clear statement of what it covers
**Victoria focus**
[Occupancy Permit (new home)](https://www.consumer.vic.gov.au/housing/building-and-renovating/checklists/when-building-work-is-complete) or Certificate of Final Inspection (reno/extension).
**Queensland focus**
Written record of [defects noticed at PCI](https://www.qbcc.qld.gov.au/home-owner-hub/build-renovate/finalising-work/practical-completion-inspection) and the next steps for rectification.
**NSW focus**
Clear [practical completion notice process](https://www.nsw.gov.au/housing-and-construction/building-or-renovating-a-home/resolving-building-disputes) per your contract, plus written defect acknowledgement to support later warranty enforcement if needed.
## Inspection Standards (AS 4349.1 / AS 4349.3)
Independent inspection reports sometimes reference Australian Standards to describe the inspection scope and reporting format.
- **AS 4349.1-2007** relates to inspection of buildings, Part 1: pre-purchase inspections (residential buildings).
- **AS 4349.3-2010** relates to inspection of buildings, Part 3: timber pest inspections.
These standards help set expectations for how an inspection is carried out and reported. They are not the same thing as a building surveyor’s approval, and they do not replace the certificates required for occupation in your state.
## How Owner Inspections Helps With PCI Defect Follow-Up
When the builder’s PCI defect list does not match your independent inspection report, the next step is not just asking for repairs. You need a clear record that shows what was missed, where each defect is located, and whether the builder has agreed to fix it.
[Owner Inspections](/) Owner Inspections can help homeowners, property investors, and small developers through a [pre-handover inspection](/pre-handover-inspections), defect list review, photo-based reporting, and follow-up checks before the file is closed.
### Defect List Reconciliation
Owner Inspections can compare the builder’s defect list against the independent PCI report and identify missing items line by line. This helps create a cleaner defects schedule that is easier for the builder, site supervisor, or contract administrator to review.
This may include:
- Defect description
- Room or location
- Photo reference
- Severity level
- Whether the builder has acknowledged the item
- Suggested follow-up status
### Evidence Pack for Builder Communication
A strong paper trail makes later conversations easier. Owner Inspections can help organise the inspection findings into a clear evidence pack with photos, locations, and date-stamped notes.
For owners who may need stronger records later, the guide on [how to document building defects for a legal claim](/articles/document-building-defects-legal-claim) is a useful next read.
### PCI Rectification Re-Inspection
After the builder says the defects have been fixed, a [reinspection](/reinspection) can check whether the rectification work is complete and whether any new issues have appeared during the repair process.
This is useful for common PCI items such as:
- Door and window alignment
- Silicone gaps
- Paint touch-ups
- Drainage falls
- Cabinetry adjustments
- Water ingress risks
- Poor or incomplete finishes
### Support Before Escalation
Owner Inspections does not replace legal advice or a state regulator, but a well-prepared inspection record can support clearer communication if a dispute continues. A defect register, photos, and re-inspection notes can help show what was raised, when it was raised, and whether it was properly addressed.
For owners approaching handover, the goal is simple: make sure the missing items are recorded, acknowledged, and checked before the file is closed.
Contact Owner
Inspections
}
buttonHref="/contact"
variant="primary"
/>
### Is Having a Private Inspector Worth It or Added Cost?
Source: https://ownerinspections.com.au/articles/is-a-private-building-inspector-worth-it
Published: 2026-06-26 | Category: Building Inspections
Author: Maison Azdari
Is a private building inspector one of the smartest spends you can make during a new build, or are you paying twice for something the certifier already covers? It’s a fair question, because you already have a compliance system in Australia, and builders often reassure owners that everything is being checked.
This guide is for homeowners building a new home, including first home buyers, busy professionals, risk aware families, investors, and interstate owners who can’t get to site often. It’s written to help you make a calm decision, avoid unnecessary conflict, and spend your inspection budget where it actually changes outcomes.
In Australia, the National Construction Code (NCC) sets the minimum technical baseline for building work, and it has legal effect through state and territory legislation. A certifier (or building surveyor, depending on your state) carries out mandatory inspections as part of the approvals and compliance process, but owners can still choose an independent inspector for owner focused quality checks, workmanship review, and strong defect documentation.
Book a Defect
Investigation Report
}
buttonHref="/defect-investigation-reports"
variant="secondary"
/>
### Worth it when…
You are likely to get strong value from an independent inspector if one or more of these fit:
- It’s your first build and you don’t know what “normal” looks like at each stage.
- You can’t attend site often (FIFO, interstate, long hours, young kids).
- Your build has complexity: split levels, lots of wet areas, parapets, balconies, custom windows, tight blocks, or tricky drainage.
- The schedule is fast and you feel rushed to sign off.
- You want clear photo evidence and a prioritised defects list to manage handover calmly.
- You’ve already had variation stress and want a cleaner paper trail from here.
### Might be an added cost when…
It can feel like paying twice if you already have strong oversight and can act early:
- You have deep building experience or a trusted independent project manager doing staged quality checks.
- You visit site frequently, take photos, and understand what you’re looking at.
- Your builder is unusually transparent: detailed checklists, open site access, and documented QA that you can verify.
- Your budget is tight and you would have to cut more valuable risk controls (like better waterproofing specs in writing).
## What a Certifier Does vs What a Private Inspector Does
A lot of confusion comes from assuming “someone is already inspecting, so we’re covered.” The roles overlap in timing, but the purpose is different.
### Certifier’s role
In NSW, for example, the principal certifier carries out mandatory inspections during construction and can issue written directions to comply when non compliance is found. The certifier’s job sits inside the approvals framework and ties into certificates needed to occupy the home.
Across Australia, inspection regimes vary. The ABCB’s model guidance on mandatory inspections is about setting minimum regulated inspection points and principles for jurisdictions, not a full room by room workmanship audit.
### Why “mandatory inspections” are not the same as owner focused QA
Mandatory inspections are about minimum checkpoints for compliance, based on a regulated system. They are not designed to be a detailed finish quality review, and they are not a replacement for an owner’s contract based defect process.
Also, compliance and craftsmanship are not the same thing. You can have work that meets the minimum code yet still leaves you with avoidable defects, poor finishing, or incomplete items that become hard to argue once covered up.
### What a private inspector typically focuses on
An independent inspector engaged by the owner usually focuses on:
- Workmanship and completeness (what’s missing, loose, damaged, misaligned, or unfinished).
- Before concealment checks (so you can raise issues while they’re still visible).
- Photo evidence and location references (room, wall, window label, gridline, elevation).
- A practical defects list that you can hand to the builder in plain English.
- Severity ranking, so you don’t treat a cosmetic mark the same as a safety risk.
## Certifier vs Private Inspector
| Role | Engaged by | Primary purpose | Typical inspection focus | Can enforce? | Typical outputs |
| ---------------------------------------- | ----------------------------------------------------------------------------------- | ------------------------------------------------------------------------ | ----------------------------------------------------------------------------------------------------- | -------------------------------------------------------------------------------- | ---------------------------------------------------------------------------- |
| Certifier / principal certifier | Owner appoints, or builder manages appointment in some builds (check your contract) | Compliance within the approvals system and issuing relevant certificates | Mandatory inspections at required stages, compliance evidence, directions to comply | Yes, within regulatory powers, for example written directions to comply in NSW | Inspection records, compliance requests, certification-related documentation |
| Private / independent building inspector | Owner | Owner-focused quality and defect documentation | Workmanship, completeness, practical defect list, photo evidence, contract and inclusions cross-check | No, they document and advise | Independent report, prioritised defects list, photos, re-inspection notes |
## Where Private Inspections Add the Most Value
The best return comes from timing. Once work is covered, your options narrow and disputes get harder.
### Before work is covered up
These stages often change outcomes because they are your last clear view:
- **Frame stage:** bracing, tie downs, straightness, over notching, window openings, penetrations, and basic structural detailing.
- **Waterproofing:** membrane coverage, puddle flanges, bond breakers, falls, and penetrations before tiles hide everything.
- **Pre plaster:** services, insulation, sarking, wet area detailing, penetrations, and obvious frame movement.
**What late vs early looks like in real life:**
- If a waterproofing detail is wrong before tiling, it can be corrected in hours. If found after handover when water damage appears, you’re looking at disruption, tile removal, drying time, arguments about cause, and longer timeframes.
- If frame issues are found before linings, fixes are often straightforward. If found after plaster, the builder may need to cut, patch, repaint, and you may never get full visibility again.
### Practical completion / pre handover: best leverage point
Practical completion is usually when you have the most leverage to document defects while the build is being finished, before you sign off and handover moves forward.
QBCC describes practical completion as when works are essentially finished and can be used for their intended purpose. Even outside Queensland, this “essentially finished and usable” idea is a helpful way to think about the handover point.
A strong practical completion inspection (PCI) report usually includes:
- A structured defects list by room and trade.
- Photos that clearly show the issue and its location.
- A priority rating so safety and functional problems get handled ahead of minor cosmetics.
- A clear re check plan.
## Stage Inspection ROI Matrix
| Stage | What gets covered next | Common risk areas | Why it matters | Best for |
| ----------------------------------------- | ------------------------------------------------ | -------------------------------------------------------------------------- | ------------------------------------------------------ | --------------------------------------------------------- |
| Slab pre-pour | Concrete pour and reinforcement become permanent | Set out, edge beams, penetrations, vapour barrier, reinforcement placement | Very hard to verify after the pour | Owners who can’t attend site and want an early baseline |
| Frame stage | Linings, wrap, and services | Bracing, tie-downs, straightness, openings, obvious defects | Last clear view of the structure before it disappears | First builds, complex designs |
| Waterproofing | Tiles and finishes | Membrane detail, penetrations, puddle flanges, falls, junctions | Fixing later is disruptive | Homes with multiple wet areas or balconies |
| Pre-plaster | Plaster, cornices, internal finishes | Insulation, service penetrations, wet area prep, obvious gaps | Catches issues before walls close | Interstate owners, fast builds |
| Lock-up / fixing (optional) | Cabinets, doors, trim, paint | Window installation detail, door operation, cabinetry alignment | Functional issues show up here | Owners who want fewer surprises at handover |
| Practical completion / pre-handover (PCI) | Handover and occupation | Missing items, damage, incomplete work, functional defects, finish quality | Best leverage point for a defects list before sign-off | Almost everyone, especially if you only do one inspection |
## What Acceptable Workmanship Means
A lot of handover stress comes from one sentence: “That’s within tolerance.” The trick is knowing what tolerance is being used and what your contract says.
### Using Guides to Standards and Tolerances as a reference point
In NSW, the NSW Guide to Standards and Tolerances 2017 is published as a general reference to help homeowners understand acceptable standards, and it’s not framed as strict rules. Used well, it reduces arguments because it gives both sides a shared language.
Private inspection reports often reference common tolerance guidance to explain why something is a concern in plain language, without turning your handover into a legal fight.
### The NCC is a minimum technical baseline
The NCC sets minimum technical requirements for safety, health, amenity, accessibility and sustainability. It also has legal effect through references in state and territory legislation.
What this means for owners is simple: code compliance is not the same as perfect finishes. You still need clear expectations in your contract, inclusions, and variations, plus good documentation at the right times.
View Expert
Witness Reports
}
buttonHref="/expert-witness-reports"
variant="secondary"
/>
## Costs vs Risk: Choosing the Minimum Effective Inspection Plan
Prices vary by home size, location, and access, so rather than quoting numbers, this section helps you spend your budget where it changes outcomes.
### If you do one inspection
Best single choice for most owners: Pre handover / practical completion (PCI). You get a structured defects list while the builder is still finalising the job and before you sign off.
*Trade off:* you may miss issues already covered up, which limits what can be proven visually.
### If you do two inspections
Add one “before concealment” stage to your PCI. Most owners pick one of these:
- Waterproofing inspection (high impact, hard to verify later), or
- Frame stage (structure visibility), or
- Pre plaster (broad coverage of what’s about to disappear).
### If you do 4–5 staged inspections
A common “ideal sequencing” looks like:
1. Slab pre pour (or early stage)
2.Frame stage
3. Waterproofing
4. Pre plaster
5. Practical completion / pre handover (PCI)
This plan is popular with interstate owners, busy households, and anyone who wants fewer surprises at the end.
## Minimum Effective Package Options
| Package | Stages included | Best for | Trade-offs | Estimated time required from owner |
| ---------- | -------------------------------------------- | ------------------------------------------------------ | --------------------------------- | -------------------------------------------------------------------------------------- |
| 1 visit | PCI / pre-handover | Tight budgets, most owners | Less visibility into covered work | 15–30 minutes to share plans and inclusions; 30–60 minutes to review report |
| 2 visits | One before concealment + PCI | Owners who want real risk reduction | Still may miss early slab items | 30–60 minutes across the build for coordination and review |
| 4–5 visits | Slab, frame, waterproofing, pre-plaster, PCI | Interstate owners, complex builds, risk-aware families | Higher spend | 60–120 minutes total across the build for booking, access, review, and defect tracking |
## Examples of Issues That are Easier to Fix Early
These examples are anonymised and described in the way owners usually see them in reports.
- **Waterproofing stage:** missing bond breaker at a wall-to-floor junction, or a penetration detail that isn’t properly sealed. Before tiling, it’s a straightforward rework. After tiling, it can mean tile removal, delays, and arguments about damage.
- **Frame stage:** wall bracing not installed as shown in documentation, or studs over notched where services run through. Before plaster, a builder can correct and document the fix. After plaster, you’re left with limited visibility and patch repairs.
- **Pre plaster stage:** gaps around penetrations that need sealing, insulation missing or compressed, wet area prep that looks incomplete. Once linings go on, the owner loses the ability to see it.
- **Pre handover / PCI:** doors rubbing, windows not operating smoothly, missing sealant, paint and trim damage, drainage falls that don’t look right, loose fittings, and incomplete finishes. These are the items that often cause handover friction because they’re obvious, but easy to miss when you’re exhausted and eager to move in.
## How to Prepare for a Practical Completion Inspection
This is the part that makes the inspection useful. A good report is only helpful if it’s easy to action.
**Step by step checklist:**
1. Gather your contract, inclusions, variations, and any updated plans.
2. Make a simple list of “must have” items you paid extra for (appliances, niche upgrades, lighting, tapware).
3. Confirm site access and safety requirements (PPE, induction rules, timing).
4. Ask your inspector how defects will be labelled (room by room, elevation, photo numbering).
5. Plan how you’ll send the defects list to the builder (email trail, spreadsheet, portal), and how you’ll track rectification.
6. Book a re inspection if your contract and timeline allow it.
## How to Respond When a Builder or CRO Says “It May Not Add Value”
The goal is to keep things neutral. You’re not accusing anyone. You’re putting a process in place.
### Neutral scripts you can copy
**Script 1: process-focused**
“We understand the certifier does the mandatory inspections. We’re booking an independent inspection for our own records so we have a clear defects list at practical completion.”
**Script 2: time focused**
“We can’t get to site often, so this helps us keep decisions timely and reduce surprises at handover.”
**Script 3: before concealment**
“We’d like a check before work is covered, so if anything needs attention it can be raised while it’s still visible.”
**Script 4: relationship-friendly**
“This isn’t about blame. It’s to keep the handover smoother with a single written list we can work through.”
**Script 5: documentation-focused**
“We’re aiming for clear photos and locations so your team isn’t guessing what we mean.”
## If Defects Appear After Handover
This section is general information only, not legal advice. Time limits and definitions can depend on your contract, your build type, and how the law applies to your situation.
### NSW time limits
Building Commission NSW explains statutory warranty time limits as:
- Major defects: 6 years from completion
- Other defects: 2 years from completion
- If a breach is discovered in the last 6 months of the warranty period, there is an extra 6 months after the end of the period to commence proceedings.
### VIC implied warranties up to 10 years
Consumer Affairs Victoria states implied warranties apply to building work and action may be brought for up to 10 years from when the work was completed, with the right able to transfer to a new owner if sold within that period.
### QLD Home Warranty Scheme time limits for cover and claims
QBCC sets strict time limits for cover and claims under the Queensland Home Warranty Scheme. For example, QBCC explains timeframes for non structural defects based on when you become aware and when you lodge the claim.
If you think you have a serious issue after handover, it’s worth getting independent documentation quickly, because timeframes can be tight and evidence is easier to capture early.
## Checklist: Choosing a Good Private Inspector
You want someone who can spot issues and write them in a way that gets fixed, not ignored.
### Credentials and insurance
Look for:
- Relevant building inspection experience, with new build stage inspections in their regular work
- Professional indemnity insurance and public liability
- Clear scope wording (what’s included and excluded)
### Sample report quality
Ask for a sample report and check:
- Photos are clear and labelled
- Each issue has a location reference
- Severity is prioritised (safety, compliance, functional, cosmetic)
- Suggested next steps are practical and calm
- Language is plain, not legal heavy
### Scope and limitations
Be clear about:
- What cannot be verified visually without invasive testing
- Access constraints (locked areas, unsafe zones, timing)
- Whether the inspector offers re inspections and how they document rectification
## Why Homeowners Choose Owner Inspections
A private inspector is most useful when the report is clear, practical, and easy for the builder to action. Owner Inspections helps homeowners get independent eyes on the build at the stages where defects are easiest to identify, document, and rectify.
Whether you are building your first home, managing the process interstate, or preparing for practical completion, the goal is not to create conflict with your builder. It is to give everyone a clear written record of what has been checked, what needs attention, and what should be followed up before handover.
Owner Inspections can assist with:
- New construction stage inspections during key build stages
- Pre-handover inspections before practical completion sign-off
- Defect investigation reports for more complex or recurring issues
- Reinspections after the builder has completed rectification work
A good inspection gives you more than a list of defects. It gives you photo evidence, room-by-room clarity, practical recommendations, and a calmer way to manage the final stages of your build.
Contact Owner
Inspections
}
buttonHref="/contact"
variant="primary"
/>
### Do You Need a Private Inspector for a Maintenance Request?
Source: https://ownerinspections.com.au/articles/private-inspector-maintenance-request
Published: 2026-06-25 | Category: General Maintenance
Author: Maison Azdari
What if your maintenance request gets ignored because it is too vague, missing photos, or lumps ten issues into one line? For many new-home owners, that is the stressful part. Not spotting every tiny mark. It is getting the builder to actually act before the maintenance window closes.
This guide is for homeowners who built or bought new in the last 6–18 months and are approaching the defects liability or maintenance period in their contract. It focuses on the practical decision: book an independent inspector, do it yourself, or use a hybrid approach that still produces a builder-ready defects list.
### Quick Answer
- It is worth booking a private inspector when the issues are technical or high-risk: water ingress, wet areas, roof leaks, drainage and surface falls, or movement cracks that keep changing.
- It is often not worth it when the builder is responsive and you only have obvious, low-impact items like minor paint touch-ups or a loose door handle.
- Best timing: book before your contract maintenance window ends, leaving time for inspection, submission, builder scheduling, and a re-check if needed.
- A private report does not force a builder to agree, but it usually improves evidence quality, makes the list clearer, and reduces back-and-forth.
- Use your contract and specifications as the baseline, then use standards and tolerances guides as a reference point for common finish disputes. The NSW guide, for example, is a general reference and does not replace the NCC or Australian Standards.
Book a Maintenance
Inspection
}
buttonHref="/maintenance-inspections"
variant="secondary"
/>
## What a Maintenance Request Actually Is (and Isn’t)
A maintenance request is usually a contract-based defects list sent to the builder during the defects liability or maintenance period. Many new-home contracts set this period around 6 to 12 months after practical completion, but the exact timeframe depends on the contract.
It is not the same as statutory warranty rights. A contract maintenance period is agreed between the owner and builder. Statutory warranties are legal rights and the time limits vary by state.
In NSW, Building Commission NSW says the time limits to commence proceedings for breach of statutory warranty are [6 years for major defects](https://www.nsw.gov.au/departments-and-agencies/building-commission/about-us/building-defect-complaints) and 2 years for all other defects. If the breach becomes apparent within the last 6 months of the statutory warranty period, homeowners may have a further 6 months after the end of that period to commence proceedings.
In Queensland, the QBCC Home Warranty Scheme has [separate claim timing](https://www.qbcc.qld.gov.au/home-owner-hub/queensland-home-warranty-scheme/time-limits-cover-claims). Structural defect claims are linked to a 6 year and 6 month cover period, with a claim required within 3 months of first becoming aware of the defect. Non-structural defects must first be noticed within 6 months after substantial completion, and the claim must be made within 7 months after substantial completion.
## Do You Need a Private Inspector for a Maintenance Request?
You do not always need a private inspector maintenance request inspection, but it can be worth it when the defect list involves water, drainage, roof leaks, recurring cracks, window seals, or anything that may get worse over time.
A DIY list can work when the builder is responsive and the issues are simple, such as paint marks, loose handles, minor cabinetry alignment, or small touch-ups.
A private inspector gives you stronger evidence, clearer wording, better photos, and a priority order. That can make the maintenance request easier for the builder to action.
The best time to book is before your contract maintenance window closes, leaving time to inspect, submit the list, get a builder response, and arrange a re-check if needed.
## Why Homeowners Hire an Inspector Again
The real value is not just finding more defects. It is improving how the request is written.
A private inspector can help by:
- Recording one defect per line
- Adding room names and exact locations
- Taking clear photo evidence
- Separating urgent water or safety items from cosmetic issues
- Using neutral wording that is easier for the builder to act on
- Referring to the contract, specifications, tolerances guides, or NCC context where suitable
This matters because vague wording often creates delay.
- “Bathroom issue” is weak.
- “Ensuite shower, rear wall-to-floor junction, silicone split and lifting, water entry risk, photo Ensuite-03A and 03B, request reseal and check junction” is much stronger.
## When a Private Inspector is Worth It
Re-engage a private inspector if you notice:
- Damp smells, swelling skirting, mould, loose tiles, or other wet-area warning signs
- Roof stains, ceiling marks, damp insulation, or leaks after rain
- Poor drainage falls or ponding near the slab
- Movement cracks that are growing or returning after patching
- Door alignment and window seal problems across several rooms
- Repeated builder pushback such as “that is normal settlement”
- A maintenance window that is about to close
Water-related issues deserve faster action because the cost of delay can be high.
## When DIY or Hybrid Can Work
DIY can be enough when the list is short, obvious, and the builder is already responding.
A hybrid approach can also work well. For example, the homeowner can record simple items such as paint defects and minor hardware issues, while an inspector checks wet areas, roof space where safely accessible, drainage, movement cracks, windows, and doors.
This gives you professional input where the risk is highest without turning every minor mark into a paid inspection item.
Read the Defect
Documentation Guide
}
buttonHref="/articles/document-building-defects-legal-claim"
variant="secondary"
/>
## What a Good Maintenance Inspection Includes
A good maintenance and defects inspection is usually a visual inspection of accessible areas. It should be scoped clearly before booking.
A useful report should include:
- Line-item defects
- Photos
- Exact locations
- Severity or priority tags
- Clear defect descriptions
- Suggested rectification wording
- Notes on likely cause where appropriate
- A clear statement of scope and limits
The report supports communication with the builder. It is not a court finding, regulator decision, or full compliance audit unless that has been specifically agreed.
## Standards, Codes and Tolerances
Your contract and specifications come first. They show what was agreed.
Tolerances guides can help when there is a workmanship dispute, but they do not replace higher-ranking documents. NSW Government says the NSW Guide to Standards and Tolerances helps homeowners understand whether work meets acceptable standards, but it is a general reference, does not offer strict rules, and does not replace the Building Code of Australia or relevant Australian Standards.
Queensland’s Standards and Tolerances Guide says building standards are mainly described in the National Construction Code Series, including BCA Volumes 1 and 2, and that Acts, Regulations, NCC requirements, Australian Standards, and manufacturer instructions take precedence where there is any difference or contradiction.
AS 4349.1 is also sometimes referenced for inspection structure, but Standards Australia lists AS 4349.1-2007 as “Inspection of buildings, Part 1: [Pre-purchase inspections](/pre-purchase-inspections), Residential buildings.” That means it should not be treated as a perfect fit for every maintenance inspection unless the inspection scope explains how it is being used.
## How to Write a Maintenance Request Builders Act On
Use this format:
- **Reference ID:** Kitchen-02
- **Location:** Kitchen, sink cabinet, rear left corner
- **Defect:** Silicone gap visible at bench-to-splashback junction
- **Impact:** Possible water entry behind cabinetry
- **Evidence:** Photo Kitchen-02A and Kitchen-02B
- **Requested outcome:** Reseal joint and confirm no moisture damage
- **Priority:** Soon
Use this 8-step method:
1. Check your contract maintenance deadline.
2. Walk the home room by room.
3. Take one wide photo and one close-up photo for each item.
4. Label every defect with a room and number.
5. Write one defect per line.
6. State the impact in plain language.
7. Ask for a clear rectification outcome.
8. Request a written response with proposed dates.
## Cost vs Value Decision Guide
| Approach | Best for | Risk of missed issues | Evidence strength | Notes |
| ----------------- | -------------------------------------------------------------- | --------------------: | ----------------: | ------------------------------------------ |
| DIY | Minor obvious defects | Medium | Medium | Works if the builder is responsive |
| Private inspector | Water, roof, drainage, movement, repeated defects | Low | High | Best when timing or technical risk matters |
| Hybrid | Homeowners with some simple items and a few high-risk concerns | Low to medium | High | Good balance between cost and coverage |
## State Modules
### NSW: statutory warranties overview and time periods
In NSW, statutory warranties apply regardless of whether they are written into the contract. NSW Government guidance and the Home Building Act set limitation periods that commonly appear in defect discussions:
- **Major defects:** 6 years from completion
- **All other defects:** 2 years from completion
- **Extra 6 months rule:** if you become aware of a breach in the last 6 months of the statutory warranty period, you generally have an additional 6 months after the end of the period to commence proceedings.
> Practical tip for maintenance requests: even if you are still inside your contract maintenance period, do not assume that means you can wait. Start documenting early and keep records in case timing becomes an issue later.
### QLD: QBCC scheme time limits overview
Queensland has strict notice and claim timing that can catch homeowners out, especially for non-structural issues.
QBCC guidance on time limits for cover and claims sets out that:
- **Structural defects:** generally must be noticed within 6 years 6 months, and the claim must be made within 3 months of becoming aware (with cover commencement day rules).
- **Non-structural defects:** cover is linked to becoming aware within 6 months after work is substantially complete and making the claim within 7 months after substantial completion.
> Practical tip for maintenance requests: treat your 6–12 month contract maintenance window as a prompt to inspect early, not a reason to delay.
Contact Owner
Inspections
}
buttonHref="/contact"
variant="primary"
/>
### Why Reinforced Concrete Matters in New Builds
Source: https://ownerinspections.com.au/articles/reinforced-concrete-new-builds
Published: 2026-06-16 | Category: New Construction
Author: Maison Azdari
What keeps a new building steady when soil moves, rain hits, heavy loads are added and years of use begin to test the structure?
A new build must handle more than the weight of walls, floors and roof framing. It also needs to cope with ground movement, moisture, temperature change, wind, soil pressure and daily use. That is why reinforced concrete in new builds matters.
Plain concrete is strong when something presses down on it. This is called compression. It is not as strong when it is pulled, bent or affected by ground movement. This is called tension. Steel reinforcement, such as mesh, rebar or trench mesh, helps concrete handle that extra stress.
> **Short answer**: Reinforced concrete matters in new builds because plain concrete is strong under compression but weak under tension. Steel reinforcement helps concrete resist cracking, bending, movement and long-term structural stress.
For homeowners, builders, owner-builders and property investors, the main issue is timing. Before concrete is poured, an inspector can still see the reinforcement, formwork, vapour barrier, service penetrations and slab set-out. After the pour, much of that evidence is hidden inside the structure.
That is where a reinforced concrete inspection, especially a pre-pour inspection, can help. It gives owners and builders a chance to raise visible issues before they become covered by concrete.
Book a Stage
Inspection
}
buttonHref="/new-construction-stage-inspections"
variant="secondary"
/>
## What Is Reinforced Concrete?
Reinforced concrete is concrete strengthened with steel reinforcement. The reinforcement may include rebar, reinforcing mesh, trench mesh or steel rods placed inside the concrete before it sets. These materials come together to form a strong material, namely a reinforced steel material, like this [concrete mesh by Sydney REO](https://sydneyreo.com.au/reinforcement-mesh/). This sturdy material enables it to resist many types of pressure, from compressive loads to lateral pressure from soil and wind.
Concrete and steel work together. The concrete surrounds the steel and gives the structure mass and compressive strength. The steel helps where tension develops, such as in slabs, beams, footings, retaining walls and suspended concrete areas.
Concrete handles downward pressure well, but it is less effective when pulled, bent or affected by ground movement. Steel reinforcement helps support the concrete where tension develops.
This is why plain concrete may be suitable for garden paths, decorative areas or light-duty surfaces, but structural areas usually need reinforcement. A house slab, footing, beam, retaining wall or suspended slab is doing more than holding its own weight. It is part of the load path that carries forces through the building and into the ground.
The reinforcement must also be in the right position. Steel mesh sitting directly on the ground, pushed too low in the slab, poorly lapped or unsupported may not work as the design expects. Owner Inspections’ pre-pour guidance lists steel placement, bar chairs, moisture barriers, penetrations, formwork and engineering drawings as key items to prepare before a slab inspection.
## Why Reinforced Concrete Matters in New Builds
A building is constantly exposed to pressure, load changes, moisture, soil shifts and temperature movement. If structural concrete is not designed, reinforced and installed correctly, the risk of cracking, movement, corrosion and long-term defects can rise.
Reinforced concrete does not make a new build free from risk. It does, however, help the structure manage loads and movement when used according to the engineering design and project requirements.
### Improving Load-Bearing Capacity
Reinforced concrete helps slabs, beams, footings, columns and retaining walls carry loads more effectively.
In a new home, the load does not simply sit on the floor. It travels through walls, frames, slabs, beams and footings before reaching the soil. This path needs to stay stable. If reinforcement is undersized, misplaced, missing or poorly supported, the concrete may not carry loads as intended.
Reinforcement helps spread loads through the concrete. It also helps areas that are likely to bend or flex under pressure. This matters in:
- Concrete slabs
- Edge beams and internal beams
- Strip footings and pad footings
- Columns
- Retaining walls
- Suspended slabs and balconies
- Driveways and vehicle areas
During a reinforced concrete inspection, an inspector may flag steel reinforcement that does not appear consistent with the available engineering drawings or reinforcement schedule. This does not replace engineering sign-off, but it gives the owner or builder a clear issue to raise before the pour.
### Reducing Crack Risk
Concrete can crack for many reasons. Shrinkage, drying, temperature change, ground movement, poor curing and structural stress can all play a part.
Reinforced concrete is not crack-proof. No builder, inspector or engineer should describe it that way. Instead, reinforcement helps manage cracking by holding concrete together when tension develops.
This is helpful in areas such as slab corners, slab edges, around service penetrations, driveways and retaining walls. These areas can be exposed to concentrated stress, soil movement or load changes.
There is also a difference between minor shrinkage cracks and cracks that may suggest movement or a structural issue. A post-pour inspection can check visible cracking, but it cannot fully confirm hidden reinforcement placement once the concrete has covered it.
This is why pre-pour inspection matters. When reinforcement is still visible, an inspector can check whether the mesh is supported, lapped and positioned before the slab is poured.
### Improving Weather and Moisture Resilience
Australian homes face moisture, heat, cold, storms and changing ground conditions. Concrete expands and contracts with temperature changes. Moisture can also affect slabs and footings over time.
Steel reinforcement helps concrete stay together under stress, but the steel must be protected inside the concrete. If reinforcement is too close to the surface or exposed, it can corrode. As steel rusts, it expands and can damage the surrounding concrete.
Concrete cover is the layer of concrete between the steel and the surface. It helps protect reinforcement from moisture and exposure. Vapour barriers also matter in slab systems because they help reduce rising moisture through the floor.
HIA explains that AS 2870-2011 covers site classification and design and construction requirements for [slab-on-ground](https://hia.com.au/resources-and-advice/building-it-right/australian-standards/articles/residential-slabs-and-footings), stiffened rafts, waffle slabs, strip footings, pad footings and piled footings. It also lists requirements such as drainage, reinforcement placement, concrete grade, cover, vapour barriers and aggressive soils.
### Offering Design Versatility
Reinforced concrete can be shaped with formwork, allowing it to suit many building layouts.
It can be used in slabs, beams, columns, stairs, balconies, driveways and retaining walls. This makes it useful for simple homes as well as more detailed designs.
The design freedom still depends on proper engineering and site work. The formwork must be set out correctly. The reinforcement must be placed correctly. The concrete must be poured, compacted, finished and cured with care.
Good design is only part of the job. Good execution is what turns the design into a safe, durable structure.
## Where Reinforced Concrete Is Commonly Used in New Builds
| Building Area | Why Reinforcement Matters |
| ----------------------------- | ------------------------------------------------- |
| Concrete slabs | Supports building loads and helps manage movement |
| Footings | Transfers loads into the ground |
| Beams | Helps resist bending and tension |
| Columns | Supports vertical loads |
| Retaining walls | Resists soil pressure and lateral loads |
| Driveways | Helps manage vehicle loads and surface cracking |
| Balconies and suspended slabs | Supports elevated loads and bending forces |
In residential construction, reinforced concrete often sits below the finished surfaces people see every day. The slab may later be covered by walls, framing, flooring and cabinetry. Footings may be hidden below ground. Beams may be hidden in the structure.
That is why inspection timing matters. The best time to check visible steel reinforcement is before concrete covers it.
## What Do Inspectors Check When Evaluating Reinforced Concrete Structures?
Building inspectors look at the accessible work and compare visible items against available plans, drawings and common construction expectations. The exact scope depends on the inspection type, state or territory rules, site access and documentation available.
For reinforced concrete, inspectors usually focus on three stages: before the pour, during concrete placement where this is part of the scope, and after the pour.
### Pre-Pour Inspection
A pre-pour inspection is one of the most useful stages because the reinforcement is still visible, which is why many owners book a [slab pre-pour inspection through a new construction stage inspection](/new-construction-stage-inspections).
At this stage, inspectors may check:
- Engineering drawings and reinforcement schedule
- Slab set-out and formwork dimensions
- Footing trenches and edge beams
- Reinforcing mesh and trench mesh
- Rebar size, spacing and placement where visible
- Bar chairs and spacers
- Mesh laps and ties
- Vapour barrier condition and overlaps
- Service penetrations
- Termite barrier where applicable
- Cleanliness of trenches and slab area
- General readiness before concrete arrives
Bar chairs are small supports that hold mesh or bars at the required height. Without enough bar chairs, the mesh may sit too low or move during the pour.
The vapour barrier should also be checked before pouring. Tears, poor overlaps or unsealed penetrations can increase moisture risk later.
### Concrete Placement Phase
The pour itself can affect the final result. Even when reinforcement is placed correctly before the pour, it can shift if it is not supported well or if workers step on the mesh without care.
During the concrete placement phase, inspectors or site supervisors may look at:
- Pour sequencing
- Concrete consistency
- Slump testing where applicable
- Vibration or compaction to reduce air pockets
- Reinforcement movement during the pour
- Weather conditions
- Finishing practices
- Curing practices
Slump testing checks concrete consistency. Vibration helps remove trapped air and reduces voids. Poor compaction can lead to honeycombing, which is visible as voids or rough, stony concrete after formwork is removed.
Hot, windy or wet weather can also affect concrete placement and curing. Good site management reduces the chance of early surface defects and uneven finish.
### Post-Pour Concrete Inspection
After the pour, inspectors can only check what is visible. They cannot directly see whether hidden reinforcement was supported, lapped, tied or placed correctly unless specialist testing is arranged.
A post-pour concrete slab inspection may check:
- Slab levels and finish
- Visible surface cracking
- Honeycombing or poor compaction
- Exposed reinforcement
- Slab edges and edge beams
- Penetrations and set-outs
- Drainage falls
- Curing condition
- Visible defects before framing hides areas
Post-pour checks still have value. They can identify surface defects, poor finish, exposed steel, obvious cracking and level issues. However, they are not a substitute for a pre-pour inspection.
## Common Reinforced Concrete Defects Inspectors May Find
| Defect | Why It Matters | When It Is Usually Found |
| -------------------------------------------- | -------------------------------------------------- | -------------------------------- |
| Low reinforcement mesh | Steel may not sit in the designed zone of the slab | Pre-pour |
| Missing bar chairs | Reinforcement can move or sit on the ground | Pre-pour |
| Poor mesh overlaps | Load transfer may not work as intended | Pre-pour |
| Incorrect reinforcement type | Work may not match the engineering design | Pre-pour |
| Damaged vapour barrier | Moisture may rise through the slab | Pre-pour |
| Pipe penetrations too close to reinforcement | Can affect spacing and concrete cover | Pre-pour |
| Honeycombing | May suggest poor compaction | Post-pour |
| Exposed reinforcement | Steel may corrode over time | Post-pour |
| Cracks wider than expected | May need further review or monitoring | Post-pour |
| Incorrect slab level | Can affect framing, flooring and drainage | Post-pour |
| Formwork movement | Can change dimensions or slab edges | During or post-pour |
| Concrete cover issues | Steel may have less protection from exposure | Pre-pour or post-pour if exposed |
Not every defect means the structure is unsafe. Some issues can be minor, while others need review by the builder, engineer or building surveyor. The value of an independent inspection is that visible concerns can be recorded clearly with photos and practical next steps.
Learn How to
Document Defects
}
buttonHref="/articles/document-building-defects-legal-claim"
variant="secondary"
/>
## Australian Standards and Building Requirements to Mention
Reinforced concrete work in Australia is guided by the NCC, Australian Standards, engineering drawings and project specifications. Homeowners should rely on the builder, engineer, building surveyor or certifier and relevant professionals for compliance decisions.
The inspector’s role is usually an independent visual assessment of accessible work.
References that may apply include:
- NCC and Building Code of Australia
- AS 2870: Residential slabs and footings
- AS 3600: Concrete structures
- AS/NZS 4671: Steel reinforcing materials
- Engineering drawings and project specifications
- State-based standards and tolerances guidance where relevant
Standards Australia lists [AS 2870-2011](https://www.standards.org.au/standards-catalogue/standard-details?designation=as-2870-2011) as the Australian Standard for residential slabs and footings. HIA states that AS 3600:2018 sets minimum requirements for the design and construction of concrete building structures and members containing reinforcing steel or tendons.
AS/NZS 4671 deals with [reinforcing steel materials](https://codehub.building.govt.nz/resources/46712001asnzs) such as bars, coils and welded mesh, including chemical, mechanical and physical requirements. The NSW Guide to Standards and Tolerances was developed as a reference for builders and building owners on minimum technical standards and quality of work.
HIA also notes that NCC Volume Two outlines design and construction requirements for residential buildings and that Part H1D4 and the ABCB Housing Provisions cover Deemed-to-Satisfy construction requirements for [residential slabs](https://hia.com.au/resources-and-advice/building-codes/ncc-2022-provisions-for-raft-slabs) and footings.
## Why Timing Matters: Before Concrete Hides the Evidence
Once concrete is poured, the inspector can no longer directly see whether the reinforcement was correctly supported, lapped, tied or positioned.
This is why photos and pre-pour checks are so useful, and why Owner Inspections recommends understanding [when to book each stage inspection before the build](/articles/when-to-book-stage-inspections-timeline) moves ahead.
Early inspection can also make rectification easier. Adjusting bar chairs, repairing a vapour barrier, clearing debris from trenches or confirming penetrations is much simpler before the concrete truck arrives.
Late inspections may still find symptoms, such as cracking, honeycombing or uneven slab levels. Yet they may not be able to confirm the cause without further testing or engineering review.
## What a Building Inspector Can and Cannot Confirm
| Can Usually Check Visually | Cannot Fully Confirm Visually |
| -------------------------------------------------- | --------------------------------------------- |
| Visible reinforcement placement before pour | Hidden reinforcement after concrete is poured |
| Formwork dimensions and obvious set-out issues | Full structural design adequacy |
| Bar chairs, mesh laps and vapour barrier condition | Concrete strength without testing |
| Surface defects after pour | Every concealed defect inside the slab |
| Alignment with available plans | Engineering certification |
This helps set the right expectation. A building inspector is not a replacement for the structural engineer. The engineer designs the slab, footing or concrete element. The inspector visually checks accessible work and reports visible concerns.
That distinction builds trust. It also helps homeowners and builders avoid overclaiming what any visual inspection can prove.
## How Reinforced Concrete Issues Can Affect Homebuyers and Owners
Reinforced concrete defects can become expensive because many concrete elements are hard to access after construction continues.
For homebuyers, the concern is hidden risk. A newly built or recently completed home may look clean and finished, but defects below the surface can be harder to identify later.
For homeowners and owner-builders, poor reinforced concrete work can lead to:
- Cracking concerns
- Moisture ingress
- Settlement issues
- Flooring problems
- Drainage issues
- Construction delays
- Disputes with trades or builders
- Costly repairs after handover
- Reduced confidence during resale
For builders and developers, early checks can reduce rework, help keep projects moving and provide a clearer record of site conditions.
For real estate professionals, simple explanations help clients understand why a slab or pre-pour inspection is not just another box to tick. It is a chance to check visible work before it becomes hidden.
## Reinforced Concrete Inspection Checklist for New Builds
Use this checklist before the concrete pour is locked in:
- Latest engineering drawings available on site
- Slab set-out checked
- Formwork secure and correctly located
- Footing trenches clean
- Reinforcement installed as specified
- Mesh supported on bar chairs
- Correct cover maintained where visible
- Mesh overlaps and ties checked
- Vapour barrier intact
- Plumbing and electrical penetrations correctly placed
- Termite protection considered where required
- Site ready before the concrete truck arrives
- Photos taken before pour
This checklist is not a replacement for engineering review or builder quality control. It gives owners and builders a simple way to prepare for a reinforced concrete inspection.
## Getting the Most Value from Your Home and Building Investment
Reinforced concrete is one of the most widely used structural materials in new builds because it combines the compressive strength of concrete with the tensile support of steel reinforcement.
For homeowners, owner-builders, buyers and investors, the key lesson is simple. The best time to check reinforced concrete is before it is covered.
A pre-pour inspection can help identify visible issues with reinforcement, formwork, vapour barriers, slab set-out and service penetrations before concrete hides them inside the structure.
[Owner Inspections](/) provides independent new construction stage inspections with clear reporting, site photos and practical next steps. Book an inspection before the pour so visible issues can be raised early.
Contact Owner
Inspections
}
buttonHref="/contact"
variant="primary"
/>
### Building Inspector Sydney: Cost, Checklist and Buyer Tips
Source: https://ownerinspections.com.au/articles/building-inspector-sydney
Published: 2026-06-09 | Updated: 2026-06-22 | Category: Building Inspections
Author: Maison Azdari
Buying property in Sydney is a major financial decision. A building inspector Sydney buyers can trust helps identify visible defects, safety concerns and major problems before a buyer commits to a house, townhouse, apartment or investment property.
A building inspection before buying can help you understand the condition of the property before exchange, auction or settlement. NSW Government says a written building inspection report can help buyers know problems in advance, negotiate based on findings and seek specialist advice about major issues.
This guide explains building inspector Sydney costs, what is included in a standard checklist, what reports do not cover, and how to choose an independent inspector before buying.
Book a Sydney
Building Inspection
}
buttonHref="/nsw/building-inspections-sydney"
variant="secondary"
/>
## What Does a Building Inspector in Sydney Do?
A building inspector visually assesses the accessible parts of a property and prepares a written report about the property’s condition. The goal is not to *“pass”* or *“fail”* the home. The goal is to help the buyer understand visible defects, safety concerns and areas that may need further investigation.
NSW Government says a building inspection report is a written account of the [property’s condition](https://www.nsw.gov.au/housing-and-construction/buying-and-selling-property/buying-property-nsw/inspecting-a-property/inspection-reports) and may include significant building defects or problems such as rising damp, wall movement, cracking, safety hazards or a faulty roof.
A standard [pre-purchase building inspection](/pre-purchase-inspections) usually covers accessible parts of the property, including the interior, exterior, roof space, under-floor space, roof exterior and site areas. Areas such as garages, carports, garden sheds, small retaining walls, steps, fencing, surface water drainage, stormwater run-off, paths and driveways as areas an inspector should check where accessible.
## What Do Building Inspectors Look For Before Buying a House?
A Sydney building inspector may look for signs such as:
| Inspection Area | What the Inspector May Look For |
| --------------------------- | ---------------------------------------------------------------------- |
| Walls, ceilings and floors | Cracking, movement, sagging, stains or unevenness |
| Roof and roof space | Leaks, damaged roof coverings, timber issues or poor ventilation |
| Wet areas | Waterproofing failure, damp, mould indicators or leaking fixtures |
| Subfloor | Moisture, timber decay, poor ventilation or termite damage indicators |
| Exterior areas | Drainage issues, damaged cladding, render cracks or site fall problems |
| Safety areas | Loose balustrades, unsafe stairs, deck movement or trip hazards |
| Outbuildings and site areas | Garages, sheds, paths, driveways, fencing and small retaining walls |
The report gives the buyer clearer evidence before exchange, auction or settlement. It also helps the buyer decide whether to proceed, seek quotes, request specialist advice or speak with their conveyancer before making contract decisions.
## Building Inspection Before Buying a House in Sydney
A building inspection before buying is one of the most useful checks a buyer can arrange before committing to a property. It is sometimes called a home buyers inspection, home buyer building inspection, or building report for buying a house.
NSW Government says the building inspection is usually carried out before the exchange of sale contracts, so buyers can identify problems that may be costly to repair if left unchecked.
A home inspector for buying a house does not replace legal, pest, electrical, plumbing or engineering advice. Instead, the inspection gives the buyer a clearer understanding of visible building defects and whether further specialist checks are needed.
For a Sydney buyer, this matters because many properties are purchased under time pressure. Auctions, short cooling-off periods and competitive private treaty negotiations can leave little time to investigate defects after the buyer has already become emotionally committed.
A building inspection when buying a house may help with:
- Identifying visible major defects
- Understanding safety concerns
- Deciding whether to proceed
- Asking for repair quotes
- Negotiating with the seller
- Requesting further specialist advice
- Planning future maintenance
NSW Government lists negotiation and specialist advice as benefits of getting a building inspection report before buying.
## How Much Does a Building Inspector Cost in Sydney?
The building inspector Sydney cost depends on the property type, size, age, access and scope. A small apartment often costs less than a large freestanding house because there may be fewer roof, subfloor and external site areas to inspect.
Older properties, difficult roof access, tight subfloors, extra structures and same-day reporting may increase the fee.
Use this as a general market guide, not as a fixed pricing, because of factors that affect the pricing.
| Inspection Type | Typical Sydney Cost Guide | Notes |
| ------------------------------------- | ------------------------: | ---------------------------------------------------------------------------- |
| Apartment building inspection | $395 to $460+ | Usually simpler access, but strata issues may need separate document review. |
| 1 to 2 bedroom house or townhouse | $425 to $500+ | Depends on access, age and inspection scope. |
| 3 to 4 bedroom house | $455 to $600+ | Larger roof, subfloor and site areas can increase time. |
| 5+ bedroom or large property | $485 to $700+ | Larger homes may require more inspection time. |
| Combined building and pest inspection | $425 to $650+ | Strong option for houses and timber-framed properties. |
| Commercial building inspection | Quote required | Scope depends on building type, use, size and compliance needs. |
A cheap report may not be good value if it is vague, rushed or hard to understand. The better question is whether the report explains visible defects, limitations, major concerns, photos and recommended next steps in plain language.
## What Should Be Included in a Sydney Building Inspection Checklist?
A Sydney building inspection checklist should help buyers understand what they are paying for. NSW Government says buyers can ask for particular items or parts of the property to be inspected, including visible signs of asbestos, an operable electrical safety switch and operable smoke alarms.
A practical checklist should include:
| Area | What to Check |
| --------------------- | --------------------------------------------------------------------------------------------------------------------- |
| Interior | Walls, ceilings, floors, doors, windows and visible cracking |
| Wet areas | Bathrooms, laundries, kitchens, moisture indicators and water staining |
| Roof space | Roof void where safe access is available |
| Roof exterior | Roof coverings, gutters, downpipes and visible stormwater issues |
| Subfloor | Subfloor space where accessible |
| Exterior | External walls, cladding, brickwork and render |
| Safety areas | Balconies, decks, stairs and balustrades |
| Outbuildings | Garage, carport, sheds and other accessible structures |
| Site areas | Driveways, paths, fencing, small retaining walls and site drainage |
| Buyer-requested items | Visible asbestos indicators, safety switch visibility and smoke alarm visibility where noted within inspection limits |
A detailed Sydney building inspection can help buyers [understand visible defects](/articles/common-defects-sydney-apartments-2010s-construction-boom), access limits and recommended next steps before exchange or settlement.
The report should also record the property address, inspection date, scope, inaccessible areas, major faults, significant problems and recommendations for further inspection where needed. The report should also record the property address, inspection date, scope, inaccessible areas, major faults, significant problems and recommendations for further inspection where needed. NSW Government says reports should list areas not inspected, reasons why they were not inspected and, where needed, recommend further investigation by a suitable specialist.
For buyers, this matters because access is often limited during a sale campaign. Stored items, locked areas, low roof clearance, unsafe roof access, tight subfloors and bad weather can all affect what the inspector can see.
## Building Inspection vs Pest Inspection: Do You Need Both?
A building inspection focuses on visible building defects and property condition. A pest inspection focuses on timber pests, termite activity, termite damage and conditions that may attract pests.
A combined building and pest inspection Sydney buyers book before purchase can be useful for houses, townhouses and older properties because it gives both building and timber pest context.
NSW Government says a building report may identify visible termite damage, but it will not include whether termites or other timber-destroying pests are still present. It recommends getting a pest inspection as well, especially where termites are a known problem.
| Report Type | Best For | What It Helps Identify |
| ------------------------------------- | ------------------------------------------------ | ------------------------------------------------------------------------------------------------ |
| Building inspection | Buyers assessing property condition | Major defects, visible damage, damp indicators, roof issues, drainage issues and safety hazards. |
| Pest inspection | Buyers concerned about termites and timber pests | Termite activity, timber pest damage and conditions that may attract pests. |
| Combined building and pest inspection | Most house and townhouse buyers | Broader due diligence before exchange, auction or settlement. |
| Strata report | Apartment and unit buyers | Owners corporation records, levies, defects, disputes and building history. |
Apartment buyers should not assume a [strata report](/strata-reports) replaces a building inspection. A building inspection checks visible unit condition and immediate exterior areas, while a strata report reviews owners corporation records and building history.
## What Australian Standards Apply to Building Inspections?
For residential pre-purchase inspections, AS 4349.1 is the key Australian Standard. It sets the framework for a visual pre-purchase inspection of residential buildings. NSW Government says there is an Australian Standard that pre-purchase [building inspection reports must comply](https://www.nsw.gov.au/housing-and-construction/buying-and-selling-property/buying-property-nsw/inspecting-a-property/inspection-reports) with, though it does not prescribe every style or content detail.
AS 4349.3 relates to timber pest inspections. It is relevant when a buyer books a pest inspection or combined building and pest inspection.
Scope and limitations matter. An AS 4349.1-style report should identify accessible areas, inaccessible areas, major defects and recommendations for further investigation where needed. It should not be treated as an engineering certificate, warranty or guarantee against future defects.
Standards Australia describes [standards as a trusted and consistent foundation](https://www.standards.org.au/standards-catalogue/standard-details?designation=as-4349-1-2007) for how products, services and systems are designed, built and regulated.
A good inspector should explain the standard in plain English. Buyers should be able to see what was inspected, what was not inspected and what needs specialist review.
## What a Building Inspection Report Does Not Cover
A standard pre-purchase building inspection is visual and non-invasive. It does not deal with every part of a property. NSW Government says the role of the report is to identify major problems visible at the time of inspection, and that the extent of a problem can be influenced by the age and type of property.
A standard report usually does not include:
- Inaccessible areas
- Concealed defects behind walls, floors, ceilings or stored items
- Matters outside the inspector’s expertise
- Repair cost estimates
- Minor defects unless relevant to larger concerns
- Termite detection
- Electrical, plumbing, gas or structural engineering certification
- A compliance certificate
- A warranty or insurance against future problems
A building inspection report should not be used as a certificate of compliance, warranty or insurance policy against future problems. It also says repair cost estimates usually need a special-purpose property report.
Owner Inspections clearly explain limitations in the report so buyers understand what was inspected, what was inaccessible and where specialist advice may be needed.
## Can a Building Inspector Find Hidden Defects?
No inspector can find every hidden defect during a standard visual inspection. Concealed damp, covered structural issues, faults under floor coverings and areas blocked by furniture or stored items may not be visible. Weather, access, information provided to the consultant and deliberately covered problems can affect the final report.
Owner Inspections clearly explains limitations in the report so buyers understand what was inspected, what was inaccessible and where specialist advice may be needed.
## Common Building Defects Sydney Buyers Should Watch For
Sydney buyers see many property types, from older brick homes and renovated terraces to townhouses, apartments and newer strata buildings. Defects vary by age, construction type, maintenance history and site conditions.
Common issues include:
- Waterproofing defects in bathrooms, balconies and laundries
- Roof leaks and damaged roof coverings
- Blocked or poor stormwater drainage
- Cracking in walls, brickwork or render
- Subfloor moisture and poor ventilation
- Timber decay
- Termite damage indicators
- Rusted gutters and downpipes
- Balcony, deck and balustrade safety concerns
- Poor renovations or owner-builder work
- Damp, mould and water staining
- Fire safety concerns in apartments and strata buildings
NSW strata buyers should pay close attention to waterproofing and fire safety issues. Building Commission NSW’s 2025 strata defects research found that [53% of buildings surveyed had serious defects](https://www.nsw.gov.au/departments-and-agencies/building-commission/building-and-construction-resources/research-on-serious-building-defects-nsw-strata-communities). It also reported waterproofing defects at 22%, making them the most common serious defect, and fire safety systems defects at 16%, the second most common.
| Defect Type | Example | Buyer Action |
| -------------------------- | -------------------------------------------------------------------------- | -------------------------------------------------------------- |
| Major defect | Significant structural movement, major roof leak, failed waterproofing | Seek specialist advice and repair estimates before proceeding. |
| Safety hazard | Loose balustrade, unsafe stairs, visible electrical risk indicator | Treat as urgent and request qualified trade review. |
| Maintenance issue | Rusted gutter, minor cracking, worn sealant | Budget for repair or maintenance. |
| Further investigation item | Inaccessible roof space, obstructed subfloor, suspected concealed moisture | Ask for reinspection or specialist assessment. |
Read the Defect
Documentation Guide
}
buttonHref="/articles/document-building-defects-legal-claim"
variant="secondary"
/>
## How to Choose the Best Building Inspector in Sydney
The best building inspector Sydney buyers can choose is not always the cheapest. A buyer should look for independence, suitable experience, clear reporting and proper insurance.
NSW Government recommends using a suitably qualified person such as a licensed builder, surveyor or architect. It also says buyers should ensure the person has adequate insurance cover, particularly professional indemnity insurance.
Look for:
- Relevant building experience
- Suitable qualifications
- Professional indemnity insurance
- Public liability insurance
- Sample reports
- Clear explanation of the inspection scope
- Experience with Sydney houses, apartments, townhouses and strata properties
- Ability to provide building and pest services where needed
- Independence from the selling agent
- Clear report turnaround time
- Willingness to explain findings after the inspection
Owner Inspections provides independent reports with photos, practical findings and clear explanations for buyers who need a trusted [building inspector Sydney](/nsw/building-inspections-sydney) service.
Before booking, ask:
| Question to Ask | Why It Matters |
| ----------------------------------------------- | ---------------------------------------------------- |
| Are you independent of the selling agent? | Helps reduce conflict-of-interest concerns |
| What standard does your report follow? | Helps clarify scope and limitations |
| Do you carry professional indemnity insurance? | NSW Government recommends adequate insurance cover |
| Can I see a sample report? | Helps you judge report clarity before booking |
| Will the report identify inaccessible areas? | Helps you understand inspection limits |
| Can I ask questions after receiving the report? | Helps you understand defects before making decisions |
***A certified building inspector Sydney buyers hire should make the process clearer, not more confusing.***
## When Should You Book a Building Inspection in Sydney?
Book before exchange where possible. This gives the buyer more time to read the report, ask questions, get quotes and seek contract advice before becoming bound.
For auction properties, book before bidding. Auction purchases are often unconditional, and NSW Government says the cooling-off period does not apply when a buyer buys at auction or exchanges contracts on the same day as an auction after the property is passed in.
For private treaty purchases, buyers sometimes order the report during the cooling-off period. NSW Government says most consultants need at least 2 to 3 days’ notice, and buyers should get vendor permission as early as possible.
It also states that NSW buyers usually have a 5 business day cooling-off period after exchange, but if they withdraw, they forfeit 0.25% of the purchase price.
That timing can be tight. Book early so the inspection, report review and any specialist advice can happen before the buyer needs to make a contract decision.
For time-sensitive purchases, an [independent building inspection in Sydney](/nsw/building-inspections-sydney) can help buyers act with clearer information during the buying process.
## Can You Use a Building Inspection Report to Negotiate?
Yes, a building inspection report may support negotiation. NSW Government lists negotiation as one benefit of getting a building inspection report before buying, because the buyer may need to pay to repair some of the problems found.
Buyers may use findings to:
- Request a lower purchase price
- Ask the vendor to fix certain items
- Seek repair quotes
- Renegotiate contract terms with professional advice
- Walk away if risks are unacceptable, subject to contract conditions
A report can also help separate cosmetic issues from more serious concerns. A fresh coat of paint may hide mould, and neat staging may distract from damp, poor drainage or roof issues.
For more guidance, read Owner Inspections’ article on how to [negotiate price after a building inspection](/articles/negotiate-price-after-building-inspection).
## Building Inspector Sydney Cost vs Risk: Is It Worth It?
A building inspection costs a few hundred dollars in many Sydney cases. That cost should be weighed against the risk of buying a property with visible roof leaks, failed waterproofing, drainage issues, major cracking, subfloor moisture or termite damage indicators.
An inspection cannot find every hidden defect, but it can help identify visible red flags before you commit. It also gives the buyer a written record that can be discussed with trades, specialists, a solicitor or a buyer’s agent.
Owner Inspections’ shows buyers often want to avoid hidden defects, future repair costs and legal or financial risk. Buyers value accurate reporting, clear explanations and practical next steps.
This makes an inspection a risk management step. It does not remove all uncertainty, but it can reduce guesswork.
## How to Get a Building Inspection in Sydney
Here is the usual process:
| Step | What to Do | Why It Matters |
| ---- | -------------------------------- | ------------------------------------------------------------------------------------- |
| 1 | Choose the inspection type | Decide between building only, pest only, or combined building and pest |
| 2 | Confirm the property type | Apartment, townhouse, freestanding house, strata property or commercial property |
| 3 | Book early | Most consultants need notice, and auction buyers may not have a cooling-off period |
| 4 | Arrange access | The vendor or agent must allow access before the inspection can occur |
| 5 | Share known concerns | Send the listing, contract, floor plan and visible issues if available |
| 6 | Read the report carefully | Look for major defects, limitations, inaccessible areas and recommendations |
| 7 | Ask follow-up questions | A good inspector should explain findings clearly |
| 8 | Seek specialist advice if needed | Structural, pest, electrical, plumbing, legal or waterproofing advice may be required |
NSW Government says buyers should get the vendor’s permission to have the property inspected as early as possible in the sale negotiations.
## Buyer Tips Before Booking a Sydney Building Inspector
Use these tips before booking:
- Check the inspector’s qualifications and insurance.
- Ask whether the inspection follows AS 4349.1 for residential pre-purchase inspections.
- Ask what is excluded from the report.
- Book early, especially before auction.
- Confirm whether pest inspection is included.
- Ask whether the inspector can explain the report after delivery.
- Send the contract, listing, floor plan and known concerns if available.
- Ask about access to roof space, subfloor, garage and exterior areas.
- Do not rely only on cosmetic presentation.
- Keep the report and photos for future maintenance planning.
Vendor-supplied reports can be useful, but buyers should check who commissioned the report, whether they can legally rely on it, what it covers and whether the inspector is independent.
Vendors may get a building report to give to interested buyers, but it is not a substitute for a buyer’s own independent report.
## Getting the Most Value from Your Home and Building Investment
Buying in Sydney is a major decision, and a clear inspection report can help you understand visible defects before you commit. Owner Inspections provides independent building inspections, combined building and pest inspections, and practical reports with photos, findings and recommended next steps.
Book an [independent building inspection](/nsw/building-inspections-sydney) in Sydney with Owner Inspections to understand visible defects, safety concerns and next steps before committing to a property.
Contact Owner
Inspections
}
buttonHref="/contact"
variant="secondary"
/>
### Buying a Home with Soakwells: What Should You Check During a Property Inspection?
Source: https://ownerinspections.com.au/articles/soakwell-inspection-home-buyers
Published: 2026-06-05 | Category: General Maintenance
Author: Maison Azdari
Buying a home with a soakwell? Many buyers hear the word during an inspection and are not sure whether it is a small drainage detail or a bigger property risk.
Soakwells are common across many Western Australian homes because they help manage roof runoff and surface water on-site. Buyers are not expected to become stormwater drainage experts, but they should know the warning signs that may show up during an open home, a pre-purchase inspection or a final inspection.
Stormwater is water that drains from the roof and land around a house. It can carry soil, organic matter, litter, fertilisers and oil residues into downstream waterways when it is not managed well. YourHome also notes that poorly managed stormwater can cause erosion and move pollutants into waterways.
During a property inspection, the key question is not simply whether a soakwell exists. It is whether the visible drainage system appears to direct water away from the building without creating damp, movement or boundary issues.
View Inspection
Services
}
buttonHref="/services"
variant="secondary"
/>
## What Is a Soakwell?
A soakwell is an underground stormwater drainage structure that collects water and allows it to soak into the surrounding soil.
In simple words, a soakwell receives stormwater from downpipes, paved areas or surface drains. The water then disperses slowly into the soil instead of pooling around the home or flowing straight onto a neighbouring property.
### Soakwell vs drainage pit
A soakwell is designed for soakage. It holds water and lets it infiltrate into the ground.
A drainage pit or sump may hold and direct water into another drainage system. The City of Gosnells also explains that a silt pit captures silt and solid objects before stormwater moves into the drainage system.
### Why buyers should care
A hidden or failing soakwell can contribute to:
- Pooling water near walls
- Damp smells inside or below the home
- Softened soil near footings
- Paver subsidence
- Moisture ingress
- Termite-conducive conditions
- Disputes about stormwater crossing a property boundary
A soakwell problem may not be obvious during dry weather. That is why visible signs around downpipes, paving, garden beds and external walls matter during a building inspection.
## Why Soakwells Matter When Buying a Home
Good stormwater management protects the building, neighbouring properties and the buyer’s budget.
Stormwater runoff from roof water or surface water must be disposed of within the subject lot without detriment to adjoining land. It also states that the distance from buildings and boundaries should not be less than the depth of the soakwell.
This matters because stormwater rarely stays in one place. Water that falls near the house may soak into soil near footings, sit against external walls, run into subfloor spaces, wash out bedding sand under pavers or move toward the neighbour’s land.
A property may look dry at the open home in summer, yet show drainage defects after sustained winter rain. For buyers, the best approach is to ask better questions early and use the inspection report to decide whether further drainage review is needed before settlement.
## What Does a Property Inspector Look for Around Soakwells?
A standard building inspection does not usually expose underground drainage components. It is a visual inspection of accessible areas, so the inspector looks for signs that the drainage system may not be working as intended.
### Downpipes and roof drainage
Downpipes are one of the easiest places to start. An inspector may observe whether downpipes appear:
- Connected to a drainage system
- Disconnected at the base
- Damaged or rusted
- Overflowing
- Discharging beside walls, slabs, paths or garden beds
- Poorly directed toward neighbouring land
REIWA advises buyers to [inspect roof drainage outlets](https://reiwa.com.au/the-wa-market/resources/articles/check-that-everything-works-before-buying-a-home/), check that guttering is sound and find out where soak wells are located before buying.
A downpipe that ends on paving beside the wall does not prove the soakwell has failed, but it does suggest stormwater may not be directed to a suitable system.
### Surface water and paving falls
Paving should generally fall away from the dwelling. Water should not be encouraged toward walls, garage entries, subfloor vents, retaining walls or weep holes.
Watch for low spots in paving, ponding near the slab edge, green staining, damp garden beds against brickwork and areas where paving has been lifted or patched.
### Signs of moisture movement
Drainage defects can show up inside and outside the home. Common signs include:
- Damp skirting boards
- Musty smells
- Efflorescence on brickwork
- Fretting brick faces
- Blistering paint
- Swollen cabinetry near external walls
- Cracks that appear worse after rain
- Damp subfloor soil or timber
These signs do not automatically prove a failed soakwell. They do tell the buyer that moisture is present and should be assessed in context.
### Visible access limitations
[AS 4349.1-2007 is listed by ABLIS](https://ablis.business.gov.au/service/qld/australian-standard-4349-1-2007-inspection-of-buildings-pre-purchase-inspections-residential-buildings/45899) as the Australian Standard for pre-purchase inspections of residential buildings. A standard inspection is not a full hydraulic engineering assessment.
An inspector may identify visible drainage defects and recommend further review. They may not be able to confirm underground soakwell size, depth, capacity or internal condition without specialist equipment, excavation, drainage plans or CCTV inspection.
## Common Soakwell Problems Found During Property Inspections
| Warning Sign | What It May Suggest | Buyer Action |
| ---------------------------------------------- | ---------------------------------------------------------- | ---------------------------------------------------------- |
| Downpipes discharge onto paving or garden beds | Missing or disconnected stormwater system | Ask the inspector to note it and recommend drainage review |
| Pooling water near walls | Poor surface fall, blocked soakwell or inadequate drainage | Investigate before settlement where possible |
| Sinking pavers or driveway dips | Possible collapsed soakwell, poor compaction or washout | Request drainage specialist assessment |
| Damp walls or musty subfloor | Moisture ingress or poor site drainage | Consider building and pest inspection |
| Water flowing toward neighbour | Potential boundary or compliance issue | Check local council requirements |
| Termite-conducive moisture | Damp conditions around timber or concealed areas | Add timber pest inspection |
Rainwater that is not managed well can contribute to erosion, building subsidence, footing and concrete pad subsidence, rising damp, wood rot and termite-conducive moisture.
## Soakwells, Council Requirements and Australian Inspection Standards
Council requirements vary by location, soil type, groundwater level, lot size and drainage design. This is why buyers should not assume that one property’s soakwell setup is suitable for another.
The City of Canning requires developments to [provide stormwater drainage within lot boundaries](https://www.canning.wa.gov.au/media/d2gnyokv/stormwater-drainage-information-sheet.pdf). Its stormwater information sheet says each lot must manage and dispose of stormwater without impacting neighbouring lots. It also lists on-site disposal via soakwells, soakwells with overflow connection, and detention via drainage pits as possible stormwater disposal methods.
The City of Gosnells also notes that [on-site infiltration](https://www.gosnells.wa.gov.au/Building_and_development/Engineering/Stormwater_and_drainage/Frequently_asked_questions) depends on factors such as soil, groundwater and stormwater disposal conditions. It states that high groundwater can reduce the efficiency of deeper soakwells and may require shallow soakwells with a larger diameter for storage capacity.
### What AS 4349.1 means for buyers
AS 4349.1 is relevant to pre-purchase residential building inspections. For buyers, the key point is scope.
A building inspector can report visible defects, visible moisture-related risk and accessible drainage concerns. They are not usually confirming that an underground soakwell is correctly sized, compliant with council design rules or free from collapse.
### When to request further investigation
Ask for further drainage, plumbing or engineering review when there is evidence of:
- Repeated pooling near the home
- Paver subsidence
- Damp skirting or internal moisture
- Unconnected downpipes
- Suspected collapsed soakwell
- Neighbour runoff concerns
- Recent drainage works without receipts or plans
- New paving that may conceal old defects
## Buyer Checklist: What to Look for Before and During the Inspection
### At the open home
- Look for downpipes that discharge onto the ground.
- Check for damp smells near external walls, garages and subfloor areas.
- Look for paving that slopes toward the house.
- Check whether garden beds are built up against weep holes or damp-proof courses.
- Ask the agent whether soakwell locations, drainage plans or recent drainage repairs are known.
- Look for access lids, grates, silt pits or patched paving.
- Check driveway dips and areas where pavers look newer than the rest.
### During the inspection
- Ask the inspector to comment on visible site drainage.
- Ask whether moisture-related defects were observed.
- Ask whether downpipes appear to be connected to a stormwater system.
- Ask whether further drainage, plumbing or CCTV inspection is recommended.
- Ask whether a timber pest inspection is advisable.
- Ask whether any visible defects could affect negotiation or repair planning.
### Before settlement
- Re-check the property after rain if possible.
- Ask for receipts or evidence of recent soakwell repairs if the seller says work has been done.
- Do not assume new paving means the drainage below is sound.
- Ask your conveyancer or solicitor about any contract steps linked to inspection findings.
Learn How to
Document Defects
}
buttonHref="/articles/document-building-defects-legal-claim"
variant="secondary"
/>
## What Should Your Inspection Report Say About Soakwells?
A clear inspection report should separate what was observed from what needs specialist testing.
For a suspected soakwell issue, the report should describe:
- The visible drainage defect
- The location of the defect
- Photos showing the concern
- Related moisture or structural warning signs
- Conditions conducive to timber pests
- Any access or weather limitations
- Whether underground drainage could not be assessed
- Recommended next steps
For example, a report may say that a downpipe discharges beside an external wall, paving falls toward the dwelling and damp staining was visible nearby. It may then recommend a licensed drainage contractor or plumber for further investigation.
Owner Inspections supports buyers with independent reporting, photos and practical findings that help them understand visible risks before committing to a property. This is especially useful when drainage defects may affect repair quotes, settlement questions or future maintenance planning.
## When Is a Soakwell Issue Serious?
| Severity | Example | Recommended Next Step |
| -------- | -------------------------------------------------------------------------- | -------------------------------------------------------------- |
| Low | Minor surface water away from the house after heavy rain | Monitor and maintain gutters and downpipes |
| Moderate | Downpipe not connected to drainage | Obtain drainage repair quote |
| High | Pooling against walls, damp skirting, paver subsidence | Specialist drainage inspection before settlement |
| Critical | Structural movement, major damp, suspected collapsed soakwell near footing | Building inspector plus engineer or drainage contractor review |
A low-risk issue may be a maintenance item. A high-risk issue may affect the buyer’s decision, repair budget or settlement strategy.
The risk rises when water sits near footings, visible damp is present, timber is affected, or the drainage concern appears close to structural movement. In those cases, a building inspection and pest inspection can help identify whether moisture is linked to wider damage or termite-conducive conditions.
## Can a Buyer Negotiate After a Soakwell Issue Is Found?
Inspection findings may help buyers ask questions, seek quotes, negotiate repairs or reconsider risk. The best next step depends on the contract, the timing of the inspection and the seriousness of the defect.
A report with photos and clear findings may support a buyer when asking for more information from the seller. It may also help the buyer obtain a drainage repair quote before settlement.
Speak with your conveyancer or solicitor before relying on any inspection finding to change contract terms.
Do not treat every soakwell defect as a deal breaker. Some issues are repairable. Others may point to broader moisture, boundary or structural concerns. The value of an inspection is that it helps buyers understand the risk before they commit.
## Getting the Most Value from Your Home and Building Investment
A soakwell is easy to overlook because it is usually underground. Yet drainage defects can affect moisture, paving, walls, termite risk and future repair costs.
Before you commit to a property, Owner Inspections can assess visible drainage risks, moisture-related defects, structural warning signs and termite-conducive conditions as part of a detailed pre-purchase inspection or building and pest inspection.
Buying a property with soakwells or visible drainage concerns? Book an independent inspection and receive a clear report with photos, practical findings and next-step recommendations before you commit.
Contact Owner
Inspections
}
buttonHref="/contact"
variant="primary"
/>
### Why Steel Reinforcement Matters in Pre-Slab Inspections
Source: https://ownerinspections.com.au/articles/pre-slab-inspection-steel-reinforcement
Published: 2026-05-29 | Category: New Construction
Author: Maison Azdari
What happens if a concrete slab looks ready, but the reinforcing mesh is sitting too low, the bar chairs are missing, or the steel does not match the engineering drawings?
That is the exact reason a pre-slab inspection steel reinforcement check matters before concrete is poured. At this stage, the formwork, plumbing, vapour barrier, termite barrier where required, trench mesh and reinforcing mesh are still visible.
Once the concrete goes in, those same details are hidden. Any problem with mesh placement, lap lengths, concrete cover or slab penetrations can become harder and more expensive to fix. That is why many homeowners book a [new construction stage inspection](/new-construction-stage-inspections) before the slab is poured.
***Reference:*** [Australian Bureau of Statistics building activity](https://www.abs.gov.au/statistics/industry/building-and-construction/building-activity-australia/latest-release) and [building approvals data](https://www.abs.gov.au/statistics/industry/building-and-construction/building-approvals-australia/latest-release) for the December 2025 quarter and March 2026.
Australia is still seeing strong residential building activity. ABS reported 53,567 total dwellings commenced in the December 2025 quarter, including 28,469 new private sector houses. ABS also reported 17,300 dwellings approved in March 2026, with private sector house approvals rising to 10,194.
For homeowners, owner-builders, builders and investors, the slab stage is one of the best chances to catch visible defects before they are covered.
Book a
Stage Inspection
}
buttonHref="/new-construction-stage-inspections"
variant="secondary"
/>
## What Is a Pre-Slab Inspection?
A pre-slab inspection is a construction stage inspection carried out before the concrete slab is poured. It is sometimes called a pre-pour inspection, concrete slab inspection or slab stage inspection.
The inspection looks at visible site preparation and workmanship. It does not replace the engineer, builder, certifier or building surveyor. It is an independent visual check of the work that can be seen at the time of inspection.
### When does it happen?
A pre-slab inspection usually happens after the slab area has been prepared and before the concrete truck arrives. For a wider timeline across the build, see Owner Inspections’ guide on [when to book each stage inspection](/articles/when-to-book-stage-inspections-timeline),
At this point, the inspector may be able to check:
- Footing trenches and slab set-out
- Formwork dimensions
- Reinforcing mesh and trench mesh
- Bar chairs and spacers
- Vapour barrier condition
- Slab penetrations and services
- Alignment with engineering drawings
This timing matters because the slab preparation is still visible. If a defect is found, it may be corrected before the pour rather than discovered after the concrete has cured.
### What does the inspector check?
The inspector compares visible work against the available drawings, site conditions and expected workmanship. For steel reinforcement, the focus is usually on mesh type, mesh position, overlaps, ties, bar chairs, trench mesh, beam reinforcement and any strengthening around load-bearing areas. Owner Inspections also explains the role of inspectors in its guide to [inspector responsibilities at each construction stage](/articles/inspector-responsibilities-construction-stages).
The brief also notes that the article should not claim a pre-slab inspection certifies compliance. It should be framed as an independent visual construction stage inspection that checks visible workmanship against plans, drawings, standards and accessible site conditions.
## Why Steel Reinforcement Is So Important in Concrete Slabs
Concrete is strong when it is compressed. That means it can handle downward pressure well. But concrete does not perform as well when it is pulled, bent or affected by ground movement. Hence, [reinforcement mesh](https://sydneyreo.com.au/reinforcement-mesh/) is required to fortify it.
Steel reinforcement helps the slab manage those forces. Reinforcing mesh, trench mesh and bars help reduce cracking, support load transfer and improve the way the slab performs over time.
This is especially relevant for Australian homes. Soil conditions can vary from one site to another. Moisture changes, reactive soil and seasonal movement can all affect slab performance.
AS 2870:2011 sets out requirements for site classification and the design and construction of footing systems for single dwelling houses. AS 3600:2018 covers minimum requirements for concrete building structures and members containing reinforcing steel or tendons.
## What Inspectors Look for in Steel Reinforcement Before the Pour
A reinforcing mesh inspection is not only about checking that steel is present. The steel needs to be the right type, in the right position, and supported well enough to stay there during the pour.
### Mesh type and reinforcement size
The installed reinforcing mesh should match the engineering drawings and reinforcement schedule.
Inspectors should not guess mesh sizes or accept substitutions without confirmation. If the plans call for a specific mesh or trench mesh arrangement, the installed steel should reflect that design.
Common checks include:
- Mesh type shown on the drawing
- Trench mesh position
- Beam reinforcement
- Steel around service penetrations
- Extra reinforcement around load-bearing points
- Any notes from the engineer
If there is a mismatch, it should be raised before concrete is poured.
### Correct mesh height and concrete cover
Steel should not sit directly on the ground, sand bed or vapour barrier. It should be positioned within the slab using suitable chairs or spacers.
Concrete cover means the thickness of concrete around the reinforcement. It helps protect steel from moisture exposure and corrosion. It also helps the reinforcement work as designed.
If the mesh is too low, too high, too close to the edge or pushed out of place, the inspector may record it as a defect.
### Bar chairs and spacers
Bar chairs hold reinforcing mesh and bars at the required height during the concrete pour. The Steel Reinforcement Institute of Australia notes that [AS/NZS 2425 covers bar chairs and spacers](https://www.sria.com.au/wp-content/uploads/2024/05/Bar-Chairs-for-Support-of-Reinforcement.pdf), including requirements for load capacity, concrete placement around chairs and durability.
The same SRIA guide says engineers can specify the required load capacity, spacing and type of bar chairs for each project. It also notes that bar chair spacing depends on the load to be supported and the chair strength grade.
For homeowners, the point is simple: if there are too few chairs, the mesh can sag or move when workers, hoses and wet concrete place pressure on it.
### Mesh overlaps and tying
Reinforcing mesh sheets are usually laid in sections. Where they meet, the overlap needs to follow the engineering drawings or specification.
Poor mesh overlap can prevent the reinforcement from acting as a continuous system. Loose or missing ties can also allow mesh to move during the pour.
A pre-slab inspection should check whether laps and ties appear consistent with the approved details available on site.
### Trench mesh, beams, penetrations and load-bearing areas
The slab is not the same everywhere. Footings, beams, trench mesh, service penetrations and load-bearing areas may need extra attention.
Pipes, drains and electrical conduits can interrupt the slab layout. If penetrations are in the wrong location, or reinforcement has been cut without proper detailing, the issue should be reviewed before the pour.
This is where the engineer’s drawings are the main reference point. The inspector can flag visible concerns, but design changes should be confirmed by the builder, engineer or relevant project professional.
### Engineering-plan alignment
The inspector should compare visible steel installation against the latest available engineering drawings.
This includes:
- Slab dimensions
- Footing depth and layout
- Reinforcement schedule
- Trench mesh placement
- Beam reinforcement
- Slab penetrations
- Extra reinforcement zones
If drawings are missing, outdated or unclear, the inspection becomes harder. Homeowners and owner-builders should make sure the latest plans are available before the inspection.
## What Counts as High-Quality Steel Reinforcement?
High-quality steel reinforcement is not only about buying steel that looks clean and new. It also needs to be the right product for the job, installed in the right way and backed by reliable documentation where needed.
AS/NZS 4671:2019 provides material specifications for steel bars and welded mesh used to reinforce concrete structures. Standards Australia also lists AS/NZS 4671:2019 as “Steel for the reinforcement of concrete”.
For a residential slab, high-quality reinforcement usually means:
- The steel matches the engineering schedule
- Mesh and bars are supplied to the relevant Australian or Australian/New - Zealand Standard
- The steel is not heavily damaged, bent out of shape or badly corroded
- Welded mesh does not show poor weld quality
- The reinforcement has not been substituted without approval
- The steel is stored and handled in a way that avoids damage
- Bar chairs, spacers and accessories are suitable for the project
ACRS can also be relevant. ACRS describes itself as a steel certifier to Australian and New Zealand Standards, with an independent, not-for-profit approach accredited by JAS-ANZ. Its site also lists welded steel mesh to AS/NZS 4671.
For a homeowner, the practical step is to ask the builder or supplier what reinforcement has been supplied and whether it matches the drawings. For larger or higher-risk projects, documentation may be requested by the engineer, builder, certifier or project manager.
Learn How to
Document Defects
}
buttonHref="/articles/document-building-defects-legal-claim"
variant="secondary"
/>
## Common Reinforcement Defects That Can Fail a Pre-Slab Inspection
| Defect | Why it matters | Likely action before pour |
| -------------------------------- | --------------------------------------------------- | ---------------------------------- |
| Mesh sitting too low | May reduce intended cover and performance | Add or adjust chairs before pour |
| Insufficient bar chairs | Mesh may sag or move during concrete placement | Install extra supports |
| Short mesh overlaps | Reinforcement may not act as a continuous system | Re-lap and tie as per drawings |
| Wrong mesh type | May not match design load requirements | Confirm with builder or engineer |
| Damaged vapour barrier | Moisture protection may be affected | Repair membrane before pour |
| Services not aligned | May affect slab penetrations and later construction | Rectify before concrete |
| Reinforcement too close to edges | May increase corrosion and durability risk | Adjust steel placement |
| Missing trench mesh | Footings or beams may not match the design | Install or confirm with engineer |
| Reinforcement cut around pipes | May weaken the intended layout | Seek builder or engineer direction |
| Heavy corrosion or damaged steel | May affect durability or acceptance | Review before pour |
## What Happens If Reinforcement Problems Are Found?
If a pre-slab inspection identifies a reinforcement concern, the issue should be documented before the concrete pour. Homeowners can also read Owner Inspections’ guide on [what happens if a stage inspection finds defects](/articles/what-happens-if-stage-inspection-finds-defects) to understand the usual next steps after defects are reported.
A typical process may include:
- The inspector records the issue with photos
- The builder or site supervisor is notified
- Mesh, chairs, laps, vapour barrier or penetrations are corrected
- The engineer may need to confirm design-related changes
- A reinspection may be arranged if needed
- The pour proceeds once the issue has been resolved
A failed slab inspection can lead to removed mesh, added reinforcement, repositioned steel, replacement materials and another inspection. It also noted that missed pours can affect pump hire, crews, deliveries and budget.
This is why the inspection should be booked before the concrete truck, pump and crew are locked in too tightly.
## Pre-Slab Inspection Checklist for Homeowners and Owner-Builders
Before the inspection, homeowners and owner-builders should make sure the latest drawings are on site, access is ready, and the inspection is booked before the pour is locked in. Owner-builders can also read this guide on [how to arrange independent stage inspections with a builder](/articles/how-do-i-arrange-independent-stage-inspections).
| Item checked | Why it matters | What a defect may look like |
| --------------------------- | ----------------------------------- | ---------------------------------------------- |
| Latest engineering drawings | Confirms what should be installed | Old or missing plans on site |
| Slab set-out | Checks slab shape and dimensions | Formwork not matching plan |
| Footing trenches | Affects foundation support | Wrong depth, width or location |
| Reinforcing mesh | Must match the design | Wrong mesh, damaged mesh or poor layout |
| Trench mesh | Supports footing and beam areas | Missing or incorrectly positioned mesh |
| Bar chairs | Hold steel at the required height | Too few chairs or mesh sitting low |
| Mesh laps and ties | Help reinforcement act continuously | Short overlaps or loose sheets |
| Vapour barrier | Helps manage moisture | Tears, gaps or displacement |
| Services and penetrations | Need correct locations | Pipes in wrong places or steel cut around them |
| Load-bearing areas | May need extra reinforcement | Missing additional bars or mesh |
Before the inspection, homeowners and owner-builders should:
- Confirm the latest engineering drawings are on site
- Ask whether mesh and trench mesh match the schedule
- Check that bar chairs are installed before inspection
- Look for torn or displaced vapour barrier sections
- Make sure service penetrations match the plan
- Photograph the slab before concrete is poured
- Book the inspection before the pour is locked in
- Avoid approving design changes without builder or engineer confirmation
## Australian Standards and References
| Standard or reference | Relevance | Note |
| --------------------- | ---------------------------------------- | ---------------------------------------------------------------------------------------------------------------------------------- |
| AS 2870:2011 | Residential slabs and footings | Covers site classification and footing system design and construction for single dwelling houses. |
| AS 3600:2018 | Concrete structures | Covers minimum requirements for concrete structures containing reinforcing steel or tendons. |
| AS/NZS 4671:2019 | Reinforcing steel | Covers material specifications for steel bars and welded mesh used to reinforce concrete. |
| AS/NZS 2425:2015 | Bar chairs and spacers | Covers requirements for bar chairs and spacers, including strength and deflection. |
| SRIA bar chair guide | Practical reinforcement support guidance | Explains bar chair types, load capacity, spacing and durability considerations. |
| ACRS certification | Steel product certification | Provides independent steel certification to Australian and New Zealand Standards. |
## How Owner Inspections Helps Before Concrete Is Poured
Owner Inspections provides independent property and building inspection services for homeowners, buyers, investors, builders and real estate professionals in Australia. Its ICP identifies independence, detailed reports, clear recommendations, experienced inspectors and customer education as key service strengths.
For a pre-slab inspection, that means the focus is on clear reporting, site photos and practical next steps. The goal is to help the client raise visible issues before they become hidden inside the slab.
Owner Inspections also has a [new construction stage inspections](/new-construction-stage-inspections) and a [construction stage inspections guide](/guides/construction-stage-inspections-guide) that can support internal linking.
## Getting the Most Value from Your Home and Building Investment
Before concrete is poured, make sure the reinforcement, bar chairs, vapour barrier, slab set-out and engineering-plan details have been checked by an independent inspector. [Owner Inspections](/) provides clear new construction stage inspections with photos and practical next steps, helping clients address visible issues before they become hidden in the slab.
Request an
Inspection Quote
}
buttonHref="/contact"
variant="primary"
/>
### Can a Builder Refuse an Independent Inspector in Queensland?
Source: https://ownerinspections.com.au/articles/can-builder-refuse-independent-inspector-qld
Published: 2026-05-26 | Category: Construction Inspections
Author: Maison Azdari
No, a builder cannot legally refuse access to an independent building inspector in Queensland. Under the Domestic Building Contracts Act 2000, Section 34, a homeowner or their authorised representative has the right to enter the building site at any reasonable time during construction. The builder must not obstruct or hinder this access. If your builder is refusing entry to your independent inspector, they are breaching Queensland law and may face disciplinary action from the QBCC, including licence suspension or cancellation.
This protection exists because independent inspections are one of the most effective ways homeowners can ensure construction quality. Without third-party oversight, defects can be concealed behind plasterboard, cladding, or concrete - making them far more expensive to rectify after completion.
## Domestic Building Contracts Act 2000
The [Domestic Building Contracts Act 2000](https://www.legislation.qld.gov.au/view/html/repealed/current/act-2000-009) is the primary legislation protecting homeowner inspection rights in Queensland. Two sections are particularly relevant.
### Section 34 - Right of Entry
Section 34 establishes that the building owner, or a person authorised by the owner, may enter the building site at any reasonable time. The builder must not obstruct or hinder the owner or their authorised person from exercising this right. An independent building inspector engaged by the homeowner qualifies as an "authorised person" under this provision.
### Section 35 - Notice Before Covering Work
Section 35 requires the builder to give reasonable notice before covering any work that will no longer be accessible for inspection. This means your builder cannot pour concrete over reinforcing steel, close up wall frames, or apply waterproof membranes without first giving you the opportunity to have the work inspected. Failure to provide this notice is a breach of the building contract.
## QBCC Regulatory Powers
The [Queensland Building and Construction Commission Act 1991](https://www.legislation.qld.gov.au/view/html/inforce/current/act-1991-098) gives the QBCC significant power to take action against builders who breach their obligations.
### Section 72 - Grounds for Disciplinary Action
Under Section 72, the QBCC can take disciplinary action against a licensee for "unsatisfactory conduct". Refusing access to a homeowner's independent inspector constitutes unsatisfactory conduct because it breaches the builder's obligations under the Domestic Building Contracts Act 2000.
### Section 74 - Available Penalties
Section 74 grants the QBCC the power to issue directions to a builder, impose conditions on their licence, suspend a licence, or cancel a licence entirely. A builder who repeatedly refuses inspector access is risking their livelihood.
## Mandatory Inspection Stages
The [Building Act 1975, Section 71](https://www.legislation.qld.gov.au/view/html/inforce/current/act-1975-011) sets out mandatory inspection stages for residential construction in Queensland. While these are the stages requiring certification by the building certifier, they also represent the critical points at which independent inspections deliver the most value.
The mandatory stages include:
- **Slab stage** - before concrete is poured over reinforcing and services
- **Frame stage** - after frame erection and before cladding or lining
- **Lock-up stage** - when the building is enclosed with roof, walls, windows, and doors
- **Fixing stage** - after internal linings, wet area waterproofing, and before final finishes
- **Completion stage** - final inspection before handover
## Australian Consumer Law Protections
Beyond Queensland-specific legislation, the [Australian Consumer Law](https://www.accc.gov.au/consumers/buying-products-and-services/consumer-rights-and-guarantees) provides additional protections through consumer guarantees that apply to building services.
- **Section 60** - Services must be provided with due care and skill
- **Section 61** - Services must be fit for their specified purpose
- **Section 62** - Services must be provided within a reasonable time
A builder who refuses independent inspections may be attempting to conceal workmanship that fails to meet the "due care and skill" guarantee. The refusal itself can be evidence of a potential breach of consumer guarantees, which strengthens any future claim you may need to make.
## Current Penalty Values
The [Penalties and Sentences Regulation 2015](https://www.legislation.qld.gov.au/view/html/inforce/current/sl-2025-0106) sets the value of a penalty unit in Queensland at AUD 161.19 for the 2024-25 financial year. Many offences under Queensland building legislation carry penalties of 20 to 100 penalty units, meaning fines can range from approximately AUD 3,224 to AUD 16,119.
## What to Do If Your Builder Refuses Access
If your builder refuses access to your independent inspector, follow these steps in order.
## Frequently Asked Questions
### Can a Builder Refuse an Independent Inspector in Victoria?
Source: https://ownerinspections.com.au/articles/can-builder-refuse-independent-inspector-vic
Published: 2026-05-26 | Category: Construction Inspections
Author: Maison Azdari
No, a builder cannot legally refuse access to an independent building inspector in Victoria. Under Section 19 of the Domestic Building Contracts Act 1995, a builder must permit the owner or any person authorised by the owner to have reasonable access to the building site. Refusing access is a criminal offence carrying a penalty of 20 penalty units, which equals $4,070.20 at 2025-26 rates. This right cannot be overridden by any clause in your building contract, and Consumer Affairs Victoria explicitly confirms that builders must allow reasonable access even if the contract attempts to restrict visits.
## What the Law Says
Consumer Affairs Victoria is unambiguous on this point. Their guidance for builders states that homeowners have the right to arrange independent inspections during construction. Even if a building contract contains a clause attempting to restrict site visits, that clause cannot override the statutory rights provided by the Domestic Building Contracts Act 1995.
This means any contract term that says you cannot bring an inspector to site, or that you must use the builder's preferred inspector, is void to the extent it conflicts with the legislation.
## Domestic Building Contracts Act 1995
The [Domestic Building Contracts Act 1995](https://www.legislation.vic.gov.au/in-force/acts/domestic-building-contracts-act-1995) is the primary legislation that protects Victorian homeowners during residential construction. Two sections are particularly relevant when a builder attempts to block your independent inspector.
### Section 17 - Builder Has No Exclusive Possession
Section 17 establishes that the builder is only a contractual licensee on the site. The builder does not have exclusive possession of the land. This is a critical distinction because it means the builder cannot treat the construction site as their own property and refuse entry to others.
As the landowner, you retain rights over your property throughout the construction period. The builder's presence is by licence only, not by any form of tenancy or exclusive occupation.
### Section 19 - Builder Must Permit Reasonable Access
Section 19 is the most powerful provision for homeowners. It states that a builder must permit the building owner, or any person authorised by the owner, to have reasonable access to the building site at all reasonable times.
The key elements of Section 19 are:
- The owner can authorise any person (such as an independent inspector)
- Access must be at "reasonable times" (typically normal business hours)
- The builder "must permit" access - this is mandatory, not discretionary
- Non-compliance attracts a penalty of 20 penalty units
## Building Act 1993
The [Building Act 1993](https://www.legislation.vic.gov.au/in-force/acts/building-act-1993) provides additional protections through Section 240, which confirms that an owner may appoint agents in writing to act on their behalf in building matters.
This means you can formally authorise your independent inspector in writing, giving them legal standing to attend the site as your agent. A simple letter of authority stating the inspector's name, qualifications, and the scope of their appointment is sufficient.
This written appointment strengthens your position if a builder attempts to question the inspector's right to be on site.
## Australian Consumer Law Protections
The [Australian Consumer Law](https://www.accc.gov.au/consumers/buying-products-and-services/consumer-rights-and-guarantees) (Schedule 2 of the Competition and Consumer Act 2010) provides further protections through consumer guarantees that apply to building services:
- **Section 60** - Services must be provided with due care and skill
- **Section 61** - Services must be fit for purpose
- **Section 62** - Services must be provided within a reasonable time
A builder who refuses independent inspections may be attempting to conceal work that fails to meet these consumer guarantees. The right to verify compliance with these guarantees through independent inspection is an important consumer protection mechanism.
## Penalty Values
The current value of a penalty unit in Victoria is $203.51 for the 2025-26 financial year, as published by the [Department of Justice and Community Safety](https://www.justice.vic.gov.au/justice-system/fines-and-penalties/penalties-and-values).
For a builder who refuses access in breach of Section 19, the maximum penalty is:
20 penalty units x $203.51 = **$4,070.20**
This penalty applies each time access is refused. A builder who repeatedly blocks your inspector could face multiple charges and cumulative penalties.
## What to Do If Your Builder Refuses Access
If your builder refuses to allow your independent inspector onto the site, follow these steps in order:
### Step 1 - Send Written Notice
Send your builder a formal written notice (email is acceptable) citing Sections 17 and 19 of the Domestic Building Contracts Act 1995. State clearly that you are authorising your named inspector to attend the site and that refusing access is a criminal offence carrying a penalty of 20 penalty units.
### Step 2 - Lodge a Complaint with Consumer Affairs Victoria
If the builder continues to refuse access after your written notice, lodge a formal complaint with [Consumer Affairs Victoria](https://www.consumer.vic.gov.au/housing/building-and-renovating). They can investigate and take action against builders who breach the Act.
### Step 3 - Apply to VCAT
You can apply to the [Victorian Civil and Administrative Tribunal (VCAT)](https://www.vcat.vic.gov.au/case-types/building-and-construction) for an order requiring the builder to provide access. VCAT handles domestic building disputes and can make enforceable orders.
### Step 4 - Report to the Victorian Building Authority
Report the builder's conduct to the [Victorian Building Authority (VBA)](https://www.vba.vic.gov.au). The VBA regulates registered builders and can take disciplinary action, including suspension or cancellation of registration, for repeated or serious non-compliance.
### What Hidden Commercial Building Defects Do Inspections Miss?
Source: https://ownerinspections.com.au/articles/what-hidden-commercial-building-defects-do-inspections-miss
Published: 2026-05-22 | Category: Defect Investigation
Author: Maison Azdari
What looks clean during a commercial property walkthrough can still hide major repair risk. A fresh coat of paint, a tidy fit-out and a dry ceiling on inspection day do not always tell the full story.
Commercial building defects are often found in places buyers, tenants and managers do not see every day. Roof spaces, service penetrations, plant rooms, low-pitched roof areas, drainage points, wall cavities and older services can hide problems until rain, heavy use or tenant disruption brings them into view.
This guide explains which defects are commonly missed, why they stay hidden and how a commercial property inspection can reduce risk before purchase, lease renewal or long-term maintenance planning.
Australian defect data supports this concern. Building Commission NSW’s 2025 strata defects research reported that [53% of surveyed buildings had serious defects](https://www.nsw.gov.au/departments-and-agencies/building-commission/building-and-construction-resources/research-on-serious-building-defects-nsw-strata-communities). The same research listed waterproofing as the most common defect type at 22%, followed by fire safety systems at 16%. While this research focuses on NSW strata buildings, the defect patterns are highly relevant to commercial owners and managers who deal with water ingress, fire safety, structure, enclosures and key services.
Read the
defect claim guide
}
buttonHref="/articles/document-building-defects-legal-claim"
variant="secondary"
/>
## Why Hidden Commercial Building Defects Matter
Hidden defects cost money, but they can also disrupt tenants, damage stock, affect insurance claims and create safety concerns.
A small roof leak can stain ceiling tiles today and damage insulation, wiring or internal linings later. Blocked drainage can push water towards footings, basements or loading areas. Poor roof-space ventilation can add to condensation and mould risk. Past fit-outs can also hide unsafe penetrations, non-compliant service changes or water damage behind new finishes.
The main point is simple: an inspection reduces risk, but it is not a guarantee that every concealed issue will be found. Commercial property inspections are usually visual and limited to areas that are safe and accessible at the time of inspection.
That is why the best report does more than list defects. It should explain the likely cause, severity, evidence, next steps and when a licensed specialist should be called in.
## Why Do Some Commercial Building Defects Go Unnoticed?
Commercial buildings are often harder to inspect than homes. They may have tenants trading on site, locked plant rooms, ceiling grids, stored stock, restricted roof access, safety barriers or services that need a specialist trade to test.
### Limited access during visual inspections
Inspectors generally assess visible and accessible areas. If a roof space is unsafe to enter, a tenancy is locked, a switch room is not accessible or stock blocks a wall, the report should record that limitation.
That limitation matters. A defect cannot always be assessed if the evidence is covered, unsafe or outside the scope of a standard visual inspection.
### Recent cosmetic repairs
Paint, plaster and new flooring can hide old water stains, cracked linings and patch repairs. This does not mean every renovation is suspicious. It does mean fresh finishes should be read alongside moisture clues, roof condition, drainage and maintenance records.
A repainted ceiling under a known roof penetration needs more care than a normal clean-up before sale.
### Weather-dependent defects
Some roof leaks and drainage faults only appear after heavy rain, wind-driven rain or blocked gutter overflow. A dry ceiling during summer may not reflect how the building performs during storms.
This is common in low-pitched roofs, box gutters, parapet walls, skylights, HVAC penetrations and flat roof membranes.
### Layered renovations
Commercial buildings often go through many fit-outs. Each tenant may add partitions, plumbing, cabling, air conditioning, signage, exhaust systems or roof penetrations.
Over time, records can become patchy. Defects may sit above ceiling tiles, behind wall linings or around old penetrations that no longer serve a clear purpose.
## The Most Common Commercial Building Defects to Watch For
The table below groups common commercial building defects by warning signs and business risk.
| Defect type | Common warning signs | Why it matters |
| -------------------------- | --------------------------------------------------------- | ---------------------------------------------------------------------- |
| Roof leaks | Stains, rusted sheets, damaged flashing, wet insulation | Can damage ceilings, stock, framing and services |
| Poor drainage | Ponding water, blocked gutters, damp external walls | Can lead to leaks, corrosion and movement near footings |
| Ventilation issues | Condensation, heat build-up, mould odours | Roof-space condensation depends on insulation, airflow and drainage |
| Water ingress | Damp patches, swelling, mould, bubbling paint | Waterproofing defects are a common serious defect category in NSW data |
| Structural movement | Cracks, uneven floors, sticking doors | May point to settlement, footing movement or water-related issues |
| Electrical concerns | Old switchboards, exposed wiring, overloaded circuits | Requires review by a licensed electrician |
| Plumbing faults | Slow leaks, stains, damp cabinetry, odours | Can damage finishes and create mould-friendly conditions |
| Fire safety defects | Damaged doors, missing seals, blocked exits, poor records | May affect safety, compliance and occupancy risk |
| Building enclosure defects | Cladding gaps, failed sealants, façade cracks | Can allow water entry and affect durability |
## Roof-Space Defects Commercial Inspections Often Miss
Roof spaces deserve close attention in commercial buildings because many signs of trouble start above the ceiling line. The room may look fine below, while the roof cavity shows water entry, condensation, damaged insulation, poor airflow or staining around penetrations.
### Poor ventilation and condensation
Condensation in a roof space can be caused by the way insulation, ventilation and temperature interact. YourHome explains that [condensation can form under roofing materials](https://www.yourhome.gov.au/passive-design/condensation) when surface temperature falls below dew point. Moisture must be drained outside the building to avoid build-up in insulation and lining materials.
In commercial buildings, this can be made worse by warm internal air, poor airflow, sealed roof cavities, exhaust duct leaks or insulation that traps moisture where it should not.
Warning signs include damp insulation, rust staining, mould odours, water marks on sarking and corrosion on metal fixings. Where mould is suspected, a [mould inspection](/mould-inspections) can help assess visible moisture and mould-related concerns.
### Water entry around penetrations
Commercial roofs often carry more penetrations than residential roofs. HVAC units, vents, skylights, solar mounts, exhaust systems, antenna mounts and access hatches all create points where water can enter if flashing, sealants or fixings fail.
A small gap around a penetration can become a costly leak when water tracks along framing or ceiling linings before it appears inside the tenancy. A [roof inspection](/roof-inspection) can help identify visible roof condition, flashing and drainage concerns before they spread.
### Flat or low-pitched roof drainage
Flat and low-pitched roofs need careful drainage. Ponding water can speed up corrosion, stress membranes, expose failed joints and increase leak risk around outlets.
Box gutters and internal gutters also need close attention. If they overflow, water may enter wall cavities, ceiling voids or service zones before anyone sees a clear leak.
### Pests entering through damaged roofing
Birds, rodents and insects often use damaged roof sheets, open eaves, broken vents and loose flashing as entry points.
Pests can damage insulation, wiring and stored items. They can also add odours and hygiene issues in food, medical, childcare or hospitality premises.
This is why many building owners look into solutions such as [commercial roof vent installation from Airocle](https://airocle.com.au/blog/commercial-roof-vent-installation/) to properly address roof ventilation problems in commercial buildings.
## Structural Warning Signs Commercial Property Owners Should Not Ignore
Not every crack means a building has serious structural movement. Many small cracks come from normal settlement, thermal movement or ageing finishes. The risk rises when cracks widen, appear with water ingress, run through structural elements or come with uneven floors.
Commercial owners should investigate:
- Cracks around doors and windows
- Bowing or leaning walls
- Uneven or sloping floors
- Sagging ceilings
- Large concrete cracks
- Cracks that reopen after repair
- Doors that stick after rain
- Movement near retaining walls or drainage lines
Defective work is [faulty or unsatisfactory building work](https://www.qbcc.qld.gov.au/complaints-disputes/building-work-issue/defective-work-dispute/what-defective-work). Structural defective building work can affect structural performance, health or safety, functional use, or allow water penetration into a building. That definition matters because water and structure often overlap. A drainage issue can become a footing issue. A roof leak can damage framing. Failed waterproofing can affect safe use of an area.
## Can Small Electrical or Plumbing Issues Become Major Risks?
Yes. Small service defects can become large commercial problems because tenants rely on services every day.
A slow plumbing leak inside a wall can damage plasterboard, joinery, flooring and stock. It may also create damp conditions where mould can grow. A small roof leak near electrical services can become a safety concern and needs urgent review.
Electrical issues need care because older commercial buildings may not suit current tenant loads. A building that once housed a low-load office may now support cool rooms, hospitality equipment, medical equipment, servers or heavy lighting.
Commercial fit-outs may also add circuits, data cabling, hydraulic services or exhaust systems without clear records. A building inspector can note visible concerns, but licensed electricians, plumbers, fire contractors and HVAC technicians should assess specialist systems when the report recommends it.
## What Should a Commercial Property Inspection Include?
A commercial property inspection should match the building type, access conditions and client risk. A small retail shop does not need the same scope as a warehouse, medical centre or multi-storey mixed-use site.
A useful inspection may include accessible checks of:
- Building interior and exterior
- Roof exterior and roof space
- Walls, ceilings and floors
- Windows, doors and visible façade elements
- Gutters, downpipes and drainage paths
- Plumbing observations
- Electrical observations
- Underfloor areas where safe and accessible
- Car parks, driveways and loading areas
- Retaining walls
- Outbuildings
- Visible moisture, movement and safety hazards
- Maintenance issues that may become larger defects
Owner Inspections’ [commercial property inspection](/commercial-property-inspections) service covers offices, retail spaces, industrial facilities and warehouses. The service is designed to identify defects that may affect investment, business use or future repair costs.
For best results, clients should arrange access before inspection day. That includes roof access, plant rooms, switch rooms, basements, service cupboards, vacant tenancies and areas behind stored goods where safe.
View commercial
inspections
}
buttonHref="/commercial-property-inspections"
variant="secondary"
/>
## What Are the Limits of a Commercial Property Inspection?
A trustworthy inspection report explains its limits clearly. Most commercial inspections are visual and non-invasive unless a different scope is agreed in writing.
They may not include:
- Destructive testing
- Engineering certification
- Cost estimates
- Hidden wiring or concealed pipework
- Areas blocked by tenants, stock or unsafe access
- Specialist HVAC, lift, fire-system or electrical certification
- Testing behind walls, ceilings or floor finishes
- Checks of every service component in large plant systems
Consider a professional inspection before signing a contract. An inspection report may help buyers negotiate price and contract terms. That advice applies strongly to commercial buyers and tenants. The report should reduce uncertainty, but it should not be treated as a promise that no concealed defects exist.
## How to Avoid Costly Commercial Building Repairs
The best time to manage defects is before the purchase, lease or maintenance issue becomes urgent.
### Before purchase or lease
Use this checklist before signing:
- Book an independent commercial property inspection.
- Request maintenance records.
- Ask for roof, waterproofing, fire safety and service documents.
- Review the fit-out history.
- Confirm access to roof spaces, plant rooms and basements.
- Check whether any recent repairs were made after leaks or storms.
- Ask whether specialist reports are available for lifts, fire systems, HVAC and switchboards.
A clear report can support negotiation, risk planning and repair priorities. Buyers can also read Owner Inspections’ guide on [how to read and use your property inspection report](/articles/understanding-your-property-inspection-report) for practical report follow-up steps.
### During ownership
Preventive maintenance should focus on areas that fail quietly.
Schedule roof and gutter inspections. Keep drainage paths clear. Monitor roof-space ventilation and moisture signs. Investigate cracking early. Act on damp odours, ceiling stains and mould concerns. For ongoing asset care, [maintenance inspections](/maintenance-inspections) can help owners and managers track issues before they become larger repair items.
Keep photos, invoices and maintenance notes. These records help owners track whether a defect is stable or getting worse. They also help when dealing with insurers, tenants, body corporate groups or future buyers.
### After major weather events
After heavy rain, strong wind or hail, check roof coverings, flashing, gutters, internal ceilings, basements, drains and low points around the building.
Water may not appear immediately. Stains, odours, bubbling paint and damp carpet can show up days later.
## Commercial Defect Severity Levels
| Severity | Meaning | Example | Action |
| -------- | ------------------------------------------------- | ------------------------------------------------------------------------ | -------------------------------------------------------- |
| Minor | Cosmetic or low-risk maintenance item | Small paint blister, minor corrosion | Monitor or schedule maintenance |
| Moderate | Defect may worsen if ignored | Blocked gutter, localised leak, minor cracking | Repair within a planned timeframe |
| Major | Safety, structural, water ingress or service risk | Active roof leak, major crack, faulty drainage | Seek urgent specialist assessment |
| Critical | Immediate safety or operational concern | Exposed wiring, unstable structure, severe water near electrical systems | Restrict access and seek urgent trade or engineer advice |
Severity should be based on evidence, not guesswork. A small stain may be minor if the source is known and fixed. The same stain may be major if water is still entering near electrical services.
## Getting the Most Value from Your Home and Building Investment
Commercial building defects are often easier to manage when they are found early. The most expensive problems are usually the ones that stay hidden behind ceilings, roof spaces, walls, drainage systems and old fit-outs.
A commercial property inspection cannot open every wall or test every service. It can, however, give buyers, owners, managers and investors a clearer picture of visible risk before money is committed.
[Owner Inspections](/) provides independent commercial property inspections with clear reporting, photos and practical next steps. The goal is simple: help clients understand the condition of a property before defects become major repair bills.
Request a commercial property inspection quote today.
Contact Owner
Inspections
}
buttonHref="/contact"
variant="primary"
/>
### Moving Interstate? Things to Know Before Moving Into Your Dream Home
Source: https://ownerinspections.com.au/articles/moving-interstate-things-to-know-before-moving-into-your-dream-home
Published: 2026-05-14 | Category: Pre-Purchase Inspections
Author: Maison Azdari
Moving interstate into your dream home can feel like the start of a better chapter. New suburb, new routine, new space and a fresh chance to settle your family into a home that fits your goals.
Yet moving interstate is not just about booking removalists and packing boxes. It can also mean buying into a property market you do not know well, relying on listing photos, dealing with settlement from another state and trying to judge the condition of a home before your furniture arrives.
Reference: [Australian Bureau of Statistics](https://www.abs.gov.au/statistics/people/population/national-state-and-territory-population/latest-release), National, state and territory population, September 2025.
That risk is real for many Australians. In the year ending September 2025, Queensland gained 19,092 people through net interstate migration, while NSW recorded a net interstate migration loss of 23,353. That means plenty of Australians are crossing state borders and making major housing decisions at the same time.
Your dream home should not come with unexpected structural defects, pest damage or urgent repair bills. Before the moving truck arrives, check both your moving plan and the actual condition of the property.
Below is a practical moving interstate checklist for Australian home buyers, homeowners and investors who want fewer surprises before move-in day.
**Disclaimer:** *This article is general information only and is not legal, financial or building compliance advice. Speak with your conveyancer, solicitor, insurer or licensed specialist for advice about your situation.*
Read the Defect
Documentation Guide
}
buttonHref="/articles/document-building-defects-legal-claim"
variant="secondary"
/>
## What Should You Know Before Moving Interstate?
Before moving interstate, focus on five checks.
1. Set a realistic moving budget that includes removalists, travel, utilities, insurance, storage, cleaning, inspections and repair money.
2. Create a packing and unpacking plan early, including labelled boxes, a first-week box and a separate document folder.
3. Confirm the property condition with a professional pre-purchase inspection, building and pest inspection or property condition report before settlement where possible.
4. Research the neighbourhood, including schools, commute times, shops, healthcare, public transport, local risks and access to trades.
5. Prepare an overnight bag for the first 24 to 48 hours, including clothing, medication, chargers, key documents, children’s items, pet supplies and a saved copy of your inspection report.
## Things to Know Before Moving Into Your Dream Home
## 1. Build a Realistic Interstate Moving Budget
One of the first things to get right when moving interstate is the budget. Many buyers plan for the property price, deposit and stamp duty, then underestimate how much the move itself will cost.
Interstate relocation can involve removalist costs, packing supplies, flights, fuel, accommodation, meals, utility connection fees, insurance, storage, cleaning and pet relocation. Those smaller expenses can build quickly, especially if you are moving with children, pets or large furniture.
A better moving budget should also include property checks and repair money. This matters because the home may need work before it is safe or comfortable to live in. A building inspection or [pest inspection](/timber-pest-inspections) may find roof issues, moisture, safety hazards, termite activity or drainage concerns that affect your first few months in the property.
| Cost category | What to budget for |
| -------------------- | --------------------------------------------------------------------------------------- |
| Removalists | Interstate transport, access issues, heavy items, packing support and transit insurance |
| Travel | Flights, fuel, hire car, accommodation, meals and pet transport |
| Utilities | Electricity, gas, water, internet and connection fees |
| Property checks | Building inspection, pest inspection, pool inspection or solar inspection where needed |
| Repairs | Urgent defects, moisture problems, roof issues, pest damage or safety hazards |
| Storage and cleaning | Short-term storage, end-of-lease cleaning, rubbish removal and bond cleaning |
A moving budget should reduce pressure, not add to it. Give yourself room for the items you cannot see from a listing photo. If the inspection report shows work is needed, you will have a clearer idea of what to deal with before and after settlement.
Here are some of the expenses in details that you must consider before moving out of your original home:
- **Removalist costs:** Hiring removalist services from [Muval interstate movers](https://www.muval.com.au/interstate-removalists) or other local movers will rack up a pretty penny, but they’re essential to ensuring your items get moved safely. Ensure that you have enough funds to cover their services, and consider vetting different movers to find one that offers the best value for your needs.
- **Packing materials:** If you don’t have cardboard boxes at home or other packing materials like styrofoam or duct tape, then you may need to head to the hardware store to get some high-grade stuff.
- **Travel expenses:** Besides the payment for moving your belongings, you should also consider your own relocation. This may entail a ticket flight from a ferry or aircraft. If you’re bringing family along, consider their ticket as well.
- **Utility setup costs:** One-time installation fees may be charged to you as you move into your new space. Have these values in mind before heading to your dream home to ensure your water and electricity are operational by the time you move in.
## 2. Plan Your Packing and Unpacking Strategy Early
Packing for an interstate move takes longer than most people expect. You are not just boxing up plates and clothing. You are deciding what should travel, what should be sold, what should be donated and what should stay within reach during settlement.
**Start with decluttering.** Sell, donate or dispose of items that do not suit the new home. This can reduce removalist volume and may lower your moving cost.
**Pack by room and priority.** Use clear labels such as “Kitchen, open first”, “Bedroom, low priority” or “Garage, tools”. Keep fragile, valuable and personal items separate. Take photos of electronics before unplugging cables, so setting them up later is easier.
**Create a first-week box for items you will need straight away.** Include basic cookware, towels, linen, cleaning wipes, toilet paper, bin bags, school items, work items and a few tools.
**Do not pack your inspection report, contract documents, insurance papers or settlement notes into general boxes.** Keep them in your overnight bag or document folder. When a question comes up about a defect, inclusion, appliance, access issue or repair, you do not want that paperwork buried in the moving truck.
## 3. Check Your New Property’s Condition Before Moving In
This is the check many interstate buyers leave too late.
When you are buying from another state, you may only see the home through listing photos, video tours, agent walkthroughs or one rushed inspection. Those tools help, but they do not replace an independent view of the property’s condition.
Listing photos are designed to show the property at its best. They may not show roof defects, subfloor moisture, drainage issues, cracking, dampness, damaged decks, pest activity or poor ventilation. A cosmetic renovation can also make a home look move-in ready while hiding defects that cost money later.
[NSW Government](https://www.nsw.gov.au/housing-and-construction/buying-and-selling-property/buying-property-nsw/inspecting-a-property/inspection-reports) says a building inspection report is a written account of a property’s condition and may include defects or problems such as rising damp, cracking from wall movement, safety hazards or a faulty roof. It also notes that reports are usually carried out before contract exchange so buyers can identify problems that may be costly to repair if left unchecked.
Consumer Affairs Victoria also advises buyers to consider [engaging a qualified building inspector](/), surveyor or architect to provide a professional building inspection report before signing a contract of sale.
For interstate buyers, that timing matters. It is far better to learn about structural defects, roof leaks, timber pest risk or safety hazards before the moving truck arrives. Once your furniture is inside, repairs become harder to plan and more disruptive.
A professional inspection can also help you speak with your conveyancer, solicitor or agent using clearer information. It gives you photos, findings and defect notes rather than guesswork.
### What Should an Interstate Buyer’s Inspection Report Include?
A useful inspection report should be clear, visual and practical. It should help you understand what the inspector saw, why it matters and what may need further review.
Look for reporting on:
- Structural defects
- Roof and ceiling condition
- Wall cracks and movement
- Dampness and moisture
- Drainage and stormwater issues
- Pest activity or pest-friendly conditions
- Safety hazards
- Major and minor defects
- Photos of key findings
- Recommendations for further specialist assessment where needed
The goal is not to make every home look bad. The goal is to understand what you are buying before you move your family, furniture and finances into it.
### Which Inspection Should You Book Before Moving Interstate?
| Inspection type | Best for |
| ------------------------------------- | ------------------------------------------------------------- |
| Pre-purchase building inspection | Understanding the condition of the property before settlement |
| Pest inspection | Checking termite, timber pest or pest-related risks |
| Combined building and pest inspection | Buyers who want one practical report pathway before moving |
| Structural integrity report | Serious cracking, movement or suspected structural problems |
| Property condition report | Move-in planning, maintenance and documentation |
Queensland buyers should also check who is allowed to complete the work. QBCC states that only a licensed residential building inspector can complete pre-purchase building inspections, and only a licensed pest controller can complete termite inspections. A [building and pest inspection](/building-and-pest-inspections) is a practical option for buyers who want one clear report pathway before moving.
## 4. Research the Neighbourhood and Nearby Amenities
A home may look perfect on paper, but the surrounding neighbourhood will shape daily life.
Check commute times during peak hours, not just on a quiet Sunday. Look at school and childcare options, hospitals, clinics, supermarkets, public transport, local parks, gyms, fuel stations and council services.
Safety and comfort matter too. Research traffic noise, flight paths, nightlife, nearby industrial areas, flood overlays, bushfire exposure, stormwater issues and local repair access. If a pipe bursts, a roof leaks or an electrical fault appears, you need to know whether local trades are easy to contact.
Neighbourhood research should also include property-risk context. A buyer moving to Queensland, for example, may need more awareness of termite risk, weather exposure, drainage and stormwater issues. Queensland Government advises buyers to get inspections done before purchase to identify property issues, including building, pest, swimming pool and solar system inspections where relevant.
Speak with local residents where possible. Walk the area at different times of day if you can. Check how close you are to shops, schools and medical care. Your home is not only the building. It is the lifestyle and risk profile around it.
Book a Defect
Investigation Report
}
buttonHref="/defect-investigation-reports"
variant="secondary"
/>
## 5. Prepare an Overnight Bag and First-Week Safety Kit
The first night after moving interstate can be messy. You may arrive tired, hungry and surrounded by boxes. If your key items are packed away, even simple tasks become stressful.
Pack an overnight bag for the first 24 to 48 hours. Include clothes, toiletries, medication, phone chargers, laptops, children’s items, pet supplies, basic kitchen items, snacks and water bottles.
Add a first-week safety kit as well. Include a torch, tape measure, first-aid kit, cleaning wipes, bin bags, basic tools, spare batteries and a list of emergency contacts.
### Documents to Keep With You, Not in the Moving Truck
Keep these documents in a folder or saved securely on your phone:
- Building inspection report
- Pest inspection report
- Property condition report
- Contract documents
- Settlement notes
- Insurance papers
- Utility account details
- Removalist booking details
- Contact details for your inspector, conveyancer, agent, insurer and utility providers
This is a simple step, but it can save time if there is damage during the move, a question about settlement, a utility delay or a repair issue that needs quick attention.
### Interstate Move-In Timeline: What to Do and When
An interstate move works best when relocation tasks and property checks happen together.
| Timing | Moving task | Property task |
| --------------------------------- | ------------------------------------------------- | ------------------------------------------------------- |
| 8 to 12 weeks out | Research removalists, schools, suburbs and travel | Shortlist inspection providers in the destination state |
| Before signing or contract period | Confirm finance and legal advice | Book building and pest inspection |
| 4 to 6 weeks out | Declutter and start packing | Review report findings and repair priorities |
| 2 to 3 weeks out | Transfer utilities and update address | Arrange follow-up checks if needed |
| Week of settlement | Confirm keys, access and removalist timing | Conduct final inspection where applicable |
| First week after move | Unpack priority boxes and settle in | Address urgent safety or maintenance issues |
This timeline is flexible, but the main point is simple. Do not treat inspection as a last-minute task. If you are buying remotely, book early enough to review the report and ask questions before decisions become harder to change.
## Common Defects to Check Before Moving Into a Dream Home
Every property has some wear. The key is knowing which defects are minor maintenance items and which ones may affect safety, repair budgets or liveability.
Common defects to check before moving into a home include:
Rising damp
Cracking in walls
Roof leaks
Faulty roof coverings
Poor drainage
Subfloor moisture
Termite or timber pest activity
Poor ventilation
Unsafe decks or balconies
Water damage
Unapproved renovations
Electrical or plumbing concerns that need a licensed specialist review
Australian Standards also give inspection work a clearer framework. Standards Australia lists AS 4349.1-2007 as [“Inspection of buildings, Part 1: Pre-purchase inspections, Residential buildings”](https://www.standards.org.au/standards-catalogue/standard-details?designation=as-4349-1-2007), while AS 4349.3-2010 relates to “Inspection of buildings, Part 3: Timber pest inspections”.
A report does not remove every risk. It gives you a better view of the property at the time of inspection. For interstate buyers, that view can be the difference between moving in prepared and moving in shocked.
## Should You Book a Building and Pest Inspection Before Moving Interstate?
Yes, especially if you are buying remotely, relying on listing images or moving into an unfamiliar property market.
A building and pest inspection can help identify defects before move-in day. It may also help you understand repair priorities, protect your moving budget and support clearer discussions with your conveyancer or agent.
For remote buyers, photos and written findings are especially useful. They give you evidence you can review from another state. This matters when you cannot easily revisit the home, bring a trusted builder through or check every roof space, subfloor area or damp patch yourself.
A building inspection may help identify visible defects and safety concerns. A pest inspection may help identify termite activity, timber pest damage or pest-friendly conditions. A structural integrity report may be more suitable if there are signs of serious movement, cracking or structural concern.
Owner Inspections provides independent pre-purchase building inspections, building and pest inspection reports, pest inspections, structural integrity reports and property condition reports. These reports are designed to give buyers clearer findings, photos and practical recommendations before they move.
### Key Takeaways
- Moving interstate requires relocation planning and property due diligence.
- Budget for more than removalists, packing and travel.
- A professional inspection can help identify defects before move-in day.
- Keep inspection and settlement documents separate from packed boxes.
- Research the neighbourhood, including amenities, safety and local property risks.
- Keep your first-night items with you, not in the moving truck.
- [Owner Inspections](/) can help interstate buyers understand property condition before they relocate.
Contact Owner
Inspections
}
buttonHref="/contact"
variant="primary"
/>
## Getting the Most Value from Your Home and Building Investment
Moving interstate into a newly purchased home is a major step. The right planning can help you avoid stress, delays and repair surprises.
Start with your moving budget. Plan your packing early. Research the neighbourhood. Keep your first-night bag ready. Most of all, confirm the condition of the home before move-in day.
Before you move your family, furniture and finances into an interstate property, make sure the home is safe, inspected and ready. Owner Inspections provides independent building inspections, pest inspections, structural integrity reports and property condition reports with clear findings, photos and practical recommendations.
Book an inspection before settlement and move into your dream home with fewer surprises.
### Air Conditioning Installation in New Builds: What to Check Before Handover
Source: https://ownerinspections.com.au/articles/air-conditioning-new-build-handover-checklist
Published: 2026-05-08 | Updated: 2026-05-26 | Category: Pre-Settlement Inspections
Author: Maison Azdari
Walking through a newly built home is exciting. The paint looks fresh, the flooring is down, the kitchen is ready, and handover finally feels close.
But before you accept practical completion, your air conditioning installation in new builds should do more than switch on. It should cool and heat properly, drain safely, operate across all zones, sit in a suitable location, and come with the right compliance paperwork.
Reference: [YourHome: Heating and cooling](https://www.yourhome.gov.au/energy/heating-and-cooling)
For new homeowners, property investors, and owner-build clients, handover is one of the best times to find air conditioning defects. Once the final payment clears and furniture moves in, roof spaces, ceiling cavities, ductwork, pipework, and drains become much harder to check.
## Why Air Conditioning Gets Missed During New Home Handover
Most buyers check what they can see. Paintwork, benchtops, tiles, doors, windows, cabinetry, and flooring usually get the most attention.
Air conditioning is different. Many defects sit above ceilings, inside walls, behind bulkheads, in roof spaces, or around the outdoor condenser. A system may turn on during a quick walkthrough and still have poor airflow, noisy operation, incorrect zoning, drainage faults, or missing paperwork.
HVAC work also depends on several trades working in the right order. The builder, electrician, air conditioning installer, plasterers, roof space trades, insulation workers, and sometimes smart home contractors may all affect the finished result.
Common handover issues include:
- Poor rough-in coordination before plasterboard goes up
- Ductwork that is kinked, crushed, or poorly sealed
- Outdoor condenser units placed in tight or noisy areas
- Condensate drains with poor fall or unclear discharge points
- Weak airflow in bedrooms or living areas
- Missing commissioning records, warranty documents, or licence details
That is why a new home handover checklist should include air conditioning, not just visible finishes.
Book Pre-Handover
Inspection
}
buttonHref="/pre-handover-inspections"
variant="secondary"
/>
## What a Quality Air Conditioning Installation Should Look Like
**Start with a visual check.** You are not servicing the system or opening sealed components. You are looking for signs that the installation is neat, stable, complete, and ready for normal use.
**The outdoor condenser should sit level and stable.** It should have enough clearance for airflow and service access. A unit squeezed into a tight corner, boxed against fencing, or placed too close to bedroom windows can cause comfort, noise, and maintenance problems.
**Wall penetrations should be sealed and weatherproof.** Pipework insulation should be neat and continuous, with no exposed copper between insulation sections. Indoor grilles should sit flush with the wall or ceiling, without gaps, loose fixings, or damaged plaster around the edges.
**Condensate drains need attention too.** Air conditioners remove moisture from the air. That water needs to drain safely to an approved point. A poor drain fall or hidden discharge can lead to ceiling stains, plasterboard damage, or moisture issues that only become clear months later.
| Item | Good Sign | Possible Defect |
| ----------------- | -------------------------------------- | ---------------------------------------- |
| Outdoor unit | Level, stable, ventilated, serviceable | Cramped, vibrating, poor clearance |
| Pipework | Fully insulated and neatly clipped | Exposed copper, torn lagging, loose runs |
| Drainage | Visible fall or clear discharge route | Pooling, leaks, unclear outlet |
| Grilles | Flush, secure, balanced airflow | Gaps, weak airflow, noisy outlet |
| Wall penetrations | Sealed and weatherproof | Cracked sealant, gaps, water entry risk |
## Functional Air Conditioning Testing Checklist Before Handover
Visual checks only catch part of the problem. Functional testing helps you find faults that only appear when the system runs.
You are not trying to repair, service, or adjust refrigerant, wiring, or sealed components. You are checking whether the installed system performs as promised and whether any issue needs to be listed for builder rectification.
### Cooling mode
Turn on each indoor unit or the ducted system. Set the system to cooling mode and allow it to run long enough for cool air to be felt at the outlets.
Walk through each room. Check that supply air reaches every area that should be serviced. If one room feels much weaker than the others, write it down.
### Heating mode
Reverse cycle systems should also be tested in heating mode. Warm air should come through clearly after the system has had time to change mode.
A system that cools but does not heat, or that gives weak heating in certain zones, should be raised before sign-off.
### Ducted zones
For ducted air conditioning, test each zone by itself. Do not rely on a single whole-house test.
Check bedrooms, living areas, studies, media rooms, and any upstairs or downstairs zones separately. Poor zone balancing is common in new homes, especially where duct runs are long or squeezed through tight ceiling areas.
### Airflow and return air
Stand near each supply outlet. Feel whether air is moving evenly.
Then check the return air grille. It should pull air back to the system without obvious blockage or rattling. YourHome notes that ducted systems need suitable duct sizing and return air paths to work well.
### Noise and vibration
Listen near the outdoor unit, indoor units, grilles, and return air. Watch for rattling, knocking, buzzing, grinding, or vibration through the wall or frame.
Noise near bedrooms matters. A condenser placed beside a bedroom wall may be tolerable for five minutes during a walkthrough but frustrating at night.
### Controllers and smart features
Test every controller, remote, wall panel, Wi-Fi setting, app connection, timer, and schedule function included in your contract.
Make sure the zone names make sense. A controller that labels the bedroom as the living room may sound minor, but it can point to wiring or commissioning issues.
## Air Conditioning Handover Checklist
| Check Area | What to Look For | Why It Matters |
| ------------ | -------------------------------------------------------- | --------------------------------------------------- |
| **Cooling** | Cool air from each indoor unit or supply outlet | Confirms basic cooling performance |
| **Heating** | Warm air in reverse cycle mode | Confirms seasonal operation |
| **Zoning** | Each zone opens, closes, and responds correctly | Helps find duct or controller faults |
| **Airflow** | Even air movement across rooms | Weak airflow may indicate poor ducting |
| **Return air** | Strong pull at return air grille | Poor return air can reduce performance |
| **Outdoor unit** | Level, stable, clear, accessible | Helps airflow, noise control, and service access |
| **Pipework** | Insulated, clipped, protected | Exposed or damaged insulation can affect efficiency |
| **Drainage** | Clear fall and approved discharge route | Poor drainage can cause hidden water damage |
| **Noise** | No rattling, grinding, buzzing, or frame vibration | Noise can point to poor mounting or faulty parts |
| **Controls** | Remotes, wall panels, apps, timers, and schedules work | Confirms handover readiness |
| **Paperwork** | Manuals, warranties, licences, and commissioning records | Supports warranty and future maintenance |
## Documents and Warranty Paperwork to Request Before Final Sign-Off
Good installation should come with good records. Missing paperwork can make warranty claims, maintenance, and future troubleshooting harder.
Ask the builder or installer for:
- Manufacturer warranty documents or registration details
- Operating manuals for indoor and outdoor units
- Controller and remote-control guides
- Installer business details
- ARC licence details where refrigerant handling occurred
- Electrical compliance certificate where required
- Commissioning record
- Model and serial numbers
- As-built layout or zone diagram for ducted systems
- Maintenance requirements
NSW also has specific licensing rules. NSW Government says a licence or certificate is required before carrying out air conditioning and refrigeration work in NSW, including associated electrical wiring that would otherwise be done by an electrician. It also says unlicensed air conditioning and refrigeration work breaches the Home Building Act 1989.
| Document | Why You Need It | Who Provides It |
| --------------------------------- | ------------------------------------------- | ------------------------------- |
| Manufacturer warranty | Supports future warranty claims | Builder, installer, or supplier |
| Operating manuals | Helps the owner use and maintain the system | Builder or installer |
| Controller guide | Explains zones, timers, and modes | Builder or installer |
| ARC licence details | Confirms licensed refrigerant handling | Installer |
| Electrical compliance certificate | Supports electrical compliance records | Licensed electrician or builder |
| Commissioning record | Shows testing and setup were completed | Installer |
| Model and serial numbers | Needed for warranty and servicing | Installer or supplier |
| Zone diagram | Helps owners understand ducted layouts | Builder or installer |
| Maintenance requirements | Helps protect system performance | Installer or manufacturer |
Book Construction
Stage Inspection
}
buttonHref="/new-construction-stage-inspections"
variant="secondary"
/>
## Common Air Conditioning Defects Found in Brand-New Homes
Brand-new does not always mean defect-free. Air conditioning problems can come from design, product selection, installation, builder coordination, or poor commissioning.
The most common defects include wrong-sized equipment, weak airflow, ducting faults, poor zoning, condensate leaks, noise issues, inadequate service clearance, exposed pipe insulation, missing paperwork, and smart controller faults.
Air conditioners must meet Minimum Energy Performance Standards, and non-ducted household air conditioners must carry a Zoned Energy Rating Label. The label helps compare performance across hot, average, and cold climate zones.
| Defect | Warning Sign | Possible Consequence | Who to Raise It With |
| ---------------------------- | ----------------------------------- | ---------------------------------------- | --------------------- |
| Wrong-sized system | Rooms do not cool or heat properly | Higher running costs, poor comfort | Builder and installer |
| Poor airflow | One room feels weak or stagnant | Duct kink, collapse, poor balance | Builder and installer |
| Ducting fault | Airflow drops in one zone | Comfort issues and energy waste | Builder and installer |
| Poor zone balancing | One zone works better than another | Uneven comfort | Builder and installer |
| Condensate leak | Staining, dripping, damp smell | Plasterboard or insulation damage | Builder |
| Outdoor unit noise | Compressor heard inside bedrooms | Ongoing sleep and noise complaints | Builder and installer |
| Missing acoustic mounts | Vibration through frame or wall | Rattling and structural noise transfer | Builder and installer |
| Poor clearance | Unit boxed into a tight area | Overheating, poor service access | Builder and installer |
| Exposed pipe insulation | Copper visible or insulation split | Efficiency loss and pipe wear | Installer |
| Missing commissioning record | No proof of final setup | Warranty and maintenance problems | Builder and installer |
| Smart controller fault | App, Wi-Fi, or zones not responding | Poor usability and possible wiring fault | Builder and installer |
## When Should You Bring in an Independent Inspector?
A builder’s walkthrough is not the same as an independent [pre-handover inspection](/pre-handover-inspections). The builder is checking their project. An [independent inspector](/articles/owner-builder-inspection-requirements-by-state) is checking the home for you.
[Owner Inspections](/) can help identify visible defects, record them with photos, and present findings in clear language that can be given to the builder. This is useful when defects involve systems that most buyers do not feel confident assessing, such as ducted air conditioning, condensate drainage, roof space installation, or outdoor condenser placement.
An independent pre-handover inspection can provide:
- Photographic evidence
- A written defect list
- Plain explanations for the builder
- Wider checks across the home, not only air conditioning
- Reinspection support after rectification
- More confidence before final sign-off
A [construction stage inspection](/new-construction-stage-inspections) can also help earlier in the build. Refrigerant pipework, duct routes, penetrations, and drainage paths are easier to correct before plasterboard and finishes cover them.
Sydney homeowners who reject a builder's substandard install, or who want to replace base-spec equipment after moving in, often bring in dedicated HVAC specialists for the rectification work.
Choosing a licensed Sydney installer such as [Alliance Climate Control](https://www.alliancecc.com.au/air-conditioning-installation/) means your replacement install comes with ARC-licensed refrigerant handling, full compliance paperwork, and a lifetime workmanship warranty backing every joint, mount, and termination.
## What to Do If You Find Air Conditioning Defects at Handover
Finding defects does not mean the whole build has failed. It means [issues need to be documented and rectified](/articles/document-building-defects-legal-claim) before you accept everything as complete.
Use this process:
1. Photograph each issue clearly.
2. Record short videos for noise, vibration, weak airflow, leaks, or controller faults.
3. Note the room name, zone name, and controller setting.
4. Ask for installer details, warranty records, ARC licence details, and commissioning documents.
5. Submit the defect list to the builder in writing.
6. Ask for rectification before final payment where your contract allows.
7. Arrange a reinspection once the builder says the issues are fixed.
This is general information, not legal advice. Always check your building contract and seek legal advice for payment disputes or formal claims.
### State warranty timeframes differ
> In NSW, Building Commission NSW says homeowners have statutory warranties of 6 years for major defects and 2 years for minor defects.
> In Victoria, Consumer Affairs Victoria says statutory building warranties apply for up to 10 years after the occupancy permit or certificate of final inspection was issued.
> In Queensland, QBCC says structural defect cover applies where the owner first becomes aware of the defect within 6 years and 6 months after the cover commencement day, while non-structural defects must be noticed within 6 months after substantial completion and claimed within 7 months.
## How Owner Inspections Checks Air Conditioning at Handover
[Owner Inspections](/) looks at air conditioning as part of the wider property condition. The aim is not to service the system or replace the role of a licensed HVAC technician. The aim is to identify visible and functional defects that should be raised before handover.
A pre-handover inspection may include:
- Checking visible indoor and outdoor components
- Testing cooling and heating operation where safe and accessible
- Checking zone operation and airflow concerns
- Looking for poor clearances, loose grilles, gaps, and rough workmanship
- Checking visible condensate drainage concerns
- Listing missing documents that should be requested
- Recommending specialist HVAC review where needed
This gives the homeowner a clear [defect report](/articles/home-defect-inspection-report) before practical completion sign-off.
## Air Conditioning Handover Checklist
### Visual checks
- Outdoor unit is level, stable, and clear of obstructions
- Unit has service access and is not boxed into a tight corner
- Pipework is neat, clipped, and insulated
- No exposed copper is visible
- Wall penetrations are sealed
- Indoor grilles sit flush with walls or ceilings
- No cracked plaster, loose vents, or gaps around outlets
- Condensate drainage route is visible or explained
- No signs of water staining or dampness
### Performance checks
- Cooling mode works
- Heating mode works
- Each ducted zone works
- Each indoor unit works
- Airflow feels even across rooms
- Return air grille has clear pull
- No unusual rattling, buzzing, grinding, or vibration
- Outdoor unit noise is reasonable for its location
- Timer and schedule settings work
- Smart home or app controls work where included
### Paperwork checks
- Manufacturer warranty documents
- Manuals and controller guides
- ARC licence details
- Electrical certificate where required
- Commissioning record
- Installer contact details
- Model and serial numbers
- Ducted zone diagram or as-built layout
- Maintenance instructions
Get a Building
Defect Report
}
buttonHref="/defect-investigation-reports"
variant="primary"
/>
### What Your Property Inspection Results Mean for Equity
Source: https://ownerinspections.com.au/articles/property-inspection-results-home-equity
Published: 2026-05-06 | Category: Building Inspections
Author: Maison Azdari
Could a hidden roof leak, termite issue or structural defect reduce the value buyers see in your home?
Property inspection results can shape how buyers, agents and lenders view a property’s condition. An inspection does not automatically increase home equity. It can, however, help protect your position by showing defects early, guiding repair decisions and reducing the chance of last-minute buyer negotiations.
**Source note:** Statistics are from the [Australian Bureau of Statistics](https://www.abs.gov.au/statistics/economy/price-indexes-and-inflation/total-value-dwellings/latest-release), Total Value of Dwellings, December Quarter 2025. The ABS reported that Australia’s total residential dwelling value rose by $384.8 billion to $12,307.2 billion, while the mean dwelling price rose to $1,074,700.
## What Does Home Equity Mean in a Property Sale?
Home equity is the estimated value of a property minus the debt secured against it.
For example, if a home is worth $900,000 and the mortgage balance is $500,000, the owner has about $400,000 in equity before selling costs, agent fees, legal fees and any loan payout adjustments.
In a sale, equity can be affected by:
- The final sale price
- The remaining loan balance
- Selling costs
- Repair costs
- Buyer negotiation after a building and pest inspection
Property inspection results affect equity indirectly. They do this by influencing buyer confidence, repair expectations, pricing discussions and the final negotiated sale price.
Book a Pre-Sale
Building Inspection
}
buttonHref="/pre-sale-inspections"
variant="secondary"
/>
## What Can a Property Inspection Report Reveal?
A [building inspection](/articles/what-does-a-building-inspection-cover) report is a written account of the property’s condition. NSW Government says a [pre-purchase building inspection](/pre-purchase-inspections) report may include significant building defects or problems such as rising damp, wall movement or cracking, safety hazards and a faulty roof.
A property inspection is usually visual and limited to accessible areas. Even so, it can give sellers and buyers a clearer picture of visible defects and maintenance risks.
### Major Structural Defects
Structural defects often create the strongest buyer concern because they may involve safety, engineering work or high repair costs.
Examples include:
- Foundation movement
- Large wall cracks
- Sagging roof framing
- Uneven floors
- Subfloor deterioration
- Serious retaining wall movement
### Moisture and Drainage Issues
[Water damage](/articles/water-damage-inspection-report) can worry buyers because the cause is not always obvious during an open home.
Common findings include:
- Rising damp
- Leaking showers
- Poor site drainage
- Roof leaks
- Damp subfloors
- Mould-conducive conditions
### Pest and Termite Damage
A [pest inspection report](/articles/pest-inspection-clues-buyers-miss-when-buying-a-home) can identify timber pest activity, conditions that attract termites and visible timber damage.
Standards Australia lists AS 4349.3-2010 as the standard for “Inspection of buildings, Part 3: [Timber pest inspections](/timber-pest-inspections).”
### Safety Hazards
Safety issues may not always be expensive, but they can raise buyer concern quickly.
Examples include:
- Loose balustrades
- Unsafe decks or stairs
- Trip hazards
- Fire safety issues
- Electrical risk indicators
- Pool or balcony safety concerns
### Cosmetic and Maintenance Defects
[Cosmetic defects](/articles/cosmetic-vs-structural-issues-unit-blocks) can affect presentation, but they usually carry less negotiation weight than structural, pest, safety or moisture issues.
Examples include:
- Paint damage
- Worn fittings
- Loose handles
- Damaged flyscreens
- Tired fixtures
- Minor plaster cracks
By knowing these categorical buckets, you can understand which parts of your home structure is good and what needs to be improved before getting listed in the market. If you need additional assistance in calculating your overall equity, you can [use this tool to calculate your equity](https://www.westpac.com.au/personal-banking/home-loans/calculator/home-equity-calculator/) more comprehensively.
## How Property Inspection Results Can Affect Property Value and Equity
Inspection findings do not create market value on their own. Market value depends on location, land size, demand, comparable sales, property features and buyer competition.
Yet inspection results can affect the price buyers are willing to pay.
A seller should understand the difference between:
| Factor | What It Means | How Inspection Results Can Affect It |
| ------------------------------ | ----------------------------------------- | ------------------------------------------------------ |
| Actual market value | The likely value based on market evidence | Defects may reduce buyer demand or price expectations |
| Perceived value | What buyers think the home is worth | Visible or reported defects may lower confidence |
| Negotiated sale price | The final agreed price | Buyers may ask for a discount after their inspection |
| Repair cost exposure | Likely cost to fix defects | Sellers may choose to repair before listing |
| Seller equity after settlement | Sale proceeds after debt and costs | Lower sale price or repair spend can reduce net equity |
For example, if a buyer discovers $25,000 in roof, drainage or termite-related issues after their inspection, they may ask for a price reduction, repairs before settlement or changes to contract conditions.
A seller who knows about these issues before listing can decide whether to repair, disclose or adjust the pricing strategy before buyers use the findings in negotiation.
## Which Inspection Findings Matter Most to Buyers?
Buyers often react most strongly to defects that are expensive, unsafe, hidden, linked to water or termites, or likely to delay finance, insurance or settlement.
| Defect Type | Buyer Concern | Possible Sale Impact |
| --------------------- | ----------------------------------- | -------------------- |
| Structural movement | Cost and safety uncertainty | High |
| Active termite damage | Hidden damage risk | High |
| Roof leaks | Ongoing water damage | High |
| Drainage issues | Future moisture and foundation risk | Medium to high |
| Unsafe deck or stairs | Safety and liability risk | Medium to high |
| Minor paint damage | Presentation issue | Low |
| Old fixtures | Cosmetic update concern | Low to medium |
Not every defect reduces sale price. A minor maintenance issue may simply be part of normal property ageing. A major defect, active leak or termite issue is different because buyers may see it as risk they need to price in.
## How to Prioritise Repairs After an Inspection
Not all property defects deserve the same spend before sale. The best approach is to sort findings by severity, buyer concern, safety and cost.
### Priority 1: Safety and Major Structural Issues
These findings should usually be reviewed first.
Examples include:
- Major cracks
- Unsafe decks or stairs
- Significant roof defects
- Structural movement
- Electrical safety risks that need a licensed trade review
### Priority 2: Active Water and Pest Issues
Active issues can worsen if they are left alone.
Examples include:
- Current leaks
- Drainage failures
- Termite activity
- Mould-conducive moisture
- Wet subfloor areas
### Priority 3: Compliance and Documentation Issues
Some findings may relate to approvals, certificates or safety documentation.
Examples include:
- Unapproved renovations
- Missing certificates
- Non-compliant additions
- Pool safety concerns
- Deck or balcony concerns
### Priority 4: Presentation and Minor Maintenance
These items may help open-home presentation, but sellers should avoid overspending on low-impact work.
Examples include:
- Paint touch-ups
- Loose handles
- Damaged flyscreens
- Worn fittings
- Minor silicone repairs
| Repair Priority | Fix Before Listing? | Why |
| ----------------------- | ------------------- | -------------------------------------------- |
| Major structural defect | Usually yes | High buyer concern and high negotiation risk |
| Active leak | Usually yes | Can worsen and suggests poor maintenance |
| Termite activity | Usually yes | Can reduce buyer confidence |
| Unsafe deck or stairs | Usually yes | Safety issue buyers may not ignore |
| Cosmetic wear | Maybe | Useful when visible and low cost |
| Outdated fixtures | Optional | May not justify major spend before sale |
Read the Defect
Documentation Guide
}
buttonHref="/articles/document-building-defects-legal-claim"
variant="secondary"
/>
## Should You Fix Defects, Disclose Them or Offer a Price Adjustment?
After receiving property inspection results, sellers usually have three choices.
### Fix the Issue Before Listing
This often suits safety issues, active leaks, major defects and problems likely to scare buyers.
Repairing before listing can help the agent answer buyer questions with confidence. Keep invoices, photos and trade notes so buyers can see what was done.
### Disclose the Issue With Supporting Documents
Some repairs may not be practical before listing. In that case, disclosure with supporting documents can help reduce surprises.
This may include:
- The inspection report
- Trade quotes
- Engineering advice
- Repair invoices
- Council or certificate documents
### Price the Property Accordingly
Some sellers choose to sell “as is”, especially when the property is older, due for renovation or aimed at buyers who want to complete their own works.
In South Australia, government guidance says buyers may be able to use a building inspection report to negotiate the price and contract conditions when making an offer.
That is why sellers should understand defects before buyers do.
## How Pre-Sale Inspections Help Sellers Control Negotiations
A [pre-sale building inspection](/articles/pre-sale-building-inspection-potential-issues) gives the seller information before buyers commission their own building and pest inspection.
This can help sellers:
- Repair high-risk defects before listing
- Get trade quotes before negotiation starts
- Disclose known issues clearly
- Brief the agent with accurate defect details
- Avoid overpricing a property with hidden problems
- Reduce surprise renegotiation after contract review
[Consumer Affairs Victoria](https://www.consumer.vic.gov.au/housing/buying-and-selling-property/buying-property/inspect-properties-before-you-buy) advises buyers to consider engaging a qualified building inspector, surveyor or architect before signing a contract. It also says the fee for a professional inspection is small compared with buying a property that needs extensive unforeseen repairs.
Sellers should assume serious buyers may seek the same kind of advice. A [pre-sale inspection](/pre-sale-inspections) helps the seller prepare for that.
## What Inspection Results Mean for Refinancing or Investment Decisions
A property inspection is not a bank valuation. It does not decide lending approval or guarantee a finance result.
It can still help owners understand maintenance risk before refinancing, renovating or holding an investment property long term.
For investors, inspection findings can help estimate future capital expenditure. For example, a roof, drainage or termite issue may affect cash flow planning even if the property is not being sold soon.
This matters in an active investor market. [ABS lending data](https://www.abs.gov.au/statistics/economy/finance/lending-indicators/latest-release) shows that in the December quarter 2025, the number of new investor loan commitments for dwellings rose 5.5%, while the value rose 7.9%.
## Australian Standards and State Considerations
Australian property inspections should be read with scope and limits in mind.
Standards Australia lists AS 4349.1-2007 as “Inspection of buildings, Part 1: Pre-purchase inspections - Residential buildings.”
It also lists AS 4349.3-2010 as “Inspection of buildings, Part 3: Timber pest inspections.”
These standards help guide inspection scope and reporting expectations. They do not mean every hidden issue will be found. Most standard inspections are visual and limited to accessible areas.
State rules also differ.
In NSW, agents need to disclose records of pre-purchase inspection reports to prospective buyers when they ask for a copy of the sale contract.
In Victoria, the government has said it would develop a mandatory building and pest inspection scheme to be legislated in early 2027 if re-elected. At the time of writing, this is an emerging Victorian proposal, not a national rule.
## How to Read Your Inspection Report Without Overreacting
A long report can feel alarming, but not every defect is a deal-breaker.
Start by separating the findings into:
- Major defects
- Minor defects
- Safety hazards
- Active moisture or pest issues
- Items needing specialist review
- Maintenance and presentation issues
Then ask practical questions:
- Is this defect major or minor?
- Is it active or historical?
- Is further specialist assessment needed?
- Could the issue worsen before sale?
- What should be repaired before listing?
- Should a licensed trade provide a quote?
- Does the issue need legal, financial or building advice?
A [good report](/articles/document-building-defects-legal-claim) should help you make decisions. It should not leave you guessing what matters most.
## Example: Turning Inspection Results Into a Seller Action Plan
A seller receives a building inspection report showing:
- Roof flashing defects
- Poor subfloor ventilation
- Minor internal cracking
- Old bathroom silicone
- Worn flyscreens
Instead of renovating the whole home, the seller focuses on the defects most likely to affect buyer confidence.
They repair the roof flashing, improve subfloor ventilation, monitor the cracking and complete minor bathroom maintenance. They keep invoices and photos, then brief their agent so buyer questions can be answered clearly.
This approach avoids unnecessary spend while still dealing with the issues most likely to affect negotiation.
## When Should You Book a Property Inspection Before Selling?
Book a property inspection early enough to act on the findings.
Good timing includes:
- Before listing photos and open homes
- Before major repairs or renovations
- Before an auction campaign
- Before refinancing or investment review
- Before accepting offers with building and pest clauses
- Before setting a sale price for an older or renovated property
The earlier you inspect, the more choices you have.
A last-minute inspection may still help, but it may leave less time to repair, quote or disclose issues properly.
## Getting the Most Value from Your Home and Building Investment
Property inspection results help sellers make better decisions before the market makes those decisions for them.
A clear report can show which defects need urgent action, which repairs can wait and which issues buyers may use during negotiation. It can also help sellers avoid overspending on cosmetic work while ignoring defects that matter more.
Before you list, refinance or negotiate, Owner Inspections can help you understand what your property inspection results mean in practical terms. Our independent inspectors provide clear digital reports with photos, defect notes and next-step guidance so you can prioritise repairs, disclose issues confidently and make informed property decisions.
Request a pre-sale or property condition inspection quote today.
Request an Inspection
Quote Today
}
buttonHref="/contact"
variant="primary"
/>
### How to Use Your Home’s Equity to Renovate
Source: https://ownerinspections.com.au/articles/how-to-use-your-homes-equity-to-renovate
Published: 2026-05-01 | Updated: 2026-06-30 | Category: Structural Inspections
Author: Maison Azdari
Thinking about using equity to renovate instead of moving? Many Australian homeowners look at home equity when they want to fund a kitchen renovation, bathroom upgrade, extension, roof repair, outdoor area or staged home improvement project.
Home equity may help fund renovations, but it still means borrowing against your home. NAB explains that a home loan top-up is a way to access more funds by borrowing against your home’s equity, which is the difference between the lender’s valuation of your home and the amount you owe.
Reference: [ABS Lending Indicators](https://www.abs.gov.au/statistics/economy/finance/lending-indicators/)
Before using equity for renovations, start with three practical questions:
| Question | Why it matters |
| -------------------------------------- | ----------------------------------------------------------------------- |
| How much usable equity do you have? | Total equity and usable equity are not the same. |
| Can you afford the repayments? | Borrowing more can increase repayments and long-term interest. |
| Does the property suit the renovation? | Hidden defects can change the budget, order of works and project scope. |
## What Is Home Equity?
Home equity is the difference between your property’s current value and the amount still owing on your home loan.
Simple formula:
**Home equity = current property value - remaining home loan balance**
Equity can grow when your property value rises, when you pay down your mortgage, or both.
For example:
| Calculation | Example |
| ------------------------- | --------------------------------: |
| Property value | $800,000 |
| Current home loan balance | $400,000 |
| Total equity | $400,000 |
| 80% of property value | $640,000 |
| Estimated usable equity | $240,000 before lender assessment |
This does not mean $400,000 is available to spend. Lenders usually focus on usable equity, not total equity. They will also look at income, expenses, credit history, loan type, property valuation and repayment ability.
Equity can grow when your property value rises, when you pay down your mortgage, or both. Westpac explains that equity grows as you reduce your loan balance and as the property value increases.
This does not mean the full equity amount is available to spend. Lenders may assess your income, expenses, credit history, loan type, property valuation and repayment ability before approving funds.
Book a
Building Inspection
}
buttonHref="/building-and-pest-inspections"
variant="secondary"
/>
## What Is Usable Equity?
Usable equity is the portion of your equity that a lender may allow you to borrow against.
A common estimate is:
**80% of property value minus current loan balance**
The 80% figure matters because borrowing above this point may take your loan-to-value ratio, or LVR, above a lender’s usual comfort level. LVR means the loan amount divided by the property value.
A homeowner may be able to increase the size of a home loan up to 80% of the property value, depending on equity and financial situation.
| Calculation step | Example |
| ----------------------------------------------- | -------: |
| Estimated property value | $900,000 |
| 80% of property value | $720,000 |
| Current loan balance | $500,000 |
| Possible usable equity before lender assessment | $220,000 |
The 80% figure matters because borrowing above this point may push your loan-to-value ratio, or LVR, above a lender’s usual threshold. Westpac notes that Lenders Mortgage Insurance may be needed if the LVR is likely to go higher than 80% after a loan increase.
Do not assume the full difference between your property value and mortgage balance is available to spend. Your lender may apply a lower borrowing limit after reviewing your financial position.
## Can You Use Home Equity to Renovate?
Yes, many Australian homeowners can use home equity to renovate, subject to lender approval and borrowing capacity.
Common renovation projects include:
- Kitchen upgrades
- Bathroom renovations
- Extensions
- Outdoor entertaining areas
- Roof repairs
- Drainage improvements
- Waterproofing repairs
- Ventilation and mould remediation
- Structural repairs
- Rectification of poor previous renovation work
[NAB](https://www.nab.com.au/personal/home-loans/renovation-lending-ideas) notes that using equity from a property can provide renovation funds, but it increases the loan balance and monthly repayments.
Before using equity for cosmetic work, it is worth checking whether the home has hidden issues that should come first. A property condition report can help identify visible defects, moisture problems, termite-conducive conditions, roof defects, drainage concerns and signs of structural movement.
## Can You Include Renovation Costs in a Mortgage in Australia?
Yes, in many cases, renovation costs may be included through a loan increase, home loan top-up, refinance, supplementary loan or construction loan, subject to lender approval.
The right option depends on the size and type of renovation. Westpac says a loan increase may help fund renovations, while larger renovation budgets may need a construction loan with a fixed-price contract and progress payments.
| Renovation type | Possible funding path | What to check first |
| --------------------------------------- | ------------------------------------- | --------------------------------------------------------------------- |
| Small cosmetic upgrade | Redraw, savings or personal loan | Does the home have moisture or ventilation issues? |
| Kitchen or bathroom renovation | Top-up, refinance or loan increase | Check plumbing, drainage, waterproofing and ventilation. |
| Extension or structural work | Construction loan or larger refinance | Check approvals, structure, soil, drainage and builder documentation. |
| Roof, drainage or waterproofing repairs | Equity, savings or staged work | Prioritise defects that could cause further damage. |
Do not assume every renovation cost can simply be added to your mortgage. Lenders may ask for quotes, income documents, current living expenses, approvals, contract details and evidence that repayments are affordable. Westpac says loan increase applications can require information about living expenses, financial position and evidence of income.
## How Do You Access Equity for Renovations?
There are several ways to access equity for renovations. The best fit depends on your loan, project size, risk level, repayment capacity and whether the work is cosmetic or structural.
### Refinance Your Home Loan
Refinancing means replacing your current home loan with a new loan. This may be with your current lender or a new lender.
It may help if you want to access equity, review your interest rate, change loan features or restructure your loan. Many homeowners explore options like [AFMS mortgage refinancing](https://www.afmsgroup.com.au/services/refinance/) when planning larger renovation projects, because it can provide them with both access to funds and improved loan terms.
The risk is that refinancing can involve fees, a longer loan term and more total interest over time. ASIC warns that borrowers who switch lenders may end up with a longer loan term, and should consider costs such as LMI, discharge fees and loan arrangement fees.
### Top Up Your Existing Home Loan
A home loan top-up increases your existing loan amount.
This may suit moderate renovations where you have enough equity and meet lender criteria. CommBank says topping up may cost less than other types of loans because home loans generally have lower interest rates than credit cards and personal loans, but it also means taking on more debt and may increase repayments.
### Use Redraw
Redraw may be available if you have made extra repayments and your loan allows access to them. This can suit smaller renovation costs. The trade-off is that using redraw reduces your repayment buffer.
NAB describes redraw as a way to withdraw extra repayments made into a home loan if the borrower is ahead on repayments.
### Use a Line of Credit
A line of credit gives flexible access to funds up to an approved limit.
This can suit staged renovations because you can draw money as needed. The risk is overspending, especially when renovation variations, fixture upgrades and labour costs keep rising.
### Use a Construction Loan for Major Works
A construction loan may suit major structural renovations, extensions or staged building contracts.
Funds are often released in progress payments. This can help match funding to the build stage, but lenders may require more documentation, approvals and builder details.
## Using Equity for Renovations: Which Finance Option Fits the Project?
There is no single best option for using equity for renovations. The right choice depends on renovation size, loan structure, fees, repayment capacity, risk tolerance and whether the work is cosmetic or structural.
| Option | Best For | Main Benefit | Main Risk |
| ----------------- | --------------------------------------- | --------------------------------------- | -------------------------------------------- |
| Refinance | Larger renovations or switching lenders | May access equity and review loan terms | Fees, longer term, higher total interest |
| Home loan top-up | Moderate upgrades | Keeps funding tied to home loan | Repayments increase |
| Redraw | Smaller renovations | Uses extra repayments already made | Reduces financial buffer |
| Line of credit | Staged projects | Flexible drawdown | Overspending risk |
| Construction loan | Major structural works | Progress payments match build stages | More paperwork and lender oversight |
| Personal loan | Smaller projects without equity access | Faster access in some cases | Usually higher interest than home loan rates |
When comparing options, check repayments at more than one interest rate. As of 17 June 2026, the RBA cash rate target was 4.35%, with the next update listed for 11 August 2026.
## How Much Equity Can You Use for Renovations?
A rough usable equity estimate starts with LVR.
**LVR = loan amount divided by property value**
Example:
| Item | Amount |
| ------------------------ | -------: |
| Estimated property value | $900,000 |
| 80% lender threshold | $720,000 |
| Current loan balance | $500,000 |
| Possible usable equity | $220,000 |
*This is only a guide. Lenders may use their own valuation, not a real estate agent’s estimate. Income, expenses, credit history, dependants, credit cards and existing debts can all affect borrowing capacity.*
Interest rates also matter. The RBA cash rate target was 4.10% from 18 March 2026, with the next update listed for 5 May 2026. Rate changes can affect lending rates and repayments, so borrowers should test their budget at more than one rate level.
## What are the Pros and Cons of Using Equity to Renovate?
### Pros
Using home equity may help you access a larger renovation budget than a personal loan, making it a popular option for homeowners planning significant upgrades, extensions, or property improvements. For those exploring their financing options, [Achieve home equity assistance](https://www.achieve.com/home-equity-loan) can provide valuable guidance on leveraging available equity responsibly while evaluating loan structures, repayment obligations, and long-term financial goals. Taking the time to understand these options can help homeowners make more informed borrowing decisions and maximize the value of their investment.
Home loan interest rates are often lower than unsecured personal loans or credit cards, although the debt may run for much longer.
Renovations can improve day-to-day living. Repairs may also protect the home from further damage, especially when dealing with leaks, poor drainage, timber decay, waterproofing failure, subfloor ventilation or pest-related risks.
Some upgrades may support buyer appeal, especially kitchens, bathrooms, layout improvements and outdoor areas.
### Cons
The main downside is simple: your debt increases.
That may increase repayments and total interest. If you extend the loan term during refinancing, the total cost can rise even if the monthly repayment looks manageable.
LMI may apply if your new loan pushes your LVR above the lender’s threshold. Property values can also move, which may affect your equity position.
Renovation budgets can blow out due to hidden defects, material changes, labour delays, approval issues and variations. Aussie notes that using equity for renovations can increase mortgage balance and repayments, and a longer loan term may mean more interest over time.
Get a Property
Condition Report
}
buttonHref="/services"
variant="secondary"
/>
## How Do Renovations Affect Property Value?
Renovations do not all add value in the same way.
The impact depends on location, property type, buyer demand, workmanship, layout, approvals and whether the renovation fixes real problems.
Kitchens, bathrooms and open-plan living areas can attract buyer interest. Outdoor spaces can also be popular in many Australian suburbs. But safety, water and structure issues should not be ignored.
A new kitchen may look good, but it will not solve subfloor moisture, poor drainage, roof leaks or active movement cracking.
## Why Get a Building Inspection Before Using Equity to Renovate?
A building inspection before borrowing can help you decide where renovation money should go first.
This matters because many renovation budgets start with visible upgrades, such as benchtops, tiles, flooring and paint. But the property may need less visible work first.
A pre-renovation inspection can help identify:
- Moisture ingress and water damage risks
- Mould and poor ventilation
- Roof leaks
- Blocked or failing gutters
- Drainage issues
- Termite-conducive conditions
- Timber decay
- Waterproofing failure
- Movement cracking
- Poor previous renovation work
- Safety and maintenance risks
[Owner Inspections](/) highlights independent inspections, detailed reports, photos and actionable guidance for homeowners, buyers and investors who want clearer property decisions.
| Inspection Finding | Renovation Impact |
| ----------------------------- | ---------------------------------------------------------------------- |
| Moisture ingress | Budget may need to prioritise drainage, waterproofing or ventilation |
| Termite-conducive conditions | Pest management may be needed before cabinetry, flooring or extensions |
| Roof defects | Cosmetic interior upgrades may be delayed until leaks are resolved |
| Structural movement | Engineer or builder input may be needed before layout changes |
| Poor previous renovation work | Scope may need compliance review or rectification |
A building inspection is not a property valuation and it is not financial advice. It is a practical condition check that can support better conversations with builders, designers, lenders and advisers.
## Do You Need Approval Before Renovating?
Some cosmetic changes may not need approval. Structural changes, extensions, external works and changes to services often do.
YourHome says [different renovations may need different approvals](https://www.yourhome.gov.au/buy-build-renovate/renovations-and-additions). It also states that changes to plumbing, drainage, gas and electrical services require approval and inspection by the relevant authority, even where planning or building approval may not be needed.
In NSW, residential building work between $5,000 and $20,000 must be covered by a small jobs contract, while work over $20,000 has a separate contract template for new homes and major alterations and additions.
In Queensland, the QBCC says homeowners are responsible for making sure the right building approvals are in place before work starts, even if they have hired a builder.
## How to Avoid Overcapitalising
Overcapitalisation happens when you spend more on renovations than the value they add to the property.
To reduce this risk:
- Review recent comparable sales
- Ask a local agent what buyers expect
- Prioritise safety, structure, water and pest issues before cosmetic upgrades
- Get quotes before borrowing
- Allow a contingency for defects and variations
- Avoid luxury upgrades that exceed suburb expectations
- Get a building inspection before finalising the scope
| Renovation Type | Possible Value Impact | Inspection Consideration |
| -------------------- | --------------------- | --------------------------------------------- |
| Kitchen | High buyer appeal | Check plumbing, ventilation and moisture |
| Bathroom | High buyer appeal | Check waterproofing and drainage |
| Extension | Adds space | Check structure, approvals, soil and drainage |
| Deck or outdoor area | Lifestyle appeal | Check timber decay, footings and drainage |
| Roof repairs | Protects property | Check leaks, flashing and gutters |
| Cosmetic repainting | Lower-cost refresh | Check moisture before painting |
## Alternatives to Using Equity
Home equity is not the only way to fund renovations.
Alternatives include savings, offset funds, redraw, personal loans, staged renovation, construction loans or delaying non-urgent cosmetic work.
Savings can reduce borrowing, but may reduce your emergency buffer. Personal loans may be faster for smaller jobs, but unsecured credit often has higher interest than home loan lending.
For some homeowners, staging the work is safer. For example, complete drainage, waterproofing and roof repairs first, then delay cosmetic upgrades until the property condition is stable.
## Step-by-Step: How to Use Equity for Renovations
1. **Estimate your property value**
Use recent sales as a guide, but expect your lender to use its own valuation.
2. **Check your current loan balance**
This helps you estimate total equity.
3. **Calculate rough usable equity**
Start with 80% of the property value minus the current loan balance.
4. **Model repayments**
Use a mortgage calculator and test higher interest rates, not just the current rate. ASIC MoneySmart offers repayment and borrowing calculators for this purpose.
5. **Define the renovation scope**
Separate must-fix defects from nice-to-have cosmetic upgrades.
6. **Book a building inspection**
Check for visible defects, moisture, termites, roof issues, drainage and structural movement before locking in the budget.
7. **Get builder quotes**
Ask for detailed inclusions and exclusions.
8. **Check approvals and contracts**
Contact your council, certifier or state regulator before work starts.
9. **Speak with a lender or broker**
Ask about borrowing capacity, fees, LVR, LMI, repayment changes and loan term impact.
10. **Keep contingency funds aside**
Renovations can expose hidden defects once work begins.
11. **Stage works in priority order**
Fix water, safety, pest and structure issues before high-end finishes.
## Getting the Most Value from Your Home and Building Investment
Using equity can be a practical way to fund renovations, but it should not start with the loan application.
It should start with the property.
Before borrowing against your home, make sure the renovation plan matches the condition of the building. Hidden moisture, drainage defects, roof problems, termite-conducive conditions or structural movement can change what should be done first.
[Owner Inspections](/) can assess visible building defects, moisture issues, termite-conducive conditions, structural movement and maintenance risks so homeowners can plan renovation spending with clearer priorities.
Book Building
and [Pest Inspection](/timber-pest-inspections)
}
buttonHref="/building-and-pest-inspections"
variant="primary"
/>
### How Do You Choose a Pest Control Company After a Building Inspection
Source: https://ownerinspections.com.au/articles/choose-pest-control-after-building-inspection
Published: 2026-04-24 | Updated: 2026-04-30 | Category: Pest Inspections
Author: Maison Azdari
Buying a property is stressful enough without opening your building and pest inspection report and seeing words like termite activity, timber pest damage, moisture risk, fungal decay, or conditions conducive to termites.
The good news is that pest findings do not always mean you should walk away from the property. The bad news is that guessing your next step can be expensive.
A building and pest inspection report may identify active termites, old timber damage, damp subfloor areas, wood borers, or drainage issues that increase the risk of future infestation. What happens next depends on whether the issue is active, historical, or a risk condition.
Book a Building
and [Pest Inspection](/timber-pest-inspections)
}
buttonHref="/building-and-pest-inspections"
variant="secondary"
/>
## What Is a Building and Pest Inspection?
A building and pest inspection is a professional visual assessment of a property’s condition. It helps buyers understand structural defects, safety concerns, moisture problems, timber pest evidence, and other issues before they commit to a purchase.
A building inspection may look at accessible areas such as:
- Walls, ceilings, floors, and roof spaces
- External walls and visible structural elements
- Wet areas, plumbing signs, leaks, and drainage
- Subfloor spaces, where accessible
- Safety hazards and major defects
- Moisture readings in areas of concern
The pest inspection part focuses on timber pests and pest-related risks. This may include termites, wood borers, fungal decay, termite damage, termite workings, and conditions that may attract termites.
> In Western Australia, Consumer Protection states that pest inspections should be [completed to the national standard](https://www.consumerprotection.wa.gov.au/property-inspections) for timber pest inspections and reports, AS 4349.3, and should cover timber structures such as roofs, floors, outbuildings, and fencing.
## What Happens After a Building and Pest Inspection Finds Pest Issues?
Once your inspection is complete, you will receive a building and pest inspection report outlining the findings. At this point, the report becomes your decision guide.
Do not rely only on the summary page. Read the full report and look for terms such as:
- Active termite activity
- Previous termite damage
- Timber pest damage
- Wood borers
- Fungal decay
- Moisture readings
- Timber-to-soil contact
- Poor drainage
- Roof leaks
- Subfloor dampness
- Inaccessible areas
- Conditions conducive to termites
The next step is to speak with your inspector. Ask them to explain the pest-related findings in plain language. For example, *“Does this mean termites are active now?”* or *“Is this old damage, or does it need urgent assessment?”*
The inspector may recommend a licensed pest controller, termite specialist, builder, engineer, plumber, roofer, or drainage contractor, depending on the issue.
Where possible, get written pest control quotes before settlement. A written quote may help you understand treatment costs, repair risks, and whether you need to discuss a price adjustment, repair request, or contract condition with your conveyancer or solicitor.
## Do You Always Need Pest Control After an Inspection?
No. Not every pest-related finding means immediate pest control treatment is required.
Some findings are warning signs rather than active infestations. For example, a report may note damp timber in the subfloor, garden beds covering weep holes, leaking pipes, or timber stored against the house. These issues raise the risk of termites but may not mean termites are currently active.
| Report Finding | What It Means | Likely Next Step |
| -------------------- | -------------------------------------------------------------------------------------- | -------------------------------------------------------- |
| Active infestation | Live termites or active pest evidence may be present. | Arrange urgent assessment and a written treatment quote. |
| Previous damage | Past termite or timber pest damage is visible, but activity may not be current. | Confirm treatment history and assess repair needs. |
| Conducive conditions | Moisture, poor drainage, stored timber, or timber-to-ground contact may increase risk. | Remove risk factors and schedule monitoring. |
> Health Victoria explains that [termites need wood and water to stay alive](https://www.health.vic.gov.au/environmental-health/pest-control-termites). Reducing their access to these can reduce the risk of termite attack.
That is why a good pest control company should not push the same treatment for every property. They should confirm the finding, inspect the affected areas where accessible, and explain whether the issue needs treatment, monitoring, repair, or risk reduction.
Working with experienced providers like Masters Pest Control is a good option. Engaging [licensed termite specialists in Sydney](https://www.masterspestcontrolsydney.com.au/services/termite-control/) tends to ensure your pest issue goes away permanently.
## Common Pest Risks Found in Building and Pest Reports
### Termites
Termites are one of the most serious findings in a building and pest inspection report because they can damage timber framing, flooring, skirting boards, roof timbers, fences, and other timber structures.
Signs may include mud tubes, termite workings, hollow-sounding timber, damaged skirting boards, soft timber, moisture around affected areas, or visible termite activity.
Active termite activity needs prompt assessment. Previous termite damage also matters because it may affect structural integrity, repair costs, insurance questions, and future resale confidence.
### Wood Borers
Wood borers can leave small holes, fine dust-like frass, and weakened timber. They are more common in some older properties or untreated timber.
Not every borer finding is severe, but the report should help identify whether the damage is minor, widespread, or worth further specialist review.
### Fungal Decay
Fungal decay, often called wood rot, occurs when timber stays damp. It may be linked to roof leaks, plumbing leaks, poor subfloor ventilation, rising damp, drainage problems, or failed waterproofing.
Fungal decay is not the same as termite damage, but it can weaken timber and create conditions that pests like.
### Rodents, Cockroaches, Spiders, and Other Pests
Some reports may mention evidence of rodents, cockroaches, spiders, ants, or other pests. These may need general pest treatment, but in a property purchase, the highest-risk issues are usually timber pests, moisture problems, and damage that may affect structure or safety.
### Moisture and Drainage Issues
Moisture findings matter because they can point to hidden property problems. A moisture reading may lead to further checks for plumbing leaks, drainage faults, roof leaks, poor ventilation, or waterproofing failure.
Moisture also increases termite risk, so it should not be ignored.
## Why Choosing the Right Pest Control Company Matters
Choosing the right pest control company after a building inspection is not just about getting rid of pests. It can affect your repair budget, settlement decision, negotiation position, safety, and long-term property costs.
The wrong provider may:
- Miss active termites
- Treat only visible areas
- Provide a vague quote with hidden exclusions
- Recommend a cheap treatment that does not suit the property
- Fail to include monitoring or follow-up
- Use pressure tactics before you have time to compare options
Termite management often needs careful investigation, treatment selection, follow-up inspections, and risk reduction. A quick spray may be suitable for some general pests, but it is not a full answer for many termite situations.
View Expert
Witness Reports
}
buttonHref="/expert-witness-reports"
variant="secondary"
/>
## How to Choose a Pest Control Company After a Building Inspection
### 1. Check Their Pest Control Licence
Pest control licensing is managed by state and territory rules, not one single national system. Ask for the company’s licence number and verify it with the relevant regulator in your state or territory.
In Victoria, the Department of Health advises homeowners to make sure a pest control operator is licensed before hiring them. It also provides a searchable register of current licence holders.
Do not stop at “Yes, we are licensed.” Ask:
- What is your licence number?
- Is the licence current?
- Does it cover the work needed at this property?
- Does it include timber pests if termites are involved?
Victorian licensing information also separates authorisations for general pest control excluding timber pests and general pest control including timber pests. This is a good reminder to check the scope, not just the existence of a licence.
### 2. Confirm They Handle Timber Pests, Not Just General Pests
Termite treatment is not the same as a general spider, cockroach, or ant treatment.
If your pest inspection report mentions termites, termite damage, timber pest activity, or conditions conducive to termites, ask whether the provider regularly handles timber pests.
Good questions include:
- Do you specialise in termite management?
- Have you treated properties with this type of construction?
- Can you assess subfloor, roof void, slab edge, garden, fence, and detached structures where relevant?
- Can you explain the likely source of activity?
### 3. Ask for Insurance Details
A professional pest control company should be able to provide proof of insurance.
Ask for:
- Public liability insurance
- Professional indemnity insurance where relevant
- Workers compensation where applicable
Do not rely on verbal assurance. Ask for written proof. If the work involves drilling, chemical application, access to subfloor areas, or treatment near occupied spaces, insurance and safety procedures matter.
### 4. Give Them the Inspection Report Before Quoting
A pest control quote should respond to the actual findings in your building and pest inspection report.
Send the pest controller:
- The full report
- Photos from the report
- Notes on affected rooms or areas
- Moisture readings
- Details of inaccessible areas
- Any treatment history provided by the seller
A quote given without reading the report or inspecting the property may be too generic. It may also miss key areas, such as a detached garage, fence line, subfloor, roof void, wet area, or retaining wall.
### 5. Compare Treatment Options, Not Just Price
Different pest problems need different treatment plans. Health Victoria lists termite control methods such as baiting, dusting, and chemical barriers. It also notes that physical barriers can be built into new homes to help prevent termites reaching timber structures.
| Treatment Type | Best For | Ask About |
| --------------------------- | -------------------------------- | ------------------------------------------------------- |
| Chemical barrier | Subterranean termite management | Product, drilling, warranty, retreatment, access limits |
| Baiting system | Monitoring and colony management | Visit frequency, bait replacement, contract length |
| Dusting | Localised termite activity | Suitability, follow-up timing, disturbance risk |
| Moisture or risk correction | Reducing future termite risk | Drainage, leaks, ventilation, timber removal |
The cheapest quote may not include monitoring, warranty, drilling, follow-up visits, detached structures, or treatment of high-risk external areas. Compare the scope before comparing price.
### 6. Ask for a Written Treatment Plan
A written pest treatment plan should include:
- Pest identified
- Areas affected
- Treatment method
- Products or chemicals used
- Safety instructions
- Preparation required
- Follow-up visits
- Warranty or service period
- Exclusions
- Total cost
### 7. Check Reviews, But Read Them Carefully
Reviews can help, but star ratings alone are not enough.
Look for reviews that mention:
- Termite treatment
- Timber pest inspections
- Follow-up service
- Clear communication
- Written quotes
- Aftercare
- Warranty handling
A company with strong general pest reviews may not be the best choice for termite work. Read the details.
### 8. Ask About Follow-Up Inspections
Termite management is often ongoing. Ask how often the property should be checked after treatment.
The answer should depend on the property, construction type, moisture conditions, treatment method, and level of risk. In higher-risk situations, more frequent checks may be recommended.
A provider who treats the property and disappears without follow-up may not be the right fit.
### 9. Make Sure They Communicate Clearly
A good pest control company explains:
- What is urgent
- What is preventive
- What is optional
- What is excluded
- What the treatment can and cannot do
- What needs repair by another trade
They should not pressure you into immediate expensive treatment without showing evidence.
## Questions to Ask Before Hiring a Pest Control Company
| Question | Why It Matters |
| ------------------------------------------------------------ | -------------------------------------------------------------------- |
| Are you licensed in this state or territory? | Confirms legal authority to perform pest control work. |
| Does your licence cover timber pests or termite treatment? | General pest control may not be enough for termites. |
| Can you review my building and pest inspection report first? | Ensures the quote responds to actual findings. |
| What treatment options are available? | Helps compare chemical, baiting, monitoring, or combined approaches. |
| Will I receive a written treatment plan? | Protects the buyer from vague or verbal promises. |
| What chemicals or products will be used? | Helps assess safety, preparation, and environmental concerns. |
| Is follow-up included? | Termite management often requires monitoring. |
| Is there a warranty or service agreement? | Clarifies what happens if activity continues. |
| Do you provide before-and-after documentation? | Useful for records, negotiation, and future resale. |
| Are there exclusions? | Prevents surprise costs. |
## Red Flags to Watch Out For
Some warning signs should make you pause before hiring a pest control company.
Be careful if the provider:
- Refuses to provide licence details
- Cannot explain whether they are authorised for timber pests
- Gives a quote without inspecting the property or reviewing the report
- Offers a “one spray fixes everything” solution for termites
- Uses scare tactics or pressures immediate payment
- Provides no written quote
- Provides no product or safety information
- Has poor communication before the job
- Makes guarantees that sound unrealistic
- Is much cheaper than every other quote without explaining why
A low price is not automatically a red flag, but a vague low price is. If one provider is significantly cheaper, ask what is excluded. It may be follow-up visits, monitoring, warranty, drilling, access work, or treatment of detached structures.
## How Much Does Pest Control Cost After a Building Inspection?
Pest control costs after a building inspection vary depending on the pest, property size, access conditions, severity of activity, treatment method, and whether follow-up monitoring is included.
*Use the table below as an indicative guide only.*
| Service Type | Indicative Cost Range | Notes |
| ------------------------------------------- | --------------------: | ------------------------------------------------------------------------ |
| General pest treatment | $150–$350+ | Often for cockroaches, spiders, ants, or general pests. |
| Timber pest or termite inspection follow-up | $250–$500+ | May vary by property size and urgency. |
| Localised termite treatment | $500–$1,500+ | Depends on location, access, and treatment type. |
| Full termite management system | $2,000–$5,000+ | May include chemical barriers, baiting, monitoring, or combined systems. |
| Major termite damage repairs | Highly variable | Requires builder, engineer, or specialist assessment. |
These figures are not fixed quotes. Always get at least 2–3 written quotes and compare treatment scope, warranty, follow-up, exclusions, and safety details.
## Can You Use the Pest Control Quote to Negotiate?
Yes, a written pest control quote may help support a negotiation, but your options depend on the contract, timing, state rules, and advice from your conveyancer or solicitor.
Buyers may discuss:
- A price reduction
- Seller-funded treatment before settlement
- Access for further inspection
- A contract extension
- A specialist timber pest report
- Repair quotes from builders or engineers
In Victoria, Consumer Affairs Victoria states that private sale buyers can negotiate contract conditions such as successful completion of a building or pest inspection.
Auction buyers need to be more careful. SA Government says buyers need to arrange a building and pest inspection before auction day because, if they are the successful bidder, the contract cannot be made subject to a satisfactory building inspection report.
Do not make legal or financial decisions based only on a pest quote. Speak with your conveyancer or solicitor before asking for formal contract changes.
## Should You Walk Away If Termites Are Found?
Not always. Termites are serious, but the right decision depends on the facts.
You may still proceed if:
- The damage is minor
- There is no current activity
- Treatment history is clear
- Repairs are manageable
- The seller agrees to a fair adjustment
- Your conveyancer confirms your options
You may need to reconsider if:
- Active termites are present
- Structural timber damage is extensive
- Repair costs are unclear
- Access is limited
- The seller refuses further inspection
- The contract does not protect you
- The risk is beyond your comfort level
## What Role Does Your Building Inspector Play After the Report?
Your building inspector does not necessarily perform pest treatment. Their role is to identify visible defects, pest-related signs, moisture concerns, safety issues, and recommended next steps.
A good inspector can help you understand whether a finding is:
- Structural
- Pest-related
- Moisture-related
- Maintenance-related
- A safety issue
- A matter for a specialist
[Owner Inspections](/) aligns with buyers and owners who want independent, comprehensive reporting, clear explanations, and practical next steps. Its ideal customers include homebuyers, homeowners, real estate investors, agents, builders, and property managers who value accurate reports and independent advice.
Owner Inspections reports may help identify structural defects, termite and pest activity, previous pest damage, moisture issues, conditions conducive to pests, and areas that need specialist follow-up.
## Choosing a Pest Control Company After an Inspection
Use this checklist before hiring a pest control company:
- Read the full building and pest inspection report.
- Ask your inspector to explain pest-related findings.
- Confirm whether the issue is active, historical, or a risk condition.
- Choose a licensed pest control company.
- Verify licence status with your state or territory regulator.
- Confirm they handle termites or timber pests if relevant.
- Provide the inspection report before requesting a quote.
- Get a written treatment plan.
- Compare at least 2–3 quotes.
- Ask about follow-up inspections and warranty.
- Avoid vague, verbal, or high-pressure offers.
- Speak with your conveyancer before making settlement decisions.
## Getting the Most Value from Your Home and Building Investment
A building and pest inspection report gives you a clearer view of the property before you make a major decision. If pest issues appear in the report, the best next step is not panic or guesswork. It is a careful process.
Read the report, speak with your inspector, confirm whether the issue is active or historical, and choose a licensed pest control company that can provide a written treatment plan. Compare licence details, timber pest experience, insurance, treatment options, follow-up, warranty, and exclusions before choosing a provider.
Request an
Inspection Quote
}
buttonHref="/contact"
variant="primary"
/>
### What Costs Beyond the Mortgage Catch Buyers Out in Australia?
Source: https://ownerinspections.com.au/articles/costs-beyond-mortgage-buyers
Published: 2026-04-20 | Category: Building Inspections
Author: Maison Azdari
Sources:{" "}
[ABS “Total Value of Dwellings, December Quarter 2025”](https://www.abs.gov.au/statistics/economy/price-indexes-and-inflation/total-value-dwellings/latest-release)
[Moneysmart “lenders mortgage insurance (LMI)”](https://moneysmart.gov.au/glossary/lenders-mortgage-insurance-lmi)
[NAB “What are the upfront costs of buying a house?”](https://www.nab.com.au/personal/life-moments/home-property/buy-first-home/costs)
---
Buying a home is one of the biggest financial decisions most Australians will ever make. And for many, the focus during the buying process sits almost entirely on the mortgage, the deposit, the repayments, the interest rate. What tends to get far less attention is everything else.
Homeownership carries a long list of ongoing costs that sit well and truly outside the loan repayment. Some are predictable and annual. Others surface without warning and demand immediate attention. Taken together, they can add thousands of dollars a year to the real cost of owning a property, and for buyers who have not built these expenses into their budgets, the surprise can be financially destabilising.
Planning makes all the difference. Here is a practical breakdown of the costs every homeowner should account for, and how to approach budgeting for each one.
See the Buyer
Inspection Guide
}
buttonHref="/guides/pre-purchase-building-pest-inspection-guide"
variant="secondary"
/>
## Why Buyers Underestimate the Real Cost of a Home
A lot of buyers start with borrowing power because that is what lenders, calculators and property ads put in front of them. The trouble is that borrowing power does not equal full affordability. NSW Government’s buyer guidance lists duty, LMI, inspections, conveyancing, mortgage registration, title registration and loan application fees as upfront buying costs outside the loan itself.
That means cost beyond mortgage is not one hidden fee. It is a stack of one-off and ongoing costs. Some hit before settlement. Some start on day one of ownership. Some only appear when an inspection picks up defects, or when a body corporate raises a special levy, or when an older hot water system stops working in your first few months.
For cautious buyers, this is not a small admin detail. It is a financial stability issue. When your emergency cash is swallowed by buying costs you did not plan for, you have less room to handle rate rises, urgent repairs or job changes. That is one reason a careful pre-purchase budget matters as much as the loan approval itself.
## Upfront Costs Beyond the Mortgage
Before you even pick up the keys, there are several costs that can change the true price of the property. These are the expenses buyers most often leave out of early budgeting, especially when they are focused on winning the property first and sorting out the details later.
### Stamp duty and transfer duty
For many buyers, duty is the biggest extra cost after the deposit. The amount depends on the state or territory, the value of the property, the buyer’s status and whether a concession or exemption applies.
In NSW, transfer duty is based on the sale price or market value, whichever is higher, and must generally be paid within three months of signing, or earlier if settlement happens first.
Victoria’s calculator factors in first home buyer help and principal place of residence concessions, and
Queensland’s estimator directs buyers to home concession rates.
The practical lesson is simple: do not guess duty. Use your state revenue office calculator early, before you decide what you can comfortably offer.
A property that looks affordable on the mortgage alone can feel very different once duty is added.
### Conveyancing and legal fees
Conveyancers and property solicitors do more than shuffle paperwork. They review the contract, check the title, prepare settlement documents and help manage duty and transfer steps. NAB says buyers can typically expect conveyancing or legal fees of about $700 to $2,500, depending on complexity and whether the work is done by a conveyancer or solicitor. The Australian Institute of Conveyancers NSW also points buyers to title searches, council inquiries, settlement agency fees, loan and mortgage document work, and registration fees as part of the transaction.
This is not an optional add-on. It is a standard cost of buying properly, and it can save you from signing a contract you do not fully understand.
### Lenders Mortgage Insurance (LMI)
LMI is one of the most misunderstood buying costs in Australia. Moneysmart defines it as insurance that protects the lender, not the borrower, and says it is usually a one-off cost when the amount borrowed exceeds 80% of the property’s value. NSW Government gives the same practical rule of thumb: buyers borrowing more than 80% of the purchase price may need to pay it.
That means a buyer with a smaller deposit might face thousands in extra cost beyond the mortgage itself. Not every buyer pays LMI, and some government guarantee schemes can help eligible buyers avoid it, but it should be checked early, not after the offer is accepted.
### Loan setup, valuation and registration fees
These costs are usually smaller than duty or LMI, but they still count. NSW Government includes mortgage registration fees, registration of title, loan application fees and independent valuer fees in its upfront buying list. AIC NSW also flags fees and charges for obtaining a loan, attending to mortgage documents and registration costs.
On their own, these charges may not look dramatic. Together, they can still add another layer to the amount you need in cash before settlement.
### Building, pest and strata inspection costs
This is where many buyers treat an inspection as just another line item, when it is often one of the smartest cost-control steps in the whole purchase.
A [pre-purchase building inspection](/pre-purchase-inspections) looks for visible defects and areas of concern in the structure and condition of the home. Owner Inspections notes that a building inspection is carried out to Australian Standard AS 4349.1 and records defects in reasonably accessible areas. A combined building and pest inspection adds a timber pest assessment for termites, termite damage and termite risk conditions.
Owner Inspections’ current buyer guidance also points to faults such as [roof issues](/articles/roof-defect-inspection-to-detect-leaks-and-structural-issues), [leaking ceilings](/articles/australias-top-10-most-common-building-defects), [cracked walls](/articles/hidden-home-issues-living-room-furniture), [foundation problems](/articles/structural-integrity-inspection), [mould](/articles/mould-inspection-for-home-damage), [waterproofing failures](/articles/waterproofing-inspections-prevent-water-damage-and-save-costs) and [drainage issues](/articles/plumbing-defect-inspection-to-identify-water-issues) as the kinds of defects that can materially change what a property will cost you after settlement.
For apartments and some townhouses, a [strata report](/strata-reports) or strata records review matters too. NSW Government includes strata reports in the upfront buying costs list because shared-property issues, low sinking funds or unresolved maintenance can become your problem after settlement.
The real value is not just finding defects. It is turning unknown costs into known costs. Owner Inspections’ guidance says a building inspection report can support price negotiation when it uncovers defects or risks that affect value, safety or repair costs. That gives buyers a better shot at adjusting the price, renegotiating terms or deciding not to proceed before the hidden bill becomes theirs.
View Inspection
Cost Guide
}
buttonHref="/articles/pre-purchase-house-inspection-cost"
variant="secondary"
/>
### Settlement adjustments, moving and connection costs
Settlement day brings its own smaller but real costs. AIC NSW flags adjustments of rates and taxes for the period you own the property, and NAB notes that property-related charges such as rates and taxes are adjusted on settlement day.
On top of that, buyers still need to cover removalists, cleaning, utility setup and internet connection. Those costs are easy to ignore in a spreadsheet because they do not feel as formal as duty or legal fees, but they still come out of the same savings pool.
## Ongoing Costs That Start After Settlement
The mortgage is only one part of owning a home. Once settlement is done, the regular bills begin. This is where buyers who stretched to get across the line can feel caught out, because the mortgage payment is now sitting beside rates, insurance, levies, utilities and repairs.
### Council rates, water and utilities
These costs sit outside the mortgage and they affect monthly affordability straight away. AIC NSW notes that rates and taxes are part of settlement adjustments, and Australian lenders also remind buyers to factor in ongoing costs such as council rates and insurance. Utility connection and internet setup costs are another common move-in expense.
Before committing, ask for the latest rates notice, check water charges where relevant and price the practical move-in costs, not just the loan repayment.
### Home insurance and contents insurance
Home insurance sits among the most important ongoing costs of homeownership, and one of the most frequently underestimated in terms of what adequate cover actually costs.
Two categories of cover matter here.
- Buildings insurance protects the physical structure of your home such as walls, roof, floors, and permanent fixtures.
- Other structures on the property, against events like fire, storm, flood, and theft.
Contents insurance protects the belongings inside:
- furniture
- electronics
- appliances
- clothing
- everything else you own
Policies that combine both under a single product, such as [NRMA home and contents insurance](https://www.nrma.com.au/home-insurance/buildings-contents-combined-insurance), cover the full asset (the structure and its contents) with the convenience of a single policy and a single renewal date.
The cost of a combined policy varies based on your property's location, construction type, claims history, and the sum insured you nominate for both buildings and contents. Getting those sums right matters.
Many homeowners insure their buildings based on the original purchase price rather than the current cost to rebuild, which, given rising construction labour and material costs in recent years, can leave a significant gap between what a claim pays out and what full reinstatement actually requires. Reviewing both figures annually, rather than simply accepting automatic renewal amounts, is one of the most valuable insurance habits a homeowner can develop.
### Strata or body corporate fees
If you are buying an apartment, townhouse or property in a managed community, strata or body corporate fees can be a major part of the real cost beyond mortgage repayments. In NSW, all owners in a strata scheme are charged yearly levies, usually paid quarterly. In Victoria, annual owners corporation fees cover administration, maintenance, insurance and other ongoing costs. In Queensland, body corporate contributions fund regular maintenance, insurance, common property renewal and, where needed, extra special contributions.
A very low levy is not automatically good news. That can be a sign the scheme is collecting less for maintenance or future common property work, which may raise the chance of special levies later. That is an inference from how NSW, Victorian and Queensland schemes fund administration, insurance, maintenance and sinking or maintenance works.
### Maintenance, repairs and emergency buffer
Even a tidy property can cost money soon after settlement. Building inspections commonly cover roofs, subfloors, wet areas, drainage, structural elements, doors, windows, retaining walls and safety items, and a quality report will classify defects and recommend repairs or further specialist investigation. Owner Inspections also says its reports cover issues across plumbing, structural condition and other defects that affect the property’s quality and integrity.
That is why older homes usually need a bigger year-one repair buffer than newer homes, and why a well-presented property should never be assumed to be low risk. Roofing work, plumbing faults, drainage problems, repainting, electrical issues or a failed hot water system can all land quickly, especially if they were already brewing before purchase. A pre-purchase inspection does not remove those costs, but it gives you a better chance to budget for them before they hit.
## How an Inspection Helps Prevent Budget Blowouts
Open homes are built to sell the property, not diagnose it. You might notice layout, light and street appeal, but you will not usually get a clear view of roof void issues, subfloor problems, drainage concerns, termite evidence or whether a crack is cosmetic or a sign of movement. A licensed inspector looks at the property differently and documents the defects in a way a buyer can actually use.
That report can help a buyer do four practical things. It can show which repairs are urgent and which can wait. It can help estimate near-term maintenance spend. It can support negotiation when defects affect value, safety or repair cost. And it can help a buyer walk away from a property that no longer fits the budget or the risk appetite. That is why inspections are better thought of as a decision-support tool, not just a transaction cost.
## Four Buyer Scenarios that Change the Total Cost
### First-home buyer purchasing a house
A first-home buyer often focuses on the deposit and the monthly repayment, then gets hit by duty, legal costs, lender fees and inspection costs. If the deposit is below 20%, LMI may be part of the bill too. The smart move is to price duty with the state calculator, check concession eligibility and book the inspection before your cash buffer is spoken for elsewhere.
### Apartment buyer dealing with strata costs
Apartment buyers often underestimate levies and overestimate how much “the building” will take care of for them. In reality, strata or body corporate fees fund insurance, administration, common property maintenance and future works, and special contributions can be raised when budgets fall short. A strata report matters because the sticker price of the unit is only part of what you are signing up for.
### Buyer considering an older home with repair risks
Older homes can still be great buys, but they usually deserve a wider margin for repairs. Roof issues, subfloor problems, drainage defects, cracking, leaks, outdated wet areas and termite risk can all turn a “character home” into a much more expensive first year than expected. This is where a detailed building and pest report gives buyers a more honest ownership budget.
### Auction buyer who needs inspection timing sorted early
Auction buyers have less room for delay and far less room for mistakes. NSW, Victoria and Queensland all make the same practical point in different ways: there is no cooling-off period for a successful auction purchase. In Queensland, the government states plainly that you still have to settle even if the house does not pass inspections. That is why inspections, finance checks and contract review need to happen before bidding, not after.
## A Practical Checklist Before You Make an Offer
Treat this as a short buying process, not a loose list.
1. Estimate transfer duty or stamp duty with the correct state calculator and check whether any first-home or principal place of residence concession applies.
2. Get a conveyancing quote and ask what searches, registration fees and settlement tasks are included.
3. Confirm lender fees and LMI exposure before you make the offer, not after.
4. Book a building inspection, and a [pest inspection](/timber-pest-inspections) where relevant, before exchange where possible, or before auction day if the property is going to auction.
5. Review strata records or body corporate information for units, apartments and townhouses.
6. Get insurance estimates for the building and contents so the ongoing budget is real, not assumed.
7. Check council rates, water charges and move-in setup costs such as utilities and internet.
8. Keep an emergency repair buffer for defects the inspection flags or for items likely to need work in year one.
Book an
Inspection
}
buttonHref="/building-and-pest-inspections"
variant="primary"
/>
### How Poor Ventilation Causes Mould, Condensation and Hidden Defects
Source: https://ownerinspections.com.au/articles/poor-ventilation-mould-hidden-defects
Published: 2026-04-13 | Category: Defect Investigation
Author: Maison Azdari
Poor ventilation traps moist air inside a home. When that air hits a colder surface, it can reach dew point and turn into condensation. If that keeps happening, mould can grow and hidden damp can build up inside wall cavities, roof spaces and subfloors. In Australian homes, that is not just an air-quality nuisance. It can also point to concealed building defects, water ingress, or moisture damage that needs proper inspection.
**Source:** [WA Health](https://www.health.wa.gov.au/~/media/Corp/Documents/Health-for/Mould/Indoor-Mould--Health-Risk-Assessment-and-Management.pdf), [Asthma Australia Housing Survey Report](https://asthma.org.au/what-is-asthma/statistics/), and [Australian Bureau of Statistics](https://www.abs.gov.au/statistics/health/health-conditions-and-risks/asthma/latest-release)
## Why Poor Ventilation Becomes a Building Problem
Poor ventilation becomes a building problem when moisture-laden air cannot escape. Repeated dampness settles on colder surfaces such as windows, external walls, ceiling linings and poorly insulated corners. Over time, that moisture can move beyond what you can see and affect insulation, timber, plasterboard and floor areas. Condensation is the mechanism, mould is the visible symptom, and concealed deterioration is the bigger risk.
Australian guidance treats condensation as more than a comfort issue because it can lead to damp, mould, rot and loss of amenity, which is why the NCC includes condensation management provisions aimed at removing internal moisture from buildings.
## Why Ventilation Matters in Australian Homes
Homes create moisture every day. Showering, cooking, drying clothes indoors and even breathing all add water vapour to the air. That is normal. The problem starts when the home does not get enough air exchange to move that moisture out before it settles on cooler surfaces.
This matters even more in newer or upgraded homes. Better insulation, draught sealing and tighter construction can improve comfort and energy performance, but they can also reduce unintended air leakage. If that tighter envelope is not balanced with proper ventilation, indoor humidity can rise and stale air can build up. A home can feel warm and dry in winter while condensation is still forming behind a wardrobe, inside a window reveal, or in a roof void.
Australian rules reflect that balance. The NCC requires ventilation to habitable rooms, bathrooms, laundries and other occupied rooms, and its condensation provisions are intended to reduce illness or loss of amenity caused by excessive internal moisture.
Book a Building
Inspection
}
buttonHref="/pre-purchase-inspections"
variant="secondary"
/>
## How Poor Ventilation Turns Into Condensation and Mould
### Warm air, cold surfaces and the dew point
The chain is simple. Warm indoor air holds moisture. When that moist air meets a colder surface, the air can no longer hold the same amount of water vapour, so liquid water forms. That temperature threshold is the dew point. You do not need a roof leak for this to happen. It can happen from normal household moisture if the home has high indoor humidity, cold internal surfaces, thermal bridging, or weak airflow.
### Why condensation is often the first visible sign
Condensation on windows in winter is often the first clue. It may also show up as damp wardrobe walls, black spotting in room corners, water beads on aluminium window frames, or mould on the wall behind furniture pushed against an external wall. These are usually the coldest and least ventilated parts of the room. Because the moisture event happens over and over, the same areas keep showing the same symptoms.
### Why mould is often not the first problem, but the second
Mould usually follows moisture. It is rarely the starting point. NSW Health notes that mould needs moisture to grow, and Better Health Victoria lists condensation from cooking, showering, indoor clothes drying and poor air circulation among common indoor causes.
## Where Hidden Defects Usually Form
### Roof spaces
Roof spaces often hide ventilation-related moisture problems because they are out of sight and rarely checked by owners. Warm moist air can move upward from bathrooms, laundries and living areas, then condense on colder framing, sarking, metal roof sheets or insulation. Damp insulation loses performance, timber can stay wet for too long, and mould can establish before there is any obvious stain on the ceiling below. NCC water and moisture rules exist because both external water entry and internal moisture build-up can damage building elements.
### Subfloors
Subfloors are another common trouble spot. Ground moisture, blocked vents, poor clearance, plumbing leaks and stale air can all keep the area damp. YourHome notes that underfloor and wall cavity moisture may be caused by poor subfloor ventilation, excess moisture, leaking plumbing or condensation build-up, while NSW Health says poor sub-floor ventilation can worsen damp problems. That means a musty smell indoors may be coming from below the floor, not from the room where you notice it.
### Wall cavities and window reveals
Wall cavities and window reveals are where moisture becomes expensive because the damage is easy to miss. YourHome warns that condensation can occur inside walls, ceilings and floors as interstitial condensation. WA Health also notes that mould can be present behind walls or under carpets even if nothing obvious is visible. In practice, that is why bubbling paint, recurring mould near skirtings, or a damp smell from a built-in robe should not be brushed off as surface grime. Those clues may be pointing to hidden damp inside the wall system or around the window opening.
## Warning Signs Homeowners and Buyers Should Not Ignore
If you are seeing one of these signs once, monitor it. If you are seeing several of them together, or the same sign keeps returning, it is time to treat it as a moisture problem instead of a cleaning problem. NSW Health, ACT guidance and WA guidance all focus on reducing moisture, improving ventilation and fixing building faults, not just wiping mould away.
Watch for:
- recurring mould in the same spot
- condensation on windows most mornings in cooler weather
- a musty smell in closed rooms or wardrobes
- bubbling paint or peeling plaster
- damp wardrobe walls or mould behind furniture
- mould near skirting boards, ceiling edges or window reveals
- stale air that lingers after showering or cooking
- staining around vents, air returns or ceiling penetrations
When several of these signs appear together, there is a fair chance the home has an underlying moisture source, inadequate roof space ventilation, poor subfloor ventilation, water ingress, or a mix of those issues.
Explore Moisture
Testing Services
}
buttonHref="/services"
variant="secondary"
/>
## Symptom, Likely Cause and What to Do Next
| Symptom | Likely cause | What to do next |
| -------------------------------- | --------------------------------------------------------------------- | ---------------------------------------------------------------------------------- |
| Condensation on windows | High indoor humidity, cold glazing, weak airflow | Check daily moisture sources, use exhaust fans, inspect ventilation and insulation |
| Musty smell in a bedroom or robe | Hidden damp, poor air circulation, wall cavity moisture | Move furniture, inspect external walls, test for hidden moisture |
| Bubbling paint or peeling finish | Repeated condensation, water ingress, trapped moisture | Check for leaks and moisture behind the surface |
| Recurring ceiling mould | Bathroom steam, roof space moisture, poor exhaust or roof ventilation | Check whether exhaust fans vent outside and inspect the roof void |
| Damp smell from floors | Subfloor moisture, blocked vents, plumbing leak | Inspect subfloor ventilation and moisture sources |
This table reflects the way Australian guidance approaches mould: look for moisture, airflow and building faults together, not as separate issues.
## How Heating, Cooling and Ventilation Systems Can Worsen the Issue
Heating and cooling systems can help or hurt, depending on the type of system, how the home is built, and how well everything is maintained. YourHome notes that ducted air systems may recirculate indoor air without introducing fresh outdoor air or removing pollutants. It also says evaporative cooling systems can increase indoor humidity and may increase mould or dust mite levels.
Maintenance matters too. Better Health Victoria says mould linked with damp buildings can worsen asthma and allergic conditions, while YourHome recommends regular cleaning of ducts and filters in ducted systems and reverse-cycle air conditioners. That does not mean servicing alone solves the problem. A cleaned system cannot fix hidden damp in a wall cavity or a wet subfloor.
Annual professional maintenance including checking ventilation pathways, cleaning filters, and inspecting ductwork is essential. For Canberra homes with Bonaire ducted systems, [Bonaire servicing in Canberra](https://climateplus.com.au/bonaire-gas-heating-systems-servicing-maintenance/) by licensed technicians covers exactly these checks: gas pressure testing, carbon monoxide assessment, duct inspection, and airflow performance.
All of these components directly affect how well the system manages moisture and ventilation throughout the home.
## Area of Home, Common Ventilation Issue and Hidden Defect Risk
| Area of home | Common ventilation issue | Hidden defect risk |
| ----------------------- | ------------------------------------------------------------ | -------------------------------------------------------------- |
| Bathroom | Weak or absent exhaust, steam not vented outside | Ceiling mould, damp insulation, wet framing |
| Roof void | Limited roof space ventilation, warm moist air entering void | Condensation on framing, mould, reduced insulation performance |
| Subfloor | Blocked vents, trapped ground moisture, stale air | Timber decay, odours, damp flooring |
| Wardrobes and cupboards | Low airflow against external walls | Hidden damp, mould behind stored items |
| Bedrooms | Condensation on windows, furniture against cold walls | Mould in corners, window reveal damp, plaster damage |
These are the places inspectors pay attention to because they are common moisture traps and often show the first signs of concealed building defects.
## Why This Matters Before You Buy a Property
A property can present well at an open home and still have a moisture problem. Fresh paint, open windows, good weather, or temporary cleaning can hide the pattern. Interstitial condensation inside walls, damp insulation in the roof void, or mould beneath carpets will not always show up in a quick walk-through. That is not guesswork. Australian guidance recognises that condensation can occur inside construction systems and that mould may be hidden behind walls or under carpets.
For buyers, the big risk is misreading the clue. A small patch of mould in a corner may be minor, but it can also be the visible edge of a broader problem involving indoor humidity, blocked subfloor vents, water ingress or poor exhaust. Repeated condensation on windows can point to a building-performance issue rather than a housekeeping issue, especially in a tightly sealed or poorly balanced home. That is an inspection question because repair costs rise fast once framing, plasterboard, insulation or floor materials stay wet for too long.
A good [pre-purchase inspection](/pre-purchase-inspections) does more than note “mould present”. It helps separate cosmetic staining from signs that deserve closer moisture testing before exchange or settlement. That gives buyers clearer risk, better questions for the agent or seller, and a stronger basis for deciding whether to proceed, negotiate, or investigate further. This is an inference from how concealed moisture behaves in buildings and why the NCC and health guidance focus on moisture control rather than surface cleaning alone.
## How a Professional Inspection Finds What You Can’t See
A professional inspection starts with the visible pattern. That includes staining, window condensation, mould location, odours, cracked or bubbling finishes, and clues around bathrooms, laundries, subfloors and roof spaces. The goal is not only to see mould. It is to work out why that mould or dampness is there.
From there, an inspector may use moisture meter readings to compare suspect areas with drier parts of the home and look for hidden damp behind walls, near skirtings, around window reveals, or below wet areas. Thermal imaging can also help identify temperature anomalies linked to water leaks, shifted insulation and other issues, which makes it useful for spotting areas that need closer checking. A thermal image does not diagnose the cause on its own, but it can show where moisture or missing insulation may be affecting the building fabric.
## Buyer vs Homeowner, Best Next Step
| Situation | Best next step |
| ---------------------------------------------------------- | --------------------------------------------------------------------------------------- |
| Homebuyer seeing mould or condensation before purchase | Pre-purchase building inspection with moisture testing and thermal imaging where needed |
| Homeowner with recurring mould in the same room | Maintenance inspection focused on moisture source and ventilation |
| Homeowner with musty odour but no visible mould | Hidden moisture investigation of roof void, subfloor, wall cavities and wet areas |
| Buyer seeing bubbling paint or damp wardrobe walls | Inspect for concealed damp, water ingress and ventilation issues before committing |
| Occupant with one-off small mould spot after a known spill | Dry and clean the area, then monitor for recurrence |
The dividing line is recurrence, hidden symptoms, or purchase risk. Once those are present, inspection is usually a better next step than cosmetic cleaning alone.
## Fix the Cause First, Then the Mould
The order matters. Cleaning visible mould before you deal with the moisture source often leads to the same patch returning. NSW Health says mould is likely to come back unless the cause is treated, and ACT guidance says reducing mould growth means improving ventilation, fixing leaks and cleaning condensation as well as cleaning mould itself.
A sensible sequence looks like this:
- Identify the moisture source
- Improve ventilation, or fix leaks, drainage, exhaust or system issues
- Dry affected areas properly
- Assess concealed damage in roof spaces, subfloors, wall cavities and around openings
- Remediate mould and replace materials that cannot be dried or cleaned properly
That sequence fits Australian health and building guidance. Moisture control comes first. NSW Health, ACT Government and WA Health all focus on preventing and controlling moisture, maintaining the building envelope and dealing with water damage quickly. When water ingress is involved, NCC provisions are aimed at preventing outside water and internal moisture accumulation from damaging building elements and creating musty, damp and unhealthy conditions.
Arrange a Pre-Purchase
Inspection
}
buttonHref="/building-and-pest-inspections"
variant="primary"
/>
### 6 Hidden Home Issues to Check Before Replacing Your Living Room Furniture
Source: https://ownerinspections.com.au/articles/hidden-home-issues-living-room-furniture
Published: 2026-04-08 | Updated: 2026-04-28 | Category: Defect Investigation
Author: Maison Azdari
Before buying a new sofa or entertainment unit, check whether the real problem is hidden in the walls, floors, moisture levels, or layout of the room.
A living room can feel tired for reasons that have nothing to do with the sofa. Musty air, warped boards, cracked walls, hidden leaks, or termite damage can make the space feel old, uneven, or uncomfortable. Many homeowners only notice the symptom. The room smells stale, the floor feels off, or the wall behind a cabinet looks marked. It is easy to assume the furniture is the whole problem.
That assumption can be expensive. Replacing a lounge suite, coffee table, rug, and TV unit often costs far more than expected. If you later discover water ingress, mould, movement, or timber pest damage, your new furniture may end up sitting in the same damaged room. You may also need to [dispose of old furniture](https://www.1300rubbish.com.au/services/furniture-removal/) before delivery day, which adds another cost and another layer of logistics.
*References:*
- [ABCB mould statistic](https://www.abcb.gov.au/sites/default/files/resources/2024/Final-Report-Impact-Analysis-NC-Economics.pdf)
- [ABCB condensation statistic](https://www.abcb.gov.au/sites/default/files/resources/2024/Final-Report-Impact-Analysis-NC-Economics.pdf)
- [QBCC termite inspection interval](https://www.qbcc.qld.gov.au/sites/default/files/documents/publication-termite-management-systems-homeowners-builders.pdf)
Book a
Maintenance Inspection
}
buttonHref="/maintenance-inspections"
variant="secondary"
/>
## Symptom to Hidden Issue Guide
| What You Notice | Possible Hidden Issue | What to Check Next | Relevant Owner Inspections Service |
| ---------------------------------------------------- | ---------------------------------------------------------- | ----------------------------------------------------------------------------------------- | ------------------------------------------------------------------------------------------------------------------------------------------------------------------------- |
| Musty smell near the sofa or TV unit | Damp, poor ventilation, mould growth, water ingress | Pull furniture away from the wall, inspect skirtings, look for staining or bubbling paint | [Mould Inspections](/mould-inspections), [Defect Investigation Reports](/defect-investigation-reports), [Maintenance Inspections](/maintenance-inspections) |
| Dark marks behind furniture | Condensation, damp, mould | Check airflow, wall finish, nearby windows, and signs of recurring moisture | [Mould Inspections](/mould-inspections) |
| Wall cracks in the living room | Cosmetic shrinkage, footing movement, settlement | Measure crack width, check if cracks are growing, look at doors and windows nearby | [Defect Investigation Reports](/defect-investigation-reports), [Pre-Purchase Inspections](/pre-purchase-inspections), [Pre-Sale Inspections](/pre-sale-inspections) |
| Coffee table rocks or rug will not sit flat | Uneven flooring, subfloor issues, movement | Check for sloping, soft spots, bounce, gaps, or floor finish lifting | [Maintenance Inspections](/maintenance-inspections), [Defect Investigation Reports](/defect-investigation-reports), [Pre-Purchase Inspections](/pre-purchase-inspections) |
| Soft or damaged skirtings | Moisture, decay, termite damage | Tap timber, inspect paint finish, look for frass, blistering, or softness | [Timber Pest Inspections](/timber-pest-inspections), [Building and Pest Inspections](/building-and-pest-inspections) |
| Ceiling stains or damp smell after rain | Roof leak, flashing issue, drainage problem, water ingress | Check if the staining worsens after rain and whether plaster or flooring is lifting | [Roof Inspection](/roof-inspection), [Defect Investigation Reports](/defect-investigation-reports), [Maintenance Inspections](/maintenance-inspections) |
| Room still feels wrong after cleaning and repainting | Defect hidden under finishes or poor room setup | Rule out building issues before changing furniture layout or size | [Maintenance Inspections](/maintenance-inspections), [Defect Investigation Reports](/defect-investigation-reports) |
## 1. Moisture, Damp and Mould Behind Furniture
### Why furniture often hides the issue
Large sofas, entertainment units, bookshelves, and cabinets often sit hard against internal and external walls. That can reduce airflow and hide early signs of trouble. A wall may look fine from the front of the room, while the space behind the furniture tells a very different story.
Damp patches, mould growth, flaking paint, staining, swollen skirtings, and warped flooring often show up first in spots people do not inspect often. If the room has a cold wall, limited ventilation, past water ingress, or ongoing condensation, furniture can act like a screen that delays detection.
A fresh sofa will not fix a moisture problem. In some cases, it can make the issue harder to spot until the damage spreads to the new piece.
### Signs readers might notice
- A musty smell that returns even after cleaning
- Dark marks or mould behind furniture
- Bubbling paint or plaster staining
- Swelling in skirting boards
- Warped timber flooring or lifting edges
- Mould that keeps returning after being wiped away
### What to do next
Pull larger items away from the wall and inspect the back edge of the room carefully. If marks are recurring, the question is not how to clean them better. The question is why moisture is still present.
This is where service-led help matters. [Mould Inspections](/mould-inspections) can help locate affected areas, while [Defect Investigation Reports](/defect-investigation-reports) and [Maintenance Inspections](/maintenance-inspections) are useful when the source may be a building defect, leak, or ongoing moisture problem.
## 2. Wall Cracks, Movement and Settlement
### Why a tired room may really be a defect clue
Many people look at cracked paint lines or wall marks and think the room just looks old. Sometimes that is true. Small cosmetic cracking can happen with normal movement, ageing materials, or minor shrinkage. But some cracks point to a bigger issue that deserves a closer look.
A living room often makes these signs obvious because it is one of the most used spaces in the home. Good light, plain wall finishes, and long sightlines make cracking easier to notice around openings, cornices, and skirtings.
### What to mention
Look out for:
- Hairline cracks that stay stable
- Wider cracks that keep returning after patching
- Cracks near doors, windows, or corners of openings
- Doors or windows nearby that start sticking
- Gaps opening up around skirtings or cornices
Not every crack is a structural problem. Some are cosmetic and can be monitored. But if cracks are widening, returning, or appearing with sticking joinery and visible movement, further assessment makes sense.
### When to get more certainty
If you are preparing to buy, [Pre-Purchase Inspections](/pre-purchase-inspections) can help flag visible concerns before you commit. If the issue is more specific or ongoing, [Defect Investigation Reports](/defect-investigation-reports) can help identify whether you are looking at cosmetic wear, footing movement, or another building problem. Sellers who want a clearer picture before listing can also use [Pre-Sale Inspections](/pre-sale-inspections).
## 3. Uneven Floors or Subfloor Problems
### Why furniture may not be the true issue
Sometimes the first clue is not dramatic. A coffee table rocks in one corner. The sofa feels uneven. A media unit needs packing under one leg. A rug never sits flat. These can look like furniture problems, but the room itself may be out of level or affected by subfloor conditions.
Flooring issues can show up in different ways. Timber floors may feel bouncy, sloped, soft, or noisy. Finished surfaces may cup, lift, or separate. In older homes, movement in stumps or subfloor framing can leave a room feeling subtly off long before it becomes obvious to the eye.
### What to tell readers
New furniture cannot correct a floor issue. It may hide it for a while, but it will not make the room stable. If the floor feels uneven or the room feels unsteady underfoot, check the condition before upgrading anything expensive.
This is where [Maintenance Inspections](/maintenance-inspections), [Defect Investigation Reports](/defect-investigation-reports), and [Pre-Purchase Inspections](/pre-purchase-inspections) can all be relevant, depending on whether you already own the property or are still deciding whether to buy.
## 4. Termites and Timber Pest Damage
### Why this belongs in a living room article
Living rooms contain more timber than many people realise. Skirtings, architraves, floorboards, trims, door frames, and concealed framing can all be affected by timber pest activity. Damage in these areas can be mistaken for age, wear, or poor paintwork.
### Signs to mention
Readers may notice:
- Hollow-sounding timber
- Bubbling or blistering paint
- Soft skirtings or trim
- Warped or deteriorating timber
- Small piles of frass or unexplained timber breakdown
Visible damage does not confirm active termites. Moisture, decay, and past repairs can create similar signs. But it is enough to justify a closer look.
### What inspection path fits best
[Timber Pest Inspections](/timber-pest-inspections) are the direct fit when the concern centres on termite damage, termite risk, borers, or decay fungi. [Building and Pest Inspections](/building-and-pest-inspections) make sense when you want both the general building condition and timber pest issues assessed together, especially before purchase.
## 5. Leaks, Drainage Problems and Water Ingress
### How the living room becomes the symptom
A living room may be where the stain appears, but not where the problem starts. Water can travel from roof defects, failed flashings, blocked gutters, poor drainage, failed waterproofing, or plumbing issues elsewhere in the home.
That is why the symptom can feel confusing. The room smells damp after rain, yet there is no obvious leak. The ceiling has a stain, but the wall below it looks dry. The floorboards swell in one area, even though the nearest wet area is not in the living room at all.
### Signs readers may notice
- Ceiling staining
- Paint peeling or plaster damage
- Damp smell after rain
- Flooring that swells, cups, or lifts
- Recurring mould in one localised area
- Stains that reappear after repainting
### Why this should be checked first
Replacing the sofa while the roof, drainage, or water entry point remains unresolved usually leads to the same problem coming back. In some cases, new furniture becomes part of the damage story.
Relevant internal pathways here include [Roof Inspection](/roof-inspection), [Defect Investigation Reports](/defect-investigation-reports), [Mould Inspections](/mould-inspections), and [Maintenance Inspections](/maintenance-inspections).
Explore Defect
Investigation Reports
}
buttonHref="/defect-investigation-reports"
variant="secondary"
/>
## 6. Before You Spend on Furniture, Check Whether the Room Setup Is the Real Problem
### Room setup can be the issue even when there is no defect
Once moisture, movement, pests, and leaks are ruled out, the room may still feel wrong for reasons that have nothing to do with defects. The sofa may be too large, the walkways may be blocked, the room may have no clear focal point, or the materials may not suit kids, pets, or daily use.
This is the point where furniture advice becomes useful again. There is no value buying a better lounge if the room only feels awkward because the scale is wrong or the circulation path is poor.
### Common setup problems include:
- Furniture that is too large or too small for the room
- Layouts that block movement
- No clear walkway between key points
- Materials that do not suit pets, children, or heavy use
- No plan to dispose of old furniture before replacement arrives
Once the room itself has been checked, the original furniture checklist becomes much more useful.
## Smart Furniture Checks to Reuse from the Original Draft
### Measure the living room and delivery path
Start with the actual floor area, not guesswork. Measure the wall lengths, window positions, doorway clearances, and the footprint available once walkways are left clear. Then check the access route into the home. Hallways, staircases, corners, lifts, entry doors, and internal doorways can all stop a large piece from reaching the room.
Be sure to measure the floor area where the furniture will sit, check hallways, staircases and doorways, and make a plan to dispose of old furniture before the new pieces arrive.
### Think about the living room layout
Most living rooms work best when there is a clear focal point. That could be a window, fireplace, TV wall, or conversation area. Place the largest items first, then use smaller pieces to support the layout. Keep traffic flow simple so people can move through the room without squeezing past corners or cutting in front of seated people.
A common mistake is buying individual items that look good on a shop floor but do not work together once they are in the room.
### Choose the right sofa size
A large sofa can overwhelm a modest living room and make the whole space feel cramped. A small sofa can make a bigger room feel empty or unfinished. Think about household size, how often the room is used, and whether the sofa needs to support everyday lounging, entertaining, or both.
Sizing should match the room and the way the household actually lives in it.
### Consider comfort and everyday use
Looks matter, but so does comfort. A sofa that looks sharp online may not offer the back support, seat depth, or firmness your household needs. If possible, test key pieces in person. Sit in them for longer than a few seconds. Think about how the room is used at night, on weekends, and during longer periods at home.
### Pick materials that suit your lifestyle
Material choice affects cleaning, wear, and long-term satisfaction. Fabric may feel softer and warmer, while leather can be easier to wipe down. Households with pets, children, or high daily use often do better with durable, easy-clean finishes and realistic expectations about upkeep.
The best material is not the one that looks best on day one. It is the one that still works after a year of real life.
### Set a realistic budget
Living room upgrades often cost more than the sticker price. Delivery, assembly, protection plans, rugs, lamps, room touch-ups, and disposal costs all add up. If your old lounge cannot be donated, recycled, sold, or collected easily, you may also need to pay to dispose of old furniture before the replacement arrives.
A realistic budget leaves room for the furniture itself and the practical costs around it. It also stops you spending heavily on new pieces before you know whether the room needs inspection or repair.
## Hidden Issue vs Replacement Decision
| Issue | Why New Furniture Won’t Fix It | Repair or Inspection Priority | Replace Furniture Now or Later? |
| ------------------------------------ | ----------------------------------------------------------------------- | ------------------------------------------------------------ | ------------------------------- |
| Damp or living room mould | The moisture source remains and may damage new furniture | Identify and fix moisture source, then assess mould extent | Later |
| Wall cracks and movement | New furniture does not address settlement or footing movement | Monitor minor cracking, investigate if widening or recurring | Usually later |
| Uneven floor living room | Furniture may wobble and the room may still feel unstable | Assess floor level, subfloor, and movement signs | Later |
| Termite damage | New items do nothing for timber pest activity or damaged elements | Arrange timber pest or combined inspection | Later |
| Water ingress or leak | Stains, odours, and swelling usually return until water entry is fixed | Trace source and repair first | Later |
| Poor layout or wrong furniture scale | The room may simply be set up badly | Re-measure, replan, then replace if needed | Now, if defects are ruled out |
| Comfort or wear only | The room condition may be fine and the furniture may truly be the issue | Compare comfort, durability, and budget | Now |
## Furniture Checklist After the Room Is Cleared
| Furniture Decision | What to Measure or Assess | Common Mistake | Better Choice |
| --------------------- | -------------------------------------------------------------------- | ---------------------------------------------- | ------------------------------------------------ |
| Sofa size | Room width, depth, wall space, walkway clearance | Buying the biggest sofa that fits the wall | Match size to room scale and daily use |
| Layout | Focal point, traffic flow, conversation zones | Pushing everything against the walls | Place large items first, then refine |
| Delivery access | Doorways, hallways, stairs, lift size, corners | Measuring the room but not the access path | Check the full delivery route |
| Comfort | Seat depth, back support, firmness, arm height | Choosing on looks alone | Test comfort for real daily use |
| Material | Pets, children, spills, sun exposure, cleaning needs | Choosing delicate finishes for busy households | Pick practical surfaces and realistic upkeep |
| Budget | Furniture cost plus delivery, assembly, rugs, touch-ups | Spending all money on the main piece only | Keep a whole-room budget |
| Old furniture removal | Assess whether to donate, recycle, sell, or dispose of old furniture | Leaving removal until delivery day | Arrange removal before the new furniture arrives |
## When an Inspection Makes More Sense Than a Furniture Upgrade
In some living rooms, the signs are strong enough that inspection should come before shopping. That includes cases where:
- The room smells damp behind the sofa
- Mould keeps returning after cleaning
- The floor feels uneven or bouncy
- Wall cracks seem to be getting worse
- Skirting boards feel soft or look damaged
- Stains reappear after repainting
- You are about to buy, sell, or renovate the property
The best service depends on the concern.
- Use [Mould Inspections](/mould-inspections) when recurring mould, damp, or indoor air concerns are the main issue.
- Use [Timber Pest Inspections](/timber-pest-inspections) when timber damage, soft skirtings, or termite signs need checking.
- Use [Roof Inspection](/roof-inspection) when signs point to ceiling stains, rain-related odours, or possible roof leaks.
- Use [Defect Investigation Reports](/defect-investigation-reports) when the cause is unclear or the issue seems more complex than surface wear.
- Use [Maintenance Inspections](/maintenance-inspections) when you want a wider condition check before planning repairs or upgrades.
- Use [Building and Pest Inspections](/building-and-pest-inspections) or [Pre-Purchase Inspections](/pre-purchase-inspections) before buying, and Pre-Sale Inspections before listing.
## Check the Room Before You Replace the Furniture
Replacing furniture may improve how a living room looks, but it will not solve the wrong problem. Damp, movement, pests, leaks, and flooring issues can all make a room feel old or uncomfortable, even when the furniture is only part of the story.
The smarter order is to rule out hidden property issues first. Once the room is clear, choose replacement furniture based on room size, layout, comfort, materials, budget, and a clear plan to dispose of old furniture before the new pieces arrive.
### End checklist before you buy
- Pull large items away from the wall and check for damp, staining, and living room mould
- Look for wall cracks in the living room and note whether they are stable or growing
- Check whether the floor feels sloped, soft, bouncy, or uneven
- Inspect skirtings and trims for softness, blistering, or termite damage
- Watch for stains, odours, or swelling that suggest water ingress
- Measure the room and delivery path properly
- Set a budget that includes touch-ups, delivery, and the cost to dispose of old furniture
- Book the right inspection if the room condition still looks uncertain
Request a Quote
for the Right Inspection
}
buttonHref="/contact"
variant="primary"
/>
### Pest Inspection Clues Buyers Miss When Buying a Home
Source: https://ownerinspections.com.au/articles/pest-inspection-clues-buyers-miss-when-buying-a-home
Published: 2026-04-06 | Category: Pest Inspections
Author: Maison Azdari
## Why Do Pest Problems Slip Through at Open Homes?
How many minutes do most buyers spend at an open home before they decide whether to bid or offer? Not long. Add furniture staging, fresh paint, rugs covering floors, and “do not enter” areas like roof voids and subfloors, and it becomes easy for timber pest clues to stay hidden until after settlement.
A pre-purchase pest inspection is a non-invasive, visual inspection of accessible areas to look for evidence of timber pests (like termites and borers) and conditions that increase risk, with findings recorded in a written report. The catch is in that phrase accessible areas. Industry standards for [timber pest inspections](/timber-pest-inspections) set minimum requirements for visual inspection and reporting, but they also assume reasonable access and non-destructive methods.
If the property is headed to auction or you are working with a tight finance and settlement window, this guide gives you practical clues to look for before you book, what a report can and cannot tell you, and how to act on results without panic.
See what inspectors
actually look for
}
buttonHref="/pre-purchase-inspections"
variant="secondary"
/>
## What a Pest Inspection Checks
A pre-purchase timber pest inspection usually aims to visually assess the following, where safe and accessible:
- Interior rooms, especially wet areas (bathrooms, laundry, kitchen)
- Roof void (if there is an access hatch and safe clearance)
- Subfloor (if there is an access point and enough clearance)
- Exterior perimeter, slab edge, weep holes, and attached structures
- Outbuildings within scope (garages, sheds, pergolas), if included
The report is written to a minimum standard for timber pest inspection and reporting, and it is normally described as visual and non-invasive.
### Accessible Areas Explained in Buyer-friendly Terms
Accessible means the inspector can get to it without damaging the building, risking injury, or moving heavy items that are not reasonably movable on the day. In real life, access gets blocked by:
- A manhole covered by stored items or furniture
- A subfloor entry that is locked, painted shut, or too low to safely enter
- A roof access hatch hidden in a cupboard full of belongings
- Gardens, decking, or paving that cover the slab edge or weep holes
When access is limited, the report should state what could not be inspected and why. That matters because termites can be present in concealed locations even when there are no obvious internal signs.
### Non-invasive Limitations Buyers Should Understand
A timber pest inspection is not a guarantee that termites are not present. Termites can travel inside walls, behind linings, or under floors without being visible at the time of inspection. A standard-compliant inspection is designed to identify visible evidence and risk factors, not to open walls or lift fixed finishes.
## The Pest Inspection Clues Buyers Miss at Open Homes
### Outside the home: high-signal risk clues
These are the “small things” that often create termite-friendly conditions. Termites need food (wood) and water, and reducing access to those needs helps reduce risk.
- **Garden beds or mulch bridging weep holes or the slab edge:**
When soil, mulch, or garden edging sits above the slab edge or covers weep holes, it can hide termite entry points and reduce the visible inspection zone.
- **Timber-to-ground contact (fences, sleepers, steps, pergola posts):**
Wood in direct contact with soil is a direct food source and a bridge for pests to reach structural timbers.
- **Poor drainage, ponding, or downpipes dumping near footings:**
Persistent moisture near the house increases termite risk and can also support timber decay fungi.
- **Blocked subfloor vents or bridged barriers:**
Subfloor ventilation matters. Blocked vents can increase humidity and moisture, which helps termites and decay.
- **Tree stumps, stored timber, and clutter against walls:**
Stumps and stored timber can harbour termite activity. Clutter against walls reduces visibility of slab edges and timber features.
### Inside the home: subtle signs buyers dismiss
Many signs look like “general wear” or “water damage”, so they get waved away during a quick walkthrough.
- **Doors or windows suddenly tight in one area:**
Movement can be from moisture changes or structural factors, but it can also appear alongside termite damage when timber loses strength.
- **Bubbling paint or rippled plaster near skirting:**
This can indicate moisture issues. Moisture is a risk factor for timber decay and can also make conditions more attractive to termites.
- **Skirting boards that feel thin, hollow, or “papery”:**
Termites can eat timber from the inside out, leaving a thin outer layer.
- **Pinholes, fine powder, or gritty debris (frass):**
Some borers leave powdery frass. It is not always dramatic, so it is easy to miss.
- **A persistent musty smell in one corner or room:**
Musty odours can point to dampness and poor ventilation, which links to decay risk and can also support pest activity.
- **Fresh paint, new skirting, or recent patching in a small zone:**
Cosmetic touch-ups can be innocent. They can also be used to quickly tidy up visible damage before a campaign.
### Roof void and subfloor: where the best clues live
Most buyers never enter these spaces, and many open homes restrict access. Yet roof voids and subfloors often reveal the clearest signs: mud leads, moisture sources, timber contact points, and previous treatment indicators.
| Clue buyers miss | What it can indicate | What an inspector does next | Why it matters financially |
| ----------------------------------------------------------------------------- | ----------------------------------------------------- | ---------------------------------------------------------------------------------------------- | --------------------------------------------------------------------------------------- |
| Mud tubes on brickwork, piers, or in subfloor | Possible active termite travel paths | Trace leads, look for entry points, note risk level, recommend specialist assessment if needed | Treatment and repairs can be significant, and delay can increase damage costs |
| Weep holes or slab edge covered by soil/mulch | Reduced inspection zone and concealed entry potential | Record as conducive condition and access limitation | Reduces early detection odds, can affect negotiation |
| Leaking pipe, damp subfloor, poor drainage | Moisture source supporting pests and decay | Moisture assessment, document source, recommend repairs | Moisture can drive ongoing maintenance and increase pest risk ([Health Victoria][1]) |
| Timber posts or stairs in contact with soil | Direct access route to timber | Document contact points, recommend separation/repair | Ongoing risk and future treatment planning |
| Evidence of previous termite treatment (bait stations, drill holes, patching) | Prior activity or management plan | Note evidence, recommend records, confirm current monitoring | Past activity is not always a dealbreaker, but you need proof of management and repairs |
[1]: https://www.health.vic.gov.au/environmental-health/pest-control-termites?utm_source=chatgpt.com "Pest control - termites"
## Termites and Timber Pests: What’s Common in Australia
### Termites (subterranean termites are the main structural risk)
Subterranean termites pose a significant concern because they can access a home from underground and travel through concealed pathways. Victorian health guidance explains that [termites need wood and water to survive](https://www.health.vic.gov.au/environmental-health/pest-control-termites), and reducing access to those needs can reduce risk.
### Borers and timber decay fungi are commonly reported findings
Not every report is about termites. Borers can affect certain timbers, and timber decay fungi can become an issue when moisture and poor ventilation persist. These findings can still matter for repair budgets, safety, and future maintenance.
### What do termite costs look like in real terms?
An ACCC determination discussing termite management cites multiple studies and figures used by industry, including:
- A 2012 industry study estimating an average cost for treatment and repair at about [$10,000 per house](https://www.accc.gov.au/system/files/public-registers/documents/D17%2B142812.pdf)
- A Queensland public housing study estimating repairs ranging from $18,000 to $60,000 per property
- A 2003 Archicentre estimate that 650,000 Australian homes became infested over five years, with treatment and repair costs estimated at $3.9 billion
Numbers vary, but the pattern is consistent: early detection and reducing conducive conditions can protect budgets and avoid ugly surprises after settlement.
| Pest type | Typical signs | Where found | Risk level | Next step |
| ------------------------ | --------------------------------------------------------------------------------- | ---------------------------------------------------- | ------------------------------------- | --------------------------------------------------------------------- |
| Subterranean termites | Mud tubes, damaged/hollow timber, unexplained movement, shelter tubes in subfloor | Subfloor, slab edge, perimeter, wall cavities | High when active or strong evidence | Get specialist treatment quote and consider invasive inspection |
| Wood borers | Small exit holes, frass (powder), weakened timber | Roof timbers, older hardwood elements, stored timber | Medium to high depending on extent | Identify timber type, confirm active vs old, repair/replace if needed |
| Timber decay fungi (rot) | Soft timber, musty smell, discoloration, damp areas | Wet areas, subfloor, poorly ventilated zones | Medium, can become high if structural | Fix moisture source, improve ventilation, repair affected timber |
| Other timber pests | Localised damage, surface trails | Various | Varies | Follow report recommendations and monitor |
### How often should you get inspections (and why annual is common)
For ongoing termite risk management, regular inspections are widely recommended. A CSIRO publication on managing termites states that regular inspections, at least annually, are required because many methods do not provide lasting protection against reinfestation by other colonies.
That annual cadence is a common baseline. Some homes may need more frequent checks depending on local risk factors, property design, history of termite activity, and whether barriers have been compromised.
View sample pest
inspection report
}
buttonHref="/articles/termite-inspections-expectations-and-preparations"
variant="secondary"
/>
## How to Choose a Pest Inspector
### Ask about standards, scope, and what “non-invasive” means
A timber pest inspection standard sets minimum requirements for visual inspection and reporting.
Ask the inspector:
- Do you conduct inspections aligned with AS 4349.3 reporting expectations?
- What areas do you inspect by default: roof void, subfloor, perimeter, outbuildings?
- How do you record access limitations and risk ratings?
### Ask what tools are used, and what they can’t prove
Buyers often expect to hear about moisture meters and detection aids. These can help identify moisture and suspect zones, but they do not “see through” every surface or confirm termite absence behind linings.
Good practice is plain talk:
- What the tool detected
- What it suggests
- What needs follow-up to confirm
### Look for a report that is easy to act on
Avoid tick-box reports that do not show photos, locations, and clear next steps. A strong report usually includes:
- Plain-English risk summary
- Annotated photos
- Clear “what to do next” actions (monitor, fix conditions, treat, invasive inspection, get quotes)
- A short call or debrief option so buyers can make decisions fast
Confirm independence and conflicts of interest
Independence matters for negotiation. If the inspection business is also paid for treatment work, ask how they manage conflicts and whether recommendations are evidence-based, not sales-based.
### Check licensing and professionalism where relevant
Pest control licensing is regulated at a state level. For example, Victoria provides information on pest control legislation and licensing.
Even when you are booking a [pre-purchase inspection](/pre-purchase-inspections) rather than a treatment, professionalism, insurance, and clear documentation are signals that the process is taken seriously.
## What to Do if the Report Flags Risk
**If active termites are suspected or confirmed**
- Request a specialist termite treatment quote and ask what method is proposed and why.
- Ask whether an invasive inspection is recommended to confirm extent, especially in high-risk structural zones.
- If you are under auction pressure, use the report to set a hard budget limit or walk-away rule.
**If there is evidence of past termite activity**
Past activity is not always a dealbreaker. The key questions are:
- Was the damage repaired properly?
- Is there a current termite management plan (barriers, monitoring, annual inspections)?
- Are there still conducive conditions that make recurrence more likely?
Ask for treatment records, warranties, and any repair documentation. If records are missing, price in uncertainty and consider a specialist follow-up.
**If the report mainly flags conducive conditions**
This is common and often fixable:
- Improve drainage and downpipe discharge
- Clear weep holes and maintain a visible inspection zone
- Reduce timber-to-ground contact
- Improve subfloor ventilation and reduce moisture
Use the report as a checklist for early maintenance. Also consider ongoing inspections because conditions can change with seasons and landscaping.
## Inspection-day Access Checklist
Make sure the inspector can see what matters:
1. **Confirm keys and access:**
Ensure gates, garages, subfloor entries, and roof hatches are accessible.
2. **Clear the manholes and hatches:**
Remove stored items so the inspector can enter roof void and subfloor access points.
3. **Clear the perimeter:**
Move pot plants, stored timber, and clutter away from external walls and slab edges.
4. **Expose weep holes and slab edges where possible:**
Trim back garden beds and mulch that cover inspection zones.
5. **Note any leaks or damp smells:**
Tell the inspector about known leaks, overflows, or drainage problems.
Book your inspection
or request a quote
}
buttonHref="/timber-pest-inspections"
variant="primary"
/>
### Rising Oil Prices and the Impact on Building Costs and Delays
Source: https://ownerinspections.com.au/articles/oil-prices-building-costs-delays
Published: 2026-03-30 | Category: Building Inspections
Author: Maison Azdari
What does a jump in oil prices have to do with the property you are about to buy, renovate, or repair? Quite a lot. On 30 March 2026, ABC reported Brent crude at US$116.20 a barrel and WTI at US$103.23. Just days earlier, the ACCC said average retail diesel across Australia’s five largest cities had reached 303.5 cents per litre, while regular unleaded petrol averaged 252.2 cpl. When numbers move that fast, the pressure does not stop at the bowser. It flows into freight, machinery, piping, concrete deliveries, builder margins, and project timing.
For homebuyers, homeowners and investors, that matters because hidden defects become more expensive to fix in a rising-cost market. A cracked drain, roof leak, damp subfloor, failed waterproofing detail or termite-damaged framing is never good news. But when diesel, freight and material inputs are surging, each repair can bite harder than it would in a calmer market. That is why this is not just commodity news. It is a property decision issue.
*Source: ACCC, 25 March 2026 retail averages.*
*ACCC weekly fuel price monitoring update, comparing the week to 20 February with the week to 11 March 2026.*
## Oil Prices in Australia Today
Rising oil prices lift building costs in Australia through three main channels: diesel and freight, energy-heavy manufacturing, and oil-linked products such as PVC and bitumen. The result is higher quotes, more supplier surcharges, tighter fixed-price margins, and a greater risk of delays.
Oil benchmark and Australian fuel snapshot, current as at 30 March 2026.
| Measure | Current reading | Why it matters |
| ----------------------------------------------- | ----------------------------: | -------------------------------------------------------------------------- |
| Brent crude | US$116.20/barrel | Main global crude benchmark watched by Australian media and industry |
| WTI crude | US$103.23/barrel | Another global crude benchmark, useful for oil price news context |
| AIP International Market Watch | Published 30 March 2026 | Best Australia-relevant chart source for Brent, Tapis, Mogas 95 and Gasoil |
| ACCC average diesel, 5 largest cities | 303.5 cpl on 25 March | Diesel hits freight, earthmoving, quarries, deliveries and site equipment |
| ACCC average regular unleaded, 5 largest cities | 252.2 cpl on 25 March | Gives broader fuel context, but diesel is more exposed to construction use |
| ACCC move from 20 Feb to 11 Mar | Brent US$73 to US$91 | Shows how fast crude moved in a short period |
| ACCC move from 20 Feb to 11 Mar | Mogas 95 68 to 106 A cpl | Shows refined petrol benchmark pressure |
| ACCC move from 20 Feb to 11 Mar | Gasoil 10 ppm 79 to 140 A cpl | Shows why diesel pressure has been especially sharp |
## Why Oil Prices Affect Building Costs in Australia
### Fuel and freight
Construction runs on diesel. Trucks carry bricks, timber, plasterboard, cable, tiles and pipes. Quarries and concrete suppliers run heavy equipment. Excavators, generators and site vehicles all burn fuel. Diesel has distinct industrial and remote-use demand, which is one reason it can move differently from petrol. Suppliers applying fuel surcharges to sand, concrete and delivered materials, while builders say anything moved by truck is going up.
This pass-through is not theoretical. One quarry operator told ABC diesel accounted for about 20 per cent of overheads at his off-grid site. In civil construction, industry figures cited that diesel makes up about 7.75 per cent of any tender, with roughly $46 million added to a $1 billion project under current conditions. Those examples are from larger projects, but the same mechanics flow into residential work through supplier pricing, delivery charges and subcontractor margins.
### Energy-intensive manufacturing
Not every building cost is directly oil-based, but many are energy-heavy. Construction prices are being pushed up by labour shortages, wage growth and higher input costs. It also notes pressure in concrete and electrical services, and earlier ABS releases linked clay bricks to higher energy, labour and freight costs and cables and conduits to higher copper prices for manufacturing. QBCC now tells Queensland homeowners plainly that timber, steel, concrete and other core materials have risen because of global supply issues, demand spikes and freight challenges.
That matters because even when oil is not the whole story, it can still be the trigger that pushes already-stretched supply chains into a new round of increases. A material might be made locally, but its ingredients, freight, packaging, energy bill or imported components can still carry the oil shock through.
### Oil-derived building products
Some products are much more directly exposed. PVC pipes, resins, certain sealants, coatings, insulation inputs and bitumen all have petroleum links somewhere in the chain. The federal housing minister identified PVC piping sourced from Asia as the most immediate vulnerability, while Australian pipe suppliers warned of price rises and disrupted supply capability.
Book a Pre-Purchase
Inspection
}
buttonHref="/pre-purchase-inspections"
variant="secondary"
/>
## Which Building Materials Are Most Exposed?
Material exposure to higher oil and fuel costs.
| Material | Why it rises | Likely project impact |
| ------------------------ | ------------------------------------------------------------------------------- | --------------------------------------------------------------------------- |
| PVC pipes and fittings | Petrochemical feedstocks, imported resin, shipping and freight | Plumbing, drainage and civil works become dearer, with higher shortage risk |
| Bitumen | Oil-linked input, much of Australia’s bitumen is imported | Road base, driveways and civil works can face sharper cost pressure |
| Concrete | Diesel for quarrying and transport, fuel levies, higher energy and labour costs | Slab pours, footings and structural works become more expensive |
| Bricks | Energy-intensive manufacturing plus freight | Masonry packages and delivered rates rise |
| Copper and cabling | Higher copper prices plus manufacturing pressure | Electrical rough-in and fit-off budgets tighten |
| Steel and reinforcement | Freight, energy and wider industrial input pressure | Frames, structural steel and reinforcement can move up |
| Skip bins and site waste | Diesel and haulage costs | Small line item, but repeated charges add up |
For buyers and owners, the point is not to memorise every commodity. It is to recognise where surprises usually show up. Wet areas, drainage, roofing, external waterproofing, structural cracking, retaining walls, paving and site drainage all rely on materials or deliveries that can become more expensive very quickly.
## How Rising Oil Prices Cause Construction Delays
The first delay effect is simple: higher prices trigger admin and negotiation. Builders reprice quotes, suppliers shorten validity periods, and some firms add emergency fuel levies with little warning. ABC reported suppliers charging emergency levies on everything from sand to concrete, with builders receiving immediate surcharge notices and trying to rework client expectations on fixed-price jobs.
The second delay effect is supply risk. In the same ABC coverage, pipe suppliers warned of looming shortages, and industry sources described disruption that felt “like COVID” again. When a key product is late, work often cannot proceed in the planned sequence. Plumbing rough-in, groundworks, concrete scheduling and fit-off can all shift. That does not always stop the whole project, but it often slows it down.
The third effect is project viability. ABC reported that civil contractors expect some slowdown in projects starting, and industry groups warned some projects could stall without cost-recovery support. On residential jobs, the same risk shows up in a different way: builder caution, slower quote turnaround, tighter contract terms, or owners postponing discretionary renovation stages.
Get a Building
and [Pest Inspection](/timber-pest-inspections)
}
buttonHref="/building-and-pest-inspections"
variant="secondary"
/>
## What This Means for Homebuyers, Homeowners and Investors
If you are buying an existing home, rising oil prices do not change the building itself. They change the cost of putting things right after settlement. That makes due diligence more valuable. Written building inspection report can list faults, whether they can be repaired, how much repairs are likely to cost, and issues that may help negotiate price or contract terms. In a rising-input market, that information matters even more.
If you are planning a renovation, the main risk is not only a higher quote. It is a quote that changes after demolition starts or after a supplier resets pricing. Homeowners should use a detailed contract, understand variations, and keep communication clear because unforeseen issues and changing costs are common drivers of blowouts.
If you are building new, fixed-price contracts may not fully shield the market. Many builders are being forced to absorb oil-related increases under fixed-price arrangements, which can pressure profitability and timelines. This means your price might stay the same on paper for a while, but the risk can reappear through variations, longer lead times, or pressure on completion dates.
## World Oil Prices vs the Price of Oil Today in Australia
When people search price of the oil today Australia, they often mean two different things. One is the global barrel price, usually Brent or WTI. The other is what Australians feel locally, which is retail petrol and diesel pricing. Those are connected, but they are not the same number.
Australia-relevant pricing sits closer to Singapore petrol and diesel benchmarks, plus crude markers such as Brent and Tapis. Australian retail fuel prices are largely determined by international refined fuel benchmarks, crude oil prices and the AUD-USD exchange rate. That is why a crude price headline alone never tells the full story for local builders or homeowners.
Diesel also deserves separate attention. Diesel has its own demand pattern because it is used not only in transport but also in industrial and remote energy applications. That helps explain why diesel can rise faster than petrol and why construction feels the squeeze so quickly.
## How to Reduce Cost and Delay Risk Before You Buy or Build
Start with an independent [pre-purchase inspection](/pre-purchase-inspections). The fee is small compared with buying a property that needs extensive unforeseen repairs, and a written report can help identify faults, repair needs and likely repair costs. That is exactly the kind of information buyers need when building inputs are rising.
Prioritise structural, moisture and drainage defects first. Obvious defects such as faulty roofs, leaking ceilings, cracked walls, damaged foundations, mould, lack of waterproofing and drainage issues. These are the kinds of findings that can become costly quickly when concrete, plumbing and delivered materials are all under pressure.
Budget a contingency and prepare for variations and unforeseen issues. In the current market, that means allowing room not only for the defect itself, but also for freight, material and timing pressure.
Check contract wording. If you are renovating or building, look closely at variation clauses, price validity periods, fuel surcharge wording, delay clauses and lead-time assumptions. Builders and suppliers are actively dealing with surcharge pressure and fixed-price strain.
Use staged repair planning. Not every issue has to be fixed on day one. A clear inspection report lets buyers separate urgent work from work that can wait, helping them protect cash flow when materials are volatile. Owner Inspections’ own buyer and reporting guides support this type of prioritised decision-making.
Speak With
Our Team
}
buttonHref="/contact"
variant="primary"
/>
### What Poor Polished Concrete Floors Look Like
Source: https://ownerinspections.com.au/articles/what-poor-polished-concrete-floors-look-like
Published: 2026-03-26 | Category: Defect Investigation
Author: Maison Azdari
Is the floor meant to look like that, or is something wrong?
Polished concrete floors can look sharp and modern, but they can also show every shortcut. When the finish is poor, it usually looks patchy, distracting, or plastic in places. Sometimes it can also be a warning sign that moisture is moving through the slab, which can keep causing haze, white salts, and sealer failure.
These are the most common red flags that suggest workmanship issues or finish failure:
- Patchy sheen in one room (glossy areas next to dull areas, even after cleaning)
- Swirl arcs, trowel circles, or straight screed lines that jump out under sunlight or downlights
- Cloudy or milky haze that looks like a film sitting on the surface
- Random leopard spot aggregate exposure that looks accidental
- Directional stripes or grinder waves that repeat across a hallway
- Stains sealed in (rust spots, paint overspray, adhesive shadows)
- White salt deposits (efflorescence), often near control joints or external walls
- Sealer peeling, flaking, bubbling, or whitening
- Trip edges at joints, spalling at joint edges, or repairs that sit proud
- Slippery wet zones at entries, ramps, or stairs
Book a
[Pre-Purchase Inspection](/pre-purchase-inspections)
}
buttonHref="/pre-purchase-inspections"
variant="secondary"
/>
## Normal Variation vs Poor Workmanship
Concrete varies, even when it’s done well. The goal is to judge the floor the way it’s meant to be seen, not under harsh defect hunting conditions.
### Normal viewing position
Queensland’s Standards and Tolerances Guide says variations in surface colour, texture, and finish should be viewed where possible from a normal viewing position. It defines this as looking from a distance of 1.5 m or greater with the surface illuminated by “non-critical light” (diffused light, not glancing light).
That matters because polished concrete is very sensitive to raking light. Low-angle sunlight or a strong downlight can make normal texture look dramatic.
### What usually counts as normal variation
- Subtle mottling or tonal changes that are visible up close but not distracting from 1.5 m
- Fine “pepper” variation in a salt and pepper finish
- Minor differences that change with light direction and are not in a repeating pattern
### What usually points to workmanship or system issues
- Repeating patterns such as arcs, circles, parallel stripes, tramlines, or waves
- Coating-like haze that looks like a film and is worse in some areas
- Peeling, whitening, or blistering of a sealer
- White salts that return after cleaning, especially near edges, joints, and external walls
## The Most Common Bad Finish Patterns
### 1. Swirl, trowel, helicopter, and screed marks
#### What you’ll see
Arcs, tight circles, or straight lines that become obvious in sunlight or downlights, especially on light or salt and pepper finishes.
#### Likely causes
Light or nil exposure finishes remove very little concrete. That means slab finishing marks can remain visible. If the slab was not finished evenly, the polishing process can reveal those marks rather than remove them.
#### How serious
Often cosmetic. It becomes a bigger issue when the marks are obvious from normal viewing distance, or when the agreed expectation was a consistent, even finish.
#### What to do next
- Confirm what exposure level was specified (nil/light vs random vs full).
- Ask whether fixing requires deeper grinding that changes the look by exposing more aggregate.
- If buying, photograph the marks under daylight and downlights for negotiation.
### 2. Patchy gloss, cloudy haze, plastic-looking shine
### What you’ll see
A room where parts of the floor look glossy and other parts look dull, or a milky haze that sits on top and won’t clean off. Some areas can look like a coating rather than polished concrete.
#### Likely causes
Often sealer-related: uneven application, contamination, poor prep, or moisture affecting the coating. Patchiness can also appear when different parts of the slab respond differently to the same process.
#### How serious
Cosmetic if it’s stable and not failing. Functional if it’s whitening, peeling, or changing over time, because it can keep failing and become stain-prone.
#### What to do next
- Note where it’s worst: wet zones, near external doors, at slab edges, and along control joints.
- Ask what sealer/densifier system was used and when it was applied.
- If there are moisture signs, avoid a simple reseal and consider moisture checks first.
### 3. Random unexpected aggregate exposure (leopard spotting)
#### What you’ll see
Spotted patches of exposed stone beside smoother paste, often irregular and scattered.
#### Likely causes
Local over-grinding to flatten high spots or chase marks can expose aggregate unevenly. Light exposure finishes are especially sensitive because a little extra grinding changes the look.
#### How serious
Usually cosmetic, but can be a specification problem if the intended look was minimal aggregate exposure.
#### What to do next
- Compare the floor to any sample panel or contract description.
- Decide whether you can live with the look, because fixing often means committing to a higher exposure finish.
### 4. Grinder waves, burn marks, and directional stripes
#### What you’ll see
Repeating stripes or waves that run in the same direction. Hallways show this clearly because the eye follows the length of the space.
#### Likely causes
Machine tracking, inconsistent tooling sequence, rushed passes, or heat and pressure variation.
#### How serious
Usually cosmetic, but often expensive to correct because it may require re-honing and polishing larger areas to blend.
#### What to do next
- Document which rooms show the pattern and the stripe direction.
- Ask what method was used (grind and seal vs honed vs mechanically polished) and what grit sequence was followed.
### 5. Stains locked under the finish
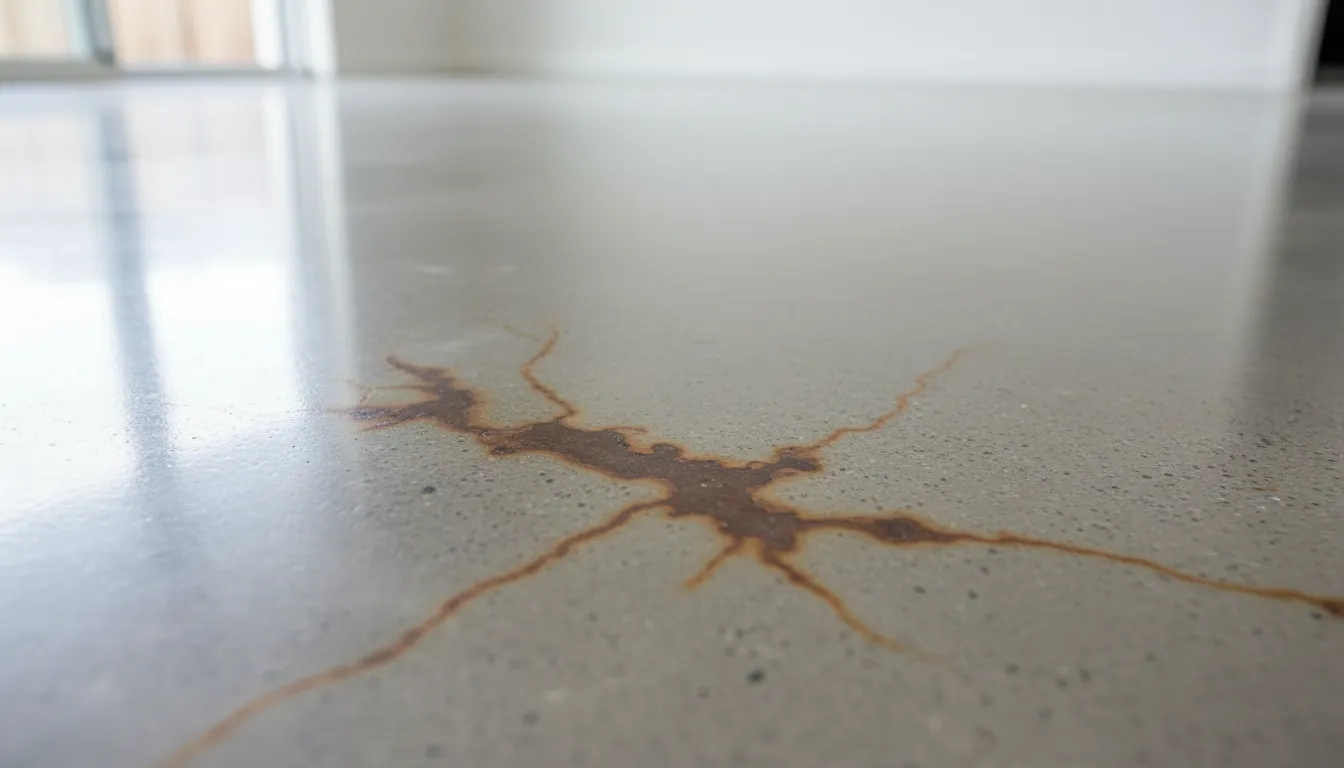
#### What you’ll see
Rust spots, paint overspray, adhesive shadows, tyre marks, or dark blotches that do not lift with normal cleaning.
#### Likely causes
Construction contamination sealed in, metal fragments rusting, or spills not removed before sealing.
#### How serious
Often cosmetic, but stains sealed under the finish can be hard to reduce without stripping and refinishing.
#### What to do next
- Photograph stains clearly and note locations.
- Ask whether stain treatment was attempted before sealing.
- Use repair quotes to support negotiation or rectification requests.
### 6. Efflorescence (white salts) and dampness indicators
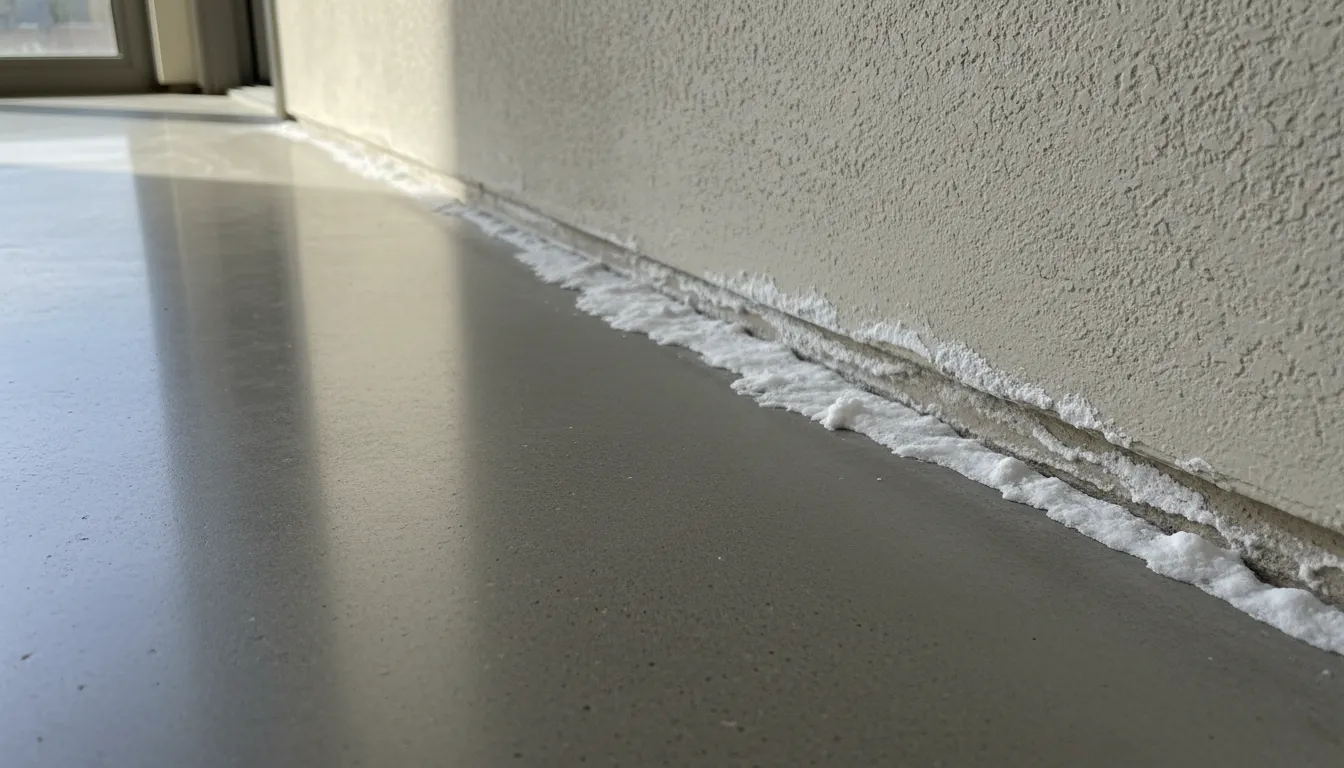
#### What you’ll see
White powdery deposits, crusty patches, or a white haze that returns after wiping. Often near control joints, external wall lines, and slab edges.
#### Likely causes
Moisture moving through concrete can dissolve salts and deposit them as it evaporates. This is often linked to moisture pathways, drainage, or slab edge conditions rather than just “a dirty floor”.
#### How serious
Higher risk than most cosmetic issues because it can indicate ongoing moisture movement. If moisture stays active, sealers can keep whitening or failing, and salts can keep returning.
#### What to do next
- Check drainage, downpipes, and ground falls near that wall line.
- Avoid sealing over active efflorescence without addressing the moisture pathway.
- Consider moisture investigation where repairs are planned.
### 7. Cracks, spalling, and control joint problems
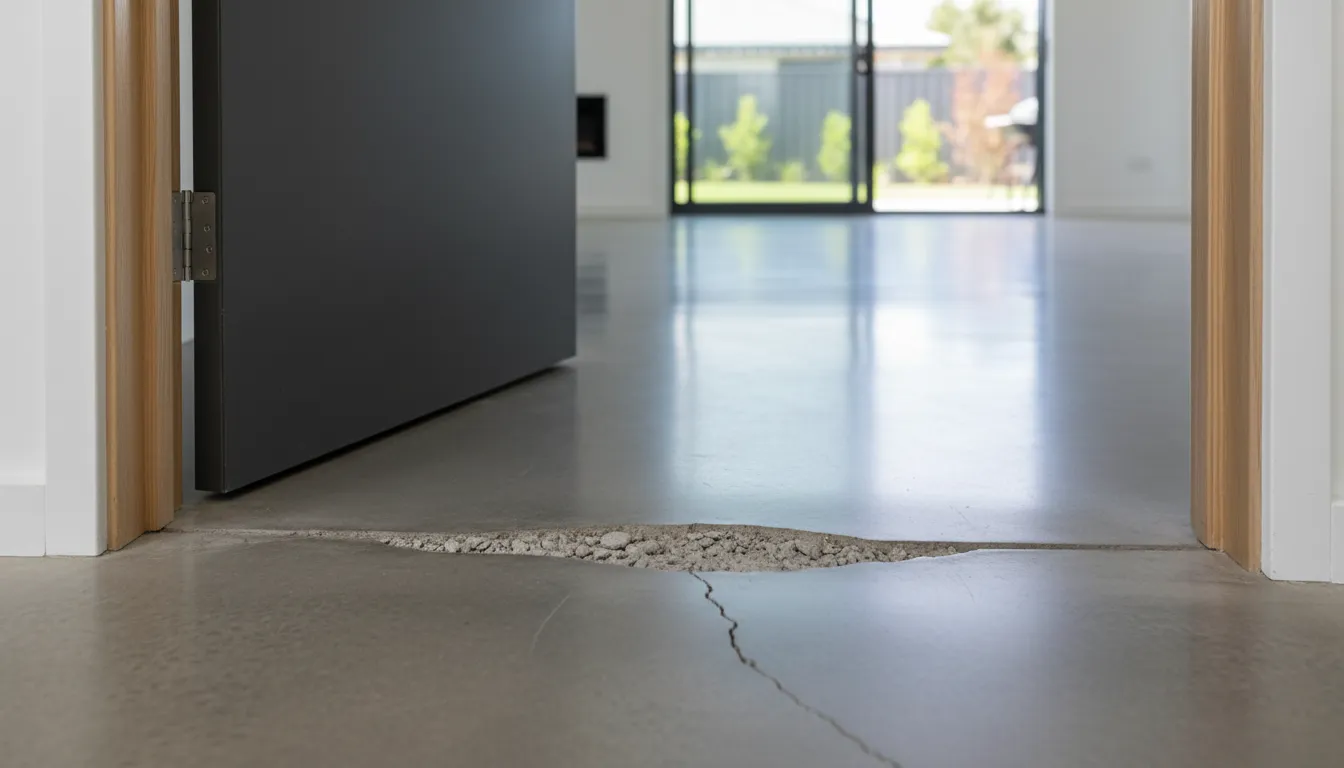
#### What you’ll see
Cracks crossing a doorway, joint edges chipping away (spalling), or lipping that catches a shoe.
#### Likely causes
Shrinkage, restraint, local moisture changes, movement, or joint detailing issues. Cracks can be harmless hairlines or signs of movement, depending on pattern and behaviour.
#### How serious
Varies. Spalling and lipping are safety issues even when the crack itself is minor.
#### What to do next
- Map cracks room by room and note any height difference across the crack.
- Treat trip edges at joints as a priority.
- If buying, get independent assessment rather than guessing causes.
### 8. Slip risk zones (wet entries, ramps, stairs)

#### What you’ll see
A glossy surface that looks slick when wet, puddling near entries, or a ramp that feels unsafe in rain.
#### Why it matters
Slip risk can be a safety issue in daily use, and certain settings have slip-resistance expectations for ramps and stairs.
#### What to do next
- Treat slippery ramps and stair zones as a safety item, not just a style issue.
- Document where water pools and where it feels slick underfoot.
- Consider practical treatments or product changes in wet zones.
Get a Defect
Investigation Report
}
buttonHref="/defect-investigation-reports"
variant="secondary"
/>
## Why It Happens: Root Causes
### Concrete placement and finishing workmanship
Light exposure floors rely heavily on a clean, even slab finish. If the slab was overworked, trowel marks can remain and become obvious once polished.
### Mix, curing, and drying
Concrete drying is not instant. If a sealer is applied before the slab has dried enough for the conditions, haze, whitening, and failure risk increases.
### Moisture in the slab
Moisture can enter from outside due to drainage issues, ground levels, or slab edge conditions. When moisture keeps moving, salts and sealer failures can keep returning.
### Sealer and densifier choice and application
Different systems behave differently. A topical sealer can show patchiness and may need rework if applied unevenly or under poor conditions.
### Contamination and poor protection
Plaster, paint mist, mud, rusting fragments, adhesives, and foot traffic can mark a slab. Once those marks are sealed in, they can be difficult to remove without refinishing.
## Is It a Defect, or Just Ugly?
Start by separating cosmetic from functional, safety, and structural indicators. This helps buyers decide what to negotiate, and helps owners decide what is worth fixing. Use this framework to decide whether to live with it, negotiate, or push for rectification.
| Severity category | What it means | Examples | Next step |
| --------------------------------- | -------------------------------------------------- | ----------------------------------------------------------------------------- | ---------------------------------------------------------------------------------------- |
| Cosmetic only | Looks off, but doesn’t affect performance. | Mild mottling, subtle trowel character only visible in harsh light. | Decide if you can live with it. Document for negotiation if buying. |
| Functional | Affects durability, cleaning, or stain resistance. | Cloudy haze, patchy sealer, surface that scratches easily, stain-prone areas. | Work out if it’s coating related or moisture related before paying for rework. |
| Safety | Slip or trip risk. | Lipped joints, spalled edges, slippery wet entry or ramp zones. | Treat as priority and document clearly. |
| Structural or moisture indicators | Suggests a bigger driver behind the finish issues. | Recurring efflorescence, damp edges, crack behaviour that suggests movement. | Investigate drainage and moisture pathways and consider specialist testing where needed. |
## Finish Types Comparison and Typical Australian Cost Ranges
Use this to sanity-check what was specified and whether the outcome matches the method.
| Finish type | How it’s typically achieved | Pros | Cons | Indicative AU cost per m² |
| --------------------- | -------------------------------------------------- | ---------------------------------------------------- | ----------------------------------------------------- | ----------------------------------------------------------------------------------------- |
| Grind and seal | Grind surface, then apply a non-penetrating sealer | Lower upfront cost, fast | Can need reseal over time, sealer can show patchiness | Around $50 per m² average, sometimes under $25 to $100+ depending on scope |
| Honed concrete | Similar grind, with a penetrating sealer | More natural look, longer-lasting than basic sealers | Still sensitive to moisture and prep | Around $75 per m² |
| Mechanically polished | Multi-step grinding, densifier, polishing to gloss | High durability, long life | Higher upfront cost, needs skilled process | $100+ per m² |
## Fix Options
Many fixes change the look. The goal is to choose the least invasive option that solves the real problem.
| Fix option | Best for | Outcome / watch-outs |
| -------------------------------------- | --------------------------------------------------------------- | ------------------------------------------------------------------------------------------------------------ |
| Clean and burnish | Surface grime, light scuffs, minor dulling | Improves clarity and sheen, but won’t remove embedded marks. |
| Localised stain treatment | Surface staining that isn’t sealed in | Can reduce contrast; rarely makes stains disappear completely. |
| Strip and reseal | Sealer haze, patchiness, early peeling, wrong gloss level | If moisture is driving the failure, resealing without fixing moisture often repeats the problem. |
| Hone and repolish | Grinder patterning, patchy gloss from inconsistent finishing | More uniform look, but may increase aggregate exposure in high spots. |
| Regrind to a higher exposure level | Heavy trowel marks and slab flaws that can’t be removed lightly | Changes the design intent; deeper grinding can expose more aggregate and may require restarting the process. |
| Overlay systems or alternate coverings | Slab surface not fit for the desired finish | Hides issues, adds thickness, changes details at doors and skirtings. |
| Full replacement or major rework | Rare residential cases with major problems | Usually only considered when structural or severe moisture issues exist due to cost and disruption. |
## If You’re Buying a Home With Poor Polished Concrete Floors
Buyers tend to get stuck in the “is it normal” loop. The fastest way out is a structured walk-through and clear documentation.
### Buyer action checklist
Ask for paperwork and details
- Exposure level (nil/light, random, full).
- Method used (grind and seal vs honed vs mechanically polished).
- Sealer and densifier products, application dates, warranty, maintenance history.
- Any known moisture issues, past leaks, drainage changes.
### Walk-through tips
- View in daylight and at night with downlights on.
- Step back and use the 1.5 m normal viewing idea before you judge defects.
- Check edges, control joints, and transitions at bathrooms and laundries.
- Look for white salts, damp smells, or recurring haze near external walls.
- Wet-test slip risk carefully using a small damp cloth, not by flooding. If it feels slick, note it.
### When to escalate
- Efflorescence or persistent whitening and peeling.
- Widespread sealer failure across multiple rooms.
- Trip hazards at joints, repairs, or lipping.
- Significant crack behaviour, especially if it looks like movement rather than hairlines.
## Getting the Most Value from Your Home and Building Investment
A poor polished concrete floor can be an aesthetic annoyance or a sign of bigger risks like moisture movement and ongoing sealer failure. The fastest way to protect your budget is to identify the pattern, check where it occurs, decide whether it’s cosmetic, functional, safety-related, or a moisture indicator, then match the fix to the real cause.
If you’re buying a property with polished concrete floors or you’re worried your finish is defective, an independent inspection can document the issues clearly and help you decide what to do next. Book an Owner Inspections assessment and get a photo-backed report you can use for negotiations or rectification discussions.
Contact
Owner Inspections
}
buttonHref="/contact"
variant="primary"
/>
### How do I Arrange Independent Stage Inspections With My Builder?
Source: https://ownerinspections.com.au/articles/how-do-i-arrange-independent-stage-inspections
Published: 2026-03-24 | Updated: 2026-03-26 | Category: Building Inspections
Author: Maison Azdari
What if you could spot the kinds of build problems that get hidden fast, then fix them while they are still cheap and simple to fix? That is the whole point of independent [stage inspections](/new-construction-stage-inspections) during a new home build. You are not trying to catch out your builder. You are setting up a calm, repeatable process that keeps quality on track, keeps the site safe, and gives you clear evidence if something needs to be corrected.
This guide is written for homeowners and first-time builders doing a volume-builder or custom build, plus investors and townhouse owners who want fewer surprises at handover.
## What Independent Stage Inspections Do (And Don’t Do)
Independent stage inspections are a private, owner-engaged check of workmanship and build rsk at agreed milestones. They work alongside the mandatory inspections done by the building surveyor/certifier, not instead of them.
### What They Do Well
They help you:
- Catch issues before they are covered up (wrap, plasterboard, tiles, cladding).
- Get photo evidence tied to locations and plan references.
- Prioritise defects so the supervisor can action them without guessing what matters.
- Reduce handover surprises by building a running defects register.
### What They Do Not Do
They typically do not:
- Replace the certifier or building surveyor’s compliance role or mandatory inspection obligations. In NSW, for example, the principal certifier carries out mandatory inspections during construction.
- Override your contract, variations process, or progress payment clauses.
- Guarantee an outcome, or force a builder to adopt a specific product or method.
### Independent Inspector vs Building Surveyor/Certifier
Keep this distinction clear when you talk to your builder:
- **Certifier/surveyor:** checks compliance with approvals and mandated inspection stages and can issue written directions to comply where required.
- **Independent inspector:** checks quality, workmanship, and risk areas that are easy to miss, then reports back to you with practical fix items.
Statistics reference: [Building Approvals, Australia](https://www.abs.gov.au/statistics/industry/building-and-construction/building-approvals-australia/latest-release)
View the stage inspection
guide
}
buttonHref="/guides/construction-stage-inspections-guide"
variant="secondary"
/>
## When to Tell Your Builder
Timing drives everything. If you raise inspections late, you run into tight trade schedules and cover-up stages.
### Best Case Timing: Pre-contract or Tender
If you are still negotiating or reviewing the tender pack, this is the smoothest time to add a simple process clause such as:
- You will engage an independent inspector.
- The builder will provide a booking pathway through the site supervisor.
- Notice period (often 48–72 hours).
- Inspections happen at agreed milestones and do not interfere with work.
### Fallback Timing: Immediately After Contract, Before the First Hold Point
If the contract is already signed, tell the builder as soon as a supervisor is assigned and before the first cover-up stage. The first big hold point is often the pre-pour slab inspection.
## How to Tell Your Builder Without Creating Friction
If you want the least pushback, use “process + safety + early fix” language. Do not frame it as mistrust.
### The Framing That Usually Lands Well
Use phrases like:
- “We are booking independent stage inspections as a normal risk-management step.”
- “The goal is to pick up issues early so they’re simpler to fix and less likely to delay trades later.”
- “We will follow your site safety rules and coordinate through the supervisor.”
### Short Phone Script (30 seconds)
“Hi [Supervisor Name], just letting you know we’ll be doing independent stage inspections at key milestones. It’s a quality check for peace of mind, not a replacement for the certifier. We’ll give 48–72 hours notice, follow your induction and PPE rules, and we’ll send the report through promptly with prioritised items.”
### Email Template to Introduce Your Inspector
Subject: Independent stage inspections for [Address] and site access process
Hi [Supervisor Name],
We’d like to arrange independent stage inspections at key milestones for our build at [Address]. These inspections are a workmanship and risk check to complement the certifier/surveyor’s mandatory compliance inspections.
To keep things simple and safe, we propose:
- 48–72 hours notice for bookings
- Inspections coordinated through you during normal site hours
- Inspector to comply with site induction, sign-in and PPE requirements
- Report issued with photos and prioritised items, shared with you the same day (where possible)
Proposed stages (we can adjust to your programme):
- Pre-pour slab
- Frame
- Waterproofing and/or pre-lining (before plasterboard)
- PCI (pre-handover)
Could you confirm the best contact method for bookings and any site access requirements (induction, PPE, supervision rules)?
Kind regards,
[Your Name]
[Phone]
### Quick Meeting Agenda (10 minutes)
- Confirm the booking contact (supervisor vs office portal).
- Confirm required notice period.
- Confirm site induction/PPE and whether supervision is required.
- Confirm which stages the builder considers “no-go” times (high-risk activities).
- Confirm report handoff: who receives it and how rectification is tracked.
## Site Access: Your Rights vs The Builder’s Safety Control
Most disputes happen here. Owners assume access is automatic. Builders assume everyone must follow strict site controls. Both can be true at the same time.
### Why builders control access (WHS duties)
A building site is a workplace. Visitors have WHS responsibilities and must follow reasonable instructions and procedures.
Construction workplaces also use inductions and PPE rules to manage hazards. SafeWork Australia provides [induction guidance](https://www.safeworkaustralia.gov.au/system/files/documents/1703/information-sheet-work-induction-for-construction.pdf) that includes PPE checks and “no-go zone” awareness.
### White Card and induction: What to expect
Many builders require anyone entering operational construction zones to hold general construction induction training (a White Card) or be managed under a visitor process.
SafeWork NSW explains [White Card requirements](https://www.safework.nsw.gov.au/licences-and-registrations/white-cards) and who may need one, including people accessing operational construction zones.
Your independent inspector should already have a White Card and PPE. You should still ask the supervisor what their site requires.
### State access notes (examples)
Access rights vary by state and contract terms, so treat this as general information, not legal advice.
**Victoria example:** Consumer Affairs Victoria states that the builder must allow the owner and/or the owner’s agent reasonable access during construction ([Domestic Building Contracts Act 1995, section 19](https://www.consumer.vic.gov.au/licensing-and-registration/builders-and-tradespeople/running-your-business/working-with-your-home-building-client/during-construction-and-building-completion)).
**Queensland example:** Queensland legislation requires a building contractor to allow the consumer reasonable access to the building site upon request ([QBCC Act, section 109](https://classic.austlii.edu.au/au/legis/qld/consol_act/qbacca1991487/s109.html)).
## The Key Stages to Inspect (And What Gets Missed Most Often)
You can inspect many stages, but these are the checkpoints that tend to give the best value for most builds.
### Stage 1: Slab Stage (pre-pour)
This is where problems become permanent fast. AS 2870 sets requirements for site classification and the design and construction of footing systems for houses and townhouses.
Common misses at slab stage:
- Set-out and dimensions drifting from plans.
- Reinforcement placement issues.
- Termite management details not matching the system requirements.
- Drainage and penetrations that create future water pathways.
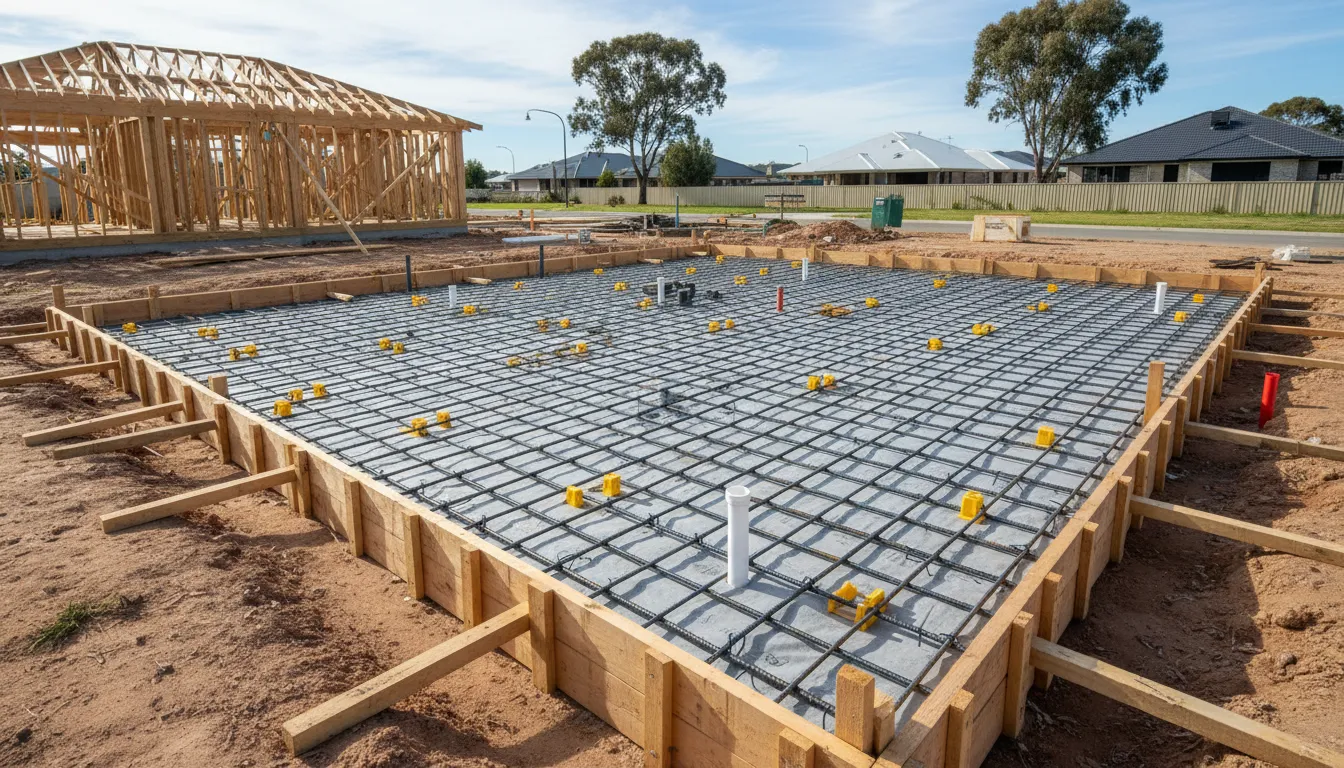
### Stage 2: Frame Stage (before wrap, cladding, and linings)
Frame defects often get hidden once wrap and cladding go on. This stage is also where weatherproofing details start to matter.
Common misses:
- Bracing and tie-down details not matching drawings.
- Openings not square, leading to window/door issues later.
- Flashings and sarking details rushed because trades are moving fast.
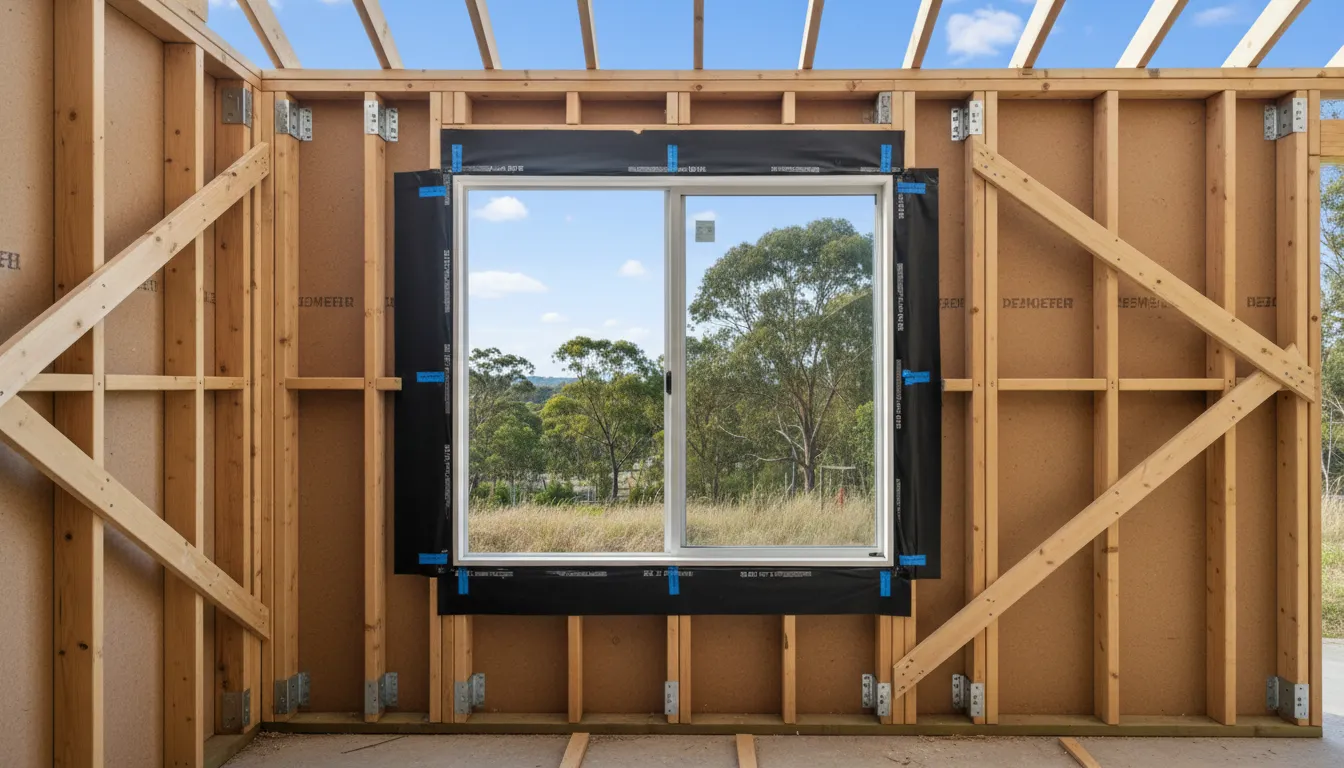
### Stage 3: Waterproofing (wet areas) and NCC Requirements
Wet areas are a high-risk zone for defects disputes. NCC Housing Provisions include specific wet area waterproofing requirements, including waterstops and waterproofing extents.
[AS 3740:2021](https://store.standards.org.au/product/as-3740-2021) sets minimum requirements for materials, design and installation of waterproofing for domestic wet areas.
Common misses:
- Membrane detailing at junctions, penetrations, and hobless showers
- Falls to wastes not achieved
- Waterstop positioning and continuity issues
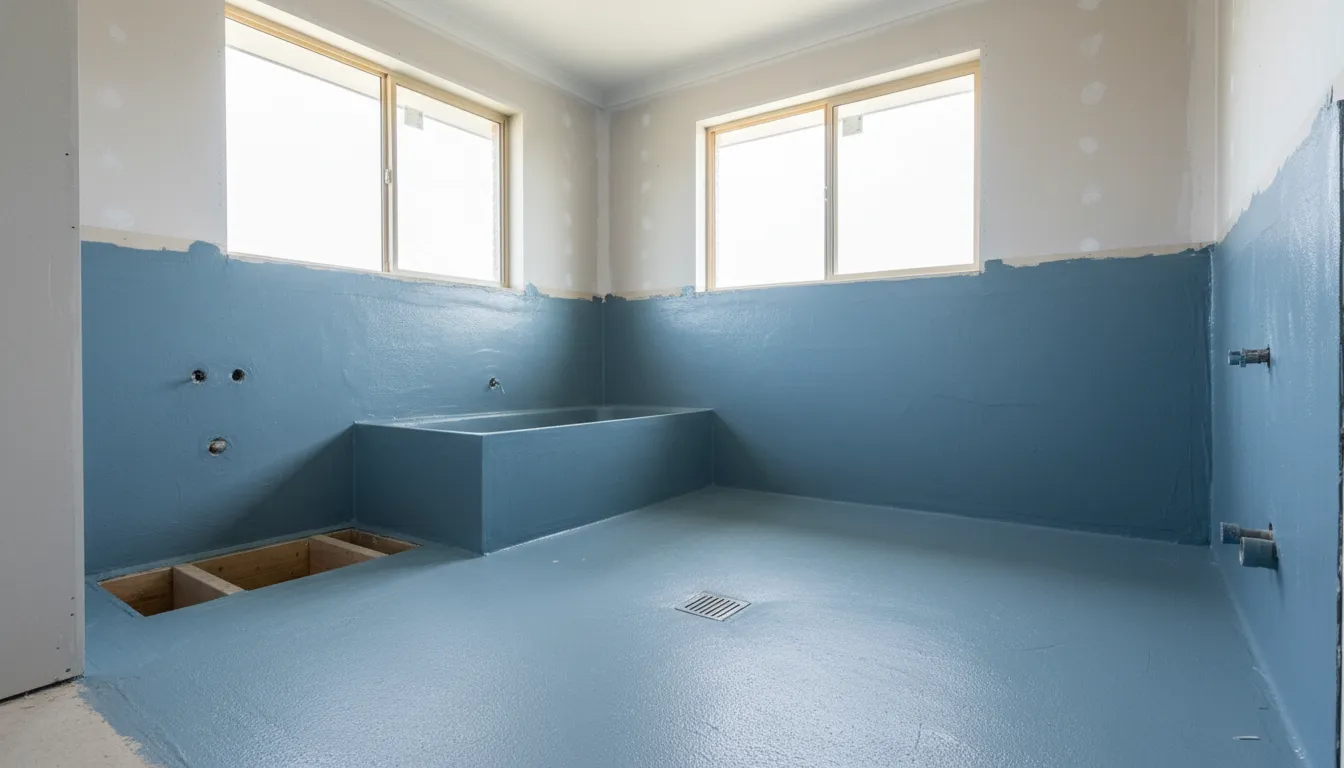
### Stage 4: Pre-lining (services before plasterboard)
This is often called pre-plaster. You want services visible:
- Plumbing rough-in
- Electrical rough-in
- Exhausts, penetrations, insulation placement where visible
- Wet area prep before linings close everything up
Common misses:
- Missing or poorly sealed penetrations
- Incomplete flashing and wrap integration
- Service runs that compromise framing or waterproofing zones
### Stage 5: Lock-up (optional but useful)
Lock-up can be helpful for checking:
- External doors/windows installed and operating
- Weatherproofing continuity
- Visible external defects before finishes distract from them
### Stage 6: PCI (practical completion inspection) or pre-handover
PCI turns a vague “handover list” into a structured defects register before final sign-off.
Common misses:
- Doors and windows binding
- Missing sealants or incomplete finishes
- Wet area functional checks and drainage issues
- Items that fall outside what owners think is included
Request a stage inspection
booking
}
buttonHref="/new-construction-stage-inspections"
variant="secondary"
/>
## Stage-by-stage Inspections Recommended Inclusions
| Stage | When to book | What’s checked | What evidence you get | Typical “high-cost later” defects |
| ------------------ | --------------------------------------------------------------------- | ------------------------------------------------------------------------------------------------------------------ | ----------------------------------------- | ---------------------------------------------------------------- |
| Slab (pre-pour) | Once formwork, reinforcement, penetrations are ready, before concrete | Set-out, prep, reinforcement, moisture/termite/drainage details (AS 2870 context) ([Standards Australia Store][1]) | Photos, notes by location, priority items | Slab movement risk, drainage problems, termite system gaps |
| Frame | Before wrap/cladding/linings cover the frame | Bracing/tie-downs, openings, straightness, roof framing, early flashing | Photos, marked-up items to fix | Out-of-square openings, structural tie-down issues, future leaks |
| Waterproofing | After membrane application, before tiling | Membrane detailing, junctions, penetrations, falls, waterstops (NCC + AS 3740) ([National Construction Code][2]) | Waterproofing defects list with photos | Water ingress, mould risk, re-tiling later |
| Pre-lining | After rough-ins, before plasterboard | Services, penetrations sealing, wrap continuity, insulation where visible | Services checklist + photos | Hidden leaks, drafts, noise, missing sealing |
| Lock-up (optional) | Once external envelope is closed | Windows/doors, weatherproofing, visible external defects | Photos + action list | Leak pathways behind cladding, door/window defects |
| PCI / pre-handover | Near practical completion, before final sign-off | Defects register, operational checks, finishes vs tolerances | Full defects list, severity ranking | Cosmetic disputes, incomplete items, rework after move-in |
## How to Handle Defects and Reports so They Lead to Fixes
A good report is only useful if it produces a clean, trackable rectification process.
### Step 1: Use severity triage that a supervisor can act on
A simple severity system helps the builder respond fast:
- Safety or structural risk
- Water ingress risk
- Functional defects
- Cosmetic items
You can also reference common standards and tolerances guides used in your state. NSW provides a Guide to Standards and Tolerances for minimum workmanship references.
QBCC also publishes a [Standards and Tolerances guide](https://www.qbcc.qld.gov.au/sites/default/files/documents/guide-standards-tolerances.pdf) intended to align with NCC and relevant standards.
### Defect severity guide
| Severity | What it means | Examples | How fast to act |
| ---------------------- | -------------------------------------------- | --------------------------------------------------- | ----------------------------------------- |
| Structural/safety risk | Could affect structural integrity or safety | Major frame tie-down concerns, unsafe stairs/guards | Raise same day, request site meeting |
| Water ingress risk | Likely leak pathway now or later | Waterproofing detailing gaps, flashing failures | Raise within 24–48 hours, before cover-up |
| Functional defect | Affects operation or performance | Binding doors/windows, poor drainage falls | Raise promptly, track for re-check |
| Cosmetic/tolerance | Visual finish issues within tolerance debate | Paint blemishes, minor chips | Bundle for PCI list unless severe |
### Step 2: Send a “request for rectification” in a consistent format
Keep it practical:
- Reference the stage and date
- List items by location (Bathroom 1, Bed 3, rear elevation)
- Include photos with labels
- Ask for a proposed rectification date or sequence
### Step 3: Re-inspection protocol
A simple re-check process avoids arguments:
- Builder confirms items are ready for re-check
- Inspector re-attends and marks items closed or still open
- Defects register updated and shared
## Builder Communication Plan
| Date/trigger | Who you contact | What you send | Expected response time | Escalation step |
| -------------------------------------- | ---------------------- | --------------------------------------------------- | ---------------------- | ---------------------------------------------------------------- |
| Contract signed or supervisor assigned | Site supervisor | Intro email + proposed stages + safety compliance | 2–5 business days | Follow up call, ask for booking pathway |
| Two weeks before slab pre-pour window | Supervisor or bookings | Request slab inspection slot, confirm notice period | 1–2 business days | Ask for written confirmation of pour date |
| Frame complete notice | Supervisor | Book frame inspection, confirm access | 1–2 business days | Ask for a brief site window outside high-risk tasks |
| Waterproofing booked | Supervisor | Book waterproofing inspection before tiling | 24–48 hours | Escalate to construction manager if stage is about to be covered |
| PCI window set | Supervisor + admin | Book PCI, request handover checklist if available | 2–5 business days | Confirm in writing and request alternate time if refused |
## Common Flashpoints And How to Avoid Them
### “We already have a certifier”
Reply with:
“Understood. This is a separate workmanship and risk check for our peace of mind. We’ll coordinate it so it doesn’t disrupt your programme.”
This keeps the distinction clear without arguing.
### Builder refuses access or demands supervision
Start with a calm reset:
- Confirm you are authorising the inspector as your agent.
- Confirm you will comply with induction and PPE rules.
- Offer a short inspection window when high-risk work is not happening.
If you are in Victoria or Queensland, you can point to “reasonable access” concepts as general guidance while still acknowledging WHS controls.
### Report tone causes defensiveness
Ask your inspector for:
- Factual language
- Photos and locations
- Prioritised items
R- eferences to relevant requirements where appropriate (NCC, AS 3740, AS 2870)
### Timing clashes with progress payment milestones
Try to book inspections to match the build programme’s natural hold points. When the inspection is late, defects become arguments about time, not quality.
## A Practical Timeline Checklist (Mid-year to Q3 Starts)
Use this as a planning checklist if your build begins around mid-year through to the September quarter.
- **Tender or pre-contract:** confirm inspection stages and notice period in writing
- **Contract signed:** email supervisor with the inspection process and stages
Pre-slab: book once reinforcement and prep are close to ready
- **Frame:** book as soon as the frame is complete, before wrap and linings
- **Waterproofing:** book immediately when waterproofing is scheduled, before tiling
- **Pre-lining:** book when rough-ins are complete, before plasterboard
Optional lock-up: book when the external envelope closes
- **PCI:** book when practical completion is approaching, before final sign-off
Get a schedule
and quote
}
buttonHref="/contact"
variant="primary"
/>
If you want a builder-friendly inspection plan, [Owner Inspections](/) can map your build programme to the right hold points and help you book checks at the stages that get covered fastest.
### Home Inspections Melbourne: Common Issues We Find
Source: https://ownerinspections.com.au/articles/home-inspections-melbourne-common-issues-we-find
Published: 2026-03-19 | Updated: 2026-03-26 | Category: Defect Investigation
Author: Maison Azdari
Buying in Melbourne can feel like a sprint. Auction week pressure, short settlement windows, lots of “looks good to me” advice, and not much time to work out what’s normal ageing and what’s a big repair bill. If you’re searching for home inspections Melbourne, the real question is usually this: what problems show up most often, and what should be done about them?
Australian research suggests building issues are common across the housing stock. AHURI reports that [70% of homes](https://www.ahuri.edu.au/analysis/news/australians-deserve-better-low-quality-inefficient-housing) had some building quality problem, with cracks (44%), mould (35%), and plumbing issues (27%) among the most commonly reported.
## What This Article Covers (And Who It’s For)
A typical home inspection (also called a building inspection or [pre-purchase inspection](/pre-purchase-inspections)) is a visual, non-invasive check of accessible parts of the property to identify visible defects, safety issues, and signs of bigger problems.
This article is for:
- Auction-week first home buyers who need fast clarity before bidding
- Investors and landlords planning maintenance budgets and reducing vacancy risk
- Apartment and townhouse buyers worried about waterproofing, balconies, and owners corporation costs
Melbourne’s mix of older brick homes, timber subfloors, and newer Class 2 apartment buildings can produce different defect patterns, so the examples below include both houses and multi-res buildings.
## Common Issues We See in Melbourne Homes
1. Cracks and signs of movement
2. Moisture ingress, damp and mould (wet areas, ceilings, external walls)
3. Roof leaks, gutters and stormwater problems
4. Subfloor issues (ventilation, moisture, timber decay)
5. Termite risk and timber pests
6. Bathroom, balcony and waterproofing defects (houses and apartments)
7. Non-compliant or poor-quality renovations (DIY red flags)
8. Plumbing and drainage warning signs
9. Ventilation and condensation risks (especially in cooler months)
10. Safety basics (handrails, trip hazards, hot water, obvious electrical issues)
Book a Melbourne
building inspection
}
buttonHref="/vic/building-inspections-melbourne"
variant="secondary"
/>
### 1. Cracks and signs of movement (when it’s cosmetic vs structural)
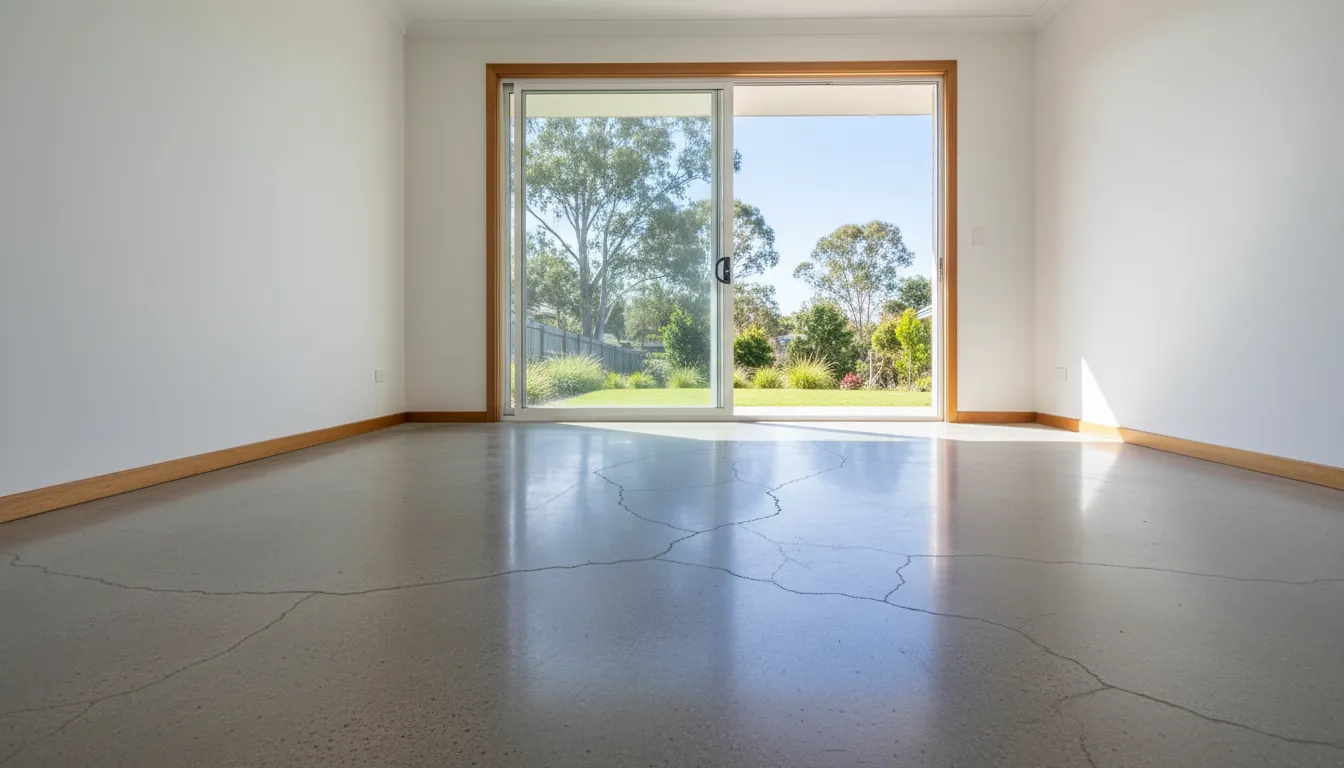
Cracks are one of the most commonly reported housing issues in Australia. In Melbourne, cracks often show up in brick veneer, older solid masonry, and homes sitting on reactive clay sites.
**What it can look like:**
- Step cracking in brickwork (often around windows or corners)
- Diagonal cracks from door/window corners
- Plaster cracking that repeats after repainting
- Cornice separation
- Doors or windows binding
- Uneven floors or new gaps at skirting
**Why it matters:**
Some cracking is normal settlement or seasonal movement, especially on reactive soils where moisture changes drive expansion and shrinkage. The NCC recognises site classes that include moderately to extremely reactive clay, which can experience moderate to extreme ground movement from moisture changes.
### Crack guide: what it often means and the next step
| Crack type | Common location | Why it might matter |Practical next step |
| --- | --- | ----- | ----- |
| Hairline plaster crack | Internal walls/ceilings | Often cosmetic movement | Monitor with dated photos |
| Step crack in brickwork | External walls | Can indicate movement | Check for matching internal signs; consider engineer if progressing |
| Diagonal crack at opening | Doors/windows | Stress concentration, possible movement | Check if doors/windows are sticking |
| Wide crack that changes | Anywhere | Ongoing movement | Engineer assessment recommended |
| Cracks plus sloping floors | Multiple rooms | Higher chance of footing movement | Engineer + drainage review |
**Moisture and reactive soils**
Victorian guidance notes that soil reactivity reflects how much soil shrinks and swells with moisture changes, and “the greater the reactivity, the greater the possibility of excessive movement”.
**What helps when movement is moisture-driven:**
- Make sure surface water drains away from the house. Victorian guidance suggests sloping soil/paths away from foundations and notes more reactive soils may need steeper falls.
- Check gutters and downpipes discharge away from footings
- Keep garden beds and sprinklers from soaking external walls
**When to call an engineer:**
- Cracks are widening, new cracks appear quickly, or doors start binding
- Cracks are paired with noticeable floor slope
- You see brickwork separation, bulging, or lintel distress
### 2. Moisture ingress, damp and mould (especially wet areas)
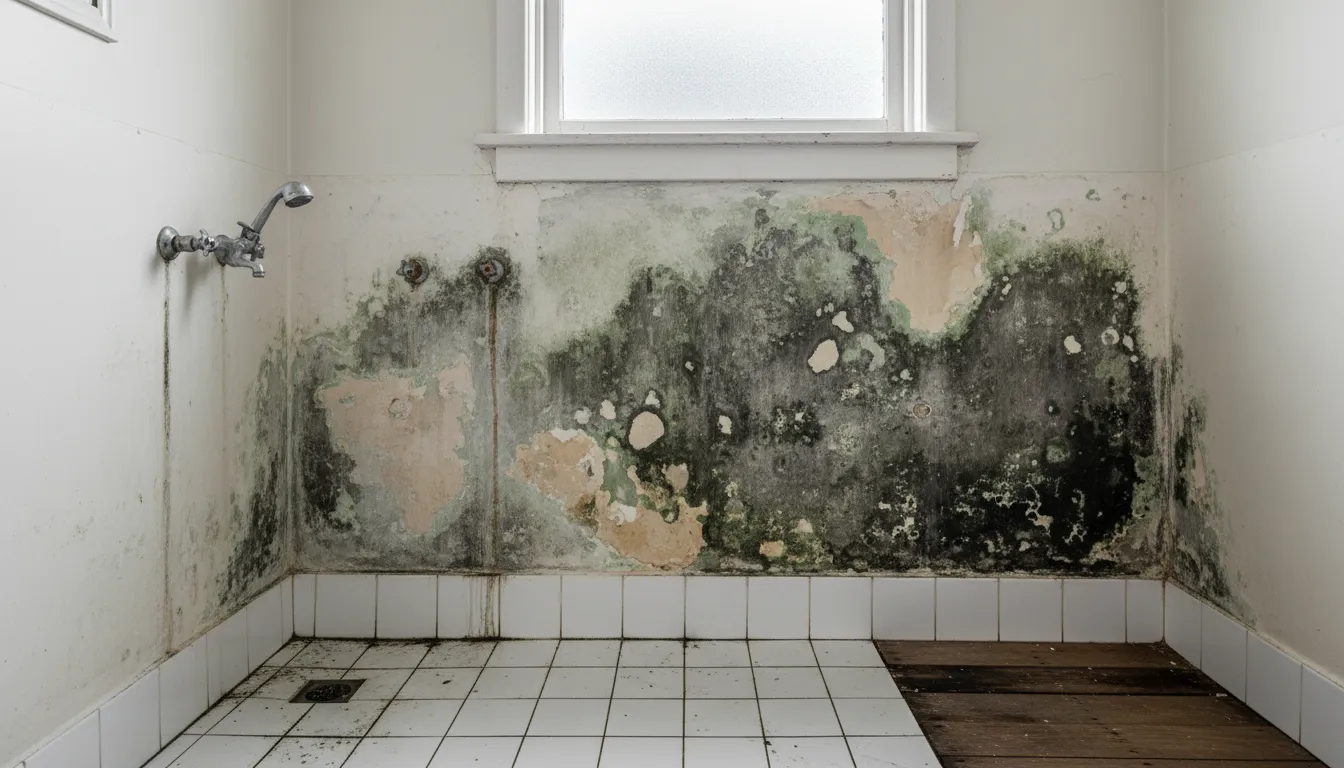
Moisture is one of the fastest ways a “small defect” turns into a bigger one, because it can affect linings, framing, flooring, and indoor air quality. Melbourne’s climate can support moisture issues, with Bureau of [Meteorology data for Melbourne Airport](https://www.bom.gov.au/climate/averages/tables/cw_086282_All.shtml) showing a mean annual rainfall of 536.2 mm and a mean 9am relative humidity around 72%.
**What it can look like:**
- Musty smell in wardrobes, bathrooms, or bedrooms
- Bubbling paint, staining, or swollen skirting
- Efflorescence (salty white deposits) on brick or concrete
- Mould spotting around windows, ceilings, or behind furniture
- Loose “drummy” tiles in showers or balconies
- Damp patches at ceiling corners after rain
**Common causes checklist:**
- Shower leaks and failed grout/seals (grout is not waterproof)
- Bathroom waterproofing defects
- Poor exhaust ventilation
- Roof leaks or blocked gutters
- Downpipes dumping water near the house
- Ground levels too high against walls
- Plumbing leaks under sinks or behind toilets
**Why wet areas are a repeat offender**
ABCB guidance explains that wet-area waterproofing provisions aim to prevent health risks and building damage caused by internal moisture and water flow from wet areas, such as bathrooms and laundries. Victorian building guidance also draws a clear line between defects and non-compliance. It states that if a bathroom isn’t adequately waterproofed, it may be non-compliant and can lead to moisture problems.
**What an inspection can’t confirm**
A visual inspection can identify symptoms, but it can’t confirm the condition of a hidden membrane without invasive testing. The Victorian waterproofing fact sheet also shows how compliance and sign-off decisions can depend on building surveyor requirements and documentation.
**When to call a specialist**
- Licensed plumber for suspected pipe/shower waste leaks
- Waterproofing specialist for shower/balcony membrane failure
- Indoor air/mould specialist if mould is widespread or occupants have health concerns
### 3. Roof leaks, gutters and stormwater problems
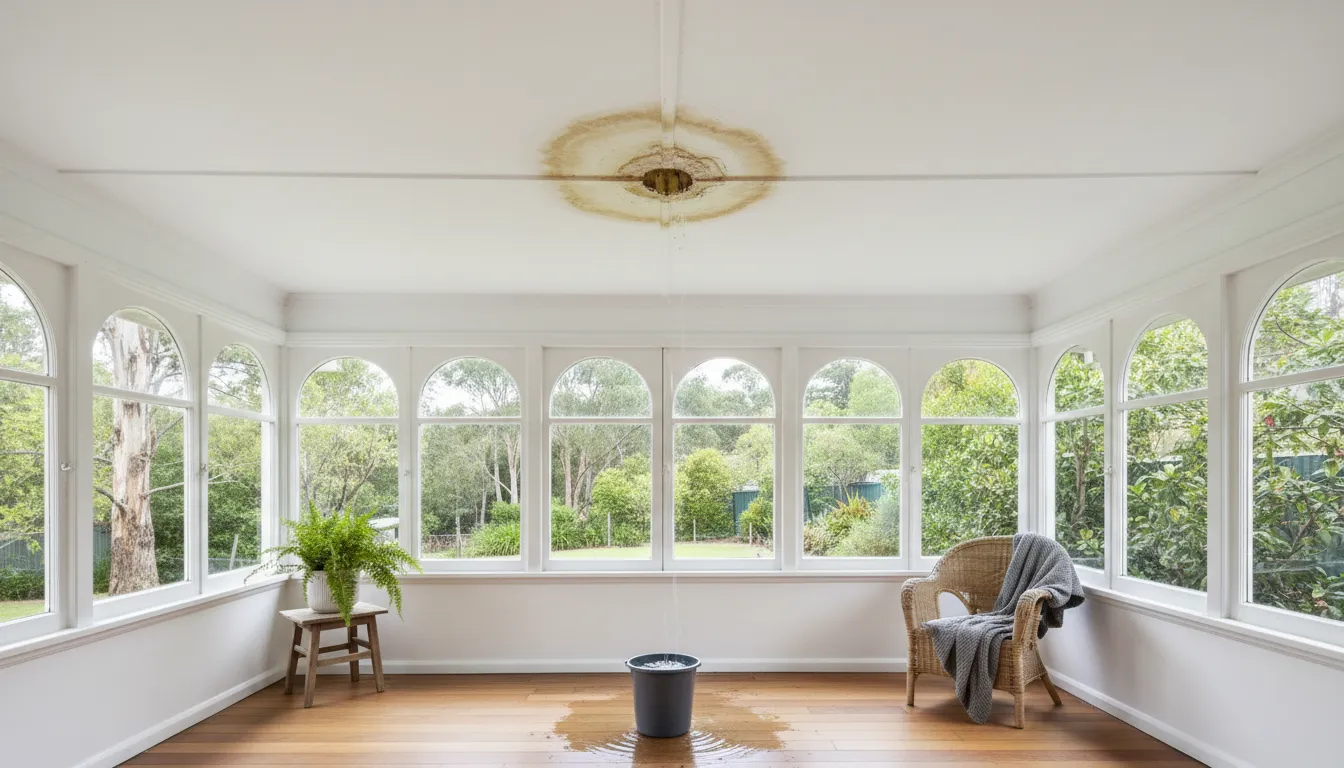
Roof-space access is one of the best “early warning systems” for water issues. In Melbourne, many roof problems show up first as small stains, damp insulation, or mould growth in the roof space.
**What it can look like:**
- Staining on ceilings (often near cornices or light fittings)
- Damp insulation or mouldy rafters
- Rusted valleys, cracked tiles, loose flashing
- Blocked gutters or sagging sections
- Downpipes discharging at the base of walls
**Why it matters**
Water entry from above can travel and show up far from the source. Poor roof drainage can also increase moisture around foundations and raise movement risk.
**Buyer action steps (fast checks you can do):**
- Ask the agent for any roof repair history, leak repairs, or insurance claims
- Look at ceiling corners in bedrooms and living rooms
- Check gutter overflow marks or plant growth in gutters
- Confirm where downpipes discharge and whether stormwater is connected properly
### 4. Subfloor issues (timber decay, ventilation, moisture)
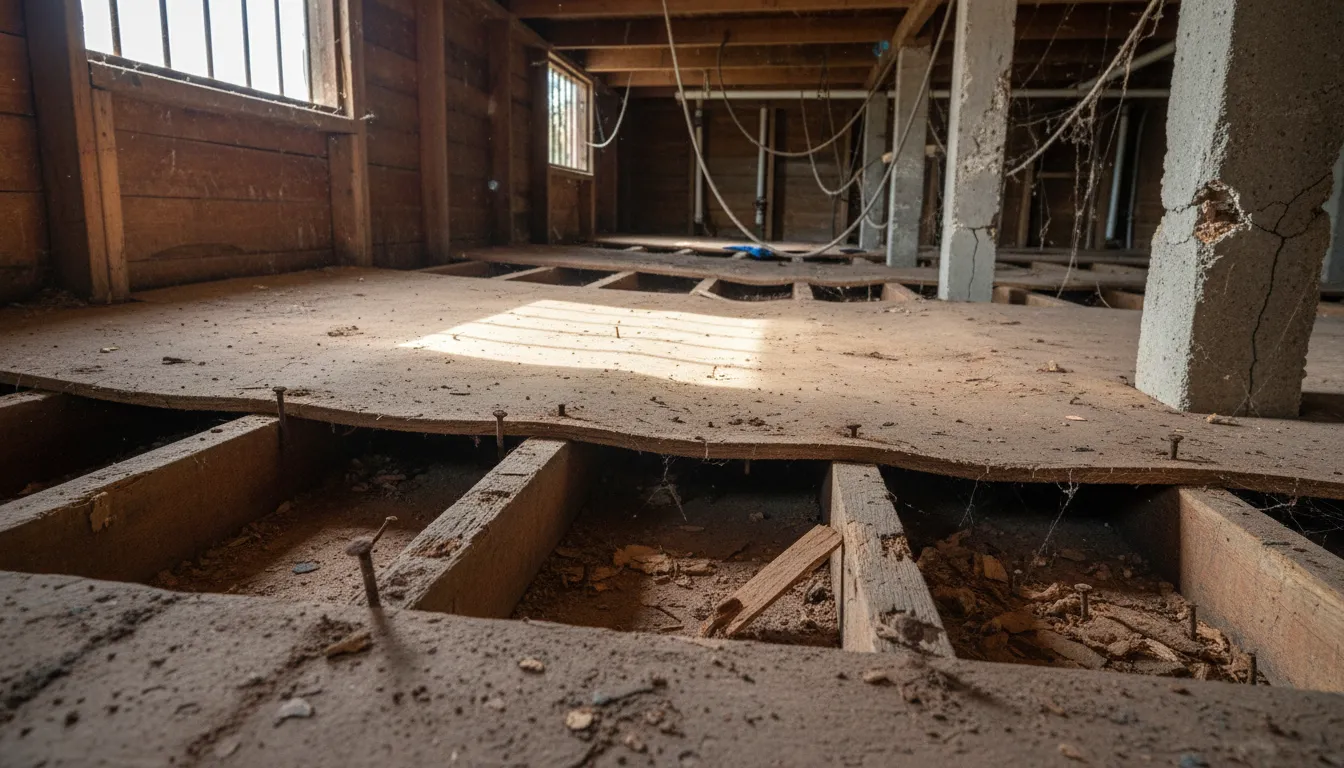
Older Melbourne houses often have subfloors, and subfloor moisture issues can quietly damage bearers, joists, and flooring.
**What it can look like**
- Bouncy floors or uneven floor levels
- Musty odours near floor vents
- Visible fungal decay on timbers
- Poor clearance or blocked vents
- Pooling water under the house
**Risk escalators**
- Garden beds or paving higher than the damp course
- Poor site falls that push water towards the building
- Leaking outdoor taps or air con drains near walls
- Downpipes dumping water at footings
[Victorian guidance on foundation maintenance](https://www.vba.vic.gov.au/__data/assets/pdf_file/0020/33536/Minimising-foundation-movement-and-damage-to-your-house-info-sheet.pdf) stresses avoiding water ponding against footings or walls and managing drainage to reduce moisture problems around the perimeter.
### 5. Termite risk and timber pests (why “no visible damage” isn’t a guarantee)
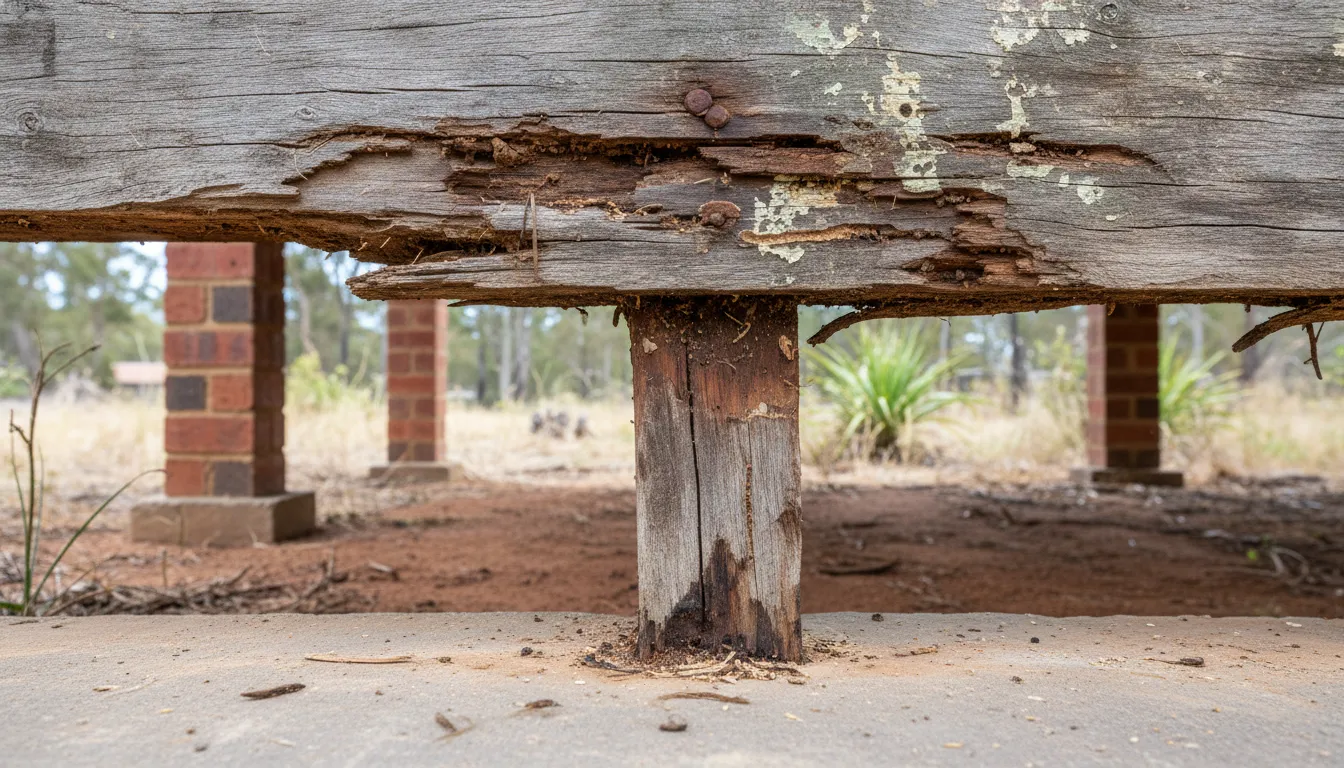
Many buyers ask: “Do I really need building and pest?” For houses, the safest answer is often yes, because [timber pest inspection](/timber-pest-inspections) is its own discipline and pests can be hidden.
Archicentre notes timber pest inspections are visual assessments of reasonably accessible parts, and it’s not possible to guarantee a property is completely free of timber pests. It also defines “no visible evidence” as no visible indication at the time of inspection, not proof of absence.
**What inspectors look for (visible indicators)**
- Mud leads, damaged timbers, or suspect timber softness
- Excess moisture that increases timber decay risk
- Subfloor and roof-space conditions that help pests thrive
- Past treatment evidence and conducive conditions (where visible)
**When to add a pest inspection**
- Any house with accessible subfloor or garden beds against walls
- Properties with decks, pergolas, timber fencing close to the house
- Homes with known moisture issues or poor drainage
- Older homes with limited maintenance history
### 6. Bathroom, balcony and waterproofing defects (houses and apartments)
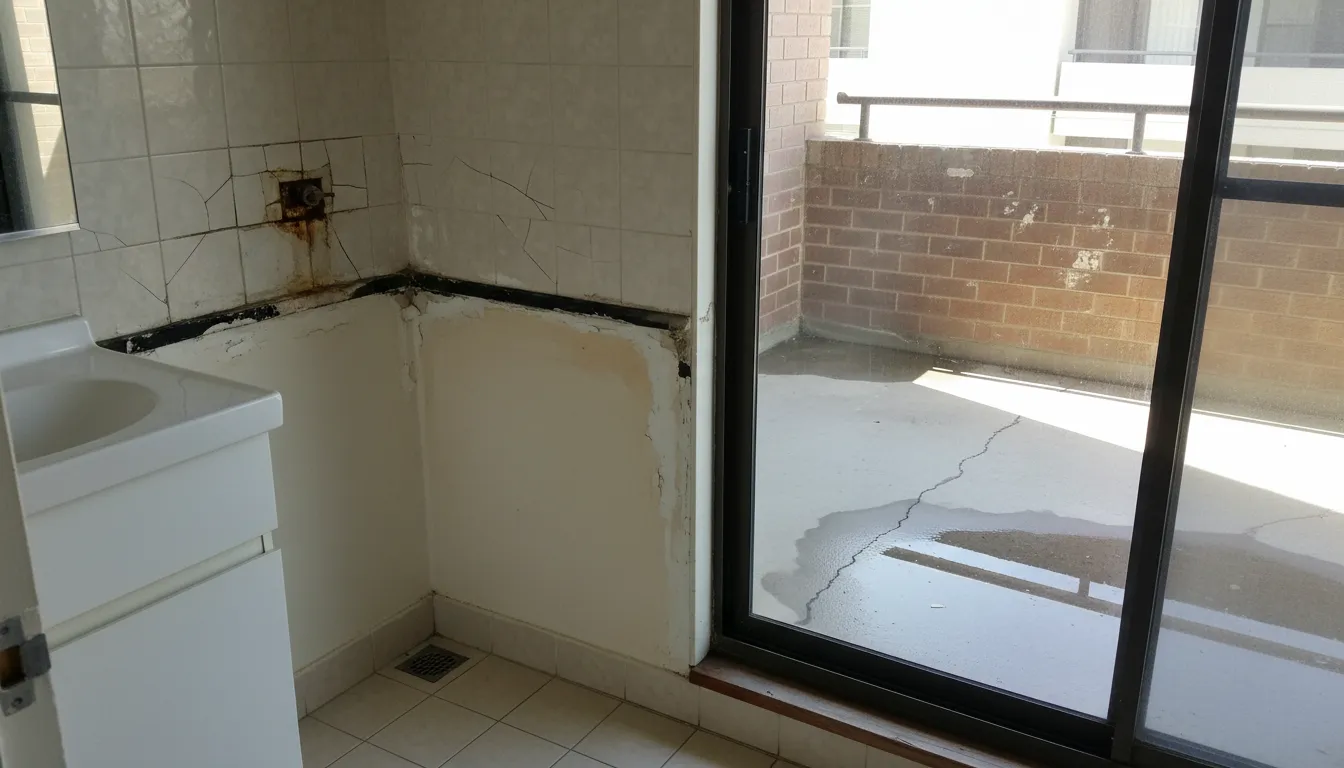
Waterproofing problems can be expensive in any property. In apartments and townhouses, they can also trigger owners corporation (OC) involvement, shared-cost disputes, and longer timelines.
**What it can look like**
- Balcony tile “drummy” areas, cracking grout, ponding
- Staining under balcony edges or soffits
- Efflorescence on balcony edges or internal walls
- Water marks on ceilings below bathrooms/balconies
- Musty smell in adjacent rooms
#### Why Melbourne apartment buyers watch balconies closely
Victorian research into balcony defects found:
- 52% of impacted buildings had defective balconies caused by water ingress issues
- 19% had waterproofing issues due to lack or insufficient waterproofing
- 64% of impacted buildings were constructed more than 10 years ago
That doesn’t mean every balcony leaks. It does mean visible symptoms deserve quick follow-up, especially in buildings outside warranty periods.
#### Balcony decision tree (simple and practical)
- **Minor symptoms only** (hairline grout cracking, no staining, no ponding)
Monitor, take photos, ask for OC maintenance history.
- **Clear water signs** (staining below, efflorescence, ponding, drummy tiles)
Ask for OC records, committee minutes, and any past reports. Get a waterproofing specialist opinion.
- **Structural concerns** (spalling concrete, rust staining, movement, loose balustrades)
Treat as higher risk. Engage an engineer and notify OC promptly.
**What inspections can’t confirm in wet areas and balconies**
Membranes and concealed junctions can’t be verified without invasive work. The Victorian Building Authority water ingress research insights point to relevant waterproofing standards and encourages engaging a waterproofing consultant or suitably skilled design practitioner for specific designs.
### 7. Non-compliant or poor-quality renovations (DIY red flags)
Renovations can look great at opens, but shortcuts often appear around wet areas, structural changes, and ventilation.
Victorian guidance explains:
- Defects relate to contract terms and agreed quality
- Non-compliance means work in breach of building laws, and gives the example that inadequate bathroom waterproofing can be non-compliance and lead to moisture problems
**Common red flags buyers can spot**
- No visible exhaust fan ducting in bathrooms (or fan that vents into roof space)
- Uneven tiling, cracked grout, or persistent silicone patching
- DIY structural changes (removed walls, altered openings) with no paperwork
- New paint in one corner where staining might have been covered
- Balcony tiles replaced without clear drainage detail
**What to ask for**
- Compliance certificates where relevant
- Receipts and scope of works for waterproofing, plumbing, and structural changes
- OC approvals for apartment alterations
### 8. Plumbing and drainage warning signs you can spot early
A standard inspection is not a full plumbing test, but visible signs can still tell you plenty.
**What it can look like**
- Active leaks under sinks or at visible pipe joints
- Rust staining, swollen cabinetry, or damp kickboards
- Slow-draining fixtures
- Yard pooling and soggy patches near stormwater lines
- Downpipes discharging right at the base of walls
**Next steps**
- If you see active leaks, plan for a plumber to investigate
- If site drainage slopes towards the house, plan for drainage improvements
- For apartments, ask whether leaks have been raised with OC before
### 9. Ventilation and condensation risks
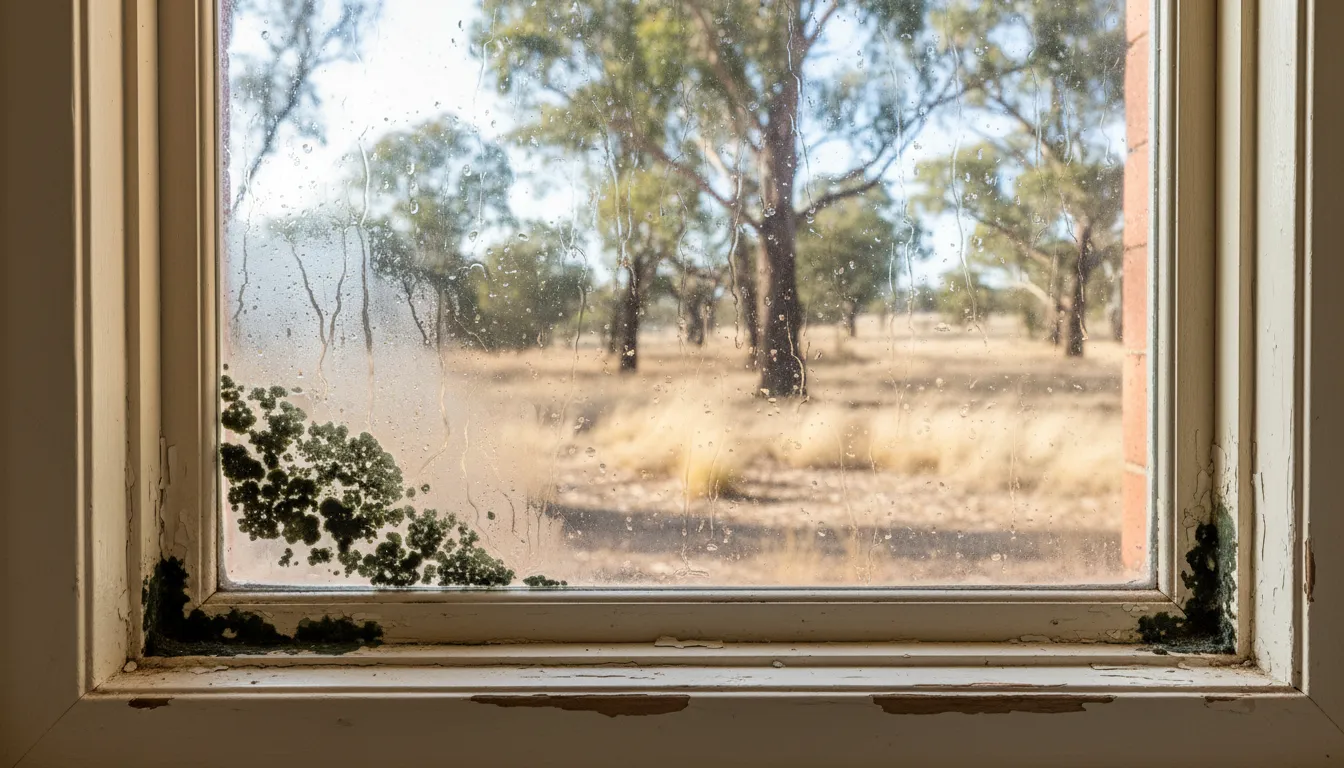
Condensation is one of the most misunderstood issues we see in Melbourne homes. It often gets blamed on “rising damp” or a roof leak, but it can also be a ventilation and temperature problem where warm indoor air hits cold surfaces and turns into water.
**What we see**
- Water beading on windows in the morning
- Mould on window reveals, curtains, or the corners of ceilings
- Peeling paint or bubbling plaster on cold external walls
- Musty smells in wardrobes, bedrooms, or behind furniture
- Black spotting on bathroom ceilings or around exhaust fans
- Damp skirting in external corners without a clear leak source
**Why it matters**
Condensation can feed mould, damage finishes, and make rooms feel colder and harder to heat. In some cases, it also hides a different issue like a slow plumbing leak or water ingress, so the pattern is what matters.
#### Condensation vs leak vs rising damp
| Issue | Common signs | Where it shows up | Likely next step |
| --- | ----- | ----- | ----- |
| Condensation | Moisture on glass, mould in corners, worse overnight or mornings | Windows, external corners, behind furniture | Improve ventilation and extraction, check insulation and air flow |
| Leak | Localised stain, gets worse after rain or after using a fixture | Ceiling patches, around showers, under sinks | Plumber or roofer to trace and repair source |
| Rising damp | Dampness low on walls, salts (efflorescence), skirting damage | Lower brick or plaster near ground level | Damp specialist or builder assessment, check ground levels and drainage |
**Common causes checklist**
- Bathroom and laundry fans not working, not ducted outside, or not used long enough
- Dryer venting indoors
- Blocked or painted-over vents, including subfloor ventilation vents
- Furniture pushed hard against external walls (no airflow)
- Older windows and cold surfaces that collect moisture
- Persistent moisture from wet areas such as leaking showers or failed waterproofing
**What a standard inspection can check**
- Visible mould patterns, staining, and peeling finishes
- Whether bathrooms and laundries have exhaust fans (and visible ducting where accessible)
- General airflow clues such as vent locations and blocked vents
- Signs that moisture may be coming from elsewhere, like roof leaks, plumbing leaks, or water ingress around openings
**What a standard inspection can’t confirm**
- Hidden mould inside sealed wall cavities
- Exact humidity levels over time without monitoring equipment
- Insulation coverage behind linings
- The condition of concealed waterproofing membranes without invasive checks
**What to do next**
If symptoms look like condensation only, start with practical fixes that are low cost and low risk.
- Run exhaust fans during showers and for a period after, and confirm they vent outside.
- Improve cross ventilation when weather allows.
- Avoid drying clothes indoors without extraction.
- Keep a small gap between furniture and external walls.
- Consider a dehumidifier in problem rooms while you investigate the cause.
If mould is widespread, keeps returning after cleaning, or the source is unclear, a specialist can help confirm whether it’s a ventilation issue, a leak, or water ingress.
**When to call a specialist**
- A mould or indoor air specialist if mould is extensive or persistent
- A plumber if there are wet-area symptoms, leaking fixtures, or unexplained damp patches
- A waterproofing specialist if showers, balconies, or wet areas show ongoing moisture signs
### 10. Safety basics (handrails, trip hazards, hot water, obvious electrical issues)
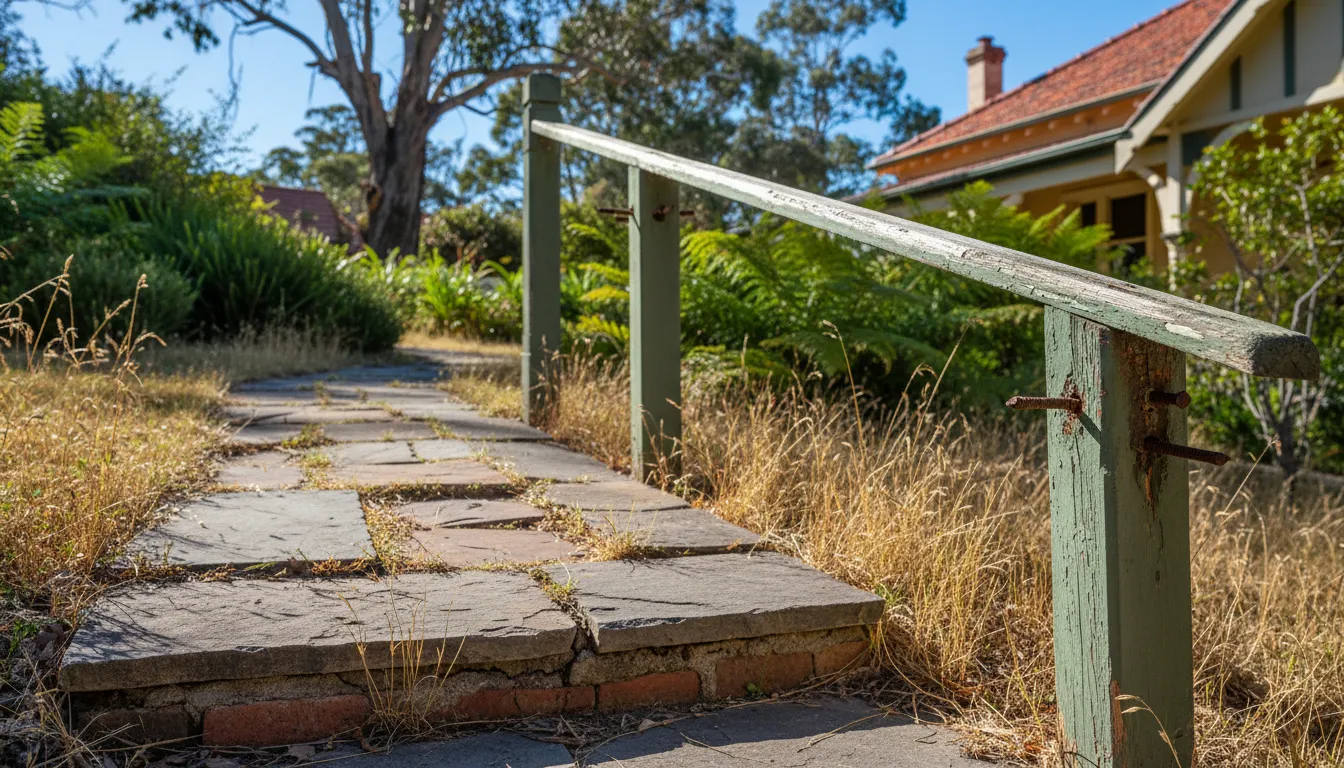
Safety items are easy to dismiss during an emotional purchase, but they can be the fastest way a property becomes unliveable or expensive to make safe. A home inspection won’t replace licensed trade testing, but it can flag obvious hazards and help you set priorities.
**What we see**
- Loose or unstable handrails and balustrades
- Uneven steps, damaged stair treads, or worn nosings
- Lifted tiles, raised timber edges, loose carpets, or uneven paving
- Missing covers on power points or switchboards, scorch marks, exposed wiring
- Hot water units showing corrosion, leaks, or poor mounting (visual signs only)
- Wet areas where water is reaching power points or lights
**Why it matters**
Falls and electrical hazards can be immediate risks. Some safety issues are also negotiation points because the fix is often required before moving in or leasing the property.
#### Safety table: visible signs and next step
| Safety item | What you might see | Why it matters | Likely next step |
| ----- | ----- | ----- | ----- |
| Handrails and balustrades | Movement when pushed, loose fixings | Fall risk | Repair promptly, builder or qualified trades |
| Stairs and steps | Cracked treads, uneven risers, worn edges | Trip and fall risk | Repair soon, carpenter or builder |
| Floors and paving | Lifted tiles, uneven paving, loose mats | Trip hazard | Repair soon, trades depending on surface |
| Electrical red flags | Scorch marks, exposed wiring, DIY-looking cabling | Fire and shock risk | Electrician assessment before settlement or occupancy |
| Hot water unit (visual only) | Leaks, corrosion, unstable base | Water damage and failure risk | Plumber to assess and service or replace |
**What a standard inspection can check**
- Obvious hazards that are visible in accessible areas
- Stability of handrails where safe to test lightly
- Clear trip hazards in common walkways
- Visible electrical red flags such as damaged fittings or unsafe-looking cabling
- Visible hot water issues like active leakage or corrosion
**What a standard inspection can’t confirm**
- Full electrical safety and compliance without testing by a licensed electrician
- Hot water temperature control performance without trade testing
- Hidden wiring issues or concealed plumbing faults
**What to do next**
If there’s an immediate safety risk, treat it as a priority item, not a “later” job.
- **Urgent safety:** exposed wiring, scorch marks, unstable balustrades, severely damaged steps
Next step: licensed electrician or builder before settlement or before anyone moves in.
- **Repair soon:** loose handrails, uneven paving in main paths, minor stair damage
Next step: obtain quotes and schedule repairs early.
- **Monitor:** minor wear that does not create a clear hazard
Next step: include in your maintenance plan.
Compare building
vs pest inspection
}
buttonHref="/articles/building-inspection-vs-building-and-pest-inspection"
variant="secondary"
/>
## What a Home Inspection in Melbourne Typically Includes (And Excludes)
### Typically includes (visual, accessible areas)
- External walls, visible brickwork and cladding
- Internal rooms, ceilings, wet areas for visible moisture signs
- Roof covering from ground level and roof space if accessible
- Subfloor if accessible
- Gutters, downpipes, surface drainage basics
- Doors/windows operation (binding can indicate movement)
- Visible safety issues (trip hazards, loose handrails)
### Typically excludes (common limitations)
- Invasive testing (cutting access holes, removing tiles, lifting flooring)
- Detailed engineering calculations
- Full electrical or plumbing compliance testing
- Asbestos sampling (requires specialist handling and lab testing)
- Concealed areas blocked by stored items or no safe access
### Common add-ons when risk is higher
- Timber pest inspection (AS 4349.3 focuses on timber pests)
- Structural engineer assessment for movement concerns
- Waterproofing specialist for balconies/showers
- Licensed electrician or plumber checks where symptoms exist
## How Much Do Home Inspections in Melbourne Cost?
Home inspection pricing in Melbourne depends on the property type, size, access, and what you bundle in. Owner Inspections quotes every job on the property, so ask for a fixed-price quote before you book. Across the Melbourne market, a standard residential building inspection is commonly in the $400 to $700 range.
If you want building condition plus termite and timber pest coverage, a [combined building and pest](/building-and-pest-inspections) inspection starts from $500, with pricing commonly sitting higher for larger or more complex properties. Owner Inspections also notes combined inspections can take 2 to 3 hours depending on the property, and they provide the report within 24 hours.
**What changes the price**
- **Property type:** apartment, townhouse, house, duplex
- **Size and layout:** floor area, number of storeys, roof complexity
- **Access:** roof space and subfloor access can affect scope and time onsite
- **Age and condition:** older homes and visible defects can increase inspection time
- **Inspection scope:** building-only vs building and pest, plus any specialist add-ons
### Indicative pricing table
| Inspection type | Typical Melbourne starting point | Best for | Notes |
| ---- | --- | ----- | ----- |
| Building inspection | From $400 | Buyers and owners wanting building condition and defect risk | Report delivered within 24 hours |
| Pre-purchase building inspection | From $400 | Pre-auction or cooling-off decisions | Report typically within 24 hours |
| Building and pest inspection (combined) | From $500 | Houses and any property where timber pest risk needs checking | Usually 2–3 hours onsite, report within 24 hours |
## When to Book a Home Inspection in Melbourne
### Pre-auction
- Book as early as you can once you’re serious.
- Provide the agent with access details up front (roof space, subfloor, meters).
- Use the report to decide: bid, cap your price, or walk away.
### Private sale
- Aim for inspection during the offer stage or within any cooling-off window (your conveyancer can advise on contract timing).
- If access is limited at the first visit, ask the agent to organise follow-up access.
### New build handover or pre-settlement
- Focus on workmanship, water management, drainage falls, and obvious compliance signals.
- Keep a list of defects with photos and locations so the builder can action them quickly.
### How to use the report to negotiate (without overclaiming)
Good negotiation is about evidence and priorities, not panic.
A conservative approach that works
- Separate findings into urgent safety, repair soon, and monitor
- Ask for receipts, compliance certificates, and OC records to fill gaps
- Get quotes from relevant specialists for leverage on higher-cost items
- Use defect photos and clear descriptions to support a price adjustment or repair request
## Severity Guide
| Severity label | What it usually means | Buyer action |
| --- | ------ | ------ |
| Monitor | Minor issue, no clear progression | Photo and re-check over time |
| Repair soon | Likely to worsen or cause damage | Budget and plan repairs |
| Urgent safety | Immediate risk or major damage likely | Specialist advice before committing |
## Home Inspections in Melbourne Common Issues
| Common issue | Visible signs | Why it matters | Likely next step |
| --- | ----- | ----- | ----- |
| Movement | Step cracking, binding doors, sloping floors | Can affect structure and finishes | Engineer if progressing |
| Damp | Efflorescence, bubbling paint, musty smell | Can cause decay and mould | Plumber or waterproofing specialist |
| Roof drainage | Blocked gutters, overflow marks | Drives water into building fabric | Repair gutters, confirm stormwater |
| Subfloor moisture | Musty smell, rot, poor vents | Timber decay and pest risk | Improve drainage/ventilation |
| Termite risk | Mud leads, damaged timbers, high moisture | Hidden damage risk | Separate pest inspection |
| Balcony leak | Ponding, staining below, drummy tiles | OC cost risk and structural damage | OC records + waterproofing review |
## Melbourne Buyer Checklist
Take this to opens. It won’t replace an inspection, but it helps you spot early warning signs.
- Check ceilings for stains, especially corners and near wet areas
- Smell for mustiness in wardrobes and bathrooms
- Look for efflorescence on bricks, balconies, and basement walls
- Test a few doors and windows for sticking
- Scan external brickwork for step cracking
- Check gutters for overflow marks or plant growth
- Look at downpipe discharge points (do they dump near walls?)
- Note ground levels: do paths and garden beds slope away from the house?
- Check bathrooms for loose tiles, cracked grout, heavy silicone patching
- In apartments, look under balconies for staining and rust marks
- Ask the agent for OC records, maintenance history, and past leak reports (apartments)
- Ask for receipts or compliance paperwork for renovations
- If you see moisture signs, plan for specialist follow-up
- If you see movement signs, consider an engineer review
- If it’s a house, plan for a pest inspection too
## Getting the Most Value from Your Home Inspection in Melbourne
A good inspection outcome is not perfect house or run away. It’s a clear picture of what’s normal, what needs repair, what needs specialist checking, and what that means for your budget and negotiating position. In Melbourne, the repeat themes are movement, moisture management, roof drainage, and waterproofing, with balconies and OC risk adding a layer for apartment buyers.
Request a quote
or book now
}
buttonHref="/contact"
variant="primary"
/>
### When Defects Are Found, Do Inspectors Re-inspect. Do You Pay Extra?
Source: https://ownerinspections.com.au/articles/when-defects-are-found-do-inspectors-re-inspect
Published: 2026-03-16 | Updated: 2026-03-26 | Category: Building Inspections
Author: Maison Azdari
What happens next when your stage inspector flags defects? Do you just forward the report to the builder and hope it gets fixed, or does someone actually come back to verify the work before it’s covered up?
If you’re building with a volume builder (or buying a turnkey build), this is the part that can feel murky. The build keeps moving, plaster is about to go on, and you’re trying to avoid paying for endless extra visits while still protecting your home.
Is a defect report the end of it, or the start of a loop of extra site visits and extra fees?
[Stage inspections](/new-construction-stage-inspections) are meant to catch problems while the work is still visible, before plaster, tiles, and finishes hide it. That changes the timeline the moment defects are found, because some items need proof of rectification before the build moves on.
## What the Typical 5–6 Stage Package Includes
Stage packages vary by state and inspector, but for detached volume-builder homes a 5-stage (sometimes 6-stage) set is common. Many inspectors call these progress inspections or construction stage inspections.
Most independent inspection packages are really a bundle of scheduled progress inspections. The labels vary, but the aim stays the same: check key work before it gets covered up.
### Slab / pre-slab (steel, set-out, penetrations)
This inspection usually happens before the concrete pour. It often focuses on:
- Set-out and dimensions against plans
- Reinforcement placement and spacing
- Slab penetrations (plumbing, electrical)
- Termite management elements (where visible and applicable)
- Site drainage and moisture management items that will be buried
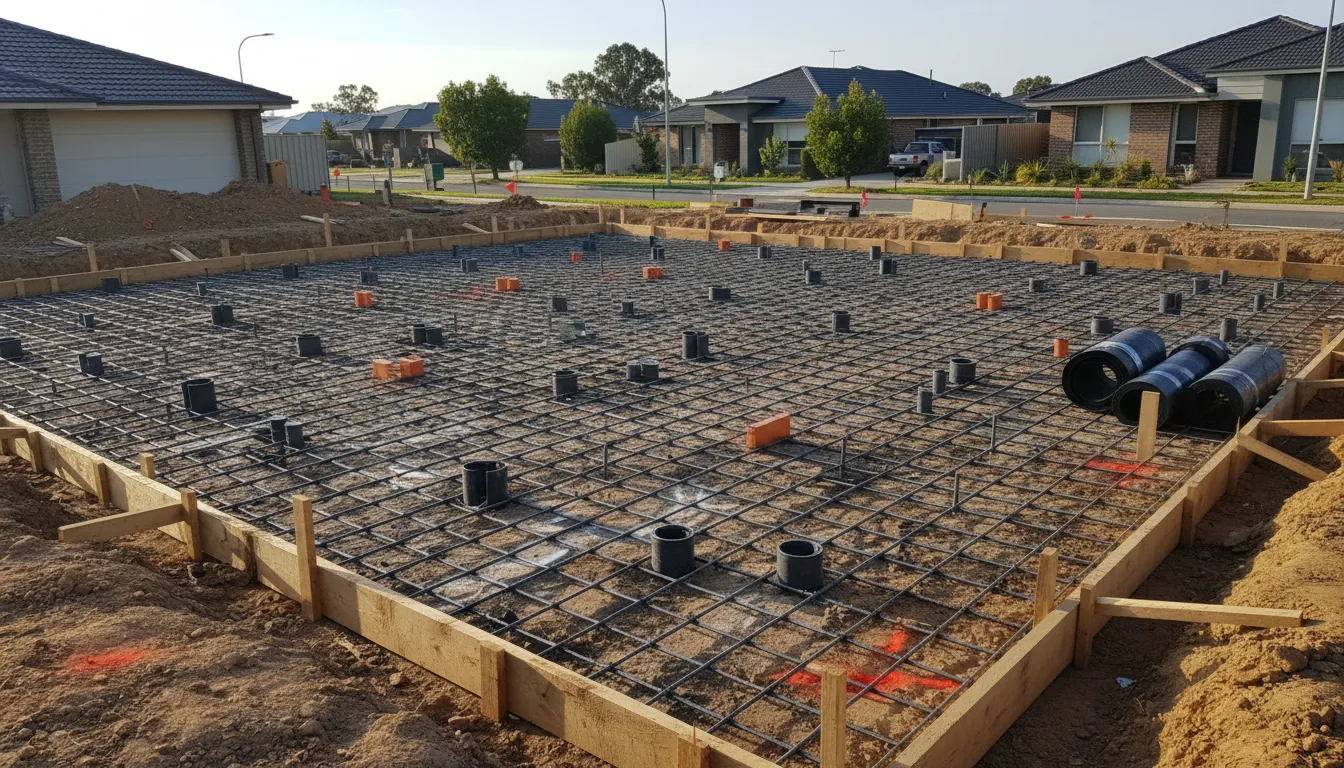
### Frame
Frame stage is where structural lines get locked in. Checks commonly include:
- Wall and roof framing alignment and bracing
- Tie-downs and connectors
- Openings for doors and windows
- Obvious workmanship issues that can flow into plaster problems later
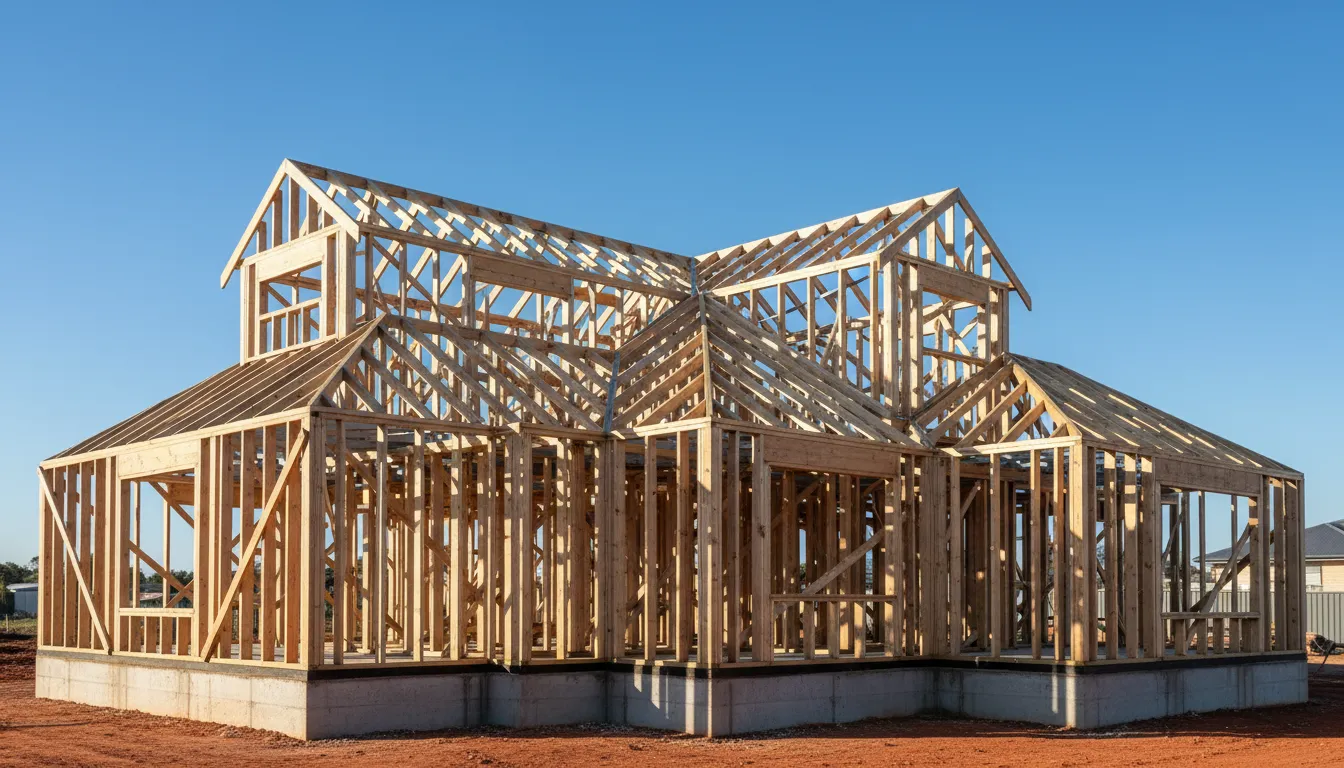
### Lock-up / pre-plaster
Many builders call this “lock-up” or “pre-plaster”. It is a high-risk stage because the next step hides a lot of evidence.
Typical checks include:
- Services rough-in (plumbing and electrical visible items)
- Wet area prep and obvious gaps that affect waterproofing outcomes
- Frame items still visible
- Windows and external envelope items that can affect water ingress
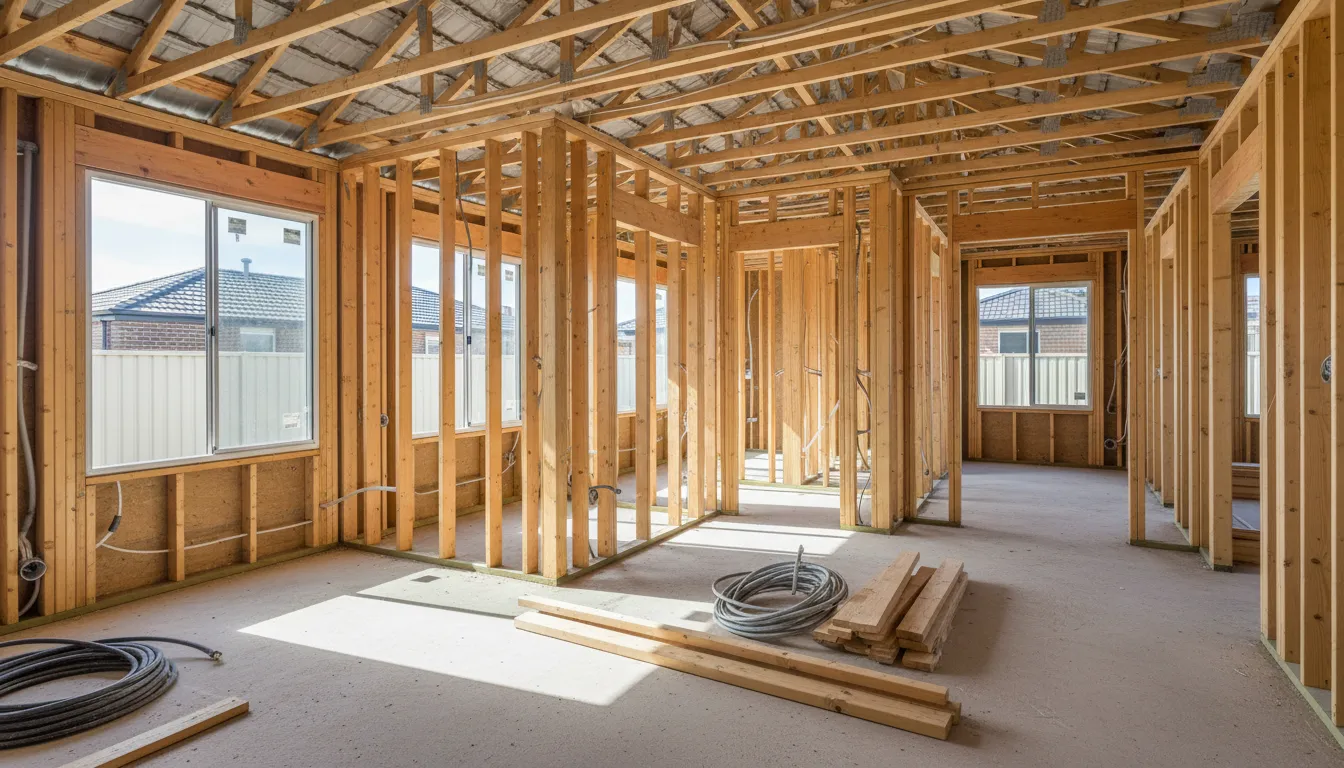
### Fixing / waterproofing (where offered)
Not every provider includes this stage, but when they do, it often covers:
- Waterproofing inspection (wet areas, balconies where accessible)
- Fixing stage items that affect finish quality and function
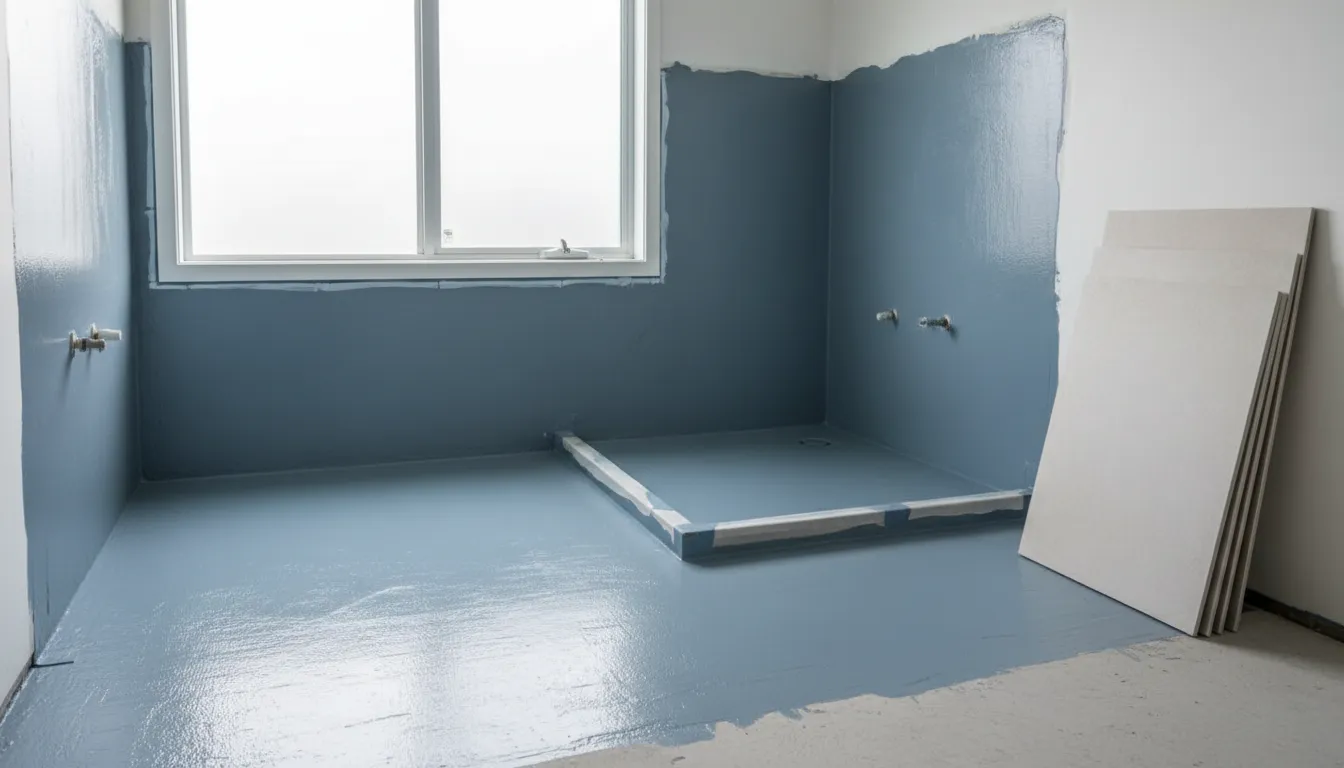
### PCI / Handover
A Practical Completion Inspection (PCI) or handover inspection is where a defects list often gets created. In QLD, the QBCC describes defects and incomplete work being documented in a defects list at the practical completion inspection, usually signed by both parties.
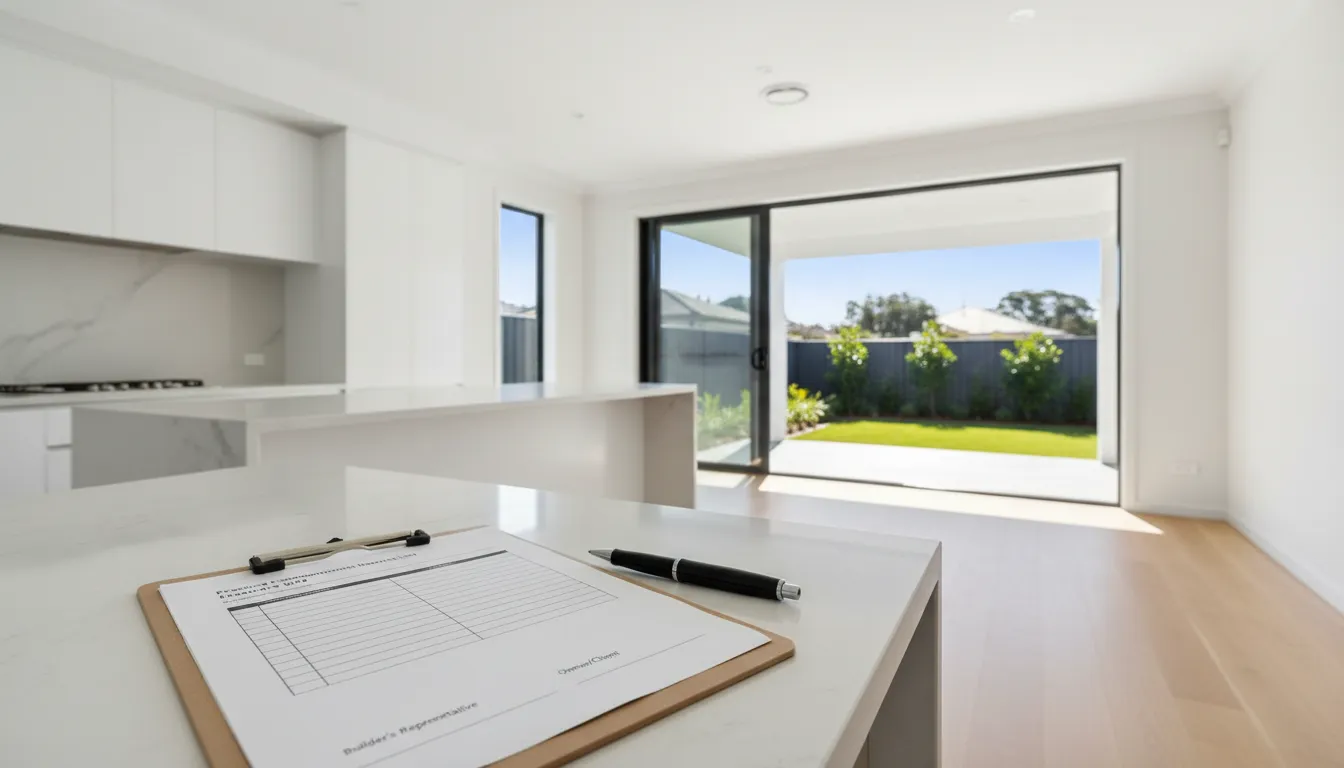
See what’s included
in stage inspections
}
buttonHref="/new-construction-stage-inspections"
variant="secondary"
/>
## What Happens When Issues are Found
Defects found at a stage inspection usually trigger a predictable sequence: report, builder response, rectification, and either verification or a decision to check at the next stage.
### The inspector’s deliverable: report + photos + priority/severity
A useful report does more than list issues. It should make the next actions obvious:
- Photos with clear locations
- A severity or priority label (safety/compliance risk vs minor)
- A note on whether the item must be verified before the next stage
- References to plans/specs where relevant
This matters because the pressure point is rarely “is there a defect”. The pressure point is “does it need proof before the builder covers it up”.
### Builder response pathways: fix, dispute, or “within tolerance”
Builders tend to respond in one of three ways:
- Rectify (best case)
- Dispute (the item is denied, delayed, or argued)
- Within tolerance (the builder argues it meets acceptable workmanship tolerances)
In NSW, the Guide to Standards and Tolerances is presented as a convenient reference for minimum technical standards and quality of work, and NSW Government notes it does not replace the Building Code of Australia or relevant Australian Standards.
### Why some defects must be rechecked before the next stage
A recheck is most valuable when the next trade will conceal the work. Once concealed, verification can become:
- Impossible without invasive inspection
- A fight over photos and claims
- A cost blowout if demolition is needed
This is the core reason re-inspections exist in private stage inspection workflows.
## Re-inspections: When You Actually Need Them
A re-inspection is an extra site visit to confirm rectification. It is not always required. The key question is visibility and risk.
### Critical hold points
Pre-plaster is the common pressure point because plasterboard hides:
- Frame fix quality
- Many rough-in issues
- Gaps, penetrations, and alignment problems
If the report flags “verify before cover-up”, treat it like a hold point. When owners skip verification here, they often lose leverage later.
When the next scheduled stage visit is enough (no extra trip)
### A separate reinspection is often avoidable when:
- The defect and the fix will still be visible at the next scheduled stage
- The item is minor and does not affect compliance or safety
- The builder can provide credible evidence and you can confirm later
**Example:** some frame items remain visible at lock-up. If they stay accessible, the next planned inspection can double as a check.
### When an extra reinspection prevents cover-up risk
A targeted reinspection can be worth it when:
- The builder is about to sheet, tile, waterproof-over, or pour over the area
- The defect has a compliance or safety angle
- The builder has a pattern of partial fixes or “we’ll get to it”
- The rectification needs proof for dispute prevention later
In NSW disputes, regulators and inspectors can focus on specific disputed items rather than doing a general inspection, so keeping evidence tight helps if a complaint escalates.
Book a
Reinspection
}
buttonHref="/reinspection"
variant="secondary"
/>
## Do Inspectors Charge Extra for Re-inspections?
Often yes. Many packages price the scheduled stages, and treat extra site trips as a separate service.
### The common fee models
Here are the models seen most often in the market:
| Pricing model | What it usually means | Best for | Watch-outs |
| ------------------------------------------ | ------------------------------------------------------------ | -------------------------------- | --------------------------------- |
| **Per extra visit (call-out)** | Any return to site is billed | Builds with uncertain quality | Costs rise if fixes are drip-fed |
| **Included one return (conditions apply)** | One recheck included for a stage, often within a time window | Owners who want certainty | Read the conditions carefully |
| **Targeted recheck rate** | Cheaper fee for checking only flagged items | Pre-plaster and PCI punch lists | Needs clear scope in writing |
| **Hourly + travel** | Time on site plus travel | Regional builds or complex sites | Travel and minimum hours can bite |
### Typical price ranges you’ll see in the market (and why they vary)
There is no single “official” reinspection price for private stage inspections in Australia. What can be measured publicly is the cost of a notice-period site visit for common stages, which gives a realistic anchor for what an extra trip tends to cost.
Many extra private reinspections (an extra site trip) land in one of these brackets:
- **Targeted recheck:** often priced below a full stage visit when it’s limited to flagged items
- **Full return visit:** often priced similar to a standard stage inspection fee
- **Regional travel loadings:** can push it higher due to time, distance, and access constraints
### What to Confirm in Writing Before You Book a Package
Before paying for a bundle, get clear answers to these in writing:
- What counts as a reinspection vs a scheduled stage visit?
- Is any return included? If yes, which stage and under what conditions?
- Is the return a full repeat inspection or a targeted recheck?
- Are there travel or after-hours surcharges?
- How fast can a recheck be scheduled if the builder gives short notice?
- Will the inspector accept builder photos for minor items, and when is on-site proof required?
## How Many Re-inspections are Normal by the End?
There is no universal benchmark because build quality, supervision, and trade sequencing vary a lot. A better way to think about “normal” is by scenario.
### Scenarios: smooth build vs average vs high-defect build
#### Smooth build (0 extra visits)
- Defects are minor
- Builder rectifies quickly
- Most fixes can be checked at the next scheduled stage
#### Average build (1–2 extra visits)
- One must-verify item before cover-up (often pre-plaster)
- A follow-up after PCI to confirm close-out on the defects list
### High-defect build (3+ extra visits)
- Multiple “must verify” items across stages
- Rectifications happen in pieces
- Scheduling pressure leads to “partial fixes” before the next trade arrives
A high-defect pattern is where a clear reinspection policy saves money, because it lets owners bundle rechecks rather than paying repeatedly.
### The stages where extra visits most commonly occur (pre-plaster + PCI)
Two stages create most of the extra visit risk:
- Pre-plaster / lock-up because concealment removes your chance to verify
- PCI / handover because a defects list is common and owners often want proof it is closed out
### Budgeting rule-of-thumb without overpaying
A practical way to budget is:
- Assume the base package covers the scheduled stage visits
- Set aside a buffer for one targeted recheck for pre-plaster risk
- Consider a post-PCI follow-up if the defects list is long or the builder has a slow response pattern
## Regulatory / Standards
Private stage inspections sit alongside building laws, codes, and dispute systems. Knowing the basics makes it easier to push back when “within tolerance” gets used as a blanket answer.
### Guide to Standards and Tolerances: what it is and what it isn’t
In NSW, the Guide to Standards and Tolerances 2017 is positioned as a convenient reference to minimum technical standards and quality of work.
NSW Government also notes the Guide is a general reference and does not replace the Building Code of Australia or relevant Australian Standards.
What that means in practice:
- The Guide can help frame workmanship debates
- It does not automatically override your contract, plans, inclusions, or NCC compliance requirements
- Some issues are not “tolerance issues” at all. They are contract or compliance issues
Victoria has its own guidance approach too. The Victorian government building advice site notes that the Guide to Standards and Tolerances can help determine if something is defective, for workmanship areas not covered by minimum legal standards or specified in a contract.
### Practical completion + defects list (QLD example)
The QBCC describes practical completion inspection as the point where defects, incomplete work, or items not built to specification are documented in a defects list, usually signed at the inspection.
QBCC also notes you can engage a building inspector at your own cost, and that the builder is responsible for fixing agreed defects within a reasonable timeframe after practical completion, with reasonable access required.
This supports a simple strategy: document clearly, agree the list, then verify close-out.
### Rectification pathways (NSW example)
If a dispute escalates in NSW, the NSW Government describes Rectification Orders under the Home Building Act, which list work to be rectified or completed, set conditions, and set a completion date.
NSW also provides statutory warranty timeframes for contracts signed on or after 1 February 2012, including 6 years for major defects and 2 years for other defects, with extra time if loss becomes apparent late in the period.
This is a big reason to keep inspection reports, photos, and dates organised from the start.
### Defects liability period (contract) vs statutory warranty (law)
HIA Insurance explains that a Defects Liability Period (DLP) is a contract clause that usually starts at practical or substantial completion, and for residential construction it is commonly around 3–6 months, varying by region and contract.
HIA also explains DLP is not the same as statutory warranty periods, which can extend longer under legislation.
Owners often mix these up. The practical takeaway: do not delay reporting and verification just because “warranty will cover it later”.
### Strata note (where bond/inspection schemes apply)
Handover and defects can work differently under strata schemes. In NSW strata building bond settings, NSW Government notes the developer is responsible for ensuring defective building work identified in an interim report is rectified before the final building inspection and report.
If you sit on a strata committee, check which scheme applies and what your inspection timing needs to be.
### NCC / Building Code
The National Construction Code (NCC) is described by the ABCB as Australia’s performance-based building and plumbing code that sets minimum technical requirements for new buildings and new building work.
Stage inspections do not replace certification. They give owners independent evidence and leverage while the work is still visible.
## How to Request a Reinspection and Manage Rectifications
Use this workflow to reduce wasted visits and reduce the risk of cover-up.
1. **Read the report like a to-do list**
Circle items marked as safety/compliance risk or verify before cover-up.
2. **Send a single, dated defects email to the builder**
Attach the report pages and photos. Ask for a proposed rectification date.
3. **Bundle fixes where possible**
Ask the builder to group rectifications so the inspector can verify once.
4. **Book a targeted recheck, not a full repeat, when appropriate**
Make sure the scope is flagged items only and confirm the fee.
5. **Do not allow concealment of unverified critical items**
Pre-plaster and waterproofing concealment are the common points of no return.
6. **Keep a simple evidence folder**
Report PDFs, photos, emails, site dates, and builder responses.
Request a quote
with reinspection terms
}
buttonHref="/contact"
variant="primary"
/>
### Builder won't fix defects: what are your options in NSW and Victoria?
Source: https://ownerinspections.com.au/articles/builder-wont-fix-defects-options-nsw-vic
Published: 2026-02-26 | Updated: 2026-08-07 | Category: Defect Investigation
Author: Maison Azdari
If your builder won't fix defects, you have four escalating options in both NSW and Victoria: send a formal written notice of defect, get an independent defect investigation report, lodge a complaint with the state regulator, and then apply to the tribunal. In NSW that regulator is Building Commission NSW, which can issue a rectification order, and the tribunal is NCAT. In Victoria it is the Building and Plumbing Commission, which runs free conciliation, and the tribunal is VCAT. In both states you must go through the regulator before the tribunal will hear most home building disputes, so the order matters.
The thing that decides these disputes is not how unreasonable the builder has been. It is whether you can show what the defect is, when you raised it in writing, and what independent evidence supports it.
This guide covers each step, the warranty deadlines that can end your claim, the duty you owe the builder to let them back on site, and what happens if the builder goes under.
## Builder Not Fixing Defects? Start Here
A defect is not just something you dislike. In Victoria, Consumer Affairs Victoria describes defects as work that breaches the contract by failing to meet a required standard or quality, or work that breaches an implied warranty.
In NSW, the Home Building Act 1989 gives homeowners statutory warranty rights for residential building work. The Act sets a 6-year warranty period for major defects and a 2-year period for other defects.
If you have a problem with a builder, treat the issue as an evidence process. Your goal is to show what the defect is, where it is located, when you raised it, what the builder said, and whether the builder had a fair chance to inspect and fix it.
Common signs that you may need to escalate include:
| Situation | What It May Mean | Next Step |
| ------------------------------------------------- | -------------------------------- | ------------------------------------ |
| Builder ignores emails or calls | Poor response record | Send a formal written notice |
| Builder says the defect is “normal” | Dispute over workmanship | Get an independent defect inspection |
| Builder attempts a repair but the issue returns | Incomplete or poor rectification | Document the failed repair |
| Builder refuses access or delays repeatedly | Escalation may be needed | Prepare complaint documents |
| Builder has disappeared, died or become insolvent | Insurance may become relevant | Check NSW HBC or VIC DBI cover |
This is the sort of finding that turns a disagreement into a documented defect. Staining spread across multiple boards and joists points to an ongoing water entry problem rather than a one off spill, which is exactly the distinction a builder will dispute and an independent report needs to settle.
## Builder Refusing to Fix Defects: What to Do First
If your builder is refusing to fix defects, do not rely on verbal promises. Put the issue in writing and keep records.
Consumer Affairs Victoria advises homeowners to [try resolving the dispute directly first](https://www.consumer.vic.gov.au/housing/building-and-renovating/defects-delays-and-insolvency/disputes-defects-and-delays), keep copies of relevant documents, record conversations, and take photographs of the disputed work.
A clear written record helps if you later need to report a builder, lodge a building defect complaint, apply to NCAT, apply to VCAT, or make an insurance claim.
Before escalating, prepare:
- The building contract
- Approved plans and specifications
- Occupancy permit, occupation certificate, or certificate of final inspection
- Photos and videos of the defects
- Emails, text messages, and call notes
- Any previous defect list or handover report
- Invoices, receipts, and payment records
- Independent defect investigation report, if available
Book a Defect
Investigation
}
buttonHref="/defect-investigation-reports"
variant="secondary"
/>
## Step 1: Send a Written Notice of Defect
Start with a written notice of defect. This gives the builder a clear chance to respond and creates a paper trail.
In Victoria, Consumer Affairs Victoria advises homeowners to send a letter or email formally outlining the issue and requesting a response if they cannot resolve the problem by speaking with the builder directly.
Your notice should include:
| What to Include | Why It Matters |
| ----------------------- | ----------------------------------------------- |
| Property address | Confirms the work in dispute |
| Contract details | Connects the defects to the agreed scope |
| Defect list | Shows each issue clearly |
| Photos | Gives visual evidence |
| Location of each defect | Helps the builder inspect and respond |
| Date first noticed | Supports your timeline |
| Requested repair | Shows the outcome you want |
| Response deadline | Creates a clear next step |
| Warning of escalation | Shows that you may lodge a complaint if ignored |
Use simple wording. For example:
> I am writing to notify you of defective building work at [property address]. Please see the attached defect list and photographs. Please confirm within 14 days when you will inspect and rectify the defects. If I do not receive a response, I may lodge a formal complaint with the relevant authority.
Send the notice by email and keep a copy. If you send it by post, Consumer Affairs Victoria recommends using registered mail.
### What Happens After You Send the Notice
There are three typical outcomes.
- The builder may respond and arrange to inspect and rectify the defects.
- The builder may respond and dispute the defects.
- The builder may not respond at all.
If the builder responds and arranges rectification, supervise the work carefully and document the results. If the repairs are inadequate, you will need to go through the process again. If the builder disputes the defects or fails to respond, proceed to the next step.
## Step 2: Get an Independent Defect Investigation Report
If the builder disagrees, delays, or refuses to fix the work, get independent evidence.
A defect investigation report can identify the defective building work, record its location, explain likely causes, and give repair recommendations. It can also help separate genuine building defects from cosmetic issues, maintenance issues, design disputes, or contract disagreements.
This matters because regulators and tribunals usually need evidence, not just frustration. NCAT tells applicants to provide relevant documents such as the contract, repair quotes, and photos when applying in home building matters under $30,000.
A good defect report may include:
| Report Item | Why It Helps |
| -------------------------------- | -------------------------------------------------------- |
| Defect description | Clearly explains the issue |
| Location | Shows exactly where the defect appears |
| Photos | Supports the written finding |
| Likely cause | Helps identify faulty workmanship or material issues |
| Relevant standard or requirement | Supports the technical basis |
| Severity | Helps separate minor defects from major defects |
| Recommended rectification | Gives the builder or tribunal a practical repair pathway |
Cracked tiles and failed ridge capping mortar like this are commonly written off by a builder as weathering or maintenance. A report that records the location, the extent and the likely cause is what separates a defect claim from an opinion.
## Step 3: Lodge a Complaint with the Regulator
If the builder does not respond or refuses reasonable rectification, the next step depends on your state.
| State | First Main Pathway | Tribunal Pathway |
| -------- | -------------------------------------------------------------------------------------- | ---------------- |
| NSW | Building Commission NSW / NSW Fair Trading complaint process | NCAT |
| Victoria | Building and Plumbing Commission dispute resolution service, previously known as DBDRV | VCAT |
Building Commission NSW provides a [free complaint handling service](https://www.nsw.gov.au/departments-and-agencies/building-commission/about-us/building-defect-complaints) for complaints about home building work, including houses, multi-unit dwellings, and specialist trade work.
Consumer Affairs Victoria sets out the [domestic building dispute resolution process](https://www.consumer.vic.gov.au/licensing-and-registration/builders-and-tradespeople/resolving-building-disputes) for consumers and practitioners. That free service is now delivered by the Building and Plumbing Commission, and was previously known as Domestic Building Dispute Resolution Victoria.
### NSW: Building Commission NSW
In New South Wales, home building complaints are handled by Building Commission NSW under the Home Building Act 1989. The Commission has taken over the building and construction regulatory work that NSW Fair Trading previously handled, so it is now the body you lodge a home building complaint with.
When you lodge a complaint, Building Commission NSW may:
A rectification order carries real weight, because failing to comply with one is a breach of the Home Building Act 1989. That said, the Commission cannot award you compensation. If the builder ignores the order, or if the inspector decides the builder is not responsible, the next step is NCAT.
### Victoria: the Building and Plumbing Commission
The BPC can:
Applying to the BPC is still a mandatory step before VCAT will hear most domestic building disputes involving a homeowner. Existing DBDRV cases carried across to the BPC rather than starting again.
## Step 4: Mediation
Mediation is a structured negotiation process where an independent mediator helps you and the builder reach an agreement. It is less formal and less expensive than a tribunal hearing, and many building disputes are resolved at this stage.
### How Mediation Works
The mediator does not make a decision or issue orders. Their role is to facilitate a discussion, help both parties understand each other's position, and work towards a mutually acceptable outcome. If you reach an agreement, it is put in writing and signed by both parties. The agreement can then be enforceable.
### Mediation in NSW
In NSW, Building Commission NSW runs a free dispute resolution service for home building disputes. You can also engage a private mediator if you prefer. Having your defect investigation report available during mediation strengthens your position, because it provides independent evidence of the defects and their estimated repair cost.
### Mediation in Victoria
In Victoria, the Building and Plumbing Commission provides assessment and conciliation for domestic building disputes, at no cost to the homeowner. This is a mandatory step before applying to VCAT. If conciliation cannot resolve the dispute, the BPC issues a certificate that allows you to proceed to the tribunal.
## Step 5: Apply to the Tribunal
If mediation and regulatory complaints have not resolved the dispute, the next step is to apply to the relevant tribunal for a formal hearing and binding orders.
### NSW: NCAT (NSW Civil and Administrative Tribunal)
NCAT can hear and decide disputes about residential building work in NSW. NCAT can make orders about payment for home building work, incomplete or defective home building work, specialist work, damage caused by home building work, and insurance claim appeals.
Before NCAT can accept most home building applications, the dispute must first be referred to the NSW Fair Trading dispute resolution process, now run by Building Commission NSW, unless an exemption applies.
NCAT can:
For claims under $30,000, NCAT says homeowners must first take part in the NSW Fair Trading dispute resolution process, now delivered by Building Commission NSW, which may involve a building inspector or direct referral to NCAT.
### Victoria: VCAT (Victorian Civil and Administrative Tribunal)
VCAT hears domestic and commercial building disputes between owners, builders, subcontractors, architects, engineers, and other building practitioners.
VCAT says it generally cannot help with domestic building work disputes involving a homeowner if the matter has not first been to DBDRV, now part of the Building and Plumbing Commission, unless the applicant seeks an injunction.
VCAT can:
If your matter may go to VCAT, organise your evidence early. VCAT’s building and construction resources include preparation topics such as evidence, witnesses, and expert reports.
View Expert Witness
Reports
}
buttonHref="/expert-witness-reports"
variant="secondary"
/>
## Documents to Prepare Before Escalating
Strong documentation can make a major difference when dealing with defective building work.
| Document | Why You Need It |
| ------------------------------------------------------------------------- | ------------------------------------------------------------- |
| Building contract | Shows the agreed scope, price, stages, and terms |
| Approved plans and specifications | Helps confirm whether work matches the agreed documents |
| Defect list | Gives a clear issue-by-issue record |
| Photos and videos | Shows the condition of the work |
| Emails and text messages | Proves when you notified the builder |
| Written notice of defect | Shows that you made a reasonable attempt to resolve the issue |
| Defect investigation report | Provides independent technical evidence |
| Repair quotes | Helps quantify the cost of rectification |
| Occupation certificate, occupancy permit, or final inspection certificate | Helps confirm completion dates |
| Insurance certificate | Helps identify whether HBC or DBI may apply |
## Builder Not Fixing Defects in NSW
If your builder is not fixing defects in NSW, start by trying to resolve the issue with the builder. If that fails, lodge a complaint through the NSW building dispute process. Building Commission NSW says homeowners should try to resolve the matter with the contractor or builder before making a complaint.
For home building complaints after completion, Building Commission NSW provides a free complaint handling service and can help with complaints under the Home Building Act 1989. A Building Commission NSW inspector may inspect the disputed items and either issue a rectification order or conclude that the builder is not responsible for the alleged defects.
A rectification order can list the work to be rectified or completed, set conditions for the parties, and set a completion date for the work. If the builder does not comply with a rectification order, or if you disagree with the decision, you may lodge a claim with NCAT.
### How Long Does a Builder Have to Fix Defects in NSW?
There is no single repair timeframe that applies to every defect in every NSW building dispute. The timeframe can depend on the contract, the type of defect, access, urgency, the complaint process, and any rectification order.
NSW statutory warranty periods are strict. For contracts signed on or after 1 February 2012, NSW gives 6 years for major defects and 2 years for all other defects. If the loss becomes apparent in the last 6 months of the warranty period, the homeowner has a further 6 months to enforce the statutory warranty.
This means you should not wait too long. If your warranty period is close to ending, get advice and act quickly.
## Builder Not Fixing Defects in Victoria
If your builder is not fixing defects in Victoria, first try to resolve the issue directly with the builder. Keep written communications, photographs, contract documents, invoices, and any other relevant evidence.
If direct contact does not resolve the dispute, send a formal letter or email that outlines the issue and requests a response.
If the builder still does not respond, you can apply for domestic building dispute resolution through the Building and Plumbing Commission. The BPC service was previously known as Domestic Building Dispute Resolution Victoria, or DBDRV.
The BPC offers a free and impartial service to help resolve domestic building disputes without the cost or delay of going to court.
If conciliation does not resolve the dispute, the BPC can issue binding dispute resolution orders or certificates that allow the dispute to progress to VCAT.
### How Long Does a Builder Have to Fix Defects in Victoria?
There is no single repair deadline for every Victorian building defect. The timeframe can depend on the contract, the defect type, the dispute resolution process, and any order made by the BPC or VCAT.
Victoria’s implied warranties apply to domestic building work, and builders must carry out work in a proper and workmanlike manner, use suitable materials, comply with laws and legal requirements, complete work with reasonable care and skill, and ensure completed homes are suitable for occupation.
Consumer Affairs Victoria states that the Building Act 1993 allows action against a builder for up to 10 years from the date the work was completed, and that this right transfers to a new owner if the property is sold within that time.
## How Long Does a Builder Have to Fix Defects?
Many homeowners search for how long does a builder have to fix defects because they want a clear deadline. The practical answer is this: give the builder a reasonable written deadline, but also watch the legal warranty periods.
| State | Main Time Limit / Warranty Period | Important Note |
| -------- | -------------------------------------------------------- | -------------------------------------------------------------------------------------------------------------------------------------------------------------- |
| NSW | 6 years for major defects and 2 years for other defects | NSW may allow a further 6 months if the loss becomes apparent in the last 6 months of the warranty period. |
| Victoria | Action may be brought for up to 10 years from completion | Domestic building insurance has separate cover limits: 6 years for structural defects and 2 years for non-structural defects. |
Do not confuse a builder’s repair deadline with a statutory warranty period. A repair deadline is the timeframe you give the builder to respond or rectify. A statutory warranty period is the legal timeframe that may affect your right to bring a claim.
## Can You Refuse to Let the Builder Back to Fix the Defects?
Usually not, and this is where homeowners most often damage their own claim. Once a relationship has soured, the instinct is to refuse the builder access and engage someone else to do the repairs. In NSW, that instinct can cost you money.
Section 18BA of the Home Building Act 1989 puts two duties on a homeowner claiming under a statutory warranty:
If you unreasonably refuse access, a tribunal can reduce what you recover, on the basis that the builder would have fixed the problem more cheaply than the contractor you hired instead.
Refusing access is not always unreasonable. It may be justified where the builder has already failed at the same repair several times, where the proposed method would not actually fix the cause, or where there is a genuine safety concern. The point is that the refusal needs a documented reason, not just a loss of confidence. An independent report that explains why the builder's proposed rectification method will not work is far stronger ground than a general unwillingness to have them back.
Whether a particular refusal is reasonable is a legal question that turns on your specific facts, so get advice from a solicitor before you lock the gate.
## Understanding Warranty Periods
Every step in this process is governed by statutory warranty periods. If you miss the deadline, you may lose the right to pursue the builder entirely.
### What Counts as a Major Defect?
In NSW, a major defect is defined in the Home Building Act 1989 as a defect in a major element of a building that is attributable to defective design, defective or faulty workmanship, defective materials, or failure to comply with the structural performance requirements of the NCC. A major element includes the internal or external load-bearing parts of a building, fire safety systems, and waterproofing.
In Victoria, the Domestic Building Contracts Act 1995 covers structural defects for ten years. These include defects affecting the structural soundness of the building, waterproofing failures, and issues that make the building unfit for habitation.
## Practical Steps to Protect Yourself
Regardless of which stage of the dispute you are at, these practical steps will help protect your position:
## What If the Builder Has Gone Out of Business?
If the builder has died, disappeared, become insolvent, or can no longer complete or fix the work, insurance may become relevant.
### NSW Home Building Compensation Cover
In NSW, home building compensation insurance is required for residential building work over $20,000, including GST, unless an exemption applies.
SIRA states that this cover protects homeowners and future homeowners when a building business cannot complete the work or rectify defects because of insolvency, death, disappearance, or certain licence suspension situations. Insurers are not obliged to offer more than $340,000 of cover per dwelling, a limit that has not moved in over a decade while construction costs have risen sharply. On a substantial rebuild, the cover may not stretch to the full cost of putting things right.
### Victoria Domestic Building Insurance
In Victoria, builders or tradespeople must take out domestic building insurance for clients when the cost of works exceeds $16,000.
Domestic building insurance gives limited cover if the builder or tradesperson dies, becomes insolvent, or disappears. If the policy was issued on or after 1 July 2015, it can also provide cover if the builder fails to comply with a final VCAT or court order.
Consumer Affairs Victoria states that domestic building insurance covers costs up to $300,000 to fix structural defects for 6 years and non-structural defects for 2 years.
Contact Owner
Inspections
}
buttonHref="/contact"
variant="primary"
/>
### Building Inspection vs Building and Pest Inspection: Which Do You Need?
Source: https://ownerinspections.com.au/articles/building-inspection-vs-building-and-pest-inspection
Published: 2026-02-26 | Updated: 2026-03-12 | Category: Pre-Purchase Inspections
Author: Maison Azdari
Buying a home is expensive enough without finding hidden defects after settlement. So which report do you actually need: a building inspection, or a building and pest inspection?
Here is the simple answer. A building inspection focuses on the condition of the property and looks for obvious defects and safety issues. A building and pest inspection includes that building check, plus a separate timber pest assessment for termites, termite damage and termite risk conditions. NSW Government says a building report may note visible termite damage, but it will not tell you whether termites are still present, which is why a separate [pest inspection](/timber-pest-inspections) is recommended, especially in known termite areas. Victorian and Queensland consumer guidance also tells buyers to arrange inspections before signing or finalising the purchase.
Choosing the wrong option can leave you exposed to thousands of dollars in undetected damage. This guide explains exactly what each inspection covers, how the costs compare, and when it makes sense to pay for the combined service.
## What is the Difference Between a Building Inspection and a Building and Pest Inspection?
A [pre-purchase building inspection](/pre-purchase-inspections) looks for obvious defects and areas of concern in the structure and condition of the home. Queensland guidance lists examples such as a faulty roof, leaking ceiling, weak or cracked walls, damaged foundations, mould, lack of waterproofing and drainage problems. Victorian guidance adds that a written report can flag faults, unsafe or unauthorised renovations or extensions, likely repair needs and issues that may help you negotiate price or contract terms.
A building and pest inspection goes further. The pest side checks for termites, evidence of termite damage and any existing termite management system. QBCC also says the inspector should tell you whether the property sits in an area with termite risk. Its termite management guide explains that a timber pest inspection under AS 4349.3 is a non-invasive visual inspection that looks for present or past timber pest activity, associated damage and conditions that could increase the chance of attack.
Read our
Buyer Guide
}
buttonHref="/guides/pre-purchase-building-pest-inspection-guide"
variant="secondary"
/>
## Do I Need to Do a Building and Pest Inspection?
In most cases, yes, especially if you are buying a house, townhouse, villa, duplex, older home, or any property with timber elements near the ground. NSW Government says you should get a pest inspection as well as a building report where termites are a known problem. Queensland guidance is even more direct: before you finalise the purchase, get a pre-purchase building inspection and a termite inspection, and make the sale conditional on being satisfied with the results. The National Construction Code also makes clear that termite management matters wherever subterranean termites present a potential risk and termite-susceptible building elements are involved.
A building-only inspection may still make sense in a narrower group of cases, such as some upper-floor apartments in mostly concrete buildings. Even then, that should not be an automatic decision. Shared roof spaces, storage areas, timber framing, balconies, gardens and common property can still raise questions, and a building inspection is still worth getting for defects, damp, safety issues and illegal works.
## What Does a Building Inspection Cover?
A building inspection is carried out in accordance with Australian Standard AS 4349.1. A licensed building inspector examines all reasonably accessible areas of the property and provides a written report detailing any defects found.
A typical building inspection covers:
- **Structural elements** such as foundations, footings, load-bearing walls, beams, columns, and floor systems
- **Roof exterior** including tiles or metal sheeting, flashings, valleys, gutters, and downpipes
- **Roof void** where accessible, checking framing, insulation, ventilation, and signs of leaks
- **Subfloor** including stumps, bearers, joists, and ventilation
- **Interior** covering walls, ceilings, floors, windows, doors, and wet areas
- **Exterior** including cladding, decks, balconies, retaining walls, fencing, and drainage
- **Safety items** such as smoke alarms, handrails, balustrades, and electrical switchboard condition
The inspector will classify defects by severity (minor, significant, or major) and note any areas that were not accessible. A quality report also includes photographs and recommendations for repairs or further specialist investigation.
What a building inspection does not cover is a detailed assessment of timber pest activity. The inspector may note visible signs of termite damage if they happen to observe it, but a standard building inspection does not include the systematic pest evaluation required by AS 4349.3.
## What Does a Building and Pest Inspection Cover?
A building and pest inspection combines the full building assessment described above with a dedicated timber pest inspection conducted under AS 4349.3. The pest component is typically carried out by a licensed pest inspector, and in many firms, this is a separate specialist who works alongside the building inspector.
The timber pest inspection adds the following:
- **Termite detection** using moisture meters, thermal imaging cameras, and tapping tools to identify active termite colonies or evidence of past activity
- **Timber borer assessment** looking for exit holes, frass (sawdust), and structural weakening caused by borers
- **Fungal decay identification** checking for wood rot in subfloor timbers, framing, and other structural timber
- **Conducive conditions** documenting factors that increase pest risk, such as poor drainage, timber-to-soil contact, garden beds against walls, and inadequate subfloor ventilation
- **Treatment history review** noting any existing termite management systems, chemical barriers, or baiting stations
The pest inspector will provide a separate report (or a combined report) that grades the risk level and recommends treatment or preventative measures.
## Key Differences at a Glance
| Aspect | Building Inspection | Building and Pest Inspection |
| --- | --- | --- |
| Standard | AS 4349.1 | AS 4349.1 + AS 4349.3 |
| Scope | Structure, safety, general condition | Structure, safety, condition + timber pests |
| Pest assessment | Incidental observations only | Systematic evaluation with specialised tools |
| Inspector | Licensed building inspector | Building inspector + licensed pest inspector |
| Duration | 1.5 to 2.5 hours | 2 to 3.5 hours |
| Typical cost | $400 to $700 | $500 to $900 |
| Report | Building defect report | Combined building and pest report |
Explore Timber
Pest Inspections
}
buttonHref="/timber-pest-inspections"
variant="secondary"
/>
## Cost Comparison
The price difference between the two inspection types is smaller than many buyers expect. In most Australian capital cities, a standalone building inspection costs between $400 and $700 depending on property size and location. A [combined building and pest](/building-and-pest-inspections) inspection typically costs between $500 and $900.
That means the pest component adds roughly $100 to $250 to the total cost. When you consider that termite damage repair bills regularly exceed $10,000 and can climb above $100,000 for severe infestations, the additional outlay for a pest inspection is marginal.
Booking both services together as a combined inspection is almost always cheaper than booking them separately. Most inspection companies offer a bundled rate, and scheduling both at the same time also means less disruption to the vendor and the selling agent.
## When You Need a Building Inspection Only
A building-only inspection may be sufficient in a narrow set of circumstances:
- **High-rise apartments** where the unit is above ground level and there is no direct timber-to-ground contact. Termite risk in upper-floor apartments is very low, though not zero.
- **Recent pest report available.** If the vendor has a current (within the past three months) timber pest inspection report from a reputable company, you might rely on that and commission a building inspection only. Always verify the report's currency and the inspector's credentials.
- **Concrete or steel construction** with no significant timber framing. Some commercial and industrial properties use no structural timber, which reduces the relevance of a pest inspection.
Even in these scenarios, it is worth discussing the decision with your inspector. They may identify conditions that increase pest risk beyond what you would expect.
## When You Need a Building and Pest Inspection
For the vast majority of residential property purchases in Australia, a combined building and pest inspection is the appropriate choice. This is especially true when:
- **The property has a timber subfloor or timber framing.** Most Australian houses, including brick veneer homes, use timber framing for walls and roof structures. Termites target these timbers whether the house looks like a "timber house" or not.
- **The property is in a high-risk termite zone.** The CSIRO has mapped termite risk across Australia, and most of the populated coastline falls within moderate to very high risk areas. Queensland, northern NSW, and parts of Western Australia carry the highest risk.
- **The property is older.** Homes built before modern termite management systems were standard are more vulnerable, particularly if chemical barriers have expired or were never installed.
- **You are buying a house with a garden.** Landscaping, mulch, garden beds, and trees near the house create conditions that attract termites.
- **There are signs of previous termite treatment.** Drill holes in concrete paths, bait stations in the yard, or chemical application records suggest a known termite history that warrants fresh assessment.
- **Your lender requires it.** Some mortgage lenders require a building and pest inspection report before approving a home loan, particularly in high-risk termite areas.
## What is the Most Common Building Code Violation?
There is not one single answer that fits every house in Australia. The type of issue depends on whether you are looking at a freestanding home, a recent apartment build, a renovation or an extension.
That said, waterproofing is one of the most common defect areas raised by regulators. Building Commission NSW says a small selection of defect types accounts for a large share of the defects found in its audits, and its Building Defects Library is built around those common issues.
Separate NSW research into recently completed strata buildings found that, among buildings with serious defects, waterproofing was the most common serious defect at 63%, ahead of fire safety systems and structural defects. The National Construction Code also treats waterproofing of wet areas as a core health and amenity requirement. So if a buyer wants one defect area to pay close attention to, waterproofing is near the top of the list.
## Why Your Own Independent Report Matters
Do not rely on a seller’s report just because it is available. NSW Government says a vendor report can help, but it is not a substitute for your own independent report. Consumer Affairs Victoria goes further and says buyers should be wary of reports offered by the agent or seller because getting your own report is the only way to make sure it is independent and accurate.
It is also worth checking who is doing the work. Queensland says only a licensed residential building inspector can carry out pre-purchase building inspections, and only a licensed pest controller can carry out termite inspections. In NSW, pest controllers doing prescribed pesticide work must hold a licence issued by the EPA. Victorian guidance also recommends using an inspection service with full professional indemnity insurance.
## Getting the Most Value From Your Home and Building Investment
For most home buyers, the safest default is simple: book the combined building and pest inspection unless there is a clear reason not to. The extra check can uncover termite damage, treatment history and risk conditions that a standard building report will not fully answer. At the same time, the building report helps you spot structural movement, damp, waterproofing failures, unsafe renovations and other defects that can affect price, safety and future maintenance.
The real value is not just finding defects. It is knowing what you are buying, what needs work, what should change the price, and when you need more specialist advice before you commit. For buyers who want a clear, independent view of a property, booking the inspection before exchange is money well spent.
## Our Recommendation
For any freestanding house, townhouse, villa, or duplex purchase in Australia, we recommend a combined building and pest inspection without exception. The cost difference is small, the protection is significant, and the peace of mind is well worth it.
Termite damage is one of the most expensive defects to repair, and it is also one of the most preventable when detected early. A pest inspection identifies not just existing damage but also the conditions that make future infestation likely. This allows you to take preventative action before a problem develops.
If you are buying an upper-floor apartment in a concrete building, a building-only inspection is usually adequate. But if there is any timber framing or if the building has a history of pest issues, add the pest component.
The bottom line is simple: unless you have a clear reason to exclude the pest inspection, include it. The small additional cost protects you against one of the biggest financial risks in Australian property ownership.
For a complete overview, see our [guide to pre-purchase building and pest inspections](/guides/pre-purchase-building-pest-inspection-guide).
### How Much Do Construction Stage Inspections Cost in Sydney and Melbourne?
Source: https://ownerinspections.com.au/articles/construction-stage-inspection-cost-sydney-melbourne
Published: 2026-02-26 | Updated: 2026-06-03 | Category: Construction Inspections
Author: Maison Azdari
Building a new home in Sydney or [Melbourne](/vic/building-inspections-melbourne) is exciting, but it also comes with a big question: how much does a [construction stage inspection](/new-construction-stage-inspections) cost, and is it worth paying for more than one inspection?
Most construction stage inspections in Sydney and Melbourne cost about $400 to $600 per stage, depending on the property size, location, stage being inspected, report detail and whether the home is single or double storey. A full package of building stage inspections often costs less than booking each inspection one by one.
If you are building a new home in Sydney or Melbourne, one of the smartest financial decisions you can make is to hire an independent inspector at each major construction stage. But how much do construction stage inspections actually cost, and what affects the price?
Get a Stage Inspection
Quote
}
buttonHref="/new-construction-stage-inspections"
variant="secondary"
/>
## What is Construction Stage Inspections?
Construction stage inspections are independent assessments carried out at key milestones during a residential build. A licensed third-party inspector visits the site to check visible work against the approved plans, the National Construction Code, relevant Australian Standards and the building contract.
The National Construction Code is the technical code used across Australia for the design, construction and performance of buildings, plumbing and drainage systems. It sets minimum requirements for structure, fire safety, access, health, amenity and sustainability.
The five standard building stage inspections are:
| Stage | What is checked |
| --------------------------- | ---------------------------------------------------------------------------------- |
| Slab or base stage | Footings, reinforcement, formwork, plumbing set-out and slab preparation |
| Frame stage | Structural framing, bracing, tie-downs, roof trusses, openings and alignment |
| Lock-up stage | Roof, windows, external doors, cladding, weatherproofing and external enclosure |
| Fixing or pre-plaster stage | Internal linings, waterproofing, cabinetry, wet areas and visible workmanship |
| Pre-handover or PCI | Final finishes, defects, incomplete work, fixtures, fittings and overall condition |
These inspections are also searched as building stage inspections, stage inspections, new construction inspection cost and construction stage inspections Melbourne.
Each inspection results in a detailed report with photographs, defect descriptions, and references to the relevant codes or standards.
## Construction Stage Inspection Cost in Victoria, NSW and QLD
The practical answer is that construction stage inspection cost usually sits between $400 and $600 per stage across Victoria, NSW and Queensland, with the final price shaped by the property, inspection stage, location and report scope.
| State | Typical per-stage cost | Notes |
| ---------- | ---------------------: | ----------------------------------------------------------------------------------- |
| NSW | $400 to $600 | Sydney travel time and larger outer growth areas may affect the quote |
| Victoria | $400 to $600 | Melbourne pricing is similar, with variation across inner, middle and outer suburbs |
| Queensland | $400 to $600 | PCI and handover checks may cost more due to the level of final review |
In NSW, [residential building contracts over $20,000](https://www.nsw.gov.au/housing-and-construction/building-or-renovating-a-home/preparing/contracts) must include a progress payment schedule, and payments may be tied to completed stages of work.
In Victoria, Consumer Affairs Victoria explains that [progress payments](https://www.consumer.vic.gov.au/housing/building-and-renovating/plan-and-manage-your-building-project/deposits-and-payments) are paid for completed building stages such as base, frame, lock-up and fixing, and that owners can use an independent building consultant or building inspector to check completed work before progress payments.
## Full Package Pricing
Most inspection companies, including Owner Inspections, offer a discounted package when you book all five stages together. A full five-stage package in Sydney or Melbourne typically costs between $1,500 and $2,500, depending on the size and complexity of the build.
Booking a package offers two clear benefits. You usually save compared with booking each stage separately, and the same inspector or inspection team can track the build history from slab through to handover.
| Package type | Typical cost guide | Best suited to |
| ------------------- | -----------------: | ---------------------------------------------------- |
| Two-stage package | $700 to $1,100 | Owners who only want frame and PCI checked |
| Three-stage package | $1,000 to $1,600 | Owners who want slab, frame and handover checked |
| Five-stage package | $1,500 to $2,500 | Owners who want full quality checks across the build |
A full package of building stage inspections generally costs a small percentage of the total build cost, but it can help identify defects before they are covered by later work.
## Sydney vs Melbourne Pricing
Pricing between Sydney and Melbourne is broadly similar, though local travel and market conditions can change the final quote.
Sydney inspection costs often sit toward the higher end of the range. This is usually due to travel time across Greater Sydney, site access, parking, and the distance to growth corridors such as the North West, South West and Macarthur areas.
Melbourne inspection costs are comparable. Some construction stage inspection Melbourne quotes may be slightly lower for inner and middle-ring suburbs, but outer areas such as Casey, Wyndham, Whittlesea, Melton and Pakenham may attract extra travel time.
| Location | Typical per-stage cost | What may change the price |
| ---------------------------- | ---------------------: | ------------------------------------------------- |
| Sydney metro | $350 to $600 | Traffic, parking, site access and travel distance |
| Greater Sydney growth areas | $400 to $600+ | Distance, scheduling and site access |
| Melbourne metro | $300 to $550 | Property size, stage and report scope |
| Outer Melbourne growth areas | $350 to $600+ | Travel time, double-storey builds and access |
The core inspection fee is usually similar in both cities. The main price differences come down to property size, location, number of stages and report detail.
## Per-Stage Inspection Costs
Individual stage inspections in Sydney and Melbourne generally fall within a consistent price range. The table below shows typical costs for each stage.
Prices are in Australian dollars and are indicative as of early 2026. Actual costs vary based on the factors described below.
Read the Defect
Inspection Guide
}
buttonHref="/articles/construction-defect-inspection"
variant="secondary"
/>
## What Affects the Price?
Several factors influence construction stage inspection cost.
| Price factor | Why it matters |
| --------------------- | -------------------------------------------------------------------------------- |
| Property size | Larger homes take longer to inspect and report |
| Number of storeys | Double-storey homes usually require more time |
| Build complexity | Custom designs, split levels and multiple wet areas can increase inspection time |
| Location and travel | Outer suburbs or regional areas may include travel fees |
| Stage being inspected | Slab and PCI inspections can require more detailed review |
| Report detail | Photo-rich reports with code references take longer to prepare |
| Urgency | Short-notice bookings may cost more |
| Package booking | Booking several stages together can reduce the per-stage cost |
Do not choose a building inspector on price alone. A basic checklist may cost less, but a detailed report with photos, defect descriptions and relevant code references gives the owner stronger documentation.
## The Value Argument: Inspection Cost vs Build Cost
The average cost of building a new home in Sydney or Melbourne can run into hundreds of thousands of dollars. A full set of construction stage inspections at $1,500 to $2,500 is a small share of the total build spend.
The value comes from timing. A defect found at frame stage, slab stage or waterproofing stage is usually easier to raise with the builder before the next trade covers it.
| Defect type | Why early detection matters |
| ------------------------- | -------------------------------------------------------------------------- |
| Waterproofing failure | Wet area defects can be hidden once tiling is complete |
| Frame defects | Framing issues are harder to see after plasterboard is installed |
| Slab defects | Reinforcement and set-out issues can be concealed after concrete is poured |
| Roof and flashing defects | Leaks may not appear until after handover |
| Drainage issues | Poor drainage can lead to moisture and movement concerns |
## Handover Inspection Cost and PCI Inspection Cost
A handover inspection is also called a PCI inspection, or Practical Completion Inspection. This happens near the end of the build before the owner accepts the home and final payment is made.
QBCC explains that a home reaches practical completion or is ready for handover when all building work is done, the property owner can move in, the home is suitable for occupation, has power and water, is weatherproof, and has no major defects.
Arranging a pre-handover inspection around a week before the nominated handover inspection so remaining issues can be addressed before handover.
| Inspection | Typical cost guide | What it checks |
| -------------------------------------- | -----------------: | ------------------------------------------------------------------- |
| Handover inspection | $350 to $600 | Final finishes, defects, incomplete work and visible quality issues |
| PCI inspection | $350 to $600 | Practical completion items before keys and final payment |
| New home handover inspection Melbourne | $350 to $600+ | Melbourne new builds before final acceptance |
## What Is Included in the Fee?
When you pay for a construction stage inspection, the fee should usually include:
Some providers also include a follow-up phone call to walk you through the report findings. Ask about this when requesting a quote.
## How to Get Accurate Pricing
The best way to get accurate pricing is to provide the inspection company with enough detail to quote properly.
| Detail to provide | Why it helps |
| ---------------------------- | ---------------------------------------------------------- |
| Property suburb | Confirms travel time and local access |
| Build type | Single-storey, double-storey, duplex or townhouse |
| Approximate floor area | Helps estimate inspection time |
| Stage required | Slab, frame, lock-up, fixing or PCI |
| Builder timeline | Helps schedule the inspection before work is covered |
| Package or single inspection | Changes the per-stage price |
| Report needs | Confirms whether a standard or detailed report is required |
Ask whether the quote includes GST, travel, report delivery, photographs, code references and a follow-up call.
Book Stage
Inspections
}
buttonHref="/new-construction-stage-inspections"
variant="primary"
/>
For a complete overview, see our [guide to construction stage inspections](/guides/construction-stage-inspections-guide).
### Defect Investigation Report vs Building Inspection Report: What Is the Difference?
Source: https://ownerinspections.com.au/articles/defect-investigation-vs-building-inspection-report
Published: 2026-02-26 | Category: Defect Investigations
Author: Maison Azdari
Australian homeowners dealing with building problems often hear two terms that sound interchangeable: building inspection report and [defect investigation report](/defect-investigation-reports). In practice, these are very different documents with different scopes, different levels of detail, and different uses. Choosing the wrong one can cost you time, money, and legal standing.
This article breaks down the differences so you can make an informed decision about which report you actually need.
## The Basic Distinction
A building inspection report is a general assessment of a property's condition. It tells you what the property looks like at a point in time. A defect investigation report is a targeted analysis of specific problems. It tells you what went wrong, why it went wrong, and what it will cost to fix.
The building inspection answers: "What is the current state of this property?"
The defect investigation answers: "What caused this defect, who is responsible, and how much will it cost to rectify?"
This distinction matters because the two reports serve different audiences and different purposes. A building inspection is typically prepared for a buyer, seller, or property owner who wants a general overview. A defect investigation is prepared for a homeowner who has identified specific problems and needs professional evidence to pursue rectification or a legal claim.
## Scope: What Each Report Covers
### Building Inspection Report
A standard building inspection report is prepared in accordance with AS 4349.1 (Inspection of Buildings). It covers the accessible areas of a property through a visual assessment. The inspector walks through the property, inspects the interior and exterior, and records what can be seen at the time of the visit.
The scope typically includes:
The inspection has defined limitations. The inspector does not move furniture, lift carpet, open up walls, or test concealed systems such as waterproofing membranes or structural framing. It is a snapshot of what is visible on the day.
### Defect Investigation Report
A defect investigation report focuses on specific problems. Rather than covering the entire property at a surface level, it examines particular defects in depth. The scope is defined by the issues the homeowner has identified or the building consultant has been engaged to investigate.
The investigation may include:
## When Each Report Is Used
Understanding when each report is appropriate helps you avoid paying for the wrong service.
## Level of Detail and Analysis
The depth of analysis is where the two reports differ most significantly.
### Building Inspection Report
A building inspection report describes what the inspector observed. The language is typically straightforward. Defects are noted with a brief description and sometimes a photograph. The report may classify issues as minor, significant, or major, but it generally does not explain why the defect occurred or reference specific code provisions.
For example, a building inspection report might state: "Cracking observed in the living room wall, approximately 3mm wide, extending from the window head to the ceiling."
### Defect Investigation Report
A defect investigation report takes the same crack and analyses it in depth. The investigator will measure the crack, examine the crack pattern to determine whether it is caused by structural movement, settlement, shrinkage, or thermal expansion, review the building plans and structural engineering details, and reference the relevant provisions of the NCC and Australian Standards.
For the same crack, a defect investigation report might state: "A diagonal crack measuring 3.2mm at its widest point extends from the window head to the ceiling junction in the living room. The crack pattern is consistent with differential foundation settlement. The footing design does not comply with AS 2870:2011 for the reactive clay soil classification at this site. The builder has failed to meet the structural adequacy provisions of NCC Volume Two, Part 3.1. Estimated rectification cost including underpinning and crack repair: $18,500."
The difference in depth is clear. The first description identifies the problem. The second explains it, attributes it, and quantifies it.
## Legal Standing and Evidentiary Value
A building inspection report is a commercial document prepared for a private client. It is not designed for use in legal proceedings. While it can be submitted as supporting material, tribunals such as NCAT and VCAT will generally give it limited weight compared to a report specifically prepared to address the issues in dispute.
A defect investigation report is closer to the type of evidence that tribunals expect. It identifies each defect, provides a cause analysis, references the codes and standards that have been breached, and estimates rectification costs. If the matter escalates to a hearing, the defect investigation report can form the basis of a formal [expert witness report](/expert-witness-reports).
Some defect investigation reports are prepared with the explicit intent of being used as evidence. In these cases, the building consultant may include a declaration of independence, a statement of qualifications and experience, and a methodology section that meets the requirements of the relevant tribunal's practice directions.
## Cost Comparison
The cost difference between the two reports reflects the difference in time, expertise, and depth of work involved.
While a defect investigation report costs more upfront, it provides substantially more value when you are dealing with building defects that need to be addressed. The detailed findings, code references, and rectification costings give you a clear basis for negotiating with the builder, lodging a formal complaint, or pursuing a tribunal claim.
## Can a Building Inspection Report Be Used for a Defect Claim?
A building inspection report can be a useful starting point. If you commissioned a pre-purchase or [pre-settlement inspection](/apartment-pre-settlement) that identified defects, those findings and photographs provide initial evidence. However, the report alone will not be sufficient for a formal warranty claim or tribunal application.
Here is why:
If your building inspection has flagged defects that you want to pursue, the next step is to engage a building consultant to carry out a targeted defect investigation. The building inspection report can inform the scope of that investigation, but it cannot replace it.
## Which Report Do You Need?
For a complete overview, see our [guide to building defect investigations](/guides/building-defect-investigation-guide).
### How to Document Building Defects for a Legal Claim
Source: https://ownerinspections.com.au/articles/document-building-defects-legal-claim
Published: 2026-02-26 | Updated: 2026-03-09 | Category: Defect Investigation
Author: Maison Azdari
Building defects are stressful enough on their own. The bigger problem starts when a homeowner knows something is wrong but cannot prove when it appeared, how bad it is, or what the builder was told. If a dispute reaches a regulator, tribunal or court, the outcome will depend on the quality of your evidence. NCAT says cases are decided on the evidence presented, VCAT treats expert reports as evidence, and QCAT accepts documents such as contracts, receipts, correspondence, photos, videos and expert reports.
If you have cracking, leaks, movement, poor finishes, waterproofing failures or incomplete work, start documenting straight away. Good documentation helps you show what the defect is, when it appeared, whether it is getting worse, what you spent to limit damage, and whether the builder had a fair chance to fix it. That makes your position much stronger in NSW, Victoria and Queensland.
## Why Documentation Matters in Defect Claims
Tribunals such as NCAT in New South Wales and VCAT in Victoria make decisions based on the evidence presented by each party. If you claim that your builder left waterproofing defects in your bathroom, the tribunal will want to see photographs, inspection reports, and a record of when the problem first appeared and what was communicated to the builder.
Builders and developers have legal teams. They will challenge your claim at every opportunity. They may argue that the defect does not exist, that you caused it, that it falls outside the warranty period, or that they were never properly notified. Strong documentation removes these arguments one by one.
The goal is simple: create a clear, dated, verifiable record that tells the story of the defect from the moment you first noticed it through every communication and inspection to the present day.
## Photography and Video Tips
Photographs and videos are the most immediate and persuasive form of evidence in a defect claim. A tribunal member who can see a crack, a water stain, or a poorly installed fitting will understand the issue far more quickly than one reading a written description alone.
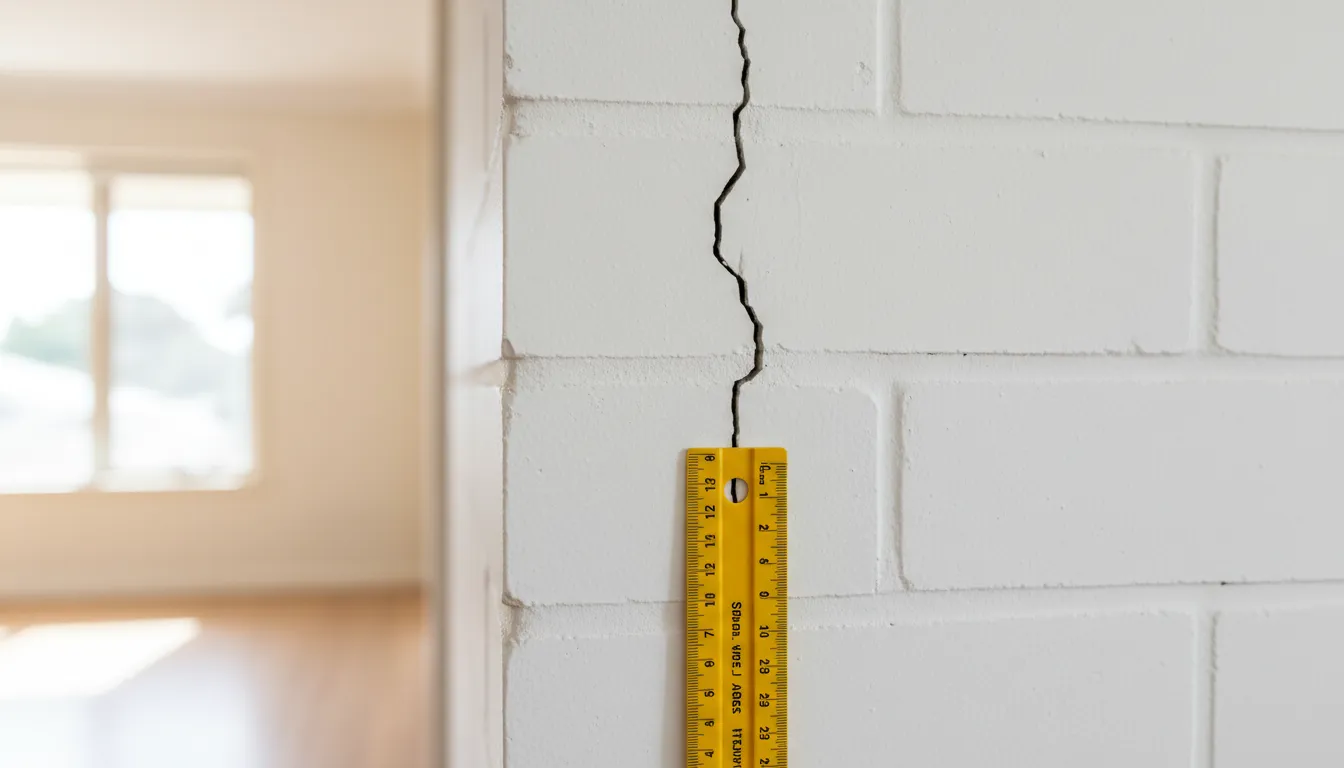
### What to Photograph
Every defect should be photographed from at least two perspectives: a wide shot that shows the defect in context within the room or area, and a close-up that shows the detail of the problem.
### Video Walkthroughs
Video is especially useful for documenting water leaks, areas of extensive damage, and defects that are difficult to capture in a single photograph. Walk through the affected area slowly, narrating as you go. State the date, the room you are in, and describe what you are seeing.
### Organising Your Photos
Create a folder structure on your computer or cloud storage that is organised by date and location. For example:
This organisation makes it straightforward to retrieve specific evidence when preparing your claim or briefing an inspector.
## Keeping Written Records
Written records provide the narrative that connects your photographs and reports into a coherent story. Every time you notice a new defect, observe an existing one getting worse, or have any interaction with the builder about the issue, write it down.
### What to Record
### Format
A simple dated log is the most effective format. You can use a spreadsheet, a notebook, or a document on your computer. The key is consistency. Record every observation and interaction as close to the time it happens as possible. Notes written weeks or months after the fact carry less weight.
## Obtaining Independent Reports
Your own photographs and notes are important, but an independent building inspection report from a qualified professional adds significant weight to your claim. Builders can dispute your interpretation of a problem, but it is much harder to dismiss the findings of a licensed building consultant who has referenced the National Construction Code and relevant Australian Standards.
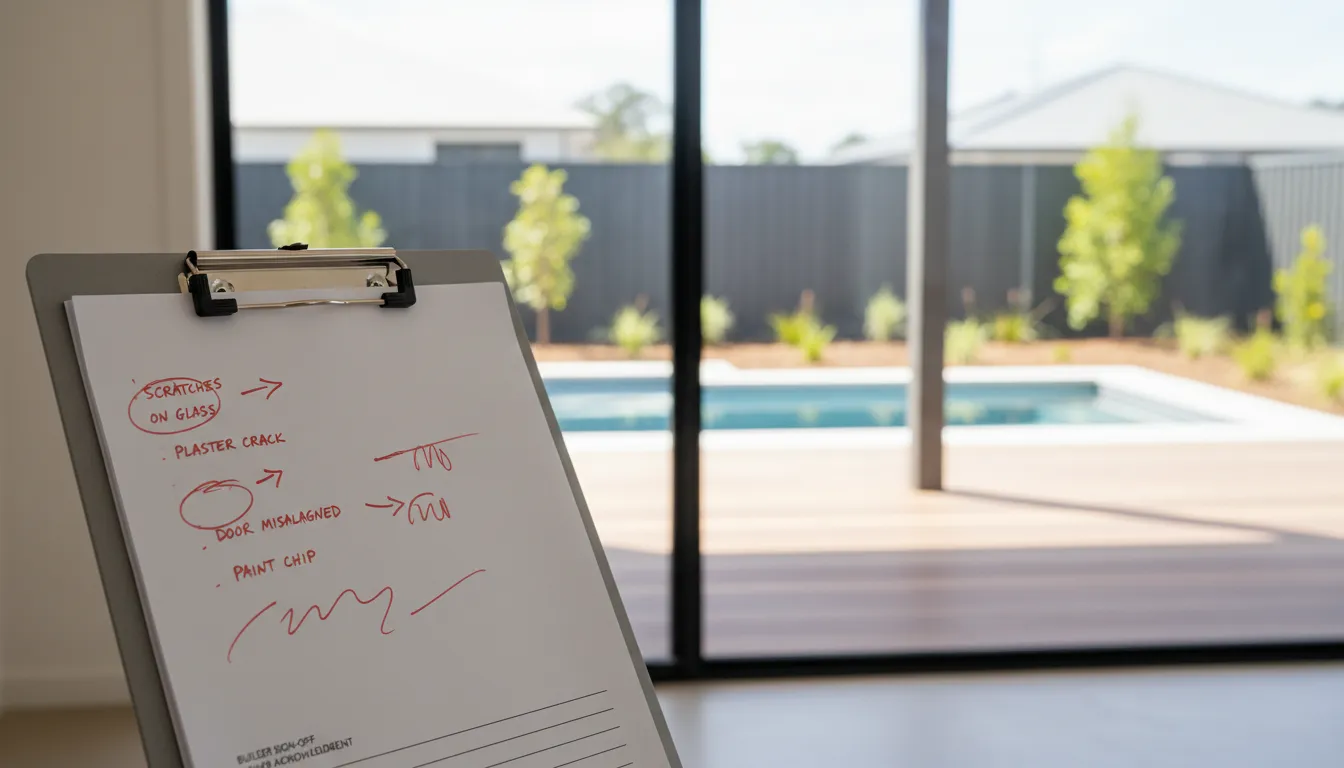
### When to Get an Independent Report
### What the Report Should Include
A useful [defect investigation report](/defect-investigation-reports) for legal purposes will identify each defect, explain its likely cause, reference the specific clauses of the NCC or Australian Standards that have been breached, and provide an estimated cost of rectification. This structure mirrors what tribunals such as NCAT and VCAT expect to see in evidence.
## Preserving All Correspondence
Every communication with the builder, developer, strata manager, or any other party involved in the defect is potential evidence. This includes emails, text messages, letters, and even social media messages.
### How to Preserve Correspondence
### Formal Written Notices
When you notify the builder of defects, do so in writing. A formal defect notice should list every defect with a description and reference to your photos, state that you expect rectification within a reasonable timeframe (typically 14 to 28 days), and reference the applicable statutory warranty provisions. Keep a copy of the notice and proof that it was delivered.
This formal notice is often a prerequisite before you can take the matter to a tribunal. In NSW, for example, NCAT will want to see that you gave the builder a reasonable opportunity to fix the defects before lodging an application.
Read the Warranty
Defect Guide
}
href="/articles/understanding-construction-warranty-defect-report"
variant="secondary"
/>
## Building a Timeline of Events
A timeline is one of the most useful documents you can prepare for a legal claim. It brings together all of your evidence into a single chronological narrative that shows when defects appeared, what was communicated, and how the builder responded (or failed to respond).
### What to Include in Your Timeline
Present the timeline as a simple table or list with the date in the first column and the event in the second. This format is easy for a tribunal member or solicitor to follow.
## How Long is a Builder Liable for Defects?
This is one of the most searched questions, and the answer depends on the state and on whether you are talking about a contract defect period, statutory rights, or insurance.
### New South Wales
In NSW, there are usually two different periods to think about. The builder’s own defects and liability period is usually around 13 weeks for new homes, but statutory warranties run longer. NSW says statutory warranties are 6 years for major defects and 2 years for all other defects for contracts signed on or after 1 February 2012. If the loss becomes apparent in the last six months of the warranty period, the owner gets an extra 6 months to enforce the warranty.
### Victoria
In Victoria, some contracts include a defect liability clause giving the builder 3, 6 or 9 months to fix defects. That is not the end of the owner’s rights. Consumer Affairs Victoria says implied warranties apply to domestic building work for 10 years. That is the main legal point the article needs to make clearly.
### Queensland
In Queensland, the defects liability period for a new build or major renovation should usually be 6 or 12 months under the contract, and QBCC says it is commonly 12 months from practical completion. For non-structural defect disputes, QBCC says owners should first notify the contractor and, if unresolved, lodge a complaint as soon as possible and no later than 12 months from completion.
## Does Insurance Cover Building Defects?
Sometimes, but only in limited situations. Homeowners should not assume that any defect will be paid by insurance.
### NSW
NSW home building compensation is there to protect owners if the builder cannot complete work or fix defects because of insolvency, licence suspension for failing to comply with a court or tribunal order, death or disappearance. SIRA says the cover protects homeowners for 6 years against major construction defects and 2 years for other losses from completion.
### Victoria
In Victoria, domestic building insurance covers the owner if the builder dies, is insolvent or disappears. For policies issued by VMIA on or after 1 July 2015, cover may also respond if the builder fails to comply with a final VCAT or court order. The cover is generally up to $300,000 for structural defects for 6 years and non-structural defects for 2 years. In all other cases, the builder is still the party expected to fix or complete the work.
### Queensland
QBCC says home warranty insurance is meant to protect homeowners for defective or incomplete building work and subsidence. For structural defects, cover generally applies if you first become aware of the defect within 6 years 6 months of the cover start date and lodge within 3 months of becoming aware. For non-structural defects, the defect must usually appear within 6 months of substantial completion and the claim must be made within 7 months.
## What is the Defect Liability Clause?
A defect liability clause is a contract clause that gives the builder a set time after completion to return and fix certain defects. In Victoria, Consumer Affairs Victoria defines it as a clause that gives the builder 3, 6 or 9 months to fix defects arising from the contracted works, and says it should not be used to deal with defects already known at completion. Those should be fixed before final payment is made.
Queensland uses the same idea, though the period is commonly 12 months from practical completion. NSW also refers to a builder’s own defects and liability period, usually about 13 weeks for new homes.
> The key point is that a defect liability period is **not** the same thing as your full legal rights. It is one contract mechanism for early rectification. Statutory warranties and insurance rights can run longer.
## When to Escalate the Dispute
If the builder does not fix the issue after written notice, the next step depends on the state.
In NSW, [home building disputes](https://ncat.nsw.gov.au/case-types/housing-and-property/home-building.html) generally need to be referred to NSW Fair Trading before NCAT can accept the application, unless an exemption applies.
In Queensland, parties generally need to go through the [QBCC dispute resolution process](https://www.qcat.qld.gov.au/case-types/building-and-construction/domestic-and-commercial-dispute-process/domestic-and-commercial-building-disputes) before making a building dispute application to QCAT, and QCAT can then require evidence and expert reports.
In Victoria, [expert evidence](https://www.vcat.vic.gov.au/the-vcat-process/prepare-to-come-to-vcat/expert-reports) can be important in VCAT building matters, and expert reports must be impartial.
Explore Expert
Witness Reports
}
href="/expert-witness-reports"
variant="secondary"
/>
## Common Documentation Mistakes to Avoid
For a complete overview, see our [guide to building defect investigations](/guides/building-defect-investigation-guide).
### How Long Does a Pre-Purchase Inspection Take?
Source: https://ownerinspections.com.au/articles/how-long-does-pre-purchase-inspection-take
Published: 2026-02-26 | Updated: 2026-03-12 | Category: Pre-Purchase Inspections
Author: Maison Azdari
If you are buying a property and wondering how long the inspection process will take, the short answer is that the on-site inspection runs for about 1.5 to 2.5 hours and the written report is typically delivered within 24 hours. But there is more to the timeline than just those two numbers.
Understanding the full process from booking through to receiving your report helps you plan around auction dates, cooling-off deadlines, and contract conditions. This guide breaks down the timeline step by step so you know exactly what to expect.
## On-Site Inspection Time
Use the guide below as a practical benchmark. Actual timing depends on property size, age, access, and whether the job is building-only or building and pest. Industry pages commonly place standard inspections at around 1 to 2 hours for many homes, with larger or more complex homes taking 2 to 4 hours.
Here is a general guide based on property type:
| Property Type | Typical On-Site Time |
| --- | --- |
| 1-2 bedroom apartment | 45 minutes to 1.5 hours |
| 3-bedroom house | 1.5 to 2.5 hours |
| 4-5 bedroom house | 2 to 3 hours |
| Large or multi-level home | 2.5 to 3.5 hours |
| Rural property with outbuildings | 3 to 4+ hours |
These times cover a thorough inspection. Be cautious of inspectors who promise to complete a full house inspection in under an hour. A comprehensive assessment takes time, and rushing through it increases the risk of missing important defects.
Read the full
inspection guide
}
buttonHref="/guides/pre-purchase-building-pest-inspection-guide"
variant="secondary"
/>
## What Affects How Long a Pre-purchase Inspection Takes?
**The first factor is the property itself**. Bigger homes take longer. Older homes also take longer because they tend to have more wear, more past alterations, and more areas that need careful checking. Access matters too. A roof void, subfloor, locked room, packed garage, or blocked inspection hatch can slow the process or limit what the inspector can assess.
**The second factor is scope**. A standard building inspection is not always the same as a [combined building and pest](/building-and-pest-inspections) inspection. NSW guidance makes that clear: a building report may note visible termite damage, but it does not confirm whether termites or other timber pests are still present, which is why a separate [pest inspection](/timber-pest-inspections) is often recommended. Electrical inspections may also need to be arranged separately unless they are specifically included.
**The third factor is property type**. In strata and company title properties, the inspector will usually assess the interior and immediate exterior of the unit, not all common property. If a buyer wants wider common-area assessment, that generally needs to be requested separately. That point is missing from many lightweight articles, but it is highly relevant for apartment buyers.
## What Happens During the Inspection
In property, PPI usually means pre-purchase inspection. A standard [pre-purchase building inspection](/pre-purchase-inspections) focuses on the visible condition of the building and aims to identify significant defects, movement, damp-related issues, safety concerns, and other major problems present at the time of inspection. Government guidance also notes that inspectors look beyond cosmetic presentation and help buyers spot faults that an untrained buyer may miss.
**Exterior assessment (30 to 45 minutes).** The inspector walks the full perimeter of the property, examining external walls, cladding, windows, doors, roofline, gutters, downpipes, drainage, paths, driveways, retaining walls, fencing, and landscaping. They look for cracking, water damage, deterioration, and conditions that might attract pests.
**Subfloor inspection (15 to 30 minutes).** If the property has a subfloor that is accessible via a crawl space, the inspector will enter and examine stumps, bearers, joists, bracing, plumbing, and ventilation. They also check for moisture, termite activity, and timber decay. Not all properties have accessible subfloors.
**Roof void inspection (15 to 30 minutes).** The inspector accesses the roof space through a manhole and checks the roof framing, insulation, ventilation, electrical wiring, and signs of water penetration or pest activity.
**Interior assessment (30 to 45 minutes).** Every room is inspected, including walls, ceilings, floors, doors, windows, wet areas (bathrooms, laundry, kitchen), built-in fixtures, and the electrical switchboard. The inspector uses moisture meters in wet areas to check for leaks.
**Pest inspection (20 to 40 minutes).** The timber pest assessment often overlaps with the building inspection but involves additional tools such as thermal imaging cameras, moisture meters, and tapping tools. The inspector checks all accessible timbers for evidence of termites, borers, and fungal decay, and documents any conducive conditions.
**Site notes and wrap-up (10 to 15 minutes).** The inspector completes their on-site notes, photographs, and measurements. If you are present, they will walk you through the key findings and answer your questions at this stage.
## What Should a Pre-purchase Inspection Include?
In NSW, the report is meant to identify major visible problems, not every issue in the property. In Victoria, consumer guidance says a professional report should list faults, whether they can be repaired, likely costs, and unsafe or unauthorised renovations, which shows why buyers should always confirm scope with the inspector before booking.
A strong pre-purchase inspection should include:
- A written report with photos
- A clear summary of major defects and safety issues
- Notes on areas that were not inspected or could not be accessed
- Advice on whether further specialist checks are needed
- Clear wording about exclusions, such as pests, electrical, plumbing, pools, or asbestos testing if those are not part of the booked service.
NSW guidance says standard reports do not usually cover things like concealed damp-proofing, most plumbing and drainage, electrical wiring and smoke detectors, pools, appliances, or termite detection. [Building inspection report](https://www.nsw.gov.au/housing-and-construction/buying-and-selling-property/buying-property-nsw/inspecting-a-property/inspection-reports) is not a certificate of compliance and should not be treated as a guarantee against future problems.
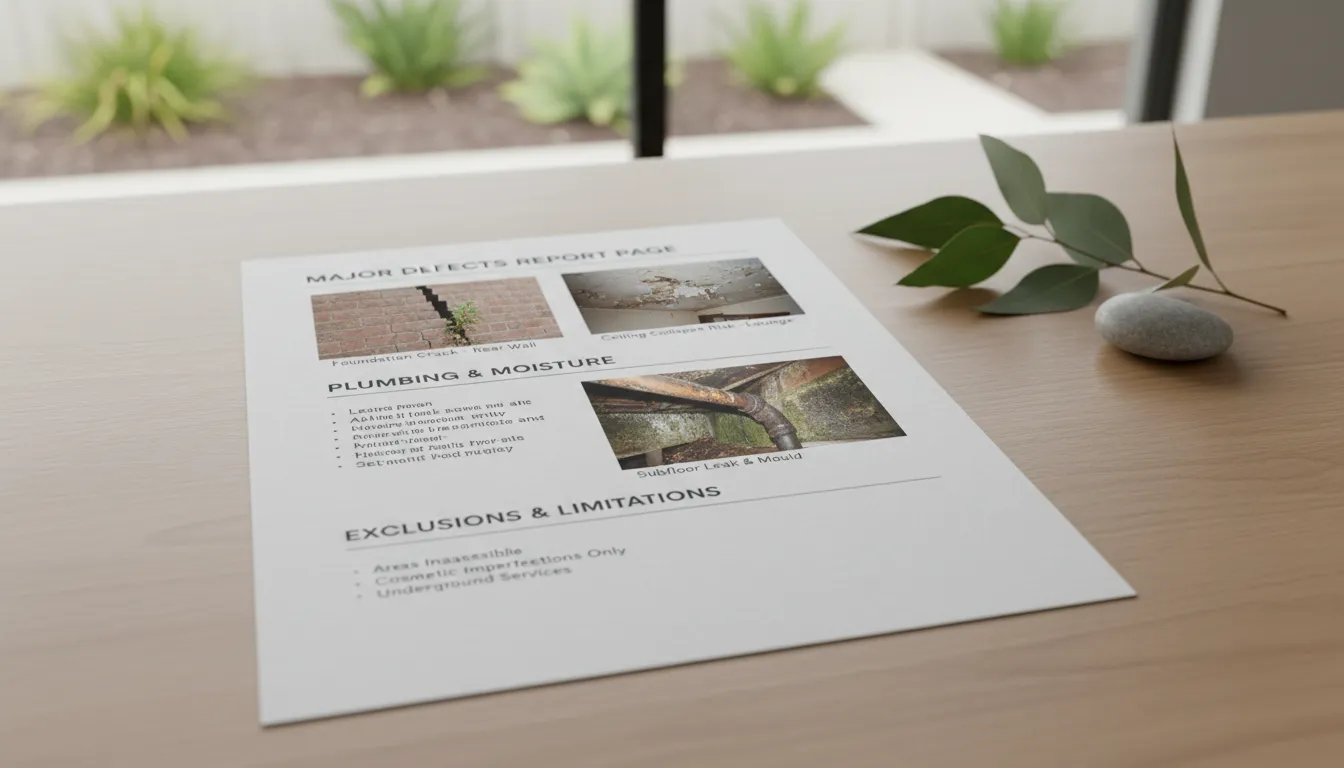
## Report Delivery Timeline
Most reputable inspection companies deliver the written report within 24 hours of the on-site inspection. Some offer same-day delivery, particularly when auction deadlines or contract conditions require a fast turnaround.
The report preparation process involves:
- Organising and annotating hundreds of photographs
- Writing detailed descriptions of each defect found
- Classifying defects by severity (minor, significant, or major)
- Documenting areas that could not be accessed and explaining why
- Preparing recommendations for repairs or further specialist investigation
- Reviewing the report for accuracy before delivery
A comprehensive report for a standard house typically runs 30 to 60 pages. Some inspectors deliver longer reports for larger or more complex properties.
If you need the report before a specific deadline (for example, before the end of a cooling-off period), make sure you communicate this when booking the inspection. Most companies can accommodate tight timelines when given advance notice.
## Is a Pre-purchase Inspection Worth It?
For most buyers, yes. Government guidance in NSW says the report can help you know the problems in advance, negotiate on price, and get advice on major issues. Consumer Affairs Victoria says the inspection fee is small compared with the cost of buying a property that needs extensive unforeseen repairs. Queensland guidance also recommends getting a pre-purchase building inspection before buying and making the contract conditional on satisfactory results where appropriate.
Even when the property is in good shape, the inspection still has value. It can help buyers budget for maintenance, compare one property against another, and decide whether a polished presentation is hiding a bigger problem. In a fast market, that kind of independent detail can be the difference between buying with confidence and buying blind.
View the buyer
inspection checklist
}
buttonHref="/articles/pre-purchase-inspection-checklist-for-buyers"
variant="secondary"
/>
## Factors That Affect Duration
Several factors can make an inspection take longer or shorter than average.
**Property size and complexity.** Larger homes take longer. Multi-level homes, homes with extensions, or properties with multiple outbuildings (sheds, granny flats, garages) all add to the inspection time.
**Property age.** Older homes often require more time because they are more likely to have accumulated defects, undergone renovations of varying quality, and developed issues related to ageing materials. Homes built before 1990 may also require asbestos identification.
**Accessibility.** If the subfloor is restricted by low clearance, the roof void is difficult to access, or furniture and stored items block walls and floors, the inspection takes longer. Poor accessibility can also limit what the inspector can assess.
**Property condition.** A well-maintained property in good condition is quicker to inspect because there are fewer issues to document. A property with significant defects, active leaks, or extensive damage requires more time for thorough documentation.
**Weather conditions.** Heavy rain can delay or extend external inspections. Wet conditions can also make subfloor and roof access unsafe, potentially requiring a return visit to complete those sections.
**Combined inspections.** A building-only inspection is faster than a combined building and pest inspection. The pest component adds approximately 20 to 40 minutes depending on the property and the level of risk.
## The Full Timeline From Booking to Report
Here is a typical timeline for the entire inspection process:
| Stage | Timeframe |
| --- | --- |
| Booking the inspection | 1 to 5 business days before the appointment |
| On-site inspection | 1.5 to 2.5 hours |
| Report preparation | Same day to 24 hours after inspection |
| Report review with inspector | 15 to 30 minutes (if requested) |
| Total elapsed time | Typically 2 to 3 business days from booking to report in hand |
In urgent situations, many inspection companies can arrange same-day or next-day inspections and deliver the report within hours of completing the on-site work. This is common before auctions, where buyers may only have a few days to arrange an inspection.
## When Should You Book the Inspection?
Book as early as possible in the negotiation process. NSW says most consultants need at least 2 to 3 days’ notice, and that there is little point spending money on conveyancing before you understand the property’s condition. In Queensland, buyers are advised to arrange inspections before negotiations where possible, or build suitable inspection conditions into the contract if timing is tight.
If you are buying at auction, timing becomes even more important because inspection opportunities can be tight and contract conditions may be limited. If you are buying a strata property, ask whether the report covers only the lot itself or whether you also need records or a special-purpose inspection for common areas.
## What to Expect if You Attend
Attending the inspection is highly recommended. It gives you the chance to see issues firsthand and ask the inspector questions in context. Here is what typically happens:
**Arrival.** The inspector will meet you and the real estate agent at the property. They may briefly explain their process before starting.
**During the inspection.** The inspector works methodically through the property. You are welcome to follow along, but give them space to concentrate. Many inspectors prefer to complete their assessment first and then walk you through the findings.
**End-of-inspection summary.** After completing the on-site work, the inspector will give you a verbal summary of their key findings. This is your opportunity to ask about anything you noticed during the inspection. The verbal summary is not a substitute for the written report, but it gives you an early indication of any significant concerns.
**After the inspection.** The written report will follow within the agreed timeframe. Some inspectors offer a follow-up phone call to discuss the report in detail once you have had time to read it.
Plan to spend 2 to 3 hours at the property if you are attending. This allows time for the inspection itself plus the verbal summary and any questions.
## Tips for a Smooth Inspection
To help the inspection run efficiently and produce the best possible results:
- **Book early.** Do not wait until the last minute. Inspectors in busy markets can be booked out days in advance, especially around auction weekends.
- **Communicate deadlines.** If you have a cooling-off deadline or auction date, tell the inspection company when you book so they can prioritise report delivery.
- **Confirm access.** Make sure the real estate agent knows the inspection is happening and that the property will be accessible, including subfloor hatches, roof access, and locked areas.
- **Clear the path.** If you already own the property (for example, a [pre-sale inspection](/pre-sale-inspections)), move stored items away from walls, clear subfloor access points, and ensure the roof manhole is accessible.
- **Ask about the scope.** Confirm what the inspection does and does not cover when you book. If you want additional assessments (such as asbestos testing or a pool inspection), ask whether these can be included.
- **Attend if possible.** Being there gives you context that no report can fully replicate.
A pre-purchase inspection is one of the most important steps in buying a property. Understanding the timeline helps you plan effectively and ensures you have the information you need before making one of the biggest financial decisions of your life.
For a complete overview, see our [guide to pre-purchase building and pest inspections](/guides/pre-purchase-building-pest-inspection-guide).
## How to Get the Most Value From the Inspection
Choose your own independent inspector rather than relying on a seller’s report. NSW says a vendor report can help, but it is not a substitute for your own independent report. Consumer Affairs Victoria goes further and says buyers should be wary of reports supplied by the agent or seller.
Check qualifications, insurance, and licensing before you book. Queensland says only a licensed residential building inspector can complete pre-purchase building inspections there, and only a licensed pest controller can carry out termite inspections. Victoria also advises using an inspection service with full professional indemnity insurance.
### How Long Do Tribunal Building Disputes Take in Australia?
Source: https://ownerinspections.com.au/articles/how-long-tribunal-building-disputes-take
Published: 2026-02-26 | Updated: 2026-03-09 | Category: Expert Witness
Author: Maison Azdari
Wondering how long a tribunal takes in a building dispute? In NSW, there is no one-size-fits-all answer. Some matters settle early at conciliation, while others run longer because they need expert evidence, extra directions, or a contested hearing. For homeowners dealing with defective work, payment disputes, or unfinished building work, the better question is this: what part of the process are you asking about?
If you are talking about the final written decision after the hearing, home building claims under $30,000 are usually decided within 6 weeks, and home building claims over $30,000 are usually decided within 3 months. The full dispute usually takes longer because most matters begin with NSW Fair Trading, then move through conciliation, hearing preparation, and sometimes expert evidence before a final hearing happens.
Understanding the typical timeframes and what drives them helps you set realistic expectations, plan your preparation, and make decisions that can reduce unnecessary delays. This guide breaks down the process into stages, compares timeframes across NCAT, VCAT, and QCAT, identifies the factors that cause disputes to drag on, and provides practical tips for moving your matter along as efficiently as possible.
## How Long Do Tribunal Building Disputes Take in NSW?
Before diving into the detail, here is a high-level overview of what most homeowners can expect.
| Stage | What usually happens |
| --- | ------- |
| Before NCAT | Most home building disputes must first be referred to NSW Fair Trading |
| First NCAT listing | The matter is first listed for conciliation and hearing |
| If not resolved | NCAT may set directions, timetables, and in some cases deal with expert evidence |
| After final hearing | Usually 6 weeks for claims under $30,000, usually 3 months for claims over $30,000 |
These ranges are approximate and represent the total time from filing the application to receiving a final decision. Many disputes settle at mediation or conciliation before reaching a hearing, which can significantly shorten the overall timeframe.
## Stages of a Tribunal Building Dispute
A building dispute at an Australian tribunal typically moves through several stages. Understanding each stage and its typical duration helps you see where the time goes and where delays are most likely to occur.
### Stage 1: Pre-Filing Preparation
**Typical duration: 2 to 8 weeks**
Before you file an application, you need to gather your evidence, engage an expert witness, and attempt to resolve the dispute directly with the builder. In Victoria, you also need to go through DBDRV conciliation before you can file at VCAT. This pre-filing stage is not part of the tribunal process itself, but it adds to the total time.
Getting an [expert witness report](/expert-witness-reports) during this stage is strongly recommended. Expert reports typically take two to six weeks to prepare, so commissioning one early ensures it is ready when you need it. Waiting until after filing to engage an expert often leads to delays later in the process.
### Stage 2: Filing and Initial Response
**Typical duration: 2 to 4 weeks**
Once you file your application, the tribunal serves it on the respondent (the builder) and allows them time to file a response. This typically takes two to four weeks. During this stage, the tribunal may also schedule an initial directions hearing.
### Stage 3: Directions Hearing
**Typical duration: Held 2 to 6 weeks after filing**
The directions hearing is a short preliminary hearing where the tribunal member sets the timetable for the case. This includes deadlines for exchanging evidence, filing expert reports, and any other steps that need to happen before the hearing. The tribunal may also refer the matter to mediation or conciliation at this stage.
This is a critical moment. The deadlines set at the directions hearing will shape the rest of your case. If you have not yet engaged an expert witness, you may need to request additional time, which delays the process for everyone.
### Stage 4: Mediation or Conciliation
**Typical duration: 2 to 8 weeks after directions**
Most tribunals encourage or require mediation or conciliation before a hearing. At NCAT, the tribunal may schedule mediation facilitated by a tribunal mediator. At VCAT, a compulsory conference with a VCAT member may be scheduled. In Victoria, DBDRV conciliation should have already occurred before filing.
Mediation and conciliation are the stages where many building disputes are resolved. If both parties approach the process in good faith and have strong evidence (including expert reports), settlement is often achievable. A dispute that settles at mediation can be resolved in as little as two to four months from the date of filing.
### Stage 5: Evidence Preparation and Exchange
**Typical duration: 4 to 12 weeks**
After directions are set, both parties prepare and exchange their evidence. This includes expert witness reports, photographs, documents, and witness statements. This stage takes time because expert reports need to be prepared, and both parties need time to review each other's evidence and respond.
If the tribunal directs the experts to confer and produce a joint report (more common at VCAT), this adds additional time but can narrow the issues in dispute and save time at the hearing.
### Stage 6: The Hearing
**Typical duration: 1 to 5 days**
The hearing is where both parties present their evidence to the tribunal member, who then makes a decision. Simple disputes with a single defect or a small number of issues may be heard in half a day or a single day. Complex disputes involving multiple defects, competing expert evidence, and extensive cross-examination can run for several days.
The availability of hearing dates at the tribunal can also affect timing. If the tribunal is busy, you may need to wait several weeks or even months for a hearing date after all evidence has been exchanged.
### Stage 7: Decision
**Typical duration: 2 to 8 weeks after the hearing**
The tribunal member may give their decision on the day of the hearing (for simple matters) or reserve their decision and deliver it in writing at a later date. Reserved decisions typically take two to eight weeks, though complex matters can take longer.
## How Does a Tribunal Work in NSW?
For residential building work in NSW, NCAT can hear disputes about payment, incomplete work, defective work, specialised trades, damage caused by building work, and some insurance claim appeals. Home building matters sit in NCAT’s Consumer and Commercial Division.
Before NCAT can accept most home building applications, the dispute must first be referred to NSW Fair Trading. You must attach evidence of the Fair Trading investigation unless your matter falls into an exempt category, such as a cross claim, debt recovery by a contractor, or a case where the time for lodging the claim is due to expire within 3 months.
Once lodged, home building matters are first listed for conciliation and hearing. Conciliation is an informal, private discussion aimed at helping both sides reach agreement before the hearing goes ahead. If the parties settle, NCAT can make binding orders reflecting that agreement. If they do not settle, the matter may be heard that day or adjourned to a later contested hearing.
For more involved cases, NCAT may make directions about documents, evidence and timetables. In some matters, especially where technical building issues are in dispute, expert evidence becomes a major part of the case.
## Timeframes by Tribunal
Each state tribunal has its own workload and processes, which affect how long disputes take.
### NCAT (New South Wales)
NCAT is one of the busiest tribunals in Australia. Building disputes in the Consumer and Commercial Division generally move through the process in three to twelve months for most matters. NCAT has made efforts to reduce waiting times through active case management and early mediation, but delays can still occur, particularly for complex cases.
### VCAT (Victoria)
VCAT has experienced significant backlogs in its Building and Property List in recent years. The mandatory DBDRV conciliation step adds four to eight weeks before you can even file. Once filed, building disputes at VCAT typically take four to eighteen months or longer. Complex matters involving multiple defects and extensive expert evidence have been known to take well over 18 months in some cases.
### QCAT (Queensland)
QCAT handles building disputes in Queensland. Timeframes are generally in the range of three to twelve months for most matters. QCAT has a somewhat smaller caseload than NCAT and VCAT, which can mean shorter waiting times for hearing dates in some regions.
| Tribunal | Simple Disputes | Moderate Disputes | Complex Disputes |
| --- | --- | --- | --- |
| **NCAT (NSW)** | 3 to 6 months | 6 to 9 months | 9 to 12+ months |
| **VCAT (Vic)** | 4 to 8 months | 8 to 14 months | 14 to 18+ months |
| **QCAT (Qld)** | 3 to 6 months | 5 to 9 months | 9 to 12+ months |
## How is a Tribunal Different From a Court?
NCAT is still a legal forum, but it is designed to be more accessible than a court. NCAT says it provides a simple, quick and effective process, uses plain language forms and documents, supports self-representation in most matters, and uses alternative dispute resolution methods such as conciliation.
That matters for homeowners because many people appear without a lawyer. Even so, NCAT orders are legally binding, and hearings still require evidence, preparation and compliance with directions. In other words, the process is simpler than court, but it should still be taken seriously.
## Factors That Affect Duration
Several factors can lengthen or shorten the time it takes to resolve a building dispute at a tribunal. Understanding these factors helps you identify areas where you can influence the timeline.
### Factors That Increase Duration
### Factors That Reduce Duration
## How Long is a Builder Liable for Defects in NSW?
This is where many homeowners get confused. In NSW, a contract for a new home usually has a defects and liability period, often around 13 weeks, for issues found after completion. That period is not the same as your statutory warranty rights.
Under NSW law, statutory warranties generally run for 6 years for major defects and 2 years for all other defects, starting from completion of the work. If the breach becomes apparent in the last 6 months of the warranty period, proceedings can be commenced within a further 6 months after the period ends. If you are close to the deadline, do not wait. NSW Government guidance says the homeowner is responsible for applying to the Tribunal before the warranty period expires.
This point matters because many owners focus on the short handover defect period in the contract and miss the longer statutory rights that may still apply. For serious structural or habitability problems, the 6 year period can make a real difference.
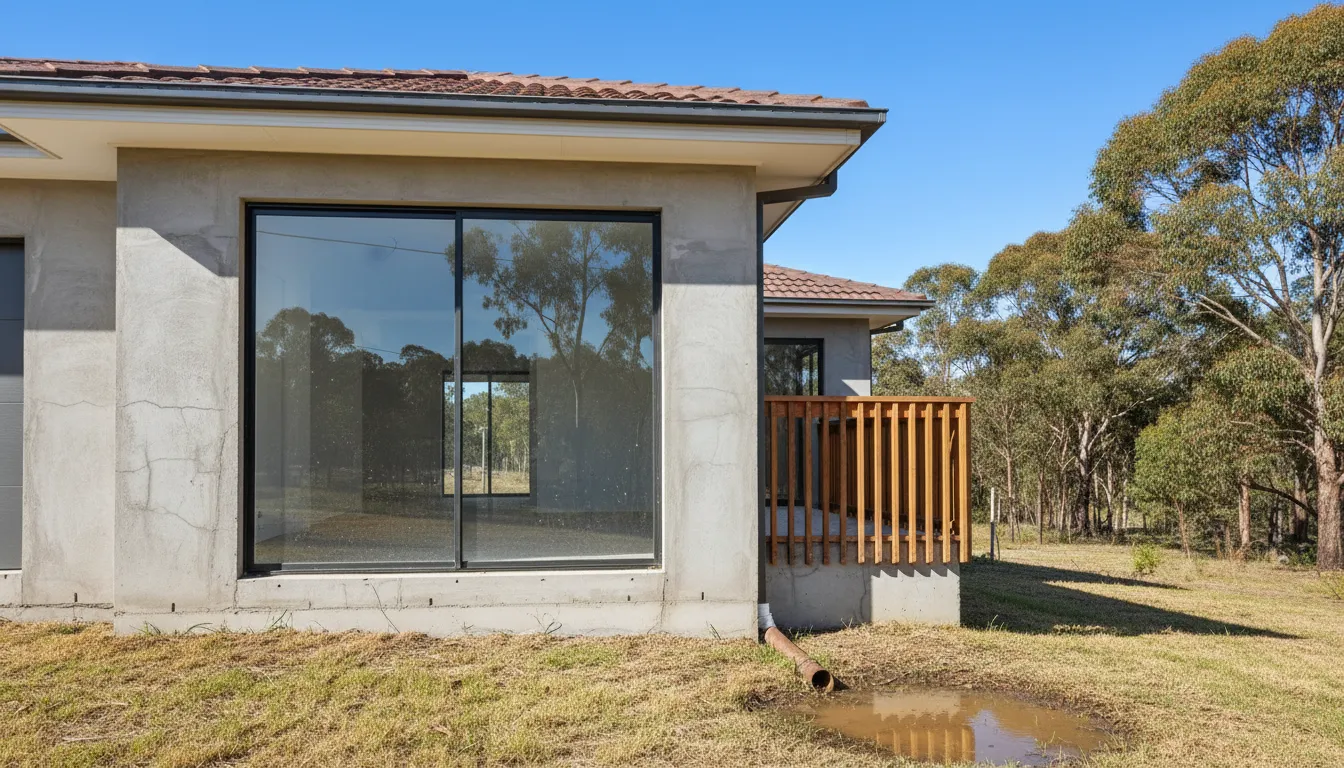
## Tips for Faster Resolution
Based on patterns we see across building disputes, the following practical steps can help you achieve a faster resolution.
**1. Engage your expert witness early.**
This is the single most impactful step you can take. Expert witness reports take time to prepare, and they are almost always required for a building dispute hearing. If your report is ready before you file, you are already ahead of the typical timeline.
**2. Be organised from day one.**
Collect and organise all relevant documents, including your contract, correspondence, photographs, and payment records, before you file your application. This saves time during the evidence preparation stage.
**3. Take mediation seriously.**
Many homeowners view mediation as a formality to get through before the "real" hearing. In reality, mediation is the fastest path to resolution. Come prepared with your evidence, know your bottom line, and be willing to negotiate. Settling at mediation can resolve your dispute in a matter of months rather than a year or more.
**4. Avoid unnecessary adjournments.**
Every adjournment adds weeks or months to the process. Only request an adjournment if it is truly necessary, and object (politely) if the other party requests an adjournment without good reason.
**5. Respond to the tribunal promptly.**
When the tribunal requests information or sets deadlines, respond as quickly as possible. Delays in your own responses contribute to the overall duration of the matter.
**6. Focus on the significant issues.**
Including every minor cosmetic defect alongside serious structural issues dilutes your case and adds to the time needed for expert reports, evidence exchange, and the hearing itself. Focus on the defects that matter most.
## When Settlement Is Faster Than a Hearing
In many cases, settlement offers a faster resolution than waiting for a tribunal hearing and decision. There are several points in the process where settlement discussions commonly occur:
Settlement does not mean giving up. It means reaching a practical resolution that avoids the additional time, cost, and uncertainty of a hearing. A well-prepared expert witness report is often the key to achieving a fair settlement, because it provides an independent, credible assessment of the defects and their rectification costs.
> The best expert witness reports do not just help you win at a hearing. They help you settle the dispute before you ever get there.
## What to Do if You Want to Move the Matter Along
Start by putting the defects and your requested outcome in writing. Then gather the building contract, photos, emails, quotes, reports and insurance details before you file. If Fair Trading is required, lodge that complaint early rather than waiting until the warranty period is close to expiry.
Be ready for conciliation. NCAT describes conciliation as a chance to talk through the issues, understand the other side’s position, and resolve the dispute quickly on the day. A practical settlement at that stage is often faster and cheaper than pushing everything to a final hearing.
If the defects are technical or disputed, get independent building evidence early. NCAT can appoint an independent expert in home building matters, and for some proceedings expert evidence rules apply. A clear, properly prepared report often helps narrow the issues and gives the Tribunal something concrete to work with.
For a complete overview, see our [guide to expert witness reports for building disputes](/guides/expert-witness-building-disputes-guide).
### Independent vs Insurer-Appointed Assessors: Why It Matters
Source: https://ownerinspections.com.au/articles/independent-vs-insurer-appointed-assessors
Published: 2026-02-26 | Updated: 2026-06-02 | Category: Insurance
Author: Maison Azdari
When your home has storm, water, fire, impact, or structural damage, the first inspection can shape the rest of your insurance claim.
Most insurers will send an insurance assessor, claims assessor, building assessor, or loss adjuster to inspect the property. That report may affect the claim outcome, the repair scope, and the settlement amount.
The key question is simple: does the assessor work for the insurer, or do they work for you?
This guide explains the insurance assessor meaning, what an insurance assessor does, what insurance assessors look for, and when an independent insurance assessor can help Australian homeowners get a clearer view of property damage.
Book a Defect
Investigation
}
buttonHref="/defect-investigation-reports"
variant="secondary"
/>
## What Is an Insurance Assessor?
An insurance assessor is a person who inspects damage, records evidence, reviews the likely cause, and prepares findings for an insurance claim.
In a property claim, the insurance assessor may inspect damaged roofing, ceilings, walls, flooring, subfloors, external areas, moisture issues, cracking, or other building defects linked to the event.
The role can be handled by different people, including:
- An internal insurance claims assessor
- An external loss adjuster
- A building assessor
- A property damage assessor
- An independent insurance assessor engaged by the homeowner
- A specialist expert, such as an engineer, builder, hydrologist, or trade expert
ASIC explains that [insurance claims handling and settling](https://download.asic.gov.au/media/q2ybygwo/info253-published-16-june-2025.pdf) is treated as a financial service in Australia, and the rules apply to people who carry on claims handling and settling services in Australia unless an exemption applies.
The [Insurance Council of Australia](https://insurancecouncil.com.au/wp-content/uploads/2024/08/INCA018-ICA-Expert-Report-Fact-Sheet_v3.pdf) also states that expert reports may be used when insurers need verified information about the cause or extent of property damage, and those reports can be reviewed by a claims manager, assessor, or loss adjuster.
## What Does an Insurance Assessor Do?
An insurance assessor looks at the damage and prepares information that helps the claim move forward.
For a home insurance assessor, the work usually includes:
- Inspecting visible property damage
- Asking when and how the damage happened
- Taking photos and notes
- Checking whether the damage appears sudden, accidental, gradual, or pre-existing
- Looking for signs of water entry, impact, movement, mould, rot, or poor maintenance
- Reviewing whether further expert reports are needed
- Preparing an insurance assessment report
- Estimating the repair scope or advising the insurer on what needs to be assessed next
The [Financial Rights Legal Centre](https://financialrights.org.au/factsheet/home-or-contents-insurance-claims/) advises policyholders to understand their Product Disclosure Statement and Policy Schedule, and notes that people making home and contents claims may need to prove their loss.
That is why the assessor’s report matters. If the report misses damage, records the wrong cause, or gives a narrow repair scope, the claim can become harder to resolve.
## What Do Insurance Assessors Look For?
During a property [insurance assessment](/insurance-claim-assessments), insurance assessors may look for:
- The likely cause of the damage
- Whether the damage is linked to the insured event
- Whether there are signs of gradual deterioration
- Whether maintenance issues may have contributed
- The visible extent of damage
- Hidden or secondary damage
- Whether temporary repairs were done
- Whether the property is safe
- Whether further expert reports are needed
- Whether the repair scope matches the damage
The [Financial Rights Legal Centre](https://financialrights.org.au/factsheet/home-or-contents-insurance-claims/) advises policyholders to understand their Product Disclosure Statement and Policy Schedule, and notes that people making home and contents claims may need to prove their loss.
For example, after heavy rain, a home insurance assessor may check roof tiles, flashing, gutters, ceiling stains, wall cavities, moisture readings, and whether the water entry came from storm damage or long-term maintenance problems.
## Insurer-Appointed Assessor vs Independent Insurance Assessor
An insurer-appointed assessor is chosen by the insurance company. An independent insurance assessor is chosen by the homeowner.
Both may inspect the same property, but their appointment, reporting pathway, and practical focus can be different.
| Area | Insurer-appointed assessor | Independent insurance assessor |
| ------------------------------ | -------------------------------------------------- | ------------------------------------------------------------------------- |
| Who appoints them? | The insurer | The homeowner or property owner |
| Who receives the report first? | Usually the insurer | The homeowner |
| Main task | Assess the claim for the insurer | Assess the damage independently |
| Common titles | Loss adjuster, claims assessor, building assessor | Independent assessor, independent loss assessor, property damage assessor |
| Report focus | Cause, cover, extent, repair scope, claim position | Cause, extent, defect evidence, repair scope, supporting photos |
| Best used for | Standard insurer claim assessment | Disputed scope, low payout, denied claim, unclear cause, hidden damage |
This does not mean an insurer-appointed assessor is dishonest. Many loss adjusters and claims assessors act professionally.
The issue is that they are appointed through the insurer’s claims process. Their report is usually used to help the insurer decide what it will accept, reject, repair, or pay.
An independent assessor gives the homeowner a separate evidence-based view. This can be useful when the insurer’s findings do not match the visible damage, repair quotes, or building evidence.
## Loss Adjuster vs Assessor vs Loss Assessor
Search data shows users often compare a loss adjuster vs assessor, loss assessor vs loss adjuster, and loss adjuster vs loss assessor. These terms are often mixed up.
| Term | Meaning | Usually works for |
| ------------------------------ | --------------------------------------------------------------------------- | ---------------------------------- |
| Insurance assessor | General term for a person assessing damage for a claim | Insurer, owner, or appointed party |
| Claims assessor | Person reviewing claim details, damage, documents, and claim value | Usually insurer |
| Loss adjuster | External specialist who investigates and assesses claims | Usually insurer |
| Loss assessor | Person who may assist the policyholder with assessing or presenting a claim | Often policyholder |
| Independent insurance assessor | Building or damage expert engaged directly by the owner | Homeowner or property owner |
In Australia, ASIC notes that a person who represents insured people in pursuing a general insurance claim for a benefit may fall within the claimant intermediary category for claims handling rules.
For homeowners, the practical point is simple. Before you rely on any report, ask who appointed the assessor, who pays them, and whether they are giving a building opinion, a claims opinion, or both.
## Who Is the Insurer-Appointed Assessor?
When your insurer receives a claim, they assign it to either an internal claims handler or an external loss adjuster. For property damage claims involving significant amounts, the insurer will usually engage a loss adjusting firm to inspect the property and prepare a report.
Loss adjusters are professionals who investigate insurance claims on behalf of insurers. Their job is to determine:
- Whether the damage is covered under the policy
- What caused the damage
- The extent and cost of the damage
- Whether any exclusions or conditions apply
Loss adjusters are regulated and must hold appropriate qualifications. However, their client is the insurance company. They are paid by the insurer, they report to the insurer, and their recommendations inform the insurer's decision about your claim.
This arrangement creates an inherent tension. The loss adjuster is expected to be thorough and fair, but they are also working within a system where the insurer has a financial interest in minimising the payout.
## The Conflict of Interest Problem
It is important to be clear: most loss adjusters act professionally and follow their industry codes of conduct. However, the structural conflict of interest cannot be ignored. Studies and industry reports have consistently shown that insurer-appointed assessors tend to produce more conservative damage estimates compared to independent assessors.
This can manifest in several ways:
- **Narrower scope of damage.** The loss adjuster may document only the most obvious damage while missing secondary or concealed issues that are related to the same event.
- **Cause attribution.** The assessor may attribute some of the damage to pre-existing conditions, wear and tear, or maintenance failures rather than the insured event.
- **Lower repair costs.** The scope of works and cost estimates may favour cheaper repair methods over full replacement, even when replacement is the more appropriate option.
- **Exclusion reliance.** The report may lean towards interpretations of the policy that favour exclusions or limitations.
None of this means the loss adjuster is acting in bad faith. But the incentive structure means that the assessment may not fully reflect the damage you have experienced.
## What Does an Independent Assessor Do?
An independent building assessor is engaged by you, the homeowner. They have no relationship with your insurance company and no financial incentive to minimise or maximise the claim. Their sole obligation is to provide an accurate, thorough assessment of the damage.
An independent assessment typically includes:
- **Comprehensive damage documentation.** The assessor inspects the entire property, not just the areas flagged by the insurer. They look for secondary damage, concealed issues, and consequential damage that may have been missed.
- **Cause analysis.** An independent assessor will determine the cause of the damage based on building science and evidence, without any pressure to attribute it to excluded causes.
- **Detailed scope of works.** The report includes a thorough scope of works needed to properly repair the property, including all trades, materials, and labour required.
- **Accurate cost estimates.** Repair costs are based on current market rates rather than insurer panel pricing, which can be significantly lower than what independent contractors charge.
- **Photographic evidence.** Detailed photographs are taken throughout the inspection, creating a comprehensive visual record of the damage.
- **Building code compliance.** The assessor checks whether repairs need to comply with current building codes, which may require upgrades beyond a simple like-for-like repair.
View Expert Witness
Reports
}
buttonHref="/expert-witness-reports"
variant="secondary"
/>
## How the Reports Differ
The differences between an insurer-appointed report and an independent report can be significant. Here is a practical example.
After a severe storm damages a roof, the insurer's loss adjuster may report that 20 tiles need replacement and there is minor water damage to one ceiling. The total claim might be assessed at $3,500.
An independent assessor inspecting the same property might find that the storm also damaged the roof sarking, displaced ridge capping, caused water ingress into the wall cavity, and created moisture damage in the subfloor framing. The independent assessment might put the true repair cost at $18,000 or more.
The difference is not about honesty. It is about the depth and scope of the investigation, the methodology used, and the incentive structures at play.
Key areas where reports commonly differ include:
- **Extent of damage.** Independent reports tend to identify more damage because the assessor has more time and a broader mandate.
- **Repair methodology.** Insurer reports may specify patch repairs where independent assessors recommend full replacement to ensure durability and code compliance.
- **Cost of repairs.** Independent reports use current market rates while insurer reports may use panel rates that are 20 to 40 percent lower.
- **Causation.** Independent reports are more likely to attribute all related damage to the insured event rather than splitting it between insured and non-insured causes.
## Why the First Insurance Assessment Report Matters
The first insurance assessment report can influence the whole claim.
If the report records limited damage, the insurer may offer a limited repair scope. If it records the cause as wear and tear, gradual deterioration, or poor maintenance, the insurer may reduce or deny part of the claim.
That is why homeowners should keep their own evidence.
Before and during the assessment, collect:
- Photos and videos of the damage
- Photos showing the wider room or roof area
- The date and time the damage was noticed
- Weather records if storm or flood is involved
- Trade invoices or emergency repair notes
- Moisture readings, where available
- Any past reports showing the property condition before the event
The Financial Rights Legal Centre includes proving your loss as part of the home and contents claim process, which makes clear documentation important.
## When Should You Get an Independent Assessment?
Not every insurance claim requires an independent assessment. For small, straightforward claims where the damage is obvious and the insurer's offer seems reasonable, you may not need one.
However, you should seriously consider an independent assessment in these situations:
- **The insurer's payout seems too low.** If the amount offered does not cover the actual cost of proper repairs, an independent report can demonstrate the true cost.
- **Your claim has been partially or fully denied.** An independent assessment provides evidence to challenge the denial through internal dispute resolution or AFCA.
- **The insurer attributes damage to maintenance or wear and tear.** An independent assessor can determine whether the damage was genuinely caused by the insured event.
- **You have significant property damage.** For claims involving tens of thousands of dollars, the cost of an independent assessment (typically $500 to $2,000) is a worthwhile investment.
- **There is hidden or secondary damage.** If you suspect the damage goes beyond what is visible, an independent assessor can investigate concealed areas.
- **You disagree with the insurer's scope of works.** If the proposed repairs seem inadequate, an independent report can recommend the appropriate repair methodology.
The Australian Parliament’s flood insurance inquiry noted concerns about the quality and consistency of expert reports used by insurers when coverage questions arose, including reports used to support claim decisions.
That point matters for homeowners. If the insurer’s report does not explain the cause clearly, does not address all visible damage, or does not match the physical evidence, a second opinion may help.
## How to Deal With Insurance Assessors
Use the inspection as an evidence-gathering step, not an argument.
Before the assessor arrives:
- Read your PDS and Policy Schedule
- Write a short timeline of what happened
- Take your own photos and videos
- Make a list of all affected areas
- Keep damaged materials where safe
- Keep invoices for emergency works
- Ask the insurer what the assessor will inspect
During the assessment:
- Show every affected area
- Explain when the damage was first noticed
- Avoid guessing about the cause
- Ask whether hidden areas need further review
- Ask whether expert reports will be used
- Take notes of what was inspected
After the assessment:
- Ask for a copy of any report the insurer relies on
- Compare the scope with your own photos and quotes
- Request clarification if the cause or repair method is unclear
- Get an independent report if the findings do not match the evidence
Final expert report should be made available on request, or when a claim decision is made that relies on the expert report.
## How to Choose an Independent Assessor
When selecting an independent assessor, look for the following:
- **Qualifications and licensing.** The assessor should hold relevant building qualifications and be licensed in your state. In NSW, this means a licence from NSW Fair Trading. In Victoria, they should be a registered building practitioner.
- **Experience with insurance claims.** Not all building inspectors have experience with insurance work. Look for an assessor who understands how insurance claims work and how to prepare reports that insurers and dispute resolution bodies will take seriously.
- **No insurer affiliations.** Confirm that the assessor does not work on any insurer panels and has no financial relationship with insurance companies.
- **Detailed reporting.** Ask for a sample report or outline of what the assessment will cover. A good report should include detailed descriptions, photographs, cause analysis, scope of works, and cost estimates.
## Common Mistakes Homeowners Make During an Insurance Assessment
Many homeowners lose ground because they wait too long to gather evidence or rely only on the insurer’s inspection.
Avoid these mistakes:
| Mistake | Why it can hurt the claim |
| -------------------------------------------- | ---------------------------------------------------- |
| Throwing away damaged materials too early | It can remove proof of the damage |
| Only photographing close-ups | The insurer may not see the full context |
| Guessing the cause | A wrong guess can weaken the claim |
| Accepting a narrow scope without checking it | Hidden damage may be missed |
| Not asking for expert reports | You may not know what evidence the insurer relied on |
| Waiting until repairs start | Evidence can be covered or removed |
The safer approach is to document the damage early, keep records, and get expert help when the scope, cause, or repair method is disputed.
## Using Your Independent Report
Once you have your independent assessment, you can use it to:
- Negotiate directly with the insurer for a higher settlement
- Support an internal dispute resolution complaint
- Lodge a complaint with AFCA with strong supporting evidence
- Pursue legal action if necessary
An independent report carries significant weight in dispute resolution because it is prepared without any financial connection to the insurer. AFCA and the courts regularly give independent reports substantial consideration when resolving disputes.
The cost of an independent assessment is a small price to pay for ensuring that your claim is treated fairly and that your home is properly repaired.
## Getting the Most Value from Your Home and Building Investment
An insurance claim is not just paperwork. It can affect whether your home is repaired properly, whether hidden damage is found, and whether the settlement reflects the actual building issue.
[Owner Inspections](/) can help with independent insurance claim assessments across Sydney, Melbourne, Brisbane, and major Australian locations.
If the insurer’s report does not match the damage you can see, or the claim outcome feels unclear, book an independent assessment before accepting the final position.
Contact Owner
Inspections
}
buttonHref="/contact"
variant="primary"
/>
### Insurance Claim Denied? Steps to Challenge the Decision
Source: https://ownerinspections.com.au/articles/insurance-claim-denied-steps-to-challenge
Published: 2026-02-26 | Category: Insurance Claims
Author: Maison Azdari
Receiving a denial letter from your insurer is one of the most frustrating experiences a homeowner can face. You have paid your premiums, filed your claim in good faith, and now the insurer says they will not cover the damage. Before you accept that decision, it is worth knowing that you have several options to challenge it.
Insurance claim denials are more common than many people realise. Sometimes the denial is justified. Other times, it is based on a misunderstanding of the damage, an incorrect application of policy terms, or an inadequate assessment by the insurer's own assessor. This guide explains what to do when your claim is denied and how to work through each step methodically.
## Understand Why the Claim Was Denied
The first step is to get absolute clarity on why your claim was rejected. Your insurer is required to provide a written explanation. Read the denial letter carefully and look for the specific policy clause or exclusion they are relying on.
Common reasons for denial include:
- **Wear and tear or gradual deterioration.** Insurers often argue that the damage was not sudden or accidental but developed over time due to lack of maintenance.
- **Pre-existing damage.** The insurer may claim the damage existed before the policy started or before the event you are claiming for.
- **Excluded event.** Certain events such as flood, earth movement, or actions of the sea may be excluded under your policy unless you have purchased additional cover.
- **Failure to maintain the property.** If the insurer believes that reasonable maintenance would have prevented the damage, they may decline the claim.
- **Late notification.** Some policies require you to notify the insurer within a specific timeframe after the damage occurs.
Once you understand the reason, you can start building your case to challenge it.
## Review Your Policy Wording
Pull out your Product Disclosure Statement (PDS) and read the relevant sections carefully. Pay close attention to the definitions, inclusions, exclusions, and conditions. Insurance policies are legal contracts, and the wording matters. If you find that the denial does not align with what the policy actually says, you may have strong grounds for a challenge.
Look for ambiguous language. Under Australian consumer law, ambiguities in insurance contracts are generally interpreted in favour of the policyholder. This principle has been upheld in numerous decisions by the Australian Financial Complaints Authority (AFCA) and the courts.
## Request an Internal Review
Every insurer in Australia is required to have an Internal Dispute Resolution (IDR) process. This is your first formal step in challenging the decision. Write to your insurer and clearly state that you disagree with the denial and wish to have the decision reviewed.
In your IDR request, include:
- A clear summary of why you believe the denial is incorrect
- Any supporting evidence, such as photographs, repair quotes, or independent reports
- References to specific policy clauses that support your position
The insurer must respond within 30 calendar days. If they fail to respond within this timeframe, or if you are unhappy with their response, you can escalate to the next level.
## Get an Independent Assessment
This is often the most important step. Insurers rely on their own assessors or loss adjusters to inspect the damage, and these assessors work for the insurer. Their reports may not fully capture the extent of the damage, the true cause, or the actual cost of repairs.
An independent building assessor works for you, not the insurance company. They can provide a detailed report that covers:
- The full extent of damage, including areas the insurer's assessor may have missed
- The actual cause of the damage, supported by evidence and building expertise
- Whether the damage is consistent with the event you are claiming for
- An accurate scope of works and cost estimate for repairs
An independent report can directly challenge the insurer's findings and provides strong evidence for your dispute, whether at the IDR stage, at AFCA, or in court.
## Escalate to AFCA
If the internal review does not resolve the issue, you can lodge a complaint with the [Australian Financial Complaints Authority (AFCA)](https://www.afca.org.au). AFCA is a free, independent external dispute resolution scheme that covers complaints about insurance companies, banks, and other financial service providers.
To lodge a complaint with AFCA, you will need:
- Your policy number and claim reference
- A copy of the denial letter and the IDR response
- Your independent assessment report and any other supporting evidence
- A clear summary of what outcome you are seeking
AFCA will review the complaint and may request further information from both parties. They have the power to make binding decisions on insurers, including ordering them to pay claims they initially denied. The process typically takes a few months, though complex cases can take longer.
One important point: AFCA has financial limits on the claims it can consider. For general insurance disputes, AFCA can consider claims up to $1,085,000 and award compensation up to $542,500 (these limits are reviewed periodically). If your claim exceeds these limits, you may need to pursue legal action instead.
## Consider Legal Action
If AFCA cannot resolve the matter, or if your claim exceeds their jurisdiction, you may need to consider legal action. This could involve proceedings in a state or territory court or tribunal. Before taking this step, it is worth getting legal advice from a solicitor who specialises in insurance disputes.
Legal action can be costly and time-consuming, but it may be the only option for large or complex claims. An independent building assessment report will be a critical piece of evidence in any legal proceedings.
## What Not to Do
While working through the dispute process, avoid these common mistakes:
- **Do not accept the denial without question.** Insurers deny claims that are later overturned every day.
- **Do not destroy evidence.** Keep all damaged materials, photographs, and correspondence.
- **Do not carry out permanent repairs before the dispute is resolved.** Emergency repairs to prevent further damage are fine, but full repairs may compromise your claim.
- **Do not sign anything without understanding it.** If the insurer offers a settlement, make sure you understand what you are agreeing to and whether it fully covers the damage.
## Take Action Early
Time matters in insurance disputes. Evidence can deteriorate, memories fade, and some dispute resolution processes have time limits. If your claim has been denied, start gathering your evidence and requesting an independent assessment as soon as possible.
The earlier you act, the stronger your position will be.
For a complete overview, see our [guide to insurance claim assessments](/guides/insurance-claim-assessment-guide).
### NCAT vs VCAT: Key Differences for Building Disputes
Source: https://ownerinspections.com.au/articles/ncat-vs-vcat-process-differences
Published: 2026-02-26 | Updated: 2026-03-10 | Category: Expert Witness
Author: Maison Azdari
A building dispute can feel similar no matter which state you are in. The paperwork is stressful, the defects are technical, and the cost of getting it wrong can be high. But NCAT vs VCAT is not just a difference in name. In New South Wales, residential home building disputes usually move through NSW Fair Trading before they reach NCAT. In Victoria, many domestic building disputes involving a homeowner must first go through the Victorian dispute resolution service now run by the Building and Plumbing Commission, previously known as DBDRV, before they can go to VCAT.
That difference matters because a lot of delay happens before a hearing date is even discussed. Homeowners often focus on who was right or wrong, but tribunals also care about whether the correct pre-filing step was followed, whether the right parties were named, and whether the evidence is organised properly. A strong case usually starts well before the application is lodged.
## NCAT vs VCAT at a Glance
| Issue | NCAT in NSW | VCAT in Victoria | |
| ----------------------------- | ---------------------------------------------------------- | ------------------------------------------------------------------------------------------------------ | -------------------------------------------- |
| Main tribunal | NSW Civil and Administrative Tribunal | Victorian Civil and Administrative Tribunal | |
| Typical building dispute path | NSW Fair Trading first, then NCAT unless exempt | BPC dispute resolution service first in many homeowner disputes, then VCAT unless an exception applies | |
| Can a lawyer appear? | Usually only with leave in Consumer and Commercial matters | Usually only with permission unless there is an automatic right | |
| Are orders binding? | Yes, NCAT orders are binding and enforceable | Yes, but VCAT orders are usually enforced through a court | |
| Appeal path | Usually to the NCAT Appeal Panel first | Supreme Court of Victoria on a question of law | |
| Current wait times | Vary by case and case management | Published current building dispute timeframes are available on VCAT’s site |
## Jurisdiction: Which Tribunal Applies to You
The threshold question is straightforward: the location of the building work determines which tribunal has jurisdiction.
**NCAT** handles building disputes where the building work was performed in New South Wales. It operates under the Civil and Administrative Tribunal Act 2013 (NSW) and the Home Building Act 1989 (NSW). Building disputes are heard in the Consumer and Commercial Division.
**VCAT** handles building disputes where the building work was performed in Victoria. It operates under the Victorian Civil and Administrative Tribunal Act 1998 (Vic) and the Domestic Building Contracts Act 1995 (Vic). Building disputes are heard in the Civil Division, specifically the Building and Property List.
If the building work was performed in another state or territory, a different tribunal applies. Queensland has QCAT, Western Australia has the State Administrative Tribunal (SAT), and each other jurisdiction has its own equivalent.
Document Your
Defects Properly
}
href="/articles/document-building-defects-legal-claim"
variant="secondary"
/>
## Before you File: The Biggest Process Difference
### NSW: NCAT usually comes after NSW Fair Trading
Before NCAT can accept an application, all home building disputes must first be referred to NSW Fair Trading unless the matter is exempt. NCAT’s under-$30,000 process page repeats the same point and starts with “Contact NSW Fair Trading.”
The usual path is try to resolve it, refer it to NSW Fair Trading, gather the investigation material or rectification outcome, and then apply to NCAT if the dispute is still open.
### Victoria: many disputes still need DBDRV, now through BPC
For domestic building disputes involving a homeowner, you generally need to go through DBDRV before applying to VCAT, unless an exception applies such as an injunction. The current government service page says this dispute resolution service is now run by the Building and Plumbing Commission and was previously known as DBDRV.
## Filing Process
### Filing at NCAT
To commence a building dispute at NCAT, you lodge an application through the [NCAT website](https://www.ncat.nsw.gov.au) or in person at a registry. The application form requires you to provide details of your claim, the amount you are seeking, and the name and contact details of the respondent (the builder or contractor you are claiming against).
You must also provide supporting documents with your application, including the building contract, evidence of the defects or issues, and any correspondence with the builder. NCAT will then serve the application on the respondent and schedule a directions hearing or callover.
### About NCAT
### What powers does NCAT have?
NCAT can make orders in home building cases about payment for home building work or services, incomplete or defective building work, specialised work such as plumbing or electrical work, damage caused to other structures by home building work, and insurance claim appeals. That belongs in the article because it answers a common search question directly and helps homeowners see whether their dispute fits NCAT at all.
Rectification of defective work by the responsible party is the preferred outcome unless there is a good reason not to order it. That is more practical than framing every dispute as a pure compensation claim.
### Can a lawyer represent you at NCAT?
Yes, but not automatically in most Consumer and Commercial Division matters. Most people represent themselves, and the representation guideline will usually permit representation, especially by an Australian legal practitioner, in cases over $30,000, where another party has a lawyer, where another party is a government agency, where the unrepresented party would be disadvantaged, or where complex issues of law or fact are likely to arise.
VCAT is similar in the sense that parties often appear without a lawyer, but if you want to be represented by a lawyer or professional advocate, you usually need permission unless an automatic right applies.
### Are NCAT decisions legally binding?
Yes. Its orders are binding and legally enforceable. If the other side does not comply, enforcement options may be available, including enforcing money orders through the Local Court.
The equivalent point for Victoria is slightly different. VCAT says it does not enforce its own orders and that enforcement usually happens through the appropriate court. That difference is worth stating clearly because many readers assume the tribunal itself handles enforcement from start to finish.
### Filing at VCAT
Before you can file at VCAT for a domestic building dispute, you are generally required to first go through the Domestic Building Dispute Resolution Victoria (DBDRV) conciliation process. DBDRV is a free service that attempts to resolve building disputes through conciliation before they reach the tribunal.
If DBDRV conciliation is unsuccessful, DBDRV will issue a certificate that allows you to proceed to VCAT. You then lodge an application with [VCAT](https://www.vcat.vic.gov.au), including your DBDRV certificate, details of the claim, and supporting documents.
This DBDRV step is a significant procedural difference from NCAT, where there is no mandatory pre-filing conciliation process.
### About VCAT
### What powers does VCAT have?
VCAT can hear building disputes, award damages in the right cases, make injunctions, manage evidence and hearing steps, and make final orders that parties must follow. In some building matters, it can also review earlier dispute resolution or regulator decisions.
### Can a lawyer represent you at VCAT?
Yes, a lawyer can represent you at VCAT, but usually not automatically. If you want a lawyer or other professional advocate to represent you, you generally need the tribunal’s permission unless you fall into a category with an automatic right to representation. If permission is refused, you should be ready to run your own case.
### Are NCAT decisions legally binding?
Yes. VCAT says that once it issues a written order, the order sets out what each party must do, and that order is legally binding. All parties must follow what VCAT decides.
VCAT does not enforce its own orders. If the other side does not comply, enforcement usually happens through a court. For monetary orders of $100,000 or less, enforcement can be sought through the Magistrates’ Court of Victoria. For monetary orders above $100,000, enforcement can go through the County Court or Supreme Court. Non-monetary orders can be enforced through the Supreme Court.
## Costs and Fees
Filing fees at both tribunals vary depending on the type of claim and the amount in dispute.
**NCAT filing fees** for building claims in the Consumer and Commercial Division generally range from approximately $50 for small claims up to several hundred dollars for larger claims. Fee schedules are published on the [NCAT website](https://www.ncat.nsw.gov.au) and are updated periodically.
**VCAT filing fees** for building disputes in the Civil Division similarly range from around $70 to several hundred dollars depending on the amount claimed. VCAT also publishes its current fee schedule on its [website](https://www.vcat.vic.gov.au).
Both tribunals offer fee waivers or reductions for applicants experiencing financial hardship. You may need to provide evidence of your financial circumstances to qualify.
Beyond the filing fees, the main cost in any building dispute is the preparation of evidence, particularly [expert witness reports](/expert-witness-reports). These costs are similar regardless of which tribunal you are appearing before, typically ranging from $1,500 to $4,000 or more for a comprehensive expert witness report.
Prepare for
Tribunal
}
href="/articles/prepare-for-ncat-vcat-homeowner-guide"
variant="secondary"
/>
## Pre-Hearing Requirements
The steps between filing your application and attending a hearing differ between the two tribunals.
### NCAT Pre-Hearing Steps
### VCAT Pre-Hearing Steps
The key difference is the mandatory DBDRV step in Victoria, which adds time to the overall process but provides an opportunity to resolve the dispute before incurring the costs of tribunal proceedings.
## Timeframes
Timeframes for building disputes vary significantly depending on the complexity of the matter, the tribunal's workload, and whether adjournments are granted.
### NCAT Typical Timeframes
### VCAT Typical Timeframes
VCAT timeframes tend to be longer than NCAT because of the mandatory DBDRV conciliation step and, in recent years, a significant backlog in the Building and Property List. However, both tribunals have experienced delays at various times, and actual timeframes can fluctuate.
## Hearing Format
Both NCAT and VCAT are designed to be less formal than courts, but they still follow structured procedures during hearings.
### NCAT Hearings
NCAT hearings are conducted by a tribunal member who may be a legal practitioner, a building professional, or both. The hearing follows a standard format:
NCAT hearings are generally held in person at tribunal hearing rooms, though some matters may be heard by telephone or video conference, particularly for directions hearings and mediations.
### VCAT Hearings
VCAT hearings follow a similar structure. One notable feature of VCAT is the more frequent use of concurrent expert evidence, sometimes called "hot tubbing." In this format, expert witnesses for both parties give evidence together, allowing the tribunal member to ask questions of both experts and to explore areas of agreement and disagreement directly.
VCAT hearings may also involve site inspections, where the tribunal member visits the property to view the defects firsthand. While NCAT can also order site inspections, they are more commonly used at VCAT in building disputes.
## Expert Evidence Requirements
Both tribunals require expert evidence to comply with specific rules, but the details differ.
### NCAT Expert Evidence Rules
Expert evidence at NCAT must comply with Schedule 4 of the Civil and Administrative Tribunal Rules 2014. Key requirements include:
### VCAT Expert Evidence Rules
VCAT's requirements are broadly similar but are set out in the VCAT Act and relevant practice notes. Additional features include:
Regardless of which tribunal your case is before, the quality and independence of your expert witness report are critical. For guidance on what makes a report effective, see our article on [what makes a strong expert witness report](/articles/what-makes-strong-expert-witness-report).
## Costs Orders
An important practical difference between NCAT and VCAT relates to costs orders, which determine whether the losing party has to pay the winning party's legal and expert costs.
**NCAT** generally operates on a "no costs" basis in the Consumer and Commercial Division. This means each party bears their own costs, regardless of the outcome. Costs orders may be made in limited circumstances, such as where proceedings were frivolous, vexatious, or where a party acted unreasonably.
**VCAT** also generally follows a "no costs" basis for domestic building disputes. However, VCAT has somewhat broader discretion to award costs in certain circumstances, including where a party has refused to participate in a DBDRV conciliation process or has acted unreasonably during the proceedings.
In practice, this means that in most building disputes at either tribunal, you should expect to pay your own expert witness fees and legal costs, regardless of whether you win or lose. This makes it important to budget for these costs from the outset.
## Appeal Options
If you are unhappy with the tribunal's decision, both NCAT and VCAT provide appeal options, though the processes differ.
### NCAT Appeals
Internal appeals at NCAT are heard by an Appeal Panel. You must seek leave to appeal, and the appeal is generally limited to questions of law or where there has been a significant procedural error. The Appeal Panel can affirm, vary, or set aside the original decision.
Further appeals from the NCAT Appeal Panel can be made to the Supreme Court of NSW on a question of law.
### VCAT Appeals
VCAT decisions can be appealed to the Supreme Court of Victoria. Appeals are generally limited to questions of law. VCAT does not have an internal appeal panel in the same way as NCAT, so appeals go directly to the Supreme Court.
In both cases, appeals are not a simple rehearing of your case. They are focused on legal errors, and success rates are relatively low. This makes getting the first hearing right particularly important.
## Side-by-Side Comparison
| Feature | NCAT (NSW) | VCAT (Victoria) |
| --- | --- | --- |
| **Governing legislation** | Civil and Administrative Tribunal Act 2013; Home Building Act 1989 | VCAT Act 1998; Domestic Building Contracts Act 1995 |
| **Division** | Consumer and Commercial Division | Civil Division, Building and Property List |
| **Pre-filing requirement** | No mandatory pre-filing conciliation | DBDRV conciliation generally required |
| **Filing fees** | $50 to several hundred dollars | $70 to several hundred dollars |
| **Typical timeframe (simple)** | 3 to 6 months | 4 to 8 months |
| **Typical timeframe (complex)** | 6 to 12+ months | 9 to 18+ months |
| **Costs orders** | Generally no costs | Generally no costs, slightly broader discretion |
| **Expert evidence rules** | Schedule 4, NCAT Rules | Practice notes and VCAT Act provisions |
| **Concurrent evidence (hot tubbing)** | Less common | More commonly used |
| **Site inspections** | Available but less common | More frequently used |
| **Appeal pathway** | Internal Appeal Panel, then Supreme Court | Directly to Supreme Court of Victoria |
For a complete overview, see our [guide to expert witness reports for building disputes](/guides/expert-witness-building-disputes-guide).
### Can You Negotiate Price After a Building Inspection?
Source: https://ownerinspections.com.au/articles/negotiate-price-after-building-inspection
Published: 2026-02-26 | Updated: 2026-05-27 | Category: Pre-Purchase Inspections
Author: Maison Azdari
Yes, you can negotiate price after a building inspection if the report finds defects that affect the property’s value, safety, repair cost, or your willingness to proceed. A professional pre-purchase inspection report gives you written evidence, photos, defect notes, and recommended next steps, which can help you ask for a fair price reduction, request repairs, or reconsider the purchase.
Consumer Affairs Victoria says a professional building inspection report can list faults, whether they can be repaired, and likely repair costs, and buyers may be able to use the report to negotiate the price and contract conditions with the seller.
NSW Government also says a [pre-purchase building inspection](/pre-purchase-inspections) report can help buyers know problems in advance, use the information to negotiate a lower price, and seek specialist advice about major issues.
This guide explains how negotiating after building and pest inspections works, when renegotiating price after building inspection results is reasonable, what to do if the seller refuses, and when withdrawing offer after building inspection may be an option.
Book a Defect
Investigation
}
buttonHref="/defect-investigation-reports"
variant="secondary"
/>
## How Does a Building Inspection Help With Negotiations?
A building inspection helps with negotiations because it turns concerns into documented evidence. Instead of saying “the roof looks old” or “there might be moisture,” you can point to a written defect, a photo, a location, and a recommended action.
A standard building inspection report is a written account of the property’s condition and may identify significant defects such as rising damp, wall movement, safety hazards, or roof faults.
This matters because sellers and agents are more likely to take a negotiation seriously when the request is based on a qualified inspector’s findings, not guesswork.
A strong report can help you:
| Inspection finding | Why it helps your negotiation |
| -------------------------------------- | ------------------------------------------------------------------ |
| Major structural cracking | Shows possible footing, foundation, or movement risk |
| Active termite damage | Supports further pest treatment and timber repair discussions |
| Roof leaks or failed flashings | Shows a clear repair cost and water damage risk |
| Failed waterproofing | Supports a price discussion because wet area repairs can be costly |
| Unsafe electrical or plumbing concerns | Gives reason to seek licensed trade advice |
| Unapproved building work | May affect insurance, resale, and future renovation plans |
NSW Government says [building inspection reports](https://www.nsw.gov.au/housing-and-construction/buying-and-selling-property/buying-property-nsw/inspecting-a-property/inspection-reports) are usually carried out before exchange so buyers can identify problems that may be costly if left unchecked.
A professional building inspection report is not just a list of problems. It is a detailed, evidence-based document that classifies defects by severity, includes photographs, and often provides guidance on the type of repairs required. This structure makes it a powerful negotiating tool for several reasons.
**It is objective.** The report comes from an independent, licensed inspector with no financial interest in the sale. This carries more weight with vendors and agents than a buyer simply pointing out issues.
**It is specific.** Rather than vague claims like "the roof looks old," the report identifies specific defects such as "cracked and displaced ridge capping on the western elevation, requiring repointing and partial replacement." Specificity makes it harder for the vendor to dismiss your concerns.
**It quantifies risk.** Major defects flagged in the report signal genuine financial exposure. When a vendor can see that a structural crack or a failing retaining wall will cost $15,000 to repair, they understand why a price adjustment is reasonable.
**It creates a record.** Once a defect is documented in a professional report, the vendor becomes aware of it. If they refuse to negotiate and then sell to another buyer without disclosing the issue, they may face legal consequences. This awareness often motivates vendors to negotiate in good faith.
Book a Pre-Purchase
Inspection
}
buttonHref="/pre-purchase-inspections"
variant="secondary"
/>
## Can You Negotiate After a Building and Pest Inspection?
Yes, you can negotiate after a building and pest inspection when the report identifies serious defects, active pest issues, timber damage, moisture problems, safety risks, or repair costs that were not reflected in the agreed price.
Negotiating after building and pest inspections is strongest when you focus on defects that affect value or liveability. Serious issues can include major termite infestation, latent structural damage, and extensive water damage.
Minor cosmetic issues are usually weaker grounds for negotiation. REIQ gives examples such as general deterioration, wear and tear, weathering, cleanliness, or a cracked bathroom tile as issues that may not justify termination or renegotiation on their own.
## Renegotiating Price After Building Inspection Results
Renegotiating price after building inspection results should be based on repair evidence, not fear. The best approach is to separate major defects from minor defects, get quotes where possible, then make a clear request.
Use this simple process:
1. Read the full report, not only the summary.
2. Highlight defects linked to safety, structure, water entry, termites, or unapproved work.
3. Ask the inspector to explain anything unclear.
4. Get written repair quotes from licensed trades.
5. Speak with your conveyancer or solicitor before sending a formal request.
6. Ask for a price reduction, seller repairs, or a contract condition that matches the defect.
A standard building inspection report is not intended to estimate repair costs, so buyers may need a special-purpose report or separate trade quotes when they need cost details.
## What Defects Justify a Price Reduction
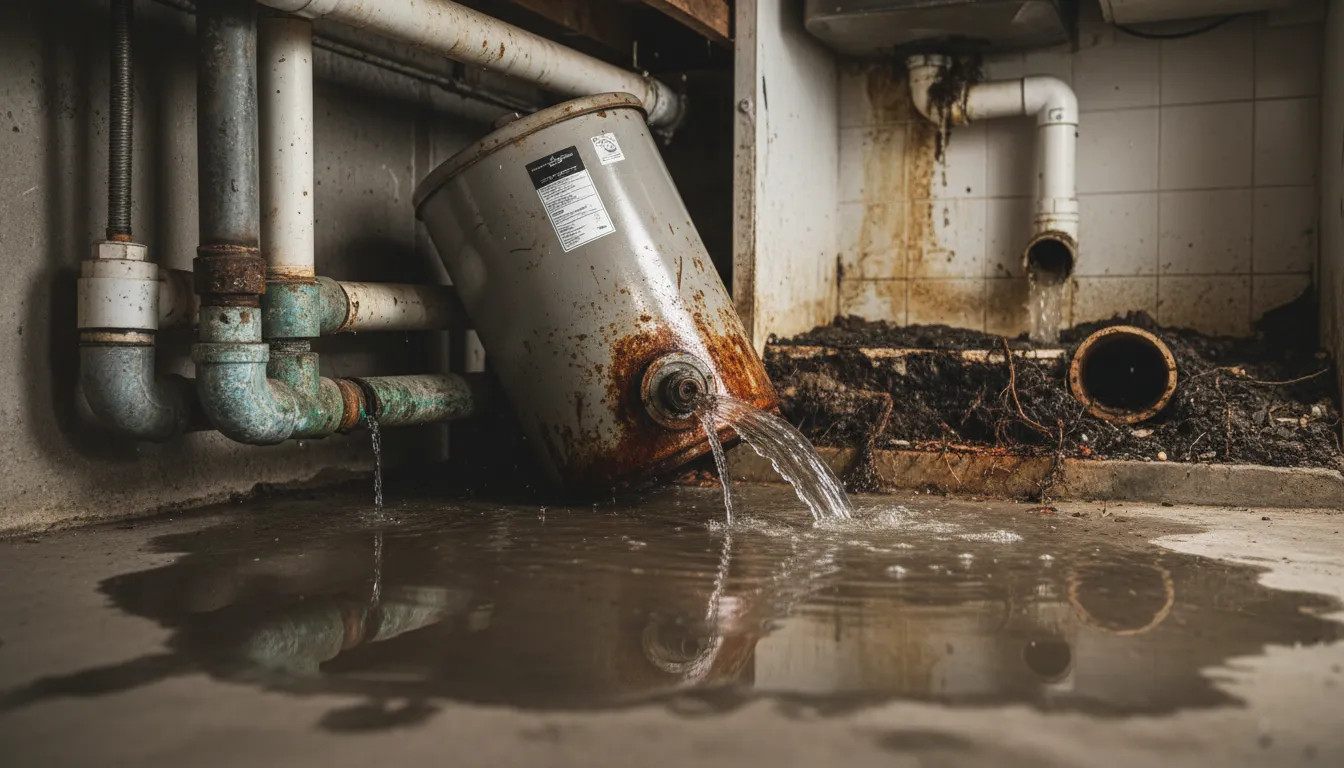
Not every defect justifies a price reduction. The strongest cases usually involve defects that are costly, unsafe, hidden, structural, or likely to worsen after settlement.
| Defect type | Usually worth negotiating? | Why it matters |
| ----------------------------------- | ---------------------------- | ----------------------------------------------------------------- |
| Major structural movement | Yes | Can affect safety, repair cost, insurance, and resale |
| Active termite activity | Yes | May need treatment, timber replacement, and further investigation |
| Roof leaks or sagging roof frame | Yes | Can damage ceilings, insulation, wiring, and framing |
| Failed waterproofing or rising damp | Yes | Can lead to mould, timber decay, and costly wet area repairs |
| Unsafe electrical observations | Yes, with electrician advice | May need licensed specialist repair |
| Non-compliant renovation work | Yes | May affect future approvals, finance, insurance, or resale |
| Old carpet or dated paint | Usually no | Often considered normal wear and tear |
| Small plaster cracks | Usually no | May be normal ageing unless linked to wider movement |
| Dirty gutters or loose handles | Usually no | Better treated as maintenance |
Consumer Affairs Victoria lists [warning signs buyers should check](https://www.consumer.vic.gov.au/housing/buying-and-selling-property/buying-property/inspect-properties-before-you-buy) for, including sloping floors, damp brick walls, termite indicators, cracked walls, moisture in wet areas, fretting mortar, sagging roof lines, damaged roof tiles, and damaged asbestos materials.
## What Defects Usually Do Not Justify Negotiation?
Minor and cosmetic items are weak negotiation points unless they form part of a larger pattern.
These usually do not justify a major price reduction:
- Worn carpet
- Dated paint
- Small chips or scratches
- Minor grout wear
- Loose fittings
- General weathering
- Minor deterioration consistent with age
- Small plaster cracks with no movement pattern
Most properties have minor defects, including blemishes, corrosion, cracking, weathering, general deterioration, unevenness, and physical damage to finishes.
## Withdrawing Offer After Building Inspection
Withdrawing offer after building inspection may be possible if your contract gives you that right, the cooling-off period applies, or the contract is subject to a satisfactory building and pest inspection. The exact position depends on your state, contract wording, timing, and the defect findings.
Do not assume every defect gives you an automatic right to walk away. NAB says a [correctly worded building and pest clause](https://www.nab.com.au/personal/life-moments/home-property/buy-first-home/building-inspection) may give a buyer the right to withdraw if the report is not satisfactory, but buyers should seek solicitor advice on wording and act reasonably during building and pest negotiations.
In NSW, buyers usually have a 5 business day cooling-off period after exchange, but they may forfeit 0.25% of the purchase price if they withdraw, and the [cooling-off period](https://www.nsw.gov.au/housing-and-construction/buying-and-selling-property/buying-property-nsw/inspecting-a-property/inspection-reports) does not apply to auction purchases or some auction-related exchanges.
In Victoria, [private residential property buyers](https://www.consumer.vic.gov.au/housing/buying-and-selling-property/buying-property/buying-property-by-private-sale) generally have three clear business days to cool off, but there are exceptions, including some auction-related purchases.
## Withdrawing Offer After Building Inspection QLD
Withdrawing offer after building inspection QLD should be handled carefully. In Queensland, buyers commonly rely on a building and pest condition, but the buyer’s response must usually be reasonable and tied to the inspection report.
REIQ explains that under the standard Queensland residential land sale contract, a buyer seeking to terminate based on a building and pest inspection report must act reasonably.
REIQ also says reasonableness can depend on the age of the property, severity of the building and pest problems, whether the issues were evident on inspection, and the potential cost of rectifying the defects.
For Queensland buyers, the safest next step is to send the report to your conveyancer or solicitor before withdrawing, renegotiating, or issuing any formal notice.
## What If the Seller Is Not Willing to Negotiate After Inspection?
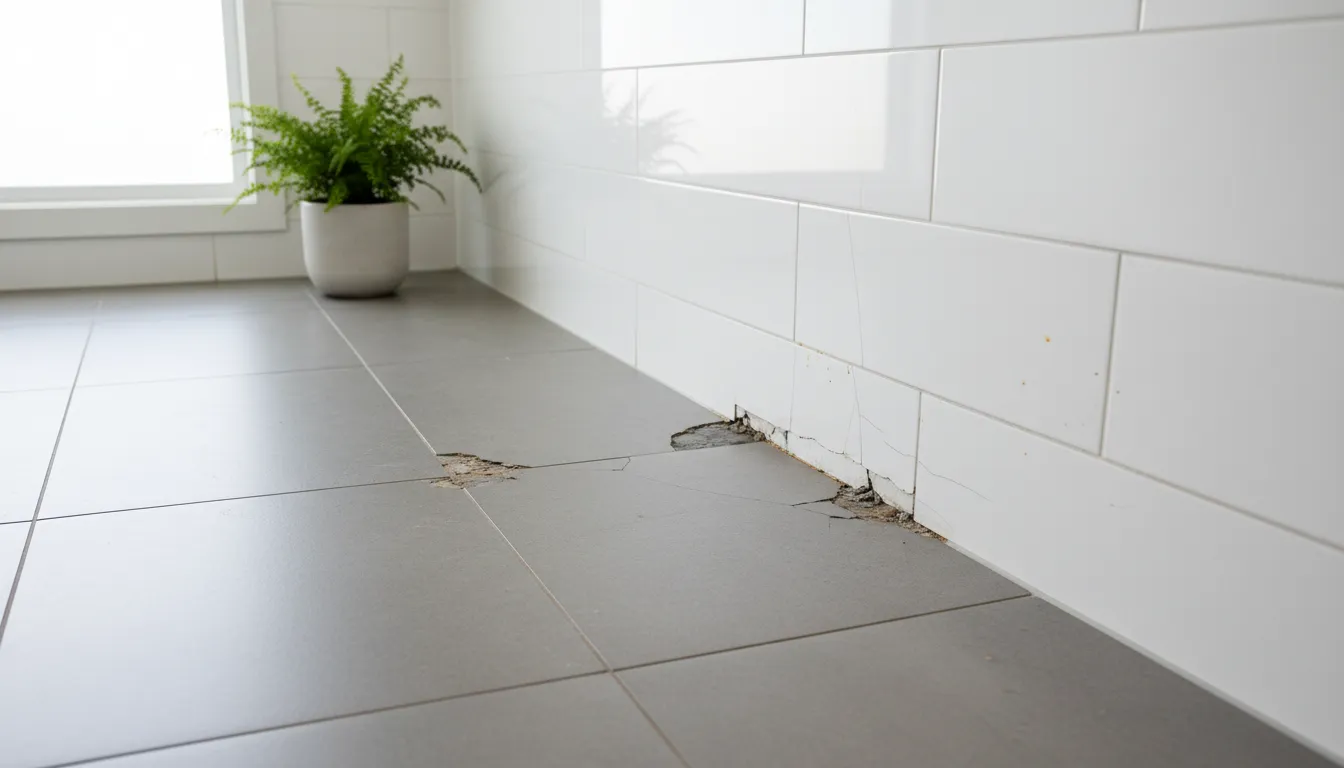
If the seller is not willing to negotiate after inspection, you still have options. The right choice depends on the contract, the defects, the market, and your risk tolerance.
| Seller response | Buyer option |
| --------------------------------------- | --------------------------------------------------------------------------------------------- |
| Seller refuses any discount | Decide whether the property is still worth the agreed price |
| Seller offers a smaller reduction | Compare the offer against repair quotes and future risk |
| Seller offers repairs before settlement | Ask who will do the work, whether licensed trades are used, and how completion will be proven |
| Seller disputes the report | Ask whether they will allow a specialist inspection or provide counter-evidence |
| Seller ignores serious defects | Speak with your conveyancer about contract rights and deadlines |
Keep the conversation factual. Focus on the report, the repair quotes, and the risk. Avoid asking for a large discount on every small issue, as that can weaken the negotiation.
Get Expert
Report Support
}
buttonHref="/expert-witness-reports"
variant="secondary"
/>
## Average Price Reduction After Home Inspection
There is no fixed average price reduction after home inspection in Australia. The reduction depends on the defect type, repair quotes, property price, buyer demand, contract terms, and whether the issue was already obvious before the offer.
A roof replacement may support a larger request than worn paint. Active termite damage may lead to treatment costs, timber repair costs, and further investigation. A small cosmetic defect may support no reduction at all.
Use this simple formula as a starting point:
| Step | What to calculate |
| ------------------ | ----------------------------------------------------------------- |
| Repair quote total | Add written quotes for major defects |
| Urgency | Give more weight to safety, water, termite, and structural issues |
| Market condition | Strong seller markets may reduce bargaining power |
| Contract risk | Check deadlines and withdrawal rights with your conveyancer |
| Fair request | Ask for a reduction that matches evidence, not emotion |
## Example Negotiation Scenarios
### Scenario 1: Roof Repairs
The report identifies rusted roof sheets, failed flashings, and water entry into the ceiling space. The buyer obtains two roof repair quotes and asks for a price reduction based on the lower quote.
This is stronger than asking for a random discount because the request is linked to a report finding and a trade quote.
### Scenario 2: Termite Damage
The [pest inspection](/timber-pest-inspections) finds active termites in subfloor timbers. The buyer asks for treatment before settlement and a price reduction for timber repairs.
This is a strong negotiation point because REIQ lists major termite infestation as a serious issue that can affect value or liveability.
### Scenario 3: Cosmetic Wear
The report notes worn carpet, old paint, and loose cupboard handles. The buyer asks for a large discount.
This is a weak request because minor defects and general wear are common in established properties and are often already reflected in the asking price. NSW Government notes most properties have minor defects such as blemishes, cracking, corrosion, weathering, and general deterioration.
## How to Negotiate House Price After Inspection
When negotiating house price after inspection, keep the request short, factual, and tied to evidence.
Use this structure:
- Thank the seller or agent for access.
- State that the inspection found significant defects.
- Attach the relevant report pages and photos.
- Attach repair quotes if available.
- Explain the requested price reduction or repair condition.
- Ask for a written response before the contract deadline.
**Sample wording:**
*“Following the building and pest inspection, the report identified active water entry to the roof space and failed flashings. We have attached the relevant report pages and a repair quote. Based on these findings, we request a price reduction of $X or completion of the listed repairs by licensed trades before settlement.”*
## What is the Biggest Red Flag in a Home Inspection?
The biggest red flag in a home inspection is major structural movement or damage.
This is the issue buyers should treat most seriously because it can affect safety, cost, insurability, and resale value all at once. Structural problems also tend to trigger follow-on defects, such as cracking, leaking, sticking doors and windows, uneven floors, and roof distortion.
Signs that deserve close attention include:
- Wide or stepped cracks in brickwork
- Sloping or springy floors
- Soors and windows that no longer sit square in their frames
- Sagging roof lines
- Movement in retaining walls
- Signs of ongoing water entry around the building.
One isolated crack does not always mean a major structural problem. But when several signs appear together, buyers should slow down and get extra advice before moving forward.
See Inspection
Red Flags
}
buttonHref="/articles/pre-purchase-inspection-red-flags"
variant="secondary"
/>
## What Devalues a House the Most?
When buyers ask what devalues a house the most, the answer is usually not one small defect. It is a pattern of deferred maintenance that points to bigger cost and risk.
The defects that hit value hardest are usually:
- Structural movement and foundation issues
- Chronic water damage or failed waterproofing
- Termite damage
- Roof failure
- Mould linked to moisture problems
- Unapproved or non-compliant renovations
- Safety issues involving electrical, stairs, balconies, or handrails.
These problems can reduce value because they do more than cost money to fix. They make buyers nervous, raise questions from lenders and insurers, and create uncertainty about what else may be hidden.
## How to Approach the Negotiation
The way you present your case matters as much as the evidence itself. Here is a practical approach that tends to produce the best results.
**Step 1: Review the report carefully.** Read the entire report and identify the defects that are significant enough to justify a price adjustment. Separate major issues from minor ones.
**Step 2: Get repair quotes.** For significant defects, obtain written quotes from licensed tradespeople. This gives you concrete cost figures to support your negotiation rather than guesswork.
**Step 3: Calculate your request.** Add up the estimated repair costs for all significant defects. This total forms the basis of your price reduction request. In some cases, you may not ask for the full amount, as negotiation involves give and take.
**Step 4: Present through your conveyancer or solicitor.** In most property transactions, negotiation happens through your legal representative or buyer's agent. They present the inspection findings and repair quotes to the vendor's agent or solicitor in a professional, factual manner.
**Step 5: Be prepared to compromise.** The vendor may counter-offer with a smaller reduction. Consider whether the revised price is still fair given the defects. If the vendor refuses to negotiate at all, you need to decide whether to proceed at the original price or walk away.
## Your Options After a Building Inspection
After receiving your inspection report, you generally have four options:
1. **Proceed at the agreed price.** If the inspection reveals only minor defects consistent with the property's age and asking price, you may be comfortable going ahead without negotiation.
2. **Negotiate a price reduction.** Request a lower price that reflects the cost of addressing significant defects. This is the most common outcome when meaningful defects are found.
3. **Request the vendor make repairs.** Instead of a price reduction, you can ask the vendor to fix specific defects before settlement. This works best for clearly defined issues with straightforward repairs. Be aware that vendor-arranged repairs may not meet the standard you would choose.
4. **Withdraw from the contract.** If the inspection reveals serious problems that make the property unsuitable or too risky, you can exercise your cooling-off rights or invoke a "subject to inspection" clause to walk away. Depending on your contract terms, you may lose a small portion of your deposit.
## What is One Thing You Should Do After You Finish an Inspection?
The one thing you should do after you finish an inspection is review the report with your inspector and identify which findings affect safety, structure, water entry, pest risk, or legal compliance.
That step turns a long report into a negotiation plan. Without quotes, buyers often guess. With quotes, you can show the seller what the defect is likely to cost and why your request is reasonable.
A good next-step checklist looks like this:
- Read the summary and defect ratings carefully
- Highlight the items that affect safety, structure, water entry, or legal compliance
- Ask the inspector to explain anything unclear
- Get quotes from licensed trades for the major issues
- Speak with your conveyancer or solicitor before making a formal request.
## Tips for Successful Negotiation
- **Be reasonable.** Asking for a reduction that reflects actual repair costs is fair. Asking for a large discount based on minor issues will not be taken seriously.
- **Do not wait.** Cooling-off periods and contract conditions have deadlines. Start your negotiation promptly after receiving the report.
- **Focus on facts.** Present the inspector's findings and repair quotes rather than opinions or emotional arguments.
- **Prioritise safety and structural issues.** These carry the most weight with vendors, agents, and solicitors because they represent genuine risk and liability.
- **Keep the relationship professional.** You may still need to work with the vendor through settlement. A respectful negotiation keeps the process smooth.
- **Know your walk-away point.** Before negotiating, decide what price reduction would make the purchase worthwhile for you given the defects found. If the vendor will not meet your minimum, be prepared to walk away.
- **Consider the market.** In a buyer's market, vendors are more likely to negotiate. In a hot seller's market with competing offers, your leverage is reduced, but documented defects still carry weight.
A pre-purchase inspection is not just about finding problems. It is about giving you the information and evidence you need to buy a property at a fair price that accounts for its true condition.
For a complete overview, see our [guide to pre-purchase building and pest inspections](/guides/pre-purchase-building-pest-inspection-guide).
## Getting the Most Value from Your Home and Building Investment
A building inspection gives you the facts you need before committing fully to a property. The report can help you negotiate price after a building inspection, request repairs, avoid hidden costs, or walk away from a risky deal when your contract allows it.
The strongest negotiations are based on clear defects, written evidence, realistic repair quotes, and advice from your conveyancer or solicitor.
[Owner Inspections](/new-construction-stage-inspections) provides independent pre-purchase building and pest inspections across Sydney, Melbourne, Brisbane, and major Australian locations. Book an inspection before your contract deadline so you have the evidence needed to make a clear decision.
Contact Owner
Inspections
}
buttonHref="/contact"
variant="primary"
/>
### Owner Builder Inspection Requirements by State in Australia
Source: https://ownerinspections.com.au/articles/owner-builder-inspection-requirements-by-state
Published: 2026-02-26 | Category: Construction Stage Inspections
Author: Maison Azdari
If you are building your own home as an owner builder in Australia, understanding your inspection obligations is not optional. Each state has its own legislation governing when inspections must occur, who can carry them out, and what happens if you do not comply. Getting this wrong can result in stop-work orders, fines, insurance complications, and serious difficulty selling the property later.
This guide covers the inspection requirements for owner builders in New South Wales, Victoria, and Queensland, including mandatory inspection points, the difference between council and independent inspections, and why going beyond the minimum requirements is strongly recommended.
## What Is an Owner Builder?
An owner builder is a homeowner who takes on the role of the principal contractor for a residential building project on their own property. Instead of hiring a licensed builder to manage the entire project, the owner builder coordinates the trades, manages the construction schedule, and takes legal responsibility for the work.
In all three states covered in this guide, you need an owner builder permit before starting any work above a certain value threshold. The permit application process typically includes completing an approved owner builder course and providing evidence of appropriate insurance.
## Why Inspection Requirements Matter for Owner Builders
When a licensed builder manages a project, they are responsible for meeting inspection requirements and coordinating with the relevant certifier or council. As an owner builder, that responsibility falls entirely on you.
Mandatory inspections serve several purposes:
Missing a mandatory inspection can lead to a stop-work notice, require retrospective assessment (which may involve opening up completed work), or prevent you from obtaining the final certificate needed to legally occupy the home.
## New South Wales (NSW)
In New South Wales, owner builder inspection requirements are governed by the Environmental Planning and Assessment Act 1979 and the Environmental Planning and Assessment Regulation 2021.
### Owner Builder Permit
You need an owner builder permit from NSW Fair Trading for residential work valued at more than $10,000. To obtain the permit, you must complete an approved owner builder course and meet insurance requirements.
### Mandatory Inspection Points (Critical Stage Inspections)
NSW legislation requires critical stage inspections to be carried out by the Principal Certifier (formerly known as the Principal Certifying Authority or PCA). The Principal Certifier can be either a council building surveyor or a private certifier registered with the NSW Building Professionals Board.
The mandatory critical stages in NSW are:
The Principal Certifier must also carry out a final inspection before issuing the occupation certificate.
### Warranty Obligations
If you sell the property within six years of completion, you must provide the buyer with a copy of the owner builder permit and disclose your role as owner builder. Statutory warranty obligations apply to the work for the same periods as they would for a licensed builder: six years for structural defects and two years for non-structural defects.
## Victoria (VIC)
In Victoria, owner builder inspection requirements fall under the Building Act 1993 and the Building Regulations 2018.
### Owner Builder Certificate of Consent
You need a Certificate of Consent from the Victorian Building Authority (VBA) to act as an owner builder for work valued at more than $16,000 (as of 2026). An approved owner builder course must be completed before applying.
### Mandatory Inspection Points
In Victoria, mandatory inspections are carried out by the Relevant Building Surveyor (RBS), who can be a municipal (council) building surveyor or a private building surveyor registered with the VBA.
The mandatory inspection stages specified by Victorian regulations typically include:
The RBS may also specify additional inspection points based on the complexity of the project. It is your responsibility as the owner builder to notify the RBS when each stage is ready for inspection and to not proceed to the next stage until the inspection has been completed and approved.
### Warranty Obligations
Victorian owner builders face significant warranty obligations. If you sell the property within 6.5 years of completion, you must take out owner builder warranty insurance (also known as domestic building insurance) before the sale. Structural defect warranty periods in Victoria extend to 10 years, which is the longest in Australia.
## Queensland (QLD)
In Queensland, owner builder requirements are managed by the Queensland Building and Construction Commission (QBCC) under the Queensland Building and Construction Commission Act 1991 and the Building Act 1975.
### Owner Builder Permit
You need an owner builder permit from the QBCC for residential work valued at more than $11,000. An approved owner builder course must be completed before the permit is granted.
### Mandatory Inspection Points
Queensland mandatory inspections are carried out by a private building certifier or the local council. The Building Act 1975 specifies the following mandatory inspection stages:
The building certifier may require additional inspections depending on the nature and complexity of the project. For example, pool fencing, retaining walls, and specific engineering elements may require separate inspections.
### Warranty Obligations
Owner builders in Queensland must provide a notice to prospective buyers if the property is sold within six years and six months of completion. The statutory warranty periods for owner builder work are the same as for licensed builder work: six years and six months for structural defects and six months for non-structural defects.
## Council Inspections vs Independent Inspections
It is important to understand the difference between mandatory inspections carried out by the certifier (whether council or private) and independent inspections commissioned by you as the owner builder.
Mandatory certifier inspections are essential for legal compliance, but they do not assess everything. Many of the most common and costly defects, particularly waterproofing failures, insulation gaps, and workmanship issues, fall outside the certifier's scope.
## Why Independent Inspections Are Worth Adding
As an owner builder, you do not have the oversight structure that a licensed builder would typically provide. You are coordinating trades yourself, and you may not have the technical knowledge to assess every aspect of their work. This is where independent inspections fill a critical gap.
Given that owner builders carry the same warranty obligations as licensed builders but often have less construction experience, independent inspections are one of the most effective risk management tools available.
## Common Mistakes Owner Builders Make With Inspections
For a complete overview, see our [guide to construction stage inspections](/guides/construction-stage-inspections-guide).
### Pre-Purchase Inspection Red Flags That Should Make You Think Twice
Source: https://ownerinspections.com.au/articles/pre-purchase-inspection-red-flags
Published: 2026-02-26 | Updated: 2026-03-13 | Category: Pre-Purchase Inspections
Author: Maison Azdari
A tidy open home can hide expensive problems. Fresh paint, new flooring and good styling might make a property feel move-in ready, but a [pre-purchase inspection](/pre-purchase-inspections) is what helps you see the risks behind the presentation. In NSW and Queensland, official guidance says buyers should use inspections to identify visible major defects, safety issues and areas that need specialist follow-up before committing to the purchase.
A pre-purchase inspection will almost always find some defects. That is normal. Every property, no matter how well maintained, has minor issues that come with age and use. But some findings go beyond normal wear and tear. Certain defects are serious enough that they should make you pause, reconsider the purchase price, or walk away from the deal entirely.
Knowing the difference between a manageable problem and a genuine red flag can save you from buying a property that costs far more than you bargained for. This guide covers the most critical warning signs that inspectors find, explains why they matter, and helps you understand what each one could mean for your decision.
## The Biggest Red Flags at a Glance
The red flags that deserve the closest attention are:
- Structural movement and major cracking
- Water ingress, damp and failed waterproofing
- Active termites or clear termite damage
- Roof and drainage defects
- Unapproved or non-compliant building work
- Asbestos risks in older homes
- Electrical safety issues
- Pool compliance problems
- Signs that defects may have been covered up.
These issues matter because they can affect safety, insurance, future renovation plans, resale value and your repair budget after settlement.
Read More From
Our Guide
}
buttonHref="/guides/pre-purchase-building-pest-inspection-guide"
variant="secondary"
/>
## Structural Cracking
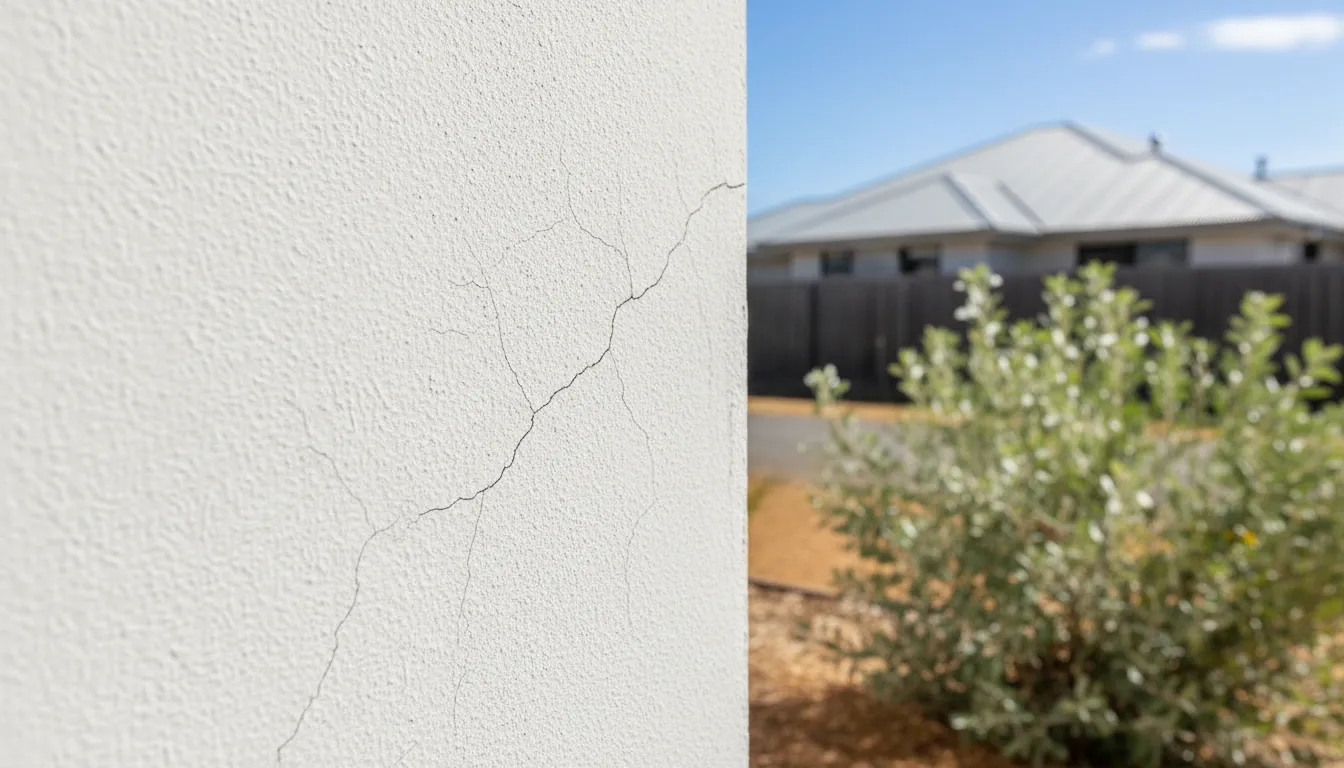
Not all cracks are created equal. Hairline cracks in plaster or render are common and usually cosmetic. They result from normal building settlement, thermal expansion, or minor ground movement. But certain types of cracking indicate serious structural problems that can cost tens of thousands of dollars to repair.
**Red flag signs to watch for:**
- Cracks wider than 5mm in masonry walls
- Stepped cracking that follows the mortar joints in brickwork, typically running diagonally
- Horizontal cracks in retaining walls or foundation walls
- Cracks that are wider at the top than at the bottom (or vice versa), indicating active rotation
- Cracks accompanied by doors or windows that no longer open or close properly
- Cracking that has been filled or patched but has reopened, indicating ongoing movement
**Why it matters.** Structural cracking often indicates foundation movement, inadequate footings, reactive soil problems, or overloading of structural elements. Remediation can involve underpinning (installing additional support beneath foundations), which typically costs $10,000 to $50,000 or more depending on the extent of the work. In severe cases, structural cracking can render a property unliveable until repairs are completed.
**What the inspector will recommend.** If significant cracking is identified, the building inspector will almost always recommend further assessment by a structural engineer. The engineer determines the cause, assesses the severity, and specifies the repair method. Do not proceed with a purchase until you have the engineer's report and a clear understanding of the repair cost.
## Active Termite Infestation
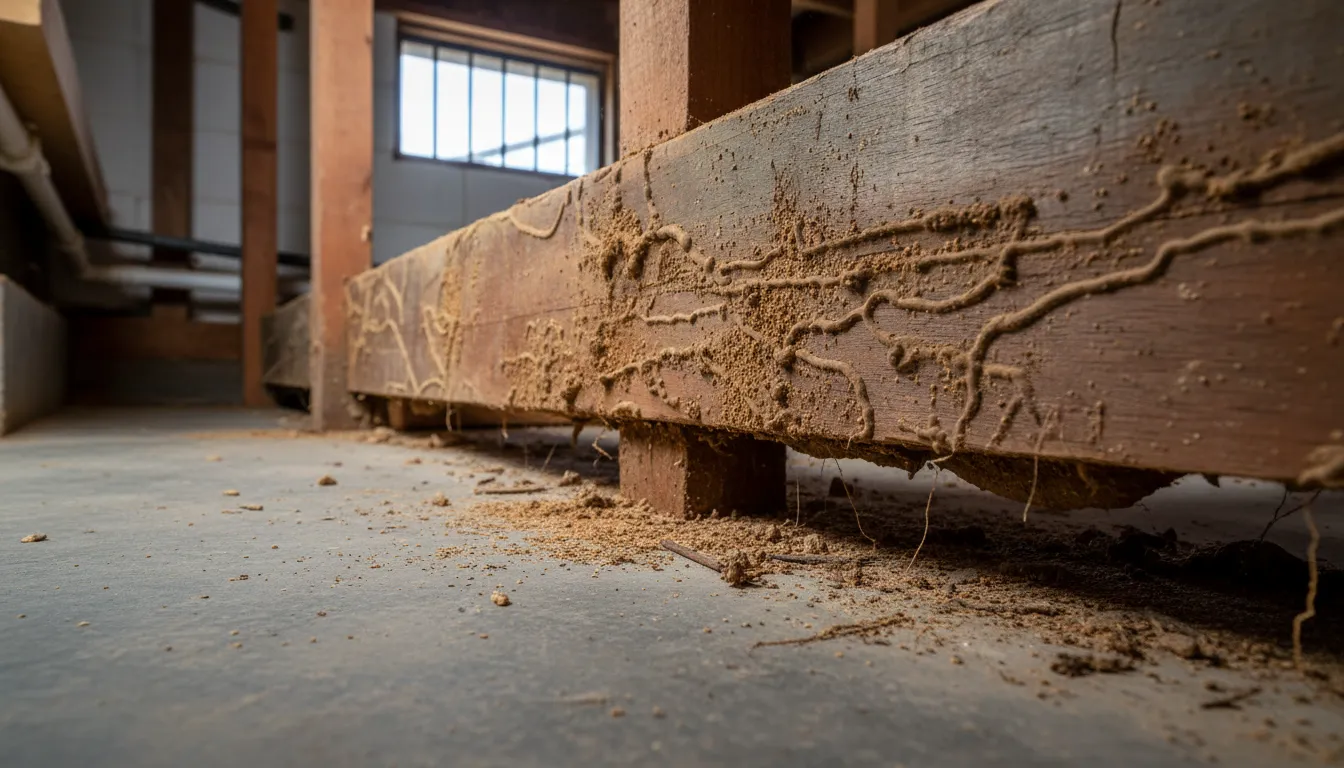
Australia has one of the highest rates of termite activity in the world. Termites cause more damage to Australian homes each year than fire, flood, and storms combined. Finding active termites during a pre-purchase inspection is one of the most significant red flags you can encounter.
**Red flag signs to watch for:**
- Live termites detected in structural timbers, wall framing, or subfloor
- Extensive termite damage to bearers, joists, or wall studs
- Hollow-sounding timbers when tapped, indicating internal consumption
- Mud leads (shelter tubes) on foundations, walls, or plumbing pipes
- Damaged or weakened floor areas that feel spongy underfoot
- Evidence of previous termite treatment with no current management system in place
**Why it matters.** Active termites mean the colony is currently feeding on the property's timber structure. Every day without treatment results in further damage. Repair costs depend on the extent of damage but regularly range from $5,000 to $30,000 for moderate infestations. Severe cases where structural timbers are comprehensively damaged can exceed $100,000. Beyond the repair cost, you also need to budget for ongoing termite management, which costs $1,500 to $3,000 per year.
**What the inspector will recommend.** The pest inspector will recommend immediate treatment by a licensed pest controller and a full assessment of the damage by a builder or structural engineer. Before proceeding with the purchase, you need to know the full extent of the damage and the total cost of treatment plus repairs.
## Asbestos-Containing Materials
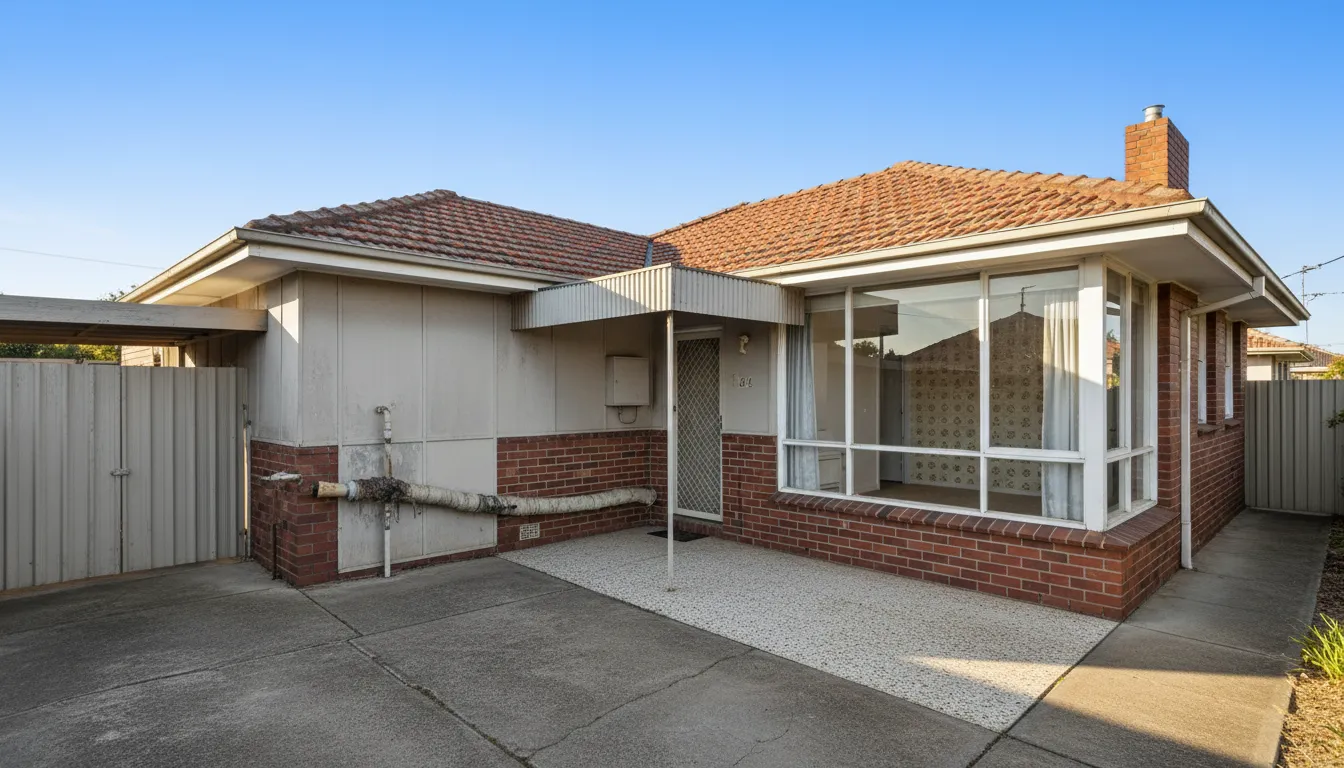
Asbestos was widely used in Australian building materials from the 1940s through to the mid-1980s. It can be found in fibro sheeting (flat and corrugated), vinyl floor tiles, insulation, pipe lagging, eaves lining, and many other products. Homes built before 1990 have a high likelihood of containing asbestos somewhere in the structure.
**Red flag signs to watch for:**
- Damaged, broken, or deteriorating fibro sheeting on walls, eaves, or fencing
- Disturbed or friable asbestos insulation in the roof void or around pipes
- Asbestos materials that have been cut, drilled, or sanded during renovations, releasing fibres
- Large quantities of asbestos products that would need removal for planned renovations
- No asbestos register or management plan for a property known to contain asbestos
**Why it matters.** Asbestos in good condition and left undisturbed is generally considered low risk. The red flag arises when asbestos materials are damaged, deteriorating, or when you plan renovations that would disturb them. Asbestos removal in Australia must be performed by licensed removalists, and costs can be substantial. Removing asbestos from an entire house (roofing, eaves, wall cladding) can cost $15,000 to $40,000 or more. Friable asbestos removal is even more expensive due to the additional safety requirements.
**What the inspector will recommend.** The inspector will note any suspected asbestos-containing materials and recommend laboratory testing to confirm. If confirmed, they will advise on the condition of the materials and whether removal or management is appropriate. Factor the cost of removal into your purchase decision, especially if you plan to renovate.
Explore Building &
[Pest Inspections](/timber-pest-inspections)
}
buttonHref="/building-and-pest-inspections"
variant="secondary"
/>
## Failed Waterproofing
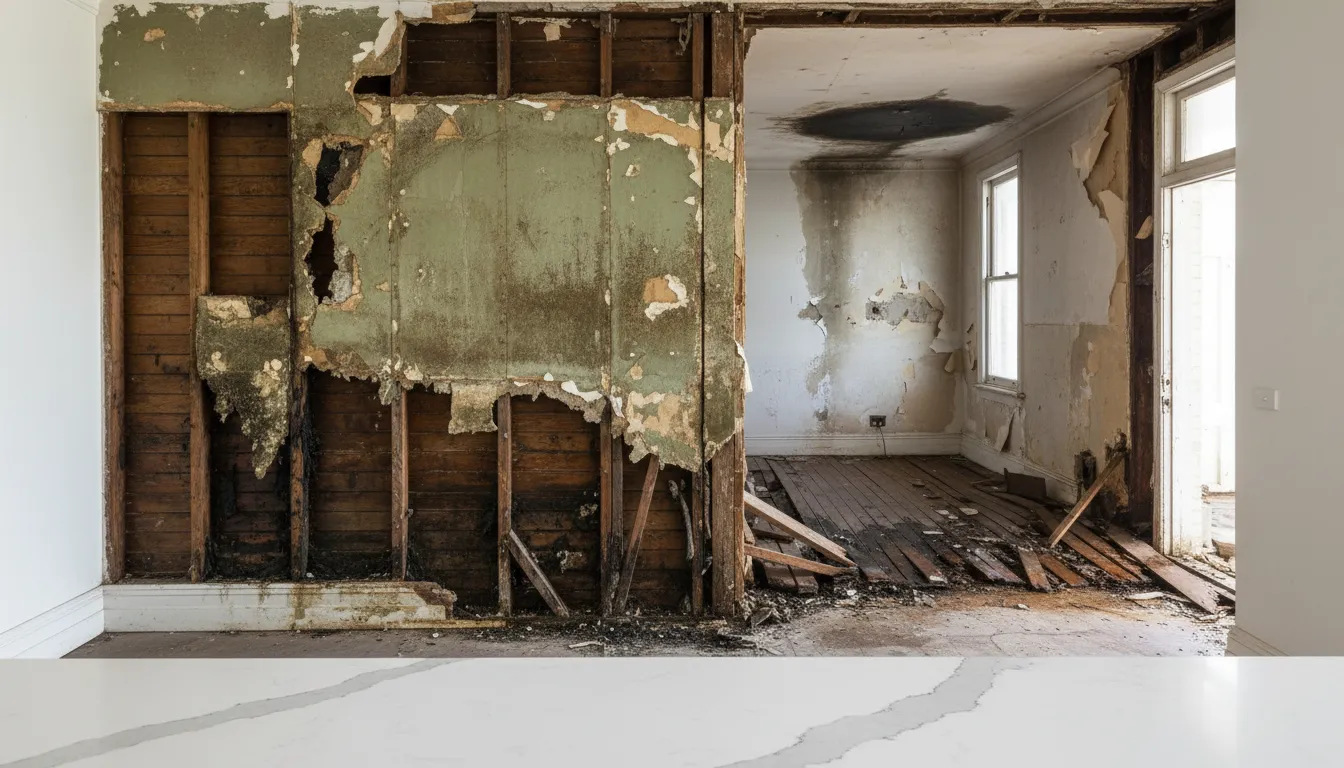
Water is one of the most destructive forces a building can face. When waterproofing fails, water penetrates areas it should not reach, causing rot, mould growth, structural damage, and deterioration of finishes. The damage often extends far beyond what is visible on the surface.
**Red flag signs to watch for:**
- Elevated moisture readings in bathroom floors and walls, indicating water is escaping the shower or bath area
- Staining, bubbling, or peeling paint on ceilings below bathrooms or balconies
- Musty or mouldy smells, particularly in enclosed areas or rooms below wet areas
- Water staining or efflorescence (white salt deposits) on external or internal walls
- Leaking balconies with cracked tiles, failed grout, or deteriorated membranes
- Visible mould growth in corners, behind furniture, or in cupboards against external walls
**Why it matters.** Failed waterproofing rarely fixes itself. The damage is progressive and gets worse over time. Repairing a failed bathroom waterproofing membrane requires stripping the entire bathroom back to the substrate, re-waterproofing, and then retiling and refitting. This typically costs $8,000 to $15,000 per bathroom. Balcony waterproofing repairs can cost $10,000 to $25,000 or more, depending on the size and complexity. If the water damage has reached structural timbers, the repair cost escalates further.
**What the inspector will recommend.** The inspector will document moisture readings and visible damage, and may recommend further investigation by a waterproofing specialist. Get a clear scope of work and repair quote before proceeding with the purchase.
## Foundation Movement
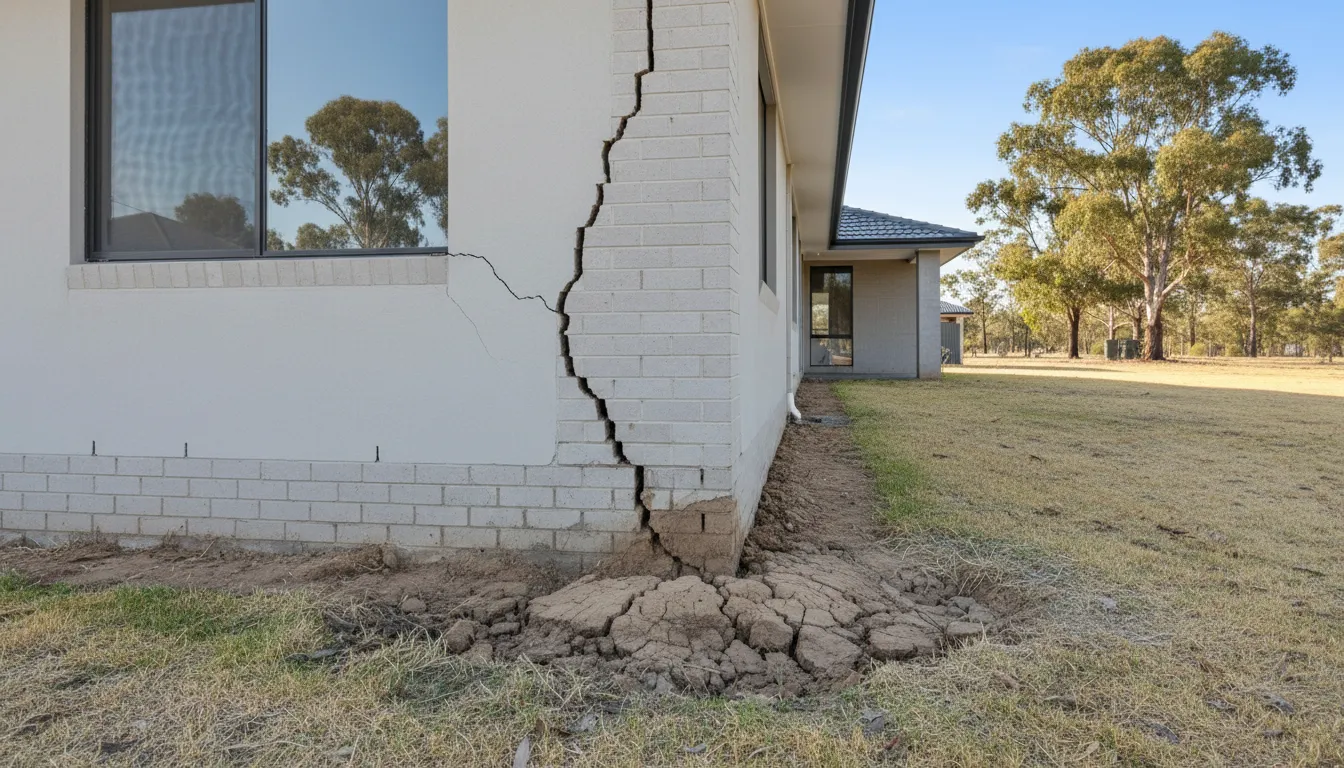
Foundation movement is one of the most expensive building defects to repair. It occurs when the soil beneath a building expands, contracts, or shifts, causing the foundation to move unevenly. This is particularly common in areas with reactive clay soils, which are prevalent across much of Sydney, Melbourne, Adelaide, and parts of Brisbane.
**Red flag signs to watch for:**
- Uneven or sloping floors, detectable by placing a ball on the floor and watching it roll
- Gaps between walls and ceilings, or walls and floors
- Doors and windows that stick, jam, or will not latch properly
- Cracking in multiple areas of the building, following a consistent pattern
- Separation between the house and attached structures such as garages, verandahs, or extensions
- Visible underpinning or previous foundation repair work, which may indicate an ongoing problem
**Why it matters.** Foundation movement affects the entire building. As the foundation shifts, it distorts the frame, cracks walls, displaces windows and doors, and can compromise the roof structure. Underpinning a residential property typically costs $15,000 to $60,000 depending on the method and the number of piers required. In extreme cases, foundation failure can render a property structurally unsound and unsafe to occupy.
**What the inspector will recommend.** The inspector will recommend a structural engineering assessment, which involves a site investigation, soil testing, level survey, and engineering analysis. The engineer's report will specify the cause of the movement, whether it is active or historic, and the recommended remediation method and estimated cost.
## What to Do if Red Flags Appear in the Report
Red flags do not always mean you should walk away. They do mean you should slow down and make a decision based on evidence.
Start with three steps:
- Get the right specialist advice for any issue outside the inspector’s scope
- Ask your conveyancer or solicitor to check approvals, contract conditions and any pool or council compliance issues
- Work out whether the issue changes the price, the timing, or the wisdom of proceeding at all.
NSW says inspection reports should list significant problems, identify areas not inspected and recommend further investigation where needed. That is exactly how buyers should use them.
## A Smarter Way to Read a Pre-purchase Inspection Report
A good report is not just a defect list. It is a decision tool.
Use it to separate:
- Cosmetic defects from major defects
- Manageable maintenance from safety concerns
- Standard wear from signs of movement, moisture or non-compliant work
- Issues you can budget for from issues that need more expert advice before exchange or settlement.
That approach gives you a better chance of negotiating well, planning properly, or walking away before a bad purchase becomes your problem.
## Non-Compliant or Unapproved Building Work
Unapproved renovations and building work that does not comply with the National Construction Code or relevant state regulations is a red flag that many buyers overlook. It creates legal, financial, and safety risks that can follow you long after settlement.
**Red flag signs to watch for:**
- Enclosed carports, garages, or verandahs converted into living spaces without obvious council approval
- Additional rooms, bathrooms, or granny flats that do not appear on the original plans
- Structural walls that have been removed without proper engineering
- Electrical or plumbing work that appears to be DIY rather than professionally installed
- Decks, pergolas, or retaining walls that do not meet current standards for height, balustrades, or structural capacity
- Swimming pools without compliant fencing
**Why it matters.** If you buy a property with unapproved work, the liability transfers to you as the new owner. Council can issue orders requiring you to bring the work up to compliance, obtain retrospective approval (which may require modifications), or in some cases demolish the non-compliant work entirely. Insurance may also be affected if a claim relates to non-compliant work. Retrospective approval costs vary widely, from a few thousand dollars for a simple deck to $20,000 or more for complex structural modifications.
**What the inspector will recommend.** The inspector will flag any work that appears non-compliant or potentially unapproved and recommend verification with the local council. Before committing to the purchase, check council records for development applications and building approvals. Your solicitor or conveyancer can assist with this process.
## Other Red Flags Worth Noting
Beyond the six major red flags above, there are several other findings that should prompt careful consideration:
- **Significant roof defects.** A roof nearing the end of its useful life, with widespread deterioration, can cost $15,000 to $30,000 to replace.
- **Drainage problems.** Poor site drainage that directs water towards or under the building can cause foundation movement, rising damp, and structural damage over time.
- **Evidence of concealment.** Fresh paint over stained areas, new carpet over damaged floors, or recently rendered walls can indicate an attempt to hide defects. Inspectors are trained to look for these patterns.
- **Electrical safety hazards.** Absence of safety switches, exposed wiring, overloaded circuits, or a switchboard that does not meet current standards are safety risks that require immediate remediation.
- **Severe timber decay.** Fungal decay (wood rot) in structural timbers, particularly in subfloor areas or around wet areas, compromises structural integrity and can be as damaging as termite attack.
## What is the Biggest Red Flag in a Home Inspection?
If you want the short answer, it is usually structural movement or major foundation-related damage.
That is an informed judgement rather than a formal government label. NSW and QBCC guidance both highlight movement in walls, weak or cracked walls, damaged foundations and safety hazards as serious findings in pre-purchase inspections. When structural movement is active, one defect can spread into many others, including sticking doors, uneven floors, cracked finishes and roof or framing stress.
## What to Do When Red Flags Appear
Finding a red flag in your inspection report does not automatically mean you should walk away. But it does mean you need to take deliberate steps before proceeding.
**Get specialist assessments.** For structural issues, engage a structural engineer. For termite damage, get a licensed pest controller and a builder to assess the full extent. For asbestos, arrange testing and removal quotes. Do not rely on guesswork.
**Understand the full cost.** Add up the cost of all required repairs and treatments. Include ongoing management costs (such as annual termite inspections) in your calculations. Compare this total against the purchase price and the property's value once repaired.
**Negotiate or walk away.** If the total repair cost is manageable and you can negotiate a fair price reduction, the property may still be a good purchase. If the defects are too severe, the repair costs too high, or the vendor refuses to negotiate, walking away is a legitimate and sometimes necessary decision. Losing a deposit during the cooling-off period is far less expensive than inheriting a property with $50,000 or more in hidden repair costs.
**Consult your legal advisor.** Your solicitor or conveyancer can advise on your contract rights, including whether you can withdraw under a subject-to-inspection clause or during the cooling-off period.
A pre-purchase inspection exists to protect you. When it reveals red flags, it is doing its job. The most important thing is to take those findings seriously, gather the information you need, and make a decision based on facts rather than emotion.
For a complete overview, see our [guide to pre-purchase building and pest inspections](/guides/pre-purchase-building-pest-inspection-guide).
### How to Prepare for NCAT or VCAT as a Homeowner
Source: https://ownerinspections.com.au/articles/prepare-for-ncat-vcat-homeowner-guide
Published: 2026-02-26 | Updated: 2026-03-10 | Category: Expert Witness
Author: Maison Azdari
If you are a homeowner dealing with defective building work, unfinished construction, or a contract dispute, you may find yourself heading to a tribunal. In New South Wales, that tribunal is the NSW Civil and Administrative Tribunal (NCAT). In Victoria, it is the Victorian Civil and Administrative Tribunal (VCAT). Both tribunals handle building disputes between homeowners and builders, and while the processes are similar in many ways, preparation is the single biggest factor in determining the outcome of your case.
This guide is written for homeowners who are approaching a tribunal hearing for the first time. It covers the key steps you should take before the hearing, how to gather and organise your evidence, why an [expert witness report](/expert-witness-reports) matters, what to expect on the day, and the typical timelines involved.
## What Should People do Before they Take a Matter to NCAT or VCAT?
Do not treat the tribunal as the first step. In both states, homeowners are expected to try earlier dispute resolution steps and to gather the right documents before filing.
### Before NCAT in NSW
For home building matters, NCAT says disputes must first be referred to NSW Fair Trading before NCAT can accept the application, unless the matter falls into an exemption category. NCAT also says you should attach evidence of the Fair Trading investigation, gather relevant documents such as the building contract, insurance certificate, reports and witness statements, and make sure you correctly identify the other party. If the other party is a company, NCAT says you should search ASIC and attach the extract.
That means a practical NSW pre filing checklist looks like this:
- Put your complaint to the builder in writing
- Keep all replies, quotes, invoices, site notes and photos
- Lodge the home building complaint with NSW Fair Trading
- Keep any Fair Trading correspondence, inspection outcome or rectification material
- Confirm the correct legal name of the builder or company
- Be clear about the orders you want, such as rectification work, payment, or compensation
NSW Fair Trading’s complaint process says it aims to resolve most complaints within 30 days before giving parties options to take the matter further. That does not mean every matter will finish in 30 days, but it is a useful guide for the early dispute stage.
### Before VCAT in Victoria
If the dispute involves a homeowner and domestic building work, VCAT says you should take the dispute to Domestic Building Dispute Resolution Victoria, DBDRV, before applying to VCAT, unless you are applying for an injunction. VCAT also says you need the right supporting document from that process, such as a certificate of conciliation, rejection letter, dispute resolution order, or breach notice, depending on your situation.
The Building and Plumbing Commission also says its dispute resolution service is free and impartial, that applicants must first take reasonable steps to resolve the issue directly within the last 3 months, and that matters involving health, safety or financial hardship are prioritised.
A practical Victorian pre filing checklist is:
- Raise the issues with the builder in writing and ask for a response
- Keep records showing you tried to resolve the problem directly
- Take the matter through DBDRV where required
- Keep your certificate or outcome letter
- Buy an ASIC company extract if the respondent is a company
- Prepare your application documents before filing
Compare NCAT
and VCAT
}
href="/articles/ncat-vs-vcat-process-differences"
variant="secondary"
/>
## Understand the Tribunal Process
Before you begin preparing evidence, it helps to understand how the tribunal process works. Both NCAT and VCAT are designed to be more accessible than courts. They are less formal, and many homeowners represent themselves without a lawyer. However, the tribunal still follows structured procedures, and you need to take them seriously.
The typical process includes the following stages:
1. **Filing your application.** You lodge an application with the tribunal, setting out your claim against the builder.
2. **Directions hearing.** The tribunal holds a preliminary hearing to set a timetable for the matter, including deadlines for filing evidence and expert reports.
3. **Mediation or conciliation.** Most matters go through a mediation or conciliation process before a hearing. In Victoria, you may need to go through Domestic Building Dispute Resolution Victoria (DBDRV) before filing at VCAT.
4. **Exchange of evidence.** Both parties exchange their evidence, including expert witness reports, photographs, and documents.
5. **Hearing.** The tribunal hears evidence from both parties and makes a determination.
Understanding these stages helps you plan your preparation and ensures you meet all deadlines. Missing a deadline can result in evidence being excluded or your case being adjourned.
## Gather Your Evidence Early
The strength of your case depends on the quality of your evidence. Start gathering evidence as soon as you identify a problem with the building work, and do not wait until you have lodged your tribunal application.
**Documents to collect include:**
Photographs are particularly important. Take clear, well-lit photos of every defect from multiple angles. Include a reference object such as a ruler or coin to show scale. Record the date each photo was taken, and keep the original files rather than just screenshots.
## Get an Expert Witness Report
An expert witness report is one of the most important pieces of evidence you can present at a tribunal hearing. Tribunals deal with technical building matters, and an independent expert can explain the issues in a way that helps the tribunal member make an informed decision.
A strong expert witness report should:
Engage your expert witness early enough to allow time for a thorough inspection and report preparation. Most expert witness reports take two to six weeks to complete. If you wait until the last minute, the report may be rushed or you may miss the tribunal's deadline for filing expert evidence.
For more detail on what separates a good expert report from a weak one, read our article on [what makes a strong expert witness report](/articles/what-makes-strong-expert-witness-report).
## Why an Expert Witness Report Can Make a Big Difference
Home building disputes often turn on technical questions. Is the work defective? What standard applies? What is the cause? What is the reasonable cost to fix it? That is where an expert report becomes useful.
VCAT says an expert report must be impartial, explain the expert’s qualifications, set out the facts and assumptions used, disclose any relationship with the party who paid for the report, and include the expert declaration required by practice note PNVCAT2. For building disputes, VCAT says the expert should explain the reasons for any recommended repair, demolition or alteration work and the likely costs involved. VCAT also says the expert is generally expected to attend the hearing to discuss the report and answer questions.
In practical terms, a strong building expert report should help the tribunal answer five questions:
- What is wrong
- Why is it wrong
- What standard or requirement has not been met
- What work is needed to fix it
- What the reasonable rectification cost is
VCAT also says that if no date has been set for filing evidence, your material should reach VCAT at least 10 business days before the hearing, with copies to the other parties, and expert reports must be sent as hard copy by post. NCAT says all communication about a case should go to the registry and also be copied to the other parties.
Read the Expert
Witness Guide
}
href="/guides/expert-witness-building-disputes-guide"
variant="secondary"
/>
## Organise Your Documents
Tribunals expect evidence to be presented in an organised, logical manner. A well-organised evidence bundle makes a strong impression and helps the tribunal member follow your case.
**How to organise your evidence:**
A clear chronology is especially useful. It helps you tell the story of what happened in a logical order and ensures the tribunal member can follow the sequence of events.
## Prepare for Mediation or Conciliation
Before your matter reaches a hearing, you will almost certainly go through a mediation or conciliation process. In NSW, NCAT typically schedules mediation early in the proceedings. In Victoria, DBDRV conciliation is generally required before you can lodge at VCAT.
Mediation is your opportunity to resolve the dispute without a formal hearing. Many building disputes settle at mediation when both parties have strong evidence and are willing to negotiate in good faith.
**To prepare for mediation:**
If mediation does not result in a settlement, the matter will proceed to a hearing. Nothing you say during mediation can be used against you at the hearing, so you can negotiate freely.
## What to Expect at the Hearing
If your matter proceeds to a hearing, knowing what to expect will help you feel more confident and present your case more effectively.
**Before the hearing:**
Arrive early and dress neatly. Bring your organised evidence bundle, your expert witness report, and any notes you want to refer to. The tribunal member may ask you to sit at a table facing them, with the other party sitting at a separate table.
**During the hearing:**
The tribunal member will explain the procedure at the start. Typically, the person who brought the claim (the applicant) presents their case first. You will explain what happened, refer to your evidence, and call any witnesses, including your expert witness if they are attending.
The other party then has the opportunity to ask you questions (cross-examination). After that, the respondent presents their case, and you have the opportunity to ask them questions.
**Key tips for the hearing:**
The tribunal member may ask questions of both parties and any expert witnesses. After hearing all the evidence, the member will either make a decision on the day or reserve their decision and provide it in writing at a later date.
## Typical Timelines
Understanding the typical timelines helps you plan your preparation and manage your expectations.
These timelines are approximate and vary depending on the tribunal's workload, the complexity of the matter, and whether adjournments are granted. Expert witness reports should be commissioned as soon as possible after filing, because the tribunal will set a deadline for exchanging expert evidence.
## Common Mistakes to Avoid
### Storm Damage Inspection: What to Do in the First 48 Hours
Source: https://ownerinspections.com.au/articles/storm-damage-inspection-first-48-hours
Published: 2026-02-26 | Updated: 2026-03-01 | Category: Building Inspections
Author: Maison Azdari
A severe storm has just hit your area. Trees are down, the power is out, and you can see damage to your home. What you do in the next 48 hours will have a direct impact on your safety, the condition of your property, and the outcome of your insurance claim.
Storms are one of the leading causes of property damage claims in Australia. Every year, events ranging from hailstorms and cyclones to severe thunderstorms and east coast lows cause billions of dollars in damage to Australian homes. Knowing what to do immediately after a storm can save you thousands of dollars and months of frustration.
This guide walks you through the steps to take in the first 48 hours after storm damage, in the order you should take them.
## Step 1: Prioritise Safety
Before you do anything else, make sure you and your family are safe. Storm damage can create hazards that are not immediately obvious.
**Stay away from fallen power lines.** If power lines are down near your property, assume they are live and keep at least eight metres away. Call your electricity distributor or call 000 in an emergency.
**Do not enter a structurally compromised building.** If you can see significant damage to walls, the roof structure, or the foundation, do not go inside until a professional has assessed whether the building is safe. Cracked walls, sagging rooflines, and leaning structures are warning signs of potential collapse.
**Watch for water hazards.** Floodwater can conceal sharp debris, open drains, and electrical hazards. Even shallow water inside the home can be dangerous if power points or wiring are submerged.
**Check for gas leaks.** If you smell gas or hear hissing, leave the property immediately and call your gas provider or 000.
**Turn off utilities if it is safe to do so.** If you can safely access your switchboard, turn off the electricity. If you can reach the water mains, turn them off to prevent further water damage from burst pipes.
Only proceed to the next steps once you are confident that the property is safe to approach and enter.
## Step 2: Document Everything
Thorough documentation in the first 48 hours is one of the most valuable things you can do for your insurance claim. Insurers need evidence of the damage, and the more detailed your records are, the stronger your claim will be.
### Photographs and Video
Take photographs and video of all damage, both inside and outside the property. Follow these guidelines:
- **Take wide shots first.** Capture the overall scene showing the extent of the damage from multiple angles.
- **Then take close-up shots.** Document specific areas of damage in detail, including cracks, broken tiles, water stains, and debris.
- **Include reference points.** Place a ruler, coin, or other object next to cracks and holes to show scale.
- **Photograph undamaged areas too.** This establishes the baseline condition of parts of the property that were not affected.
- **Record the date and time.** Most phone cameras do this automatically, but double-check that your settings are correct.
- **Photograph damaged contents.** If personal belongings have been damaged, photograph them before cleaning up or disposing of anything.
### Written Notes
Keep a written record of:
- The date and approximate time the storm hit
- What you saw and heard during the event
- When you first noticed specific damage
- Any conversations you have with neighbours, emergency services, or tradespeople
- The weather conditions at the time (you can corroborate this later with Bureau of Meteorology records)
### Keep Damaged Materials
If possible, keep samples of damaged materials. Broken roof tiles, waterlogged insulation, and damaged timber can serve as evidence. Do not throw anything away until your insurer or independent assessor has inspected the property.
## Step 3: Make Emergency Repairs Only
You have a duty under your insurance policy to take reasonable steps to prevent further damage. This means making emergency repairs to protect your property, but not carrying out permanent repairs before the insurer has assessed the claim.
Appropriate emergency repairs include:
- **Tarping a damaged roof.** Cover holes or missing sections with a tarpaulin to prevent further water ingress.
- **Boarding up broken windows or doors.** This prevents weather damage and secures the property against theft.
- **Removing fallen branches from the structure.** If branches are resting on the roof and causing ongoing damage, remove them if it is safe to do so.
- **Mopping up water.** Remove standing water to prevent it from causing additional damage to floors, walls, and electrical systems.
- **Placing buckets under leaks.** A simple but effective way to limit interior water damage.
Important: keep all receipts for emergency repair materials and any tradespeople you engage. These costs are typically covered by your insurance as part of the claim. Also photograph the emergency repairs before, during, and after they are completed.
## Step 4: Contact Your Insurer
Notify your insurer about the damage as soon as practical. Most insurers have 24-hour claims hotlines, and many allow you to lodge claims online or through their app.
When contacting your insurer, have the following ready:
- Your policy number
- The date and time of the storm
- A general description of the damage
- Your contact details and the property address
The insurer will assign a claim number and explain the next steps. In most cases, they will arrange for a loss adjuster or assessor to inspect the property. After major storm events, there can be significant delays before the insurer's assessor visits, sometimes weeks or even months. Do not wait for their visit before taking the other steps outlined in this guide.
A few things to keep in mind when speaking with the insurer:
- **Stick to the facts.** Describe what happened and what damage you can see. Do not speculate about causes or make guesses about repair costs.
- **Do not accept a quick settlement.** After major events, some insurers may offer a quick cash settlement. Before accepting, make sure it will actually cover the full cost of repairs. Once you accept, you generally cannot go back and ask for more.
- **Ask about emergency accommodation.** If the property is uninhabitable, your policy may cover temporary accommodation costs. Ask about this early so you know your options.
## Step 5: Arrange an Independent Assessment
While your insurer will send their own assessor, consider engaging an independent building assessor to inspect the property as well. As outlined above, the insurer's assessor works for the insurer, and their report may not fully capture the extent of the damage.
An independent assessment is particularly important when:
- The damage appears extensive or involves structural elements
- There is likely to be hidden damage (such as water in wall cavities or subfloor areas)
- You want an objective record of the damage before any repairs begin
- Previous storms or events have affected the property and causation may be disputed
An independent assessor will document all visible and accessible damage, assess the likely extent of concealed damage, determine the cause, and provide a detailed scope of works with cost estimates. This report becomes your evidence if the insurer's assessment seems inadequate.
The best time to arrange an independent assessment is as soon as possible after the event, while the damage is fresh and before any permanent repairs are carried out.
## Step 6: Know What Not to Do
In the chaos after a storm, it is easy to make mistakes that can hurt your claim. Avoid these common pitfalls:
- **Do not carry out permanent repairs before the insurer inspects.** Emergency repairs are fine, but replacing a roof, replastering walls, or fixing structural damage before the insurer has seen it can give them grounds to reduce or deny your claim.
- **Do not throw away damaged materials.** Everything is potential evidence. Keep it until both the insurer's assessor and your independent assessor have inspected the property.
- **Do not clean up more than necessary.** By all means, mop up water and remove debris that poses a safety risk. But do not scrub, repaint, or renovate before the assessments are complete.
- **Do not post detailed information on social media.** Insurers and their investigators do check social media. Casual comments about the damage or your claim can be taken out of context and used against you.
- **Do not sign any documents without reading them carefully.** If the insurer asks you to sign a scope of works, a settlement offer, or an authority to act, read every word. If you are unsure, get independent advice first.
- **Do not ignore the damage.** Even if the damage seems minor, report it to your insurer. What looks like a few cracked tiles could hide significant water damage underneath. Leaving it unreported may also breach your policy conditions about timely notification.
## After the First 48 Hours
Once the immediate crisis has passed, stay organised. Keep a folder (physical or digital) with all your claim documents, including:
- Your claim number and insurer contact details
- All photographs and videos
- Receipts for emergency repairs
- Correspondence with the insurer
- Your independent assessment report
- Quotes for permanent repairs
Follow up with the insurer regularly if you have not heard back. After major storm events, claims volumes surge and response times slow down. Being proactive and well-documented puts you in the strongest possible position.
The first 48 hours after storm damage are when the foundation of your insurance claim is built. What you do in that window, and what you avoid doing, can make the difference between a fair outcome and a frustrating dispute.
For a complete overview, see our [guide to insurance claim assessments](/guides/insurance-claim-assessment-guide).
### What Damage Does Home Insurance Actually Cover in Australia?
Source: https://ownerinspections.com.au/articles/what-damage-home-insurance-covers-australia
Published: 2026-02-26 | Updated: 2026-03-01 | Category: Insurance
Author: Maison Azdari
Home insurance is one of those things most Australians pay for and hope they never need. But when something goes wrong, the first question is always the same: "Is this covered?" The answer is not always straightforward, and misunderstanding your policy can lead to financial stress at the worst possible time.
This guide explains what types of damage are typically covered by home insurance in Australia, what is commonly excluded, and where the grey areas lie. Knowing this information before you need to make a claim puts you in a much stronger position.
## How Home Insurance Works in Australia
Home insurance in Australia is regulated by the Insurance Contracts Act 1984 and overseen by the Australian Prudential Regulation Authority (APRA) and the Australian Securities and Investments Commission (ASIC). Every policy comes with a Product Disclosure Statement (PDS) that sets out exactly what is and is not covered.
There are generally two types of home insurance:
- **Building insurance** covers the physical structure of your home, including walls, roof, floors, fixed fittings, and permanent fixtures like kitchens and bathrooms.
- **Contents insurance** covers your personal belongings inside the home, such as furniture, electronics, clothing, and appliances.
Many homeowners purchase a combined building and contents policy. For the purpose of this guide, we are focusing on building insurance, which is the relevant policy type when dealing with structural property damage.
## Types of Damage Typically Covered
### Storm and Wind Damage
Storm damage is one of the most common reasons Australians make home insurance claims. This includes damage caused by strong winds, hail, heavy rain, and lightning. Typical storm damage includes:
- Roof tiles or sheeting blown off or cracked by hail
- Water ingress through a damaged roof
- Fallen trees or branches damaging the structure
- Lightning strikes causing fire or electrical damage
- Damage to gutters, downpipes, and fascias
Most standard policies cover storm damage, but the definition of "storm" can vary between insurers. Some policies require wind speeds to exceed a certain threshold before the event qualifies as a storm.
### Fire Damage
Fire is covered under virtually all home insurance policies in Australia. This includes:
- Bushfire and grassfire damage
- Accidental house fires
- Fires caused by electrical faults
- Smoke damage to the structure
- Damage caused by firefighting efforts (such as water damage from fire hoses)
If you live in a bushfire-prone area, it is worth checking whether your policy has any additional conditions or excess amounts that apply to bushfire claims.
### Water Damage
Water damage is covered in many situations, but this is one of the most contentious areas of home insurance. Generally covered water damage includes:
- Burst pipes inside the home
- Overflowing baths, sinks, or appliances
- Rainwater entering through storm-damaged areas
- Accidental discharge from plumbing
The key word is "sudden." Most policies cover sudden and accidental water damage but exclude gradual water damage that occurs over weeks, months, or years.
### Impact Damage
Impact damage covers situations where something physically strikes your home. This includes:
- A vehicle crashing into your property
- Falling trees or branches (not related to storms, which are covered under storm damage)
- Aircraft or parts of aircraft
- Debris from explosions
### Theft and Vandalism
Most building insurance policies cover damage to the structure caused by theft or attempted theft. This might include broken windows, damaged doors, or forced entry damage. Vandalism to the exterior or interior of the property is also typically covered.
### Other Commonly Covered Events
Depending on your policy, you may also be covered for:
- **Earthquake damage** (included in most standard policies)
- **Explosion damage**
- **Riot and civil commotion**
- **Escape of liquid from fixed appliances** (such as a hot water system bursting)
## What Home Insurance Typically Does Not Cover
This is where most disputes begin. Exclusions vary between insurers and policies, so always check your PDS. However, the following exclusions are common across the Australian market.
### Wear and Tear
Home insurance covers sudden and accidental damage, not the gradual deterioration that happens to every building over time. If your roof is leaking because the tiles are 30 years old and have deteriorated, that is wear and tear, not an insurable event. Insurers regularly deny claims on this basis, and it is one of the most common reasons for disputes.
### Lack of Maintenance
Closely related to wear and tear, insurers expect you to maintain your property in a reasonable condition. If damage occurs because you failed to maintain gutters, fix a known leak, or address deteriorating waterproofing, the insurer may deny the claim. For example, if blocked gutters cause water to back up and damage internal walls, the insurer could argue that regular gutter cleaning would have prevented the damage.
### Gradual Damage
Damage that occurs slowly over time is generally excluded. This includes:
- Slow water leaks behind walls or under floors
- Rising damp
- Gradual movement or settlement of foundations
- Slow corrosion of pipes or fittings
- Mould caused by ongoing moisture issues
The challenge with gradual damage is that homeowners often do not notice it until it becomes severe. By that point, the insurer may argue the damage has been occurring for months or years and is therefore excluded.
### Flood Damage
Flood cover is one of the most misunderstood aspects of home insurance in Australia. Following the 2010 and 2011 floods, the Australian Government introduced a standard definition of "flood" for insurance purposes. However, flood cover is not always included in standard policies.
Some insurers include flood cover as standard, others offer it as an optional extra, and some do not offer it at all in high-risk areas. If your property is in a flood-prone area, check your policy carefully. The difference between "storm water runoff" (usually covered) and "flood" (not always covered) can determine whether your claim is accepted or denied.
### Earth Movement and Subsidence
While earthquake damage is generally covered, other types of earth movement are often excluded. This includes:
- Subsidence (the ground sinking beneath your property)
- Ground heave (the ground swelling upward)
- Landslide or mudslide
- Erosion
These exclusions can be particularly relevant for properties built on reactive clay soils, which are common across much of Australia.
### Defective Design or Construction
If damage results from poor design, faulty workmanship, or the use of substandard materials during construction, most policies will not cover it. This is particularly relevant for newer homes where construction defects may not become apparent for several years.
### Asbestos and Hazardous Materials
Most policies exclude damage related to asbestos, lead paint, or other hazardous materials. If storm damage exposes asbestos in your home, the insurer may cover the storm damage itself but exclude the cost of asbestos removal and disposal.
## The Grey Areas
Many insurance disputes fall into grey areas where the cause of damage is not clear-cut. Common grey areas include:
- **Storm damage to an ageing roof.** Was the damage caused by the storm, or did the storm simply expose pre-existing deterioration? This is one of the most common disputes in Australian home insurance.
- **Water damage from a slow leak.** Did the pipe burst suddenly (covered), or has it been leaking gradually (excluded)? The answer often requires expert investigation.
- **Tree root damage.** Tree roots damaging foundations or plumbing is generally excluded as gradual damage. But if a tree falls onto the house during a storm, that is covered.
- **Mould after water damage.** If mould develops after an insured water event, it may be covered as consequential damage. But if the mould was pre-existing or caused by poor ventilation, it will likely be excluded.
## Why an Independent Assessment Matters
When a claim falls into a grey area, the insurer's assessor will make a determination that may not be in your favour. An independent building assessment can provide an objective opinion on the cause, extent, and age of the damage. This can be the difference between a claim being accepted or denied.
Independent assessors use their building expertise to determine whether damage was caused by a sudden insured event or by gradual deterioration. They document their findings with detailed evidence that can be used to support your claim through the dispute process.
## Know Your Policy Before You Need It
The best time to understand your home insurance policy is before you need to make a claim. Read your PDS, understand the exclusions, and consider whether you need additional cover for events like flood. If you are unsure about anything, contact your insurer and ask.
When damage does occur, document everything immediately, report the claim promptly, and consider getting an independent assessment if the damage is significant or if you suspect the insurer may dispute the cause.
For a complete overview, see our [guide to insurance claim assessments](/guides/insurance-claim-assessment-guide).
### What Happens If Your Stage Inspection Finds Defects?
Source: https://ownerinspections.com.au/articles/what-happens-if-stage-inspection-finds-defects
Published: 2026-02-26 | Category: Construction Stage Inspections
Author: Maison Azdari
Finding defects during a [construction stage inspection](/new-construction-stage-inspections) is not unusual. In fact, it is one of the primary reasons homeowners hire independent inspectors during the build. Defects identified early are almost always cheaper and simpler to fix than those discovered after handover. But what exactly happens after your inspector flags an issue? This guide walks you through the entire process, from documentation and builder notification to rectification, re-inspection, and what to do if things go wrong.
## Why Defects During Construction Are Common
Residential construction involves dozens of tradespeople working across multiple stages over several months. Even with experienced builders and quality subcontractors, defects happen. Common reasons include miscommunication between trades, time pressure, material inconsistencies, and simple human error.
The important thing is not whether defects occur but whether they are found and fixed before the next stage of construction covers them up. A waterproofing defect in a bathroom, for example, costs a few hundred dollars to fix before tiling. After tiles, cabinetry, and flooring are installed, the same defect can cost $15,000 or more to rectify.
This is exactly why independent stage inspections exist. They catch problems while the fix is still straightforward.
## Step 1: Documentation in the Inspection Report
When your independent inspector identifies a defect, the first step is thorough documentation. A professional inspection report will include:
This documentation is critical. It transforms a verbal concern into a formal, evidence-based record that the builder cannot easily dismiss. The report becomes your primary tool for requesting rectification and, if needed, for supporting any formal dispute or claim down the track.
## Step 2: Notifying Your Builder
Once you receive your inspection report, the next step is to formally notify your builder about the identified defects. This should be done in writing, not just verbally. Email is the most common and practical method.
When notifying your builder:
Most reputable builders will take a professional inspection report seriously and respond promptly. The report gives them a clear, itemised list of what needs to be fixed, which is actually helpful for managing their own subcontractors.
## Step 3: The Rectification Process
After notification, the builder is expected to arrange for the defective work to be rectified. The typical process looks like this:
The builder reviews the report and discusses the findings with the relevant subcontractor or trade. The subcontractor returns to site to carry out the rectification work. The timeframe depends on the severity of the defects and the availability of the trade, but most builders aim to complete rectification within 7 to 14 days for standard defects.
For structural defects or issues that affect safety, rectification should happen before any further construction work proceeds. For minor cosmetic defects, it may be reasonable to allow the builder to address them at a later stage, as long as this is agreed in writing and documented.
## Step 4: Re-Inspection
Once the builder confirms that the defects have been rectified, it is strongly recommended to arrange a re-inspection. A re-inspection involves the independent inspector returning to site to verify that the rectification work has been completed properly.
Re-inspections are particularly important for:
Re-inspections typically cost less than a full stage inspection, often between $150 and $300, because the scope is limited to verifying the previously identified items. Some inspection companies include one re-inspection in their full stage package.
## What If the Builder Disputes the Findings?
In most cases, builders accept the findings of a professional inspection report and proceed with rectification. However, there are situations where a builder may disagree with the inspector's assessment.
If this happens, you have several options:
A builder who consistently refuses to address defects documented in a professional inspection report is a serious red flag. This behaviour should be recorded and may be relevant to a future complaint or tribunal application.
## Escalation Options
If your builder refuses to rectify defects or fails to do so within a reasonable timeframe, there are formal escalation paths available in each Australian state.
In all states, having a detailed, professionally prepared inspection report significantly strengthens your position. Regulators and tribunal members take documented evidence seriously, and a report from a licensed independent inspector carries credibility that a verbal complaint does not.
## Types of Defects and How They Are Handled
Not all defects are treated equally. They are generally categorised by severity, and the urgency of rectification varies accordingly.
### Structural Defects
These are defects that affect the structural integrity or safety of the building. Examples include inadequate slab reinforcement, incorrect frame bracing, missing tie-downs, or defective load-bearing connections. Structural defects must be rectified before construction proceeds to the next stage.
### Major Defects
Major defects are significant issues that do not pose an immediate structural risk but will cause problems if left unaddressed. Examples include waterproofing failures, incorrect drainage falls, and non-compliant window or door installations. These should also be rectified before the next stage, especially if they will be concealed.
### Minor or Cosmetic Defects
Minor defects are issues of workmanship or finish quality that do not affect the structural performance or weathertightness of the building. Examples include small plaster cracks, minor paint touch-ups, or slightly misaligned fixtures. These can often be deferred to a later stage or addressed at pre-handover, provided they are documented and agreed in writing.
## Protecting Yourself Throughout the Process
There are several practical steps you can take to protect yourself when defects are found during construction.
For a complete overview, see our [guide to construction stage inspections](/guides/construction-stage-inspections-guide).
### What Is a Defect Investigation Report and When Do You Need One?
Source: https://ownerinspections.com.au/articles/what-is-defect-investigation-report
Published: 2026-02-26 | Updated: 2026-03-10 | Category: Defect Investigation
Author: Maison Azdari
If you have discovered building defects in your home, you may have been told you need a [defect investigation report](/defect-investigation-reports). But what exactly is it, and how is it different from the standard building inspection report you might already have?
This article explains what a defect investigation report involves, when you should get one, what the report covers, and how much it typically costs across Australia.
## What Is a Defect Investigation Report?
A defect investigation report is a detailed document prepared by a qualified building consultant that identifies defects in a property, analyses why they occurred, references the applicable building codes and Australian Standards, and provides an estimated cost of rectification.
Unlike a general building inspection, which gives you a broad overview of a property's condition, a defect investigation is targeted. It focuses specifically on problems that have already been identified or suspected. The purpose is to answer four practical questions:
- What is the defect?
- Where is it located?
- What is the likely cause?
- What needs to happen next?
This type of report is commonly used when homeowners discover issues such as cracking in walls, water ingress through windows or balconies, waterproofing failures in bathrooms, poor workmanship in tiling or joinery, and non-compliance with the National Construction Code (NCC).
Compare the
Two Reports
}
href="/articles/defect-investigation-vs-building-inspection-report"
variant="secondary"
/>
## What is the Purpose of a Defect Report?
The purpose of a defect report is not just to list problems. It is to create a clear, usable record of defective or incomplete work and connect those findings to the right standards, documents, and rectification steps. In Victoria’s current dispute process, assessors may examine disputed work, determine whether it is defective or incomplete, identify the cause, and provide a timeframe for rectification. VCAT also expects expert reports to explain the basis for opinions and, in building matters, the likely cost and reasoning for repair options.
For homeowners, that usually means a defect report helps with:
- Understanding whether the issue is minor, significant, or urgent
- Showing a builder exactly what is being raised
- Supporting a request for rectification
- Keeping a proper record before warranty or insurance deadlines matter
- Preparing for conciliation, NCAT, or VCAT if the matter escalates
## What are three types of defects?
There is not one single Australia-wide rule that says every defect must fit into only three categories. For homeowners, though, this is a useful way to think about them:
### 1. Structural or movement-related defects
These include significant cracking, footing movement, bulging walls, and doors or windows that stick because the building has moved. Victorian guidance says cracks more than 5 mm wide are considered significant and outside footing movement tolerances, while cracks between 1 mm and 5 mm should be monitored over time.
### 2. Water or moisture-related defects
These include roof leaks, balcony leaks, failed waterproofing, drainage issues, and water ingress around windows, doors, wet areas, and external surfaces. NSW’s Building Defects Library and Victorian guidance both show how common waterproofing and drainage-related defects are in real projects.
### 3. Finish, workmanship, or fit-off defects
These include visible cracking in plasterboard finishes, poor alignment, gaps, uneven joins, nail popping, and other finishing work that does not meet accepted tolerances. QBCC’s standards and tolerances guide gives many examples of visible finish defects that may still count as defective work.
If you want a stricter regulatory lens, [NSW’s Building Defects Library](https://www.nsw.gov.au/departments-and-agencies/building-commission/building-and-construction-resources/building-defects-library) uses five building elements rather than three: waterproofing, fire safety, structure, building enclosure and services.
## How It Differs from a Standard Building Inspection
A standard building inspection, such as a [pre-purchase inspection](/pre-purchase-inspections) conducted under AS 4349.1, is a visual assessment of accessible areas. The inspector records visible defects and safety hazards, but does not typically investigate the underlying cause or provide detailed rectification costings.
A defect investigation report goes several steps further.
Think of a standard building inspection as a health check and a defect investigation report as a specialist diagnosis. The health check tells you something is wrong. The specialist tells you exactly what it is, why it happened, and how to treat it.
## When Do You Need a Defect Investigation Report?
You should consider getting a defect investigation report when you are dealing with building problems that go beyond simple cosmetic issues. Common situations include:
## What Does a Defect Investigation Report Include?
A thorough defect investigation report will contain the following sections:
Learn How to
Document Defects
}
href="/articles/document-building-defects-legal-claim"
variant="secondary"
/>
## What are Red Flags in Building Reports?
Some findings deserve a closer look than others. The main red flags are the ones that suggest the problem is not just cosmetic.
Watch for:
- Repeated mention of water ingress, damp, ponding, failed falls, or poor drainage
- Cracking linked to movement, especially if cracks are widening
- Bulging walls or doors and windows that no longer operate properly
- Visible finish defects that keep returning after patch repairs
- Signs that work may be incomplete or non-compliant
- Recommendations for invasive testing or structural engineering input
Victorian guidance says cracks more than 5 mm wide, bulging walls, and sticking or distorted openings should be investigated further. Its waterproofing guidance also notes ongoing concern about water ingress in balconies, roofs and drainage.
## How Much Does a Defect Investigation Report Cost?
The cost of a defect investigation report in Australia varies depending on the size of the property, the number and complexity of defects, and whether specialist testing is required.
For a standard residential property with a defined list of defects, most homeowners can expect to pay between $800 and $1,500. If the investigation requires moisture testing, thermal imaging, opening up walls or floors, or engaging subconsultants such as structural engineers or waterproofing specialists, the cost will be higher.
While this may seem like a significant outlay, the cost of a defect investigation is typically a fraction of what it would cost to repair the defects themselves. The report also provides the documentation you need to pursue the builder, developer, or insurer for rectification at their expense.
## How to Get the Most from Your Report
To ensure your defect investigation report is as thorough and useful as possible, take these steps before the inspection:
For a complete overview, see our [guide to building defect investigations](/guides/building-defect-investigation-guide).
### What Makes a Strong Expert Witness Report?
Source: https://ownerinspections.com.au/articles/what-makes-strong-expert-witness-report
Published: 2026-02-26 | Updated: 2026-03-10 | Category: Expert Witness
Author: Maison Azdari
A strong [expert witness report](/expert-witness-reports) can help a tribunal understand a building dispute quickly. A weak report can do the opposite. Even when a homeowner has a valid complaint, a poor report can leave the decision-maker with too many gaps, too many assumptions, or too little confidence in the opinion.
For building disputes in Australia, the best reports do more than list defects. They explain what was inspected, what documents were reviewed, what standard or code was applied, how the expert reached each opinion, and what can reasonably be done to fix the problem. They also stay independent from start to finish.
## Independence and Duty to the Tribunal
The most fundamental requirement of an expert witness report is independence. The expert's primary duty is to the tribunal or court, not to the party who engaged and is paying them. This is not just a professional courtesy. It is a legal obligation that applies across all Australian jurisdictions.
A strong expert witness report includes a clear declaration that the expert understands and accepts this duty. In NSW, expert evidence at NCAT must comply with Schedule 4 of the NCAT Rules, which requires the expert to acknowledge their overriding duty to the tribunal. VCAT has similar requirements under its practice notes.
**What independence looks like in practice:**
If a tribunal member suspects that an expert has tailored their opinions to favour the party who engaged them, the report may be given little or no weight. In serious cases, the expert's evidence may be excluded entirely.
> The strongest expert witness reports are the ones that acknowledge weaknesses in the client's position. Counterintuitively, this increases the expert's credibility rather than diminishing it.
## Thoroughness of Investigation
A strong expert witness report reflects a thorough, methodical investigation. This goes well beyond what a routine building inspection involves. The expert needs to examine every relevant aspect of the building work in dispute and document their findings comprehensively.
**A thorough investigation typically includes:**
An expert who has only conducted a brief visual inspection and then written a lengthy report is likely to have their findings challenged under cross-examination. The more thorough the investigation, the more defensible the opinions.
## Compliance with Australian Standards
Building work in Australia must comply with the National Construction Code (NCC) and relevant Australian Standards. A strong expert witness report identifies exactly which standards apply to each defect and explains how the work fails to meet those standards.
**Commonly referenced standards in building dispute reports include:**
Simply stating that work is "defective" or "not up to standard" is not sufficient. A strong report identifies the specific clause or requirement within the relevant standard and explains how the observed work fails to comply. This level of specificity makes the report far more persuasive to a tribunal member, who needs a clear basis for their findings.
For example, rather than stating "the shower waterproofing is defective," a strong report would say: "The shower recess waterproofing does not comply with AS 3740, Clause 5.2, which requires the waterproof membrane to extend a minimum of 150mm above the finished floor level at the hob. The observed membrane terminates at approximately 80mm, as shown in Photograph 14."
## Clear and Accessible Language
Tribunal members are legally trained, but they are not building experts. That is why they rely on expert evidence. A strong report explains complex technical matters in plain language that a non-specialist can understand.
This does not mean the report should avoid technical terms. It means technical terms should be defined or explained when they are first used. The report should assume the reader has no prior knowledge of building construction and should guide them through the findings step by step.
**Characteristics of clear expert report writing:**
An expert who writes clearly demonstrates confidence in their findings. Reports that rely on dense technical language or vague generalisations often suggest that the expert is uncertain or is trying to obscure weaknesses in their analysis.
## Photographic Evidence
Photographs are essential to any expert witness report. They provide visual proof of the defects described in the report and allow the tribunal member to see what the expert observed during their inspection.
**What makes photographic evidence strong:**
Poor quality photographs, such as blurry images, photos taken in poor lighting, or images without context, weaken the report significantly. The tribunal member needs to be able to see what the expert is describing. If the photographs do not clearly show the defect, the expert's written description may be questioned.
## Scott Schedule Compatibility
In many building disputes, the tribunal requires the parties to present their claims using a Scott Schedule. This is a tabular document where each defect is listed as a separate item, with columns for the claimant's position, the respondent's position, the expert's assessment, and the estimated rectification cost.
A strong expert witness report is structured in a way that translates easily into a Scott Schedule. This means each defect is identified with a unique number, described individually rather than grouped together, and accompanied by its own rectification cost estimate.
**Key elements for Scott Schedule compatibility:**
For more detail on Scott Schedules and how they work in building disputes, read our article on [how Scott Schedules strengthen construction dispute cases](/articles/how-scott-schedules-strengthen-construction-dispute-cases).
## Qualifications and Experience Disclosure
A strong expert witness report includes a detailed section on the expert's qualifications, professional experience, and relevant expertise. This is not optional. Tribunal rules require experts to disclose their qualifications so the decision-maker can assess whether the expert is suitably qualified to give opinions on the matters in dispute.
**This section should include:**
An expert who has appeared before NCAT, VCAT, or QCAT multiple times brings credibility that a first-time expert may not. Tribunal members recognise experienced expert witnesses and give appropriate weight to their evidence.
## Assumptions and Limitations
Every expert witness report should clearly state the assumptions the expert has made and any limitations on their investigation. This is both a legal requirement and a mark of professional integrity.
Common assumptions and limitations include:
Stating limitations openly strengthens rather than weakens the report. It shows the tribunal that the expert is honest about the boundaries of their investigation and is not overstating their findings. An expert who claims to have examined everything without any limitations is likely to face scepticism.
## Red Flags in Weak Reports
Understanding what makes a report weak can help you avoid engaging an expert who will produce substandard work.
## Strong Report vs Weak Report
| Strong report | Weak report |
| ------ | ------ |
| Independent tone | Argumentative tone |
| Relevant expertise clearly stated | Qualifications vague or missing |
| Scope and instructions disclosed | Scope unclear |
| Facts, assumptions and opinions separated | Conclusions mixed together |
| Specific code or standard references | General statements only |
| Clear reasoning for each opinion | Bare conclusions |
| Useful photos and attachments | Poor or irrelevant images |
| Limits openly stated | Limits hidden or ignored |
| Defect-by-defect structure | Disorganised discussion |
| Practical for hearing and schedules | Hard to use in proceedings |
For a complete overview, see our [guide to expert witness reports for building disputes](/guides/expert-witness-building-disputes-guide).
### When to Book Each Stage Inspection: A Timeline Guide
Source: https://ownerinspections.com.au/articles/when-to-book-stage-inspections-timeline
Published: 2026-02-26 | Category: Construction Stage Inspections
Author: Maison Azdari
Booking your [construction stage inspections](/new-construction-stage-inspections) at the right time is critical. Too early, and the work may not be complete enough to assess. Too late, and the next stage of construction may have already covered up the elements that need checking. Getting the timing right means understanding your builder's construction schedule, knowing how much lead time your inspector needs, and building a communication plan that keeps everyone aligned.
This guide walks through each of the five standard construction stages, explains exactly when to book the inspection for each one, and provides practical coordination tips that will help you get the most value from every inspection.
## The Five Standard Construction Stages
A standard residential build in Australia follows five major construction stages. Each stage represents a milestone where significant work has been completed, and in most cases, the builder will request a progress payment before moving to the next stage. This payment request is your signal that an inspection should happen.
The five stages are:
Each stage has a specific inspection window where the work is visible and accessible. Once the next stage begins, critical elements become concealed and are far more expensive to assess or fix.
## Stage 1: Slab or Base Stage
### What Is Being Inspected
The slab inspection covers the foundation of your home. This includes the formwork, reinforcement steel (rebar) placement, moisture barriers, plumbing rough-in below the slab, and the overall site preparation including drainage.
### When to Book
Book the slab inspection after the reinforcement has been placed and the formwork is complete, but before the concrete is poured. Once the concrete is poured, the reinforcement and moisture barriers are permanently concealed.
If you are building on a waffle pod slab system, the inspection should occur after the pods and reinforcement are in place but before the pour. For strip footings and piers, the inspection should happen after the footing trenches are excavated and reinforced.
### Typical Timing in the Build
The slab stage usually occurs within the first 4 to 8 weeks of construction starting on site, depending on soil conditions, site preparation requirements, and weather.
## Stage 2: Frame Stage
### What Is Being Inspected
The frame inspection covers the structural framing of the house, including timber or steel frame members, bracing, tie-down connections, roof trusses or rafters, window and door openings, and the alignment and squareness of the structure.
### When to Book
Book the frame inspection after all framing, bracing, and tie-downs are installed, but before any external cladding, internal linings, or insulation is applied. Once cladding and linings go on, the frame is hidden and cannot be properly assessed.
Your builder will typically notify you (or request a progress payment) when the frame stage is complete. This is your trigger to book the inspection. Ideally, the inspection should occur within a few days of the frame being signed off by the building surveyor or certifier.
### Typical Timing in the Build
The frame stage is usually reached 8 to 14 weeks after construction begins, depending on the size and complexity of the home and whether the build uses timber or steel framing.
## Stage 3: Lock-Up Stage
### What Is Being Inspected
At lock-up, the building is enclosed. The roof is on, external walls are clad, and all external windows and doors are installed. The inspection also covers rough-in plumbing and electrical work, roof flashings, sarking (if applicable), and the building envelope's weathertightness.
### When to Book
Book the lock-up inspection after the roof, cladding, windows, and external doors are installed and before internal lining (plasterboard) work begins. The rough-in plumbing and electrical should also be in place at this point, as these elements will be concealed once the walls are lined.
### Typical Timing in the Build
Lock-up is typically reached 14 to 22 weeks into the build. This stage can vary significantly depending on the roof type, cladding material, and weather conditions during installation.
## Stage 4: Fixing or Pre-Plaster Stage
### What Is Being Inspected
The fixing stage covers the internal work that happens after lock-up, including plasterboard installation, wet area waterproofing, internal door frames, architraves, skirting, cabinetry, and tiling preparation. This is also when waterproofing membranes in bathrooms, laundries, and other wet areas should be inspected.
### When to Book
The optimal timing for the fixing inspection depends on what exactly you want to assess. There are two key windows:
If your budget allows only one inspection at this stage, prioritise the waterproofing check. Waterproofing failures are among the most common and expensive defects in Australian residential construction.
### Typical Timing in the Build
The fixing stage generally occurs 20 to 30 weeks into the build, though this varies depending on the size of the home and the number of wet areas.
## Stage 5: Pre-Handover or Practical Completion
### What Is Being Inspected
The pre-handover inspection (also called the practical completion inspection or PCI) is a comprehensive assessment of the finished home. It covers all internal and external finishes, fixtures, fittings, paint, tiling, cabinetry, doors, windows, landscaping, driveway, and overall compliance with the approved plans and building contract.
### When to Book
Book the pre-handover inspection after the builder notifies you that the home is complete and before you sign off on practical completion or make the final progress payment. This is your last opportunity to have defects recorded and rectified before the builder considers the project finished.
Do not rush this inspection. Make sure the builder has genuinely finished all work, including any external items such as landscaping, driveway, fencing, and letterbox installation. If you inspect too early while work is still in progress, you will miss defects and may need to pay for a second inspection.
### Typical Timing in the Build
Pre-handover typically occurs 30 to 50 weeks into the build, depending on the overall project timeline. Volume builders often work to a 6 to 9 month construction period for a standard home, while custom builders may take 9 to 14 months or more.
## Typical Build Timeline and Inspection Windows
The following table summarises the typical timing for each inspection across a standard residential build.
## How Much Lead Time Do You Need?
Most inspection companies can schedule an inspection within 2 to 5 business days of your booking. However, during busy construction periods (particularly spring and summer in Sydney and Melbourne), lead times may extend to 5 to 10 business days.
To avoid delays:
## Coordinating With Your Builder
Good communication with your builder is the key to getting inspections done at the right time. Here are practical tips for making the coordination work smoothly.
Most reputable builders are supportive of independent inspections. They understand that an inspection report provides clarity for both parties and helps prevent disputes later in the project.
## What to Do If the Builder Moves Faster Than Expected
Sometimes a builder completes a stage faster than anticipated, leaving you with very little time to book an inspection. If this happens:
For a complete overview, see our [guide to construction stage inspections](/guides/construction-stage-inspections-guide).
### Termite Control Red Flags: Warning Signs a Treatment Hasn't Worked
Source: https://ownerinspections.com.au/articles/termite-control-red-flags-warning-signs-treatment-hasnt-worked
Published: 2026-02-24 | Updated: 2026-02-27 | Category: Pest Inspections
Author: Maison Azdari
A termite treatment that has not worked will typically show signs within weeks to months of application. These include live termite activity, new mud tubes, fresh timber damage, ongoing swarms, and a breakdown of the treated barrier zone. In Australia, termite damage costs an estimated $1.5 billion annually, and failed treatments are a significant contributor. If you notice any of these warning signs after a licensed pest control treatment, a follow-up [timber pest inspection](/timber-pest-inspections) is strongly recommended under AS 4349.3.
Many homeowners assume that once a treatment is done, the problem is solved. That is not always the case. Termite colonies are large, can number in the millions, and often have multiple entry points into a structure. A failed or incomplete treatment leaves the colony intact and the property at ongoing risk.
Knowing what to look for after treatment is just as important as the treatment itself. The earlier a failure is detected, the less structural damage occurs.
## What’s the #1 Sign it Hasn’t Worked?
The clearest sign termite control hasn’t worked is new, fresh termite activity after treatment, like active mudding or live termites in or on the building, especially around entry points or the perimeter.
Top 5 red flags to act on right away:
- New mud tubes or fresh mudding after treatment
- Live termites anywhere in the house, subfloor, or perimeter
- Damage that is still progressing (new hollowing, new crumbling timber)
- Swarmers (alates) indoors more than once, or repeatedly around lights
- You cannot confirm what was installed (no durable notice, no map, no records)
## Signs the Treatment Has Failed
The most reliable indicator of a failed treatment is continued termite activity. Here is what to watch for:
### Live Termites or New Mud Tubes
Mud tubes are the highways termites use to travel between the soil and your timber. If new tubes appear after treatment, or existing tubes are rebuilt, the colony is still active. Break open a tube carefully. If you see live, pale insects inside, the treatment has not eliminated the infestation.
### Fresh Timber Damage
Timber that sounds hollow when tapped, or surfaces that bow and crack without explanation, suggest active feeding. Run a screwdriver along skirting boards, door frames, and floor joists. If it sinks into soft, damaged wood, termites are still present.
### Termite Swarms (Alates) Inside the Home
Winged termites, called alates, emerge when a colony is mature and looking to expand. Swarms appearing inside a treated property after treatment suggest the colony was not fully eradicated or a new one has moved in from a neighbouring source.
### Barrier Gaps or Chemical Breakdown
Chemical soil barriers have a defined lifespan, typically 8 years for products like Termidor, but this depends on soil type, rainfall, and how well the original application was conducted. If the perimeter was not fully treated or gaps exist around pipes and footings, termites will find the path of least resistance.
### Bait Station Inactivity After Initial Activity
If bait stations showed feeding activity and then went quiet without a confirmed dead colony, the termites may have found an alternative food source rather than consuming enough bait to collapse the colony. This is a subtle but important red flag.
## How Termite Control is Supposed to Work in Australia
Termite control is not one thing. In Australian homes you’ll usually see one (or a mix) of these approaches.
**Chemical systems and reticulation**
A chemical soil treatment or external perimeter treatment is designed to reduce the risk of concealed termite entry. In new building work, termite management systems referenced by the NCC are commonly aligned with AS 3660.1 pathways. The NCC also ties chemical use to the relevant pesticides register and label information.
What “success” looks like:
- The chemical zone is continuous where it needs to be.
- Records exist (product used, date, label directions, and expected life).
- The perimeter and inspection zones remain visible and accessible over time.
Reality check:
- Chemicals have a limited effective life, and site conditions matter.
- A chemical system can be defeated if termites find an untreated path or if the system gets bridged.
**Baiting systems**
Baiting aims to reduce colony pressure by getting termites to feed on bait and share it through the colony. It relies heavily on correct placement, regular monitoring, and adjusting stations based on activity.
What “success” looks like:
- Stations are in place and easy to locate.
- Monitoring is happening on the schedule recommended for that system and risk profile.
- There is a clear service record showing checks, hits, re-baiting, and outcomes.
Reality check:
- Baiting usually takes time and depends on termites finding the stations.
- Missing checks is one of the fastest ways for baiting to underperform.
**Physical barriers and termite management systems**
Physical systems (like certain meshes or graded stone systems) are designed to force termites into the open or prevent concealed entry. The NCC termite risk management provisions reference compliance pathways using [AS 3660.1 or testing under AS 3660.3](https://ncc.abcb.gov.au/editions/ncc-2022/adopted/housing-provisions/3-site-preparation/part-34-termite-risk-management).
What “success” looks like:
- The barrier is installed correctly and remains intact.
- Inspection zones remain visible so termite activity is forced into view.
Reality check:
- Physical systems still depend on access and visibility. A blocked inspection zone can remove your early warning advantage.
## Termite Control Red Flags: The Non-negotiables
These are the signs that should trigger documentation and a professional assessment. Use the symptom and pattern, not just one clue.
| Red flag | Likely meaning | Urgency | Do this next (safe actions) |
| ---- | ----- | --- | ---- |
| **New mud tubes / fresh mudding after treatment** | Active subterranean termites are still foraging, and a path may bypass the treatment zone | High | Photograph, mark location, avoid disturbing, book inspection |
| **Live termites (inside or at perimeter)** | Active infestation or active entry point | High | Keep people away from the area, document, arrange inspection fast |
| **Damage still progressing** | Termites may still be feeding, or a second colony is present | High | Document “before/after” areas, avoid repairs until assessed |
| **Swarmers indoors repeatedly** | Colony is nearby, or there is an internal nesting source | Medium to high | Capture a sample if safe, photograph swarm points, book inspection |
| **Fresh frass (pellets)** | Possible drywood termite activity, which needs a different control approach | Medium to high | Photograph and collect a small sample in a sealed bag, book inspection |
| **Repaired or bypassed tubes near treated zones** | Termites are adapting around barriers or finding alternate routes | High | Document, avoid sealing or painting over, get assessed |
| **New sticking doors/windows + wavy paint in timber areas** | Could be moisture, movement, or termite damage. Needs confirmation | Medium | Note when it started, check moisture sources, book inspection |
| **No proof of what was installed (no map, no durable notice, no records)** | You cannot verify coverage, life expectancy, or future inspection needs | Medium | Request documents, then organise independent verification |
| **Landscaping or renos removed inspection zone or created bridging** | Termites can bypass the system unnoticed | Medium to high | Photograph changes, clear access where safe, book inspection |
### What Failure Looks Like by Treatment Type
**Chemical barrier / reticulation**
- Activity concentrated at one side of the house or around penetrations (suggests a gap).
- No documentation of product, date, or expected service life.
- Perimeter levels changed since treatment (paths may now bypass the zone).
**Baiting**
- Stations not being checked, moved, or recorded.
- New activity far from any station line, with no adjustment to the programmeme.
- “Set and forget” messaging with no monitoring trail.
**Physical barriers**
- Inspection zones covered by paving, garden beds, cladding, or renovations.
- Attachments (decks, steps, ramps, services) built without maintaining inspection access.
## Why Termite Treatments Fail
Treatments fail for several reasons, and not all of them are the pest controller's fault. Understanding the cause helps prevent a repeat.
Common causes include incomplete soil treatment around footings, pipes, or service penetrations; high water tables or clay soils that reduce chemical uptake; and properties where the original infestation was not fully mapped before treatment began.
## What to Do Next
If you suspect a treatment has failed, do not wait. The steps below give you a clear path forward.
## Costs, Documentation, and Why Speed Matters
Termite issues get expensive when they go undetected.
One widely cited Australian estimate, referenced in an ACCC determination, states 650,000 Australian homes were infested over five years, with the cost of treatment and repair estimated at $3.9 billion.
That same determination also references studies with repair ranges and average costs, showing why prompt detection and good records matter.
Why documentation helps:
- It supports warranty discussions.
- It creates a timeline of activity versus treatment dates.
- It helps an independent inspector identify likely failure points faster.
If you are buying a property where a termite treatment has been carried out, always ask for documentation of the treatment type, date, products used, and warranty. A [pre-purchase building and pest inspection](/building-and-pest-inspections) will give you an independent view of whether the treatment remains effective.
### How to Include Independent Inspections in Your Building Contract
Source: https://ownerinspections.com.au/articles/independent-inspections-building-contract
Published: 2026-02-17 | Category: New Construction
Author: Maison Azdari
In Australia, you have the right to arrange independent building inspections during construction. However, standard building contracts from the Housing Industry Association (HIA) and Master Builders Association (MBA) often include clauses that allow builders to charge additional fees or restrict access when homeowners engage their own inspectors. The key is adding a specific clause to your contract before signing that protects your inspection rights without penalty. This clause typically states that the builder must provide reasonable access to an independent inspector at no additional cost to the owner during normal business hours with 48 hours notice.
Most homeowners discover inspection restrictions only after signing their contract, when a builder either refuses access or demands payment ranging from $500 to $2,000 per inspection visit. This article explains exactly which paragraph to add, how to negotiate it with your builder, and what to do if your contract is already signed.
## Understanding Standard Contract Clauses
Standard HIA and MBA building contracts contain clauses about site access and inspections. These clauses typically favour the builder by requiring written permission for third-party inspectors or allowing the builder to charge supervision fees.
The HIA contract often includes wording like "the builder may charge a reasonable fee for supervision of any inspection arranged by the owner". This creates a financial disincentive for independent oversight.
Some builders justify these fees by claiming inspectors disrupt work schedules or create insurance liability issues. However, professional building inspectors carry their own public liability insurance and work efficiently to minimise site disruption.
## The Recommended Inspection Clause
The most effective contract amendment protects your right to independent inspections without giving the builder grounds to charge extra fees or delay access. Here is the recommended clause to add:
This clause achieves several objectives. It establishes your legal right to inspections, defines reasonable notice periods, prevents fee charging, and addresses the builder's legitimate insurance concerns.
Some builders may counter-propose limiting inspections to specific stages only. If you must compromise, insist on access at a minimum during slab pour, frame stage, waterproofing, and pre-handover. These are the most critical points for [construction stage inspections](/new-construction-stage-inspections).
You can add this clause under the "Site Access" or "Inspections" section of your contract. If no such section exists, create a new clause titled "Independent Inspections" and insert it before the signatures page.
## Negotiating With Your Builder
Present the inspection clause during your initial contract review, not at the signing meeting. This gives the builder time to consider it without pressure and demonstrates your knowledge of construction contracts.
Most reputable builders will accept the clause with minimal pushback. Those who strongly resist may be planning to cut corners or operate without adequate quality control. Their resistance itself is a red flag worth noting.
If the builder insists on charging a supervision fee, negotiate a fixed amount per inspection rather than an hourly rate. A fair compromise is $100 to $200 per visit, significantly less than the $500 to $2,000 some builders attempt to charge.
Consider walking away if a builder absolutely refuses independent inspections. This refusal suggests they operate without transparency or adequate quality assurance processes.
## What If Your Contract Is Already Signed
If you have already signed a contract without an inspection clause, you still have options. First, review your contract carefully to understand the exact restrictions in place.
Contact your builder in writing requesting a contract variation to add the inspection clause. Under the Home Building Act 1989 (NSW) and similar legislation in other states, contract variations must be documented in writing and signed by both parties.
If your builder refuses to vary the contract, you may still be able to arrange inspections by working within the existing terms. For example, if the contract allows site visits by the owner, you could visit the site with your inspector present as your advisor.
Some builders may agree to remove supervision fees if you limit inspections to specific critical stages. Focus on obtaining access for [pre-handover inspections](/pre-handover-inspections) at minimum, as this is the final opportunity to identify defects before practical completion.
In extreme cases where a builder completely refuses access and charges excessive fees, this may constitute a breach of good faith. Document all correspondence and consider lodging a complaint with your state building regulator (NSW Fair Trading, QBCC, VBA, or Consumer and Business Services SA).
## Alternative Strategies
Some homeowners negotiate inspection rights as part of the overall contract package. For example, you might accept a slightly higher contract price in exchange for confirmed inspection access. This allows the builder to budget for any perceived administrative burden.
Another approach is to specify inspection requirements in your preliminary agreement or letter of intent before the formal contract is drafted. This establishes expectations early in the negotiation process.
If you are building in a challenging market where builders have significant bargaining power, prioritise inspection access at slab, frame, and pre-handover stages rather than insisting on unlimited access. Quality is better than quantity when it comes to construction inspections.
### First-Time Homebuyer's Building and Pest Inspection Guide
Source: https://ownerinspections.com.au/articles/first-time-homebuyers-building-pest-inspection-guide
Published: 2026-02-09 | Category: Pre-Purchase
Author: Maison Azdari
A building and pest inspection for first-time homebuyers in Australia is a professional assessment of a property's structural condition and timber pest activity, typically carried out before you commit to a purchase. The building inspection follows Australian Standard AS 4349.1 and covers the roof, subfloor, walls, wet areas, exterior, and site drainage. The [pest inspection](/timber-pest-inspections) follows AS 4349.3 and checks for termites, borers, and wood decay. Combined, these inspections cost between $400 and $800 depending on the property size and location, and they can reveal defects that would cost thousands to repair if discovered after settlement.
Buying your first home is likely the largest financial decision you will make. The excitement of finding a property you love can make it tempting to skip the inspection and move quickly, especially in a competitive market. But for first-time buyers who may not have experience identifying building problems, an independent inspection is your best protection against inheriting someone else's costly defects. This guide walks you through what to expect, what the report covers, and how to use the findings when negotiating your purchase.
## What Is a Building and Pest Inspection?
A building and pest inspection is actually two separate inspections, often carried out on the same visit by qualified professionals.
The building inspection assesses the property's structural integrity and identifies defects in materials, workmanship, and compliance. The pest inspection specifically targets timber-destroying pests, which are a significant concern across most of Australia, particularly in Queensland, NSW, and parts of Victoria.
## Why First-Time Buyers Need an Inspection
As a first-time buyer, you may not know what to look for when walking through a property. Problems that appear minor or invisible to an untrained eye can represent thousands of dollars in repair costs.
## What the Building Inspection Covers
A standard [pre-purchase building inspection](/pre-purchase-inspections) under AS 4349.1 covers the following areas:
## What the Pest Inspection Covers
The timber pest inspection under AS 4349.3 checks for:
Inspectors commonly use moisture meters and thermal imaging cameras to detect activity behind walls and in concealed areas without causing damage to the property.
## How Much Does It Cost?
Costs vary by property size, location, and the complexity of the site. Properties with large subfloor areas, multiple levels, or difficult access may be at the higher end of the range.
## When to Book the Inspection
For most property purchases in Australia, the inspection should be booked during the cooling-off period after signing the contract of sale. The exact timing depends on your state:
For auction purchases, there is no cooling-off period. If you are bidding at auction, book the inspection before auction day so you know exactly what you are buying.
## How to Read the Inspection Report
A building and pest inspection report can be 30 to 80 pages long. As a first-time buyer, focus on these sections:
## Common Defects Found in Australian Homes
## Using the Report to Negotiate
The inspection report is a powerful negotiation tool. Here is how first-time buyers can use it effectively.
## What to Do If Serious Defects Are Found
If the inspection report identifies major structural defects, active termite infestation, or other significant problems:
For a complete overview, see our [guide to pre-purchase building and pest inspections](/guides/pre-purchase-building-pest-inspection-guide).
### What Are Inspector Responsibilities at Each Construction Stage?
Source: https://ownerinspections.com.au/articles/inspector-responsibilities-construction-stages
Published: 2026-02-07 | Category: Construction Inspections
Author: Maison Azdari
Building inspectors in Australia are responsible for verifying compliance with the National Construction Code (NCC) and Australian Standards at each construction stage. Their duties include checking structural elements, waterproofing, fire safety, and workmanship quality across five key phases: slab or base, frame, lock-up, fixing or fit-off, and practical completion. Stage inspections typically cost between $350 and $550 per visit, with a complete package of five inspections ranging from $1,500 to $2,500 depending on property size and location.
If you are building a new home in Australia, understanding what inspectors check at each stage protects your investment and ensures construction defects are caught early. Many issues become impossible or expensive to fix once covered by subsequent work. For example, waterproofing failures hidden behind tiles can cost $15,000 to $30,000 to rectify after completion.
This guide covers the specific duties inspectors perform at each construction phase, what documentation they provide, and how these inspections differ from council certification requirements.
## Understanding Construction Stage Inspections
Construction stage inspections serve a different purpose than council certifier inspections. Council certifiers verify minimum NCC compliance for occupancy certificates. Independent inspectors assess workmanship quality, identify defects, and confirm the work matches approved plans and specifications.
| Inspection Type | Purpose | Who Performs | Documentation |
| --- | --- | --- | --- |
| Council/Certifier | NCC compliance for certification | Licensed certifier | Compliance certificates |
| Independent Stage | Quality assurance for owner | Licensed building inspector | Detailed defect report |
| Builder's QA | Internal quality control | Builder's supervisor | Internal checklist |
Booking [new construction stage inspections](/new-construction-stage-inspections) through an independent inspector gives you leverage to have defects rectified before progress payments are made.
## Stage 1: Slab or Base Inspection
The slab inspection occurs after formwork and reinforcement installation but before concrete is poured. This is the most time-critical inspection as it must happen within a narrow window.
### Inspector Duties at Slab Stage
Common defects found at slab stage include insufficient concrete cover to reinforcement, missing or incorrectly positioned termite barriers, and plumbing penetrations that deviate from plans.
## Stage 2: Frame Inspection
The frame inspection takes place once the structural frame is complete but before cladding, insulation, or internal linings are installed. This stage reveals the skeleton of the building and allows thorough assessment of structural elements.
### Inspector Duties at Frame Stage
| Element | Specific Checks |
| --- | --- |
| Timber Frame | Member sizes, grades, tie-down connections, bracing |
| Steel Frame | Gauge thickness, fastener patterns, earthing |
| Roof Structure | Truss installation, fixing, and bracing |
| Windows/Doors | Rough opening dimensions, lintel installation |
| Services | Plumbing, electrical, and HVAC rough-in positions |
Inspectors verify that the frame construction matches the engineering specifications and NCC requirements. They check that load-bearing walls are correctly positioned and that bracing complies with wind load requirements for the specific site classification.
## Stage 3: Lock-Up Inspection
Lock-up stage occurs when the building envelope is complete. This means external cladding, roofing, windows, and doors are installed, making the building weather-tight and secure.
### Inspector Duties at Lock-Up Stage
Waterproofing failures often originate from lock-up stage defects. Poorly sealed window flanges, inadequate roof flashings, and gaps in building wrap can cause water ingress problems that only become apparent months or years later.
## Stage 4: Fixing or Fit-Off Inspection
The fixing stage inspection happens after internal linings, wet area waterproofing, cabinetry, and most fixtures are installed. This stage requires particular attention to waterproofing in bathrooms, laundries, and balconies.
### Inspector Duties at Fixing Stage
| Area | Specific Checks |
| --- | --- |
| Wet Areas | Waterproof membrane to AS 3740, fall to drains |
| Internal Linings | Plasterboard fixing, cornices, skirting |
| Cabinetry | Kitchen and bathroom cabinet installation |
| Fixtures | Plumbing fixtures, power points, switches |
| Insulation | Thermal and acoustic insulation installation |
If you suspect waterproofing issues in an existing property, a [defect investigation report](/defect-investigation-reports) can identify the source of water ingress without destructive testing where possible.
## Stage 5: Practical Completion Inspection
The practical completion or [pre-handover inspection](/pre-handover-inspections) is the final assessment before settlement and handover. This comprehensive inspection covers all visible elements and systems.
### Inspector Duties at Practical Completion
The pre-handover report provides a defect list for the builder to rectify before you make the final payment and take possession.
## Inspector Qualifications and Documentation
In Australia, building inspectors should hold relevant state licensing. In NSW, this means a builder's licence or accreditation from a relevant professional body. In Queensland, inspectors should be licensed by the QBCC.
For a complete overview, see our [guide to construction stage inspections](/guides/construction-stage-inspections-guide).
### What Issues Should You Look for After Each Construction Stage?
Source: https://ownerinspections.com.au/articles/construction-stage-inspection-issues-defects-checklist
Published: 2026-02-06 | Category: Construction Inspections
Author: Maison Azdari
Construction stage inspections identify defects at critical build milestones before they become hidden behind walls or under finishes. In Australia, the most common issues include slab level variations exceeding 10mm tolerances, frame members out of plumb by more than 5mm per metre, inadequate tie-down connections, waterproofing membrane failures, and non-compliant electrical or plumbing rough-ins. All defects must be rectified and re-inspected before construction progresses, as issues covered by subsequent work become exponentially more expensive to fix, often costing 10 to 20 times more than early-stage repairs.
This guide is essential for anyone building a new home or undertaking major renovations in Australia. Whether you are an owner-builder, have engaged a volume builder, or are working with a custom builder, understanding what to look for at each stage protects your investment and ensures compliance with the National Construction Code and relevant Australian Standards.
The building process in Australia typically involves four to six inspection stages, each governed by specific tolerances and compliance requirements. Missing defects at early stages creates compounding problems that can affect structural integrity, weatherproofing, and long-term durability of your home.
## Why Stage Inspections Matter
Every construction stage builds upon the previous one. A slab that is out of level creates problems for frame installation. A frame with inadequate bracing affects wall sheeting and roof installation. Each defect left unaddressed multiplies through subsequent stages.
Professional [construction stage inspections](/new-construction-stage-inspections) provide documented evidence of compliance or non-compliance at each milestone. This documentation becomes invaluable if disputes arise with your builder or when claiming against home building insurance.
| Stage | Typical Timing | Key Compliance Areas |
| --- | --- | --- |
| Pre-slab | Before concrete pour | Termite barriers, reinforcement, plumbing |
| Slab | After cure, before frame | Levels, hold-down bolts, waterproofing |
| Frame | Before cladding | Bracing, tie-downs, window openings |
| Lock-up | After external cladding | Weatherproofing, flashings, windows |
| Fixing | Before plaster | Services rough-in, insulation, vapour barriers |
| Practical Completion | Handover | All finishes, compliance items, defect-free |
## Slab Stage Critical Issues
The slab forms your home's foundation. Defects here affect everything built above. During a slab inspection, these are the primary concerns.
### Defects to Identify at Slab Stage
I regularly find hold-down bolts missing entirely or positioned incorrectly, requiring costly core drilling and chemical anchoring. These bolts secure your frame to the slab and are required by engineering specifications. Their absence compromises structural integrity, particularly in cyclonic regions.
## Frame Stage Defects to Identify
Frame stage is arguably the most critical inspection point. Once wall sheeting and cladding are installed, frame defects become invisible but continue causing problems.
### Common Frame Stage Issues
| Defect Type | Tolerance/Standard | Common Finding |
| --- | --- | --- |
| Walls out of plumb | 5mm per 3m height | 8-15mm deviations |
| Top plates not level | 5mm in 3m | Uneven ceiling lines |
| Inadequate bracing | Per engineering | Missing or undersized |
| Incorrect tie-downs | Per N-rating | Wrong connectors used |
| Undersized lintels | Per span tables | Deflection above openings |
Tie-down connections deserve particular attention. In wind classifications N1 to N6 across Australia, specific connector types and fixing patterns are mandated. Using the wrong connector type or insufficient nail quantities can result in roof uplift during severe weather events.
## Lock Up Stage Inspection Points
Lock-up stage occurs when the building is enclosed with external cladding, windows, and doors installed. Weatherproofing is the primary concern at this stage.
### Critical Lock Up Defects
Flashing installation around windows is frequently defective. Head flashings should extend beyond the window frame on each side, with proper returns to direct water away. Missing or short flashings allow water to enter the wall cavity, causing timber rot, mould growth, and eventual structural damage.
A thorough [pre-handover inspection](/pre-handover-inspections) later cannot identify these concealed defects. That is why independent inspection at lock-up stage is essential.
## Fixing Stage and Pre-Plaster
Before plasterboard installation, all services rough-in must be inspected. This is your last opportunity to verify compliance before walls are sealed.
Waterproofing failures in wet areas account for a significant proportion of building defect claims in Australia. The membrane must be inspected while visible, as failures only become apparent years later through water damage to adjacent rooms or lower floors.
## Practical Completion Final Inspection
At practical completion, your home should be defect-free and ready for occupation. This inspection covers all visible finishes and functional testing.
| Inspection Area | What to Check | Common Defects |
| --- | --- | --- |
| Plasterwork | Joints, cornices, patches | Visible joins, nail pops, cracking |
| Paintwork | Coverage, runs, cutting-in | Missed areas, colour variation |
| Joinery | Doors, windows, cabinetry | Alignment, operation, finish |
| Wet areas | Tiles, grouting, silicone | Lippage, hollow tiles, gaps |
| External | Landscaping, driveways, fencing | Levels, drainage, finish quality |
A [defect investigation report](/defect-investigation-reports) at this stage documents all outstanding items requiring rectification before final payment. Builders must address these items within a reasonable timeframe under home building legislation in each state.
## Ensuring Defects Are Fixed Before Progression
The critical question is not just identifying defects, but ensuring they are actually fixed before work continues.
### Verification Steps
1. Issue written defect notice with photographs
2. Set reasonable timeframe for rectification
3. Request notification when work is complete
4. Conduct [re-inspection](/reinspection) before approving progression
5. Document all correspondence in writing
Progress payments under standard building contracts are tied to stage completion. You have the right to withhold payment for incomplete or defective work. However, you cannot withhold payment for minor defects that do not prevent progression. Understanding this distinction requires familiarity with your specific contract terms.
For a complete overview, see our [guide to construction stage inspections](/guides/construction-stage-inspections-guide).
### What Defects in a 10-Year-Old Property Should Make You Walk Away?
Source: https://ownerinspections.com.au/articles/10-year-old-property-defects-walk-away
Published: 2026-02-05 | Updated: 2026-09-16 | Category: Pre-Purchase Inspections
Author: Maison Azdari
A 10-year-old property in Australia sits at a critical age where major defects often reveal themselves. During a [pre-purchase building inspection](/pre-purchase-inspections), defects that should make you reconsider include active termite infestation, significant structural movement or cracking, failed waterproofing in wet areas, major roof defects, and evidence of illegal or non-compliant building work. These issues typically cost $20,000 to $150,000 or more to rectify and may indicate systemic problems throughout the property.
Properties around the 10-year mark have usually run out their builder warranty period. NSW covers major defects for six years under the Home Building Act 1989, Queensland's QBCC statutory insurance runs 6 years and 6 months for structural defects, and Victoria's ten-year limit under section 134 of the Domestic Building Contracts Act 1995 is right at the edge. This means you inherit responsibility for almost anything found after settlement.
As building inspectors, we see the 10-year mark as a watershed moment. Early construction shortcuts become visible. Termite barriers begin failing. Waterproofing membranes approach end of life. Understanding which defects warrant walking away could save you from a costly mistake.
## What Counts as a Major Defect?
A major defect is one that affects the structural performance of the building, makes part of it unsafe or unsanitary, or makes it unfit to live in. A minor defect is everything else: finishes, fittings, wear and tear, and workmanship that looks poor but performs. The distinction is what decides whether you negotiate or leave.
This is not a matter of opinion. AS 4349.1, the standard your inspection is written to, asks the inspector to report a defect against the reasonable expectation for a building of that age and type, and to flag anything classed as a major defect separately. Statutory definitions run in parallel: NSW defines a major defect in section 18E of the Home Building Act 1989 around structural failure, uninhabitability and a failure of a major element such as footings, load-bearing walls, roof or waterproofing.
| Question to ask | Minor defect | Major defect |
| --- | --- | --- |
| Does it carry load? | No | Yes |
| Is the building safe and habitable with it? | Yes | No, or not for long |
| Does it get worse if ignored? | Slowly, or not at all | Yes, and the cost accelerates |
| Who can fix it? | A general trade | Engineer, then a licensed builder |
| Typical cost | Hundreds to low thousands | Tens of thousands upward |
### Is Water Ingress a Major Defect?
Water ingress is a major defect whenever it reaches structure, framing or a waterproofing membrane, because it keeps damaging the building for as long as it continues. Water staining on a ceiling below a bathroom, or damp at the base of a wall, is major. A weeping shower screen seal is not.
The reason we treat water so seriously at the 10-year mark is that the damage is cumulative and hidden. By the time a stain appears on plasterboard, the framing behind it has usually been wet for months. Wet framing then attracts termites, which is how one defect becomes two.
## Critical Structural Defects
Structural defects in a 10-year-old property are cracking, floor movement or footing failure that affects how the building carries load. They matter more than any other category because they are the most expensive to fix, the hardest to price before work starts, and the ones that keep moving after the repair.
These defects usually point back to either the soil under the house or shortcuts taken during original construction, and neither is something a buyer can negotiate away.
### Significant Cracking Patterns
Not all cracks are equal. Hairline cracks from normal settlement rarely concern us. However, diagonal cracks wider than 5mm, particularly around windows and doors, suggest foundation movement. Horizontal cracks in brickwork indicate lateral pressure from soil movement or failed retaining walls.
| Crack Type | Width | Concern Level | Typical Repair Cost |
| --- | --- | --- | --- |
| Hairline settling | Under 1mm | Low | $500 - $2,000 |
| Moderate movement | 1-5mm | Medium | $5,000 - $20,000 |
| Severe structural | Over 5mm | High | $30,000 - $100,000+ |
| Horizontal/stepped | Any width | Critical | $50,000 - $150,000+ |
### Foundation and Footing Failures
Reactive clay soils across much of Sydney, Melbourne, and Adelaide cause significant foundation issues. By 10 years, inadequate footings designed without proper soil testing reveal themselves through:
- Floor level variations exceeding 25mm across a room
- Gaps appearing between walls and floors
- Concrete slab edge cracking and lifting
These defects typically require underpinning or full slab replacement. Costs start at $50,000 and can exceed $200,000 for severe cases.
## Termite and Timber Pest Damage
Termite damage is a walk-away defect when white ants are active in structural timbers, or when past damage has taken meaningful section out of joists, bearers or trusses. Old, treated, repaired damage with current protection in place is a negotiation. Live termites in a bearer are not.
At 10 years, chemical barriers installed during construction have often degraded or expired. Physical barriers may have been bridged by landscaping, pavers, or debris pushed up against the slab edge.
We recommend a thorough [timber pest inspection](/timber-pest-inspections) for any property this age. Deal-breaking termite findings include:
| Termite Damage Extent | Remediation Cost | Should You Walk Away? |
| --- | --- | --- |
| Surface damage only | $3,000 - $8,000 | Negotiate price |
| Moderate structural | $15,000 - $40,000 | Consider carefully |
| Extensive structural | $50,000 - $150,000+ | Strong consideration |
| Active infestation + damage | Varies widely | Yes, unless major discount |
## Waterproofing and Moisture Failures
Failed wet area waterproofing is a major defect, and in a 10-year-old property it is one of the most likely things to be near the end of its life. Membranes typically last 10 to 15 years, so a house at this age is either approaching failure or already leaking quietly into the framing behind the tiles.
### Signs of Waterproofing Failure
During inspection, we look for:
- Bubbling or lifting tiles in wet areas
- Musty odours indicating hidden moisture
- Staining on ceilings below bathrooms
- Soft or spongy flooring around showers
Replacing failed waterproofing requires complete bathroom strip-out. Budget $15,000 to $35,000 per bathroom. If moisture has spread to wall framing, structural repairs add substantially to costs.
## Roof and Drainage Issues
Roof coverings at 10 years should still have most of their service life left, so a roof in trouble at this age almost always means an installation defect rather than age. Sagging framing, failed box gutters and widespread rust are the findings that turn a roof from a maintenance item into a reason to reconsider.
### Major Roof Defects to Watch
A professional [roof inspection](/roof-inspection) identifies issues invisible from ground level. Defects requiring immediate attention include:
- Collapsed or sagging roof framing
- Widespread rust on metal roofing
- Failed box gutters causing internal leaks
- Blocked or undersized downpipes causing overflow
## Non-Compliant Building Work
Unapproved building work is a walk-away defect because you buy the problem, not the person who created it. Once you settle, the council order, the rectification cost and the insurance exposure are all yours, and no amount of inspection detail changes that. It is the one defect category where the risk is legal rather than physical.
Makeshift repairs are the visible tip of the same problem. A rag tied around a leaking waste connection, or a pipe joint patched rather than replaced, tells you work has been done outside the licensing system somewhere in this house.
Common issues in 10-year-old properties include:
| Non-Compliant Work | Risk Level | Resolution |
| --- | --- | --- |
| Enclosed carport/patio | Medium | Council approval + possible modifications |
| Unpermitted bathroom | High | Strip-out or certification required |
| Structural alterations | Critical | Engineering assessment + council order |
| Illegal pool fencing | High | Immediate compliance required |
## How Long Is a Builder Liable for Defects?
In most of Australia a builder is liable for major or structural defects for six to ten years from completion, and for minor defects for one to two years. At the 10-year mark you are at or past the end of every one of those windows, which is the single most important reason to inspect a property of this age properly.
| State | Major or structural defects | Minor defects |
| --- | --- | --- |
| NSW | 6 years | 2 years |
| VIC | 10 years from occupancy permit | 10 years, with shorter contract warranty periods |
| QLD | 6 years 6 months (QBCC cover) | 12 months |
| WA | 6 years (Building Act limitation) | 6 years |
| SA | 5 years statutory warranty | 5 years |
If you have already settled and defects have surfaced, a [defect investigation report](/defect-investigation-reports) documents cause and extent to the standard a tribunal expects.
## Defect Severity Guide
For a complete overview, see our [guide to pre-purchase building and pest inspections](/guides/pre-purchase-building-pest-inspection-guide).
If you have already purchased and discovered defects, see our [guide to building defect investigations](/guides/building-defect-investigation-guide) for your next steps.
### What Issues Should You Care About at Each Construction Stage?
Source: https://ownerinspections.com.au/articles/construction-stage-defects-what-to-check-each-stage
Published: 2026-02-05 | Updated: 2026-08-28 | Category: Construction Inspections
Author: Maison Azdari
At each construction stage the defects that matter most are the ones about to be covered up. At slab stage that means reinforcement placement, the vapour barrier and the termite management system, all of which disappear under concrete. At frame stage it is tie-downs, bracing and timber grades, which disappear under cladding and plasterboard. At lock-up it is roof flashings and window head flashings, at waterproofing stage it is the membrane and water stops, and at practical completion it is finishes, function and the certificates you are owed.
That sequencing is the whole point. Rectifying a missing tie-down bracket before the plasterboard goes on is a tradesman with a nail gun. Rectifying it afterwards means opening walls. This guide covers what to look for at each stage, which inspections your certifier is legally required to do in NSW, Victoria and Queensland, what tolerance actually counts as a defect, and how long you have to claim once you have the keys.
## Understanding Construction Stages in Australia
Australian residential construction follows a predictable sequence of stages, and each one triggers a progress payment under your building contract. The stage boundary is what gives you leverage, because you are being asked to approve work at exactly the moment it is still visible. Knowing which stage is coming tells you when to book [new construction stage inspections](/new-construction-stage-inspections) and what to prioritise once you are on site.
| Stage | Payment (typical) | Key Focus Areas | What Gets Hidden Next |
| --- | --- | --- | --- |
| Base/Slab | 15-20% | Foundations, moisture barriers, concrete, termite system | Everything below the slab surface |
| Frame | 20-25% | Structural timber, bracing, tie-downs, truss installation | All framing, once clad and lined |
| Lock-Up | 20-25% | Roof, windows, external cladding, flashings | Flashings behind cladding and linings |
| Fixing/Fit-Off | 15-20% | Internal linings, wet area membranes, services | Waterproofing, once tiled |
| Practical Completion | 5-10% | Finishes, functionality, compliance, certificates | Nothing, but your leverage ends here |
The payment percentages above are typical of volume builder contracts and are not fixed by law. Your contract governs. Read the payment schedule before the slab is poured, not after, because the stage names in the contract will not always match the stage names your builder's site supervisor uses on the phone.
## Which Stage Inspections Are Mandatory in NSW, Victoria and Queensland?
Every state requires a building certifier or surveyor to inspect at set points, but the number of points and what they cover differ substantially. NSW mandates seven critical stage inspections for a new house, Victoria works from mandatory notification stages listed in the building permit, and Queensland requires inspections at excavation, footings, slab, frame and final. None of these are quality inspections, and that distinction is the reason independent stage inspections exist.
| State | Regulator | Mandatory inspection points for a new house | What they check |
| --- | --- | --- | --- |
| NSW | Building Commission NSW, via your Principal Certifier | Commencement, after excavation and before footings, before pouring in-situ reinforced concrete, before covering framework, before covering wet area waterproofing, before covering stormwater drainage, and final before the occupation certificate | Compliance with the development consent and the NCC |
| VIC | Building and plumbing regulator, via your Relevant Building Surveyor | The mandatory notification stages listed in the building permit, typically before placing footings, before pouring an in-situ reinforced concrete member, on completion of framework, and on completion of the building | Compliance with the Building Act 1993, the Building Regulations 2018 and the permit |
| QLD | QBCC, via your building certifier | Excavation, footings, slab, frame, and final | Compliance with the Building Act 1975 and the approved documents |
Two things follow from that table. First, NSW is the only one of the three that mandates a separate inspection of wet area waterproofing before it is covered, which is why waterproofing defects are so heavily represented in Victorian and Queensland disputes. Second, all three regimes are compliance checks against approved plans and the code, carried out in a visit that is frequently under thirty minutes. A certifier who signs off a frame has confirmed it is not unlawful. They have not confirmed it is straight, or that the studs your plasterboard is about to be fixed to are not bowed.
## Slab Stage Critical Defects
Slab stage is really two inspection opportunities, and most owners only take the second one. The valuable inspection is pre-pour, while the formwork, reinforcement, vapour barrier and termite system are all still visible. Once the concrete truck leaves, every one of those items is permanently unverifiable, and the post-pour inspection can only assess the finished surface.
The photograph above is a pre-pour inspection. Everything visible in it, the trench mesh, the bar chairs holding the reinforcement off the ground, the black vapour barrier and its lap joints, becomes invisible the moment the pour starts. This is the only day it can be checked.
### Pre-pour: what to verify before the concrete arrives
### Post-pour: what the finished slab tells you
Cracks are the item owners worry about most and the one most often misread. Fine surface crazing in a new slab is normal shrinkage. A crack that is wide, that steps, or that runs through the full slab depth is a structural question and needs an engineer, not an opinion. Slab classification under AS 2870 (Residential slabs and footings) governs what the slab was designed to tolerate on your particular soil, so the engineer's design, not a rule of thumb, is the reference point.
## Frame Stage Structural Concerns
Frame stage is the most consequential inspection point of the build. The structural frame carries the roof and resists wind load, and within a few weeks of the frame going up it will be sheeted outside and lined inside, at which point assessing it means removing finished work. A frame defect found on the day costs an hour of a carpenter's time. The same defect found after handover is a demolition job.
The circled connection above is a truss tie-down bracket that has not been fixed as designed. Nothing about the finished house would reveal it. It becomes a problem in the first serious wind event, years after everyone involved has moved on.
### Critical frame defects
| Defect Type | Severity | Rectification Difficulty |
| --- | --- | --- |
| Missing or incorrectly fixed tie-down connections | Major | Moderate before lining |
| Out-of-plumb walls (>5mm/2.4m) | Major | Difficult after lining |
| Undersized or incorrect timber grades | Major | Very difficult |
| Inadequate or missing bracing | Major | Moderate before lining |
| Incorrect truss installation or unauthorised truss cutting | Major | Expensive |
| Missing noggins at plasterboard sheet joins | Minor | Easy before lining |
| Excessive notching or drilling of studs by services trades | Major | Moderate before lining |
Frame inspections verify compliance with AS 1684 (Residential timber-framed construction) and with the engineer's specific design where one applies. Connection details matter as much as member sizes: nail patterns, connector plate types and the number of fixings per plate are specified, not discretionary. Plumbers and electricians are the other common source of frame defects, because a stud notched too deeply for a waste pipe is a structural member that no longer does its job, and that work happens after the certifier's frame inspection.
## Lock-Up Stage Weatherproofing Issues
Lock-up means the building is enclosed: roof on, external cladding fixed, windows and external doors installed. From this point the dominant risk changes from structure to water. Every weatherproofing defect at lock-up shares one characteristic, which is that it does not leak on the day. It leaks in the third year, into a wall cavity you cannot see, and by the time a stain appears on a ceiling the framing behind it has been wet for a long time.
The arrows above mark a roof to wall junction where the flashing and tile relationship is wrong. Water running down that wall in a driving rain has a path into the roof space. It is visible from a ladder at lock-up and invisible from the ground forever after.
### Weatherproofing checklist
Missing window head flashings are the single most common lock-up defect we document. The flashing is a strip of material costing a few dollars, installed in a minute, and completely hidden once the cladding and internal lining go on. Its absence sends water that hits the window head straight into the wall frame instead of back out to the face of the cladding.
If you find weatherproofing defects and the builder disputes them, a [defect investigation report](/defect-investigation-reports) documents the issue with the photographic evidence and standards references a tribunal will expect.
## Fixing and Waterproofing Stage Defects
The fixing stage covers internal linings, wet area waterproofing, tiling, joinery and services fit-off, and it contains the most expensive hidden defect in Australian residential construction: a failed shower membrane. Waterproofing is applied, inspected, then tiled over, and the tiling is the point of no return. Rectifying a failed shower after handover means removing tiles, screed and membrane, and reinstating the room.
The green membrane in the photograph is the waterproofing, and the arrows mark the door opening. This junction is where a water stop angle belongs, set so its vertical leg finishes flush with the finished floor level. Without it, water that reaches the doorway leaves the wet area under the tiles.
Waterproofing is governed by AS 3740 (Waterproofing of domestic wet areas) and NCC Volume Two. The key requirements to check before tiling begins:
Other fixing stage items worth catching: plasterboard fixed to bowed studs, cornice and skirting gaps, doors that do not latch because frames are out of square, and services fit-off that has cut through fire collars or insulation. None of these are hidden the way waterproofing is, but they multiply into a very long practical completion list if nobody raises them at fixing stage.
## Practical Completion Final Defects
Practical completion, also called pre-handover, is the point at which the dwelling is substantially complete and fit for occupation. It is also the last moment you hold money. Defects at this stage are mostly cosmetic and functional rather than structural, but the list is long: a thorough pre-handover inspection on a new volume-built home routinely runs to 60 or more items.
### Common pre-handover defects
| Category | Examples | Typical Count per Home |
| --- | --- | --- |
| Paint finishes | Runs, missed areas, poor cut-in, roller marks | 15-30 items |
| Joinery | Gaps, poor alignment, scratches, doors not closing flush | 10-20 items |
| Wet areas | Grout voids, silicone quality, falls to waste, missing certificate | 5-15 items |
| Flooring | Tile lippage, drummy tiles, carpet stretching, timber gaps | 5-10 items |
| Functionality | Doors, windows, locks, exhaust fans, smoke alarms | 5-15 items |
| Documentation | Missing waterproofing, termite, glazing or energy certificates | 3-8 items |
The documentation row is the one owners skip and later regret. A waterproofing certificate, a termite treatment certificate and the engineer's certificates are not paperwork, they are the evidence you will need for a warranty claim, an insurance claim or a sale. Ask for them at practical completion while you still have a final payment to release.
Booking a [pre-handover inspection](/pre-handover-inspections) gives you that list in a form the builder cannot argue with: photographed, located room by room, and referenced to a standard.
## What Tolerance Actually Counts as a Defect?
Most stage disputes are not about whether something is out, they are about whether it is out far enough to matter. In Victoria the reference is the Guide to Standards and Tolerances, which sets numerical benchmarks for workmanship in areas the legislation and the contract leave open, and it is widely used as persuasive guidance elsewhere. Knowing the number turns "it looks wrong to me" into a claim.
| Element | Benchmark | Period it applies |
| --- | --- | --- |
| Floor level, within a room or area | Should not differ by more than 10mm | Within 24 months of handover |
| Floor level, over any 2m length | Should not differ by more than 4mm | Within 24 months of handover |
| Floor level, across the whole building footprint | Should not exceed 20mm deviation | Within 24 months of handover |
| Wall plumb | Commonly assessed at 5mm over a 2.4m height | Frame and lining stages |
| Shower waterproofing height | Minimum 1800mm above finished floor, or 50mm above the shower rose | AS 3740, at fixing stage |
Tolerances cut both ways, and an honest inspector will tell you when an item you have flagged is within tolerance. That is worth more than a longer list, because a defect register padded with items that are compliant is easy for a builder to dismiss wholesale, taking the genuine items with it.
## Ensuring Defects Are Fixed Before Progression
Whether defects were actually fixed before the build progressed is the question that decides how much your house is worth in ten years. The mechanism is your building contract, which almost always requires you to approve a stage before the builder proceeds and before you release payment. That approval is the leverage, and it exists once per stage.
The practical sequence is: inspect, issue the report, send the defect list in writing, get a written response, have the rectification re-inspected, then approve the stage. Skipping the [re-inspection](/reinspection) is the common failure. "It has been fixed" and "it has been fixed correctly" are different claims, and only one of them can be verified.
## How Long Do You Have to Claim a Defect After Handover?
Time limits differ by state and are shorter than most owners assume. In NSW the statutory warranty runs 6 years for a major defect and 2 years for anything else. In Victoria a building action generally cannot be brought more than 10 years after the occupancy permit or certificate of final inspection is issued. In Queensland the QBCC home warranty scheme covers structural defects for 6 years and 6 months from the contract date, and non-structural defects for a much shorter window.
| State | Structural or major defects | Non-structural defects | Runs from |
| --- | --- | --- | --- |
| NSW | 6 years | 2 years | Completion of the work |
| VIC | 10 year limitation on building actions | Same 10 year limitation applies to the action | Issue of the occupancy permit or certificate of final inspection |
| QLD | 6 years and 6 months under the QBCC scheme | Substantially shorter, check the current QBCC policy conditions | Date of the contract |
Owner Inspections is an inspection company, not a law firm. We can establish what the defect is, what standard it breaches and what it will cost to rectify. Whether a claim is available to you, and against whom, is a question for a solicitor or your state tribunal, being NCAT in NSW, VCAT in Victoria and QCAT in Queensland.
### What Should You Expect from a Good Asbestos Inspector?
Source: https://ownerinspections.com.au/articles/what-to-expect-from-good-asbestos-inspector
Published: 2026-02-05 | Updated: 2026-02-09 | Category: Building Inspections
Author: Maison Azdari
A good asbestos inspector in Australia should hold a Class A or Class B asbestos assessor licence issued by SafeWork or the equivalent state regulator, use NATA-accredited laboratory services for sample analysis, and provide a detailed report identifying all asbestos-containing materials (ACMs), their condition rating, and recommended management actions. Inspection costs typically range from $300 to $600 for residential properties, with laboratory analysis fees of $30 to $80 per sample.
If you're buying a home built before 1990, renovating an older property, or managing a commercial building, understanding what separates a competent asbestos inspector from an inadequate one can protect your health and save thousands in remediation costs. Asbestos was widely used in Australian construction until its complete ban in 2003, meaning millions of properties still contain this hazardous material.
This guide explains the qualifications, equipment, processes, and reporting standards you should expect from a professional asbestos inspector. These criteria apply across all Australian states and territories, though licensing requirements vary slightly by jurisdiction.
## Essential Qualifications and Licensing
Asbestos assessment in Australia requires specific licensing. A competent inspector must hold appropriate credentials recognised by your state regulator.
| Licence Type | Scope | Authority |
| --- | --- | --- |
| Class A Assessor | All asbestos assessments including air monitoring | SafeWork NSW, WorkSafe VIC, WHS QLD |
| Class B Assessor | Identification and risk assessment only | State WHS regulators |
| Occupational Hygienist | Air monitoring and clearance certificates | AIOH certified |
### What to verify before hiring
Ask for the inspector's licence number and verify it with your state regulator. In NSW, use the SafeWork licence verification portal. In Victoria, check the WorkSafe Victoria register. Queensland maintains the WHS Queensland database.
A good inspector should also carry current professional indemnity insurance of at least $1 million and public liability insurance. Request certificates of currency before booking.
## Equipment and Inspection Methods
Professional asbestos inspectors use specialised equipment to identify and assess ACMs safely.
### Laboratory requirements
Samples must be analysed by a NATA-accredited laboratory using polarised light microscopy (PLM) or transmission electron microscopy (TEM). The inspector should provide laboratory certificates with every sample result.
Never accept verbal identification only. While experienced inspectors can visually identify likely ACMs, laboratory confirmation is the only definitive method.
## The Inspection Process
A thorough asbestos inspection follows a systematic methodology.
When arranging a [pre-purchase building inspection](/pre-purchase-inspections), ask whether asbestos assessment is included or requires a separate specialist. Many standard building inspections note suspected ACMs but don't confirm through laboratory testing.
## Report Quality and Content
The inspection report is your most valuable deliverable. A quality asbestos report should include:
| Section | What It Should Contain |
| --- | --- |
| Executive Summary | Clear statement of ACMs found, risk levels, urgent actions |
| Methodology | Inspection standards followed, sampling procedures |
| Findings | Location, material type, condition rating for each ACM |
| Laboratory Results | NATA certificates for all samples |
| Risk Assessment | Condition rating using industry-standard matrix |
| Recommendations | Management options: monitor, encapsulate, or remove |
| Asbestos Register | Ready-to-use register compliant with WHS regulations |
### Condition rating system
Good inspectors use a standardised condition rating:
| Rating | Condition | Action Required |
| --- | --- | --- |
| A | Good condition, no damage | Monitor annually |
| B | Minor damage or weathering | Seal, encapsulate, or remove |
| C | Significant damage or friability | Urgent removal required |
## Red Flags to Watch For
Not all asbestos inspectors deliver the same quality. Watch for these warning signs.
Independent assessors should not also provide removal services. This separation ensures unbiased recommendations. If an inspector pushes removal when encapsulation or monitoring would suffice, seek a second opinion.
For complex properties or strata buildings, consider a [defect investigation report](/defect-investigation-reports) that includes asbestos assessment as part of a comprehensive building analysis.
## Costs and Timeframes
Asbestos inspection costs vary by property size and number of samples required.
| Service | Typical Cost (AUD) | Timeframe |
| --- | --- | --- |
| Residential inspection | $300 - $600 | 2-4 hours on site |
| Commercial inspection | $600 - $2,000+ | Half to full day |
| Laboratory analysis per sample | $30 - $80 | 2-5 business days |
| Asbestos Register preparation | $150 - $400 | Included or additional |
| Air monitoring (if required) | $400 - $800 | Same day results |
Reports should be delivered within 5 to 7 business days of inspection, though urgent turnarounds are available for additional fees.
### What Are the Common Defects in Sydney Apartment Buildings from the 2010s?
Source: https://ownerinspections.com.au/articles/common-defects-sydney-apartments-2010s-construction-boom
Published: 2026-02-04 | Updated: 2026-02-13 | Category: Defect Investigation
Author: Maison Azdari
[Sydney](/nsw/building-inspections-sydney) apartments constructed during the 2010s building boom frequently contain significant defects that can cost owners hundreds of thousands of dollars to rectify. The most common issues include waterproofing failures affecting 85% of buildings inspected, structural cracking, non-compliant fire safety systems, and combustible cladding. Between 2010 and 2018, Sydney experienced an unprecedented surge in apartment construction, with approximately 180,000 units approved. Many were built under intense time and cost pressures that compromised quality control.
If you own, live in, or are considering purchasing an apartment built during this period, understanding these defects is essential for protecting your investment. The NSW Building Commissioner's audit programme has identified systemic issues across the sector, leading to new legislation requiring building certifiers to lodge certificates with the state government.
This article draws on our experience inspecting hundreds of Sydney apartments from this era. We cover the defects we see most often, their causes, and what you can do about them. For a complete overview, see our [guide to building defect investigations](/guides/building-defect-investigation-guide).
## The Scale of Sydney's Apartment Defect Crisis
The NSW Building Commissioner's investigations have revealed the extent of problems in recently constructed apartments. A 2019 audit of 225 buildings found that 39% had serious defects, while industry research suggests the actual figure is considerably higher when minor defects are included.
| Building Age | Defect Rate | Average Rectification Cost |
| --- | --- | --- |
| 0-2 years old | 97% | $83,000 |
| 3-5 years old | 74% | $215,000 |
| 6-10 years old | 42% | $380,000 |
The older the building from this era, the higher the rectification costs tend to be. This is because defects that go unaddressed for years cause cascading damage. Water ingress through failed waterproofing, for instance, eventually damages structural steel, electrical systems, and internal finishes.
## Most Common Defects in 2010s Apartments
### Waterproofing Failures
Waterproofing defects are the single most common issue in 2010s apartments. These failures occur in bathrooms, balconies, rooftops, and basement car parks. Water finds its way through inadequate membranes, poorly sealed penetrations, and failed joints.
The National Construction Code requires waterproofing to comply with AS 3740. During the boom, many installers cut corners or used inferior products. Rectifying waterproofing in an occupied building is expensive and disruptive.
### Structural Cracking and Concrete Defects
Structural issues range from cosmetic cracking to serious concerns affecting building safety. We regularly find:
A [defect investigation report](/defect-investigation-reports) can determine whether cracks are structural or cosmetic, and what remediation is required.
### Fire Safety Non-Compliance
Fire safety defects are particularly concerning because they put lives at risk. Common issues include:
| Defect Type | Prevalence | Risk Level |
| --- | --- | --- |
| Combustible cladding | 23% of buildings | Critical |
| Inadequate fire doors | 45% of buildings | High |
| Missing fire collars | 38% of buildings | High |
| Faulty smoke detection | 31% of buildings | Moderate |
Since the Grenfell Tower disaster in 2017 and the Neo200 fire in Melbourne, combustible cladding has received significant attention. NSW maintains a register of buildings with combustible cladding, and owners are required to remediate.
### Defective Windows and Facades
Window and facade defects allow water and air infiltration. Common problems include poor installation, inadequate flashing, and incompatible materials that expand and contract at different rates.
## Why the 2010s Boom Produced So Many Defects
Several factors combined to create widespread quality problems:
The NSW government has since introduced the Design and Building Practitioners Act 2020 and Residential Apartment Buildings Act 2020 to address these systemic issues.
## What Apartment Owners Can Do
If you own or are buying an apartment from the 2010s construction boom, take these steps:
Before purchasing a 2010s apartment, a thorough [apartment pre-settlement inspection](/apartment-pre-settlement) can identify defects affecting your specific unit. For strata committees investigating building-wide issues, a comprehensive [strata report](/strata-reports) documents defects and provides a basis for pursuing builders or developers.
### What's the Difference Between Cosmetic Issues and Structural Concerns in Unit Blocks?
Source: https://ownerinspections.com.au/articles/cosmetic-vs-structural-issues-unit-blocks
Published: 2026-02-04 | Category: Defect Investigation
Author: Maison Azdari
Cosmetic issues in unit blocks are surface-level defects affecting appearance only, such as paint chips, minor cracks under 2mm, and scuff marks. Structural concerns involve load-bearing elements like foundations, beams, and columns that affect building safety and integrity. In Australian unit blocks, cosmetic repairs typically cost $500 to $5,000, while structural remediation can exceed $50,000 per unit and may require evacuation. The distinction matters significantly for strata levies, insurance claims, and property valuations.
For apartment buyers and owners' corporation members, understanding this difference affects decisions worth tens of thousands of dollars. A hairline crack might be purely aesthetic, or it could indicate foundation movement requiring urgent engineering assessment. Getting it wrong in either direction creates problems: panic over minor imperfections wastes money, while dismissing structural warnings risks safety and financial loss.
Australian building defect claims have surged in recent years, with the Building Commissioner's reports highlighting significant issues in apartment construction. Whether you're buying into a strata scheme, serving on a committee, or investigating a defect notice, this guide explains how professionals distinguish between what looks bad and what actually is bad.
## Defining Cosmetic Issues in Unit Blocks
Cosmetic issues affect appearance without compromising structural integrity or safety. These defects, while annoying, don't threaten the building's ability to perform its intended function.
### Common Cosmetic Defects
| Defect Type | Description | Typical Repair Cost |
| --- | --- | --- |
| Hairline cracks | Under 2mm, stable, no pattern | $200 - $800 |
| Paint defects | Peeling, fading, colour inconsistency | $500 - $2,000 |
| Minor tile damage | Chips, grout discolouration | $300 - $1,500 |
| Door/window scratches | Surface marks, not affecting operation | $150 - $600 |
| Carpet wear | Traffic patterns, minor stains | $800 - $3,000 |
Cosmetic defects in common property typically fall under general maintenance budgets rather than special levies. Under the Strata Schemes Management Act 2015 (NSW) and equivalent legislation in other states, owners' corporations must maintain common property, but the urgency depends on severity.
## Identifying Structural Concerns
Structural concerns affect elements designed to carry loads, resist forces, or maintain building stability. These require immediate professional assessment and often involve engineers, not just builders.
### Critical Structural Elements
When structural issues are suspected, a [defect investigation report](/defect-investigation-reports) provides the evidence needed for remediation planning, insurance claims, or legal proceedings against builders.
| Structural Issue | Warning Signs | Risk Level |
| --- | --- | --- |
| Foundation settlement | Diagonal cracks, uneven floors | High |
| Concrete cancer | Rust stains, spalling, exposed rebar | High |
| Balcony degradation | Cracks at connections, water damage | Critical |
| Roof structure failure | Sagging, spreading walls | High |
| Retaining wall movement | Tilting, bulging, drainage failure | Medium-High |
## The Grey Zone: When Cosmetic Becomes Structural
Many defects start cosmetic and become structural over time. Water damage is the classic example: a small crack allows water entry, which causes corrosion, which leads to concrete cancer, which compromises structural capacity.
This progression explains why experienced inspectors monitor certain cosmetic defects carefully. A crack that's been stable for five years is different from one that appeared last month and is growing.
## Cost Implications for Strata Schemes
The financial difference between cosmetic and structural issues is substantial and affects every lot owner through strata levies.
Before purchasing a unit, reviewing [strata reports](/strata-reports) reveals planned works, existing defects, and the financial health of the owners' corporation. This due diligence can save buyers from inheriting expensive structural remediation projects.
## What Inspectors Look For
Professional inspectors use systematic approaches to distinguish cosmetic from structural issues. This assessment follows AS 4349.1 guidelines for building inspections.
### Assessment Criteria
| Factor | Cosmetic Indicator | Structural Indicator |
| --- | --- | --- |
| Crack width | Under 2mm | Over 5mm or growing |
| Crack pattern | Random, shrinkage | Diagonal, stepped |
| Location | Surface finishes | Load-bearing elements |
| Progression | Stable over time | Active, worsening |
| Associated symptoms | None | Water, movement, rust |
A thorough [building and pest inspection](/building-and-pest-inspections) examines both common property and individual lots, identifying issues that might otherwise be missed in a visual-only assessment.
## Frequently Asked Questions
### Garage Insulation Requirements Under the NCC: Does Your Attached Garage Need External Wrapping or Internal Wall Insulation?
Source: https://ownerinspections.com.au/articles/garage-insulation-requirements-ncc-attached-garage
Published: 2026-02-02 | Updated: 2026-05-18 | Category: New Construction
Author: Maison Azdari
If your garage is attached to your home, garage wall insulation is not just a comfort upgrade. It can affect how the home performs under the National Construction Code, especially where the garage wall, ceiling or floor sits beside a habitable room.
Under the NCC, a private garage is usually a Class 10a building, which means it is non-habitable. But once that garage is attached to a Class 1 home, it can affect the home’s thermal performance. In most jurisdictions, the code says the attached garage must either be built so its external fabric achieves the required thermal performance for the dwelling, or it must be separated from the dwelling with construction that achieves that required thermal performance. In NSW, this specific NCC clause does not apply the same way, and BASIX is the main residential sustainability pathway for new homes and many larger alterations and additions.
That point matters because many online articles reduce the issue to one question: “Do I need insulation in the wall between the garage and the house?” or simply "Do garages need insulation?". Sometimes yes, but not always as a stand-alone answer. In some designs, the shared wall and adjoining floor or ceiling form the thermal boundary. In others, the garage’s own external walls and floor are brought into the thermal envelope instead.
## Understanding NCC Classifications for Garages
The NCC treats garages differently based on their relationship to the main dwelling. An attached garage sharing a wall with habitable rooms creates a thermal envelope breach that must be addressed.
A private garage is normally Class 10a, which means it is not a habitable part of the home. That is why a detached garage is usually treated very differently from a bedroom, study or living room. But the moment a garage is attached, it becomes part of the thermal discussion because it touches the dwelling and can transfer heat, cold air and fumes.
The key distinction depends on how your garage connects to the dwelling:
| Garage type | Typical classification | What it means for insulation |
| -------------------------------- | ---------------------------------- | ------------------------------------------------------------------------- |
| Detached garage used for parking | Class 10a | Usually outside the home’s thermal envelope |
| Attached garage with shared wall | Class 10a attached to Class 1 home | The garage must not reduce the home’s thermal performance |
| Garage with room above | Class 10a below habitable space | Ceiling or floor insulation usually becomes a key issue |
| Garage converted to living space | May need Class 1 assessment | New insulation, ventilation, ceiling height and approval checks may apply |
That last row is where many owners get caught out. A garage used as a room has different requirements from a garage used to park cars and store tools. Habitable rooms need higher minimum ceiling heights, and councils commonly require approval or a building permit for garage-to-room conversions.
Explore Stage
Inspections
}
href="/new-construction-stage-inspections"
variant="secondary"
/>
## Do Garages Need Insulation Under the NCC?
Attached garages often need insulation or thermal separation because they can affect the heating and cooling performance of nearby rooms.
The NCC housing energy efficiency requirements sit in NCC Volume Two and the ABCB Housing Provisions Standard. Also, the NCC thermal performance requirement looks at heating load, cooling load and total thermal energy load for habitable rooms and conditioned spaces.
The garage should not become the weak point that lets heat, cold air or drafts affect the living area.
| Question | Practical answer |
| --------------------------------------------------------------- | -------------------------------------------------------------------------------------------------- |
| Does a garage need insulation if it is detached? | Usually not for energy compliance if it remains a non-habitable Class 10a garage |
| Do you need to insulate garage walls if the garage is attached? | Often yes, unless the garage’s external walls and roof are treated as part of the thermal envelope |
| Does the wall between garage and house need insulation? | Usually yes if that wall forms the thermal boundary |
| Does garage ceiling insulation matter? | Yes if there is a room above, shared ceiling space or heat transfer into the home |
## Does Insulating a Garage Make a Difference?
Yes, especially when the garage is attached to the house.
Heating and cooling account for about 40% of household energy use in the average Australian home. Insulation works by slowing heat flow, which helps keep a home warmer in winter and cooler in summer. Your Home also notes that in cool conditions, ceilings and roof spaces account for 25 to 35% of winter heat loss, walls account for 15 to 25%, and floors account for 10 to 20%. Air leaks can add another 15 to 25% of winter heat loss.
That is why attached garages matter even if you never heat or cool the garage itself. A garage can act like a buffer zone, but it can also become a weak spot. The biggest trouble areas are often the large garage door, the ceiling or roof over the garage, the internal door linking the garage to the home, perimeter gaps, and any wall or floor that forms part of the home’s thermal boundary. Australian garage door manufacturers also lean heavily on door insulation and weather seals because the garage door is such a large moving panel and a common source of heat gain, heat loss and drafts.
There is also an indoor air quality angle. Your Home recommends that if a garage is attached, the linking door should be well fitted and securely sealed against leaks, because vehicle exhaust contains very fine particles and toxic gases.
## What Insulation Is Best for Garage Walls?
The best insulation for garage walls depends on the wall system and the inspection goal.
Bulk insulation uses pockets of trapped air to resist conducted and convected heat, while reflective insulation mainly resists radiant heat flow and needs an air layer beside the shiny surface. All insulation materials sold in Australia must meet [AS/NZS 4859, Materials for the thermal insulation of buildings](https://www.yourhome.gov.au/passive-design/insulation).
| Insulation type | Best use in attached garages | Notes |
| -------------------------- | ----------------------------------------------------------- | -------------------------------------- |
| Glass wool batts | Common wall insulation for garage cavities | Cost-effective and widely used |
| Polyester batts | Wall insulation where low-irritant handling is preferred | Good option for renovations |
| Rockwool batts | Garage walls needing acoustic and fire-performance benefits | Useful near noisy or higher-risk areas |
| Rigid foam board | Continuous insulation to reduce thermal bridging | Often used where space is limited |
| Reflective sarking or foil | Radiant heat control and wall or roof wrap systems | Needs correct air gap and installation |
The right product is not enough on its own. YourHome warns that gaps, compression, dust on reflective insulation and missing air gaps can reduce total R value.
## Garage Ceiling Insulation and Garage Roof Insulation
Garage ceiling insulation can be just as important as wall insulation, especially where there is a bedroom, living room or study above the garage.
Roof and ceiling insulation can save up to 45% or more on heating and cooling costs. In attached garages, ceiling insulation for garage areas matters when heat moves through the ceiling into the house or when the garage roof space connects with the home’s roof space. Garage ceiling insulation can also work together with heating, cooling and ducting details, so owners of new homes may also want to check the guide on [air conditioning installation in new builds](/articles/air-conditioning-new-build-handover-checklist).
| Garage layout | Insulation focus |
| ---------------------------- | ---------------------------------------------------------- |
| Room above garage | Garage ceiling insulation or floor insulation above garage |
| Shared roof space with house | Ceiling line, roof space barriers and air sealing |
| Exposed garage roof | Garage roof insulation and reflective membrane details |
| Raked garage ceiling | Higher-detail insulation due to limited cavity space |
## Is Insulation Mandatory in Australia?
For new homes and approved residential building work, yes, minimum thermal performance standards apply. For attached garages, the exact pathway depends on the state or territory, the design, the climate zone and the assessment method used. The NCC sets the national technical framework, while NSW uses BASIX as the main sustainability assessment tool for new homes and many alterations and additions. BASIX says its thermal performance standards are there to help homes stay cool in summer and warm in winter without using large amounts of energy.
For an existing garage that stays a garage, there is not a simple Australia-wide rule that every owner must retrofit insulation tomorrow. The bigger compliance triggers are new construction, major additions, and change-of-use work such as converting a garage into a habitable room. That is where approvals, new thermal targets and habitable-room requirements usually come into play.
## What R-value Should I Insulate my Garage With?
There is no single Australia-wide garage R-value.
That is one of the biggest mistakes in the current article. The NCC does not work like a one-line “all attached garage walls must be R2.0” rule. Your Home explains that NCC minimum insulation levels depend on your location and other building features, and that total R-value is the best guide because it reflects the whole assembly, not just one product in isolation. BASIX in NSW also varies standards by location and building type, and aligns newer thermal standards with higher star-rating expectations.
A better way to answer the question is this:
- If the shared wall, ceiling or floor is acting as the thermal boundary, that construction needs to achieve the home’s required thermal performance.
- If the garage exterior is being treated as part of the home envelope, the garage’s outside walls, and sometimes the garage floor, need to do that job instead.
- The right specification depends on climate zone, wall type, roof type, glazing, assessment path and state variations.
## Climate Zones Australia: Why Location Changes Garage Insulation
Australia has eight main climate zones, from tropical zones in the north to cold zones in the south. The best type and R value of insulation depends on climate and construction type.
This is why climate zone 5 insulation requirements and climate zone 6 insulation requirements can produce different garage wall insulation outcomes.
| Climate zone keyword | Search intent to answer in the blog | Content angle |
| -------------------------------------- | ------------------------------------------- | ---------------------------------------------------- |
| climate zones Australia | User wants to know where their home fits | Explain the 8 climate zones |
| climate zone 5 insulation requirements | Sydney, Perth and Adelaide related searches | Discuss warmer temperate design needs |
| climate zone 6 insulation requirements | Melbourne and Canberra related searches | Discuss higher heating and cooling performance needs |
| garage insulation R value | User wants a product number | Explain that total R value and design pathway matter |
The [ABCB Handbook](https://ncc.abcb.gov.au/sites/default/files/resources/2024/Housing%20energy%20efficiency%20handbook.pdf) gives an example of a climate zone 5 house with an attached Class 10a garage and an example of a Melbourne climate zone 6 house with an attached Class 10a garage.
> In the climate zone 5 example, the handbook shows a wall insulation example of R2.0 for a masonry veneer wall with the stated solar absorptance, overhang and wall height assumptions.
> In the climate zone 6 example, the handbook shows a wall insulation example of R2.5 for a masonry veneer wall with the stated design assumptions.
## Climate Zone Requirements for Garage Insulation
Australia is divided into eight climate zones under the NCC, each with different insulation requirements. Your location determines minimum R-values for walls, ceilings, and floors.
| Climate Zone | Regions | Minimum Wall R-Value | External Wrap Required |
| ------------ | ------------------------ | -------------------- | ------------------------- |
| Zone 1 | Far North QLD | R1.4 | Condensation control only |
| Zone 2 | Northern coastal areas | R1.4 | Condensation control only |
| Zone 3 | Inland QLD, northern NSW | R1.4 | Recommended |
| Zone 4 | Central NSW, coastal SA | R2.0 | Yes |
| Zone 5 | Sydney, Perth, Adelaide | R2.0 | Yes |
| Zone 6 | Melbourne, Canberra | R2.8 | Yes |
| Zone 7 | Tasmania, alpine regions | R2.8 | Yes |
| Zone 8 | Alpine areas | R3.0+ | Yes |
## External Wall Wrap, Sarking and Internal Garage Wall Insulation
External wall wrap and internal garage wall insulation do different jobs.
A pliable building membrane is treated in the NCC as a water barrier classified by AS 4200.1. NCC referenced documents include AS 4200.1 for pliable building membranes and underlays, and AS 4200.2 for installation requirements.
Internal insulation between the garage and living space deals with heat flow through the shared wall. External wrap helps with wall system performance, weather resistance and moisture control when it forms part of the specified wall system.
| Area | What to check |
| ----------------------------- | ------------------------------------------------------------ |
| Garage external wall | Correct membrane, cladding cavity and wall insulation detail |
| Wall between garage and house | Bulk insulation, air sealing and service penetrations |
| Garage ceiling | Batts, roof space separation and access disturbance |
| Garage door | Weather seals and panel insulation where comfort is a goal |
| Internal garage access door | Sealing around frame and threshold |
## External Wall Wrapping Requirements
External wall wrapping serves two purposes: thermal performance and condensation management. Even where insulation R-values are met, wrapping may still be required under NCC Part 10.8 (condensation management).
For attached garages, external wrap requirements apply to:
External wrap is generally not required for:
The type of wrap matters. Reflective sarking with appropriate permeability ratings must be installed according to manufacturer specifications. We often find wrap installed incorrectly during [new construction stage inspections](/new-construction-stage-inspections), with gaps at junctions or incorrect tape sealing.
Read the
Stage Guide
}
href="/guides/construction-stage-inspections-guide"
variant="secondary"
/>
## Do You Need External Wrap, Internal Wall Insulation, or Both?
Sometimes one, sometimes the other, sometimes both.
If a pliable building membrane is installed in an external wall, the NCC says it must comply with AS 4200.1, be installed to AS 4200.2, and sit on the exterior side of the primary insulation layer. In climate zones 4 to 8, membranes on the outside of the primary insulation layer also need minimum vapour permeance. Where there is no membrane in many wall types, the primary water control layer must still be separated from water-sensitive materials by a drained cavity.
That means “wrap” is not a magic yes-or-no box. The correct detail depends on the wall system and condensation risk, not just on the word “garage”.
Internal wall insulation is also not the whole story. If the shared wall forms the thermal boundary, then yes, that wall matters. But so do the junctions, penetrations, door frames, ceiling line and any floor or slab edge that sits on the same boundary. The NCC says insulation must butt or overlap adjoining insulation and form a continuous barrier. Your Home adds that corners, wall junctions, and door and window frames are common heat-leak points.
## Internal Wall Insulation Between Garage and House
The wall separating your attached garage from habitable rooms requires insulation regardless of climate zone. This is not just about thermal comfort. It also addresses:
1. **Fire separation** under NCC Part 3.7.1
2. **Sound transmission** for attached garages
3. **Fume and odour isolation** from vehicles and stored chemicals
Standard insulation options for the shared wall include:
| Insulation Type | R-Value Range | Cost per m² (2026) | Installation Notes |
| ---------------- | ------------- | ------------------ | ------------------------------------------------ |
| Glass wool batts | R2.0 to R2.7 | $18 to $30 | Most common, easy to install |
| Polyester batts | R2.0 to R2.5 | $25 to $40 | Non-irritant, moisture resistant |
| Rockwool batts | R2.5 to R3.0 | $30 to $45 | Best fire and acoustic properties |
| Spray foam | R2.0 to R3.5 | $45 to $70 | Excellent air sealing, professional install only |
If you suspect insulation defects in your property, a [defect investigation report](/defect-investigation-reports) can identify compliance gaps and recommend remediation.
## Where Do Garages Lose the Most Heat?
In attached garages, the main weak points are usually:
- The garage door, because it is large, thin and often poorly sealed
- The ceiling or roof over the garage
- The internal door between the garage and the home
- Gaps and penetrations around edges, services and frames
- Any shared wall or floor that forms part of the home’s thermal boundary
This is why insulating only one surface can disappoint owners. A nicely insulated shared wall will not fix a hot garage if the roof space above is bare, the garage door is uninsulated and the perimeter is leaking air.
## Do Garage Walls Need to Be Fire Rated?
Sometimes, but this needs project-specific checking.
The NCC includes fire safety provisions for Class 1 and Class 10 buildings, and Class 10a buildings must not significantly increase fire spread risk between certain buildings.
For a standard attached garage beside a Class 1 dwelling, do not assume a single fire rating applies in every state and every layout. Boundary setbacks, dwelling-above-garage layouts, wall type, penetrations and local approval conditions can change the answer.
## Common Garage Insulation Mistakes We See in Inspections
The most common problem is assuming the garage does not matter because it is “only a garage”. During a [new construction stage inspection](/new-construction-stage-inspections), these issues can often be checked before wall linings, ceiling linings or insulation defects are hidden.
Other common issues include:
| Defect | Why it matters |
| -------------------------------------- | ----------------------------------------------- |
| Missing batts in the shared wall | Creates a weak point beside habitable rooms |
| Compressed insulation | Reduces insulation performance |
| Gaps around pipes and cables | Allows air leakage and heat transfer |
| Poor ceiling coverage | Affects rooms above or nearby roof spaces |
| Incorrect reflective foil installation | Reflective insulation needs the right air gap |
| No check before plasterboard | Defects become harder and more expensive to fix |
## Common Compliance Issues We Find
Through thousands of inspections across Australian properties, certain garage insulation defects appear repeatedly:
## Do You Need a Permit to Insulate a Garage?
Small insulation upgrades to an existing garage may be treated differently from structural work, recladding, fire-rated wall changes or a garage conversion.
In Victoria, a building permit sets out whether an occupancy permit or certificate of [final inspection is required](https://www.vba.vic.gov.au/consumers/home-renovation-essentials/permits) when the work is complete.
In Queensland, building certifiers assess and approve plans for new, altered and existing building work, inspect mandatory stages and give [final approval for occupation](https://www.qbcc.qld.gov.au/home-owner-hub/build-renovate/doing-work/building-approvals-certification).
If the garage is being converted into a bedroom, study, rumpus room or other habitable space, treat it as an approval issue before work starts.
## Pros and Cons of Proper Garage Insulation
## NSW BASIX and Garage Insulation
NSW is different because BASIX is a key sustainability pathway for new homes and many renovations.
[BASIX](https://www.planningportal.nsw.gov.au/sites/default/files/documents/2021/DP_SEPP_BASIX_FAQ.pdf) sets standards for water use, energy use and thermal performance in NSW residential development. BASIX also sets thermal performance requirements to help homes stay cool in summer and warm in winter without using a large amount of energy.
For NSW projects, check the BASIX certificate, NatHERS report and construction drawings before deciding whether the garage wall, ceiling or garage exterior is part of the required thermal boundary.
## Getting the Most Value from Your Home and Building Investment
Garage wall insulation is not only about making the garage more comfortable. For attached garages, it can affect the home’s energy performance, inspection outcome and long-term comfort.
Before plasterboard goes on, check the wall between the garage and house, garage ceiling insulation, garage roof insulation, external wrap, service penetrations and the internal access door.
[Owner Inspections](/) can assess garage insulation, thermal boundary defects, construction stage issues and visible compliance risks before they become expensive rectification work.
### Pre-Purchase Inspection Checklist for Buyers
Source: https://ownerinspections.com.au/articles/pre-purchase-inspection-checklist-for-buyers
Published: 2026-02-02 | Updated: 2026-03-13 | Category: Pre-Purchase Inspections
Author: Maison Azdari
A [pre-purchase inspection](/pre-purchase-inspections) checklist is a structured document used by licensed building inspectors and property buyers in Australia to systematically assess a property's condition before purchase. It covers structural elements, roofing, electrical systems, plumbing, pest activity, moisture levels and safety compliance, providing buyers with a clear picture of defects, maintenance issues and potential risks that may affect the property's value or safety.
Buying property in Australia is a major financial commitment, and many defects are not visible during a standard open home walkthrough. Cracked foundations, concealed termite damage, faulty wiring and leaking plumbing can remain hidden until they become expensive problems after settlement. A thorough pre-purchase inspection, guided by a detailed checklist, gives buyers the information they need to make confident purchasing decisions.
This guide provides a complete pre-purchase inspection checklist aligned with Australian Standard AS 4349.1 (Inspection of Buildings: Pre-purchase Inspections for Existing Buildings) and AS 4349.3 ([Timber Pest Inspections](/timber-pest-inspections)). Whether you are a first home buyer or an experienced investor, this checklist will help you understand exactly what a qualified inspector examines and what to look for yourself during property viewings.
> A pre-purchase inspection is not a cost. It is an investment that can save you tens of thousands of dollars by identifying defects before you sign a contract. The National Construction Code and Australian Standards set clear benchmarks for what your inspector should assess.
## What Is a Pre-Purchase Building Inspection?
A pre-purchase building inspection is a professional assessment of a property's physical condition conducted by a licensed building inspector. The inspection follows the procedures set out in AS 4349.1 and produces a written report detailing the condition of all accessible building elements.
The inspection is typically arranged by the buyer during the cooling-off period or as a condition of the purchase contract. It is a visual, non-invasive assessment, meaning the inspector examines what is accessible and visible without moving furniture, lifting carpet or removing wall linings.
Book a Pre-Purchase
Inspection
}
buttonHref="/pre-purchase-inspections"
variant="secondary"
/>
### What a Pre-Purchase Inspection Covers
A standard pre-purchase inspection examines the following areas and systems:
### What a Pre-Purchase Inspection Does Not Cover
It is equally important to understand the limitations. A standard inspection under AS 4349.1 does not include:
| Excluded Item | Reason for Exclusion | Additional Inspection Required |
| ------------------------------------------ | ----------------------------------- | ---------------------------------------- |
| Pest and termite assessment | Separate standard (AS 4349.3) | Timber pest inspection |
| Concealed plumbing and wiring | Non-invasive inspection only | Specialist plumbing or electrical report |
| Swimming pool compliance | Separate regulatory requirement | Pool safety inspection |
| Asbestos identification | Requires laboratory testing | Asbestos survey and testing |
| Soil conditions and contamination | Beyond scope of building inspection | Geotechnical or environmental report |
| Compliance with original building approval | Requires council records search | Section 10.7 or building certificate |
## The Complete Pre-Purchase Inspection Checklist
The following checklist covers every area a qualified inspector should examine. You can also use this as a guide when attending open homes, though a professional inspection is always recommended before making a purchase.
### Exterior Inspection Checklist
The exterior of the building often reveals the first signs of structural movement, water damage and maintenance neglect.
| Component | What to Check | Warning Signs |
| ------------------- | ------------------------------------------------ | --------------------------------------------------------- |
| External walls | Cracking, bowing, staining, mortar condition | Diagonal cracks wider than 2mm, horizontal cracking |
| Cladding | Secure attachment, damage, weathering | Loose boards, peeling paint, gaps at joints |
| Windows and doors | Operation, seals, frames | Sticking, rotting frames, broken seals |
| Balconies and decks | Structural condition, waterproofing, balustrades | Bouncing, rust staining, non-compliant height |
| Fascia and eaves | Rot, paint condition, gaps | Soft timber, peeling paint, bird or pest entry points |
| Driveways and paths | Cracking, settlement, trip hazards | Heaving, tree root damage, ponding water |
| Fencing | Structural condition, lean, compliance | Leaning posts, rotting timber, non-compliant pool fencing |
| Retaining walls | Lean, cracking, drainage | Bowing, weep hole blockages, soil washout |
### Interior Inspection Checklist
Internal defects can indicate problems with the structure, plumbing, ventilation or previous poor repairs.
Read the Pre-purchase
Inspections Guide
}
buttonHref="/guides/pre-purchase-building-pest-inspection-guide"
variant="secondary"
/>
### Roof Space Inspection Checklist
The roof void provides valuable information about the structural frame, insulation, ventilation and signs of water ingress or pest activity.
### Subfloor Inspection Checklist
For properties with accessible subfloor spaces (raised or stumped homes), the subfloor inspection is one of the most telling parts of the assessment.
### Roof Exterior Checklist
| Component | What to Check | Common Defects |
| ---------------------- | -------------------------------------------- | ---------------------------------------------- |
| Roof tiles or sheeting | Cracking, displacement, corrosion, condition | Broken tiles, rusted metal, lifted sheets |
| Ridge capping | Bedding and pointing condition | Cracked mortar, missing pointing |
| Valleys | Condition, rust, alignment | Corroded valley irons, debris buildup |
| Gutters and downpipes | Rust, sagging, leaks, capacity | Overflowing, disconnected, corroded |
| Flashings | Condition, seal integrity | Lifted flashings, poor sealing at penetrations |
| Chimneys and vents | Structural condition, flashing | Cracked masonry, deteriorated flashing |
## Common Issues Found During Pre-Purchase Inspections
Understanding the most frequently identified defects helps you assess the significance of findings in your inspection report.
**Structural movement** is particularly common across much of Australia due to reactive clay soils. These soils expand and contract with moisture changes, placing stress on foundations and causing cracking in walls and floors. Properties in Sydney, Melbourne and Brisbane are commonly affected.
**Termite damage** remains one of the most significant risks for Australian property buyers. CSIRO estimates that one in three Australian homes will be affected by termites during their lifetime. A timber pest inspection under AS 4349.3 is essential to identify current activity and previous damage.
**Moisture and waterproofing failures** affect both older and newer buildings. Poor waterproofing in bathrooms and on balconies can lead to structural timber decay, mould growth and expensive remediation.
## Choosing a Qualified Building Inspector
Not all building inspectors offer the same level of service. Selecting the right inspector is just as important as getting the inspection done.
## How to Use Your Inspection Report for Negotiation
Your inspection report is a powerful tool at the negotiating table. The findings give you documented evidence to support price reductions, repair requests or withdrawal from the purchase.
## Australian Standards and Regulations
Pre-purchase inspections in Australia are governed by a framework of standards and regulations that set minimum requirements for inspection scope, methodology and reporting.
**AS 4349.1 (Inspection of Buildings: Pre-purchase Inspections)** defines the scope for building inspections, including what must be examined, how findings are categorised and what constitutes a major defect.
**AS 4349.3 (Inspection of Buildings: Timber Pest Inspections)** covers pest inspections, specifying procedures for identifying termites, borers and wood decay fungi.
**The National Construction Code (NCC)** sets the minimum performance requirements for new building work in Australia. While pre-purchase inspections apply to existing buildings, the NCC provides benchmarks for assessing compliance of additions, renovations and recently constructed homes.
State and territory licensing requirements vary. In NSW, building inspectors typically hold a builders licence or accredited inspector qualification. In Queensland, inspectors must hold appropriate licensing under the QBCC framework. Always verify your inspector's credentials with the relevant state authority.
Request a Quote
or Book Now
}
buttonHref="/contact"
variant="secondary"
/>
### Hiring a Private Inspector for a New House Purchase
Source: https://ownerinspections.com.au/articles/private-inspector-for-a-new-house
Published: 2026-02-02 | Updated: 2026-02-12 | Category: Pre-Purchase Inspections
Author: Maison Azdari
A private building inspector is a licensed professional hired independently by a property buyer to assess the condition and compliance of a new house before settlement. Unlike council inspectors who verify minimum regulatory compliance at specific construction stages, a private inspector conducts a detailed evaluation of workmanship, structural integrity, and overall build quality on behalf of the buyer. With research showing that approximately 70% of newly built Australian homes contain undetected defects, engaging a private inspector has become one of the most effective ways to protect your financial investment in a new property.
Many buyers assume that because a house is new, it must be free of problems. This assumption can be costly. Builders operate under tight schedules and budgets, and even well-intentioned construction teams can overlook defects that range from minor cosmetic issues to serious structural concerns. A private inspector serves as your independent set of eyes, identifying problems that might otherwise go unnoticed until long after the builder's warranty obligations have expired.
> A new home does not guarantee a defect-free home. Independent inspection before settlement gives you the strongest possible position to have issues rectified at the builder's expense.
## What Is a Private Building Inspector?
A private building inspector is a qualified professional who works independently of the builder, developer, and local council. Their role is to conduct a thorough assessment of a property's construction quality, compliance with the National Construction Code (NCC), and adherence to relevant Australian Standards such as AS 4349.1 (Inspection of Buildings).
Private inspectors differ from council or certifier inspections in a number of important ways. Council inspectors typically attend a building site at mandated stages to verify compliance with the approved plans and minimum code requirements. Their focus is on regulatory compliance rather than overall quality. A private inspector, by contrast, examines the property from the perspective of the buyer, looking at both compliance and workmanship to a much higher level of detail.
## Private Inspector vs Council Inspector
Understanding the difference between private and council inspections is essential for any buyer considering a new house purchase.
| Aspect | Private Building Inspector | Council or Certifier Inspector |
| -------------------- | ------------------------------------------------------- | -------------------------------------------- |
| Hired by | The property buyer | Required by legislation |
| Purpose | Comprehensive quality and defect assessment | Verify minimum code compliance |
| Scope | All accessible areas, workmanship, materials | Specific mandated construction stages |
| Report detail | Detailed written report with photos and recommendations | Pass or fail certificate |
| Independence | Fully independent of builder | May have ongoing relationships with builders |
| Standards referenced | NCC, AS 4349.1, and best practice | NCC and approved plans |
| Timing | Before settlement or at buyer's discretion | At prescribed construction stages only |
| Cost to buyer | Paid by the buyer directly | Included in construction or council fees |
## Qualifications and Licensing by State
Building inspector licensing requirements vary across Australian states and territories. When selecting a private inspector, it is important to confirm they hold the correct licence for the jurisdiction where the property is located.
**New South Wales (NSW):** Inspectors must hold a building consultant licence issued by NSW Fair Trading. They should be familiar with the Home Building Act 1989 and associated regulations that govern residential construction standards and warranty obligations.
**Queensland (QLD):** The Queensland Building and Construction Commission (QBCC) oversees licensing for building inspectors. Inspectors should hold a relevant QBCC licence and be experienced with Queensland's specific requirements around termite management and cyclone-rated construction.
**Victoria (VIC):** The Victorian Building Authority (VBA) regulates building practitioners. Inspectors should be registered building practitioners or hold equivalent qualifications recognised by the VBA.
**Other states and territories:** South Australia, Western Australia, Tasmania, the ACT, and the Northern Territory each have their own regulatory frameworks. Always verify that your inspector holds the appropriate licence for the relevant jurisdiction.
## Benefits of Hiring a Private Inspector for a New House
### Early Defect Detection
The most significant benefit of a private inspection is identifying defects before you take ownership. Once settlement occurs, the process of having defects rectified becomes substantially more difficult. A pre-settlement inspection report gives you documented evidence to present to the builder, allowing defects to be addressed while the builder still has a contractual obligation to fix them.
### Compliance Verification
A private inspector checks that the building complies with the NCC and relevant Australian Standards. This goes beyond what council inspections cover, ensuring that elements such as waterproofing, insulation, ventilation, and fire safety meet the required standards.
### Buyer Confidence
Purchasing a new home is one of the largest financial commitments most Australians will make. Having an independent professional confirm the quality of your new home provides genuine peace of mind and confidence in your purchase.
### Cost Prevention
Identifying defects early prevents them from becoming expensive problems later. Water ingress through poorly installed flashing, for example, can lead to structural timber damage, mould growth, and interior damage that costs tens of thousands of dollars to repair. Termite damage alone costs Australian homeowners an estimated $1.5 billion annually, and a combined building and pest inspection can identify conditions that attract termite activity before they cause harm.
## Key Areas a Private Inspector Examines
A comprehensive private inspection of a new house covers the following areas:
### Structural Elements
The inspector assesses foundations, concrete slabs, load-bearing walls, beams, columns, and the overall structural frame. They look for cracking, movement, inadequate connections, and any signs that the structure does not meet the engineering design or NCC requirements.
### Plumbing and Drainage
All accessible plumbing is checked for leaks, correct installation, adequate water pressure, and proper drainage fall. Hot water systems, taps, toilets, and stormwater drainage are all included in the assessment.
### Electrical Systems
While a private building inspector is not an electrician, they visually assess electrical installations for obvious defects such as incomplete work, unsafe wiring, missing covers on power points, and the presence of safety switches and smoke alarms as required by the NCC.
### Roofing and Guttering
The roof structure, coverings, flashing, guttering, and downpipes are inspected for correct installation, adequate overlap, secure fixings, and proper drainage. Poorly installed roofing is one of the most common sources of water damage in new homes.
### Pest and Termite Assessment
A combined building and pest inspection includes a check for termite activity, termite-conducive conditions, and the presence of other timber pests. Given that termite damage costs $1.5 billion annually across Australia, this assessment is particularly important for properties in high-risk areas such as Queensland and northern NSW.
### Insulation and Ventilation
The inspector checks that ceiling and wall insulation has been installed to the correct R-value as specified in the NCC energy efficiency provisions. Adequate subfloor and roof space ventilation is also assessed, as poor ventilation leads to moisture buildup, condensation, and mould growth.
### Waterproofing
Wet areas including bathrooms, laundries, and balconies are examined for evidence of adequate waterproofing. Waterproofing failures are among the most common and expensive defects found in new Australian homes.
## How to Choose a Qualified Private Inspector
Selecting the right inspector is just as important as deciding to get an inspection in the first place. Consider the following when making your choice:
## Pricing for Private Building Inspections
The cost of a private building inspection varies depending on the property size, location, and scope of the inspection.
| Inspection Type | Typical Cost | What Is Included |
| --------------------------------------- | ----------------- | --------------------------------------------------------------------- |
| Standard building inspection | From $390 + GST | Visual assessment of all accessible areas, written report with photos |
| Combined structural and pest inspection | From $1,000 + GST | Full building inspection plus termite and pest assessment |
| Stage inspections (per visit) | From $300 + GST | Inspection at specific construction milestones |
| Defect reinspection | From $200 + GST | Follow-up to verify defects have been rectified |
When compared to the potential cost of undetected defects, a private inspection represents a modest investment. Remediation of waterproofing failures alone can exceed $50,000 in severe cases. Structural defect repairs can cost even more, making the inspection fee a fraction of what you could save.
## Red Flags to Watch For
When engaging a private inspector, be cautious of the following warning signs:
- **No licence or insurance:** Any inspector who cannot provide proof of current licensing and professional indemnity insurance should be avoided.
- **Unusually low pricing:** Inspections priced significantly below market rates may indicate a superficial assessment or lack of qualifications.
- **Builder referrals:** If the builder recommends a specific inspector, consider finding your own. Independence is the whole point of a private inspection.
- **No written report:** A verbal summary alone is not sufficient. You need a detailed written report with photographs to support any defect claims.
- **Rushed inspections:** A thorough inspection of a new house takes at least two to three hours. If an inspector promises to be done in under an hour, they are unlikely to be examining the property adequately.
- **No reference to standards:** A professional inspector should reference the NCC, AS 4349.1, and relevant state regulations in their report.
## When to Schedule Your Private Inspection
For a new house purchase, the ideal time to arrange a private inspection is after practical completion but before settlement. This timing allows you to identify any defects and request rectification from the builder before you take legal ownership of the property.
If you are building a new home rather than purchasing an already completed one, consider engaging a private inspector at multiple construction stages. Key stages include the slab or base stage, frame stage, lock-up stage, fixing stage, and the final pre-handover inspection. Each [stage inspection](/new-construction-stage-inspections) costs less than a full inspection and allows defects to be caught and corrected before subsequent work covers them up.
### What Does a Building Inspector Do in Victoria?
Source: https://ownerinspections.com.au/articles/what-does-a-building-inspector-do-in-victoria
Published: 2026-02-02 | Updated: 2026-09-07 | Category: Building Inspections
Author: Maison Azdari
A building inspector is a qualified professional who visually inspects a property's structure, surfaces and services against the Australian Standard and reports defects, safety hazards and non-compliant work in writing, so a buyer, owner or owner-builder knows what they are taking on before they commit. In Victoria that means checking the same core areas as anywhere else in Australia, which is the roof, the subfloor, the structure, moisture and safety, against AS 4349.1 and the Victorian building regulations. A standard [pre-purchase inspection](/pre-purchase-inspections) runs about one and a half to two and a half hours on site and ends with a written report that ranks each defect by severity rather than issuing a pass or a fail. Most buyers commission their own inspector rather than relying on a report supplied by the vendor, because the person who pays for the report is the person it protects.
## What is a building inspector?
A building inspector is someone who examines the condition of a building and writes down what they find. In the pre-purchase context, which is what most people mean by the term, the inspector has no statutory authority: they cannot order work, issue a notice, or stop a sale. Their power is entirely in the report, and in what you do with it.
That is worth separating from a **building surveyor**, who is a very different role. A building surveyor in Victoria is a statutory officer who issues building permits and occupancy permits, and who can issue building notices and orders under the Building Act 1993. An inspector tells you the balustrade is 830mm high and unsafe. A surveyor is part of the system that can compel someone to fix it. Readers conflate the two constantly, usually at exactly the moment they are trying to work out who to call.
## What does a building inspector do in Australia?
Across Australia the job is broadly consistent. A pre-purchase inspector carries out a **visual, non-invasive** inspection to AS 4349.1, the Australian Standard for pre-purchase inspections of residential buildings, published by [Standards Australia](https://www.standards.org.au/), and produces a written report identifying defects, safety hazards and areas requiring further investigation. Non-invasive is the load-bearing word: the inspector does not lift floor coverings, cut into walls, move heavy furniture, or dismantle anything. They report what can be seen, plus what the visible evidence reasonably implies.
What varies between states is not the method but the regulation around it, and the compliance code the inspector references. Registration and licensing of building inspectors are **not** uniform nationally. Queensland licenses completed residential building inspections through the QBCC. New South Wales does not license pre-purchase inspectors as such. Victoria registers building inspectors as a class of building practitioner, which is covered further down. If you are reading this outside Victoria, check your own state regulator rather than assuming the Victorian position applies.
One scope point to settle early: a standard building inspection is not a termite inspection. Timber pest work is carried out under a separate standard, AS 4349.3, and is usually quoted as a separate or combined service. If you want both, you have to ask for both. Our guide to [how a building and pest inspection differs from a building inspection](/articles/building-inspection-vs-building-and-pest-inspection) sets out exactly what each one covers.
### What a building inspector does in Victoria specifically
In Victoria the inspector's work sits inside a particular conveyancing rhythm, and that rhythm is what makes timing so tight.
A Victorian vendor must give you a **section 32 statement** (the vendor statement, under section 32 of the [Sale of Land Act 1962](https://www.legislation.vic.gov.au/in-force/acts/sale-land-act-1962)) before you sign. It discloses things like building permits issued for the property in the preceding seven years, rates, easements and title particulars. What it does not tell you is the **condition** of anything. A section 32 can be complete, accurate and entirely compliant while the house has a failed subfloor and a leaking shower. That gap is the inspector's whole job.
If you buy at a private sale, you generally have a **cooling-off period of three clear business days** after signing, and ending it costs you $100 or 0.2% of the purchase price, whichever is greater. If you buy at auction, there is **no cooling-off period at all**, and the same exclusion applies to a sale made within three clear business days before or after a publicly advertised auction. In practice this means Victorian buyers inspect before the auction, or they inspect inside a three business day window while already contractually exposed. Book the inspector before you bid, not after. Cooling off is also not a substitute for a building inspection clause: ending a contract in the cooling-off period costs you the penalty regardless of what the report found.
Victorian inspectors also do a job that has no equivalent in most other states: the **section 137B report**. If an owner-builder sells a home within six years and six months of the occupancy permit or certificate of final inspection, section 137B of the [Building Act 1993](https://www.legislation.vic.gov.au/in-force/acts/building-act-1993) requires them to obtain a report on the condition of the building work from a prescribed practitioner, being a registered building inspector or building surveyor, and to hold the required insurance where the work exceeded the relevant threshold. That threshold moved recently: domestic building insurance applied to work over $16,000 under contracts signed before 1 July 2026, and the [Home Warranty scheme](https://www.bpc.vic.gov.au/home-owners/insurance-for-domestic-building-work/domestic-building-insurance-and-home-warranty) applies to eligible work valued over $20,000 from that date. Anything you read that still quotes $16,000 as the current threshold is out of date. If you are buying from an owner-builder in Victoria, that report should exist. If it does not, that is a problem for the vendor before it is a problem for you, and it is worth raising with your conveyancer immediately.
## What does a building inspector check in Victoria?
Here is what actually happens in the two hours or so an inspector is at the property, roughly in the order it happens. This is the part most definition pages leave out.
**The exterior and the site, first.** The inspector walks the perimeter before going inside, because the outside usually explains the inside. They are looking at ground levels against the weep holes and the damp proof course, at surface drainage and where stormwater discharges, at cracking in brickwork and its pattern (stepped cracking at a corner reads very differently from a hairline crack mid wall), at retaining walls, and at the condition of paths and driveways where they abut the house. Cracks get measured, not just noted: AS 2870 classifies damage in masonry from Category 0 (hairline, under 0.1mm) through Category 1 (fine, under 1mm) and Category 2 (noticeable, up to 5mm) to Category 3 (5mm to 15mm) and Category 4 (extensive, 15mm to 25mm). That number is what separates a cosmetic patch from an engineer's referral, so if a report says "some cracking noted" without a width, it is not doing its job. Melbourne's reactive clay soils, particularly through the west and the north, produce the seasonal movement that shows up here first.
**The roof exterior and roof space.** From ground level or a ladder, the inspector assesses tile or sheet condition, ridge capping and pointing, flashings, valleys, and the gutters and downpipes. Then, if there is safe access, they enter the roof void. This is where an inspection earns its fee: sagging or cut roof timbers, water staining on the underside of the sarking, daylight through the roof, undersized or bowed ceiling battens, and old wiring are all visible up there and nowhere else.
**The interior, room by room.** Walls, ceilings and cornices for cracking and movement, floors for level and springiness, windows and doors for operation and for whether they still sit square in their frames. Wet areas get particular attention: the inspector will use a moisture meter around shower bases, at the base of walls adjoining showers, and under sinks. A failed shower is one of the most common significant findings in an established Victorian home, and one of the most expensive: a failed waterproofing membrane in a second storey bathroom is, as at 2026, typically eight to fifteen thousand dollars to rectify, because the floor has to come up and everything above it has to be reinstated.
**Safety items.** Smoke alarm presence and placement. Every Victorian home must have working smoke alarms; homes built after 1 August 1997 must have mains powered alarms rather than battery only ones, and homes constructed or largely renovated after 1 May 2014, where more than one alarm is required, must also have them interconnected, so that one alarm sounding sets off the rest. Also balustrade height and gaps, the condition of the switchboard and whether safety switches are present, and pool or spa barriers where they exist. Note the limit here: an inspector reports what they can see, and a pre-purchase report is not a compliance certificate. In Victoria a pool or spa barrier certificate is a separate document, issued by a registered building surveyor, building inspector, pool inspector or municipal building surveyor, and lodged with the council on a four year cycle.
**The subfloor.** For the many Victorian homes on stumps or piers, the subfloor is where the structural truth lives: stump condition and settlement, bearer and joist condition, ventilation, ground moisture and drainage, and any evidence of timber pest activity. Weatherboard homes across Melbourne's inner north, inner west and bayside suburbs frequently have original timber stumps well past their design life, and you cannot see any of it from the living room.
### What stops an inspection cold
Worth knowing before the day, because these are the things that turn a full report into a report full of caveats:
- **A locked or inaccessible subfloor.** If the access hatch is screwed shut, blocked by stored goods, or the crawl space is under 400mm of clearance, the inspector cannot safely enter and will note the subfloor as not inspected.
- **No roof void access, or insulation covering the manhole.** Loose fill insulation over the manhole, or a manhole located inside a built-in wardrobe with a full shelf across it, both end the roof inspection.
- **A tenant who was not told.** If the property is tenanted and proper notice was not given, the inspector may be refused entry at the door. This is the single most common reason an inspection is rebooked.
- **Weather.** Inspectors will not go onto a wet roof or into a roof void during a storm. Safety limits are not negotiable and a rescheduled inspection is better than a rushed one.
- **Solar panels and stored goods.** A roof covered in panels limits what can be assessed underneath; a garage stacked to the ceiling limits what can be assessed behind.
Every one of these appears in the report as a limitation. A report with four limitations is a much weaker document than a report with none, and it is usually fixable with one phone call to the agent beforehand.
## What would fail a building inspection?
Nothing, strictly, and this is the most useful thing on this page.
**A pre-purchase building inspection does not issue a pass or a fail.** That framing is imported from council and occupancy inspections, where a statutory inspector genuinely does approve or reject work at a stage of construction. A pre-purchase report does something different: it lists what was found and grades each item by severity, typically as a major defect, a minor defect, or a safety hazard, along with anything requiring further investigation by a specialist. There is no threshold at which a house is declared to have failed. There is only a report, and your judgment about what it means for your offer.
That said, the findings that most often change a buyer's mind are consistent:
- **Major structural defect.** Significant footing or stump movement, cracked or displaced brickwork with a structural pattern, sagging or failed roof framing. These usually attract a recommendation for a structural engineer, and the engineer's report is what determines the cost.
- **Active termite activity.** Live termites or fresh workings found during a combined inspection. Victoria has lower termite pressure than Queensland or northern New South Wales, but activity is well documented in parts of Melbourne's outer east, north east and the Yarra Valley, including Yarra Ranges and Manningham, both designated termite-prone areas under the Building Regulations 2018 (Yarra Ranges' designation excludes garages, carports and non-habitable outbuildings).
- **Unsafe electrical work.** No safety switch on power circuits, a fuse board still running rewireable ceramic fuses, visible unenclosed or damaged wiring, or obvious unlicensed work. Reported as a safety hazard with a licensed electrician recommendation.
- **Non-compliant balustrades and decks.** Where it is possible to fall one metre or more, the National Construction Code requires a barrier at least one metre high at landings and balconies, 865mm above stair nosings, with openings that will not pass a 125mm sphere. Older decks routinely fail both tests, and elevated decks with corroded fixings are a genuine collapse risk rather than a paperwork issue.
- **Water ingress.** Failed shower waterproofing, roof leaks, rising or lateral damp, and inadequate site drainage. Cheap to find, expensive to fix, and the most common reason a buyer renegotiates.
None of these stop a sale by themselves. They change the number, or they change your mind. If you are weighing up whether a finding is serious enough to walk, our piece on [defects serious enough to walk away from a purchase](/articles/10-year-old-property-defects-walk-away) works through where that line usually sits.
## How long does a building inspection take in Victoria?
Budget **one and a half to two and a half hours on site** for a standard three bedroom home, and expect the written report within 24 hours of the inspection, often the same evening.
What pushes it longer: floor area and the number of separate structures (a house plus a bungalow plus a garage is three inspections, not one), difficult roof or subfloor access, a period home with multiple additions from different eras, extensive landscaping or retaining walls, and whether a timber pest inspection is being carried out at the same time. A combined building and pest inspection on a large or complex property can run beyond three hours.
What makes it shorter is rarely good news. An inspection that finishes in 45 minutes generally means the inspector could not get into the roof or under the floor.
## How much does a building inspection typically cost in Melbourne?
As at August 2026, a standalone pre-purchase building inspection in metropolitan Melbourne typically falls in the **$400 to $700** range, with a combined building and timber pest inspection generally **$550 to $900**. A large, multi-storey or heavily extended period home can sit above both. Treat those as ranges rather than quotes, and get a written price for the specific address before you book.
For context, our national article on [typical pre-purchase inspection costs across Australia](/articles/pre-purchase-house-inspection-cost) puts the range at $300 to $800. That figure is national, not Melbourne specific, and Melbourne sits within it rather than below it.
What moves the price:
- **Property size and type.** Priced on floor area and number of bedrooms. Apartments are usually cheaper; a large double storey home with outbuildings costs more.
- **Combined building and pest.** Adding timber pest typically adds $150 to $250 rather than doubling the fee, because the inspector is already on site.
- **Distance.** Outer metropolitan and regional Victorian addresses often carry a travel component.
- **Timing.** A pre-auction inspection booked for tomorrow morning, or a weekend inspection inside a three business day cooling-off window, can attract a priority fee. Booking early is the cheapest thing you can do.
Be wary of anything priced conspicuously below the range. The cost difference between a thorough inspection and a cursory one is a couple of hundred dollars. The cost difference between finding a failed second storey shower and not finding it is measured in tens of thousands, because rectification means removing the floor, replacing the waterproofing membrane and reinstating everything above it.
## Who pays for a building inspection?
**The buyer, in almost all cases.** You commission the inspector, you pay the fee, the report is yours, and the inspector owes their duty to you. That is the arrangement worth paying for.
You will sometimes be offered a report the vendor or agent already has, and it may well be a competent report by a competent inspector. The problem is not quality, it is who it was written for. A vendor-supplied report was commissioned by the seller, its scope was set by the seller, and it may be months old. You generally have no contractual relationship with the inspector who wrote it, which means limited recourse if something material was missed. Read it if it is offered, treat it as useful background, and then engage your own inspector anyway.
If you are buying, [book an independent pre-purchase building inspection](/building-inspections-australia) in your own name and to your own brief, and be there for the walkthrough at the end if you can. Twenty minutes with the inspector on site is worth more than an hour re-reading the report.
The exception worth knowing: for **owner-builder sales in Victoria**, the section 137B report is obtained and paid for by the vendor, because the obligation sits on them. You should still commission your own inspection on top of it.
## Frequently Asked Questions
## What qualifications does a building inspector need?
This is where the honest answer is "it depends on the state", and where Victorian buyers are usually told something misleading.
In Victoria, **building inspector** is a registered class of building practitioner under the Building Act 1993, administered by the [Building and Plumbing Commission](https://www.bpc.vic.gov.au/), which is the trading name the Victorian Building Authority now operates under. The classes are Building Inspector (unlimited) and Building Inspector (limited), and registered inspectors appear on a public register anyone can search. What that registration actually covers is **statutory** work: [inspecting building work at permit stages](https://www.bpc.vic.gov.au/resource-hub/info-sheets/what-is-building-inspection-work) on behalf of the relevant building surveyor, and preparing section 137B reports.
Here is the part that matters to a buyer. **A pre-purchase inspection is not a permit function, and Victoria has no licence class that exists for it.** Anyone may legally inspect a house you are thinking of buying and write you a report about it. Queensland is the outlier that does license this work, through the QBCC's completed residential building inspection licence; New South Wales, like Victoria, does not. So in Victoria the quality floor is set by who you choose rather than by the law, and the checks below are not optional extras. What to look for:
- Registration with the BPC as a building inspector, or registration as a builder, or membership of a recognised inspection body.
- Current **professional indemnity insurance**, and ask for the certificate of currency rather than taking it on trust. This is your only real recourse if something material is missed.
- A sample report you can read before booking. If it is four pages of tick boxes and stock photos, look elsewhere.
- Explicit confirmation that the inspection is carried out to AS 4349.1.
Outside Victoria the rules genuinely differ, so do not carry this answer across a border. Our comparison of [how a building surveyor's role differs from an inspector's](/articles/building-surveyor-vs-building-inspector) covers the regulated and unregulated boundary in more detail, which is the part most people get wrong when they are deciding who to engage.
## How do I become a building inspector in Australia?
Briefly, because most people reading this page are buying a house rather than changing careers.
The common route is a trade or construction background followed by a qualification such as a Diploma of Building and Construction (Building), CPC50220, or an Advanced Diploma, then documented industry experience, then registration with the state regulator where the state requires it. In Victoria that means applying to the Building and Plumbing Commission for registration in the inspector category, which involves demonstrating qualifications and experience, passing the relevant assessment, and holding required insurance. Registration is what lets you do permit-stage and section 137B work; it is not what lets you carry out pre-purchase inspections, which is why many practising pre-purchase inspectors are registered builders rather than registered inspectors. Requirements, categories and assessment processes vary by state, so start with your own regulator rather than a generic national description.
## How clean does my house need to be for an inspection?
Not very. Tidiness is almost irrelevant. **Access is everything.**
If you are the owner or the vendor, the useful preparation list is short:
- **Clear the roof void manhole.** Empty the wardrobe shelf underneath it, move whatever is stacked below it, and make sure a ladder can be set up beneath it.
- **Unlock and clear the subfloor access.** Move the stored boxes, unscrew the hatch, and unchain the gate that leads to it.
- **Open access to the meter box and switchboard**, and unlock the side gates so the inspector can walk the full perimeter.
- **Move cars off the driveway** and clear the garage floor enough to see the slab and the walls.
- **Have keys for everything**, including the shed, the bungalow, the garage and any external laundry.
- **If the property is tenanted, give proper notice.** This is the one that actually derails inspections.
Nobody is grading your kitchen. The inspector wants to get into the four places you never go.
## Frequently asked questions
### Is a building inspection compulsory in Victoria?
No. There is no legal requirement for a buyer to obtain a pre-purchase building inspection in Victoria, and no requirement for a vendor to supply one in an ordinary sale. It is voluntary and it is entirely on you to arrange. The exception is the owner-builder situation described above, where section 137B of the Building Act 1993 imposes an obligation on the vendor.
### Can I attend the building inspection?
Yes, and you should. Most inspectors are happy for you to arrive for the last 20 or 30 minutes and walk the property with them. Seeing the crack they are describing, standing in front of the shower with the moisture meter reading, changes how you read the report. Ask when you book, because it needs to be arranged with the agent.
### What is excluded from a standard building inspection report?
More than people expect. A standard AS 4349.1 inspection is visual and non-invasive, so it excludes anything concealed within walls, floors or ceilings, and anything the inspector could not safely reach. It also generally excludes timber pest activity (separate service), the operation of plumbing, electrical, gas and air conditioning systems (licensed trades), swimming pool and spa shells and their barrier certification, asbestos identification, and any estimate of what rectification will cost. Read the limitations and exclusions section of your report first, not last. It tells you what you still do not know.
### What Pre-Purchase Inspections Reveal About Melbourne Properties
Source: https://ownerinspections.com.au/articles/what-pre-purchase-inspections-reveal-about-melbourne-properties
Published: 2026-02-02 | Updated: 2026-05-17 | Category: Pre-Purchase Inspections
Author: Maison Azdari
A pre purchase inspection Melbourne buyers arrange before signing, bidding or settling can reveal problems that are easy to miss during an open home.
Fresh paint, styled rooms and good lighting can hide cracking, moisture stains, roof leaks, poor drainage, timber pest damage and unsafe renovation work. [Consumer Affairs Victoria](https://www.consumer.vic.gov.au/housing/buying-and-selling-property/buying-property/inspect-properties-before-you-buy) recommends that buyers consider engaging a qualified building inspector, surveyor or architect before signing a contract of sale because a professional report can list faults, whether they can be repaired and likely repair costs.
A pre purchase building inspection in Melbourne is especially useful because local homes face a mix of older housing stock, reactive soil movement, changing weather, terrace-style drainage issues, ageing roofs and renovation history.
This guide explains what a pre purchase inspection in Melbourne includes, what defects are commonly found, what happens before auction, how [pest inspections](/timber-pest-inspections) fit in, and how to use the building inspection report before making your next move.
## What Does a Pre Purchase Inspection in Melbourne Include?
A pre purchase building inspection Melbourne buyers book is a visual assessment of the property’s accessible areas. It is designed to identify defects, safety risks and repair concerns before the buyer becomes fully committed.
Consumer Affairs Victoria says a written building inspection report can list property faults, whether those faults can be repaired, and how much repairs are likely to cost. The report can also highlight unsafe or unauthorised renovations and extensions.
| Area Checked | What the Inspector Looks For | Why It Matters |
| --------------------- | ------------------------------------------------------------------------------- | ---------------------------------------------------------------- |
| Structure | Cracking, movement, uneven floors, wall distortion, damaged stumps or footings | Helps identify major defects and movement risks |
| Roof exterior | Broken tiles, rusted sheets, poor flashing, blocked gutters, sagging roof lines | Roof leaks can lead to ceiling damage, mould and timber decay |
| Roof void | Water stains, insulation issues, frame damage, ventilation concerns | Hidden roof defects are often missed during open homes |
| Subfloor | Dampness, termite damage, timber rot, poor ventilation, stump movement | Subfloor problems can affect structural safety |
| Plumbing | Leaks, poor drainage, old pipework, hot water system condition | Water damage can spread quickly if left untreated |
| Electrical visibility | Old switchboards, missing safety switches, exposed or unsafe-looking wiring | Visible electrical concerns may need a licensed electrician |
| Wet areas | Bathroom leaks, failed waterproofing, mould, loose tiles | Failed waterproofing is one of the most expensive hidden defects |
| External areas | Drainage, retaining walls, balconies, paths, fences and site grading | Poor drainage can worsen soil movement and moisture issues |
## Why Melbourne Buyers Should Book an Inspection Before They Buy
Melbourne buyers often make fast decisions, especially when a property is going to auction. That makes the inspection timing important.
[Consumer Affairs Victoria’s buying checklist](https://www.consumer.vic.gov.au/housing/buying-and-selling-property/checklists/buying-property) says that if you are buying at auction, you should get the inspection report before the auction because you cannot place conditions on the contract of sale at auction without the vendor’s agreement.
For private sales, a cooling-off period of three clear business days applies to residential and small rural property sales in Victoria.
| Buying Situation | Best Time to Book the Inspection | Why |
| ------------------- | ----------------------------------------------- | ---------------------------------------------------------------------------------------- |
| Auction | Before auction day | Auction contracts usually do not allow inspection conditions unless agreed by the vendor |
| Private sale | Before signing or during the cooling-off period | Gives time to review defects and seek advice |
| Older home | Before making a firm offer | Older homes often have roofing, drainage, asbestos or wiring concerns |
| Renovated property | Before signing | The report may flag unsafe or unauthorised work |
| Investment purchase | Before final commitment | Helps estimate repair costs and rental safety risks |
## Understanding Pre-Purchase Inspections in Victoria
In Victoria, pre-purchase building inspections are carried out by registered building practitioners or licensed building inspectors under the Victorian Building Authority (VBA) framework. The VBA regulates building practitioners and sets the standards for inspection quality across the state.
A pre-purchase inspection under AS 4349.1 is a visual, non-invasive assessment. The inspector examines all reasonably accessible areas of the property and provides a written report documenting defects, areas of concern and any sections that could not be inspected.
Buyers in Victoria typically arrange a pre-purchase inspection during the cooling-off period after signing a contract of sale, or as a condition precedent in the contract. Under the Sale of Land Act 1962 (Vic), buyers of residential property have a three business day cooling-off period during which they can withdraw from the contract, subject to a penalty. Some buyers arrange inspections before auction to avoid buying without full knowledge of the property's condition.
Read the defect
documentation guide
}
buttonHref="/articles/document-building-defects-legal-claim"
variant="secondary"
/>
## Melbourne Property Types and What Inspectors Often Find
Different Melbourne property types often come with different inspection risks.
| Property Type | Common Inspection Concerns |
| ----------------------------- | --------------------------------------------------------------------------- |
| Victorian and Edwardian homes | Rising damp, cracked brickwork, old wiring, roof leaks, timber decay |
| Post-war brick veneer homes | Stump movement, drainage faults, ageing plumbing, roof tile damage |
| Renovated homes | Poor workmanship, unauthorised work, waterproofing failures |
| Townhouses | Party wall issues, balcony drainage, roof flashing, garage water entry |
| Apartments | Water ingress, balcony defects, ventilation, owners corporation maintenance |
| Newer homes | Settlement cracks, drainage, waterproofing, workmanship defects |
## Key Areas Inspected in Melbourne Properties
A thorough pre-purchase inspection in Melbourne covers the following building elements and systems.
### Structural Elements
Structural assessment is the foundation of any pre-purchase inspection. In Melbourne, inspectors pay particular attention to:
Melbourne sits on a range of soil types, but large areas of the eastern, northern and western suburbs are built on highly reactive Basalt and Silurian clay soils. These soils expand when wet and contract when dry, causing seasonal ground movement that can crack foundations, shift stumps and distort wall and floor levels.
### Electrical Systems
Inspectors assess the visible components of the electrical system, including the switchboard, safety switches (RCDs), wiring type and condition, power points and light fittings. Many older Melbourne homes still have ceramic fuse boxes, aluminium wiring or wiring insulated with rubber or cloth, all of which pose safety risks and require upgrading.
### Plumbing
The plumbing inspection covers visible pipework, taps, water pressure, hot water systems, drainage and stormwater management. Melbourne's ageing housing stock means many properties still have galvanised steel or cast iron pipes that corrode over time, leading to leaks, low water pressure and potential water damage.
### HVAC and Ventilation
Heating and cooling systems are checked for visible defects and general condition. Melbourne's climate demands both heating in winter and cooling in summer, so inspectors assess ducted heating, split systems, evaporative coolers and subfloor ventilation. Poor ventilation in subfloor spaces is a common finding in Melbourne homes and can lead to timber decay and mould growth.
### Roofing
The roof is inspected from both outside and within the roof void. Inspectors check for damaged or missing tiles, deteriorated flashing, sagging ridge lines, corroded metal roofing, blocked gutters and evidence of leaks. Melbourne experiences significant rainfall across autumn and winter, and wind-driven rain can exploit even minor gaps in roofing materials.
### Pest Activity
While a dedicated timber pest inspection under AS 4349.3 is a separate service, many Melbourne inspectors offer combined building and pest inspections. Termite activity is found across Melbourne, particularly in suburbs with mature tree cover. Borers, dampwood termites and subterranean termites are all present in the greater Melbourne area.
## Common Defects Found in Melbourne Pre Purchase Inspections
A property inspection Melbourne buyers arrange can reveal issues linked to local soil, weather, building age and renovation quality.
The [Bureau of Meteorology’s Melbourne climate statistics](https://www.bom.gov.au/climate/averages/tables/cw_086071.shtml) show long-term annual mean rainfall of about 648.3 mm at the Melbourne Regional Office station, which helps explain why roof drainage, stormwater, damp and waterproofing checks matter in local inspections.
| Defect Category | Common Melbourne Findings | Buyer Risk |
| ---------------------- | -------------------------------------------------------------------- | -------------------------------------------------- |
| Structural cracking | Stepped brick cracks, slab edge cracks, internal plaster cracks | May suggest movement or footing issues |
| Roof deterioration | Cracked tiles, rusted metal sheets, failed flashing, blocked gutters | Can lead to leaks and ceiling damage |
| Moisture and damp | Rising damp, mould, damp subfloors, wet wall linings | Can affect health, timber framing and repair costs |
| Drainage faults | Water pooling near footings, blocked downpipes, poor site fall | Can worsen movement and moisture problems |
| Timber pest damage | Termite damage, borer activity, damp timber | May require pest treatment and structural repair |
| Old electrical systems | Old switchboards, visible unsafe wiring, limited safety devices | Needs review by a licensed electrician |
| Plumbing defects | Corroded pipes, poor water pressure, leaks, poor stormwater control | Can cause water damage and costly repairs |
| Asbestos risk | Suspected asbestos cement in eaves, cladding, wet areas or fences | Needs specialist assessment before renovation |
### Structural Cracking and Reactive Soil Movement
Many Melbourne homes show some form of cracking, but not every crack is serious.
Fine plaster cracks may be minor, while diagonal cracks, stepped brick cracks, uneven floors and doors that no longer close properly can point to movement. Reactive clay soil can expand and shrink with seasonal moisture changes, and YourHome advises seeking professional advice from an engineer before repairing movement-related cracking because some repairs can worsen structural damage when foundations move again.
A good building inspection Melbourne report should explain whether cracking appears minor, needs monitoring, or requires further investigation by a structural engineer.
| Crack Type | Possible Meaning | Recommended Next Step |
| ---------------------------- | ---------------------------------------- | ------------------------------------------ |
| Hairline plaster cracks | Minor settlement or age-related movement | Monitor and maintain |
| Stepped brick cracks | Possible footing or soil movement | Ask inspector if engineer review is needed |
| Wide external cracks | Possible structural movement | Seek further assessment before purchase |
| Cracks near windows or doors | Movement around openings | Check if doors/windows stick |
| Cracks with sloping floors | Potential structural concern | Get specialist advice |
### Faulty and Outdated Electrical Wiring
Many Melbourne homes built before the 1980s have electrical systems that do not meet current standards. Common findings include switchboards without residual current devices (RCDs), which are now mandatory under AS/NZS 3000. Homes with old wiring insulation that has degraded present fire and electrocution risks.
### Roof Deterioration
Melbourne's weather, with its combination of UV exposure in summer, heavy rain in winter and occasional hailstorms, takes a toll on roofing materials. Terracotta tile roofs on older homes often show cracked, chipped or displaced tiles. Metal roofing can develop corrosion at fixings and overlaps. Box gutters, common on Melbourne's period homes and row terraces, are a frequent source of concealed leaks when flashings fail or gutters block.
### Plumbing Problems
Galvanised steel pipes, common in homes built before 1970, corrode internally and restrict water flow over time. Inspectors often find evidence of ongoing leaks, water staining on ceilings and walls, and poor drainage that causes water to pool against foundations, which in turn exacerbates soil movement and damp issues.
## What to Do If the Inspection Finds Major Defects
A major defect does not always mean the property should be avoided, but it should change the decision-making process.
| Finding | Buyer Action |
| ------------------------- | -------------------------------------------------------- |
| Structural movement | Ask whether engineer review is needed |
| Active water leak | Request repair scope and likely cost |
| Termite damage | Arrange timber pest treatment advice and repair estimate |
| Unsafe electrical concern | Ask a licensed electrician to assess |
| Failed waterproofing | Get repair quote before committing |
| Unauthorised works | Ask your conveyancer to review risk |
View the building defect
investigation guide
}
buttonHref="/guides/building-defect-investigation-guide"
variant="secondary"
/>
## Building and Pest Inspection Melbourne: Why Pest Checks Matter
A standard building inspection may note visible signs of pest damage, but a dedicated timber pest inspection gives stronger coverage for termites, borers and timber decay.
Standards Australia lists [AS 4349.3-2010](https://www.standards.org.au/standards-catalogue/standard-details?designation=as-4349-3-2010) as the Australian Standard for inspection of buildings, Part 3: Timber pest inspections.
For Melbourne buyers, a building and pest inspection Melbourne package can be useful when buying older timber-framed homes, properties with poor subfloor ventilation, homes close to mature trees, or properties with past moisture problems.
| Pest Risk Area | What Inspectors Look For |
| ---------------------- | -------------------------------------------------------- |
| Subfloor | Termite leads, timber decay, poor ventilation, damp soil |
| Roof void | Damaged timber, moisture, pest evidence |
| External timbers | Decay, soil contact, damaged posts or decking |
| Fences and landscaping | Timber in ground contact, termite-friendly conditions |
| Wet areas | Moisture that may attract timber pests |
## How Melbourne's Climate Affects Properties
Melbourne's climate is classified as temperate oceanic, with warm summers averaging around 25 degrees Celsius and cool winters averaging approximately 7 degrees Celsius. The city receives about 600mm of rainfall per year, distributed primarily across the cooler months.
This climate creates specific challenges for buildings.
### Waterproofing and Drainage
Waterproofing failures are among the most costly defects found in Melbourne properties. In wet areas such as bathrooms, laundries and balconies, failed waterproofing membranes allow water to penetrate the building structure, causing timber rot, corrosion of steel framing and mould growth.
Drainage is equally important. Melbourne's stormwater system relies on properties directing rainwater away from foundations. Inspectors assess the grading of the site, the condition of downpipes and stormwater connections, and whether surface water is being managed effectively. Poor drainage on reactive soils accelerates foundation movement.
## How to Read a Building Inspection Report Melbourne Buyers Receive
A building inspection report Melbourne buyers receive should not be treated as a pass or fail document. It is a risk report.
Standards Australia lists [AS 4349.1-2007](https://www.standards.org.au/standards-catalogue/standard-details?designation=as-4349-1-2007) as the Australian Standard for inspection of buildings, Part 1: Pre-purchase inspections for residential buildings.
Focus on these parts of the report:
| Report Section | What It Means | What Buyers Should Do |
| --------------------- | ------------------------------------------------------------------------ | -------------------------------------------------- |
| Major defects | Serious defects affecting safety, structure, use or future deterioration | Ask for repair advice, quotes or specialist review |
| Minor defects | Issues that need repair but may not affect structure | Use for maintenance planning |
| Safety hazards | Items that may create risk to occupants | Treat as urgent |
| Access limitations | Areas the inspector could not check | Understand that hidden risk remains |
| Further investigation | Items needing another specialist | Do this before going unconditional where possible |
| Photos | Visual proof of each issue | Use when discussing repairs or price |
When reviewing the report, focus on the major defects first. These are the items most likely to affect the property's safety, structural integrity and value. Ask your inspector to explain any findings you do not understand and to provide rough cost estimates for rectification where possible.
Look at the report's limitations section carefully. If the inspector could not access the subfloor, roof void or other areas, those areas remain unknown risks. You may need to arrange further investigation before committing to the purchase.
## Legal and Financial Considerations in Victoria
Pre-purchase inspections have both legal and financial implications for Melbourne property buyers.
Under Victorian consumer law, a seller is generally not required to disclose building defects unless asked specific questions or the contract includes particular warranties. This places the burden on the buyer to investigate the property's condition independently.
If your contract of sale includes a building inspection clause (also known as a subject to inspection clause), you have a defined period to obtain and review the inspection report. If the report reveals significant defects, you may be able to renegotiate the price, request repairs before settlement or withdraw from the contract.
### Pre Purchase Inspection Cost Melbourne Buyers Should Plan For
The pre purchase inspection cost Melbourne buyers pay depends on property size, age, access, location and whether pest inspection is included.
Consumer Affairs Victoria does not set one fixed inspection price, but it states that the fee for a professional inspection service is small compared with the cost of buying a property that needs extensive unforeseen repairs.
| Inspection Type | Best For | Notes |
| -------------------------------- | ------------------------------------------------ | --------------------------------------------------------------- |
| Building inspection only | Units, newer homes, basic condition checks | Focuses on visible building defects |
| Building and pest inspection | Houses, older homes, timber homes, leafy suburbs | Stronger option where termite risk or timber damage may exist |
| Specialist structural inspection | Cracking, movement, sloping floors | Often used after a building inspector recommends further review |
| Asbestos assessment | Homes built before 1990 | Needed if suspected materials require confirmation |
From a financial perspective, the cost of a pre-purchase inspection in Melbourne typically ranges from $400 to $800 for a standard building inspection, with combined building and pest inspections costing slightly more. Given that rectifying a major structural defect can cost $10,000 to $50,000 or more, the inspection represents a small investment relative to the potential savings.
## Building Inspection Before Auction Melbourne Buyers Should Arrange Early
A building inspection before auction Melbourne buyers arrange should be completed before auction day.
Consumer Affairs Victoria says buyers should get building and pest inspection results before auction because conditions cannot be placed on the contract of sale at auction without the vendor’s agreement.
Consumer Affairs Victoria also states that if a pre-auction offer is accepted less than three clear business days before the auction date, the buyer does not get a cooling-off period.
| Auction Step | What to Do |
| ---------------------- | ----------------------------------------------------------- |
| Before bidding | Book a pre purchase inspection and pest inspection |
| Before signing | Ask your conveyancer to review the contract and Section 32 |
| Before auction day | Read the report and ask the inspector about major defects |
| Before setting a limit | Allow for repair costs in your maximum bid |
| After winning | Keep the report for maintenance planning and future repairs |
## Choosing a Registered Building Inspector Melbourne Buyers Can Trust
When searching for a registered building inspector Melbourne, do not rely only on a fast booking time or a low fee.
Consumer Affairs Victoria recommends engaging a qualified building inspector, surveyor or architect to provide a professional building inspection report before signing a contract of sale.
The Building and Plumbing Commission is now Victoria’s building and plumbing regulator, bringing together the former Victorian Building Authority, Domestic Building Dispute Resolution Victoria and the domestic building insurance arm of VMIA.
| What to Check | Why It Matters |
| -------------------------------- | ------------------------------------------------------------ |
| Qualifications and registration | Helps confirm the inspector is suitable for the work |
| Professional indemnity insurance | Protects buyers if professional negligence becomes an issue |
| Melbourne experience | Local homes have soil, drainage, roof and age-related issues |
| Sample report | Shows whether the report is clear and useful |
| Pest inspection option | Saves time when timber pest risk is relevant |
| Clear defect ratings | Helps buyers understand urgency and repair priority |
A good inspector will not only identify defects but explain what they mean in context, whether they are progressing, and what rectification may involve. The inspector should explain major defects in plain English, not just list technical terms.
## Getting the Most Value from Your Home and Building Investment
A pre purchase inspection Melbourne buyers arrange at the right time can protect them from hidden repair costs, unsafe work and rushed decisions.
The best report does more than list defects. It explains what matters, what can wait, what needs specialist advice, and what may affect the price or safety of the property.
Before you buy in Melbourne, book a pre purchase building inspection, consider a building and pest inspection, read the report carefully, and ask questions before signing or bidding.
Book your
inspection
}
buttonHref="/pre-purchase-inspections"
variant="primary"
/>
For a complete overview, see our [guide to pre-purchase building and pest inspections](/guides/pre-purchase-building-pest-inspection-guide).
### Why Hire a Private Building Inspector in Melbourne
Source: https://ownerinspections.com.au/articles/why-hire-a-private-building-inspector-in-melbourne
Published: 2026-02-02 | Updated: 2026-02-13 | Category: Pre-Purchase Inspections
Author: Maison Azdari
A private building inspector is an independent, qualified professional who conducts property assessments on behalf of homebuyers, homeowners or investors, rather than working for a builder, developer or local council. In [Melbourne](/vic/building-inspections-melbourne), where the median house price exceeds $1 million and construction defects are increasingly common in new builds, hiring a private building inspector gives you an unbiased evaluation of a property's structural condition, compliance with the National Construction Code (NCC) and adherence to Australian Standards. Private inspectors are registered with the Victorian Building Authority (VBA) and operate independently from the parties involved in a property transaction, meaning their sole obligation is to you.
Melbourne's property market moves quickly, and buyers often face pressure to waive due diligence steps to secure a purchase. However, skipping an independent building inspection is one of the costliest mistakes a buyer can make. An ABC News investigation highlighted a case where homeowners discovered over $700,000 worth of defects in their new Melbourne home, defects that an independent inspection during construction stages could have identified far earlier and at a fraction of the rectification cost.
> A private building inspector works exclusively for you. Unlike council inspectors who check minimum regulatory compliance, a private inspector assesses overall build quality, workmanship and adherence to your approved plans and specifications.
## What Is a Private Building Inspector?
A private building inspector is a licensed professional who carries out property inspections independently of builders, developers and government bodies. In Victoria, building inspectors must hold registration with the Victorian Building Authority (VBA) under the Building Act 1993 (VIC). This registration confirms they have the qualifications, experience and insurance required to conduct inspections and provide professional opinions on building work.
Private inspectors differ from council or municipal building surveyors in several ways. Council inspectors focus on confirming that building work meets minimum regulatory requirements at mandatory inspection stages. A private inspector goes further, assessing the quality of workmanship, identifying defects that may not breach regulations but could cause problems later, and providing detailed photographic reports written in plain language.
### Qualifications to Look For
When engaging a private building inspector in Melbourne, confirm that they hold the following:
- **VBA registration** as a building inspector or building surveyor
- **Professional indemnity insurance** covering the value of properties they inspect
- **Public liability insurance** in case of injury or damage during the inspection
- **Relevant tertiary qualifications** in building, construction management or a related field
- **Membership in a professional body** such as the Master Builders Association of Victoria (MBAV) or the Australian Institute of Building Surveyors (AIBS)
## Benefits of Hiring a Private Building Inspector
### Independent Quality Verification
A private inspector has no commercial relationship with the builder, vendor or real estate agent. This independence means they have no incentive to overlook or minimise defects. Their report reflects the true condition of the property, giving you an accurate picture of what you are buying or what has been built.
### Early Defect Detection
Identifying defects early, particularly during construction, saves significant money. A crack in a concrete slab identified before framing begins may cost a few hundred dollars to address. The same defect discovered after completion could require tens of thousands of dollars in demolition and rectification work. Private inspectors can attend each construction stage to catch problems before they are concealed by subsequent work.
### Negotiation Leverage
A detailed inspection report from a qualified professional gives you documented evidence to negotiate price reductions or request repairs before settlement. Vendors and builders take formal inspection reports seriously, particularly when they include photographs, references to Australian Standards and estimated rectification costs.
### Unbiased Advocacy
Your private inspector works for you and only you. They are not beholden to the builder's timeline, the agent's commission or the vendor's asking price. This means they can provide frank, honest advice about whether a property represents good value or whether the construction quality meets acceptable standards.
## When to Hire a Private Building Inspector in Melbourne
### Pre-Purchase Inspections
Before buying any property in Melbourne, a [pre-purchase building inspection](/pre-purchase-inspections) is one of the most important steps you can take. The inspection assesses the structural integrity, safety and overall condition of the property. In Victoria, buyers should include a building inspection clause in their contract of sale, giving them the right to withdraw or renegotiate if significant defects are found.
### During New Home Construction
The Domestic Building Contracts Act 1995 (VIC) governs residential building contracts in Victoria. Under this legislation, builders must carry out work in a proper and workmanlike manner. However, relying solely on the builder's own quality checks or the private building surveyor engaged by the builder is a significant risk. A private inspector can attend each construction stage, including pre-slab, frame, lock-up, fixing and handover, to verify the work meets your contract specifications and Australian Standards.
### Renovation and Extension Projects
Renovations and extensions are common in Melbourne's inner suburbs, where heritage overlays and planning restrictions often mean modifying existing homes rather than building new. A private inspector can review renovation work at key stages to confirm structural adequacy, compliance with planning permits and quality of finishes.
### Pre-Settlement and Handover
For new builds, the [handover inspection](/pre-handover-inspections) is your last opportunity to identify defects before the builder's liability shifts. A private inspector will compile a comprehensive defect list that becomes part of your formal handover documentation. Under Victorian law, builders are liable for defects for six years (non-structural) and ten years (structural) from the date of the occupancy permit.
## How to Choose the Right Private Building Inspector in Melbourne
Selecting the right inspector requires more than choosing the cheapest quote. The quality of your inspection directly affects the protection you receive. Consider the following when making your decision.
## Cost vs Value: Why the Investment Pays Off
The average cost of a pre-purchase building inspection in Melbourne, between $400 and $700, is a small fraction of the property's purchase price. Consider what this investment protects you against:
- **Structural defects** that could cost $50,000 or more to rectify
- **Termite damage** that affects approximately one in three Australian properties over their lifetime
- **Non-compliant building work** that could render your insurance void
- **Moisture and waterproofing failures** that lead to mould growth and health issues
- **Electrical and plumbing defects** that pose safety hazards
The ABC News story of Melbourne homeowners facing $700,000 in defect rectification costs illustrates the extreme end of the risk. But even moderate defects, a leaking shower, inadequate drainage or substandard roofing, can cost thousands of dollars to repair. A $500 inspection that identifies a $20,000 problem before you commit to purchase delivers an extraordinary return on investment.
## Understanding Your Rights in Victoria
Victorian legislation provides several protections for homebuyers and homeowners engaging private building inspectors.
### Domestic Building Contracts Act 1995 (VIC)
This Act governs residential building contracts in Victoria and includes provisions for:
- Implied warranties that work will be carried out in a proper and workmanlike manner
- Implied warranties that materials will be suitable for their intended purpose
- Defect liability periods of six years for non-structural defects and ten years for structural defects
- Homeowner rights to engage independent inspectors during construction
### Victorian Civil and Administrative Tribunal (VCAT)
If disputes arise from building defects, VCAT provides a relatively accessible forum for resolution. A private inspector's report can serve as supporting evidence in VCAT proceedings, and your inspector may be called upon to provide expert testimony.
### Building Act 1993 (VIC)
This Act establishes the regulatory framework for building in Victoria, including the registration of building practitioners and the role of building surveyors. Understanding this framework helps you appreciate why VBA registration is a non-negotiable requirement for any inspector you engage.
For a complete overview, see our [guide to pre-purchase building and pest inspections](/guides/pre-purchase-building-pest-inspection-guide).
### Can a Builder Refuse Private Inspectors During Construction? Your Rights by State
Source: https://ownerinspections.com.au/articles/builder-refuses-private-inspector-construction-stages-australia
Published: 2026-02-01 | Updated: 2026-06-12 | Category: New Construction
Author: Maison Azdari
Can a builder refuse a private inspector when you are building a new home in Australia? The safest answer is this: a builder should not refuse a reasonable inspection request without a valid reason, but your exact rights depend on your building contract, your state or territory, site safety rules, and the stage of construction.
This matters because many defects are hidden once the next stage begins. A missed slab inspection, frame [stage inspection](/new-construction-stage-inspections), or pre plaster inspection can leave homeowners with problems that are harder and more expensive to prove later.
Australian building law also gives homeowners important protection around workmanship, contract performance, and defective work. In NSW, residential building work carries statutory warranties, including that work must be done with due care and skill, in line with plans and specifications, and in compliance with the law.
This guide explains what to do when a builder refuses a private inspector, how to request access in writing, which construction stage inspections matter most, and how an independent building inspector during construction can help protect your new home.
Read the
Defect Report Guide
}
buttonHref="/articles/what-is-defect-investigation-report"
variant="secondary"
/>
## Can a Builder Refuse a Private Inspector in Australia?
A builder may be able to delay or limit access for genuine safety, supervision, or scheduling reasons. A builder should not use those reasons as a blanket excuse to block an owner’s reasonable request for a private building inspector during construction.
The strongest protection is a clear inspection clause in your building contract. Your contract should say that you can engage an independent building inspector during construction, that the builder must provide reasonable access, and that the builder must give enough notice before work is covered.
The Australian Consumer Law also gives consumers [automatic guarantees when buying services](https://www.accc.gov.au/consumers/buying-products-and-services/consumer-rights-and-guarantees), including that services must be carried out with an acceptable level of care and skill.
That does not mean every site visit can happen at any time. Building sites carry safety duties, and site controllers may set reasonable conditions for visitors, including induction, personal protective equipment, supervision, and agreed inspection times.
## Your Legal Rights by State
Legislation varies significantly across Australian states. Some explicitly protect your right to independent inspections, while others rely on implied contractual terms.
| State | Key Legislation | Right to Private Inspector | Enforcement Body |
| ----- | ------------------------------------ | ------------------------------------------------- | ---------------------------- |
| NSW | Home Building Act 1989 | Explicitly protected under s.18B | NSW Fair Trading |
| VIC | Domestic Building Contracts Act 1995 | Implied right, cannot unreasonably refuse | VBA |
| QLD | QBCC Act 1991 | Protected, builder must provide reasonable access | QBCC |
| SA | Building Work Contractors Act 1995 | Implied right under contract terms | Consumer & Business Services |
| ACT | Building Act 2004 | Owner access rights protected | Access Canberra |
### New South Wales
NSW provides the strongest protection. Section 18B of the Home Building Act 1989 implies warranties into every residential building contract, including that work will be done with due care and skill. Courts have consistently interpreted this to include allowing reasonable owner oversight.
NSW Fair Trading can intervene if a builder refuses access without legitimate cause. Legitimate causes include active safety hazards or insurance restrictions during specific high-risk activities.
### Victoria
The Domestic Building Contracts Act 1995 doesn't explicitly mention private inspectors, but Section 8 requires builders to carry out work in a proper and workmanlike manner. The Victorian Building Authority has confirmed that unreasonably refusing owner access may breach this obligation.
### Queensland
The QBCC Act 1991 and the standard QBCC contract include provisions for owner access. Builders must provide reasonable access for inspections at agreed times. QBCC takes complaints about access refusal seriously and can issue directions to builders.
### South Australia and ACT
Both states rely heavily on contract terms. Most standard contracts include owner access provisions. If your contract is silent on this, the implied duty of good faith generally requires reasonable accommodation of inspection requests.
## Your Rights Depend on Contract Terms, State Rules, and Site Safety
There is no single national rule that says every builder must allow every private inspector at any time. In practice, access usually comes from three areas:
| Protection area | What it means for homeowners |
| -------------------------- | ----------------------------------------------------------------------------------------------------- |
| Building contract | The contract may give the owner access rights or inspection rights at agreed stages. |
| Statutory warranties | Builders must meet workmanship, legal compliance, and contract obligations. |
| Consumer law | Services must be carried out with due care and skill. |
| Building authority process | State bodies may help with building disputes, defective work, or complaint pathways. |
| Site safety rules | Access can be managed for safety, but safety should not be used as a fake reason to block inspection. |
In NSW, statutory warranties apply even if they are not written into the contract, and they cover issues such as due care and skill, compliance with plans, suitable materials, legal compliance, and reasonable fitness for occupation.
In Victoria, builders must meet obligations under the Domestic Building Contracts Act 1995 and the Australian Consumer Law, and implied warranties can be used to make sure a building contractor uses good workmanship and delivers what is listed in the contract.
In Queensland, the property owner can request a private certifier to perform extra inspections beyond those required under the building development approval, with the owner paying for those added functions.
In the ACT, the land owner is responsible for appointing the building certifier, and the ACT Government says an owner may request further inspections during construction.
## Why Builders Resist Private Inspectors
Understanding the builder's perspective helps you address their concerns effectively.
Builders who consistently refuse inspections are often concealing problems. Quality builders welcome independent verification because it protects them from disputes later.
## Private Building Inspector vs Building Certifier
Many homeowners think a building certifier and a private building inspector do the same job. They do not.
A building certifier checks whether building work meets approval and compliance requirements. A private building inspector focuses on defects, workmanship, and issues that may affect the homeowner.
| Role | Main purpose | Who they protect |
| -------------------------- | --------------------------------------------------------------- | ------------------------- |
| Building certifier | Checks compliance with building approval and required standards | Public compliance process |
| Private building inspector | Checks visible defects, workmanship, and quality risks | Homeowner |
| Builder’s supervisor | Manages trades and progress | Builder |
| Engineer | Checks specific structural design or engineering items | Project requirements |
A private inspector does not replace a certifier. A certifier also does not replace a private inspector. The best protection is to use both properly.
## Why Builders Refuse Private Inspectors
Some builders have fair reasons to manage access. Others use access refusal to avoid outside review.
Common reasons include:
- The site is unsafe at the requested time
- Trades are working in the inspection area
- The request was made without enough notice
- The builder wants the supervisor present
- The builder says only its own quality team can inspect
- The builder wants to keep work moving before defects are recorded
- The contract does not clearly mention private inspections
A short delay for safety can be reasonable. Repeated delays that push the project past slab, frame, pre plaster, lock-up, or pre handover inspection points should be treated seriously.
Homeowners keep copies of contracts, invoices, written communication, records of conversations, and photographs when a building dispute arises.
## What to Do If a Builder Refuses Private Inspector Access
Do not rely on phone calls only. Put everything in writing.
| Step | What to do | Why it helps |
| ---- | ---------------------------------- | ---------------------------------------------------- |
| 1 | Ask for access by email | Creates a written record |
| 2 | Name the inspection stage | Shows the request is specific and reasonable |
| 3 | Offer 2 or 3 time options | Reduces scheduling excuses |
| 4 | Confirm safety requirements | Shows cooperation |
| 5 | Refer to the contract | Grounds the request in agreed terms |
| 6 | Ask for refusal reasons in writing | Forces the builder to explain |
| 7 | Keep photos and progress updates | Helps prove if work was covered before inspection |
| 8 | Escalate if needed | Gives state authorities or advisers a clear timeline |
Use calm wording. The aim is not to fight the builder. The aim is to protect the build before defects are hidden.
## Who to Contact If Builder Refuses Access
| Location | Possible contact pathway |
| --------------- | -------------------------------------------------------------------------- |
| NSW | NSW Fair Trading or Building Commission NSW |
| Victoria | Consumer Affairs Victoria or Domestic Building Dispute Resolution Victoria |
| Queensland | QBCC |
| South Australia | Consumer and Business Services |
| ACT | Access Canberra |
| Other states | Local building regulator or consumer affairs body |
NSW Government says [homeowners should review the contract](https://www.nsw.gov.au/housing-and-construction/building-or-renovating-a-home/resolving-building-disputes) because it sets out the requirements for the work and statutory warranties.
Consumer Affairs Victoria recommends trying to [resolve the dispute with the builder](https://www.consumer.vic.gov.au/housing/building-and-renovating/defects-delays-and-insolvency/disputes-defects-and-delays), then putting the issue in a formal letter or email if direct discussion does not solve the problem.
South Australia’s SA Government says advice is available from Consumer and Business Services when a [dispute arises with a builder or tradesperson](https://www.sa.gov.au/topics/rights-and-law/consumer-rights/disputes/disputes-with-a-builder-or-tradesperson).
Access Canberra says it can provide consumer advice, help resolve disputes with a business, and provide other options for [resolving a dispute](https://www.accesscanberra.act.gov.au/consumer-rights/get-help-with-a-consumer-issue).
Book a Defect
Investigation Report
}
buttonHref="/defect-investigation-reports"
variant="secondary"
/>
## Email Template When a Builder Won’t Allow Inspection
*Subject: Request for private building inspector access at [stage name]*
*Hi [Builder/Site Supervisor],*
*Please confirm access for our independent building inspector during the [slab/frame/pre plaster/lock-up/pre handover] stage inspection at [property address].*
*Our requested inspection times are:*
*[Option 1]*
*[Option 2]*
*[Option 3]*
*The inspector will follow all reasonable site safety requirements, including PPE, site induction, and supervision where required.*
*Please confirm the inspection time in writing. If access is refused or delayed, please provide the reason in writing and confirm when access will be made available before the relevant work is covered.*
*Regards,*
*[Your name]*
## Construction Stage Inspections You Should Not Skip
Private inspector construction stages matter because some defects are only visible for a short time.
| Stage | What the inspector checks | Why timing matters |
| ------------------------ | ------------------------------------------------------------------------------- | ----------------------------------------------------- |
| Slab inspection | Footings, reinforcement, set-out, moisture barriers, drainage concerns | Many items cannot be checked after concrete is poured |
| Frame stage inspection | Structural frame, bracing, tie-downs, alignment, fixings | Frame defects may be hidden once wall linings start |
| Pre plaster inspection | Services rough-in, waterproofing preparation, insulation, framing, penetrations | Last chance before walls and ceilings are covered |
| Lock-up inspection | Roofing, windows, doors, external cladding, weatherproofing | Helps find water entry and external envelope issues |
| Pre handover inspection | Finish defects, safety issues, incomplete work, visible faults | Best time to list defects before final payment |
| Post handover inspection | Defects found after occupation | Helps document warranty or rectification issues |
## What to Put in Your Building Contract Before Work Starts
The best time to protect your inspection rights is before signing.
Ask your builder to include a clause that covers:
- Your right to engage a private building inspector
- Reasonable access to the building site
- Minimum notice before each inspection stage
- No covering of work before agreed inspection access
- Site safety requirements for the inspector
- Written reasons if access is refused or delayed
- Rectification process for defects found during inspection
- Recommended Contract Clause
“The owner may engage a private building inspector to inspect the works at agreed construction stages, including slab, frame, pre plaster, lock-up, pre handover, and any other stage agreed in writing. The builder must provide reasonable site access after reasonable written notice, subject to site safety requirements. The builder must not cover relevant work before the owner has had a reasonable opportunity to arrange inspection.”
Get legal advice before changing a building contract.
## Critical Inspection Stages You Should Never Skip
| Stage | What's Checked | Why It Matters |
| ------------- | -------------------------------------------- | --------------------------------------- |
| Slab/Footings | Reinforcement, formwork, drainage | Cannot be inspected after concrete pour |
| Frame | Structural integrity, bracing, tie-downs | Hidden once walls are lined |
| Pre-Plaster | Waterproofing, electrical, plumbing rough-in | Last chance before cover-up |
| Lock-Up | Windows, doors, external cladding, roof | Weather protection critical |
| Pre-Handover | Complete defect assessment | Negotiating power before final payment |
| Post-Handover | Warranty period defects | Documents issues for warranty claims |
## When Refusal Becomes a Red Flag
One delayed inspection is not always a serious issue. A pattern of refusal is different.
Warning signs include:
- The builder refuses to put reasons in writing
- The builder says private inspectors are never allowed
- The builder rushes to cover work after you request inspection
- The builder says the certifier is enough
- The builder claims insurance prevents access but will not show the policy clause
- The builder delays until the frame or pre plaster inspection is no longer possible
- The builder refuses to answer defect questions
If defective work is suspected, raise it with the builder first and keep records. Queensland’s QBCC advises homeowners to raise defective work with the contractor as a first step.
If the issue cannot be resolved, the next step may be your state or territory building dispute body, a construction lawyer, or a formal defect report.
## Protecting Your Build Before Defects Are Covered Up
A builder who refuses private inspector access creates risk for the homeowner. The best response is written, calm, and well documented.
Book your independent building inspector during construction before each major stage. Give written notice. Keep records. Ask for reasons if access is refused. Check your contract before making decisions about payments or disputes.
[Owner Inspections](/) can help homeowners arrange independent construction stage inspections, pre handover inspections, reinspections, and defect investigation reports so problems are recorded before they become hidden or harder to fix.
Contact Owner
Inspections
}
buttonHref="/contact"
variant="primary"
/>
### Effective Defect Rectification Strategies in Construction
Source: https://ownerinspections.com.au/articles/effective-defect-rectification-strategies-in-construction
Published: 2026-01-30 | Updated: 2026-02-09 | Category: New Construction
Author: Maison Azdari
Defect rectification in construction refers to the process of identifying, documenting, and repairing faults in a building so that it meets quality, safety, and compliance standards under Australian law. Builders are typically required to fix defects at no cost during the Defects Liability Period (DLP), which lasts 12 to 24 months after completion. Beyond that period, statutory warranties under the Home Building Act 1989 (NSW) and equivalent legislation in other states cover major structural defects for up to six years and non-structural defects for up to two years. Effective rectification depends on early detection, thorough documentation, and the use of qualified professionals.
Unresolved building defects can compromise structural integrity, create safety hazards, and lead to expensive legal disputes. High-profile Australian cases like the Opal Tower cracking incident and the Mascot Towers evacuation have shown what happens when defects go undetected or unrectified. These events affected hundreds of residents and resulted in repair bills running into tens of millions of dollars.
For homeowners, investors, and developers, understanding the strategies behind effective defect rectification is not just about fixing problems after they appear. It is about knowing your rights, managing defects systematically, and putting preventive measures in place so that issues are minimised from the start. For a complete overview, see our [guide to building defect investigations](/guides/building-defect-investigation-guide).
## What Are Construction Defects?
Construction defects are faults or shortcomings in a building that affect its structural integrity, functionality, appearance, or safety. They can stem from design errors, poor workmanship, the use of substandard materials, or environmental factors. When left unaddressed, defects can escalate into serious safety risks and result in significant financial losses.
In Australia, defects are governed by a mix of state legislation, the National Construction Code (NCC), and Australian Standards. Builders, developers, and contractors carry legal obligations to deliver work that is free from defects and compliant with approved plans and specifications.
## Types of Construction Defects
Understanding the type of defect is the first step towards effective rectification. Defects fall into two broad categories.
### Patent Defects
Patent defects are visible and can be identified during a standard inspection or immediately after construction is completed. These are often cosmetic or surface-level issues that are straightforward to document.
### Latent Defects
Latent defects are hidden and may not become apparent for months or even years after construction. They tend to be more serious and more costly to repair because the damage often spreads before it is noticed.
## Common Causes of Construction Defects
Defects rarely have a single cause. In most cases, they result from a combination of factors during the design, construction, or post-construction phases.
A Melbourne apartment complex experienced extensive water leakage caused by improper waterproofing installation. The defects led to widespread mould growth, flooring damage, and deterioration of load-bearing walls, costing property owners approximately $2.5 million in rectification expenses.
## Legal Framework and Obligations in Australia
Australian construction law provides multiple layers of protection for property owners. Understanding these rights is central to pursuing defect rectification effectively.
### Defects Liability Period (DLP)
The DLP is the contractual window, typically lasting 12 to 24 months after practical completion, during which the builder must return and fix any defects at no extra charge to the owner. Builders are expected to comply with Australian Standards (including AS 4349.1) and the National Construction Code during this period and beyond.
### Statutory Warranties Beyond the DLP
Even after the DLP expires, statutory warranties provide ongoing protection.
### Recent Regulatory Changes
## Defect Severity Classification
Classifying defects by severity helps determine the order and urgency of rectification. Not all defects carry the same risk, and a structured approach ensures that resources are allocated where they matter most.
## Effective Defect Rectification Strategies
A systematic approach to defect rectification reduces cost, prevents disputes, and ensures that repairs are completed to the correct standard.
### 1. Early Detection Through Regular Inspections
The earlier a defect is found, the cheaper and simpler it is to fix. Waiting until problems become visible to the naked eye often means the damage has already spread.
### 2. Comprehensive Documentation
Good records are the foundation of any successful defect rectification process, whether it is handled cooperatively with the builder or escalated through legal channels.
A Defect Rectification Report (DRR) should include:
### 3. Prioritisation Based on Risk
Not every defect needs to be fixed at the same time. A risk-based approach ensures that the most dangerous or damaging issues are addressed first.
### 4. Engage Qualified Professionals
Defect rectification should always involve licensed and experienced professionals. Using unqualified workers can make problems worse and may void warranties or insurance coverage.
### 5. Use Compliant, High-Quality Materials
Defects frequently reoccur when repairs are carried out using the same substandard materials that caused the original problem. All replacement materials should meet or exceed the relevant Australian Standards.
### 6. Clear Communication With All Parties
Defect rectification involves multiple stakeholders, including the property owner, builder, subcontractors, inspectors, and sometimes regulators. Keeping all parties informed reduces misunderstandings and speeds up resolution.
### 7. Post-Rectification Verification
The rectification process is not complete until repairs have been independently verified.
## Preventive Measures to Minimise Future Defects
Fixing defects after they occur is necessary, but the most cost-effective strategy is preventing them in the first place. The following measures significantly reduce the likelihood of defects arising during construction.
### Quality-Focused Planning and Design
### Strict Quality Control During Construction
### Ongoing Training for Construction Teams
### Collaboration Across All Project Stakeholders
A Sydney commercial developer reduced defects by 40% after integrating BIM with real-time quality monitoring across their project portfolio. The combination of predictive design tools and continuous on-site checks caught issues during construction rather than after handover.
## State-by-State Defect Liability Comparison
Defect liability protections vary across Australian states. The table below summarises the key differences for residential construction.
### What Is the Difference Between a Building Inspection and a Strata Inspection?
Source: https://ownerinspections.com.au/articles/difference-between-building-inspection-and-strata-inspection
Published: 2026-01-29 | Updated: 2026-09-04 | Category: Building Inspections
Author: Maison Azdari
A building inspection is a physical examination of the apartment you are buying, carried out on site by a licensed inspector who looks for defects, water damage and safety hazards inside your lot. A strata inspection is a desktop review of the owners corporation's records, carried out by a strata searcher who reads the financials, meeting minutes and correspondence for the whole building. One tells you the condition of the property. The other tells you the condition of the money and the management behind it. Neither substitutes for the other, and an apartment purchase normally needs both.
The distinction matters because the two most expensive surprises in strata buying sit on opposite sides of it. A failed shower membrane in your bathroom will never appear in a strata search. A $60,000 special levy for facade remediation will never appear in a building report. Buyers who commission one and skip the other are usually protected against exactly half of what can go wrong.
## What Is the Difference Between a Strata Report and a Building Inspection?
A building inspection is physical and covers your lot. A strata inspection is documentary and covers the scheme. A building inspector attends the property and reports on what can be seen and accessed. A strata searcher never visits the property and reports on what the owners corporation has written down about the building's finances, disputes, insurance and planned works.
| Aspect | Building inspection | Strata inspection |
| --- | --- | --- |
| Method | Physical examination on site | Document review, no site visit |
| Scope | Your lot and accessible adjacent areas | The whole scheme's records |
| Carried out by | Licensed building inspector | Strata searcher or conveyancer |
| Australian Standard | AS 4349.1 | No equivalent standard |
| Finds | Defects, water damage, movement, safety hazards | Levies, arrears, disputes, planned works, insurance |
| Misses | Anything financial or administrative | Anything physical inside the lot |
| Typical cost | $400 to $700 | $200 to $400 |
| Typical turnaround | 1 to 3 days | 3 to 10 business days |
| Required by law | No, but strongly recommended | The seller's disclosure documents are required in most states |
The last row is the one people misread. In most states the law does not require *you* to commission a strata inspection. It requires the *seller* to hand over a defined set of strata documents. Those minimum documents are a starting point, not a search. A full strata inspection goes further, into the meeting minutes and correspondence where the unpleasant news usually lives.
## What Is a Building Inspection on a Strata Property?
A building inspection on a strata property is an on site assessment of the individual lot you are purchasing, reported against AS 4349.1. The inspector examines internal walls, ceilings, floors, wet areas, windows, doors and fixtures within your boundaries, plus balconies, courtyards and any accessible common property immediately adjacent to the unit. It identifies defects and safety hazards that are visible and accessible on the day.
Almost everything visible in a photograph like this is common property. Your lot usually stops at the internal face of the boundary walls, floors and ceilings, which is precisely why a unit inspection has a narrower footprint than a house inspection.
The scope limitation is structural to strata, not a shortcoming of the inspector. A building inspector attending your apartment cannot enter other lots, plant rooms, lift motor rooms, roof spaces or locked service risers. They can comment on what they observe of the building envelope from ground level or from your balcony, and a good report will do so, but they cannot certify the condition of a facade or a roof they have no access to.
## What Is a Strata Inspection?
A strata inspection, also called a [strata report](/strata-reports) or a strata search, is a review of the owners corporation's books. The searcher inspects the financial statements, budgets, levy notices, meeting minutes, insurance certificates, by-laws, correspondence and any building reports the scheme holds. The output is a written report on the financial health, maintenance history and legal exposure of the building.
It exists because a strata purchase is really two purchases. You are buying a lot, and you are buying a share of a collective liability. The second one is invisible on inspection day. A building can look immaculate while its capital works fund is empty, a defect claim against the original builder is running, and a special levy has already been foreshadowed in minutes that no marketing brochure will ever mention.
## Is a Strata Report the Same as a Building Report?
No. A strata report and a building report are different documents produced by different people using different methods, and the words are not interchangeable even though agents sometimes use them loosely. A building report is the written output of a physical inspection of a property. A strata report is the written output of a records search on an owners corporation.
The confusion is worth taking seriously because it costs money. Buyers regularly tell us they "already have the report", meaning the strata report the agent circulated, and assume the unit has been inspected. It has not. Nobody has looked at the shower, the balcony door seal, the ceiling above the bathroom or the windows. Equally, buyers who order a building inspection sometimes believe it will surface levies, because it is the more expensive of the two. It will not.
## What Does Each Inspection Actually Cover?
A building inspection covers the physical fabric of your lot in four zones: internal areas, external areas attached to the lot, roof and ceiling space where accessible, and subfloor where accessible. A strata inspection covers seven document categories, none of which describe physical condition inside your unit.
### Building inspection inclusions
Wet areas do more damage in strata than anywhere else, because a failed membrane on level six leaks into level five and turns a private repair into a dispute between two lot owners and the owners corporation. This is the single most valuable thing a physical inspection buys you in an apartment.
### Strata inspection inclusions
| Document category | What it reveals |
| --- | --- |
| Financial statements | Current levies, arrears, administrative and capital works fund balances |
| Meeting minutes | Disputes, deferred maintenance, planned works, levies under discussion |
| Correspondence | Complaints, notices, insurance claims, legal matters |
| Insurance certificate | Coverage, excesses, claims history and any exclusions |
| By-laws | Rules on renovations, pets, parking and short stay letting |
| Building and engineering reports | Known defects, remediation scopes and capital works plans |
| Levy and special levy notices | Amounts already struck and major expenses on the horizon |
## Do You Need Both Inspections?
For almost every apartment, unit or townhouse purchase, yes. The two reports answer different questions and the gap between them is where losses happen. The only common exception is a survey strata lot in Western Australia with no common property and no shared building, where there may be very little scheme to search.
There is one order that works better than the other. Get the strata search moving first, because it depends on a third party responding and can take up to ten business days, then book the building inspection, which is normally available within a few days. Buyers who do it the other way round routinely run out of cooling off period waiting on a strata manager.
## What Do They Cost and How Long Do They Take?
A building inspection on an apartment typically costs $400 to $700 and is delivered within one to three days of the site visit. A strata inspection typically costs $200 to $400 and takes three to ten business days, because the searcher depends on the strata manager granting access to records. Combined, you are looking at roughly $600 to $1,100 to cover both sides of a purchase worth several hundred thousand dollars or more.
The strata timeframe is the one that breaks contracts. Access to records is a statutory right rather than a favour, but it still runs on the strata manager's queue, and some managers charge for urgency. If your contract has a short cooling off period, order the search on the day you sign, not the day you get around to it.
## What Are the Rules in Each State?
Every state requires a seller of a strata lot to disclose certain scheme documents, and every state gives an interested person a right to inspect the records for a fee. What differs is which document, which form and how much of the picture it contains. In no state does the mandatory disclosure amount to a full strata search.
Assessments like this one are commissioned by the owners corporation, not by an individual buyer. Their findings sit in the scheme's records, which is why a strata search is often how a buyer first learns that the building has a known defect.
| State | Key disclosure document | What to know |
| --- | --- | --- |
| NSW | Section 184 certificate under the Strata Schemes Management Act 2015 | Sections 182 and 183 also give an interested person the right to inspect the records for a fee. From 1 April 2026 the certificate must also disclose embedded network utility arrangements, orders and compliance action against the owners corporation, and meetings held in the past year or coming up. |
| QLD | Form 2 seller disclosure statement plus a body corporate certificate | Since 1 August 2025 the Property Law Act 2023 requires the seller to give the buyer a Form 2 before the contract is signed, with a Form 33 body corporate certificate attached (Form 34 for two lot schemes). The body corporate must allow an inspection of records within 7 days of a written request and payment of the fee, with copies at 70 cents a page. |
| VIC | Owners corporation certificate under the Owners Corporations Act 2006 | The certificate must be attached to the section 32 vendor statement. It shows fees, the maintenance plan status, insurance and any current proceedings. |
| WA | Strata company disclosure under the Strata Titles Act 1985 | Note the built strata versus survey strata distinction below, because it changes how much scheme there is to search at all. |
| SA | Vendor's Form 1 statement | Strata and community corporation details are disclosed through the Form 1 rather than a separate strata certificate. |
| ACT | Units plan documents under the Unit Titles (Management) Act 2011 | The owners corporation must provide a section 119 certificate on request. |
## What Is the Difference Between Strata and Survey Strata?
Built strata and survey strata are two different forms of subdivision in Western Australia. In a built strata scheme, at least one building is shown on the plan and lot boundaries are defined by reference to that building, usually the internal faces of walls, floors and ceilings. In a survey strata scheme, no buildings are shown on the plan at all, and lot boundaries are surveyed on the ground by a licensed surveyor, much like an ordinary freehold subdivision.
The practical consequences run right through both inspections:
The commonly cited disadvantages of survey strata are the flip side of that ownership. There is no strata company maintaining your roof and no collective insurance covering your building, so repairs and building insurance fall to you personally. Some survey strata schemes also have restrictive management statements, and where there is no common property there may be no functioning strata company at all to resolve a dispute with a neighbour.
## Can Strata Inspect Your Property?
An owners corporation generally can enter a lot, but only in defined circumstances and usually with notice. The typical grounds are to inspect or carry out work on common property that runs through your lot, such as pipes or wiring, to investigate a defect or a leak affecting other lots, or to comply with a statutory duty. In an emergency, entry without notice is normally permitted.
This is a right of access, not a right of general inspection. An owners corporation cannot decide to walk through your apartment to see how you keep it. Notice periods, permitted purposes and dispute pathways are set by each state's strata legislation, and if a request for entry seems to be going beyond those grounds it is a question for a solicitor or the relevant tribunal rather than for a building inspector.
Where it becomes relevant to buyers is leak investigation. If minutes show repeated access to a lot to chase a leak, that lot has a live problem, and it may be the one you are buying.
## Red Flags in a Strata Report
The clearest warning signs are an underfunded capital works fund, a pattern of reactive special levies, high levy arrears, live disputes and an insurance claims history that has loaded the excess. Any one of these can be explained. Two or three together usually mean the scheme is deferring maintenance it cannot afford, and a new owner inherits that.
If a strata search turns up a defect claim or a remediation scope, that is usually the point to get a physical assessment of the affected work rather than relying on the paperwork alone. Owner Inspections reports on what is physically there and what it will take to put right. Whether a claim, a levy or a contract term is enforceable is a legal question, and a strata title solicitor should answer it.
### Why Are Termites Such a Major Concern in Queensland and NSW?
Source: https://ownerinspections.com.au/articles/termites-major-concern-queensland-nsw-pest-inspections
Published: 2026-01-29 | Updated: 2026-02-13 | Category: Pest Inspections
Author: Maison Azdari
Termites represent the single greatest threat to Australian homes, causing over $1.5 billion in property damage annually according to CSIRO research. Queensland and New South Wales bear the heaviest burden of this damage, with climate conditions and housing construction methods creating ideal environments for termite activity.
This guide is written for property buyers, homeowners and investors in Queensland and NSW who need to understand termite risks and the role professional pest inspections play in property protection. Under Australian Standard AS 4349.3, [timber pest inspections](/timber-pest-inspections) provide systematic assessment of termite activity, damage and conducive conditions.
Whether you are purchasing a property, maintaining your home or investigating potential termite damage, understanding why these states face elevated risk will help you make informed decisions about pest management and inspection frequency.
## Understanding Termite Risk in Queensland and NSW
Australia is divided into termite hazard zones based on climate, soil conditions and termite species distribution. The Building Code of Australia (NCC) classifies most of Queensland and the northern two-thirds of NSW as high to very high termite risk areas.
Several factors contribute to elevated termite risk in these states:
| Risk Factor | Queensland Impact | NSW Impact |
| -------------------- | ------------------------------------- | ---------------------------------- |
| Humidity levels | Very high year-round | High, especially coastal areas |
| Average temperatures | 20-30°C ideal for termites | 15-28°C supports activity |
| Rainfall patterns | Wet summers increase activity | Variable, concentrated periods |
| Soil types | Clay and loam retain moisture | Mixed, many termite-friendly zones |
| Housing stock | High timber content, many older homes | Mix of construction types |
## Termite Species of Concern
Not all termites pose equal risk to buildings. Understanding the species active in Queensland and NSW helps explain why professional inspections require specialist knowledge.
### Subterranean Termites
Subterranean termites cause approximately 95% of termite damage to Australian buildings. They build nests underground or in tree stumps and travel through mud tubes to reach timber food sources.
| Species | Distribution | Damage Potential | Behaviour |
| ------------------------- | ------------------------- | ---------------- | ------------------------------------- |
| Coptotermes acinaciformis | All QLD and NSW | Very high | Most destructive species in Australia |
| Coptotermes frenchi | Coastal and urban areas | High | Common in urban environments |
| Schedorhinotermes | Northern QLD, coastal NSW | High | Aggressive, multiple colonies |
| Nasutitermes | Throughout both states | Moderate | Often builds visible mounds |
| Heterotermes | Widespread | Moderate | Prefers decayed timber |
### Drywood Termites
While less common, drywood termites (Cryptotermes species) establish colonies entirely within timber without soil contact. They are particularly prevalent in coastal Queensland and northern NSW, often entering homes through furniture or timber products.
## What a Professional Pest Inspection Covers
Pest inspections conducted under AS 4349.3 follow systematic procedures to identify termite activity, damage and conditions that may encourage future infestation.
### Inspection Limitations
AS 4349.3 defines standard pest inspections as visual assessments with specific limitations. Inspectors cannot see through walls, under concrete slabs or into areas without safe access.
| Area Type | Standard Inspection Access | Additional Investigation Required |
| ------------------------------ | -------------------------- | --------------------------------- |
| Subfloor (>400mm clearance) | Full inspection | No |
| Subfloor (<400mm clearance) | Limited or excluded | Excavation or camera inspection |
| Roof void | Full inspection | No |
| Wall cavities | External only | Invasive inspection if suspected |
| Concrete slab edges | Visual only | Core sampling if suspected |
| Landscaping within 50m | Visual assessment | Tree drilling for nest detection |
## When to Get a Pest Inspection
Regular pest inspections form the foundation of termite risk management in high-risk areas like Queensland and NSW.
### Critical Inspection Timing
| Situation | Inspection Type | Urgency |
| -------------------------------- | ---------------------------- | --------------------------------------- |
| Before purchasing property | Pre-purchase pest inspection | Essential before contract unconditional |
| Annual maintenance | Routine pest inspection | Recommended yearly minimum |
| After major rainfall or flooding | Additional inspection | Within 2-4 weeks of event |
| Before selling property | Pre-sale pest inspection | Recommended for vendor disclosure |
| After noticing signs | Urgent inspection | Immediate |
### Understanding Construction Warranty Defect Reports
Source: https://ownerinspections.com.au/articles/understanding-construction-warranty-defect-report
Published: 2026-01-27 | Updated: 2026-06-02 | Category: New Construction
Author: Maison Azdari
A construction warranty defect report is a written record of building faults found after a new build, renovation, extension, commercial fitout or apartment handover. It helps show what the defect is, where it is located, when it was found, and why it may fall under the builder’s warranty obligations.
For homeowners, a proper builders warranty report can be the difference between a clear warranty claim and a long dispute with missing evidence. In NSW, homeowners have statutory warranties of 6 years for major defects and 2 years for all other defects, and a further 6 months may apply if the breach becomes known in the last 6 months of the warranty period.
This guide explains what a warranty report includes, how construction warranty defect tracking works, what warranty periods apply in NSW, Victoria and Queensland, and how an independent report can support warranty disputes in construction projects.
Book a Defect
Investigation Report
}
buttonHref="/defect-investigation-reports"
variant="secondary"
/>
## What Is a Construction Warranty Defect Report?
A construction warranty defect report is a formal inspection document that records defects that may be covered by statutory warranties, implied warranties, contractual warranties or home warranty insurance.
It should not be a loose list of complaints. A strong warranty report should give the builder, insurer, regulator or tribunal enough detail to understand the issue and decide what needs to happen next.
| Report item | Why it matters |
| ------------------------- | -------------------------------------------------------------------- |
| Defect location | Shows exactly where the issue is found |
| Description of the defect | Explains what is wrong in plain language |
| Photos and evidence | Supports the claim with visual proof |
| Likely cause | Helps link the issue to workmanship, materials, design or compliance |
| Severity | Separates minor defects from possible major structural defects |
| Recommended next step | Gives the owner a clear action path |
In NSW, [Building Commission NSW deals](https://www.nsw.gov.au/departments-and-agencies/building-commission/about-us/building-defect-complaints) with home building defects, incomplete work and damage caused by building work, and it advises owners to try to resolve the matter with the builder before making a formal complaint.
### Types of Warranties in Australia
## When Do You Need a Builders Warranty Report?
You may need a builders warranty report when defects appear after practical completion, during the defect liability period, before the 2-year non-major defect period ends, or when there are signs of possible structural movement.
A report is also useful when a builder says the issue is normal wear and tear, poor maintenance or owner damage. The report gives a technical view before the matter becomes a bigger dispute.
Common times to book a warranty defect inspection include:
| Timing | Why book an inspection |
| --------------------------------------- | --------------------------------------------------------- |
| Soon after handover | Catch incomplete or poor-quality work early |
| Before the defect liability period ends | Give the builder a clear defect list |
| Before the 2-year warranty period ends | Record minor and workmanship defects before time runs out |
| When cracking, leaks or movement appear | Check whether the issue may be a major defect |
| Before lodging a complaint | Prepare evidence for a regulator, insurer or tribunal |
Owners should review the contract, talk to the builder, then confirm concerns in writing by letter or email and keep a copy.
## Construction Warranty Periods in Australia
Warranty timeframes differ between states, so the report should always be written with the property location in mind.
| State | Main warranty or insurance period | What owners should know |
| ------------------------------------ | ------------------------------------------------------------------------------------------ | -------------------------------------------------------------------------------------------------------------------------------------------------------------------------------------------- |
| NSW | 6 years for major defects and 2 years for all other defects | Building Commission NSW says homeowners may get an extra 6 months to start proceedings if the breach becomes known in the last 6 months of the warranty period. |
| Victoria | Implied warranties transfer to new owners for up to 10 years from completion | Consumer Affairs Victoria says implied warranties apply by law and cannot be signed away. |
| Victoria domestic building insurance | 6 years for structural defects and 2 years for non-structural defects, up to policy limits | Consumer Affairs Victoria says domestic building insurance covers up to $300,000 for structural defects for 6 years and non-structural defects for 2 years. |
| Queensland | Structural defect cover generally runs for 6 years and 6 months | QBCC says structural defect claims must be lodged within 3 months of noticing the defect. |
| Queensland non-structural defects | Cover extends for 6 months from completion | QBCC says non-structural defect claims must be lodged within 7 months of completion. |
### What Is Not Covered?
This is why a generic warranty report is not enough. A useful report should match the defect type, warranty period and complaint process for the state where the property is located.
## Common Types of Construction Defects
A structural defects warranty usually relates to problems that affect the stability, safety or use of major building elements.
### Major vs Minor Defects
### Common Defect Categories
## Identifying and Documenting Defects
### Warning Signs to Watch For
### Why Engage a Professional Inspector
Hiring a licensed building inspector ensures:
### How to Document Defects Yourself
## Construction Warranty Defect Tracking: How to Build a Clear Defect List
Construction warranty defect tracking means keeping a live record of each defect from the day it is found until the day it is fixed. This helps avoid missing deadlines, repeating the same complaint, or losing track of what the builder agreed to fix.
Use a simple defect list like this:
| Defect no. | Location | Defect | Date found | Evidence | Status |
| ---------- | ---------------- | ---------------------- | ------------- | -------------------------- | ----------------------- |
| 1 | Ensuite shower | Water leak near screen | 10 March 2026 | Photos, moisture reading | Sent to builder |
| 2 | Living room wall | Crack above window | 12 March 2026 | Photos, marked measurement | Monitoring |
| 3 | Kitchen cabinet | Door misaligned | 13 March 2026 | Photos | Rectification requested |
For better defect reporting, keep photos, videos, emails, builder replies, inspection reports, invoices, warranty documents and the building contract together in one folder.
NSW Government advises owners to send written correspondence after speaking with the builder and to keep dated copies, using email or registered post where proof of sending is needed.
## What Should a Warranty Defect Report Include?
A good building defect report for warranty claims should do more than say “defective” or “poor workmanship”. It should explain the issue in a way that a builder, insurer, regulator or tribunal can understand.
| Section | What to include |
| ------------------- | ---------------------------------------------------------------------------------------- |
| Property details | Address, inspection date, owner details and project type |
| Scope of inspection | Areas inspected and any access limits |
| Defect summary | Short list of defects ranked by risk |
| Detailed findings | Photos, notes, location and defect description |
| Likely cause | Workmanship, materials, design, maintenance, movement or water entry |
| Warranty relevance | Whether the issue may fit a major defect, non-major defect or contractual warranty issue |
| Recommended action | Builder rectification, further testing, monitoring or expert report |
In Victoria, [implied warranties](https://www.consumer.vic.gov.au/housing/building-and-renovating/checklists/implied-warranties-and-domestic-building-insurance) require builders and tradespeople to carry out work in a proper and workmanlike manner, use suitable materials, follow laws and legal requirements, and complete work with reasonable care and skill.
## Reporting Defects and Submitting Warranty Claims
### Preparing Your Defect Report
### Where to Submit Your Claim
Read the Legal
Defect Guide
}
buttonHref="/articles/document-building-defects-legal-claim"
variant="secondary"
/>
## Builder Obligations and the Rectification Process
### Legal Obligations
Builders in Australia are required to:
### The Rectification Process
### Homeowner Responsibilities
## Warranty Disputes in Construction Projects
Warranty disputes in construction projects often happen because the owner and builder disagree about the cause, seriousness or timing of the defect.
A builder may argue that the problem is cosmetic, caused by owner maintenance, outside the warranty period, or not part of the original work. An independent report helps bring the conversation back to evidence.
A strong report can support:
| Situation | How the report helps |
| ------------------------------ | ------------------------------------------------------- |
| Builder refuses to fix defects | Shows what was found and why it matters |
| Builder offers a poor repair | Gives a record for checking whether the fix is suitable |
| Complaint to a regulator | Gives clear details for the complaint file |
| Insurance claim | Helps show the defect type and timing |
| Tribunal matter | Gives independent technical evidence |
Building Commission NSW says it may inspect major building defects and can [issue a Rectification Order](https://www.nsw.gov.au/housing-and-construction/building-or-renovating-a-home/resolving-building-disputes) if there are matters the contractor needs to rectify.
### Your Legal Rights
Property owners can seek recourse under:
### Dispute Resolution Options
## Preventative Measures for Future Projects
### Choosing the Right Builder
### Post-Construction Maintenance
## Construction Defect Claims NSW: What Owners Should Do
For construction defect claims NSW, the process should usually start with evidence, written notice and a clear chance for the builder to inspect and respond.
A practical sequence is:
- Review the building contract and warranty details.
- List each defect with photos and dates.
- Get an independent warranty defect report if the issue is technical, repeated or disputed.
- Send the report to the builder in writing.
- Ask for a written rectification plan and timeframe.
- Keep all replies and site visit notes.
- Escalate to Building Commission NSW, NCAT or another pathway if the matter is not resolved.
If a dispute is not resolved with the contractor, owners can contact Building Commission NSW for help with dispute resolution.
## Defect Liability Period vs Builder Warranty
The defect liability period is usually a contract period after practical completion where the builder returns to fix listed defects.
A builder warranty is broader. It may include statutory warranties, implied warranties, consumer guarantees, contractual promises and insurance protections, depending on the state and project.
| Term | Meaning |
| ----------------------- | ---------------------------------------------------------------------------------------------- |
| Defect liability period | Contract period for early defect rectification after handover |
| Statutory warranty | Legal protection for defects under state building law |
| Implied warranty | Warranty that applies by law, even if not written into the contract |
| Consumer guarantee | Australian Consumer Law protection for services |
| Home warranty insurance | Insurance that may apply in limited cases, such as insolvency or failure to comply with orders |
Implied warranties apply automatically to all domestic building work, regardless of cost or whether there is a written contract.
## Common Warranty Defects Found in New Homes and Renovations
Warranty defects can appear in almost any part of a building, but some issues come up often in new homes, renovations and commercial fitouts.
Common examples include:
| Defect category | Examples |
| ------------------- | ------------------------------------------------------------ |
| Waterproofing | Shower leaks, balcony leaks, wet area moisture |
| Structural movement | Cracking, sticking doors, uneven floors |
| Roofing | Leaks, poor flashing, sagging roof elements |
| Plumbing | Leaks, poor drainage, loose fixtures |
| Electrical | Unsafe or incomplete fittings, tripping circuits |
| Finishes | Poor paint, cracked grout, uneven tiling |
| Joinery | Misaligned cabinets, loose doors, poor hardware installation |
A warranty report should not overstate minor issues as major defects. It should explain the likely risk and give the owner a practical next step.
## Getting the Most Value from Your Home and Building Investment
A construction warranty defect report gives owners a clear record before warranty periods expire. It supports a builders warranty report, improves defect reporting, helps with construction warranty defect tracking, and gives stronger evidence if the matter turns into a dispute.
Contact Owner
Inspections
}
buttonHref="/contact"
variant="primary"
/>
### Compliance Inspection for Construction Projects: A Complete Guide
Source: https://ownerinspections.com.au/articles/compliance-inspection-for-construction-projects
Published: 2026-01-23 | Category: Construction Inspections
Author: Maison Azdari
A building that does not meet compliance standards is not just a legal liability. It is a
safety hazard that puts lives at risk. In Australia, construction compliance is not
optional: it is the difference between a structure that stands safely for decades and one
that may fail catastrophically.
Ensuring compliance in construction projects is about protecting lives, securing
investments, and maintaining the integrity of the built environment. Whether constructing a
new home, developing a commercial space, or renovating an existing structure, compliance
inspections play a pivotal role in verifying that every phase of construction aligns with
safety, environmental, and legal standards.
Non-compliance can lead to fines, work stoppages, legal issues, and structural failures that
compromise safety. This guide delves deep into the role of compliance inspections, the
regulatory framework in Australia, and how stakeholders can ensure their projects meet the
required standards.
> The cost of a compliance inspection is a fraction of what non-compliance can cost you.
> Fines, demolition orders, and structural failures have turned minor oversights into
> financial disasters.
## What Is Construction Compliance?
Construction compliance encompasses all legal, safety, and environmental obligations that
govern building projects. It ensures structures are built to withstand environmental
stresses, support their intended function, and meet health and safety standards.
Compliance covers multiple aspects:
- **Structural integrity:** Ensuring buildings can handle weight loads, weather conditions, and long-term usage.
- **Fire safety measures:** Implementing systems to mitigate fire risks and facilitate safe evacuation.
- **Electrical and plumbing systems:** Ensuring proper installation to prevent malfunctions that could cause accidents or structural damage.
- **Environmental sustainability:** Adhering to energy efficiency and waste management regulations to minimise environmental impact.
By following these principles, property owners, builders, and developers can create legally
sound, safe, and sustainable structures.
## Legal and Regulatory Framework in Australia
In Australia, construction projects must comply with multiple layers of regulation, each
designed to enhance safety and sustainability. Key regulatory bodies and codes include:
| Regulatory Body/Code | Purpose | Key Requirements |
| -------------------------------------- | ---------------------------------- | ------------------------------------------------------- |
| National Construction Code (NCC) | Building performance standards | Structure, fire resistance, plumbing, energy efficiency |
| Work Health and Safety (WHS) Act | Workplace safety | Safe work practices, hazard prevention |
| Australian Building Codes Board (ABCB) | Code development and maintenance | Building safety and performance standards |
| Local Councils and State Regulations | Local enforcement | Building permits, zoning laws, site-specific rules |
| NSW Fair Trading | Consumer protection (NSW) | Licensing, dispute resolution, compliance |
| QBCC (Queensland) | Building industry regulation (QLD) | Licensing, insurance, defect resolution |
Failure to comply with these frameworks can result in significant penalties, including
suspension of construction activities or costly modifications to meet required standards.
## Key Areas of Compliance Inspections
Compliance inspections are conducted at different stages to identify and address issues
before they become major problems. Here is a closer look at the essential areas covered:
### 1. Building Codes and Structural Integrity
#### Building Codes
Building codes regulate the design, materials, and structural elements to ensure long-term
safety and stability. These codes are crucial for preventing building failures due to
improper construction techniques or the use of substandard materials.
#### Structural Inspections
Structural inspections verify that foundations, load-bearing walls, beams, and roofing
systems comply with engineering standards and regulatory requirements. Some common issues
flagged include:
- **Foundation cracks and settlement:** Indicating soil instability or poor foundational work.
- **Improper framing or weak connections:** Reducing the building's ability to withstand stress.
- **Material defects:** These include using low-quality concrete or improper reinforcements.
A structural compliance certificate confirms that the structure meets all necessary safety
requirements before further work continues.
### 2. Fire Safety Compliance
#### Fire Safety Requirements
Fire hazards pose a significant risk in construction. Australian fire safety regulations
cover:
- Smoke alarms and fire suppression systems to detect and control fires quickly.
- Emergency exits and escape routes for safe evacuations.
- Fire-resistant materials that prevent rapid fire spread.
#### Building Features Inspections
Fire safety inspections assess the adequacy of these features to ensure they function as
intended. Poor fire safety compliance can lead to catastrophic loss of life and property,
making these inspections essential.
### 3. Electrical Wiring Standards
#### Electrical Code Compliance
Electrical installations must meet the AS/NZS 3000 Wiring Rules, ensuring they are safe,
efficient, and hazard-free.
#### Common Violations
Common electrical compliance issues include:
- **Overloaded circuits:** Leading to overheating and fire hazards.
- **Improper grounding:** Increasing the risk of electrocution.
- **Use of substandard materials:** Which may fail prematurely.
Electrical inspections verify that all components are installed correctly and meet strict
safety standards.
### 4. Plumbing and Water Systems
#### Plumbing Code
Plumbing regulations ensure safe water distribution, proper drainage, and efficient waste
disposal. Compliance checks include:
- Pipe material and sizing standards to prevent leaks and contamination.
- Properly installed drainage systems to avoid waterlogging and property damage.
- Hot water system safety to prevent scalding or pressure buildup.
#### Inspection Process
Plumbing inspectors assess whether installations meet code requirements and verify the
efficiency of water pressure, fixture installation, and sewage system.
### 5. Health and Safety Compliance on Worksites
#### Workplace Safety Regulations
The Work Health and Safety Act (WHS) mandates:
- Proper personal protective equipment (PPE) usage.
- Safe operation of machinery, tools, and scaffolding.
- Site hazard assessments to prevent falls, electrical shocks, or material collapses.
### 6. Energy Efficiency and Environmental Impact
#### Energy Efficiency
Compliance ensures buildings are environmentally responsible and cost-effective. Key
considerations include:
- High-efficiency insulation to regulate indoor temperatures.
- Solar power and water heating systems to reduce energy consumption.
- Energy-efficient lighting and HVAC systems.
#### Environmental Regulations
Construction projects must minimise environmental harm by implementing:
- Proper waste disposal methods.
- Sustainable building materials.
- Water conservation measures.
### 7. Permits and Documentation
#### Construction Permits
Projects must secure the necessary permits before starting construction. These ensure
compliance with zoning laws, environmental regulations, and structural safety requirements.
#### Inspection Reports
Detailed reports document:
- Findings from compliance inspections.
- Recommendations for rectifications.
- Final approvals before occupancy.
## Types of Compliance Inspections
| Inspection Type | When Conducted | What It Covers |
| ------------------------------- | ------------------------- | ------------------------------------------------- |
| Pre-construction Inspection | Before work begins | Site assessment, permit verification, plan review |
| Foundation Inspection | After excavation | Footings, soil conditions, reinforcement |
| Frame Inspection | After framing complete | Structural framing, bracing, connections |
| Lock-up Inspection | When building is enclosed | Roofing, external cladding, windows, doors |
| Practical Completion Inspection | Before handover | All finishes, fixtures, systems functionality |
| Final Compliance Inspection | Before occupation | Full code compliance, certificate issuance |
## The Role of Quality Control in Construction
### Quality Control Checklist
Maintaining quality control throughout the project prevents defects and ensures compliance.
Key inspection points include:
- Foundation and structural checks
- Mechanical, electrical, and plumbing evaluations
- Final finishing and safety measures
### Minimising Errors
Early detection of code violations, structural weaknesses, or system failures reduces costly
modifications and enhances overall project quality.
## How to Ensure Compliance from Start to Finish
### Step by Step Guide
1. **Pre-Construction:** Secure permits, review blueprints, and conduct site assessments.
1. **During Construction:** Perform routine inspections at key phases.
1. **Post-Construction:** Conduct final checks and obtain compliance certifications.
### Collaboration with Inspectors
Partnering with certified inspection professionals like Owner Inspections ensures projects
meet industry standards and pass regulatory approvals.
## Compliance Inspection Costs in Australia
| Inspection Type | Typical Cost Range | Factors Affecting Cost |
| ------------------------------- | ------------------ | ------------------------------------ |
| Single Stage Inspection | $300 to $600 | Property size, location, complexity |
| Full Construction Package | $2,000 to $5,000 | Number of stages, property type |
| Practical Completion Inspection | $400 to $800 | Property size, detail level required |
| Defect Inspection | $350 to $700 | Scope of defects, follow-up visits |
## Frequently Asked Questions
###
What is a compliance inspection in construction?
**Short answer:** A compliance inspection verifies that construction work
meets all relevant building codes, safety standards, and regulatory requirements in
Australia.
Compliance inspections are conducted by licensed building inspectors at various stages
of construction. They assess structural integrity, fire safety systems, electrical
installations, plumbing, and environmental compliance. The inspector reviews the work
against the National Construction Code (NCC), Australian Standards, and local council
requirements. Upon passing inspection, a compliance certificate is issued, allowing
construction to proceed to the next phase or, in the case of final inspection, enabling
occupation of the building.
###
How much does a compliance inspection cost in Sydney?
**Short answer:** Compliance inspection costs in Sydney typically range
from $300 to $800 for single stage inspections, with full construction packages costing
$2,000 to $5,000.
The cost varies depending on several factors including property size, construction
complexity, the specific stage being inspected, and the level of detail required in the
report. Larger commercial projects will cost more than residential inspections. Some
inspection companies offer package deals for multiple stage inspections throughout a
construction project, which can provide cost savings compared to booking individual
inspections.
###
What happens if a construction project fails a compliance inspection?
**Short answer:** If a project fails inspection, the builder must rectify
the identified defects and schedule a reinspection before work can continue.
The inspector will provide a detailed report outlining the specific non-compliance
issues. The builder is responsible for addressing these issues within a specified
timeframe. Depending on the severity of the violations, work may be halted until
corrections are made. Repeated failures can lead to fines, project delays, and potential
legal action. In extreme cases, non-compliant structures may need to be demolished and
rebuilt to meet code requirements.
###
Who is responsible for arranging compliance inspections?
**Short answer:** The builder or developer is typically responsible for
arranging compliance inspections, though property owners can also engage independent
inspectors.
In most Australian states, the builder must arrange mandatory inspections at key
construction stages. However, property owners building their own homes or engaging
owner-builder permits are responsible for scheduling inspections. Many savvy property
owners engage independent building inspectors in addition to mandatory council
inspections to ensure thorough quality control. This provides an extra layer of
protection and can identify issues that might otherwise be missed.
###
What are the mandatory inspection stages in NSW?
**Short answer:** NSW requires critical stage inspections including
pre-commencement, footings, frame, waterproofing, and final inspection stages.
Under the Building and Development Certifiers Act 2018, NSW mandates specific inspection
stages for most construction projects. These include inspection of footings before
concrete pour, frame inspection before cladding, waterproofing inspection before tiling,
and final inspection before occupation certificate issuance. The exact requirements
depend on the class of building and the scope of work. Failure to complete mandatory
inspections can result in penalties and inability to obtain an occupation certificate.
###
What is the difference between a compliance inspection and a building inspection?
**Short answer:** Compliance inspections verify adherence to codes during
construction, while building inspections typically assess existing structures for
defects or pre-purchase evaluation.
Compliance inspections occur during the construction process and focus on whether work
meets regulatory requirements at specific stages. Building inspections, such as
[pre-purchase inspections](/pre-purchase-inspections), evaluate completed structures for defects, maintenance issues,
and overall condition. Both are conducted by licensed inspectors but serve different
purposes. Compliance inspections are mandatory for construction projects, while building
inspections are typically voluntary but highly recommended when purchasing property.
###
How long does a compliance inspection take?
**Short answer:** A typical compliance inspection takes between 1 to 3
hours on site, with the report delivered within 24 to 48 hours.
The duration depends on the construction stage, property size, and complexity of the
work being inspected. Frame inspections for a standard residential property usually take
1 to 2 hours. Larger commercial projects or detailed practical completion inspections
may take 3 to 4 hours or longer. The inspector will then prepare a comprehensive report
documenting their findings, typically delivered within 24 to 48 hours of the inspection.
### Can I attend the compliance inspection?
**Short answer:** Yes, property owners are encouraged to attend compliance
inspections to understand the findings and ask questions directly.
Attending the inspection provides valuable insights into the construction quality and
any issues identified. You can ask the inspector questions about specific concerns and
better understand the technical aspects of your project. Most inspectors welcome owner
participation and can explain their findings in plain language. This also provides an
opportunity to discuss any concerns you may have observed during construction.
###
What qualifications should a compliance inspector have?
**Short answer:** Compliance inspectors should hold relevant building
qualifications, state licensing, and professional indemnity insurance.
In Australia, compliance inspectors typically hold qualifications such as a Diploma of
Building and Construction or equivalent. They must be registered or licensed in their
state, such as registration with NSW Fair Trading or QBCC in Queensland. Professional
indemnity insurance is essential to protect both the inspector and property owner.
Experienced inspectors often have backgrounds in building, construction management, or
engineering, providing practical knowledge of construction methods and common defects.
###
What is included in a compliance inspection report?
**Short answer:** A compliance inspection report includes detailed
findings, photographic evidence, code references, compliance status, and recommendations
for rectification.
A comprehensive compliance inspection report documents all areas assessed during the
inspection with clear descriptions and photographs. It identifies any non-compliance
issues with references to the specific codes or standards breached. The report rates the
severity of defects and provides recommendations for rectification. It also includes
details about the property, inspection date, weather conditions, and areas that could
not be accessed. The report serves as an official record that can be used for builder
negotiations, insurance claims, or legal proceedings if necessary.
###
What is an occupation certificate and when is it required?
**Short answer:** An occupation certificate (OC) confirms a building is
suitable for occupation and must be issued before anyone can legally use the building.
An occupation certificate is issued by a principal certifying authority (council or
private certifier) after final compliance inspection confirms the building meets all
approval conditions and code requirements. Without an OC, it is illegal to occupy or use
the building. There are two types: interim OC for partial occupation and final OC for
complete building occupation. Banks often require an OC before releasing final loan
funds, and insurers may void coverage for buildings without proper certification.
###
What are the penalties for non-compliance in construction?
**Short answer:** Penalties range from fines of thousands of dollars to
stop work orders, demolition requirements, and potential criminal prosecution for
serious breaches.
In NSW, penalties for building non-compliance can reach $110,000 for corporations and
$22,000 for individuals per offence. Queensland's QBCC can issue fines up to $69,000.
Beyond financial penalties, non-compliance can result in stop work orders halting
construction, demolition orders requiring removal of non-compliant work, and licence
suspension or cancellation for builders. In cases involving safety breaches that cause
harm, criminal prosecution with potential imprisonment is possible.
###
How do I choose between a council certifier and private certifier?
**Short answer:** Private certifiers often offer faster turnaround and
flexibility, while council certification may be required for certain complex projects.
Both council and private certifiers are authorised to issue construction certificates
and occupation certificates. Private certifiers typically offer faster response times
and more flexible scheduling, which can benefit tight construction timelines. Council
certifiers may have deeper local knowledge but often have longer wait times. For complex
projects or those requiring council involvement in other aspects, using the council
certifier can streamline approvals. Compare fees, availability, and experience with your
project type when choosing.
###
What is the difference between BCA compliance and Australian Standards compliance?
**Short answer:** The BCA (now NCC) sets minimum performance requirements,
while Australian Standards provide detailed technical specifications for achieving those
requirements.
The National Construction Code (formerly BCA) establishes the minimum necessary
requirements for safety, health, amenity, and sustainability in buildings. Australian
Standards are referenced within the NCC and provide detailed technical specifications
for materials, construction methods, and testing procedures. For example, the NCC
requires structural adequacy, while AS 1684 provides detailed timber framing
specifications. Compliance with both is typically required, with the NCC setting the
outcome and Australian Standards providing the method.
## Key Takeaways
- Compliance inspections are mandatory at critical construction stages in Australia to ensure safety and code adherence.
- The National Construction Code (NCC) and state regulations govern all construction compliance requirements.
- Key inspection areas include structural integrity, fire safety, electrical, plumbing, and environmental compliance.
- Non-compliance can result in fines, work stoppages, legal issues, and costly rectification work.
- Property owners can engage independent inspectors in addition to mandatory council inspections for added protection.
- Inspection costs vary based on property size, location, and construction complexity.
- Always verify your inspector holds appropriate licensing and professional indemnity insurance.
- Early detection of compliance issues saves time, money, and prevents serious safety hazards.
## References and Resources
- [ National Construction Code (NCC) ](https://ncc.abcb.gov.au/)
- [ Australian Building Codes Board (ABCB) ](https://www.abcb.gov.au/)
- [ Safe Work Australia ](https://www.safeworkaustralia.gov.au/)
- [ NSW Fair Trading ](https://www.fairtrading.nsw.gov.au/)
- [ Queensland Building and Construction Commission (QBCC) ](https://www.qbcc.qld.gov.au/)
- [ Victorian Building Authority (VBA) ](https://www.vba.vic.gov.au/)
For a complete overview, see our [guide to construction stage inspections](/guides/construction-stage-inspections-guide).
### Termite Inspection to Protect Your Home from Damage
Source: https://ownerinspections.com.au/articles/termite-inspection-to-protect-your-home
Published: 2026-01-20 | Category: Pest Inspections
Author: Maison Azdari
They work silently, 24 hours a day, eating through your home's structural timbers from the
inside out. By the time you notice the damage, termites may have already caused thousands of
dollars in destruction. This is the reality facing Australian homeowners every day.
Termites are one of the most destructive pests in Australia, causing approximately $1.5
billion in damage to properties annually. These silent destroyers can compromise the
structural integrity of your home long before visible signs appear, making professional
[termite inspections](/timber-pest-inspections) essential for every Australian property owner.
Whether you are purchasing a new property, maintaining your current home, or concerned about
potential termite activity, understanding the inspection process and warning signs can save
you thousands of dollars in repair costs and protect your family's safety.
> Most home insurance policies do not cover termite damage. Prevention through regular
> inspections is your only real protection against these destructive pests.
## What Is a Termite Inspection?
A termite inspection is a comprehensive professional assessment designed to detect the
presence of termites and other timber pests before they cause serious structural damage to
your property. Conducted by licensed pest inspectors, these inspections follow the
Australian Standard AS 4349.3 for timber pest inspections.
The inspection process involves a thorough examination of all accessible areas of your
property, both internally and externally, using a combination of visual assessment and
advanced detection technology.
### External Evaluation
The external assessment examines your property's perimeter for visible signs of termite
activity. Inspectors look for:
- Mud tubes or shelter tubes on external walls and foundations
- Timber deterioration around doors, windows, and fence lines
- Tree stumps, garden beds, and landscaping that may harbour termites
- Moisture issues that create favourable conditions for termites
- Entry points where termites may gain access to the structure
### Internal Assessment
Inside the property, inspectors examine all accessible timber components and concealed
areas, including:
- Subfloor areas and crawl spaces
- Roof void and ceiling spaces
- Built-in cupboards and storage areas
- Skirting boards, architraves, and door frames
- Wet areas including bathrooms, laundry, and kitchen
### Advanced Detection Technology
Modern termite inspections utilise sophisticated equipment to detect hidden termite activity
that cannot be seen with the naked eye:
- **Thermal imaging cameras:** Detect temperature variations that may indicate termite presence behind walls
- **Moisture meters:** Identify elevated moisture levels that attract termites
- **Termatrac radar devices:** Detect termite movement through walls without invasive drilling
- **Borescopes:** Allow visual inspection inside wall cavities and confined spaces
## Warning Signs of Termite Infestation
Early detection is critical for minimising termite damage. Being aware of the warning signs
can help you identify potential problems before they become severe.
| Warning Sign | Description | Location |
| ------------------------------ | ---------------------------------------------------------- | ------------------------------------------------ |
| Hollow sounding timber | Wood sounds hollow when tapped due to internal consumption | Door frames, skirting boards, structural timbers |
| Mud tubes | Protective tunnels made of soil and termite saliva | External walls, foundations, subfloor |
| Bubbling or cracking paint | Paint distortion caused by moisture from termite activity | Walls, door frames, window frames |
| Frass (termite droppings) | Fine powdery waste deposits resembling sawdust | Near wooden structures, window sills |
| Discarded wings | Wings shed by reproductive termites after swarming | Window sills, door frames, light fittings |
| Tight fitting doors or windows | Warping caused by moisture from termite activity | Doors, windows throughout property |
| Sagging floors or ceilings | Structural weakening due to timber damage | Floor areas, ceiling sections |
## Financial Impact of Termite Damage
The cost of termite damage repair in Australia can be substantial, often catching homeowners
off guard. Understanding the potential financial impact highlights the importance of regular
inspections and early detection.
| Damage Severity | Typical Repair Cost | Common Repairs Required |
| ----------------------- | -------------------- | ------------------------------------------------------ |
| Minor damage | $5,000 to $15,000 | Skirting boards, door frames, minor timber replacement |
| Moderate damage | $15,000 to $50,000 | Floor joists, wall framing, subfloor repairs |
| Severe damage | $50,000 to $100,000+ | Structural repairs, restumping, major reconstruction |
| Termite inspection cost | $250 to $500 | Professional assessment with detailed report |
It is important to note that standard home and contents insurance policies in Australia
typically do not cover termite damage. This makes prevention through regular inspections
even more critical for protecting your investment.
## How Often Should You Get a Termite Inspection?
The frequency of termite inspections depends on several factors including your location,
property type, and risk level.
### Annual Inspections
Annual termite inspections are recommended as a minimum for most Australian properties. This
frequency is supported by Australian Standard AS 3660.2 and is essential for:
- Properties in moderate to high risk termite zones
- Homes with established termite management systems
- Properties with previous termite history
- Standard residential properties in suburban areas
### Six Monthly Inspections
More frequent inspections every six months are advised for:
- Properties in tropical or subtropical climates (Queensland, Northern Territory, northern NSW)
- Older homes with timber subfloors or stumps
- Properties surrounded by native bushland
- Homes with known termite activity in the immediate area
- Properties with high moisture issues
### Additional Inspections
You should arrange an immediate inspection if you notice:
- Any of the warning signs mentioned above
- Termite activity reported by neighbours
- Recent flooding or water damage to your property
- New construction or landscaping work nearby
## Common Termite Species in Australia
Australia is home to over 350 termite species, with approximately 30 species known to cause
structural damage to buildings. Understanding the most common destructive species helps in
identification and treatment.
| Species | Distribution | Damage Potential |
| ------------------------- | ------------------ | --------------------------------------- |
| Coptotermes acinaciformis | Nationwide | Most destructive species in Australia |
| Coptotermes frenchi | Southern states | Highly destructive to structural timber |
| Schedorhinotermes | Eastern Australia | Second most destructive genus |
| Nasutitermes | Northern Australia | Moderate damage to timber structures |
| Heterotermes ferox | Nationwide | Attacks damp or decaying timber |
## Choosing a Professional Termite Inspector
Selecting a qualified and experienced termite inspector is crucial for accurate assessment
and reliable results. Here are key factors to consider:
### Qualifications and Licensing
- Ensure the inspector holds a current pest control licence for your state
- Look for membership in professional associations such as the Australian Environmental Pest Managers Association (AEPMA)
- Verify they follow Australian Standard AS 4349.3 for timber pest inspections
### Experience and Equipment
- Choose inspectors with extensive experience in your local area
- Confirm they use modern detection technology including thermal imaging and moisture meters
- Ask about their inspection methodology and what areas will be examined
### Insurance and Guarantees
- Verify the inspector carries professional indemnity insurance
- Ask about public liability coverage
- Understand what is covered in their inspection report and any limitations
## Termite Prevention Strategies
While regular inspections are essential, implementing prevention strategies can
significantly reduce your property's termite risk.
### Moisture Management
- Fix leaking taps, pipes, and downpipes promptly
- Ensure adequate drainage around your property
- Maintain good ventilation in subfloor areas
- Direct air conditioning overflow away from the building
### Garden and Landscaping
- Remove dead trees, stumps, and timber debris from your property
- Maintain a clearance between garden beds and external walls
- Avoid using untreated timber for garden edging or retaining walls
- Keep mulch away from building foundations
### Building Maintenance
- Maintain physical barriers and termite shields
- Avoid storing timber or cardboard boxes against external walls
- Ensure weep holes are not blocked or bridged
- Consider installing a termite monitoring system
## Frequently Asked Questions
###
How much does a termite inspection cost in Australia?
**Short answer:** A professional termite inspection in Australia typically
costs between $250 and $500 for a standard residential property.
The cost varies depending on the property size, location, accessibility of inspection
areas, and the level of detail required. Combined building and pest inspections are
often available for $400 to $700, providing better value than booking separately. Some
inspectors may charge additional fees for thermal imaging or written reports. Given that
termite damage repairs can cost tens of thousands of dollars, the inspection fee
represents excellent value for early detection and peace of mind.
## Key Takeaways
- Termites cause approximately $1.5 billion in property damage annually in Australia, making regular inspections essential.
- Professional termite inspections use advanced technology including thermal imaging and radar to detect hidden infestations.
- Annual inspections are recommended as a minimum, with six-monthly inspections for high-risk properties.
- Standard home insurance does not cover termite damage, making prevention critical.
- Repair costs range from $5,000 to over $100,000 depending on damage severity.
- Warning signs include hollow sounding timber, mud tubes, bubbling paint, and discarded wings.
- Choose licensed inspectors with appropriate insurance and modern detection equipment.
- Prevention strategies include moisture management, garden maintenance, and maintaining building barriers.
## References and Resources
- [ CSIRO (Commonwealth Scientific and Industrial Research Organisation) ](https://www.csiro.au/)
- [ Australian Environmental Pest Managers Association (AEPMA) ](https://www.aepma.com.au/)
- [ Standards Australia (AS 4349.3 and AS 3660.2) ](https://www.standards.org.au/)
- [ NSW Fair Trading ](https://www.fairtrading.nsw.gov.au/)
- [ Queensland Building and Construction Commission (QBCC) ](https://www.qbcc.qld.gov.au/)
### What to Expect in Your Pre-Settlement Inspection
Source: https://ownerinspections.com.au/articles/what-to-expect-in-a-pre-settlement-inspection
Published: 2026-01-18 | Category: Pre-Settlement Inspections
Author: Maison Azdari
You have found your dream property, signed the contract, and settlement day is approaching.
But before you collect the keys, there is one crucial step that could save you thousands of
dollars and countless headaches: the [pre-settlement inspection](/apartment-pre-settlement).
A pre-settlement inspection is your final opportunity to verify that the property is in the
agreed condition before you complete the purchase and take ownership. This walkthrough can
reveal damage, missing inclusions, or incomplete repairs that you have every right to have
addressed before handing over your money.
Whether you are purchasing an established home, a newly constructed property, or an
off-the-plan apartment, understanding what to expect during a pre-settlement inspection can
help you identify issues, protect your investment, and avoid costly surprises after
settlement.
> Many buyers underestimate the importance of the pre-settlement inspection. It is your last
> line of defence before becoming legally responsible for a property and its condition.
## What Is a Pre-Settlement Inspection?
A pre-settlement inspection, also known as a final inspection or handover inspection, is a
walkthrough of the property conducted shortly before the settlement date. The purpose is to
confirm that the property is in the same condition as when you signed the contract, or in
the case of new builds, that construction has been completed to the agreed standard.
During this inspection, you verify that:
- The property has not been damaged since the contract was signed
- All inclusions listed in the contract are present and functional
- Any agreed repairs or rectification work has been completed
- The property is clean and ready for handover
- For new builds, construction defects are identified before you take possession
### Who Should Attend the Inspection?
Several parties may attend a pre-settlement inspection depending on the type of property and
the circumstances:
- **The buyer:** You have the right to attend and should always be present
- **Real estate agent:** Often facilitates access and can answer questions about the property
- **Builder or developer:** For new builds, to address any construction queries
- **Independent building inspector:** Recommended for thorough professional assessment
- **Your solicitor or conveyancer:** May attend in complex situations
## When to Schedule Your Pre-Settlement Inspection
Timing is critical for pre-settlement inspections. Schedule too early, and issues may arise
between the inspection and settlement. Schedule too late, and you may not have time to
address any problems discovered.
| Property Type | Recommended Timing | Key Considerations |
| ----------------------- | --------------------------- | ------------------------------------------- |
| Established homes | 5-7 days before settlement | Allows time to negotiate repairs if needed |
| New builds | 7-14 days before settlement | Builder may need time to rectify defects |
| Off-the-plan apartments | 7-14 days before settlement | First opportunity to see completed property |
| Vacant properties | 3-5 days before settlement | Less risk of changes, easier access |
For new builds and off-the-plan purchases, scheduling earlier is advisable because builders
may require additional time to rectify any defects identified. This also gives you leverage
to ensure issues are addressed before you finalise payment.
## What to Check During a Pre-Settlement Inspection
A thorough pre-settlement inspection covers both the interior and exterior of the property.
Use a systematic approach to ensure nothing is overlooked.
### Structural and Cosmetic Elements
Examine the property's structural integrity and cosmetic condition:
- **Walls and ceilings:** Check for cracks, water stains, or damage
- **Flooring:** Look for scratches, stains, loose tiles, or damaged floorboards
- **Doors and windows:** Test that all open, close, and lock properly
- **Paintwork:** Check for consistency, touch-ups, and any damage
- **Built-in fixtures:** Inspect wardrobes, shelving, and cabinetry
### Plumbing Systems
Test all plumbing fixtures and check for leaks or drainage issues:
- Run all taps and check water pressure and temperature
- Flush all toilets and check for proper operation
- Test showers and baths for drainage
- Check under sinks for leaks or moisture
- Verify hot water system is functioning correctly
- Inspect visible pipes for corrosion or damage
### Electrical Systems
Verify all electrical systems are working safely:
- Test all power points with a device or tester
- Check all light switches and light fittings
- Test exhaust fans in bathrooms and kitchen
- Verify smoke detectors are present and functional
- Check the switchboard for proper labelling
- Test any security systems or intercoms
### Appliances and Fixtures
If appliances are included in the sale, test each one:
- Oven, cooktop, and rangehood
- Dishwasher operation and drainage
- Air conditioning and heating systems
- Ceiling fans
- Any other appliances listed in the contract
### External Areas
Do not neglect the property's exterior:
- **Fencing:** Check condition and that gates operate properly
- **Driveway and paths:** Look for cracks or damage
- **Drainage:** Ensure stormwater drains are clear
- **Garden and landscaping:** Verify agreed condition
- **Garage:** Test doors and check for any damage
- **Outdoor lighting:** Test all external lights
- **Pool or spa:** Check equipment and condition if applicable
## Pre-Settlement Inspection Checklist
Use this checklist to ensure you cover all essential areas during your inspection:
| Area | Items to Check | Common Issues |
| ------------ | ---------------------------------------- | -------------------------------------- |
| Kitchen | Appliances, taps, cabinets, benchtops | Scratched benchtops, faulty appliances |
| Bathrooms | Taps, toilet, shower, tiles, exhaust fan | Leaks, poor drainage, cracked tiles |
| Bedrooms | Wardrobes, power points, windows, carpet | Damaged doors, stained carpet |
| Living areas | Flooring, walls, windows, lighting | Wall damage, scratched floors |
| Laundry | Taps, tub, cabinets, dryer vent | Blocked drains, missing fixtures |
| Garage | Door operation, lights, floor condition | Faulty door mechanism, oil stains |
| Exterior | Fencing, driveway, landscaping, drainage | Fence damage, blocked drains |
## The Role of Independent Building Inspectors
While you can conduct a pre-settlement inspection yourself, engaging an independent building
inspector provides significant advantages, particularly for new builds or if you have
concerns about the property's condition.
### Benefits of Professional Inspection
- **Unbiased evaluation:** Independent inspectors have no vested interest in the sale proceeding
- **Expert knowledge:** Trained to identify defects that untrained eyes may miss
- **Hidden defect identification:** Can detect issues behind walls or in concealed areas using specialised equipment
- **Documentation:** Provide detailed reports that can be used in negotiations or disputes
- **Peace of mind:** Confidence that the property has been thoroughly assessed
### When to Engage an Inspector
Consider hiring a professional inspector if:
- You are purchasing a new build or off-the-plan property
- The property is high value or has complex features
- You noticed issues during earlier inspections
- You cannot attend the inspection personally
- You want documented evidence of the property's condition
## Builder's Defect Rectification Process
For new builds, the builder has legal obligations to rectify defects before settlement.
Understanding this process helps you navigate any issues that arise.
### Minor vs Major Defects
| Defect Type | Examples | Typical Resolution |
| --------------- | ---------------------------------------------------------- | ------------------------------------------------ |
| Minor defects | Paint touch-ups, scratched surfaces, minor adjustments | Can be rectified after settlement under warranty |
| Major defects | Structural issues, waterproofing failures, safety hazards | Must be rectified before settlement |
| Incomplete work | Missing fixtures, unfinished areas, incomplete landscaping | Must be completed before settlement |
### Rectification Timeline
The time required for rectification varies depending on the nature and extent of defects:
- Minor cosmetic issues: 1-3 days
- Moderate defects: 3-7 days
- Major structural issues: May require settlement postponement
## Legal Implications of Unresolved Issues
If significant issues are discovered during your pre-settlement inspection, you have several
options available under Australian property law.
### Your Options
- **Negotiate repairs:** Request the vendor or builder rectify issues before settlement
- **Negotiate price reduction:** Agree to a reduced purchase price to cover repair costs
- **Delay settlement:** Postpone until issues are resolved (may require legal advice)
- **Withhold funds:** In some cases, a portion of the purchase price may be held in trust until repairs are completed
- **Terminate contract:** In cases of major undisclosed defects (legal advice essential)
### Seeking Legal Advice
Consult your solicitor or conveyancer if you discover significant issues during your
pre-settlement inspection. They can advise on:
- Your rights under the contract of sale
- Whether the issue constitutes a breach of contract
- The best course of action for your circumstances
- How to document issues for potential legal proceedings
## How to Request Repairs Before Settlement
If you identify defects during your pre-settlement inspection, follow these steps to request
repairs:
### Step 1: Document Everything
- Take clear photographs of all defects
- Note the location and nature of each issue
- Keep a written record with dates and times
- Obtain a professional inspection report if applicable
### Step 2: Submit a Formal Request
- Prepare a written list of defects requiring rectification
- Submit through your solicitor or conveyancer
- Include photographs and supporting documentation
- Set a reasonable timeframe for response
### Step 3: Negotiate Resolution
- Be prepared to negotiate on minor issues
- Stand firm on major defects affecting safety or value
- Consider alternative remedies such as price adjustments
- Get any agreements in writing
## Frequently Asked Questions
###
What is the main purpose of a pre-settlement inspection?
**Short answer:** To verify the property is in the agreed condition before
you complete the purchase and take ownership.
The pre-settlement inspection allows you to confirm that the property has not been
damaged since you signed the contract, all inclusions are present and working, any
agreed repairs have been completed, and the property is ready for handover. For new
builds, it is your opportunity to identify construction defects that need to be
rectified before settlement.
###
Should I hire a professional inspector for a pre-settlement inspection?
**Short answer:** It is highly recommended for new builds and valuable
properties, and beneficial for any purchase where you want documented evidence.
Professional inspectors bring expertise in identifying defects that may not be obvious
to untrained eyes. They use specialised equipment to detect hidden issues and provide
detailed reports that can be used in negotiations or legal proceedings. For established
homes, you may conduct the inspection yourself, but for new builds where construction
quality is being assessed, professional inspection is strongly advised.
###
What is the difference between minor and major defects?
**Short answer:** Minor defects are cosmetic issues that do not affect
habitability, while major defects involve structural problems, safety hazards, or
significant failures.
Minor defects include things like paint touch-ups, small scratches, or minor adjustments
that can typically be addressed after settlement under warranty. Major defects are
serious issues such as structural problems, waterproofing failures, electrical hazards,
or anything that makes the property unsafe or uninhabitable. Major defects should
generally be rectified before settlement proceeds.
###
Who is responsible for fixing defects found during a pre-settlement inspection?
**Short answer:** The vendor or builder is generally responsible for
rectifying defects or damage that occurred before settlement.
For established homes, the vendor must deliver the property in the same condition as
when the contract was signed, fair wear and tear excepted. Any damage or changes that
occurred after contract signing are the vendor's responsibility to rectify. For new
builds, the builder must complete construction to the agreed specifications and rectify
any defects identified before handover. The specific obligations depend on your contract
terms and state legislation.
###
How far before settlement should I schedule the inspection?
**Short answer:** Schedule 5-7 days before settlement for established
homes, and 7-14 days for new builds.
This timing allows sufficient time to identify any issues and negotiate repairs or other
remedies before settlement. For new builds, allowing more time is advisable as the
builder may need several days to rectify defects. Scheduling too close to settlement
leaves little time to address problems, while scheduling too early risks issues arising
between inspection and settlement.
###
What legal protections do buyers have if issues are found?
**Short answer:** Buyers can negotiate repairs, seek price reductions,
delay settlement, or in serious cases, potentially terminate the contract.
Australian property law provides buyers with protections when properties are not
delivered as agreed. Your options depend on the nature and severity of the issues, the
terms of your contract, and applicable state legislation. For minor issues, negotiating
repairs or a small price reduction is common. For major defects, you may be entitled to
delay settlement until rectified, withhold funds in trust, or seek legal remedies.
Always consult your solicitor for advice specific to your situation.
###
What happens if the vendor refuses to fix defects before settlement?
**Short answer:** You may need to seek legal advice on your options, which
could include delaying settlement, negotiating a price reduction, or pursuing legal
action.
If the vendor refuses to rectify significant defects, consult your solicitor
immediately. Depending on the severity of the issues and your contract terms, you may be
able to delay settlement until issues are resolved, negotiate a reduction in the
purchase price to cover repair costs, or pursue legal remedies for breach of contract.
For minor cosmetic issues, it may be more practical to proceed with settlement and
address them yourself rather than risk the sale falling through.
###
Can I do a pre-settlement inspection myself?
**Short answer:** Yes, you can conduct your own inspection, but
professional assistance is recommended for new builds or complex properties.
For established homes where you are mainly checking that nothing has changed since
contract signing, a DIY inspection using a comprehensive checklist can be sufficient.
However, you may miss technical defects or hidden issues that a professional would
identify. For new builds, where you are assessing construction quality for the first
time, professional inspection is strongly recommended to ensure all defects are
identified and documented before you take ownership.
###
What should I bring to a pre-settlement inspection?
**Short answer:** Bring a copy of the contract, a checklist, your phone for
photos, a torch, and any previous inspection reports.
Having your contract allows you to verify that all inclusions listed are present. A
comprehensive checklist ensures you do not overlook any areas. Your phone is essential
for taking photos and videos of any issues found. A torch helps inspect dark areas like
roof spaces, under sinks, and in cupboards. If you had a building inspection when
purchasing, bring that report to verify any noted issues have been addressed.
###
Is a pre-settlement inspection the same as a building inspection?
**Short answer:** No, they serve different purposes and occur at different
stages of the buying process.
A building inspection is typically conducted before you sign the contract, during the
due diligence period. It is a comprehensive assessment of the property's structural
condition and identifies existing defects. A pre-settlement inspection occurs just
before settlement and verifies the property has not changed since contract signing and
that any agreed works have been completed. While both are important, they serve
different purposes in protecting your property purchase.
###
Can the vendor refuse access for a pre-settlement inspection?
**Short answer:** Generally no, as the right to a pre-settlement inspection
is typically included in the standard contract of sale across Australian states.
Most standard contracts of sale in Australia include a clause allowing the buyer to
conduct a pre-settlement inspection. In NSW, the standard contract provides for
inspection on reasonable notice. If a vendor refuses access without valid reason, this
may constitute a breach of contract. However, you must provide reasonable notice and
conduct the inspection at a mutually agreeable time. If access is being denied, contact
your solicitor immediately for advice on your options.
###
What if the property is tenanted during the pre-settlement inspection?
**Short answer:** You can still conduct an inspection, but you must
coordinate with the tenant and provide appropriate notice as required by tenancy
legislation.
When purchasing a tenanted property, you are still entitled to a pre-settlement
inspection. The real estate agent or vendor should arrange access with the tenant,
typically requiring 24 to 48 hours notice depending on your state. Be respectful of the
tenant's belongings and privacy during the inspection. You may need to work around
furniture and personal items, which can make it harder to inspect some areas. Consider
engaging a professional inspector who is experienced with tenanted property inspections.
###
How do I check if appliances are working during the inspection?
**Short answer:** Test each appliance included in the sale by turning it on
and running it through a basic cycle or function.
For ovens and cooktops, turn on each element and check that it heats up. Run the
dishwasher through a quick cycle to check for leaks and drainage. Test air conditioning
on both heating and cooling modes if applicable. Check the rangehood fan and light. For
hot water systems, run hot water taps and verify temperature. Test ceiling fans on
different speeds. Document any appliances that do not work properly with photographs and
notes for your rectification request.
###
What is the difference between a defect and fair wear and tear?
**Short answer:** Defects are damage or faults that occurred between
contract and settlement, while fair wear and tear is normal deterioration from everyday
use that was present at contract signing.
Fair wear and tear includes minor scuff marks on walls, slight carpet wear in high
traffic areas, or minor fading of paint from sunlight. These existed when you inspected
and agreed to purchase the property. Defects are new issues that arose after the
contract was signed, such as a broken window, new water damage, holes in walls from
removed fixtures, or damaged flooring from furniture removal. The vendor is responsible
for rectifying defects but not fair wear and tear.
## Key Takeaways
- A pre-settlement inspection verifies the property is in agreed condition before you complete your purchase.
- Schedule your inspection 5-7 days before settlement for established homes, or 7-14 days for new builds.
- Check all structural elements, plumbing, electrical systems, appliances, and external areas systematically.
- Engage a professional inspector for new builds, high-value properties, or when you need documented evidence.
- Document all defects with photographs and written descriptions for negotiation purposes.
- Builders are legally obligated to rectify major defects before settlement on new builds.
- Consult your solicitor if significant issues are discovered to understand your legal options.
- Minor defects may be addressed after settlement under warranty, but major issues should be resolved before handover.
## References and Resources
- [ NSW Fair Trading ](https://www.fairtrading.nsw.gov.au/)
- [ Consumer Affairs Victoria ](https://www.consumer.vic.gov.au/)
- [ Queensland Building and Construction Commission (QBCC) ](https://www.qbcc.qld.gov.au/)
- [ WA Building Commission ](https://www.commerce.wa.gov.au/building-commission)
- [ Consumer and Business Services South Australia ](https://www.cbs.sa.gov.au/)
### Construction Stage Defect Assessment for Early Fixes
Source: https://ownerinspections.com.au/articles/construction-stage-defect-assessment
Published: 2026-01-16 | Category: Defect Investigation
Author: Maison Azdari
Building your dream home is exciting, but it comes with a risk that many owners only
discover when it is too late: hidden construction defects. What seems like a minor issue
during the build can transform into a major structural problem that costs tens of thousands
of dollars to repair.
Construction stage defect assessments are your insurance policy against these costly
surprises. By identifying defects early in the construction process, you prevent minor
issues from escalating into problems that can compromise safety and blow out your budget.
According to the Australian Construction Industry report, structural defects can increase
the overall cost of a construction project by up to 20%. This sobering statistic underscores
the importance of thorough inspections at every stage of construction, from foundation to
final finishes.
> The best time to find a construction defect is before it gets covered up by the next stage
> of work. Once walls are closed up, detecting and fixing problems becomes exponentially more
> expensive.
## The 5 Stages of Construction and Common Defects
Understanding the different stages of construction and the types of defects that can occur
at each phase is essential for effective quality control. Each stage presents unique
challenges and opportunities for defect detection.
| Construction Stage | Key Activities | Common Defects |
| --------------------------- | -------------------------------------------- | ---------------------------------------------------------------- |
| Pre-Construction | Design planning, material selection, permits | Improper planning, inadequate specifications, overlooked permits |
| Foundation and Substructure | Excavation, footings, slab pouring | Improperly poured concrete, unstable soil, poor drainage |
| Superstructure | Framing, walls, roof structure | Frame misalignment, improper materials, inadequate reinforcement |
| Interior Finishing | Plumbing, electrical, insulation, HVAC | Plumbing leaks, electrical faults, insulation problems |
| Exterior Finishing | Roofing, waterproofing, landscaping | Improper roofing, faulty waterproofing, drainage issues |
### Stage 1: Pre-Construction
The pre-construction phase involves design planning, material selection, and obtaining
necessary permits. While this stage does not involve physical construction, defects in
planning can have far-reaching consequences throughout the project.
Common defects during pre-construction include:
- Improper planning that fails to account for site conditions
- Inadequate specifications that lead to material quality issues
- Overlooked permits or non-compliance with local regulations
- Insufficient structural engineering calculations
Poor planning at this stage can result in structural misalignments, material failures, and
costly redesigns during construction. Engaging qualified professionals to review plans and
specifications before construction begins is essential.
### Stage 2: Foundation and Substructure
The foundation and substructure phase is the critical groundwork upon which the entire
building rests. Defects at this stage affect the stability and longevity of the entire
structure.
Key issues to monitor during foundation work include:
- **Improperly poured concrete:** Incorrect mix ratios, inadequate curing time, or poor compaction
- **Unstable soil:** Insufficient soil testing or failure to address reactive soil conditions
- **Poor drainage:** Inadequate waterproofing or drainage systems around footings
- **Foundation settlement:** Uneven settling due to soil conditions or construction errors
Soil testing by qualified geotechnical engineers determines the ground's stability and
load-bearing capacity. This testing is essential for designing appropriate footings and
foundation systems that will support the structure safely.
### Stage 3: Superstructure
The superstructure stage involves constructing the building's frame or skeleton, including
walls, floors, and roof structure. This phase requires precise measurements and quality
materials to ensure structural integrity.
Critical defects to identify during superstructure construction include:
- **Frame misalignment:** Even minor misalignments can cause significant long-term problems including uneven floors and cracking walls
- **Improper materials:** Use of undersized or substandard timber or steel members
- **Inadequate reinforcement:** Missing or incorrectly placed steel reinforcement in concrete elements
- **Connection failures:** Improperly installed brackets, ties, or connectors
Professional inspectors use laser levelling equipment and plumb bobs to verify alignment and
ensure the frame meets engineering specifications. Detecting and correcting misalignments at
this stage is far more cost-effective than addressing problems after completion.
### Stage 4: Interior Finishing
The interior finishing stage is where many hidden defects can emerge or become concealed
behind walls and ceilings. This phase includes plumbing, electrical, insulation, and HVAC
installation.
Common defects during interior finishing include:
- **Plumbing issues:** Misaligned pipes, inadequate joints, and potential leak points that can cause water damage
- **Electrical faults:** Loose wiring, improper connections, and code violations that create fire hazards
- **Insulation problems:** Gaps, compression, or incorrect installation reducing thermal performance
- **HVAC failures:** Undersized systems, poor ductwork installation, or inadequate ventilation
The rough-in phase, before walls are closed up, is the critical time for inspection. Once
plasterboard is installed, accessing and repairing these systems becomes significantly more
expensive and disruptive.
### Stage 5: Exterior Finishing and Final Inspections
The exterior finishing stage completes the building envelope with roofing, waterproofing,
cladding, and landscaping. This phase is particularly important in Australian climates where
heavy rainfall and extreme temperatures test the building's weather resistance.
Key areas of concern during exterior finishing include:
- **Roofing defects:** Gaps between tiles or sheets, improper flashing installation, inadequate fixing
- **Waterproofing failures:** Incorrect membrane application, failed joints, or inadequate coverage in wet areas
- **Cladding issues:** Poor installation, inadequate weatherproofing, or incorrect expansion allowances
- **Drainage problems:** Inadequate site drainage, incorrect falls, or blocked stormwater systems
Water ingress through poorly installed roofing or waterproofing causes mould growth,
structural rot, and significant damage to interior finishes. These defects are particularly
concerning in regions with heavy rainfall.
## Common Construction Defects and Detection Methods
Understanding the most common types of construction defects and how they are detected helps
property owners and project managers know what to look for during inspections.
| Defect Type | Warning Signs | Detection Methods |
| -------------------------- | ------------------------------------------------------- | ----------------------------------------------------- |
| Structural frame alignment | Uneven floors, doors not closing properly, visible lean | Laser levels, plumb bobs, spirit levels |
| Concrete defects | Cracking, spalling, honeycombing, discolouration | Visual inspection, compression testing, core sampling |
| Plumbing issues | Water stains, dampness, slow drainage, odours | Pressure testing, pipe cameras, moisture meters |
| Electrical faults | Flickering lights, warm power points, tripping breakers | Electrical testers, thermal imaging, circuit testing |
| Waterproofing failures | Water stains, bubbling paint, mould, efflorescence | Flood testing, moisture meters, thermal imaging |
| Roofing defects | Leaks, damaged tiles, rusted fixings, sagging | Visual inspection, water testing, drone inspection |
### Concrete Strength and Curing Issues
Concrete defects are among the most serious issues that can affect a building's structural
integrity. Temperature and humidity control during curing is essential for achieving proper
concrete strength.
- **Cracking:** Can indicate excess pressure, poor curing, or improper mix ratios
- **Spalling:** Surface deterioration often caused by moisture penetration and reinforcement corrosion
- **Honeycombing:** Voids in concrete caused by poor compaction or segregation of materials
- **Low strength:** Results from incorrect mix ratios, inadequate curing, or contamination
Compression testing machines verify concrete strength meets engineering specifications. Core
samples may be extracted for laboratory testing if there are concerns about concrete
quality.
## Foundation Stability Evaluation
A stable foundation is the cornerstone of any successful construction project. Foundation
stability evaluation involves several methods to ensure the ground and foundation can safely
support the structure.
### Geotechnical Testing
Qualified geotechnical engineers conduct soil testing to determine:
- Soil composition and classification
- Load-bearing capacity of the ground
- Groundwater levels and drainage characteristics
- Reactive soil conditions that may cause movement
### Foundation Monitoring Methods
- **Levelling instruments:** Monitor foundation position and detect any movement or settlement
- **Soil compaction tests:** Verify fill material is adequately compacted to support loads
- **Laser levels:** Confirm foundation surfaces are level and within tolerance
- **Settlement monitoring:** Track any foundation movement over time
## Compliance and Documentation Requirements
Construction projects in Australia must comply with the National Construction Code (NCC) and
relevant Australian Standards (AS). Proper documentation of defects and corrective actions
is essential for legal compliance and quality assurance.
### Key Regulatory Requirements
- **National Construction Code (NCC):** Sets minimum requirements for safety, health, amenity, and sustainability
- **Australian Standards:** Provide detailed technical specifications for materials and workmanship
- **Work Health and Safety Act:** Ensures safe construction practices and site management
- **Environmental regulations:** Address stormwater management, waste disposal, and site protection
### Defect Documentation
Thorough documentation of identified defects should include:
- Detailed description of the defect and its location
- Photographic evidence with date stamps
- Assessment of severity and potential impact
- Recommended corrective actions
- Timeline for remediation
- Sign-off confirmation once repairs are completed
## Corrective Action Recommendations
When defects are identified, prompt corrective action prevents further deterioration and
additional costs. The approach to remediation depends on the type and severity of the
defect.
| Defect Category | Corrective Actions | Prevention Measures |
| ---------------------- | -------------------------------------------------------- | -------------------------------------------- |
| Framing misalignment | Beam and stud repositioning, laser level verification | Regular alignment checks during construction |
| Foundation cracks | Structural fillers, sealants, underpinning, re-levelling | Proper soil preparation and drainage |
| Plumbing defects | Joint repair, pipe replacement, pressure testing | Rough-in inspection before wall closure |
| Electrical issues | Rewiring, connection repair, safety testing | Licensed electrician inspection at rough-in |
| Waterproofing failures | Membrane repair or replacement, joint sealing | Independent waterproofing inspection |
## Benefits of Construction Stage Inspections
Investing in professional [construction stage inspections](/new-construction-stage-inspections) provides significant benefits
throughout the project lifecycle and beyond.
### Cost Savings
- Early defect detection prevents expensive repairs after completion
- Avoids the cost of demolishing finished work to access hidden defects
- Reduces risk of project delays caused by major defect rectification
- Protects against potential legal costs from defect-related disputes
### Quality Assurance
- Ensures workmanship meets Australian Standards and NCC requirements
- Provides independent verification of builder performance
- Documents construction quality for warranty purposes
- Identifies issues before they affect subsequent construction stages
### Peace of Mind
- Confidence that your investment is protected
- Independent professional assessment separate from builder
- Clear documentation of construction quality
- Early warning of potential problems
## Frequently Asked Questions
###
What is a construction stage defect assessment?
**Short answer:** A professional inspection conducted at key stages during
construction to identify defects before they become hidden behind finished surfaces.
Construction stage defect assessments are systematic inspections performed at critical
points during the building process. These inspections examine workmanship quality,
compliance with plans and specifications, and adherence to Australian Standards and the
National Construction Code. By identifying defects early, issues can be corrected while
access is still available and before they cause problems for subsequent construction
stages or become concealed within the finished building.
###
How many stage inspections should I have during construction?
**Short answer:** Most residential projects benefit from four to six
inspections at key stages including slab, frame, lock-up, fixing, and practical
completion.
The number of inspections depends on the project complexity and value. Standard
residential construction typically requires inspections at slab stage (before concrete
pour), frame stage (before cladding), lock-up stage (when the building is
weather-tight), fixing stage (before plasterboard installation), and practical
completion. Larger or more complex projects may require additional inspections. Each
inspection targets specific elements that will become inaccessible once subsequent work
is completed.
###
What is the most critical stage for defect detection?
**Short answer:** The frame stage and rough-in stage are most critical as
structural and services defects become hidden once walls are closed up.
While all stages are important, the frame and rough-in stages are particularly critical
because structural framing, plumbing, and electrical work will be concealed behind wall
linings. Defects in these areas are extremely expensive to repair once the building is
completed, often requiring demolition of finished surfaces to access the problem.
Waterproofing inspection in wet areas is equally critical as failures can cause
extensive damage and are difficult to rectify after tiling is complete.
###
How much do construction stage inspections cost?
**Short answer:** Individual stage inspections typically cost $300 to $600
each, with package deals for multiple inspections offering better value.
The cost varies depending on the property size, location, and scope of inspection. Many
inspection companies offer package deals covering all construction stages at a reduced
total cost compared to booking individually. When compared to the potential cost of
defect rectification, which can reach tens of thousands of dollars or more, stage
inspections represent excellent value for protecting your investment. The cost is
insignificant relative to the total construction cost and potential savings from early
defect detection.
###
Can I attend the construction stage inspection?
**Short answer:** Yes, attending inspections is recommended as it allows
you to understand any issues and ask questions directly.
Most inspection companies welcome owner attendance at inspections. Being present allows
you to see any defects firsthand, understand their significance, and ask questions about
construction quality. However, ensure you have appropriate permission to be on the
construction site and follow all safety requirements. Even if you cannot attend, you
will receive a detailed written report with photographs documenting all findings.
###
What happens if defects are found during a stage inspection?
**Short answer:** Defects are documented in a detailed report which you
present to your builder for rectification before work proceeds.
When defects are identified, the inspector provides a comprehensive report including
descriptions, photographs, locations, and severity assessments. You then present this
report to your builder and request rectification before the next stage payment is made
or before subsequent work covers the defective areas. Most building contracts include
provisions for defect rectification. Maintaining clear documentation protects your
interests and provides evidence if disputes arise.
###
Are construction stage inspections the same as council inspections?
**Short answer:** No, council or certifier inspections focus on compliance
with approval conditions, while independent inspections assess overall quality and
workmanship.
Mandatory inspections by council or private certifiers confirm the work complies with
the building approval and relevant codes. However, these inspections have limited scope
and do not comprehensively assess workmanship quality or identify all defects.
Independent construction stage inspections provide a more thorough examination of
construction quality, looking for defects and issues that may not cause code
non-compliance but still affect the building's quality, durability, and value.
###
When should I book my first construction stage inspection?
**Short answer:** Book your inspection company before construction starts
so they can schedule inspections at the appropriate times.
Engaging an inspection company early allows them to understand your project and schedule
inspections at critical points. For the slab inspection, the inspector needs to examine
the reinforcement and formwork before concrete is poured, which may only be accessible
for a short window. Your builder should notify you and your inspector when each stage is
ready for inspection. Establishing this process early ensures no critical inspections
are missed.
###
Do I need stage inspections if I have a fixed-price contract?
**Short answer:** Yes, a fixed-price contract does not guarantee quality
workmanship, and independent inspections protect your interests.
Fixed-price contracts set the project cost but do not ensure construction quality.
Builders may use minimum specification materials or acceptable but not excellent
workmanship to maintain margins. Independent inspections verify the work meets the
contracted specifications and Australian Standards. Additionally, identifying defects
during construction is easier to rectify than after completion when warranty claims may
be disputed. Inspections protect your investment regardless of contract type.
###
What qualifications should a construction stage inspector have?
**Short answer:** Look for inspectors with building or engineering
qualifications, relevant licensing, and professional indemnity insurance.
Qualified inspectors should hold relevant building industry qualifications such as a
builder's licence, building inspection certification, or engineering degree. They should
have practical experience in construction and be familiar with Australian Standards and
the National Construction Code. Professional indemnity insurance protects you if the
inspector fails to identify a significant defect. Membership in professional
associations and positive reviews from previous clients are also good indicators of
competence and reliability.
###
Should I withhold progress payments if defects are found?
**Short answer:** You should address defects before making progress
payments, as your building contract typically ties payments to satisfactory completion
of each stage.
Most building contracts in Australia require the builder to complete each stage to a
satisfactory standard before payment is due. If your independent inspection identifies
defects, you have grounds to request rectification before releasing the stage payment.
Document all defects in writing with photographs and provide the report to your builder.
Be reasonable about minor issues that can be addressed promptly, but stand firm on
significant defects that could affect structural integrity or subsequent work.
###
What happens if my builder refuses to fix defects?
**Short answer:** Document everything and seek advice from your state's
building authority or a construction lawyer if the builder refuses to rectify legitimate
defects.
If your builder disputes defects identified in your inspection report, request a formal
written response explaining their position. You may seek a second opinion from another
qualified inspector. If the builder continues to refuse rectification of legitimate
defects, you can lodge a complaint with your state's building authority such as NSW Fair
Trading, QBCC in Queensland, or VBA in Victoria. For significant disputes, consulting a
construction lawyer or building dispute resolution service may be necessary.
###
How do waterproofing inspections fit into stage inspections?
**Short answer:** Waterproofing inspection is a critical separate
inspection that must occur after membrane application but before tiling in wet areas.
Waterproofing failures are among the most common and expensive defects in Australian
homes. The waterproofing inspection should verify correct membrane application,
appropriate overlap at joints, adequate height on walls, proper integration with
fixtures and penetrations, and compliance with AS 3740. This inspection is often
mandated by councils and must be completed by a licensed waterproofer or certifier. Once
tiles are installed, waterproofing failures become extremely costly to repair.
###
Can I use stage inspection reports for warranty claims?
**Short answer:** Yes, stage inspection reports provide documented evidence
of construction quality that can support warranty claims during the defects liability
period.
Your stage inspection reports create a record of the property's condition at each
construction phase. If defects emerge later that relate to issues present during
construction, these reports provide evidence for warranty claims. In NSW and Queensland,
statutory warranty periods of 6 years for major defects and 2 years for minor defects
apply. Having independent inspection documentation strengthens your position when making
claims against the builder or their warranty insurance.
## Key Takeaways
- Construction defects can increase project costs by up to 20%, making early detection essential for protecting your investment.
- The five key construction stages each present unique opportunities for defect detection: pre-construction, foundation, superstructure, interior finishing, and exterior finishing.
- Frame stage and rough-in inspections are critical as defects become hidden once walls are closed up.
- Professional inspectors use specialised equipment including laser levels, moisture meters, and thermal imaging cameras.
- All construction must comply with the National Construction Code (NCC) and relevant Australian Standards.
- Thorough documentation of defects with photographs and descriptions is essential for rectification and legal compliance.
- Independent stage inspections are separate from and more thorough than mandatory council or certifier inspections.
- Stage inspection costs are minimal compared to potential defect rectification costs after completion.
## References and Resources
- [ National Construction Code (NCC) ](https://ncc.abcb.gov.au/)
- [ Standards Australia ](https://www.standards.org.au/)
- [ Queensland Building and Construction Commission (QBCC) ](https://www.qbcc.qld.gov.au/)
- [ Victorian Building Authority (VBA) ](https://www.vba.vic.gov.au/)
- [ NSW Fair Trading ](https://www.fairtrading.nsw.gov.au/)
For a complete overview, see our [guide to construction stage inspections](/guides/construction-stage-inspections-guide).
If defects persist after construction is complete, a formal investigation may be needed. See our [guide to building defect investigations](/guides/building-defect-investigation-guide).
### How to Resolve Pre-Settlement Disputes Effectively
Source: https://ownerinspections.com.au/articles/pre-settlement-disputes-and-resolution
Published: 2026-01-06 | Updated: 2026-01-26 | Category: Pre-Settlement Inspections
Author: Maison Azdari
You have signed the contract, secured financing, and settlement day is approaching. Then you
discover defects during your final inspection, or the builder refuses to fix issues you
raised weeks ago. Welcome to the stressful world of pre-settlement disputes.
Pre-settlement disputes create significant challenges for property buyers, developers, and
investors across Australia. The Australian Housing Industry Association reports that one in
five new homeowners encounters settlement problems, with construction defects being the most
frequently cited issue.
These conflicts can result in financial losses, legal complications, and delays in property
transactions. Unresolved disputes lead to financial strain from delayed access, legal costs,
and repair expenses. Extended legal battles create unnecessary stress, and compromised
property quality means accepting substandard homes.
> Most pre-settlement disputes can be resolved without legal action when you understand your
> rights, document everything properly, and follow the correct escalation process.
## Common Pre-Settlement Disputes in Construction
Understanding the most common types of pre-settlement disputes helps you prepare and respond
effectively when issues arise.
### 1. Construction Defects and Quality Issues
Structural cracks, faulty plumbing, uneven tiling, and electrical hazards frequently plague
newly built homes. Poor workmanship and substandard materials frustrate buyers after making
substantial investments.
**Solution:** Hire a qualified building inspector for a pre-settlement
assessment. Document all defects photographically and present findings to developers for
rectification before settlement completion. An independent inspection report provides the
evidence you need to support your claims.
### 2. Delays in Property Handover
Labour shortages, supply chain disruptions, unexpected site issues, or contractual variation
disputes cause construction delays. Buyers face financial burdens when settlements are
postponed after selling existing properties or securing financing.
**Solution:** Australian Consumer Law permits financial claims when delays
breach contractual obligations and cause inconvenience or loss. Review your contract for
sunset clauses and delay compensation provisions.
### 3. Unapproved Changes to Property Specifications
Developers sometimes substitute premium materials without consent. Examples include
replacing stone countertops with laminate alternatives, changing fixture brands, or reducing
landscaping scope.
**Solution:** Review contracts for breaches and document the differences
between promised and delivered specifications. Legal recourse may compel restoration to
original specifications or demand financial compensation.
### 4. Disagreements Over Outstanding Repairs or Incomplete Work
Unfinished landscaping, paint defects, missing appliances, and non-functional installations
commonly emerge during final inspections. Buyers face pressure to settle despite incomplete
promised work.
**Solution:** Ensure all repair agreements are documented in writing and
completed before final payment. Documented commitments strengthen your position in dispute
resolution.
### 5. Contractual Disputes and Misinterpretation of Terms
Ambiguous contract language regarding warranties, delay penalties, and developer obligations
creates legal conflicts. Some contracts unfairly favour developers, limiting buyer recourse.
**Solution:** Consult property lawyers before signing to understand your rights
fully and negotiate better terms. Prevention is always easier than resolution.
| Dispute Type | Common Causes | Resolution Approach |
| --------------------- | ---------------------------------------------- | ----------------------------------------------------- |
| Construction defects | Poor workmanship, substandard materials | Independent inspection, written rectification request |
| Handover delays | Labour shortages, supply issues, site problems | Contract review, compensation claim under ACL |
| Specification changes | Unapproved substitutions, material downgrades | Documentation comparison, breach of contract claim |
| Incomplete work | Missing finishes, non-functional installations | Written completion agreements, withhold settlement |
| Contractual disputes | Ambiguous terms, unfair clauses | Legal advice, negotiation, tribunal if necessary |
## Understanding the Dispute Resolution Process
When pre-settlement disputes arise, following a structured resolution process maximises your
chances of a favourable outcome while minimising costs and delays.
### Step 1: Direct Communication with the Developer or Seller
Begin with direct negotiation as the first resolution step. Maintain written communication
through emails and formal letters documenting all complaints and responses. Clearly outline
issues, reference contractual obligations, and suggest reasonable solutions while remaining
professional and factual.
- Put all communications in writing via email or letter
- Reference specific contract clauses being breached
- Include photographs and inspection reports as evidence
- Set reasonable deadlines for response and action
- Keep copies of all correspondence
### Step 2: Engage a Professional Inspector for an Independent Report
Licensed building inspectors provide unbiased property condition assessments. These reports
serve as evidence supporting legal claims or dispute resolutions, strengthening buyer
positions during repair negotiations or compensation discussions.
An independent inspection report carries more weight than your own observations because it
comes from a qualified professional without a vested interest in the transaction outcome.
### Step 3: Alternative Dispute Resolution (ADR) Methods
If direct negotiation fails, Alternative Dispute Resolution offers faster and less expensive
options than litigation.
- **Mediation:** A neutral third party facilitates discussions enabling voluntary agreement. This process is cost-effective and typically faster than other options.
- **Conciliation:** Similar to mediation, often involving consumer protection agencies as intermediaries who can provide guidance on likely outcomes.
- **Arbitration:** A formal, legally binding resolution where independent arbitrators make final decisions both parties must follow.
### Step 4: Legal Options for Unresolved Disputes
If disputes persist after ADR attempts, legal escalation becomes necessary. Property lawyers
assist in filing complaints with relevant tribunals or courts. Legal action can prove
expensive, so it should be a last resort after other options have been exhausted.
### Step 5: Government and Consumer Protection Bodies
Several government bodies can assist with pre-settlement disputes:
- **NSW Fair Trading:** Handles building disputes in New South Wales
- **Victorian Building Authority (VBA):** Regulates building standards in Victoria
- **QBCC:** Queensland Building and Construction Commission handles Queensland disputes
- **Australian Consumer Law (ACL):** Provides consumer protection for property transactions nationwide
| Resolution Method | Typical Timeframe | Approximate Cost |
| --------------------------- | ------------------- | ---------------------- |
| Direct negotiation | 1-4 weeks | Minimal (your time) |
| Mediation | 2-8 weeks | $500 - $2,000 |
| State tribunal (NCAT, VCAT) | 2-6 months | $100 - $500 filing fee |
| Court litigation | 6 months - 2+ years | $10,000 - $100,000+ |
## Legal Protections and Homebuyer Rights in Australia
Australian law provides significant protections for property buyers. Understanding these
rights helps you navigate disputes effectively.
### Key Legal Frameworks Governing Pre-Settlement Disputes
- **Home Building Act 1989 (NSW):** Governs defect liability and dispute resolution for residential building work
- **Australian Consumer Law (ACL):** Protects buyers against deceptive practices and provides remedies for breaches
- **Building Warranties and Statutory Protections:** Covers defects post-settlement with mandatory warranty periods
- **Domestic Building Contracts Act 1995 (VIC):** Regulates domestic building contracts in Victoria
### Time Limits for Filing Complaints
Be aware of limitation periods that restrict when you can make claims:
- **Major structural defects:** 6 years from completion to report
- **Minor defects:** 2 years from completion to report
Missing these deadlines can severely limit your legal recourse options, so act promptly when
issues are identified.
## Frequently Asked Questions
###
What steps should I take if my new home has defects before settlement?
**Short answer:** Obtain an independent [pre-settlement inspection](/apartment-pre-settlement), document
all defects with photographs, and notify the builder in writing requesting
rectification.
Start by engaging a qualified building inspector to conduct a thorough pre-settlement
inspection. Create a comprehensive list of defects with clear photographs showing each
issue. Provide this documentation to your builder in writing, requesting a rectification
plan with specific completion dates. Involve your conveyancer or solicitor if the
builder delays or refuses to address the issues. Do not proceed to settlement until
major defects are resolved or you have written agreements for post-settlement
rectification.
###
How long do I have to file a dispute for construction defects in Australia?
**Short answer:** Generally 6 years for major structural defects and 2
years for minor defects from the date of completion, though timeframes vary by state.
Limitation periods vary depending on your state and the statutory warranty scheme that
applies. In NSW, the statutory warranty period is 6 years for major defects and 2 years
for other defects from the date of completion. Victoria has similar provisions under the
Domestic Building Contracts Act. Queensland's QBCC scheme also provides warranty
protections. Check your specific state's rules and act promptly to preserve your rights.
Earlier notification typically leads to better outcomes.
###
Can I delay settlement if my property is incomplete?
**Short answer:** Sometimes, but only if your contract permits it or key
conditions are not met. Seek legal advice before delaying to avoid default penalties.
Your ability to delay settlement depends on the specific terms of your contract and
whether the incomplete work constitutes a breach of those terms. Some contracts include
practical completion clauses that define when the property is considered ready for
handover. Unilaterally refusing to settle can put you in breach of contract and trigger
penalties. Always consult with your conveyancer or solicitor before deciding to delay
settlement to understand your rights and risks.
###
What are my rights if the developer refuses to fix defects before settlement?
**Short answer:** Escalate through formal written notice, state building
dispute services, and if necessary, tribunal or legal action depending on your state.
If direct negotiation fails, escalate to your state's building dispute resolution
service. In NSW, lodge a complaint with NSW Fair Trading. In Victoria, contact the VBA
or Consumer Affairs Victoria. You may also file an application with the relevant
tribunal such as NCAT in NSW or VCAT in Victoria. For significant defects, you may have
grounds to withhold a portion of the settlement funds pending rectification, but this
requires careful legal advice.
###
What is the difference between mediation and arbitration in property disputes?
**Short answer:** Mediation helps parties reach voluntary agreements, while
arbitration results in binding decisions made by an independent arbitrator.
Mediation involves a neutral mediator facilitating discussions between parties to help
them reach a mutually acceptable resolution. Neither party is forced to accept any
outcome. Arbitration is more formal, with an arbitrator hearing evidence and arguments
from both sides before making a decision that is usually legally binding. Mediation is
generally cheaper and faster but requires both parties to cooperate. Arbitration
provides a definitive outcome when agreement cannot be reached.
###
How do I negotiate repairs with my builder before settlement?
**Short answer:** Use inspection reports as evidence, communicate in
writing, specify required fixes with deadlines, and request signed rectification plans.
Start with a professional inspection report that documents all defects with photographs
and references to relevant standards. Present this to your builder in writing, clearly
specifying each issue and the required remedy. Set reasonable deadlines for response and
completion. Request a signed rectification plan that commits the builder to specific
works and timeframes. Keep all correspondence as evidence. If the builder is
uncooperative, involve your conveyancer and consider escalating to dispute resolution
services.
###
What government bodies can help me with pre-settlement disputes?
**Short answer:** Contact your state's building authority such as NSW Fair
Trading, VBA, or QBCC, plus relevant tribunals like NCAT, VCAT, or QCAT.
In NSW, contact NSW Fair Trading or the Building Commission NSW for residential building
disputes. In Victoria, the Victorian Building Authority (VBA) and Consumer Affairs
Victoria handle building complaints. Queensland buyers should contact the QBCC
(Queensland Building and Construction Commission). Each state also has a civil and
administrative tribunal that can hear building disputes, including NCAT in NSW, VCAT in
Victoria, and QCAT in Queensland. These tribunals offer more affordable dispute
resolution than traditional courts.
###
Can I get compensation if my settlement is delayed?
**Short answer:** Possibly, if your contract includes liquidated damages or
delay compensation terms, or if delays breach agreed timelines causing you loss.
Your entitlement to compensation depends on your contract terms and the circumstances of
the delay. Many contracts include liquidated damages provisions that specify
compensation amounts for delays. Even without such clauses, you may be entitled to claim
losses caused by the delay under general contract law or Australian Consumer Law. Losses
could include additional rent payments, storage costs, or interest on bridging finance.
Document all additional expenses caused by the delay to support any compensation claim.
###
What documents should I keep when dealing with pre-settlement disputes?
**Short answer:** Keep contracts, specifications, all correspondence,
inspection reports, photographs, quotes, and notes from any meetings or phone calls.
Maintain comprehensive records including your contract of sale, building plans and
specifications, any variations or change orders, all emails and letters between parties,
independent inspection reports, dated photographs of defects, quotes for rectification
work, formal notices sent and received, and written notes from meetings or phone
conversations with dates and attendees. This documentation is essential for supporting
your position in negotiations, mediation, or legal proceedings.
###
Is legal action always necessary for resolving pre-settlement disputes?
**Short answer:** No, most disputes resolve through negotiation or
alternative dispute resolution. Legal action is a last resort when other methods fail.
The majority of pre-settlement disputes are resolved without court involvement. Direct
negotiation with documented communication resolves many issues. Mediation and
conciliation through state building authorities provide effective resolution for more
difficult disputes. State tribunals offer relatively affordable and accessible dispute
resolution. Full court litigation is expensive, time-consuming, and unpredictable.
Reserve legal action for significant disputes where substantial amounts are at stake and
other methods have been exhausted.
###
Should I proceed with settlement if there are unresolved defects?
**Short answer:** It depends on the severity of defects and whether you
have written agreements for post-settlement rectification. Seek legal advice for major
issues.
For minor cosmetic defects with written rectification agreements, proceeding to
settlement is usually safe as these can be addressed under warranty. For significant
defects affecting habitability, safety, or substantial value, delaying settlement may be
appropriate if your contract permits. Consider negotiating a retention amount held in
trust until defects are fixed. Never proceed without documented agreements for any
outstanding work. Consult your conveyancer or solicitor before making this decision, as
the consequences of either choice can be significant.
## Key Takeaways
- One in five new homeowners encounters settlement problems, with construction defects being the most common issue.
- Always obtain an independent pre-settlement inspection and document all issues with photographs before raising disputes.
- Direct negotiation with written communication should be your first resolution step, with escalation to ADR if needed.
- Time limits apply to defect claims: 6 years for major structural defects and 2 years for minor defects in most states.
- Government bodies like NSW Fair Trading, VBA, and QBCC can assist with dispute resolution before resorting to legal action.
- Mediation and tribunal applications are significantly cheaper and faster than court litigation.
- Keep comprehensive documentation including contracts, correspondence, inspection reports, and photographs.
- Most pre-settlement disputes can be resolved without legal action when you follow the correct process and document everything properly.
## References and Resources
- [ NSW Fair Trading ](https://www.fairtrading.nsw.gov.au/)
- [ Victorian Building Authority (VBA) ](https://www.vba.vic.gov.au/)
- [ Queensland Building and Construction Commission (QBCC) ](https://www.qbcc.qld.gov.au/)
- [ Australian Consumer Law (ACCC) ](https://www.accc.gov.au/consumers/consumer-rights-guarantees)
- [ NSW Civil and Administrative Tribunal (NCAT) ](https://www.ncat.nsw.gov.au/)
- [ Victorian Civil and Administrative Tribunal (VCAT) ](https://www.vcat.vic.gov.au/)
### Independent Dilapidation Report Services: Why You Need One
Source: https://ownerinspections.com.au/articles/independent-dilapidation-report-services
Published: 2025-12-30 | Category: Dilapidation Reports
Author: Maison Azdari
Independent [dilapidation reports](/dilapidation-reports) have become an essential safeguard in Australia's
construction industry, providing property owners, builders, and developers with impartial
documentation of property conditions before adjacent construction or excavation work begins.
Unlike council-mandated surveys or builder-commissioned reports, independent dilapidation
reports are prepared by third-party professionals with no vested interest in the
construction outcome, ensuring complete objectivity and legal credibility.
The Australian construction sector continues to experience significant growth, with major
infrastructure projects, residential developments, and commercial construction activities
occurring in urban centres across the country. This increased construction activity
heightens the risk of damage to neighbouring properties through vibrations, ground movement,
excavation works, and heavy machinery operations. Independent dilapidation reports provide
the documented baseline evidence necessary to protect all parties involved when disputes
arise.
Whether you are a homeowner concerned about a neighbouring high-rise development, a property
investor protecting your portfolio, or a builder seeking to limit liability exposure,
understanding the value and process of independent dilapidation services is crucial. This
comprehensive guide examines the legal framework, practical applications, and selection
criteria for independent dilapidation report services across Australian jurisdictions.
> An independent dilapidation report is your strongest defence in construction damage
> disputes. Without impartial baseline documentation, proving whether damage existed before
> construction becomes a matter of speculation rather than evidence.
## What is an Independent Dilapidation Report?
An independent dilapidation report is a detailed condition survey prepared by a qualified
building inspector who has no commercial relationship with the property owner, builder,
developer, or any other party involved in the construction project. This independence is the
defining characteristic that distinguishes these reports from builder-commissioned surveys
or council assessments, providing enhanced credibility and legal standing.
The report provides an unbiased, third-party assessment of a property's condition before and
after construction projects. By creating detailed documentation at specific points in time,
these reports establish clear evidence that can be referenced if disputes arise regarding
property damage. The inspector's independence ensures that all defects, cracks, and
conditions are documented without bias or omission.
Independent dilapidation reports follow Australian Standard AS 4349.0 general requirements
for property inspections, using metric measurements and standardised terminology. This
compliance with recognised industry standards ensures the report will be accepted by
councils, insurers, legal professionals, and tribunals across all Australian jurisdictions.
### Key Components of Independent Reports
- **Visual Documentation:** High-resolution photographs and written descriptions capturing existing defects throughout the property, including date stamps and measurement references where appropriate.
- **Structural Assessments:** Analysis of walls, floors, ceilings, foundations, and drainage systems to establish baseline conditions, with crack measurements recorded in millimetres for future comparison.
- **Legal Significance:** Legally accepted in disputes and insurance claims, providing objective evidence of pre-construction conditions that meets evidentiary standards.
- **Inspector Credentials:** Details of the inspector's qualifications, licensing, professional indemnity insurance, and declaration of independence from all parties.
- **Methodology Statement:** Clear explanation of inspection procedures, equipment used, and limitations, ensuring transparency and reproducibility.
### When Independent Reports Are Required
Independent dilapidation reports are required or strongly recommended in numerous
circumstances across Australian construction projects. Local councils frequently mandate
these reports as conditions of development approval under the Environmental Planning and
Assessment Act 1979 (NSW) and equivalent legislation in other states. Development consent
conditions often specify that dilapidation reports must be prepared by independent
inspectors with no affiliation to the development applicant.
Reports are typically needed before major construction projects, for properties near
excavation sites, during commercial property tenancy transitions, and when construction
involves piling, tunnelling, or demolition activities. Insurance policies for builders and
developers may also require independent dilapidation surveys as a condition of coverage for
third-party property damage claims.
## Australian Legal Framework for Dilapidation Reports
Understanding the legal framework governing dilapidation reports in Australia helps property
owners and construction professionals appreciate their importance and ensure compliance with
regulatory requirements. Several key pieces of legislation and regulatory frameworks apply
across different jurisdictions.
### Environmental Planning and Assessment Act 1979 (NSW)
In New South Wales, the Environmental Planning and Assessment Act 1979 (EP&A Act)
establishes the framework for development assessment and approval. Section 4.17 of the Act
empowers consent authorities to impose conditions on development consents, including
requirements for dilapidation reports. Standard consent conditions frequently require
pre-construction dilapidation surveys for properties within specified distances of
development sites, particularly for projects involving excavation deeper than two metres,
basement construction, demolition of existing structures, or construction within three
metres of property boundaries.
The EP&A Regulation 2021 further supports these requirements, with Schedule 2 outlining
conditions that may be imposed to protect adjoining properties. Local Environmental Plans
(LEPs) and Development Control Plans (DCPs) prepared by individual councils may contain
additional specific requirements for dilapidation reports based on local conditions and
development patterns.
### Civil Liability Act 2002
The Civil Liability Act 2002 and its equivalents across Australian states establish the
framework for negligence claims and property damage liability. Under this legislation,
property owners who suffer damage from neighbouring construction activities may seek
compensation if they can demonstrate that the damage resulted from the construction
company's negligence or failure to take reasonable precautions.
Independent dilapidation reports play a crucial role in civil liability claims by
establishing the property's pre-construction condition. Section 5B of the Act requires
claimants to demonstrate that the defendant's conduct fell below the standard of care
expected of a reasonable person. Dilapidation reports provide the baseline evidence
necessary to compare pre and post-construction conditions, supporting claims that damage
occurred as a result of construction activities.
### State Building Regulations
Each Australian state and territory maintains building regulations that may affect
dilapidation report requirements. The following table summarises the key regulatory bodies
and relevant legislation across jurisdictions.
| State/Territory | Regulatory Body | Key Legislation | Inspector Licensing |
| ------------------ | -------------------------------------------- | ------------------------------------------------------- | ----------------------------------- |
| New South Wales | NSW Fair Trading | Home Building Act 1989, EP&A Act 1979 | Building Inspector Licence required |
| Victoria | Victorian Building Authority | Building Act 1993, Domestic Building Contracts Act 1995 | VBA registration required |
| Queensland | QBCC | Building Act 1975, QBCC Act 1991 | QBCC licence required |
| South Australia | Consumer and Business Services | Planning, Development and Infrastructure Act 2016 | Building work contractor licence |
| Western Australia | Building and Energy Division (DMIRS) | Building Act 2011, Building Services Act 2011 | Building surveyor registration |
| Tasmania | Consumer, Building and Occupational Services | Building Act 2016 | Building practitioner accreditation |
| ACT | Access Canberra (Construction Occupations) | Building Act 2004, Construction Occupations Act 2004 | Construction Occupations Licence |
| Northern Territory | NT Building Advisory Services | Building Act 1993 (NT) | Building practitioner registration |
### Local Council DA Conditions
Local councils across Australia regularly impose dilapidation report requirements as
conditions of development approval. These conditions vary between councils but typically
specify the following requirements:
- **Survey radius:** The distance from the construction site within which properties must be surveyed, typically ranging from 15 to 50 metres depending on construction type and scale.
- **Timing requirements:** Reports must be completed and submitted to council before any site works commence, including demolition or site preparation.
- **Inspector qualifications:** Many councils specify that inspectors must hold relevant licensing and professional indemnity insurance, with some requiring independence from the development applicant.
- **Report format:** Councils may specify minimum requirements for photographic documentation, written descriptions, and report structure.
- **Public infrastructure:** In addition to private property surveys, councils often require documentation of footpaths, kerbs, road surfaces, street trees, and other public assets that may be affected by construction traffic or activities.
### Insurance Requirements
Insurance considerations affect both the requirement for dilapidation reports and the
qualifications of inspectors who prepare them. Builders' construction insurance policies
commonly include conditions relating to dilapidation surveys:
- **Policy conditions:** Many construction insurance policies require pre-construction dilapidation surveys as a condition of coverage for third-party property damage claims. Failure to obtain appropriate surveys may void coverage or reduce claim payouts.
- **Professional indemnity:** Inspectors preparing dilapidation reports should hold professional indemnity insurance with coverage appropriate to the value of properties being surveyed. This protects clients if errors or omissions in the report cause financial loss.
- **Home warranty insurance:** Under the Home Building Act 1989 (NSW) and equivalent legislation in other states, builders must hold home warranty insurance for residential construction work. Dilapidation reports support claims assessment processes under these insurance schemes.
## Why Independent Surveyors Matter
The independence of the surveyor preparing a dilapidation report is perhaps the most
critical factor affecting the report's credibility and usefulness. Understanding why
independence matters helps property owners and construction professionals make informed
decisions about report procurement.
> The value of a dilapidation report lies in its objectivity. A report prepared by a surveyor
> with commercial ties to any party in the construction process is inherently compromised,
> regardless of the surveyor's intentions or professional integrity.
### Advantages Over Builder-Commissioned Reports
Independent reports avoid the conflicts of interest present in builder-provided assessments.
When a builder commissions their own dilapidation survey, there may be inherent bias in how
existing conditions are documented or interpreted, even if unintentional. Builders have a
financial interest in minimising the documented baseline of existing defects, as this
reduces their potential liability for post-construction damage claims.
Courts and tribunals in Australia have long recognised the importance of independent expert
evidence. In construction damage disputes, reports prepared by surveyors engaged by the
defendant builder are typically accorded less weight than independent assessments. The
landmark case of Makita (Australia) Pty Ltd v Sprowles (2001) established principles for
expert evidence admissibility that apply to dilapidation report disputes, emphasising the
importance of independence and objectivity.
### Advantages Over Council Reports
Council-prepared dilapidation surveys serve a different purpose than independent reports and
often lack the necessary detail for comprehensive property protection. Council surveys
typically focus on public infrastructure such as footpaths, kerbs, and road surfaces, rather
than private property conditions. They may be prepared by council staff without specific
building inspection qualifications and may not follow the systematic methodology used by
professional building inspectors.
Independent reports offer accurate, detailed, and bias-free evaluations compared to
government-issued reports, which may lack the necessary detail for comprehensive protection.
Private surveyors invest the time required to thoroughly document every area of a property,
whereas council resources often limit the depth of assessment possible for individual
properties.
### Professional Benefits of Independence
- **Licensed professionals:** Accredited by Australian regulatory bodies including state fair trading departments and building authorities, with ongoing professional development requirements.
- **Greater accuracy:** Comprehensive documentation using professional equipment and systematic inspection methodologies developed specifically for dilapidation assessment.
- **Faster turnaround times:** Dedicated inspection services can deliver reports more quickly than government agencies, often within three to five business days.
- **Protection against liability:** Detailed baseline evidence protects against unfounded compensation claims and provides defensible documentation if disputes proceed to litigation.
- **Expert witness capability:** Independent inspectors can provide expert witness testimony in court or tribunal proceedings, explaining their findings and defending their methodology under cross-examination.
## Comparison: Independent, Council, and Builder Reports
The following table compares the characteristics of dilapidation reports prepared by
independent surveyors, council officers, and builder-engaged inspectors.
| Characteristic | Independent Reports | Council Reports | Builder Reports |
| --------------------------- | ----------------------------------- | -------------------------------------- | ------------------------------------- |
| Objectivity | Highest level of independence | Generally objective but limited scope | Potential conflict of interest |
| Detail Level | Comprehensive interior and exterior | Often limited to public infrastructure | Varies, may minimise existing defects |
| Legal Standing | Strongest evidentiary weight | Acceptable but limited value | May be challenged on bias grounds |
| Cost | $400 to $1,200 typically | Often included in DA fees | $300 to $800 typically |
| Turnaround Time | 3 to 5 business days | Variable, often weeks | 2 to 5 business days |
| Inspector Qualifications | Licensed building inspectors | Council staff, variable qualifications | May use subcontractors |
| Professional Indemnity | Typically $1M to $10M coverage | Council insurance applies | Varies, may be limited |
| Expert Witness Availability | Inspector available for testimony | Limited availability | May have conflict in disputed matters |
## What Independent Reports Include
Comprehensive independent dilapidation reports contain detailed documentation that meets
both legal and practical requirements for property condition assessment. The following
sections outline the standard components of a professional independent report.
### Report Components
| Component | Description | Purpose |
| ------------------------ | --------------------------------------------------- | ---------------------------------------- |
| Executive Summary | Overview of key findings and property condition | Quick reference for stakeholders |
| Property Details | Address, property type, construction type, age | Property identification and context |
| Inspection Methodology | Equipment used, areas accessed, limitations | Transparency and reproducibility |
| External Assessment | Walls, roof, foundations, fencing, paving | Baseline for construction-affected areas |
| Internal Assessment | Walls, ceilings, floors, doors, windows | Comprehensive interior documentation |
| Photographic Schedule | Numbered photographs with location references | Visual evidence cross-referenced to text |
| Defect Schedule | Itemised list of existing defects with measurements | Quantitative baseline for comparison |
| Inspector Credentials | Qualifications, licensing, insurance details | Verification of inspector competence |
| Independence Declaration | Statement confirming no conflicts of interest | Establishes report objectivity |
### Photographic Documentation Standards
Professional independent dilapidation reports include extensive photographic documentation
following industry best practices:
- **High-resolution images:** Minimum 12 megapixel resolution ensuring detail is preserved for future comparison and enlargement if required.
- **Date and time stamps:** Embedded metadata recording exactly when each photograph was captured, creating an unalterable timeline.
- **Measurement references:** Scale rulers or crack width gauges included in photographs of defects to provide objective size reference.
- **Context photographs:** Wide-angle shots establishing the location of defects within the overall property layout.
- **Close-up detail:** Macro photographs of cracks, damage, and defects showing precise condition and extent.
- **Systematic coverage:** All elevations, rooms, and external areas documented regardless of current condition to establish comprehensive baseline.
### Measurement and Analysis
Quantitative measurements distinguish professional independent reports from basic visual
surveys. Inspectors record precise measurements including:
- **Crack widths:** Measured in millimetres using calibrated crack width gauges, with measurements recorded at multiple points along longer cracks.
- **Crack lengths:** Total length measured and recorded, with notation of whether cracks are active or dormant.
- **Floor levels:** Where significant variations exist, floor level surveys may be conducted using laser levels or other surveying equipment.
- **Door and window operation:** Assessment of opening, closing, and latching function to establish baseline operation.
- **Existing movement patterns:** Analysis of crack patterns, settlement indicators, and historical movement that may be relevant to construction impact assessment.
## Cost Factors for Independent Dilapidation Reports
Understanding the factors that influence the cost of independent dilapidation reports helps
property owners and construction professionals budget appropriately and evaluate quotes from
different providers.
| Factor | Impact on Cost | Typical Range |
| ------------------- | ---------------------------------------------------- | -------------------------------------------- |
| Property Size | Larger properties require more inspection time | $50 to $150 per additional 100m2 |
| Property Type | Commercial and heritage properties more complex | 20% to 50% premium for complex properties |
| Inspection Scope | External only vs comprehensive interior and exterior | External: $300 to $500; Full: $500 to $1,200 |
| Access Complexity | Difficult access or multiple access arrangements | $50 to $200 additional |
| Location | Travel time and regional accessibility | Travel fees vary by distance |
| Urgency | Expedited turnaround requirements | 25% to 50% premium for urgent requests |
| Multiple Properties | Volume discounts for multiple property surveys | 10% to 25% discount for 3+ properties |
When evaluating quotes, ensure you are comparing like-for-like services. Cheaper quotes may
exclude interior inspection, provide limited photographic documentation, or be prepared by
inspectors without appropriate qualifications or insurance. The cost of a comprehensive
independent report is minimal compared to the potential cost of inadequate documentation in
a damage dispute.
## Choosing the Right Independent Surveyor
Selecting an appropriately qualified and genuinely independent surveyor is essential for
obtaining a reliable and useful dilapidation report. The following criteria should guide
your selection process.
### Essential Qualifications
Independent surveyors preparing dilapidation reports should hold appropriate qualifications
and licensing for their state or territory. At minimum, verify the following credentials:
- **Building inspector licence:** Current registration with the relevant state building authority (NSW Fair Trading, VBA, QBCC, etc.) confirming competence to conduct building inspections.
- **Professional qualifications:** Diploma of Building and Construction or equivalent, with additional training or certification in building inspection methodologies.
- **Professional indemnity insurance:** Current policy with adequate coverage (typically minimum $1 million) providing protection if errors or omissions in the report cause financial loss.
- **Public liability insurance:** Coverage for any damage or injury that may occur during the inspection process.
### Verifying Independence
True independence requires more than simply not being employed by the builder. When
assessing a surveyor's independence, consider the following factors:
- **No commercial relationships:** The surveyor should have no ongoing business relationships with the builder, developer, property owner, or any other party involved in the construction project.
- **No referral arrangements:** Surveyors who receive referrals or commissions from builders may have incentives that compromise their objectivity.
- **Declaration of independence:** Professional surveyors should provide a written declaration confirming their independence from all parties, included within the report.
- **Direct engagement:** Ideally, the property owner or their legal representative should engage the surveyor directly, rather than accepting a builder-arranged report.
### Questions to Ask Potential Surveyors
- What licensing and qualifications do you hold, and can you provide copies?
- What is your professional indemnity insurance coverage amount and current expiry date?
- Do you have any commercial relationship with any party involved in this construction project?
- Can you provide sample reports demonstrating your standard format and detail level?
- What is your turnaround time for report delivery?
- Do you have experience with properties similar to mine in type and complexity?
- Are you available to provide expert witness testimony if required?
- What equipment do you use for inspection and documentation?
## Case Examples: Independent Reports in Practice
The following case examples illustrate how independent dilapidation reports protect property
owners and construction companies in real-world situations.
### Case 1: Residential Property Near High-Rise Development
A homeowner in Sydney's inner west arranged an independent dilapidation report before
construction of an adjacent eight-storey apartment development commenced. The report
documented existing hairline cracks in the living room ceiling and minor settlement cracks
in the external brickwork, with precise measurements of crack widths recorded.
During construction, which involved deep basement excavation and piling, the homeowner
noticed the existing cracks had widened and new cracks had appeared. A post-construction
comparison inspection by the same independent surveyor documented the changes, measuring
crack widths that had increased from 0.5mm to 3mm in several locations.
The documented evidence enabled the homeowner to successfully negotiate compensation from
the developer for structural repairs, with the independent report's measurements providing
irrefutable evidence of the extent of damage caused by construction activities.
### Case 2: Builder Protected from Unfounded Claims
A Melbourne builder undertaking a residential extension project commissioned independent
dilapidation reports for three neighbouring properties before commencing work. One neighbour
initially declined to participate but reconsidered after the builder explained the report
would protect both parties.
Following project completion, one neighbour claimed that new cracks had appeared in their
boundary fence and driveway. Reference to the independent pre-construction report revealed
that both the fence damage and driveway cracking were clearly documented before construction
commenced, with photographs and measurements proving the conditions pre-existed.
The independent report enabled the builder to conclusively demonstrate that the alleged
damage was not caused by construction activities, avoiding a potentially costly dispute and
preserving the business relationship with the neighbour.
### Case 3: Tribunal Proceedings and Expert Evidence
A commercial property owner in Brisbane claimed significant structural damage following
adjacent road widening works conducted by a state government contractor. The dispute
proceeded to the Queensland Civil and Administrative Tribunal (QCAT) when negotiations
failed to reach agreement.
The property owner's case relied heavily on an independent dilapidation report prepared
before construction, which documented minor existing cracks with measurements and
photographs. The independent surveyor provided [expert witness](/expert-witness-reports) testimony, explaining the
baseline conditions and the methodology used to assess pre and post-construction changes.
The tribunal accepted the independent report as credible evidence, contrasting it with the
contractor's own assessment which was criticised for lacking independence. The tribunal
found in favour of the property owner, ordering compensation for repairs based on the
documented evidence of construction-related damage.
## Common Pitfalls to Avoid
Property owners and developers should be aware of common mistakes that can undermine the
effectiveness of dilapidation reports:
- **Delaying reports until after construction begins:** Once work commences, it becomes impossible to establish true baseline conditions. Reports must be completed before any construction activity starts, including demolition or site preparation works.
- **Accepting builder-commissioned reports without review:** While builders may offer to arrange dilapidation reports, property owners should consider commissioning their own independent assessment to ensure complete objectivity.
- **Selecting inspectors based on price alone:** Cheaper reports may lack the detail and professional standards necessary for effective protection. The cost difference between basic and comprehensive reports is minimal compared to potential dispute costs.
- **Failing to verify inspector credentials:** Not all inspectors claiming to prepare dilapidation reports hold appropriate qualifications or insurance. Always verify licensing and insurance before engagement.
- **Inadequate photographic documentation:** Reports with insufficient or poor-quality photographs may not provide adequate evidence if disputes arise. Ensure reports include comprehensive, high-resolution photographic documentation.
- **Excluding interior inspection:** External-only reports may miss damage to internal elements caused by vibrations or ground movement. Comprehensive interior and exterior assessment provides complete protection.
- **Not arranging comparison inspection:** The pre-construction report only provides value when compared with post-construction conditions. Budget for and arrange a comparison inspection after construction is completed.
## Frequently Asked Questions
###
What is the legal significance of an independent dilapidation report?
**Short answer:** An independent dilapidation report creates a timestamped
record that carries significant evidentiary weight in disputes, insurance claims, and
tribunal or court proceedings.
The report serves as objective evidence documenting the property's condition at a
specific point in time, prepared by a professional with no vested interest in the
outcome. This independence gives the report greater credibility than assessments
prepared by parties with commercial interests. Australian courts and tribunals,
including NCAT, VCAT, and QCAT, routinely accept independent dilapidation reports as
evidence in property damage disputes. Under the Civil Liability Act 2002 and equivalent
legislation, claimants must demonstrate the property's pre-construction condition to
establish that damage occurred as a result of construction activities. Without
independent baseline documentation, proving causation becomes significantly more
difficult.
###
How does an independent report differ from a builder-commissioned report?
**Short answer:** Independent reports are prepared by surveyors with no
commercial relationship to any party, eliminating potential bias and providing stronger
evidentiary value.
When a builder commissions a dilapidation report, there is an inherent commercial
relationship between the inspector and the party who may later be liable for damage
claims. Even if the inspector acts with complete integrity, this relationship creates
the appearance of potential bias that can be challenged in legal proceedings. Courts and
tribunals accord greater weight to reports prepared by truly independent surveyors who
have no financial or commercial incentive to minimise or maximise the documented
baseline conditions. Independent reports also typically include a declaration of
independence confirming the surveyor has no conflicts of interest.
###
What factors affect the cost of an independent dilapidation report?
**Short answer:** Pricing depends on property size, inspection scope
(external only vs comprehensive), property complexity, location, and urgency of
turnaround requirements.
Larger properties require more time to inspect and document thoroughly. Complex sites
with difficult access, multiple buildings, or heritage features may require additional
time and specialised assessment. The level of detail required also affects pricing, with
comprehensive reports covering both interior and exterior areas costing more than
external-only surveys. Location and travel requirements can influence the final cost,
with regional properties often incurring travel fees. Expedited turnaround times
typically attract a premium. Standard residential properties typically cost between $500
and $1,000 for comprehensive interior and exterior surveys, with commercial and complex
properties costing more.
###
When should I arrange an independent dilapidation inspection?
**Short answer:** Arrange inspections after development approval is granted
and construction methods are confirmed, but before any site works commence.
The ideal timing is after development approval has been granted and construction methods
are confirmed, but before any site works commence including demolition, site clearing,
or preliminary earthworks. This allows the surveyor to understand the nature of proposed
works and focus on areas most likely to be affected. Council development consent
conditions typically require dilapidation reports to be submitted before construction
commencement. Leaving insufficient time before construction starts risks incomplete
documentation or having to proceed after works have already begun, which defeats the
report's purpose. Allow at least two weeks between engaging the surveyor and the
anticipated construction start date.
###
Can independent dilapidation reports be used in court proceedings?
**Short answer:** Yes, professionally prepared independent reports are
admissible as evidence and carry significant weight when produced by qualified
inspectors following accepted methodologies.
Courts and tribunals accept professionally prepared independent dilapidation reports as
evidence in property damage disputes. The report provides objective, dated documentation
of property condition that can be compared with post-construction evidence to
demonstrate damage. For reports to carry maximum weight, they should be prepared by
appropriately licensed and qualified inspectors, include comprehensive photographic
documentation with date stamps, and follow accepted professional standards consistent
with AS 4349.0. The independent surveyor may be required to provide expert witness
testimony explaining their findings and methodology under cross-examination. Courts
generally prefer documentary evidence over verbal testimony alone, making well-prepared
independent dilapidation reports particularly valuable.
###
What Australian regulations require dilapidation reports?
**Short answer:** While no single legislation mandates all dilapidation
reports, they are commonly required through council development consent conditions under
the Environmental Planning and Assessment Act 1979 (NSW) and equivalent legislation in
other states.
The Environmental Planning and Assessment Act 1979 (NSW) and Regulation 2021 empower
consent authorities to impose conditions requiring dilapidation reports. Similar powers
exist under the Building Act 1993 (Vic), Building Act 1975 (Qld), and planning
legislation in other jurisdictions. Local councils regularly include dilapidation report
requirements in development consent conditions, particularly for developments involving
excavation, demolition, or construction near property boundaries. Insurance policies may
also require dilapidation surveys as a condition of coverage for third-party property
damage claims. Even where not legally mandated, independent dilapidation reports are
strongly recommended as prudent risk management for any construction project that could
potentially affect neighbouring properties.
###
How do I verify an inspector is truly independent?
**Short answer:** Request a declaration of independence, verify no
commercial relationships exist with any party, and consider engaging the inspector
directly rather than accepting builder arrangements.
True independence requires more than simply not being employed by the builder. Request
that the inspector provide a written declaration confirming they have no commercial
relationship with the property owner, builder, developer, or any other party involved in
the construction project. Ask directly whether they receive referrals or commissions
from builders or developers. Verify that the inspector operates independently rather
than as a subcontractor to a construction company. Ideally, the property owner or their
legal representative should engage the inspector directly and pay the inspection fee
directly to the inspector, rather than having the fee paid through the builder. This
direct engagement relationship reinforces the inspector's independence and removes any
financial relationship with other parties.
###
What is the difference between an independent report and a council report?
**Short answer:** Independent reports provide comprehensive private
property documentation by qualified building inspectors, while council reports typically
focus on public infrastructure with more limited detail.
Council-prepared dilapidation surveys serve a different purpose than independent
reports. Council surveys typically focus on public infrastructure such as footpaths,
kerbs, road surfaces, and street trees that may be affected by construction traffic or
activities. They may be prepared by council staff with variable qualifications rather
than licensed building inspectors. Council surveys often lack the systematic methodology
and comprehensive documentation of professional independent reports. Independent reports
provide detailed assessment of private property conditions, including interior areas,
using professional equipment and following AS 4349.0 standards. For comprehensive
protection of private property interests, an independent report is essential regardless
of whether council also requires a public infrastructure survey.
###
What insurance implications should I consider?
**Short answer:** Independent reports support insurance claims by providing
evidence of pre-construction conditions, and may be required by builders' insurance
policies as a condition of coverage.
For property owners claiming construction-related damage, an independent dilapidation
report provides essential evidence for insurance claims. Without pre-construction
documentation, insurers may dispute whether damage resulted from construction activities
or pre-existing conditions, potentially denying or reducing claims. For builders and
developers, construction insurance policies often require dilapidation reports as a
condition of coverage for third-party property damage claims. Failure to obtain
appropriate surveys may void coverage or result in reduced claim payouts. Inspectors
preparing independent reports should hold professional indemnity insurance with adequate
coverage, typically minimum $1 million, providing protection if errors or omissions in
the report cause financial loss to any party relying on the report.
###
How far from a construction site should properties be surveyed?
**Short answer:** Survey distance depends on construction type, typically
ranging from 15 metres for minor works to 50 metres or more for major infrastructure
projects involving piling, tunnelling, or deep excavation.
The appropriate survey distance depends on the nature and scale of construction
activities. For residential construction projects involving standard excavation and
construction methods, properties within 15 to 25 metres of the site boundary are
commonly surveyed. Major commercial developments with deep basements or significant
earthworks may require surveys within 30 to 50 metres. Infrastructure projects involving
tunnelling, piling, or major excavation can affect properties much further away, with
survey distances of 50 to 100 metres sometimes specified. Development consent conditions
often specify required survey distances based on the specific project characteristics.
When in doubt, it is better to survey additional properties than to risk missing
potential damage. The cost of additional reports is minimal compared to the potential
cost of unsubstantiated damage claims.
###
What should I do if I notice damage during construction?
**Short answer:** Document the damage immediately with photographs and
dates, notify the construction company in writing, and arrange an interim inspection by
your independent surveyor as soon as possible.
Early identification of damage is important for several reasons. It allows prompt
notification to the construction company, who may be able to modify their methods to
prevent further damage. It also creates a clearer timeline linking damage to specific
construction activities. If you notice new cracks, changes to door operation, unusual
vibrations, or other potential damage during construction, take dated photographs
immediately and document what you observed in writing. Notify the construction company
in writing, requesting acknowledgement of your notification. Contact your independent
building inspector to arrange an interim inspection to formally document the damage and
compare it with the baseline report. Prompt action supports any subsequent insurance
claims or compensation negotiations by establishing a clear record of when damage
occurred and the construction activities being undertaken at that time.
###
Can a neighbour refuse to allow a dilapidation inspection?
**Short answer:** Yes, property owners can refuse access for interior
inspection, but external areas visible from public spaces can still be documented, and
the refusal should be recorded in writing.
Property owners have the right to refuse access to their property for interior
dilapidation inspection. However, external areas visible from public spaces or with the
neighbour's consent can still be documented. If a neighbour refuses access, document the
refusal in writing and conduct the most thorough external assessment possible from
public vantage points. Some development consent conditions require proof that neighbours
were offered the opportunity to participate in dilapidation surveys, even if they
declined. A written record of the offer and refusal satisfies this requirement. Property
owners should understand that refusing a dilapidation survey may actually disadvantage
them, as they lose the protection of baseline documentation if damage does occur.
Approaching neighbours professionally and explaining the mutual benefits of dilapidation
surveys usually results in cooperation.
###
Are interior inspections necessary or just external?
**Short answer:** Interior inspections are strongly recommended as
construction activities can cause internal damage through vibrations, settlement, and
structural movement that may not be visible externally.
Construction vibrations can cause internal wall cracks, ceiling damage, and displacement
of fixtures and fittings that may not be apparent from external inspection alone. Ground
movement and settlement can affect internal floors, walls, and door frames, causing
doors to stick, floors to become uneven, and internal cracks to develop. Interior
elements such as plasterboard walls and cornices are often more susceptible to vibration
damage than exterior masonry elements. A comprehensive independent dilapidation report
should document all internal areas, including walls, ceilings, floors, doors, windows,
and any visible services. External-only reports provide incomplete protection and may
miss significant damage that affects internal living conditions and property value. The
modest additional cost of interior inspection provides substantially greater protection.
###
How long should I keep my dilapidation report?
**Short answer:** Retain dilapidation reports indefinitely, or at minimum
for six years after construction completion, which corresponds to the standard
limitation period for property damage claims.
Under the Limitation Act 1969 (NSW) and equivalent legislation in other states, the
standard limitation period for bringing property damage claims is six years from when
the damage occurred or was discovered. However, damage from construction activities may
not become apparent until years after construction completion, particularly damage
related to ground movement, settlement, or drainage changes. Retaining dilapidation
reports indefinitely ensures documentation remains available if issues emerge years
later. Store reports in a secure location with backup copies, ideally including digital
copies stored separately from physical documents. If you sell the property, consider
providing copies of dilapidation reports to the new owner along with other building
documentation.
## Key Takeaways
- Independent dilapidation reports provide objective baseline documentation prepared by surveyors with no commercial relationship to any party, offering stronger legal standing than builder-commissioned or council reports.
- Australian legislation including the Environmental Planning and Assessment Act 1979 (NSW) and Civil Liability Act 2002 provides the framework for dilapidation report requirements and their use in damage claims.
- Council development consent conditions frequently require independent dilapidation reports for properties within specified distances of construction sites, with requirements varying by project type and scale.
- Independent reports carry greater evidentiary weight in court and tribunal proceedings, with courts preferring objective documentation over assessments by parties with commercial interests in the outcome.
- When selecting an independent surveyor, verify licensing with the relevant state building authority, professional indemnity insurance coverage, and confirm no commercial relationships exist with any party.
- The cost of comprehensive independent reports typically ranges from $500 to $1,200 for residential properties, which is minimal compared to potential dispute costs without adequate documentation.
- Reports should be arranged after development approval but before any site works commence, allowing at least two weeks for inspection and report preparation.
- Interior inspection is strongly recommended in addition to external assessment, as construction activities can cause internal damage not visible from outside.
- If damage is noticed during construction, document it immediately, notify the construction company in writing, and arrange an interim inspection to formally record the changes.
- Retain dilapidation reports for at least six years after construction completion, corresponding to the standard limitation period for property damage claims under Australian law.
## References and Resources
The following resources provide additional information about dilapidation reports, building
regulations, and dispute resolution processes across Australian jurisdictions.
### Federal and National Bodies
- [ National Construction Code (NCC) ](https://ncc.abcb.gov.au/)
- [ Australian Building Codes Board (ABCB) ](https://www.abcb.gov.au/)
- [ Standards Australia ](https://www.standards.org.au/)
### State Regulatory Bodies
- [ Victorian Building Authority (VBA) ](https://www.vba.vic.gov.au/)
- [ Queensland Building and Construction Commission (QBCC) ](https://www.qbcc.qld.gov.au/)
- [ Consumer and Business Services South Australia ](https://www.cbs.sa.gov.au/)
### Dispute Resolution Bodies
- [ NSW Civil and Administrative Tribunal (NCAT) ](https://www.ncat.nsw.gov.au/)
- [ Victorian Civil and Administrative Tribunal (VCAT) ](https://www.vcat.vic.gov.au/)
- [ Queensland Civil and Administrative Tribunal (QCAT) ](https://www.qcat.qld.gov.au/)
### Industry Associations
- [ Master Builders Australia ](https://www.masterbuilders.com.au/)
- [ Housing Industry Association (HIA) ](https://hia.com.au/)
- [ Australian Institute of Building Surveyors (AIBS) ](https://www.aibs.com.au/)
### Relevant Legislation
- [ Environmental Planning and Assessment Act 1979 (NSW) ](https://legislation.nsw.gov.au/view/html/inforce/current/act-1979-203)
- [ Civil Liability Act 2002 (NSW) ](https://legislation.nsw.gov.au/view/html/inforce/current/act-2002-022)
- [ Home Building Act 1989 (NSW) ](https://legislation.nsw.gov.au/view/html/inforce/current/act-1989-147)
- [ Building Act 1993 (Vic) ](https://www.legislation.vic.gov.au/in-force/acts/building-act-1993)
- [ Building Act 1975 (Qld) ](https://www.legislation.qld.gov.au/view/html/inforce/current/act-1975-011)
### How Construction Progress Inspections Prevent Delays and Defects
Source: https://ownerinspections.com.au/articles/construction-progress-inspections
Published: 2025-12-07 | Updated: 2026-02-09 | Category: New Construction
Author: Maison Azdari
Construction progress inspections are scheduled assessments carried out at defined milestones during a building project to verify that completed work meets approved plans, Australian building codes, and the National Construction Code (NCC). These inspections identify workmanship issues, structural defects, and code non-compliance before they become expensive problems. For homeowners, developers, and investors building in Australia, progress inspections are the most reliable way to prevent delays, avoid cost blowouts, and protect the long-term quality of the finished property.
Australian residential construction has faced rising defect rates in recent years. Data from state regulators including the Victorian Building Authority (VBA) and the Queensland Building and Construction Commission (QBCC) consistently show that early detection of building defects through staged inspections can reduce rectification costs by up to 80% compared to discovering those same issues at practical completion. Knowing when to inspect and what to look for at each stage gives you a significant advantage as a property owner.
## What Are Construction Progress Inspections?
Construction progress inspections are independent quality checks performed at specific stages during the building process. Each inspection verifies that the work completed so far matches the approved building plans, complies with the NCC and relevant Australian Standards, and meets the contractual obligations set out between the owner and builder.
Unlike a single final inspection at handover, progress inspections happen throughout the build. This means problems are caught when they are still easy and affordable to fix, rather than after walls have been lined, concrete has cured, or finishes have been applied over defective work.
The scope of each inspection depends on the construction stage, but typically covers structural elements, material quality, waterproofing, alignment, and compliance with engineering specifications.
## Why Progress Inspections Matter
Building a home or investment property is one of the largest financial commitments most Australians will make. Without independent oversight during construction, homeowners rely entirely on the builder's own quality control, which may not always catch every issue.
Without inspections at each stage, defects can be hidden behind plaster, tiling, or cladding. Once covered, these issues often remain undetected until they cause visible damage months or years later, at which point repairs become significantly more expensive and disruptive.
## The Key Construction Inspection Stages
Australian residential construction typically follows a series of defined stages, each with its own inspection requirements. While the exact terminology varies between states, the standard stages are consistent across most builds.
## Who Should Conduct Progress Inspections
The quality and independence of your inspector directly affects the value of the inspection. Several professionals may be involved at different stages.
The key principle is independence. A building inspector engaged by the homeowner or developer provides an unbiased assessment that is not influenced by the builder's schedule or commercial interests. This is different from a certifier, who may have an ongoing relationship with the builder.
## How Inspections Prevent Delays
One of the most significant benefits of regular progress inspections is delay prevention. Construction delays in Australia cost homeowners and developers billions of dollars each year through extended loan interest, rental losses, temporary accommodation costs, and contract penalties.
Progress inspections prevent delays in several ways:
A proactive inspection schedule is always more cost-effective than a reactive approach where problems are only dealt with after they cause significant setbacks.
## Cost Control and Financial Accountability
Beyond preventing delays, progress inspections play a direct role in controlling costs throughout the build.
The return on investment from progress inspections is significant. Spending a few hundred dollars per stage inspection can save thousands in rectification costs, and in some cases, prevent disputes that would otherwise lead to tribunal or court proceedings.
## Compliance and Safety Requirements
All residential construction in Australia must comply with the National Construction Code (NCC), which incorporates the Building Code of Australia (BCA). State-specific legislation adds further requirements.
Progress inspections verify compliance with these regulations at each stage. Specific standards that inspectors check against include:
Non-compliance discovered after construction is complete can result in costly rectification orders from building regulators, insurance complications, or reduced property values at the time of sale.
## Common Defects Found During Progress Inspections
The types of defects found vary by stage, but certain issues appear frequently across Australian residential builds.
An experienced independent inspector will know exactly what to look for at each stage and will document every finding with photographs, measurements, and references to the applicable standard or code.
## Real-World Examples
### Sydney Foundation Defect
A developer in western [Sydney](/nsw/building-inspections-sydney) commissioned an independent pre-slab inspection on a multi-unit residential project. The inspector discovered that the concrete formwork had been set at the wrong level and that several steel reinforcement bars were positioned outside the tolerance specified in the engineering drawings. Rectification at this stage cost approximately $2,500. Had the defect gone undetected, the resulting structural issues would have required underpinning at an estimated cost exceeding $45,000.
### Melbourne Roofing Rework
A homeowner building in Melbourne's outer suburbs chose not to engage an independent inspector during construction. At the [pre-handover inspection](/pre-handover-inspections), significant roofing installation errors were found, including incorrect tile overlaps and missing flashing at multiple junction points. The builder initially disputed the findings, and the resulting delay for rectification added six weeks to the project timeline. An inspection at the lock-up stage would have caught these issues before internal linings were installed.
### Brisbane Waterproofing Failure
During a fixing stage inspection on a townhouse project in Brisbane, an inspector identified that the waterproofing membrane in two bathrooms had been applied incorrectly and did not extend to the required height under AS 3740. The builder rectified the work before tiling commenced. Without this inspection, the waterproofing failure would likely have resulted in water damage to adjacent rooms and the floor structure below, with repair costs estimated at more than $20,000 per bathroom.
## Technology in Modern Construction Inspections
Modern construction inspections in Australia are increasingly supported by technology that improves accuracy and efficiency.
These tools allow inspectors to deliver more comprehensive reports and give property owners a clearer picture of build quality at each stage.
## How to Arrange Progress Inspections for Your Build
Setting up construction progress inspections for your project is straightforward, but timing is important.
For a complete overview, see our [guide to construction stage inspections](/guides/construction-stage-inspections-guide).
### Construction Project Monitoring for Quality and Timelines
Source: https://ownerinspections.com.au/articles/construction-project-monitoring
Published: 2025-12-07 | Updated: 2026-02-09 | Category: New Construction
Author: Maison Azdari
Construction project monitoring is the process of overseeing every phase of a building project, from initial planning through to completion, to verify that work progresses according to approved plans, meets quality standards set by the National Construction Code (NCC) and Australian Standards, stays within budget, and remains on schedule. In Australia, effective monitoring typically involves a combination of independent stage inspections, on-site supervision, digital project management tools and structured reporting. For homeowners, investors and developers, project monitoring serves as the primary safeguard against costly defects, timeline blowouts and regulatory non-compliance.
Whether you are building a new home, managing a renovation or overseeing a multi-unit development, the gap between what gets planned on paper and what actually happens on site can be significant. Construction projects across Australia regularly face challenges including subcontractor coordination issues, material supply delays, weather interruptions and quality shortfalls. Without structured monitoring, these problems compound. A missed defect during the slab stage can become a $30,000 rectification job by the time finishes are applied. A week of unchecked delays at framing can push the entire project timeline out by months.
This guide explains what construction project monitoring involves, why it matters for Australian property owners, the role of inspections and technology, and how to set up a monitoring framework that protects your investment from start to finish.
## What Is Construction Project Monitoring?
Construction project monitoring is a structured approach to tracking and verifying the progress, quality and compliance of a building project throughout its lifecycle. It covers everything from the initial site preparation through to practical completion and handover.
Monitoring goes beyond simply visiting the site occasionally. It involves systematic assessments at defined milestones, ongoing communication between stakeholders, documented reporting and proactive identification of risks before they become problems.
In Australia, monitoring responsibilities are shared across several parties. The builder manages day-to-day site operations, council certifiers verify minimum code compliance at mandatory hold points, and independent inspectors provide impartial quality assessments on behalf of the property owner. Each plays a different role, and relying on only one leaves gaps.
## Why Monitoring Matters for Australian Building Projects
The Australian construction industry has seen a sharp increase in reported defects in new residential builds. Data from state consumer protection bodies including NSW Fair Trading and the QBCC shows that building complaints remain high, with waterproofing failures, structural cracking and incomplete work among the most common issues.
### Protecting Your Investment
For most Australians, building a home is their single largest financial commitment. Without independent oversight, property owners are relying entirely on the builder to self-assess their own quality. Project monitoring introduces accountability and transparency into the process.
### Keeping Projects on Schedule
Construction delays are common in Australia, driven by factors such as weather, material shortages, subcontractor availability and regulatory approvals. Monitoring provides early visibility into schedule risks, allowing corrective action before a minor delay becomes a major timeline blowout.
### Maintaining Compliance
The NCC sets minimum performance standards for structural adequacy, fire safety, accessibility, moisture control and energy efficiency. State legislation including the Home Building Act 1989 (NSW), the Domestic Building Contracts Act 1995 (VIC) and the Queensland Building and Construction Commission Act 1991 (QLD) adds further requirements. Monitoring verifies that all work meets these standards throughout the build.
## The Role of Stage Inspections in Project Monitoring
Stage inspections are one of the most effective components of construction project monitoring. These are formal assessments carried out by qualified inspectors at defined construction milestones, where work that will soon be concealed by subsequent building activity is examined in detail.
## Key Areas Covered by Construction Monitoring
Effective construction monitoring covers four main areas: quality, timeline, budget and safety. Each requires different assessment methods and reporting approaches.
### Quality Assurance in Practice
Maintaining consistent quality across a building project requires ongoing attention, not just a single check at the end. Quality monitoring includes verifying that materials match specifications, checking that tradespeople follow correct installation methods and confirming that finished work meets acceptable standards.
## Digital Tools and Technology in Construction Monitoring
Construction project monitoring has moved well beyond clipboards and handwritten notes. Digital tools now provide real-time visibility into project progress, quality and communication across all stakeholders.
### Project Management Platforms
Cloud-based project management platforms serve as a central hub where builders, inspectors, project managers and property owners can access progress reports, documentation, photographs and communications in real time. These systems create a permanent audit trail of all project activity.
### Drone Site Surveys
Drone technology allows inspectors and project managers to capture high-resolution aerial imagery of construction sites. This is particularly useful for monitoring large sites, tracking earthworks progress, documenting roof installations and identifying issues that are difficult to see from ground level.
### Building Information Modelling (BIM)
BIM creates a three-dimensional digital model of the building that integrates design, structural, mechanical and electrical information. During construction, the BIM model can be compared against actual site conditions to identify deviations from the approved design.
### Automated Reporting and Quality Tracking
Modern inspection software allows inspectors to generate standardised reports directly from site using tablets and smartphones. These reports include geotagged photographs, defect classifications, compliance assessments and recommended actions, all delivered to the property owner within 24 to 48 hours of the inspection.
## On-Site Supervision and Reporting
On-site supervisors play a direct role in construction monitoring by verifying that day-to-day work follows the project specifications and schedule. The site supervisor is often the first person to identify deviations from the plan, quality issues or safety concerns.
### What Good On-Site Supervision Looks Like
### Reporting Standards
Monitoring reports should be clear, factual and consistent. Each report should document the date and time of the assessment, the areas inspected, findings including any defects or non-compliance, photographic evidence and recommended actions. Reports should reference specific clauses from the NCC, relevant Australian Standards or the building contract where applicable.
## Common Challenges in Construction Project Monitoring
Even well-planned monitoring programmes face challenges. Understanding these helps property owners and project managers prepare for them.
### Dealing with Builder Resistance
Some builders view independent monitoring as an intrusion rather than a quality assurance measure. However, reputable builders generally welcome third-party oversight because it confirms the quality of their work and reduces the risk of post-completion disputes.
## How to Set Up an Effective Monitoring Plan
A monitoring plan does not need to be complicated, but it does need to be structured. Setting clear expectations from the start of the project helps all parties understand their responsibilities.
## Construction Monitoring Costs in Australia
The cost of construction monitoring depends on the scope of services, property size, location and the number of inspection stages. For standard residential projects in Australian capital cities, the following provides a general guide.
These monitoring costs represent a fraction of the total construction budget. For a typical new home build costing $350,000 to $600,000, a full stage inspection package represents roughly 0.5% to 1.5% of the total cost. Compared to potential defect rectification costs that can reach tens of thousands of dollars, monitoring provides a strong return on investment.
## Regulatory Framework and Compliance
Construction monitoring in Australia operates within a regulatory framework set by national codes and state-specific legislation. Understanding this framework helps property owners know what standards apply and where to seek assistance if issues arise.
For a complete overview, see our [guide to construction stage inspections](/guides/construction-stage-inspections-guide).
### Council Requirements for Dilapidation Reports in Australia
Source: https://ownerinspections.com.au/articles/council-requirement-for-dilapidation-reports
Published: 2025-11-28 | Updated: 2026-06-09 | Category: Dilapidation Reports
Author: Maison Azdari
What is a dilapidation report, and why do councils ask for one before construction starts? The simple dilapidation report meaning is this: it is a written and photographic record of the current condition of a property, neighbouring structure or public asset before nearby work begins.
This matters because excavation, demolition, piling, heavy machinery and major renovation work can affect nearby buildings, driveways, fences, retaining walls, roads, kerbs, footpaths and stormwater assets. NSW Planning’s standard residential consent conditions include a dilapidation report before site work starts, prepared by a suitably qualified engineer, to record adjoining buildings, structures, works and public land.
For homeowners, builders, developers and neighbours, a good report gives everyone a fair starting point. It records what damage was already there before the project and helps compare the property condition later if a dispute arises. NSW Planning says the reason for this condition is to document adjoining properties and public land for comparison as site work progresses and is completed.
Book a Defect
Investigation
}
buttonHref="/defect-investigation-reports"
variant="secondary"
/>
## What Is a Dilapidation Report?
A dilapidation report is a detailed, independent record of the existing condition of a property or piece of infrastructure at a specific point in time. It documents cracks, defects, structural features, surface damage, and general wear through written descriptions, high-resolution photographs, and measurements.
The report serves as a baseline. If damage occurs during or after nearby construction, the pre-construction report can be compared against the current state to determine whether the building works caused the problem. Without this documentation, proving or disproving construction-related damage becomes extremely difficult.
It is not the same as a [pre-purchase building inspection](/pre-purchase-inspections). A pre-purchase inspection helps a buyer understand the condition of a property before buying, while a dilapidation report creates a baseline record before nearby works begin. NSW Government advises property buyers to arrange property inspection reports such as building inspection reports before buying, which shows the different purpose of a buyer-focused inspection.
## Dilapidation Report Meaning in Simple Terms
The practical meaning of a dilapidation report is proof of condition before work starts.
| Term | Simple meaning | Why it matters |
| ------------------------------------- | ------------------------------------------------------------- | ------------------------------------------------------------- |
| Dilapidation report | A record of the existing condition of a property or asset | Helps compare before and after construction |
| Pre-construction dilapidation report | Report prepared before work begins | Often required before demolition, excavation or building work |
| Post-construction dilapidation report | Report prepared after work is complete | Helps check whether new damage appeared |
| Public domain dilapidation report | Record of council assets such as roads, kerbs and footpaths | Helps councils protect public infrastructure |
| Independent dilapidation report | Report prepared by a third party with no conflict of interest | Gives stronger evidence in disputes |
City of Sydney development conditions show how this works in practice. One decision required dilapidation reports and a photographic survey before [demolition or excavation](https://meetings.cityofsydney.nsw.gov.au/ieDecisionDetails.aspx?Id=5266), with a second report after excavation or demolition to identify damage to nearby properties.
## When Is a Dilapidation Report Required?
Council requirements for dilapidation reports are typically triggered by specific types of development activity. Not every project will require one, but the following scenarios almost always do.
| Project type | Why a report may be required |
| ----------------------------- | ----------------------------------------------------------------- |
| Demolition | Vibration and impact can affect neighbouring structures |
| Excavation | Ground movement can affect adjoining walls, footings and services |
| Basement work | Deep excavation can increase risk near boundaries |
| Piling and underpinning | Vibration and ground support issues may affect nearby properties |
| Major renovation | Structural work can create movement or vibration |
| Civil works | Roads, kerbs, drainage and footpaths may need protection |
| Works near heritage buildings | Older structures may be more sensitive to movement |
**Pre-construction.** Large residential and commercial developments that involve excavation, piling, or heavy machinery near existing buildings or council infrastructure. Councils impose this requirement as a standard condition of consent.
**Demolition.** Any demolition project near adjoining properties or public roads, footpaths, and stormwater systems. The vibration and impact from demolition work present a high risk of damage to surrounding structures.
**Major renovations.** Significant renovation projects that involve structural modifications, underpinning, or deep excavation close to property boundaries.
**Projects affecting public infrastructure.** Any work that could impact council-owned assets such as roads, kerbs, footpaths, stormwater drains, or retaining walls. Councils are particularly strict about protecting these assets and will often require dilapidation reports covering all public infrastructure within a defined radius of the site.
**Subdivision and earthworks.** Large-scale earthworks, land subdivision, and site preparation activities that may cause ground movement affecting neighbouring properties.
## Dilapidation Report Before Construction: Why Timing Matters
A [pre-construction dilapidation report](/articles/who-needs-pre-construction-dilapidation-report) should be completed before any physical site activity starts. This includes demolition, excavation, piling, ground works, heavy machinery access or other activity that may affect adjoining properties.
NSW Planning’s condition states that adjoining owners must receive a copy of the report before site work begins, and council must receive a copy where council is not the principal certifier.
The timing matters because a report prepared after work starts may not prove what condition existed before the risk began.
## What Must a Council-Compliant Report Include?
A strong dilapidation report should be detailed enough to compare the condition of the property before and after nearby work.
| Report section | What should be included |
| --------------------- | --------------------------------------------------------------------------- |
| Property details | Address, inspection date, weather, inspected areas and access limits |
| Inspector details | Name, qualifications, licence or registration details and insurance |
| Photographic evidence | Clear photos of each inspected area and existing defects |
| Written observations | Notes on cracks, stains, settlement, corrosion, damage and wear |
| Measurements | Crack width, location, length and severity where relevant |
| External areas | Walls, fences, driveways, paths, retaining walls, garages and drainage |
| Internal areas | Floors, ceilings, walls, wet areas, doors, windows and visible movement |
| Public assets | Kerbs, gutters, footpaths, roads, pits and stormwater assets where required |
| Access limitations | Areas not inspected and reasons why |
| Summary | Clear findings that can be used for later comparison |
## How Detailed Is a Dilapidation Report?
A useful dilapidation report should be detailed, but it should also be clear. The goal is not to fill pages for the sake of it. The goal is to create evidence that can be checked later.
A thin report with vague statements such as “minor cracking observed” is weak. A stronger report records the room or area, wall direction, crack size, photo reference and notes about visible condition.
City of Sydney conditions refer to a photographic survey, copies to property owners and council, and a [second report after demolition or excavation](https://meetings.cityofsydney.nsw.gov.au/ieDecisionDetails.aspx?Id=5266), which shows that the report needs enough detail for later comparison.
Get Expert
Report Support
}
buttonHref="/expert-witness-reports"
variant="secondary"
/>
## What Issues Does a Dilapidation Report Cover?
A dilapidation report can cover visible defects and conditions such as:
| Area | Common issues recorded |
| ------------------- | --------------------------------------------------------------------- |
| Walls | Cracks, render damage, bowing, staining and movement |
| Ceilings | Sagging, cracks, water marks and plaster damage |
| Floors | Unevenness, cracking, lifting tiles and movement |
| External walls | Brick cracking, mortar loss, corrosion and settlement |
| Driveways and paths | Cracks, sinking, heaving and trip hazards |
| Retaining walls | Leaning, cracking, drainage staining and movement |
| Fences | Leaning, broken panels, damaged posts and corrosion |
| Roof and gutters | Visible damage, rust, broken tiles and drainage issues |
| Public assets | Footpath cracks, kerb damage, road surface damage and stormwater pits |
Owner Inspections’ [dilapidation report](/dilapidation-reports) service also documents areas such as floors, walls, ceilings, roof drainage, driveways, pathways, stairs, balustrades, balconies, windows, doors, fences and retaining walls.
## Pre-Construction vs Post-Construction Reports
| Report type | When it is prepared | Main purpose |
| ------------------------------------- | ------------------------------------------------------------------- | ----------------------------------------------------- |
| Pre-construction dilapidation report | Before site work begins | Records the original condition |
| Post-construction dilapidation report | After work is complete or before occupation certificate if required | Compares the later condition with the original report |
Dilapidation reports are prepared at two key stages: before construction begins and after construction is completed.
The **pre-construction report** is the baseline document. It records the condition of neighbouring properties and public infrastructure before any site works commence. This is the report that councils require as a condition of development consent.
The **post-construction report** is prepared after building works are finished. It records the same properties and infrastructure using the same methodology, allowing a direct comparison with the pre-construction report. If new damage is identified, the post-construction report provides the evidence needed to determine whether the construction activity caused it.
Some councils require both pre-construction and post-construction reports as conditions of consent. Others only require the pre-construction report but strongly recommend the post-construction follow-up. Check your development consent conditions carefully, as failing to complete a required post-construction report can delay the issue of an occupation certificate.
NSW Planning includes a [post-construction dilapidation report condition](https://www.planning.nsw.gov.au/sites/default/files/2023-03/standard-conditions-of-consent-residential.pdf) that compares the pre-construction and post-construction reports to identify whether structural damage occurred and whether it resulted from the approved work.
## Council Requirements by Location
Dilapidation report requirements vary significantly across Australian jurisdictions. Urban councils in major cities generally impose stricter and more detailed requirements than regional or rural councils.
**[Sydney](/nsw/building-inspections-sydney) (NSW).** Inner-city councils such as the City of Sydney, Inner West Council, and Randwick City Council have some of the strictest dilapidation report requirements in the country. Reports are commonly required for all properties within a specified radius (often 25 to 50 metres) of the construction site, including public infrastructure. The Environmental Planning and Assessment Act 1979 provides the legislative framework, with conditions imposed through development consent.
**Melbourne (VIC).** Melbourne councils including the City of Melbourne, Yarra City Council, and Stonnington City Council regularly require dilapidation reports for medium to large developments. The Building Act 1993 and associated regulations govern the process. Victorian councils are particularly focused on protecting heritage buildings near construction sites.
**Brisbane (QLD).** Brisbane City Council requires dilapidation reports for developments that may affect neighbouring properties or public assets. The requirements are set out in conditions of development approval under the Planning Act 2016.
**Adelaide (SA).** Adelaide councils generally require dilapidation reports for larger developments, particularly in the CBD and inner suburbs. The Planning, Development and Infrastructure Act 2016 provides the regulatory basis.
**Regional and rural areas.** Councils in regional areas may have less formal dilapidation report requirements, but they can still impose them as conditions of consent. Smaller projects in low-density areas are less likely to trigger the requirement, but any project near council infrastructure may still require documentation.
## Why Councils Require Dilapidation Reports
Council requirements for dilapidation reports serve several practical purposes that go beyond simple record-keeping.
**Risk management.** Construction activity near existing buildings and infrastructure creates genuine risk of damage. Dilapidation reports help manage this risk by establishing a clear record of pre-existing conditions, which reduces the likelihood of unresolved disputes.
**Infrastructure protection.** Councils are responsible for maintaining public infrastructure including roads, footpaths, stormwater systems, and retaining walls. Dilapidation reports protect these assets by documenting their condition before and after construction, allowing councils to recover repair costs from developers if damage occurs.
**Insurance and liability clarity.** Without a dilapidation report, determining who is responsible for property damage near a construction site becomes contentious and expensive. The report provides objective, time-stamped evidence that simplifies insurance claims and liability assessments.
**Urban planning and development management.** As Australian cities become denser, construction activity increasingly affects neighbouring properties. Dilapidation reports are part of a broader framework that allows councils to approve development while protecting the interests of existing property owners and the community.
## Is a Dilapidation Report Necessary If You Are Not Planning Construction?
Yes, it can still be useful if construction is happening next door or nearby.
City of Gold Coast says adjoining building owners can obtain a dilapidation report before neighbouring building work occurs, and that it can help determine whether damage resulted from the works on the adjoining site.
This means a homeowner does not have to be the builder or developer to benefit from a report. If a neighbouring site is about to start excavation, demolition or heavy works, an independent dilapidation report can protect the homeowner’s position.
## Who Can Prepare a Dilapidation Report for Council?
Councils require dilapidation reports to be prepared by suitably qualified professionals. The specific qualifications accepted vary by council, but the following professionals are generally recognised.
**Structural engineers.** Registered structural engineers with current practising certificates are widely accepted by all councils. Their reports carry significant weight in legal and insurance proceedings.
**Registered building surveyors.** Licensed building surveyors with appropriate qualifications and professional indemnity insurance are accepted by most councils.
**Certified building consultants and inspectors.** Licensed building inspectors with demonstrated experience in dilapidation reporting are accepted by many councils. Check with your specific council to confirm their requirements.
Regardless of the professional's qualifications, the report must be independent. Councils will not accept dilapidation reports prepared by parties with a financial interest in the construction project. The inspector must be a third party engaged independently of the developer or builder.
The National Construction Code (NCC) and relevant Australian Standards provide the technical framework that guides how dilapidation assessments are conducted. Inspectors should reference these standards in their reports to demonstrate compliance.
## Submission Timing and Process
Timing is one of the most common areas where developers and builders get tripped up. Councils are specific about when dilapidation reports must be submitted.
**Before any site works begin.** Most councils require the pre-construction dilapidation report to be submitted and accepted before any physical work commences on site. This includes demolition, excavation, and even site preparation activities like tree removal or temporary fencing installation.
**As a condition of consent.** The requirement for a dilapidation report is typically listed as a condition in the development consent. Read your consent conditions carefully. Some councils require the report to be submitted a set number of days before work starts.
**Before the occupation certificate.** If a post-construction report is also required, it must be submitted before the council will issue an occupation certificate. Failing to meet this condition can delay the completion of your project.
**Notification of neighbours.** Some councils require the developer to notify adjoining property owners that a dilapidation report will be prepared and to offer them access to a copy of the report. Cooperation from neighbours is important, as they need to provide access for the inspection.
## Benefits for Developers and Builders
While council requirements for dilapidation reports may seem like an additional cost and administrative burden, they offer real benefits to developers and builders.
**Legal protection.** A thorough pre-construction report protects you from unfounded damage claims. If a neighbour alleges that your construction caused damage to their property, the dilapidation report provides documented evidence of what existed before your project started.
**Operational efficiency.** Addressing dilapidation report requirements early in the project timeline prevents delays. Councils can hold up construction commencement if the required reports have not been submitted. Planning ahead keeps your project on schedule.
**Community relations.** Commissioning dilapidation reports demonstrates professionalism and respect for neighbouring property owners. This goodwill can reduce objections during the approval process and minimise friction during construction.
**Reduced insurance costs.** Clear documentation of pre-existing conditions can simplify and reduce the cost of insurance claims related to construction activity. Insurers value objective evidence when assessing liability.
## Dilapidation Report Cost: What Affects the Price?
A [dilapidation report cost](/articles/dilapidation-report-cost) depends on the number of properties, site size, access, risk level, number of photos, whether public assets are included, and whether an engineer is required.
| Cost factor | Why it changes the price |
| --------------------- | ----------------------------------------------------------------------- |
| Number of properties | More properties need more inspection time and report pages |
| Property size | Larger homes and commercial sites need more documentation |
| Access | Limited or complex access may require more time |
| Risk level | Excavation, basements and heritage areas may need more detail |
| Professional required | Engineer-led reports may cost more than standard inspector reports |
| Council requirements | Some councils require specific sections, photos or submission steps |
| Pre and post reports | Two inspections cost more than one, but give better comparison evidence |
## Getting the Most Value from Your Home and Building Investment
For homeowners, builders and developers, the message is simple: get the report before work starts, make sure it is independent, and check the wording of your council or certifier condition before booking.
Owner Inspections provides dilapidation reports for construction sites and records existing property condition before work such as excavation, demolition and construction begins.
Contact Owner
Inspections
}
buttonHref="/contact"
variant="secondary"
/>
### How to Make a Warranty Claim for Defects in Your Apartment
Source: https://ownerinspections.com.au/articles/apartment-defect-warranty-claims
Published: 2025-11-25 | Updated: 2026-02-09 | Category: Building Inspections
Author: Maison Azdari
Apartment owners in Australia have statutory warranty rights that protect them against building defects for up to six years after completion. Under state-based legislation such as the Home Building Act 1989 (NSW), Domestic Building Contracts Act 1995 (VIC), and Queensland Building and Construction Commission Act 1991 (QLD), builders and developers are legally required to fix defects that fall within the warranty period. Minor defects must generally be reported within two years, while major structural defects are covered for six to seven years depending on the state. Making a successful warranty claim requires proper documentation, an independent defect assessment, and a formal written notice to the builder.
Buying an apartment off the plan or settling on a newly built unit should be an exciting milestone. But for many Australian apartment owners, that excitement quickly fades when defects start showing up: cracked tiles, leaking balconies, waterproofing failures, and poorly finished joinery. The question then becomes: who is responsible, what are your rights, and how do you actually get these problems fixed?
This guide breaks down the warranty claim process for apartment defects across Australia, covering what counts as a defect, your statutory protections in each state, and how to build a strong claim that gets results.
## What Counts as a Building Defect in an Apartment?
A building defect is any part of the construction that does not meet the plans, specifications, Australian Standards, or the National Construction Code (NCC). Defects can appear in individual apartments (lot property) or in common areas managed by the owners corporation (common property).
Not every issue is a defect. Normal wear and tear, damage caused by residents, and problems arising from lack of maintenance are not covered by builder warranties. The distinction matters because builders will often argue that a reported issue falls outside their responsibility.
## Minor Defects vs Major Defects
The distinction between minor and major defects affects both the warranty period and the urgency of your claim. Each state defines these categories slightly differently, but the general principles are consistent across Australia.
## Statutory Warranty Periods Across Australia
Each state and territory has its own legislation governing statutory warranties for residential building work. Understanding which laws apply to your apartment is the first step in any warranty claim.
## Step-by-Step Guide to Lodging a Warranty Claim
A structured approach increases the likelihood of a successful warranty claim. Builders and developers are more responsive when they receive formal, well-documented notices rather than informal complaints.
## Documenting Apartment Defects Effectively
The strength of your warranty claim depends on the quality of your documentation. Builders and their insurers will challenge claims that lack clear evidence, so thorough records from the start save time and disputes later.
## The Role of Strata and Owners Corporations
In apartment buildings, defects can affect individual lots, common property, or both. Understanding who is responsible for lodging the warranty claim depends on where the defect is located.
If your apartment is part of a strata scheme, raise defects at strata meetings and request that the owners corporation take action on common property issues. In many cases, the strata manager will coordinate the defect claim process and engage a building inspector on behalf of all owners.
## Common Apartment Defects in Australian Buildings
Research from UNSW's City Futures Research Centre and reports from NSW Fair Trading consistently show that certain defect types appear far more often than others in Australian apartment buildings. Knowing what to look for helps you identify issues early.
## What Happens When the Builder Refuses to Fix Defects
Builders do not always respond promptly or cooperatively to defect claims. Some dispute responsibility, argue that the defect is outside the warranty period, or simply stop responding. When this happens, you have several formal options.
## Independent Building Inspections for Defect Claims
An independent defect inspection report from a qualified building inspector strengthens your warranty claim by providing expert evidence of each defect, its likely cause, the applicable Australian Standard or NCC provision, and the estimated cost of rectification.
Building inspectors who carry out defect assessments should hold a relevant licence in their state and have experience with apartment and multi-unit buildings. The inspection should comply with AS 4349.1 (Inspection of buildings) and reference AS 3740 (Waterproofing of domestic wet areas) where applicable.
## Strata Building Bond and Inspection Scheme (NSW)
In NSW, the Strata Building Bond and Inspection Scheme (SBBIS) provides additional protection for apartment owners. Under this scheme, developers of new strata buildings with more than three lots must lodge a building bond equal to 2% of the contract price with NSW Fair Trading before an occupation certificate is issued.
## Protecting Yourself as an Apartment Buyer
Whether you are buying off the plan or purchasing a completed apartment, there are steps you can take before and during ownership to protect your warranty rights.
### Benefits of Pre-Sale Inspections for Sellers and Buyers
Source: https://ownerinspections.com.au/articles/benefits-of-pre-sale-inspections-for-sellers-and-buyers
Published: 2025-11-21 | Updated: 2026-02-10 | Category: Pre-Sale Inspections
Author: Maison Azdari
A [pre-sale building inspection](/pre-sale-inspections) is a professional assessment of a property's condition carried out before it is listed for sale. In Australia, this inspection is arranged by the seller and covers structural integrity, plumbing, electrical systems, pest activity, and compliance with the National Construction Code (NCC). While not legally required in most states, a pre-sale inspection benefits both sellers and buyers by identifying defects early, supporting accurate pricing, and reducing the risk of failed transactions. Inspections are conducted under Australian Standard AS 4349.1 and typically cost from AUD 300 depending on property size and location.
Whether you are preparing to sell or looking to buy with confidence, understanding what a pre-sale inspection includes and how it affects the transaction can save thousands of dollars and weeks of delays. This guide breaks down the specific advantages for each side, what the inspection covers, how much it costs, and what to do with the findings.
## What Is a Pre-Sale Inspection?
A pre-sale inspection is a detailed building assessment carried out by a qualified inspector before a property goes on the market. The seller arranges and pays for it, and the resulting report is made available to prospective buyers during the sale campaign.
This differs from the more common [pre-purchase inspection](/pre-purchase-inspections), which is arranged by the buyer after making an offer. With a pre-sale inspection, the seller takes a proactive step to understand the property's condition, fix issues in advance, and present a transparent picture to the market.
Pre-sale inspections have become increasingly common in the Australian property market. Sellers who invest in this process often find that it leads to stronger offers, fewer renegotiations, and faster settlement timelines.
## Key Areas Covered in a Pre-Sale Inspection
A pre-sale inspection follows the same scope as a standard building inspection under AS 4349.1. The inspector examines visible and accessible areas of the property and documents any defects, safety concerns, or maintenance issues.
## Benefits for Sellers
### Identify and Fix Problems Before Listing
The biggest advantage for sellers is the ability to discover and address defects before buyers find them. When issues surface after an offer is made, the buyer typically uses them to negotiate a lower price or withdraw altogether. By repairing problems in advance, the seller avoids these setbacks and maintains a stronger position throughout the sale.
For example, a seller who discovers a minor plumbing leak during a pre-sale inspection can have it repaired for a few hundred dollars. If the same leak is found during the buyer's inspection, it could be used to justify a price reduction of several thousand dollars, even if the actual repair cost is low.
### Support a Higher and More Accurate Asking Price
A property with a clean inspection report gives the real estate agent a factual basis for the listing price. Rather than relying on comparable sales alone, the agent can point to the report as evidence that the property is in good condition and free from significant defects.
Buyers are more willing to pay the asking price when they can see documented proof that the home has been independently assessed. Properties listed with a recent inspection report tend to attract more serious enquiries and fewer lowball offers.
### Build Trust and Attract Serious Buyers
Transparency is a strong selling point in property transactions. Buyers who receive an inspection report upfront see it as a sign of honesty, which encourages them to make firm offers rather than conditional ones. This is particularly valuable in competitive markets where sellers want to avoid drawn-out negotiations.
A pre-sale inspection signals that the seller has nothing to hide. It also filters out buyers who are not genuinely committed, because the report gives everyone a clear picture of what they are purchasing.
### Speed Up the Sale Process
Deals fall apart when surprises emerge during the buyer's due diligence. A pre-sale inspection eliminates most of these surprises, leading to smoother and faster transactions. Fewer conditions on the contract, fewer requests for price adjustments, and fewer delays from additional inspections all contribute to a quicker settlement.
Sellers also reduce their legal risk by disclosing all known issues upfront. In states like NSW, vendors have disclosure obligations under the Conveyancing Act 1919. Providing an inspection report demonstrates good faith and helps protect against post-sale disputes.
### Reduce the Risk of a Failed Sale
According to the Real Estate Institute of Australia (REIA), a significant number of property sales fall through due to issues discovered during the buyer's inspection. A pre-sale inspection greatly reduces this risk by ensuring there are no deal-breaking surprises waiting to be found.
## Benefits for Buyers
### Make Offers with Greater Confidence
For buyers, a pre-sale inspection report removes much of the uncertainty that comes with purchasing property. Instead of guessing what might be wrong with a home, buyers can review a professional assessment before submitting an offer. This allows them to make informed decisions without the anxiety of hidden defects.
### Avoid Unexpected Repair Costs
Buying a property with unknown defects can lead to expensive repair bills soon after settlement. A pre-sale inspection gives buyers a clear understanding of the property's condition, including any items that will need maintenance or replacement in the near term.
For example, if the inspection report notes that the roof is nearing the end of its serviceable life, the buyer can factor replacement costs into their budget or negotiate a fair price adjustment rather than being caught off guard after moving in.
### Speed Up Mortgage Approval
Many Australian lenders require a property inspection before approving a home loan. When the seller provides a current inspection report, the buyer can submit it as part of the loan application, potentially speeding up the approval process. This is particularly helpful in fast-moving markets where delays can mean losing out on a property.
### Gain a Competitive Edge in Hot Markets
In competitive markets, buyers often need to move quickly. When a pre-sale inspection report is available, buyers can review the property's condition and submit offers without waiting for their own inspection to be scheduled and completed. This gives them an advantage over other buyers who still need time for due diligence.
## Pre-Sale Inspection vs Pre-Purchase Inspection
While both types of inspection cover the same technical scope, there are practical differences in who arranges them, when they happen, and how the results are used.
## Cost of a Pre-Sale Inspection in Australia
The cost of a pre-sale building inspection in Australia varies depending on the property's size, location, type, and the scope of the assessment. As a general guide, prices start from around AUD 300 for a standard residential property.
While the upfront cost may seem like an added expense, it is minor compared to the potential savings. Sellers who invest in a pre-sale inspection often avoid price reductions of thousands of dollars that buyers would otherwise negotiate based on defects discovered later.
## Handling Inspection Findings as a Seller
Receiving the inspection report is only the first step. How a seller responds to the findings directly affects the sale outcome.
## Legal Considerations and Disclosure Obligations
Pre-sale inspections are not mandatory under Australian law, but there are strong practical and legal reasons to conduct one.
Conducting a pre-sale inspection demonstrates that the seller has taken reasonable steps to understand and disclose the property's condition. This is a strong defence against any future claim that defects were knowingly concealed.
### Plumbing Defect Inspection to Identify Hidden Water Issues
Source: https://ownerinspections.com.au/articles/plumbing-defect-inspection-to-identify-water-issues
Published: 2025-11-18 | Updated: 2026-02-09 | Category: Defect Investigation
Author: Maison Azdari
A plumbing defect inspection is a professional assessment of a property's water supply, drainage, and waste systems to detect hidden leaks, pipe corrosion, blocked drains, and non-compliant installations. In Australia, plumbing work must comply with the Plumbing Code of Australia (PCA) and Australian Standard AS/NZS 3500, and a defect inspection confirms whether these standards have been met. Inspectors use thermal imageing cameras, moisture meters, acoustic leak detectors, and CCTV drain cameras to find problems that are invisible to the naked eye. The typical cost ranges from $300 to $800 depending on the property size and scope.
Plumbing defects are among the most common issues found in Australian homes, both new builds and older properties. A single undetected leak behind a wall or under a slab can cause mould growth within 48 hours, rot structural timber, and drive water bills up by hundreds of dollars per quarter. For homebuyers, investors, and property managers, a plumbing defect inspection provides the evidence needed to make informed decisions, request repairs, or negotiate on price before settlement. For a complete overview, see our [guide to building defect investigations](/guides/building-defect-investigation-guide).
## Common Plumbing Defects Found in Australian Properties
Plumbing issues range from minor drips to serious structural threats. Understanding the most frequent defects helps homeowners and buyers know what to look for and when to call in a professional.
### Leaks in Water Supply Pipes
Leaks in supply pipes are often caused by poor installation, corroded joints, shifting foundations, or high water pressure. Even a small, slow leak behind a wall can weaken timber framing, cause plasterboard to deteriorate, and create the perfect conditions for mould. The warning signs include water stains on ceilings or walls, musty odours, and a sudden increase in water bills.
Inspectors use thermal imageing cameras to detect temperature differences caused by moisture behind walls, acoustic leak detectors to pinpoint leaks by sound, and moisture meters to measure dampness levels in building materials.
### Pipe Corrosion and Rust
Older Australian homes fitted with galvanised steel or cast iron pipes are particularly vulnerable to internal corrosion. As pipes corrode from the inside, they release rust particles into the water supply, reduce water flow, and eventually develop pinhole leaks or full ruptures. Discoloured water from taps, a metallic taste, or persistent leaks at pipe joints are common indicators.
During inspections, the assessor evaluates pipe material, age, and remaining service life. In many cases, corroded galvanised pipes need to be replaced with modern copper or PEX (cross-linked polyethylene) piping to meet current standards.
### Clogged or Slow Drains
Recurring drainage problems often signal deeper issues within the plumbing system. Grease buildup, hair, foreign objects, and tree root intrusion into sewer lines are the most common causes. While a slow drain may seem like a minor annoyance, it can lead to complete blockages, wastewater backups, and serious health hazards.
CCTV drain cameras allow inspectors to visually examine the interior condition of drain lines without any need for excavation. This technology identifies cracks, root penetration, bellied pipe sections, and material buildup that restrict flow.
### Faulty Installations and Non-Compliant Work
Plumbing work that does not meet the Plumbing Code of Australia or AS/NZS 3500 creates ongoing risks. Common installation faults include incorrect pipe gradients that prevent proper drainage, missing or damaged backflow prevention devices, cross-connections between potable and non-potable water supplies, and inadequate joint sealing.
DIY plumbing repairs are a frequent source of non-compliant work, particularly in older homes. In Australia, all plumbing work beyond basic maintenance must be carried out by a licensed plumber.
### Waterproofing Failures in Wet Areas
Bathrooms, laundries, and shower recesses require waterproofing membranes that comply with AS 3740. When these membranes fail or were never installed correctly, water seeps into the substrate, wall cavities, and adjoining rooms. Signs of waterproofing failure include lifting tiles, grout deterioration, bubbling paint on adjacent walls, and musty smells near wet areas.
## How Hidden Water Issues Affect Different Stakeholders
Plumbing defects affect everyone involved in property ownership and transactions, but the consequences vary depending on your role.
## The Plumbing Inspection Process
A professional plumbing defect inspection follows a structured approach to evaluate every part of the property's plumbing system. Here is what the process typically involves.
## What a Plumbing Defect Report Includes
After the inspection, you receive a detailed written report. This document is your record of the property's plumbing condition and serves as evidence for negotiations, insurance claims, or warranty disputes.
A well-prepared report gives homebuyers the information they need to make an informed purchase decision, provides builders with evidence of code compliance, and gives property managers a clear maintenance roadmap.
## Plumbing Defect Severity Levels
Not all plumbing defects carry the same level of risk. Inspectors classify issues by severity to help property owners prioritise repairs.
## How to Prevent Major Plumbing Failures
Proactive maintenance reduces repair costs and extends the life of your plumbing system. These practices apply to all property types across Australia.
## Choosing a Qualified Plumbing Inspector
The quality of your inspection depends on the qualifications and experience of the person conducting it. Here is what to look for.
### Pre-Purchase Report for Mortgage Approval: Key Details
Source: https://ownerinspections.com.au/articles/pre-purchase-report-for-mortgage-approval
Published: 2025-11-11 | Updated: 2026-03-13 | Category: Pre-Purchase Inspections
Author: Maison Azdari
A pre-purchase report is a professional property assessment that evaluates structural condition, pest activity, and compliance with Australian building codes. Lenders in Australia use these reports to determine whether a property meets their financing criteria and does not carry risks that could affect its value. Without a satisfactory pre-purchase report, buyers may face delayed, reduced, or denied mortgage approval, even after receiving conditional pre-approval from their bank.
Many buyers assume that getting mortgage pre-approval is the final step. In reality, the lender still needs to verify the property itself is a sound investment. A [pre-purchase inspection](/pre-purchase-inspections) uncovers issues such as foundation cracks, termite damage, faulty wiring, and unapproved building work that could lower the property's valuation or make it ineligible for financing. For buyers, this report also serves as a powerful negotiation tool, and for sellers, it adds transparency that can speed up the sale.
## What Is a Pre-Purchase Report?
A pre-purchase report is a detailed property assessment carried out by a licensed building inspector. The report evaluates the structural integrity of the building, identifies active pest infestations or damage, and checks whether the property complies with Australian building standards. It gives buyers a clear picture of the property's true condition before they commit financially.
The inspection follows Australian Standard AS 4349.1 for building inspections and AS 4349.3 for [timber pest inspections](/timber-pest-inspections). These standards set out what the inspector must assess, the format of the report, and the definitions of defect severity. A report prepared under these standards is recognised by lenders, conveyancers, and legal professionals across Australia.
For mortgage purposes, the report serves as independent verification that the property is worth the amount the buyer intends to borrow. If the report reveals significant problems, the lender may adjust the loan amount, request repairs before settlement, or decline the application altogether.
Book Your
Inspection
}
buttonHref="/pre-purchase-inspections"
variant="secondary"
/>
## Types of Pre-Purchase Reports
There are three main types of pre-purchase reports that buyers and lenders rely on in Australia. Each one covers a different aspect of the property's condition.
Many buyers choose a [combined building and pest](/building-and-pest-inspections) inspection, which covers both structural and pest assessments in a single visit. This is the most common approach for standalone houses and is often the minimum that lenders expect to see before processing a loan.
## How Lenders Use Pre-Purchase Reports
Banks and mortgage providers do not simply rely on the purchase price when deciding how much to lend. They assess the property independently to confirm it represents adequate security for the loan.
### Property Valuation and Condition
The lender's valuer considers the property's physical condition alongside comparable sales data. If a pre-purchase report identifies major structural issues, the valuer may reduce their estimate of the property's market value. A lower valuation means the buyer may need a larger deposit or face a reduced loan amount.
### Risk Assessment
Lenders factor the property's condition into their risk profile. A property with active termite damage, rising damp, or non-compliant electrical work is considered a higher risk. In some cases, the lender may impose conditions such as requiring the seller to complete repairs before settlement, or the buyer to take out additional insurance cover.
### Impact on Loan Terms and Approval
## Understanding Conditional Pre-Approval
Conditional pre-approval is a lender's preliminary agreement to finance a property purchase, subject to further checks. It gives buyers a clear borrowing limit and signals to sellers that the buyer has financial backing. However, it is not a guarantee that the loan will be approved.
### Common Conditions Attached to Pre-Approval
### Why Pre-Approval Does Not Guarantee Final Approval
Buyers should not treat conditional pre-approval as a done deal. The pre-purchase inspection is one of several conditions that must be satisfied. If the inspection reveals termite damage, structural faults, or non-compliant building work, the lender can change the loan terms, reduce the amount, or withdraw the offer entirely.
## What to Look for in a Pre-Purchase Report
A thorough pre-purchase report will cover multiple areas of the property. Here are the key factors every buyer should review carefully.
### Structural Soundness
Look for reports on foundation stability, wall cracks, roof condition, load-bearing walls, and signs of settlement or movement. These issues directly affect the building's safety and long-term value.
### Pest Damage
Check for evidence of termite activity, wood borer damage, and fungal decay. In Australia, termites cause more damage to homes than fire, flood, and storms combined. The CSIRO estimates that one in three Australian homes will be affected by termites at some point.
### Electrical and Plumbing Systems
The report should note whether electrical wiring and plumbing meet current Australian regulations. Outdated or faulty systems are both a safety risk and a potential cost burden after purchase.
### Asbestos and Hazardous Materials
Properties built before 1990 may contain asbestos in walls, ceilings, eaves, or flooring. The report should flag any suspected asbestos-containing materials and recommend further testing if needed.
### Damp and Mould Issues
Water intrusion, rising damp, and mould growth indicate ongoing moisture problems that can lead to structural degradation and health risks for occupants. These issues often require specialist remediation.
Read the
Full Guide
}
buttonHref="/guides/pre-purchase-building-pest-inspection-guide"
variant="secondary"
/>
## Red Flags That Could Affect Mortgage Approval
Certain findings in a pre-purchase report are more likely to cause problems with your mortgage application. These are the issues that lenders view as high risk.
If any of these red flags appear in your report, discuss them with your conveyancer or solicitor before proceeding. In many cases, you can negotiate with the seller to have repairs completed before settlement, request a price reduction, or exercise a cooling-off clause to exit the contract.
## Steps to Obtain a Pre-Purchase Report
## Cost and Timeframe
Pre-purchase inspection costs in Australia vary depending on property size, location, and the scope of the inspection.
At Owner Inspections, the typical turnaround time for a building inspection report is 24 hours. Costs start from $300, with the final price depending on the property size and location.
## How Pre-Purchase Reports Benefit Different Parties
A pre-purchase report is not just for the buyer. It serves the interests of everyone involved in the transaction.
Get a
Quote Today
}
buttonHref="/contact"
variant="primary"
/>
For a complete overview, see our [guide to pre-purchase building and pest inspections](/guides/pre-purchase-building-pest-inspection-guide).
### Dilapidation Reports for Insurance Claims: Why They Matter
Source: https://ownerinspections.com.au/articles/dilapidation-reports-for-insurance-claims
Published: 2025-11-07 | Updated: 2026-02-09 | Category: Dilapidation Reports
Author: Maison Azdari
A [dilapidation report](/dilapidation-reports) is a detailed, independent property condition survey that records pre-existing damage, structural defects, and general wear before construction or development work begins nearby. For insurance claims in Australia, these reports serve as baseline evidence that allows property owners, insurers, and developers to determine whether damage was caused by external works or already existed. Without one, proving the source of property damage becomes extremely difficult, and many insurance claims fail as a result.
When construction, excavation, demolition, or major infrastructure projects take place near your property, the risk of structural damage increases significantly. Vibrations from heavy machinery, soil movement from deep excavation, and changes to drainage patterns can all affect neighbouring buildings. A dilapidation report completed before works begin gives you a clear, time-stamped record that protects your interests if you need to lodge an insurance claim later.
This guide explains what dilapidation reports contain, how they support insurance claims, the Australian standards they must follow, and the steps involved in getting one done properly.
For a complete overview, see our [guide to insurance claim assessments](/guides/insurance-claim-assessment-guide).
## What Is a Dilapidation Report?
A dilapidation report is an independent, legally recognised property condition survey prepared by a licensed building inspector. It captures the exact state of a property at a specific point in time, typically before nearby construction, demolition, or infrastructure work begins.
The report provides an objective, factual record that can be referred to later if any damage is alleged to have occurred during or after the works. Courts, insurers, and local councils across Australia accept these reports as evidence, making them a practical tool for resolving disputes without drawn-out legal proceedings.
Unlike a general building inspection, which focuses on the overall condition and habitability of a property, a dilapidation report specifically targets the documentation of existing damage, wear, and structural issues so that any new damage can be clearly identified by comparison.
## Why Dilapidation Reports Matter for Insurance Claims
Insurance claims related to construction damage are among the most disputed categories in property insurance. Without a pre-works condition record, insurers often argue that reported damage was pre-existing. Property owners, in turn, struggle to prove the damage was caused by external works. This standoff frequently leads to denied claims, reduced payouts, and lengthy disputes.
A dilapidation report resolves this problem by providing a clear "before" snapshot. When combined with a post-construction inspection, it creates a direct comparison that shows exactly what changed.
## What a Dilapidation Report Includes
A thorough dilapidation report documents every observable condition of a property at the time of inspection. The level of detail is what makes these reports effective in insurance claim scenarios.
The combination of photographic evidence and written commentary creates a comprehensive record that holds up in [insurance assessments](/insurance-claim-assessments), legal proceedings, and council reviews.
## Australian Standards for Dilapidation Reports
Dilapidation reports in Australia must comply with AS 4349.0, the general standard for property inspections. This standard sets out requirements for inspection methodology, reporting format, and inspector qualifications. Compliance with this standard is what gives a dilapidation report its legal weight in insurance disputes and court proceedings.
### Why Compliance with AS 4349.0 Matters
Key regulatory bodies that oversee property assessment standards include local councils, state government planning departments, and the Australian Building Codes Board (ABCB). In NSW, the Environmental Planning and Assessment Act 1979 often requires dilapidation reports for development applications near existing structures. Victoria's Building Act 1993 and Queensland's Building Act 1975 contain similar provisions.
## Common Scenarios Where Dilapidation Reports Support Claims
Dilapidation reports are not limited to one type of project or property. They apply across a wide range of construction and development scenarios where neighbouring properties may be affected.
In each of these scenarios, the dilapidation report acts as the single point of reference for determining what damage, if any, was caused by the works.
## The Dilapidation Report Process Step by Step
A structured process ensures that the report captures everything needed to support an insurance claim. Here is what to expect from a professional dilapidation inspection.
## Dilapidation Reports vs Standard Building Inspections
Property owners sometimes confuse dilapidation reports with standard building inspections. While both involve a licensed inspector examining a property, their purpose, scope, and output are different.
Both reports have value, but for insurance claims related to construction damage, the dilapidation report is the more appropriate document.
## Who Benefits from Dilapidation Reports
Dilapidation reports protect multiple parties in any construction or development scenario. The benefits extend well beyond insurance claims.
### Homeowners and Property Buyers
For homeowners living near an upcoming construction project, a dilapidation report is the most effective way to protect your property and your claim rights. If damage occurs during the works, you have timestamped proof of what your property looked like before the project started.
Buyers purchasing a property near an active construction site should also request a dilapidation report as part of their due diligence. This prevents inheriting disputes about pre-existing damage.
### Builders and Developers
Builders and developers benefit from dilapidation reports because they provide protection against unjustified claims from neighbouring property owners. If a neighbour alleges that construction caused damage, the pre-works report can demonstrate that the damage was already present.
Many councils in NSW, Victoria, and Queensland now require dilapidation reports as part of the development application process, making them a compliance requirement rather than just a precaution.
### Commercial Property Managers
For commercial properties, dilapidation reports protect investment assets from adjacent construction impacts. They also provide documented evidence for lease negotiations, maintenance disputes, and insurance claims related to commercial developments.
### Government and Infrastructure Authorities
Public infrastructure projects, such as road widening, bridge construction, or utility upgrades, often affect surrounding properties. Government bodies use dilapidation reports to document conditions along project corridors, reducing the risk of disputed claims from affected residents and businesses.
## Cost of a Dilapidation Report in Australia
The cost of a dilapidation report varies depending on the size and type of property, the level of detail required, and the location of the inspection.
While these costs represent an upfront investment, the expense is minor compared to the potential losses from a denied insurance claim or an unresolved property dispute. A denied claim for structural damage can easily exceed tens of thousands of dollars in repair costs alone.
## How to Choose a Qualified Dilapidation Inspector
Not all building inspectors have the same experience with dilapidation assessments. Choosing the right inspector directly affects the quality and legal standing of your report.
For a complete overview, see our [guide to insurance claim assessments](/guides/insurance-claim-assessment-guide).
### Hidden Building Defects: How to Identify Them and Protect Your Property
Source: https://ownerinspections.com.au/articles/hidden-building-defects-protection-steps
Published: 2025-11-06 | Updated: 2026-02-09 | Category: Building Inspections
Author: Maison Azdari
Hidden building defects are faults in a property's construction or condition that are not visible during a normal visual inspection or walkthrough. In Australia, these concealed issues include failed waterproofing membranes behind tiles, structural cracking concealed by paint or render, termite damage inside wall cavities, defective plumbing within wall linings, and non-compliant electrical wiring. A professional building inspection following Australian Standard AS 4349.1 can identify many of these defects using moisture meters, thermal imaging, and other diagnostic tools before they cause serious damage or financial loss.
Research by the University of New South Wales found that around 85% of newly built homes in Australia contain at least one defect, and a significant number of those defects are not immediately visible. For property buyers, owners, and investors, the risk of purchasing or living in a building with hidden problems is real and potentially expensive. Repair costs for concealed defects can range from a few thousand dollars for minor waterproofing failures to well over $100,000 for major structural remediation.
This guide breaks down the most common types of hidden building defects in Australian properties, explains how professionals detect them, outlines your legal rights under state and federal legislation, and provides a clear set of steps to protect yourself whether you are buying, building, or maintaining a property. For a complete overview, see our [guide to building defect investigations](/guides/building-defect-investigation-guide).
## What Are Hidden Building Defects?
A hidden building defect is any fault in a property that cannot be seen during a standard visual walkthrough. These defects are concealed behind wall linings, under floor coverings, within roof spaces, behind tiles, or beneath the ground. Unlike visible defects such as cracked plaster or peeling paint, hidden defects require specialist equipment, professional knowledge, or invasive testing to identify.
Hidden defects can exist in both new and older properties. In new builds, they often result from poor workmanship, cost-cutting during construction, or failure to follow the National Construction Code (NCC). In older properties, they develop over time through weathering, ground movement, pest activity, or deterioration of building materials.
The distinction between a hidden defect and a visible defect matters legally. In most Australian states, builders and developers carry liability for hidden defects for longer periods than for visible ones, because the property owner could not reasonably have known about them at the time of purchase or handover.
## Most Common Hidden Defects in Australian Properties
Based on inspection data and industry reports, the following defects are among the most frequently found concealed issues in Australian homes and buildings.
### Waterproofing Failures
Failed or poorly applied waterproofing membranes are one of the most common hidden defects. They typically occur in wet areas such as bathrooms, laundries, and balconies. Water can seep through failed membranes into the subfloor, wall cavities, and structural timber for months or years before any visible signs appear.
Australian Standard AS 3740 sets out the requirements for waterproofing of domestic wet areas. Non-compliance with this standard is a frequent finding in [defect investigations](/defect-investigation-reports).
### Structural Cracking Behind Render or Paint
Structural cracks in brickwork, block walls, or concrete can be concealed by thick render coats, textured paint, or decorative finishes. These cracks may indicate foundation movement, inadequate footings, reactive soil issues, or poor construction practices. Without removal of the surface finish, the true severity of the cracking remains unknown.
### Concealed Termite Damage
Termites are active across most of Australia, with Queensland, NSW, and parts of Victoria classified as high-risk zones. Termites feed on timber framing inside wall cavities, roof trusses, and subfloor structures, often causing severe damage before any external signs are visible. Australian Standard AS 4349.3 covers [timber pest inspections](/timber-pest-inspections).
### Defective Plumbing and Drainage
Leaking pipes, poorly joined connections, and blocked or broken drains inside walls and under slabs are common hidden defects. These can cause water damage, mould growth, and even structural deterioration over time. Plumbing faults are frequently found during pre-purchase inspections using moisture detection equipment.
### Non-Compliant Electrical Work
Wiring that does not meet current Australian standards, unlicensed electrical work, or degraded cabling inside wall cavities creates serious safety hazards. These defects are not visible without opening walls or using thermal imaging to detect hot spots.
### Roof Membrane and Sarking Failures
Damaged or missing sarking (the waterproof membrane under roof tiles or sheeting) allows water to enter the roof cavity. Over time, this causes timber rot, mould growth, and insulation damage, all hidden from view unless the roof space is physically inspected.
### Inadequate Insulation and Ventilation
Missing or incorrectly installed insulation in wall cavities and roof spaces contributes to moisture buildup, condensation, and mould growth. Poor subfloor ventilation can also lead to rising damp and timber decay. These issues are hidden within enclosed spaces.
## Why Hidden Defects Go Undetected
There are several reasons why hidden defects remain concealed, sometimes for years, before they cause noticeable problems.
## How Professionals Detect Hidden Defects
Licensed building inspectors use a combination of visual assessment, specialist equipment, and professional experience to detect defects that are not visible to the untrained eye.
### Diagnostic Tools and Methods
## Your Legal Rights and Warranty Periods
Australian law provides property owners with protections against hidden building defects. The specifics vary by state, but all jurisdictions impose minimum warranty and defect liability periods on builders and developers.
### Statutory Warranty Periods by State
### Key Legislation
### Consumer Rights for Existing Property Purchases
When purchasing an existing property, the statutory builder warranties may have expired. However, buyers still have some protections:
## Steps to Protect Yourself from Hidden Defects
Whether you are buying, building, or maintaining a property, there are practical steps you can take to reduce the risk of hidden defects causing financial loss.
### Before Buying a Property
### During New Home Construction
### For Current Property Owners
## Hidden Defects in New Builds vs Older Properties
The types of hidden defects and their causes differ between newly constructed properties and older homes.
In new builds, hidden defects are often the result of construction shortcuts, inadequate site supervision, or pressure to meet tight project timelines. The rapid pace of residential construction during boom periods has been linked to higher defect rates across multiple Australian studies.
In older properties, defects develop gradually through weathering, soil movement, material degradation, and the cumulative effects of poor or deferred maintenance. Properties built before 1990 may also contain hazardous materials such as asbestos, which are concealed within wall cavities, eaves, and floor sheeting.
## Cost of Ignoring Hidden Defects
Failing to identify and address hidden defects early leads to higher repair costs, lower property values, and in some cases, safety hazards for occupants.
Early detection through professional inspections is far less expensive than the cost of remediation once a defect has progressed. A pre-purchase inspection typically costs between $400 and $800, while a comprehensive defect investigation for an existing property ranges from $500 to $2,000 depending on the scope and property size. Compare this to the tens of thousands of dollars required to repair structural cracking, replace failed waterproofing, or treat extensive termite damage.
## When to Book a Building Inspection
Knowing when to arrange a professional inspection is just as important as knowing what to look for.
### Fact Witness vs Expert Witness: What Property Owners Need to Know
Source: https://ownerinspections.com.au/articles/commercial-and-home-inspection-fact-witness-vs-expert-witness
Published: 2025-10-31 | Updated: 2026-02-12 | Category: Expert Witness
Author: Maison Azdari
When a property dispute reaches a tribunal or court, the evidence presented determines the outcome. Witness testimony is one of the most common forms of evidence in building and construction disputes across Australia. However, the type of witness you call can make a significant difference to your case.
Australian law recognises two distinct categories of witnesses: fact witnesses and expert witnesses. Each serves a different purpose, carries different legal requirements, and is subject to different rules about what they can say. Choosing the wrong type of witness, or failing to understand the distinction, can weaken your position or lead to evidence being excluded entirely.
This guide breaks down the differences between fact witnesses and expert witnesses in the context of property inspections and construction disputes. It covers what each type does, when you need them, and how Australian courts treat their testimony.
## What Is a Fact Witness?
A fact witness testifies about events they personally observed or experienced. Their testimony is limited to what they saw, heard, felt, or otherwise perceived through their own senses. They do not offer opinions, interpretations, or professional analysis.
In property disputes, fact witnesses are often neighbours, tenants, tradespeople who were on site, or property owners themselves. A fact witness might describe seeing water leaking through a ceiling, hearing construction noise at certain hours, or noticing cracks appearing in a wall after nearby excavation work.
No special qualifications are required to be a fact witness. Any person who directly observed relevant events can provide fact witness testimony. Their credibility rests on their reliability, consistency, and the accuracy of their recollection rather than on any professional credentials.
Fact witnesses are bound by a strict limitation: they cannot give opinion evidence. A tenant can describe that water pooled on the floor every time it rained, but they cannot testify that the cause was a defective waterproof membrane. That type of analysis falls within the domain of an expert witness.
## What Is an Expert Witness?
An expert witness provides opinion-based testimony grounded in specialised knowledge, training, or experience. Unlike fact witnesses, experts are specifically permitted to offer professional opinions on technical matters that are beyond the understanding of the average person.
In building and construction disputes, expert witnesses are typically licensed building inspectors, structural engineers, hydraulic consultants, or other qualified professionals. They examine the evidence, apply their technical knowledge, and form opinions about matters such as defect causation, code compliance, and rectification costs.
Expert witnesses prepare formal reports that set out their qualifications, methodology, findings, and opinions. These reports must comply with court rules and practice directions. The expert's primary duty is to the court, not to the party who engaged them. This obligation to independence is a defining feature of expert witness evidence in Australia.
Expert witnesses must be available for cross-examination and may need to attend joint conferences with opposing experts. Their evidence is scrutinised closely, and a failure to maintain objectivity can result in their testimony being discounted or excluded.
For a detailed explanation of [expert witness reports](/expert-witness-reports), see our guide on [expert witness reports explained](/articles/legal-expert-witness-reports-explained).
## Comparison of Fact Witnesses and Expert Witnesses
## When to Use a Fact Witness
Fact witnesses are valuable when you need to establish what happened, when it happened, and who was involved. Their testimony provides the factual foundation upon which expert analysis can be built.
Common situations where fact witnesses are needed in property disputes include:
- **A neighbour witnessed water damage** occurring during a specific storm event
- **A tenant documented recurring issues** such as mould growth or water ingress over time
- **A tradesperson observed site conditions** during construction, such as missing reinforcement or incorrect materials
- **A property owner recorded defects** through photographs and written notes at the time they appeared
- **A project manager attended site meetings** where decisions about construction methods were discussed
Fact witnesses are particularly useful for establishing timelines. Courts and tribunals need to understand when defects first appeared, when complaints were made, and what responses were given. Fact witness testimony fills these gaps in the documentary record.
## When to Use an Expert Witness
Expert witnesses are needed when the dispute involves technical questions that require professional knowledge to answer. If the tribunal or court needs to understand why a defect occurred, whether construction work complied with applicable standards, or how much it will cost to rectify, expert evidence is required.
You should engage an expert witness when:
- **The dispute involves defect causation.** Determining why a wall cracked, why waterproofing failed, or why a structure is settling requires professional analysis.
- **Code compliance is contested.** Assessing whether work meets the National Construction Code, Australian Standards, or state building regulations requires specialised knowledge.
- **Rectification costs must be quantified.** Courts require evidence-based costings, not estimates from the property owner.
- **The matter is before a tribunal or court.** NCAT, VCAT, QCAT, and other tribunals rely heavily on expert evidence in building disputes.
- **Mediation requires credible evidence.** An expert report strengthens your negotiating position at mediation and may help resolve the dispute without a hearing.
For more on how expert witnesses support tribunal proceedings, read our article on [expert witnesses in Sydney construction disputes](/articles/the-role-of-expert-witnesses-in-sydneys-construction-disputes).
## Legal Framework in Australia
The admissibility and treatment of witness evidence in Australia is governed by the uniform evidence legislation, including the Evidence Act 1995 (Cth), the Evidence Act 1995 (NSW), and equivalent legislation in other states and territories.
**Section 76** of the Evidence Act sets out the opinion rule, which provides that evidence of an opinion is not admissible to prove the existence of a fact about which the opinion was expressed. This is the general prohibition on opinion evidence that applies to fact witnesses.
**Section 79** provides the exception for expert opinion evidence. It allows a person with specialised knowledge based on training, study, or experience to give opinion evidence that is wholly or substantially based on that knowledge. This is the provision that permits expert witnesses to offer their professional opinions in court.
The practical effect is clear. A fact witness who attempts to offer opinions about defect causation or code compliance may have that portion of their evidence ruled inadmissible. Conversely, an expert witness who lacks the required specialised knowledge may be found unqualified to give expert evidence on a particular topic.
State tribunals have their own procedural rules that supplement the evidence legislation. In NSW, the NCAT Rules and associated practice directions set out specific requirements for expert witness reports, including the expert's declaration, disclosure of instructions, and the format of the report. Similar requirements exist in VCAT, QCAT, and SAT.
## Practical Example: Commercial Property Electrical Dispute
Consider a dispute over electrical wiring in a commercial property. The building owner discovers that the electrical installation does not comply with AS/NZS 3000 (the Wiring Rules) and initiates proceedings against the electrical contractor.
**The fact witness** is the building manager who noticed flickering lights and a burning smell in the switchboard room. They can testify about when they first noticed these issues, what they observed, and what steps they took in response. They can describe the smell, the visual appearance of the switchboard, and the timeline of events. They cannot testify about whether the wiring was installed correctly or what caused the problems.
**The expert witness** is a licensed electrical engineer engaged to inspect the installation. They examine the wiring, test the circuits, review the installation against AS/NZS 3000, and prepare a formal report. Their report identifies specific non-compliant work, explains how the installation deviates from the standard, determines the cause of the issues, and estimates the cost of bringing the installation into compliance.
Both witnesses are needed. The fact witness establishes that the problems occurred and provides the factual timeline. The expert witness explains what went wrong, why it went wrong, and what it will cost to fix. Together, their evidence builds a complete case.
## Can One Person Be Both?
In some situations, a single person may serve as both a fact witness and an expert witness. For example, a building inspector who conducted a routine inspection of a property may later be asked to provide expert witness evidence about defects they observed during that inspection.
When this occurs, the witness must clearly separate their factual observations from their expert opinions. Courts expect the witness to identify which parts of their evidence are based on direct observation (fact witness evidence) and which parts are based on professional analysis (expert witness evidence).
This dual role can create complications. A witness who has personal involvement in the facts of the case may face challenges to their independence as an expert. The opposing party may argue that the witness has a bias because of their prior involvement. Courts will assess whether the witness can maintain objectivity despite their factual connection to the matter.
## Preparing Witnesses for Property Disputes
Whether you are calling a fact witness or an expert witness, proper preparation is important for presenting a strong case.
**For fact witnesses**, preparation involves reviewing any notes, photographs, or records made at the time of the events. Fact witnesses should refresh their memory about dates, times, and sequences of events. They should understand that they will be asked to describe only what they personally observed and should avoid speculation or opinion.
**For expert witnesses**, preparation involves selecting a qualified professional with experience in the specific technical area of the dispute. The expert must be engaged early enough to conduct thorough investigations, prepare a comprehensive report, and meet any court-directed timetables. The expert should also be experienced in giving oral evidence and withstanding cross-examination.
In both cases, witnesses should be honest and straightforward. Attempting to exaggerate, minimise, or fabricate evidence can have serious consequences, including adverse findings by the court and potential referral for prosecution.
For a complete overview, see our [guide to expert witness reports for building disputes](/guides/expert-witness-building-disputes-guide).
### What Is the Difference Between Expert Witness and Routine Inspection Reports?
Source: https://ownerinspections.com.au/articles/expert-witness-vs-routine-inspection-reports
Published: 2025-10-30 | Updated: 2026-09-09 | Category: Expert Witness
Author: Maison Azdari
An [expert witness report](/expert-witness-reports) is written as evidence for a court or tribunal, and a routine inspection report is written for the person who paid for it. That single difference drives everything else: the expert owes their paramount duty to the tribunal rather than to their client, the report must carry formal declarations and reasoning that the rules of evidence demand, and it costs several times more because the investigation behind it is far deeper. A routine inspection report cannot be reformatted into an expert report after the fact, which is why choosing the wrong one at the start is expensive.
If you are buying, selling or maintaining a property, a routine inspection report is the right document. If you are heading to NCAT, VCAT, QCAT or a court, it is not.
## What Is a Routine Inspection Report?
A routine inspection report is a standard building assessment prepared for a private client so they can make a decision about a property. It documents visible defects, safety hazards and maintenance issues in accessible areas, usually in line with AS 4349.1. It is written in plain language for a buyer or owner, not for a tribunal, and it carries no formal evidentiary declarations.
[Pre-purchase inspections](/pre-purchase-inspections), [defect assessments](/defect-investigation-reports) and periodic maintenance reports all fall into this category. The inspector examines what can be seen and reached on the day, and the report states clearly what was not accessible.
Common types of routine inspection report include:
- **Pre-purchase inspections** for residential and commercial properties
- **Pre-settlement inspections** verifying completed construction
- **Defect assessment reports** documenting building issues
- **Periodic maintenance reports** for property managers
- **Dilapidation reports** recording property condition before nearby construction
For a broader overview of what building inspections involve, see our [comprehensive guide to house inspections](/articles/a-comprehensive-guide-to-house-inspections).
## What Is an Expert Witness Report?
An expert witness report is a formal document prepared for legal proceedings, giving an independent technical opinion to help a court or tribunal decide a building dispute. Its defining feature is that the expert's paramount duty is owed to the tribunal, not to the party paying the fee. Every opinion must be supported by stated facts, assumptions and reasoning, because the author can be cross-examined on all of it.
An expert report is built from documents as well as site observations. Contract drawings, engineering details, variation records and prior correspondence all inform the opinion, and the report has to show that reasoning rather than assert a conclusion.
Expert witness reports in building disputes typically address:
- Identification and classification of defects against the applicable codes and standards
- Causation analysis explaining why each defect occurred
- Compliance with the National Construction Code, Australian Standards and state regulations
- Quantification of rectification costs with detailed costings
- Whether the work meets an acceptable standard of workmanship
For a deeper look at what separates a persuasive expert report from a weak one, read [what makes a strong expert witness report](/articles/what-makes-strong-expert-witness-report).
> A routine inspection report tells you what is wrong with a property. An expert witness report tells a tribunal why it is wrong, who is responsible, what it will cost to fix, and provides the evidence to prove it.
## Detailed Comparison Table
The two reports differ on almost every dimension that matters: who they serve, how deep the investigation goes, whether they can be admitted as evidence, and what happens to the author afterwards. The table below sets out the practical differences side by side.
| Aspect | Routine Inspection Report | Expert Witness Report |
| -------------------------- | ----------------------------------------------- | ----------------------------------------------------------------------------- |
| **Objective** | Inform the client about property condition | Assist the court or tribunal in understanding technical matters |
| **Audience** | Property buyer, seller, or owner | Judge, tribunal member, arbitrator, or mediator |
| **Depth of analysis** | Visual assessment of accessible areas | Comprehensive investigation including invasive testing where required |
| **Legal standing** | Limited; not prepared for legal proceedings | Admissible as expert evidence in courts and tribunals |
| **Timing** | Before purchase, settlement, or as needed | During or in preparation for legal disputes |
| **Author requirements** | Licensed building inspector | Qualified expert with relevant experience, accepted by the court as an expert |
| **Duration to prepare** | 1 to 3 business days | 2 to 6 weeks depending on complexity |
| **Report format** | Standardised template per AS 4349.1 | Structured to comply with court practice directions and rules of evidence |
| **Duty owed to** | The client who commissioned the report | The court or tribunal, regardless of who engaged the expert |
| **Cross-examination** | Inspector is not expected to give oral evidence | Expert must be available for cross-examination |
| **Methodology disclosure** | General description of inspection process | Full disclosure of methodology, qualifications, assumptions, and limitations |
### Depth of Investigation
A routine inspection is a visual assessment of accessible areas at a single point in time, with defined limitations for anything concealed or unreachable. An expert investigation goes further: invasive testing, specialist subconsultants, multiple site visits and a review of the construction documentation, because the findings have to survive cross-examination rather than simply inform a purchase.
A roof space like this one illustrates the gap. A routine report records that the sarking is displaced and the insulation disturbed. An expert report has to establish when it happened, whether the installation ever complied, which party was responsible for that trade, and what rectification will cost.
## What Is the Difference Between Expert Evidence and an Expert Witness?
Expert evidence is the opinion itself, the material a tribunal is asked to accept about a technical matter outside ordinary knowledge. An expert witness is the person who gives it. The distinction matters because evidence can be excluded while the witness remains qualified: if the report fails the formal requirements, the opinion never reaches the decision-maker no matter how competent its author.
This is the trap that catches homeowners who arrive at a hearing with a good inspection report from a genuinely experienced inspector. The inspector is credible. The document is not evidence.
## Why a Routine Report Is Not Admissible as Expert Evidence
A routine inspection report is not admissible as expert evidence because it lacks the acknowledgment the rules require. [NCAT Procedural Direction 3](https://ncat.nsw.gov.au/documents/procedural-directions/ncat_pd3_expert_witnesses.pdf) obliges any party retaining an expert to bring the experts' code of conduct to that expert's attention, and the report must record that they have read it and agree to be bound. The equivalent rule for NSW courts sits in Schedule 7 of the Uniform Civil Procedure Rules 2005, where a report without that acknowledgment is not validly served and cannot be admitted.
That is a formal requirement, not a matter of quality. Beyond it, routine reports typically also lack:
- A declaration of the expert's paramount duty to the tribunal
- Disclosure of qualifications and experience relevant to the issues in dispute
- Detailed reasoning linking each observation to each conclusion
- Consideration of alternative explanations for the defect
- A statement of assumptions and limitations in the form the rules require
## When to Use a Routine Inspection Report?
Use a routine inspection report whenever the purpose is commercial rather than legal: you need to know the condition of a property in order to buy it, sell it, accept a handover or plan maintenance. There is no dispute on foot, nobody is going to cross-examine the inspector, and paying for court-grade evidence would be wasted money.
- **Buying a property.** A pre-purchase inspection identifies defects and safety issues before you commit.
- **Selling a property.** A [pre-sale inspection](/pre-sale-inspections) lets vendors address issues before listing.
- **New construction handover.** A pre-settlement inspection checks the builder has completed the work properly.
- **Ongoing maintenance.** Periodic inspections catch problems before they become expensive.
- **Insurance documentation.** Recording condition for insurance purposes or after a weather event.
## When Do You Need an Expert Witness Report?
You need an expert witness report once a dispute has reached, or is realistically heading to, a tribunal or court. If you have filed at NCAT, VCAT or QCAT, received directions to serve expert evidence, or been told your claim will be defended, a routine report will not carry you. Engage the expert early, because a rushed report is the one that gets picked apart.
Common triggers include:
- **Building defect claims** against a builder or developer for defective work
- **Strata and [body corporate disputes](/articles/expert-witnesses-body-corporate-building-disputes)** over common property defects
- **Insurance claim disputes** where the insurer and policyholder disagree on cause or extent
- **Contractual disputes** between builders, subcontractors and clients
- **Neighbour disputes** involving damage from adjoining construction or tree roots
For guidance on tribunal disputes in NSW, see our article on [NCAT building disputes](/articles/navigating-ncat-building-disputes-with-expert-witness-support).
## What Do Australian Tribunals Require From an Expert?
Every Australian tribunal requires the same three things: an acknowledgment of the expert's overriding duty to the tribunal, disclosure of the qualifications and experience that make them an expert on the issues, and the facts, assumptions and reasoning behind each opinion. The instrument that imposes them differs by state, and so do the rules on conferring with the other side's expert.
**NCAT (New South Wales).** Expert evidence is governed by [NCAT Procedural Direction 3](https://ncat.nsw.gov.au/documents/procedural-directions/ncat_pd3_expert_witnesses.pdf), which contains the experts' code of conduct. Any party retaining an expert must bring the direction to that expert's attention. Where NCAT appoints its own expert, you cannot call your own or tender another report without leave. See also NCAT's guidance on [evidence and witnesses](https://ncat.nsw.gov.au/how-ncat-works/prepare-for-your-hearing/evidence-and-witnesses.html).
**VCAT (Victoria).** [Practice Note PNVCAT2 Expert Evidence](https://www.vcat.vic.gov.au/documents/practice-notes/practice-note-pnvcat2-expert-evidence) applies to any evidence given by an expert witness. The expert must state that they have read it, and the report must be filed and served at least ten business days before the hearing, mediation or compulsory conference at which it is relied on. VCAT also publishes plain-language guidance on [expert reports](https://www.vcat.vic.gov.au/the-vcat-process/prepare-to-come-to-vcat/expert-reports).
**QCAT (Queensland).** [Practice Direction 4 of 2009](https://www.qcat.qld.gov.au/__data/assets/pdf_file/0008/101231/Practice-Direction-4-of-2009-Expert-Evidence.pdf) governs expert evidence, and QCAT publishes separate [guidelines for experts in building disputes](https://www.qcat.qld.gov.au/__data/assets/pdf_file/0010/101206/guidelines-experts-building-disputes.pdf). In building matters the experts are usually sent to a conclave, a private meeting chaired by a QCAT member with no parties or lawyers present, after which they file a joint report setting out what they agree on, what they do not, and why.
The conclave is worth understanding before you engage anyone. Your expert will have to defend their opinion to an opposing expert in a room where nobody is there to help them. An opinion that was written to please the client rarely survives it.
## How Is an Expert Witness Discredited?
An expert is discredited by showing they strayed outside their expertise, argued for the party paying them, relied on assumptions they did not disclose, or reached a conclusion the evidence does not support. Cross-examination rarely attacks the qualifications. It attacks the gap between what the expert observed and what they concluded.
The most common failures in building matters are practical ones:
- **Advocacy.** An expert who reads as the client's champion has their evidence discounted or excluded, whatever its technical merit.
- **Undisclosed assumptions.** If a costing assumes full replacement where repair was possible, and the report never says so, the whole figure is in doubt.
- **Scope creep.** A building consultant opining on structural adequacy without engineering qualifications invites the obvious question.
- **Inconsistency with the joint report.** Positions taken at a conclave and then abandoned at hearing are damaging.
This is the practical reason the two report types cannot be merged. A routine inspection is not written to be defended, so its shortcuts become liabilities the moment someone tests them.
## The Role of Scott Schedules
A Scott Schedule is a table that lists each alleged defect as a numbered item, with columns for the claimant's position, the respondent's position and the expert's assessment. Tribunals commonly direct parties to use one in building disputes so that findings can be made defect by defect rather than on the claim as a whole.
Expert witness reports feed directly into this format. The expert numbers each defect, describes it, states which standard or code it breaches, and estimates rectification cost. Routine inspection reports group findings by location or severity instead, so they need substantial reworking before they fit.
For a detailed guide, see our article on [how Scott Schedules strengthen construction dispute cases](/articles/how-scott-schedules-strengthen-construction-dispute-cases).
## What Does Each Report Cost?
Across the Australian market, routine inspection reports generally fall between $300 and $600, while expert witness reports for building disputes generally start around $1,500 and run to $4,000 or beyond. The gap reflects work, not margin: one is a single site visit and a templated report, the other is a documented investigation whose author may spend a day in a witness box defending it.
An expert witness fee covers reviewing instructions and background documents, one or more detailed inspections, specialist subconsultants where required, research into the applicable codes, the written report, detailed rectification costings, and availability for conferences, mediations and hearings. Attendance at a hearing is usually charged separately, as is any supplementary or joint report.
Whether the higher cost is justified depends on the amount in dispute. In a defect claim worth tens of thousands, an expert report is a small fraction of the exposure and frequently the thing that produces a settlement, because it gives both sides an independent view of the merits. Commissioning one when no dispute exists is simply an expensive inspection.
## Choosing the Right Professional
For a routine inspection, engage a licensed building inspector who works to AS 4349.1 and holds the right licence for your state: NSW Fair Trading in New South Wales, registration as a building practitioner in Victoria, a QBCC licence in Queensland. For an expert report, licensing is the starting point rather than the test, because the tribunal decides whether someone qualifies as an expert on the issues in dispute.
When engaging an expert witness, check:
- **Relevant qualifications.** The expertise must match the issues. Structural questions need an engineer, not a general inspector.
- **Experience giving evidence.** Writing reports and being cross-examined are separate skills. Ask which tribunals they have appeared before.
- **Independence.** No conflict of interest with any party, and no prior involvement in the work being assessed.
- **Availability.** Hearings, conclaves and mediations are scheduled with limited notice, and an absent expert is a wasted report.
## Frequently Asked Questions
### Why Dilapidation Reports Are Essential Before Demolition
Source: https://ownerinspections.com.au/articles/dilapidation-report-before-demolition
Published: 2025-10-23 | Updated: 2026-02-09 | Category: Dilapidation Reports
Author: Maison Azdari
A [dilapidation report](/dilapidation-reports) before demolition is a detailed, photo-rich record of the existing condition of neighbouring properties and public assets. In NSW, pre-construction dilapidation reports are commonly a standard condition of development consent, and councils typically require a matching post-construction report before issuing an Occupation Certificate. In Victoria, demolition often triggers a Section 29A Report and Consent, and where protection works apply, a Section 94 survey of adjoining property is expected before works begin. These reports create an independent baseline that reduces dispute risk, supports insurance claims, and helps you meet your legal and council obligations.
Whether you are a homeowner planning a knockdown rebuild, a developer managing a multi-lot demolition, or a neighbour concerned about nearby works, understanding how dilapidation reports fit into the demolition process can save you thousands of dollars and months of stress. This guide breaks down the state-by-state requirements, explains what inspectors actually look for, and walks you through the full workflow from booking to post-demolition comparison.
## What Is a Dilapidation Report?
A dilapidation report, also called a pre-construction condition report or adjoining property survey, records the existing condition of neighbouring structures and public assets before demolition or excavation begins. The report provides photographic evidence and written notes on cracks, movement, surface finishes, and site features so any changes can be identified after the works are complete.
The scope typically covers interior and exterior surfaces, fences, driveways, retaining walls, outbuildings, and council assets such as kerbs, footpaths, and stormwater pits.
## Is It Required Before Demolition in Australia?
Requirements vary by state and local council. Here is what applies in the two most common jurisdictions.
### NSW
Most residential development consents include a dilapidation report condition before any site work begins. The report must be prepared by a suitably qualified professional and accepted by the principal certifier (PC) or council.
NSW's standard conditions programme confirms that councils should use these standard consent conditions under the Environmental Planning and Assessment Act (Part 4), which is why you will often see the same wording across different local government areas.
### Victoria
Demolition commonly triggers a Section 29A Report and Consent from the responsible authority (usually council) before a building permit for demolition is issued. Guidance from the Victorian Building Authority and state planning guides set out the timing and tests, including whether more than half the volume is being removed or whether a street-facing facade is affected.
Where protection works apply, the Building Act provides for a Section 94 survey of adjoining property. This is a signed record of the pre-existing condition, and it includes rights of entry to carry out the survey and works. Councils like the City of Melbourne also publish specific guidance on the Section 29A process for proposed demolitions.
## Why It Matters Before Demolition
Demolition generates vibration, ground movement, and airborne debris. It can stress older structures next door and shift foundations. Without a baseline record, even minor pre-existing cracks can become the subject of expensive disputes.
A pre-demolition dilapidation report helps you in three clear ways.
## What Inspectors Document
A thorough dilapidation inspection produces a photo-rich, geo-tagged record covering every relevant surface and structure. Expect the report to document the following areas.
Good reports include crack measurements, sketch plans, and clear location references so a post-demolition inspection can be aligned accurately with the original baseline.
## Pre- and Post-Demolition Workflow
### Before Works
### After Demolition
## NSW and VIC Compliance Cheat-Sheet
## Who Should Do It and Why Independence Matters
Your principal certifier (NSW) or relevant building surveyor (VIC) has regulatory duties and cannot act as your advocate. Their role is different from the inspector who documents property condition for comparison.
When selecting a dilapidation report provider, look for these qualities.
An independent inspection firm produces a report that carries more weight in disputes because it is not influenced by any party with a financial interest in the project outcome.
## Costs, Timing, and Practical Tips
Costs vary depending on property size, the number of neighbouring properties, access constraints, and whether council assets are included in the scope. As a general guide, expect to pay between $500 and $1,500 for a standard residential dilapidation report, with multi-property or [commercial inspections](/commercial-property-inspections) costing more.
## Builder and Neighbour Playbooks
### Builder and PCBU Checklist
### Neighbour Checklist
### Why Pre-Settlement Inspections Are Non-Negotiable for Property Buyers
Source: https://ownerinspections.com.au/articles/why-pre-settlement-inspections-are-essential-for-buyers
Published: 2025-10-23 | Updated: 2026-05-19 | Category: Pre-Settlement Inspections
Author: Maison Azdari
A pre settlement inspection is your final chance to check a property before settlement is completed. Also called a final inspection before settlement, this walkthrough helps confirm the home is in the agreed condition, included fixtures are still there, agreed repairs are complete, and no new damage has appeared before ownership transfers.
For buyers, this check matters because settlement is the point where the balance is paid, legal ownership transfers, and the keys are handed over. In NSW, settlement is when the buyer pays the rest of the sale price and becomes the legal owner of the property.
A pre-settlement inspection does not replace a [full building and pest inspection](/building-and-pest-inspections) or [pre-purchase inspection](/pre-purchase-inspections). It is a final check before settlement to make sure the property still matches the contract and that agreed items or repairs have not changed.
This guide walks through what a pre-settlement inspection involves, how it differs from other property inspections, your legal rights in each Australian state, what to check during the walkthrough, and how to handle issues if they arise.
Book a Defect
Investigation
}
buttonHref="/defect-investigation-reports"
variant="secondary"
/>
## What Is a Pre-Settlement Inspection?
A pre-settlement inspection is a final walkthrough of the property before settlement. It gives the buyer a chance to check that the property is in the same general condition as when the contract was signed.
In Queensland, buyers are told to make sure the [property is still in the same condition](https://www.qld.gov.au/law/housing-and-neighbours/buying-and-selling-a-property/buying-a-home/making-an-offer-on-a-home/inspections) as when they signed the contract and to check anything included in the contract.
A pre-settlement inspection is also called:
| Common name | Meaning |
| ----------------------------------- | ------------------------------------------------------------ |
| Final inspection before settlement | The last buyer inspection before settlement day |
| Inspection before settlement | A broad term for checking the property before final payment |
| Final walkthrough before settlement | A simple buyer walkthrough to check condition and inclusions |
| Settlement inspection | Another name for checking the property before settlement |
The goal is not to reopen every part of the deal. The goal is to check that the property, inclusions, and agreed conditions still match the contract.
During the inspection, buyers should check:
| What to check | Why it matters |
| ----------------------- | ----------------------------------------------------------- |
| Fixtures and fittings | Confirms items listed in the contract have not been removed |
| Appliances | Checks included appliances still work |
| Plumbing and taps | Helps identify leaks, blockages, or no hot water |
| Lights and power points | Confirms basic electrical items are working |
| Doors and windows | Checks locks, handles, glass, and operation |
| Agreed repairs | Confirms the seller has completed negotiated work |
| Cleanliness and rubbish | Helps avoid taking possession of a property full of waste |
| New damage | Checks for damage after exchange or contract signing |
For a broader overview of the process, see our guide on [what to expect in a pre-settlement inspection](/articles/what-to-expect-in-a-pre-settlement-inspection).
## Final Inspection Before Settlement: Is It the Same Thing?
Yes. A final inspection before settlement usually means the same thing as a pre settlement inspection.
Buyers often use both phrases when searching online. Some will search “pre settlement inspection checklist”, while others will search “final inspection before settlement” or “inspection before settlement”. The article should use these terms naturally because they all match the same buyer intent.
In Victoria, buyers are [entitled to inspect the property at any reasonable time](https://www.consumer.vic.gov.au/housing/buying-and-selling-property/buying-property/property-settlement/before-property-settlement) during the week before settlement. The seller must hand over the property in the same condition as when it was sold, and buyers can request repairs if something is damaged or not working as it was on the sale date.
That is why the final inspection before settlement should be treated as a serious step, not just a quick look around.
## When to Do Pre Settlement Inspection
Many buyers ask when to do pre settlement inspection because timing can affect what happens next.
If the inspection is too early, the property can still change before settlement. If the inspection is too late, your solicitor or conveyancer may not have enough time to raise problems with the seller.
A good rule is to book the final inspection before settlement as close to settlement day as your contract allows.
| State or territory | Timing guidance | Source-backed note |
| ------------------ | ---------------------------------------------------------- | ---------------------------------------------------------------------------------------------------------------------------------------------------------------------------------------------------------------------------------------- |
| NSW | Morning of settlement day | NSW Government says buyers should conduct a final inspection on the morning of settlement day to check the property is in the same condition as when contracts were exchanged. ([NSW Government][1]) |
| Victoria | During the week before settlement | Consumer Affairs Victoria says buyers can inspect at any reasonable time during the week before settlement. ([Consumer Affairs Victoria][2]) |
| Queensland | 2 to 3 days before settlement | Queensland Government says buyers should inspect the property 2 to 3 days before settlement. ([Queensland Government][3]) |
| South Australia | About a week before settlement if included in the contract | SA Government says a contract can be made subject to a pre-settlement inspection, normally about a week before settlement. ([South Australia Government][4]) |
| Western Australia | Before finalising settlement | WA Consumer Protection says the property should be in the same condition as when inspected, unless the contract says otherwise, and buyers should conduct a thorough inspection before finalising settlement. ([Consumer Protection][5]) |
| ACT | Before settlement | The ACT Law Society says a solicitor may advise a buyer to do a final inspection before settlement occurs. ([Act Law Society][6]) |
Book access through the selling agent and keep your solicitor or conveyancer updated if anything looks wrong.
## Is Pre Settlement Inspection Mandatory?
Is pre-settlement inspection mandatory? In most cases, no. A buyer is usually not forced to complete a pre-settlement inspection, but skipping it can be risky.
The inspection gives you one last chance to check appliances, fixtures, agreed repairs, rubbish removal, keys, access, and visible damage before settlement. Once settlement is complete, fixing these issues can become harder.
In South Australia, buyers can make the contract subject to a pre-settlement inspection, and this is normally done about a week before settlement.
In Queensland, buyers are advised to ask their solicitor if all contract conditions have been met before settlement day.
So, while a pre-settlement inspection may not always be compulsory, it is a smart protection step for buyers.
## Pre Settlement Inspection vs Building and Pest Inspection
A pre settlement inspection and a building and pest inspection are not the same thing. They happen at different stages and answer different questions.
| Feature | Pre settlement inspection | Building and pest inspection |
| --------------- | ----------------------------------------------------------------- | ----------------------------------------------------------------- |
| Timing | Just before settlement | Before exchange, signing, auction, or during due diligence |
| Main purpose | Check the property still matches the contract | Identify defects, pest activity, safety hazards, and repair risks |
| Level of detail | Visual walkthrough and contract check | Technical inspection and written report |
| Main user | Buyer, sometimes with inspector | Qualified building or pest inspector |
| Result | Issues are raised with solicitor or conveyancer before settlement | Buyer may negotiate, request advice, or decide whether to proceed |
A building inspection report is a written account of the property’s condition and can include major issues such as rising damp, wall movement, safety hazards, or a faulty roof.
NSW Government says a building inspection report is usually carried out before exchange of contracts so buyers can identify problems that may be costly to repair.
A pre settlement inspection happens later. It checks whether the property is still in the agreed condition before settlement.
## Pre Settlement Inspection Rights in NSW, VIC, QLD, SA, WA and ACT
Pre settlement inspection rights vary across Australia. Your contract, state rules, and special conditions will decide when you can inspect and what action you can take if something is wrong.
Buyers searching for pre settlement inspection NSW or pre settlement inspection QLD usually want to know whether they can delay settlement, ask for repairs, or request compensation. The safest step is to report problems to your solicitor or conveyancer before settlement takes place.
| Location | Buyer guidance |
| ----------------- | ------------------------------------------------------------------------------------------------------------------------------------------------------------------------------------------------------------------------------------- |
| **NSW** | NSW Government says the buyer should conduct a final inspection on the morning of settlement day to check the property is in the same condition as when contracts were exchanged. |
| **Victoria** | Consumer Affairs Victoria says buyers can inspect at any reasonable time during the week before settlement and can request repair if something is damaged or not working as it was on the sale date. |
| **Queensland** | Queensland Government says buyers should inspect 2 to 3 days before settlement and check contract inclusions. |
| **South Australia** | SA Government says buyers can make the contract subject to a pre-settlement inspection, normally about a week before settlement. |
| **Western Australia** | WA Consumer Protection says the property should be in the same condition as when inspected, unless the contract states otherwise. |
| **ACT** | The ACT Law Society says a solicitor may advise the buyer to do a final inspection before settlement. |
## Why Pre-Settlement Inspections Matter
There are four main reasons why every property buyer should treat the pre-settlement inspection as a non-negotiable step.
### 1. Verify the Property Condition
Between the date you signed the contract and the date of settlement, weeks or even months may have passed. During that time, the property could have sustained storm damage, experienced a water leak, been vandalised, or simply deteriorated through neglect. The pre-settlement inspection lets you confirm nothing has changed.
### 2. Confirm Agreed Repairs Were Completed
If your building and pest inspection revealed defects and you negotiated repairs as a condition of the sale, the pre-settlement inspection is when you verify that work was actually done. Check that repairs meet a reasonable standard and are not just cosmetic cover-ups.
### 3. Avoid Unexpected Costs After Settlement
Discovering after settlement that the hot water system no longer works, the air conditioning unit has been removed, or the garden shed promised in the contract is gone puts you in a difficult position. Your legal options become limited and expensive once the title has transferred. A thorough pre-settlement walkthrough catches these problems while you still have leverage.
### 4. Confirm Contract Compliance
The contract of sale specifies inclusions, exclusions, and the expected condition of the property. The pre-settlement inspection is your opportunity to walk through every room and verify that the property matches what was agreed. This includes checking that no fixtures have been swapped for inferior alternatives and that all appliances included in the sale are present and functional.
View Expert
Witness Reports
}
buttonHref="/expert-witness-reports"
variant="secondary"
/>
## When to Schedule Your Pre-Settlement Inspection
The ideal timing for a pre-settlement inspection is five to seven days before the scheduled settlement date. This window gives you enough time to raise any issues with the seller through your solicitor or conveyancer and have them addressed before settlement proceeds.
Scheduling too early (more than two weeks before settlement) means the property could sustain damage in the intervening period. Scheduling too late (the day before or on settlement day) leaves no time to address problems if you find them.
## Your Pre-Settlement Inspection Checklist
A pre settlement inspection checklist helps buyers stay focused during the final walkthrough. It is easy to miss small but costly issues when settlement is only days away.
Use this pre settlement inspection checklist room by room. Take photos and videos of anything that does not match the contract or the condition of the property when you agreed to buy it.
### Interior Checklist
| Area | What to check |
| ----------------- | ------------------------------------------------------------------ |
| Entry and hallway | Door locks, keys, alarms, intercoms, visible wall damage |
| Living areas | Lights, power points, flooring, blinds, curtains, air conditioning |
| Kitchen | Oven, cooktop, rangehood, dishwasher, taps, sinks, cabinetry |
| Bathrooms | Toilets, showers, taps, drains, vanity, exhaust fans, leaks |
| Bedrooms | Wardrobes, windows, doors, lights, power points |
| Laundry | Taps, trough, drainage, washing machine connections |
| Garage | Remote controls, doors, lights, storage, internal access |
| Safety | Smoke alarms, visible trip hazards, broken glass |
### Exterior Checklist
| Area | What to check |
| ------------------------- | ----------------------------------------------------- |
| Roof and gutters | Visible damage, blocked gutters, sagging sections |
| External walls | New cracks, impact damage, water staining |
| Fences and gates | Condition matches the contract and prior inspection |
| Driveway and paths | Cracks, damage, trip hazards |
| Garden and landscaping | Condition, rubbish, removed plants if included |
| Sheds and pergolas | Included structures are present and intact |
| Pool and equipment | Pump, filter, fencing, gates, accessories if included |
| Outdoor taps and drainage | Water flow, leaks, blocked drains |
### Contract and Inclusion Checklist
| Item | What to confirm |
| ------------------ | -------------------------------------------------------------- |
| Fixtures | Items fixed to the property remain in place |
| Fittings | Curtains, blinds, light fittings, and agreed items are present |
| Special conditions | Seller has completed agreed repairs or works |
| Appliances | Included appliances are present and working |
| Keys and access | Keys, remotes, fobs, codes, and garage controls are ready |
| Rubbish | Seller has removed waste and unwanted items |
For apartment-specific guidance, see our [checklist for apartment pre-settlement inspections](/articles/checklist-for-apartment-pre-settlement-inspections).
## What to Bring to Your Pre-Settlement Inspection
A good pre settlement inspection needs more than a quick look around. Bring the right documents and tools so you can check the property properly.
| Item | Why to bring it |
| ------------------------------------- | ----------------------------------------------------------------- |
| Contract of sale | Confirms inclusions, exclusions, and special conditions |
| Pre settlement inspection checklist | Keeps the inspection organised |
| Phone or camera | Records damage, missing items, or unfinished work |
| Torch | Helps check cupboards, under sinks, roof spaces, and dark corners |
| Phone charger or small plug-in device | Helps check power points |
| Tape measure | Useful if agreed items or spaces need checking |
| Notepad | Records room-by-room issues |
| Previous inspection report | Helps compare known issues with new problems |
Take clear photos and videos. Capture wide shots for context and close-up shots for detail.
If something looks wrong, write down the room, item, date, time, and issue. Send the notes to your solicitor or conveyancer as soon as possible.
## What Happens If You Find Problems During a Pre Settlement Inspection?
If you find problems during a pre settlement inspection, do not argue directly with the seller. Document the issue and contact your solicitor or conveyancer.
| Problem type | Examples | What to do |
| -------------- | ------------------------------------------------------------------ | ---------------------------------------------------------------- |
| Minor issue | Light cleaning, small marks, missing light globe | Photograph and record it |
| Moderate issue | Appliance not working, agreed repair incomplete, missing remote | Ask your solicitor to request repair, replacement, or adjustment |
| Major issue | Flooding, major damage, unsafe condition, removed fixture of value | Ask your solicitor about delaying settlement or formal remedies |
In Queensland, if the property is not in good condition, the [buyer can ask their lawyer to delay settlement](https://www.qld.gov.au/law/housing-and-neighbours/buying-and-selling-a-property/selling-a-home/settlement-day-when-selling-your-home) until the seller fixes the problem.
In Victoria, if something is damaged or not working as it was on the day the property was sold, the [buyer can request a repair](https://www.consumer.vic.gov.au/housing/buying-and-selling-property/buying-property/property-settlement/before-property-settlement).
Every case depends on the contract. Your solicitor or conveyancer should advise whether the issue supports a repair request, compensation, settlement adjustment, or delay.
## Common Mistakes Buyers Make During Pre-Settlement Inspections
Even buyers who understand the importance of a pre-settlement inspection can undermine the process by making avoidable errors.
**Rushing through the walkthrough.** A rushed pre settlement inspection can miss leaks, broken appliances, missing remotes, rubbish, and incomplete repairs.
**Not testing anything.** Turn on every tap, flush every toilet, flick every light switch, and open every window. A visual scan is not enough. You need to confirm that systems and fittings actually work.
**Inspecting in poor light.** If possible, schedule the inspection during daylight hours. Natural light reveals defects that artificial lighting can hide, particularly on walls, ceilings, and floor surfaces.
**Failing to document issues.** Verbal observations are easy to dispute. Photograph and video every issue you find, with timestamps. Written notes alongside visual evidence create a strong record if disputes arise later.
**Not reading the contract beforehand.** If you do not know exactly what the contract says about inclusions, condition, and special conditions, you cannot properly assess whether the property complies. Read the contract the night before your inspection.
## Should You Book a Professional Pre-Settlement Inspection?
Many buyers do the final inspection before settlement themselves. That can work for straightforward homes where the buyer understands the contract and knows what to check.
A professional pre-settlement inspection may help when:
| Situation | Why an inspector helps |
| -------------------------------- | ------------------------------------------------------------------------ |
| Off-the-plan property | New defects, incomplete work, and handover issues can be missed |
| High-value property | Small defects can still cost thousands |
| Previous repairs were negotiated | The inspector can check whether work appears complete |
| Buyer is interstate or overseas | The inspector can attend and document issues |
| Apartment or strata property | Shared areas, access systems, balconies, and parking need careful checks |
| New build handover | Defects, incomplete work, and missing fittings need clear records |
For new builds in Queensland, QBCC says practical completion means the contractor has fulfilled their contract obligations except for minor defects. QBCC also says the final inspection is when the owner does a detailed walk-through with the builder to identify and document issues.
QBCC also says owners can engage a building inspector to check building work on their behalf at their own cost.
## Getting the Most Value from Your Home and Building Investment
A pre settlement inspection gives buyers one last chance to check the property before final payment and ownership transfer.
The main goal is not to find every hidden defect. It is to confirm the property is in the agreed condition, included items are still there, agreed repairs are complete, and no new damage has appeared.
Use a pre settlement inspection checklist, book the inspection close to settlement, bring your contract, test what you can, take photos, and contact your solicitor or conveyancer straight away if something is wrong.
Contact Owner
Inspections
}
buttonHref="/contact"
variant="primary"
/>
### Pre-Sale Strata Inspection for Apartments and Units
Source: https://ownerinspections.com.au/articles/pre-sale-strata-inspection-for-apartments
Published: 2025-10-21 | Updated: 2026-02-09 | Category: Pre-Sale Inspections
Author: Maison Azdari
A pre-sale strata inspection is an independent review of an apartment or unit building's financial records, maintenance history, insurance coverage, and bylaws before a property is listed or purchased. In Australia, apartments and units operate under strata schemes where owners share responsibility for common property costs. A thorough strata inspection reveals whether the building is well managed or carrying hidden financial liabilities, deferred maintenance, or unresolved disputes that could cost new owners thousands of dollars in unexpected levies or repairs.
Whether you are buying, selling, or managing a strata property, understanding the health of the scheme before a transaction protects your investment. Poorly funded sinking funds, overdue maintenance, and rising levies are among the most common problems found during strata inspections across NSW, Victoria, and Queensland. This guide explains what a pre-sale strata inspection covers, how to interpret the report, and what red flags to look out for.
## What Is a Pre-Sale Strata Inspection?
A pre-sale strata inspection is an independent assessment of a strata scheme's financial, legal, and maintenance records. Unlike a standard building inspection that focuses on the physical condition of the property, a strata inspection examines how the building is managed and funded as a collective.
A professional strata inspector reviews:
This inspection gives buyers and sellers a clear picture of the building's health beyond what a physical walkthrough reveals. A well-run strata scheme adds value to every lot in the building, while a poorly managed one can erode property values and create ongoing financial headaches.
## Why Strata Inspections Matter for Buyers and Sellers
Apartments and units are different from standalone houses because they operate under a shared ownership structure. Every unit owner pays levies that fund building maintenance, insurance, and long-term capital works. If the scheme is financially unstable or has a backlog of unresolved issues, all owners share the burden.
### For Buyers
A strata inspection protects buyers from inheriting hidden costs. Some of the most common problems uncovered include:
### For Sellers
Sellers who organise a pre-sale strata inspection demonstrate transparency. Providing a current [strata report](/strata-reports) with the sales package can speed up the transaction and reduce the chance of a buyer pulling out after discovering problems during due diligence.
### For Real Estate Agents and Strata Managers
A strata inspection report helps agents answer buyer questions with confidence and gives strata managers a documented baseline of the building's current standing.
## Legal Framework for Strata in Australia
Strata properties in Australia are governed by state-based legislation. Each state has its own rules around financial reporting, bylaw enforcement, and building maintenance obligations.
Regardless of the state, the owners corporation or body corporate has a legal obligation to maintain common property, keep proper financial records, and hold adequate insurance. A pre-sale strata inspection checks whether these obligations are being met.
## Key Areas Examined During a Strata Inspection
### 1. Strata Financial Health
The financial position of a strata scheme directly affects every owner. The inspection covers:
### 2. Common Property Condition
Common property includes everything outside the individual lots: hallways, stairwells, car parks, roofing, facades, lifts, pools, gardens, and shared plumbing or electrical systems. The inspection reviews maintenance records and identifies:
Poorly maintained common areas lower property values and may result in unexpected levies. A strata inspection highlights any history of deferred maintenance.
### 3. Outstanding Levies and Arrears
Unpaid strata fees and levies can become a liability for the building as a whole. Buyers need to check for overdue payments and whether legal action is pending against non-paying owners. In NSW, under the Strata Schemes Management Act 2015, a seller must provide a strata certificate (Section 184 certificate) that discloses outstanding levies before settlement.
### 4. Insurance Coverage
Strata insurance should cover the building structure, common property, and public liability. The inspection checks whether coverage is adequate and identifies any gaps, such as:
## Understanding Strata Bylaws
Strata bylaws are the rules governing how owners, tenants, and visitors use the building and its common areas. They cover matters such as:
In NSW, bylaws must be registered with NSW Land Registry Services to be enforceable. In Queensland, by-laws are recorded with the body corporate records. Understanding these rules before buying prevents conflicts with the owners corporation after settlement.
## What a Strata Inspection Report Includes
A comprehensive strata inspection report covers several categories of information. Here is a breakdown of what buyers and sellers can expect.
### Evaluating Recent Building Works
New renovations or capital works can increase property value, but they can also signal past problems. A strata inspection reveals whether improvements were planned upgrades or emergency fixes triggered by poor maintenance or safety compliance issues.
### Assessing Strata Management Quality
Strong strata management leads to efficient conflict resolution, transparent financial decisions, and proactive building maintenance. Signs of poor management include delayed maintenance, lack of financial transparency, frequent changes in strata managers, and ongoing disputes between owners and the committee.
## Red Flags to Watch For
Not every strata scheme is well run. The following warning signs should prompt further investigation or a renegotiation of purchase terms.
### What to Do If You Find Red Flags
If a strata inspection reveals problems, buyers have several options:
## The Strata Inspection Process Step by Step
In NSW, sellers must provide a Section 184 certificate from the strata managing agent before settlement. This certificate discloses key financial and legal information about the lot and the scheme. However, this certificate provides only a snapshot. A full strata inspection report goes much deeper.
## Strata Inspection vs Building Inspection
Buyers often wonder whether they need a strata inspection, a building inspection, or both. The answer depends on what you want to know.
For apartment purchases, getting both a strata inspection and a building inspection gives the most complete picture. The strata inspection covers the scheme-level risks, while the building inspection covers the physical condition of your specific lot and the broader structure.
## Costs and Timeframes
A pre-sale strata inspection in Australia typically costs between $250 and $500, depending on the size of the building, the number of lots, and the complexity of the strata records. Larger schemes with extensive history may cost more due to the volume of documents to review.
Turnaround time is usually 3 to 7 business days after the inspector receives the strata records. In busy markets or during peak selling seasons, it is worth ordering the inspection early to avoid delays.
For sellers, organising the strata inspection before listing the property saves time. Having the report ready for prospective buyers shows confidence in the building's standing and can speed up the sales process.
### Apartment Pre-Settlement Final Walkthrough Checklist
Source: https://ownerinspections.com.au/articles/apartment-pre-settlement-final-walkthrough-checklist
Published: 2025-10-20 | Updated: 2026-02-09 | Category: Pre-Settlement Inspections
Author: Maison Azdari
Your apartment pre-settlement final walkthrough is the last opportunity to check that the property matches the contract of sale before ownership transfers to you. In Australia, this walkthrough covers the interior condition of every room, all fixtures and fittings, appliances, plumbing, electrical systems, balconies, car spaces, and common areas. Defects found during the walkthrough should be documented with photos and raised in writing with the builder or vendor before settlement proceeds. While not a legal requirement, most contracts allow it, and skipping this step can leave you financially responsible for issues that should have been the builder's or seller's responsibility.
Apartment purchases account for a growing share of property transactions across Australian capital cities. According to the Australian Bureau of Statistics, apartments made up roughly 30% of all dwelling approvals in 2024. With construction timelines under pressure and trades stretched thin, quality control issues in new apartment builds have become more common. Even for established apartments, the condition can change between exchange and settlement due to tenant damage, weather events, or deferred maintenance.
This guide provides a practical, room-by-room final walkthrough checklist designed for Australian apartment buyers. Whether your apartment is brand new or an established unit, this checklist will help you identify defects, protect your rights, and settle with confidence.
## What to Bring to Your Final Walkthrough
Walking into your final inspection unprepared is one of the biggest mistakes apartment buyers make. Having the right documents and tools on hand turns a casual walkthrough into a thorough assessment.
## Entry and First Impressions
Start your walkthrough at the front door. Check the door for smooth operation, proper alignment, and a secure deadlock that engages without force. Inspect the door frame for chips, dents, and clean paint lines. Test the doorbell or intercom to confirm it connects to the building's security system.
Look at the entry hallway with fresh eyes. Walls should be free of scuffs and construction marks. Skirting boards should sit flush against the floor and wall with neat, consistent joins. Light switches at the entry should control the correct fittings.
## Kitchen Walkthrough
The kitchen is typically the most expensive room per square metre in any apartment. Defects here tend to be costly and disruptive to fix once you have moved in.
### Benchtops and Splashbacks
Run your hands along every benchtop edge. Feel for chips, rough spots, and unfinished areas that might cut or snag. Examine stone and engineered surfaces from several angles because cracks and discolouration sometimes only show under certain light.
Check that joins are tight, level, and colour-matched. Gaps where the benchtop meets the wall or sink cutout will let water in, leading to swelling, mould, and early deterioration.
Inspect the splashback for cracks, chips, and uneven tile lines. Grout should be consistent and fully filled. Where the splashback meets the benchtop, silicone sealant should be neatly applied with no gaps or bubbling.
### Cabinetry and Drawers
Open every cupboard door and drawer. Soft-close mechanisms should work without sticking or bouncing back. Drawers should glide on their runners with no wobble. Check hinges for proper alignment and tighten any loose handles.
Look inside cabinets with your torch. Construction debris, sawdust, and unfinished edges are common findings in new apartments.
### Appliances
### Tapware and Sink
Run both hot and cold water through the mixer tap. Check water pressure and confirm smooth operation across the full range of movement. Look under the sink for drips at pipe connections and the tap base. Plug the sink, fill it, and confirm the drain empties quickly when released.
## Bathroom and Ensuite Walkthrough
Bathrooms are high-moisture environments where construction defects can cause serious long-term damage. Waterproofing failures, poor drainage, and inadequate ventilation are among the most expensive defects to fix in apartments.
### Tiles and Waterproofing Signs
Tap tiles gently with your knuckle or a coin. A hollow sound means the tile may not be properly bonded to the substrate, which can lead to cracking and water penetration behind the surface. This is a defect that must be addressed before settlement.
Check grout lines for completeness, consistency, and colour uniformity. Missing or cracked grout allows moisture behind tiles and compromises the waterproofing membrane beneath. Pay close attention to corners, edges, and around fixtures.
### Fixtures, Fittings, and Ventilation
Test the shower, basin taps, and toilet. Flush the toilet several times to confirm it fills correctly and stops at the right level. Run the shower to check water pressure and temperature control. Inspect towel rails, toilet roll holders, mirrors, and soap dishes for secure mounting.
Test the exhaust fan by holding a tissue near the grille. The tissue should be pulled towards the fan, confirming air is being extracted. Poor bathroom ventilation leads directly to mould growth, which is a persistent problem in Australian apartments. Waterproofing matters throughout the apartment, and our guide on [common issues in pre-settlement inspections](/articles/common-issues-in-pre-settlement-inspections) covers waterproofing defects in detail.
## Living Areas and Bedrooms
### Walls, Ceilings, and Paintwork
Use your torch to cast light at a low angle across wall and ceiling surfaces. This raking light technique reveals dents, bumps, cracks, roller marks, and poor plaster finishing that standard overhead lighting hides completely.
Paint quality is one of the most frequently reported defects in new apartment builds. Builders often rush painting during the final stages, and the results show under proper inspection.
### Flooring
Walk slowly across every floor surface. Feel for squeaks, soft spots, and unevenness. For timber and laminate, check for gaps between boards, scratches, and lifting edges. For carpet, look for ripples, poor stretching, and visible seams. For tiles, repeat the tap test.
Roll a tennis ball or marble across hard floors. It should travel in a relatively straight line. If it veers consistently to one side, the floor may not be level.
### Windows and Doors
Open and close every window and door in the apartment. They should operate smoothly without sticking, scraping, or requiring excessive force.
### Built-in Wardrobes
Open every wardrobe door and drawer in each bedroom. Sliding doors should run smoothly on their tracks without derailing. Shelving should be stable and correctly spaced. Hanging rails need to be level and firmly fixed.
Check inside with your torch for unfinished edges, missing paint, and leftover construction debris.
## Laundry Area
Apartment laundries are compact but still need careful checking. Test taps for pressure and smooth operation. Confirm hot and cold connections are correctly labelled. Check washing machine tap connections for leaks.
Run water through the laundry trough and floor waste. Drainage should be fast with no gurgling, which could signal a venting problem in the waste plumbing.
Confirm the laundry has proper ventilation through either an openable window or a mechanical exhaust fan. Poor laundry ventilation contributes to moisture problems throughout the entire apartment.
## Balcony and Outdoor Spaces
Balconies are exposed to weather year-round and are one of the most common sources of water ingress in apartment buildings.
### Balustrade Safety
Australian Standard AS 1170.1 requires balustrades on balconies above one metre to be at least one metre high. Push firmly against the balustrade to check for excessive movement or flex. Inspect glass panels for scratches, chips, and secure base fixings. Metal balustrades should be free of rust, dents, and sharp edges.
### Drainage and Surface Condition
Pour water on the balcony floor and watch the flow pattern. Water should move towards the drain or scupper without pooling anywhere. Ponding water on a balcony eventually leads to waterproofing failure.
Inspect the junction between the balcony floor and the external wall. This is a critical waterproofing point. Look for proper flashing and sealant. If you can access the ceiling of the balcony below, check for water stains or efflorescence, both signs of moisture penetration.
## Electrical and Safety Systems
Electrical defects in apartments are surprisingly common. Test every power point by plugging in your phone charger. Flick every light switch and dimmer to confirm each one controls the correct fitting.
## Plumbing and Water Systems
Plumbing problems rank among the most disruptive defects to fix after settlement because they often require access through walls and ceilings.
Run every tap in the apartment at the same time. Low water pressure when multiple taps are open may point to undersized supply pipes. Check the hot water system type and location against the specifications. Note how long hot water takes to reach taps furthest from the system.
## Car Parking and Storage
Visit your allocated car space during the walkthrough. Confirm the space number matches your contract. Check for adequate width, ceiling height, and any obstructions such as columns or pipes that could restrict access for your vehicle.
Test the garage door remote or access fob. Locate your storage cage and verify its size, condition, and lock. These details are easy to overlook but become frustrating problems once you move in.
## Common Areas
Your apartment purchase includes shared facilities managed by the owners corporation (body corporate). While a full [strata inspection](/strata-reports) covers the financial and maintenance records, you should visually assess common areas during your walkthrough.
Formal defect claims for common areas are typically managed by the strata manager on behalf of all owners. However, documenting issues you observe gives the body corporate a head start on raising claims with the developer during the defect liability period.
## What to Do When You Find Defects
Once you have completed your walkthrough, compile your defect list with clear photographs and written descriptions for each item. Submit this list to the builder or the vendor's agent in writing. Email is acceptable and creates a paper trail.
For new builds, the builder is required to rectify defects before settlement under most Australian state legislation. In New South Wales, the [Home Building Act 1989](https://legislation.nsw.gov.au/view/html/inforce/current/act-1989-147) provides statutory warranties that protect buyers. In Victoria, the [Domestic Building Contracts Act 1995](https://www.consumer.vic.gov.au/housing/building-and-renovating/contracts-and-costs/domestic-building-contracts) provides similar protections. In Queensland, the QBCC administers warranty and insurance requirements under the [Queensland Building and Construction Commission Act 1991](https://www.qbcc.qld.gov.au/).
## Why a Professional Inspector Makes a Difference
While this checklist is thorough, a licensed building inspector brings training, experience, and specialised tools that most buyers simply do not have.
For apartments built during high-volume construction periods, where quality control can vary significantly between units, professional inspection is strongly recommended. A qualified inspector following Australian Standard AS 4349.1 will produce a report that documents every defect with photographic evidence and technical descriptions.
### Roof Defect Inspection to Detect Leaks and Structural Issues
Source: https://ownerinspections.com.au/articles/roof-defect-inspection-to-detect-leaks-and-structural-issues
Published: 2025-10-17 | Updated: 2026-02-09 | Category: Roof Inspections
Author: Maison Azdari
A roof defect inspection is a professional assessment that identifies leaks, cracks, sagging, flashing failures, drainage problems, and structural weaknesses in a property's roof. In Australia, where roofs endure extreme heat, heavy storms, and high winds, regular inspections are one of the most effective ways to prevent small defects from becoming major repair bills. A qualified building inspector will examine roofing materials, support structures, gutters, insulation, and ventilation to determine the roof's overall condition and flag issues that need attention.
Your roof is the first barrier between your home and the weather. It absorbs UV radiation in summer, takes the full force of storms, and channels thousands of litres of rainwater away from your walls and foundations. Despite this, it is one of the most neglected parts of most properties. Many homeowners only think about their roof after a leak appears on the ceiling or tiles start falling off during a storm.
Whether you are buying a property, managing a rental, or simply maintaining your own home, understanding what a roof defect inspection covers can save you thousands of dollars and prevent safety risks that affect everyone living under that roof. For a complete overview, see our [guide to building defect investigations](/guides/building-defect-investigation-guide).
## Why Roof Defect Inspections Matter
### Protecting Property Value
A property's roof has a direct impact on its market value. Buyers and their building inspectors will look closely at the condition of the roof before making an offer. Visible damage such as cracked tiles, rusted metal sheeting, or sagging ridgelines sends a clear signal that the property has been poorly maintained. On the other hand, a roof in good condition with documented inspection history gives buyers confidence and can justify a higher asking price.
### Preventing Expensive Repairs
Small roofing problems grow quickly. A hairline crack in a tile can let moisture into the roof cavity, where it slowly rots timber battens and ceiling joists. A blocked gutter can cause water to pool under the eaves and seep into wall framing. What starts as a $200 repair can become a $20,000 problem if left unchecked for a few years. Regular inspections catch these issues while they are still minor and affordable to fix.
### Ensuring Safety
A damaged roof is a safety hazard. Weakened structures can collapse under heavy rain or wind loads. Water ingress encourages mould growth, which affects indoor air quality and can trigger respiratory problems and allergies. In commercial buildings, a failing roof also creates legal liability for the property owner under workplace health and safety laws. Keeping your roof in sound condition protects everyone who lives or works under it.
## The Australian Climate Factor
Australia's climate puts extreme pressure on roofing materials. The conditions vary significantly across states and regions, but most roofs face at least one of the following environmental stresses.
These conditions mean Australian roofs deteriorate faster than those in milder climates. Without regular inspections, damage from these environmental factors can go unnoticed until it causes serious structural problems or water damage inside the home.
## What Happens During a Roof Defect Inspection
A professional [roof inspection](/roof-inspection) is a systematic process. Here is what a qualified building inspector will assess during a thorough roof defect inspection.
### Visual Inspection of Roofing Materials
The inspector begins with a visual assessment of the roof surface, looking for:
### Structural Integrity Assessment
The roof's support framework, including rafters, trusses, and beams, is checked for:
### Leak Detection
Leaks are among the most common roof defects. Inspectors identify them by looking for:
### Drainage and Gutter Check
Gutters and downpipes are a major part of roof performance. The inspector checks for:
### Insulation and Ventilation Inspection
Poor insulation and ventilation contribute to condensation, mould growth, and premature material degradation. The inspection covers:
### Skylight and Flashing Review
Roof penetrations such as skylights, chimneys, and pipe boots are common leak sources. Inspectors examine:
## Common Roof Defects Found During Inspections
These are the most frequently identified roof defects across Australian residential and commercial properties.
### Leaks and Water Damage
Leaks usually result from deteriorating tiles, failed flashing, cracked sealants, or blocked gutters. If water enters the roof cavity unchecked, it damages insulation, timber framing, ceilings, and electrical wiring. The longer a leak persists, the more expensive the repair.
### Tile and Sheeting Damage
Cracked, broken, or displaced tiles and corroded metal sheeting expose the underlayment to moisture. High winds can lift poorly secured sheets, and hail can crack terracotta and concrete tiles on impact.
### Sagging Roof Structure
A visible sag in the roofline indicates that load-bearing members such as rafters or trusses have been compromised. This may be caused by prolonged water damage, excessive weight from debris, or original construction deficiencies. Sagging requires immediate professional assessment.
### Clogged Gutters and Poor Drainage
Blocked gutters force water to overflow into fascia boards, wall cavities, and foundations. Regular cleaning is needed, but inspectors also check for design issues like insufficient gutter capacity, incorrect fall, and inadequate downpipe sizing.
### Mould and Mildew Growth
Persistent moisture from leaks or poor ventilation creates conditions for mould and mildew to grow in the roof cavity and on ceilings. Beyond structural damage, mould poses health risks including respiratory irritation and allergic reactions.
### Flashing Failures
Flashing seals the joints around chimneys, skylights, valleys, and roof junctions. When flashing loosens, cracks, or corrodes, water enters the roof structure at these connection points. Flashing failures are one of the leading causes of roof leaks in Australian homes.
## Roof Defect Severity Levels
Not all roof defects carry the same urgency. The following table outlines how inspectors typically classify defects by severity.
## How Often Should You Have Your Roof Inspected
The recommended inspection frequency depends on the age and condition of the roof, the local climate, and whether the property has recently experienced a severe weather event.
## What Happens if Your Roof Fails Inspection
If a roof defect inspection reveals significant problems, there are several paths forward depending on the nature and severity of the defects.
## Roof Inspection Methods Compared
Modern roof inspections may use a combination of techniques depending on the property's size, accessibility, and the type of defects being investigated.
### The Importance of Soil Testing Before Construction Begins
Source: https://ownerinspections.com.au/articles/soil-testing-construction-importance
Published: 2025-10-16 | Updated: 2026-05-27 | Category: New Construction
Author: Maison Azdari
Before you build a house, extension, garage, pool, or major structure, one question matters before almost anything else: what is happening under the ground?
Soil testing for construction checks the ground conditions on a building site so engineers can design footings and slabs that suit the actual soil. In Australia, site classification and footing design are closely linked to AS 2870 Residential slabs and footings, which sets requirements for classifying a site and designing footing systems for single dwellings.
A soil test can show whether the site has reactive clay, fill, soft ground, drainage risks, high moisture variation, or other conditions that may affect the build. The Victorian Building Authority says a soil test classifies how reactive the soil is and helps determine how much the soil may shrink and swell with moisture changes.
Book a Defect
Investigation
}
buttonHref="/defect-investigation-reports"
variant="secondary"
/>
## Quick Answers About Soil Testing for Construction
| Question | Short Answer |
| ---------------------------------------------- | ----------------------------------------------------------------------------------------------------------------------------------------------------------------------------------------------------------------------------------------------------- |
| What is soil testing in construction? | It is the assessment of ground conditions so engineers can design suitable footings, slabs, and site works. |
| Do I need a soil test before building? | For most new homes and many extensions, a site classification or geotechnical report is requested by the builder, engineer, certifier, or council. |
| How much does a soil test cost? | Published Australian provider prices vary, but many standard residential soil tests or site classifications sit in the few-hundred-dollar to low-thousand-dollar range, depending on site conditions. |
| Is a soil test required for a building permit? | Requirements vary, but permit pathways may require an AS 2870 site classification report. Queensland plumbing and drainage permit documents, for example, can require a site classification report complying with AS 2870. |
| What does a soil test report include? | It usually includes site classification, soil profile notes, borehole information, soil reactivity, moisture and plasticity data, and recommendations for engineering design. |
## What is Soil Testing in Construction?
Soil testing in construction is the process of checking the soil and ground conditions where a building will sit. It helps confirm whether the soil can support the proposed structure and what footing or slab design may be needed.
For residential projects, this usually leads to a soil test report, soil site classification report, or geotechnical report. A soil site classification report is often prepared under AS 2870 and gives the site class used by engineers, designers, builders, and owners for planning and footing design.
Three standards often appear in soil testing for building construction:
| Standard | What It Covers | Why It Matters |
| -------- | ------------------------------------------------------------------ | ------------------------------------------------------------------------------------------------------------------------------- |
| AS 2870 | Site classification and footing systems for single dwelling houses | Helps guide slab and footing design for residential sites. ([Standards Store][1]) |
| AS 1289 | Methods of testing soils for engineering purposes | Covers soil testing methods, including moisture, compaction, density, bearing, and classification tests. ([Standards Store][2]) |
| AS 1726 | Geotechnical site investigations | Provides requirements for geotechnical investigations and soil, rock, and groundwater descriptions. ([Standards Store][3]) |
[1]: https://store.standards.org.au/product/as-2870-2011 "AS 2870-2011"
[2]: https://store.standards.org.au/product/as-1289-0-2014 "AS 1289.0:2014"
[3]: https://store.standards.org.au/product/as-1726-2017 "AS 1726:2017"
A simple way to understand it is this:
- AS 1726 guides how the ground is investigated
- AS 1289 covers many test methods
- AS 2870 links site classification to residential footing and slab design
A geotechnical report produced from these tests is typically required by your local council or private certifier before construction approval is granted. The report answers three key questions:
## Why Pre-Construction Soil Testing Matters Before You Build
Pre-construction soil testing helps builders, designers, engineers, and homeowners avoid guessing what is below the surface.
Reactive clay is one of the biggest concerns for residential construction. The VBA explains that the more reactive the soil is, the greater the possibility of excessive footing movement, and excessive moisture changes around a home can cause footings to move and damage the building.
Soil testing helps answer practical questions before work starts:
- Can the soil support the proposed home or extension?
- Is the site affected by reactive clay, fill, soft soils, or slope issues?
- Will the footing system need deeper beams, piers, stiffer slabs, or special drainage?
- Is the site class A, S, M, H1, H2, E, or P?
- Are there signs that extra geotechnical soil testing may be needed?
This is why soil testing for building a house should happen early, not after excavation starts. When the soil report is delayed, the design, engineering, permit, and construction program can also be delayed.
View Construction
Stage Inspections
}
buttonHref="/new-construction-stage-inspections"
variant="secondary"
/>
## Do You Need a Soil Test for a Building Permit?
Many people search for soil test for building permit, soil test building permit, and building permit soil test because they want to know whether it is optional.
The safe answer is: check with your builder, structural engineer, private certifier, building surveyor, or local council before lodging documents.
Requirements vary by state, council, building type, and permit pathway. In Queensland, for example, [plumbing and drainage permit documentation](https://www.business.qld.gov.au/industries/building-property-development/building-construction/plumbing-drainage/permits/supporting-documents) for certain buildings can require a site classification report complying with AS 2870, and H, E, or P sites may need extra sanitary drainage articulation design.
A site classification report can also help the structural engineer design the footings. The VBA says once the soil has been classified, the designer or engineer designs the house footings so they can cope with the soil classification and likely movement.
## Soil Testing is Often a Requirement, Not an Optional Extra
Soil testing supports three things buyers, owners, and builders care about.
**Compliance and approvals**
The NCC requires site classification in accordance with AS 2870 for footings. Some councils and permit pathways also state that a soil report is required for building permits in their area, particularly for houses, extensions, garages, and structural changes.
In Queensland, even plumbing and drainage permit documentation can require an AS 2870 site classification report, and extra drainage design detail if the site is H, E or P.
**Foundation design that matches the ground**
Soil class influences whether a standard slab works or whether the design needs stiffer beams, deeper edge footings, piers, bored piers, screw piles, drainage controls, or other engineering measures.
**Fewer surprises during construction**
A proper report can flag fill, soft ground, groundwater, slope instability, aggressive soils for concrete, and drainage risks early, when changes are cheaper.
## Soil Test Report for Construction: What Should It Include?
A soil test report for construction gives the engineer and builder information about the ground below the proposed building area.
A soil site classification report normally provides a site classification to AS 2870 and contains information for planning, designing, costing, constructing, and maintaining footings, but it is not the same thing as a footing design.
A useful soil report for construction may include:
| Report Item | Why It Matters |
| --------------------------------- | -------------------------------------------------------------------------------------------------------- |
| Site classification | Gives the engineer a starting point for slab and footing design. |
| Borehole logs | Show the soil layers found during drilling or probing. |
| Moisture and plasticity data | Helps assess how soil may shrink or swell. |
| Compaction or density information | Helps assess fill, earthworks, and preparation needs. |
| Bearing information | Helps engineers understand support conditions. |
| Groundwater notes | Helps with drainage, excavation, and construction planning. |
| Problem-site flags | Fill, soft soil, slope instability, abnormal moisture, or previous site disturbance may lead to Class P. |
| Recommendations | Helps the engineer, designer, and builder plan the next steps. |
[NATA’s accreditation scope examples](https://nata.com.au/accredited-organisation/soil-testing-laboratory-3372-3365/) show soil testing can include soil classification, moisture content, sieve analysis, linear shrinkage, compaction characteristics, field density, bearing properties, pH, and permeability testing under AS 1289 and related methods.
## Key Soil Tests and What They Reveal
## Soil Testing vs Geotechnical Report vs Compaction Test
These terms are often used together, but they do not always mean the same thing.
| Term | What It Usually Means |
| -------------------------- | ------------------------------------------------------------------------------------------------------------------------ |
| Soil testing | Broad term for field and lab testing of ground conditions. |
| Soil test report | Often used for residential site classification or soil report. |
| Geotechnical report | Broader report that may include subsurface conditions, groundwater, slope, excavation, retaining, and foundation advice. |
| Site classification report | Report that classifies the site under AS 2870 for residential footing design. |
| Compaction test | Test used to assess density or compaction, often for fill or earthworks. |
NATA’s soil testing laboratory scope includes dry density and moisture relationship tests, field density, compaction control, and other AS 1289 methods, which shows why a compaction test is different from a general soil report.
Read the Warranty
Defect Guide
}
buttonHref="/articles/understanding-construction-warranty-defect-report"
variant="secondary"
/>
## The Problems Soil Testing Helps Prevent
Skipping soil testing does not guarantee failure, but it increases the chance of choosing the wrong footing system or missing conditions that need extra design work.
Common issues tied to ground conditions include:
- Slab heave or settlement that shows up as cracking
- Uneven floors or doors that start sticking
- Drainage and water management problems that keep feeding moisture changes under the slab
- Extra costs when fill or poor soils are discovered after work starts
## Site Classification: What A, S, M, H1, H2, E and P Mean
Most homeowners first notice the site class when the report arrives.
The VBA lists common reactivity levels from A for non-reactive through S, M, H1, H2 and E, with higher reactivity linked to greater possible movement.
| Site Class | General Meaning | What It Can Mean for the Build |
| ---------- | ---------------------------------- | ---------------------------------------------------------------------------------------------------------------------- |
| A | Non-reactive or very stable ground | Lower expected movement from moisture changes. |
| S | Slightly reactive | Slight movement may be expected. |
| M | Moderately reactive | Footings need to allow for moderate ground movement. |
| H1 | Highly reactive | Higher movement risk and more careful footing design. |
| H2 | Very highly reactive | Stronger design and drainage control may be needed. |
| E | Extremely reactive | High level of engineering care needed. |
| P | Problem site | Site-specific engineering is needed because of fill, soft soil, abnormal moisture, slope, trees, or other constraints. |
A Class P result does not mean the site cannot be built on. It means the site does not fit the normal classes and needs project-specific engineering judgement. McClellands states that Class P can relate to fill, abnormal moisture, vegetation, services, former buildings, drainage problems, slope instability, soft soils, or collapsing soils.
## Risks of Skipping Soil Testing
The consequences of bypassing soil testing are real and well-documented across Australian construction.
Book a Stage
Inspection
}
buttonHref="/new-construction-stage-inspections"
variant="secondary"
/>
## Costs and Long-Term Value
The return on investment from soil testing is significant:
According to CSIRO research, soil-related damage contributes to millions of dollars in property loss annually across Australia. A small investment upfront protects your largest asset for its entire lifespan.
## Soil Testing Cost in Australia: What Affects the Price?
There is no single national price because each site is different. Published Australian provider prices show that simple residential site classifications may start in the hundreds of dollars, while broader geotechnical reports can cost more when extra boreholes, deeper testing, density tests, salinity, slope stability, or acid sulfate soil assessments are needed.
| Cost Driver | Why It Changes the Price |
| ------------------------ | ------------------------------------------------------------------------------------ |
| Number of boreholes | More boreholes mean more fieldwork and more lab testing. |
| Borehole depth | Deeper testing takes longer and may need different equipment. |
| Site access | Tight, steep, or blocked sites can increase fieldwork time. |
| Soil type | Reactive clay, fill, soft soil, or groundwater can require extra checks. |
| Report type | A basic site classification is usually simpler than a detailed geotechnical report. |
| Council or DA conditions | Salinity, slope stability, acid sulfate soil, or contamination checks can add scope. |
| Turnaround time | Priority reporting may cost more. |
### Typical timeframes
Some providers describe a timeline where lab testing and report preparation can take several business days after the site work, with total turnaround often around a week, depending on site and workload.
The final soil test cost depends on site access, borehole depth, number of tests, location, and the type of report required. Pre construction soil testing cost is usually lower for simple residential blocks and higher for complex sites that need deeper investigation, compaction checks, or a full geotechnical report.
## Who Performs Soil Testing?
Soil testing is carried out by geotechnical engineers (or geotechnical consultants) working with specialised drilling contractors and NATA-accredited laboratories. They collect samples on-site, run field tests, and complete laboratory testing to classify the soil and confirm its bearing capacity, reactivity, and contamination risks.
A proper geotechnical report typically includes:
## Soil Test Before Buying Land: When Should You Book It?
A soil test before buying land can be useful when the site has signs of fill, steep slope, drainage issues, nearby cracking, large trees, old structures, or known reactive soil in the area.
NSW Government advises buyers to inspect a property carefully before buying and look for defects, structural problems, damp, cracking, drainage issues, and other warning signs.
For vacant land, a soil test can help you understand possible footing costs before you commit to a design. It may also help reveal whether the site needs extra engineering, drainage planning, retaining walls, or further geotechnical investigation.
Book the soil test before these milestones:
## How Long Does a Soil Test Take for Building?
Timeframes vary by provider, weather, access, lab workload, and report scope. McClellands states that most soil site classification reports are aimed for issue within 8 to 10 business days after acceptance, with shorter turnaround sometimes available.
A basic process usually looks like this:
| Step | What Happens |
| ------------------ | ----------------------------------------------------------------------------------------------- |
| Booking | The provider confirms address, access, scope, and building type. |
| Site work | Boreholes, probing, sampling, or field tests are carried out. |
| Lab testing | Samples may be tested for moisture, plasticity, shrinkage, compaction, pH, or other properties. |
| Engineering review | The geotechnical professional reviews the results. |
| Report issue | The soil report or site classification is sent to the client, builder, designer, or engineer. |
## What to Do After You Receive Your Soil Report
A soil report is only useful if the right people use it.
Give the report to your structural engineer, designer, builder, and certifier or building surveyor. The VBA says the designer or engineer uses the soil classification to design footings that suit the soil and likely movement.
Ask these questions before work starts:
- Has the footing design been prepared using the soil report?
- Does the building permit match the engineering drawings?
- Is the builder aware of site class H, E, or P conditions?
- Has drainage been designed to move water away from the slab and footings?
- Are slab penetrations, vapour barriers, reinforcement, and set-out ready for inspection before the concrete pour?
[Moisture changes around foundation soil](https://www.vba.vic.gov.au/__data/assets/pdf_file/0020/33536/Minimising-foundation-movement-and-damage-to-your-house-info-sheet.pdf) can contribute to cracking of walls and floors, so drainage and site maintenance should be taken seriously after construction.
## Where Owner Inspections Fits In After Soil Testing
Owner Inspections does not perform soil testing or prepare geotechnical reports. That work should be handled by a qualified geotechnical engineer, consultant, or testing provider. Instead, we help clients make informed decisions by:
Owner Inspections helps once the report, engineering details, and construction documents are ready. Independent building inspections can check visible work during key stages such as slab pre-pour, frame, lock-up, fixing, handover, reinspections, and defect investigations where relevant.
If defects are found, a reinspection can help confirm whether the builder has addressed the listed issues. For concerns that appear after work is complete, a defect investigation report may be more suitable.
## Getting the Most Value from Your Home and Building Investment
Soil testing before construction helps set the footing design, highlights site risks early, and supports smoother approvals. It also gives a clearer picture of what the build may need around drainage and moisture control on reactive sites.
Planning a new build or extension? [Owner Inspections](/) does not carry out soil testing or foundation design but provides [independent building inspections](/articles/how-do-i-arrange-independent-stage-inspections) across NSW, Victoria, and Queensland once your project reaches visible construction stages.
Explore Inspection
Services
}
buttonHref="/services"
variant="primary"
/>
Contact Owner
Inspections
}
buttonHref="/contact"
variant="secondary"
/>
### Construction Phase Defect Reports: Identifying Critical Issues
Source: https://ownerinspections.com.au/articles/construction-phase-defect-deports
Published: 2025-10-14 | Updated: 2026-02-10 | Category: Construction Inspections
Author: Maison Azdari
Construction Phase Defect Reports (CPDRs) play a vital role in maintaining quality and compliance throughout the building process. These reports systematically document defects, non-conformances, and deviations from approved plans and specifications at each stage of construction. For property owners, builders, and project managers, CPDRs provide an essential record that supports accountability, warranty claims, and the delivery of a building that meets Australian standards.
Without thorough defect reporting during construction, issues can be concealed behind walls, ceilings, and finishes, only to emerge months or years later as costly problems. This guide explains what CPDRs are, their key functions, the common defects they capture, their role in warranty claims, and best practices for identification, documentation, and reporting.
## What Are Construction Phase Defect Reports?
A Construction Phase Defect Report is a formal document that records defects, deficiencies, and non-conformances identified during the construction of a building. These reports are prepared by qualified building inspectors, project managers, or independent third-party inspectors at various stages of the construction process. They serve as an objective record of the condition of the work at the time of inspection, providing evidence that can be referenced during rectification, disputes, or warranty claims.
CPDRs are important because they catch problems early, before they are covered up by subsequent construction stages. A crack in a slab, a poorly installed waterproofing membrane, or a plumbing defect is far easier and cheaper to fix during construction than after the building is completed and occupied.
## Key Functions of CPDRs
### Quality and Compliance Assurance
CPDRs serve as a quality control mechanism throughout the construction process. They verify that the work being carried out complies with the approved plans, the National Construction Code (NCC), Australian Standards, and the specifications outlined in the building contract. By documenting the condition of the work at each stage, CPDRs help ensure that the finished building meets the required standards for safety, performance, and durability.
### Who Relies on CPDRs?
A range of stakeholders rely on CPDRs to protect their interests:
### When Are CPDRs Conducted?
CPDRs are typically conducted at key stages of the construction process:
## Common Defects Identified in CPDRs
### Structural Weaknesses
Structural defects are among the most critical issues captured in CPDRs. These include cracks in concrete slabs, inadequate reinforcement, improperly tied steel, insufficient bracing in framing, and foundation issues caused by poor site preparation or reactive soils. Structural defects can compromise the safety and longevity of the building and must be rectified before construction proceeds.
### Plumbing and Electrical Defects
Common plumbing defects include incorrectly graded pipes, leaking joints, non-compliant installations, and inadequate waterproofing around wet areas. Electrical defects can include exposed wiring, incorrectly wired circuits, non-compliant switchboard installations, and inadequate earthing. Both plumbing and electrical defects pose safety risks and must comply with the relevant Australian Standards.
### Concrete and Material Defects
Defects related to concrete work include honeycombing, surface cracking, poor finishing, inadequate curing, and incorrect cover to reinforcement. Material defects can include the use of non-compliant or substandard materials that do not meet the specifications in the building contract or the requirements of the NCC.
### Roofing and Waterproofing Issues
Roofing defects include incorrectly installed tiles or sheeting, poor flashing, inadequate sealing around penetrations, and blocked or improperly graded gutters and downpipes. Waterproofing defects, particularly in wet areas such as bathrooms, showers, and balconies, are a major source of problems in new buildings. Inadequate or incorrectly applied waterproofing membranes can lead to water ingress, structural damage, and mould growth.
### HVAC Defects
Defects in heating, ventilation, and air conditioning systems can include poorly installed ductwork, disconnected or damaged ducts, inadequate insulation around ducts, and systems that have not been properly commissioned or balanced. These issues can result in reduced efficiency, uneven temperatures, and increased energy costs.
### Unapproved Deviations from Plans
CPDRs also capture instances where the construction deviates from the approved plans without proper authorisation. This can include changes to room dimensions, structural elements, material substitutions, or the omission of specified features. Unapproved deviations may not comply with the NCC and can affect the building's certification and insurance.
## CPDRs and Warranty Claims
### Structural Failures and Warranty
CPDRs provide critical evidence for warranty claims related to structural failures. In most Australian states, statutory warranties cover structural defects for six to seven years after completion. A well-documented CPDR that identified a structural issue during construction, along with records of how it was (or was not) rectified, can be instrumental in supporting a warranty claim.
### Material Defects and Warranty
When defective or non-compliant materials are identified during construction and documented in a CPDR, this creates a clear record for any future warranty claim. If a material fails prematurely, the CPDR can demonstrate that the issue was present from installation and may not have been adequately addressed.
### The Cost of Poor Documentation
Inadequate documentation during construction can significantly increase the cost and difficulty of resolving defects after completion. A case in Melbourne highlighted the consequences of poor documentation, where a residential apartment building required over $2 million in rectification works for waterproofing and structural defects that were not properly documented or addressed during construction. Comprehensive CPDRs could have identified these issues early and ensured they were rectified at a fraction of the eventual cost.
## How to Identify and Document Defects
### Pre-Construction Phase
Before construction begins, a thorough review of the plans, specifications, and site conditions establishes a baseline for the project. This includes reviewing the geotechnical report, confirming the design meets NCC requirements, and documenting the existing site conditions. Pre-construction documentation ensures that any changes or deviations during the build can be measured against an agreed starting point.
### During Construction
Inspections during construction are the core of the CPDR process. At each critical stage, a qualified inspector examines the work in progress and documents any defects, non-conformances, or deviations from the approved plans.
Advanced inspection techniques can reveal hidden defects that are not visible to the naked eye. Thermal imaging cameras can detect moisture intrusion behind walls, heat loss through poor insulation, and electrical hotspots. These tools provide objective evidence that supports the inspector's findings and strengthens the CPDR.
### Post-Construction Phase
The post-construction inspection is a comprehensive assessment of the finished building. It checks all visible and accessible elements against the plans, specifications, and NCC requirements. Moisture testing is particularly important at this stage to identify any water ingress issues before the building is handed over or occupied.
### Recommended Tools and Technology
Modern CPDR processes benefit from a range of tools and technology:
## How Builders Address Defects
### Best Practices for Rectification
When defects are identified in a CPDR, the builder is responsible for rectifying the issues before construction proceeds to the next stage. Best practices include:
### Preventive Measures
The most effective approach to defect management is prevention. Builders can reduce the incidence of defects by:
## Best Practices for Reporting
### Standardised Procedures
Adopting standardised reporting procedures ensures consistency and completeness across all inspections. A well-structured CPDR should include:
### Real-Time Reporting
Modern inspection software enables real-time reporting, allowing defects to be captured, documented, and communicated to the builder immediately. This reduces delays in rectification and ensures that all parties have access to the latest information. Real-time reporting also creates an auditable trail of when defects were identified, communicated, and resolved.
For a complete overview, see our [guide to construction stage inspections](/guides/construction-stage-inspections-guide).
If defects persist after construction is complete, a formal investigation may be needed. See our [guide to building defect investigations](/guides/building-defect-investigation-guide).
### Pre-Occupancy Inspection Checklist for New Buildings
Source: https://ownerinspections.com.au/articles/pre-occupancy-inspection-checklist-for-new-buildings
Published: 2025-10-14 | Updated: 2026-02-12 | Category: New Construction
Author: Maison Azdari
A pre-occupancy inspection is a detailed assessment of a newly constructed building carried out before the owner or tenant moves in. In Australia, this inspection checks the property against the National Construction Code (NCC), the approved building plans, and the terms of the construction contract. It identifies defects, incomplete work, and non-compliant items while the builder is still responsible for rectification. A typical pre-occupancy inspection for a new house costs between $500 and $900 and takes two to four hours, depending on the property size and complexity.
Research consistently shows that around 70% of newly built Australian homes contain defects at the time of handover. Many of these are cosmetic, but a significant number involve structural, waterproofing, or safety issues that can cost thousands of dollars to fix later. The pre-occupancy inspection is your opportunity to identify every one of these problems while the builder still has a legal and contractual obligation to address them at no cost to you.
This article provides a room-by-room and system-by-system checklist for pre-occupancy inspections, explains your legal protections in each state, and outlines what to do if defects are found.
## What Is a Pre-Occupancy Inspection?
A pre-occupancy inspection (also called a practical completion inspection or PCI) is a thorough review of a newly built property carried out after the builder declares practical completion but before the buyer makes the final payment and receives the keys. The purpose is to verify that the building has been completed in accordance with the approved plans, the NCC, and the building contract.
This inspection differs from the council or certifier inspections that occur during construction. Council inspections verify that minimum regulatory requirements are met at each mandated stage. A pre-occupancy inspection goes further by examining workmanship quality, fit and finish, and overall build standard from the perspective of the person who will live in the property.
## When Should You Arrange the Inspection?
Timing matters. The inspection should happen after the builder has completed all work and declared practical completion, but before you sign off on the final progress payment.
## Structural and Exterior Checklist
The structural elements of a new building are the most important to check because defects in these areas can affect the safety, durability, and value of the property.
## Interior Finishes Checklist
Interior finishes are where the majority of cosmetic defects are found. While these may not affect structural integrity, they indicate the builder's attention to detail and overall workmanship standard.
## Plumbing and Wet Area Checklist
Plumbing defects and waterproofing failures are among the most expensive issues to fix after handover. Wet areas must comply with Australian Standard AS 3740 for waterproofing.
## Electrical and Safety Systems Checklist
Electrical work must comply with AS/NZS 3000 (the Wiring Rules) and be completed by a licensed electrician. Safety systems are subject to specific NCC requirements.
## Outdoor and External Works Checklist
External works are frequently incomplete at the time of practical completion. Every item specified in the building contract should be verified.
## NCC Compliance and Documentation Checks
Beyond the physical inspection, a number of documents and certificates should be obtained before you accept the property. These confirm that the building complies with the NCC and relevant Australian Standards.
## Common Defects Found During Pre-Occupancy Inspections
Based on thousands of inspections across NSW, Victoria, and Queensland, certain defect categories appear far more frequently than others in new builds.
## What to Do When Defects Are Found
Finding defects is expected. What matters is how they are managed and resolved before handover.
Site clean-up is normally the builder's responsibility under the contract, so record leftover construction waste or debris as a defect item rather than clearing it yourself. Where you have agreed to arrange the clearance, a skip bin or dumpster hire service keeps the site clear for the re-inspection. Readers outside Australia have local equivalents, such as dumpster rental Ventura County in California.
## State-by-State Legal Protections
Each Australian state and territory has its own building legislation that provides specific protections for owners of new builds.
## DIY Inspection vs Professional Inspection
Some buyers attempt to conduct a pre-occupancy inspection themselves. While a DIY walkthrough can catch obvious cosmetic issues, it has significant limitations compared to a professional inspection.
### DIY Inspection
### Professional Inspection
The cost of a professional pre-occupancy inspection is a fraction of what even a single undetected structural or waterproofing defect could cost to rectify after settlement. For most new builds, the investment is well worth it.
### Pre-Purchase Defect Report: Why It's Essential for Buyers
Source: https://ownerinspections.com.au/articles/pre-purchase-defect-report-for-buyers
Published: 2025-10-10 | Updated: 2026-03-13 | Category: Pre-Purchase Inspections
Author: Maison Azdari
A pre-purchase [defect report](/defect-investigation-reports) is an independent assessment of a property's condition carried out by a licensed building inspector before you commit to buying. It identifies structural defects, pest damage, electrical and plumbing faults, and safety hazards that are not visible during a standard open home visit. In Australia, these reports follow Australian Standard AS 4349.1 and typically cost between $400 and $800 depending on the property's size and location. For any buyer looking to avoid unexpected repair bills and make an informed purchasing decision, a pre-purchase defect report is one of the most valuable steps in the buying process.
A property may look perfectly fine on the surface. Fresh paint, new carpets, and staged furniture can mask problems that run deep. Cracked foundations, termite damage behind walls, faulty wiring, and non-compliant plumbing are all issues that a qualified inspector will detect and document. Without a defect report, you are relying on appearances alone, and that is a risk most buyers cannot afford to take.
This guide explains what a pre-purchase defect report covers, why it matters for Australian buyers, how to choose the right inspection service, and what to do with the findings.
## What Is a Pre-Purchase Defect Report?
A pre-purchase defect report is a detailed written assessment of a property's physical condition. It covers the building's structure, external and internal elements, roof, subfloor, electrical systems, plumbing, drainage, and any visible signs of pest activity. The report documents every defect found, rates its severity, and provides recommendations for repairs.
Unlike a quick walk-through or a verbal assessment from a real estate agent, a defect report is an independent document prepared by a licensed building inspector. It gives you an unbiased picture of what you are actually buying, not just what the seller wants you to see.
The report is yours to use as you see fit. You can use it to negotiate a lower purchase price, request that the seller fix certain issues before settlement, or decide to walk away from the deal entirely.
Book a
[Pre-Purchase Inspection](/pre-purchase-inspections)
}
buttonHref="/pre-purchase-inspections"
variant="secondary"
/>
## Who Carries Out the Inspection?
Pre-purchase defect reports are prepared by licensed building inspectors who hold qualifications recognised under state and territory legislation in Australia. These inspectors follow Australian Standard AS 4349.1 for general building inspections and AS 4349.3 for [timber pest inspections](/timber-pest-inspections).
A qualified inspector will have:
Always verify that your chosen inspector is licensed and insured before booking. An unlicensed inspection report may not hold up in negotiations or legal proceedings.
## Key Components of a Pre-Purchase Defect Report
A thorough pre-purchase defect report covers multiple areas of the property. Here is a breakdown of the main components.
### Structural Assessment
The structural assessment examines foundations, load-bearing walls, beams, columns, roofing frames, and the overall building framework. Inspectors look for cracks in walls, uneven floors, moisture damage, signs of subsidence, and any movement in the structure.
Structural issues are often the most expensive to repair. A hairline crack might be cosmetic, but a diagonal crack running from a window corner to the floor could indicate foundation movement that requires engineering work.
### Pest Inspection
Timber pest inspections identify the presence of termites, wood borers, and wood decay fungi. Inspectors check for hollow-sounding timber, mud tubes, frass (wood dust), sagging floors, and discoloured or blistered paint near timber elements.
Australia has some of the most active termite species in the world, and the damage they cause can compromise the structural integrity of a building within months. According to CSIRO, termites cause more damage to Australian homes each year than fire, flood, and storms combined.
### Electrical Systems
The inspector checks the switchboard, wiring, power points, light fittings, and safety switches. They look for outdated wiring (such as old rubber or cloth-insulated cables), missing safety switches, overloaded circuits, and any non-compliant installations.
Faulty electrical work is a leading cause of house fires in Australia. Non-compliant wiring can also affect your insurance coverage and create legal liability issues.
### Plumbing and Drainage
This component covers water supply pipes, hot water systems, drainage, fixtures, and visible signs of leaks or water damage. Inspectors assess water pressure, check for corroded or blocked pipes, and look for evidence of poor drainage around the property.
Plumbing problems that go undetected can lead to mould growth, structural timber rot, and significant damage to internal finishes.
### Safety Hazards
The report identifies potential health and safety risks such as asbestos-containing materials (common in Australian homes built before 1990), lead-based paint, mould, inadequate ventilation, and non-compliant smoke alarm installations.
The inspector also assesses fire safety compliance, checking that smoke alarms are in working order and positioned correctly, and that escape routes are clear and accessible.
## Why Every Buyer Needs a Defect Report
### Making an Informed Decision
A defect report gives you the facts about a property's condition before you sign a contract. Without one, you are relying on the seller's disclosure (which may be incomplete) and your own visual assessment (which cannot detect hidden problems).
The report lays out every defect, rates its severity, and explains what needs attention now and what can wait. This allows you to weigh up the true cost of ownership, not just the purchase price.
### Negotiation Leverage
If the report reveals significant defects, you have a strong basis for negotiating a lower purchase price or requesting that the seller carry out repairs before settlement. Many buyers have saved tens of thousands of dollars by presenting documented evidence of defects that the seller was either unaware of or had failed to disclose.
For example, a defect report showing $15,000 worth of required waterproofing and drainage repairs gives you clear, documented grounds for a price reduction.
### Long-Term Cost Savings
Identifying problems before they get worse saves money. A small roof leak detected during inspection might cost $500 to fix now, but if left unaddressed, the resulting water damage, timber rot, and mould remediation could cost $20,000 or more.
A defect report also helps you plan and budget for future maintenance, giving you a realistic picture of what the property will need over the coming years.
### Compliance with Australian Property Regulations
The report checks whether the property meets the requirements of the National Construction Code, local council building standards, and state-specific legislation such as the Home Building Act 1989 (NSW), Domestic Building Contracts Act 1995 (VIC), or the Queensland Building and Construction Commission Act 1991 (QLD).
Non-compliant building work can result in council orders, insurance complications, and difficulty reselling the property later.
## Common Defects Found During Pre-Purchase Inspections
Based on thousands of inspections conducted across NSW, Victoria, and Queensland, these are the most frequently identified defects.
Read the
Inspection Guide
}
buttonHref="/guides/pre-purchase-building-pest-inspection-guide"
variant="secondary"
/>
## What Happens If a Seller Refuses an Inspection?
Sellers in Australia are not legally required to allow a pre-purchase inspection. However, most sellers and their agents understand that refusing an inspection raises serious concerns for buyers.
If a seller refuses to allow an inspection:
In competitive auction markets, some buyers skip inspections to speed up the process. This is a high-risk strategy. The cost of a defect report is a fraction of what you could lose if you buy a property with serious hidden problems.
## How to Choose the Right Inspection Service
Not all building inspectors deliver the same quality of work. Here is what to look for when choosing an inspection service.
### Licensing and Accreditation
Confirm that the inspector holds a current licence issued by your state's building authority. In NSW, this is managed by NSW Fair Trading. In Queensland, it is the QBCC. In Victoria, it is the VBA. A licensed inspector has met the educational, training, and insurance requirements set by the relevant authority.
### Experience and Specialisation
Choose an inspector with experience in the type of property you are buying. Residential homes, apartments, heritage buildings, and commercial properties each have different inspection requirements. Ask how many inspections the inspector has completed and whether they have experience with properties similar to yours.
### Report Quality
A good defect report is detailed, clearly written, and includes high-resolution photographs of every defect found. It should rate each issue by severity, explain the likely cause, and provide recommendations for repair. Reports that use vague language or lack supporting images are of limited value.
### Professional Insurance
Your inspector should carry professional indemnity insurance. This protects you in the event that the inspector misses a significant defect or provides incorrect advice. Ask for proof of insurance before booking.
## Defect Severity Levels Explained
Professional defect reports classify issues by severity so you can prioritise what needs attention. Here is how defects are typically rated.
Understanding severity ratings helps you determine whether to proceed with the purchase, negotiate a lower price, or request that the seller fix certain defects before settlement.
Get a Fast
Quote Today
}
buttonHref="/contact"
variant="secondary"
/>
### Steps to File a Building Insurance Claim after Storm Damage
Source: https://ownerinspections.com.au/articles/building-insurance-claim-storm-damage
Published: 2025-10-09 | Updated: 2026-02-10 | Category: Insurance
Author: Maison Azdari
Filing a building insurance claim after storm damage in Australia should be done within 48 to 72 hours of the event. The process involves documenting all damage with photos and video before cleaning up, making only temporary repairs, reviewing your policy for inclusions and exclusions, lodging the claim with full supporting evidence, and working with the insurer's assessor. If your claim is denied or reduced, you can escalate through the insurer's internal dispute process or to the Australian Financial Complaints Authority (AFCA) at no cost.
In early 2025 alone, more than 125,000 storm-related insurance claims were filed across Australia, with over $4.5 billion in losses reported according to the Insurance Council of Australia. As severe weather events become more frequent, homeowners, landlords, and strata managers need a clear process for making claims that actually get paid.
For a complete overview, see our [guide to insurance claim assessments](/guides/insurance-claim-assessment-guide).
## Step 1: Stay Safe First
After a storm, personal safety comes before salvaging possessions. Electrical systems may be live, ceilings could collapse, and structural elements might be unstable.
## Step 2: Document the Damage
Once it is safe to enter, document everything before moving or cleaning anything. Accurate documentation is your strongest asset when lodging a claim.
According to Mills Oakley, over 50% of denied claims in Australia involve inadequate documentation or allegations of insufficient property maintenance. Poor records can cost you the entire claim.
## Step 3: Make Temporary Repairs Only
Preventing further damage is expected by your insurer, but rebuilding too early could jeopardise your case. Insurers generally cover emergency temporary repairs, not full-scale fixes, unless approved in writing.
## Step 4: Review Your Insurance Policy
Understanding your policy before making a claim prevents surprises during the process.
Request the Product Disclosure Statement (PDS) from your insurer and cross-check every clause related to natural disasters before lodging your claim.
## Step 5: File the Claim Quickly
Insurers typically require claims within 48 to 72 hours of the storm event. Delays can weaken your case, especially during large-scale disasters when insurers manage high volumes of claims.
The earlier your claim is lodged, the sooner it is prioritised in the insurer's pipeline.
## Step 6: Meet the Insurance Assessor
Within days or weeks, your insurer will assign an assessor to inspect the property. This visit directly influences the final claim amount.
## Step 7: Review, Negotiate, and Settle
Once the assessor completes their report, the insurer will issue a settlement proposal in one of two forms:
If the offer does not reflect the actual cost of damage:
Under AFCA guidelines, you have the right to dispute low offers, request a review, and seek a fair resolution.
## Step 8: What to Do If Your Claim Is Denied
A denied or reduced claim is not the end of the process. Common rejection reasons include late lodgement, pre-existing defects, and insufficient supporting evidence.
## Step 9: Temporary Accommodation and Support
If your home is declared unsafe or uninhabitable after storm damage:
Always get written approval from your insurer before incurring costs you plan to claim.
## Step 10: Future-Proofing Your Property
Storms are a fact of life across much of Australia. Preparation reduces future risks and losses.
For a complete overview, see our [guide to insurance claim assessments](/guides/insurance-claim-assessment-guide).
### Dilapidation Inspections for Renovations: Protection and Compliance
Source: https://ownerinspections.com.au/articles/dilapidation-inspections-for-protection-and-compliance
Published: 2025-10-07 | Updated: 2026-05-29 | Category: Dilapidation Reports
Author: Maison Azdari
A dilapidation inspection is a pre-construction survey that records the existing condition of a property and its surrounding structures before renovation or demolition work begins. In Australia, these inspections are commonly required by local councils for projects near public infrastructure, heritage buildings, and shared boundaries. The resulting dilapidation report serves as legally admissible evidence in damage disputes, protecting both property owners and builders from unfounded liability claims. Inspections follow Australian Standard AS 4349.1 and typically cost between $500 and $1,500 depending on the number of properties assessed.
Renovation-related property damage disputes are among the most common construction complaints in Australia. A Melbourne homeowner once faced a $50,000 legal battle when a neighbouring property owner claimed foundation cracks resulted from nearby construction. A dilapidation report completed before work began proved the damage was pre-existing, resolving the dispute and protecting the builder from liability.
Whether you are a homeowner planning an extension, a builder managing a renovation project, or a property manager overseeing works in a strata complex, this guide explains why dilapidation inspections matter, when they are required, and how they protect your property and finances.
Book a Dilapidation
Report
}
buttonHref="/dilapidation-reports"
variant="secondary"
/>
## What Is a Dilapidation Inspection?
A dilapidation inspection is a formal, independent assessment that documents the current condition of a property and its neighbouring structures before construction, renovation, or demolition work starts. The purpose is to create a baseline record, so if damage occurs during the project, there is clear evidence of what the property looked like beforehand.
These inspections are carried out by licensed building inspectors who have experience in property condition assessments. The inspector performs a thorough visual survey of structural elements including walls, ceilings, floors, roofs, retaining walls, fences, driveways, and footpaths. Every existing defect, crack, settlement issue, or area of concern is recorded using high-resolution photographs and detailed written notes.
The final dilapidation report becomes a reference document that can be used in court proceedings, insurance claims, council compliance checks, and dispute resolution between neighbours. The aim is not to approve the building or check every part of the home for purchase. The aim is to create a dated baseline record before work begins.
A proper dilapidation inspection survey usually includes:
| Area checked | What the inspector records |
| --------------------------- | ------------------------------------------------------------------- |
| Internal walls and ceilings | Cracks, stains, movement, sagging or visible damage |
| External walls | Brick cracks, render damage, settlement, loose materials |
| Floors and slabs | Cracking, uneven areas, lifting tiles or visible movement |
| Roof and gutters | Visible damage, drainage issues and affected roof areas |
| Fences and retaining walls | Leaning, cracking, impact damage or movement |
| Driveways and paving | Existing cracks, sinking, trip hazards and surface damage |
| Public assets | Footpaths, kerbs, roads, pits and council assets near the work zone |
| Drainage and moisture areas | Visible leaks, ponding, damp patches and water staining |
NSW Government advises buyers to [understand a property’s condition before purchase](https://www.nsw.gov.au/housing-and-construction/buying-and-selling-property/buying-property-nsw/inspecting-a-property) and says buyers can arrange inspection reports such as building inspection reports.
A dilapidation report before construction is different because it is focused on pre-existing damage around the work site, not whether the property is a good purchase.
## Dilapidation Report vs General Building Inspection
A pre-construction dilapidation report is worth arranging whenever renovation or construction work could affect nearby structures.
You should consider one before:
| Project type | Why a report helps |
| -------------------------------------------------- | ---------------------------------------------------------- |
| Home extensions near a boundary | Shared walls, fences, footings and paths may be affected |
| Demolition work | Vibration and debris can affect nearby structures |
| Excavation for basements, pools or retaining walls | Ground movement can create cracking or settlement issues |
| Renovations near strata common property | Shared areas need a clear condition record |
| Work near footpaths, kerbs or roads | Councils may need proof of existing public asset condition |
| Work beside older or heritage buildings | Older materials may already have cracks or movement |
| Neighbouring construction | Owners may need evidence if damage appears later |
Many property owners confuse what’s the difference between a dilapidation report and a building inspection. The answer is simple: they are both property condition reports, but they are used for different reasons.. While both involve property condition assessments, they serve different purposes.
The key difference is that a dilapidation report specifically documents the impact zone around a construction site, while a general building inspection focuses on a single property's overall condition.
Safe Work Australia’s excavation code applies to excavation work such as bulk excavations, trenches, shafts and tunnels, and provides guidance on managing excavation risks.
NSW standard consent wording also gives a clear example of councils requiring a dilapidation report before site work starts, with access refusal recorded and reasonable steps documented.
## How a Dilapidation Report Protects You in Case of Property Damage
A dilapidation report protects you by creating a clear before-work record.
If a neighbour later claims that your renovation caused wall cracks, sinking paving or damaged drainage, the report can be compared against the current condition. NSW Planning material says a dilapidation report may be needed to record existing buildings, structures, infrastructure and services before development, and can be used as a reference if future damage occurs.
For Queensland owners, the QBCC says building work on one property can cause damage to a neighbouring property, which may be treated as consequential damage.
## Why Dilapidation Inspections Matter for Renovations
### Protecting Property Owners and Contractors
Renovation work, particularly projects involving excavation, demolition, or structural modifications, creates vibrations and ground movement that can affect neighbouring properties. Without a dilapidation report, it becomes a matter of "your word against theirs" if a neighbour claims your renovation caused damage to their property.
A dilapidation report provides clear, dated evidence of every crack, settlement mark, and defect that existed before your project started. This protects builders from liability for pre-existing damage and gives property owners confidence that any new damage can be accurately identified and attributed.
### Preventing Legal Disputes
Property damage disputes are expensive and time-consuming. In [Sydney](/nsw/building-inspections-sydney), a homeowner sued a builder for foundation damage after a neighbouring renovation. The builder had commissioned a dilapidation report before work started, and the report confirmed that the cracks were pre-existing. Without that report, the builder would have faced a costly court battle with no evidence to support their position.
Courts across Australia recognise dilapidation reports as official evidence in property damage disputes. Having one completed before work begins is the single most effective way to prevent unfounded claims.
### Reducing Structural Risks
Excavation, heavy machinery, and demolition work can transmit vibrations through the ground, potentially causing cracks, settlement, or movement in nearby structures. A dilapidation inspection identifies properties that may be at risk, allowing builders to adjust their construction methods, install vibration monitoring, or take other precautions to minimise impact.
## What Issues Does a Dilapidation Report Cover?
A thorough dilapidation report includes the following assessments:
The report covers not just the property being renovated but all neighbouring properties and public infrastructure within the potential impact zone of the construction work. A dilapidation report is usually visual and non-invasive. It records what can be seen and safely accessed on the day.
If the concern is termites or timber pest activity, a timber pest inspection is a separate service. Standards Australia lists AS 4349.3 as the inspection standard for timber pest inspections.
## Who Pays for a Dilapidation Report?
In most renovation and construction projects, the person arranging the work pays for the report. That may be the homeowner, builder or developer.
If the report is required by council or a consent condition, check the exact wording. [NSW standard consent wording](https://www.planning.nsw.gov.au/sites/default/files/2023-09/standard-conditions-of-consent-residential.pdf) refers to a dilapidation report being prepared before site work starts and provided to adjoining owners and council where required.
For smaller residential renovations, the owner may ask their builder to organise the inspection. For larger developments, the developer usually manages the process.
The report should still be independent. A report prepared by an independent dilapidation report provider carries more weight than one prepared by someone with a direct interest in the building work.
## Dilapidation Report Cost Sydney, NSW, VIC and QLD
The cost depends on scope, not just postcode.
| Cost factor | Why it changes the quote |
| -------------------- | ----------------------------------------------------------------- |
| Number of properties | More neighbouring properties mean more inspection time |
| Access | Difficult access can slow the inspection |
| Project risk | Excavation, demolition and boundary work need more detail |
| Public assets | Footpaths, kerbs, roads and pits add reporting time |
| Report urgency | Fast turnaround may affect scheduling |
| Post-work inspection | A second inspection adds another site visit and comparison report |
A simple renovation near one boundary is usually faster to inspect than a multi-property project involving public land, excavation and strata common areas.
For Sydney, Melbourne, Brisbane and regional areas, the best next step is to request a written quote based on the number of adjoining properties, project type and council or certifier requirements.
## Dilapidation Inspection Survey Process
A good dilapidation inspection survey follows a clear process.
For larger projects, the inspector may also recommend a post-construction dilapidation inspection. This follow-up survey compares the property's condition after work is completed against the original baseline report, confirming whether any new damage occurred during construction.
## Dilapidation Report Neighbour: Access, Refusal and Disputes
A dilapidation report neighbour issue usually starts with access. The inspector may need permission to enter neighbouring properties to photograph walls, paths, ceilings, garages, fences or other areas close to the work.
Neighbours are often willing to allow access once they understand the report also protects them. It gives them a dated record of their property before work starts.
If a neighbour refuses access, the inspector should record the refusal and inspect visible external areas where possible. NSW standard residential consent wording says that where access has not been granted, the report should be based on what can be observed externally and should show that reasonable steps were taken to obtain access.
## When You Need a Dilapidation Report
### Before Renovation Work
### After Renovation Work
A post-construction dilapidation report is just as valuable as the pre-construction version. It:
Arrange a Pre-Construction
Dilapidation Report
}
buttonHref="/articles/who-needs-pre-construction-dilapidation-report"
variant="secondary"
/>
## Legal and Regulatory Requirements in Australia
### Council and Government Obligations
Local councils across Australia frequently require dilapidation reports as a condition of development consent. The requirement is most common for:
Failing to provide a required dilapidation report can result in council stop-work orders, fines, or complications with your development application.
### State-Specific Requirements
### Building Codes and Industry Standards
All dilapidation inspections should comply with Australian Standard AS 4349.1 for property assessments. Reports prepared under this standard are widely recognised by courts, insurance providers, and regulatory bodies. Some insurance providers also require a dilapidation report before offering coverage for construction projects, particularly those involving excavation or demolition near existing structures.
## Independent Dilapidation Report: Why Inspector Choice Matters
Not all building inspectors are equally suited to dilapidation reporting. The quality of the report depends directly on the experience and qualifications of the inspector. An independent dilapidation report should be prepared by someone with the right inspection experience, reporting process and professional judgement.
### What to Look For
| What to check | Why it matters |
| -------------------------------------------- | ---------------------------------------------------------------- |
| State licence or registration where required | Building inspection rules differ by state |
| Experience in dilapidation inspections | A purchase inspection and a dilapidation report are not the same |
| Clear photo records | Photos help compare before and after conditions |
| Plain English descriptions | Owners and neighbours need to understand the findings |
| Professional indemnity insurance | Helps protect the client and reporting process |
| No conflict of interest | Independence helps avoid disputes over bias |
### Red Flags to Avoid
A dilapidation report is only as strong as the inspector who prepares it. Choosing a qualified, independent professional ensures the report holds up in court and satisfies council requirements.
## Common Mistakes to Avoid
Property owners and builders often lose the value of a report by booking it too late or choosing the wrong type of inspection.
Avoid these mistakes:
| Mistake | Better approach |
| ------------------------------------------- | ------------------------------------------------------------------------- |
| Starting work before the report is complete | Book the dilapidation inspection before site work starts |
| Using a general building inspection only | Use a purpose-made dilapidation report before construction |
| Ignoring neighbouring properties | Include properties and assets in the likely impact zone |
| Not recording access refusal | Ask the inspector to document refusal and external observations |
| Skipping public assets | Record footpaths, kerbs, roads and drains where relevant |
| Choosing a non-independent provider | Use an independent dilapidation report provider |
| Forgetting the post-work inspection | Compare conditions after work where risk or consent conditions require it |
| Not keeping the report | Store the report with permits, contracts and insurance records |
## Getting the Most Value from Your Home and Building Investment
A dilapidation inspection is a simple way to protect a renovation, extension, demolition or excavation project before problems begin.
The best time to arrange the report is before site work starts. The report should clearly document nearby buildings, structures, boundaries and public assets, especially where council consent conditions, excavation, demolition or neighbour concerns are involved.
[Owner Inspections](/) provides independent dilapidation inspections and detailed reports across NSW, Victoria and Queensland. Book a quote before work begins so your project has a clear record from day one.
Contact Owner
Inspections
}
buttonHref="/contact"
variant="primary"
/>
### Insurance Inspection for Commercial Buildings: Affecting Premium
Source: https://ownerinspections.com.au/articles/insurance-inspection-for-commercial-buildings
Published: 2025-10-03 | Updated: 2026-02-09 | Category: Insurance
Author: Maison Azdari
An insurance inspection for a commercial building is a risk-focused evaluation that directly affects your insurance premium. Inspectors assess the structural condition, fire safety systems, security features, electrical and plumbing systems, and location-based hazards such as bushfire zones or flood plains. In Australia, buildings that score well on these assessments typically receive lower premiums, while properties with identified risks, outdated systems, or poor maintenance records face higher costs. Property owners who address inspection findings before renewal can reduce their premiums by 10% to 30% depending on the improvements made.
For commercial property owners, developers, and managers across Australia, understanding what goes into an insurance inspection is a practical way to control costs. With natural disasters such as bushfires, floods, and severe storms becoming more frequent, insurers are paying closer attention to the risk profile of every property they cover. The good news is that you have a direct say in many of the factors that determine your premium.
For a complete overview, see our [guide to insurance claim assessments](/guides/insurance-claim-assessment-guide).
## What Is an Insurance Inspection for Commercial Buildings?
An insurance inspection is a specialised assessment carried out by either an independent building inspector or an insurance company representative. Its purpose is to evaluate the risks involved in insuring a commercial property. Unlike a standard building code compliance check or a routine safety audit, this type of inspection focuses specifically on hazards that could lead to financial loss for the insurer.
The inspection typically covers four main areas:
The outcome of this inspection feeds directly into the insurer's pricing model. A property with fewer risks and better safety systems will be offered a lower premium, while a property with multiple issues will face higher costs or even coverage restrictions.
## Why Insurance Inspections Matter for Your Premium
Insurance inspections are not a formality. They are the single biggest factor in how your insurer calculates what you pay each year. The inspection gives the insurer a clear picture of the financial exposure they are taking on by covering your property.
### Risk Identification and Mitigation
When an inspector identifies hazards early, such as outdated electrical wiring, missing fire suppression systems, or structural weaknesses, you have the opportunity to fix those issues before they lead to a claim. Insurers view properties with fewer risks as safer investments, and that translates directly into lower premiums.
For example, a commercial building fitted with modern fire suppression systems and updated electrical infrastructure will almost always attract a lower premium than a building with old wiring and no sprinkler system.
### How Inspections Influence Premium Calculations
Insurers use the inspection report to estimate their potential financial exposure. The more risks identified, the higher the premium. Here are some real-world examples of how specific findings can shift your costs:
## Key Factors That Affect Your Commercial Insurance Premium
Insurers weigh several factors when setting your premium. Knowing what they look for gives you the power to manage your costs proactively.
### 1. Building Condition
The physical state of your property is the most significant factor. Well-maintained buildings present a lower risk of damage and are cheaper to insure. Inspectors will examine:
### 2. Location
The geographic location of your property directly affects its risk profile. Properties in natural disaster zones face higher premiums because the likelihood of a claim is greater.
### 3. Type of Business
The nature of the business operating from the building influences risk calculations. A restaurant with commercial kitchens and open flames presents a significantly higher fire risk than a standard office tenancy. Factories, chemical storage facilities, and manufacturing plants also attract higher premiums due to the increased chance of damage or liability claims.
### 4. Age of the Building
Older buildings, especially those constructed before modern building codes were introduced, often have outdated electrical systems, plumbing, and roofing. These properties are more vulnerable to damage and cost more to insure unless the owner has invested in renovations and upgrades.
### 5. Previous Claims History
A building with a track record of insurance claims signals higher risk to insurers. Past claims for fire damage, water damage, or storm damage will all factor into the premium calculation. Maintaining a clean claims history by investing in prevention and maintenance can keep your premiums lower over time.
## Commercial Insurance Inspection Checklist
Before the official inspection, property owners and managers can run through their own pre-inspection assessment to identify and address issues ahead of time. This checklist covers the areas inspectors will focus on.
### Structural Elements
### Electrical and Plumbing Systems
### Fire Safety
### Exterior and Grounds
### Security
### Accessibility
## How to Prepare for an Insurance Inspection
Taking the right steps before your inspection can lead to a better outcome and potentially lower premiums. Here is a practical guide to getting ready.
## What Happens After the Inspection
Once the inspection is complete, the inspector provides a detailed report to the insurer. This report includes:
Based on the findings, the insurer will take one of three actions:
If the inspection reveals serious deficiencies, the insurer may also impose coverage conditions or exclusions until those issues are addressed. In some cases, coverage may be refused altogether until specific repairs or upgrades are completed.
## Reducing Your Premium Through Risk Management
You do not have to accept a high premium as a fixed cost. There are practical steps commercial property owners can take to lower their insurance costs over time.
Getting an independent building inspection before your insurance inspection can also help. An independent report gives you a clear picture of the property's condition and allows you to address problems before the insurer's assessor arrives. This proactive approach often results in a better risk rating and a lower premium.
For a complete overview, see our [guide to insurance claim assessments](/guides/insurance-claim-assessment-guide).
### Top Warning Signs of Structural Defects in New Builds
Source: https://ownerinspections.com.au/articles/structural-defects-new-build-warning-signs
Published: 2025-10-02 | Category: Defect Investigation
Author: Maison Azdari
Nearly 70% of newly built Australian homes show major defects, with many involving
structural or waterproofing problems. This alarming statistic underscores the importance of
understanding what to look for when purchasing or taking possession of a new build property.
Structural defects in new builds are not merely cosmetic concerns. They represent
fundamental flaws in a building's construction that can compromise safety, create health
hazards, and lead to significant financial losses if left unaddressed. For new homebuyers,
recognising the warning signs early can mean the difference between a straightforward
warranty claim and years of costly legal disputes.
The Australian building industry has seen significant growth, but this expansion has not
always been accompanied by consistent quality control. Research indicates that structural
defects account for a substantial portion of building disputes, with remediation costs
frequently exceeding initial construction budgets. Understanding the warning signs enables
buyers to take proactive action during warranty periods. For a complete overview, see our [guide to building defect investigations](/guides/building-defect-investigation-guide).
> Structural problems in new builds rarely exist in isolation. Where one defect appears,
> others often follow. Regular inspection during the warranty period is critical for
> protecting your investment.
## Why Structural Defects Matter
Structural defects extend far beyond aesthetic concerns. They can create genuine safety
risks for occupants and pose significant health hazards, particularly those related to
moisture intrusion and mould growth.
The Oakmont apartment complex in Sydney serves as a cautionary example of how structural
defects can emerge in relatively new buildings. Within years of occupancy, residents
discovered significant issues including subsidence and waterproofing failures. Such cases
highlight how defects that appear minor at first can develop into major problems requiring
extensive and expensive remediation.
When structural defects go unaddressed, they typically worsen over time. Foundation movement
that begins as hairline cracking can progress to significant settlement affecting the entire
building. Water intrusion through small gaps can lead to widespread timber rot, mould
contamination, and corrosion of structural elements. Early detection and intervention
prevent this escalation.
## Eight Warning Signs of Structural Defects
Understanding the key indicators of structural problems empowers new homebuyers to identify
issues before they become severe. The following eight warning signs warrant immediate
attention and professional assessment.
### 1. Foundation Cracks
Foundation cracks are among the most telling indicators of structural problems in new
builds. While some minor cracking can occur during the normal curing and settling process,
certain crack patterns signal more serious concerns.
Key indicators to watch for include:
- **Hairline cracks:** Very fine cracks that appear during initial settling may be cosmetic, but should be monitored for progression
- **Horizontal cracks:** These often indicate lateral pressure against the foundation and are more concerning than vertical cracks
- **Widening cracks:** Any crack that appears to be getting wider over time suggests ongoing structural movement
- **Cracks exceeding 2.5mm:** Cracks wider than 2.5mm warrant immediate professional evaluation as they indicate significant movement
In new builds, foundation cracks often result from inadequate site preparation, poor
concrete mixing, insufficient curing time, or reactive soil conditions that were not
properly addressed in the foundation design.
### 2. Uneven Flooring
Floors in a new build should be level and solid underfoot. Any deviation from this indicates
potential structural issues that require investigation.
Warning signs include:
- **Noticeable slopes:** If you can feel the floor sloping when walking, or if round objects roll on their own, the floor is not level
- **Soft spots:** Areas that feel spongy or give way slightly when walked upon suggest subfloor damage or inadequate support
- **Springiness:** Excessive bounce in floors indicates undersized joists, inadequate blocking, or compromised structural connections
- **Gaps at skirting boards:** Visible gaps between the floor and skirting boards suggest differential movement or settlement
Uneven flooring in new builds typically results from foundation settlement, improperly
installed subfloor framing, or inadequate support systems. These issues rarely resolve
themselves and typically worsen without intervention.
### 3. Sticky Doors and Windows
Doors and windows that do not operate smoothly can indicate structural movement affecting
the building frame. While some minor adjustment is normal in new builds as materials settle,
persistent problems warrant investigation.
Concerning indicators include:
- **Doors that stick:** Doors that suddenly become difficult to open or close, particularly at the top or bottom, suggest frame distortion
- **Window misalignment:** Windows that no longer close properly or have uneven gaps when closed indicate frame movement
- **Cracking around frames:** Cracks appearing in plasterwork around door and window frames signal structural stress
- **Lock alignment issues:** Locks that no longer align properly suggest the frame has shifted
In new builds, these problems often result from structural movement due to foundation
issues, inadequate frame bracing, or moisture-related swelling of timber elements.
Distinguishing between normal settling and problematic movement requires professional
assessment.
### 4. Water Intrusion
Water intrusion is one of the most damaging defects in new builds, as it can affect critical
structural elements and create health hazards through mould growth.
Signs of water intrusion include:
- **Water stains:** Discolouration on walls, ceilings, or around windows indicates moisture penetration
- **Peeling paint:** Paint that bubbles, cracks, or peels away suggests moisture behind the surface
- **Musty odours:** Persistent damp or mouldy smells indicate hidden moisture problems
- **Visible mould:** Any mould growth signals excessive moisture that requires investigation
- **Efflorescence:** White crystalline deposits on masonry surfaces indicate water moving through the material
Water intrusion in new builds commonly results from defective waterproofing membranes,
improperly installed flashings, inadequate sealing around penetrations, or poor drainage
design. The source must be identified and corrected to prevent ongoing damage.
### 5. Roofing Issues
The roof is a critical structural element that protects the entire building. Defects in new
build roofing can have far-reaching consequences.
Warning signs include:
- **Uneven rooflines:** A roof ridge that is not straight or level indicates framing problems or inadequate support
- **Sagging sections:** Any visible sag in the roof surface suggests undersized members or failed connections
- **Truss deflection:** Trusses that have moved from their designed position require immediate assessment
- **Missing or damaged components:** Absent tie-downs, connectors, or bracing compromise the roof's structural integrity
Roofing issues in new builds typically stem from design errors, incorrect installation of
trusses, inadequate connection details, or substandard materials. These problems can affect
the building's ability to withstand wind loads and other forces.
### 6. Poor Drainage
Proper drainage is essential for protecting a building's foundation from moisture-related
damage. Inadequate drainage in new builds can lead to serious structural problems over time.
Signs of drainage problems include:
- **Pooling water:** Water that collects around foundations after rain indicates inadequate grading or drainage systems
- **Erosion:** Soil being washed away from around the foundation exposes structural elements to damage
- **Damp subfloor areas:** Moisture in subfloor spaces suggests inadequate drainage or waterproofing
- **Blocked or missing drainage:** Stormwater systems that do not function properly put foundations at risk
Poor drainage can cause foundation heave when soils become saturated, or subsidence when
they dry out and shrink. Both conditions create significant stress on the building structure
and can lead to cracking and movement.
### 7. Installation Flaws
Defects in building services installation can gradually weaken structural elements and
create conditions for pest infestation.
Common installation flaws include:
- **Plumbing defects:** Leaking pipes or incorrectly installed plumbing can introduce moisture that damages timber framing
- **Insulation problems:** Incorrectly installed insulation can trap moisture against structural elements, promoting rot and corrosion
- **Penetration sealing:** Gaps around pipes and cables through walls and floors allow water and pest entry
- **Ventilation defects:** Inadequate subfloor or roof ventilation creates conditions conducive to timber decay
These installation flaws may not be immediately obvious but can cause progressive damage to
wooden structural elements. Termites and other pests are attracted to moisture-damaged
timber, compounding the structural damage.
### 8. Exterior Cracks
External wall cladding protects the building structure from weather exposure. Defects in
exterior surfaces can allow water to penetrate behind facades, causing hidden damage.
Warning signs include:
- **Bulging stucco or render:** Surfaces that push outward indicate moisture has accumulated behind the cladding
- **Cladding separation:** Gaps appearing between cladding panels or at junctions suggest movement or failed fixings
- **Cracking patterns:** Cracks that follow structural lines or appear at corners indicate building movement
- **Staining:** Rust stains or water marks on exterior surfaces point to water penetration or corroding fixings
Exterior defects in new builds often result from inadequate weather sealing, incorrect
flashing installation, or insufficient allowance for thermal movement. Water penetration
through these defects can cause extensive damage to the building frame and insulation.
## Warning Signs Reference Guide
The following table summarises the key warning signs of structural defects in new builds and
the recommended actions for each.
| Warning Sign | What to Look For | Severity | Recommended Action |
| ------------------------ | ---------------------------------------------------------------- | ----------------------- | --------------------------------------------------------------------- |
| Foundation Cracks | Hairline, horizontal, or widening cracks; cracks exceeding 2.5mm | Moderate to Critical | Professional evaluation for cracks over 2.5mm; monitor smaller cracks |
| Uneven Flooring | Slopes, soft spots, springiness, gaps at skirting boards | Moderate to Significant | Subfloor inspection; foundation assessment |
| Sticky Doors and Windows | Binding doors, misaligned windows, cracking around frames | Moderate | Structural assessment if persistent; frame inspection |
| Water Intrusion | Stains, peeling paint, musty odours, visible mould | Significant | Immediate waterproofing assessment; identify and repair source |
| Roofing Issues | Uneven rooflines, sagging sections, truss deflection | Significant to Critical | Urgent roof structure assessment; check connections |
| Poor Drainage | Pooling water around foundations, erosion, damp subfloor | Moderate to Significant | Drainage assessment; grading correction; stormwater review |
| Installation Flaws | Plumbing leaks, insulation issues, unsealed penetrations | Moderate | Services inspection; rectification of defects |
| Exterior Cracks | Bulging stucco, cladding separation, weather staining | Moderate to Significant | Facade inspection; waterproofing assessment |
## Key Recommendations for New Build Owners
Taking proactive steps to identify and address structural defects in new builds protects
both your investment and your family's safety. The following recommendations help ensure
issues are detected and resolved while warranty coverage remains in effect.
### Engage Certified Inspectors Before Warranty Expiration
Australian statutory warranty periods for new builds typically provide 6 years of coverage
for major structural defects and 2 years for other defects. Engaging a certified building
inspector before these warranty periods expire ensures that any defects are documented and
can be claimed against the builder.
A thorough inspection should be conducted:
- At practical completion, before taking possession
- Within the first 12 months to identify early settling issues
- Before the 2-year warranty period expires for minor defects
- Before the 6-year warranty period expires for major defects
### Document Defects with Photographs
Comprehensive photographic documentation is essential for warranty claims and any potential
legal proceedings. When documenting defects:
- Take wide-angle photos showing the location within the property
- Take close-up photos showing the detail of the defect
- Include a ruler or other reference object to indicate scale
- Date all photographs and maintain an organised filing system
- Photograph the same defects at regular intervals to demonstrate progression
### Consult Legal Professionals for Severe Cases
For significant structural defects, legal advice may be necessary to protect your interests.
Building disputes can be complex, and early legal consultation helps ensure appropriate
steps are taken within applicable limitation periods.
Consider legal advice when:
- The builder is unresponsive to defect notifications
- Remediation work is inadequate or incomplete
- Defects affect the safety or habitability of the property
- Estimated repair costs are substantial
- Warranty periods are approaching expiration
### Understand That Problems Rarely Exist in Isolation
Structural problems in new builds often indicate systemic issues with construction quality
or supervision. Where one defect is found, others frequently follow. A comprehensive
inspection approach that examines all aspects of the building is more effective than
focusing solely on visible problems.
Regular inspection throughout the warranty period enables early identification of emerging
issues and creates a documented history of the building's condition. This documentation is
invaluable for warranty claims and provides evidence if disputes arise.
## Frequently Asked Questions
###
How common are structural defects in new Australian homes?
**Short answer:** Research indicates that nearly 70% of newly built
Australian homes show major defects, with many involving structural or waterproofing
issues.
The high rate of defects in new builds has been documented in multiple studies and
reflects the rapid pace of construction, skills shortages, and inconsistent quality
control across the industry. While not all defects are severe, the prevalence of issues
underscores the importance of independent inspection before taking possession and
throughout the warranty period.
###
What size crack in a new build should concern me?
**Short answer:** Cracks exceeding 2.5mm in width warrant professional
evaluation, though all cracks in new builds should be monitored for progression.
In new builds, some minor cracking is expected as materials cure and the building
settles. However, cracks wider than 2.5mm, horizontal cracks, or cracks that are visibly
widening over time indicate significant movement requiring assessment. Even smaller
cracks should be photographed and monitored to track any progression.
###
When should I have my new build inspected for defects?
**Short answer:** Inspect at practical completion, at 12 months, before 2
years (minor defect warranty), and before 6 years (major defect warranty).
The initial inspection at practical completion identifies construction defects before
you take possession. The 12-month inspection catches issues that emerge during the first
year of settling. Inspections before warranty expiration dates ensure all defects are
documented while coverage remains available. Additional inspections may be warranted if
problems are observed or suspected.
###
What should I do if I discover structural defects in my new home?
**Short answer:** Document the defects with photographs, notify the builder
in writing, obtain a professional inspection report, and seek legal advice if the
builder is unresponsive.
Written notification to the builder creates a formal record and triggers their
obligation to respond under warranty provisions. A professional inspection report
provides independent documentation of the defects and their severity. Keep copies of all
correspondence and maintain detailed records of any remediation work undertaken.
###
Are builders required to fix structural defects in new homes?
**Short answer:** Yes, statutory warranties in Australian states require
builders to rectify defects within warranty periods, typically 6 years for major
structural defects.
Australian consumer protection laws impose statutory warranties on residential building
work. Builders are legally obligated to rectify defective work within warranty periods.
If a builder fails to honour warranty obligations or becomes insolvent, home warranty
insurance provides additional protection. The specific warranty periods and processes
vary between states and territories.
###
Can I claim on home warranty insurance for structural defects?
**Short answer:** Home warranty insurance covers structural defects if the
builder is unable to rectify them due to insolvency, death, or disappearance.
Home warranty insurance is designed as a last resort protection when builders cannot
fulfil their warranty obligations. Claims can be made for incomplete or defective work
if the builder has become insolvent, died, or cannot be located. The insurance does not
cover situations where the builder is available but refusing to rectify defects; these
disputes must be pursued through other channels.
## Key Takeaways
- Nearly 70% of newly built Australian homes show major defects, making professional inspection essential for new build purchases.
- Structural defects create safety risks and health hazards, particularly those related to moisture intrusion and mould growth.
- The eight key warning signs include foundation cracks, uneven flooring, sticky doors and windows, water intrusion, roofing issues, poor drainage, installation flaws, and exterior cracks.
- Foundation cracks exceeding 2.5mm warrant immediate professional evaluation.
- Engage certified inspectors before warranty periods expire to ensure defects are documented and can be claimed against the builder.
- Document all defects with dated photographs showing both location and detail.
- Structural problems rarely exist in isolation; where one defect appears, others often follow.
- Consult legal professionals for severe cases, particularly when builders are unresponsive or warranty periods are approaching expiration.
### Pre-Sale House Report Checklist for Sellers
Source: https://ownerinspections.com.au/articles/pre-sale-house-report-checklist
Published: 2025-10-01 | Updated: 2026-02-09 | Category: Pre-Sale Inspections
Author: Maison Azdari
A pre-sale house report is a professional building inspection conducted before you list your property for sale in Australia. It identifies structural defects, maintenance issues, pest activity, and compliance concerns so you can address them on your terms rather than having a buyer's inspector reveal them during negotiations. Reports follow Australian Standard AS 4349.1 and typically cost between $500 and $800 plus GST for a combined building and pest inspection.
Selling a property without understanding its true condition is a gamble. Around 75 percent of property transactions in Australia involve some form of price renegotiation after the buyer commissions their own inspection. When a buyer discovers defects you did not know about, you lose control of the process. The buyer may demand heavy price reductions, ask for rushed repairs, or simply walk away from the deal altogether.
A pre-sale house report puts that control back in your hands. By knowing exactly what your property's condition is before it goes on the market, you can fix problems at your own pace, choose your own contractors, set a realistic asking price, and present a transparent report that builds buyer confidence.
This checklist breaks down every area inspectors assess, how to prepare your home for the inspection, and the steps to take once you receive your report.
## What Is a Pre-Sale House Report?
A pre-sale house report is a comprehensive written assessment of a residential property's condition, carried out by a licensed building inspector on behalf of the seller before the property goes to market. The report covers structural soundness, moisture issues, pest activity, compliance with building codes, and the general state of all accessible areas.
The inspection follows the same methodology used for [pre-purchase inspections](/pre-purchase-inspections) under Australian Standard AS 4349. The difference is who commissions it and when. Instead of a buyer ordering an inspection during the cooling-off period, the seller arranges it weeks before listing.
### Why Sellers Benefit from a Pre-Sale Report
There are several practical reasons to invest in a pre-sale report before listing your property.
## Full Checklist: What Inspectors Assess
A qualified inspector examines every accessible area of the property during a [pre-sale inspection](/pre-sale-inspections). Below is a detailed checklist of what gets assessed across each part of the home.
## Structural Integrity
The structural assessment looks at the elements that hold the building together and keep it stable.
## Roof and Exterior
The roof and exterior are among the first areas buyers notice and the most exposed to weather damage.
## Interior Condition
The interior inspection covers every room and built-in element that is accessible to the inspector.
## Wet Areas and Waterproofing
Water damage is one of the most common and expensive defects found in Australian homes. Inspectors pay close attention to all wet areas.
## Subfloor and Foundations
Where accessible, the subfloor provides information about the property's foundation health and ventilation.
## Pest and Timber Assessment
Timber pests cause hundreds of millions of dollars in damage to Australian properties each year. A combined building and pest inspection covers the following.
Pest inspections follow Australian Standard AS 4349.3, which sets out the methodology for [timber pest inspections](/timber-pest-inspections) in residential buildings.
## Safety and Compliance Items
While a building inspection is not a full compliance audit, inspectors flag obvious safety issues and non-compliance with the National Construction Code (NCC).
## Site Drainage and External Areas
Poor drainage causes ongoing damage to foundations, subfloors, and external structures. Inspectors assess the overall site.
## How to Prepare Your Home Before the Inspection
Preparing your property before the inspector arrives ensures a thorough assessment and avoids follow-up visits.
## What to Do After You Receive the Report
Once the inspection is complete and you have the written report, follow these steps to get the best outcome from your pre-sale preparation.
### Review Every Section
Do not skip straight to the summary. Read the full report including photographs and descriptions. If anything is unclear, call the inspector and ask them to explain the finding.
### Categorise the Findings
Sort each defect into one of four groups.
### Decide on Repairs
Not every defect needs fixing. Weigh the repair cost against the likely impact on sale price and buyer perception. Safety issues and compliance matters should always be addressed. For everything else, consider whether the cost of repair is less than the expected price reduction if the issue stays.
### Document All Repairs
Keep itemised receipts, before-and-after photos, compliance certificates, and contractor warranties for every repair you undertake. This documentation becomes part of your disclosure package for buyers.
### Share the Report Strategically
You can provide the report to all interested buyers upfront, make it available on request, or obtain an updated report after completing repairs. Talk to your real estate agent about which approach works best in your local market.
## Common Defects Found in Pre-Sale Reports
Understanding the most frequently found issues helps you prepare for what your report might contain.
## Pre-Sale Report Costs and Return on Investment
A pre-sale inspection is a small upfront cost that can save you thousands in avoided price reductions and failed contracts.
### The Numbers in Context
Consider a property valued at $900,000. If a buyer's inspection reveals defects that trigger a 3 percent price reduction, that costs you $27,000. A pre-sale inspection costing $600 to $800 gives you the chance to address those issues on your own terms or set a price that already accounts for them. Properties with pre-sale reports also tend to sell faster, reducing holding costs like mortgage payments, council rates, and insurance.
Around 15 percent of property sales fall through due to inspection findings. Each failed sale costs time, ongoing expenses, and can lead to the perception that something is wrong with the property if it sits on the market for too long.
## Choosing a Qualified Inspector
The quality of your pre-sale report depends on the inspector you choose. Look for the following qualifications and attributes.
Ask for a sample report before you book. A good report should be easy to read, well-organised, and backed by high-quality photographs showing each issue.
### Rental Safety Checks to Ensure Tenant Protection
Source: https://ownerinspections.com.au/articles/rental-safety-checks-to-ensure-tenant-protection
Published: 2025-09-26 | Updated: 2026-02-09 | Category: General Maintenance
Author: Maison Azdari
Rental safety checks in Australia are a legal and practical requirement for landlords and property managers. These inspections cover electrical systems, gas appliances, smoke alarms, fire safety equipment, structural integrity, and water efficiency. Under the National Construction Code (NCC) and state-specific tenancy legislation, landlords must keep rental properties safe, habitable, and compliant. Failure to do so can result in fines, legal action, and liability for injuries caused by unresolved hazards.
As a landlord or property manager, you carry a direct responsibility for the safety of the people living in your rental properties. Regular safety inspections are not just a box-ticking exercise. They protect your tenants, meet legal requirements, and safeguard the long-term value of your investment. Ignoring these checks can lead to accidents, legal repercussions, and significant financial losses.
## Why Rental Safety Checks Matter
### Tenant protection: preventing hazards and accidents
Rental properties, especially older ones, can present a variety of safety hazards if not properly maintained. Electrical fires, gas leaks, and structural issues are just a few of the risks that could put tenants in danger. Routine safety inspections help identify and fix these hazards before they escalate into serious incidents. Addressing safety concerns early ensures that tenants feel secure in their living environment.
### Legal compliance: meeting Australian standards
Australian law imposes strict safety regulations for rental properties. Landlords must ensure that their properties comply with safety standards outlined in the National Construction Code (NCC) and state-specific rules. Electrical systems must meet AS/NZS 3000 standards, and gas appliances must be regularly inspected to prevent leaks. Failure to meet these standards can result in heavy fines, penalties, and legal action.
### Financial benefits: protecting your investment
Regular inspections allow landlords to identify and fix small issues before they become costly. Spotting a minor leak in a roof or a small crack in the foundation early can save thousands of dollars in repairs down the line. A well-maintained property is also more likely to retain tenants and attract long-term renters, ensuring consistent rental income.
### Tenant satisfaction: maintaining a comfortable environment
A safe, well-maintained, and compliant property is more likely to attract and retain quality tenants. When tenants feel secure, they are more likely to stay longer, reducing turnover and minimising vacancy periods. This ensures steady cash flow and helps build a reputation as a responsible landlord.
## Key Safety Checks for Rental Properties
Landlords must perform regular inspections across several areas of the property. Below are the inspections every rental property should undergo.
### Electrical safety inspections
Electrical issues are one of the leading causes of house fires in rental properties. Exposed wires, faulty power points, and overloaded circuits are all fire hazards that can cause significant harm.
### Gas compliance inspections
Gas appliances, from stoves to hot water systems, are common in rental homes. If not regularly checked for leaks or faults, they present serious risks including carbon monoxide poisoning, fires, or explosions.
### Smoke alarm testing
Australian law mandates that smoke alarms be installed in all rental properties and tested regularly.
### Fire safety and emergency exits
In the event of a fire, tenants must be able to evacuate quickly and safely.
### Water efficiency inspections
Water efficiency is both an environmental concern and a legal requirement in many Australian states.
### Structural integrity
Cracks in walls, unstable floors, or deteriorating roofs can pose significant risks to tenants.
## Inspection Types at a Glance
## Tenant Rights and Responsibilities
### Tenant rights: a safe living environment
Tenants have the legal right to live in a property that meets minimum safety standards. This includes working smoke alarms, compliant gas appliances, and a structurally sound building. Tenants can request safety inspections if they believe the property is unsafe.
### Tenant responsibilities: reporting safety hazards
Tenants must promptly report any safety hazards or concerns to the landlord. They are also responsible for maintaining the property's condition during their tenancy, including keeping smoke alarms functional and reporting issues with plumbing or electrical systems.
### Notice of inspection: ensuring transparency
Landlords must provide tenants with sufficient notice before conducting safety inspections. Typically, tenants must be given at least 24 hours' notice (48 hours in some states) before an inspection takes place. This ensures transparency and allows tenants to prepare.
## How Often Should Rental Inspections Be Done
Safety inspections should generally be conducted at least once a year, though more frequent inspections may be necessary depending on the property.
## Landlord Inspection Checklist
## Legal Obligations for Landlords
Landlords must comply with national and state safety standards to avoid legal risks and protect tenants. This includes keeping accurate records of inspections and maintaining compliance with safety regulations. Failing to comply can result in penalties, fines, and even loss of rental income.
### Common Contractual Clauses That Lead to Building Disputes
Source: https://ownerinspections.com.au/articles/common-contractual-clauses-building-disputes
Published: 2025-09-25 | Updated: 2026-02-09 | Category: Building Disputes
Author: Maison Azdari
Building disputes in Australia frequently originate from unclear or unfair contract clauses rather than from poor workmanship alone. The most common dispute-prone clauses involve scope of work definitions, payment terms, variation procedures, liquidated damages, dispute resolution mechanisms, indemnity provisions, force majeure, and termination rights. By understanding these clauses and drafting them with precision, homeowners, builders, and developers can avoid costly tribunal hearings and legal battles.
In the construction world, it is not the rare or unusual clauses that cause the most trouble. It is the everyday provisions, particularly when they are loosely worded, open to interpretation, or poorly aligned with what actually happens on site. Whether you are a homeowner building your first home, a developer managing a multi-unit project, or a contractor bidding on residential work, knowing which contract clauses tend to spark conflict can save you serious time, money, and stress.
## Safe vs. Risky Contract Clauses
The table below compares well-drafted contract clauses with their risky counterparts. A single poorly worded clause can trigger months of legal arguments, so it pays to get these right from the start.
Each clause listed above has been at the centre of thousands of disputes between builders, owners, developers, and subcontractors across Australia. Knowing what to watch for is your best protection.
## Scope of Work and Variation Clauses
A clear scope of work is the cornerstone of any construction contract. Disputes erupt when it is vague, incomplete, or does not evolve as the project does. The same goes for variation clauses. Changes are part of every build, but without a proper paper trail, they can quickly lead to disagreements.
### Why scope clauses cause disputes
### How to avoid scope disputes
## Payment Terms and Liquidated Damages
Money is a major flashpoint in construction. Vague or inconsistent payment schedules, late payments, or unclear retainage terms are a recipe for conflict. Meanwhile, poorly worded liquidated damages clauses can turn delays into legal battlegrounds.
### Why payment clauses cause disputes
### How to avoid payment disputes
## Dispute Resolution and Forum Selection
When a dispute does happen, the contract should guide how it is resolved. But if the dispute resolution clause is vague or overly rigid, it can make things worse.
### Why dispute resolution clauses cause problems
### How to avoid it
In Victoria, for example, many residential building disputes are heard at [VCAT](https://www.vcat.vic.gov.au/). In New South Wales, NCAT handles similar matters. Knowing the correct forum before signing avoids confusion later.
## Indemnity, Liability, and Exculpatory Clauses
These clauses are about who pays if things go wrong. If they are written too broadly, or attempt to waive responsibility for serious issues like gross negligence, they often end up being challenged in court.
### Why these clauses cause disputes
### How to avoid it
## Force Majeure and Time of the Essence
Unexpected events like bushfires, floods, or supply chain disruptions can throw construction timelines into chaos. Force majeure and time clauses address these situations, but only if they are written well.
### Why these clauses cause disputes
### How to avoid it
## Termination and Acceleration Clauses
These determine how either party can exit the contract or speed up delivery. Poor drafting can lead to claims of wrongful termination or unfair pressure to finish early without proper compensation.
### Why these clauses cause disputes
### How to avoid it
## How Disputes Typically Show Up
Disputes frequently come to light in the form of:
These conflicts drain budgets, ruin timelines, and often end up souring long-term working relationships. Even minor oversights in contracts can spiral into major legal issues.
## Best Practices to Avoid Contract Disputes
For a complete overview, see our [guide to expert witness reports for building disputes](/guides/expert-witness-building-disputes-guide).
### Builder Obligations in Pre-Settlement Inspections
Source: https://ownerinspections.com.au/articles/builder-obligations-in-pre-settlement-inspections
Published: 2025-09-23 | Category: Pre-Settlement Inspections
Author: Maison Azdari
[Pre-settlement inspections](/apartment-pre-settlement) represent the final checkpoint before property ownership
transfers from builder to buyer. Understanding builder obligations during this critical
phase protects your investment and ensures you receive the property you contracted for.
Australian law provides comprehensive protections for buyers, but exercising these rights
requires knowing what builders must deliver.
Builder obligations extend far beyond simply completing construction. They encompass
compliance with building codes, adherence to contract specifications, rectification of
defects, and honouring statutory warranties that continue well after settlement. The Master
Builders Association reports that disputes over builder obligations account for
approximately 40% of all residential building complaints in Australia.
This guide examines the legal framework governing builder obligations, defect classification
systems, warranty entitlements by state, and the dispute resolution pathways available when
builders fail to meet their responsibilities.
> Builders have a legal duty to deliver properties that comply with the National Construction
> Code, meet contract specifications, and are fit for habitation. These obligations cannot be
> contracted away and remain enforceable through statutory warranty periods.
## Key Legislative Framework Governing Builder Obligations
Australian builders operate within a comprehensive regulatory environment that establishes
minimum standards, warranty requirements, and consumer protections. Understanding this
framework helps buyers identify when obligations have not been met.
### Home Building Act 1989 (NSW)
The Home Building Act 1989 (NSW) provides the primary legislative framework for residential
building work in New South Wales. This Act establishes statutory warranties that builders
must provide, including that work will be done with due care and skill, in accordance with
plans and specifications, and using suitable materials. Section 18B of the Act implies these
warranties into every residential building contract.
The Act also establishes the home building compensation fund, which protects homeowners if a
builder dies, disappears, or becomes insolvent before completing rectification work.
Licensed builders must hold insurance covering work valued over $20,000.
### Domestic Building Contracts Act 1995 (VIC)
Victoria's Domestic Building Contracts Act 1995 regulates building contracts for domestic
building work exceeding $10,000. The Act requires builders to provide written contracts
containing specific information, comply with implied warranties, and follow prescribed
dispute resolution procedures. Section 8 implies warranties that work will be carried out in
a proper and workmanlike manner and with reasonable care and skill.
The Act also establishes cooling-off periods for contracts, limits on deposit amounts, and
requirements for progress payment schedules. These provisions protect consumers from unfair
contract terms and payment demands.
### Queensland Building and Construction Commission Act 1991
The Queensland Building and Construction Commission Act 1991 establishes the QBCC as the
regulatory body for the building and construction industry in Queensland. The Act provides
for licensing of contractors, home warranty insurance, and dispute resolution services. The
QBCC maintains a defects liability period during which builders must rectify defects at
their own cost.
Queensland's statutory warranty scheme provides coverage for structural defects for 6 years
and 6 months and non-structural defects for 12 months from practical completion. The QBCC
can direct builders to rectify defective work and can take disciplinary action against
non-compliant builders.
### Building Act 2004 (ACT)
The Building Act 2004 (ACT) governs building work in the Australian Capital Territory. It
requires builders to hold appropriate licences, comply with the Building Code of Australia,
and meet statutory warranty obligations. The Act establishes rectification order provisions
allowing the regulator to direct builders to fix defective work.
ACT building legislation also establishes the residential building warranty scheme, which
provides coverage when builders fail to complete work or rectify defects. Homeowners can
claim against this scheme when builders become insolvent or refuse to honour warranty
obligations.
### National Construction Code Requirements
The National Construction Code (NCC) sets the minimum technical standards for building work
throughout Australia. All builders must ensure their work complies with NCC requirements
covering structural adequacy, fire safety, access and egress, services and equipment, energy
efficiency, and health and amenity provisions.
Compliance with the NCC is mandatory and cannot be varied by contract. Building surveyors
and certifiers verify NCC compliance through inspections during construction and at
completion. Non-compliant work must be rectified regardless of contract terms.
### Australian Consumer Law Protections
The Australian Consumer Law (ACL), contained in Schedule 2 of the Competition and Consumer
Act 2010, provides additional consumer guarantees for building services. Under the ACL,
building services must be provided with due care and skill, be fit for any specified
purpose, and be completed within a reasonable time.
The ACL prohibits misleading or deceptive conduct, unconscionable conduct, and unfair
contract terms. These provisions apply to building contracts and can be enforced through
state consumer tribunals or courts. Remedies include compensation, repair, and in serious
cases, contract termination.
| Legislation | Jurisdiction | Key Builder Obligations |
| ------------------------------------ | ------------ | ------------------------------------------------------------------ |
| Home Building Act 1989 | NSW | Statutory warranties, insurance requirements, defect rectification |
| Domestic Building Contracts Act 1995 | VIC | Written contracts, implied warranties, dispute resolution |
| QBCC Act 1991 | QLD | Licensing, home warranty insurance, defects liability |
| Building Act 2004 | ACT | Licensing, rectification orders, warranty scheme |
| National Construction Code | National | Technical standards, safety requirements, performance criteria |
| Australian Consumer Law | National | Consumer guarantees, fair trading, remedies for breaches |
## Defect Classification and Rectification Obligations
Building defects are categorised according to their severity and impact on the property.
This classification determines builder rectification timeframes, warranty coverage periods,
and the urgency of required repairs. Understanding defect categories helps buyers
communicate effectively with builders and regulatory authorities.
### Major Defects (Structural)
Major defects are defined under state legislation as defects that cause or are likely to
cause the inability to inhabit or use the building for its intended purpose, destruction of
the building or part of the building, or a threat of collapse that is imminent or will
result from a defect in a primary structural element.
Examples of major defects include foundation failures, structural cracking indicating
movement, roof frame defects, load-bearing wall failures, waterproofing failures in wet
areas, and fire safety system deficiencies. These defects typically require immediate
attention and carry longer warranty periods.
### Minor Defects (Non-Structural)
Minor defects are issues that do not fall within the major defect definition but still
represent departures from contract specifications or acceptable workmanship standards. These
include cosmetic issues, finish defects, minor waterproofing problems in non-structural
areas, and incomplete work.
Common minor defects include paint imperfections, scratched surfaces, uneven tiling, minor
gaps in joinery, misaligned doors and windows, and defective fixtures. While less serious
than major defects, builders remain obligated to rectify these issues within warranty
periods.
> The classification of a defect as major or minor significantly affects your warranty
> entitlements. Major defects carry warranties of 6 years in most states, while minor defects
> are typically covered for only 2 years. Document and report defects promptly to preserve
> your rights.
| Defect Category | Examples | Typical Rectification Timeframe | Priority Level |
| -------------------- | ----------------------------------------------------- | ------------------------------- | ------------------ |
| Major Structural | Foundation cracks, roof failures, load-bearing issues | Immediate to 60 days | Critical |
| Major Non-Structural | Waterproofing failures, fire safety defects | 7 to 30 days | High |
| Minor Functional | Plumbing issues, electrical faults, HVAC problems | 7 to 14 days | Medium |
| Minor Cosmetic | Paint defects, scratches, minor gaps | 14 to 28 days | Low |
| Incomplete Work | Missing fixtures, unfinished landscaping | Prior to settlement | Settlement blocker |
### Builder Rectification Process
Builders must follow a structured process when addressing defects identified during
pre-settlement inspections. This process ensures defects are properly documented, assessed,
and rectified within appropriate timeframes.
1. **Defect Documentation:** Builders must acknowledge receipt of defect notifications and maintain records of all reported issues with photographs, descriptions, and dates.
1. **Classification and Assessment:** Each defect must be classified according to severity and assessed against contract specifications and applicable standards.
1. **Rectification Plan:** Builders must provide a written rectification plan specifying the proposed remedy, timeframe for completion, and any access requirements.
1. **Repair Execution:** Work must be completed by appropriately qualified tradespeople using suitable materials and methods that comply with relevant standards.
1. **Verification Inspection:** Upon completion, buyers should verify repairs meet acceptable standards. Follow-up inspections may be necessary for complex defects.
## Statutory Warranties by State
Each Australian state and territory provides statutory warranty protections for residential
building work. These warranties are implied by law into building contracts and cannot be
excluded or limited. Understanding your state's warranty provisions ensures you can enforce
your rights within applicable timeframes.
| State/Territory | Major Defects | Minor Defects | Regulatory Body |
| ------------------ | --------------------- | ------------- | --------------------------------- |
| New South Wales | 6 years | 2 years | NSW Fair Trading |
| Victoria | 10 years | 2 years | VBA / Consumer Affairs |
| Queensland | 6 years 6 months | 12 months | QBCC |
| South Australia | 10 years (structural) | 5 years | Consumer and Business Services |
| Western Australia | 6 years | 6 years | Building and Energy |
| ACT | 6 years | 2 years | Access Canberra |
| Tasmania | 6 years | 6 years | Consumer Affairs and Fair Trading |
| Northern Territory | 10 years | 2 years | NT Consumer Affairs |
### What Statutory Warranties Cover
Statutory warranties implied into building contracts typically include the following builder
obligations:
- **Due care and skill:** Work will be done with the care and skill expected of a competent builder
- **Compliance with plans:** Work will be in accordance with approved plans and specifications
- **Suitable materials:** All materials supplied will be suitable for their intended purpose and new unless otherwise specified
- **Compliance with laws:** Work will comply with all applicable laws, including the National Construction Code
- **Fitness for purpose:** The completed building will be reasonably fit for occupation as a dwelling
- **Completion with due diligence:** Work will be completed within the agreed timeframe or a reasonable time
## Dispute Resolution When Builders Fail to Meet Obligations
When builders fail to meet their obligations during pre-settlement inspections, a structured
dispute resolution process provides pathways to resolution. Starting with direct
communication and escalating through formal channels maximises your chances of a
satisfactory outcome.
### Step 1: Formal Written Notice to the Builder
Begin by providing the builder with a formal written notice identifying defects and
requesting rectification. Include specific details of each defect, photographs as evidence,
references to contract specifications or standards breached, and a reasonable deadline for
response and action. Keep copies of all correspondence as evidence.
### Step 2: State Building Authority Complaint
If the builder fails to respond adequately, lodge a complaint with your state building
authority. In NSW, contact NSW Fair Trading. Victorian buyers should contact the Victorian
Building Authority or Consumer Affairs Victoria. Queensland residents should lodge
complaints with the QBCC, which has specific powers to direct rectification work.
### Step 3: Alternative Dispute Resolution
Most states offer mediation or conciliation services for building disputes. These processes
are faster and less expensive than tribunal or court proceedings. A neutral third party
helps both sides reach agreement. If mediation fails, you may proceed to more formal
resolution options.
### Step 4: Tribunal Applications
State civil and administrative tribunals hear building disputes and can order builders to
rectify defects or pay compensation. In NSW, apply to NCAT (NSW Civil and Administrative
Tribunal). Victorian disputes go to VCAT. Queensland has QCAT. Tribunal processes are
designed to be accessible without legal representation, though complex cases may benefit
from professional assistance.
### Step 5: Court Proceedings
For significant disputes exceeding tribunal jurisdictional limits, or where tribunal
decisions are appealed, court proceedings may be necessary. This option is expensive and
time-consuming, typically reserved for major disputes involving substantial amounts. Legal
representation is strongly recommended for court proceedings.
| Resolution Stage | Typical Duration | Estimated Cost | Binding Outcome |
| ---------------------------- | -------------------- | --------------------- | ---------------------------- |
| Written notice | 1 to 2 weeks | Nil | No (voluntary) |
| Building authority complaint | 2 to 8 weeks | Nil | Sometimes (direction powers) |
| Mediation/Conciliation | 2 to 6 weeks | $0 to $2,000 | Yes (if agreement reached) |
| Tribunal hearing | 2 to 6 months | $100 to $1,000 filing | Yes |
| Court proceedings | 6 months to 2+ years | $10,000 to $100,000+ | Yes |
## Specific Builder Obligations During Pre-Settlement Inspections
During the pre-settlement inspection process, builders have specific obligations that extend
beyond general construction requirements. These obligations ensure buyers can properly
assess the property before settlement proceeds.
### Access and Cooperation
Builders must provide reasonable access for pre-settlement inspections, including access for
independent building inspectors engaged by the buyer. This includes making available all
areas of the property, providing access to roof spaces and subfloor areas where safely
accessible, and ensuring all services and systems are operational for testing.
### Practical Completion
Before requesting settlement, builders must achieve practical completion, meaning the work
is complete except for minor omissions or defects that do not prevent the property being
used for its intended purpose. Builders cannot demand settlement when significant work
remains incomplete.
### Documentation Provision
Builders must provide required documentation at or before settlement, including occupation
certificates, warranty certificates for appliances and systems, as-built drawings where
applicable, compliance certificates for fire safety and electrical work, and maintenance
manuals for installed systems.
### Defect Response
When defects are identified during pre-settlement inspections, builders must acknowledge the
defect list in writing, provide a rectification timeline, complete repairs before settlement
where practical, or agree to documented post-settlement rectification for minor items with
specific completion dates.
> Builders cannot use settlement deadlines to pressure buyers into accepting defective work.
> If significant defects remain unresolved, buyers may have grounds to delay settlement or
> negotiate retention amounts. Always seek legal advice before refusing to settle.
## Frequently Asked Questions
###
What are a builder's legal obligations during pre-settlement inspections?
**Short answer:** Builders must provide access for inspections, achieve
practical completion, rectify identified defects, and supply required documentation
including compliance certificates.
Builders have comprehensive legal obligations during pre-settlement inspections under
state building legislation and the Australian Consumer Law. They must allow reasonable
access for buyer inspections, including independent building inspectors. The property
must reach practical completion before settlement can be demanded. All identified
defects must be acknowledged and rectified within appropriate timeframes. Builders must
also provide occupation certificates, warranty documents, and compliance certificates.
Failure to meet these obligations may entitle buyers to delay settlement or seek
remedies through dispute resolution processes.
###
How long do builders have to fix defects found during pre-settlement inspections?
**Short answer:** Timeframes vary by defect severity: major defects should
be addressed immediately to 60 days, minor functional issues within 7 to 14 days, and
cosmetic defects within 14 to 28 days.
Rectification timeframes depend on the nature and severity of defects identified. Major
structural defects affecting habitability or safety should be addressed as a matter of
urgency before settlement proceeds. Functional defects affecting systems like plumbing,
electrical, or HVAC typically require rectification within 7 to 14 days. Cosmetic
defects such as paint imperfections or minor scratches may be allowed 14 to 28 days for
rectification. Where defects cannot be resolved before the contracted settlement date,
written agreements should document post-settlement rectification with specific
completion deadlines. Builders who fail to meet agreed timeframes may be subject to
regulatory action or tribunal orders.
###
What is the difference between major and minor defects under Australian building law?
**Short answer:** Major defects affect structural integrity, habitability,
or safety and carry 6 to 10 year warranties. Minor defects are cosmetic or
non-structural issues with 2 year warranties in most states.
Australian building legislation distinguishes between major and minor defects based on
their impact on the property. Major defects are defined as those causing or likely to
cause inability to inhabit the building, destruction of the building, or threat of
collapse. Examples include foundation failures, structural cracking, waterproofing
failures in wet areas, and fire safety deficiencies. Minor defects encompass all other
departures from contract specifications or workmanship standards, including paint
imperfections, minor gaps, and surface damage. This classification matters because
warranty periods differ significantly: NSW provides 6 years for major defects and 2
years for minor defects, while Victoria extends major defect coverage to 10 years.
###
Can I refuse to settle if the builder has not fixed defects?
**Short answer:** Potentially yes for major defects affecting habitability
or significant contract breaches, but seek legal advice first as wrongful refusal can
put you in breach of contract.
Your ability to refuse settlement depends on the nature and severity of outstanding
defects and your contract terms. For major defects that affect the habitability or
safety of the property, or where the property has not reached practical completion, you
may have grounds to delay settlement. However, unilaterally refusing to settle carries
significant risks. If your refusal is found to be unjustified, you may be in breach of
contract, potentially forfeiting your deposit and facing damages claims. For minor
defects, settlement typically proceeds with documented rectification agreements. Always
obtain legal advice from a property lawyer before refusing to settle, as the
consequences of either decision can be substantial.
###
What statutory warranties must builders provide under Australian law?
**Short answer:** Builders must warrant that work is done with due care and
skill, complies with plans and laws, uses suitable materials, and the building is fit
for habitation.
Statutory warranties are implied by law into every residential building contract and
cannot be excluded or limited. Under the Home Building Act 1989 (NSW), builders warrant
that work will be done with due care and skill, in accordance with plans and
specifications, in compliance with all applicable laws including the National
Construction Code, using materials that are suitable and new unless otherwise specified,
and that the building will be reasonably fit for occupation. Similar warranties exist
under the Domestic Building Contracts Act 1995 (VIC) and equivalent legislation in other
states. These warranties continue for specified periods after completion, protecting
buyers against defects discovered after settlement.
###
How do I lodge a complaint against a builder who refuses to fix defects?
**Short answer:** Contact your state building authority: NSW Fair Trading,
VBA in Victoria, or QBCC in Queensland. Provide documentation including defect lists,
photographs, and correspondence.
Begin by documenting all defects with photographs and written descriptions, and keep
copies of all correspondence with the builder. In NSW, lodge a complaint with NSW Fair
Trading online or by phone. Victorian buyers should contact the Victorian Building
Authority or Consumer Affairs Victoria. Queensland complaints go to the QBCC, which has
specific powers to direct rectification and discipline non-compliant builders. Your
complaint should include your building contract, the defect list provided to the
builder, the builder's response or lack thereof, photographs and inspection reports, and
copies of all written communication. The regulator will assess your complaint and may
facilitate resolution, issue directions to the builder, or advise on further options
including tribunal applications.
###
What happens if my builder becomes insolvent before fixing defects?
**Short answer:** Claim against the home warranty insurance scheme in your
state. Licensed builders must hold insurance that covers completion and rectification if
they become insolvent.
Home warranty insurance, also known as home building compensation fund coverage,
protects homeowners when builders die, disappear, or become insolvent. In NSW, builders
must hold insurance through the icare Home Building Compensation Fund for work over
$20,000. This insurance covers the cost of rectifying defective work and completing
unfinished work when the builder cannot do so. To claim, contact the insurer with
evidence of the builder's insolvency and details of outstanding defects or incomplete
work. Coverage limits and eligibility criteria vary by state, so check your specific
scheme. The insurance does not cover disputes with solvent builders, which must be
pursued through normal dispute resolution channels.
###
Can builders charge extra to fix defects identified in pre-settlement inspections?
**Short answer:** No, builders must rectify defects that represent
departures from contract specifications or building standards at no additional cost to
the buyer.
Builders cannot charge for rectifying defects that constitute non-compliance with the
building contract, departures from approved plans and specifications, breaches of the
National Construction Code, or failures to meet statutory warranty obligations. These
defects represent work that should have been completed correctly in the first instance.
However, builders may legitimately charge for additional work requested by buyers that
goes beyond contract requirements, variations agreed during construction, or repairs to
damage caused by the buyer or their agents. Ensure any additional charges are justified
by comparing requests against your original contract and specifications. If you dispute
charges, document your objection in writing and seek advice from your conveyancer or the
relevant building authority.
###
What documentation should builders provide at pre-settlement inspection?
**Short answer:** Builders must provide occupation certificates, compliance
certificates, warranty documents, appliance manuals, and as-built drawings where
applicable.
At or before settlement, builders are obligated to provide comprehensive documentation
including the occupation certificate or certificate of completion issued by the
certifying authority, compliance certificates for electrical work, gas fitting,
plumbing, air conditioning, and fire safety systems, warranty certificates for
appliances, hot water systems, and other installed equipment, manufacturer manuals and
maintenance instructions, as-built drawings showing any variations from approved plans,
and evidence of required inspections during construction. This documentation is
essential for future warranty claims, maintenance, and compliance verification. Do not
settle without receiving all required documentation, or ensure written agreements
specify delivery dates for outstanding items.
###
How do NCAT and VCAT handle builder obligation disputes?
**Short answer:** State tribunals hear building disputes and can order
rectification, compensation, or contract termination. Applications cost $100 to $1,000
and typically resolve within 2 to 6 months.
NCAT (NSW Civil and Administrative Tribunal) and VCAT (Victorian Civil and
Administrative Tribunal) provide accessible forums for resolving building disputes. To
apply, complete the relevant application form, pay the filing fee, and provide
supporting documentation including your contract, inspection reports, photographs, and
correspondence with the builder. The tribunal will schedule a hearing where both parties
present their case. Tribunals can order builders to rectify defects within specified
timeframes, pay compensation for losses, reduce the contract price, or in serious cases,
terminate the contract. Decisions are legally binding and can be enforced through the
courts. While legal representation is not required, complex cases may benefit from
professional assistance. Similar tribunals exist in other states including QCAT in
Queensland.
## Key Takeaways
- Builders have comprehensive legal obligations under state legislation including the Home Building Act 1989 (NSW), Domestic Building Contracts Act 1995 (VIC), and QBCC Act 1991.
- Statutory warranties are implied into all residential building contracts and cannot be excluded. These cover workmanship, materials, compliance, and fitness for habitation.
- Major defects affecting structure or habitability carry warranty periods of 6 to 10 years depending on your state. Minor defects typically have 2 year coverage.
- Builders must achieve practical completion before demanding settlement and must provide access for pre-settlement inspections including independent building inspectors.
- Defects identified during inspections must be acknowledged in writing with rectification timelines. Builders cannot charge for fixing work that does not meet contract standards.
- Dispute resolution follows a structured pathway: written notice, building authority complaint, mediation, tribunal, and finally court proceedings as a last resort.
- Home warranty insurance protects buyers if builders become insolvent. Licensed builders must hold this insurance for work over $20,000 in NSW.
- Document everything: keep contracts, specifications, correspondence, photographs, and inspection reports to support any future claims against builders.
## References and Resources
- [ NSW Fair Trading ](https://www.fairtrading.nsw.gov.au/) - Building complaints and dispute resolution in New South Wales
- [ Victorian Building Authority (VBA) ](https://www.vba.vic.gov.au/) - Building regulation and compliance in Victoria
- [ Queensland Building and Construction Commission (QBCC) ](https://www.qbcc.qld.gov.au/) - Licensing, insurance, and dispute services in Queensland
- [ Housing Industry Association (HIA) ](https://hia.com.au/) - Industry standards and best practice guidance
- [ Master Builders Australia ](https://www.masterbuilders.com.au/) - Industry information and contractor standards
- [ NSW Civil and Administrative Tribunal (NCAT) ](https://www.ncat.nsw.gov.au/) - Building dispute resolution in NSW
- [ Victorian Civil and Administrative Tribunal (VCAT) ](https://www.vcat.vic.gov.au/) - Building dispute resolution in Victoria
- [ Australian Competition and Consumer Commission (ACCC) ](https://www.accc.gov.au/consumers/consumer-rights-guarantees) - Consumer rights under Australian Consumer Law
- [ National Construction Code (NCC) ](https://ncc.abcb.gov.au/) - Technical standards for building work in Australia
### Pre-Sale Defect Inspection to Prevent Buyer Negotiations
Source: https://ownerinspections.com.au/articles/pre-sale-defect-inspection-to-prevent-buyer-negotiations
Published: 2025-09-19 | Updated: 2026-02-09 | Category: Pre-Sale
Author: Maison Azdari
A pre-sale defect inspection is a detailed property evaluation conducted before listing a home for sale. It identifies structural problems, plumbing issues, electrical faults, pest damage, and cosmetic defects so sellers can fix them before buyers use them as negotiation leverage. In Australia, sellers who invest in a [pre-sale inspection](/pre-sale-inspections) typically sell faster, face fewer last-minute deal breakers, and achieve a higher sale price compared to those who list without one.
Many sellers assume their property is in good shape and skip the inspection step. They expect buyers to overlook minor issues or believe the property will sell on its own. However, this often leads to unpleasant surprises during negotiations. Problems that could have been addressed quickly before listing, such as small plumbing leaks or a worn-out roof, can end up derailing a sale or causing price reductions.
## Why Pre-Sale Inspections Matter for Both Sides
### For buyers
From a buyer's standpoint, a pre-sale defect inspection report provides confidence. It means they are less likely to inherit significant, unexpected repair costs after finalising the deal. Problems like leaking pipes, a faulty electrical system, or major roof damage could result in substantial bills if discovered after closing. A pre-sale inspection mitigates these risks by giving buyers a detailed picture of the property's condition.
### For sellers
For sellers, a pre-sale defect inspection is a strategic move. When a property is free from significant defects or has been repaired ahead of time, it stands a higher chance of attracting serious buyers. It also helps sellers avoid last-minute negotiations over repairs. If a buyer finds major issues after making an offer, the deal could fall apart or the price may be significantly reduced. By addressing these issues upfront, sellers increase the chances of receiving their asking price.
### Preventing last-minute deal breakers
Without a pre-sale inspection, buyers often find themselves in situations where a sale falls through due to unexpected issues. A buyer might pull out after discovering a significant pest infestation or structural damage that was not visible during a walkthrough. Pre-sale inspections allow sellers to fix these issues beforehand, ensuring the transaction can proceed without interruptions.
## What Does a Pre-Sale Defect Inspection Cover
A comprehensive pre-sale defect inspection checks a range of structural and cosmetic factors.
### Structural issues
### Hidden property flaws
### Cosmetic issues
## Defect Severity and Repair Priorities
Not all defects carry the same weight. The inspection report categorises defects based on their severity, helping sellers prioritise repairs.
## How Pre-Sale Inspections Reduce Buyer Negotiations
### Reducing buyer repair requests
One of the biggest advantages of a pre-sale defect inspection is that it allows sellers to address defects before the property goes on the market. Without this proactive approach, buyers often use issues found during their own inspection as a bargaining tool, requesting repairs or asking for price reductions. By getting an inspection done first, sellers can fix problems that might otherwise lead to repair requests, resulting in a smoother and more predictable sales process.
### Improving buyer trust
A pre-sale inspection report builds trust with potential buyers. When sellers provide a clear, professional inspection report, it signals transparency. Buyers are more likely to trust a seller who openly shares information about the property's condition than one who might be hiding issues. This trust can help avoid post-offer negotiation, such as last-minute demands for repair credits or price reductions.
## The Inspection Process Step by Step
## How to Prepare for a Pre-Sale Defect Inspection
Preparing your home for the inspection ensures the inspector can complete the process without interruptions, giving you the most accurate and useful findings.
## Compliance and Regulatory Considerations
In Australia, building codes are designed to ensure the safety, structural integrity, and habitability of residential properties. A pre-sale inspection helps sellers identify whether their property complies with these codes, reducing the risk of legal complications.
If the property fails to meet the required standards, it may lead to significant issues during the sale process. Buyers may back out or demand that the seller correct the problems, delaying the sale and potentially reducing the property's value.
By addressing potential compliance issues early, sellers improve their chances of a smoother, faster transaction.
### How Do Expert Witnesses Support Body Corporate Building Disputes?
Source: https://ownerinspections.com.au/articles/expert-witnesses-body-corporate-building-disputes
Published: 2025-09-18 | Updated: 2026-01-30 | Category: Expert Witness
Author: Maison Azdari
Strata living has transformed the Australian housing landscape over the past two decades. With over two million Australians now residing in strata schemes and new high-density developments rising in every capital city, disputes over building defects in common property have become increasingly common. When these disputes escalate beyond negotiation, expert witnesses play a central role in helping tribunals and courts reach fair, evidence-based outcomes.
Body corporate building disputes can involve millions of dollars in rectification costs, affect hundreds of lot owners, and drag on for years without resolution. The complexity of these matters, from waterproofing failures in basement car parks to non-compliant cladding on high-rise facades, demands specialised knowledge that goes well beyond what judges, tribunal members, or body corporate committees possess.
This guide explains the role of expert witnesses in body corporate and strata building disputes across Australia. It covers the legal framework, the types of defects most commonly in dispute, the duties experts owe to the court, the admissibility criteria established in landmark case law, and practical guidance on selecting the right expert for your matter.
> The value of an expert witness in a body corporate dispute lies not in advocacy for one side, but in providing the tribunal with an independent, well-reasoned technical opinion that helps resolve what is often a deeply polarising conflict between lot owners, committees, and developers.
## The Growth of Strata Living in Australia
Australia has seen remarkable growth in strata title developments since the early 2000s. Census data and industry reports consistently show that apartments and townhouses now represent a significant proportion of new dwelling approvals, particularly in Sydney, Melbourne, Brisbane, and the Gold Coast.
Several factors drive this trend:
- **Population growth and urbanisation** have increased demand for higher-density living.
- **Affordability pressures** push buyers towards apartments as an entry point into the property market.
- **Investor activity** has fuelled large-scale apartment construction, particularly during building booms between 2010 and 2020.
- **Government planning policies** encourage urban infill and transit-oriented development.
With this growth has come a corresponding increase in building defect complaints. Reports from bodies such as the [QBCC (Queensland Building and Construction Commission)](https://www.qbcc.qld.gov.au/) and various state fair trading agencies have highlighted the prevalence of defects in newly constructed strata buildings. The result is a growing caseload at tribunals like [NCAT (NSW Civil and Administrative Tribunal)](https://www.ncat.nsw.gov.au/) and [VCAT (Victorian Civil and Administrative Tribunal)](https://www.vcat.vic.gov.au/), where body corporate disputes over defective common property are heard regularly.
## What Is an Expert Witness?
An expert witness is a person who, by reason of training, study, or experience, is qualified to provide opinion evidence on matters that fall outside the knowledge of ordinary decision-makers. In Australian law, the role of expert witnesses is governed primarily by the [Evidence Act 1995 (Cth)](https://www.legislation.gov.au/Details/C2024C00003) and its state equivalents.
Section 79 of the Evidence Act 1995 provides the gateway for expert opinion evidence. It states that opinion evidence is admissible where the witness has "specialised knowledge based on the person's training, study or experience" and the opinion is "wholly or substantially based on that knowledge."
This is a critical distinction. Expert witnesses are not advocates. They do not argue a case on behalf of the party that engaged them. Their overriding duty is to the court or tribunal, and their evidence must be independent, impartial, and grounded in their genuine professional opinion.
For a detailed overview of how [expert witness reports](/expert-witness-reports) are structured and used in legal proceedings, see our guide on [expert witness reports explained](/articles/legal-expert-witness-reports-explained).
## Why Expert Witnesses Matter in Body Corporate Disputes
Body corporate building disputes present unique challenges that make expert evidence essential. Unlike a single residential dwelling where the homeowner deals directly with the builder, strata disputes involve multiple stakeholders with competing interests.
### Multiple Parties and Complex Interests
A typical body corporate building dispute may involve the body corporate (owners corporation), individual lot owners, the original developer, the head contractor, subcontractors, design consultants, and insurers. Each party may have a different perspective on the nature, cause, and extent of defects.
### Technical Complexity
Building defects in multi-storey strata developments are often technically complex. A water leak in a unit on the fifth floor may originate from a waterproofing failure on the roof, a defective window installation on the sixth floor, or a plumbing defect within the wall cavity. Tracing the cause requires specialised investigation methods, testing, and analysis.
### High Financial Stakes
Rectification costs for common property defects in large strata schemes can run into the tens of millions of dollars. Special levies imposed on lot owners to fund rectification works can cause significant financial hardship. Expert evidence is critical in quantifying these costs accurately.
### Regulatory Complexity
Strata buildings must comply with the National Construction Code (NCC), relevant Australian Standards, state-based building legislation, and local council requirements. Determining whether a particular element is defective often requires an expert assessment of compliance against multiple regulatory instruments.
## Common Defect Types in Body Corporate Disputes
The following table outlines the most common categories of building defects that give rise to body corporate disputes in Australia.
| Defect Category | Examples | Common Locations |
| -------------------------- | --------------------------------------------------------------------------- | ------------------------------------------------------------ |
| Waterproofing failures | Membrane breaches, failed shower recesses, balcony leaks, planter box leaks | Bathrooms, balconies, rooftops, basements, podium levels |
| Structural cracking | Foundation settlement, slab deflection, wall cracking, beam failures | Load-bearing walls, columns, transfer slabs, retaining walls |
| Fire safety non-compliance | Missing fire collars, non-compliant fire doors, inadequate compartmentation | Service penetrations, fire stairs, inter-tenancy walls |
| HVAC defects | Undersized systems, poor ductwork installation, condensation issues | Plant rooms, ceiling spaces, common corridors |
| Cladding defects | Non-compliant combustible cladding, delamination, poor fixing | External facades, balcony soffits, feature panels |
| Plumbing and drainage | Cross-connections, inadequate falls, failed joints, blocked stormwater | Wet areas, risers, basement drainage, roof drainage |
| Electrical defects | Non-compliant wiring, inadequate earthing, faulty switchboards | Common area switchboards, car parks, risers |
| Acoustic deficiencies | Inadequate sound insulation between units, impact noise transmission | Inter-tenancy floors and walls, plant rooms |
Each of these defect categories requires a different area of expertise. In complex disputes, it is not uncommon for multiple expert witnesses to be engaged, each covering a distinct discipline.
For further reading on how structural defects are identified and assessed, see our article on [structural defect inspections](/articles/structural-defect-inspections-to-prevent-future-problems).
## Where Expert Witnesses Are Most Needed
Expert witnesses are called upon at various stages and in various forums across the Australian dispute resolution landscape.
### Tribunals
State and territory tribunals handle the majority of body corporate building disputes. [NCAT](https://www.ncat.nsw.gov.au/) in New South Wales, [VCAT](https://www.vcat.vic.gov.au/) in Victoria, QCAT in Queensland, and their equivalents in other jurisdictions all hear strata-related building claims. Tribunal proceedings tend to be less formal than court proceedings, but expert evidence remains essential.
For a detailed look at how expert witnesses support NCAT proceedings, see our guide on [NCAT building disputes](/articles/navigating-ncat-building-disputes-with-expert-witness-support).
### Courts
Larger or more complex body corporate disputes may proceed through state Supreme Courts or the Federal Court. Court proceedings involve stricter procedural requirements for expert evidence, including compliance with practice directions on expert reports and concurrent evidence (hot-tubbing).
### Mediation and Conciliation
Many body corporate disputes are resolved through alternative dispute resolution (ADR) before reaching a hearing. Expert reports prepared for mediation sessions help parties understand the strengths and weaknesses of their respective positions, facilitating settlement.
### Insurance Claims
Where body corporate insurance policies respond to building defect claims, insurers often require independent expert assessments before approving or denying coverage. Expert witnesses may be engaged by the body corporate, the insurer, or both.
## Legal and Ethical Duties of Expert Witnesses
Expert witnesses in Australian proceedings are subject to strict legal and ethical obligations. These duties are codified in court rules, practice notes, and professional codes of conduct.
### The Overriding Duty to the Court
The most fundamental duty of an expert witness is the duty owed to the court or tribunal, not to the party that engaged them. This principle is enshrined in the [Uniform Civil Procedure Rules 2005 (NSW)](https://legislation.nsw.gov.au/view/html/inforce/current/sl-2005-0418) and equivalent rules in other jurisdictions.
This duty requires the expert to:
- Provide opinions that are genuinely held and based on their specialised knowledge.
- Identify and disclose any limitations in their opinion or the data upon which it is based.
- Acknowledge matters that fall outside their area of expertise.
- Avoid acting as an advocate for any party.
- Promptly notify the court of any change in their opinion.
### Code of Conduct for Expert Witnesses
Most Australian jurisdictions have adopted expert witness codes of conduct that experts must acknowledge and comply with. These codes typically require the expert to include a declaration in their report confirming that they understand and accept their obligations.
### Concurrent Evidence (Hot-Tubbing)
Australian courts and tribunals frequently use concurrent evidence procedures, where opposing experts give evidence at the same time and are able to discuss and debate areas of disagreement. This process, sometimes called "hot-tubbing," requires experts to be well prepared, collegial, and willing to make concessions where the evidence warrants it.
To understand how expert witness reports differ from standard inspection reports, read our comparison of [expert witness vs routine inspection reports](/articles/expert-witness-vs-routine-inspection-reports).
## The Makita Criteria: Five Requirements for Admissible Expert Evidence
The landmark decision in _Makita (Australia) Pty Ltd v Sprowles_ [2001] NSWCA 305 established the key criteria that expert evidence must satisfy to be admissible in Australian courts. These criteria are frequently applied in body corporate building disputes and serve as the benchmark against which expert reports are assessed.
| Makita Criterion | Description | Practical Application in Body Corporate Disputes |
| ------------------------------------------ | ------------------------------------------------------------------------------------------------------------------ | ------------------------------------------------------------------------------------------------------------------------------------------------------------------------- |
| **Specialised knowledge** | The expert must possess specialised knowledge based on training, study, or experience. | The expert must hold relevant qualifications and have demonstrated experience in the specific defect category (e.g., waterproofing, structural engineering, fire safety). |
| **Opinion based on specialised knowledge** | The opinion expressed must be wholly or substantially based on that specialised knowledge. | The expert must connect their opinion to their area of expertise, not offer speculation outside their field. |
| **Facts or assumptions identified** | The expert must identify the facts or assumptions upon which the opinion is based. | The report must clearly state what information was reviewed, what site inspections were conducted, and what assumptions were made. |
| **Reasoning disclosed** | The expert must disclose the reasoning process by which the opinion was reached. | The report must explain, step by step, how the expert arrived at their conclusions, including reference to applicable codes, standards, and industry practice. |
| **Demonstrated connection** | There must be a demonstrated connection between the specialised knowledge, the facts/assumptions, and the opinion. | The expert must show a logical chain from the evidence observed, through the applicable standards, to the opinion expressed. |
Failure to satisfy any of the Makita criteria can result in the expert evidence being ruled inadmissible or given reduced weight. In body corporate disputes involving significant sums, this can be decisive.
## The Dispute Resolution Process: Where Experts Fit In
Body corporate building disputes typically progress through several stages. Expert witnesses may be involved at one or more of these stages.
### Stage 1: Investigation and Assessment
Before any formal dispute is lodged, the body corporate usually engages a building consultant or inspector to investigate reported defects. This initial assessment identifies the nature and extent of defects, provides preliminary cost estimates for rectification, and forms the basis for any demand or claim.
### Stage 2: Demand and Negotiation
Armed with the investigation report, the body corporate (usually through its solicitors) issues a demand to the developer or builder. Negotiations may follow. At this stage, the developer may engage their own expert to review the claims.
### Stage 3: Formal Dispute (Tribunal or Court Filing)
If negotiations fail, the body corporate files a claim at the relevant tribunal or court. Expert reports are prepared in accordance with the applicable practice directions and procedural rules.
### Stage 4: Expert Conferencing
Courts and tribunals often direct opposing experts to confer and produce a joint report identifying areas of agreement and disagreement. This process narrows the issues for hearing and can facilitate settlement.
### Stage 5: Mediation
Many jurisdictions require or encourage mediation before a matter proceeds to hearing. Expert reports and joint expert reports are used extensively in mediation sessions.
### Stage 6: Hearing
At hearing, experts present their evidence, either through their written reports, oral evidence, or concurrent evidence procedures. Cross-examination tests the reliability and credibility of the expert's opinions.
For information on how Scott Schedules are used to organise defect claims in these proceedings, see our article on [Scott Schedules in construction disputes](/articles/how-scott-schedules-strengthen-construction-dispute-cases).
## The Evolving Role of Expert Witnesses
The role of expert witnesses in body corporate disputes continues to evolve alongside advances in building technology and investigative methods.
### Drone Technology
Unmanned aerial vehicles (drones) are now widely used by expert witnesses to inspect facades, roofs, and other areas of multi-storey strata buildings that would otherwise require expensive scaffolding or elevated work platforms. High-resolution imagery and thermal imaging captured by drones can reveal defects that are invisible from ground level.
### Building Information Modelling (BIM)
Building Information Modelling allows experts to create detailed 3D models of buildings and their systems. In body corporate disputes, BIM can be used to illustrate the location and extent of defects, model water ingress pathways, and present complex technical information in a format that tribunal members and mediators can readily understand.
### Thermal Imaging and Moisture Mapping
Infrared thermography and advanced moisture detection equipment allow experts to identify hidden defects without destructive investigation. These non-invasive techniques are particularly valuable in strata buildings where access to individual lots for invasive testing can be difficult to arrange.
### Digital Reporting and Interactive Scott Schedules
Modern expert reports increasingly incorporate interactive elements, hyperlinked photo evidence, and digital Scott Schedules that allow parties and decision-makers to navigate complex defect lists efficiently.
## Choosing the Right Expert Witness
Selecting the right expert witness for a body corporate building dispute is one of the most important decisions the body corporate or its legal team will make. The following factors should guide the selection process.
### Relevant Qualifications and Licensing
The expert must hold qualifications that are directly relevant to the defect types in dispute. A structural engineer is the appropriate expert for structural cracking, while a hydraulic engineer or waterproofing specialist is needed for membrane failures. Check that the expert holds current registration or licensing in the relevant state or territory.
### Experience in Strata and Body Corporate Matters
Body corporate disputes have unique procedural and practical characteristics. An expert who has experience working with owners corporations, body corporate managers, and strata solicitors will navigate these complexities more effectively than one whose experience is limited to single-dwelling disputes.
### Tribunal and Court Experience
An expert who has given evidence before NCAT, VCAT, QCAT, or the relevant court will understand the expectations of decision-makers, the process of concurrent evidence, and the rigours of cross-examination.
### Independence and Objectivity
The expert must have no conflicts of interest with any party to the dispute. Any prior relationship with the developer, builder, or body corporate should be disclosed at the outset.
### Communication Skills
The most technically brilliant expert is of limited value if they cannot communicate their findings clearly to a non-technical audience. The expert must be able to write clear, well-structured reports and present their opinions concisely in oral evidence.
## Key Takeaways
- **Expert witnesses owe their primary duty to the court or tribunal**, not to the party that engaged them. Independence and objectivity are non-negotiable.
- **The Makita criteria establish five requirements** that expert evidence must satisfy to be admissible: specialised knowledge, opinion based on that knowledge, identified facts and assumptions, disclosed reasoning, and a demonstrated connection between all elements.
- **Body corporate disputes are technically complex** and often involve multiple defect categories, requiring experts with specific qualifications and experience in each relevant discipline.
- **Waterproofing, structural cracking, fire safety, and cladding** are among the most common defect types in strata building disputes across Australia.
- **Expert conferencing and concurrent evidence** are standard procedures in Australian tribunals and courts, requiring experts to engage constructively with opposing experts.
- **Emerging technologies** such as drones, BIM, and thermal imaging are enhancing the quality and efficiency of expert investigations in multi-storey strata buildings.
- **Selecting the right expert** requires careful consideration of qualifications, strata experience, tribunal or court experience, independence, and communication skills.
## Frequently Asked Questions
### What is a body corporate building dispute?
A body corporate building dispute is a legal disagreement between a body corporate (also known as an owners corporation) and another party, typically the original developer or builder, concerning defects in the common property of a strata scheme. These disputes may relate to construction defects, non-compliance with building codes, or failures to meet the standards required under the building contract.
### When is an expert witness needed in a body corporate dispute?
An expert witness is needed whenever the dispute involves technical building matters that require specialised knowledge to assess. This includes identifying the nature and cause of defects, determining whether construction work complies with the National Construction Code and Australian Standards, quantifying the cost of rectification, and providing opinions on appropriate repair methodologies.
### What qualifications should an expert witness have for a strata building dispute?
The expert should hold qualifications directly relevant to the defect categories in dispute. Common qualifications include degrees in structural engineering, building surveying, architecture, hydraulic engineering, or fire safety engineering. The expert should also hold current professional registration or licensing in the relevant state or territory.
### How does the Makita case affect expert evidence in body corporate disputes?
The _Makita (Australia) Pty Ltd v Sprowles_ decision established five criteria that expert evidence must satisfy to be admissible. If an expert report fails to identify the basis for the expert's specialised knowledge, the facts or assumptions relied upon, or the reasoning process leading to the opinion, the evidence may be excluded or given reduced weight. This decision is routinely applied in body corporate building disputes at both tribunal and court level.
### Can a body corporate engage more than one expert witness?
Yes. In complex disputes involving multiple defect categories, it is common for the body corporate to engage separate experts for each discipline. For example, a structural engineer may address cracking and foundation issues, a waterproofing specialist may address membrane failures, and a fire safety engineer may address fire compliance deficiencies. Courts and tribunals generally accept multiple expert witnesses where the issues genuinely require different areas of expertise.
### What is the difference between an expert witness report and a standard building inspection report?
An expert witness report is prepared specifically for use in legal proceedings and must comply with court rules, practice directions, and the applicable expert witness code of conduct. It must include a declaration acknowledging the expert's duty to the court. A standard building inspection report is prepared for commercial purposes and is not subject to the same procedural requirements. For a detailed comparison, see our article on [expert witness vs routine inspection reports](/articles/expert-witness-vs-routine-inspection-reports).
### What happens during expert conferencing?
Expert conferencing, sometimes called a "conclave," is a process directed by the court or tribunal where opposing experts meet (in person or remotely) to discuss their respective opinions. The experts produce a joint report that identifies areas of agreement and areas of disagreement, with reasons for any disagreement. This process is designed to narrow the issues for hearing and can significantly reduce hearing time.
### How much does an expert witness cost for a body corporate dispute?
Costs vary depending on the complexity of the matter, the number of defect categories, the size of the building, and the amount of investigation required. Initial expert assessments for a medium-sized strata scheme may range from several thousand dollars to tens of thousands. For large, complex disputes proceeding to hearing, total expert costs (including report preparation, conferencing, and giving evidence) can be substantially higher.
### What is hot-tubbing and how does it work?
Hot-tubbing is an informal term for concurrent evidence, a procedure where opposing experts give evidence at the same time. The tribunal member or judge facilitates a structured discussion between the experts, asking questions and allowing each expert to respond to the other's opinions. This process is widely used in Australian jurisdictions and is considered an efficient way to test expert evidence.
### Can expert witness evidence be challenged or excluded?
Yes. Expert evidence can be challenged through cross-examination, where the opposing party tests the reliability, methodology, and reasoning of the expert's opinion. Evidence can also be excluded if it fails to satisfy the Makita criteria or if the expert has not complied with the applicable expert witness code of conduct. Tribunals and courts also have discretion to exclude evidence that is misleading, unduly prejudicial, or of limited probative value.
### What role does the QBCC play in body corporate building disputes in Queensland?
The [QBCC](https://www.qbcc.qld.gov.au/) is the regulatory body responsible for licensing building contractors and certifiers in Queensland. It also handles complaints about defective building work and can issue directions to rectify defects. In body corporate disputes in Queensland, QBCC records, including licence details, complaint histories, and compliance notices, are often relied upon as part of the evidence.
### How long do body corporate building disputes typically take to resolve?
The duration varies considerably. Simple disputes resolved through mediation may be settled within a few months. Complex disputes involving multiple defect categories, large rectification costs, and multiple parties can take several years from initial investigation to final determination. Expert witness involvement often spans the entire duration of the dispute.
## Take the Next Step
If your body corporate is facing a building dispute and you need independent, expert-level assessment of defects in your common property, our team of licensed building inspectors can help. We provide thorough, objective investigations and expert reports that meet the requirements of Australian courts and tribunals.
[Contact us today](/expert-witness-reports) to discuss your body corporate building dispute and learn how our expert witness services can support your matter.
For a complete overview, see our [guide to expert witness reports for building disputes](/guides/expert-witness-building-disputes-guide).
### Structural Defect Inspections to Prevent Future Problems
Source: https://ownerinspections.com.au/articles/structural-defect-inspections-to-prevent-future-problems
Published: 2025-09-16 | Updated: 2026-05-20 | Category: Defect Investigation
Author: Maison Azdari
Seen new wall cracks, sloping floors or doors that suddenly will not close properly?
These signs can be easy to dismiss during a busy property purchase or renovation. Yet they can point to structural movement, foundation issues, water damage, poor workmanship or a load-bearing problem that needs a closer look.
A structural defect inspection checks the visible and accessible parts of a property for defects that may affect the building’s strength, safety, function or long-term condition. If the concern is already visible, a [defect investigation report](/defect-investigation-reports) can help record what has gone wrong and what should happen next.
For buyers, owners, investors and real estate professionals, structural defect inspections help answer three practical questions:
- Is the property structurally sound?
- Are there defects that need urgent action?
- Do you need a structural engineer, builder or further specialist report?
This guide explains when to book a specific structural inspection, what inspectors look for, how to read a defect report, and what to do if your inspection report reveals structural issues.
> The cost of identifying a structural defect early is minimal compared to the expense of
> repairing damage that has been allowed to progress unchecked. Prevention through
> professional inspection is always more economical than cure.
Get a Defect
Report
}
buttonHref="/defect-investigation-reports"
variant="secondary"
/>
## What Is a Structural Defect Inspection?
A structural defect inspection is a focused assessment of building elements that help carry, transfer or resist loads. These can include foundations, footings, floors, walls, beams, columns, roof framing and load-bearing components.
Unlike a general open-home walk-through, a professional inspection gives buyers and owners a written record of the property’s condition. NSW Government guidance says a building inspection report is a written account of a property’s condition and can help identify problems before exchange of contracts.
A structural defect inspection may be needed when there are signs of:
- Structural movement
- Major wall cracks
- Uneven or bouncy floors
- Sagging roof lines
- Load-bearing wall alterations
- Water penetration
- Poor building work
- Foundation movement
- Storm, flood or impact damage
In Queensland, structural defective building work can include work that affects structural performance, health and safety, functional use, or allows water penetration into a building.
## Structural Defect Inspection vs General Building Inspection
A standard building inspection and a structural defect inspection are related, but they are not always the same service.
| Inspection type | Main purpose | Best suited for | Typical outcome |
| ------------------------------ | --------------------------------------------------------------------------- | ----------------------------------------------------------------------------------------------- | ------------------------------------------------------------------------------------------- |
| General building inspection | Reviews the overall visible condition of the property | Pre-purchase checks, pre-sale checks and general property condition reviews | Identifies major visible defects, safety hazards and areas that may need further assessment |
| Structural defect inspection | Focuses on structural elements and signs of movement or failure | Wall cracks, sloping floors, foundation concerns, load-bearing wall changes and serious defects | Provides findings on structural concerns, likely causes and recommended next steps |
| Specific structural inspection | Targets one known issue or area | A cracked wall, sagging roof, affected slab, retaining wall or foundation issue | Gives a focused opinion on one defect or location |
| Structural adequacy report | Reviews whether a structure or element appears fit for its intended purpose | Alterations, wall removals, compliance concerns and serious structural matters | Often recommends engineering review, repairs or further testing |
NSW Government notes that a building inspection report usually identifies major visible problems, but it does not deal with every aspect of a property. It may [recommend further inspection](https://www.nsw.gov.au/housing-and-construction/buying-and-selling-property/buying-property-nsw/inspecting-a-property/inspection-reports) by a structural engineer, geotechnical engineer, surveyor or other specialist where needed.
## Why Structural Inspections Matter
Structural inspections serve as a critical safeguard for property owners, providing detailed assessments of a building's condition and identifying potential problems before they become catastrophic. There are four fundamental reasons why these inspections are essential for every Australian property.
### Preventing Expensive Repairs
Early detection of structural defects can save property owners tens of thousands of dollars in repair costs. When structural issues are identified in their initial stages, remediation is typically straightforward and affordable. A hairline crack in a foundation, for example, might cost a few hundred dollars to address when caught early. Left undetected for several
years, that same crack can develop into a major foundation failure requiring extensive underpinning work costing $50,000 or more.
Professional structural inspections identify problems at their source, allowing targeted repairs that address root causes rather than symptoms. This approach prevents the cycle of repeated repairs that occurs when superficial fixes are applied to deeper structural issues.
### Ensuring Occupant Safety
The primary purpose of structural elements is to support loads and protect occupants. When these components fail, the consequences can be severe. Collapsed ceilings, falling masonry, and structural failures have caused injuries and fatalities in Australian properties.
Regular structural inspections identify safety hazards before they pose immediate danger. This is particularly important for older properties where materials may have degraded over time, or for buildings that have been modified without proper engineering oversight. Families living in properties with undetected structural defects are unknowingly exposed to risks that professional assessment could eliminate.
### Extending Property Longevity
Buildings are designed to last for decades, but only when properly maintained. Structural defects that go unaddressed accelerate deterioration throughout the property. Water ingress through foundation cracks, for instance, can lead to timber rot in floor framing, corrosion of steel reinforcement, and mould growth in wall cavities.
By identifying and addressing structural issues promptly, property owners protect their investment for the long term. A well-maintained structure with no significant defects can easily outlast a building where problems have been allowed to compound over years of neglect.
### Maintaining Resale Value
Property buyers are increasingly aware of structural issues and their implications. [Pre-purchase inspections](/pre-purchase-inspections) have become standard practice in Australian real estate transactions, and any identified structural defects can significantly impact sale prices or cause deals to collapse entirely.
Sellers who maintain accurate records of structural inspections and remediation work demonstrate responsible property ownership. This documentation provides confidence to potential buyers and can justify premium pricing in competitive markets. Conversely, properties with known or suspected structural issues often sell well below market value, if
they sell at all.
## When Do You Need a Specific Structural Inspection?
A specific structural inspection is useful when one part of the property is causing concern.
For example, a buyer may not need a full structural assessment of every building element if the main issue is a wide diagonal crack beside a window. In that case, the inspection can focus on the affected wall, nearby footings, floor levels, drainage, roof load path and any signs of movement around that area.
Book a specific structural inspection when you notice:
- A crack that is widening or spreading
- A stair-step crack through brickwork
- A floor that slopes across a room
- Doors or windows that bind after dry or wet weather
- A sagging ceiling, roof ridge or balcony
- Water ingress near structural elements
- A retaining wall that is leaning or bowing
- A wall removed without clear engineering records
- Building work that may not match approved plans
Consumer Affairs Victoria advises buyers to [seek advice from a structural engineer](https://www.consumer.vic.gov.au/housing/buying-and-selling-property/buying-property/inspect-properties-before-you-buy) if there are large cracks, and notes that cracked walls may point to issues such as the house sinking.
## Structural Damage Inspection: Warning Signs to Watch
A structural damage inspection looks for visible signs that a building element may be weakened, moving, overloaded or affected by water, soil or poor workmanship.
Some defects are minor. Others need fast action. The table below can help property owners decide when to seek advice.
| Warning sign | What it may indicate | Recommended action |
| ------------------------ | ------------------------------------------------------------- | ----------------------------------------- |
| Hairline plaster cracks | Normal shrinkage, minor movement or age-related wear | Monitor and photograph |
| Wide wall cracks | Structural movement, settlement or stress | Book a structural defect inspection |
| Stair-step brick cracks | Differential settlement or footing movement | Seek building or engineering advice |
| Sloping or bouncy floors | Subfloor movement, damaged stumps, joist issues or settlement | Inspect subfloor where accessible |
| Sticky doors and windows | Frame distortion, seasonal movement or structural movement | Check if issue is ongoing or worsening |
| Sagging roof line | Roof framing movement, water damage or overloaded members | Inspect roof space if safe and accessible |
| Bulging walls | Moisture damage, poor wall ties, lateral pressure or movement | Arrange urgent assessment |
| Retaining wall cracking | Soil pressure, drainage failure or wall movement | Arrange specialist inspection |
Consumer Affairs Victoria lists several warning signs buyers should check for, including sloping or bouncy floors, cracked walls, fretting brick mortar, sagging roofs, damp walls and signs of moisture.
## Common Structural Problems in Australian Properties
Australian buildings face unique challenges due to the country's diverse climate zones, soil conditions, and construction methods. Understanding the most common structural problems helps property owners recognise warning signs and appreciate the importance of professional assessment.
### Wall and Beam Cracking
Wall cracks are one of the most common reasons owners book a defect inspection. Not every crack is serious. The pattern, width, location and movement history matter.
| Crack type | Possible meaning | Risk level |
| ----------------------- | ----------------------------------------------- | ---------------- |
| Hairline vertical crack | Shrinkage, minor settlement or surface movement | Low if stable |
| Diagonal crack | Differential movement or stress around openings | Moderate to high |
| Stair-step brick crack | Footing movement or settlement | Moderate to high |
| Horizontal crack | Lateral pressure or wall movement | High |
| Crack with bulging wall | Structural distress or wall tie failure | High |
Large cracks should not be ignored. Consumer Affairs Victoria recommends seeking structural engineering advice where large cracks are present.
#### Vertical Cracking Patterns
Vertical cracks typically occur due to shrinkage as building materials cure and age. In many cases, these cracks are cosmetic and do not indicate structural distress. However, wide vertical cracks, particularly those that extend through multiple courses of masonry or appear near corners, may indicate differential settlement or inadequate reinforcement.
Vertical cracks wider than 5 millimetres warrant professional investigation. These may indicate that one section of the building is settling at a different rate than adjacent areas, creating stress in the masonry or concrete.
#### Horizontal Cracking Patterns
Horizontal cracks are generally more concerning than vertical cracks. These often indicate lateral pressure against walls, which may result from soil movement, inadequate drainage, or structural overloading. Horizontal cracks in retaining walls are particularly serious as they suggest the wall may be failing to contain the soil behind it.
In masonry walls, horizontal cracking along mortar joints can indicate that the wall is being pushed inward or outward. This type of cracking requires immediate professional assessment to determine the cause and appropriate remediation.
#### Diagonal and Stair-Step Cracking
Diagonal cracks, often appearing in a stair-step pattern through masonry, are classic indicators of differential settlement. These cracks typically start narrow at one end and widen progressively, pointing towards the section of the building that is settling more rapidly.
Stair-step cracking through brick courses follows the mortar joints, which are the weakest
points in masonry construction. The direction and severity of these cracks provide valuable
diagnostic information for structural engineers assessing foundation movement.
### Uneven or Sagging Floors
Floor levelness issues affect both comfort and structural integrity. Uneven floors can result from multiple causes, each requiring different remediation approaches.
Common causes of floor problems include:
- **Foundation settlement:** Uneven settlement beneath the building causes sections of the floor to drop relative to others
- **Undersized floor joists:** Joists that are too small for the span they support will sag over time under normal loading
- **Timber deterioration:** Rot, termite damage, or borer activity weakens floor framing members, causing deflection
- **Inadequate stumps or supports:** Stumps that have settled, rotted, or were improperly installed fail to provide adequate support
- **Concrete slab problems:** Cracked or heaved slabs create uneven floor surfaces and may indicate underlying soil issues
Floor levelness is typically measured using laser levels, with variations exceeding 10 millimetres over 3 metres considered significant. Severe cases may see floor slopes of 50 millimetres or more across a room, creating obvious visual and functional problems.
### Foundation Instability and Structural Movement
The foundation is the most critical structural element of any building. Foundation problems affect everything above them and are among the most expensive defects to remediate.
Foundation movement can affect walls, floors, doors, windows and roof lines.
Warning signs include:
- Gaps between walls and ceilings
- Cracks near doors and windows
- Uneven floors
- Separation at wall junctions
- Cracks in external brickwork
- Doors that no longer latch
- Repeated patching of the same cracks
Significant building defects or problems in a building inspection report may include movement in walls, cracking, rising damp, safety hazards or a faulty roof.
### Compromised Load-Bearing Walls
Load-bearing walls help transfer weight from the roof, upper floors and framing down to the foundations. If a load-bearing wall has been removed or altered, a structural adequacy review may be needed to check whether beams, posts, lintels or other supports are doing the right job.
Common issues affecting load-bearing walls include:
- **Unauthorised modifications:** Removal of load-bearing walls without proper engineering and support installation
- **Inadequate lintels:** Undersized or deteriorated lintels above openings failing to transfer loads properly
- **Moisture damage:** Water ingress causing deterioration of wall materials and embedded reinforcement
- **Cracking and displacement:** Structural cracks indicating overloading or differential movement
- **Bulging or leaning:** Walls moving out of plumb due to inadequate bracing or lateral support
Identifying load-bearing walls requires understanding the building's structural system. Professional engineers assess wall construction, position, and connections to determine which walls are structural and which are simply partitions.
### Water Penetration and Structural Defects
Water can damage timber framing, corrode steel reinforcement, weaken masonry, contribute to rot and lead to mould or damp issues.
QBCC includes water penetration as one of the [ways structural defective building work](https://www.qbcc.qld.gov.au/complaints-disputes/building-work-issue/defective-work-dispute/what-defective-work) may affect a building.
## Structural Defect Classification
Structural defects are classified according to their severity and potential impact on building safety and functionality. Understanding these classifications helps property owners prioritise remediation and allocate resources appropriately.
| Defect Type | Severity Level | Typical Indicators | Recommended Action |
| ------------------------ | ----------------------- | ----------------------------------------------------------------------- | ------------------------------------------------------------------------ |
| Hairline cracks | Minor | Cracks less than 1mm wide, stable over time | Monitor annually, cosmetic repair if desired |
| Moderate wall cracking | Moderate | Cracks 1mm to 5mm wide, may show progression | Engineering assessment, crack monitoring, targeted repairs |
| Severe cracking | Significant | Cracks exceeding 5mm, multiple locations, active movement | Urgent engineering assessment, structural repairs required |
| Floor deflection | Moderate to Significant | Noticeable bounce, visible sag, slopes exceeding 10mm over 3m | Subfloor inspection, joist assessment, support reinforcement |
| Foundation movement | Significant to Critical | Multiple crack patterns, door and window binding, floor slopes | Geotechnical investigation, underpinning assessment, drainage review |
| Structural failure | Critical | Visible structural distress, imminent collapse risk, major displacement | Immediate evacuation, emergency shoring, major reconstruction |
| Load-bearing wall damage | Significant to Critical | Bulging walls, separation at junctions, cracking around openings | Structural engineering assessment, temporary propping, permanent repairs |
| Roof structure defects | Moderate to Critical | Sagging ridge, spreading rafters, damaged trusses | Roof void inspection, truss assessment, reinforcement or replacement |
| Concrete deterioration | Moderate to Significant | Spalling, exposed reinforcement, rust staining, cracking | Concrete testing, reinforcement assessment, patch repairs or replacement |
| Retaining wall failure | Significant to Critical | Leaning, horizontal cracking, bulging, drainage issues | Immediate assessment, temporary support, reconstruction if necessary |
## Early Warning Signs of Structural Problems
Recognising the early warning signs of structural defects allows property owners to seek professional assessment before problems escalate. While some indicators are obvious, others require careful observation to detect.
### Visible Wall Cracks
Wall cracks are the most commonly noticed indicator of structural movement. However, interpreting crack patterns requires understanding their significance:
- **Location matters:** Cracks near corners, around openings, and at wall junctions are more concerning than those in the middle of walls
- **Pattern is significant:** Diagonal stair-step cracks typically indicate settlement, while horizontal cracks suggest lateral pressure
- **Width indicates severity:** Cracks exceeding 5mm warrant immediate professional assessment
- **Progression is critical:** Cracks that are widening or extending over time indicate ongoing movement
Property owners can monitor crack progression by placing dated marks at crack ends and measuring width at regular intervals. This information is valuable for engineers assessing structural behaviour.
### Sloped or Uneven Flooring
Floor slopes that develop over time indicate structural movement or framing problems. While slight variations are normal, noticeable slopes warrant investigation:
- Furniture that rolls or tips on its own
- Doors that swing open or closed without touch
- Visible gaps between floor surfaces and skirting boards
- Bouncy or springy floor sections indicating inadequate support
- Creaking or groaning sounds when walking across floors
### Sticky Doors and Windows
Doors and windows that suddenly become difficult to open or close often indicate structural movement. As buildings shift, door frames and window openings distort, preventing proper operation:
- Doors that stick at the top or bottom but not throughout the year
- Windows that no longer lock properly or have gaps when closed
- Visible gaps between frames and surrounding walls
- Cracking in plasterwork around door and window openings
Seasonal variations in door and window operation are normal and relate to timber expansion and contraction with humidity changes. However, persistent or worsening problems suggest structural causes requiring investigation.
### Bulging or Bowing Surfaces
Walls, floors, or ceilings that bulge outward or bow inward indicate structural distress:
- **Bulging brick walls:** May indicate moisture damage, inadequate ties, or foundation movement
- **Bowing retaining walls:** Suggest soil pressure exceeding design capacity
- **Sagging ceilings:** Can indicate roof structure problems or water damage to ceiling framing
- **Buckling floors:** May result from moisture problems, inadequate expansion allowances, or subfloor issues
### Other Warning Indicators
Additional signs that may indicate structural problems include:
- Gaps appearing between walls and ceilings or floors
- Nails or screws popping out of walls or ceilings
- Cracks appearing in tiles or concrete floors
- Separation at internal wall junctions
- Water pooling in unusual locations
- Musty odours suggesting hidden moisture problems
## What Is Included in a Structural Defect Inspection?
The scope depends on the property, access and reason for inspection. Most structural defect inspections include a visual assessment of accessible areas and a written report.
A report may cover:
- Property details and inspection date
- Reason for inspection
- Scope and limitations
- Areas inspected and areas not inspected
- Photos of defects
- Crack locations and patterns
- Signs of structural movement
- Visible damage to walls, floors, roof framing or foundations
- Safety risks
- Severity of each defect
- Recommended next steps
- Advice on further specialist assessment where needed
NSW Government states that a building inspection report should include details such as the reason for inspection, date, scope, areas not inspected, major faults, significant problems that need fixing and any recommendation for further specialist assessment.
Request Expert
Support
}
buttonHref="/expert-witness-reports"
variant="secondary"
/>
## Professional Inspection Methodology
Structural defect inspections follow a systematic methodology designed to thoroughly assess a property's condition and identify all significant issues. Understanding this process helps property owners know what to expect and appreciate the value of professional assessment.
### Stage 1: Appointment Scheduling and Preparation
The inspection process begins with scheduling and preparation. During this phase:
- The property owner provides relevant documentation including building plans, previous inspection reports, and details of any known issues or concerns
- Access arrangements are confirmed for all areas of the property including roof voids, subfloors, and any locked or restricted spaces
- The inspector reviews available information about the property's construction type, age, and history
- Weather conditions are considered as some inspections are best conducted in specific conditions
Property owners can assist by clearing access points, removing stored items that block
inspection areas, and compiling any relevant documentation about the property's history.
### Stage 2: Site Evaluation by Certified Engineers
The on-site inspection is conducted by qualified structural engineers or experienced building inspectors with structural expertise. The evaluation encompasses:
- **External assessment:** Examination of all external surfaces including walls, foundations, roofing, and site drainage
- **Internal assessment:** Inspection of all accessible internal areas including rooms, cupboards, and service spaces
- **Roof void inspection:** Examination of roof structure, framing connections, and any visible issues from above
- **Subfloor inspection:** Assessment of stumps, bearers, joists, and underfloor conditions where accessible
- **Site assessment:** Evaluation of drainage patterns, vegetation, and external factors affecting the building
### Stage 3: Critical Component Assessment
Particular attention is given to critical structural components that have the greatest impact on building safety and stability:
- **Foundation systems:** Assessment of foundation type, condition, and any signs of movement or deterioration
- **Load-bearing elements:** Inspection of walls, columns, beams, and other structural members
- **Connections and fixings:** Examination of how structural elements are connected and whether fixings are adequate
- **Roof structure:** Assessment of rafters, trusses, ridge beams, and roof framing
- **Floor framing:** Inspection of bearers, joists, flooring materials, and support systems
### Stage 4: Detailed Reporting with Photographic Documentation
Following the on-site inspection, a comprehensive report is prepared documenting all findings. Professional inspection reports include:
- Executive summary outlining major findings and recommendations
- Detailed description of each identified defect with location information
- Photographic evidence of all significant issues
- Assessment of severity and priority for each defect
- Recommendations for remediation or further investigation
- Estimated timeframes for addressing identified issues
Quality inspection reports provide sufficient detail for property owners to understand issues and for contractors to scope remediation work. Reports should be clear, well organised, and supported by appropriate photographs.
### Stage 5: Follow-Up Consultation
The inspection process typically includes a follow-up consultation where:
- The inspector explains findings and answers questions
- Priority issues are discussed and remediation options outlined
- Recommendations for specialist input are provided where required
- Monitoring requirements for ongoing issues are established
- Future inspection schedules are suggested based on property condition
## Specialised Inspection Equipment
Modern structural inspections utilise sophisticated equipment that enables detection of problems invisible to the naked eye. This technology significantly improves inspection accuracy and enables early identification of developing issues.
### Crack Monitors
Crack monitors are precision instruments installed across existing cracks to measure
movement over time. These devices provide objective data about whether cracks are stable or
progressing:
- **Tell-tale monitors:** Simple two-part devices that show movement direction and magnitude
- **Vernier crack monitors:** Precision instruments providing accurate measurements to fractions of a millimetre
- **Electronic monitors:** Digital sensors that record movement continuously and can transmit data remotely
Data from crack monitors helps engineers distinguish between active structural movement and stable historic cracking. This information is essential for determining appropriate remediation strategies.
### Laser Levels
Laser levelling equipment enables precise measurement of floor levels, wall verticality, and structural alignment:
- Rotating laser levels project horizontal planes allowing floor level measurement across entire rooms or buildings
- Self-levelling point lasers provide accurate vertical and horizontal reference lines
- Distance measuring lasers enable precise dimension recording without physical contact
These instruments detect floor slopes and wall deviations that would be impossible to measure accurately by eye. The data they provide forms the basis for quantifying structural movement and assessing severity.
### Thermal Imaging Cameras
Thermal imaging technology detects temperature variations that may indicate structural problems or their causes:
- **Moisture detection:** Wet areas appear cooler than surrounding dry materials, revealing water ingress or plumbing leaks
- **Insulation defects:** Missing or displaced insulation shows as temperature variations
- **Air leakage:** Gaps in building envelope appear as thermal bridges
- **Electrical issues:** Overheating electrical components appear as hot spots
While thermal imaging does not directly detect structural defects, it identifies moisture problems that often cause or accompany structural deterioration. Early detection of water ingress prevents the timber rot, concrete damage, and reinforcement corrosion that lead to structural failure.
### Drones for Elevated Structures
Unmanned aerial vehicles (drones) equipped with high-resolution cameras enable detailed inspection of areas that are difficult or dangerous to access:
- **Roof inspections:** Close-up examination of roofing materials, flashings, and accessories without ladder access
- **High facades:** Inspection of upper-level walls, cornices, and decorative elements
- **Chimneys and parapets:** Assessment of elevated masonry structures
- **Site overview:** Aerial perspectives showing drainage patterns, site levels, and overall building condition
Drone inspections reduce safety risks associated with working at heights while providing detailed imagery for assessment and documentation. Modern drones can capture high-resolution photographs and video suitable for professional analysis.
### Additional Inspection Tools
Professional inspectors employ various other specialised tools including:
- **Moisture meters:** Measure moisture content in timber and other materials
- **Borescopes:** Flexible cameras for viewing inside wall cavities and confined spaces
- **Metal detectors:** Locate reinforcement in concrete and steel framing behind linings
- **Concrete cover meters:** Measure depth of reinforcement cover in concrete elements
- **Spirit levels and plumb bobs:** Traditional tools for checking level and vertical alignment
## Structural Adequacy Reports and Defect Reports
A structural adequacy report is usually needed when there is a question about whether a building element is fit for purpose. This may come up after wall removal, foundation movement, major cracking, roof sagging or visible structural damage.
A defect report may focus on the defect itself. A structural adequacy report may go further by commenting on whether a structural element appears adequate, whether more engineering input is required, and what should happen next.
| Report type | When it is useful | What it helps answer |
| ------------------------------- | ------------------------------------------------------------------- | ----------------------------------------------- |
| Building defect report | Visible defects, workmanship concerns or buyer due diligence | What defects are present? |
| Structural defect report | Cracks, movement, sagging, unsafe elements or load-bearing concerns | Are there structural issues? |
| Structural adequacy report | Alterations, wall removals, major defects or safety concerns | Is the structure fit for purpose? |
| Crack mapping and defect report | Multiple cracks, movement tracking or legal documentation | Where are cracks located and are they changing? |
Reports can help buyers know problems in advance, negotiate on price and gain specialist advice about major problems and how they may affect the property over time.
## How to Use the Report After the Inspection
A structural defect report is most useful when it leads to the right next step.
For buyers, the report can support negotiation, further specialist advice or a decision to walk away from a high-risk purchase.
For owners, it can guide repairs, maintenance planning, warranty discussions or dispute resolution.
For agents and property managers, it can provide clearer documentation for vendors, landlords, owners corporations and contractors.
A building inspection report can help buyers identify problems before the exchange of contracts and may help with negotiation.
## Crack Mapping and Defect Report Sydney
Crack mapping records the location, direction, width and pattern of cracks across a property. This can help inspectors, engineers, builders, owners and buyers understand whether cracks are isolated, repeated or linked to wider structural movement.
A crack mapping and defect report in Sydney may be useful when:
- Cracks appear in several rooms
- Cracks are wider near doors or windows
- Brickwork has stair-step cracking
- Cracks reopen after repairs
- A property is part of a dispute
- A buyer wants written evidence before settlement
- An owners corporation needs a clear record of common property defects
For residential apartment buildings in NSW, [Building Commission NSW](https://www.nsw.gov.au/departments-and-agencies/building-commission/about-us/building-defect-complaints) deals with serious defects that can include structural matters, waterproofing, fire safety, enclosures, cladding and services.
## Advantages of Professional Structural Assessment
While property owners can observe obvious signs of structural problems, professional assessment provides significant advantages that justify the investment in expert services.
### Expertise in Defect Identification
Certified structural engineers and experienced building inspectors bring knowledge that enables them to identify problems general inspectors might overlook:
- Understanding of structural behaviour allows correct interpretation of observed symptoms
- Knowledge of construction methods helps identify defects specific to particular building types
- Experience with similar properties provides context for assessing severity and urgency
- Awareness of common failure modes directs attention to critical areas
General building inspectors provide valuable property condition assessments, but structural specialists offer deeper expertise for complex or concerning structural issues. For properties with significant structural concerns, specialist engineering assessment is recommended.
### Understanding of Building Codes and Standards
Professional inspectors understand the regulatory framework governing building construction and safety:
- National Construction Code (NCC) requirements for structural adequacy
- Australian Standards specifying materials, workmanship, and performance criteria
- State and local planning requirements affecting building work
- Work Health and Safety obligations for property owners and occupiers
This knowledge ensures inspections address compliance issues and that recommendations align with regulatory requirements.
### Access to Specialist Equipment
Professional inspectors have access to equipment that enables detection of hidden defects:
- Thermal imaging reveals moisture problems invisible to the naked eye
- Precision levelling equipment quantifies floor slopes and structural movement
- Borescopes allow inspection inside wall cavities without destructive investigation
- Moisture meters detect elevated moisture content before visible damage appears
### Objective Assessment and Documentation
Professional inspection reports provide objective documentation that serves multiple purposes:
- Evidence for warranty claims and insurance matters
- Documentation for property transactions
- Baseline records for monitoring structural movement over time
- Specifications for remediation contractors
- Records for future property owners demonstrating maintenance history
## What Happens If My Inspection Report Reveals Structural Issues?
If your inspection report reveals structural issues, the next step depends on the severity of the defect.
| Finding in report | What it means | Next step |
| ----------------------- | -------------------------------------------- | ----------------------------------------------------- |
| Minor defect | Low safety risk and no clear active movement | Monitor, photograph and repair when suitable |
| Moderate defect | Needs repair or further checking | Get a quote or arrange targeted assessment |
| Major structural defect | May affect stability, safety or use | Seek structural engineering advice |
| Active movement | Defect may be worsening | Start crack monitoring or specialist review |
| Safety risk | Occupants or visitors may be at risk | Restrict access and seek urgent advice |
| Hidden cause suspected | Visible defect may be a symptom | Inspect drainage, subfloor, roof space or foundations |
Major defects can include a defect in a major element due to defective design, workmanship or materials, or failure to comply with National Construction Code structural performance requirements. Major elements may include load-bearing parts such as foundations, footings, floors, walls, roofs, columns and beams.
## Legal and Transactional Significance
Structural inspections have important implications for property transactions, insurance coverage, and warranty considerations. Understanding these aspects helps property owners make informed decisions.
### Real Estate Negotiations
Structural inspection reports significantly influence property transactions in Australia:
- **Pre-purchase inspections:** Buyers use inspection findings to negotiate purchase prices or request vendor repairs before settlement
- **Cooling-off period:** Inspection findings during cooling-off periods may provide grounds for contract termination
- **Price adjustments:** Identified structural defects typically result in price reductions reflecting estimated repair costs
- **Deal termination:** Severe structural issues may cause buyers to withdraw from transactions entirely
For sellers, obtaining structural inspections before listing enables proactive addressing of issues and more accurate pricing. Disclosure of known defects is required, and professional documentation demonstrates responsible ownership.
### Insurance Coverage Considerations
Structural defects have complex relationships with insurance coverage:
- **Home building insurance:** Does not typically cover gradual deterioration or maintenance-related issues
- **Sudden damage:** Structural damage from covered events such as storms or impact may be claimable
- **Defective workmanship:** Original construction defects may be covered under home warranty insurance or statutory warranties
- **Policy exclusions:** Pre-existing defects known at policy inception are typically excluded from coverage
Professional inspection reports provide documentation for insurance claims where damage results from covered events. They also establish property condition at specific points in time, which can be valuable if disputes arise about when damage occurred.
### Warranty Considerations
Australian consumer protection laws provide warranties for residential building work:
- **Statutory warranties:** Most states provide statutory warranty periods for new construction, typically 6 years for major defects and 2 years for other defects
- **Builder obligations:** Builders are required to rectify defective work within warranty periods
- **Documentation requirements:** Professional inspection reports support warranty claims by documenting defects and their timing
- **Home warranty insurance:** Provides coverage if builders become insolvent or fail to honour warranty obligations
Regular structural inspections during warranty periods ensure defects are identified and documented while warranty coverage remains available. Claims made after warranty expiry are typically unsuccessful even for defects that existed during the warranty period.
### Legal Liability
Property owners have legal obligations regarding structural safety:
- Duty of care to ensure properties are safe for occupants and visitors
- Disclosure obligations when selling properties with known defects
- Potential liability for injuries resulting from structural failures
- Compliance obligations under building codes and safety regulations
Regular professional inspections demonstrate responsible property ownership and help identify issues before they create liability exposure.
## Structural Safety Check Before Buying
A structural safety check is useful before buying, especially when the property shows signs of cracking, movement, water damage, poor renovation work or visible defects.
For auction purchases, timing matters. Consumer Affairs Victoria advises buyers to get inspection reports before auction because auction contracts usually cannot be made subject to building or [pest inspection](/timber-pest-inspections) conditions without the vendor’s agreement.
For private sales, buyers may be able to make the contract subject to a building inspection. Consumer Affairs Victoria lists this as a point buyers should consider before purchasing.
A pre-purchase structural safety check can help buyers:
- Understand the risk before committing
- Negotiate based on documented defects
- Request further specialist advice
- Avoid taking on unknown repair costs
- Plan repairs and maintenance after settlement
The benefits of a building inspection report include knowing problems in advance, using the information to negotiate a lower price and gaining specialist advice about major problems.
## House Structural Inspection for Owners and Buyers
A house structural inspection or home structural inspection is not only for buyers. Current owners may need one when cracks appear, floors move, moisture enters the home or renovation work raises concern.
Owners should consider a structural defect inspection after:
- Major storms or flooding
- Nearby excavation or construction
- Tree removal or soil changes
- Renovations involving walls, beams or openings
- Persistent leaks around roofs, balconies or bathrooms
- Termite damage
- Cracks that return after patching
- Doors or windows that change alignment
Consumer Affairs Victoria warns buyers to check whether renovations or extensions had relevant planning or building permits, and notes that illegal alterations may become the buyer’s responsibility once the contract is signed.
## Getting the Most Value from Your Home and Building Investment
Structural defects are easier to manage when they are found early, recorded clearly and assessed by the right person.
A strong structural defect inspection can help buyers avoid unknown risks, help owners plan repairs, and help sellers address defects before listing. It can also support negotiations, maintenance plans, warranty claims and further specialist advice.
If you have wall cracks, sloping floors, foundation concerns, water damage or signs of structural movement, book a structural defect inspection before the issue becomes harder to understand.
Contact Owner
Inspections
}
buttonHref="/contact"
variant="secondary"
/>
## Key Takeaways
- Approximately one in five Australian homes experience structural issues during their lifespan, making regular inspections essential for protecting property investments.
- Early detection of structural defects can save tens of thousands of dollars compared to addressing problems after they have progressed significantly.
- Common structural problems include wall and beam cracking, uneven floors, foundation instability, and compromised load-bearing walls.
- Warning signs include visible cracks, sloping floors, sticky doors and windows, and bulging surfaces that warrant professional assessment.
- Professional inspections follow a five-stage methodology: scheduling, site evaluation, critical component assessment, detailed reporting, and follow-up consultation.
- Specialised equipment including crack monitors, laser levels, thermal imaging cameras, and drones enables detection of hidden defects.
- Certified structural engineers identify problems that general inspectors might overlook, providing expertise in structural behaviour and building codes.
- Structural inspection reports have significant implications for property transactions, insurance claims, warranty considerations, and legal liability.
### Common Defects in Off-the-Plan Apartments
Source: https://ownerinspections.com.au/articles/common-defects-in-off-the-plan-apartments
Published: 2025-09-15 | Updated: 2026-02-09 | Category: Building Inspections
Author: Maison Azdari
Off-the-plan apartments in Australia commonly suffer from waterproofing failures, structural cracking, poor fire safety compliance, plumbing problems, electrical faults, and cosmetic finishing defects. Research by the UNSW City Futures Research Centre found that up to 85% of apartment buildings constructed since 2000 in NSW contain at least one significant defect, with waterproofing failures accounting for roughly 40% of all reported issues. A 2023 NSW Government study confirmed that 53% of strata buildings registered between 2016 and 2022 had serious defects, with average repair costs reaching $331,829 per building.
Buying off the plan offers potential savings and the excitement of a brand-new property, but the reality is that new does not always mean defect-free. Whether you are a first-home buyer, an investor, or a downsizer, understanding what can go wrong before settlement puts you in a much stronger position. This guide breaks down the most frequently found defects in off-the-plan apartments across Australia, explains why they happen, and outlines your options for getting them fixed. For a complete overview, see our [guide to building defect investigations](/guides/building-defect-investigation-guide).
## Why Do Off-the-Plan Apartments Have So Many Defects?
The high rate of defects in newly built apartments is driven by several factors that compound during the construction process. Tight project timelines, cost-cutting measures, subcontractor management challenges, and inconsistent quality control all contribute to the problem.
Large apartment developments often involve dozens of subcontractors working across multiple trades. When scheduling is tight, work gets rushed. One trade finishes before the previous one has been properly checked, and errors get covered up by the next layer of construction. Waterproofing membranes get tiled over before they are tested. Plumbing connections get concealed behind walls before pressure testing is complete.
Developer-driven cost reductions also play a role. Cheaper materials, less experienced tradespeople, and reduced quality assurance processes all increase the likelihood of defects making it through to handover. The buyer typically does not see the finished product until weeks or even days before settlement, which limits the time available to identify and raise issues.
## Waterproofing Failures
Waterproofing defects are the single most reported category of building defect in Australian apartment buildings. They account for approximately 40% of all reported defects in new strata buildings, according to research conducted by UNSW and referenced in the NSW Government's Building Commission reports.
### Where Waterproofing Fails
### Why It Matters
A properly applied waterproofing membrane in a bathroom costs around $300 to $400. Rectifying a failed membrane after tiling, fixtures, and cabinetry are installed can cost $15,000 or more per bathroom. In multi-storey buildings, water from a failed membrane can travel through the slab and damage the apartment below, multiplying the repair costs.
Australian Standard AS 3740 sets out the requirements for waterproofing of domestic wet areas. All new apartments must comply with this standard, and waterproofing must be inspected and certified before being covered by floor and wall finishes.
## Structural Defects
Structural defects are among the most serious issues found in off-the-plan apartments. They can affect the safety and long-term stability of the entire building, not just individual units.
### Common Structural Issues
The high-profile cases at Opal Tower in Sydney Olympic Park (2018) and Mascot Towers in Mascot (2019) brought national attention to structural defects in new apartment buildings. Both cases resulted in mass evacuations and highlighted systemic issues in the construction and certification of residential buildings.
Structural defects must be assessed in accordance with the National Construction Code (NCC) and relevant Australian Standards. Any concerns should be referred to a qualified structural engineer.
## Fire Safety and Compliance Issues
Fire safety defects in new apartment buildings pose a direct risk to occupant safety. These defects often go unnoticed by buyers because they are hidden within walls, ceilings, and service risers.
The 2017 Grenfell Tower fire in London and subsequent investigations into combustible cladding across Australia led to state government cladding registers and remediation programmemes. In NSW, the Cladding Support Scheme and the Building Commission actively audit apartment buildings for non-compliant cladding materials.
## Plumbing and Drainage Defects
Plumbing problems in new apartments range from minor annoyances like dripping taps to significant issues such as cross-connected hot and cold supply lines or improperly graded drainage.
### What to Look For
### Common Plumbing Defects
Plumbing work in new buildings must comply with AS/NZS 3500 (Plumbing and Drainage) and the Plumbing Code of Australia. All plumbing work should be carried out by licensed plumbers and inspected by the relevant authority.
## Electrical Defects
Electrical defects are surprisingly common in new apartments and can present safety hazards if not identified and corrected before occupancy.
## Cosmetic and Finishing Defects
While cosmetic defects are not safety hazards, they are among the most commonly reported issues at handover. In a brand-new apartment, buyers rightly expect a high standard of finish.
### Paintwork
### Flooring
### Joinery and Cabinetry
## HVAC and Ventilation Problems
Heating, ventilation, and air conditioning (HVAC) systems in new apartments can have defects that affect comfort, air quality, and energy efficiency.
The NCC requires that all habitable rooms have adequate ventilation, either through natural means (openable windows) or mechanical systems. Bathrooms without windows must have mechanical exhaust ventilation that discharges directly to the outside of the building.
## Common Area and Shared Facility Defects
Defects in common areas affect all owners in a strata scheme, not just individual lot owners. These areas are maintained by the owners corporation, and the cost of repairing common area defects is typically shared across all lot owners through the strata levies.
## How to Protect Yourself as a Buyer
Taking the right steps before and during settlement significantly reduces the risk of being left with costly defect repairs.
## Your Legal Rights When Defects Are Found
Australian buyers have statutory protections when defects are found in newly built apartments. These protections vary by state but generally provide meaningful recourse.
If the developer refuses to rectify reported defects, you have several options depending on your state:
### Independent Construction Inspections and Why They Matter
Source: https://ownerinspections.com.au/articles/independent-construction-inspections-why-they-matter
Published: 2025-09-12 | Updated: 2026-02-12 | Category: Construction Inspections
Author: Maison Azdari
An independent construction inspection is a professional assessment of building work carried out by a qualified inspector who has no financial or contractual relationship with the builder, developer or contractor. In Australia, these inspections are conducted in accordance with Australian Standard AS 4349.1 and the National Construction Code (NCC), and they serve as a safeguard for property owners who want an unbiased evaluation of workmanship, materials and regulatory compliance. Independent inspections are commonly engaged during new home builds, renovations, pre-purchase assessments and defect liability periods, and they can identify issues that council inspections alone may not cover in sufficient detail.
Building a home or purchasing a property represents one of the largest financial commitments most Australians will make. Yet many buyers and owner-builders rely solely on council inspections or builder-arranged checks to verify construction quality. The problem with this approach is that council inspections are primarily concerned with code compliance at a broad level and are not designed to assess overall workmanship quality. Independent inspectors fill this gap by providing detailed, impartial reporting that puts the property owner's interests first.
> A defect that costs a few hundred dollars to fix at the framing stage can escalate to tens of thousands once walls are lined and finishes are applied. Independent inspections catch problems when they are still affordable to resolve.
## What Are Independent Construction Inspections?
Independent construction inspections are assessments performed by licensed building inspectors who operate separately from the builder and the local council. Their role is to examine construction work at various stages and identify defects, non-compliant work, poor workmanship or deviations from approved plans and specifications.
Unlike council inspections, which focus on minimum code compliance, independent inspections assess a broader range of quality indicators. This includes checking that materials match specifications, verifying structural elements are correctly installed, and confirming that finishes meet acceptable standards.
## Types of Independent Construction Inspections
Independent inspections cover multiple stages and purposes throughout the construction lifecycle. Understanding each type helps property owners determine which inspections are most relevant to their situation.
### Pre-Purchase Inspections
[Pre-purchase inspections](/pre-purchase-inspections) assess the condition of an existing property before a buyer commits to the purchase. These inspections examine structural integrity, identify defects and highlight maintenance concerns. They are conducted under AS 4349.1 and provide buyers with a clear picture of the property's condition.
### Stage Inspections
[Stage inspections](/new-construction-stage-inspections) occur at defined milestones during new construction. Common stages include pre-slab, frame, lock-up, pre-plaster, fixing and handover. Each stage inspection examines work that will soon be concealed by subsequent construction, making it the last opportunity to identify and rectify issues.
### Handover and Pre-Settlement Inspections
Handover inspections take place before practical completion, when the builder considers the home ready for occupancy. [Pre-settlement inspections](/apartment-pre-settlement) occur before final payment or settlement. Both aim to identify incomplete work, defects and items that do not match the approved plans or contract specifications.
### Defect Liability Inspections
Most residential building contracts include a defect liability period, typically ranging from 90 days to 12 months after handover. An independent inspection during this period documents any defects that have appeared since completion, such as cracks from settling, leaks or finish failures, so they can be addressed under the builder's warranty obligations.
### Structural Inspections
Structural inspections focus specifically on load-bearing elements such as foundations, beams, columns, roof trusses and retaining walls. These are particularly important when signs of structural distress are present or when modifications to an existing structure are being considered.
## Council Inspections vs Independent Inspections
One of the most common misconceptions among homeowners is that council inspections are sufficient to guarantee build quality. In reality, council and independent inspections serve different purposes and have different scopes.
| Aspect | Council Inspection | Independent Inspection |
| ----------------- | ----------------------------------- | ----------------------------------------- |
| Purpose | Verify minimum code compliance | Assess overall quality and compliance |
| Who pays | Builder (via permit fees) | Property owner |
| Inspector loyalty | Council (regulatory body) | Property owner (client) |
| Scope | NCC minimum requirements | NCC, Australian Standards, contract specs |
| Detail level | General compliance check | Detailed defect and quality assessment |
| Report provided | Pass/fail or compliance certificate | Comprehensive written report with photos |
| Time on site | Typically 20 to 40 minutes | Typically 1.5 to 3 hours |
| Frequency | Mandatory stages only | Any stage requested by the owner |
## Why Independent Inspections Matter for Homeowners
### Unbiased Assessment
Independent inspectors have no financial relationship with the builder. This removes the conflict of interest that can arise when a builder's own supervisor or a builder-appointed inspector assesses the work. The inspector's sole obligation is to the property owner who engaged them.
### Early Defect Detection
Identifying defects during construction, before they are hidden behind plasterboard, cladding or finishes, is far more cost-effective than discovering them after completion. Common issues identified at stage inspections include:
- Incorrect reinforcement placement in slabs
- Misaligned or undersized framing members
- Missing or incorrectly installed tie-down connections
- Inadequate waterproofing in wet areas
- Non-compliant electrical or plumbing rough-ins
- Poor brickwork or cladding installation
### Builder Accountability
When builders know that an independent inspector will review their work at each stage, the quality of workmanship often improves. The presence of third-party oversight creates accountability and encourages tradespeople to follow specifications and standards more carefully.
### Documentation for Disputes
If a dispute arises between the property owner and the builder, independent inspection reports provide documented evidence of the condition of the work at specific points in time. These reports can be used in negotiations, mediation, or proceedings before bodies such as NCAT in New South Wales, QCAT in Queensland, or VCAT in Victoria.
## The Role of Regulatory Bodies
Several state and national bodies govern building standards and consumer protection in Australia. Understanding their roles helps property owners know where to seek guidance and lodge complaints.
| Regulatory Body | Jurisdiction | Key Responsibilities |
| --------------------------------- | ----------------- | ------------------------------------------------ |
| ABCB / NCC | National | Sets minimum building performance standards |
| QBCC | Queensland | Builder licensing, insurance, dispute resolution |
| NSW Fair Trading | New South Wales | Builder licensing, home building complaints |
| VBA | Victoria | Building practitioner registration, compliance |
| SA Consumer and Business Services | South Australia | Builder licensing, consumer protection |
| DMIRS | Western Australia | Building services regulation |
The National Construction Code, maintained by the Australian Building Codes Board (ABCB), provides the baseline performance requirements for all building work across Australia. State bodies such as the QBCC, NSW Fair Trading and VBA administer licensing, insurance and complaint processes within their respective jurisdictions.
## Owner-Builders and Independent Inspections
Owner-builders face unique challenges because they take on the responsibilities that a licensed builder would normally carry. In most states, owner-builders must obtain a permit and are personally responsible for ensuring all work meets the NCC and relevant Australian Standards.
Independent inspections are particularly valuable for owner-builders because:
- They may lack the technical knowledge to assess subcontractor work
- They carry personal liability for defects and non-compliance
- They must provide a defect report to future purchasers if selling within a specified period (six years in NSW, 6.5 years in Queensland)
- Insurance requirements for owner-builders are often more restrictive
## Safety and Compliance Considerations
Independent inspections contribute directly to building safety by identifying non-compliant work that could pose risks to occupants. Common safety-related issues found during independent inspections include:
- Inadequate bracing or tie-down systems in high-wind areas
- Missing or incorrectly installed smoke alarms
- Non-compliant balustrades and handrails
- Insufficient termite management systems
- Poor waterproofing leading to structural timber decay
- Electrical defects not identified during council inspection
The NCC sets minimum performance standards for structural adequacy, fire safety, access and egress, moisture control, energy efficiency and services. Independent inspectors assess compliance with these requirements and flag any areas that fall short.
## How to Choose a Qualified Independent Inspector
Selecting the right inspector is a significant decision. Not all inspectors offer the same level of expertise or service quality. Consider the following criteria when making your selection.
## Red Flags During Construction
Independent inspectors are trained to identify issues that may not be obvious to untrained observers. Some red flags that warrant immediate attention include:
- Significant deviations from approved engineering drawings
- Water pooling on slabs or in subfloor areas
- Visible cracking in concrete within the first few weeks of pouring
- Timber framing that appears warped, split or undersized
- Missing flashing or sarking at roof and wall junctions
- Builder reluctance to allow independent access to the site
- Unexplained delays at specific construction stages
If your builder discourages or obstructs independent inspections, this should be treated as a serious concern. Reputable builders welcome third-party oversight because it confirms the quality of their work.
## Cost of Independent Inspections
The cost of independent construction inspections varies based on property size, location and the number of stages inspected. As a general guide for residential properties in major Australian cities:
| Inspection Type | Typical Cost Range |
| ------------------------------------------ | ------------------ |
| Single stage inspection | $300 to $600 |
| Full stage inspection package (all stages) | $2,000 to $4,500 |
| Pre-purchase building inspection | $400 to $700 |
| Defect liability inspection | $400 to $700 |
| Pre-settlement inspection (apartments) | $300 to $500 |
| Structural assessment | $500 to $1,200 |
These costs represent a small fraction of the total construction budget but can prevent defect rectification costs that run into tens of thousands of dollars. Many property owners consider independent inspections a form of insurance against poor workmanship.
## References and Resources
- [National Construction Code (NCC)](https://ncc.abcb.gov.au/)
- [Australian Standard AS 4349.1: Inspection of Buildings](https://www.standards.org.au/)
- [Queensland Building and Construction Commission (QBCC)](https://www.qbcc.qld.gov.au/)
- [NSW Fair Trading: Home Building](https://www.fairtrading.nsw.gov.au/)
- [Victorian Building Authority (VBA)](https://www.vba.vic.gov.au/)
- [Australian Building Codes Board (ABCB)](https://www.abcb.gov.au/)
For a complete overview, see our [guide to construction stage inspections](/guides/construction-stage-inspections-guide).
### Pre-Purchase House Inspection Cost in Australia
Source: https://ownerinspections.com.au/articles/pre-purchase-house-inspection-cost
Published: 2025-09-09 | Updated: 2026-05-18 | Category: Pre-Purchase Inspections
Author: Maison Azdari
A pre-purchase house inspection cost in Australia typically ranges from $300 to $800 for a standard building inspection, with combined building and pest inspections costing between $500 and $900. The exact price depends on property size, location, inspection scope, urgency and the qualifications of the inspector. In Sydney, a building inspection for a two-bedroom house starts from around $550, while Brisbane prices begin from approximately $350. Specialist assessments such as structural engineer reports can cost between $1,500 and $2,200 plus GST.
Understanding what you will pay and what influences the price helps you budget accurately and avoid surprises. More importantly, knowing how to compare inspection quotes ensures you get a thorough report that protects your investment rather than a cheap report that misses significant defects.
This guide covers the full breakdown of pre-purchase inspection costs across Sydney, Melbourne, and Brisbane, what is included in the inspection, factors that affect pricing, additional services you may need, and how to choose a qualified inspector who delivers real value.
## Why a Pre-Purchase Inspection Matters
A professional inspection helps you identify defects that are easy to miss at an open home, and it supports negotiation with evidence rather than guesswork. The average Australian property purchase involves hundreds of thousands of dollars. Spending a few hundred dollars on a professional inspection can save you from inheriting problems that cost tens of thousands to repair.
Common defects that inspections uncover include structural cracking, rising damp, termite damage, roof leaks, faulty drainage, non-compliant electrical work and deteriorating subfloor framing. Many of these issues are invisible during a standard open home walkthrough. [Victorian consumer guidance](https://www.consumer.vic.gov.au/housing/buying-and-selling-property/buying-property/inspect-properties-before-you-buy) lists professional building and pest inspections as part of buyer due diligence. [NSW guidance](https://www.nsw.gov.au/housing-and-construction/buying-and-selling-property/buying-property-nsw/inspecting-a-property/inspection-reports) also encourages ordering inspection reports early in negotiations so you can decide if the property is worth buying before spending heavily on other steps.
What inspections commonly uncover (examples):
- Roof leaks and drainage problems
- Moisture damage and mould conditions
- Movement or cracking that needs monitoring
- Subfloor ventilation and timber risk issues
- Safety hazards that affect repairs and resale
Beyond defect identification, the inspection report gives you leverage to negotiate the purchase price. If the inspector identifies $15,000 worth of defects, you can use that information to request a price reduction, ask the seller to complete repairs before settlement, or withdraw from the purchase entirely during the cooling-off period.
## What Is a Pre-Purchase Building Inspection?
A pre-purchase building inspection is a systematic, visual assessment of a property's condition conducted by a licensed building inspector. In Australia, the inspection follows the methodology set out in [Australian Standard AS 4349.1](https://www.standards.org.au/standards-catalogue/standard-details?designation=as-4349-1-2007) (Inspection of Buildings: Pre-purchase Inspections for Existing Buildings).
The inspector examines all reasonably accessible areas of the property and produces a detailed written report identifying major defects, minor defects and areas requiring monitoring or further investigation. The report also documents any areas that could not be accessed during the inspection.
A standard building inspection covers the following:
- Structural elements including foundations, footings, walls, beams and columns
- Roof structure, coverings and flashings
- Ceiling spaces and roof void
- Subfloor structure and ventilation
- Internal walls, floors and ceilings
- Wet areas including bathrooms, laundry and kitchen
- External walls, cladding and finishes
- Windows, doors and frames
- Visible plumbing and drainage
- Visible electrical components and safety switches
- Site drainage and stormwater
- Fencing, retaining walls and external structures
A separate pest inspection under AS 4349.3 covers timber pest activity including termites, borers and wood decay fungi. Many buyers opt for a combined building and pest inspection, which is usually offered at a discounted rate compared to booking each service separately.
### What it often excludes (and why that affects price)
Standard reports are primarily visual and only cover readily accessible areas, with many items outside scope such as detailed plumbing/electrical testing and appliances. That’s why add-ons can change your final house inspection price and why cheap quotes can be misleading if scope is thin.
## Pre Purchase House Inspection vs Building and Pest Inspection
A combined building and pest inspection is commonly priced lower than booking separate services because it can reduce duplicated site time and admin.
| Option | Best for | Pros | Watch-outs |
| --------------- | ---------------------------------------------------- | ------------------------------------------- | ---------------------------------------------------- |
| Building only | Apartments, low timber risk, or when budget is tight | Lower upfront cost | Can miss timber pest risk unless you add pests |
| Pest only | Timber homes, termite-prone areas | Targets timber pests | Doesn’t cover building condition |
| Building + pest | Most house purchases | Broader risk coverage, usually better value | Still visual scope unless you add specialist testing |
Get an Instant
Quote
}
buttonHref="/pre-purchase-inspections"
variant="secondary"
/>
## Factors That Affect Pre-Purchase Inspection Cost
Several variables determine the final cost of your pre-purchase inspection. Understanding these helps you compare quotes accurately and avoid underpaying for a substandard service.
### Property Size and Complexity
Property size is the primary cost driver. A one-bedroom apartment requires less time to inspect than a four-bedroom house on a large block with a detached garage, granny flat, swimming pool and extensive landscaping. Inspectors generally price by time on site, so larger properties with more accessible areas cost more.
Multi-storey homes take longer than single-storey homes because of the additional roof access requirements and structural complexity. Properties with basements, attic spaces, or complex subfloor areas also add to inspection time. Bigger homes and complex layouts take longer to inspect, which increases your house inspector cost.
### Location and Access
Inspection costs vary by city and region. Sydney and Melbourne tend to have higher prices than Brisbane and regional areas, reflecting differences in operating costs, insurance premiums and market demand. Regional properties may attract additional travel fees if the inspector needs to travel more than 50 kilometres from their base.
### Scope of Inspection and Reporting Detail
A standard building-only inspection costs less than a combined building and pest inspection. Adding specialist assessments such as electrical testing, plumbing inspections, asbestos sampling or structural engineering reports increases the total cost significantly.
### Urgency and Turnaround Time
Standard turnaround for a pre-purchase inspection report is one to three business days. But not with Owner Inspections because we publish the report within 24 hours, and do not charge an express or priority fee on top of the standard price.
### Inspector Credentials and Experience
Licensed building inspectors with extensive experience and professional indemnity insurance typically charge more than less experienced operators. This premium reflects higher quality reporting, better defect identification and a report that holds up in legal proceedings or insurance claims if needed.
In New South Wales, inspectors should hold a licence issued by [NSW Fair Trading](https://www.fairtrading.nsw.gov.au/). In Queensland, the [Queensland Building and Construction Commission (QBCC)](https://www.qbcc.qld.gov.au/) oversees licensing. In Victoria, the [Victorian Building Authority (VBA)](https://www.vba.vic.gov.au/) regulates the industry.
## Building Inspection Cost by City and State (Sydney, Melbourne, Brisbane, NSW)
### City pricing guide (use as a budgeting range)
| City | Building inspection cost guide | Building & pest guide |
| --------- | --------------------------------------------------------:| ------------------------------: |
| Sydney | often higher in metro settings | combined may be better value |
| Melbourne | metro pricing often similar to other capitals | combined may be better value |
| Brisbane | buyers still commonly report “hundreds of dollars” | combined may be better value |
### Sydney
Sydney is one of the more expensive markets for pre-purchase inspections due to high demand and elevated operating costs.
| Property Type | Building Only | Building and Pest |
| ----------------------- | ------------- | ----------------- |
| 1-bedroom apartment | From $400 | From $550 |
| 2-bedroom single storey | From $550 | From $700 |
| 2-bedroom double storey | From $650 | From $800 |
| 3-4 bedroom house | From $600 | From $750 |
| Large or luxury home | From $800 | From $1,000+ |
### Melbourne
Melbourne pricing closely mirrors Sydney, with slight variations depending on the suburb and inspector availability.
| Property Type | Building Only | Building and Pest |
| ----------------------- | ------------- | ----------------- |
| 1-bedroom apartment | From $400 | From $550 |
| 2-bedroom single storey | From $550 | From $700 |
| 2-bedroom double storey | From $650 | From $800 |
| 3-4 bedroom house | From $600 | From $750 |
| Large or luxury home | From $800 | From $1,000+ |
### Brisbane
Brisbane generally offers more competitive pricing, though demand is increasing due to rapid population growth and the development activity associated with the 2032 Olympics.
| Property Type | Building Only | Building and Pest |
| ----------------------- | ------------- | ----------------- |
| 1-bedroom apartment | From $350 | From $500 |
| 2-bedroom single storey | From $450 | From $600 |
| 2-bedroom double storey | From $550 | From $700 |
| 3-4 bedroom house | From $550 | From $700 |
| Large or luxury home | From $700 | From $800+ |
Brisbane prices range broadly from $350 to $800 for building-only inspections depending on the property size and location within the greater Brisbane area.
## Additional Inspection Services and Costs
A standard building and pest inspection covers the most common areas of concern, but some properties require specialist assessments. These are typically arranged as separate engagements with the appropriate professionals.
| Service | Typical Cost Range | When You Might Need It |
| -------------------------- | ---------------------- | ------------------------------------------------------ |
| [Pest inspection only](/timber-pest-inspections) | From $350 | Timber-framed homes, high termite risk areas |
| Structural engineer report | $1,500 to $2,200 + GST | Major cracking, settlement, structural concerns |
| Electrical inspection | From $300 | Older properties, aluminium wiring, no safety switches |
| Plumbing inspection | From $300 | Older properties, galvanised pipes, drainage issues |
| [Asbestos assessment](/articles/what-to-expect-from-good-asbestos-inspector) | $300 to $600 | Pre-1990 properties with suspected asbestos materials |
| Pool safety inspection | $200 to $350 | Properties with swimming pools or spas |
| [Strata report (apartments)](/strata-reports) | $300 to $500 | Strata-titled apartments and townhouses |
A standalone pest inspection from $350 is advisable for any property in a termite-prone area, particularly in Queensland and northern New South Wales, where termite activity is widespread.
Structural engineer reports at $1,500 to $2,200 plus GST are recommended when the building inspector identifies significant structural cracking, differential settlement, or potential foundation problems that go beyond the scope of a standard visual inspection.
Read the Report
Explainer
}
buttonHref="/articles/decoding-pre-purchase-inspection-reports"
variant="secondary"
/>
## What the Inspection Report Includes
Your pre-purchase inspection report should comply with AS 4349.1 and include the following:
Quality reports include annotated photographs, clear descriptions of the location and severity of each defect, and practical recommendations. The report should be written in plain language that a property buyer can understand without technical expertise. For more detail on interpreting your report, see our guide on [decoding pre-purchase inspection reports](/articles/decoding-pre-purchase-inspection-reports).
## How to Choose a Qualified Inspector
Choosing the right inspector is just as important as deciding to get an inspection in the first place. A thorough inspection by a qualified professional delivers significantly more value than a cheap, superficial assessment.
Government guidance encourages buyers to understand scope and ask questions during inspections. Use this checklist to avoid paying for a report that doesn’t help you negotiate:
- Ask what standard the report aligns with (AS 4349.1 for building, and a separate pest scope where relevant).
- Confirm they carry professional indemnity insurance and public liability insurance (ask for a certificate of currency).
- Ask for a sample report so you can judge detail, photos, and clear recommendations.
- Confirm how they handle access limits (roof void, subfloor, locked rooms), because visual access affects what they can responsibly sign off.
### Verifying registrations and licences (where relevant)
If the inspector is a licensed builder or tradesperson, you can verify their details on official registers.
- [NSW licence checks](https://www.service.nsw.gov.au/transaction/check-a-builder-or-tradesperson-licence) can be done via Service NSW.
- [Queensland licence checks](https://my.qbcc.qld.gov.au/s/qbcc-licensee-register) can be done through the QBCC register and guidance.
- [Victoria allows searches for registered building practitioners](https://www.vba.vic.gov.au/tools/find-practitioner) via VBA tools.
## Cost Versus Value: Why the Cheapest Inspection Is Rarely the Best
It is tempting to choose the lowest priced inspection, particularly when you are already spending heavily on legal fees, stamp duty and the property itself. However, the inspection cost is one area where paying a little more delivers outsized returns.
A low quote is not automatically bad, but buyers should compare scope, time on site, access attempts, and report quality, not just price. Owner Inspections expressly warns that extremely cheap reports may not be worth it if they miss issues that cost far more later.
Consider this comparison:
A comprehensive inspection that costs an extra $200 to $300 can identify defects worth tens of thousands of dollars, giving you the information to negotiate a better price or avoid a costly purchase altogether.
## When to Book Your Pre-Purchase Inspection
The best time to arrange a pre-purchase inspection is as soon as you are seriously considering making an offer on a property. In most Australian states, buyers have a cooling-off period after exchanging contracts during which they can withdraw from the purchase, often subject to a small penalty.
Booking the inspection during the cooling-off period ensures you have the report in hand before you are fully committed. In auction purchases, where there is no cooling-off period, it is wise to arrange the inspection before auction day so you bid with full knowledge of the property's condition.
Book Your
Inspection
}
buttonHref="/pre-purchase-inspections"
variant="secondary"
/>
### Dilapidation Survey for Real Estate: Benefits for Developers
Source: https://ownerinspections.com.au/articles/dilapidation-survey-for-real-estate
Published: 2025-09-05 | Updated: 2026-02-09 | Category: Dilapidation
Author: Maison Azdari
A [dilapidation survey](/dilapidation-reports) is a detailed property condition assessment carried out before and after construction, demolition, or excavation work. It documents the existing state of nearby structures using photographs, video, and written descriptions, giving real estate developers a clear record to rely on if damage claims arise. In Australia, local councils in states like Victoria, New South Wales, and Queensland often require or strongly recommend dilapidation surveys as part of construction permit conditions.
Beyond protecting against false or exaggerated claims, these surveys play a key role in securing project financing, satisfying regulatory requirements, and demonstrating due diligence to insurers and stakeholders. Developers who carry out dilapidation surveys before starting work show that they take risk management seriously, and that credibility can make a real difference when disputes arise.
## What Does a Dilapidation Survey Include
A dilapidation survey creates an unbiased record of a property's condition at a specific point in time. It typically includes:
The documentation is carried out by certified building inspectors or structural engineers who specialise in property condition assessments. The resulting report serves as evidence in insurance claims and legal proceedings.
## Types of Dilapidation Surveys
Pre-construction surveys set the benchmark. Post-construction surveys compare the current state against that benchmark. Together, they provide clear evidence of whether construction activities caused any damage to nearby properties.
## Legal Requirements Across Australian States
Dilapidation surveys are not uniformly mandated across Australia, but local councils in several states strongly recommend or require them.
## Benefits for Real Estate Developers
### Risk mitigation
Real estate developments involving excavation and heavy machinery can lead to claims of property damage from neighbouring owners. A dilapidation survey serves as a legal safeguard, protecting developers from fraudulent or exaggerated claims. There are documented cases of developers successfully defending against unfounded claims thanks to well-documented pre-existing conditions.
Unexpected damage to neighbouring properties can also cause delays and unforeseen expenses. Having a dilapidation survey allows developers to plan ahead and budget for any potential remediation costs.
### Dispute prevention
Neighbouring property owners may raise concerns about construction activities affecting their buildings. A thorough dilapidation report provides clear, objective proof of a property's condition before construction begins, preventing unnecessary disputes. This is particularly relevant in high-density areas, where even minor construction work can lead to tensions between developers and nearby property owners.
### Regulatory compliance
Developers must comply with Australian building regulations and planning laws. A dilapidation survey helps ensure that construction activities meet the Australian Building Codes and local council requirements, reducing the risk of compliance issues and project delays.
### Cost savings
Legal battles over alleged construction-related damage can be expensive. By investing in a professional dilapidation survey, developers can avoid:
## Cost Comparison: Survey vs. Legal Dispute
## The Dilapidation Survey Process
### Pre-construction phase
### Post-construction phase
## Choosing a Qualified Surveyor
Selecting the right professional ensures accuracy and reliability. Key criteria to consider:
### Common Issues in Structural Insurance Claims
Source: https://ownerinspections.com.au/articles/common-issues-in-structural-insurance-claims
Published: 2025-09-02 | Updated: 2026-06-01 | Category: Insurance
Author: Maison Azdari
Does home insurance cover structural damage? In Australia, the answer depends on what caused the damage, what your Product Disclosure Statement says, and whether the insurer treats the problem as sudden damage, gradual deterioration, a building defect, poor workmanship, or lack of maintenance. A PDS must explain the product’s key features, benefits, risks, fees and complaints process.
Home insurance, also called building insurance, can help pay for repairing or rebuilding a house when something goes wrong, but buyers should compare what is and is not covered before choosing a policy.
Structural insurance claims often become difficult because the damage is serious, expensive, and open to dispute. One assessor may call it storm damage. Another may say it is old movement, poor drainage, defective workmanship, or a pre-existing fault.
For homeowners, buyers and property investors, the key question is simple: is structural damage covered by home insurance, or will the insurer reject the claim?
This guide explains what may be covered, what is often excluded, why claims get denied, and how an insurance claim building inspection or independent insurance claim inspection can support your case.
Book a Defect
Investigation
}
buttonHref="/defect-investigation-reports"
variant="secondary"
/>
## Does Home Insurance Cover Structural Damage?
Home insurance may cover structural damage when the damage is caused by an insured event listed in the policy, such as storm, fire, lightning, impact, earthquake or another covered event. MoneySmart notes that most home insurance covers storms, including damage from strong winds, rainwater, hail and cyclones, and most home and contents policies cover fire damage.
Home insurance may not cover structural damage if the issue is linked to wear and tear, gradual deterioration, poor maintenance, faulty workmanship, natural settlement, pre-existing defects, or exclusions listed in the policy. AFCA decisions regularly consider exclusions such as wear and tear, gradual deterioration, lack of maintenance, structural defects and poor workmanship in home insurance disputes.
That means does insurance cover structural damage is not answered by the size of the crack alone. It is answered by the cause, evidence, policy wording and timing.
| Damage type | More likely to be considered | Often disputed or excluded |
| -------------------------------------- | --------------------------------------- | ----------------------------------- |
| Storm-damaged roof framing | Sudden insured event | Poor roof maintenance |
| Fire-damaged structural timbers | Insured fire event | Non-compliant installation issues |
| Foundation cracking after a burst pipe | Sudden water event, depending on policy | Long-term soil movement |
| Wall cracks from tree root movement | Often disputed | Gradual ground movement |
| Defective load-bearing wall | Warranty or builder issue | Standard home insurance exclusion |
| Sinking foundation | Depends on cause | Settlement, drainage, soil movement |
## Structural Insurance Claims vs Standard Home Insurance
The phrase structural insurance claims is often used broadly, but it can refer to several different types of cover.
Standard home insurance usually deals with insured events that damage the building. Domestic building insurance, home building compensation or home warranty insurance deals with certain defective or incomplete building work, depending on the state and the trigger event.
In NSW, [home building compensation protects](https://www.sira.nsw.gov.au/home-building-compensation) homeowners and future homeowners for 6 years against major construction defects and 2 years for other losses from project completion.
In Victoria, [domestic building insurance](https://www.consumer.vic.gov.au/housing/building-and-renovating/defects-delays-and-insolvency/insurance-and-insolvency) can cover costs up to $300,000 to fix structural defects for 6 years and non-structural defects for 2 years, but in many cases the builder remains responsible unless the builder has died, disappeared, become insolvent, or failed to comply with a final VCAT or court order under certain VMIA policies.
In Queensland, structural defects under the [Queensland Home Warranty Scheme](https://www.qbcc.qld.gov.au/home-owner-hub/queensland-home-warranty-scheme/time-limits-cover-claims) are covered if the owner becomes aware of the defect within 6 years and 6 months after the cover commencement day and makes the claim within 3 months of becoming aware.
| Question | Best-fit topic |
| ----------------------------------------------------------- | ------------------------------------------------- |
| Does house insurance cover structural damage after a storm? | Home insurance or building insurance |
| Does building insurance cover structural damage from fire? | Home insurance or building insurance |
| Does insurance cover unknown building faults? | Policy wording, evidence and timing |
| Are construction defect insurance claims covered? | Domestic building insurance or statutory warranty |
| Is poor workmanship insurance claim covered? | Usually disputed under standard home insurance |
| Are foundation issues covered by insurance? | Depends on cause and policy exclusions |
## What Structural Damage Is Usually Covered?
Structural damage may be covered when it results from a sudden insured event and affects parts of the building such as foundations, walls, roof framing, support beams, floor systems or other load-bearing elements.
Examples may include:
- Storm damage that affects roofing or wall framing
- Fire damage to structural timbers or load-bearing walls
- Impact damage from a vehicle or fallen tree
- Accidental damage, if the policy includes accidental damage cover
- Water damage from a sudden insured event, depending on the policy
Your insurer will review your claim to decide whether your policy covers the event or circumstances you are claiming for.
## What Structural Damage Is Usually Not Covered?
Many structural damage disputes arise because the insurer argues that the problem was not caused by an insured event.
Common exclusions include:
- Normal wear and tear
- Gradual deterioration
- Poor maintenance
- Long-term leaks
- Pre-existing structural issues
- Hidden defect insurance disputes
- Defective design or poor workmanship
- Unauthorised renovations
- Natural settlement or soil movement
- Tree root damage or poor drainage around footings
Financial Rights Legal Centre says insurers may refuse a home or contents claim because of misrepresentation, a policy condition or exclusion clause, a cancelled policy, or fraud.
## Does Insurance Cover Unknown Building Faults?
**Does insurance cover unknown building faults?** Sometimes, but not always.
An unknown building fault may still be excluded if it existed before the policy started, developed slowly, came from poor workmanship, or should have been found through normal maintenance.
This is why the timing and evidence matter. A building inspection report can record visible defects, movement in walls, rising damp, safety hazards and faulty roofing before a property is purchased.
A report can also recommend further assessment by a structural engineer, geotechnical engineer, surveyor, pest inspector or another specialist when the issue sits outside the inspector’s scope.
For claim support, Owner Inspections should explain whether the issue appears sudden, gradual, structural, cosmetic, moisture-related, movement-related or linked to poor workmanship.
| Fault or defect | Why insurers may dispute it | Evidence that helps |
| --------------------- | ---------------------------- | --------------------------------------- |
| Hidden wall movement | May be called pre-existing | Dated photos and inspection report |
| Cracked slab | May be called settlement | Engineer or structural report |
| Roof sagging | May be called wear and tear | Maintenance records and roof inspection |
| Water-damaged framing | May be called long-term leak | Moisture testing and repair history |
| Poor workmanship | May be excluded by policy | Builder documents and warranty checks |
## Does Building Insurance Cover Structural Movement?
**Does building insurance cover structural movement?** It depends on the cause.
Structural movement may be considered if it results directly from an insured event. It may be disputed if the insurer links it to natural settlement, soil changes, tree roots, poor drainage, defective footing design, poor workmanship or gradual movement.
A standard inspection report may identify visible movement in walls, cracking, rising damp, safety hazards and roof faults, but it does not deal with every aspect of the property or every hidden item.
This is where an independent insurance claim inspection helps. It can document the visible damage, likely cause, affected areas, safety concerns and whether a specialist structural engineer or geotechnical report is needed.
## Are Foundation Issues Covered by Insurance?
Many users ask: are foundation issues covered by insurance, does insurance cover sinking foundation, and does house insurance cover foundation repair.
Foundation issues may be covered if a policy covers the direct cause of the damage. For example, sudden damage from an insured water event may be treated differently from long-term settlement or drainage-related movement.
Foundation claims are often difficult because the damage may develop slowly and may involve soil, drainage, tree roots, slab design, nearby excavation or old construction defects.
When the insurer rejects a foundation claim, ask for the reason in writing and request the evidence relied on, including assessor reports, expert reports and photos. Financial Rights Legal Centre recommends asking for the reason for rejection, the evidence used, and a copy of the policy documents.
## The Four Most Common Structural Insurance Claim Issues
### 1. Delayed detection of structural defects
Structural damage may take years to become visible, particularly with foundation movement or gradual material degradation. Many insurance policies have strict reporting timeframes, and failing to report damage promptly can lead to claim denial.
**Example:** A homeowner notices cracks in the walls five years after moving in. When they file a claim, the insurer rejects it because a clause requires damage to be reported within three years of construction completion.
**How to avoid this:** Conduct regular inspections and document any minor issues before they escalate. Retain engineer reports as evidence that supports future claims if problems develop.
### 2. Policy exclusions and limitations
Insurers often include specific exclusions for damage attributed to maintenance neglect or pre-existing conditions. This creates disputes over coverage and responsibility.
**Example:** A roof collapses due to long-term water exposure from an undetected leak. The insurer denies the claim, arguing that maintenance failure contributed to the damage.
**How to avoid this:** Schedule annual maintenance checks and retain inspection records to demonstrate due diligence in property upkeep.
### 3. Insufficient documentation
A lack of detailed documentation is one of the biggest reasons for claim delays or denials. Without proper records, insurers may argue that the damage is not covered under the policy.
**What to keep on file:**
### 4. Disputes over the cause of damage
Insurers may attribute damage to natural ground movement or other factors outside of policy coverage, leading to disputes about who is responsible and whether the damage qualifies.
**Example:** A homeowner files a claim for a sinking foundation, but the insurer argues it is due to normal settling rather than a construction defect.
**How to avoid this:** Obtain an independent structural engineer's assessment to challenge insurer findings and support your claim with objective, expert analysis.
Get an Expert
Witness Report
}
buttonHref="/expert-witness-reports"
variant="secondary"
/>
## Coverage vs. Exclusions at a Glance
| Claim issue | May support the claim | May weaken the claim |
| ---------------------- | ---------------------------------------------------- | ---------------------------------------------- |
| Sudden storm damage | Event date, photos, weather records, roof inspection | Old roof defects or poor maintenance |
| Fire damage | Fire report, insurer inspection, building report | Non-compliant heater or intentional damage |
| Structural movement | Engineer findings and event link | Long-term settlement or soil movement |
| Foundation cracking | Cause report and drainage evidence | Pre-existing cracks or tree root movement |
| Construction defects | Builder documents and warranty records | Standard policy exclusion for poor workmanship |
| Hidden building faults | Independent report and purchase records | Evidence the fault existed before cover |
## How to Handle Structural Insurance Claims Effectively
## What to Do Before Lodging a Structural Insurance Claim
1. Take photos and videos before moving, cleaning or repairing anything.
2. Read your policy schedule and PDS.
3. Check whether the damage came from a listed insured event.
4. Record when the damage was first noticed.
5. Keep receipts for emergency repairs.
6. Ask the insurer what reports or evidence they need.
7. Arrange an [insurance claim assessment](/insurance-claim-assessments) if the cause is unclear.
8. Ask for an engineer or specialist report if the matter involves foundation movement, structural cracking or major deformation.
Your insurer must respond within 10 business days after you make a claim, either with a decision or by telling you what further information or assessment is needed.
## Preventative Measures
### Regular property inspections
Annual inspections by licensed professionals help detect minor issues before they escalate into costly structural failures. Early detection means problems can be addressed under warranty or insurance before they become exclusion-level maintenance issues.
### Ensure quality workmanship in construction
Work with reputable, licensed builders and contractors who comply with Australian construction standards. Request documentation of compliance at each stage of the build.
### Maintain detailed records
Retain all construction warranties, engineer reports, and maintenance logs. These records form the foundation of any future insurance claim and demonstrate that the property has been properly looked after.
## What to Do If Your Structural Insurance Claim Is Denied
If your claim is denied, ask the insurer to explain the decision in writing.
If a claim is denied, the insurer must provide written reasons, identify what part of the claim was not accepted, explain your right to ask for reports, and tell you how to complain.
If you disagree, request copies of the assessor report, photos, expert reports and policy documents.
Financial Rights Legal Centre says you can complain to the insurer’s internal dispute resolution department and, if the insurer does not fix the problem within 30 days, your next step is usually AFCA, which is a free and independent complaints service.
## How an Independent Insurance Claim Inspection Helps
An [independent insurance claim inspection](/insurance-claim-assessments) can give a clear record of the condition of the property, visible damage, likely cause and recommended next steps.
This is helpful when:
- The insurer’s assessor says the damage is not covered
- The scope of works misses structural items
- The claim involves foundation issues
- The damage is linked to building movement
- There may be construction defect insurance claims
- The property has hidden defects
- A poor workmanship insurance claim is being disputed
The insurer may appoint a loss assessor or loss adjuster to assess the claim and must tell you their role within five business days of appointing them. Homeowners may need their own expert evidence to argue against the insurer’s decision or the insurer’s assessor findings.
## Getting the Most Value from Your Home and Building Investment
Structural insurance claims are hard because one phrase can change the outcome: sudden damage, gradual deterioration, poor workmanship, hidden defect, structural movement, insured event or maintenance issue.
To improve your position, focus on evidence. Read the PDS, report damage quickly, take photos, keep records and get an independent inspection when the cause is unclear.
[Owner Inspections](/) can help homeowners, buyers and investors with independent building inspection reports, defect investigations, insurance claim assessments and [expert witness reports](/expert-witness-reports).
Contact Owner
Inspections
}
buttonHref="/contact"
variant="primary"
/>
### How Expert Witnesses Strengthen Construction Litigation Cases
Source: https://ownerinspections.com.au/articles/how-expert-witness-strengthen-litigation-case
Published: 2025-08-29 | Updated: 2026-02-09 | Category: Expert Witness
Author: Maison Azdari
Expert witnesses strengthen construction litigation cases in Australia by providing independent, fact-based technical analysis that helps courts understand complex building issues. They review construction documentation, assess structural integrity, evaluate compliance with the National Construction Code (NCC), and present credible testimony under oath. Engaging an expert witness early in the litigation process improves case strategy, increases the credibility of legal arguments, and can lead to faster dispute resolution through mediation or settlement.
Construction litigation refers to legal disputes that arise from construction projects. These disputes commonly stem from contract breaches, construction defects, project delays, or failure to comply with building codes and industry standards. Given the high financial stakes and technical complexity involved, courts and arbitration panels rely on expert witnesses to provide unbiased, professional opinions that clarify the facts and inform judicial decisions.
## Why Construction Disputes Require Expert Witnesses
Construction disputes often hinge on technical details that require specialised knowledge to interpret. Courts and arbitration panels rely on expert witnesses to provide unbiased, professional opinions on construction issues. These experts help clarify disputes by analysing evidence, offering technical assessments, and testifying in legal proceedings.
Expert witnesses serve as a bridge between legal principles and industry-specific knowledge. Attorneys, judges, and arbitrators may not have construction-specific expertise, and without a qualified professional to interpret technical evidence, the court risks making decisions based on incomplete understanding.
## The Fundamentals of Construction Litigation
Common disputes in construction litigation include:
### Key stakeholders in construction disputes
### The impact of litigation on construction projects
Legal disputes can lead to significant disruptions, including project delays and cost escalations, diminished trust between parties, financial losses due to legal fees and penalties, and regulatory scrutiny that can attract additional oversight from governing bodies.
## Expert Witness vs. Fact Witness
## Core Functions of a Construction Expert Witness
## Types of Expertise Provided
### Structural engineering assessments
Assessing the integrity of buildings, load-bearing structures, and compliance with Australian Building Codes. This is particularly important in cases involving collapsed structures, foundation failures, or load-bearing deficiencies.
### Building code compliance evaluations
Ensuring adherence to the National Construction Code (NCC) and state-specific regulations. Non-compliance can result in legal action, fines, or mandated repairs.
### Material and methodology analysis
Examining whether construction materials and techniques meet industry standards for durability and quality. Experts evaluate material performance under stress, environmental impact, and longevity.
### Construction project management and scheduling
Evaluating project timelines, delays, and inefficiencies that may affect case outcomes. Poor planning, unexpected site conditions, or inadequate resource management are common causes of disputes.
### Workplace safety and site conditions
Reviewing compliance with Work Health and Safety (WHS) regulations to determine liability in workplace accidents. Experts assess safety protocol violations, equipment failures, and hazard mitigation measures.
## Legal Requirements in Australia
Expert witnesses in Australia must adhere to strict guidelines:
## Benefits of Engaging an Expert Witness Early
For a complete overview, see our [guide to expert witness reports for building disputes](/guides/expert-witness-building-disputes-guide).
### Property Depreciation Schedule for Maximising Tax Benefits
Source: https://ownerinspections.com.au/articles/property-depreciation-schedule-for-maximizing-tax-benefits
Published: 2025-08-26 | Updated: 2026-02-09 | Category: Depreciation Schedule
Author: Maison Azdari
A [property depreciation schedule](/depreciation-schedule) is a detailed report prepared by a licensed quantity surveyor that outlines the tax deductions an Australian property investor can claim for the decline in value of a building and its assets over time. The Australian Taxation Office (ATO) allows investors to claim depreciation under two categories: Division 40 (plant and equipment items like carpets, appliances, and air conditioning units) and Division 43 (capital works deductions for structural elements like walls, roofs, and floors at 2.5% per year over 40 years). A well-prepared depreciation schedule can generate between $5,000 and $15,000 in annual tax deductions, depending on property type, age, and improvements.
Understanding and using a property depreciation schedule is one of the most effective ways for property investors to reduce their taxable income legally. Many investors miss out on thousands of dollars in deductions each year simply because they do not have a schedule prepared or do not realise they are eligible.
## What Is Property Depreciation
Property depreciation is the decrease in value of a building and its assets over time due to wear and tear. The ATO allows investors to claim this decline in value as a tax deduction, effectively reducing taxable income. By accounting for the natural ageing of a property, investors can lower their tax liabilities and improve their annual cash flow.
Claiming depreciation is a legal and ATO-approved method of reducing tax. It is not a loophole. It is a recognised deduction that rewards investors for the ongoing cost of maintaining and owning income-producing assets.
## Who Should Use a Depreciation Schedule
A property depreciation schedule is beneficial for:
Both residential and commercial property owners can benefit from a well-prepared depreciation schedule.
## Division 40 vs. Division 43
## Benefits of a Depreciation Schedule
### Example investment comparison
## How to Prepare a Depreciation Schedule
The cost of a depreciation report typically ranges from $600 to $800 and is tax-deductible. Given the potential savings of $5,000 to $15,000 annually, the return on investment is substantial.
## ATO Guidelines and Eligibility
### Eligibility requirements
### How property age affects depreciation
### Key legislative updates
## Common Mistakes to Avoid
## When to Update Your Schedule
### The Importance of Dilapidation Reports for Property Safety
Source: https://ownerinspections.com.au/articles/importance-of-dilapidation-reports-for-property-safety
Published: 2025-08-20 | Updated: 2026-03-02 | Category: Dilapidation Reports
Author: Maison Azdari
A [dilapidation report](/dilapidation-reports) is a formal record of a property's existing condition prepared before nearby construction, demolition, or infrastructure work begins. In Australia, these reports are commonly required by local councils as a condition of development approval. They protect property owners by providing dated photographic and written evidence of pre-existing defects, cracks, and structural features. If construction causes damage, the report gives you the baseline needed to prove it. Without one, resolving disputes becomes significantly harder and more expensive for everyone involved.
Construction activity across Australia continues to grow, with residential and commercial developments reshaping suburbs in every major city. The closer a building site operates to an existing property, the greater the risk of vibration damage, ground movement, and accidental impacts. Homeowners, investors, strata managers, and developers all benefit from understanding how dilapidation reports work and why they matter for property safety.
This guide covers what makes dilapidation reports so valuable, when they are required, what a thorough report includes, and how they prevent disputes before they start.
## What Is a Dilapidation Report?
A dilapidation report (also called a condition report or condition survey) is an independent inspection document that records a property's physical state at a specific point in time. It is typically prepared before construction, demolition, or major infrastructure work begins near the property.
A qualified building inspector visits the property and examines every accessible area, including internal walls and ceilings, external facades, driveways, fences, retaining walls, landscaping, pools, and footpaths. The inspector photographs all visible defects such as cracks, staining, movement, corrosion, and wear. Each defect is described in writing with its location, size, and condition noted.
The completed report becomes a legal-grade document that establishes what the property looked like before construction started. It can be used to compare against a post-construction inspection to determine whether new damage has occurred.
## Why Dilapidation Reports Matter for Property Safety
### Protecting Properties from Construction Impacts
Construction sites generate ground vibrations, dust, debris, and heavy vehicle movements that can affect neighbouring properties. Pile driving, rock breaking, deep excavation, and demolition are among the highest-risk activities. These forces can crack walls, shift foundations, damage plumbing connections, and worsen pre-existing defects in nearby buildings.
A dilapidation report creates the evidence needed to hold responsible parties accountable. Without a documented baseline, property owners are left trying to prove damage occurred during construction rather than before it, which is extremely difficult without photographic proof and professional documentation.
### Encouraging Contractor Accountability
When builders and developers know that surrounding properties have been formally documented, they are more likely to take precautions. The existence of a dilapidation report encourages construction teams to implement vibration monitoring, use appropriate machinery, and follow best-practice site management. This accountability benefits the safety of the surrounding neighbourhood.
### Identifying Pre-Existing Risks
The inspection itself often reveals defects that property owners were not previously aware of. Hairline cracks in brickwork, early signs of foundation movement, deteriorating mortar joints, and drainage problems may all be identified during the survey. While the primary purpose is to create a baseline record, the report also gives owners valuable information about the current health of their property.
## When Is a Dilapidation Report Required?
Dilapidation reports are required in a range of scenarios across Australia. The most common situations include:
## What a Dilapidation Report Includes
A thorough dilapidation report covers far more than a few photos and a summary. The following elements are standard in a professional report prepared by a licensed inspector.
## How Dilapidation Reports Prevent Disputes
Property damage disputes related to construction are common, expensive, and stressful. A well-prepared dilapidation report addresses the root cause of most disputes: the inability to prove when damage occurred.
### Before Construction
The pre-construction report captures the property's baseline. Every crack, stain, and area of wear is photographed and described. This removes any ambiguity about what existed before the builder broke ground.
### During Construction
If a property owner notices new damage while construction is underway, they can reference the dilapidation report to confirm whether the issue is new. Early identification allows them to raise the matter with the builder or developer while the project is still active, which is far more effective than waiting until after completion.
### After Construction
A post-construction dilapidation report is carried out once building works are finished. The inspector compares the current condition against the original baseline report, identifying any new cracks, movement, or damage. This comparison report provides the evidence needed to pursue a damage claim or confirm that no new damage has occurred.
## Who Benefits from a Dilapidation Report?
Dilapidation reports are not just for property owners. Several parties benefit from having this documentation in place.
### Property Owners and Homeowners
If you live next to a construction site, a dilapidation report protects your home. It gives you a formal record to fall back on if anything goes wrong during the build. Many homeowners only realise the value of this report after construction damage has already occurred, by which point it is too late to establish a baseline.
### Builders and Developers
A [pre-construction dilapidation report](/articles/who-needs-pre-construction-dilapidation-report) also protects builders. Without a documented baseline, neighbouring owners may blame the construction for defects that existed long before the project started. The report shields builders from exaggerated or false damage claims, saving them time, money, and reputational harm.
### Strata Managers and Body Corporates
Strata buildings near construction sites face a heightened risk due to shared walls, common areas, and complex ownership structures. A dilapidation report covering the entire strata complex ensures all lot owners and common property are protected.
### Local Councils and Government Bodies
Councils use dilapidation reports to manage development approvals responsibly. They provide a mechanism for holding developers accountable and protecting ratepayers from construction-related damage to public assets such as roads, footpaths, and drainage infrastructure.
### Property Investors
Investment properties are financial assets. Any unresolved construction damage can reduce property value and rental income. A dilapidation report protects the investor's asset and provides documentation for insurance purposes.
## State-by-State Requirements Across Australia
While there is no single national law mandating dilapidation reports, each state and territory has legislation and council-level policies that govern when they are required.
### New South Wales
The Environmental Planning and Assessment Act 1979 allows councils to impose dilapidation report conditions on development consents. Many NSW councils have Development Control Plans (DCPs) that require reports for developments involving excavation over one metre deep or construction within specified distances of boundaries. NSW Fair Trading provides guidance on resolving building disputes through the NSW Civil and Administrative Tribunal (NCAT).
### Victoria
The Building Act 1993 and Planning and Environment Act 1987 provide the framework in Victoria. The Victorian Building Authority (VBA) oversees building practitioners and can be involved in disputes where construction causes damage. Many Victorian councils require dilapidation reports for projects near existing buildings, particularly in established suburbs undergoing significant redevelopment.
### Queensland
The Queensland Building and Construction Commission Act 1991 governs building work in Queensland. The QBCC handles complaints and disputes related to construction damage. Brisbane City Council and other Queensland councils commonly impose dilapidation report conditions for large-scale developments and projects involving deep excavation.
### South Australia
The Planning, Development and Infrastructure Act 2016 provides the regulatory framework in South Australia. Consumer and Business Services SA oversees building disputes. Adelaide councils may require dilapidation surveys for developments near heritage properties or in areas with challenging soil conditions.
### Australian Capital Territory
The Building Act 2004 and the Planning Act 2007 govern construction in the ACT. The ACT Planning and Land Authority and Access Canberra oversee compliance. Dilapidation reports may be required for construction near government buildings, heritage properties, or in areas with known ground stability concerns.
## What Happens Without a Dilapidation Report?
Choosing not to commission a dilapidation report before nearby construction begins is a risk with potentially serious consequences.
In many disputed cases that reach the courts or tribunals, the absence of a dilapidation report is cited as a major factor in the difficulty of reaching a fair resolution. The [cost of a dilapidation report](/articles/dilapidation-report-cost) is minimal compared to the potential expense of litigation or unresolved damage.
## How to Choose a Qualified Inspector
Not all dilapidation reports carry the same weight. The quality of the report depends heavily on the qualifications and experience of the inspector who prepares it.
An [independent dilapidation report](/articles/independent-dilapidation-report-services) from a licensed inspector carries far more weight in legal proceedings than a report prepared by someone with a direct interest in the construction project.
### Pre-Sale Real Estate Assessment to Maximise Property Value
Source: https://ownerinspections.com.au/articles/pre-sale-real-estate-assessment
Published: 2025-08-19 | Updated: 2026-02-09 | Category: Pre-Sale
Author: Maison Azdari
A pre-sale real estate assessment is a detailed property evaluation conducted before listing a home or commercial space for sale. It covers structural integrity, legal compliance, market positioning, and improvement opportunities to help sellers achieve the highest possible sale price. In Australia's competitive real estate market, sellers who undergo this assessment gain a strategic advantage by ensuring their properties attract serious buyers, are priced accurately, and are free from surprises that could derail negotiations.
Whether you are a homeowner selling your family home, a developer moving completed units, or a real estate agent preparing a listing, a pre-sale assessment provides the factual foundation you need to sell with confidence.
## Who Benefits from a Pre-Sale Assessment
## What a Pre-Sale Assessment Covers
A pre-sale assessment is a comprehensive review that evaluates multiple aspects of a property:
### Who conducts a pre-sale assessment?
Licensed professionals, including certified property valuers, building inspectors, and real estate specialists, carry out these assessments. Sellers should choose assessors accredited by the Australian Property Institute (API) for reliable valuations and compliance with industry standards.
### Why is a pre-sale assessment important?
## Assessment Areas and Outcomes
## How a Pre-Sale Assessment Maximises Property Value
### Establishing the right property price
Pricing a property too high leads to prolonged listing times and buyer scepticism. Underpricing results in lost revenue. A professional assessment uses real-time market data, historical sales trends, and economic factors to determine an optimal listing price that is competitive and maximises returns.
### Identifying repairs and upgrades
A pre-sale assessment uncovers:
### Smoother transactions and faster sales
Buyers often conduct their own property inspections, and undisclosed issues can derail deals. A pre-sale assessment minimises renegotiations by ensuring transparency, increasing the likelihood of a quick sale at the highest possible price.
## Value-Adding Improvements
### Cosmetic enhancements
### Energy efficiency upgrades
### Landscaping and street appeal
## Choosing the Right Property Valuer
### What to look for in an assessor
### Independent valuers vs. real estate agent appraisals
### Water Damage Inspection Report to Protect Your Property
Source: https://ownerinspections.com.au/articles/water-damage-inspection-report
Published: 2025-08-15 | Updated: 2026-07-01 | Category: Building Inspections
Author: Maison Azdari
A water damage inspection report helps property owners, buyers and investors understand where moisture is coming from, how serious the damage is and what should happen next. In Australia, water damage can come from leaking pipes, roof defects, failed waterproofing, rising damp, condensation, stormwater overflow or hidden water ingress inside walls, ceilings and subfloors. YourHome notes that leaks can quickly lead to significant damage, and NSW Health explains that mould often grows where moisture builds up in wet or poorly ventilated areas.
A professional water damage inspection is especially useful before a [pre-purchase inspection](/pre-purchase-inspections), after a storm, before renovation work, or when a previous [building inspection](/building-and-pest-inspections) has flagged moisture, damp, staining or roof leak concerns.
Book a Defect
Investigation
}
buttonHref="/defect-investigation-reports"
variant="secondary"
/>
## What is a Water Damage Inspection Report?
A water damage inspection report is a documented assessment prepared after a property is inspected for moisture-related defects. It records where water damage was found, the likely cause, the extent of the issue, severity ratings, photos, moisture readings and repair recommendations.
Unlike a general [building inspection](/building-and-pest-inspections), a water damage inspection focuses specifically on moisture-related issues. Inspectors use specialised equipment such as pin and pinless moisture meters, thermal imaging (infrared) cameras, and hygrometers to detect moisture hidden behind walls, under flooring, and within ceiling cavities.
The report serves multiple purposes:
## Common Causes of Water Damage in Australian Properties
Water damage rarely appears without a traceable cause. Understanding the most frequent sources helps property owners recognise risks early and take preventive action.
In coastal and high-rainfall regions such as Far North Queensland, the Northern Rivers of NSW, and parts of Victoria, water damage from storms and flooding is particularly common. Properties in these areas benefit from more frequent inspections.
## Warning Signs That You Need a Water Damage Inspection
Not all water damage is obvious during a quick open home inspection. Some moisture problems sit behind paint, tiles, cabinetry or plasterboard until staining, odour or movement appears.
Book a water damage inspection if you notice:
## Water Damage Assessment vs Water Damage Inspection
Many people use the terms water damage assessment and water damage inspection in the same way, but there is a small difference.
| Use of the report | Why it matters |
| ------------------------- | ------------------------------------------------------------------ |
| Pre-purchase decisions | Helps buyers understand hidden moisture risks before settlement |
| Insurance claims | Gives photos, readings and defect notes that may support a claim |
| Repair planning | Shows what needs urgent repair and what can be monitored |
| Strata or rental issues | Records the condition of the property at a point in time |
| Legal or warranty matters | Gives written evidence if water damage relates to building defects |
A proper water damage assessment should not only say that moisture is present. It should explain the likely source, what materials may be affected, whether the issue appears active or historic, and what further trade checks may be needed.
This distinction matters because Google users often search for water damage assessments, water damage assessment report, water damage assessor and assess water damage when they want both the inspection and clear next steps.
## How a Water Damage Inspection Is Carried Out
A professional water damage inspection follows a structured process designed to locate moisture, trace its source, and assess the damage it has caused.
The inspection typically takes between one and three hours depending on the size of the property and the extent of damage being investigated.
## What the Report Includes
A thorough water damage inspection report provides clear, actionable information. While formats vary between inspection companies, a quality report should contain all of the following sections.
## Understanding Severity Ratings
Inspectors assign severity ratings to each defect based on the risk it poses to the property's structure, the health of occupants, and the estimated cost of repair.
| Rating | Example finding | Suggested action |
| -------------- | --------------------------------------------------------------------------------- | ---------------------------------------------------------------------- |
| Minor | Small stain, low moisture reading, localised surface damage | Monitor and repair during routine maintenance |
| Moderate | Failed grout, early mould, recurring damp patch, warped finish | Investigate source and repair within a planned timeframe |
| Major | Saturated materials, timber rot, failed waterproofing, large affected area | Arrange specialist repair as a priority |
| Safety concern | Active water ingress near electrical systems, severe mould, structural compromise | Take immediate action and seek the right qualified trade or specialist |
Damp in a home can cause poor indoor air quality, mould, mildew and rot, and it can shorten the life of a building if left untreated.
### How Does Moisture Damage Affect the Inspection?
Moisture damage affects the inspection result by changing the severity rating, repair priority and recommended next steps.
High moisture readings may point to active leaks, trapped moisture behind finishes, failed waterproofing, poor ventilation, roof leaks, rising damp or drainage problems. If moisture is found near structural timber, electrical systems or large mould-affected areas, the issue may be treated as a higher risk.
NSW Health states that mould needs moisture and nutrients to grow, and that repairing water leaks, plumbing problems, leaking roofs and blocked rain gutters helps control moisture and dampness.
## Common Areas Where Water Damage Is Found
Water damage can occur in almost any part of a building, but some areas are higher risk because they handle water, collect moisture or have poor ventilation.
### Bathrooms and Wet Areas
Bathrooms are the most common location for water damage in Australian homes. Failed shower waterproofing, cracked tiles, and deteriorated silicone seals allow water to seep into wall and floor cavities. Over time, this causes timber framing to rot, subfloor structures to weaken, and mould to grow in hidden spaces.
Australian Standard AS 3740 sets out the requirements for waterproofing in domestic wet areas. A property that does not meet these standards is at higher risk of ongoing water damage.
### Subfloor and Foundation
Properties with timber subfloors or pier-and-beam construction are susceptible to moisture accumulation beneath the building. Poor drainage, inadequate ventilation, and high water tables can all contribute. Rising damp in older homes with compromised or missing damp-proof courses is a frequent finding in inspection reports across Sydney, Melbourne, and Adelaide.
### Roof and Ceiling Spaces
Roof leaks caused by cracked tiles, damaged flashing, or blocked gutters allow rainwater to enter the ceiling cavity. Damage may go unnoticed for months, with the first visible sign often being a brown stain on the ceiling or a sagging section of plasterboard.
### Balconies and External Areas
Balcony waterproofing failures are one of the most reported defects in apartment buildings and multi-storey homes across Australia. Water penetrating through a balcony slab can damage the rooms below, corrode structural steel reinforcement, and create conditions for concrete cancer.
### Laundry and Kitchen
Leaking taps, dishwasher connections, and washing machine hoses are common culprits. Water pooling behind or beneath appliances often goes unnoticed until the damage becomes visible on adjacent walls or flooring.
## Water Damage and Australian Building Standards
Several Australian Standards and regulations govern building practices related to water management and waterproofing.
State regulators including [NSW Fair Trading](https://www.fairtrading.nsw.gov.au/), the [Victorian Building Authority (VBA)](https://www.vba.vic.gov.au/), and the [Queensland Building and Construction Commission (QBCC)](https://www.qbcc.qld.gov.au/) enforce compliance with these standards. If your property was built or renovated in breach of these codes, you may have grounds for a building defect claim.
View Expert
Witness Reports
}
buttonHref="/expert-witness-reports"
variant="secondary"
/>
## Water Damage Inspection Cost in Australia
A water damage inspection cost can vary based on property size, location, the number of affected areas and the level of reporting required.
| Cost factor | How it affects price |
| ------------------------ | ------------------------------------------------------------------------ |
| Property size | Larger homes take longer to inspect |
| Number of affected areas | Multiple rooms or levels require more testing |
| Access | Roof spaces, subfloors and apartments may need extra time |
| Equipment | Thermal imaging and moisture mapping can affect the fee |
| Report detail | Insurance, strata or legal-style reports usually need more documentation |
| Location | Metro, regional and urgent bookings can be priced differently |
As a general guide, a water damage inspection typically costs between $300 and $700 depending on property size and location.
For insurance-related damage, the cost of the inspection is separate from any claim approval. QBE reported that water damage incidents accounted for almost a quarter of its home insurance claims in cited claims data, with an average claim of about $5,000 and severe claims far higher.
## Water Damage Inspection Sydney and Other Service Areas
A water damage inspection Sydney search usually means the user wants a local inspector who can assess water damage in houses, apartments, strata properties or investment properties.
Owner Inspections lists New South Wales service locations on its site, including [Sydney CBD](/nsw/building-inspections-sydney) and many surrounding suburbs.
The Sydney section should stay short on this article because location-specific pages should carry the deeper suburb content. This blog should focus on the inspection report, assessment process, cost, warning signs and next steps.
## What to Do After Receiving Your Report
Receiving a water damage inspection report is only the first step. Acting on the findings quickly and in the right order is what prevents the damage from worsening.
### Using the Report for Insurance Claims
If the water damage was caused by a sudden and accidental event such as a burst pipe or storm, your building insurance policy may cover the repair costs. The inspection report provides the documented evidence your insurer will need to assess the claim.
### Using the Report for Property Purchases
If a water damage inspection is conducted as part of a [pre-purchase building inspection](/pre-purchase-inspections), the findings can be used to:
## Preventing Future Water Damage
Prevention is always less expensive than repair. A proactive approach to moisture management can significantly reduce the risk of water damage in your property.
## Benefits of a Water Damage Inspection
A professional inspection can:
- Find hidden water damage before it spreads
- Identify the likely source of moisture
- Support insurance, strata or warranty discussions
- Help buyers make informed purchase decisions
- Reduce the chance of repeat repairs
- Provide photos, readings and written records
- Help owners prioritise repair budgets
NSW Government encourages buyers to know the condition of a property before buying to avoid problems and costs.
## Risks of Leaving Water Damage Unchecked
Leaving water damage untreated can lead to:
- Timber rot and framing deterioration
- Mould growth and poor indoor air quality
- Damage to plasterboard, flooring, cabinetry and insulation
- Waterproofing failure spreading to nearby rooms
- Electrical safety concerns
- Higher repair costs
- Lower buyer confidence when selling
Mould may grow indoors in wet or moist areas without adequate ventilation, and YourHome says damp can increase health risks and shorten the lifespan of a building.
## Getting the Most Value from Your Home and Building Investment
A water damage inspection report gives property owners a clear way to understand moisture problems before they become larger repair, health or resale issues.
For buyers, it can reveal hidden water damage before settlement. For homeowners, it can help trace leaks, damp, failed waterproofing or water ingress before repairs begin. For investors, strata managers and sellers, it provides a written record that can support maintenance planning, insurance discussions and property decisions.
If there are water stains, damp smells, mould, warped floors, ceiling marks, leaking wet areas or unexplained moisture readings, book an independent water damage inspection before the damage spreads.
View Expert
Witness Reports
}
buttonHref="/expert-witness-reports"
variant="primary"
/>
### Construction Site Safety Inspection: Compliance and Protection
Source: https://ownerinspections.com.au/articles/construction-site-safety-inspection
Published: 2025-08-12 | Updated: 2026-02-09 | Category: New Construction
Author: Maison Azdari
A construction site safety inspection is a systematic assessment that identifies hazards, evaluates compliance with the Work Health and Safety Act 2011 (WHS Act), and verifies that workers, equipment, and processes meet Australian safety standards. In Australia, construction accounts for over 11% of total worker fatalities annually, making regular safety inspections a legal obligation and a practical necessity. Sites with routine inspections report up to 50% fewer incidents, while non-compliance can result in fines of up to $3 million and project shutdowns.
The complexity of construction sites, with heavy machinery, work at heights, and hazardous materials, means that safety risks are present at every stage of a project. A well-structured inspection programme ensures that hazards are identified, minimised, and controlled before they cause harm.
## Legal and Regulatory Framework
Australia has strict regulations governing construction site safety. Safe Work Australia and state-based safety agencies enforce compliance through legislation and codes of practice:
Failure to comply can result in hefty fines, legal repercussions, and project shutdowns. A proactive approach to safety inspections ensures compliance and a safer working environment for everyone on site.
## What Is a Construction Site Safety Inspection
A construction site safety inspection is a planned assessment aimed at identifying hazards, unsafe conditions, and compliance gaps. Inspections occur at different stages of a project:
### Who conducts safety inspections?
## Safety Inspections vs. Safety Audits
## Key Components of a Safety Inspection
### Risk management
### Site access control and worker safety
### Safe Work Method Statements (SWMS)
Safe Work Method Statements are required for all high-risk activities, including working at heights, confined spaces, and handling hazardous materials. A SWMS outlines specific risk control measures, emergency procedures, and required PPE for each activity.
## Common Hazards and Inspection Focus Areas
### Falls from heights
Falls account for nearly 30% of construction site fatalities in Australia.
### Machinery and equipment safety
### Electrical safety
### Fire safety
## Inspection Frequency
### Documentation and reporting
Inspection reports should include:
## Benefits of Regular Safety Inspections
For a complete overview, see our [guide to construction stage inspections](/guides/construction-stage-inspections-guide).
### Why Get a Pre-Purchase Inspection? Key Benefits Explained
Source: https://ownerinspections.com.au/articles/why-get-a-pre-purchase-inspection
Published: 2025-08-08 | Updated: 2026-03-13 | Category: Pre-Purchase Inspections
Author: Maison Azdari
A [pre-purchase building inspection](/pre-purchase-inspections) is a detailed assessment of a property's condition carried out before the buyer finalises a purchase. It covers structural integrity, pest activity, compliance with the National Construction Code (NCC), electrical and plumbing systems, and potential safety hazards. In Australia, pre-purchase inspections are not legally required in most states but are strongly recommended. They typically cost between $400 and $800 depending on property size and location, and they can save buyers tens of thousands of dollars by uncovering defects, code violations, and pest damage that would otherwise go undetected.
Without an inspection, buyers risk facing costly repairs, legal compliance issues, and safety hazards after finalising their investment. In a competitive market, knowing the true condition of a property allows buyers to make informed decisions, plan for future maintenance, and negotiate with confidence.
## Uncover Hidden Structural Issues
Many property buyers focus only on visible defects, but hidden structural issues can cause significant financial setbacks. A minor crack in a wall may indicate deeper foundation problems, and seemingly well-maintained homes can have undetected structural defects.
Read the
Full Guide
}
buttonHref="/guides/pre-purchase-building-pest-inspection-guide"
variant="secondary"
/>
### Common structural issues in Australian properties
## Identify Pest Infestations
Pest infestations are a major concern in Australia, with termites alone causing over $1.3 billion in damage annually. Many infestations go unnoticed until significant damage has occurred.
### Common pests in Australian properties
### Inspection techniques
## Assess Compliance with Building Codes
Australian properties must adhere to the National Construction Code (NCC). Failure to meet these regulations can lead to legal penalties, costly retrofits, and safety risks.
### Potential risks of non-compliance
## Negotiate Better Purchase Terms
A pre-purchase inspection provides buyers with strong negotiating grounds. Knowing about defects or necessary repairs allows buyers to adjust their offers or request seller concessions.
### Best practices for negotiating with an inspection report
A buyer who identified plumbing and insulation issues during an inspection successfully negotiated a $10,000 reduction in the purchase price, avoiding unexpected repair costs.
View the
Buyer Checklist
}
buttonHref="/articles/pre-purchase-inspection-checklist-for-buyers"
variant="secondary"
/>
## Plan for Future Maintenance and Repairs
Even if a home passes inspection with no major concerns, understanding its current state helps buyers plan future maintenance costs. Early awareness allows for budgeting and prevents emergency repairs.
## Ensure Safety and Peace of Mind
A pre-purchase inspection helps detect hazardous conditions that could affect a property's safety. Buying a home should be a secure investment, not one filled with unexpected risks.
### Safety hazards commonly identified during inspections
## What Inspections Cover vs. What They Do Not
For a complete overview, see our [guide to pre-purchase building and pest inspections](/guides/pre-purchase-building-pest-inspection-guide).
Get a Free
Quote
}
buttonHref="/pre-purchase-inspections"
variant="primary"
/>
### Dilapidation Reports for Local Councils: What You Need to Know
Source: https://ownerinspections.com.au/articles/dilapidation-reports-for-local-councils
Published: 2025-08-05 | Updated: 2026-02-10 | Category: Dilapidation Reports
Author: Maison Azdari
Local councils across Australia are responsible for maintaining roads, footpaths, stormwater drains, kerbs, and other public infrastructure. When construction or demolition takes place near these assets, councils need a way to document existing conditions before work begins. That is where [dilapidation reports](/dilapidation-reports) come in.
A dilapidation report is a formal assessment that records the condition of a property or structure at a specific point in time. For local councils, these reports serve as a baseline that can be compared against post-construction conditions to identify any damage caused by building works. Without this documentation, disputes about who caused the damage become difficult and expensive to resolve.
This guide explains why councils require dilapidation reports, when they are mandatory, what the reports include, and how to select a qualified professional to prepare one.
## What Is a Dilapidation Report for Council?
A dilapidation report for council is a detailed document that records the existing condition of council-owned infrastructure and neighbouring properties before construction or demolition begins. It captures cracks, surface wear, structural features, drainage conditions, and any pre-existing damage through photographs, written descriptions, and measurements.
The report creates an objective, time-stamped record. If any damage occurs during or after construction, the council can compare the current state against the original report to determine whether the building works were responsible.
Council dilapidation reports typically focus on public assets such as roads, footpaths, kerbs and gutters, stormwater pits, retaining walls, and nature strips. In some cases, they also cover adjacent private properties when development approval conditions require it.
> A dilapidation report gives the council an undeniable record of what existed before construction started. Without it, proving construction-related damage is nearly impossible.
## Why Local Councils Need Dilapidation Reports
Councils have a duty to protect public infrastructure on behalf of ratepayers. Dilapidation reports support that responsibility in several ways.
**Safeguarding public assets.** Heavy vehicle movements, excavation, vibration from piling, and demolition work can all damage roads, footpaths, and underground services. A pre-construction dilapidation report ensures that any damage to council assets is documented and attributable.
**Minimising liability.** Without a baseline record, councils may struggle to prove that damage was caused by a specific construction project. This can leave ratepayers bearing the cost of repairs. A dilapidation report shifts the burden of proof and protects the council from absorbing costs that should fall on the developer or builder.
**Resolving disputes.** Disagreements between councils and developers about property damage are common. A professionally prepared dilapidation report provides objective evidence that can resolve disputes quickly, often without the need for legal proceedings.
**Enforcing compliance.** Many development approvals include conditions requiring the developer to repair any damage to council infrastructure. A dilapidation report gives the council a clear benchmark to enforce those conditions at project completion.
## Who Requires Dilapidation Reports
Several parties may be involved in commissioning or requiring dilapidation reports for council purposes.
**Builders and developers** are most commonly required to arrange and pay for dilapidation reports as a condition of their development approval or construction certificate. The council imposes this requirement to protect its assets before heavy construction activity begins.
**Property owners** undertaking significant renovations or demolition may also need to provide a dilapidation report, particularly when their project involves excavation near council infrastructure or requires heavy vehicle access across footpaths and kerbs.
**Local councils** themselves sometimes commission dilapidation reports when they are aware of a major project proceeding in their area. This is especially common for large-scale civil works, road upgrades, or projects near heritage infrastructure.
**State government bodies** and utility providers may also require dilapidation reports when their assets are located near proposed construction. This includes water, gas, and electricity infrastructure that could be affected by ground movement or vibration.
## When Are Dilapidation Reports Mandatory
Dilapidation reports are typically mandatory in the following situations.
**Major construction or demolition projects.** Most councils require a dilapidation report when a development involves demolition, excavation deeper than one metre, or construction of multi-storey buildings. The scale and intensity of these projects pose a high risk of damage to surrounding infrastructure.
**Development near council assets.** When construction takes place adjacent to council roads, footpaths, parks, stormwater systems, or retaining walls, a dilapidation report is usually a condition of development consent. The specific distance triggers vary between councils, but properties within 25 to 50 metres of council assets are commonly covered.
**Projects requiring construction traffic permits.** Heavy vehicles, cranes, and concrete pumps can cause significant damage to roads and kerbs. Councils often require dilapidation reports as a condition of issuing permits for construction traffic, particularly when the access route involves residential streets not designed for heavy loads.
**Subdivision and civil works.** Land subdivision projects involving new road construction, drainage installation, or service connections frequently require dilapidation reports covering existing council infrastructure at the boundaries of the development.
**Council consent conditions.** Even when a project does not fall neatly into the categories above, individual councils may impose a dilapidation report requirement through specific consent conditions based on their assessment of the project's potential impact.
## What a Council Dilapidation Report Includes
A thorough dilapidation report for council purposes includes several components that work together to create a complete record.
**Written descriptions.** Each area of the property or infrastructure is described in detail, noting existing cracks, surface deterioration, alignment issues, and any other visible defects. The descriptions use consistent terminology and reference specific locations so that findings can be replicated in a post-construction assessment.
**Photographic evidence.** High-resolution photographs document every area covered by the report. Photos are taken with reference markers, timestamps, and location identifiers to ensure they can be matched to written descriptions. Close-up images capture the severity and extent of individual defects.
**Video documentation.** Some reports include video walkthroughs that provide continuous visual evidence of conditions along footpaths, roads, and other linear assets. Video is particularly useful for large sites where hundreds of individual photographs would be impractical to review.
**Diagrams and site plans.** Annotated diagrams show the location of documented defects in relation to the construction site. Site plans identify the areas covered by the report and mark the position of each photograph and measurement.
**Measurements.** Where defects such as cracks or settlement are identified, measurements of their width, length, and depth are recorded. These quantitative records allow precise comparison during post-construction assessment.
**Inspector credentials.** The report includes details of the inspector's qualifications, licensing, professional indemnity insurance, and relevant experience. This information supports the report's credibility if it is used as evidence in a dispute.
## The Inspection Process
The process of preparing a dilapidation report for council follows a structured sequence.
**Initial consultation.** The inspector reviews the scope of the construction project, identifies the council assets and properties that need to be documented, and confirms any specific requirements from the development consent conditions.
**On-site examination.** The inspector attends the site and conducts a thorough visual inspection of all areas within the agreed scope. This includes walking the perimeter of the construction site, examining roads and footpaths, checking stormwater infrastructure, and documenting retaining walls and boundary structures.
**Documentation.** During the on-site examination, the inspector captures photographs, video, and measurements. Written notes are taken for each area, recording the type, location, and severity of any defects found.
**Report compilation.** Back in the office, the inspector compiles the photographs, measurements, and written descriptions into a structured report. The report is formatted to allow easy comparison with a future post-construction assessment.
**Report submission.** The completed report is submitted to the council and the developer. Councils typically require the report to be lodged before any construction activity begins on site. Some councils have specific submission portals or require reports in a particular format.
**Post-construction comparison.** After construction is complete, a follow-up inspection is conducted using the same methodology. The pre-construction and post-construction reports are compared to identify any new damage. If damage is found, the developer is required to arrange repairs to the council's satisfaction.
## Benefits of Dilapidation Reports for Councils
**Protecting public assets.** The primary benefit is clear documentation that allows councils to hold developers accountable for any damage to roads, footpaths, drains, and other infrastructure. Without this evidence, repair costs may fall on ratepayers.
**Regulatory compliance.** Dilapidation reports help councils demonstrate that they have taken reasonable steps to protect community assets. This supports compliance with local government legislation and asset management obligations.
**Legal evidence.** If a dispute progresses to legal proceedings or tribunal hearings, a professionally prepared dilapidation report serves as admissible evidence. Courts give significant weight to independent, contemporaneous documentation.
**Cost recovery.** When post-construction damage is identified, the dilapidation report provides the evidence needed to recover repair costs from the responsible party. This protects council budgets and ensures developers bear the true cost of their projects.
**Streamlined approvals.** By including dilapidation report requirements in standard consent conditions, councils create a consistent and efficient process for managing construction impacts. This reduces ad hoc decision-making and administrative burden.
## Choosing a Qualified Inspector
Selecting the right professional to prepare a council dilapidation report makes a significant difference to the quality and usefulness of the document.
**Structural assessment experience.** The inspector should have demonstrated experience in assessing structural conditions, identifying defects, and documenting infrastructure. Experience with council assets such as roads, footpaths, and drainage systems is particularly valuable.
**Independence.** The inspector must be independent of the builder, developer, and property owner. An independent report carries far greater credibility in dispute resolution and legal proceedings. Councils should be cautious about accepting reports prepared by parties with a commercial interest in the construction project.
**Australian licences and qualifications.** The inspector should hold relevant Australian licences and professional qualifications. This may include registration as a building inspector, structural engineer, or surveyor depending on the jurisdiction and scope of the report.
**Professional indemnity insurance.** A qualified inspector will carry professional indemnity insurance that covers their inspection and reporting activities. This protects both the inspector and the council in the event that an error or omission in the report leads to a financial loss.
**Report quality and format.** Ask to see sample reports before engaging an inspector. The report should be well-structured, clearly written, and include high-quality photographs with appropriate labelling. It should be formatted in a way that facilitates direct comparison with a post-construction assessment.
### The Importance of Insurance for New Constructions
Source: https://ownerinspections.com.au/articles/insurance-for-new-constructions
Published: 2025-08-01 | Updated: 2026-02-09 | Category: Insurance
Author: Maison Azdari
Construction insurance in Australia protects builders, homeowners, and developers from financial losses caused by accidents, structural damage, theft, liability claims, and contractor failures during new building projects. The main types of coverage include builder's risk insurance (contract works insurance), public liability insurance, professional indemnity insurance, home warranty insurance (which is mandatory in most states for residential projects over a certain value), construction defect insurance, and site liability insurance. Selecting the right combination of policies ensures that your project is covered from start to finish and that all parties are protected against unforeseen events.
The construction industry in Australia is growing rapidly, with residential and commercial projects expanding across the country. However, new construction projects come with risks that can result in significant financial losses, including structural damage from extreme weather, theft of materials, workplace injuries, and financial setbacks from project delays or contractor insolvency.
For a complete overview, see our [guide to insurance claim assessments](/guides/insurance-claim-assessment-guide).
## Why Is Construction Insurance Important
Without adequate insurance, stakeholders in a construction project may face devastating financial losses due to property damage, legal claims, or contractor failures. Some policies, such as home warranty insurance, are legally mandated in various Australian states, making compliance a requirement for builders and developers. Beyond legal compliance, insurance provides financial stability and ensures that projects can reach completion without financial ruin.
Common risks faced by new construction projects:
## Types of Insurance for New Constructions
### 1. Builder's risk insurance (contract works insurance)
A temporary insurance policy that covers the construction phase of a building project. It protects against unforeseen incidents such as natural disasters, theft, and vandalism.
**What it covers:**
**Who needs it:** Builders, property developers, and homeowners investing in large construction projects.
### 2. Public liability insurance
Covers legal and compensation costs if third parties sustain injuries or property damage due to construction activities.
**What it covers:**
**Who needs it:** Builders, contractors, and developers. Often required before obtaining construction permits in Australia.
### 3. Professional indemnity insurance
Protects professionals against claims of negligence, design flaws, or professional errors that may affect the integrity of a construction project.
**Who needs it:** Architects, engineers, surveyors, and consultants.
**Example:** An architect's flawed blueprint leads to unstable foundations. The builder sues for damages, and the architect's professional indemnity insurance covers the legal and compensation costs.
### 4. Home warranty insurance (domestic building insurance)
A mandatory policy in most Australian states for residential projects exceeding a specified value (for example, $16,000 in Victoria). It protects homeowners against defective or incomplete work if the builder goes bankrupt or disappears.
**State requirements:**
### 5. Construction defect insurance
Covers damages resulting from construction defects, including structural failures, poor workmanship, or material defects.
**Who needs it:** Builders, property developers, and project owners.
**Example:** A newly built office develops foundation cracks due to substandard concrete. This insurance covers the necessary repairs and prevents costly litigation between stakeholders.
### 6. Site liability insurance
Protects against injuries or damage caused by hazardous construction sites, particularly from unauthorised access or poor site security.
**Who needs it:** Builders, contractors, and developers responsible for site safety.
## Insurance Types at a Glance
## Key Considerations When Choosing Construction Insurance
For a complete overview, see our [guide to insurance claim assessments](/guides/insurance-claim-assessment-guide).
### When Do You Need Testimony from an Expert Witness?
Source: https://ownerinspections.com.au/articles/testimony-for-an-expert-witness
Published: 2025-07-29 | Updated: 2026-02-09 | Category: Expert Witness
Author: Maison Azdari
Expert witness testimony is needed in Australian real estate disputes when technical property issues require professional interpretation that goes beyond everyday knowledge. Under Section 79 of the Evidence Act 1995 (Cth), an expert witness is a person qualified by specialised knowledge, training, or experience to provide opinion-based evidence in legal proceedings. Common scenarios requiring expert testimony include property boundary disputes, valuation disagreements, construction defect claims, environmental compliance issues, and breach of contract cases. Their independent, fact-based assessments help courts, tribunals, and arbitration panels make informed decisions on complex property matters.
Real estate transactions and developments involve high financial stakes. Even minor discrepancies in assessments or documentation can result in substantial financial losses or prolonged litigation. Expert witnesses provide clarity by applying industry standards, methodologies, and best practices to accurately assess and interpret property-related matters.
## What Is an Expert Witness
Under the Evidence Act 1995 (Cth), an expert witness is a person qualified by their specialised knowledge, training, or experience to provide opinion-based evidence in legal proceedings. Their testimony helps courts understand complex technical matters that non-specialists may not easily grasp. They bridge the gap between legal principles and industry-specific knowledge, ensuring that all relevant facts are properly interpreted and applied.
### Key qualifications of an expert witness
For testimony to be admissible, an expert witness must possess:
Experts must also maintain ongoing professional development and adhere to strict ethical guidelines. Their credentials, past testimonies, and publications can affect their credibility in court. The ability to communicate complex concepts clearly and effectively also plays a significant role in how much weight the court gives their testimony.
## Types of Expert Witnesses in Real Estate
## Expert Witness Types Compared
## Legal Framework for Expert Testimony in Australia
### The Evidence Act 1995 (Cth) and state variations
Expert testimony in Australia is primarily governed by Section 79 of the Evidence Act 1995 (Cth), which mandates that expert opinions must be based on specialised knowledge obtained through training, study, or experience. Similar provisions exist under state laws such as the Evidence Act 1995 (NSW) and the Evidence Act 2008 (VIC).
### Criteria for admissibility in court
For expert testimony to be considered valid in legal proceedings, it must meet four criteria:
### Recent precedents
## When Is Expert Testimony Required
### Dispute resolution
**Property boundary disputes:** Land surveyors provide expert reports in disputes involving unclear property lines or encroachment claims. For example, a homeowner sues a neighbour over an extension that crosses into their property, and surveyors establish the legal boundaries.
**Valuation disputes in property transactions:** Property valuers assess whether a property's pricing is fair, particularly in contested appraisals. For example, a commercial tenant disputes a rental increase, arguing it exceeds fair market rates, and valuation experts testify on industry norms.
**Construction defect claims:** Building inspectors and structural engineers assess whether a property's defects stem from non-compliance with Australian building codes or contractor negligence.
### Litigation cases
## Importance of Expert Testimony in Court
### Enhancing legal clarity
Judges and juries often lack technical real estate knowledge. Expert witnesses break down complex information into understandable terms, ensuring that the court can make well-informed decisions.
### Strengthening case credibility
Courts give significant weight to objective, fact-based professional opinions. Expert testimony that is independent, well-documented, and clearly presented can be the deciding factor in a case outcome.
### Facilitating settlements
Many disputes are resolved outside of court once expert reports clarify the strengths and weaknesses of each party's case. When both sides understand the technical facts, settlement becomes more achievable.
For a complete overview, see our [guide to expert witness reports for building disputes](/guides/expert-witness-building-disputes-guide).
### What's Involved in a Building and Pest Inspection?
Source: https://ownerinspections.com.au/articles/whats-involved-in-a-building-and-pest-inspection
Published: 2025-07-25 | Updated: 2026-01-30 | Category: Building Inspections
Author: Maison Azdari
A building and pest inspection is one of the most valuable steps you can take before purchasing a property in Australia. It reveals hidden defects, pest activity, and safety hazards that are not visible during a standard open home walkthrough.
Whether you are buying your first home or adding to an investment portfolio, knowing what these inspections cover puts you in a stronger negotiating position. This guide breaks down every aspect of the process, from structural assessments to termite detection, costs, legal standards, and what happens after the report is delivered.
> A combined building and pest inspection can uncover issues that cost tens of thousands of dollars to repair. Spending a few hundred dollars before settlement is a fraction of what you might pay to fix undetected problems later.
## What Is a Building and Pest Inspection?
A building and pest inspection is a professional assessment of a property's structural condition and pest status. It is typically carried out before a buyer finalises the purchase of a residential property, though existing homeowners also commission inspections for maintenance purposes.
The building component examines the physical structure of the home, including the roof, walls, floors, foundations, and wet areas. The pest component focuses on timber-destroying pests such as termites, borers, and wood decay fungi.
In most cases, both inspections are completed on the same day by either one inspector with dual qualifications or two specialists working together. The result is a detailed written report that outlines defects, pest findings, risk areas, and recommended actions. If you are buying for the first time, our [first time homebuyers building and pest inspection guide](/articles/first-time-homebuyers-building-pest-inspection-guide) covers what to expect in more detail.
## The Building Inspection Component
### Structural Assessment
The structural assessment is the core of the building inspection. An inspector evaluates load-bearing elements to determine whether the property is sound or showing signs of movement, deterioration, or failure.
Key structural elements inspected include:
- **Foundations and footings** for cracking, subsidence, or heave
- **Load-bearing walls** for cracks, bowing, or water damage
- **Roof structure and framing** for sagging, broken members, or inadequate bracing
- **Floor systems** for excessive bounce, rot, or structural compromise
- **Retaining walls** for leaning, cracking, or drainage failure
Inspectors classify defects as minor, significant, or major. Major structural defects can affect the safety of occupants and often require immediate remediation.
### Interior Inspection
Inside the property, inspectors check every accessible room. They look for visible signs of damage, poor workmanship, and wear that could indicate deeper issues.
Interior elements assessed include walls, ceilings, floors, doors, windows, built-in fixtures, and stairways. Inspectors note cracking patterns, water staining, mould growth, and any evidence of previous repairs. If mould is detected, a specialist [mould inspection](/mould-inspections) may be recommended as a follow-up.
Wet areas such as bathrooms, kitchens, and laundries receive particular attention. Leaking showers, failed waterproofing membranes, and damaged grouting are among the most common defects found in Australian homes.
### Exterior Inspection
The exterior inspection covers cladding, brickwork, render, paintwork, fascias, eaves, gutters, downpipes, and drainage systems. Inspectors also examine decks, balconies, pergolas, carports, garages, fencing, driveways, and paths.
Drainage is a critical focus. Poor site drainage can lead to water pooling against foundations, causing structural movement over time. Inspectors assess the grading of the land around the building and the condition of stormwater systems.
### Roof Inspection
The roof is inspected both externally and from within the roof space. External checks cover tiles or metal sheeting, ridge capping, flashings, valleys, and guttering. Inside the roof void, inspectors look at framing timbers, sarking, insulation, ventilation, and any signs of leaks or pest activity.
Roof access is not always possible. Inspectors will note if areas could not be accessed due to safety concerns, height limitations, or obstructions. For a broader look at what inspectors assess across the entire property, see our guide on [essential home building inspections in Australia](/articles/essential-home-building-inspections-in-australia).
### Subfloor Inspection
Properties with accessible subfloor areas are inspected underneath. Inspectors check stumps or piers, bearers, joists, and the underside of flooring. They also look for moisture, ventilation adequacy, drainage issues, and evidence of pest activity.
Subfloor areas are one of the most common locations for termite entry. Inspectors pay close attention to timber-to-ground contact, which is a significant risk factor for termite infestation.
## The Pest Inspection Component
### What Pests Are Inspected For?
The pest inspection targets timber-destroying organisms. These are the pests and conditions that cause the most significant structural damage to Australian homes.
The primary pests and conditions assessed include:
- **Subterranean termites** (the most destructive pest in Australia)
- **Drywood termites** (less common but still significant)
- **Wood borers** (various beetle species that attack seasoned timber)
- **Wood decay fungi** (wet rot and dry rot)
- **Dampwood termites** (found in areas with chronic moisture)
The inspection does not typically cover general household pests such as cockroaches, spiders, or rodents, unless specifically requested. For detailed information about termite risk and detection, read our article on [termite inspection to protect your home](/articles/termite-inspection-to-protect-your-home).
### How Pest Inspections Are Conducted
A qualified pest inspector examines all accessible areas of the property for evidence of live pests, previous damage, and conditions that favour pest activity. This includes a visual assessment combined with the use of specialised detection equipment.
Inspectors check both the interior and exterior of the building, including the roof void, subfloor, garden beds, retaining walls, stored timber, tree stumps, and fencing. They look for mud leads (termite tunnels), frass (borer dust), damaged or hollow-sounding timber, and moisture conditions that attract pests.
Properties in high-risk areas, such as south-east Queensland, may require more frequent inspections. Our article on [Brisbane termite infestations and when to schedule an inspection](/articles/brisbane-termite-infestations-when-to-schedule-an-inspection) provides region-specific guidance.
### Detection Tools and Technology
Modern pest inspectors use a range of tools beyond a visual assessment. These technologies increase the chance of detecting hidden activity behind walls, under floors, and within roof spaces.
| Tool | Purpose | How It Works |
| -------------------------- | -------------------------------- | ----------------------------------------------------------------------------------------------- |
| Moisture meter | Detects elevated moisture levels | Measures moisture content in timber and other materials, highlighting areas attractive to pests |
| Thermal imaging camera | Identifies temperature anomalies | Detects heat patterns behind walls that may indicate termite activity or moisture intrusion |
| Termatrac motion detection | Locates live termite activity | Uses radar technology to detect movement behind surfaces without physical intrusion |
| Sounding device (donger) | Tests timber integrity | Tapping timber to listen for hollow sounds indicating internal damage |
| Borescope | Views concealed spaces | A small camera inserted through tiny holes to inspect wall cavities and other hidden areas |
These tools do not replace a thorough visual inspection but supplement it. In many cases, thermal imaging or moisture readings provide the first indication of a problem that is not yet visible on the surface.
## Australian Standards and Legal Requirements
Building and pest inspections in Australia are governed by specific standards published by Standards Australia. These standards set out the scope, methodology, and reporting requirements for inspectors.
**AS 4349.1** covers pre-purchase building inspections for residential properties. It defines the areas to be inspected, the limitations of a visual inspection, and how defects should be classified and reported.
**AS 4349.3** covers timber pest inspections. It specifies the procedures for detecting timber-destroying pests and the reporting format for findings. Both standards are referenced by the [Standards Australia](https://www.standards.org.au/) organisation.
Inspectors must also hold the appropriate licences for their state or territory. In Queensland, building inspectors require a licence from the Queensland Building and Construction Commission (QBCC). Pest inspectors require a pest management licence from the relevant state authority. You can verify inspector licences through the [QBCC online search tool](https://www.qbcc.qld.gov.au/).
It is worth noting the difference between a standard pre-purchase inspection and a more detailed investigation. Our article on [pre-inspection vs full inspection](/articles/pre-inspection-vs-full-inspection-whats-the-difference) explains how the scope and depth of assessment can vary.
## When Do You Need a Building and Pest Inspection?
### Before Buying a Property
The most common reason for a building and pest inspection is a [pre-purchase inspection](/pre-purchase-inspections). Most property contracts in Australia include a building and pest clause that allows the buyer to arrange an inspection during the cooling-off period.
If the inspection reveals significant defects or active pest damage, the buyer can negotiate a lower price, request repairs, or withdraw from the contract entirely. Without an inspection, you are accepting the property in its current condition, defects and all.
### Before Selling a Property
Some sellers commission a building and pest inspection before listing their property. This approach, sometimes called a pre-sale or [vendor inspection](/pre-sale-inspections), allows sellers to address issues in advance and present the report to prospective buyers as evidence of the property's condition.
### During Ownership
Annual termite inspections are recommended for all Australian homeowners, particularly in areas with high termite activity. Regular building inspections can also catch maintenance issues before they escalate into major repairs. A dedicated [timber pest inspection](/timber-pest-inspections) is an effective way to stay on top of pest risk during ownership.
### Before Renovating
If you are planning a renovation or extension, a building and pest inspection can reveal existing issues that need to be addressed before construction begins. Discovering termite damage or structural defects during a renovation is far more disruptive and costly than finding them beforehand.
## What Common Issues Do Inspections Detect?
Building and pest inspections regularly uncover problems that are invisible during a casual property viewing. Some of the most frequently detected issues include:
- **Cracking in walls and foundations** caused by soil movement, poor construction, or tree root activity
- **Roof leaks and deteriorated flashings** leading to water ingress and timber decay
- **Rising damp and failed damp-proof courses** in older homes
- **Defective waterproofing in wet areas** allowing moisture to travel into wall and floor cavities
- **Active termite infestations** often found in subfloor areas, wall frames, and roof timbers
- **Previous termite damage** that has been concealed or inadequately repaired
- **Borer activity** in hardwood and softwood timbers
- **Mould growth** in poorly ventilated areas, behind furniture, or in roof spaces
- **Non-compliant building work** including unlicensed additions, poor drainage, and electrical hazards
- **Asbestos-containing materials** in homes built before 1990
Mould is an increasingly common finding, particularly in properties with poor ventilation or a history of water damage. If your inspection flags mould, our [mould inspection guide](/articles/mould-inspection-guide) explains the next steps and health considerations.
## What Does a Building and Pest Inspection Cost?
Inspection costs vary depending on the property size, location, age, and the level of detail required. As a general guide, here is what you can expect to pay across Australia.
| Inspection Type | Typical Cost Range |
| ------------------------------------ | --------------------- |
| Building inspection only | $300 to $500 |
| Pest inspection only | $200 to $350 |
| Combined building and pest | $400 to $700 |
| Large or complex property | $700 to $1,000+ |
| Additional services (pool, asbestos) | $100 to $300 per item |
These figures are indicative and can vary by region. Metropolitan areas and properties with large footprints or multiple structures tend to sit at the higher end of the range.
Choosing the cheapest inspection is rarely a good strategy. An experienced inspector with proper equipment and thorough reporting practices is worth the investment. A missed defect or undetected termite colony can result in repair costs that dwarf the inspection fee.
## How Long Does a Building and Pest Inspection Take?
A [combined building and pest](/building-and-pest-inspections) inspection for a standard three-bedroom house typically takes between 1.5 and 3 hours on site. Larger, older, or more complex properties can take longer.
The written report is usually delivered within 24 to 48 hours of the inspection. Some inspectors offer same-day reporting for an additional fee. Reports are delivered as PDF documents and include photographs, descriptions of defects, risk ratings, and recommendations.
Buyers should allow enough time within their contract's inspection clause to receive the report, review it, and seek further advice if needed. Rushing this process can lead to poor decisions.
## Who Conducts Building and Pest Inspections?
Building inspectors in Australia are typically licensed builders, building surveyors, or construction professionals with specific training in property assessment. They must hold a current licence in the state or territory where they operate.
Pest inspectors hold a pest management technician licence and specialise in timber pest detection. Some inspectors are dual-qualified, holding both building and pest inspection licences, which allows them to complete the full assessment in a single visit.
When choosing an inspector, look for:
- Current and valid licences for your state
- Professional indemnity insurance and public liability cover
- Experience with the type of property you are purchasing
- Membership of a professional body such as the Master Builders Association or the Australian Environmental Pest Managers Association
- Use of modern detection equipment including thermal imaging
- Clear, detailed sample reports
The distinction between a routine inspection and an expert investigation is also relevant in certain situations. Our article on [expert witness vs routine inspection reports](/articles/expert-witness-vs-routine-inspection-reports) explains when a higher level of assessment may be required.
## What Happens After the Inspection?
Once you receive the report, read it thoroughly. Pay attention to the summary section, which highlights major and significant defects, as well as any active pest findings.
If the report identifies major issues, you have several options. You can negotiate a price reduction based on estimated repair costs. You can request that the seller complete the repairs before settlement. Or you can choose to walk away from the purchase if the contract allows it.
For pest findings, particularly active termite infestations, you should seek a quote for treatment and any necessary repairs. A property with active termites is not necessarily a deal-breaker, but you need to understand the full cost of remediation before proceeding.
If you are unsure about anything in the report, contact the inspector directly. Good inspectors are willing to explain their findings over the phone or in person and can help you understand the severity of each issue.
## Limitations of Building and Pest Inspections
It is essential to understand what a building and pest inspection cannot do. These are visual inspections of accessible areas only. Inspectors do not move furniture, lift floor coverings, remove wall linings, or excavate soil.
Areas that are inaccessible due to stored goods, fixed coverings, safety hazards, or insufficient clearance will be noted in the report as limitations. This means some defects or pest activity may exist in areas the inspector could not access.
A building and pest inspection is not a guarantee that the property is free of defects. It is a professional opinion based on the conditions observed at the time of the inspection. Concealed defects, latent conditions, and pest activity in inaccessible areas may not be identified.
The inspection does not cover compliance with local council approvals, plumbing and electrical systems (beyond visible components), swimming pool safety barriers (unless specifically requested), or environmental hazards such as soil contamination.
## Frequently Asked Questions
## Tips for Getting the Most From Your Inspection
To maximise the value of your building and pest inspection, keep these practical tips in mind.
Request access to all areas of the property before the inspection. Ask the seller or agent to clear stored items from the subfloor, roof space, garage, and along external walls. The more the inspector can see, the more comprehensive the report will be.
Attend the inspection in person if possible. Walking through the property with the inspector gives you a firsthand look at the issues they identify and the opportunity to ask questions on the spot.
Choose an inspector who provides a detailed, photographic report rather than a basic tick-and-flick checklist. The quality of the report directly affects your ability to make an informed decision.
Do not rely solely on the real estate agent's recommendation for an inspector. While some agents recommend reputable inspectors, there can be a conflict of interest. Select your own inspector to ensure independence.
## Frequently Asked Questions
### What is a building and pest inspection?
A building and pest inspection is a professional assessment of a property's structural condition and timber pest status. It identifies defects, damage, safety hazards, and active or previous pest activity in accessible areas of the building.
### How much does a building and pest inspection cost in Australia?
A combined building and pest inspection typically costs between $400 and $700 for a standard residential property. Costs vary based on property size, location, and age. Larger or more complex properties may cost $1,000 or more.
### How long does a building and pest inspection take?
The on-site inspection for a standard three-bedroom house takes approximately 1.5 to 3 hours. The written report is usually delivered within 24 to 48 hours after the inspection.
### Do I need a building and pest inspection before buying a house?
While not legally mandatory in most states, a building and pest inspection is strongly recommended before any property purchase. It can reveal hidden defects and pest damage that may cost thousands of dollars to repair.
### What do building inspectors look for?
Building inspectors examine the structural integrity of the property, including foundations, walls, roof, floors, wet areas, exterior cladding, drainage, and all accessible internal and external areas. They classify defects as minor, significant, or major.
### What do pest inspectors look for?
Pest inspectors look for evidence of timber-destroying pests including termites, wood borers, and wood decay fungi. They check for live activity, previous damage, conducive conditions, and risk factors such as timber-to-ground contact and excessive moisture.
### Can I do a building and pest inspection myself?
While you can visually assess a property yourself, a professional inspection is far more thorough. Licensed inspectors have the training, experience, and specialised equipment (thermal cameras, moisture meters, motion detectors) needed to identify issues that are not visible to the untrained eye.
### What happens if termites are found during an inspection?
If active termites are detected, the report will detail the location and extent of activity. You can then obtain quotes for termite treatment and damage repair. This information helps you negotiate the purchase price or decide whether to proceed with the sale.
### Are building and pest inspections mandatory in Australia?
Building and pest inspections are not legally required in most Australian states and territories. They are, for all practical purposes, an industry standard for property transactions and are strongly advised by conveyancers, solicitors, and financial institutions.
### What is the difference between a building inspection and a pest inspection?
A building inspection focuses on the structural and physical condition of the property, covering elements like walls, roof, foundations, and wet areas. A pest inspection specifically targets timber-destroying organisms such as termites and borers. They are often combined into a single appointment for efficiency.
### What areas of a property cannot be inspected?
Inspectors cannot access areas concealed by furniture, floor coverings, wall linings, stored goods, or dense vegetation. Areas with insufficient clearance (less than 400mm in subfloors) or safety hazards are also excluded. These limitations are documented in the report.
### How often should I get a pest inspection on my home?
Annual timber pest inspections are recommended for all Australian homes, particularly in termite-prone regions such as south-east Queensland, northern New South Wales, and northern Australia. Regular inspections allow early detection before significant damage occurs.
## Book Your Building and Pest Inspection
A thorough building and pest inspection gives you the information you need to make a confident property decision. Whether you are buying, selling, or maintaining your home, professional inspections protect your investment and your family's safety.
Owner Inspections provides comprehensive building and pest inspections conducted by licensed, experienced inspectors using the latest detection technology. [Contact Owner Inspections today](/pre-purchase-inspections) to book your inspection and get a detailed report you can rely on.
For a complete overview, see our [guide to pre-purchase building and pest inspections](/guides/pre-purchase-building-pest-inspection-guide).
### Chemical Delignification and Its Impact on Timber Safety
Source: https://ownerinspections.com.au/articles/chemical-delignification-on-timber-safety
Published: 2025-07-22 | Updated: 2026-02-09 | Category: Mould & Pests
Author: Maison Azdari
Chemical delignification is the breakdown of lignin in timber caused by chemical reactions from environmental pollutants, gas appliance emissions, and moisture exposure. Lignin is the natural binding agent that gives wood its rigidity and load-bearing strength. When it deteriorates, timber becomes brittle, frayed, and structurally unsound. In Australian homes, this condition most commonly affects roofing timbers and can lead to partial or complete roof collapse if left untreated. Early detection through professional inspection is the most effective way to manage this risk.
Timber plays a central role in Australian construction, particularly in roof framing and structural supports. While most homeowners are familiar with termite damage and wood rot, chemical delignification remains a lesser-known threat that can compromise a building's safety without any visible warning to the untrained eye. Understanding what causes it, how to spot it, and what to do about it is important for anyone who owns or manages property in Australia.
## What Is Chemical Delignification?
Chemical delignification occurs when the lignin in timber deteriorates due to chemical exposure, leaving the cellulose fibres exposed and weakened. Lignin is the natural polymer that binds wood cells together and provides structural rigidity. Without it, timber loses its ability to bear loads and becomes soft, fuzzy, and prone to crumbling.
This condition is different from surface weathering. While weathering affects the outer layer of exposed timber, delignification attacks the wood at a deeper structural level. It can compromise roof trusses, beams, and rafters without any obvious external signs until the damage is well advanced.
## How It Differs from Other Timber Problems
Unlike wood rot, which is driven by fungi, delignification results from chemical reactions triggered by environmental or industrial pollutants. Termite damage creates hollowed-out tunnels, while delignified timber has a distinct frayed, hairy texture. Surface weathering only affects the outer layer, but chemical delignification weakens the wood at a deeper structural level.
## Causes of Chemical Delignification
Understanding the root causes helps prevent the onset of delignification and informs effective treatment strategies.
### Environmental Factors
**High Humidity and Moisture Exposure**
Poor ventilation in roof cavities increases humidity, which accelerates timber degradation. Constant moisture exposure softens wood fibres, weakening their structural integrity. Over time, this can lead to widespread delignification affecting multiple structural elements in a building.
**Industrial and Urban Pollution**
Buildings near major roads, factories, or industrial zones are exposed to airborne pollutants that contribute to lignin breakdown. Acidic compounds in the air react chemically with timber, leading to faster degradation. Urban areas with high levels of vehicle emissions are particularly at risk because nitrogen oxides and sulphur compounds contribute significantly to timber deterioration.
**Salt Exposure in Coastal Areas**
Homes and buildings near the ocean face increased risk due to salt-laden air. Roof trusses, eaves, and exposed timber structures are most affected because they are in direct contact with salty wind and moisture. The combination of salt and humidity creates conditions that make coastal properties particularly vulnerable.
### Internal Factors
**Gases from Household Appliances**
Gas hot water systems, unflued heaters, and stoves release nitrogen oxides that react with timber and break down lignin. Roof cavities where gases accumulate present a high-risk environment. In poorly ventilated areas, chemical reactions between these emissions and timber can accelerate decay significantly.
**Poor Ventilation and Condensation**
Inadequate airflow traps moisture, leading to prolonged timber exposure to humid conditions. This is particularly problematic in older homes with limited ventilation systems. Condensation buildup in enclosed spaces creates an environment where delignification spreads more aggressively.
## How to Identify Chemical Delignification
Detecting chemical delignification early can prevent severe damage and costly repairs.
### Visual Indicators
### Structural Symptoms
### Professional Inspection Techniques
## Effects on Timber Safety and Building Integrity
### Structural Risks in Roofing
Weakened roof trusses and beams may collapse over time, endangering occupants and requiring costly repairs. The risk of structural failure increases as lignin loss progresses, and affected sections can give way without warning.
### Reduced Timber Lifespan
Affected timber deteriorates prematurely, meaning more frequent replacements and higher maintenance costs. What might normally last decades may need replacing within a few years if delignification takes hold.
### Safety Hazards
Brittle timber can fail unexpectedly, causing falling debris and posing risks to residents or workers. In commercial buildings, structural failures can result in serious injuries or significant property damage.
### Compliance Issues with Australian Building Standards
Homes with untreated timber degradation may fail safety inspections and breach building codes, leading to legal and financial consequences. The National Construction Code (NCC) sets minimum structural performance standards, and delignified timber is unlikely to meet those requirements.
## Prevention and Treatment Methods
### Improving Ventilation
Enhance roof airflow by installing vents and exhaust fans to minimise moisture buildup. Ensure adequate cross-ventilation in enclosed timber structures to reduce exposure to damaging gases. Whirlybirds and ridge vents are cost-effective options for improving air circulation in roof cavities.
### Safe Use of Gas Appliances
Install flued gas heaters to prevent harmful emissions from accumulating in roof spaces. Ensure proper ventilation when using gas stoves or heaters indoors. If your home has an unflued gas appliance, consider replacing it with a flued or electric alternative.
### Applying Protective Treatments
Timber sealants and preservatives can slow the progression of delignification in mildly affected areas. For moderate damage, structural reinforcement with steel brackets or sister beams can restore load-bearing capacity. Severely delignified timber should be replaced entirely by a licensed builder.
### Regular Timber Inspections
Schedule annual inspections to detect early signs of damage before they escalate. Engage licensed building inspectors for accurate assessments and recommendations. Properties in coastal, urban, or industrial areas should be inspected more frequently.
### Pre-Settlement Property Handover Inspection Guide
Source: https://ownerinspections.com.au/articles/pre-settlement-property-handover-inspection-guide
Published: 2025-07-18 | Updated: 2026-02-10 | Category: Building Inspections
Author: Maison Azdari
A pre-settlement property [handover inspection](/pre-handover-inspections) is a final check carried out shortly before settlement to confirm that the property is in the condition agreed upon in the contract of sale. It allows buyers to verify that all contractual obligations have been met, any agreed repairs have been completed, and no new damage has occurred since exchange. In Australia, buyers are entitled to this inspection under property law in every state and territory, and it is one of the most important steps before taking legal ownership of a property.
Buying property is one of the largest financial commitments most Australians will make. Without a proper handover inspection, buyers risk inheriting unresolved defects, incomplete repairs, or undisclosed damage that can lead to thousands of dollars in unexpected costs. This guide explains how to prepare for the inspection, what to look for, and what to do if problems are found.
## Why Pre-Settlement Inspections Matter
A pre-settlement inspection is your last opportunity to confirm the property matches what you agreed to buy. It protects you from unexpected costs and gives you grounds to raise issues before ownership transfers.
## How It Differs from a Building and Pest Inspection
A building and pest inspection identifies potential long-term problems such as foundation issues, termites, or water damage. A pre-settlement inspection is narrower in scope. It checks that the property is still in the same condition as when the contract was signed and that any agreed repairs have been completed.
## Legal Framework in Australia
### Buyer Rights and Seller Obligations
Australian property laws protect buyers by requiring sellers to hand over properties in the agreed condition. Buyers are entitled to a pre-settlement inspection, and sellers must allow reasonable access.
### Vendor Disclosure Laws
Sellers are legally required to disclose known defects before the contract is signed. Failure to do so can lead to legal action or compensation claims. Buyers should carefully review the disclosure statement and compare it against the property's actual condition during the pre-settlement inspection.
## Preparing for Your Inspection
### When to Schedule
Conduct the inspection 1 to 2 weeks before settlement. This allows enough time to raise issues with the seller and arrange any last-minute repairs. Coordinate with the real estate agent and seller to arrange access.
### Documents to Bring
### Tools to Have on Hand
## Comprehensive Pre-Settlement Checklist
### Exterior of the Property
### Interior of the Property
### Utilities and Systems
### Compliance Checks
## The Role of Professional Inspectors
### Why Hire an Independent Inspector?
### How to Choose the Right Inspector
### Cost of Pre-Settlement Inspections
Pre-settlement inspections typically start at $300 depending on property size, location, and complexity. This is a small cost relative to the financial risk of taking ownership of a property with unresolved defects.
## Handling Issues Found During the Inspection
### Documenting Problems
Take detailed photos and videos to support any claims. List all defects and categorise them by severity. Ensure every issue is recorded in writing before raising it with the seller.
### Communicating with the Seller
Notify the seller in writing about any issues found, including attached documentation. Request repairs, financial compensation, or contract renegotiation before settlement proceeds.
### Negotiating Resolutions
If the seller disputes the issues, consider engaging a third-party mediator. Understand your legal options if the seller refuses to act, including the possibility of delaying settlement until the matter is resolved.
## Common Mistakes to Avoid
### Pre-Sale Home Inspection Report for Confident Selling
Source: https://ownerinspections.com.au/articles/pre-sale-home-inspection-report-for-confident-selling
Published: 2025-07-15 | Updated: 2026-02-09 | Category: Pre-Sale
Author: Maison Azdari
A pre-sale home inspection report is a professional assessment of a property's condition conducted before it is listed for sale. Licensed building inspectors evaluate the structure, roofing, plumbing, electrical systems, and pest activity to identify defects that could affect the sale process. In Australia, this report helps sellers reduce buyer hesitation, prevent last-minute renegotiations, and justify their asking price with documented evidence. Inspections typically follow Australian Standard AS 4349.1 for building inspections and AS 4349.3 for [timber pest inspections](/timber-pest-inspections).
In the competitive Australian property market, buyers increasingly expect full transparency about a property's condition. Without an upfront inspection report, sellers risk having defects uncovered during the buyer's own inspection, which can lead to lower offers, delayed settlements, or collapsed deals. A [pre-sale inspection](/pre-sale-inspections) puts sellers in control of the process from the start.
## Why It Matters for Sellers
Selling a property without knowing its true condition is risky. Buyers who discover defects during their own inspection often use them as leverage to negotiate significant price reductions or walk away entirely. A pre-sale inspection report addresses this by giving sellers a clear picture of their property's condition before listing.
## What a Pre-Sale Inspection Covers
In Australia, building inspections must be performed by qualified professionals following industry standards, including AS 4349.1 for general building inspections and AS 4349.3 for timber pest inspections.
## Benefits for Sellers, Buyers, and Agents
### For Sellers
### For Buyers
### For Real Estate Agents
## Common Issues Found in Pre-Sale Inspections
## How to Prepare for a Pre-Sale Inspection
## Cost of a Pre-Sale Home Inspection
Costs depend on property size, the scope of the inspection, and the location. A comprehensive package that includes structural, pest, and compliance review gives sellers the most complete picture.
## Legal and Regulatory Considerations
### Are Pre-Sale Inspections Legally Required?
While not mandatory in Australia, pre-sale inspections help sellers comply with disclosure obligations under Australian Consumer Law. Sellers who fail to disclose known structural issues may face legal disputes, compensation claims, or transaction cancellations.
### State-Specific Regulations
## Choosing a Qualified Inspector
### Pre-Settlement Defect Inspection: How to Ensure Property Quality Before Handover
Source: https://ownerinspections.com.au/articles/pre-settlement-defect-inspection-to-ensure-quality
Published: 2025-07-11 | Updated: 2026-02-12 | Category: Pre-Settlement Inspections
Author: Maison Azdari
A pre-settlement defect inspection is a final assessment of a property carried out before settlement and handover. It identifies unfinished work, construction faults, and non-compliance with contractual specifications or building standards. In Australia, buyers of new builds and off-the-plan properties have the right to conduct this inspection to confirm the property matches the agreed plans and meets the requirements of the National Construction Code (NCC). The inspection typically costs between $300 and $800 depending on the property type, and it should be arranged within the final week before the settlement date.
This guide is written for home buyers, property investors, and anyone purchasing a new or recently constructed property in Australia. It explains the purpose and process of a pre-settlement defect inspection, your legal rights, a detailed checklist of what to look for, and the steps to take if defects are found.
## What Is a Pre-Settlement Defect Inspection?
A pre-settlement defect inspection is a walkthrough carried out shortly before the settlement date to verify that the property is in the condition specified in the contract of sale. For new builds and off-the-plan purchases, this means checking that all construction work has been completed, that finishes match the specifications, and that the property complies with the NCC and relevant Australian Standards.
The inspection covers everything from structural elements like walls, ceilings, and floors through to fixtures, fittings, and services such as plumbing, electrical, and HVAC systems. It is your last opportunity to identify and raise issues before ownership transfers and final payment is made.
Unlike a routine maintenance check, a pre-settlement defect inspection specifically focuses on whether the builder or developer has delivered the property to the standard promised in the contract. This includes checking for:
## How It Differs from a Standard Building Inspection
It is common for buyers to confuse a pre-settlement defect inspection with a standard [pre-purchase building inspection](/articles/pre-purchase-inspections-guide-sydney). While both involve examining a property for defects, they serve different purposes and are conducted at different stages.
A [pre-purchase building inspection](/pre-purchase-inspections) is typically ordered before exchanging contracts. It assesses the overall condition of an existing property, including structural integrity, pest damage, and safety hazards. It follows Australian Standard AS 4349.1.
A pre-settlement defect inspection, on the other hand, is conducted after contracts have been exchanged but before settlement. It focuses on contract compliance, ensuring the builder has delivered what was promised. For new builds, this means comparing the finished property against the approved plans, specifications, and any variations agreed during construction.
## When to Schedule the Inspection
The inspection should be arranged within the final week before the scheduled settlement date. This timing gives you enough opportunity to identify defects while still allowing time to raise issues with the builder or developer before settlement proceeds.
For off-the-plan apartments, the developer will typically offer a formal inspection window. Make sure you attend this inspection and, if possible, bring a professional inspector with you. If the developer provides only a short notice period, request additional time if needed.
Some key timing considerations include:
## Your Legal Rights in Australia
Australian property buyers are protected by a range of federal and state laws when it comes to building quality and settlement. Understanding these protections helps you hold builders and developers accountable for defective work.
### Australian Consumer Law (ACL)
Under the Australian Consumer Law, building services must be provided with due care and skill, be fit for their intended purpose, and meet any specified requirements. If a new property has defects that breach these guarantees, the buyer may be entitled to a remedy including repair, replacement, or compensation.
### State-Specific Legislation
Each state and territory has its own building legislation that provides further protections:
### Statutory Building Warranties
Builders in Australia are required by law to provide statutory warranties on residential building work. These warranties cover both major (structural) and minor (non-structural) defects for defined periods after completion. The warranty periods vary by state, as outlined above.
### Your Right to a Final Inspection
Most building contracts in Australia include a clause allowing the buyer to conduct a final inspection before settlement. Even if the contract does not explicitly mention it, you have the right to verify that the property is in the agreed condition. For further detail on [builder obligations in pre-settlement inspections](/articles/builder-obligations-in-pre-settlement-inspections), refer to our dedicated guide.
## Pre-Settlement Defect Inspection Checklist
A thorough pre-settlement defect inspection should cover every area of the property. The following checklist outlines the key items to examine in each zone.
### Walls, Ceilings, and Floors
### Doors and Windows
### Plumbing
### Electrical
### HVAC and Ventilation
### Kitchen
### Bathrooms and Laundry
### Exterior and Landscaping
For apartment-specific guidance, see our [checklist for apartment pre-settlement inspections](/articles/checklist-for-apartment-pre-settlement-inspections).
## Who Should Conduct the Inspection
While you can conduct the inspection yourself, engaging a professional building inspector is strongly recommended. Licensed inspectors have the training and equipment to identify hidden defects that a layperson may miss, such as waterproofing failures, structural movement, and non-compliant electrical work.
A professional inspector will provide a detailed written report with photographs documenting every defect found. This report serves as formal evidence if you need to negotiate repairs with the builder or pursue a claim.
If you are purchasing a new build, it is worth investing in an independent inspector who is not connected to the builder or developer. This ensures objectivity and avoids any conflict of interest.
## What to Do if Defects Are Found
Finding defects during a [pre-settlement inspection](/apartment-pre-settlement) does not mean you have to walk away from the purchase. In most cases, defects can be resolved through negotiation. Here is the process to follow:
For more detail on resolving disputes during the pre-settlement process, see our guide on [pre-settlement disputes and resolution](/articles/pre-settlement-disputes-and-resolution).
## Cost of a Pre-Settlement Defect Inspection
The cost of a pre-settlement defect inspection in Australia varies depending on the property type, size, and location. As a general guide:
The cost of the inspection is a small price compared to the potential expense of rectifying defects after settlement. Identifying a single significant defect, such as a waterproofing failure or structural crack, can save you thousands of dollars in future repair costs. For more on [common issues found in pre-settlement inspections](/articles/common-issues-in-pre-settlement-inspections), refer to our detailed guide.
### Pre-Handover Construction Inspection: Key Final Checks
Source: https://ownerinspections.com.au/articles/pre-handover-construction-inspection-final-checks
Published: 2025-07-08 | Updated: 2026-02-12 | Category: Construction Inspections
Author: Maison Azdari
A pre-handover construction inspection is the final quality check before a new build is handed over to the owner. In Australia, where construction must comply with the National Construction Code (NCC) and various state and territory regulations, this inspection plays a critical role in ensuring that the building meets all contractual and regulatory requirements.
Skipping this step or relying solely on the builder's own checks can leave you with undetected defects that are far more expensive and difficult to address after settlement. An independent [pre-handover inspection](/pre-handover-inspections) gives you the information you need to make an informed decision before accepting the property.
## Why Pre-Handover Inspections Are Crucial in Australia
Australian construction is governed by the National Construction Code (NCC), which sets minimum standards for structural integrity, fire safety, accessibility, energy efficiency, and waterproofing. Each state and territory also has its own building legislation and consumer protection laws that impose obligations on builders and developers.
Despite these regulations, building defects remain common in new construction. A pre-handover inspection provides an independent assessment of whether the building complies with the NCC, the approved plans, and the terms of the building contract. It is your best opportunity to identify and document defects before you assume responsibility for the property.
## What is a Pre-Handover Inspection
A pre-handover inspection, also known as a practical completion inspection or a defect inspection, is a detailed assessment of a newly constructed building conducted before the owner takes possession.
## Why a Pre-Handover Inspection is Essential
There are several compelling reasons to invest in an independent pre-handover inspection.
## What the Inspection Covers
A comprehensive pre-handover inspection assesses every aspect of the completed building.
## Who Should Conduct the Inspection
The inspection should be conducted by an independent, qualified building inspector who is not affiliated with the builder or the developer.
Look for an inspector who holds a relevant building inspection licence in your state or territory, has experience with new construction inspections, and can provide a detailed written report with photographs.
## Step-by-Step Guide
Follow these steps to ensure your pre-handover inspection is thorough and effective.
## Common Issues Found
Pre-handover inspections frequently identify a range of defects and incomplete work in new constructions.
## Legal Protections for Property Owners
Australian property owners have several legal protections when it comes to building defects in new construction.
### Pre-Purchase Property Valuation: What Buyers Should Know
Source: https://ownerinspections.com.au/articles/pre-purchase-property-valuation
Published: 2025-07-04 | Updated: 2026-03-13 | Category: Pre-Purchase Inspections
Author: Maison Azdari
Buying a property is one of the largest financial decisions most Australians will ever make. Whether you are purchasing your first home, upgrading, or investing, understanding the true value of a property before committing is essential. A pre-purchase property valuation provides an independent, professional assessment of what a property is worth, giving you the confidence to negotiate effectively and avoid overpaying.
This guide explains what a pre-purchase property valuation involves, why it is important, how the process works in Australia, and how to make the most of the information it provides.
## What Is a Pre-Purchase Property Valuation?
A pre-purchase property valuation is a formal process carried out by a certified property valuer to determine the market value of a property. Unlike a real estate agent's appraisal, which is an informal estimate often used for marketing purposes, a valuation is an independent, objective assessment based on established methodology and professional standards.
A certified valuer considers a range of factors including the structural condition of the property, its location, current market demand, land size, zoning, and comparable recent sales in the area. The result is a detailed report that provides a defensible estimate of the property's market value at the time of inspection.
It is important to understand the distinction between a valuation and an appraisal. An appraisal by a real estate agent is typically free and designed to attract your listing. A valuation by a certified professional is a paid, independent service that carries legal weight and is recognised by lenders, insurers, and the courts.
[Pre-Purchase Inspections](/pre-purchase-inspections)
for Buyers
}
buttonHref="/pre-purchase-inspections"
variant="secondary"
/>
## Why a Pre-Purchase Valuation Is Essential
A pre-purchase valuation serves several critical purposes for property buyers.
### Avoid Overpaying
The property market can be competitive, and it is easy to get caught up in the heat of an auction or negotiation. A professional valuation gives you a clear benchmark of what the property is actually worth, helping you set a realistic budget and avoid paying more than the market supports.
### Assess Financial Viability
For investment properties, a valuation helps assess whether the purchase price aligns with the property's income potential and long-term capital growth prospects. This is essential for making sound investment decisions and ensuring the numbers stack up.
How the property will be held is part of the same question. Investors buying in a company or family trust name usually want the valuation on file for the structure's own records, and buyers whose assets sit across more than one country often take separate advice on ownership before they commit. Specialist firms such as NTL Trust advise on Caribbean residency and citizenship by investment programmes and the trust and corporate structures that sit alongside them. That is a separate decision from the purchase itself, and one for your accountant and lawyer rather than your valuer, but it is worth settling before you sign rather than after.
### Secure Mortgage Approvals
Most Australian lenders require a property valuation before approving a mortgage. The lender needs to confirm that the property provides adequate security for the home loan. If the valuation comes in lower than the purchase price, the lender may reduce the loan amount, requiring you to make up the difference or renegotiate the price.
### Identify Structural and Legal Issues
While a valuation is not a substitute for a [building inspection](/articles/pre-purchase-inspection-checklist-for-buyers), the valuer will note obvious structural concerns and legal issues that could affect value. These may include zoning restrictions, encroachments onto neighbouring land, flood or bushfire risk designations, and evidence of building code violations or unapproved works.
### Facilitate Informed Decision-Making
With an independent valuation in hand, you are better positioned to negotiate with confidence, walk away from a poor deal, or proceed knowing you are paying a fair price. It removes much of the guesswork from what can be an emotionally charged process.
## Key Components of a Property Valuation
A comprehensive property valuation report typically covers the following areas.
### Property Condition Report
The valuer inspects the physical condition of the property, noting the age and state of the building, any visible defects, the quality of finishes, and the overall level of maintenance. This assessment contributes to the valuer's determination of the property's market value.
### Home Valuation Assessment
This is the core of the report. The valuer analyses comparable sales, market conditions, and the specific attributes of the property to arrive at a market value figure. The assessment takes into account both the improvements (the building) and the underlying land.
### Structural Integrity Check
While not as detailed as a full building inspection, the valuer notes any obvious structural issues such as significant cracking, subsidence, moisture damage, or unapproved alterations. These factors can materially affect the property's value.
### Property Risk Analysis
The valuer considers external risk factors that may influence value, including flood and bushfire risk mapping, proximity to industrial or commercial uses, noise exposure, and any planned infrastructure or development in the area.
### Independent vs Agent Appraisal
The valuation report explains its methodology and the basis for its conclusions, distinguishing it from the informal estimates provided by selling agents. This independence is what gives the valuation its credibility and legal standing.
### When a pre-purchase valuation is worth paying for
| Tool | Who provides it | Typical use | Pros | Watch-outs |
| --- | --- | --- | ----- | ----- |
| **Valuation** | Qualified valuer | Buying, refinancing, legal/tax uses | Independent, method-based, can be relied on by banks and in formal settings | Costs money and is still an expert opinion, not a guarantee |
| **Appraisal / price guide** | Real estate agent | Marketing, listing strategy | Helpful starting point | Can be influenced by selling strategy and competition |
| **Online estimate (AVM)** | Algorithm using available data | Early research | Fast and easy | Misses property condition and unique features |
| **Bank valuation** | Valuer engaged by lender | Loan security check | Key for finance approval | Can come in conservative and may not reflect auction pressure |
Many lenders do their own valuation as part of the home loan process because the property is their security.
## When a Pre-purchase Valuation is Worth Paying For
A valuation is not mandatory for every buyer, but it is often worth it in these situations.
- You are buying in a fast-moving market and don’t want to bid emotionally.
- The home is unusual, renovated in a way that’s hard to compare, or on a large block.
- You are buying off-market, where price signals are less visible.
- The vendor’s price guide feels optimistic and recent comparable sales are unclear.
- You need confidence for a final offer, especially on private treaty.
- You are planning a subdivision or redevelopment and need a realistic baseline.
## What a Valuer Actually Looks at
A valuer is trying to answer one question: what would this property sell for in today’s market, based on evidence?
A typical valuation considers:
- Comparable sales of similar properties (location, land size, condition, layout).
- Land and planning controls like zoning, overlays, and highest and best use concepts.
- Dwelling details including size, rooms, parking, overall presentation, and obvious condition issues.
- Market context such as demand, supply, and recent local trends.
## What a Valuation Does Not Do
A valuation is not a [defect investigation](/defect-investigation-reports) and it is not a compliance audit.
Valuers usually won’t:
- Enter every tight roof void or subfloor space like an inspector
- Test moisture the way building inspectors often do
- Confirm building approvals, permits, or waterproofing compliance in detail
That’s why NSW Fair Trading encourages buyers to consider professional building and pest reports as part of due diligence.
Building and Pest
Inspections
}
buttonHref="/guides/pre-purchase-building-pest-inspection-guide"
variant="secondary"
/>
## The Valuation Process in Australia
Understanding how the valuation process works helps buyers know what to expect and how to prepare.
### Certified Valuers
In Australia, property valuers must be registered or licensed in the state or territory where they practise. Many are accredited members of the Australian Property Institute (API), which sets professional standards and a code of ethics for the industry. When engaging a valuer, look for API certification as a mark of quality and professionalism.
### Timeframe and Cost
A standard residential property valuation in Australia typically costs between $300 and $600, depending on the size, type, and location of the property. The process from booking to receiving the report usually takes 3 to 5 business days, though this can vary during busy market periods.
## Common Valuation Methods
Certified valuers use several established methods to determine property value, often combining more than one approach.
### Comparable Sales Method
This is the most commonly used method for residential properties. The valuer identifies recent sales of similar properties in the same area and adjusts for differences to arrive at a market value for the subject property. It relies on having sufficient comparable sales data, which can be a limitation in thinly traded markets.
### Income Approach
Used primarily for investment properties, the income approach values the property based on its actual or potential rental income. The valuer calculates the net income the property generates and applies a capitalisation rate to determine its value. This method is particularly relevant for commercial properties and residential investment portfolios.
### Cost Approach
The cost approach estimates value based on the cost of replacing the building (less depreciation) plus the value of the land. It is most commonly used for specialised or unique properties where comparable sales data is limited, such as heritage buildings or properties with unusual features.
## Factors That Influence Property Value
Several key factors contribute to a property's market value, and understanding them helps buyers interpret a valuation report.
### Location
Location is consistently the most significant driver of property value. Proximity to schools, public transport, shops, parks, employment centres, and the coast or waterfront all influence demand and therefore price. Neighbourhood character and safety also play a role.
### Size and Layout
The size of the land and the floor area of the building directly affect value. A well-designed layout that maximises usable space is generally valued more highly than a larger but poorly configured property. The number of bedrooms, bathrooms, and car spaces are key considerations for residential properties.
### Market Conditions
Property values are influenced by broader market conditions including interest rates, economic confidence, supply and demand, and government policy. A valuation reflects the market at the time of the assessment, which is why valuations have a limited shelf life and should be updated if market conditions change significantly.
### Condition and Age
The overall condition and age of the property affect its value. A well-maintained older home can hold its value well, while a newer property with defects or poor-quality construction may be valued lower than expected. Recent renovations, particularly kitchens and bathrooms, tend to add value.
## What are Common Home Valuation Mistakes?
This is where many buyer budgets get blown out. These are the mistakes that show up again and again.
**Treating the agent’s price guide as the value**
A price guide is a marketing tool, not an independent valuation. It can be influenced by the selling strategy, competition, and shifting buyer demand.
**Relying on online estimates without checking the property condition**
Online estimates cannot see defects like rising damp, roof leaks, termite activity, poor drainage, or DIY renovations. Condition can change value fast, especially when repairs are expensive.
**Comparing the wrong sales**
Not all “similar” properties are actually comparable. A renovated home on a quiet street is not the same as an original-condition home on a main road. If your comparable sales are off, your price expectations will be off too.
**Ignoring strata costs and building issues (apartments and townhouses)**
High strata levies, special levies, upcoming rectification works, and building defects can reduce buyer demand and resale value. Always factor likely ongoing costs into what you are willing to pay.
**Forgetting risk pricing (flooding, erosion, insurance costs)**
Buyers and insurers price risk. If insurance is expensive or hard to get, demand can drop and the market may discount the property.
**Paying for a valuation too late to use it**
A valuation is most useful before your offer becomes unconditional. If you commission it after signing, it may confirm you have already agreed to a price that is hard to renegotiate.
## Challenges Buyers Should Be Aware Of
### Underquoting and Overpricing
Real estate agents may underquote a property to generate interest or overprice it to attract the listing. A professional valuation provides an objective counterpoint to these estimates, helping you assess whether the asking price is reasonable.
### Variations in Appraisals
Different agents and even different valuers may arrive at slightly different figures for the same property. This is normal and reflects differences in methodology, comparable sales selection, and professional judgement. If there is a significant discrepancy between a valuation and the asking price, it warrants further investigation.
### Market Volatility
In rapidly changing markets, a valuation can become outdated relatively quickly. If significant time passes between the valuation and the purchase, or if market conditions shift materially, consider requesting an updated assessment.
## What Decreases Property Value the Most?
Some value drops are small and cosmetic. Others can cut demand, increase holding costs, and reduce what buyers are willing to pay.
Here are the big ones buyers should watch.
| Value killer | Why it hits value | What to do before buying |
| ---- | ----- | ----- |
| **Structural movement and major cracking** | Expensive rectification, buyer fear, finance risk | Get a building inspection and ask for repair cost estimates |
| **Water damage, mould, rising damp** | Hidden repairs, health concerns, recurring issues | Inspect wet areas, subfloors, roof space where possible |
| **Termite activity or termite damage** | Repairs can be extensive and resale can suffer | Book a timber pest inspection and check risk conditions |
| **Unapproved or poor-quality renovations** | Legal and safety risks, future sale problems | Ask for approvals and check with your conveyancer |
| **Flood risk, storm exposure, insurance cost blowouts** | Higher ongoing costs and buyer reluctance | Check flood mapping and insurance quotes early |
| **Bad location factors (main road, flight path, noise)** | Reduces buyer pool | Visit at different times and days |
| **Outdated kitchens/bathrooms in a premium market** | Buyers discount renovation effort | Price in realistic upgrade costs, avoid overcapitalising |
## What to Do if the Valuation Comes in Lower Than the Price
A low valuation does not automatically kill the deal, but it changes your options.
- **Renegotiate using evidence:** show the valuation figure and the comparable sales it relied on.
- **Adjust the deal structure:** change terms, deposit, or settlement timing if the seller is open.
- **Ask your lender about a review:** lenders sometimes allow a reassessment if new evidence exists.
- **Decide your walk-away number:** if finance becomes tight, don’t patch the gap with panic decisions.
This matters because lenders base lending decisions on valuation security, not your negotiated price.
## Tips for Buyers
For a complete overview, see our [guide to pre-purchase building and pest inspections](/guides/pre-purchase-building-pest-inspection-guide).
### Dilapidation Assessment for Properties: Why It Matters and What It Covers
Source: https://ownerinspections.com.au/articles/dilapidation-assessment-for-properties
Published: 2025-07-01 | Updated: 2026-03-02 | Category: Dilapidation Reports
Author: Maison Azdari
A dilapidation assessment is a detailed property inspection carried out before and after nearby construction to document the existing structural condition of a building. In Australia, it is commonly required by local councils for developments that involve excavation, demolition, or heavy machinery near neighbouring properties. The assessment creates a photographic and written record of any pre-existing defects, cracks, and damage, giving property owners a clear baseline to reference if a dispute arises about construction-related harm. Residential assessments typically start from $500 plus GST, while commercial assessments begin at around $800 plus GST.
Whether you are a homeowner worried about a high-rise going up next door, a developer seeking council approval, or a government body overseeing infrastructure works, a dilapidation assessment provides the evidence you need to resolve disputes quickly and fairly. This guide covers what the assessment involves, when it is required, who should carry it out, and how it protects your interests under Australian law.
## What Is a Dilapidation Assessment?
A dilapidation assessment is a systematic inspection that records the physical condition of a property at a specific point in time. The inspector examines the building's exterior and interior surfaces, structural elements, landscaping, driveways, fences, retaining walls, and any other features that could be affected by nearby construction activity.
The resulting report contains high-resolution photographs, written descriptions of all visible defects, measurements of crack widths, and a professional opinion on the building's overall condition. This documentation serves as a baseline. If the property suffers damage during or after construction, the owner can compare the current state against the original report to determine whether the damage is new or pre-existing.
The assessment is sometimes referred to as a [dilapidation report](/dilapidation-reports), a condition report, or a pre-construction condition survey. Regardless of the name, the purpose is the same: to protect all parties by creating an objective record of the property's condition before construction begins.
## Why a Dilapidation Assessment Matters
### Construction Vibrations and Structural Risk
Construction activities including pile driving, excavation, demolition, and heavy vehicle movements generate vibrations that travel through the ground and can affect nearby structures. These vibrations may cause new cracks in walls, shift foundations, damage plumbing, or worsen existing defects.
Without a dilapidation assessment, it becomes extremely difficult to prove whether damage was caused by construction or was already present. This leaves property owners vulnerable to bearing the cost of repairs themselves, even when the construction next door is clearly the likely cause.
### Growing Infrastructure Demand Across Australia
Australia has seen a significant increase in infrastructure and construction activity in recent years. Major transport projects, residential high-rise developments, road widening works, and commercial precincts are under construction in every capital city and many regional centres. This surge in building activity has led to a corresponding rise in dilapidation disputes and a stronger demand for pre-construction assessments.
### Council and Regulatory Requirements
Many local councils across Australia now require dilapidation assessments as a condition of development consent. This is particularly common for large-scale developments, excavation works near property boundaries, and projects that involve heavy machinery or vibration-intensive processes. Failing to comply with a council's dilapidation reporting requirements can result in stop-work orders, fines, or complications during the final occupation certificate process.
## Who Needs a Dilapidation Assessment?
A dilapidation assessment benefits a broad range of stakeholders. Understanding who typically requires or benefits from one helps clarify when to arrange an inspection.
| Stakeholder | Why They Need an Assessment |
| --- | --- |
| Homeowners | Protect their property from damage caused by nearby construction |
| Builders and contractors | Demonstrate pre-existing conditions and limit liability for damage claims |
| Property developers | Meet council consent conditions and protect against third-party claims |
| Government entities | Document road, rail, and infrastructure project impacts on adjacent properties |
| Commercial property managers | Preserve asset value and maintain lease obligations |
| Real estate agents | Provide buyers with transparency about a property's condition near active construction zones |
## What Does a Dilapidation Assessment Cover?
A thorough dilapidation assessment examines and documents every accessible area of a property. The inspector's goal is to capture a complete picture of the building's existing condition so that any future changes can be identified and attributed accurately.
### External Inspection
The external inspection covers all visible surfaces and features outside the building. This includes:
- Exterior walls (brickwork, render, cladding, and paint finishes)
- Roof condition (tiles, metal sheeting, gutters, fascia, and downpipes)
- Driveways, paths, and paving
- Retaining walls and boundary fences
- Landscaping, garden beds, and trees
- Swimming pools, decks, and pergolas
- Garage structures and outbuildings
### Internal Inspection
The internal inspection documents the condition of all accessible rooms and internal surfaces. This includes:
- Walls, ceilings, and floors in every room
- Door and window frames, including operation and alignment
- Wet areas (bathrooms, kitchens, and laundries)
- Visible plumbing and drainage
- Stairwells, hallways, and common areas
### Defect Analysis
The inspector records all visible defects with detailed descriptions and measurements. Common defects documented during a dilapidation assessment include:
- Cracking in walls, ceilings, and floors (with crack width measurements)
- Foundation movement or settlement signs
- Roof damage including broken or displaced tiles
- Water staining, dampness, and moisture ingress
- Corrosion of metal elements
- Deterioration of timber components
- Movement in retaining walls or fencing
### Structural Assessment
Where concerns about structural integrity are identified, the inspector provides a professional assessment of the building's structural condition. This may include commentary on load-bearing walls, foundation systems, and any evidence of prior structural repairs or modifications.
### Photographic Record
High-resolution photographs form the backbone of every dilapidation assessment. Each defect, crack, surface, and feature is photographed with clear labelling and, where appropriate, measurement references. The photographic record is time-stamped and typically includes hundreds of images for a standard residential property.
## When Is a Dilapidation Assessment Required?
While a dilapidation assessment can be arranged voluntarily by any property owner, certain situations make it either mandatory or strongly recommended.
### Mandatory Scenarios
- **High-rise developments:** Councils routinely require assessments for all properties within a defined radius of high-rise construction
- **Road and railway expansions:** State government transport projects often mandate assessments for properties along the construction corridor
- **Deep excavation works:** Any excavation near property boundaries, particularly below the level of existing foundations, typically triggers a council requirement
- **Major demolition projects:** Large-scale demolition involving heavy machinery and vibration may require assessments for adjacent properties
### Strongly Recommended Scenarios
- Renovations involving structural work on adjoining or party walls
- Basement construction in established neighbourhoods
- Utility installation works (water, sewer, gas) near property boundaries
- Any construction that requires piling or ground compaction
For more detail on when councils require dilapidation assessments, see our guide on [council requirements for dilapidation reports](/articles/council-requirement-for-dilapidation-reports).
## The Dilapidation Assessment Process
Understanding the [dilapidation report process](/articles/dilapidation-report-process-a-walkthrough-of-key-steps) helps property owners prepare and know what to expect.
### Step 1: Engagement and Scheduling
The property owner, developer, or council contacts a qualified inspector and arranges a suitable date for the assessment. Both the property owner and the party responsible for the construction should be notified.
### Step 2: Pre-Construction Inspection
The inspector visits the property and conducts a thorough inspection of all accessible areas. They photograph every surface, record all defects, and take measurements. This visit typically takes between one and three hours for a residential property, depending on its size and complexity.
### Step 3: Report Preparation
After the inspection, the inspector compiles the findings into a detailed written report. This includes the photographic record, defect descriptions, structural commentary, and a summary of the property's overall condition. The report is typically delivered within five to ten business days.
### Step 4: Post-Construction Inspection
After the nearby construction is complete, a follow-up inspection is conducted using the same methodology. The inspector compares the property's current condition against the original baseline report and identifies any new damage or changes.
### Step 5: Comparison Report
If new damage is identified, the inspector prepares a comparison report that highlights the differences between the pre-construction and post-construction conditions. This report forms the basis for any damage claims or dispute resolution.
## Who Should Conduct a Dilapidation Assessment?
The quality and defensibility of a dilapidation assessment depends heavily on who carries it out. In Australia, the following professionals are qualified to conduct dilapidation assessments:
- **Licensed building inspectors** with experience in structural condition reporting
- **Registered structural engineers** who can provide engineering-grade assessments
- **Professional surveyors** with building condition survey qualifications
- **Council-approved consultants** listed on local authority panels
It is important to select an [independent inspector](/articles/independent-dilapidation-report-services) who has no commercial relationship with the party responsible for the construction. Independence strengthens the credibility of the report, particularly if it is later used in legal proceedings.
For guidance on [who needs a pre-construction dilapidation report](/articles/who-needs-pre-construction-dilapidation-report), we have a dedicated article covering the topic in more detail.
## Dilapidation Report Melbourne Quick Facts
**Best time to book:** 1–2 weeks before demolition/excavation starts (and again after completion for a post-works comparison).
**Common Victorian triggers:**
- Protection works process where a Registered Building Surveyor (RBS) identifies a risk of significant damage to an adjoining property
- City/council asset protection requirements (bond/security) for footpaths, kerbs, pits, and stormwater assets
**What your Melbourne report should clearly show:**
- Written notes and a photo schedule of cracks/defects (internal and external near the works)
- Defect locations mapped (elevations/floor plan) plus crack measurements with a gauge/ruler in frame
- A limitations section (areas blocked, unsafe, or not accessed)
**On-site access (protection works survey):** At least 24 hours’ notice, typically between 8am–6pm for survey/protection work entry.
## Dilapidation Assessment Costs in Australia
The [cost of a dilapidation report](/articles/dilapidation-report-cost) varies depending on the property type, size, location, and scope of the inspection.
| Property Type | Estimated Cost (incl. GST) |
| --- | --- |
| Apartment or unit | $550 to $770 |
| Standard residential house | $770 to $1,320 |
| Large or luxury residential property | $1,320 to $1,650+ |
| Small commercial property | $1,650 to $2,750 |
| Large commercial or industrial property | $2,750 to $5,500+ |
These figures are indicative. The final cost depends on factors such as urgency, travel requirements, the number of properties to be inspected, and the level of structural assessment required. Some providers offer discounted rates for bulk inspections covering multiple properties on the same street or development zone.
### Who Pays for the Report?
In most cases, the party responsible for the construction project pays for the dilapidation assessment. This is often a condition of development consent imposed by council. However, homeowners may choose to commission their own independent report for added protection, particularly if they have concerns about the impartiality of the developer's chosen inspector.
## Legal Protection and Dispute Resolution
One of the most significant benefits of a dilapidation assessment is the legal protection it provides. In Australia, dilapidation reports are admissible as evidence in courts and tribunals, including:
- **NCAT** (NSW Civil and Administrative Tribunal)
- **VCAT** (Victorian Civil and Administrative Tribunal)
- **QCAT** (Queensland Civil and Administrative Tribunal)
- **SAT** (State Administrative Tribunal, Western Australia)
A properly prepared dilapidation report provides an objective, time-stamped record that can be used to establish liability for construction-related damage. Without this evidence, property owners face an uphill battle in proving that damage was not pre-existing.
### Compliance with Australian Standards
Dilapidation assessments conducted by licensed professionals align with Australian Building Code standards and relevant Australian Standards for building inspections. The report methodology follows industry best practice and meets the evidentiary requirements expected by tribunals and courts.
## Benefits of a Dilapidation Assessment
### Risk Mitigation
By documenting the property's condition before construction begins, a dilapidation assessment removes ambiguity about the cause of any damage that appears during or after construction. This protects both the property owner and the builder.
### Financial Protection
The cost of a dilapidation assessment is a small fraction of the potential repair bills and legal fees that can arise from unresolved damage disputes. Properties near large construction projects face a real risk of damage to foundations, walls, plumbing, and external features.
### Structural Preservation
Early identification of pre-existing defects allows property owners to address issues before they are worsened by construction vibrations. The assessment may reveal problems such as deteriorating mortar joints, minor foundation settlement, or water ingress that warrant attention regardless of nearby construction activity.
### Stronger Negotiating Position
Whether you are dealing with a builder, developer, insurer, or council, a professional dilapidation report gives you a documented basis for your claims. Disputes that might otherwise drag on for months can often be resolved quickly when both parties have access to clear before-and-after evidence.
## Common Mistakes to Avoid
## Which professionals should I hire for a dilapidation survey before starting a new construction near my property?
For a dilapidation survey before nearby construction, hire someone who can produce an independent condition record with clear photos and measurements. In Australia, that usually means:
- **Structural engineer:** Often specified in consent conditions for adjoining buildings/public land, especially on higher-risk works.
- **Experienced building inspector / building consultant:** Common for residential properties where you need strong photo evidence, crack measurements, and mapped defect locations.
- **Registered Building Surveyor (Victoria):** Relevant where the protection works process applies and an adjoining property survey/record is required.
If you want the report to stand up in a dispute, choose a professional who can document findings clearly and act impartially if the matter escalates.
### Insurance Risks for New Construction Projects in Australia
Source: https://ownerinspections.com.au/articles/insurance-risks-for-new-construction
Published: 2025-06-27 | Updated: 2026-02-09 | Category: Insurance
Author: Maison Azdari
Insurance risks in new construction projects in Australia include physical damage from fire, storms, and theft, design and structural defects from faulty plans or substandard workmanship, financial risks such as cost overruns and contractor insolvency, and legal risks from non-compliance with Australian building codes. A thorough insurance risk assessment helps developers, builders, and property owners identify these vulnerabilities early, secure the right coverage, and reduce financial exposure. Policies such as builder's risk insurance, public liability insurance, professional indemnity insurance, and workers' compensation are all needed to properly protect a construction project.
Australia's construction industry continues to grow, but insurance claims related to construction defects and property damage have also risen. A well-planned risk assessment allows stakeholders to price their projects accurately, avoid costly surprises, and meet regulatory requirements under the National Construction Code (NCC) and state-specific legislation.
For a complete overview, see our [guide to insurance claim assessments](/guides/insurance-claim-assessment-guide).
## What Is Insurance Risk Assessment in Construction?
Insurance risk assessment evaluates potential hazards in a construction project to determine coverage needs and premium rates. This process allows insurers to price policies accurately while helping builders and developers reduce their financial exposure.
### Key Considerations
### How Risk Assessment Affects Premiums
### Who Conducts Risk Assessments?
## Common Risks in New Construction
### Physical Risks
### Design and Structural Risks
### Financial Risks
### Legal and Regulatory Risks
## Insurance Policies for New Construction
## Best Practices for Construction Risk Management
### Conducting Comprehensive Risk Assessments
### Implementing Strong Safety Protocols
### Contractual Risk Transfer
Well-drafted contracts ensure risk is properly allocated among stakeholders. Clauses covering indemnity, insurance requirements, and defect liability periods reduce each party's exposure and clarify responsibilities if something goes wrong.
### Continuous Insurance Policy Review
Annual policy reviews ensure coverage remains adequate as the project progresses. Construction projects evolve over time, and the insurance cover should keep pace with changes in scope, value, and risk profile.
## Australian Regulations and Construction Insurance
State-specific regulations also apply. In NSW, the Home Building Act 1989 requires home warranty insurance for residential projects over $20,000. In Victoria, the Domestic Building Contracts Act 1995 sets out similar protections. In Queensland, the QBCC regulates builder licensing and insurance requirements.
For a complete overview, see our [guide to insurance claim assessments](/guides/insurance-claim-assessment-guide).
### Expert Witness Case Studies: How They Shape Legal Outcomes
Source: https://ownerinspections.com.au/articles/expert-witness-case-studies
Published: 2025-06-24 | Updated: 2026-02-12 | Category: Expert Witness
Author: Maison Azdari
Expert witnesses play a significant role in Australian legal proceedings. Their specialised knowledge helps courts and tribunals understand technical matters that fall outside the experience of judges, magistrates, and tribunal members. Rather than advocating for one side, an expert witness owes a duty to the court to provide independent, objective opinions grounded in their professional expertise.
This article examines real-world case studies from construction, property, finance, and environmental disputes across Australia. Each case illustrates how expert testimony can shift the direction of a legal proceeding and directly influence its outcome.
## The Legal Framework for Expert Evidence in Australia
Expert evidence in Australian courts is governed by a combination of legislation and practice notes. The [Evidence Act 1995 (Cth)](https://www.legislation.gov.au/Details/C2023C00072) sets out the rules for admissibility of expert opinion evidence at the federal level, with equivalent state legislation in each jurisdiction.
Under the Evidence Act, opinion evidence is generally inadmissible unless it is based on specialised knowledge that the witness has acquired through training, study, or experience. The expert must demonstrate that their opinion is wholly or substantially based on that knowledge.
The [Federal Court Expert Evidence Practice Note (GPN-EXPT)](https://www.fedcourt.gov.au/law-and-practice/practice-documents/practice-notes/gpn-expt) provides detailed guidance on how expert evidence should be prepared and presented. It requires experts to acknowledge their overriding duty to the court, disclose any potential conflicts of interest, and present their methodology in a transparent manner.
State tribunals such as NCAT in New South Wales, VCAT in Victoria, and QCAT in Queensland each have their own rules and guidelines for expert evidence. However, the core principles remain consistent: independence, transparency, and a duty to assist the court rather than the party who engaged the expert.
## Industries That Rely on Expert Witnesses
Expert witnesses are called upon across a broad range of industries in Australia. The most common include:
- **Construction and building**, where disputes involve defective workmanship, structural failures, and non-compliance with the National Construction Code
- **Real estate and property valuation**, where disagreements over land value, rental assessments, or compulsory acquisition arise
- **Medical and healthcare**, where clinical negligence or injury causation requires specialist medical opinion
- **Finance and accounting**, where fraud, misrepresentation, or business valuation disputes demand forensic analysis
- **Environmental science**, where contamination, pollution, or land remediation requires technical assessment
Each of these fields produces disputes that are too technical for courts to resolve without independent expert input. The following case studies illustrate how expert witnesses have shaped outcomes in four of these areas.
## Case Study 1: Structural Engineer in a Building Defect Dispute
**Background:** A homeowner in Sydney noticed significant cracking in the internal and external walls of their two-year-old residential property. The cracks were progressive, with some exceeding 5mm in width. The homeowner engaged a solicitor and lodged a claim against the builder in NCAT, alleging defective construction.
**The expert's role:** A structural engineer with over 20 years of experience in residential construction was engaged as an expert witness. The engineer conducted a thorough site inspection, reviewing the original geotechnical report, the structural drawings, and the as-built conditions of the property.
**Findings:** The expert identified that the original soil testing was inadequate. The geotechnical investigation had been conducted at only two test locations on a site with highly reactive clay soils. This fell well short of the requirements under [AS 2870 (Residential Slabs and Footings)](https://www.standards.org.au). As a result, the foundation design did not account for the degree of soil movement present at the site.
The engineer's report demonstrated that the cracking was a direct consequence of differential foundation movement caused by improper footing design. The report included photographic evidence, crack monitoring data collected over a three-month period, and calculations showing the expected versus actual soil reactivity.
**Outcome:** The tribunal accepted the expert's findings in full. The builder was ordered to fund remedial works, including underpinning of the foundations and repair of all affected walls. The total rectification cost exceeded $180,000. Without the structural engineer's independent assessment, the homeowner would have struggled to establish the technical cause of the defects.
## Case Study 2: Property Valuation Expert in a Commercial Dispute
**Background:** A commercial property developer in Melbourne acquired a site for a mixed-use development. During the planning phase, the local council issued a compulsory acquisition notice for a portion of the land to accommodate a road widening project. The government's valuation of the acquired portion was significantly lower than what the developer believed the land was worth.
**The expert's role:** A certified practising valuer (CPV) with extensive experience in commercial property and compulsory acquisition was retained as an expert witness. The valuer was instructed to provide an independent assessment of the market value of the acquired land, taking into account its highest and best use.
**Findings:** The government's valuation had assessed the land based on its existing zoning without considering an approved planning permit for a mixed-use development that significantly increased the site's value. The expert valuer prepared a detailed report applying the comparable sales method and the hypothetical development approach, both recognised methods under the [Land Acquisition and Compensation Act 1986 (Vic)](https://www.legislation.vic.gov.au/).
The expert demonstrated that the acquired portion contributed disproportionately to the overall development yield of the site. Losing that portion reduced the feasible number of apartments by 15%, which had a cascading effect on the project's financial viability.
**Outcome:** The Victorian Civil and Administrative Tribunal (VCAT) preferred the expert valuer's assessment over the government's valuation. The compensation awarded was approximately 40% higher than the original offer. The case highlighted how a well-prepared valuation report, grounded in appropriate methodology and market evidence, can significantly influence compensation outcomes.
## Case Study 3: Forensic Accountant Uncovering Fraud
**Background:** Investors in a large residential development project in Queensland became concerned when construction stalled despite having contributed substantial funds. The developer claimed that cost overruns and supply chain issues were responsible for the delays. Several investors initiated legal proceedings, alleging mismanagement and potential fraud.
**The expert's role:** A forensic accountant with qualifications in both accounting and fraud examination was appointed as an expert witness. The accountant was given access to the developer's financial records, bank statements, project accounts, and contracts with subcontractors.
**Findings:** The forensic accountant's analysis revealed a pattern of fund diversion. Investor contributions intended for construction costs had been redirected into personal accounts controlled by the developer's directors. The scheme operated as a form of Ponzi arrangement, where funds from later investors were used to make token progress payments and create the appearance of ongoing construction activity.
The expert's report traced the flow of funds through multiple entities, identified fictitious invoices from shell companies, and quantified the total amount diverted at approximately $4.2 million. The report was prepared in accordance with the APES 215 (Forensic Accounting Services) professional standard.
**Outcome:** The court accepted the forensic accountant's evidence as credible and well-documented. The developer's directors were found liable for fraud, and orders were made for the recovery of diverted funds. The forensic accountant's ability to present complex financial data in a clear, logical manner was cited by the judge as a significant factor in reaching the decision.
## Case Study 4: Environmental Scientist in a Contamination Case
**Background:** Residents living near a former industrial site in Western Sydney reported health concerns and unusual odours. Soil and groundwater testing commissioned by the local council revealed elevated levels of heavy metals and volatile organic compounds. The residents commenced legal proceedings against the former site operator, seeking remediation and compensation.
**The expert's role:** An environmental scientist specialising in contaminated land assessment was engaged as an expert witness for the residents. The scientist held qualifications in environmental chemistry and was accredited as a contaminated sites auditor under the [Contaminated Land Management Act 1997 (NSW)](https://www.epa.nsw.gov.au/your-environment/contaminated-land).
**Findings:** The expert conducted independent soil and groundwater sampling at multiple locations on and around the former industrial site. The results confirmed contamination levels that exceeded the National Environment Protection (Assessment of Site Contamination) Measure guidelines. The expert's report established a clear contamination pathway from the industrial site to the surrounding residential properties through groundwater migration.
The scientist also reviewed historical site records, aerial photographs, and waste disposal documentation to establish that the contamination originated from the former operator's activities over a period spanning more than 30 years.
**Outcome:** The Land and Environment Court accepted the expert's contamination pathway analysis and ordered the former operator to fund a comprehensive remediation programme. The court also awarded compensation to affected residents for diminution in property value and health monitoring costs. The expert's independence and methodical approach to sampling and analysis were key factors in the court's acceptance of the evidence.
## How to Choose the Right Expert Witness
Selecting an appropriate expert witness can determine the strength of your case. Consider the following factors when engaging an expert:
**Qualifications and experience.** The expert should hold formal qualifications directly relevant to the subject matter. Membership of professional bodies such as Engineers Australia, the Australian Property Institute, or CPA Australia adds credibility. Years of practical experience in the specific field are just as important as academic credentials.
**Reputation and track record.** An expert who has previously provided evidence in tribunals or courts and whose evidence has been accepted carries more weight than someone appearing for the first time. Ask for references or examples of previous cases where they have been engaged.
**Communication skills.** Technical expertise alone is not enough. The expert must be able to explain complex concepts in plain language that a judge or tribunal member can understand. A well-written report that is clear, logical, and free of unnecessary jargon will always be more persuasive than a highly technical document that is difficult to follow.
**Understanding of legal obligations.** The expert must understand their duty to the court, the requirements for report preparation under the applicable practice notes, and the process of giving evidence including cross-examination. An expert who confuses their role with that of an advocate will quickly lose credibility.
**Independence and objectivity.** Courts and tribunals place significant weight on the independence of expert witnesses. Any actual or perceived conflict of interest must be disclosed. An expert who is seen to be partisan will have their evidence given little or no weight.
For a complete overview, see our [guide to expert witness reports for building disputes](/guides/expert-witness-building-disputes-guide).
### Mould Inspection to Detect and Prevent Home Damage
Source: https://ownerinspections.com.au/articles/mould-inspection-for-home-damage
Published: 2025-06-17 | Updated: 2026-01-30 | Category: Mould Inspections
Author: Maison Azdari
Mould is one of the most destructive and underestimated threats to Australian homes. It can silently spread through wall cavities, ceiling spaces, and subfloor areas, causing structural deterioration and posing serious risks to the health of occupants. A professional mould inspection is the most reliable way to identify contamination before it escalates into a costly and disruptive problem.
Many homeowners only become aware of mould when they notice discolouration on walls or a persistent musty smell. By that stage, the infestation has often been developing for weeks or months. Spores travel through air ducts and settle in areas that are difficult to access, making visual checks alone insufficient for detecting the full extent of contamination.
> Mould can begin colonising damp surfaces within 24 to 48 hours of water exposure. Without prompt detection and remediation, a minor moisture event can rapidly evolve into a widespread infestation affecting your entire property.
## Why Mould Inspection Is Essential for Every Australian Home
Australia's climate creates ideal conditions for mould growth. Coastal humidity, seasonal rainfall, and temperature fluctuations all contribute to moisture accumulation inside residential properties. From [Sydney](/nsw/building-inspections-sydney)'s wet winters to Brisbane's subtropical summers, no region is immune to the risk.
A [professional mould inspection](/mould-inspections) goes beyond surface-level observation. Trained inspectors assess the building envelope, internal moisture levels, ventilation adequacy, and air quality to build a complete picture of any mould contamination present. This comprehensive approach ensures that hidden problems are identified before they result in permanent damage.
Ignoring mould does not make it go away. Left unchecked, it will continue to spread and compromise the materials it feeds on, including timber framing, plasterboard, carpet, and insulation. The cost of remediating an advanced mould infestation is significantly higher than addressing it in the early stages.
## The Impact of Mould on Your Home and Health
### Structural and Material Damage
Mould feeds on organic materials found throughout residential construction. Timber framing, plasterboard linings, carpet backing, and wallpaper all provide a food source for mould colonies. Over time, this biological activity weakens structural components and degrades finishes.
Prolonged mould exposure can cause timber to rot, reducing the load-bearing capacity of structural members. Plasterboard becomes soft and crumbly, paint bubbles and peels, and adhesives lose their bonding strength. These forms of damage are often irreversible and require full replacement of affected materials.
In severe cases, mould contamination can render rooms or entire properties uninhabitable until professional remediation is completed. The financial cost of structural repairs, material replacement, and temporary accommodation can be substantial.
### Health Risks for Occupants
The health effects of mould exposure are well documented by authorities including [NSW Health](https://www.health.nsw.gov.au/environment/factsheets/Pages/mould.aspx) and the [Mayo Clinic](https://www.mayoclinic.org/diseases-conditions/mold-allergy/symptoms-causes/syc-20351519). Mould releases spores and volatile organic compounds into the indoor air, which can trigger a range of symptoms.
Common health effects include:
- Persistent coughing, sneezing, and nasal congestion
- Eye irritation and watery eyes
- Skin rashes and dermatitis
- Wheezing and shortness of breath
- Aggravation of existing asthma conditions
- Headaches and fatigue
- Allergic alveolitis (inflammation of lung tissue)
Children, elderly residents, and individuals with compromised immune systems are particularly vulnerable to the effects of mould exposure. Pets can also experience respiratory distress and allergic reactions in mould-affected environments.
### Property Value Decline
Mould contamination directly affects the market value of a property. Prospective buyers and their building inspectors will identify mould issues during pre-purchase assessments, leading to renegotiated prices or failed sales. Addressing mould proactively protects your investment and ensures a smoother transaction when the time comes to sell.
## Common Causes of Mould Growth in Australian Homes
Mould requires three things to grow: moisture, a food source, and a suitable temperature. Since most homes contain organic building materials and maintain temperatures between 20 and 30 degrees Celsius, moisture is the primary factor that determines whether mould will establish itself.
### Plumbing Leaks and Water Damage
Leaking pipes are one of the most frequent causes of indoor mould growth. Slow drips from concealed plumbing within wall cavities or under floors can go unnoticed for months, creating a persistently damp environment that is perfect for mould colonisation.
Burst pipes, failed seals around showers and baths, and leaking dishwasher or washing machine connections can all introduce enough moisture to trigger mould growth within days.
### High Humidity and Condensation
Many Australian homes, particularly those in coastal and subtropical regions, experience indoor humidity levels above 60 percent. At these levels, condensation forms on cooler surfaces such as windows, external walls, and metal fixtures. This condensation provides the moisture mould needs to thrive.
Activities like cooking, showering, and drying clothes indoors add significant amounts of moisture to the air. Without adequate ventilation, this moisture has nowhere to go and accumulates on surfaces and within building materials.
### Poor Ventilation
Insufficient airflow allows moisture to build up and remain trapped within a property. Bathrooms without exhaust fans, kitchens without rangehoods, and bedrooms with windows that are rarely opened all contribute to elevated humidity levels.
Subfloor areas with blocked or inadequate ventilation are particularly susceptible. Stagnant air beneath the floor allows moisture from the ground to accumulate, which can lead to mould growth on floor joists, bearers, and the underside of flooring materials.
### Flooding and Storm Damage
Flood events and storm damage introduce large volumes of water into a property in a short period. Carpets, underlay, plasterboard, and insulation can absorb significant amounts of water, and if these materials are not dried within 24 to 48 hours, mould growth is almost certain.
Even after visible water has been removed, residual moisture within building materials can sustain mould growth for weeks. A thorough [mould inspection](/articles/mould-inspection-guide) after any water event is essential for confirming that all affected areas have been properly dried and treated.
### Inadequate Waterproofing
Failed or substandard waterproofing in wet areas such as bathrooms, laundries, and balconies allows water to migrate into surrounding building materials. This type of moisture intrusion is often slow and difficult to detect without professional equipment, making it a common contributor to concealed mould growth.
## Recognising the Signs of Mould in Your Home
### Visible Indicators
The most obvious sign of mould is visible growth on surfaces. Mould can appear as black, green, white, or grey patches on walls, ceilings, grout lines, window frames, and other surfaces. Discolouration, staining, or a fuzzy texture on building materials should be investigated promptly.
Peeling paint, bubbling wallpaper, and warped timber can also indicate moisture problems that may be associated with hidden mould growth behind the surface.
### Smell and Sensory Clues
A persistent musty or earthy odour is one of the most reliable indicators of mould, even when no visible growth is present. This smell is caused by microbial volatile organic compounds released by active mould colonies.
If you notice this odour in specific rooms or areas of your home, it is worth investigating further, even if surfaces appear clean and dry.
### High-Risk Areas to Check
Some areas of a home are more prone to mould growth than others. Pay close attention to:
- Bathrooms and ensuites, particularly around showers and baths
- Kitchens, especially behind the dishwasher and under the sink
- Laundries and areas where clothes are dried indoors
- Wardrobes and cupboards against external walls
- Window sills and frames, particularly on south-facing walls
- Subfloor spaces and crawl areas
- Roof cavities and ceiling spaces near the roof line
- Air conditioning units, ducts, and return air grilles
### Detecting Hidden Mould
Mould that grows within wall cavities, under flooring, or inside ceiling spaces cannot be seen during a visual inspection. This is where professional [mould inspection techniques and tools](/articles/mould-inspection-techniques-tools-and-methods) become essential. Thermal imaging, moisture mapping, and air quality testing can reveal contamination that would otherwise go undetected.
## Professional Mould Assessment Methods
A professional mould inspection involves a systematic evaluation of the property using specialised equipment and standardised assessment protocols. Qualified inspectors combine visual assessment with technology-driven testing to deliver accurate and actionable results.
### Moisture Meters
Pin-type and pinless moisture meters are used to measure the moisture content of building materials including timber, plasterboard, concrete, and masonry. These readings help inspectors identify areas where moisture levels exceed acceptable thresholds, indicating conditions favourable for mould growth.
Pinless meters are particularly useful for scanning large areas quickly without damaging surfaces, while pin-type meters provide precise readings at specific points.
### Infrared Thermal Imaging
Thermal imaging cameras detect temperature variations across surfaces, which can reveal hidden moisture within walls, ceilings, and floors. Wet areas appear cooler than surrounding dry materials on the thermal image, allowing inspectors to map moisture distribution without invasive testing.
This non-destructive technique is invaluable for identifying concealed leaks, condensation patterns, and areas of trapped moisture that would otherwise require physical removal of linings or finishes to investigate.
### Air Quality and Spore Testing
Air sampling devices collect airborne particles from indoor environments for laboratory analysis. The samples are examined to identify the types and concentrations of mould spores present in the indoor air. This testing can confirm mould contamination even when no visible growth is found.
Results are compared against outdoor baseline readings and published guidelines to determine whether indoor mould levels are elevated and require remediation.
### Surface Sampling
Tape lifts, swab samples, and bulk material samples can be collected from surfaces where mould is suspected. These samples are analysed in a laboratory to confirm the presence and species of mould, which informs the appropriate remediation approach.
## DIY vs Professional Mould Inspection: A Comparison
Many homeowners wonder whether they can assess mould problems themselves or need to engage a professional. The table below outlines the key differences.
| Factor | DIY Inspection | Professional Inspection |
| ---------------------------------- | ---------------------------------------- | -------------------------------------------------------------------- |
| **Detection scope** | Limited to visible surfaces | Includes hidden cavities, subfloor, and ceiling spaces |
| **Equipment** | Visual observation, basic moisture meter | Thermal imaging, calibrated moisture meters, air sampling |
| **Mould identification** | Cannot determine species | Laboratory analysis identifies species and concentration |
| **Hidden mould** | Unlikely to detect | Infrared and moisture mapping reveal concealed growth |
| **Air quality assessment** | Not possible | Spore counts compared against baseline standards |
| **Moisture source identification** | Limited to obvious leaks | Systematic assessment of all potential moisture pathways |
| **Report and documentation** | Informal notes | Detailed report with findings, images, and recommendations |
| **Cost** | Minimal upfront | Investment that prevents costly future remediation |
| **Accuracy** | Prone to missed or misidentified issues | High accuracy with technology and expertise |
| **Suitability** | Minor surface mould in accessible areas | Any suspected contamination, insurance claims, property transactions |
A DIY approach may be sufficient for cleaning small patches of surface mould in well-ventilated areas like shower recesses. For anything beyond minor surface contamination, a professional inspection is strongly recommended to ensure the full extent of the problem is identified and addressed correctly.
Learn more about the common [myths surrounding black mould](/articles/black-mold-myths-unveiling-the-truth-in-mould-inspections) and what inspections actually reveal.
## Prevention Strategies to Keep Your Home Mould-Free
Preventing mould is far more cost-effective than remediating it. The following strategies can significantly reduce the risk of mould establishing itself in your home.
### Control Indoor Humidity
Aim to maintain indoor relative humidity below 60 percent. Use exhaust fans in bathrooms and kitchens during and after activities that generate moisture. A hygrometer is an inexpensive tool for monitoring humidity levels in different rooms.
In particularly humid climates, a dehumidifier can help maintain acceptable moisture levels, especially in enclosed spaces with limited natural ventilation.
### Improve Ventilation
Good airflow is critical for preventing moisture accumulation. Open windows when weather permits to allow cross-ventilation. Ensure that exhaust fans in bathrooms and kitchens vent to the outside, not into the roof cavity.
Subfloor ventilation should be checked regularly to ensure vents are not blocked by garden beds, debris, or stored items. In some cases, mechanical ventilation systems may be needed to supplement natural airflow. Sydney homeowners can find specific advice on [combatting mould growth in Sydney homes](/articles/key-to-combatting-mould-growth-in-sydney-homes).
### Address Leaks Promptly
Any plumbing leak, roof leak, or water intrusion should be repaired as quickly as possible. Even a small drip can introduce enough moisture to trigger mould growth within 24 to 48 hours. After repairs are completed, ensure that all affected materials are thoroughly dried.
### Dry Wet Areas Quickly
After flooding, spills, or condensation events, dry affected areas within 24 hours. Remove wet carpets, underlay, and furnishings for drying or disposal. Use fans and dehumidifiers to accelerate the drying process.
### Maintain Building Envelope Integrity
Regularly inspect and maintain the external envelope of your home, including roof coverings, flashings, gutters, downpipes, external wall cladding, and waterproofing in wet areas. Addressing maintenance issues promptly prevents water from entering the building fabric.
### Use Mould-Resistant Products
When renovating or building, consider using mould-resistant plasterboard, paints, and sealants in areas prone to moisture exposure. These products do not prevent mould entirely but can slow its establishment and make cleaning easier.
### Avoid Drying Clothes Indoors
Drying clothes on indoor racks or airers releases a significant amount of moisture into the home. Where possible, use an outdoor clothesline or a vented dryer to prevent this moisture from contributing to elevated indoor humidity.
## When to Book a Professional Mould Inspection
There are several situations where a professional mould inspection is warranted:
- You can see or smell mould in your property
- You have experienced a water leak, flood, or storm damage
- Occupants are experiencing unexplained respiratory symptoms or allergies
- You are purchasing a property and want to confirm it is free from mould
- You are a landlord and need to meet your obligations under tenancy law
- You have previously had mould remediated and want to confirm it has not returned
- Your property has been unoccupied for an extended period
Early intervention is always more effective and less expensive than waiting until the problem becomes severe.
## Frequently Asked Questions
### Can I remove mould myself?
Small areas of surface mould on non-porous surfaces like tiles and glass can often be cleaned with a diluted bleach solution or commercial mould remover. Wear gloves, eye protection, and a P2 respirator mask during cleaning. For mould covering more than one square metre, or mould on porous materials like plasterboard and carpet, professional remediation is recommended.
### What are the long-term health effects of living with mould?
Prolonged exposure to mould spores and mycotoxins can lead to chronic respiratory conditions, persistent allergic reactions, and immune system suppression. Children exposed to mould during early development may have a higher risk of developing asthma. If you suspect mould in your home and occupants are experiencing health symptoms, seek both medical advice and a professional inspection.
### How do inspectors detect mould hidden inside walls?
Professional inspectors use infrared thermal imaging cameras to identify temperature anomalies caused by moisture within wall cavities. Calibrated moisture meters measure the moisture content of building materials without requiring destructive investigation. Air quality sampling can also confirm the presence of elevated spore levels even when mould is not visible.
### Does renters insurance cover mould damage?
Most standard renters insurance policies in Australia do not cover mould damage caused by gradual deterioration, poor maintenance, or lack of ventilation. Some policies may cover mould damage resulting from a sudden and accidental insured event, such as a burst pipe, provided the tenant took reasonable steps to mitigate the damage. Review your policy wording or speak with your insurer for specific coverage details.
### How can I improve ventilation to prevent mould?
Install or upgrade exhaust fans in bathrooms and kitchens, ensuring they vent directly to the outside. Open windows regularly to encourage cross-ventilation. Check that subfloor vents are unobstructed. Consider installing mechanical ventilation systems in rooms with limited natural airflow. Avoid blocking wall vents with furniture or stored items.
### Is black mould more dangerous than other types?
The term "black mould" typically refers to Stachybotrys chartarum, which produces mycotoxins that can be harmful to health. While Stachybotrys is a concern, many other mould species also produce allergens and irritants that affect health. The colour of mould alone is not a reliable indicator of its toxicity. Professional testing is the only way to accurately identify species and assess risk. Read more about [black mould myths and what inspections reveal](/articles/black-mold-myths-unveiling-the-truth-in-mould-inspections).
### How quickly can mould grow after water damage?
Mould can begin growing within 24 to 48 hours of a surface becoming wet. Spores are naturally present in the air and will colonise any damp organic material rapidly under favourable conditions. This is why prompt drying after any water event is critical for preventing mould establishment.
### Can mould affect my pets?
Yes. Pets, particularly dogs and cats, can experience respiratory distress, skin irritation, and allergic reactions from mould exposure. Smaller animals and those with pre-existing respiratory conditions are especially vulnerable. If your pet shows signs of respiratory difficulty or unusual skin irritation, mould contamination in the home should be investigated.
### What qualifications should a mould inspector have?
In Australia, look for inspectors who hold relevant qualifications in building inspection and mould assessment. Membership in professional bodies such as the Australian Institute of Building Surveyors or certifications in indoor air quality and mould remediation indicate a higher level of expertise. Ask about their equipment, sampling methods, and whether laboratory analysis is included in the inspection.
### How much does a professional mould inspection cost?
The cost of a professional mould inspection varies based on the size of the property, the extent of testing required, and the location. A standard residential inspection with visual assessment, moisture mapping, and thermal imaging typically ranges from $300 to $800. Air sampling and laboratory analysis may incur additional costs. The investment is modest compared to the potential cost of undetected mould damage.
### Can mould come back after remediation?
Yes, mould can return if the underlying moisture source is not resolved. Successful remediation requires both removing the existing mould and eliminating the conditions that allowed it to grow. A follow-up inspection after remediation confirms that moisture levels have been reduced to safe levels and that no residual contamination remains.
### Do I need a mould inspection before buying a property?
A mould inspection is highly recommended when purchasing a property, particularly if there are signs of past water damage, musty odours, or visible staining. Mould issues discovered after settlement become the buyer's responsibility and can be extremely costly to remediate. A pre-purchase mould assessment provides peace of mind and protects your investment.
## Protect Your Home with a Professional Mould Inspection
Mould contamination is a serious issue that affects the structural integrity of your home, the health of your family, and the value of your property. Early detection through professional inspection is the most effective way to prevent minor moisture issues from becoming major remediation projects.
If you suspect mould in your home, or want to ensure your property is free from hidden contamination, [book a professional mould inspection](/mould-inspections) with Owner Inspections. Our qualified inspectors use advanced detection technology to identify mould and moisture problems, providing you with a detailed report and clear recommendations for keeping your home safe and healthy.
### Pre-Sale Building Inspection to Identify Potential Issues
Source: https://ownerinspections.com.au/articles/pre-sale-building-inspection-potential-issues
Published: 2025-06-10 | Updated: 2026-02-09 | Category: Pre-Sale
Author: Maison Azdari
A [pre-sale building inspection](/pre-sale-inspections) is a thorough assessment conducted before a property is listed for sale, designed to uncover hidden structural, plumbing, electrical, and pest-related issues. Unlike a [pre-purchase inspection](/pre-purchase-inspections) conducted for the buyer, a pre-sale inspection serves the seller by identifying problems that could derail a sale or reduce the final price. In Australia, this inspection follows Australian Standard AS 4349.1 and helps sellers address defects proactively, comply with disclosure obligations, and present their property with full transparency to potential buyers.
The Australian property market is highly competitive, and buyers are increasingly cautious about hidden defects. Properties with documented inspection reports tend to attract more interest and sell faster because buyers feel confident they know exactly what they are purchasing. Sellers who skip this step risk having their buyer's inspector uncover problems that lead to price reductions, delayed settlements, or collapsed deals.
## What Is a Pre-Sale Building Inspection?
A pre-sale building inspection is a professional assessment of a property's condition before it goes on the market. Licensed building inspectors examine the structure, services, and compliance of the property to identify defects that could affect the sale.
This inspection gives sellers an advantage by allowing them to fix problems, adjust their asking price, or disclose known issues upfront. Without it, sellers are at risk of buyers discovering defects during their own inspection and using them as leverage to negotiate significant price reductions.
## Benefits of a Pre-Sale Inspection
### Identifying Structural Issues Early
Foundation cracks, roof leaks, and faulty wiring can be expensive to repair and deter potential buyers. Addressing these problems before listing prevents last-minute price reductions and delays. Even minor issues such as uneven flooring or misaligned doors can hint at more significant underlying problems that will concern buyers.
### Ensuring Building Code Compliance
Non-compliance with building regulations can delay or derail sales. Older properties may need updates to meet current standards. A pre-sale inspection identifies whether electrical wiring, plumbing, and structural elements meet legal requirements, reducing the risk of complications during the sale.
Australia has strict building codes under the National Construction Code (NCC), and non-compliance can lead to fines or mandatory modifications. Ensuring compliance before listing protects sellers from legal liability.
### Enhancing Buyer Confidence
Buyers often approach a purchase with scepticism, particularly regarding structural integrity. Providing an upfront inspection report demonstrates transparency and makes them more likely to purchase without requesting additional inspections or steep price reductions.
## Key Areas Assessed
## Common Issues Found
## Steps to Take After the Inspection
### Addressing Identified Issues
Sellers should prioritise repairs that offer the highest return on investment. Roof repairs, electrical upgrades, and plumbing fixes are among the most impactful. Hiring professional contractors for major work ensures quality and prevents future buyer concerns.
### Updating Disclosure Statements
Australian law requires sellers to disclose known defects in the property. Transparent disclosure builds trust and reduces the risk of post-sale disputes. Failure to disclose known defects can result in legal claims from buyers after settlement.
### Adjusting the Asking Price
If certain defects are not worth repairing, sellers can adjust their asking price to reflect the property's true condition. This approach is honest, prevents renegotiation, and can still result in a successful sale.
## Cost of Pre-Sale Inspections
Pre-sale building inspections in Australia typically start at $390 plus GST. The cost varies depending on property size, location, and the scope of the inspection.
## Choosing a Qualified Inspector
### Building Defect Identification to Prevent Costly Repairs
Source: https://ownerinspections.com.au/articles/building-defect-identification
Published: 2025-06-06 | Updated: 2026-02-09 | Category: Defect Investigation
Author: Maison Azdari
Building defects are structural, material, or workmanship issues that affect the safety, function, or appearance of a property. In Australia, common defects include waterproofing failures, wall and foundation cracks, roofing problems, faulty plumbing, and electrical faults. Identifying these defects early through professional inspections can prevent repairs that cost thousands of dollars and protect property value. The Australian construction industry faces billions of dollars in defect rectification costs each year, making regular inspections one of the most effective ways to safeguard your investment.
High-profile cases like the Opal Tower and Mascot Towers incidents in Sydney highlighted how widespread building defects can be and how costly the consequences are when they go undetected. Property owners, buyers, and developers all benefit from understanding what defects look like, what causes them, and how to address them before they escalate. For a complete overview, see our [guide to building defect investigations](/guides/building-defect-investigation-guide).
## What Is a Building Defect?
A building defect is any issue with the structure, materials, or workmanship that affects a building's safety, function, or appearance. Defects range from minor cosmetic issues to severe structural failures. Some are visible immediately, while others take years to appear, which is why periodic professional inspections are so important.
### Types of Building Defects
### Common Causes of Building Defects
## Common Building Defects in Australia
### Water Leaks and Waterproofing Issues
Water infiltration is one of the most common and damaging defects in Australian properties.
### Cracking in Walls and Foundations
Cracks can indicate anything from minor settling to serious structural problems.
**Types of Cracks**
**Causes**
### Roofing Defects
Roofing issues are a leading cause of water damage and insulation problems.
### Faulty Plumbing and Drainage
### Electrical Defects and Safety Concerns
## Importance of Professional Inspections
### Why Professional Inspections Are Needed
Hiring a certified building inspector is the most reliable way to detect defects before they escalate. [Pre-purchase inspections](/pre-purchase-inspections) help buyers avoid properties with hidden issues, while routine assessments allow owners to address problems early.
### What a Building Defect Inspection Covers
## How to Prevent and Address Defects
### Working with Reputable Builders
### Routine Maintenance and Repairs
### Reporting and Resolving Defects
Builders must rectify defects under statutory defect liability periods, which vary by state. In NSW, the major defect period is 6 years and the minor defect period is 2 years under the Home Building Act 1989. NSW Fair Trading and the Queensland Building and Construction Commission (QBCC) handle dispute resolution if builders fail to act.
## Regulatory Compliance
All properties in Australia must meet the National Construction Code (NCC) and state-specific building regulations. Failure to comply can result in legal action, property devaluation, and financial losses.
### Structural Integrity Inspection: Preventing Building Failures
Source: https://ownerinspections.com.au/articles/structural-integrity-inspection
Published: 2025-06-03 | Updated: 2026-06-01 | Category: Structural Inspections
Author: Maison Azdari
What if a building looks solid during an open home, but hidden movement, cracking, moisture, or material damage is already weakening the structure?
A structural integrity inspection checks whether a building’s main load-bearing elements are safe, stable, and performing as intended. It is different from a quick walkthrough because it focuses on the parts of the property that hold weight, resist movement, and protect occupants.
For Australian buyers, homeowners, strata committees, investors, and commercial property owners, this inspection can help answer one important question: is the building structurally sound enough for its current use?
In Australia, the importance of structural integrity inspections has been thrust into the spotlight following several high-profile building failures. The Opal Tower incident in Sydney on Christmas Eve 2018 forced the evacuation of approximately 3,000 residents when structural cracks appeared in the 36-storey residential building. Just months later, residents of Mascot Towers were evacuated after engineers discovered cracking in the primary support structure and facade. These incidents served as stark reminders that even modern buildings can harbour serious structural defects.
Structural integrity inspections are not merely a precaution. They are an essential component of responsible property ownership and building management. Whether you are purchasing a new home, managing a commercial property, or maintaining a strata complex, understanding the importance of structural inspections can protect your investment and ensure the safety of occupants. For a complete overview, see our [guide to building defect investigations](/guides/building-defect-investigation-guide).
Learn How to
Document Defects
}
buttonHref="/articles/document-building-defects-legal-claim"
variant="secondary"
/>
## What is a Structural Integrity Inspection?
A structural integrity inspection is a focused assessment of a building’s structural health. It looks at whether the foundations, footings, walls, beams, columns, floors, roof framing, connections, and other load-bearing elements are showing signs of movement, stress, deterioration, or failure.
In simple terms, structural integrity means the structure can carry expected loads and stay safe under normal use. The NCC structure provisions refer to structural reliability and require buildings to perform adequately under expected design actions and withstand extreme or repeated design actions.
A structural integrity inspection may be carried out as a specific structural inspection, a building structural inspection, a house structural inspection, or a broader structural integrity assessment, depending on the property type and the concerns being investigated.
Registered building inspectors also play a formal role in monitoring and enforcing building standards in Victoria by carrying out inspections of building work.
### Visual Assessment
The inspection begins with a thorough visual examination of all accessible structural elements. Inspectors look for visible signs of distress, including cracks, deflection, corrosion, deterioration, and movement. This visual survey covers foundations, walls, beams, columns, floors, and roof structures. Experienced inspectors can identify patterns in cracking and other damage that indicate underlying structural issues.
### Diagnostic Testing
Beyond visual assessment, structural inspections may employ various diagnostic techniques to evaluate hidden conditions. Common testing methods include:
- **Concrete testing:** Core sampling, rebound hammer tests, and carbonation depth testing assess concrete strength and condition.
- **Steel assessment:** Ultrasonic thickness testing, magnetic particle inspection, and visual examination for corrosion evaluate steel component integrity.
- **Moisture detection:** Electronic moisture meters and thermal imaging identify water infiltration that may be affecting structural elements.
- **Level surveys:** Precision instruments measure floor levels and wall alignment to detect settlement or movement.
- **Crack monitoring:** Gauges installed across cracks track movement over time to determine if cracking is active or stable.
### Engineering Analysis
For complex structural concerns, engineers may perform detailed analysis using original building plans, load calculations, and computer modelling. This analysis determines whether identified issues affect the building's structural capacity and what remediation may be required.
### Documentation and Reporting
A comprehensive structural inspection report documents all findings with photographs, diagrams, and detailed descriptions. The report identifies defects, assesses their severity, explains potential causes, and provides recommendations for repair or further investigation. This documentation becomes a crucial reference for property owners, builders, insurers, and
regulatory authorities.
## Structural Inspection vs Standard Building Inspection
A standard building inspection gives a broad condition overview. A structural inspection goes deeper into the building elements that affect stability, safety, and long-term performance.
| Inspection type | Main purpose | Best for | Output |
| ------------------------------- | --------------------------------------------- | ------------------------------------------------------ | ----------------------------------------------- |
| Standard building inspection | General property condition | Pre-purchase buyers, sellers, owners | Building inspection report |
| Building and pest inspection | Building defects plus timber pest risk | Buyers and investors | Combined building and pest report |
| Structural integrity inspection | Load-bearing elements and structural safety | Cracking, movement, sagging, settlement, major defects | Structural integrity report |
| Structural audit of building | Wider review of structural condition and risk | Strata, commercial, industrial, aged buildings | Structural audit or structural condition report |
| Durability inspection | Material performance and deterioration | Coastal, concrete, steel, masonry, older buildings | Durability findings and repair priorities |
NSW Government guidance says inspectors should check accessible areas such as the interior, exterior, roof space, under-floor space, roof exterior, drainage, garages, carports, paths, driveways, and site elements.
A [pest inspection](/timber-pest-inspections) may still be needed because a [standard building inspection](https://www.nsw.gov.au/housing-and-construction/buying-and-selling-property/buying-property-nsw/inspecting-a-property/inspection-reports) may identify visual termite damage, but it does not confirm whether termites or timber-destroying pests are still active.
## Key Areas Assessed During a Structural Integrity Inspection
A thorough structural integrity inspection examines multiple building systems and components. Understanding what inspectors look for helps property owners recognise potential issues and appreciate the scope of a professional assessment.
### Foundation Stability
The foundation is arguably the most critical structural element, as it transfers all building loads to the underlying soil. Foundation problems can affect every other part of the structure. During inspection, engineers assess:
- **Cracking patterns:** Horizontal cracks may indicate lateral soil pressure, while vertical or diagonal cracks often suggest settlement or movement. Stair-step cracking in masonry is a classic sign of differential settlement.
- **Settlement and subsidence:** Uneven settlement causes structural stress and can lead to cracking throughout the building. Inspectors check floor levels and look for evidence of past movement.
- **Water damage:** Moisture intrusion weakens foundations and can cause erosion of supporting soil. Signs include efflorescence, staining, and visible water ingress.
- **Drainage adequacy:** Poor drainage directs water towards foundations, increasing the risk of damage. Inspectors evaluate grading, drainage systems, and stormwater management.
- **Soil conditions:** Reactive clay soils common in many Australian regions expand and contract with moisture changes, placing stress on foundations designed without adequate allowance for soil movement.
### Load-Bearing Structures
Load-bearing elements transfer weight from the roof and upper floors down to the foundation. These include beams, columns, load-bearing walls, and floor systems. The inspection evaluates:
- **Beams and lintels:** Inspectors check for sagging, cracking, corrosion in steel beams, and rot or termite damage in timber beams. Lintels over openings are particularly vulnerable to failure.
- **Columns and posts:** Vertical load-bearing elements are assessed for plumb alignment, connection integrity, base deterioration, and signs of overloading.
- **Load-bearing walls:** Cracking patterns, bulging, bowing, and separation from floor or ceiling indicate structural problems. Inspectors distinguish between structural and non-structural walls.
- **Stress fractures:** Concentrated stress points can develop cracks that propagate over time. Early identification allows intervention before failure occurs.
- **Material fatigue:** Repeated loading and environmental exposure can weaken materials over time. Inspectors look for signs of fatigue in concrete, steel, and timber elements.
- **Connection integrity:** The connections between structural elements are often the weakest points. Inspectors examine bolts, welds, brackets, and other fastening systems for adequacy and condition.
### Roof and Ceiling Integrity
The roof structure must support its own weight, roofing materials, and imposed loads such as maintenance access, solar panels, and wind forces. Ceiling systems must remain securely attached and support any suspended loads. Assessment includes:
- **Roof framing:** Rafters, trusses, purlins, and ridge beams are examined for damage, deflection, splitting, and connection failures. Timber members are checked for rot and termite damage.
- **Sagging and deflection:** Visible sagging indicates overloading, member failure, or inadequate original design. Inspectors measure deflection and assess its significance.
- **Water damage:** Roof leaks cause progressive deterioration of roof framing. Staining, decay, and weakened timber are key indicators.
- **Structural distress:** Cracking in ceiling linings, separation from walls, and displaced fixings suggest roof movement or overloading.
- **Ventilation adequacy:** Poor roof space ventilation promotes condensation that damages timber members. Inspectors assess ventilation and moisture conditions.
- **Tie-down systems:** In cyclone and high-wind regions, roof tie-down systems must comply with wind loading requirements. Missing or inadequate tie-downs compromise safety.
### Material Degradation
Building materials deteriorate over time due to environmental exposure, chemical reactions, and biological attack. The inspection assesses the condition of primary structural materials:
- **Concrete deterioration:** Spalling, cracking, carbonation, and alkali-silica reaction (concrete cancer) compromise concrete strength and durability. Inspectors assess the extent and progression of deterioration.
- **Steel corrosion:** Rust reduces steel cross-section and structural capacity. Surface rust may be superficial, but advanced corrosion requires immediate attention. Coastal environments accelerate corrosion rates.
- **Timber condition:** Rot, termite damage, borer attack, and fungal decay weaken timber structures. Inspectors probe timber members and look for evidence of pest activity.
- **Masonry deterioration:** Mortar erosion, brick spalling, and salt attack weaken masonry walls and facades. Repointing and repair requirements are assessed.
- **Protective coatings:** Paint, sealants, and other protective coatings prevent moisture ingress and material deterioration. Failed coatings expose underlying materials to damage.
### Seismic and Environmental Resilience
Australia experiences earthquakes, severe storms, flooding, and bushfires. Buildings must be designed and constructed to resist these forces. Structural inspections evaluate:
- **Earthquake resistance:** While Australia is not on a major fault line, intraplate earthquakes do occur. Buildings in seismic zones must comply with AS 1170.4 for earthquake actions in structures. Older buildings may not meet current seismic requirements.
- **Wind resistance:** Cyclonic and high-wind regions require specific structural detailing. Inspectors verify tie-down systems, connection strength, and overall wind resistance capacity.
- **Flood resilience:** Buildings in flood-prone areas must withstand hydrostatic pressure, debris impact, and erosion. Foundation and lower level construction is particularly critical.
- **Bushfire construction:** Properties in bushfire-prone areas must comply with AS 3959 for construction in bushfire-prone areas. Structural assessments evaluate ember protection, radiant heat resistance, and construction materials.
- **Climate adaptability:** Temperature extremes, humidity variations, and changing weather patterns stress building structures. Inspectors assess how well buildings are adapting to local conditions.
## Common Structural Issues Identified During Inspections
Understanding the most frequently encountered structural problems helps property owners recognise warning signs and appreciate the value of professional inspection. The following issues are commonly identified in Australian buildings:
| Structural Issue | Warning Signs | Typical Solutions | Urgency Level |
| --------------------- | ---------------------------------------------------------- | -------------------------------------------------------------------- | ------------------------ |
| Foundation Settlement | Diagonal wall cracks, sticking doors, uneven floors | Underpinning, resin injection, drainage improvement | High |
| Concrete Cancer | Rust staining, spalling concrete, exposed reinforcement | Concrete repair, reinforcement treatment, protective coatings | High |
| Termite Damage | Hollow-sounding timber, mud tubes, visible damage | Timber replacement, pest treatment, barrier installation | High |
| Timber Rot | Soft or crumbling timber, discolouration, fungal growth | Timber replacement, moisture source elimination, fungicide treatment | Medium to High |
| Steel Corrosion | Rust, flaking, section loss, staining | Rust treatment, protective coating, member replacement | Medium to High |
| Roof Sagging | Visible deflection, ceiling cracking, water pooling | Structural bracing, member replacement, load reduction | Medium to High |
| Wall Cracking | Cracks wider than 5mm, stair-step patterns, growing cracks | Crack repair, wall stabilisation, foundation remediation | Varies |
| Connection Failure | Loose joints, visible gaps, movement under load | Fastener replacement, connection reinforcement, structural ties | High |
| Inadequate Tie-Downs | Missing straps, disconnected fixings, uplift damage | Install compliant tie-down systems, cyclone strapping | High in wind-prone areas |
| Masonry Deterioration | Mortar erosion, brick spalling, salt efflorescence | Repointing, brick replacement, waterproofing | Medium |
### Foundation Problems
Foundation issues are among the most serious and costly structural defects. In Australia, reactive clay soils are prevalent in many regions, including large parts of Melbourne, Adelaide, and western Sydney. These soils expand significantly when wet and shrink when dry, causing foundations to heave and settle.
Common foundation problems include:
- **Differential settlement:** Different parts of the foundation settle at different rates, causing cracking and structural distortion.
- **Subsidence:** Gradual sinking of the foundation due to soil consolidation, erosion, or changes in groundwater levels.
- **Heave:** Upward movement of foundations due to expanding clay soils or tree root activity.
- **Lateral movement:** Horizontal displacement of foundations due to soil pressure, particularly in sloping sites.
Signs of foundation problems include diagonal cracking in walls, sticking doors and windows, uneven floors, and gaps between walls and ceilings or floors. Early detection and intervention can prevent catastrophic failure and reduce repair costs.
### Concrete Cancer (Spalling)
Concrete cancer, technically known as concrete spalling, is a significant problem in
Australian buildings, particularly those located in coastal regions. The condition occurs
when the steel reinforcement within concrete corrodes, expanding and causing the surrounding
concrete to crack and break away.
The corrosion process begins when moisture and oxygen penetrate the concrete to reach the steel reinforcement. Contributing factors include:
- **Inadequate concrete cover:** Insufficient concrete thickness over reinforcement allows faster penetration of moisture and chlorides.
- **Carbonation:** Carbon dioxide from the atmosphere reacts with concrete, reducing its alkalinity and allowing steel corrosion.
- **Chloride ingress:** Coastal environments expose concrete to salt spray, which accelerates reinforcement corrosion.
- **Poor quality concrete:** Porous or poorly compacted concrete allows faster penetration of harmful agents.
- **Cracking:** Cracks provide direct pathways for moisture and chemicals to reach reinforcement.
Visible signs of concrete cancer include rust staining, cracking along reinforcement lines, spalled or detached concrete, and exposed reinforcement. Untreated concrete cancer progressively worsens and can lead to structural failure. Repair involves removing damaged concrete, treating or replacing corroded reinforcement, and applying new concrete or specialised repair mortars.
### Timber Decay and Termite Damage
Timber is extensively used in Australian construction, making buildings vulnerable to biological attack. Termites cause more damage to Australian homes than fire, floods, and storms combined. In addition to termites, timber structures face threats from wood rot, borer beetles, and fungal decay.
Key timber issues include:
- **Subterranean termite damage:** Termites consume timber from the inside out, often leaving only a thin veneer. Structural members can be completely hollowed before damage becomes visible externally.
- **Dry rot:** Despite its name, dry rot requires moisture to develop. Fungal decay weakens timber progressively, turning solid timber into crumbly, weakened material.
- **Wet rot:** Persistent moisture exposure causes timber to soften and lose structural capacity. Common in areas with water leaks or poor drainage.
- **Borer damage:** Wood-boring beetles lay eggs in timber, and larvae tunnel through the wood, weakening structural members.
Structural inspections include timber assessment, and dedicated timber pest inspections provide detailed evaluation of termite risk and existing damage. Building regulations require termite management systems for new construction in most Australian regions.
### Cracks in Walls and Ceilings
Cracking is one of the most visible signs of structural movement or distress. However, not all cracks are structurally significant. Experienced inspectors differentiate between cosmetic cracking and cracks that indicate serious structural issues.
Significant cracking types include:
- **Stair-step cracking:** Diagonal cracks following mortar joints in masonry typically indicate foundation settlement or movement.
- **Horizontal cracking:** May indicate lateral soil pressure against foundations or walls, or inadequate wall ties in cavity construction.
- **Vertical cracking:** Often occurs at building corners or changes in wall thickness, potentially indicating thermal movement or settlement.
- **Cracking around openings:** Stress concentrations at door and window corners often cause cracking that can indicate lintel failure or structural movement.
- **Wide or growing cracks:** Cracks wider than 5mm or those that are actively growing require urgent assessment.
Crack monitoring may be recommended to determine whether cracking is active or stable before deciding on repair strategies. Monitoring involves installing gauges across cracks and taking regular measurements over weeks or months.
### Corrosion of Steel Components
Steel corrosion affects various building components, from structural frames to connectors, lintels, and facade fixings. Corrosion is particularly problematic in:
- **Coastal areas:** Salt-laden air accelerates corrosion of exposed and inadequately protected steel.
- **Industrial environments:** Chemical pollutants can create corrosive conditions that attack steel.
- **Areas with moisture intrusion:** Water leaks and condensation promote corrosion of otherwise protected steel.
- **Buried elements:** Steel in contact with soil or inadequately protected from soil moisture corrodes over time.
Corrosion reduces the effective cross-section of steel members, decreasing their load-carrying capacity. Severely corroded steel can fail suddenly, making inspection and maintenance critical. Protective measures include galvanising, painting, and cathodic protection for buried elements.
### Roof Structural Weaknesses
Roof structures experience significant stresses from their own weight, roofing materials, wind loads, and maintenance access. Common roof structural issues include:
- **Truss or rafter failures:** Overstressed, damaged, or deteriorated roof members can fail, potentially causing roof collapse.
- **Connection failures:** Nail plates, bolts, and other connectors can work loose, corrode, or fail, compromising structural integrity.
- **Inadequate bracing:** Roof structures require proper bracing to prevent racking and maintain stability. Missing or inadequate bracing is a common defect.
- **Overloading:** Addition of heavy roofing materials, solar panels, or air conditioning equipment can overload roof structures not designed for additional weight.
- **Water damage:** Roof leaks cause progressive deterioration of timber roof members, potentially leading to failure.
[Roof inspections](/roof-inspection) are essential after severe weather events, when adding rooftop equipment, and as part of regular maintenance programmes.
### Infrastructure Ageing
Australia's building stock includes many older structures that may not meet current standards or have deteriorated over time. Research indicates that over 60 per cent of new apartment buildings have some form of defect, highlighting that age alone is not the only factor. Both new and old buildings require vigilant inspection.
Age-related structural concerns include:
- **Material deterioration:** All building materials have finite service lives and deteriorate over time.
- **Outdated construction methods:** Older buildings may have been constructed using methods now known to be inadequate.
- **Code compliance:** Buildings constructed before current codes may not meet modern safety requirements.
- **Accumulated damage:** Years of minor damage events can compound into significant structural issues.
- **Deferred maintenance:** Maintenance neglect allows minor problems to develop into major structural issues.
## How to Check Structural Integrity of a Building
Many readers search how to check structural integrity of a building because they want a practical checklist before buying, selling, renovating, or calling an inspector.
A professional inspection is still the safest option, but these checks can help buyers and owners spot warning signs early:
| Area to check | What to look for | Why it matters |
| --------------------------- | ---------------------------------------------------- | ------------------------------------------------------------ |
| External walls | Step cracks, horizontal cracks, bulging, separation | May point to settlement, wall movement, or load issues |
| Internal walls and ceilings | New cracks, widening cracks, sagging, stains | May show structural movement, moisture, or roof stress |
| Floors | Uneven surfaces, bouncing, slopes, gaps | May suggest subfloor movement or framing weakness |
| Doors and windows | Sticking, jamming, uneven gaps | Can indicate wall or foundation movement |
| Roof frame | Sagging, cracked timbers, loose connections | Roof loads need secure transfer to walls and supports |
| Subfloor and foundations | Dampness, poor drainage, timber decay, pier movement | Foundation and subfloor issues can affect the whole building |
| Concrete and steel | Spalling, rust staining, exposed reinforcement | May reduce durability and structural capacity |
| Drainage | Water pooling near footings, failed stormwater paths | Moisture changes can worsen soil and foundation movement |
NSW Government recommends checking for structural problem signs during personal inspections, including sagging ceilings, buckling walls, exterior cracks, doors and windows that catch in their frames, damp, mould, roof condition, guttering, and drainage.
Book a Defect
Investigation
}
buttonHref="/defect-investigation-reports"
variant="secondary"
/>
## What a Structural Integrity Report Should Include
A structural integrity report should do more than list cracks. It should explain what was inspected, what was found, how serious the issue appears, and what action is recommended.
NSW Government says an inspection report should include the inspection reason, date, scope, inaccessible areas, overall condition, major faults, significant problems, and recommendations for further investigation where needed.
| Report section | What it should explain | Keywords covered |
| ----------------------------- | ------------------------------------------------------------------- | ------------------------------------- |
| Property and inspection scope | Address, date, reason, inspected areas, access limits | structural inspection report |
| Structural observations | Foundations, walls, floors, roof, beams, columns, connections | building structural inspection report |
| Defect description | Cracks, movement, corrosion, rot, moisture, settlement | structural condition report |
| Severity rating | Minor, moderate, significant, urgent, or requires further testing | structural report |
| Likely cause | Soil movement, moisture, poor drainage, overloading, material decay | structural integrity assessment |
| Recommendations | Monitor, repair, get engineering advice, arrange testing | structural integrity report |
| Photos and diagrams | Clear visual evidence for buyers, owners, insurers, or contractors | structural reports |
| Next steps | Who to contact and how quickly action is needed | structural safety check |
A good structural inspection report should be easy to read. It should not leave the owner guessing whether a defect is urgent, cosmetic, or suitable for monitoring.
## When Do You Need a Building Structural Inspection?
A building structural inspection is worth booking when there are signs that the building may be moving, deteriorating, overloaded, or exposed to conditions that could weaken the structure.
| Situation | Recommended inspection | Why it matters |
| ------------------------------------- | ------------------------------------------------- | ---------------------------------------------------------------------------------------------------- |
| Buying an older home | House structural inspection | Older buildings may have movement, timber decay, drainage problems, or outdated construction details |
| Buying a unit or apartment | Structural inspection plus strata document review | Common property and shared structural elements can affect risk and cost |
| Visible cracking or movement | Specific structural inspection | The cause and severity need to be understood before repair |
| Removing a wall | Building structural assessment | Wall removal can affect load paths and may need engineering input |
| Sagging roof or ceiling | Structural integrity inspection | Roof framing may be overloaded, damaged, or poorly supported |
| Coastal property | Durability inspection | Salt exposure can speed up corrosion in steel and concrete |
| Commercial property | Structural audit of building | Owners and managers need records for safety, maintenance, leasing, and insurance |
| After storms, floods, impact, or fire | Structural safety check | Sudden events can affect elements that looked sound before |
| Ongoing asset planning | Periodic structural inspection | Regular records help track changes over time |
QBCC defines structural defective building work as [defective work](https://www.qbcc.qld.gov.au/complaints-disputes/building-work-issue/defective-work-dispute/what-defective-work) that can adversely affect structural performance, health or safety, functional use, or allow water penetration into a building.
## Structural Integrity Assessment: Main Areas Inspected
A structural integrity assessment looks at the building as a connected system. A crack in one wall may not be the real problem. The cause may come from foundations, drainage, roof loads, poor construction, nearby trees, or long-term moisture.
### Foundations and footings
Foundations transfer building loads into the ground. Inspectors look for settlement, heave, cracking, erosion, dampness, poor drainage, and signs that the building has moved unevenly.
### Walls, beams, columns, and load-bearing elements
A building structure inspection checks whether walls, beams, columns, lintels, and other supports are carrying loads properly. The assessment may look for deflection, bowing, corrosion, timber decay, poor connections, or signs of overloading.
### Floors, subfloor, and framing
Uneven floors, bouncing floors, timber decay, termite damage, failed piers, and damp subfloor spaces can affect comfort and safety. These findings may also appear in a residential structural inspection or home structural assessment.
### Roof and ceiling structure
Roof framing, trusses, rafters, purlins, tie-downs, and ceiling fixings are checked for sagging, damage, water staining, poor support, or changes caused by added loads such as solar panels or air-conditioning units.
### Materials and durability
Concrete spalling, steel corrosion, timber decay, brick fretting, failed coatings, moisture staining, and salt attack can all reduce durability. This is where a durability inspection supports the wider structural integrity check.
### Structural Integrity Test Methods
A structural integrity test is not always one single test. It may include several checks depending on the building, risk, and visible signs.
| Test or method | What it can show | Common use |
| ------------------- | ------------------------------------------------------------ | ---------------------------------------- |
| Visual inspection | Cracks, movement, sagging, corrosion, water damage | All structural inspections |
| Moisture testing | Hidden dampness that may affect timber, masonry, or concrete | Wet areas, subfloors, walls |
| Level survey | Floor slope, settlement, uneven movement | Foundation and slab concerns |
| Crack monitoring | Whether cracking is stable or still moving | Walls, slabs, masonry |
| Timber probing | Softness, decay, borer or termite damage | Roof and subfloor framing |
| Concrete assessment | Spalling, exposed reinforcement, carbonation risk | Apartments, balconies, car parks |
| Steel inspection | Rust, section loss, failed coatings | Beams, posts, lintels, coastal buildings |
| Engineering review | Load paths, design capacity, repair strategy | Complex or high-risk findings |
A [QBCC fact sheet](https://www.qbcc.qld.gov.au/sites/default/files/2021-11/guide-defective-building-work-complaints-inspections.pdf) explains that its building inspectors usually carry out visual inspections for listed complaint items and do not undertake invasive investigations such as cutting holes in walls to inspect concealed damage.
This matters because some building structural assessments need follow-up testing, engineering calculations, or invasive investigation before final repair decisions are made.
## Benefits of Regular Structural Integrity Inspections
Regular structural inspections provide numerous benefits for property owners, managers, and occupants. Investing in professional assessment delivers both immediate and long-term value.
### Safety Assurance
The primary benefit of structural inspections is ensuring the safety of building occupants and visitors. Structural failures can cause serious injury or death, and regular inspections identify potential hazards before they become dangerous. Property owners have a duty of care to ensure their buildings are safe, and inspections provide documented evidence that this
duty is being met.
For commercial property owners and strata managers, structural inspections are an essential component of risk management. Identifying and addressing structural issues protects against liability claims and demonstrates responsible building management.
### Legal Compliance
The National Construction Code 2022 (NCC 2022) establishes minimum requirements for structural reliability, serviceability, and durability. Buildings must be designed and constructed to comply with these requirements, and ongoing maintenance must preserve structural integrity.
Specific compliance requirements include:
- **Work Health and Safety Act:** Building owners must ensure structures are safe for workers and visitors.
- **Strata legislation:** Owners corporations must maintain common property, including structural elements.
- **Local council requirements:** Some councils require periodic structural assessments for certain building types.
- **Insurance requirements:** Policies often require buildings to be properly maintained, including structural elements.
Regular inspections help ensure ongoing compliance and provide documentation if compliance is questioned.
### Cost Savings
Early detection of structural issues typically results in significantly lower repair costs compared to addressing problems after they have progressed. Minor foundation cracks addressed early may cost a few thousand dollars to repair, while major foundation failure can cost hundreds of thousands of dollars.
Structural inspections also help avoid:
- **Emergency repairs:** Urgent structural work commands premium pricing and may require temporary evacuation.
- **Consequential damage:** Unaddressed structural issues often cause secondary damage to finishes, services, and contents.
- **Business interruption:** Commercial properties may lose rental income or business revenue during major structural repairs.
- **Legal costs:** Structural failures can result in expensive litigation and compensation claims.
### Property Value Preservation
Structural integrity directly affects property value. Buildings with known structural issues sell for less than comparable properties without such problems. In some cases, serious structural defects can make properties virtually unsaleable.
Regular inspections and maintenance preserve property value by:
- **Documenting structural condition:** Inspection reports provide evidence of structural health for prospective purchasers.
- **Identifying issues early:** Addressing problems promptly prevents deterioration that would reduce value.
- **Demonstrating responsible ownership:** A documented maintenance history reassures purchasers about building quality.
- **Supporting insurance claims:** Documentation of pre-existing condition helps with claims for subsequent damage.
### Environmental Sustainability
Maintaining existing buildings rather than demolishing and rebuilding is more environmentally sustainable. The embodied energy in existing structures represents a significant environmental investment. Structural inspections and maintenance extend building service life, reducing the environmental impact of new construction.
Sustainable building management through regular inspection:
- **Preserves embodied energy:** Existing materials and construction energy are retained rather than wasted through demolition.
- **Reduces construction waste:** Major repairs and rebuilding generate significant waste destined for landfill.
- **Minimises resource consumption:** Maintenance uses fewer materials than reconstruction.
- **Supports heritage preservation:** Many older buildings have heritage value worth preserving through proper maintenance.
## Recommended Inspection Frequency
| Building Type | Routine Inspection | Comprehensive Assessment | Special Circumstances |
| --------------------------- | -------------------- | ------------------------ | ------------------------------------------- |
| Residential (houses) | Every 3 to 5 years | Every 10 years | Before purchase, after severe weather |
| Multi-storey Apartments | Annual facade checks | Every 5 years | After defects identified, insurance renewal |
| Commercial Buildings | Annual or biannual | Every 5 years | Change of use, lease renewal |
| Industrial Facilities | Annual | Every 3 to 5 years | Equipment changes, vibration exposure |
| Heritage Buildings | Annual | Every 3 to 5 years | Before works, heritage compliance |
| Coastal Properties | Every 2 to 3 years | Every 5 years | After storms, salt damage concerns |
| Buildings on Reactive Soils | Every 2 to 3 years | Every 5 to 7 years | After drought, tree removal |
## Structural Integrity Examples: What Inspectors Often Record
These structural integrity examples help readers understand what may appear in a structural report.
| Finding | Possible concern | Typical next step |
| -------------------------- | -------------------------------------------- | ----------------------------------------- |
| Step cracking in brickwork | Differential settlement or footing movement | Monitor or arrange engineering assessment |
| Horizontal wall crack | Lateral pressure or wall restraint issue | Specific structural inspection |
| Sagging roof line | Overloaded or damaged roof framing | Roof framing assessment |
| Rust staining on concrete | Reinforcement corrosion or concrete spalling | Durability inspection |
| Sticking doors and windows | Building movement or frame distortion | Check walls, floors, and foundations |
| Uneven floors | Settlement, subfloor movement, timber decay | Level survey and subfloor inspection |
| Damp subfloor | Drainage or ventilation problem | Drainage correction and timber check |
| Exposed reinforcement | Concrete durability issue | Concrete repair assessment |
| Bulging wall | Structural movement or restraint failure | Urgent structural safety check |
Avoid treating a visible crack as the whole story. The better question is whether the defect affects the integrity of the building, whether it is moving, and whether it changes the property’s safety or value.
## Who Should Carry Out a Structural Inspection?
Choose a suitably qualified person with the right experience, insurance, and building knowledge.
NSW Government advises buyers to use a suitably qualified person such as a licensed builder, surveyor, or architect for a professional building inspection report, and to check that the person has adequate insurance, especially professional indemnity cover.
For complex structural concerns, multi-storey buildings, class 2 buildings, commercial properties, or major movement, a registered professional engineer may be needed. Service NSW says professional engineer registration is required to undertake structural engineering work on class 2 buildings.
Engineers Australia also states that engineer registration helps confirm benchmarked education, training, professional conduct, and competency standards
## How Often Should You Book a Periodic Structural Inspection?
A periodic structural inspection is useful for properties exposed to movement, weather, moisture, salt, heavy use, age, or repeated repairs.
| Property type | Suggested timing |
| ------------------------------------------------------ | ------------------------------------------------------ |
| Standard residential home | Every 5 to 10 years, or sooner if warning signs appear |
| Older home | Every 3 to 5 years |
| Coastal property | Every 2 to 3 years |
| Apartment or strata building | As part of regular maintenance planning |
| Commercial property | Every 1 to 5 years depending on use and risk |
| Property with known movement | As directed by the inspector or engineer |
| After flood, fire, storm, impact, or nearby excavation | As soon as practical after the event |
## Getting the Most Value from Your Home and Building Investment
A structural integrity inspection gives buyers and owners a clearer view of the building’s real condition. It can confirm whether visible damage is cosmetic, whether movement needs monitoring, or whether further engineering advice is needed.
For buyers, the report can support price discussions and help avoid unexpected repair costs. NSW Government lists one benefit of a building inspection report as knowing problems in advance and using that information when negotiating a lower purchase price.
For homeowners, strata committees, and commercial property owners, a structural integrity report can support maintenance planning, insurance discussions, repair decisions, and long-term asset care.
If you are buying, selling, renovating, or worried about cracks, movement, sagging, corrosion, or water damage, book a professional structural integrity inspection with Owner Inspections.
Contact Owner
Inspections
}
buttonHref="/contact"
variant="primary"
/>
## Key Takeaways
- Structural integrity inspections assess load-bearing components including foundations, beams, columns, walls, and roof structures to ensure buildings remain safe and stable.
- High-profile failures like Sydney's Opal Tower and Mascot Towers demonstrate that even relatively new buildings can have serious structural defects requiring professional assessment.
- Common structural issues in Australian buildings include foundation problems from reactive soils, concrete cancer in coastal areas, termite damage, and steel corrosion.
- Regular inspections are recommended every 5 to 10 years for residential properties, with more frequent assessments for commercial buildings, multi-storey apartments, and properties in challenging environments.
- Early detection of structural issues typically results in significantly lower repair costs compared to addressing problems after they have progressed to critical levels.
- Structural inspections support legal compliance with the National Construction Code, Work Health and Safety requirements, and strata legislation obligations.
- Property value is directly linked to structural integrity, with documented inspections and maintenance history reassuring prospective purchasers.
- Qualified structural engineers or experienced building inspectors should conduct assessments using visual examination, diagnostic testing, and engineering analysis.
### Dilapidation Inspection for Properties: Why It Matters
Source: https://ownerinspections.com.au/articles/dilapidation-inspection-for-properties
Published: 2025-05-27 | Updated: 2026-02-09 | Category: Dilapidation
Author: Maison Azdari
A dilapidation inspection is an independent assessment that documents a property's condition before and after nearby construction, excavation, or demolition work. In Australia, these inspections protect property owners by creating a formal record of any structural or surface changes that occur as a result of adjacent works. If damage is caused by a neighbouring construction project, the [dilapidation report](/dilapidation-reports) provides the evidence needed to support a compensation claim or resolve a dispute. The inspection is typically conducted by a licensed building inspector or engineer and covers structural elements, visible surfaces, shared structures such as fences and driveways, and safety compliance.
Property owners, developers, builders, real estate agents, and commercial property managers all benefit from dilapidation inspections. Without one, proving that damage was caused by construction activity rather than pre-existing wear becomes extremely difficult. Australian building regulations in multiple states emphasise the importance of both pre-construction and post-construction property assessments to maintain accountability and minimise risk.
## What Is a Dilapidation Inspection?
A dilapidation inspection is an independent property assessment conducted before and/or after construction or excavation work takes place nearby. It identifies any structural damage or deterioration that may have occurred as a result of the construction process.
A pre-construction dilapidation report documents the property's condition before work begins. A post-construction report provides an updated record after the work is completed. Comparing the two reveals whether any damage has occurred and provides clear evidence for claims or disputes.
### Key Elements Documented
## Why Dilapidation Inspections Are Important
### Protection for Property Owners and Developers
Property owners can protect themselves against unwarranted liability claims from neighbours alleging construction-related damage. Developers can use the report to demonstrate that they did not cause damage to adjacent properties. This transparency builds trust among all stakeholders and reduces the risk of prolonged disputes.
### Legal and Insurance Considerations
Some Australian councils and insurance providers require a dilapidation report before approving permits or processing claims. The report supports defect liability periods by documenting any damage resulting from construction activity. In disputes, it provides evidence that can determine liability and support compensation claims.
### Preventing Disputes and Costly Repairs
Disputes between builders and property owners frequently arise over structural issues. Clear documentation eliminates uncertainty and gives both parties objective evidence. Property owners who identify issues early can take preventive action, avoiding expensive repairs later.
## Key Components of a Dilapidation Report
### Photographic Documentation
High-resolution images with timestamps provide a visual record for future reference. Comparison images highlight changes between pre-construction and post-construction conditions, making it straightforward to identify discrepancies.
### Structural and Surface Assessments
Inspectors identify hairline cracks, foundation movement, and uneven surfaces that may compromise property stability. They determine whether damages are cosmetic or structural, which helps in estimating accurate repair costs.
### Annotated Diagrams and Expert Analysis
Floor plans highlight problem areas and provide a clear overview of impacted sections. Inspectors provide expert observations on damage severity and recommend corrective actions where needed.
### Pre-Construction and Post-Construction Comparison
A side-by-side assessment tracks changes over time. This comparison is particularly valuable for insurance claims and legal disputes because it makes it clear exactly what changed and when.
## Who Needs a Dilapidation Inspection?
## Legal Requirements in Australia
Australian building laws require that construction projects do not negatively impact nearby properties. State-specific regulations in Victoria, NSW, and Queensland outline the need for pre-construction and post-construction reports. A dilapidation report is legally recognised evidence in property damage claims and can be used in court proceedings, tribunal hearings, and insurance disputes.
## How the Inspection Is Conducted
### Hiring a Qualified Inspector
Choose a licensed, independent inspector with experience in assessing construction-related damages. Check certifications, ask for sample reports, and read client reviews to confirm credibility.
### The Inspection Process
### Cost of a Dilapidation Inspection
Prices start at AUD $500 plus GST, depending on property size and complexity. The inspection itself typically takes 1 to 3 hours on site. Considering that a single unresolved dispute can cost tens of thousands of dollars, the inspection is a cost-effective form of protection.
### How to File a Property Damage Insurance Claim in Australia
Source: https://ownerinspections.com.au/articles/file-a-property-damage-insurance-claim
Published: 2025-05-23 | Updated: 2026-02-12 | Category: Insurance
Author: Maison Azdari
Property damage can happen without warning. Whether it is a bushfire tearing through regional land, a severe storm ripping off roof sheeting, or a burst pipe flooding your living room, the aftermath is stressful enough without having to figure out the insurance claims process from scratch.
In Australia, property damage insurance covers a wide range of events including natural disasters, accidental damage, and vandalism. The Insurance Council of Australia reported that the 2019-2020 bushfire season alone generated over $2.2 billion in insured losses. Queensland's severe weather events in 2023 caused an estimated $3 billion in claims. These figures show how frequently Australian property owners deal with significant damage events.
This guide walks you through the entire claims process, from the moment you discover damage through to settlement or dispute resolution.
For a complete overview, see our [guide to insurance claim assessments](/guides/insurance-claim-assessment-guide).
## Common Causes of Property Damage in Australia
Australia's climate and geography make properties particularly vulnerable to a range of damage events. Understanding the most common causes helps you assess your coverage needs and respond quickly when something goes wrong.
**Bushfires** remain one of the most destructive forces affecting Australian properties. The Black Summer fires of 2019-2020 destroyed over 3,000 homes across New South Wales, Victoria, and South Australia. Even properties not directly in the fire path can suffer smoke damage, ember attack, and radiant heat exposure.
**Severe storms and cyclones** cause widespread damage across Queensland, New South Wales, and the Northern Territory each year. Hail, high winds, and torrential rain can compromise roofing, windows, fencing, and structural elements in a matter of hours.
**Flooding** from both riverine events and flash flooding affects thousands of properties annually. Many homeowners are surprised to learn that flood cover is not always included in standard home insurance policies.
**Burst pipes and internal water damage** are among the most common claims lodged with Australian insurers. A slow leak behind a wall can cause significant structural deterioration and mould growth before it is detected.
**Vandalism and malicious damage** also fall under most property damage policies. This includes graffiti, broken windows, forced entry damage, and deliberate destruction.
## What Does Property Damage Insurance Cover?
Most Australian home and contents insurance policies cover damage caused by storms, fire, lightning, explosion, theft, vandalism, and impact events. However, coverage varies significantly between insurers and policy types.
Before filing a claim, you need to understand several key aspects of your policy:
- **Sum insured:** the maximum amount your insurer will pay out for a claim
- **Excess or deductible:** the amount you pay before the insurer covers the rest
- **Listed events:** specific events your policy covers (some policies are named-peril only)
- **Exclusions:** events or damage types specifically not covered, such as flood, gradual deterioration, or lack of maintenance
- **Sub-limits:** caps on specific categories like temporary accommodation, fencing, or contents
Review your Product Disclosure Statement (PDS) carefully. If anything is unclear, contact your insurer or broker before lodging a claim.
## Step-by-Step Guide to Filing Your Claim
Filing a property damage claim involves several stages. Following a structured approach improves your chances of a fair and timely outcome.
## Common Mistakes to Avoid
Many property owners inadvertently weaken their claims by making avoidable errors during the process.
### Delaying Your Claim Submission
Waiting too long to notify your insurer creates problems. Insurers may question why you delayed, and evidence can deteriorate or be cleaned up in the meantime. Some policies have strict notification requirements. Lodge your claim promptly, even if you are still gathering documentation.
### Insufficient Documentation
A claim supported only by a verbal description and a few blurry photos is far weaker than one backed by comprehensive visual evidence, an independent inspection report, and multiple repair quotes. Take the time to document everything before any clean-up or temporary repairs begin.
### Overlooking Policy Exclusions
Assuming your policy covers a particular type of damage without checking can lead to disappointment. Flood, storm surge, and gradual damage exclusions catch many policyholders off guard. Read your PDS before you lodge your claim so you can address potential coverage issues early.
### Accepting the First Offer Without Question
Insurers aim to settle claims efficiently, but their initial offer may not fully reflect the cost of proper repairs. If you believe the settlement is too low, request a detailed breakdown of how they calculated the figure. Compare it against your own repair quotes and independent assessment. You have the right to negotiate.
### Disposing of Damaged Items Too Early
Throwing away damaged items before the insurer or loss adjuster has inspected them can undermine your claim. Keep everything in place until you receive written confirmation that items can be disposed of.
## Dispute Resolution Through AFCA
If you cannot reach a satisfactory outcome with your insurer through direct negotiation, you can escalate the matter to the Australian Financial Complaints Authority (AFCA).
AFCA is a free, independent dispute resolution scheme that covers complaints about insurance products. Before lodging a complaint with AFCA, you must first go through your insurer's internal dispute resolution (IDR) process. If the IDR outcome is unsatisfactory, or if the insurer fails to respond within the required timeframe, AFCA can step in.
The AFCA process involves reviewing all documentation from both parties, conducting an investigation, and making a binding determination if the complaint cannot be resolved by agreement. AFCA can award compensation up to $1,085,000 for general insurance disputes.
To lodge a complaint, visit the AFCA website at afca.org.au or call 1800 931 678. There is no cost to the consumer for using this service.
## The Role of Independent Building Inspectors
While your insurer will typically send their own assessor or loss adjuster, these professionals work for the insurance company. Obtaining an independent building inspection report gives you a separate, unbiased assessment of the damage and required repairs.
An independent report from a licensed building inspector can identify damage that the insurer's assessor may have missed or undervalued. It provides a professional, documented basis for negotiating a higher settlement. This is particularly valuable for complex claims involving structural damage, concealed water damage, or fire-affected building elements.
Independent reports carry significant weight in AFCA disputes because they demonstrate that you have obtained professional evidence to support your position.
For a complete overview, see our [guide to insurance claim assessments](/guides/insurance-claim-assessment-guide).
### Legal Expert Witness Reports Explained
Source: https://ownerinspections.com.au/articles/legal-expert-witness-reports-explained
Published: 2025-05-20 | Category: Expert Witness
Author: Maison Azdari
When property disputes escalate to legal proceedings, the outcome often hinges on the
quality of expert evidence presented. An [expert witness report](/expert-witness-reports) is not merely a technical
document. It is a critical piece of evidence that can determine whether a case succeeds or
fails in court. In Australian jurisdictions, these reports carry significant weight,
providing judges and tribunals with the specialised knowledge necessary to understand
complex building and construction matters.
Expert witness reports serve as the bridge between technical expertise and legal
decision-making. They translate complex building defects, construction failures, and
property conditions into clear, objective assessments that courts can rely upon. Whether the
dispute involves structural failures, building code violations, contractual breaches, or
valuation conflicts, a properly prepared expert witness report provides the foundation for
informed judicial decisions.
This comprehensive guide explores the purpose, structure, and legal requirements of expert
witness reports in Australia. Understanding these elements is essential for property owners,
legal practitioners, and industry professionals who may need to commission, prepare, or
evaluate such reports in the course of litigation or dispute resolution.
> An expert witness report is only as valuable as its objectivity. The moment an expert
> becomes an advocate rather than an independent assessor, their evidence loses credibility
> and the court loses a valuable resource for truth-finding.
## What is an Expert Witness Report?
An expert witness report is an independent professional assessment prepared for use in legal
proceedings. Unlike standard building inspection reports that serve commercial purposes,
expert witness reports are specifically designed to assist courts, tribunals, and
arbitration panels in understanding technical matters that fall outside ordinary knowledge.
The defining characteristic of an expert witness report is its independence. The expert owes
their primary duty to the court, not to the party who engaged them. This fundamental
principle distinguishes expert evidence from advocacy and ensures that courts receive
objective, unbiased technical assessments.
In the context of building and construction disputes, expert witness reports typically
address matters such as:
- **Identification and assessment of building defects:** Determining the nature, extent, and cause of defects in residential and commercial properties.
- **Compliance with building codes and standards:** Evaluating whether construction work meets the requirements of the National Construction Code, Australian Standards, and relevant state regulations.
- **Causation analysis:** Establishing the relationship between alleged failures or defects and their root causes.
- **Quantification of damages:** Assessing the cost of rectification works and associated losses.
- **Standard of workmanship:** Determining whether construction work meets acceptable industry standards.
The expert witness report must be prepared with the understanding that its author may be
required to give oral evidence and face cross-examination. This prospect of scrutiny demands
the highest standards of accuracy, thoroughness, and intellectual honesty.
## Purpose and Applications of Expert Witness Reports
Expert witness reports serve multiple purposes within the Australian legal system. Their
applications extend across various types of disputes and proceedings, each requiring
specific expertise and methodological approaches.
### Property Defects and Building Failures
Property defect disputes represent one of the most common applications for expert witness
reports in building and construction litigation. These reports address a wide range of
issues that can arise in both residential and commercial properties.
#### Structural Failures
Structural failures can have catastrophic consequences, making expert evidence essential in
related disputes. Expert witness reports in structural matters typically address:
- Foundation settlement and subsidence causing cracking and movement
- Load-bearing wall failures and inadequate structural support
- Roof structure deficiencies including sagging, spreading, or collapse
- Concrete cancer and reinforcement corrosion in multi-storey buildings
- Retaining wall failures leading to earth movement and property damage
The expert must identify not only the nature of the structural failure but also its cause,
which may involve design errors, construction defects, material failures, or inadequate
maintenance.
#### Building Code Violations
Non-compliance with the National Construction Code and Australian Standards frequently forms
the basis of building disputes. Expert witness reports addressing code violations must
clearly identify:
- The specific code provisions or standards that have been breached
- The nature and extent of the non-compliance
- The implications of the breach for safety, functionality, and property value
- The rectification works required to achieve compliance
- The estimated cost of remediation
#### Material Degradation and Defective Products
Building materials that fail prematurely or perform below specifications can cause
significant damage and expense. Expert reports in these matters typically investigate:
- Waterproofing membrane failures leading to water ingress and damage
- Cladding defects including combustible materials and inadequate installation
- Window and door failures affecting weather sealing and security
- Roofing material degradation and premature failure
- Paint and coating failures exposing substrates to damage
### Construction Disputes
Construction disputes often involve multiple parties and complex factual matrices. Expert
witness reports provide the technical foundation for resolving these disputes.
#### Contractual Breaches
When parties allege that construction work fails to meet contractual specifications, expert
evidence is essential to establish the nature and extent of any breach. The expert must
compare the completed work against the contract documents, including:
- Architectural drawings and specifications
- Engineering designs and structural calculations
- Material specifications and quality requirements
- Workmanship standards incorporated by reference
#### Project Delays
Delay disputes require expert analysis to determine the causes and consequences of project
overruns. Programming experts assess construction schedules, identify critical path delays,
and apportion responsibility among the parties. Building experts may be engaged to determine
whether alleged defects contributed to delays through the need for rectification works.
#### Workmanship Issues
Disputes concerning workmanship quality require expert assessment against industry
standards. The expert must determine whether the work meets the standard of a competent and
experienced tradesperson, considering:
- Applicable Australian Standards and codes of practice
- Manufacturer installation requirements
- Industry best practice guidelines
- The reasonable expectations of the parties based on contract terms and price
### Real Estate Valuation Conflicts
Property valuation disputes arise in various contexts including compulsory acquisition,
matrimonial proceedings, estate matters, and commercial transactions. Expert witness reports
addressing valuation must demonstrate rigorous methodology and market analysis.
Building experts may work alongside valuation experts to assess how building defects,
non-compliance issues, or required rectification works affect property value. This
collaboration ensures that valuations accurately reflect the true condition of the property.
### Government and Infrastructure Assessments
Government bodies and infrastructure providers frequently engage building experts for
assessments related to:
- Compulsory acquisition and compensation claims
- Public building safety assessments
- Heritage building condition reports
- Infrastructure damage assessments following construction activities
- Dilapidation surveys for major projects
These assessments often require the expert to consider broader public interest factors
alongside technical building matters.
## The Role of an Expert Witness
The role of an expert witness in Australian legal proceedings is fundamentally different
from that of other witnesses. While ordinary witnesses can only give evidence about facts
they have personally observed, expert witnesses are permitted to express opinions on matters
within their field of expertise. This privilege carries significant responsibilities.
### Independence and Objectivity
The cornerstone of expert evidence is independence. An expert witness must approach their
task without bias or predisposition towards any party. This means:
- **Primary duty to the court:** The expert's overriding duty is to assist the court impartially, not to advance the case of the party who engaged them.
- **Objective analysis:** Conclusions must be based on the evidence and the expert's honest professional opinion, not on what would best serve the client's interests.
- **Disclosure of contrary evidence:** The expert must disclose facts or opinions that are unfavourable to the party engaging them if those matters are relevant to the issues in dispute.
- **Acknowledgement of limitations:** The expert must clearly identify the boundaries of their expertise and refrain from expressing opinions on matters outside their competence.
### Factual Analysis, Not Advocacy
Expert witnesses provide technical analysis and professional opinions. They are not
advocates for either party. This distinction is critical because:
- The expert must consider all relevant evidence, not just evidence that supports a particular conclusion.
- Alternative explanations or theories must be acknowledged and addressed, even if they weaken the case of the instructing party.
- The expert's report must fairly represent the range of professional opinion on contentious matters.
- The language used must be measured and objective, avoiding partisan or emotional language.
Courts are adept at identifying experts who have crossed the line from independent
assessment to advocacy. When this occurs, the expert's credibility is severely damaged,
often to the detriment of the party who engaged them.
### Communication with Legal Teams
While maintaining independence, experts must work cooperatively with the legal teams
involved in the proceeding. This includes:
- Receiving clear instructions about the issues to be addressed
- Obtaining access to relevant documents and evidence
- Clarifying the scope of the expert's retainer
- Discussing the format and timing of the report
- Preparing for oral evidence and cross-examination
However, the expert must resist any attempt by legal teams to influence their opinions or
the content of their report. The expert's conclusions must remain their own, based on their
professional judgement and the evidence before them.
## Australian Legal Framework for Expert Evidence
Expert witness reports in Australia must comply with specific legal requirements that vary
somewhat between jurisdictions. Understanding these requirements is essential for preparing
reports that will be admissible and carry weight in proceedings.
### Federal Court Rules 2011
The Federal Court of Australia has comprehensive rules governing expert evidence. Rule 23.13
sets out specific requirements for expert reports, including:
- The expert's qualifications and the experience that qualifies them to give opinion evidence
- The facts, matters, and assumptions on which the opinion is based
- The reasons for the opinion
- A statement that the expert has read, understood, and complied with the Expert Evidence Practice Note
- If the expert's opinion is not fully researched because of insufficient data or for any other reason, a statement of that fact and the reasons
The Federal Court Practice Note on Expert Evidence (GPN-EXPT) provides detailed guidance on
the content and form of expert reports, the conduct of concurrent evidence sessions, and the
obligations of experts.
### State and Territory Guidelines
Each Australian state and territory has its own rules and practice notes governing expert
evidence. While the fundamental principles are consistent, there are variations in specific
requirements.
| Jurisdiction | Key Legislation/Rules | Notable Requirements |
| ---------------------------- | ------------------------------------------------------------------ | ------------------------------------------------------------------------- |
| New South Wales | Uniform Civil Procedure Rules 2005, Expert Witness Code of Conduct | Mandatory acknowledgement of code of conduct, specific format requirements |
| Victoria | Supreme Court (General Civil Procedure) Rules 2015 | Harmonised expert code, concurrent evidence provisions |
| Queensland | Uniform Civil Procedure Rules 1999 | Expert witness guidelines, disclosure obligations |
| Western Australia | Rules of the Supreme Court 1971, Practice Direction No. 3 of 2023 | Expert evidence protocols, joint conferencing requirements |
| South Australia | Supreme Court Civil Rules 2006 | Expert witness guidelines, concurrent evidence procedures |
| Australian Capital Territory | Court Procedures Rules 2006 | Expert evidence practice direction, report content requirements |
### Tribunal Proceedings
Building and construction disputes often proceed in specialist tribunals such as the NSW
Civil and Administrative Tribunal (NCAT) or the Victorian Civil and Administrative Tribunal
(VCAT). These tribunals generally have less formal evidentiary requirements but still expect
expert reports to demonstrate independence and objectivity.
Tribunal proceedings may involve simplified expert evidence procedures, including:
- Joint expert appointments by the tribunal
- Single expert determinations for certain matters
- Streamlined report formats
- Greater flexibility in the presentation of expert evidence
### Credibility Evaluation
Courts and tribunals evaluate expert evidence based on several factors that determine the
weight to be given to the expert's opinions:
- **Qualifications and experience:** The expert's credentials and relevant experience in the specific subject matter
- **Methodology:** Whether the expert has applied accepted methodology in reaching their conclusions
- **Reasoning:** The logical connection between the evidence, the methodology, and the expert's conclusions
- **Independence:** Whether the expert has maintained objectivity and avoided advocacy
- **Presentation under cross-examination:** How the expert responds to challenges to their evidence and maintains their opinions under pressure
## Structure of an Expert Witness Report
A well-structured expert witness report facilitates understanding and enhances credibility.
While specific requirements vary between jurisdictions, most courts expect expert reports to
contain certain standard components.
| Component | Purpose | Key Elements |
| --------------------------------- | ------------------------------------- | --------------------------------------------------------------------------------- |
| 1. Title Page | Identification of the report and case | Case name and number, court details, parties, expert name, report date |
| 2. Introduction | Establish scope and methodology | Instructions received, issues addressed, methodology overview, site inspection |
| details |
| 3. Expert Qualifications | Establish expertise and credentials | Education, professional memberships, relevant experience, previous expert witness |
| engagements |
| 4. Materials Reviewed | Document evidentiary basis | List of documents, photographs, test results, and other materials examined |
| 5. Factual Background | Establish the context for opinions | Relevant history, timeline of events, property description, parties involved |
| 6. Methodology Explanation | Demonstrate rigorous approach | Inspection procedures, testing methods, standards applied, analytical framework |
| 7. Expert Opinion | Address the issues in dispute | Findings, analysis, conclusions with supporting reasoning and evidence |
| 8. Conclusion and Recommendations | Summarise key findings | Summary of opinions, recommended remediation, cost estimates if applicable |
| 9. Declaration of Impartiality | Confirm compliance with duties | Acknowledgement of expert code, duty to court, disclosure of any conflicts |
| 10. Appendices | Support the main report | Photographs, diagrams, test results, calculations, CV, reference documents |
### 1. Title Page with Case References
The title page must clearly identify the proceeding and the expert. Essential elements
include:
- Full names of the parties to the proceeding
- Court or tribunal name and case number
- Name and qualifications of the expert
- Date of the report
- Description of the report type (initial report, supplementary report, etc.)
### 2. Introduction and Scope
The introduction establishes the parameters of the expert's engagement. It should clearly
state:
- The party who engaged the expert and when
- The specific questions or issues the expert has been asked to address
- The date and circumstances of any site inspections
- Any limitations on the expert's investigations or access
- An overview of the methodology to be applied
### 3. Expert Qualifications and Experience
This section establishes the expert's credentials and competence to give opinion evidence on
the matters in dispute. It should include:
- Academic qualifications relevant to the subject matter
- Professional registrations and memberships
- Years of experience in the relevant field
- Specific experience relevant to the issues in the case
- Previous experience as an expert witness
A detailed curriculum vitae is typically attached as an appendix, with the body of the
report containing a summary of the most relevant qualifications.
### 4. Materials Reviewed
The expert must identify all materials they have considered in forming their opinions. This
serves to:
- Demonstrate the evidentiary foundation for the expert's conclusions
- Allow the court to assess whether the expert has considered all relevant material
- Enable the opposing party to identify any gaps or omissions
- Provide a record for future reference
Materials should be listed systematically, with clear references that correspond to any
citations in the body of the report.
### 5. Factual Background and Timeline
The expert should set out the factual context necessary to understand their opinions. This
includes:
- Description of the property and its history
- Chronology of relevant events
- Summary of the construction works or defects at issue
- Any assumptions the expert has made about disputed facts
The expert should clearly distinguish between facts they have established through their own
investigations and facts they have been instructed to assume.
### 6. Methodology Explanation
A clear explanation of methodology is essential to the credibility of the expert's opinions.
This section should describe:
- The inspection procedures followed
- Any testing or sampling conducted
- The standards and codes against which compliance has been assessed
- The analytical framework applied to reach conclusions
- Any industry guidelines or professional practices followed
The methodology should be defensible as appropriate for the issues being addressed and
consistent with accepted practice in the relevant discipline.
### 7. Expert Opinion with Supporting Evidence
This is the core of the expert report, where the expert addresses each issue with their
professional opinion. Effective presentation requires:
- Clear identification of each issue being addressed
- Detailed analysis of the relevant evidence
- Application of the stated methodology
- Logical reasoning connecting evidence to conclusions
- Reference to supporting photographs, documents, or technical data
Opinions should be expressed with appropriate qualification, acknowledging any uncertainty
and the assumptions on which they depend.
### 8. Conclusion and Recommendations
The conclusion should summarise the expert's key opinions in a clear and accessible manner.
Where appropriate, it may include:
- Summary of findings on each issue addressed
- Recommended remediation works
- Cost estimates for rectification
- Timeframes for necessary works
- Any ongoing monitoring or maintenance requirements
### 9. Declaration of Impartiality
Most courts require a formal declaration in which the expert acknowledges:
- They have read and understood the applicable expert witness code of conduct
- They agree to be bound by that code
- Their primary duty is to the court, not to any party
- They have no conflict of interest that might affect their objectivity
- They have made all inquiries they believe appropriate
- No matters of significance have been withheld from the court
### 10. Appendices
Appendices support the main body of the report and typically include:
- Detailed curriculum vitae of the expert
- Photographs with clear labelling and location references
- Diagrams, plans, and technical drawings
- Test results and laboratory reports
- Calculations supporting cost estimates or technical conclusions
- Copies of relevant standards or code provisions
## Best Practices for Expert Witness Reports
Producing an effective expert witness report requires attention to both substance and
presentation. The following best practices enhance the quality and persuasiveness of expert
evidence.
### Clarity and Accessibility
Expert reports must be comprehensible to readers who do not share the expert's technical
knowledge. Best practices include:
- **Plain language:** Avoid unnecessary jargon and explain technical terms when they must be used
- **Logical structure:** Organise the report so that it builds understanding progressively
- **Visual aids:** Use photographs, diagrams, and tables to illustrate complex points
- **Executive summaries:** Consider including a brief summary of key conclusions for lengthy reports
- **Consistent formatting:** Use clear headings, numbering, and paragraph structure
### Objectivity and Balance
Maintaining objectivity requires conscious effort throughout the report preparation process:
- **Consider alternative explanations:** Address possible alternative causes or interpretations of the evidence
- **Acknowledge limitations:** Be transparent about the limits of the evidence or the expert's analysis
- **Avoid partisan language:** Use neutral, professional language that does not appear to favour either party
- **Disclose uncertainty:** Express opinions with appropriate qualification rather than overstating confidence
### Logical Consistency
The report must demonstrate clear logical reasoning from evidence to conclusions:
- Each conclusion should be traceable to specific evidence and analysis
- The methodology should be consistently applied throughout
- Any assumptions should be clearly stated and consistently maintained
- Conclusions should not contradict each other or the underlying evidence
### Legal Compliance
Ensure the report meets all applicable procedural requirements:
- Check the specific court or tribunal rules that apply
- Include all mandatory declarations and acknowledgements
- Follow prescribed format requirements
- Meet filing deadlines and page limits
### Evidence Reliability
The expert should be able to vouch for the reliability of the evidence on which they rely:
- Document the chain of custody for physical evidence
- Use accredited laboratories for testing
- Verify the authenticity and accuracy of documents relied upon
- Conduct inspections under appropriate conditions
- Maintain detailed records of all investigations
### Professional Presentation
The physical presentation of the report affects its credibility:
- Ensure the report is free of typographical and grammatical errors
- Use high-quality photographs with clear labelling
- Ensure diagrams and drawings are legible and properly scaled
- Bind the report professionally if required
- Provide electronic copies in accessible formats
### Cross-Examination Readiness
The expert should prepare the report with cross-examination in mind:
- Ensure every statement can be supported if challenged
- Anticipate likely areas of challenge and address them in the report
- Maintain contemporaneous notes of all investigations
- Be prepared to explain and defend the methodology used
- Know the report thoroughly and be able to locate key passages quickly
## Common Challenges in Expert Witness Work
Expert witnesses face various challenges that can affect the quality and reception of their
evidence. Awareness of these challenges helps experts prepare more effective reports.
### Ambiguous Instructions
Unclear or overly broad instructions can compromise an expert report. Common problems
include:
- Instructions that do not clearly identify the issues to be addressed
- Failure to provide all relevant documents to the expert
- Conflicting instructions from different members of the legal team
- Instructions that attempt to direct the expert towards particular conclusions
Experts should seek clarification of any ambiguous instructions before commencing their
work. Written confirmation of the agreed scope helps avoid later disputes about what the
expert was asked to address.
### Data Limitations
Experts often must work with incomplete or imperfect information:
- Limited access to the property or construction site
- Missing documents or incomplete records
- Inability to conduct destructive testing
- Time constraints limiting the scope of investigations
The expert should clearly identify any limitations in their report and explain how those
limitations affect their conclusions. Opinions should be appropriately qualified to reflect
any uncertainty arising from data limitations.
### Legal Complexities
Experts must navigate complex legal requirements that may be unfamiliar:
- Different procedural rules in different courts and tribunals
- Legal concepts such as causation, standard of care, and remoteness of damage
- The distinction between questions of fact and questions of law
- Privilege and confidentiality obligations
Close communication with the instructing legal team helps ensure the expert understands the
legal context of their engagement. However, the expert should not express opinions on purely
legal questions, which are matters for the court.
### Cross-Examination Pressure
Cross-examination can be challenging even for experienced expert witnesses:
- Opposing counsel may attempt to confuse or mischaracterise the expert's evidence
- Questions may be designed to elicit admissions that undermine the expert's opinions
- The expert may be confronted with contradictory evidence or alternative theories
- Time pressure may limit the expert's ability to give complete answers
Preparation is essential. Experts should thoroughly review their report before giving
evidence, anticipate likely challenges, and practise giving clear, measured responses. The
key is to remain calm, listen carefully to questions, and answer honestly and precisely.
### Maintaining Independence
Pressure to favour the instructing party can come from various sources:
- Natural human tendency to identify with those who engage us
- Financial dependence on repeat instructions from particular clients
- Explicit or subtle pressure from legal teams
- Desire to appear helpful to the party paying the expert's fees
Experienced experts develop strategies to maintain independence. These include ensuring a
diverse client base, declining instructions where independence might be compromised, and
clearly communicating with legal teams about the expert's duty to the court.
## Frequently Asked Questions
###
What makes someone qualified to be an expert witness in building disputes?
**Short answer:** An expert witness in building disputes typically needs
relevant qualifications, substantial industry experience, and the ability to communicate
complex technical matters clearly.
Qualifications may include engineering degrees, building surveyor registration,
architecture credentials, or trade qualifications depending on the subject matter.
Beyond formal qualifications, courts look for demonstrated practical experience in the
specific area of the dispute. An expert in structural engineering should have extensive
experience with structural analysis and design. The expert must also be able to explain
technical concepts in terms that judges and tribunal members can understand. Previous
experience as an expert witness is helpful but not essential. Courts will assess the
expert's credentials and experience to determine whether they are qualified to give
opinion evidence on the particular issues in dispute.
###
How much does an expert witness report cost in Australia?
**Short answer:** Expert witness report costs in Australia typically range
from $3,000 to $15,000 or more, depending on the complexity of the matter and the
expert's level of experience.
Simple matters involving a single issue and limited documentation may cost between
$3,000 and $5,000. Complex building defect cases involving multiple issues, extensive
documentation review, and detailed site inspections typically cost between $7,000 and
$12,000. Highly complex matters involving multiple experts, extensive testing, or
particularly contentious issues can exceed $15,000. These costs usually include the
initial consultation, site inspection, document review, report preparation, and limited
correspondence with the legal team. Additional costs may apply for supplementary
reports, joint expert conferences, and attendance at court to give oral evidence.
Experts typically charge hourly rates ranging from $300 to $600 or more per hour, with
senior experts commanding higher rates.
###
Can an expert witness report be used in NCAT or VCAT proceedings?
**Short answer:** Yes, expert witness reports are regularly used in NCAT,
VCAT, and other state tribunals, though the formality requirements may differ from court
proceedings.
Tribunals such as NCAT and VCAT handle many building and construction disputes and
frequently rely on expert evidence. While tribunals are not bound by the rules of
evidence, they still expect expert reports to demonstrate independence and objectivity.
The report format may be simplified compared to court proceedings, but the fundamental
principles remain the same. In some cases, tribunals may appoint their own expert to
provide an independent assessment. Tribunal proceedings often involve less formal
procedures for presenting expert evidence, including written submissions in lieu of oral
testimony. However, the expert should still prepare their report with the same rigour as
for court proceedings, as they may be required to attend and answer questions from the
tribunal member and the parties.
###
What happens if the expert's opinion is unfavourable to the party who engaged them?
**Short answer:** The expert must still report their honest opinion, as
their duty is to the court rather than to the party who engaged them.
This situation tests the independence that defines expert evidence. If the expert's
honest assessment does not support the engaging party's case, they must report that
assessment faithfully. The expert cannot change their opinion to favour the client. The
engaging party may choose not to rely on the report, but if it is served, it must
accurately reflect the expert's views. In practice, experienced lawyers often seek
preliminary advice from experts before formally engaging them for a report. This allows
them to assess whether the expert's likely opinion will assist their case. However, once
engaged to prepare a formal report, the expert must express their genuine opinion
regardless of which party benefits. Attempting to tailor opinions to suit the client
undermines the expert's credibility and integrity.
###
What is a joint expert conference or hot tub session?
**Short answer:** A joint expert conference brings together experts from
both sides to identify areas of agreement and narrow the issues in dispute, while a hot
tub session involves experts giving concurrent evidence before the court.
Joint expert conferences occur before the hearing. The experts meet, usually without
lawyers present, to discuss the issues and prepare a joint report identifying what they
agree and disagree about. This process helps focus the hearing on genuinely contested
matters. The joint report becomes evidence in the proceeding. Hot tubbing, or concurrent
evidence, is a courtroom procedure where experts give evidence together rather than
separately. They may be asked questions by the judge, each other, and counsel, allowing
for direct comparison of their views. Both procedures aim to make expert evidence more
efficient and helpful to the court. Experts should approach joint conferences
constructively, seeking to reach genuine agreement where possible while maintaining
their professional opinions on matters where they genuinely differ.
###
How long does it take to prepare an expert witness report?
**Short answer:** Preparation time varies from two to eight weeks depending
on the complexity of the matter, the volume of documents to review, and the expert's
availability.
Simple matters with limited documentation may be completed in two to three weeks.
Complex building defect cases typically require four to six weeks, allowing time for
site inspection, document review, research, and report drafting. Particularly complex
matters involving multiple inspections, testing, or extensive documentation may take
eight weeks or longer. The timeline often depends on factors beyond the expert's
control, including access to the property, receipt of instructions and documents from
the legal team, and the expert's existing commitments. Legal teams should engage experts
as early as possible to allow adequate preparation time. Rushed reports are more likely
to contain errors or overlook important issues. The expert should provide a realistic
timeframe at the outset and communicate promptly if circumstances change.
###
What is the difference between an expert witness report and a standard building
inspection report?
**Short answer:** An expert witness report is prepared for legal
proceedings with strict independence requirements and formal structure, while a standard
inspection report is a commercial document for property transactions or maintenance
planning.
Standard building inspection reports serve commercial purposes such as informing
purchase decisions or identifying maintenance needs. They do not need to comply with
court rules or expert witness codes of conduct. Expert witness reports are specifically
prepared to assist courts and tribunals in understanding technical issues. They must
demonstrate strict independence, include formal declarations, and comply with procedural
requirements. The methodology must be defensible under cross-examination. Expert reports
typically address specific questions or issues identified in legal instructions, rather
than providing a general property assessment. The level of detail and supporting
analysis in an expert report usually exceeds that of a standard inspection report. Both
types of report may be prepared by the same qualified professional, but the approach,
format, and purpose differ significantly.
###
Can expert witness reports be used in insurance claims?
**Short answer:** Yes, expert witness reports are commonly used in disputed
insurance claims, particularly where the cause, extent, or cost of damage is contested.
When insurance claims are disputed, expert evidence may be needed to establish the cause
of damage, the extent of loss, or the cost of rectification. This is particularly common
in building damage claims involving storm damage, water ingress, fire, or structural
failure. The insurer and policyholder may each engage their own expert, or the parties
may agree to a single joint expert. If the dispute proceeds to litigation or
arbitration, the expert report must comply with the relevant procedural requirements.
Many insurance policies include provisions for expert determination of disputed matters.
In these cases, the expert's assessment may be binding on the parties. Expert reports
are also used in professional indemnity claims against builders, engineers, and other
construction professionals, where technical evidence is essential to establishing
liability.
## Key Takeaways
- Expert witness reports are independent professional assessments prepared to assist courts and tribunals in understanding technical building and construction matters.
- The expert's primary duty is to the court, not to the party who engaged them. This independence is fundamental to the value of expert evidence.
- Australian courts have specific rules governing expert evidence, including the Federal Court Rules 2011 and state-specific guidelines that must be followed.
- A well-structured report includes title page, introduction, qualifications, materials reviewed, factual background, methodology, expert opinion, conclusions, declaration of impartiality, and appendices.
- Best practices include clarity of expression, objective analysis, logical consistency, legal compliance, evidence reliability, and professional presentation.
- Common challenges include ambiguous instructions, data limitations, legal complexities, cross-examination pressure, and maintaining independence.
- Expert reports are used across various proceedings including court litigation, tribunal hearings, arbitration, and insurance disputes.
- Engaging an experienced and qualified expert early in the dispute resolution process helps ensure the best possible outcome.
## References and Resources
- [ Federal Court Practice Note GPN-EXPT: Expert Evidence ](https://www.fedcourt.gov.au/law-and-practice/practice-documents/practice-notes/gpn-expt)
- [ Federal Court Rules 2011 ](https://www.legislation.gov.au/Series/F2011L01551)
- [ National Construction Code (NCC) ](https://ncc.abcb.gov.au/)
- [ NSW Civil and Administrative Tribunal (NCAT) ](https://ncat.nsw.gov.au/)
- [ Victorian Civil and Administrative Tribunal (VCAT) ](https://www.vcat.vic.gov.au/)
- [ Australian Institute of Building Surveyors (AIBS) ](https://www.aibs.com.au/)
For a complete overview, see our [guide to expert witness reports for building disputes](/guides/expert-witness-building-disputes-guide).
### Rental Inspection Checklist and Tenant Rights in Australia
Source: https://ownerinspections.com.au/articles/tenant-inspection-guide-for-landlords-and-renters
Published: 2025-05-16 | Updated: 2026-06-24 | Category: General Maintenance
Author: Maison Azdari
Tenant inspections help landlords protect their rental property while giving tenants a safer, better-maintained home. A clear inspection process also helps property managers document defects, safety issues, cleanliness concerns, repairs, and lease compliance before small problems become disputes.
In Australia, landlord inspection rules are set by each state and territory. That means rental inspection notice periods, inspection frequency, privacy rights, and entry rules can change depending on where the property is located. Tenants generally have a right to peace, comfort, and privacy, while landlords and agents can enter for valid reasons when the required notice has been given.
This tenant inspection guide explains routine rental inspections, landlord entry rules, rental inspection tenant rights, notice periods, checklists, reports, failed inspections, and when professional property inspection services can help landlords, tenants, and property managers make better decisions.
Learn How to
Document Building Defects
}
buttonHref="/articles/document-building-defects-legal-claim"
variant="secondary"
/>
Rental inspections serve a dual purpose. For landlords and property managers, they provide an opportunity to identify maintenance concerns early, verify lease compliance, and document the property's condition over time. For tenants, inspections offer a chance to raise repair requests and ensure the property remains safe and liveable.
## What Is a Tenant Inspection?
A tenant inspection is a scheduled visit to a rental property where the landlord, property manager, or authorised representative checks the condition of the home. It may also be called a rental inspection, routine inspection, rental property inspection, house inspection rental, or home inspection for rental property.
The inspection usually covers internal and external areas, including walls, floors, windows, doors, wet areas, appliances, gardens, fencing, safety items, and visible maintenance concerns.
A tenant inspection is not meant to be a privacy intrusion. NSW Fair Trading states that tenants have the right to reasonable peace, comfort, and privacy, while landlords and agents may enter without the tenant’s consent only when a valid reason and required notice have been given.
## Types of Tenant Inspections
There are several types of inspections that may occur during a tenancy. Each serves a different purpose and has its own legal requirements.
| Inspection type | Purpose | Common documents |
| --------------------- | --------------------------------------------------------------------------------- | --------------------------------------------------------------------- |
| Routine inspection | Checks property condition, maintenance needs, safety issues, and lease compliance | Rental inspection checklist, photos, notes, routine inspection report |
| Move-in inspection | Records the property condition at the start of the lease | Entry condition report, photos, signed notes |
| Move-out inspection | Compares the final property condition with the start-of-tenancy records | Exit condition report, bond claim records |
| Emergency inspection | Deals with urgent safety or property damage risks | Repair notes, emergency access records |
| Pre-rental inspection | Checks condition before a new tenancy starts | Property condition report, maintenance notes |
### Routine Inspections
A routine inspection checks whether the tenant is caring for the property and whether repairs, maintenance, health, or safety issues need attention. Queensland’s Residential Tenancies Authority states that routine inspections are not housework inspections and that the person inspecting should recognise that people live in the home.
For landlords managing ageing homes or investment properties, a professional [maintenance inspection](/maintenance-inspections) can help document defects, water damage, roof concerns, pest activity, drainage issues, and safety risks before they become harder to resolve.
### Move-In and Move-Out Inspections
Move-in and move-out inspections protect both sides. The condition report completed at the start of the tenancy is often the key document used when deciding whether an issue is fair wear and tear, tenant-caused damage, or a pre-existing defect.
Tenants should take clear photos at the start of the lease, keep copies of emails, and report maintenance issues in writing. Landlords should keep signed reports, dated photos, repair records, and inspection notes.
### Emergency Inspections
Emergency entry rules are different from routine inspection rules. In NSW, notice is not required in an emergency, for urgent repairs, if the property is abandoned, if the Tribunal orders entry, or if the tenant agrees.
## Legal Requirements for Tenant Inspections in Australia
Rental inspection rules are not the same across Australia. Each state and territory has its own tenancy laws covering notice, entry reasons, inspection frequency, privacy, photos, repairs, and dispute options.
A landlord or real estate agent should always confirm the local rule before issuing a rental inspection notice. Tenants should also check their state authority if they believe entry is unlawful, excessive, or intrusive.
### Rental Inspection Notice Periods by State
The required notice period varies across Australia. Understanding these notice requirements helps landlords stay compliant and helps tenants understand their rights.
| State | Routine Inspection Notice Period | Maximum Inspection Frequency |
| ----- | -------------------------------- | ---------------------------- |
| **NSW** | [7 days](https://www.nsw.gov.au/housing-and-construction/rules/minimum-notice-periods-for-access-to-rental-property) written notice | Up to 4 times in any 12 month period |
| **VIC** | [7 days](https://www.consumer.vic.gov.au/housing/renting/rental-providers-inspecting-or-entering-a-property/when-a-rental-provider-can-enter-a-property) written notice | Not more often than every 6 months after the first 3 months of tenancy |
| **QLD** | [7 days](https://www.rta.qld.gov.au/during-a-tenancy/living-in-the-property/routine-inspections) written notice | Once every 3 months unless agreed in writing |
| **WA** | [7 to 14 days](https://www.consumerprotection.wa.gov.au/rent-inspections-and-privacy-rights) written notice | No more than 4 times a year |
| **SA** | [7 to 28](https://www.sa.gov.au/topics/housing-and-property/renting-and-letting/renting-privately/during-a-tenancy/Right-of-entry) days written notice | Generally quarterly, subject to state rules and proper notice |
| **TAS** | [Minimum 24 hours](https://www.cbos.tas.gov.au/topics/housing/renting/during-a-tenancylease/privacy-access) notice | Not more than once every 3 months unless agreed in writing, including once in the first month |
| **NT** | [At least 7 days](https://dhlgcd.nt.gov.au/media/documents/policies,-procedures-and-guidelines/living/inspections-policy.PDF) written notice | Not more than once every 3 months |
| **ACT** | [At least 1 week](https://www.act.gov.au/housing-planning-and-property/renting/during-a-tenancy) written notice | First month, final month, and twice in each 12 month period |
## When Does a Landlord Inspection Become Intrusive in Australia?
A landlord inspection becomes intrusive when inspections are conducted too frequently, without proper notice, or in ways that interfere with a tenant’s right to quiet enjoyment of the property. Australian tenancy laws protect renters from unreasonable entry while still allowing landlords to inspect the property for maintenance, safety, and lease compliance purposes.
Common examples of intrusive rental inspections include:
| Intrusive inspection concern | Why it may be a problem |
| ------------------------------------ | ---------------------------------------------------------------- |
| No proper notice | Tenancy laws usually require written notice before routine entry |
| Too many inspections | Most states limit routine inspection frequency |
| Entry outside allowed hours | Some states restrict entry times |
| Unnecessary photos of personal items | Privacy rules may apply when photos show tenant belongings |
| Staying longer than needed | Entry should match the stated reason |
| Inspecting unrelated areas | The inspection should stay connected to the lawful purpose |
Tenants have legal protections under Australian tenancy laws and may challenge unlawful inspections through state tenancy authorities or tribunals if privacy rights are breached.
In Victoria, rental providers must not exercise their right of entry in an unreasonable manner or stay longer than needed for the purpose of entry unless the renter gives permission.
NSW rules also say photos or videos used for advertising must not show the tenant’s belongings without written consent.
Landlords should always follow landlord inspection rules carefully to avoid disputes and maintain a professional relationship with tenants.
## Landlord Inspection Rules in Australia: What Counts as Fair Entry?
One of the most searched concerns among tenants is whether a landlord inspection becomes intrusive. Australian rental laws protect tenants from excessive inspections or unnecessary entry into the property.
### 1. Providing Proper Notice
A rental inspection notice should clearly state the reason for entry, the date, the time or entry window, and who will attend. In Victoria, the notice must be in writing and state the reason for entry. Notice can be delivered by email, text, or formal letter, and should include landlord or agent contact details.
### 2. Respecting Inspection Frequency
Landlords should not conduct repeated inspections just because they want to check on the property. In Queensland, routine inspections cannot be carried out more than once every 3 months unless the tenant agrees in writing. Excessive inspections can be treated as harassment and may carry legal consequences.
### 3. Checking Relevant Areas
A routine rental inspection may include the kitchen, bathrooms, laundry, bedrooms, living areas, exterior spaces, garden, fencing, smoke alarms, visible plumbing, ventilation, and signs of mould or water damage.
- *Interior:* Walls, ceilings, flooring, doors, windows, plumbing, electrical systems, appliances, smoke alarms, heating and cooling systems. If moisture, leaks, or damp patches are found, a [water damage inspection report](/articles/water-damage-inspection-report) may help identify the cause and severity.
- *Exterior:* Roof, gutters, fencing, driveways, garden condition, potential pest infestations. If roof leaks, sagging, flashing failures, or drainage problems appear, a [roof defect inspection](/articles/roof-inspection-guide) may be useful.
- *Lease Compliance:* Identifying unauthorized pets, illegal subletting, misuse of property, or any lease agreement breaches.
If the inspection identifies damp patches, leaks, cracking, roof problems, or suspected structural movement, the landlord may need a professional building inspection rather than relying only on routine inspection notes.
### 4. Keeping Clear Records
Landlords should use a rental inspection checklist and keep dated photos, videos, notes, repair requests, tenant responses, and follow-up actions. Proper documentation ensures transparency and serves as evidence if damages or bond claims are later disputed.
A rental inspection report should focus on property condition, safety concerns, maintenance needs, cleanliness concerns, and lease compliance. Photos should document the condition of the property, not personal belongings where possible.
A landlord inspection intrusion issue may arise when:
- Inspections happen too frequently
- Entry occurs without proper notice
- Photos of personal belongings are taken unnecessarily
- Landlords attend outside approved reasons under tenancy laws
Tenants have the right to question unlawful entry and can escalate disputes to their state tenancy tribunal if necessary.
Read the Defect
Documentation Guide
}
buttonHref="/articles/document-building-defects-legal-claim"
variant="secondary"
/>
## Tenant Rights During Inspections
Tenants are entitled to a number of protections when it comes to property inspections.
### Can a Tenant Refuse a Rental Inspection?
One of the most common questions renters ask is whether they can refuse a rental inspection. In Australia, tenants can refuse entry if landlords fail to provide proper notice or attempt to enter outside legal reasons permitted under tenancy legislation.
A tenant may legally challenge entry if:
- Proper notice was not given
- The inspection frequency exceeds legal limits
- The inspection time is unreasonable
- The landlord enters without consent outside emergency situations
However, tenants generally cannot refuse a lawful routine inspection when the landlord has followed the correct process.
**1. Right to Privacy**
Tenants have the right to quiet enjoyment of their home. Landlords must follow privacy laws and cannot enter outside of the agreed notice period. Inspections should be conducted professionally and without unnecessary disruptions.
**2. Conditions for Entry**
Landlords must have a valid reason for entry and conduct inspections during reasonable hours. Tenants can be present during the inspection if they choose.
**3. Handling Disputes**
If tenants believe an inspection violates their rights, they can file complaints with tenancy authorities in their state. If disputes arise over property conditions, tenants and landlords should document concerns and seek mediation before escalating to a tribunal.
## How Often Can Rental Inspections Be Done?
How often landlords can inspect rental homes depends on state legislation. Routine rental inspections are commonly conducted every three to six months. This section also answers common searches such as how often rental inspection NSW, how often are rental inspections QLD, and how often landlords can inspect rental homes in Australia.
Routine inspections help:
- Identify maintenance concerns early
- Protect the long term value of the property
- Ensure safety standards are maintained
- Reduce disputes at the end of the lease
Emergency inspections are treated differently and may occur without notice if urgent repairs or safety issues exist.
Landlords should avoid conducting inspections too frequently as repeated inspections may breach tenant privacy laws.
## How to Prepare for a Routine Inspection
Preparation benefits both parties. For tenants, a well-prepared property reduces the risk of disputes. For landlords, a structured approach ensures consistent and thorough reporting.
**For Landlords:**
- Provide written notice well in advance.
- Use a structured rental inspection checklist.
- Conduct the inspection professionally and respectfully.
- Take detailed notes and photographs for records.
- Address any maintenance concerns promptly.
**For Tenants:**
- Clean and organize the property before inspection.
- Address minor maintenance issues.
- Ensure all safety equipment (smoke alarms, locks, etc.) is in working order.
- Be present during the inspection if preferred.
- Request a copy of the inspection report if necessary.
## Rental Inspection Checklist for Landlords and Tenants
A rental inspection checklist helps both landlords and tenants stay organised and avoid confusion during inspections. Whether the inspection involves a house inspection rental, apartment inspection report, or home inspection for rental property, the checklist should focus on safety, condition, cleanliness, maintenance, and lease compliance.
| Area | What landlords commonly check | What tenants should prepare |
| ----------------- | ------------------------------------------------------- | ----------------------------------------------- |
| Kitchen | Appliances, cupboards, exhaust fan, leaks, benchtops | Clean oven, stovetop, sink, and surfaces |
| Bathroom | Mould, grout, leaks, exhaust fan, toilet, shower screen | Remove surface mould, clean tiles, report leaks |
| Laundry | Taps, drainage, ventilation, water marks | Check hoses and report dampness |
| Walls and floors | Cracks, stains, holes, carpet damage, water marks | Clean marks and report damage early |
| Smoke alarms | Function and access | Do not remove or cover alarms |
| Doors and windows | Locks, screens, glass, weather seals | Check damaged screens or stuck windows |
| Exterior | Garden, gutters, fencing, drainage, rubbish | Mow lawns, tidy garden, remove rubbish |
| Safety issues | Electrical risks, trip hazards, loose rails | Report hazards in writing |
| Lease compliance | Pets, occupants, alterations, subletting | Keep approvals and written records |
For tenants, preparing ahead of the inspection can help reduce stress and prevent avoidable issues from appearing in the report.
Recommended preparation includes:
- Cleaning high traffic areas
- Testing smoke alarms
- Reporting maintenance issues early
- Checking for leaks or water damage
- Removing rubbish and clutter
Using a structured rental inspection checklist also improves documentation and consistency across inspections.
## What Should Be Included in a Routine Inspection Report?
A routine inspection report provides a detailed snapshot of the rental property's condition during the tenancy. For broader reporting guidance, see Owner Inspections’ guide to [understanding your property inspection report](/articles/understanding-your-property-inspection-report). It may also be called an apartment inspection report, rental property inspection report, house inspection rental report, or inspection of rental property record, depending on the property type and state requirements.
A professional rental inspection report should include:
| Report item | Why it matters |
| ------------------ | ---------------------------------- |
| Date and time | Shows when the inspection occurred |
| Attendees | Records who entered the property |
| Notice details | Confirms entry process |
| Room-by-room notes | Makes findings easy to review |
| Photos | Supports condition evidence |
| Maintenance issues | Helps assign repairs |
| Tenant concerns | Shows repair requests were raised |
| Follow-up actions | Records what happens next |
Maintaining detailed reports helps protect both landlords and tenants if disputes arise later.
Good documentation also supports bond claim decisions during end of lease inspections. If the dispute relates to damage from nearby construction, excavation, or building works, [dilapidation reports](/articles/dilapidation-report-process-a-walkthrough-of-key-steps) can help record the condition of a property before and after works.
## End of Lease Inspections and Bond Refunds
The end of lease inspection is the most consequential inspection for both parties. Its outcome determines whether the tenant's bond is returned in full, partially, or claimed by the landlord.
**1. What is an End-of-Lease Inspection?**
This final inspection determines if the property meets lease requirements before returning the bond. A condition report is used to compare the property's condition at the start and end of the tenancy. Where damage or disputed defects are involved, an independent [property inspection report](/articles/understanding-your-property-inspection-report) can provide clearer evidence for landlords, tenants, and property managers.
**2. Differentiating Normal Wear and Tear vs. Damage**
- **Wear and Tear:** Faded paint, minor carpet wear, loose door handles.
- **Tenant-Caused Damage:** Broken fixtures, excessive stains, holes in walls, deliberate property alterations.
**3. Getting a Full Bond Refund**
- Thoroughly clean the property.
- Repair tenant-caused damage.
- Provide documentation for disputes.
- Ensure all keys and remotes are returned.
- Take photos before handing over the property.
## Common Issues Found During Inspections
Property managers and landlords frequently encounter recurring issues during routine inspections. Being aware of these can help tenants avoid problems.
- **Property Damage:** Holes in walls, broken appliances, missing fixtures, water damage. For more serious cracks, movement, or suspected structural concerns, a [structural integrity inspection](/articles/structural-integrity-inspection) can help assess the building’s load-bearing elements.
- **Cleanliness Issues:** Mold buildup, pest infestations, poor hygiene maintenance.
- **Unauthorized Modifications:** Alterations made without landlord approval, such as painting or structural changes.
- **Unreported Maintenance Issues:** Leaks, faulty electrical wiring, plumbing issues, mold. If plumbing defects or hidden water issues are suspected, landlords may need a focused [plumbing defect inspection](/articles/plumbing-defect-inspection-to-identify-water-issues).
- **Lease Violations:** Unauthorized occupants, pets, smoking indoors, illegal activities.
Tenants have a responsibility to report maintenance issues promptly. Failing to report a minor leak, for example, can lead to significant water damage that the tenant may become liable for if it can be shown that early reporting would have prevented the problem.
## What Happens If You Fail a Rental Inspection?
Failing a rental inspection does not usually mean immediate eviction. In most situations, landlords provide tenants with a list of concerns that need to be addressed.
Common reasons tenants fail rental inspections include:
| Reason | Common next step |
| ----------------------------- | ------------------------------------------------ |
| Excessive property damage | Repair request or breach notice |
| Poor cleanliness | Cleaning request and follow-up inspection |
| Unauthorised pets | Request for approval, removal, or breach process |
| Unreported maintenance issues | Repair investigation |
| Lease breaches | Written notice or tribunal process if unresolved |
Landlords may issue:
- Breach notices
- Requests for repairs or cleaning
- Follow-up inspections
In severe cases involving property damage or repeated lease breaches, tenancy tribunals may become involved.
Most routine inspection issues can be resolved through communication and timely repairs.
## Legal Considerations & Best Practices
**For Landlords:**
- Check the current rental inspection notice rules in the correct state or territory.
- Use the required form where one applies.
- Avoid excessive inspections.
- Keep photos focused on property condition.
- Store inspection reports, repair records, and tenant communications.
**For Tenants:**
- Read the notice carefully.
- Ask for clarification if the reason, date, or time is unclear.
- Keep your own photos and emails.
- Report maintenance issues in writing.
- Seek help from your state tenancy authority if you believe entry is unlawful.
## When to Get a Professional Inspection
A professional rental property inspection is useful when a standard routine inspection is not enough.
Consider one when:
A professional inspection report from a licensed building inspector carries more weight in tribunal proceedings than informal notes or photos taken on a phone.
Owner Inspections can support landlords, tenants, and property managers with independent building reports, [defect investigation](/defect-investigation-reports), [mould inspection](/mould-inspections), [roof inspection](/roof-inspection), maintenance inspection, and property condition documentation.
## Need Help with Rental Inspections?
Keeping rental properties in compliance while maintaining positive landlord-tenant relationships requires expertise. If you need professional inspection services, guidance on rental compliance, or support with dispute resolution, explore Owner Inspections’ [building inspection services](/building-and-pest-inspections).
Contact
Owner Inspections Today
}
buttonHref="/contact"
variant="secondary"
/>
### What Is a Granny Flat? Benefits and Legal Requirements
Source: https://ownerinspections.com.au/articles/what-is-a-granny-flat
Published: 2025-05-09 | Updated: 2026-02-09 | Category: Building Inspections
Author: Maison Azdari
A granny flat is a self-contained secondary dwelling built on the same lot as a primary residence in Australia. It includes a kitchen, bathroom, and sleeping area, making it a fully independent living space. Granny flats can be detached structures, attached extensions, garage conversions, or prefabricated modular units. They are commonly used to house family members, generate rental income, serve as home offices, or provide guest accommodation. In most Australian states, granny flats are limited to 60m2, though some states allow up to 80m2. Approval is required through either a Complying Development Certificate (CDC) or a Development Application (DA), depending on the state and the design.
Rising property prices and housing affordability challenges have made granny flats increasingly popular across Australia. Whether you are planning to build one for family use, as a rental investment, or to add value to your property, understanding the rules, costs, and benefits is the first step.
## Types of Granny Flats
## Common Uses
## Benefits of Building a Granny Flat
### Rental Income Potential
Many homeowners use granny flats to earn rental income, with rates ranging from $350 to $500 per week depending on location. In high-demand areas like Sydney and Melbourne, these secondary dwellings can provide strong returns.
A homeowner in Sydney who built a granny flat for $140,000 and rented it out for $450 per week was able to cover a significant portion of their mortgage and improve their cash flow. Investors may also be able to claim depreciation deductions and offset expenses related to maintenance, insurance, and council rates through the Australian Taxation Office (ATO).
### Increased Property Value
A well-built granny flat can increase a property's value by up to 30%, making it a smart long-term investment. Properties with secondary dwellings appeal to buyers looking for rental opportunities or extra space for family members.
### Multigenerational Living
With aged care costs exceeding $55,000 per year in many facilities, granny flats provide a financially viable alternative. Families can live together while maintaining separate spaces, reducing household stress while keeping elderly relatives close.
### Additional Functional Space
Granny flats can serve as a home office, gym, art studio, or guest house. Many professionals are converting granny flats into remote workspaces, making them a versatile addition to any property.
### Sustainability Benefits
Modern granny flat designs often incorporate solar panels, rainwater collection, and energy-efficient materials. Smaller living spaces naturally consume fewer resources, and energy-efficient construction reduces utility bills for both homeowners and tenants.
## Legal Requirements in Australia
### Zoning and Land Requirements
Each state and local council has its own zoning laws and minimum land size requirements.
### Approval Process
### Rental and Occupancy Rules
### Financing Options
## Steps to Build a Granny Flat
### Property Depreciation Calculator: Estimate Value Loss
Source: https://ownerinspections.com.au/articles/property-depreciation-calculator
Published: 2025-05-06 | Updated: 2026-02-12 | Category: Pre-Sale Inspections
Author: Maison Azdari
Property depreciation allows Australian investment property owners to claim a tax deduction for the decline in value of their building and its assets over time. This is a non-cash deduction, meaning you do not need to spend money each year to claim it. For many investors, depreciation is one of the largest deductions available and can significantly reduce taxable income.
Understanding how property depreciation works, the categories of deductions, and how to calculate your entitlements is essential for maximising your investment returns.
## What is Property Depreciation
Property depreciation in Australia is divided into two main categories as defined by the Australian Taxation Office (ATO).
## Why Property Depreciation Matters
Depreciation is a significant tax benefit for investment property owners because it reduces taxable income without requiring any cash outlay. The deductions can be substantial, particularly in the early years of owning a new or recently renovated property.
## How Depreciation Calculators Work
Property depreciation calculators estimate the deductions you may be entitled to claim based on key inputs about your property.
## Diminishing Value vs Straight-Line
The ATO allows two methods for calculating Division 40 (plant and equipment) depreciation.
The diminishing value method applies a higher percentage to the remaining value of the asset each year, resulting in larger deductions in the earlier years. The straight-line (prime cost) method spreads the deduction evenly across the effective life of the asset. Both methods yield the same total deduction over the life of the asset.
## Calculating Depreciation for Tax Purposes
To accurately calculate your depreciation entitlements, follow these steps.
## Factors Affecting Depreciation Rates
Several factors influence the amount of depreciation you can claim on your investment property.
## Maximising Your Depreciation Claims
There are several strategies to ensure you are claiming the maximum depreciation deductions available.
### Pre-Sale Property Inspection for a Smooth Selling Process
Source: https://ownerinspections.com.au/articles/pre-sale-property-inspection
Published: 2025-04-29 | Updated: 2026-02-09 | Category: Pre-Sale Inspections
Author: Maison Azdari
Selling a property is one of the most significant financial transactions you will undertake.
A pre-sale property inspection gives you the power to understand your property's true
condition before it goes on the market, allowing you to address issues proactively rather
than facing unexpected surprises during negotiations. This strategic approach can save
thousands of dollars, reduce sale time, and create a smoother transaction for everyone
involved.
In today's competitive Australian real estate market, buyers are increasingly savvy and
well-informed. They routinely commission building and pest inspections before committing to
a purchase. When a buyer's inspection reveals defects you were unaware of, it can derail
negotiations, lead to significant price reductions, or cause the sale to fall through
entirely. A [pre-sale inspection](/pre-sale-inspections) puts you back in control.
According to industry data, properties with pre-sale inspection reports sell faster and
achieve prices closer to asking price than those without. By demonstrating transparency and
addressing issues before listing, you build buyer confidence and position your property
favourably against competing listings.
> A pre-sale inspection is not about hiding problems. It is about understanding your property,
> making informed decisions about repairs, and presenting your property to buyers with
> confidence and transparency.
## What Is a Pre-Sale Property Inspection?
A pre-sale property inspection is a comprehensive evaluation of a property's condition
conducted by a qualified building inspector before the property is listed for sale. The
inspection follows the same rigorous methodology as a [pre-purchase inspection](/pre-purchase-inspections), examining
structural integrity, identifying defects, detecting pest activity, and assessing compliance
with building codes and Australian Standards.
The key difference from a pre-purchase inspection is the purpose: while buyers use
inspections to make purchasing decisions, sellers use pre-sale inspections to understand
their property's condition, make strategic repair decisions, and provide documentation that
builds buyer confidence.
### Scope of a Pre-Sale Inspection
A thorough pre-sale inspection examines all accessible areas of the property, providing a
complete picture of its condition:
- **Interior spaces:** All rooms, hallways, built-in furniture, wet areas, ceilings, walls, and floors
- **Exterior elements:** External walls, cladding, windows, doors, balconies, decks, and verandahs
- **Roof structure:** Roof covering, gutters, downpipes, fascias, eaves, and flashings
- **Subfloor areas:** Foundations, stumps, piers, bearers, joists, and ventilation
- **Roof void:** Roof framing, insulation, ventilation, and any visible services
- **Site drainage:** Stormwater systems, surface water management, grading, and retaining walls
- **Ancillary structures:** Garages, carports, sheds, fencing, pools, and outbuildings
### Australian Standards Compliance
Pre-sale inspections in Australia should be conducted in accordance with Australian Standard
AS 4349, which establishes the scope, methodology, and reporting requirements for building
inspections. This standard ensures consistency and reliability in the inspection process.
- **AS 4349.0:** General requirements for inspection of buildings
- **AS 4349.1:** Pre-purchase inspections of residential buildings
- **AS 4349.3:** Timber pest inspections
Additionally, inspectors assess obvious non-compliance with the National Construction Code
(NCC) and Building Code of Australia (BCA), including issues with balustrades, smoke alarms,
pool fencing, and structural elements that may require rectification.
## Pre-Sale vs. Pre-Purchase Inspections
Understanding the difference between these two types of inspections helps clarify their
distinct purposes in the property transaction process. Both follow the same inspection
methodology and standards, but serve different parties with different objectives.
| Aspect | Pre-Sale Inspection | Pre-Purchase Inspection |
| --------------- | -------------------------------------------- | ---------------------------------------------- |
| Initiated by | Property seller or vendor | Property buyer or purchaser |
| Timing | Before listing the property | During due diligence period |
| Primary purpose | Identify issues for repair or disclosure | Inform purchase decision and negotiations |
| Benefits to | Seller gains control over narrative | Buyer gains knowledge before commitment |
| Report sharing | Can be shared with potential buyers | Usually kept confidential by buyer |
| Outcome | Repairs made or pricing adjusted proactively | Negotiations, price adjustments, or withdrawal |
## Legal Framework and Vendor Disclosure Requirements
Understanding the legal context for property sales in Australia is essential for sellers.
Various laws and regulations govern what must be disclosed to buyers and the consequences of
failing to do so. A pre-sale inspection helps ensure compliance with these requirements.
### Australian Consumer Law
The Australian Consumer Law (ACL), contained in Schedule 2 of the Competition and Consumer
Act 2010 (Cth), applies to property sales conducted in trade or commerce. Under the ACL:
- **Misleading or deceptive conduct:** Section 18 prohibits conduct that is misleading or deceptive, or likely to mislead or deceive. This includes making false representations about a property's condition or concealing known defects.
- **False representations:** Section 29 prohibits false or misleading representations about the nature, characteristics, or suitability of goods or services, which can extend to property sales in certain circumstances.
- **Silence as misleading conduct:** In some cases, failing to disclose known defects can constitute misleading conduct, particularly where there is a reasonable expectation of disclosure.
### State and Territory Vendor Disclosure Requirements
Each state and territory has specific requirements for what vendors must disclose to
purchasers. These requirements vary significantly across jurisdictions:
| State or Territory | Disclosure Requirements | Key Legislation |
| ------------------------------------------------------------------- | -------------------------------------------------------------------------------- | --------------- |
| New South Wales | Vendor must provide Contract for Sale with prescribed documents including title, |
| zoning certificate, drainage diagram, and any building certificates | Conveyancing Act 1919 (NSW), Conveyancing (Sale of Land) Regulation 2022 |
| Victoria | Vendor Statement (Section 32) required with extensive disclosure including title |
details, planning information, building permits, and owner-builder warranty
insurance | Sale of Land Act 1962 (Vic) |
| Queensland | Disclosure requirements for pool safety, sustainability declarations, neighbourhood
disputes, and contaminated land | Property Law Act 1974 (Qld), Land Sales Act 1984 (Qld) |
| South Australia | Form 1 Vendor Statement required with certificate of title, council information,
encumbrances, and building indemnity insurance | Land and Business (Sale and Conveyancing) Act 1994 (SA) |
| Western Australia | Property disclosures required for strata properties, with general duty not to
mislead | Strata Titles Act 1985 (WA), Sale of Land Act 1970 (WA) |
| ACT | Vendor disclosure document required with title, planning, building approvals, and
compliance certificates | Civil Law (Sale of Residential Property) Act 2003 (ACT) |
### Real Estate Institute Guidelines
Real Estate Institutes in each state and territory provide guidelines for agents and vendors
regarding disclosure and best practices in property sales:
- **Agent obligations:** Real estate agents have professional obligations to disclose material facts known to them that could influence a buyer's decision
- **Industry codes of conduct:** Professional codes require honest and fair dealing with all parties to a transaction
- **Best practice recommendations:** Industry bodies recommend pre-sale inspections as a means of ensuring transparency and reducing disputes
> Transparency in property transactions is not just good ethics, it is good business. Vendors
> who disclose known issues and provide inspection reports create trust that translates into
> faster sales and better outcomes for all parties.
## Key Benefits of Pre-Sale Inspections
A pre-sale inspection provides numerous advantages that can significantly impact your sale
outcome. Understanding these benefits helps sellers appreciate the strategic value of
investing in a professional inspection before listing.
### Identifying Issues Early
One of the most valuable aspects of a pre-sale inspection is discovering problems before
buyers do. This early identification provides several advantages:
- **Control over repairs:** You can choose which issues to fix, select your own contractors, and manage the repair process on your timeline rather than under pressure during negotiations
- **Accurate budgeting:** Understanding repair costs before listing helps you make informed decisions about pricing and repair investments
- **Prioritisation:** You can focus resources on repairs that will have the greatest impact on sale price and buyer perception
- **Preventing nasty surprises:** Issues discovered late in negotiations often cause greater disruption than if addressed proactively
Research indicates that defects discovered by buyer's inspectors result in price reductions
averaging 2 to 5 percent of the property value, whereas the same defects disclosed upfront
typically have minimal impact on final sale price.
### Enhancing Buyer Confidence
Providing a pre-sale inspection report to potential buyers demonstrates transparency and
builds trust throughout the sales process:
- **Professional credibility:** An independent inspection report from a qualified building inspector provides objective evidence of the property's condition
- **Reduced buyer anxiety:** Buyers feel more confident knowing the property has been professionally assessed and issues disclosed upfront
- **Competitive advantage:** In a market with multiple similar properties, a pre-sale report distinguishes your listing as transparent and trustworthy
- **Faster decision making:** Buyers can make faster decisions when they have reliable information about the property's condition
### Facilitating Smoother Negotiations
Pre-sale inspections streamline the negotiation process and reduce the risk of deal failure:
- **Fewer surprises:** When both parties understand the property's condition from the outset, there are fewer unexpected revelations to derail negotiations
- **Reduced renegotiation:** Buyers are less likely to demand significant price reductions when issues have already been disclosed and potentially addressed
- **Lower fall-through rates:** Contracts are less likely to collapse due to inspection findings when a pre-sale report has been provided
- **Faster settlements:** With fewer disputes over property condition, transactions proceed more smoothly to settlement
### Setting Realistic Pricing
A pre-sale inspection provides objective data that supports accurate property valuation:
- **Market-appropriate pricing:** Understanding the property's true condition helps you and your agent set a realistic asking price
- **Avoiding overpricing:** Properties priced above their true condition value sit on the market longer and often sell for less than appropriately priced properties
- **Avoiding underpricing:** Sellers who are unsure about their property's condition sometimes underprice to account for unknown issues
- **Supporting price negotiations:** Documentation of repairs made or the property's sound condition supports your asking price in negotiations
### Legal Protection
A pre-sale inspection can provide important legal protections for vendors:
- **Evidence of disclosure:** Providing an inspection report demonstrates that you disclosed known issues, protecting against future claims of misleading conduct
- **Limitation of liability:** Disclosing defects in writing can limit your exposure to claims that you concealed problems
- **Professional documentation:** An independent report provides objective evidence of the property's condition at the time of sale
## Areas Assessed During a Pre-Sale Inspection
A comprehensive pre-sale inspection covers all accessible areas of the property, following
the methodology established in Australian Standard AS 4349. Understanding what is examined
helps sellers appreciate the thoroughness of a professional inspection.
### Structural Integrity Assessment
The structural assessment examines the fundamental elements that support and stabilise the
building:
- **Foundation systems:** Concrete slabs, strip footings, piers, and stumps are checked for cracking, movement, subsidence, and deterioration
- **Load-bearing walls:** Internal and external walls are assessed for cracks, bowing, leaning, or signs of structural movement
- **Roof framing:** Rafters, trusses, ridge boards, and battens are examined for damage, inadequate sizing, or poor construction
- **Floor systems:** Bearers, joists, and flooring are checked for sagging, bouncing, or structural inadequacy
- **Lintels and beams:** Critical elements above openings are assessed for cracking, corrosion, or inadequate support
### Moisture and Waterproofing Evaluation
Water damage is one of the most common and costly issues in Australian properties. The
inspection includes:
- **External waterproofing:** Assessment of walls, windows, doors, and junctions for water entry points
- **Wet area waterproofing:** Evaluation of bathrooms, laundries, and kitchens for waterproofing membrane failures
- **Roof and gutter systems:** Checking for leaks, blocked gutters, and inadequate drainage
- **Subfloor moisture:** Testing for elevated moisture levels that may indicate drainage problems or rising damp
- **Condensation issues:** Identifying areas prone to condensation that may lead to mould and timber decay
### Pest Infestation Assessment
Timber pests cause millions of dollars in damage to Australian properties annually. A
combined building and pest inspection examines:
- **Termite detection:** Searching for live termites, termite damage, and evidence of previous infestations
- **Wood decay fungi:** Identifying timber affected by rot or fungal attack
- **Borer damage:** Checking for evidence of wood-boring insects
- **Conducive conditions:** Noting factors that may attract termites, such as moisture, timber ground contact, or inadequate ventilation
- **Protection systems:** Assessing existing termite barriers, chemical treatments, or physical protection systems
### Building Code Compliance
While a building inspection is not a compliance audit, inspectors identify obvious
non-compliance that may affect safety or require rectification:
- **Smoke alarm requirements:** Presence and functionality of required smoke alarms as per state legislation
- **Pool fencing:** Compliance with pool barrier regulations where applicable
- **Balustrade and stair safety:** Compliance with height and opening requirements under the Building Code of Australia
- **Electrical safety:** Visible issues such as damaged wiring, outdated switchboards, or missing safety switches
- **Unpermitted work:** Obvious additions or alterations that may not have required building approvals
## Common Defects Found in Pre-Sale Inspections
Understanding the types of defects commonly discovered helps sellers prepare for potential
findings and make informed decisions about repairs. The following table summarises common
issues, their typical repair costs, and recommended actions:
| Defect Type | Frequency | Typical Repair Cost | Recommended Action |
| ------------------------------- | -------------------------- | ------------------- | ------------------------------------------------------ |
| Minor cracking in walls | Very common | $200 to $1,500 | Repair and repaint before listing |
| Damaged or blocked gutters | Very common | $300 to $2,000 | Clean, repair, or replace before listing |
| Moisture in wet areas | Common | $500 to $15,000 | Investigate source and repair or disclose |
| Roof tile or sheet damage | Common | $500 to $5,000 | Repair before listing to prevent water damage concerns |
| Subfloor ventilation issues | Common | $500 to $3,000 | Install additional vents or disclose |
| Termite damage or activity | Moderate | $2,000 to $50,000+ | Treat and repair; always disclose |
| Foundation movement or cracking | Moderate | $5,000 to $100,000+ | Obtain engineering assessment; disclose findings |
| Non-compliant pool fencing | Common (where pools exist) | $1,500 to $5,000 | Must be rectified; compliance certificate required |
| Outdated electrical switchboard | Moderate | $1,500 to $4,000 | Consider upgrading; adds value and safety |
| Missing or faulty smoke alarms | Common | $100 to $500 | Must be rectified; legal requirement in most states |
## Pre-Sale Inspection Costs and Value
Understanding the cost of a pre-sale inspection and comparing it to potential benefits helps
sellers appreciate the return on this investment.
### Typical Inspection Costs
| Inspection Type | Typical Cost Range | Best For |
| -------------------------- | --------------------- | ------------------------------------------ |
| Building inspection only | $400 to $600 plus GST | Properties with recent pest treatment |
| Pest inspection only | $250 to $400 plus GST | Properties with recent building inspection |
| Combined building and pest | $500 to $800 plus GST | Most properties; best value option |
| Thermal imaging add-on | $100 to $200 plus GST | Properties with suspected moisture issues |
| Pool compliance inspection | $150 to $300 plus GST | Properties with swimming pools or spas |
### Return on Investment
The relatively modest cost of a pre-sale inspection can yield significant returns:
- **Reduced price reductions:** Properties without pre-sale reports that fail buyer inspections face average reductions of 2 to 5 percent. On a $800,000 property, that represents $16,000 to $40,000.
- **Lower fall-through rates:** Approximately 15 percent of property sales fall through due to inspection findings. Each failed sale costs time, ongoing holding costs, and potentially reduced buyer interest.
- **Faster sales:** Properties with pre-sale reports typically sell faster, reducing holding costs including mortgage payments, rates, insurance, and maintenance.
- **Strategic repairs:** Knowing about issues allows targeted spending on repairs that provide the best return, rather than emergency fixes demanded during negotiations.
## Post-Inspection Steps
Once your pre-sale inspection is complete, follow these steps to maximise the benefits and
prepare your property for sale:
### Review and Understand the Report
Take time to thoroughly review the inspection report and understand all findings:
- **Read the full report:** Do not rely solely on the summary; review all sections and photographs
- **Ask questions:** Contact the inspector to clarify any findings you do not understand
- **Categorise issues:** Separate findings into urgent safety issues, significant defects, minor maintenance items, and cosmetic concerns
- **Assess implications:** Consider how each finding might affect buyer perception and negotiations
### Develop a Repair Strategy
Not all issues identified need to be repaired before sale. Consider:
- **Safety issues:** These should always be addressed before listing due to legal liability and buyer safety concerns
- **High-impact repairs:** Fix issues that create negative first impressions or suggest poor maintenance
- **Cost-benefit analysis:** Compare repair costs to potential price reductions if left unaddressed
- **Disclosure option:** Some issues may be better disclosed with a price adjustment rather than repaired
### Document All Repairs
Keep thorough records of all repairs undertaken:
- Obtain itemised receipts and invoices from all contractors
- Collect warranties and guarantees for work performed
- Take before and after photographs documenting repairs
- Keep certificates of compliance where applicable
- Prepare a summary of works completed to provide to buyers
### Decide on Report Sharing
Consider how you will use the inspection report in your marketing:
- **Full disclosure:** Provide the complete report to all interested buyers, demonstrating transparency
- **On-request availability:** Make the report available to serious buyers upon request
- **Updated report:** If significant repairs were made, consider obtaining an updated inspection to document the improved condition
## Choosing a Qualified Building Inspector
The quality of your pre-sale inspection depends heavily on the qualifications and experience
of the inspector you choose. Selecting the right professional ensures accurate, thorough
assessment that will withstand scrutiny from buyers and their advisors.
### Essential Qualifications
- **Appropriate licensing:** Verify the inspector holds current licensing for your state or territory. Building inspectors must be licensed in most Australian jurisdictions.
- **Relevant qualifications:** Look for qualifications in building, construction, or related fields such as a Certificate IV in Building and Construction (Building), Diploma of Building Surveying, or equivalent.
- **Industry membership:** Membership in professional associations such as the Master Builders Association or Housing Industry Association indicates commitment to industry standards.
- **Insurance coverage:** Confirm the inspector carries professional indemnity insurance (minimum $1 million recommended) and public liability insurance.
### Experience and Expertise
- Years of experience in building inspection (minimum 5 years recommended)
- Familiarity with local building practices and common issues in your area
- Knowledge of different construction types and methods relevant to your property
- Experience with pre-sale inspections specifically, not just pre-purchase
- Understanding of disclosure requirements in your state
### Equipment and Technology
- Thermal imaging cameras for detecting hidden moisture and defects
- Professional moisture detection equipment
- Appropriate access equipment for roof and subfloor inspection
- Quality camera equipment for comprehensive documentation
- Digital reporting systems for clear, professional reports
### Report Quality
- Request a sample report before booking to assess quality and detail
- Reports should be clear, comprehensive, and include extensive photographic evidence
- Ask about report delivery timeframes (24 to 48 hours is standard)
- Ensure the inspector is available to explain findings and answer questions
- Check that reports comply with AS 4349 requirements
## Frequently Asked Questions
###
Are pre-sale inspections mandatory in Australia?
**Short answer:** No, pre-sale inspections are not legally required in any
Australian state or territory, but they are highly recommended for smoother
transactions.
While no Australian law mandates pre-sale inspections, they are strongly recommended by
real estate professionals, legal advisors, and consumer protection agencies. The benefit
of a pre-sale inspection lies in providing sellers with knowledge and control over their
property's presentation to the market. Without an inspection, sellers risk having
defects discovered during buyer inspections, leading to renegotiations, price
reductions, or failed contracts. Some real estate agents now recommend pre-sale
inspections as standard practice, and some vendors choose to include them as part of
their marketing strategy to demonstrate transparency.
###
How long is a pre-sale inspection report valid?
**Short answer:** Inspection reports are typically considered current for
30 to 90 days, though their usefulness can extend longer depending on circumstances.
The validity of an inspection report depends on several factors. Buyers and their
advisors generally prefer reports that are less than 90 days old to ensure the
information reflects current conditions. However, the report remains a useful disclosure
document regardless of age, showing the property's condition at a specific point in
time. If your property has been on the market for an extended period, you may consider
obtaining an updated inspection, particularly if significant time has passed or weather
events may have caused changes. Some inspectors offer discounted re-inspection rates for
properties they have previously assessed.
###
Should I fix all defects found in the pre-sale inspection?
**Short answer:** Not necessarily. The decision to repair depends on the
nature of the defect, cost of repair, and potential impact on sale price and buyer
perception.
A strategic approach to repairs yields the best results. Safety issues and compliance
matters should always be addressed. For other defects, consider whether the repair cost
is less than the likely price reduction if the issue remains. Some issues are better
disclosed than repaired, particularly where repair costs are high relative to their
impact on sale price. Cosmetic issues that create negative first impressions are often
worth addressing, while minor maintenance items may not warrant attention. Consult with
your real estate agent about local buyer expectations and market conditions when making
repair decisions.
###
Will buyers still want their own inspection if I provide a pre-sale report?
**Short answer:** Many buyers will still commission their own inspection,
but your pre-sale report reduces the risk of unexpected findings derailing the sale.
Buyers have several reasons to conduct their own inspections: they may want an inspector
they trust, their lender may require it, or they may simply prefer independent
verification. However, a pre-sale report provides significant benefits regardless. It
demonstrates transparency, which builds buyer confidence. It reduces the likelihood of
significant surprises in buyer inspections, as major issues will have been disclosed or
addressed. It also provides evidence that you, as the vendor, acted in good faith in
disclosing the property's condition. Some buyers may choose to proceed without their own
inspection if they trust your pre-sale report, potentially speeding up the transaction.
###
What happens if my pre-sale inspection finds major structural issues?
**Short answer:** Discovery of major issues provides you with options:
repair before selling, adjust your price accordingly, or seek further expert assessment
before deciding.
Finding significant structural issues before listing is far better than having them
discovered by a buyer's inspector mid-negotiation. If major defects are found, first
obtain quotes for remediation to understand the true cost. For structural matters, you
may need a structural engineer's assessment. With this information, you can make
informed decisions: invest in repairs to restore the property's value, price the
property to reflect its condition and disclose the issues, or decide whether selling is
the right choice at this time. Your real estate agent can advise on how similar
properties with disclosed issues have performed in your local market.
###
Do I have to disclose what my pre-sale inspection found?
**Short answer:** While disclosure requirements vary by state, you
generally have an obligation not to mislead buyers, and withholding known significant
defects could be considered misleading conduct.
Under Australian Consumer Law, vendors must not engage in misleading or deceptive
conduct. While you are generally not required to proactively disclose every minor
defect, concealing known significant issues could constitute misleading conduct,
particularly if asked direct questions. State vendor disclosure requirements also apply.
From a practical standpoint, disclosure is usually the better approach: it builds trust,
protects you legally, and reduces the risk of post-settlement disputes. Many vendors
choose to provide their pre-sale report to buyers as a matter of course, demonstrating
good faith and transparency throughout the transaction.
### How much does a pre-sale inspection cost?
**Short answer:** A comprehensive pre-sale building and pest inspection
typically costs between $500 and $800 plus GST for a standard residential property.
Inspection costs vary based on property size, location, type of construction, and the
scope of inspection required. A combined building and pest inspection offers the best
value, as booking separately typically costs more in total. Additional services such as
thermal imaging, [pool compliance inspections](/swimming-pool-inspections), or asbestos assessments may incur extra
charges. When considering cost, weigh it against the potential benefits: avoided price
reductions, faster sales, reduced fall-through rates, and legal protection. For a
$700,000 property, even a 1 percent avoided price reduction represents $7,000, making
the inspection investment highly worthwhile.
###
When should I get a pre-sale inspection done?
**Short answer:** Ideally, conduct your pre-sale inspection 4 to 8 weeks
before your planned listing date to allow time for repairs if needed.
Timing your pre-sale inspection appropriately is important. Too early, and the report
may be considered outdated by the time you sell. Too late, and you may not have time to
address issues before listing. The ideal timeframe is 4 to 8 weeks before your planned
listing date. This provides sufficient time to review findings, obtain repair quotes,
complete necessary work, and potentially obtain an updated inspection documenting
completed repairs. If you are selling a property you know has issues, consider getting
the inspection even earlier to allow for more extensive remediation work.
###
Can I use a pre-sale inspection report for insurance purposes?
**Short answer:** A pre-sale inspection provides documentation of the
property's condition at a point in time, which may be useful for insurance claims, but
it is not specifically designed for insurance purposes.
Your pre-sale inspection report documents the property's condition at the time of
inspection, which can serve as evidence if you need to demonstrate the property's state
before a claim event. However, insurers may require their own assessments or specific
types of reports for certain purposes. If you anticipate using the report for insurance
purposes, discuss this with your inspector beforehand to ensure the report will meet
your requirements. Keep a copy of the report with your important documents even after
the property sells, as it may be useful if disputes arise about the property's condition
at the time of sale.
###
What is the difference between a pre-sale inspection and a vendor building report?
**Short answer:** These terms are often used interchangeably, referring to
an inspection commissioned by the seller before listing a property for sale.
A pre-sale inspection, vendor building report, and vendor's inspection are all terms
describing the same service: a comprehensive building assessment conducted on behalf of
the property seller before the property goes on the market. The inspection follows the
same methodology and standards as a pre-purchase inspection (conducted for buyers),
typically in accordance with Australian Standard AS 4349. Some inspection companies may
use different terminology or offer variations in service scope, so always confirm
exactly what is included when booking your inspection.
## Key Takeaways
- A pre-sale property inspection gives sellers control over their property's narrative by identifying issues before buyers' inspections reveal them.
- Pre-sale inspections follow Australian Standard AS 4349 and cover structural integrity, moisture issues, pest infestations, and building code compliance.
- Australian Consumer Law prohibits misleading or deceptive conduct, making disclosure of known significant defects important for legal protection.
- Properties with pre-sale inspection reports typically sell faster and achieve prices closer to asking price due to increased buyer confidence.
- The cost of a combined building and pest inspection, typically $500 to $800 plus GST, is minimal compared to potential price reductions of 2 to 5 percent when issues are discovered during buyer inspections.
- Not all defects need to be repaired before sale. Strategic decisions should weigh repair costs against potential price impacts and buyer perception.
- Safety issues and compliance matters, including smoke alarms and pool fencing, should always be addressed before listing.
- Choose a licensed inspector with appropriate qualifications, professional indemnity insurance, and experience with pre-sale inspections.
- Conduct your pre-sale inspection 4 to 8 weeks before your planned listing date to allow time for repairs and documentation.
## References and Resources
- [ Standards Australia (AS 4349 Building Inspection Standard) ](https://www.standards.org.au/)
- [ Australian Competition and Consumer Commission (ACCC) - Consumer Guarantees ](https://www.accc.gov.au/consumers/consumer-rights-guarantees/consumer-guarantees)
- [ NSW Fair Trading ](https://www.fairtrading.nsw.gov.au/)
- [ Consumer Affairs Victoria ](https://www.consumer.vic.gov.au/)
- [ Queensland Government - Buying and Selling Property ](https://www.qld.gov.au/law/housing-and-neighbours/buying-and-selling-a-property)
- [ South Australian Government - Buying and Selling Property ](https://www.sa.gov.au/topics/housing/buying-building-selling)
- [ WA Consumer Protection ](https://www.commerce.wa.gov.au/consumer-protection)
- [ Australian Building Codes Board (ABCB) ](https://www.abcb.gov.au/)
- [ Real Estate Institute of New South Wales ](https://www.reinsw.com.au/)
- [ Real Estate Institute of Victoria ](https://reiv.com.au/)
### Home Defect Inspection Report for a Safe and Secure Purchase
Source: https://ownerinspections.com.au/articles/home-defect-inspection-report
Published: 2025-04-25 | Updated: 2026-02-09 | Category: New Construction
Author: Maison Azdari
A home defect inspection report is a detailed assessment of a property's structural integrity, safety hazards, and compliance with Australian building standards. It identifies both visible and hidden defects, including foundation issues, electrical faults, plumbing problems, and fire safety non-compliance. In Australia, these inspections follow Australian Standard AS 4349.1 and are conducted by qualified building inspectors or structural engineers using tools such as moisture meters, infrared cameras, and borescopes. The report helps buyers avoid properties with costly hidden problems, sellers reduce legal liability, and investors evaluate the true condition of a property before committing.
Purchasing a home without a defect inspection report carries significant financial risk. Strict building codes exist in Australia, but defects still occur in both new and older properties. A professional inspection provides a clear picture of the property's condition, allowing all parties to make informed decisions and take appropriate action.
## What Is a Home Defect Inspection Report?
A home defect inspection report is a comprehensive document that evaluates a property's condition across its structure, services, and safety features. It covers everything from foundations and roofing to plumbing, electrical systems, and fire safety compliance.
The report serves multiple purposes. For buyers, it prevents unexpected repair costs. For sellers, it reduces legal liability by identifying issues that must be disclosed. For investors, it provides an accurate assessment of the property's condition and potential maintenance costs.
### Who Conducts These Inspections?
Qualified building inspectors or structural engineers perform these inspections following Australian Standard AS 4349.1. They use specialised tools including moisture meters, infrared cameras, and borescopes to detect hidden defects that are not visible during a standard walkthrough.
Certified inspectors have expertise in construction, electrical systems, plumbing, and roofing. They are typically engaged by buyers, sellers, real estate agents, and property managers to provide independent, unbiased reports.
### When Are They Needed?
## Common Defects Identified
### Structural Defects
### Mechanical and System Defects
### Safety Hazards
## The Inspection Process
### Duration and Delivery
A standard inspection takes 2 to 4 hours depending on the property's size and condition. Reports are typically delivered within 24 to 48 hours, giving buyers time to review the findings before making a purchase decision.
## Understanding the Report
### Report Structure
A home defect inspection report includes:
### How to Interpret the Findings
Minor defects such as small cracks or cosmetic issues generally require routine maintenance and do not significantly affect property value. Major defects like foundation instability, waterproofing failure, or electrical hazards demand immediate attention and could influence your purchase decision or require renegotiation of the price.
## Legal Implications and Compliance
Failing to address significant defects may breach Australian Consumer Law (ACL) and impact property transactions. Sellers who do not disclose known defects risk legal action from buyers after settlement. For buyers, a defect inspection report provides evidence that can be used in negotiations or, if needed, in legal proceedings.
In NSW, the Home Building Act 1989 provides statutory warranty protections for residential building work. In Victoria, the Domestic Building Contracts Act 1995 offers similar protections. In Queensland, the QBCC administers the dispute resolution process.
## Choosing a Qualified Inspector
### Questions to Ask
For a complete overview, see our [guide to pre-purchase building and pest inspections](/guides/pre-purchase-building-pest-inspection-guide).
If you have already purchased and discovered defects, see our [guide to building defect investigations](/guides/building-defect-investigation-guide) for your next steps.
### Why You Should Not Skip a Pre-Purchase Home Inspection
Source: https://ownerinspections.com.au/articles/why-not-skip-pre-purchase-home-inspection
Published: 2025-04-18 | Updated: 2026-03-13 | Category: Pre-Purchase Inspections
Author: Maison Azdari
A pre-purchase home inspection is a professional assessment of a property's condition conducted before the buyer commits to the purchase. In Australia, research from the Australian Housing and Urban Research Institute (AHURI) shows that approximately 70% of the country's estimated 10.9 million homes have major building defects, ranging from plumbing failures and hazardous mould to structural faults and foundation cracks. Skipping a [pre-purchase inspection](/pre-purchase-inspections) means buying a property blind, risking hidden defects that could cost tens of thousands of dollars to repair. The inspection identifies existing or potential defects, gives buyers negotiation leverage, and provides a clear basis for informed decision-making.
The Australian real estate market moves quickly, and buyers can feel pressured to skip inspections to speed up the process. However, the cost of an inspection, typically between $300 and $800, is minor compared to the financial exposure of discovering serious defects after settlement. This guide explains what a pre-purchase inspection covers, what it can uncover, and what happens when buyers skip this step.
## What Is a Pre-Purchase Home Inspection?
A pre-purchase home inspection evaluates a property's condition before the buyer finalises the purchase. It identifies existing or potential defects that might not be visible to an untrained eye, helping buyers understand the true condition of the property and whether it represents a sound investment.
### Types of Pre-Purchase Inspections
Read the Full
Inspection Guide
}
buttonHref="/guides/pre-purchase-building-pest-inspection-guide"
variant="secondary"
/>
## Common Issues Uncovered
### Structural Defects
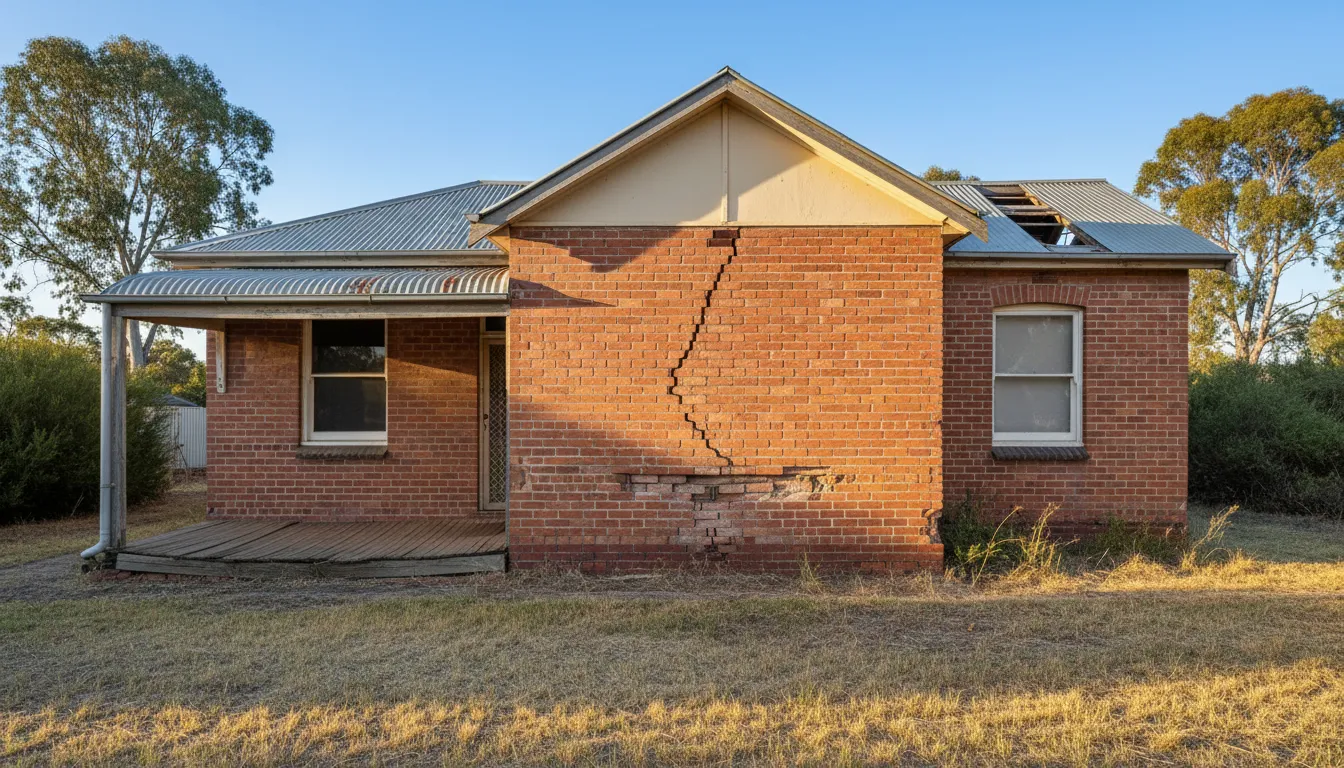
### Pest Infestations
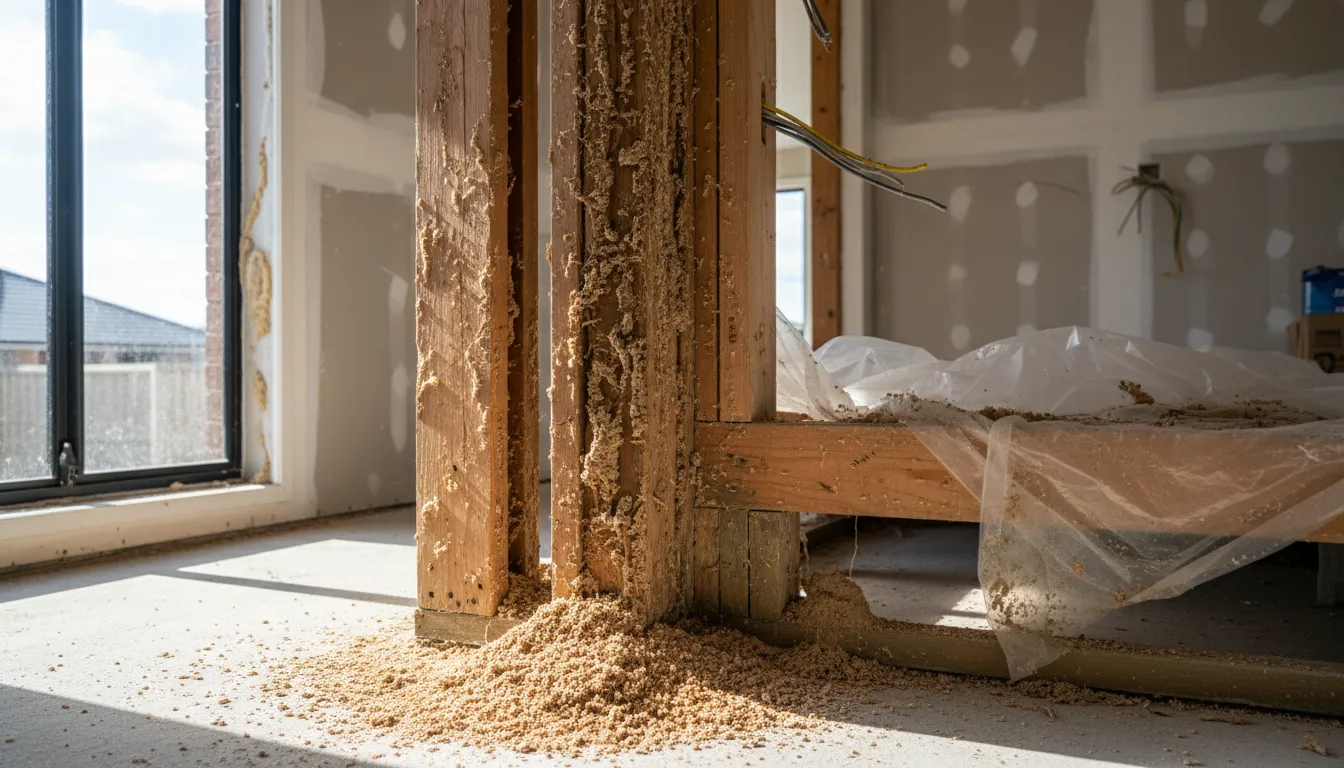
### Plumbing and Electrical Problems
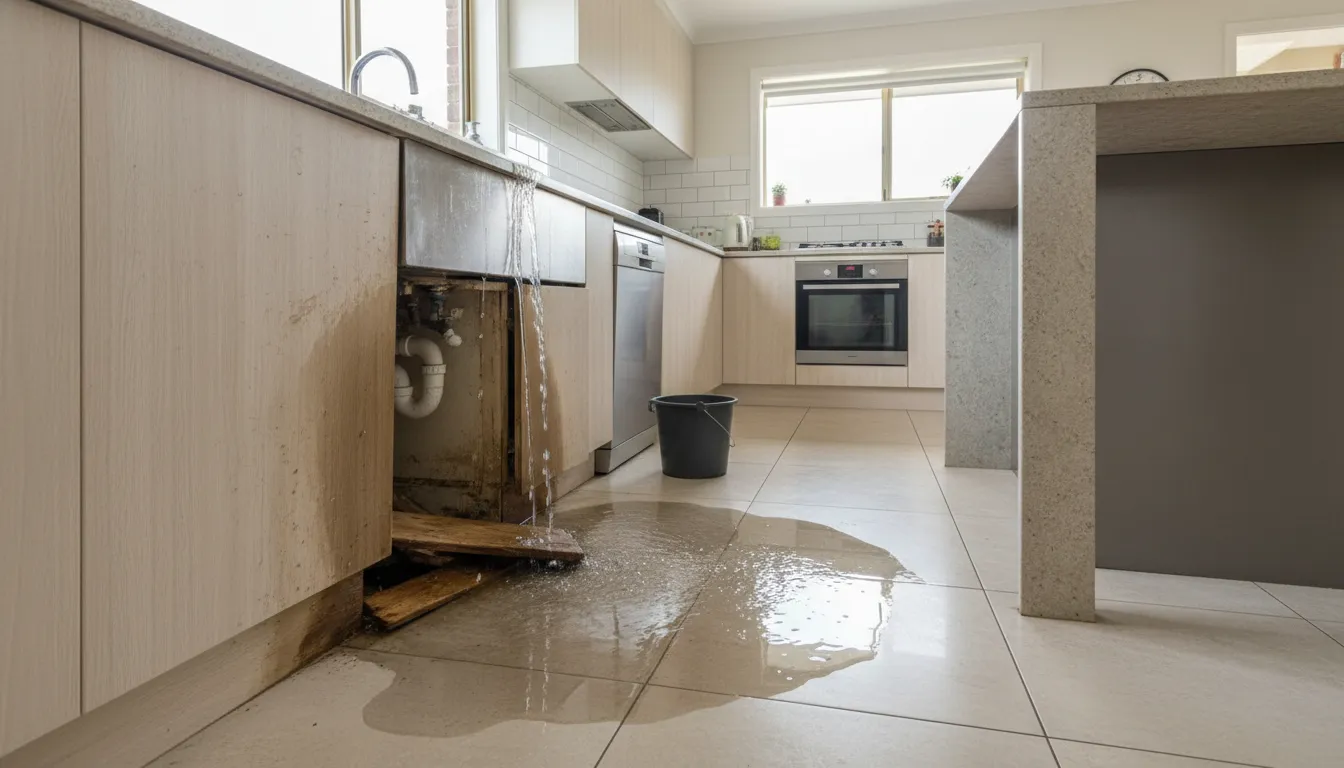
### Building Code Compliance
Some properties may have been altered without proper approvals, leading to legal complications, fines, or costly remedial work to meet regulatory requirements. A pre-purchase inspection can identify unapproved additions, modifications, or non-compliant installations before you commit to the purchase.
## Benefits of a Pre-Purchase Inspection
### Informed Decision-Making
A detailed inspection report gives buyers a clear understanding of the property's condition. This allows them to proceed with confidence or walk away if the defects are too serious. Making a well-informed decision reduces financial stress and protects the buyer's long-term interests.
### Negotiation Leverage
A report documenting defects gives buyers strong grounds to negotiate repairs or price reductions with the seller. If significant issues are found, buyers can request that the seller fix them before settlement or reduce the price to compensate for the cost of repairs.
### Future Planning
Identifying potential issues early lets buyers budget for future maintenance and avoid costly emergency repairs. Planning ahead can save thousands of dollars in unexpected expenses over the life of the property.
### Insurance Advantages
Some insurance companies may offer better rates for properties with a clean inspection report. Properties with major defects may face higher premiums or even denial of coverage, making it harder to insure your home properly.
View the Buyer
Inspection Checklist
}
buttonHref="/articles/pre-purchase-inspection-checklist-for-buyers"
variant="secondary"
/>
## Risks of Skipping the Inspection
### Unexpected Repair Costs
Undetected problems can lead to large post-purchase repair bills, turning what seemed like a good deal into a financial burden. Foundation repairs, rewiring, and termite damage remediation are among the most expensive surprises buyers face.
### Safety Hazards
Compromised structural integrity, faulty wiring, or hidden mould can put occupants at risk. In extreme cases, these issues can lead to health problems or accidents that could have been avoided with a pre-purchase inspection.
### Decreased Property Value
A home with unresolved defects can lose value over time, making it harder to sell in the future. Even minor defects can become significant selling obstacles if left unaddressed for years.
## How to Choose a Qualified Inspector
### Questions to Ask
### Who Needs a Pre-Construction Dilapidation Report?
Source: https://ownerinspections.com.au/articles/who-needs-pre-construction-dilapidation-report
Published: 2025-04-15 | Updated: 2026-04-01 | Category: Dilapidation Reports
Author: Maison Azdari
If you are asking who needs a pre-construction [dilapidation report](/dilapidation-reports), the answer is usually the people carrying out, approving, managing, or living beside building work that could affect nearby property. In most cases, that means builders, developers, neighbouring owners, strata managers, commercial property managers, councils, and project teams involved in demolition, excavation, piling, basement work, or construction close to boundaries. A dilapidation report creates a dated record of a property’s condition before work starts, helping sort out damage claims, reduce neighbour disputes, and show that reasonable steps were taken before construction began.
**Reference:** [Australian Bureau of Statistics (ABS)](https://www.abs.gov.au/statistics/economy/price-indexes-and-inflation/total-value-dwellings/latest-release). Residential dwelling count and total dwelling value are from *Total Value of Dwellings, December Quarter 2025*. Dwelling approvals are from *Building Approvals, Australia, February 2026*. Figures rounded for on-page display.
A pre-construction dilapidation report is most commonly needed by:
- Builders and developers starting work near other structures
- Owners of neighbouring homes or units
- Strata committees and body corporates
- Commercial property owners and facility managers
- Councils and public asset managers
- Contractors involved in demolition, excavation, piling or basement construction
The exact trigger varies by state, council, permit conditions, the type of work, and how close the project is to adjoining property or public assets.
> A pre-construction dilapidation report is not merely a formality. It represents your
> documented protection against construction-related disputes and provides the evidentiary
> foundation for any future damage claims or defence against unfounded allegations.
## What is a Pre-construction Dilapidation Report?
A pre-construction dilapidation report is a written and photographic record of the condition of a property before nearby building work starts. It usually documents visible defects, cracking, movement, wear, damage, finishes, and surrounding elements such as fences, paths, retaining walls, driveways, roofs, windows, internal walls and ceilings, depending on the scope and access available. The point is simple: if someone later says the work caused damage, there is a clear baseline to compare against.
This type of report is not the same as a standard [pre-purchase inspection](/pre-purchase-inspections). A pre-purchase inspection looks at defects, condition and maintenance issues for a buyer. A dilapidation report is more focused on documenting condition before nearby works so changes can be checked later.
Explore Dilapidation
Report Services
}
buttonHref="/dilapidation-reports"
variant="secondary"
/>
## Who Usually Needs One?
### Builders and developers
Builders and developers are the most common parties to order a dilapidation report. They use it to document neighbouring properties before work starts, meet approval or contract requirements, and limit disputes about damage that may already have existed before the project began. For a builder, the report is often a risk-control document as much as a technical one.
### Owners of neighbouring properties
If construction is happening next door, across a narrow laneway, or close to a shared boundary, neighbouring owners have a strong reason to care about a dilapidation report. It gives them a record of the home’s condition before vibration, excavation, demolition, traffic loading, or ground movement begins. That can help later if cracking, sticking doors, settlement, or other issues appear during the works. QBCC also notes that neighbouring building work can cause consequential damage and may become the subject of a complaint or dispute.
### Strata committees and body corporates
Strata properties often need a broader scope because the risk is not limited to one dwelling. Common property, façades, driveways, shared walls, gardens, basements, pools, and services can all become part of a dispute if nearby construction affects the building. A strata committee may need the report to protect both common assets and the interests of individual lot owners.
### Commercial property owners and managers
Commercial owners and facility managers may need a report when neighbouring works could affect tenancy areas, accessways, loading areas, façades, fit-outs, or sensitive building services. In a commercial setting, the issue is not only repair cost. It can also be tenant complaints, access problems, lease issues, and downtime.
### Councils and public asset managers
Councils and government bodies may require pre-construction condition records for public assets such as footpaths, kerbs, roads, stormwater elements, street furniture, and trees. This is especially relevant where heavy vehicle access, demolition, excavation, or high-traffic construction activity could affect public infrastructure.
### Anyone planning higher-risk works
The closer the works are to existing structures, the stronger the case for a report. Projects that involve demolition, piling, deep excavation, basement construction, underpinning, or work close to shared boundaries are much more likely to call for pre-construction documentation than a simple internal fit-out. In Victoria, the VBA’s protection work guidance specifically points to risks such as excavation, work near boundary walls, falling materials and other scenarios where adjoining property may face significant damage.
## When is a Dilapidation Report Most Commonly Needed?
A report is most commonly needed before:
- Demolition near existing homes or commercial buildings
- Excavation close to boundaries
- Basement construction
- Piling or vibration-heavy works
- Underpinning or retention systems
- Work next to shared walls or narrow side setbacks
- Projects with crane use, heavy vehicle movement, or public asset exposure
- Developments where council or permit conditions call for adjoining property protection
These are the situations where disputes usually become expensive, because multiple parties may be affected and visible damage can be difficult to date without a proper baseline.
## Australian Legislative Framework for Dilapidation Reports
Understanding the legislative requirements for dilapidation reports across Australian
jurisdictions helps stakeholders ensure compliance and adequate protection. While there is
no single national law mandating dilapidation reports, various state and territory
legislation, combined with local council requirements, create a framework of obligations and
best practices.
### New South Wales
In New South Wales, the Environmental Planning and Assessment Act 1979 provides the primary
framework for development consent conditions, which frequently include requirements for
dilapidation reports. Section 4.17 of the Act empowers consent authorities to impose
conditions on development consent, and local councils routinely use this power to require
pre-construction dilapidation surveys for neighbouring properties.
The NSW Environmental Planning and Assessment Regulation 2021 further supports these
requirements through provisions relating to construction certificates and compliance
documentation. Many NSW councils have specific Development Control Plans (DCPs) that mandate
dilapidation reports for certain types of development, particularly those involving
excavation deeper than one metre, demolition of existing structures, or construction within
specified distances of property boundaries.
NSW Fair Trading provides guidance on building disputes and property damage claims,
emphasising the importance of documented evidence when resolving construction-related
disputes through the NSW Civil and Administrative Tribunal (NCAT).
### Victoria
The Building Act 1993 (Vic) establishes the regulatory framework for building and
construction in Victoria. While the Act does not explicitly mandate dilapidation reports,
Section 29 relating to protection of adjoining property provides the basis for requiring
documentation of existing conditions before construction that could affect neighbouring
properties.
The Victorian Building Authority (VBA) oversees compliance with building regulations and
provides guidance on best practices for protecting adjoining properties during construction.
Municipal councils in Victoria frequently impose dilapidation report requirements as permit
conditions, particularly for developments involving basement construction, demolition, or
works requiring underpinning of adjoining structures.
The Domestic Building Contracts Act 1995 (Vic) also has relevance for residential
construction, establishing obligations for builders regarding protection of property and
resolution of disputes.
### Queensland
The Building Act 1975 (Qld) governs building and construction regulation in Queensland. The
Act establishes requirements for building certifiers and development approval processes that
often incorporate dilapidation report requirements. Section 86 of the Act relating to
adjoining owners and building work provides the foundation for protection measures including
pre-construction documentation.
The Queensland Building and Construction Commission (QBCC) regulates the building industry
and provides guidance on managing construction impacts on neighbouring properties.
Development approval conditions issued by Queensland councils commonly include requirements
for dilapidation surveys, particularly for developments in established urban areas where
construction impacts on existing properties are more likely.
The Queensland Civil and Administrative Tribunal (QCAT) handles building disputes, and
documented pre-construction conditions through dilapidation reports significantly strengthen
claims or defences in these proceedings.
### South Australia
The Planning, Development and Infrastructure Act 2016 (SA) provides the legislative
framework for development in South Australia. The Act enables planning authorities to impose
conditions on development approval, which frequently include requirements for dilapidation
documentation when construction could affect neighbouring properties.
Consumer and Business Services South Australia oversees building industry licensing and
provides resources for managing construction-related disputes. South Australian councils
typically require dilapidation reports for developments involving significant excavation or
construction within close proximity to existing structures.
### Local Council Development Approval Requirements
Across all Australian jurisdictions, local councils play a central role in requiring and
enforcing dilapidation report obligations. Development Approval (DA) conditions commonly
specify requirements including the radius within which properties must be surveyed, the
qualifications required for inspectors, the timing of reports relative to construction
commencement, and documentation to be submitted to council.
Council requirements vary significantly based on the nature and scale of proposed
development, the characteristics of the surrounding area, and local planning instruments.
Applicants should carefully review DA conditions and consult with council officers if
requirements are unclear.
View Council
Requirements
}
buttonHref="/articles/council-requirement-for-dilapidation-reports"
variant="secondary"
/>
## Who Needs Dilapidation Reports: Scenarios and Requirements
The following table summarises common scenarios where dilapidation reports are required or
recommended, identifying which parties typically need reports and the primary purposes
served.
| Scenario | Who Needs Report | Primary Purpose | Typical Requirement |
| ------------------------------ | ------------------------------------------------- | ------------------------------------------ | ----------------------------- |
| New residential construction | Builder and adjacent property owners | Baseline documentation, dispute prevention | Often DA condition |
| Multi-storey development | Developer, all properties within specified radius | Compliance, risk management | Mandatory DA condition |
| Deep excavation or basement | Builder, adjacent and nearby properties | Ground movement monitoring | Mandatory DA condition |
| Demolition works | Demolition contractor, adjoining owners | Vibration and debris protection | Mandatory DA condition |
| Infrastructure projects | Government agency, all affected properties | Comprehensive baseline | Project specification |
| Road and utility works | Contractor, properties along corridor | Vibration and settlement monitoring | Contract requirement |
| Tunnelling or underground work | Project authority, properties above and adjacent | Settlement and movement baseline | Mandatory project requirement |
| Commercial renovation | Tenant, building owner, adjacent tenants | Lease compliance, damage prevention | Often lease condition |
| Heritage building nearby | Developer, heritage property owner | Heritage protection | Heritage approval condition |
| Piling or pile driving | Builder, properties within vibration radius | Vibration damage baseline | Mandatory DA condition |
## Dilapidation Report Requirements by Construction Type
Different types of construction activities create varying levels of risk for neighbouring
properties. The following table outlines typical requirements and survey distances for
common construction types.
| Construction Type | Typical Survey Distance | Risk Level | Key Concerns |
| ---------------------------- | ------------------------------------- | ---------------- | --------------------------------------------- |
| Single dwelling construction | Adjacent properties (15 to 20 metres) | Moderate | Vibration, excavation impacts |
| Multi-unit residential | 30 to 50 metres from site boundary | High | Extended construction period, heavy equipment |
| Commercial development | 50 metres or as specified | High | Deep foundations, crane operations |
| Basement excavation | 1.5 to 2 times excavation depth | Very high | Ground movement, underpinning requirements |
| Demolition | All adjacent properties minimum | High | Vibration, debris, dust infiltration |
| Piling works | 50 to 100 metres depending on method | Very high | Severe vibration, ground displacement |
| Tunnelling | 100 metres or more above alignment | Very high | Settlement, ground subsidence |
| Road construction | Properties fronting works corridor | Moderate to high | Vibration, access impacts, drainage changes |
## What a Pre-Construction Dilapidation Report Contains
A comprehensive dilapidation report provides detailed documentation of all aspects of a
property that could potentially be affected by nearby construction. Understanding what the
report contains helps stakeholders appreciate its value and ensure the documentation meets
their needs.
### Property Identification and Context
The report begins with complete identification of the property including address, legal
description, property type, and construction characteristics. This section establishes the
context for the assessment, noting the property's age, construction methods, materials, and
any relevant history that may affect its susceptibility to construction impacts.
### Inspection Methodology
A professional report describes the inspection methodology, including the date and time of
inspection, weather conditions, areas accessed, and any limitations on the inspection such
as inaccessible areas or obstructions. This transparency ensures the report's reliability
and helps identify any gaps in documentation.
### Photographic Documentation
High-resolution photographs form the core evidence of a dilapidation report. Professional
inspectors capture hundreds of images documenting every accessible area of the property,
with particular attention to existing defects, cracks, and areas of concern. Photographs
include both context shots showing overall conditions and close-up images documenting
specific defects with measurement references.
### Written Descriptions
Detailed written descriptions accompany photographic documentation, providing narrative
explanation of observed conditions. Professional terminology describes defects accurately,
noting crack patterns, widths, lengths, and characteristics that help determine causes and
monitor changes over time.
### Measurements and Quantitative Data
Where appropriate, the report includes measurements of cracks, gaps, level variations, and
other quantifiable conditions. These measurements provide objective baseline data for
comparison with post-construction assessments, enabling precise identification of any
changes that have occurred.
### Areas Covered
Comprehensive reports document both interior and exterior areas, typically including
external walls, roofing, windows and doors, driveways and paths, fencing, retaining walls,
landscaping, internal walls and ceilings, floors, and any outbuildings or structures. For
commercial properties, fit-outs, equipment, and specialised installations may also be
documented.
## Key Benefits of Pre-Construction Dilapidation Reports
The benefits of dilapidation reports extend to all parties involved in or affected by
construction activities. Understanding these benefits helps stakeholders appreciate the
value of investing in quality documentation.
### Legal Protection and Evidence
The primary benefit of a dilapidation report is the legal protection it provides. The
documented record of pre-construction conditions serves as admissible evidence in tribunal
and court proceedings, supporting claims for construction-related damage or defence against
unfounded allegations. Without baseline documentation, proving when damage occurred becomes
extremely difficult.
### Dispute Prevention and Resolution
Dilapidation reports help prevent disputes by establishing clear, objective documentation
that all parties can reference. When disagreements arise about whether damage was caused by
construction activities, the pre-construction record provides the factual basis for fair
resolution. Many potential disputes are avoided entirely when comprehensive documentation
exists.
### Early Identification of Risk Areas
The inspection process identifies existing vulnerabilities and areas of concern that may be
particularly susceptible to construction impacts. This early identification allows property
owners to monitor these areas during construction and enables builders to implement
appropriate protective measures.
### Insurance Claim Support
For property owners making insurance claims for construction-related damage, dilapidation
reports provide essential supporting evidence. For builders with liability insurance,
documented pre-construction conditions support accurate assessment of third-party claims.
Some insurance policies specifically require dilapidation documentation as a condition of
coverage.
### Compliance with Regulatory Requirements
Where development approval conditions mandate dilapidation reports, obtaining quality
documentation ensures compliance and avoids potential enforcement action. Failure to comply
with DA conditions can result in stop-work orders, fines, and other penalties that far
exceed the cost of proper documentation.
### Professional Due Diligence
For builders and developers, commissioning dilapidation reports demonstrates professional
due diligence in managing construction impacts. This proactive approach enhances reputation,
builds trust with neighbours and councils, and reduces the likelihood of complaints and
disputes that can delay projects.
> The cost of a comprehensive dilapidation report is typically measured in hundreds of
> dollars. The cost of a construction damage dispute without baseline documentation can easily
> reach tens of thousands of dollars in repairs, legal fees, and project delays.
## When Pre-Construction Dilapidation Reports Are Required
Understanding when dilapidation reports are required helps stakeholders plan appropriately
and ensure compliance with applicable obligations. Requirements arise from multiple sources
including development consent conditions, contractual obligations, and prudent risk
management practices.
### Development Consent Conditions
Local councils frequently impose dilapidation report requirements as conditions of
development approval. These conditions typically specify which properties must be surveyed
(often by distance from the site boundary), when reports must be completed (before
construction commencement), the qualifications required for inspectors, and documentation to
be submitted to council. Applicants should carefully review all DA conditions to identify
dilapidation requirements.
### Construction Contracts
Many construction contracts include provisions requiring dilapidation surveys before works
commence. These contractual requirements may specify additional properties beyond council
requirements, establish procedures for managing damage claims, and allocate responsibility
for survey costs between parties. Builders and developers should review contract terms
carefully.
### Infrastructure Project Specifications
Government infrastructure projects typically include comprehensive dilapidation requirements
in project specifications. These requirements often extend further than private development
conditions, reflecting the larger scale and extended duration of infrastructure works.
Contractors should understand and plan for these requirements when tendering and delivering
projects.
### Voluntary Risk Management
Even where not formally required, dilapidation reports represent prudent risk management for
any construction activity that could affect neighbouring properties. The modest cost of
baseline documentation is insignificant compared to the potential cost of disputes without
evidence. Builders and property owners should consider voluntary reports whenever
construction impacts are possible.
Contact Owner
Inspections
}
buttonHref="/contact"
variant="primary"
/>
## Frequently Asked Questions
### Who is responsible for paying for a pre-construction dilapidation report?
**Short answer:** The builder or developer conducting the construction work
typically pays for dilapidation reports on neighbouring properties as part of their
compliance obligations.
Development consent conditions usually require the applicant (builder or developer) to
arrange and pay for dilapidation surveys of properties potentially affected by
construction activities. This cost is typically factored into project budgets as a
standard compliance expense. However, property owners who want additional documentation
beyond what the builder provides, or who want their own independent assessment, may
choose to commission and pay for their own reports. In some cases, construction
contracts allocate dilapidation costs to specific parties, so contract terms should be
reviewed carefully.
### Can I refuse to allow a dilapidation inspection of my property?
**Short answer:** Yes, property owners can refuse access to their property,
but doing so may limit their ability to claim compensation for any damage that occurs
during construction.
Property owners have the right to refuse entry to inspectors commissioned by
neighbouring developers. However, refusing access prevents documentation of
pre-construction conditions, which significantly weakens any future damage claims.
Without baseline evidence, proving that damage resulted from construction activities
becomes extremely difficult. If you have concerns about the inspection process, consider
requesting to be present during the survey, asking for inspector credentials and
insurance details, or commissioning your own independent report rather than refusing
altogether. Most professional inspectors accommodate reasonable requests from property
owners.
### How far from a construction site do properties need dilapidation reports?
**Short answer:** Survey distances typically range from 15 metres for minor
works to 100 metres or more for major infrastructure projects, depending on construction
type and council requirements.
Development consent conditions often specify the radius within which properties must be
surveyed, with distances based on the scale and nature of proposed works. Standard
residential construction may require surveys of immediately adjacent properties (15 to
20 metres). Multi-storey developments and basement excavations typically require surveys
within 30 to 50 metres. Piling works may require surveys within 50 to 100 metres
depending on the piling method. Major infrastructure projects such as tunnelling may
require surveys of all properties above and adjacent to the alignment. When requirements
are unclear, surveying additional properties provides better protection than the
potential cost of inadequate documentation.
### What qualifications should a dilapidation report inspector have?
**Short answer:** Inspectors should hold appropriate building inspection
licensing for their state, relevant qualifications such as a Diploma of Building and
Construction, and current professional indemnity insurance.
In NSW, building inspectors should be licensed through NSW Fair Trading. Victorian
inspectors should be registered with the Victorian Building Authority (VBA). Queensland
inspectors should hold QBCC licensing. Professional qualifications typically include a
Diploma of Building and Construction or equivalent, with additional training or
certification in building inspection. Professional indemnity insurance protects both the
inspector and client in case of errors or omissions. Membership in professional bodies
such as the Master Builders Association or Housing Industry Association indicates
commitment to professional standards. Always verify credentials before engaging an
inspector.
### How long does a dilapidation report inspection take?
**Short answer:** Standard residential property inspections take one to
three hours, with larger or more complex properties requiring additional time.
The duration of a dilapidation inspection depends on property size, complexity,
accessibility, and the level of existing defects requiring documentation. A standard
residential property with straightforward access typically requires one to two hours for
comprehensive interior and exterior assessment. Larger properties, those with multiple
buildings or outbuildings, or properties with significant existing defects requiring
detailed documentation may take three hours or more. Commercial properties vary widely
based on size and complexity. The inspector needs adequate time to document all areas
thoroughly. Rushing the inspection process compromises the quality and reliability of
the resulting report.
### What happens if damage occurs during construction and I do not have a dilapidation report?
**Short answer:** Without a dilapidation report, proving that damage was
caused by construction activities becomes extremely difficult, significantly weakening
any compensation claim.
If damage occurs during nearby construction and no pre-construction documentation
exists, you face a significant evidentiary challenge. The builder or their insurer may
argue that damage was pre-existing, resulted from other causes, or occurred
independently of construction activities. Without baseline evidence, you cannot
objectively demonstrate what changed during construction. While it may still be possible
to pursue a claim based on other evidence such as witness statements, timing
correlations, or expert opinions about damage patterns, success is much less certain. If
construction is still ongoing or recently completed, consider having a professional
assessment conducted to document current conditions, but understand that retrospective
documentation has limitations.
### Do I need a dilapidation report for minor construction work nearby?
**Short answer:** Even minor construction can cause damage in some
circumstances. Consider the nature of the work, proximity to your property, and your
property's condition when deciding whether documentation is warranted.
While major construction projects present the greatest risk, minor works can still cause
damage in certain circumstances. Consider factors such as the proximity of works to your
property, whether excavation or heavy equipment is involved, your property's age and
condition, and the sensitivity of finishes or equipment in your property. Even a small
renovation project may involve excavation near your boundary, use of power tools that
transmit vibrations, or construction traffic affecting your driveway. If your property
has existing vulnerabilities such as old masonry, previous crack repairs, or settlement
history, documentation before any nearby construction is prudent regardless of the
project's scale.
### How should I store my dilapidation report and for how long?
**Short answer:** Store reports securely in both digital and physical
formats for at least seven years, or longer if construction impacts may take time to
manifest.
Dilapidation reports should be retained for the duration of nearby construction and for
a reasonable period afterwards, typically a minimum of seven years to align with common
limitation periods for property damage claims. For underground works or major
infrastructure projects, longer retention may be appropriate as settlement and ground
movement effects can manifest years after construction. Store reports securely in
multiple formats: keep digital copies backed up to cloud storage or external drives, and
maintain physical copies in a safe location. Share copies with relevant parties
including your solicitor if you have one, and include reports in property documentation
if you sell during or after construction.
### Can a dilapidation report be used to stop construction from proceeding?
**Short answer:** No, a dilapidation report documents existing conditions
but does not itself prevent construction. However, it may support requests for
additional protective measures.
A dilapidation report is a documentation tool, not a mechanism for preventing approved
construction from proceeding. If a development has received proper approval and the
builder is complying with consent conditions, the dilapidation report does not provide
grounds to stop construction. However, if the inspection reveals that your property is
particularly vulnerable to construction impacts, this information may support
discussions with the builder about additional protective measures, monitoring
arrangements, or modified construction methods. If you have concerns about an approved
development, seek independent legal advice about your options, which may include
representations to council, requests for modified conditions, or civil remedies.
### What is the difference between a dilapidation report and a building inspection?
**Short answer:** A dilapidation report documents existing conditions for
comparison purposes, while a building inspection assesses overall property condition to
inform purchase or maintenance decisions.
While both involve property inspection by qualified professionals, the purpose and focus
differ significantly. A pre-purchase building inspection evaluates overall property
condition to inform buying decisions, identifying major defects, safety hazards, and
maintenance requirements. A dilapidation report focuses specifically on creating
detailed baseline documentation of all conditions, particularly existing defects, that
could potentially change due to nearby construction impacts. Dilapidation reports
emphasise comprehensive photographic evidence and measurements that enable objective
comparison with post-construction conditions. Building inspections typically assess
whether defects are significant or require action, while dilapidation reports document
conditions without necessarily evaluating their significance beyond their potential
relevance to construction impact assessment.
## Key Takeaways
- Pre-construction dilapidation reports are essential documentation for any property potentially affected by nearby construction activities, protecting both property owners and builders.
- Australian legislation including the Environmental Planning and Assessment Act (NSW), Building Act 1993 (VIC), and Building Act 1975 (QLD) provides the framework for dilapidation report requirements through development consent conditions.
- Multiple stakeholders need these reports, including builders, developers, homeowners, commercial property managers, strata corporations, government entities, and insurance companies.
- Local councils frequently mandate dilapidation reports as conditions of development approval, specifying survey distances, inspector qualifications, and documentation requirements.
- Comprehensive reports include photographic documentation, written descriptions, measurements, and inspector credentials, covering all interior and exterior areas that could be affected by construction.
- Key benefits include legal protection, dispute prevention, early risk identification, insurance claim support, regulatory compliance, and demonstration of professional due diligence.
- Survey distances typically range from 15 metres for minor works to 100 metres or more for major infrastructure, depending on construction type and applicable requirements.
- Property owners can refuse access for dilapidation surveys but doing so significantly weakens their position if damage subsequently occurs and they wish to make a claim.
- Reports should be prepared by qualified, licensed inspectors with professional indemnity insurance and retained securely for at least seven years.
- The cost of a dilapidation report is minimal compared to the potential cost of construction damage disputes without baseline documentation.
Read About
Independent Reports
}
buttonHref="/articles/independent-dilapidation-report-services"
variant="primary"
/>
## References and Resources
The following Australian authorities and organisations provide information and guidance on
building regulations, dilapidation reports, and construction-related dispute resolution.
- [ NSW Fair Trading ](https://www.fairtrading.nsw.gov.au/) {' - Building licensing, dispute resolution, and consumer protection in NSW'}
- [ Victorian Building Authority (VBA) ](https://www.vba.vic.gov.au/) {' - Building practitioner registration and regulation in Victoria'}
- [ Queensland Building and Construction Commission (QBCC) ](https://www.qbcc.qld.gov.au/) {' - Licensing, insurance, and dispute resolution in Queensland'}
- [ Consumer and Business Services South Australia ](https://www.cbs.sa.gov.au/) {' - Building industry regulation in South Australia'}
- [ National Construction Code (NCC) ](https://ncc.abcb.gov.au/) {" - Australia's primary building regulatory framework"}
- [ Australian Building Codes Board (ABCB) ](https://www.abcb.gov.au/) {' - Development and maintenance of national building standards'}
- [ Standards Australia ](https://www.standards.org.au/) {' - Australian Standards including AS 4349 for property inspections'}
- [ NSW Legislation ](https://legislation.nsw.gov.au/) {' - Environmental Planning and Assessment Act 1979 and Regulations'}
- [ Victorian Legislation ](https://www.legislation.vic.gov.au/) {' - Building Act 1993 and associated regulations'}
- [ Queensland Legislation ](https://www.legislation.qld.gov.au/) {' - Building Act 1975 and associated regulations'}
### Understanding Building Insurance Inspections in Australia
Source: https://ownerinspections.com.au/articles/understanding-building-insurance-inspections
Published: 2025-04-11 | Updated: 2026-02-09 | Category: Insurance
Author: Maison Azdari
A building insurance inspection evaluates a property's structural integrity, compliance with building codes, and potential hazards to determine insurance coverage and premiums. In Australia, these inspections assess structural elements, electrical systems, plumbing, fire safety measures, and environmental risks such as flood and bushfire exposure. Properties that meet the National Construction Code (NCC) and maintain good safety records typically qualify for lower premiums, while those with unresolved hazards face higher costs or reduced coverage. Insurance inspections affect homeowners, builders, developers, commercial property managers, and government entities.
Understanding what an insurance inspection involves, what inspectors look for, and how to prepare your property can make the difference between comprehensive coverage at a fair premium and costly gaps in your insurance protection. This guide covers the full process from pre-inspection preparation to post-inspection actions.
For a complete overview, see our [guide to insurance claim assessments](/guides/insurance-claim-assessment-guide).
## What Is a Building Insurance Inspection?
A building insurance inspection is a professional assessment that evaluates a property's condition, safety features, and code compliance to help insurers determine the level of risk associated with providing coverage.
### Key Components Assessed
## Why Insurance Inspections Matter
### Compliance with the NCC
Compliance with the National Construction Code is a baseline for maintaining property value, securing insurance coverage, and preventing legal disputes. The NCC sets minimum building safety standards that all properties must meet.
### Identifying Risks and Hazards
A comprehensive inspection can reveal foundational weaknesses, ageing infrastructure, faulty electrical systems, and plumbing failures. Identifying these issues early prevents costly damage claims and improves property safety.
### Impact on Premiums
Insurance companies use inspection reports to assess risk levels. The condition and compliance of your property directly affects what you pay for coverage.
## What Inspectors Look For
Inspectors evaluate the following areas during an insurance inspection:
## The Inspection Process
### Pre-Inspection Preparations
### Post-Inspection Procedures
After the inspection, the inspector provides a detailed report highlighting areas that require repairs or upgrades. Property owners receive recommendations for corrective actions. The insurance company uses the findings to determine eligibility, coverage terms, and pricing.
## Common Issues Found
### Structural Deficiencies
Cracks in foundations, sagging roofs, and unstable load-bearing walls are common structural issues that can affect the building's integrity and [insurance assessment](/insurance-claim-assessments).
### Non-Compliance with Building Codes
The NCC establishes national standards for safety, accessibility, sustainability, and durability. Properties that do not meet these standards face difficulties obtaining or renewing insurance.
### Fire Safety Concerns
Poorly installed smoke alarms, inadequate fire escapes, improper storage of flammable materials, and missing safety switches significantly increase fire risk and affect insurance premiums.
### Electrical and Plumbing Issues
Outdated electrical wiring, circuit overloads, and plumbing leaks can lead to severe property damage and safety hazards. These issues are among the most common findings in insurance inspections and often require remediation before coverage can be secured.
## Consequences of Failing an Inspection
## How to Prepare
## Cost of Insurance Inspections
The cost of a building insurance inspection depends on several factors:
Regular inspections can enhance property value, reduce insurance premiums over time, and prevent costly emergency repairs. The investment in a periodic inspection is significantly lower than the cost of a denied claim or an unexpected structural failure.
For a complete overview, see our [guide to insurance claim assessments](/guides/insurance-claim-assessment-guide).
### How to Choose a Legal Expert Witness for Your Case
Source: https://ownerinspections.com.au/articles/how-to-choose-a-legal-expert-witness
Published: 2025-04-08 | Updated: 2026-02-09 | Category: Expert Witness
Author: Maison Azdari
A legal expert witness is a professional with specialised knowledge in a specific field who provides expert analysis and testimony in court proceedings. Unlike fact witnesses who describe what they personally observed, expert witnesses offer professional opinions based on their expertise to help judges and juries understand complex technical matters. In Australia, expert witnesses are used in civil lawsuits, criminal cases, arbitration, and tribunal hearings, including construction disputes, insurance claims, medical malpractice, and financial fraud cases. Selecting the right expert witness requires careful evaluation of their qualifications, credibility, communication skills, and relevant experience.
The testimony of an expert witness can significantly influence a case outcome. A well-chosen witness strengthens legal arguments with authoritative, independent analysis. A poorly chosen witness can undermine credibility and weaken the entire case. This guide covers what to look for, where to find qualified experts, and how to avoid the most common selection mistakes.
## What Is a Legal Expert Witness?
A legal expert witness is a qualified professional who provides expert analysis and opinions in legal proceedings. Their role is to break down complicated concepts, present objective assessments, and clarify evidence that might otherwise be too technical for the court to interpret accurately.
Expert witnesses differ from fact witnesses in a fundamental way. A fact witness testifies about events they directly observed. An expert witness offers opinions based on their professional expertise, training, and experience, even about events they did not personally witness.
## Types of Expert Witnesses
Expert witnesses come from many different fields. The type of expert needed depends on the nature of the case and the technical issues involved.
In construction disputes, for example, an expert witness may be needed to assess building defects identified during a [pre-purchase building inspection](/pre-purchase-inspections) or to evaluate a [dilapidation report](/dilapidation-reports) in the context of a property damage claim.
## Key Qualities to Look For
### Expertise and Qualifications
A qualified expert witness must have the right academic credentials, professional certifications, and real-world experience. Their background should align with the specific issues in the case to ensure relevance and authority. A witness with published research, industry recognition, and a proven track record is more likely to be persuasive in court.
### Communication Skills and Courtroom Presence
An expert witness needs to convey complex information in clear, plain language. Experience in depositions, cross-examinations, and courtroom settings helps maintain credibility under pressure. A skilled expert can simplify technical jargon, use relatable examples, and remain composed during cross-examination.
### Objectivity and Credibility
Credibility is the foundation of effective expert testimony. The witness must be unbiased, with a solid track record of integrity and consistency across their past testimony. A witness who has been frequently disqualified or found unreliable in previous cases will weaken your legal argument rather than strengthen it.
## Steps to Finding an Expert Witness
### Where to Search
### Conducting Interviews
Once potential candidates are identified, conduct interviews to assess their suitability. Ask these questions:
Assess the expert's ability to perform under pressure. Their demeanour, ability to answer questions concisely, and familiarity with legal procedures will directly affect how well they support your case.
### Reviewing Past Performance
Check the expert's track record by reviewing past case studies, testimonials from legal professionals, and any published work. Past performance highlights the witness's ability to present information persuasively and withstand legal challenges.
## Common Mistakes to Avoid
### Choosing a General Expert Instead of a Specialist
An expert witness must have direct experience related to the specific issues in the case. A general expert may not be as effective as someone who specialises in the relevant area. Using a witness with limited familiarity with industry standards or specific legal procedures can create doubt and weaken testimony.
### Overlooking Ethical and Legal Considerations
Verify that the expert has no conflicts of interest or ethical issues that could be used to discredit their testimony. Witnesses with prior ethical violations or demonstrated biases may not be taken seriously by the court.
### Not Considering Availability
A busy expert who cannot dedicate the required time to the case is a risk. Delays in expert testimony can affect case timelines and miss opportunities to strengthen the argument. Confirm availability at the outset and build the expert's schedule into your litigation timeline.
### Choosing Based on Cost Alone
While budget matters, selecting an expert based solely on price can be a mistake. The cheapest option may lack the credentials, experience, or courtroom skill needed to be effective. The value of a credible, well-qualified expert witness far outweighs the cost difference.
For a complete overview, see our [guide to expert witness reports for building disputes](/guides/expert-witness-building-disputes-guide).
### Weep Holes and Their Role in Preventing Water Damage
Source: https://ownerinspections.com.au/articles/weep-holes-in-preventing-water-damage
Published: 2025-04-01 | Updated: 2026-05-12 | Category: General Maintenance
Author: Maison Azdari
Weep holes are small but crucial openings in masonry walls designed to manage moisture and prevent structural damage. Without them, trapped water can cause mold, cracks, and other costly issues. These holes play an essential role in ensuring a building's longevity by facilitating proper drainage and ventilation. Excess moisture can compromise the strength of masonry materials, leading to issues such as efflorescence, spalling, and even severe foundation damage over time.
Understanding how weep holes function, their requirements under Australian Standards, and
how to maintain them properly can save homeowners thousands of dollars in repair costs and
preserve the structural integrity of their buildings for decades to come.
## What Are Weep Holes?
Weep holes are small openings built into brick walls and masonry structures to allow trapped water and moisture to escape from the wall cavity. They help prevent rising damp, mould growth, timber decay, corrosion, and structural damage caused by trapped moisture. In Australian homes, weep holes are an essential part of moisture management and are required under masonry construction standards.
Weep holes are small openings found at the base of masonry walls, allowing trapped moisture to drain out. Typically, they are located in brickwork, retaining walls, and cavity walls. These holes come in various forms, including open slots, PVC inserts, or metal vents, ensuring water does not accumulate behind walls. Without them, moisture trapped inside masonry structures can lead to long-term degradation.
### Where Are Weep Holes Found?
- Brick veneer and solid brick homes
- Retaining walls to prevent hydrostatic pressure buildup
- Under windowsills to drain water penetration
- Exterior walls with cavity construction for adequate moisture release
Book a Defect
Inspection
}
buttonHref="/defect-investigation-reports"
variant="secondary"
/>
## Purpose of Weep Holes in Brick Walls
Moisture is a common issue in masonry walls due to rain penetration, condensation, or leaks. Weep holes serve a critical role in preventing water buildup by allowing moisture to escape. Without proper weep holes, water accumulation within a wall cavity can result in serious structural problems, including wood rot, corrosion of metal ties, and decreased thermal efficiency.
### Benefits of Proper Weep Hole Drainage
- Reduces the risk of mold and mildew growth, which can affect indoor air quality.
- Prevents structural damage from prolonged moisture exposure, which can weaken walls.
- Helps maintain the integrity of the building materials, reducing long-term maintenance costs.
- Supports proper airflow within the cavity, promoting drying and minimizing condensation.
### Brick Veneer Construction
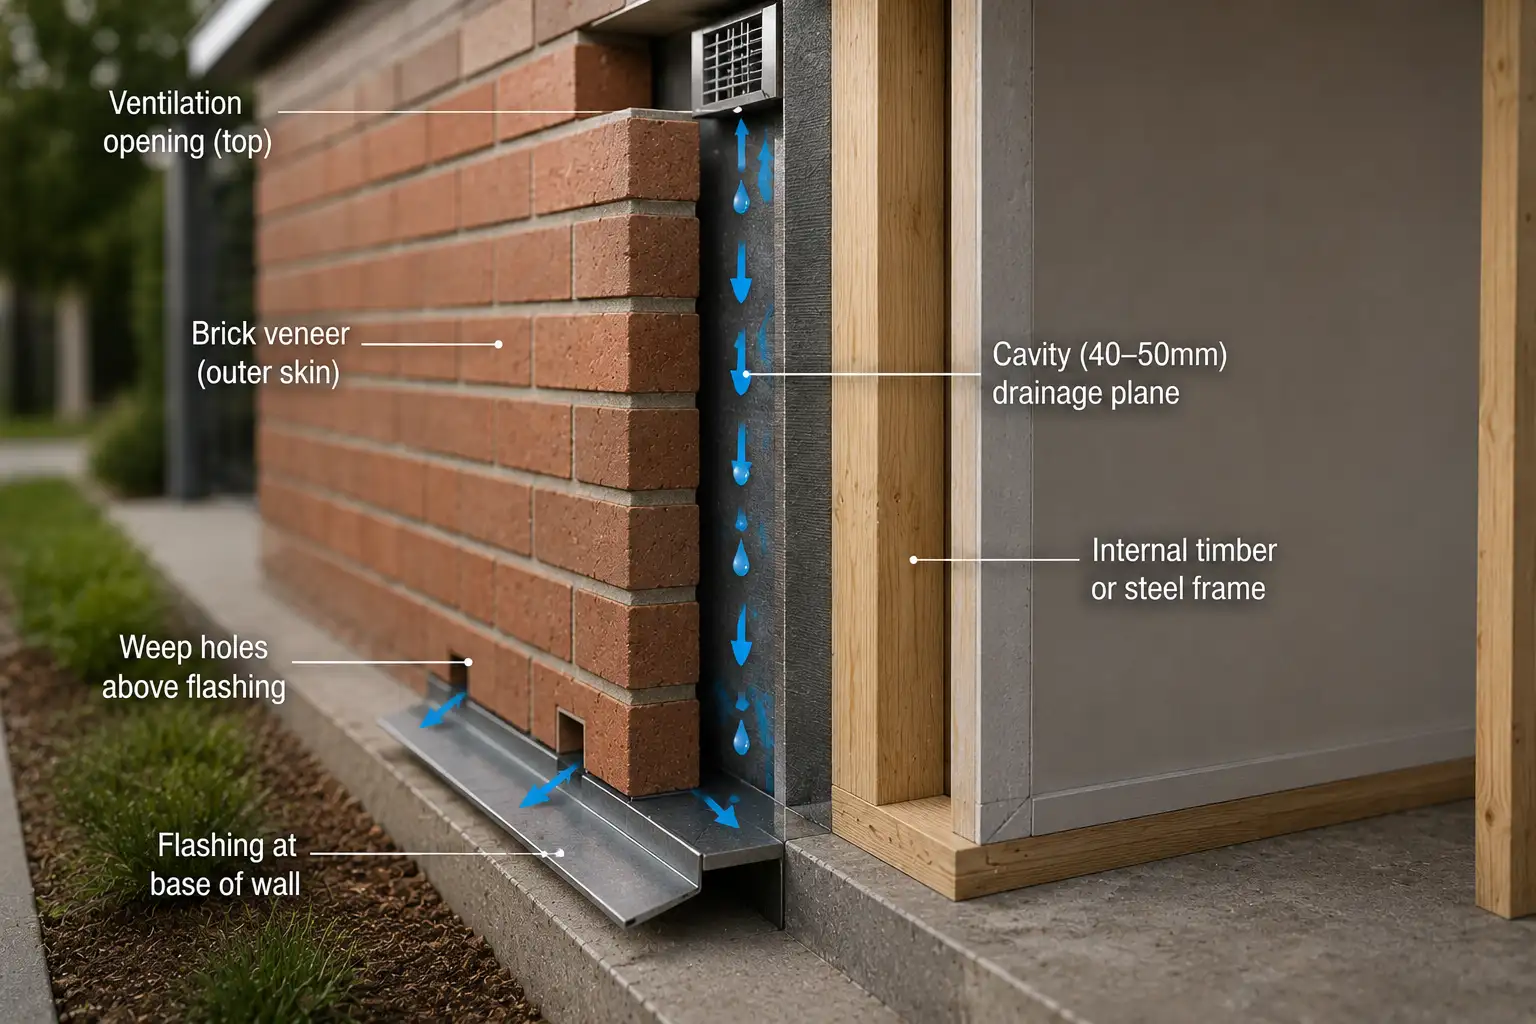
In brick veneer construction, which is the most common form of residential construction in Australia, a single layer of bricks is separated from the internal timber or steel frame by a cavity of 40 to 50 millimetres. This cavity acts as a drainage plane, with any water that penetrates the outer skin running down the back face of the bricks and collecting on the
flashing at the base of the wall.
Weep holes positioned just above the flashing allow this collected water to drain to the exterior before it can cause damage. The cavity also requires adequate ventilation to prevent moisture buildup, which is achieved through the combination of weep holes at the base and ventilation openings near the top of the walls.
### Retaining Walls
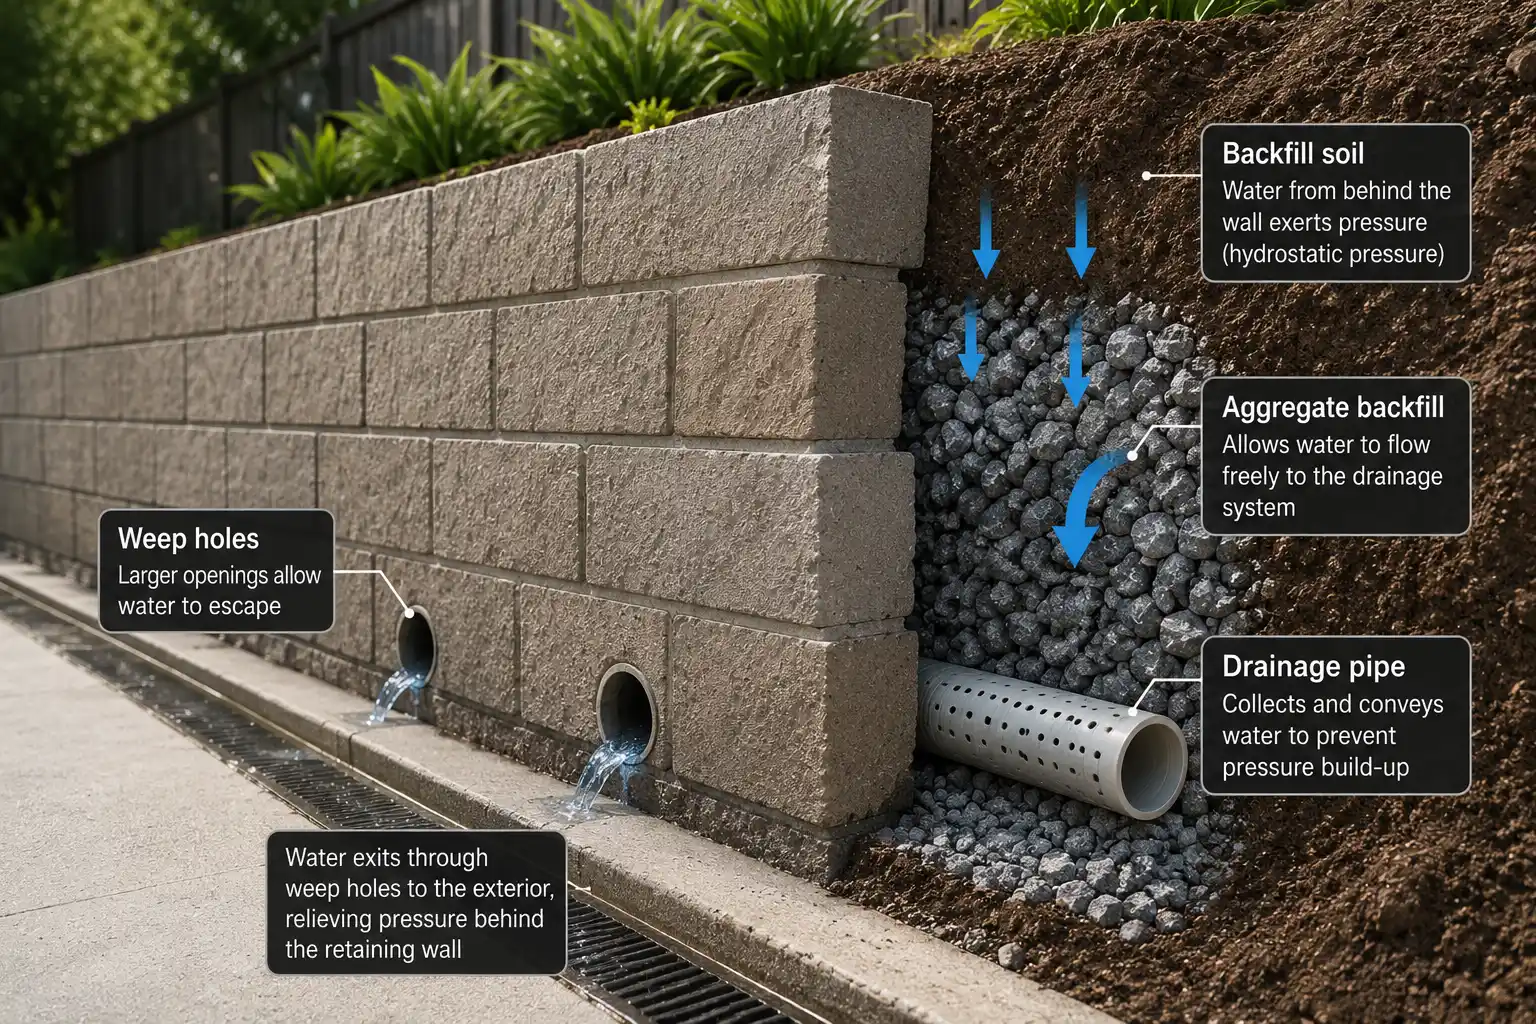
Weep holes are equally important in retaining wall construction, where they serve to relieve hydrostatic pressure behind the wall. Without proper drainage, water pressure can build up behind retaining walls, potentially causing structural failure or significant movement. Weepholes in retaining walls are typically larger than those in brick veneer construction and
may include drainage pipes or aggregate backfill to facilitate water removal.
### Cavity Wall Construction
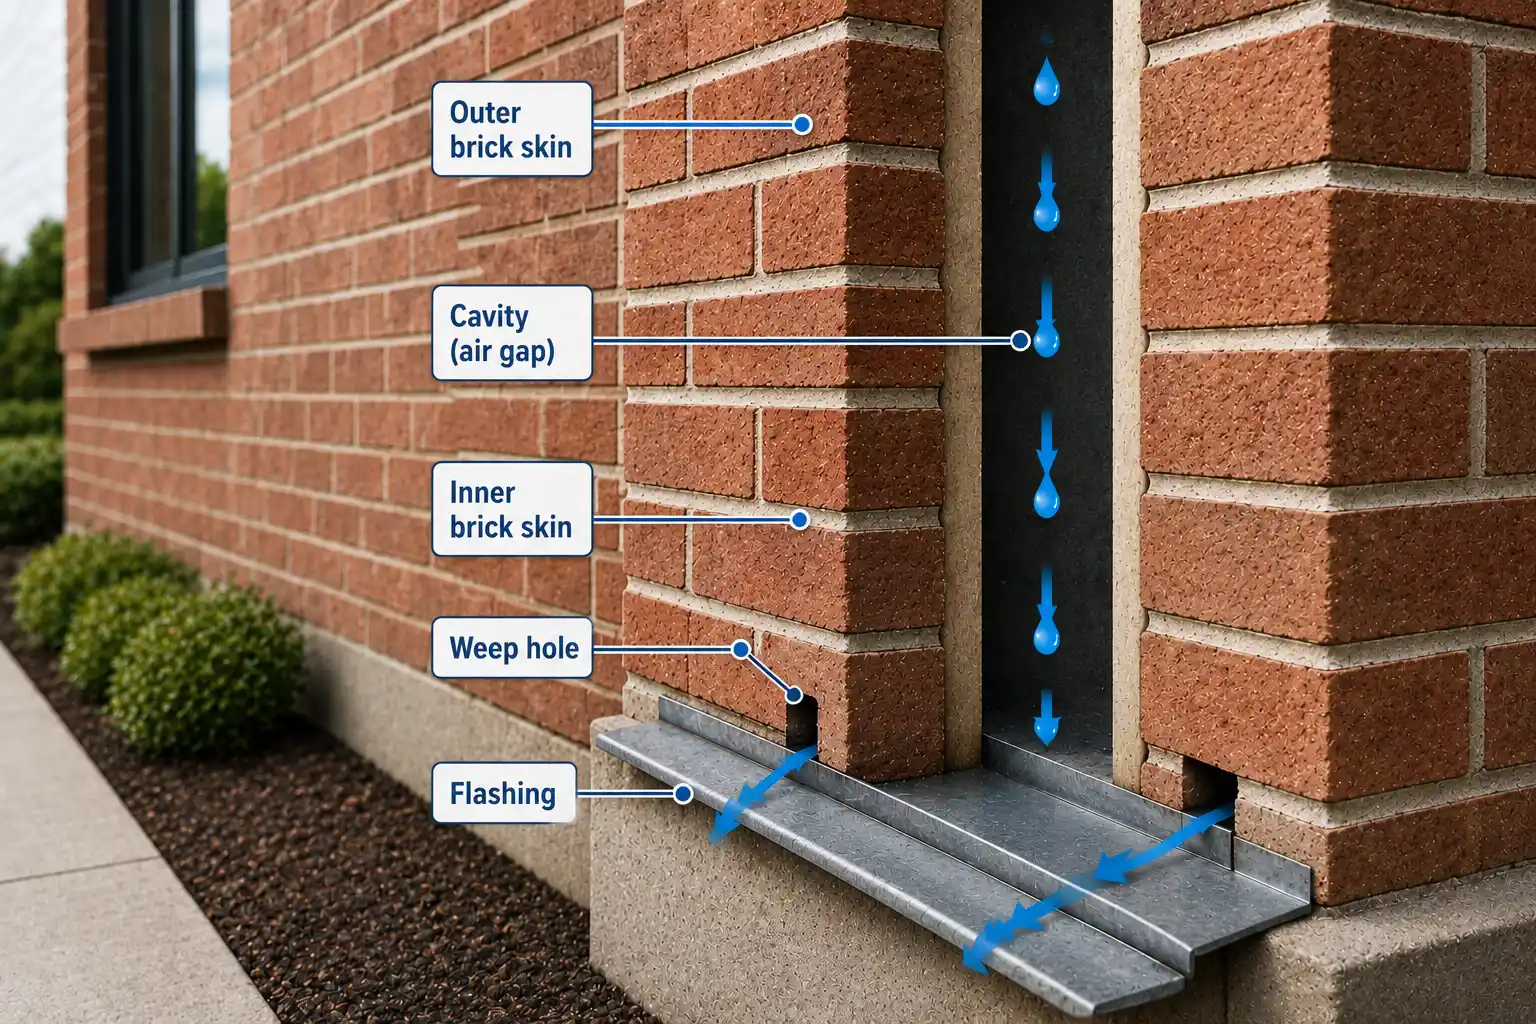
In double brick or cavity wall construction, where two skins of masonry are separated by an air gap, weep holes function similarly to those in brick veneer walls. They allow moisture to drain from the cavity and provide ventilation to help keep the cavity dry. Cavity walls are less common in modern Australian construction but remain prevalent in older properties
and commercial buildings.
## Australian Standards for Weep Holes
Many homeowners search for the weep holes Australian standard to understand whether their property complies with Australian building requirements. In Australia, weep holes form part of moisture control systems required under masonry construction guidelines and the National Construction Code (NCC). Proper weep hole placement helps prevent wall cavity moisture problems, rising damp, and long term structural deterioration.
Builders, developers, and property owners should also understand weep holes building regulations before starting construction or renovation work. Failure to comply with weep hole requirements may increase the risk of moisture ingress, hidden defects, and non compliant building work.
In Australia, the installation of weep holes follows strict regulations to ensure effective moisture management. Proper weep hole placement helps protect buildings from rising damp and other moisture-related concerns.
### Key Regulations (AS 3700-2018)
#### Spacing Requirements
According to AS 3700-2018, weep holes must be provided at maximum centres of 1200 millimetres along the base of masonry walls. This spacing ensures adequate drainage capacity and allows sufficient air circulation throughout the wall cavity. In practice, many builders install weep holes at every third perpend joint, which typically equates to approximately 600 to 900 millimetres spacing, exceeding the minimum requirements.
#### Position and Height
Weep holes must be positioned directly above the flashing or damp-proof course, typically in the first course of bricks above ground level or above any horizontal surface such as a slab edge, window head, or lintel. The bottom of the weep hole should be level with or slightly above the top of the flashing to ensure water can drain effectively.
The standard also requires weep holes to be located at the head and sill of all window and door openings, above lintels, and at any other location where water may accumulate within the cavity. These additional weep holes prevent localised moisture buildup around vulnerable areas.
#### Size and Airflow
Weep holes must be of adequate size to allow both water drainage and air circulation. The minimum opening should provide an area equivalent to a 10 millimetre diameter circle. This can be achieved through open perpend joints (where mortar is omitted from a vertical joint), proprietary weep hole vents, or purpose-made openings.
Proprietary weep hole products, such as plastic weep hole vents or stainless steel mesh inserts, are commonly used to maintain the opening while preventing pest entry. These products must not restrict airflow or drainage capacity below the minimum requirements.
| Requirement | AS 3700-2018 Specification | Purpose |
| ------------------------ | --------------------------------------------- | ------------------------------------------------------- |
| Maximum Spacing | 1200mm centres | Ensures adequate drainage along entire wall length |
| Minimum Opening Size | Equivalent to 10mm diameter circle | Allows sufficient water flow and air circulation |
| Position | Directly above flashing or DPC | Enables water collected on flashing to drain externally |
| Window and Door Openings | Required at head and sill | Prevents water accumulation around vulnerable areas |
| Above Lintels | Required at maximum 1200mm centres | Drains water collected above structural elements |
| Pest Protection | Vents or mesh permitted if airflow maintained | Prevents pest entry while maintaining function |
| Cavity Clearance | Minimum 25mm clear cavity required | Ensures unobstructed drainage and ventilation |
Ensuring compliance with these standards is essential for long-term durability and moisture protection. Homeowners and builders should also check local state-specific regulations that may have additional requirements.
For further details, you can refer to the [Australian Building Codes Board (ABCB)](https://www.abcb.gov.au/editions/ncc-2022/adopted/housing-provisions/5-masonry/part-57-weatherproofing-masonry).
## Concrete Placement Near Weep Holes
One of the most searched questions by homeowners and builders is: how far below weep holes should concrete be? This issue is common after landscaping, driveway upgrades, paving works, or external renovations where new concrete is poured too high against brick walls.
When concrete, paving, garden beds, or render cover weep holes, moisture becomes trapped inside the wall cavity. Over time, this can cause rising damp, mould, brick deterioration, corrosion of wall ties, and structural damage from moisture. During building inspections, blocked weep holes are regularly identified as a contributing factor to wall cavity moisture problems and internal dampness.
### Minimum Clearance Requirements
AS 3700-2018 and related building standards require a minimum clearance of 75 millimetres between the top of any concrete surface and the base of weep holes. This clearance ensures that water draining from weep holes can fall clear of the structure and that surface water from paths and driveways cannot splash back into the openings.
In practice, building inspectors often recommend greater clearance where possible, particularly in areas prone to heavy rainfall or where garden beds or lawn areas may be installed adjacent to walls. A clearance of 100 to 150 millimetres provides additional protection and allows for future landscaping work without compromising the weep hole function.
## Best Practices for Concrete and Weep Holes
- Maintain a minimum clearance of 75mm between the base of the weep hole and any hard surfaces like paving or concrete to allow unobstructed drainage.
- Ensure proper slope grading away from the foundation to prevent water from pooling near the structure.
- Use gravel or drainage mats near weep holes to facilitate better water flow and prevent debris accumulation.
Covering weep holes with concrete can lead to severe moisture-related issues, including rising damp and structural degradation.
For more information on construction practices, you can visit [Standards Australia – AS 3700-2018 Masonry Code](https://www.standards.org.au/standards-catalogue/standard-details?designation=as-3700-2011).
## Common Installation Errors
During [construction stage inspections](/new-construction-stage-inspections) and [defect assessments](/defect-investigation-reports), several common errors related to concrete placement near weep holes are frequently identified:
- Concrete paths poured too high, partially or completely blocking weep holes
- Garage or carport slabs constructed above the level of weep holes
- Raised garden beds or retaining walls built against the house without adequate drainage
- Paving stones or pavers installed too close to weep hole openings
- Render or texture coating applied over weep holes during external finishing
### Rectification Options
If concrete has been placed too close to weep holes, several rectification options may be available depending on the specific circumstances:
- Cutting back the concrete edge to provide adequate clearance
- Installing drainage channels or grates to redirect water away from the wall
- Creating weep slots by cutting vertical grooves in the concrete adjacent to each weep hole
- In severe cases, removing and replacing the affected concrete sections
## Weep Hole Maintenance
Regular maintenance of weep holes is essential to ensure they continue to function effectively throughout the life of the building. Neglected weep holes can become blocked with debris, mortar droppings, or pest nests, significantly reducing their drainage capacity and potentially leading to moisture problems within the wall cavity.
### Regular Inspection Schedule
Homeowners should inspect their weep holes at least twice per year, ideally before and after the wet season. During these inspections, check each weep hole for visible blockages, damage to vents or mesh inserts, and signs of pest activity. Pay particular attention to weep holes located near gardens, trees, or areas where debris may accumulate.
### Cleaning Methods
When blockages are identified, they should be cleared promptly using appropriate methods. For minor blockages caused by dust, dirt, or small debris, a stiff wire brush or pipe cleaner can be used to dislodge material from the opening. Work carefully to avoid pushing debris further into the cavity.
For more stubborn blockages, compressed air can be used to blow debris from the weep hole. Direct the air stream at an angle to encourage material to exit through the opening rather than being pushed deeper into the cavity. Commercial weep hole cleaning tools are also available, featuring flexible probes designed specifically for this purpose.
If mortar droppings have fallen into the cavity during construction and are blocking weep holes from the inside, a rigid wire or small hook tool may be needed to break up the material. In severe cases, it may be necessary to remove a brick to access and clear the blockage, then reinstall the brick with appropriate weep hole provision.
### What Not to Do
Certain practices should be avoided when maintaining or working around weep holes:
- **Never use sealants or caulk:** Sealing weep holes completely defeats their purpose and will lead to moisture accumulation within the wall cavity.
- **Avoid water blasting directly into weep holes:** High-pressure water can force moisture deep into the cavity, potentially causing more harm than good.
- **Do not paint over weep holes:** Paint can block the openings and reduce airflow, even if some drainage capacity remains.
- **Avoid storing items against walls:** Materials stored against external walls can block weep holes and prevent proper inspection and maintenance.
### Pest-Proofing Considerations
While weep holes must remain open for drainage and ventilation, they can provide entry points for pests including mice, snakes, spiders, and bees. Proprietary weep hole screensand vents are available that allow air and water to pass while preventing pest entry. These products are typically made from stainless steel mesh, plastic, or brass and are designed to fit standard perpend joint dimensions.
When installing pest-proofing products, ensure they do not significantly restrict airflow or drainage capacity. Products should be easily removable for inspection and cleaning, and should be made from durable materials that will not degrade over time.
Request a Structural
Integrity Report
}
buttonHref="/defect-investigation-reports"
variant="secondary"
/>
## Common Issues with Weep Holes
Building inspectors frequently encounter weep hole related issues during pre-purchase inspections, defect assessments, and construction stage inspections. Understanding these common problems can help homeowners identify potential issues with their own properties and take appropriate action.
### Blocked Weep Holes
Blocked weep holes are the most common issue encountered, occurring when debris, mortar, paint, or other materials obstruct the openings. Blockages prevent water from draining and air from circulating, leading to moisture accumulation within the cavity. Signs of blocked weep holes include:
- Visible debris or mortar in weep hole openings
- Paint or render covering the weep hole location
- Pest nests or insect activity in openings
- Garden soil or mulch pushed up against the wall covering weep holes
### Missing or Insufficient Weep Holes
Older properties may have insufficient weep holes due to construction practices that predate current standards. In some cases, weep holes may have been installed but were subsequently blocked during renovations or maintenance work. Missing or insufficient weep holes require professional assessment to determine the best remediation approach.
### Improper Installation
Even in new construction, weep holes may be improperly installed due to errors during the building process. Common installation defects include:
- Weep holes positioned too far above the flashing, preventing effective drainage
- Spacing greater than 1200 millimetres between weep holes
- Weep holes blocked by mortar droppings in the cavity
- Flashing installed incorrectly, preventing water from reaching weep holes
- Cavity filled with debris from construction, obstructing drainage paths
### Damage and Deterioration
Over time, weep hole vents and screens can deteriorate, crack, or fall out, leaving openings vulnerable to pest entry or complete blockage. Mortar around open perpend joints may crack and crumble, potentially blocking adjacent joints. Regular inspection can identify these issues before they lead to moisture problems.
## Signs of Weep Hole Problems
When weep holes are not functioning correctly, moisture begins to accumulate within the wall cavity and may eventually manifest as visible signs on the interior or exterior of the building. Recognising these warning signs early can help prevent extensive damage and costly repairs.
### Water Stains and Dampness
Water staining on internal walls, particularly at skirting board level or around windows and doors, may indicate moisture penetration from the cavity. These stains often appear as darker patches on painted surfaces or as tide marks where water levels have risen and receded. Dampness may also be detected through touch, with affected areas feeling cool and moist compared to surrounding surfaces.
### Efflorescence
Efflorescence is a white, powdery deposit that appears on brick or masonry surfaces when water-soluble salts are drawn to the surface through capillary action and left behind as the water evaporates. While some efflorescence is normal in new brickwork, persistent or extensive deposits may indicate excessive moisture within the wall, potentially caused by blocked weep holes.
### Musty Odours
A persistent musty or damp smell, particularly noticeable in rooms adjacent to external walls, can indicate mould growth within the wall cavity or on internal surfaces. Mould thrives in moist, poorly ventilated environments, making wall cavities with blocked weep holes ideal breeding grounds. These odours are often most noticeable after rain or during humid weather.
### Peeling Paint and Wallpaper
When moisture penetrates from the cavity to internal surfaces, it can cause paint to bubble, peel, or flake, and wallpaper to lift or develop mould spots. These symptoms typically appear first at the base of walls or around windows and doors where moisture accumulation is greatest.
### Mould Growth
[Visible mould](/articles/mould-inspection-techniques-tools-and-methods) on internal wall surfaces, particularly in corners or at the junction of walls and floors, is a serious warning sign of moisture problems. Mould may appear as dark spots or patches and can pose significant health risks, particularly for individuals with respiratory conditions or allergies.
### Structural Deterioration
In severe cases, prolonged moisture exposure can lead to structural deterioration including:
- Corrosion and failure of wall ties, compromising the connection between brick skin and frame
- Rot in timber framing, wall plates, and other structural elements
- Deterioration of the damp-proof course, allowing rising damp to develop
- Cracking or movement in brickwork due to ongoing moisture damage
## Additional Moisture Risks Associated With Blocked Weep Holes
Blocked weep holes can contribute to several [hidden building defects](/articles/hidden-home-issues-living-room-furniture) that may not become visible until significant moisture damage has already occurred. During building inspections, inspectors commonly identify damp related issues connected to poor cavity drainage and restricted airflow.
Common Moisture Related Problems
- Rising damp near skirting boards and lower wall sections
- Salt deposits and efflorescence on brickwork
- Timber decay inside wall cavities
- Corrosion of metal wall ties and fixings
- Mould growth affecting indoor air quality
- Cracking and movement in masonry walls
- Damage to insulation and plasterboard finishes
Properties located in high rainfall or coastal environments may face increased risk due to greater moisture exposure and humidity levels.
## How to Inspect Weep Holes
Homeowners can conduct basic weep hole inspections as part of regular property maintenance. While a comprehensive assessment by a [qualified building inspector](/articles/why-hire-a-private-building-inspector-in-melbourne) is recommended for detailed evaluation, regular visual checks can help identify obvious problems before they become serious.
### External Inspection
Walk around the perimeter of your property, examining the base of all external brick walls.
Look for:
- Weep holes at regular intervals, typically every third perpend joint or approximately 600 to 900 millimetres
- Clear openings or vents that are not blocked by debris, paint, or other materials
- Adequate clearance between ground level or concrete surfaces and weep hole positions
- Signs of water damage, efflorescence, or staining on the brickwork near weep holes
- Evidence of pest activity such as spider webs, wasp nests, or rodent droppings
### Using a Torch and Mirror
A small torch and angled mirror can help you see into weep hole openings and assess whether they are clear. Shine the torch into the opening and use the mirror to view the cavity behind. Look for mortar droppings, debris, or other obstructions that may be blocking drainage or airflow.
### Water Test
To test whether weep holes are functioning correctly, you can conduct a simple water test during or after rain. Observe the weep holes on the side of the building that was exposed to rain. Water should be visible dripping or weeping from the openings if the drainage system is working correctly. The absence of any water drainage, even after significant rainfall, may indicate blocked weep holes or problems with the flashing.
### Internal Inspection
While inspecting weep holes, also check internal areas for signs of moisture penetration:
- Examine skirting boards and lower wall sections for water damage, staining, or mould
- Check around window and door frames for signs of moisture ingress
- Look for peeling paint, bubbling plaster, or other surface damage that may indicate moisture problems
- Note any musty odours, particularly in rooms adjacent to external walls
## Weep Hole Placement in Exterior Walls
Correct weep hole placement in exterior walls plays a major role in preventing moisture damage with weep holes. Positioning, spacing, airflow, flashing alignment, and drainage design all influence how effectively the system performs.
Poorly positioned weep holes may allow water to remain trapped inside the cavity wall system. This can increase the likelihood of damp problems, salt staining, mould growth, and long term structural movement.
The purpose of weep holes in brick walls is not only drainage but also ventilation. Proper airflow through the cavity helps moisture evaporate and reduces condensation inside wall systems.
Correct placement of weep holes ensures effective drainage and ventilation, preventing moisture damage over time.
Guidelines for Proper Placement
- **Spacing:** Every 1200mm along the base of masonry walls, in line with building codes.
- **Alignment:** Should be positioned directly above flashing systems to enhance drainage effectiveness.
- **Considerations:** Placement should account for weather exposure, ensuring optimal protection against wind-driven rain and external moisture sources.
For more details on the placement and design, refer to [Your Home – Australian Government’s Guide to Sustainable Housing](https://www.yourhome.gov.au/sites/default/files/2022-02/YH_BookSample.pdf).
## Installing Weep Holes in Masonry Structures
Installing weep holes in masonry structures should always follow Australian building standards and manufacturer recommendations. Proper installation helps ensure the wall cavity can effectively drain water and maintain airflow.
In modern construction, weep holes are commonly installed during bricklaying and integrated with flashing systems and damp proof courses. However, many older Australian homes either have poorly designed weep holes or no visible weep holes at all.
Retrofitting weep holes into existing masonry walls may help improve moisture management where drainage problems already exist. Before modifying masonry walls, homeowners should seek professional advice to avoid [damaging structural elements or waterproofing systems](/articles/construction-defect-inspection).
For new construction, weep holes are built into the design. However, existing homes without weep holes can still benefit from retrofitting.
### Retrofitting Weep Holes
- Drill small holes (10mm-12mm diameter) at proper intervals to promote drainage.
- Use PVC or stainless steel inserts for added durability and pest prevention.
- Ensure alignment with existing drainage systems and structural elements.
## When to Call a Professional
While basic inspections can be conducted by homeowners, professional assessment is
recommended in the following situations:
- Evidence of significant moisture damage or structural issues
- Missing or insufficient weep holes requiring installation
- Blocked weep holes that cannot be cleared with simple cleaning methods
- Pre-purchase inspection to assess the overall condition of moisture management systems
- After construction or renovation work to verify compliance with standards
## Why Weep Holes Matter During Building Inspections
Weep holes are regularly assessed during [pre-purchase building inspections](/pre-purchase-inspections) because blocked or missing drainage points may indicate hidden moisture problems inside wall cavities.
Inspectors commonly assess:
- Whether weep holes are visible and unobstructed
- Concrete and paving clearance below weep holes
- Signs of rising damp or trapped moisture
- Flashing installation and drainage design
- Moisture staining around external walls
- Ventilation performance inside cavity systems
For buyers, identifying moisture issues early may help avoid unexpected repair costs after settlement.
Get an Expert
Witness Report
}
buttonHref="/expert-witness-reports"
variant="primary"
/>
## Key Takeaways
- Weep holes are essential openings at the base of masonry walls that allow trapped moisture to drain and air to circulate within the wall cavity.
- AS 3700-2018 requires weep holes at maximum 1200mm spacing, positioned directly above flashing or damp-proof courses.
- Concrete surfaces must maintain a minimum 75mm clearance below weep holes to ensure effective drainage.
- Regular maintenance including twice-yearly inspections and cleaning with wire brushes or compressed air keeps weep holes functioning effectively.
- Never seal or paint over weep holes, as this prevents drainage and ventilation.
- Signs of weep hole problems include water stains, efflorescence, musty odours, peeling paint, and mould growth.
- Pest-proofing products can prevent entry while maintaining weep hole function, but must not restrict airflow or drainage.
- Professional assessment is recommended for blocked weep holes that cannot be cleared, retrofitting to older properties, or when moisture damage is evident.
### Front Fence Ideas to Enhance Security and Street Appeal
Source: https://ownerinspections.com.au/articles/front-fence-ideas
Published: 2025-03-28 | Updated: 2026-02-09 | Category: New Construction
Author: Maison Azdari
A well-designed front fence does more than mark your property boundary. In Australia, a front fence improves security, adds privacy, and significantly boosts street appeal. The right fence choice depends on your goals, budget, local council regulations, and the style of your home. Materials range from classic timber and wrought iron to modern glass panels and composite options, with costs starting from around $50 per metre for basic DIY installations up to $600 or more per metre for professional work with premium materials.
Front fences create a first impression of any home or commercial property. They act as both a protective barrier and a design statement. With so many options available, selecting the right fence means balancing aesthetics, function, and compliance with local laws. This guide covers the best front fence ideas, from modern designs to budget-friendly solutions, to help you make a well-informed decision.
## Factors to Consider When Choosing a Front Fence
### Purpose: Security, Privacy, or Aesthetic Appeal
The first step in choosing the right fence is identifying your primary goal. A high-security fence made from steel or brick can deter intruders, while a privacy fence using timber slats or composite materials shields your property from street-level views. If aesthetics are your main focus, decorative wrought iron or glass fences add sophistication without compromising openness.
### Material Durability and Maintenance
Australian weather conditions vary greatly across regions, so selecting a material that withstands harsh sun, rain, and wind is important. Timber fences offer natural charm but require regular sealing and staining. Metal and composite materials provide longevity with minimal upkeep. Consider termite resistance, rust prevention, and ease of repair when choosing fencing materials, especially in coastal or tropical areas.
### Council Regulations
Local council regulations may restrict fence height, materials, and designs. Before installation, check your local guidelines to make sure you comply. Failure to follow these rules can result in costly modifications or penalties. Some councils also require specific fencing for heritage properties or shared boundary lines, so researching these requirements early saves time and money. Refer to [Standards Australia](https://www.standards.org.au/) for fencing standards and guidelines.
### Budget Considerations
Fencing costs vary widely based on material, size, and design complexity. Affordable options like timber or wire fencing can help reduce costs without sacrificing looks. High-end solutions like stone or frameless glass may offer long-term value but need a larger upfront investment. A well-planned budget makes sure you get the most functional and visually appealing fence within your price range.
### Neighbourhood Aesthetic and Resale Value
A front fence should complement your home's architecture and blend with the surrounding streetscape. A well-chosen fence can improve resale value by enhancing the property's overall appeal. Heritage-style homes may look best with wrought iron or brick fencing, while contemporary houses often pair well with minimalist slat fences or sleek metal designs.
## Popular Front Fence Materials and Designs
### Timber Front Fences
Timber fences offer a warm, natural look and blend into various home styles. They are versatile and highly customisable, making them a top choice for many Australian homeowners.
### Metal Front Fences
Metal fences are durable and provide excellent security while allowing creative designs.
### Brick and Stone Front Fences
Brick and stone fences are excellent for durability and sophistication. These materials provide solid security and timeless beauty.
### Glass and Composite Fencing
For a sleek, contemporary look, glass and composite fences are growing in popularity across Australian homes.
## Front Fence Cost Comparison
## Budget-Friendly Front Fence Ideas
Cost-conscious homeowners and property managers can explore these affordable fencing solutions without compromising on style:
## Enhancing Your Front Fence for Maximum Impact
### Adding Gates: Automated vs Manual
An entrance gate can significantly improve security and convenience. Automated gates offer remote access and sensor integration, while manual gates are a more budget-friendly option requiring minimal maintenance. Learn more about quality checks in our guide to [new construction stage inspections](/articles/construction-stage-inspections-in-geelong).
### Landscaping and Lighting
Strategic landscaping, such as hedges, ground cover, or flower beds, can soften the look of a fence and integrate it with the overall property aesthetic. Outdoor lighting enhances both security and nighttime street appeal. Solar-powered options are energy-efficient and simple to install.
### Colour and Texture Selection
Choosing the right paint or stain ties the fence into your home's exterior colour palette, increasing street appeal. Textured finishes or decorative accents can add character and uniqueness. Darker colours like charcoal and navy are popular for modern homes, while whites and creams suit traditional designs.
## Council Regulations and Compliance in Australia
### Height and Material Restrictions
Local councils often regulate fence heights, typically limiting front fences to around 1.2 to 1.8 metres. Some areas may also restrict materials based on neighbourhood character guidelines or heritage overlay requirements.
### Permits for Fencing Projects
Certain areas require permits for specific fence types, materials, or designs. Checking regulations before installation prevents costly rework and potential fines.
### How to Check Local Guidelines
Visit your local council's website or contact their planning department for specific requirements. Each state and council has different rules, so verify your obligations before starting work.
## DIY vs Professional Installation
Hiring a professional is recommended for complex designs, high-security requirements, or when council compliance is a concern. Professional installations typically cost $200 to $600 per metre depending on the material and design complexity, and come with workmanship warranties.
### Apartment Pre-Settlement Inspection for Buyers and Owners
Source: https://ownerinspections.com.au/articles/apartment-pre-settlement-inspection
Published: 2025-03-25 | Updated: 2026-02-09 | Category: Apartment Pre-Settlement
Author: Maison Azdari
A [pre-settlement inspection](/apartment-pre-settlement) is the final walkthrough of an apartment before the buyer completes the purchase. In Australia, this inspection confirms the property is in the condition agreed upon in the contract, identifies any defects or incomplete work, and verifies that all repairs or inclusions have been delivered. It typically takes place a few days before the settlement date and costs from around $490 for a professional inspection, depending on the property size and location.
Buying an apartment is one of the largest financial decisions most Australians will make. The pre-settlement inspection is your last opportunity to check that everything is right before the keys change hands. Whether you are purchasing a brand-new off-the-plan unit or a resale apartment, this inspection protects your investment by catching problems that could cost thousands to fix after settlement.
## Why a Pre-Settlement Inspection Matters
A well-executed pre-settlement inspection gives buyers confidence that their apartment is ready for occupation. Here is why it matters:
For more on common issues at this stage, see our guide to [common issues in pre-settlement inspections](/articles/common-issues-in-pre-settlement-inspections).
## When and How to Conduct the Inspection
### Ideal Timing
The best time to conduct a pre-settlement inspection is a few days before the final settlement date. This allows enough time for any necessary repairs while making sure the property is ready for move-in. Inspecting too early might mean missing last-minute work, while scheduling too late can limit the time available for corrections.
### Who Should Be Present?
### Tools Needed for the Inspection
## Comprehensive Pre-Settlement Inspection Checklist
### Structural and Finishing Inspections
### Plumbing and Electrical Checks
### Common Areas and External Features
## Common Defects Found in Apartment Inspections
For a detailed look at apartment-specific defects, read our article on [common defects in off-the-plan apartments](/articles/common-defects-in-off-the-plan-apartments).
## Reporting and Addressing Issues
### Notifying the Seller or Developer
If defects or incomplete work are identified during the inspection, buyers should:
## Buyer Legal Rights at Settlement
Australian apartment buyers have several legal protections during the settlement process:
## Hiring a Professional Inspector
### Benefits of a Professional Inspection
### Inspection Cost Considerations
A professional pre-settlement inspection in Australia typically starts from around $490, depending on the property size, location, and depth of the assessment. For a brand-new off-the-plan apartment, a comprehensive inspection is particularly worthwhile given the frequency of defects found in new builds.
### Why Sellers Need Pre-Sale Inspections
Source: https://ownerinspections.com.au/articles/why-sellers-need-pre-sale-inspections
Published: 2025-03-21 | Category: Pre-Sale Inspections
Author: Maison Azdari
A pre-sale building inspection is a professional assessment of a property's condition
conducted before listing it for sale. This proactive approach enables sellers to identify
potential issues early, control the sales narrative, build buyer confidence, and meet their
legal disclosure obligations under Australian law.
In Australia's competitive property market, where buyers increasingly conduct their own due
diligence, sellers who invest in [pre-sale inspections](/pre-sale-inspections) gain a significant advantage. Research
from the Real Estate Institute of Australia indicates that properties with comprehensive
pre-sale documentation typically sell faster and achieve prices closer to the asking price
compared to those without.
Whether you are selling a family home, investment property, or commercial premises,
understanding the condition of your property before listing allows you to make informed
decisions about repairs, pricing, and disclosure. A pre-sale inspection transforms potential
negotiation weaknesses into demonstrable strengths.
> According to industry data, approximately 75 percent of property transactions involve some
> form of price renegotiation after buyer inspections. Pre-sale inspections help sellers
> anticipate and address these issues before they become bargaining chips for buyers.
## Australian Legal Framework for Property Disclosure
Understanding your legal obligations as a property seller in Australia is essential. While
disclosure requirements vary between states and territories, sellers have overarching
obligations under federal consumer law and state-specific legislation.
### Australian Consumer Law Requirements
The Australian Consumer Law, contained in Schedule 2 of the Competition and Consumer Act
2010 (Cth), applies to all property transactions in Australia. Under this legislation,
sellers must not engage in misleading or deceptive conduct, or make false representations
about property condition. Key obligations include:
- **Section 18:** Prohibition against misleading or deceptive conduct in trade or commerce, which extends to property sales where sellers are engaged in business activities
- **Section 29:** False or misleading representations about goods or services, including representations about property condition, history, or defects
- **Silence as misleading conduct:** In certain circumstances, failing to disclose material information may constitute misleading conduct, particularly where the seller knows the buyer is operating under a false assumption
While private residential sales by homeowners may not always fall strictly under the
Australian Consumer Law, real estate agents acting on behalf of sellers are clearly bound by
these provisions. Furthermore, courts have increasingly held that silence about known
defects can constitute misleading conduct.
### State and Territory Vendor Disclosure Laws
Each Australian state and territory has specific vendor disclosure requirements that sellers
must comply with. Understanding your jurisdiction's requirements is critical for a legally
compliant sale.
| State/Territory | Key Disclosure Requirements | Relevant Legislation |
| --- | --- | --- |
| New South Wales | Vendor disclosure not mandatory for residential sales, but agents must not mislead. Swimming pool compliance certificate required. | Conveyancing Act 1919; Property and Stock Agents Act 2002 |
| Victoria | Mandatory vendor's statement (Section 32) required before contract signing. Must disclose building permits, restrictions, and known defects. | Sale of Land Act 1962 (Section 32) |
| Queensland | No mandatory vendor disclosure statement, but sellers must not engage in misleading conduct. Pool safety certificate required. | Property Law Act 1974; Building Act 1975 |
| South Australia | Form 1 vendor's statement mandatory. Must include searches and disclosures about property condition and encumbrances. | Land and Business (Sale and Conveyancing) Act 1994 |
| Western Australia | No mandatory disclosure statement, but sellers must answer buyer questions honestly. Strata title requires Form 28 and 29. | Sale of Land Act 1970; Strata Titles Act 1985 |
| Tasmania | Vendor disclosure not mandatory for standard residential sales. Standard form contracts include some disclosure provisions. | Conveyancing Act 2004 |
| Australian Capital Territory | No mandatory vendor disclosure, but Crown lease information must be provided. Energy efficiency rating disclosure required. | Civil Law (Sale of Residential Property) Act 2003 |
| Northern Territory | Vendor disclosure statement recommended but not mandatory. Swimming pool fencing compliance certificate required. | Law of Property Act 2000 |
### Real Estate Institute Guidelines
The Real Estate Institute of Australia (REIA) and its state-based member institutes provide
professional guidelines that many agents follow. These guidelines typically recommend:
- Full disclosure of any known material defects that could affect property value or buyer safety
- Transparent communication about property condition, including structural issues, water damage history, and pest infestations
- Documentation of any renovations or alterations, including whether proper permits were obtained
- Disclosure of neighbourhood issues that may affect property enjoyment or value
- Provision of inspection reports and certifications where available
While these guidelines may not carry legal force, they represent industry best practice and
can influence expectations in disputes.
## Key Benefits of Pre-Sale Inspections for Sellers
Pre-sale inspections offer numerous advantages that can significantly impact both the sale
price and the smoothness of the transaction. Understanding these benefits helps sellers
appreciate why this investment typically delivers strong returns.
### Uncovering Hidden Problems Early
Many property defects are not visible to untrained eyes. Professional building inspectors
identify issues that sellers may have lived with unknowingly for years or problems that have
developed gradually without obvious symptoms. Common discoveries include:
- Roof leaks and deteriorating roofing materials
- Termite damage and other timber pest infestations
- Structural movement and foundation issues
- Plumbing leaks within wall cavities
- Electrical wiring deficiencies
- Inadequate drainage causing moisture problems
- Asbestos-containing materials in older homes
- Non-compliant building work from previous renovations
Discovering these issues before listing provides time to address them strategically rather
than responding reactively during negotiations when timelines are compressed and options
limited.
### Making Strategic Repairs and Enhancements
Armed with inspection findings, sellers can make informed decisions about which repairs to
undertake. Not all defects warrant repair before sale. Strategic decisions consider:
- **Cost versus value:** Some repairs deliver returns exceeding their cost, while others may not increase sale price proportionally
- **Buyer expectations:** Safety and structural issues typically need addressing, while cosmetic defects may be acceptable to buyers
- **Market conditions:** In strong seller's markets, buyers may accept properties with minor issues; in buyer's markets, presentation matters more
- **Target buyer profile:** First home buyers often want move-in ready properties, while investors or renovators may prefer properties with work required
### Increasing Property Value and Saleability
A well-maintained property with documented repairs commands higher prices and attracts more
buyers. Statistics from Australian property markets consistently show that properties
presenting well and providing transparency about condition:
- Attract more inspection requests and auction registrations
- Generate competitive bidding situations more frequently
- Achieve prices closer to or above reserve
- Spend less time on market
- Experience fewer failed contracts and renegotiations
### Simplifying and Accelerating the Sale Process
Transparency removes uncertainty and builds buyer confidence. When sellers proactively
provide comprehensive inspection reports, buyers can make faster, more confident decisions.
This transparency:
- Reduces the likelihood of extended due diligence periods
- Minimises requests for price adjustments based on inspection findings
- Decreases the chance of contracts falling through post-inspection
- Shortens the time between offer acceptance and settlement
- Reduces stress for all parties by eliminating surprises
### Gaining Negotiation Leverage
Documented evidence of property condition strengthens the seller's negotiating position
significantly. When sellers can demonstrate that professional inspectors have assessed the
property and specific issues have been addressed, buyers find it difficult to demand
substantial price reductions based on unsubstantiated concerns.
Conversely, sellers without pre-sale inspections are often at a disadvantage when buyers
present their own inspection reports highlighting defects. Without independent evidence,
sellers may accept larger price reductions than warranted or incur emergency repair costs at
inopportune times.
### Reducing Legal and Financial Risks
Proactive disclosure of known issues provides legal protection against future claims. Under
Australian law, sellers who fail to disclose known defects may face:
- Claims for damages based on misleading or deceptive conduct
- Contract rescission if non-disclosure is sufficiently serious
- Compensation claims for repair costs discovered post-settlement
- Legal costs defending against buyer claims
- Reputational damage, particularly for investors or developers selling regularly
Pre-sale inspections create a documented record of property condition at the time of sale,
protecting sellers against claims that they knew about issues they genuinely were not aware
of.
## Pre-Sale Inspection Benefits: Comparison Analysis
The following table compares outcomes for properties sold with and without pre-sale
inspections, based on industry research and market observations.
| Aspect | With Pre-Sale Inspection | Without Pre-Sale Inspection |
| --- | --- | --- |
| Price Negotiations | Seller controls narrative; defects addressed or disclosed upfront; stronger position against unreasonable demands | Buyer uses inspection findings as leverage; reactive negotiation; may accept larger reductions under time pressure |
| Time on Market | Typically shorter; buyers more confident to proceed quickly; fewer delays from extended investigations | Often longer; buyers may be hesitant without transparency; contracts may fall through requiring relisting |
| Contract Security | Lower risk of contract collapse; issues known and priced in; fewer surprises during due diligence | Higher risk of buyers withdrawing after their inspection; may need to renegotiate or relist |
| Legal Protection | Documented disclosure; evidence of property condition at sale; defence against future claims | Potential exposure to claims of non-disclosure; less evidence of property condition at sale date |
| Buyer Confidence | Transparency builds trust; professional reports reassure buyers; competitive offers more likely | Uncertainty may deter some buyers; offers may include larger contingencies; lower competition |
| Repair Timing | Strategic repairs before listing; choice of contractors; reasonable timeframes; cost control | Reactive repairs under time pressure; limited contractor options; potentially higher costs |
## The Pre-Sale Inspection Process
Understanding what a pre-sale inspection involves helps sellers prepare their property and
set appropriate expectations. The process is comprehensive yet typically completed within a
few hours.
### What Inspectors Assess
A qualified building inspector evaluates all accessible areas of the property against
relevant building standards and codes. The assessment typically covers:
- **Structural integrity:** Foundation, footings, walls, floors, ceilings, roof structure, and load-bearing elements
- **Roof and exterior:** Roof covering, flashing, gutters, downpipes, external cladding, windows, doors, and weatherproofing
- **Plumbing:** Visible pipework, water pressure, drainage, hot water systems, and fixtures
- **Electrical:** Switchboard, safety switches, visible wiring, powerpoints, light fittings (visual inspection only, not electrical testing)
- **Interior:** Walls, ceilings, floors, built-in fixtures, doors, windows, and ventilation
- **Wet areas:** Bathrooms, laundry, kitchen, looking for water damage, waterproofing integrity, and drainage
- **Subfloor areas:** Where accessible, including stumps, bearers, joists, ventilation, and moisture levels
- **Roof space:** Where accessible, including framing, insulation, ventilation, and signs of leaks
- **Site drainage:** Grading, stormwater management, and potential water ingress risks
### Typical Inspection Duration
The inspection itself typically takes between two and four hours depending on property size,
age, and complexity. Older properties and larger homes require more time for thorough
assessment. The inspector will need access to all areas including any locked rooms, garages,
sheds, and roof access points.
### The Inspection Report
Following the inspection, you receive a detailed written report typically within 24 to 48
hours. Quality inspection reports include:
- Executive summary of key findings and overall condition
- Detailed descriptions of each identified defect or issue
- Photographic evidence with annotations
- Classification of issues by severity and urgency
- Recommendations for repairs or further investigation
- Assessment against relevant building standards
> A comprehensive pre-sale inspection report not only identifies problems but also highlights
> the property's strengths and recent improvements. This balanced assessment provides valuable
> marketing material while demonstrating transparency.
## Pre-Sale Inspection Cost vs Value Analysis
Understanding the financial implications of pre-sale inspections helps sellers evaluate this
investment objectively. The following analysis illustrates typical scenarios in the
Australian property market.
| Factor | Typical Cost/Impact | Notes |
| ----------------------------------------------- | --------------------------- | ------------------------------------------------------------ |
| Building inspection | $400 to $700 | Varies by property size and location |
| Combined building and pest inspection | $500 to $900 | Recommended for timber-framed properties |
| Typical post-inspection price reduction avoided | $5,000 to $30,000+ | Depends on issues discovered and negotiation dynamics |
| Cost of reactive emergency repairs | 20 to 50 percent premium | Rush jobs and limited contractor availability increase costs |
| Additional marketing time if contract fails | $1,000 to $5,000+ per month | Holding costs, additional advertising, agent fees |
| Legal costs defending non-disclosure claim | $10,000 to $50,000+ | Excludes potential damages if claim succeeds |
When analysed objectively, the cost of a pre-sale inspection is minimal compared to the
potential savings from avoided price reductions, faster sales, and reduced legal risk. For a
median-priced Australian property, the inspection cost represents less than 0.1 percent of
the property value while potentially protecting several percentage points of sale price.
## Common Issues Found in Pre-Sale Inspections
Understanding what inspectors typically find helps sellers anticipate potential issues and
consider proactive repairs. The following table outlines common findings in Australian
residential properties.
| Issue Category | Common Examples | Typical Repair Approach | Cost Range |
| --------------------------- | ----------------------------------------------------------------------- | ------------------------------------------------------ | ------------------ |
| Roof and Guttering | Broken tiles, rusted gutters, deteriorated flashing, blocked downpipes | Repair or replace damaged elements | $200 to $5,000 |
| Moisture and Water Damage | Leaking showers, rising damp, condensation issues, water staining | Address source, repair waterproofing, remediate damage | $500 to $15,000 |
| Electrical Deficiencies | Outdated switchboard, missing safety switches, exposed wiring, DIY work | Licensed electrician to upgrade and certify | $300 to $3,000 |
| Timber Pest Damage | Termite damage, borer activity, wood decay from moisture | Treatment, timber replacement, prevention systems | $500 to $20,000+ |
| Structural Movement | Cracking in walls, uneven floors, sticking doors, foundation settlement | Engineering assessment, underpinning, crack repair | $1,000 to $50,000+ |
| Plumbing Issues | Leaking taps, slow drains, corroded pipes, hot water system age | Repairs by licensed plumber, system replacement | $150 to $5,000 |
| Non-Compliant Building Work | Unpermitted additions, substandard renovations, building code breaches | Retrospective approval or remediation works | $500 to $20,000+ |
## Managing Inspection Findings Strategically
Receiving an inspection report with identified defects is normal and should not cause alarm.
Most properties, regardless of age or condition, have issues that inspectors will document.
The key is managing these findings strategically.
### Option 1: Repair Before Listing
For issues that are likely to concern buyers significantly or affect property value,
completing repairs before listing is often the best approach. This strategy works well when:
- Repair costs are reasonable relative to the impact on sale price
- Issues involve safety concerns that may deter buyers entirely
- Completed repairs enhance property presentation and marketing
- You have adequate time before your intended listing date
Always obtain quotes from multiple licensed contractors and keep documentation of all
repairs, including invoices and warranties. This evidence demonstrates proactive maintenance
and provides assurance to buyers.
### Option 2: Price Adjustment
For issues that are costly to repair or where timing does not permit pre-sale repairs,
adjusting the asking price may be appropriate. When taking this approach:
- Obtain accurate quotes for remediation to inform pricing decisions
- Discuss with your agent how similar properties with similar issues have performed
- Consider that buyers may seek reductions beyond actual repair costs
- Ensure full disclosure of known issues in marketing and contracts
### Option 3: Offer Repair Credits
Offering buyers credits towards repairs at settlement provides flexibility. This approach
allows buyers to manage repairs according to their preferences while addressing their
concerns. Repair credits work well when:
- Buyers may have different preferences for how repairs are completed
- The property is otherwise attractive and competitively priced
- Time constraints prevent pre-sale repairs
- Issues are cosmetic or non-urgent in nature
### Option 4: Transparent Disclosure
For minor issues or matters of buyer preference, transparent disclosure without repair or
price adjustment may be appropriate. Buyers appreciate honesty and may proceed without
concern if issues are minor and openly communicated.
> The worst outcome for sellers is unexpected discoveries during buyer inspections that derail
> negotiations or collapse contracts. Pre-sale inspections eliminate surprises and put sellers
> in control of how issues are managed and communicated.
## Market Evidence Supporting Pre-Sale Inspections
Industry research and market data consistently support the value of pre-sale inspections for
sellers. Key findings include:
- **Faster sales:** Properties with comprehensive pre-sale documentation typically spend 15 to 25 percent less time on market compared to comparable properties without this documentation
- **Stronger prices:** Sellers who address issues identified in pre-sale inspections typically achieve prices 2 to 5 percent higher than sellers who react to buyer inspection findings during negotiations
- **Higher contract completion rates:** Transactions involving pre-sale inspections experience significantly lower rates of contract collapse, reducing the costs and stress of relisting
- **Reduced legal disputes:** Properties sold with transparent disclosure supported by professional inspection reports face fewer post-sale complaints and legal claims
- **Improved buyer confidence:** Surveys indicate buyers are more likely to make offers on properties where sellers demonstrate transparency about condition
## Key Takeaways
- Pre-sale inspections allow sellers to identify and address property defects before listing, avoiding reactive negotiations and potential contract collapse.
- Australian Consumer Law prohibits misleading conduct in property sales, and some states require mandatory vendor disclosure statements.
- Properties sold with pre-sale inspection documentation typically achieve faster sales and prices closer to asking compared to those without.
- Common issues found include roof problems, moisture damage, electrical deficiencies, timber pest damage, and non-compliant building work.
- Sellers have options for managing inspection findings including repairs, price adjustments, repair credits, or transparent disclosure.
- The cost of pre-sale inspections (typically $400 to $900) is minimal compared to potential savings from avoided price reductions and legal risks.
- Timing inspections four to eight weeks before listing provides adequate time for repairs and strategic planning.
- Combined building and pest inspections are recommended for most Australian properties, especially timber-framed homes.
- Transparency and professional documentation build buyer confidence and reduce the risk of post-sale disputes and legal claims.
## References and Resources
For further information on property disclosure requirements and selling property in
Australia, the following resources may be helpful:
### Government and Regulatory Bodies
- **Australian Competition and Consumer Commission (ACCC):** Information on Australian Consumer Law and misleading conduct provisions at [ www.accc.gov.au ](https://www.accc.gov.au)
- **State Fair Trading Offices:** Each state has a fair trading or consumer affairs agency providing information on property transactions
- **State Land Titles Offices:** Information on property registration, titles, and conveyancing requirements
### Industry Bodies
- **Real Estate Institute of Australia (REIA):** National peak body representing real estate professionals at [ www.reia.com.au ](https://www.reia.com.au)
- **Master Builders Australia:** Building industry association providing information on construction standards and finding qualified builders at [ www.masterbuilders.com.au ](https://www.masterbuilders.com.au)
- **Housing Industry Association (HIA):** Industry body for residential building at [ www.hia.com.au ](https://www.hia.com.au)
### State-Specific Resources
- **NSW Fair Trading:** Information for property sellers in New South Wales
- **Consumer Affairs Victoria:** Guidance on vendor statements and Section 32 requirements
- **Queensland Building and Construction Commission:** Building standards and compliance information
- **Consumer and Business Services SA:** Form 1 requirements and property sale guidance
- **Consumer Protection WA:** Property transaction information for Western Australian sellers
### Contact Us
For professional pre-sale building inspection services across Australia, contact Owner
Inspections:
- **Phone:** [ 1300 471 805 ](tel:1300471805)
- **Email:** [ enquiries@ownerinspections.com.au ](mailto:enquiries@ownerinspections.com.au)
### Property Defect Inspection and Why It
Source: https://ownerinspections.com.au/articles/property-defect-inspection-important-for-buyers
Published: 2025-03-18 | Category: Building Inspections
Author: Maison Azdari
Purchasing a property is one of the most significant financial decisions you will make in
your lifetime. Before you commit to such a major investment, understanding the true
condition of the property is essential. A property [defect inspection](/defect-investigation-reports) provides the critical
information you need to make an informed decision and protect your investment.
Property defects can range from minor cosmetic issues to serious structural problems that
may cost tens of thousands of dollars to repair. Many defects are not visible to the
untrained eye, hiding behind walls, under floors, or in roof spaces. Without a professional
inspection, buyers often discover these issues only after settlement, when it is too late to
negotiate or walk away from the deal.
Whether you are purchasing an established home, a newly constructed property, or an
off-the-plan apartment, a comprehensive defect inspection conducted by a qualified building
inspector can reveal hidden problems, provide valuable negotiating leverage, and ultimately
save you from costly surprises down the track. For a complete overview, see our [guide to building defect investigations](/guides/building-defect-investigation-guide).
> A thorough property defect inspection is not an expense; it is an investment in protecting
> what may be your largest asset. The cost of an inspection is minimal compared to the
> potential cost of undiscovered defects.
## What Is a Property Defect Inspection?
A property defect inspection is a thorough, systematic evaluation of a building conducted by
a qualified building inspector. The purpose is to examine the property's structural
integrity, identify safety hazards, detect compliance issues, and document any defects or
deficiencies that may affect the property's value, habitability, or safety.
Unlike a casual walkthrough or a quick visual check, a professional defect inspection
follows established protocols and Australian Standards to ensure every accessible area of
the property is examined. Inspectors use their expertise and specialised equipment to
identify issues that would otherwise go unnoticed by most buyers.
### Scope of a Defect Inspection
A comprehensive property defect inspection covers all accessible areas of the building,
including:
- **Interior spaces:** All rooms, hallways, staircases, and storage areas
- **Exterior elements:** Walls, cladding, windows, doors, balconies, and decks
- **Roof structure:** Roof covering, gutters, downpipes, fascias, and eaves
- **Subfloor areas:** Foundations, stumps, piers, bearers, and joists
- **Roof void:** Roof framing, insulation, and ventilation
- **Site drainage:** Stormwater systems, surface water management, and grading
- **Ancillary structures:** Garages, carports, sheds, fencing, and retaining walls
### The Inspector's Role
A qualified building inspector brings specialised knowledge, experience, and objectivity to
the inspection process. Their role includes:
- Conducting a systematic visual examination of all accessible areas
- Using advanced detection equipment to identify hidden issues
- Assessing the severity and implications of identified defects
- Documenting findings with photographs and detailed descriptions
- Providing a comprehensive written report with recommendations
- Explaining findings and answering questions from the buyer
## Key Inspection Components
A property defect inspection encompasses multiple specialised assessments, each focusing on
critical aspects of the building. Understanding these components helps buyers appreciate the
thoroughness of a professional inspection.
### Structural Assessments
The structural assessment is one of the most critical components of a defect inspection.
Structural defects can compromise the safety and stability of the entire building, often
requiring expensive repairs. The inspector examines:
- **Foundation systems:** Concrete slabs, strip footings, piers, and stumps are checked for cracking, movement, subsidence, and deterioration
- **Load bearing walls:** Internal and external walls are assessed for cracks, bowing, leaning, or signs of structural movement
- **Roof framing:** Rafters, trusses, ridge boards, and battens are examined for damage, inadequate sizing, or poor construction
- **Floor systems:** Bearers, joists, and flooring are checked for sagging, bouncing, or structural inadequacy
- **Lintels and beams:** These critical elements above openings are assessed for cracking, corrosion, or inadequate support
### Moisture and Waterproofing Evaluations
Water intrusion is one of the most common and damaging issues in Australian properties.
Moisture problems can lead to structural damage, mould growth, and compromised indoor air
quality. The inspection includes:
- **External waterproofing:** Assessment of walls, windows, doors, and junctions for water entry points
- **Wet area waterproofing:** Evaluation of bathrooms, laundries, and kitchens for waterproofing membrane failures
- **Roof and gutter systems:** Checking for leaks, blocked gutters, and inadequate drainage
- **Subfloor moisture:** Testing for elevated moisture levels that may indicate drainage problems or rising damp
- **Condensation issues:** Identifying areas prone to condensation that may lead to mould and timber decay
### Electrical and Plumbing Checks
While a building inspector does not conduct electrical or plumbing testing, they can
identify visible defects and safety concerns that warrant further specialist investigation:
- **Electrical safety:** Checking for damaged wiring, outdated switchboards, missing safety switches, and non-compliant installations
- **Plumbing issues:** Identifying visible leaks, corrosion, inadequate support, and drainage problems
- **Hot water systems:** Assessing installation, condition, and any visible defects
- **Gas installations:** Noting visible gas fittings that may require specialist assessment
### Pest Inspections
Timber pests, particularly termites, cause significant damage to Australian properties each
year. A combined building and pest inspection is strongly recommended and includes:
- **Termite detection:** Searching for live termites, termite damage, and evidence of previous infestations
- **Wood decay fungi:** Identifying timber affected by rot or fungal attack
- **Borer damage:** Checking for evidence of wood boring insects
- **Conducive conditions:** Noting factors that may attract termites, such as moisture, timber ground contact, or inadequate ventilation
### Australian Standards Compliance Verification
Buildings in Australia must comply with various standards and codes. While a defect
inspection is not a compliance audit, inspectors identify obvious non-compliance that may
affect safety or require rectification:
- **Building Code of Australia (BCA):** Compliance with structural, fire safety, and accessibility requirements
- **Australian Standard AS4349:** The standard governing building inspections
- **Pool fencing requirements:** Compliance with pool barrier regulations
- **Smoke alarm requirements:** Presence and functionality of required smoke alarms
- **Balustrade and stair safety:** Compliance with height and opening requirements
## Common Defects Identified During Property Inspections
Property defect inspections consistently reveal similar issues across Australian buildings.
Understanding these common defects helps buyers know what to expect and appreciate the value
of professional inspection.
### Foundation Cracks
Foundation cracks are among the most concerning defects identified during inspections. They
can indicate soil movement, inadequate foundations, or structural issues that may worsen
over time.
- **Hairline cracks:** Fine cracks less than 1mm wide are often cosmetic and caused by normal shrinkage or minor settlement
- **Moderate cracks:** Cracks between 1mm and 5mm may indicate ongoing movement and require monitoring or investigation
- **Severe cracks:** Cracks wider than 5mm, stepped cracks in brickwork, or cracks with displacement indicate significant structural movement requiring engineering assessment
### Wall Misalignment
Walls that are leaning, bowing, or out of plumb indicate potential structural problems that
may require significant remediation:
- Leaning external walls may indicate foundation movement or inadequate bracing
- Bowing walls can result from lateral pressure, moisture movement, or structural failure
- Separation between walls and ceilings or floors suggests differential movement
- Cracking at wall junctions often accompanies misalignment issues
### Roof Damage
The roof is one of the most critical building elements, protecting the structure from
weather damage. Common roof defects include:
- **Tile damage:** Cracked, broken, or missing tiles allowing water entry
- **Metal roof issues:** Rust, corrosion, lifted sheets, or failed fasteners
- **Flashing failures:** Deteriorated or poorly installed flashings at junctions and penetrations
- **Gutter defects:** Sagging, damaged, or blocked gutters causing overflow and water damage
- **Valley issues:** Rusted or damaged valleys allowing water into the roof space
### Water Ingress
Water entry into buildings causes extensive damage and creates conditions for mould growth.
Common water ingress issues include:
- Leaking roofs allowing water into ceiling spaces and down walls
- Failed window and door seals permitting wind-driven rain entry
- Cracked or deteriorated external render allowing moisture penetration
- Rising damp from inadequate or bridged damp proof courses
- Plumbing leaks causing ongoing water damage to building fabric
### Dampness and Moisture Issues
Excessive moisture in buildings leads to a range of problems including structural damage,
mould growth, and poor indoor air quality:
- **Subfloor dampness:** High moisture levels in subfloor areas causing timber decay and termite attraction
- **Bathroom failures:** Leaking showers, baths, and basins due to waterproofing membrane failures
- **Condensation:** Poor ventilation causing surface condensation and mould growth
- **External wall moisture:** Water trapped in wall cavities or behind cladding
### Mould Infestations
Mould is a serious health concern and indicates underlying moisture problems that must be
addressed:
- Visible mould growth on walls, ceilings, or in cupboards
- Musty odours indicating hidden mould in wall cavities or subfloor
- Discoloured surfaces suggesting previous or current mould activity
- Health symptoms in occupants including respiratory issues and allergies
## Common Property Defects and Their Implications
The following table summarises common defects found during property inspections, their
potential causes, and the implications for buyers:
| Defect Type | Common Causes | Potential Implications | Estimated Repair Cost |
| --------------------- | ----------------------------------------------------------- | ----------------------------------------------------------- | --------------------- |
| Foundation cracking | Soil movement, tree roots, inadequate design, poor drainage | Structural instability, ongoing movement, secondary damage | $5,000 to $100,000+ |
| Roof leaks | Damaged tiles, failed flashings, blocked gutters, age | Water damage, mould, timber decay, electrical hazards | $500 to $30,000+ |
| Waterproofing failure | Poor installation, membrane deterioration, movement | Structural damage, mould, costly remediation | $3,000 to $25,000+ |
| Termite damage | Active infestation, no protection, conducive conditions | Structural compromise, extensive repairs, ongoing treatment | $5,000 to $100,000+ |
| Wall cracking | Foundation movement, thermal expansion, poor construction | Water entry, structural concerns, aesthetic issues | $1,000 to $50,000+ |
| Rising damp | Failed or bridged damp proof course, poor drainage | Salt damage, paint failure, mould, health issues | $5,000 to $20,000+ |
| Electrical defects | Outdated wiring, DIY work, age, lack of maintenance | Fire risk, electrocution hazard, non-compliance | $2,000 to $15,000+ |
| Subfloor issues | Moisture, termites, poor ventilation, rot | Floor instability, ongoing decay, restumping required | $5,000 to $40,000+ |
| Mould contamination | Water ingress, condensation, poor ventilation | Health hazards, professional remediation required | $1,000 to $15,000+ |
| Non-compliant work | Unpermitted additions, DIY renovations, poor tradework | Rectification costs, council orders, insurance issues | $2,000 to $100,000+ |
## The Property Defect Inspection Process
Understanding the inspection process helps buyers prepare appropriately and know what to
expect. A professional property defect inspection follows a systematic approach to ensure
thorough coverage of all accessible areas.
### Initial Assessment and Preparation
Before the physical inspection begins, several preliminary steps take place:
- **Booking and briefing:** The buyer provides property details, specific concerns, and any relevant documents such as building plans or previous reports
- **Access arrangements:** The inspector coordinates access to the property, including any locked areas such as subfloor hatches or roof void access
- **Equipment preparation:** The inspector ensures all necessary tools and detection equipment are ready for the inspection
- **Safety assessment:** Upon arrival, the inspector evaluates any safety hazards that may affect inspection access
### On-Site Examination
The physical inspection is a systematic examination of all accessible areas of the property.
The inspector follows a methodical approach, typically moving through the property in a
logical sequence:
#### Exterior Inspection
- Examination of external walls, cladding, and finishes for damage and defects
- Assessment of windows, doors, and their frames and seals
- Inspection of roof covering, flashings, gutters, and downpipes
- Evaluation of balconies, decks, verandahs, and external stairs
- Review of site drainage, paths, driveways, and retaining walls
- Assessment of fencing, carports, sheds, and other ancillary structures
#### Interior Inspection
- Room by room examination of walls, ceilings, floors, and fixtures
- Checking all windows and doors for operation and condition
- Assessment of wet areas including bathrooms, laundry, and kitchen
- Inspection of built-in cupboards, wardrobes, and storage areas
- Evaluation of stairs, balustrades, and internal handrails
#### Subfloor Inspection
- Entry into subfloor space where access is available and safe
- Examination of foundations, stumps, piers, and bearers
- Assessment of floor joists, bracing, and connections
- Checking for moisture, drainage issues, and ventilation adequacy
- Inspection for termite activity and timber decay
#### Roof Void Inspection
- Access into roof space where safe and available
- Examination of roof framing, connections, and condition
- Assessment of insulation and ventilation
- Checking for water entry, staining, and damage
- Inspection for pests, electrical issues, and safety concerns
### Advanced Detection Tools and Technologies
Modern property inspections utilise sophisticated equipment to detect defects that cannot be
identified through visual inspection alone:
- **Thermal imaging cameras:** Infrared imaging detects temperature variations that may indicate moisture, insulation gaps, electrical hotspots, or termite activity behind walls and ceilings
- **Moisture meters:** Electronic devices measure moisture content in building materials, identifying elevated moisture levels that indicate leaks or dampness
- **Laser levels:** Used to detect floor level variations, wall leaning, and other alignment issues
- **Borescopes:** Small cameras on flexible cables allow visual inspection inside wall cavities and other concealed spaces
- **Termatrac radar devices:** Specialist equipment detects termite movement through walls without the need for invasive investigation
### Detailed Report Compilation
Following the physical inspection, the inspector prepares a comprehensive written report
documenting all findings. A quality inspection report includes:
- **Executive summary:** An overview of significant findings and overall condition assessment
- **Defect descriptions:** Detailed explanation of each defect identified, including location and nature
- **Photographic evidence:** Clear photographs documenting defects and areas of concern
- **Severity ratings:** Classification of defects as minor, moderate, or major
- **Recommendations:** Guidance on further investigation, repairs, or maintenance required
- **Limitations:** Disclosure of areas that could not be accessed or inspected
## Regulatory Framework and Standards
Property defect inspections in Australia are governed by a framework of standards,
regulations, and industry guidelines that ensure consistency and quality in the inspection
process.
### Australian Standard AS4349
Australian Standard AS4349 is the primary standard governing building inspections in
Australia. It establishes the scope, methodology, and reporting requirements for
[pre-purchase building inspections](/pre-purchase-inspections):
- **AS4349.0:** General requirements for inspection of buildings
- **AS4349.1:** Pre-purchase inspections of residential buildings
- **AS4349.3:** Timber pest inspections
Inspections conducted in accordance with AS4349 provide a consistent and reliable assessment
that buyers can trust. The standard defines the scope of inspection, limitations, and
reporting requirements that qualified inspectors must follow.
### NSW Fair Trading Guidelines
In New South Wales, Fair Trading provides additional guidance and consumer protections
relating to building inspections and property purchases:
- Guidance on choosing qualified building inspectors
- Information about cooling off periods and building inspection conditions
- Consumer rights when defects are discovered
- Dispute resolution processes for inspection and building issues
### Australian Building Codes Board Standards
The Australian Building Codes Board (ABCB) develops and maintains the National Construction
Code (NCC), which sets the minimum required standards for building construction in
Australia:
- **Building Code of Australia (BCA):** Sets performance requirements for structural adequacy, fire safety, access, and health and amenity
- **Plumbing Code of Australia:** Requirements for plumbing and drainage installations
- **Referenced Standards:** Australian Standards that are adopted into the NCC for specific technical requirements
While a defect inspection is not a code compliance audit, inspectors identify obvious
non-compliance that may affect safety or require rectification. Understanding the regulatory
framework helps buyers appreciate the standards their property should meet.
### State and Territory Licensing Requirements
Building inspectors must hold appropriate licences to conduct inspections in their state or
territory:
| State or Territory | Licensing Authority | Key Requirements |
| ---------------------------- | ------------------------------ | --------------------------------------------- |
| New South Wales | NSW Fair Trading | Contractor licence, relevant qualifications |
| Victoria | Victorian Building Authority | Registration, relevant qualifications |
| Queensland | QBCC | Building inspector licence, QBCC registration |
| South Australia | Consumer and Business Services | Building work contractors registration |
| Western Australia | Building Commission | Building surveyor registration |
| Australian Capital Territory | Access Canberra | Relevant licence and qualifications |
## Benefits of Property Defect Inspections for Buyers
Investing in a professional property defect inspection provides buyers with numerous
advantages that extend well beyond simply identifying problems. The benefits include both
financial protection and peace of mind.
### Informed Decision Making
A comprehensive inspection report provides you with detailed information about the
property's condition, enabling you to make an informed purchase decision:
- Understanding the true condition of the property beyond cosmetic appearance
- Awareness of immediate repairs required and their estimated costs
- Knowledge of ongoing maintenance needs and future expenses
- Ability to compare multiple properties objectively
- Confidence that you are making a sound investment decision
### Negotiating Power
Documented defects provide valuable leverage in purchase negotiations:
- **Price reductions:** Request a reduction in purchase price to reflect repair costs identified in the inspection
- **Repair requests:** Ask the vendor to rectify significant defects before settlement
- **Contract conditions:** Include conditions requiring specific repairs or further investigation
- **Exit option:** Decide to withdraw from the purchase if defects are too significant
### Financial Protection
The relatively modest cost of an inspection can save you tens of thousands of dollars:
- Avoiding properties with hidden structural problems or major defects
- Negotiating fair prices that account for necessary repairs
- Preventing unexpected repair costs after settlement
- Protecting your investment by understanding true property value
### Planning for the Future
An inspection report provides a maintenance roadmap for your new property:
- Identifying items requiring immediate attention versus future maintenance
- Understanding the property's maintenance needs and schedule
- Budgeting appropriately for repairs and improvements
- Prioritising works based on urgency and importance
### Safety Assurance
Professional inspection identifies safety hazards that may not be obvious to buyers:
- Structural defects that may compromise building stability
- Electrical hazards including damaged wiring or missing safety switches
- Fire safety concerns such as missing smoke alarms or unsafe installations
- Health hazards including mould, asbestos containing materials, or lead paint
- Fall hazards from non-compliant balustrades or stairs
## When to Get a Property Defect Inspection
Timing your inspection correctly maximises its value and ensures you have the information
you need when you need it.
### Pre-Purchase Inspections
The most common time for a defect inspection is before purchasing a property:
- **Before signing contract:** In some cases, inspections can be arranged before making an offer, particularly for properties at auction
- **During cooling off period:** Standard contracts include a cooling off period during which buyers can arrange inspections
- **Subject to inspection:** Contracts can be made subject to a satisfactory building inspection, providing an exit clause if significant issues are found
### New Construction Inspections
For newly constructed or off-the-plan properties, multiple inspections may be appropriate:
- **Stage inspections:** Inspections at critical construction stages such as frame, lock-up, and practical completion
- **Pre-settlement inspection:** Final inspection before taking possession to document any defects requiring rectification
- **Defect period inspection:** Inspection before the builder's defect liability period expires to document defects covered by warranty
### Regular Property Assessments
Property inspections are not only for buyers. Regular assessments benefit existing property
owners:
- **Annual termite inspections:** Recommended minimum for ongoing termite protection
- **Maintenance inspections:** Periodic assessments to identify developing issues before they become major problems
- **Pre-sale inspections:** Identifying and addressing issues before listing your property for sale
- **After weather events:** Assessment following storms, floods, or other events that may have caused damage
### Special Circumstances
Certain situations warrant immediate property inspection:
- Discovery of new cracks, movement, or structural concerns
- Signs of water damage, leaks, or moisture problems
- Evidence of termite activity or timber damage
- Before undertaking major renovations to assess existing conditions
- Following disputes or concerns about building work quality
## Choosing a Qualified Building Inspector
The value of your inspection depends heavily on the qualifications and experience of the
inspector you choose. Selecting the right professional ensures accurate, thorough
assessment.
### Essential Qualifications
- **Appropriate licensing:** Verify the inspector holds current licensing for your state or territory
- **Relevant qualifications:** Look for qualifications in building, construction, or related fields
- **Industry membership:** Membership in professional associations indicates commitment to industry standards
- **Insurance coverage:** Confirm the inspector carries professional indemnity and public liability insurance
### Experience and Expertise
- Years of experience in building inspection
- Familiarity with local building practices and common issues
- Knowledge of different construction types and methods
- Experience with properties similar to the one you are purchasing
### Equipment and Technology
- Thermal imaging cameras for detecting hidden moisture and defects
- Professional moisture detection equipment
- Appropriate access equipment for roof and subfloor inspection
- Quality camera equipment for comprehensive documentation
### Report Quality
- Request a sample report before booking to assess quality and detail
- Reports should be clear, comprehensive, and include photographic evidence
- Ask about report delivery timeframes
- Ensure the inspector is available to explain findings and answer questions
## Frequently Asked Questions
###
How much does a property defect inspection cost?
**Short answer:** A professional property defect inspection in Australia
typically costs from $490 plus GST for a standard residential property.
The cost varies depending on the property size, location, type of construction, and the
scope of inspection required. Combined building and pest inspections are often available
at a package price that provides better value than booking separately. Additional
services such as thermal imaging or pool compliance inspections may incur extra charges.
Given that defect repairs can cost tens of thousands of dollars, the inspection fee
represents excellent value for protecting your investment. Always request a detailed
quote that specifies exactly what is included in the inspection before booking.
###
How long does a property defect inspection take?
**Short answer:** A thorough property defect inspection typically takes
between 1.5 to 3 hours for an average-sized home.
The duration depends on several factors including the property size, construction type,
accessibility of areas such as subfloor and roof void, and the number of defects
identified. Larger properties, multi-storey buildings, or properties with complex
construction may take longer. The inspector needs sufficient time to conduct a thorough
examination of all accessible areas and properly document findings. Rushing an
inspection compromises quality, so be wary of inspectors who spend minimal time on site.
The written report is typically provided within 24 to 48 hours after the inspection.
### Do new homes need a defect inspection?
**Short answer:** Yes, defect inspections are strongly recommended for new
homes and are often more important than for established properties.
New construction frequently contains defects resulting from poor workmanship,
non-compliance with plans, or failure to meet building standards. Studies consistently
show that most new homes have defects at handover. A professional inspection before
settlement identifies these issues while the builder is still liable to rectify them
under their statutory warranty obligations. Without an inspection, you may not discover
defects until after your legal rights have expired or until they cause significant
damage. Pre-settlement inspections and defect period inspections are essential for
protecting your investment in new construction.
###
What happens if defects are discovered during the inspection?
**Short answer:** The inspector documents all defects in a detailed report,
and you can then use this information to negotiate with the vendor or make an informed
decision about the purchase.
When defects are identified, the inspection report will describe each issue, assess its
severity, and provide recommendations for further action. For minor defects, you may
proceed with the purchase and address them yourself. For significant issues, you have
several options: negotiate a price reduction to cover repair costs, request the vendor
rectify defects before settlement, include conditions in the contract requiring repairs,
or withdraw from the purchase if your contract allows. Your solicitor or conveyancer can
advise on the best approach for your specific situation.
### Should I attend the property inspection?
**Short answer:** Yes, attending the inspection is highly recommended as it
provides valuable insights beyond what is included in the written report.
Being present during the inspection allows you to see defects firsthand, ask questions
about findings, understand the property's maintenance needs, and gain insights from the
inspector's experience. You can point out any specific concerns you have noticed and
ensure these areas receive thorough examination. The inspector can explain the
significance of findings and provide context that may not be fully captured in the
written report. If you cannot attend, ask if the inspector offers a follow-up call to
discuss findings once you have reviewed the report.
###
What areas are not covered by a property inspection?
**Short answer:** Standard building inspections are visual assessments of
accessible areas and do not include areas that are concealed, inaccessible, or require
specialist assessment.
A property inspection does not cover areas that cannot be safely accessed, such as
subfloor spaces with inadequate clearance or roof voids without safe access. The
inspection is non-invasive, so concealed areas within wall cavities, under floors, or
behind fixed furnishings are not examined. Specialist assessments for electrical
systems, plumbing, swimming pools, asbestos, or stormwater compliance are beyond the
scope of a standard building inspection and require separate specialist inspections if
concerns are identified. The inspection report will clearly state any areas that could
not be accessed or inspected.
###
Can I use the inspection report for insurance purposes?
**Short answer:** While the inspection report documents the property's
condition, it is not specifically designed for insurance purposes and may not be
accepted by all insurers.
A pre-purchase inspection report can provide useful documentation of the property's
condition at the time of purchase, which may be valuable if you need to make an
insurance claim for damage that occurred after settlement. However, insurers may require
their own assessments or specific types of reports. Some inspection companies offer
reports tailored for insurance purposes or can provide additional documentation if
required. If you need the report for a specific insurance purpose, discuss this with the
inspector before booking to ensure the report will meet your requirements.
###
How do defect inspections differ for apartments and units?
**Short answer:** Apartment inspections focus on the individual lot, common
property is the responsibility of the owners corporation, and strata records should also
be reviewed.
For apartments and strata titled properties, the inspection covers your individual lot
including internal walls, floors, ceilings, fixtures, and any exclusive use areas such
as balconies or courtyards. Common property such as building structure, roof, lifts, and
shared areas are the responsibility of the owners corporation and are not typically
included in a lot inspection. However, defects in common property can significantly
affect your investment through special levies for repairs. It is important to also
review strata records, meeting minutes, and building inspection reports for the complex.
Some inspectors offer combined lot and common property inspections for unit purchases.
## Key Takeaways
- A property defect inspection is a thorough examination of a building to identify structural issues, safety hazards, and compliance problems before purchase.
- Common defects include foundation cracking, roof damage, waterproofing failures, termite damage, and non-compliant work that can cost thousands to repair.
- Professional inspections use advanced technology including thermal imaging and moisture meters to detect hidden defects invisible to the naked eye.
- Inspections in Australia follow Australian Standard AS4349, ensuring consistent methodology and reliable reporting.
- The cost of an inspection, starting from $490 plus GST, is minimal compared to potential repair costs that can exceed $100,000 for major defects.
- New construction requires inspection just as much as established properties, with most new homes containing defects at handover.
- Inspection reports provide valuable negotiating leverage for price reductions or repair requests before settlement.
- Choose a licensed inspector with appropriate qualifications, experience, modern equipment, and adequate insurance coverage.
## References and Resources
- [ Standards Australia (AS4349 Building Inspection Standard) ](https://www.standards.org.au/)
- [ NSW Fair Trading ](https://www.fairtrading.nsw.gov.au/)
- [ Australian Building Codes Board (ABCB) ](https://www.abcb.gov.au/)
- [ Consumer Affairs Victoria ](https://www.consumer.vic.gov.au/)
- [ Queensland Building and Construction Commission (QBCC) ](https://www.qbcc.qld.gov.au/)
- [ Consumer and Business Services South Australia ](https://www.cbs.sa.gov.au/)
- [ WA Building Commission ](https://www.commerce.wa.gov.au/building-commission)
### Construction Defect Inspection: Identify and Prevent Issues
Source: https://ownerinspections.com.au/articles/construction-defect-inspection
Published: 2025-03-14 | Updated: 2026-02-09 | Category: Defect Investigation
Author: Maison Azdari
Construction defects affect approximately 85% of new Australian homes, according to research
from the University of New South Wales. These defects range from minor cosmetic issues to
severe structural failures that can cost hundreds of thousands of dollars to rectify. A
construction [defect inspection](/defect-investigation-reports) systematically evaluates a property's structure, materials,
and workmanship to identify faults or non-compliance with building standards, providing
property owners with the documentation needed to pursue remediation through builders,
insurers, or legal channels.
The Australian building industry has experienced significant scrutiny in recent years
following high-profile cases of building failures, including the Opal Tower and Mascot
Towers incidents in Sydney. These events highlighted systemic issues in construction quality
assurance and led to substantial reforms in building certification and inspection
requirements across all states and territories.
Understanding construction defects, their causes, and your rights as a property owner is
essential for protecting what is likely your most significant financial investment.
Professional construction defect inspections provide the independent assessment and
documentation necessary to identify problems early, while statutory warranty periods still
apply, and before minor issues develop into major structural failures. For a complete overview, see our [guide to building defect investigations](/guides/building-defect-investigation-guide).
> The true cost of a construction defect is rarely the repair itself. It encompasses the
> disruption to daily life, the stress of disputes with builders, potential temporary
> accommodation costs, and the long-term impact on property value. Early detection through
> professional inspection is the most effective strategy for minimising these impacts.
## Australian Legal Framework for Construction Defects
Australia has a comprehensive legal framework governing residential construction, with
building standards set nationally and consumer protections administered at the state and
territory level. Understanding this framework is essential for property owners seeking to
enforce their rights when defects are identified.
### National Construction Code (NCC)
The National Construction Code is Australia's primary regulatory document for building
standards. It comprises three volumes covering residential buildings (Volume Two),
commercial buildings (Volume One), and plumbing and drainage (Volume Three). The NCC
establishes performance requirements that all buildings must meet, including:
- **Structural provisions:** Requirements for buildings to withstand loads, resist collapse, and maintain structural integrity throughout their design life
- **Fire safety:** Standards for fire resistance, egress routes, and detection systems appropriate to building classification
- **Health and amenity:** Requirements for ventilation, waterproofing, sanitation, and protection from dampness
- **Energy efficiency:** Thermal performance standards to reduce energy consumption for heating and cooling
- **Accessibility:** Requirements for access and mobility provisions in applicable building classes
Construction that fails to comply with NCC requirements constitutes a defect regardless of
whether visible damage has occurred. Professional inspectors assess compliance against NCC
performance requirements as part of a comprehensive defect inspection.
### Australian Standards
The NCC references numerous Australian Standards that provide detailed technical
requirements for specific aspects of construction. Key standards relevant to construction
defect assessment include:
- **AS 4349.1:** Inspection of Buildings, Part 1: Pre-purchase inspections of residential buildings, which establishes the scope and methodology for property inspections
- **AS 2870:** Residential Slabs and Footings, which specifies requirements for foundation design and construction based on site classification
- **AS 1684:** Residential Timber-Framed Construction, which provides specifications for timber framing, connections, and bracing
- **AS 3740:** Waterproofing of Domestic Wet Areas, which establishes requirements for waterproofing membranes, falls, and detailing in bathrooms and wet areas
- **AS 4654:** Waterproofing Membranes for External Above-Ground Use, which covers balconies, terraces, and other external waterproofing applications
- **AS 3500:** Plumbing and Drainage, which provides standards for water supply, sanitary plumbing, stormwater drainage, and heated water services
- **AS/NZS 3000:** Electrical Installations (Wiring Rules), which establishes requirements for electrical safety and installation practices
### State-Based Consumer Protections
Each Australian state and territory has legislation providing consumer protections for
residential building work. These laws establish builder obligations, warranty periods, and
dispute resolution mechanisms.
#### New South Wales: Home Building Act 1989
The Home Building Act 1989 is one of Australia's most comprehensive pieces of building
consumer protection legislation. It provides:
- Statutory warranties that work will be performed with due care and skill, in accordance with plans and specifications, and compliant with all applicable laws and standards
- A six-year warranty period for major defects and a two-year period for all other defects
- Mandatory home building compensation insurance for residential work over $20,000
- Builder licensing requirements administered by NSW Fair Trading
- Access to the NSW Civil and Administrative Tribunal (NCAT) for dispute resolution
#### Victoria: Domestic Building Contracts Act 1995
Victoria's Domestic Building Contracts Act provides similar protections including:
- Statutory warranties for domestic building work including that work will be carried out in a proper and workmanlike manner
- A ten-year warranty period for structural defects and six years for non-structural defects (extended from previous shorter periods)
- Domestic building insurance requirements administered by the Victorian Managed Insurance Authority
- Builder registration through the Victorian Building Authority (VBA)
- Dispute resolution through Domestic Building Dispute Resolution Victoria (DBDRV) and the Victorian Civil and Administrative Tribunal (VCAT)
#### Queensland: Queensland Building and Construction Commission Act 1991
The QBCC Act establishes Queensland's building industry regulator and provides:
- Statutory warranties that building work will be carried out in a proper and workmanlike way and in accordance with relevant standards
- A 6-year and 6-month warranty period for structural defects and a 6-month period for non-structural defects (from practical completion)
- Queensland Home Warranty Scheme insurance for residential construction
- Contractor licensing through the QBCC
- Dispute resolution services through the QBCC and Queensland Civil and Administrative Tribunal (QCAT)
#### South Australia: Building Work Contractors Act 1995
South Australia's legislation provides:
- Statutory warranties including that work will be performed in a proper manner to accepted trade standards
- A five-year warranty period for structural defects and one year for non-structural defects
- Builder licensing through Consumer and Business Services
- Dispute resolution through the South Australian Civil and Administrative Tribunal (SACAT)
#### Western Australia: Home Building Contracts Act 1991
Western Australia's framework includes:
- Statutory warranties that work will comply with the contract, relevant standards, and applicable laws
- A six-year warranty period for structural defects and a two-year period for non-structural defects
- Home indemnity insurance requirements administered by the Building Commission
- Builder registration through the Building Commission
- Dispute resolution through the State Administrative Tribunal
## Statutory Warranty Periods by State
Understanding the applicable warranty periods in your state is critical for ensuring defects
are identified and claims lodged before coverage expires. The following table summarises
warranty periods across Australian jurisdictions.
| State/Territory | Structural Defects | Non-Structural Defects | Regulating Authority |
| ------------------ | ------------------ | ---------------------- | -------------------------------------------- |
| New South Wales | 6 years | 2 years | NSW Fair Trading |
| Victoria | 10 years | 6 years | Victorian Building Authority |
| Queensland | 6 years 6 months | 6 months | QBCC |
| South Australia | 5 years | 1 year | Consumer and Business Services |
| Western Australia | 6 years | 2 years | Building Commission WA |
| Tasmania | 6 years | 2 years | Consumer, Building and Occupational Services |
| ACT | 6 years | 2 years | Access Canberra |
| Northern Territory | 6 years | 2 years | NT Building Advisory Services |
Warranty periods typically commence from the date of practical completion or occupation,
whichever occurs first. It is essential to conduct inspections well before warranty expiry
to allow time for documentation, negotiation, and remediation.
## Key Inspection Components
A comprehensive construction defect inspection covers multiple aspects of building quality
and compliance. Professional inspectors systematically assess each element against
applicable standards, documenting any departures from acceptable practice.
### Structural Evaluation
Structural assessment forms the foundation of any defect inspection, as structural defects
pose the greatest risk to occupant safety and property value. Inspectors evaluate:
- **Foundation systems:** Assessment of concrete slabs, strip footings, or pier and beam foundations for cracking, movement, or non-compliance with AS 2870
- **Load-bearing walls:** Examination of masonry, timber, or steel framing for adequacy, damage, or structural compromise
- **Roof structure:** Inspection of trusses, rafters, ridge beams, and connections for compliance with AS 1684 and engineering specifications
- **Floor framing:** Assessment of bearers, joists, and floor systems for deflection, damage, or inadequate specification
- **Retaining structures:** Evaluation of retaining walls for movement, drainage provision, and structural adequacy
### Waterproofing and Drainage Assessment
Waterproofing failures represent one of the most common and costly categories of
construction defects in Australian buildings. Research indicates that waterproofing defects
account for approximately 30% of all building defect claims. Inspectors assess:
- **Wet area waterproofing:** Compliance with AS 3740 requirements for bathrooms, laundries, and other wet areas including membrane application, floor falls, and junction detailing
- **External waterproofing:** Assessment of balcony, terrace, and podium waterproofing against AS 4654 requirements
- **Roof weatherproofing:** Examination of roofing materials, flashings, penetrations, and drainage for weathertightness
- **Window and door sealing:** Verification of proper flashing, sealing, and drainage provision around openings
- **Site drainage:** Assessment of surface drainage, subsoil drainage systems, and stormwater management to prevent moisture effects on the building
### Electrical and Plumbing Inspection
Services installations must comply with safety requirements and applicable standards.
Defects in these systems can pose immediate safety hazards and cause significant property
damage.
- **Electrical systems:** Assessment of compliance with AS/NZS 3000 requirements for wiring, protection devices, earthing, and safety switches
- **Plumbing installations:** Verification of compliance with AS 3500 for water supply, sanitary drainage, and stormwater systems
- **Gas installations:** Where applicable, assessment of gas fitting compliance with AS/NZS 5601
- **Hot water systems:** Verification of tempering valve installation, pressure relief provisions, and energy efficiency compliance
- **Smoke alarms:** Confirmation of compliant smoke alarm installation as required by NCC and state regulations
### Finishing and Workmanship Review
While finishing defects may appear cosmetic, they often indicate broader issues with
construction quality control and may affect property value and liveability.
- **Internal linings:** Assessment of plasterboard installation, jointing, and finishing for compliance with manufacturer specifications
- **Floor coverings:** Examination of tiles, timber, carpet, and other flooring for installation quality and defects
- **Paintwork:** Evaluation of surface preparation, application, and finish quality
- **Joinery:** Inspection of doors, windows, built-in cabinetry, and trim for fit, function, and finish
- **External cladding:** Assessment of brick, render, weatherboards, or other cladding for installation quality and weathertightness
### Compliance Audit
Beyond individual defect identification, professional inspections assess overall compliance
with the approved building plans and permit conditions.
- Verification that construction matches approved plans and specifications
- Assessment of compliance with development consent conditions
- Review of certifications and compliance certificates issued during construction
- Identification of any unauthorised variations or additions
## Common Construction Defects in Australian Buildings
Understanding the most frequently encountered defect types helps property owners recognise
potential issues and appreciate the value of professional assessment. The following
categories represent the majority of defects identified in Australian residential
construction.
### Structural Defects
Structural defects compromise the integrity and safety of the building. These issues require
prompt professional assessment and remediation to prevent escalation.
- **Foundation cracking:** Cracks in concrete slabs or footings may indicate inadequate design for site conditions, poor concrete placement, or reactive soil movement
- **Framing deficiencies:** Undersized members, inadequate connections, or missing bracing can compromise structural performance
- **Masonry cracking:** Cracking in brick or block walls may indicate foundation movement, inadequate articulation, or structural overloading
- **Roof structure problems:** Damaged or incorrectly installed trusses, inadequate connections, or missing bracing
- **Floor deflection:** Excessive bounce or sag in floors indicating undersized joists or inadequate support
### Waterproofing Failures
Waterproofing defects are the leading cause of building disputes in Australia. The
consequences of water ingress extend far beyond the initial leak, causing structural damage,
mould growth, and degradation of finishes.
- **Wet area membrane failures:** Inadequate membrane application, poor detailing at junctions, or insufficient falls allowing water penetration through floors and walls
- **Balcony waterproofing defects:** Failed membranes, inadequate falls, or poor drainage causing water ingress to interior spaces below
- **Roof leaks:** Failed flashings, inadequate underlays, or poor installation of roof coverings
- **Window and door leaks:** Missing or failed flashings, inadequate sealing, or poor drainage provision
- **Rising damp:** Absent or failed damp proof courses allowing moisture to rise through masonry walls
### Electrical and Plumbing Defects
Services defects can pose immediate safety risks and may result in significant property
damage if not promptly addressed.
- **Electrical safety issues:** Missing or inadequate safety switches, faulty wiring, improper earthing, or non-compliant installations
- **Plumbing leaks:** Poorly connected joints, inadequate support, or defective fittings causing water damage
- **Drainage problems:** Incorrect falls, inadequate venting, or poor connections resulting in slow drainage or blockages
- **Hot water system defects:** Missing tempering valves, inadequate pressure relief, or improper installation
- **Gas installation faults:** Inadequate ventilation, improper connections, or non-compliant appliance installations
### Finishing and Cosmetic Defects
While less critical than structural or waterproofing issues, finishing defects affect
property presentation, functionality, and value.
- **Plasterboard defects:** Poor jointing, visible imperfections, cracking, or damage
- **Tile installation problems:** Uneven surfaces, lippage, hollow tiles, inadequate grouting, or cracked tiles
- **Paint defects:** Inadequate coverage, runs, brush marks, or poor surface preparation
- **Joinery issues:** Poorly fitted doors and windows, binding, inadequate clearances, or damaged components
- **Floor covering defects:** Uneven surfaces, lifting edges, inadequate adhesion, or damage
## Construction Defect Classification
Professional inspectors classify defects according to their severity and impact on building
safety, functionality, and compliance. This classification guides remediation priorities and
informs warranty claims.
| Defect Category | Severity | Examples | Typical Remediation Cost |
| --------------------- | ----------- | ------------------------------------------------------------------- | ------------------------ |
| Major Structural | Critical | Foundation failure, major cracking, structural member failure | $50,000 to $500,000+ |
| Waterproofing Failure | Significant | Wet area leaks, balcony membrane failure, roof leaks | $5,000 to $100,000+ |
| Fire Safety | Critical | Missing fire collars, inadequate separation, non-compliant cladding | $10,000 to $200,000+ |
| Electrical Safety | Significant | Missing safety switches, faulty wiring, inadequate earthing | $500 to $10,000 |
| Plumbing Defects | Moderate | Leaking joints, incorrect falls, missing tempering valves | $500 to $15,000 |
| Minor Structural | Moderate | Minor cracking, floor deflection, settlement within limits | $2,000 to $30,000 |
| Finishing Defects | Minor | Paint imperfections, tile lippage, joinery adjustments | $200 to $5,000 |
| Cosmetic Issues | Minor | Surface scratches, minor chips, touch-up repairs | $100 to $1,000 |
## Detection Methods and Inspection Technology
Professional construction defect inspections employ a combination of visual assessment,
technical testing, and advanced technology to identify defects that may not be immediately
apparent. Understanding these methods helps property owners appreciate the value of
professional assessment.
### Visual Inspection Techniques
Experienced inspectors identify defects through systematic visual examination, recognising
patterns and indicators that may escape untrained observers.
- **Crack pattern analysis:** Interpretation of crack location, orientation, width, and pattern to identify underlying causes and severity
- **Surface assessment:** Examination of finishes for defects, damage, and workmanship issues
- **Level and plumb checks:** Visual and instrument-assisted assessment of floor levels, wall verticality, and structural alignment
- **Water staining identification:** Recognition of moisture damage patterns indicating past or ongoing water ingress
- **Construction methodology assessment:** Evaluation of visible construction practices against industry standards
### Thermal Imaging
Thermal imaging cameras detect temperature variations that indicate hidden defects invisible
to the naked eye.
- **Moisture detection:** Evaporative cooling of wet materials creates temperature differentials revealing water ingress or plumbing leaks behind finished surfaces
- **Insulation deficiencies:** Missing or displaced insulation appears as temperature variations on internal surfaces
- **Air leakage:** Thermal bridges and air infiltration paths are visible as temperature anomalies
- **Electrical hotspots:** Overloaded circuits or faulty connections generate heat detectable through thermal imaging
### Moisture Measurement
Moisture meters and sensors provide quantitative data about moisture levels in building
materials, enabling early detection of water-related problems.
- **Pin-type meters:** Measure electrical resistance between probes inserted into materials, providing accurate moisture readings for timber and other porous materials
- **Non-invasive meters:** Use electrical impedance or capacitance to detect moisture without penetrating surfaces
- **Relative humidity sensors:** Measure moisture content in air and enclosed spaces to identify condensation risk
- **Concrete moisture testing:** Specialised tests for moisture in concrete slabs affecting floor covering adhesion
### Precision Measurement Equipment
Professional inspection equipment enables accurate measurement of construction tolerances
and structural movement.
- **Laser levels:** Rotating and line laser levels provide accurate reference planes for assessing floor levelness and wall alignment
- **Digital inclinometers:** Measure slopes and angles with high precision for floor falls and structural assessment
- **Crack width gauges:** Calibrated gauges for accurate measurement of crack widths and monitoring crack progression
- **Distance measuring devices:** Laser distance meters enable accurate dimensional verification
### Specialist Investigation
Some defects require specialist investigation beyond standard inspection techniques.
- **Borescope inspection:** Flexible cameras inspect concealed spaces including wall cavities, ceiling voids, and subfloor areas
- **Concrete testing:** Core sampling, cover meters, and carbonation testing assess concrete quality and reinforcement condition
- **Flood testing:** Controlled water testing verifies waterproofing integrity in wet areas and balconies
- **Structural engineering assessment:** Detailed analysis by qualified engineers for complex structural issues
## Comprehensive Inspection Process
Professional construction defect inspections follow a systematic methodology ensuring
thorough assessment and reliable documentation. Understanding this process helps property
owners prepare for inspections and maximise their value.
### Stage 1: Pre-Inspection Planning and Documentation Review
Effective inspection begins before the site visit with review of available documentation and
planning.
- Review of building plans, specifications, and contract documents to understand design intent and construction requirements
- Examination of any previous inspection reports, defect notices, or correspondence with the builder
- Assessment of available certifications, compliance certificates, and warranty documents
- Discussion with the property owner to understand specific concerns and areas requiring particular attention
- Confirmation of access arrangements for all areas including roof voids, subfloor spaces, and external areas
### Stage 2: Systematic On-Site Examination
The on-site inspection follows a methodical approach ensuring all areas and elements are
assessed.
- **Site and external assessment:** Examination of drainage, landscaping, external structures, and site conditions affecting the building
- **External building inspection:** Assessment of cladding, windows, doors, roofing, and external waterproofing
- **Internal room-by-room inspection:** Systematic examination of every accessible room including walls, floors, ceilings, and fittings
- **Wet area assessment:** Detailed inspection of bathrooms, laundries, and kitchens with particular attention to waterproofing and drainage
- **Roof void inspection:** Where accessible, examination of roof structure, insulation, and services
- **Subfloor inspection:** Where accessible, assessment of stumps, bearers, joists, and underfloor conditions
### Stage 3: Technical Testing and Measurement
Beyond visual assessment, professional inspections incorporate technical testing to identify
hidden defects and quantify observations.
- Moisture testing of materials showing signs of water exposure or in high-risk areas
- Thermal imaging survey to identify moisture, insulation deficiencies, and thermal anomalies
- Level and plumb measurements documenting floor slopes and wall alignment
- Crack width measurement and documentation for monitoring purposes
- Functional testing of services including taps, drains, doors, windows, and fixtures
### Stage 4: Comprehensive Photographic Documentation
Thorough photographic documentation provides essential evidence supporting defect claims and
remediation planning.
- Overview photographs establishing context and location of defects within the property
- Detailed close-up photographs clearly showing defect characteristics
- Reference photographs with measurement scales demonstrating defect severity
- Comparison photographs showing defects relative to acceptable standards
- Thermal images with corresponding visual photographs for moisture and thermal anomalies
### Stage 5: Detailed Report Preparation
The inspection report documents all findings and provides the foundation for warranty claims
and remediation.
- **Executive summary:** Overview of major findings and overall property condition assessment
- **Defect schedule:** Itemised list of all identified defects with locations, descriptions, and photographic references
- **Severity classification:** Categorisation of defects by type and priority for remediation
- **Standards references:** Identification of relevant codes and standards contravened by each defect
- **Remediation recommendations:** Suggested approaches for addressing identified defects
- **Supporting documentation:** Photographs, measurements, and test results supporting findings
### Stage 6: Post-Inspection Consultation
Professional inspection services include consultation to ensure property owners understand
findings and next steps.
- Explanation of findings and their significance for property safety and value
- Discussion of remediation options and priority sequence
- Guidance on warranty claim processes and documentation requirements
- Recommendations for specialist assessment where required
- Advice on monitoring requirements for any defects requiring ongoing observation
> A professional inspection report is only as valuable as its ability to support action. The
> best reports clearly document defects in a manner that enables effective communication with
> builders, supports warranty claims, and provides specifications for remediation contractors.
## Construction Defect Inspection Costs
Inspection costs vary based on property type, size, and the scope of assessment required.
The following table provides indicative pricing for different inspection types.
| Inspection Type | Typical Cost Range | Scope | Best Suited For |
| ----------------------------------- | ---------------------- | ----------------------------------------------------------------- | --------------------------------------- |
| Standard Defect Inspection | $400 to $800 | Visual inspection, standard testing, basic report | Pre-settlement, maintenance inspections |
| Comprehensive Defect Assessment | $800 to $1,500 | Detailed inspection, thermal imaging, comprehensive report | End of warranty, dispute support |
| Expert Witness Report | $2,000 to $5,000+ | Detailed investigation, standards analysis, tribunal-ready report | Legal proceedings, major disputes |
| Structural Engineering Assessment | $1,000 to $3,000 | Engineering assessment, structural analysis, recommendations | Foundation issues, structural concerns |
| Waterproofing Investigation | $500 to $2,000 | Moisture testing, thermal imaging, leak detection | Water ingress issues, wet area failures |
| Stage Inspection (New Construction) | $300 to $600 per stage | Inspection at key construction milestones | New builds, progress payments |
## Dispute Resolution Pathways
When construction defects are identified, various mechanisms exist for seeking remediation
from builders. Understanding these pathways helps property owners pursue the most
appropriate resolution strategy.
### Direct Negotiation with Builder
The first step in resolving construction defects is typically direct communication with the
builder. A professional inspection report supports this process by providing clear
documentation of defects and their severity.
- Written defect notification citing specific contract terms and statutory warranty provisions
- Reasonable timeframe for builder response and proposed remediation
- Clear documentation of all communications for potential escalation
- Agreement on inspection and supervision of remediation work
### Regulatory Complaints
State building regulators accept complaints about licensed builders and can require
remediation of defective work.
- **NSW Fair Trading:** Accepts complaints about residential building work and can issue rectification orders
- **QBCC:** Provides direction to rectify orders requiring builders to address defects within specified timeframes
- **VBA:** Accepts complaints about registered building practitioners and can take disciplinary action
- **Building Commission WA:** Investigates complaints and can require remediation of defective work
### Mediation and Alternative Dispute Resolution
Mediation offers a cost-effective pathway to resolution without the expense and delay of
tribunal or court proceedings.
- Industry mediation services provided through building authorities
- Private mediation through accredited mediators
- Expert determination where technical issues require specialist assessment
- Arbitration providing binding resolution outside court systems
### Tribunal and Court Proceedings
Where other resolution pathways fail, property owners can pursue remedies through tribunals
or courts.
- **NCAT (NSW):** Handles residential building disputes with claims up to $500,000
- **VCAT (Victoria):** Domestic building list handles building disputes
- **QCAT (Queensland):** Resolves building disputes following QBCC processes
- **Local and District Courts:** Handle claims exceeding tribunal limits or requiring legal remedies
> The most successful defect claims are those supported by clear documentation and
> professional inspection reports. Investing in quality inspection services early in the
> dispute process typically results in faster resolution and better outcomes.
## Case Examples: Construction Defects in Practice
Understanding how construction defects manifest in real properties helps illustrate the
importance of professional inspection. The following examples represent common scenarios
encountered by Australian property owners.
### Case 1: Waterproofing Failure in Apartment Bathroom
A property owner in a three-year-old Sydney apartment noticed moisture stains appearing on
the ceiling of the unit below their bathroom. Initial investigation revealed:
- Shower waterproofing membrane had failed at the hob junction due to inadequate overlap and lack of bond breaker installation
- Water was tracking through the concrete slab and affecting multiple levels below
- Consequential damage included degraded plasterboard, mould growth in wall cavities, and damaged floor finishes in affected units
Professional inspection documented the defect with reference to AS 3740 requirements. Total
remediation cost exceeded $85,000 including bathroom demolition, re-waterproofing,
reinstatement of finishes, and repairs to affected units below. The claim was successfully
pursued under the six-year structural warranty period as waterproofing constitutes a major
element under NSW legislation.
### Case 2: Foundation Movement in New Home
Owners of a new home in Melbourne observed cracking in internal walls and external brickwork
within two years of construction. Investigation revealed:
- The site had highly reactive clay soils (Class H2) requiring a specific foundation design
- The as-built foundation did not comply with the approved engineering design, with reduced slab thickness and missing reinforcement
- Differential settlement had caused cracking throughout the building with maximum movement of 35mm across the property
Structural engineering assessment documented non-compliance with AS 2870 and the approved
engineering drawings. Remediation required extensive underpinning at a cost of $180,000. The
matter proceeded to VCAT, resulting in an order for the builder to fund full remediation
plus associated costs.
### Case 3: Fire Safety Defects in Multi-Unit Development
A strata committee in Brisbane commissioned an inspection following concerns about general
construction quality. The inspection identified:
- Missing fire collars at service penetrations through fire-rated walls
- Inadequate fire separation between units with gaps allowing potential fire and smoke spread
- Non-compliant combustible cladding requiring replacement
These defects constituted serious safety hazards requiring immediate attention. The building
was assessed as non-compliant with NCC fire safety provisions. Total remediation cost was
estimated at $2.4 million for the 48-unit development. The matter was referred to the QBCC,
and proceedings were commenced against the builder and certifier.
## Frequently Asked Questions
###
What is a construction defect inspection and when should I get one?
**Short answer:** A construction defect inspection is a professional
assessment identifying faults in construction quality, materials, or workmanship. You
should get one before settlement on new property, before warranty expiry, or when you
notice signs of defects.
Construction defect inspections systematically evaluate all aspects of building
construction against applicable standards including the National Construction Code and
relevant Australian Standards. The inspection identifies defects ranging from minor
cosmetic issues to major structural failures, providing documentation suitable for
warranty claims and dispute resolution. Key timing for inspections includes
pre-settlement for new builds (where defects can be addressed before you take
ownership), during the defect liability period (typically 90 days after completion),
before the expiry of non-structural warranty periods (usually 2 years), and before
structural warranty expiry (typically 6 years). Additional inspections are warranted
when you observe cracking, water stains, floor slopes, or other indicators of potential
defects.
###
What qualifications should a construction defect inspector have?
**Short answer:** Look for registered building inspectors or licensed
builders with specific defect inspection experience, relevant trade or tertiary
qualifications, professional indemnity insurance, and membership in recognised industry
associations.
Qualified construction defect inspectors typically hold builder or building inspection
licences issued by their state regulator. Many have backgrounds in building, carpentry,
or engineering with additional qualifications in building inspection. For complex
structural issues, engagement of a registered structural engineer provides additional
expertise and the ability to certify structural adequacy. Professional indemnity
insurance protects property owners if defects are missed during inspection. Membership
in professional bodies such as the Australian Institute of Building Surveyors (AIBS) or
Master Builders Association indicates commitment to professional standards. When
selecting an inspector, request evidence of qualifications, insurance, and examples of
previous inspection reports.
###
How much does a construction defect inspection cost?
**Short answer:** Standard construction defect inspections typically cost
between $400 and $1,500 for residential properties, with comprehensive assessments and
expert reports ranging from $2,000 to $5,000 or more.
Inspection costs vary based on property type, size, age, and the scope of assessment
required. Basic [pre-settlement inspections](/apartment-pre-settlement) for apartments typically cost $400 to $600,
while comprehensive house inspections range from $600 to $1,000. More detailed
assessments incorporating thermal imaging, extensive moisture testing, and comprehensive
reporting may cost $1,000 to $1,500. [Expert witness reports](/expert-witness-reports) suitable for tribunal
proceedings require additional analysis and documentation, typically costing $2,000 to
$5,000 depending on complexity. Specialist assessments such as structural engineering
reports or detailed waterproofing investigations attract additional costs. When compared
to potential repair costs of tens of thousands of dollars, inspection fees represent
sound investment in early defect detection.
###
What are the most common construction defects in Australian homes?
**Short answer:** Waterproofing failures, structural cracking, finishing
defects, and services installation issues are the most commonly identified defects in
Australian residential construction.
Research indicates that waterproofing defects account for approximately 30% of all
building defect claims, making them the most prevalent category. These typically
manifest in bathrooms, laundries, and balconies where inadequate membrane application or
poor detailing allows water penetration. Structural defects including foundation
cracking, wall cracking, and framing issues represent another significant category,
often related to inadequate site classification or design. Finishing defects such as
poor paintwork, tile installation issues, and joinery problems are extremely common but
generally less serious. Services defects including plumbing leaks, electrical safety
issues, and inadequate drainage occur frequently and can have significant consequences
if not addressed promptly.
###
What warranty periods apply to construction defects?
**Short answer:** Statutory warranty periods vary by state but typically
provide 6 years coverage for structural/major defects and 2 years for non-structural
defects, with Victoria offering the longest periods at 10 years and 6 years
respectively.
Australian consumer protection legislation provides statutory warranties for residential
building work that cannot be excluded by contract. These warranties commence from the
date of practical completion or occupation. In New South Wales, the Home Building Act
provides 6 years for major defects and 2 years for other defects. Victoria recently
extended warranty periods to 10 years for structural defects and 6 years for
non-structural defects under amendments to the Domestic Building Contracts Act.
Queensland provides 6 years and 6 months for structural defects but only 6 months for
non-structural defects under the QBCC Act. It is essential to conduct inspections well
before warranty expiry to allow time for documentation, negotiation, and remediation
before coverage lapses.
###
How do I make a warranty claim for construction defects?
**Short answer:** Document the defects with professional inspection, notify
the builder in writing citing statutory warranty provisions, allow reasonable time for
response, and escalate to your state regulator or tribunal if the builder fails to
remediate.
Successful warranty claims require clear documentation and proper process. Begin by
obtaining a professional inspection report documenting defects with reference to
applicable standards. Notify the builder in writing, clearly describing each defect,
referencing the inspection report, and citing the relevant statutory warranty
provisions. Set a reasonable timeframe for response, typically 14 to 28 days. If the
builder disputes the claim or fails to respond, escalate to your state building
authority who can assess the claim and issue rectification orders. Where the builder
remains non-compliant, you may proceed to the relevant tribunal or court. Throughout
this process, maintain copies of all correspondence and documentation. Professional
inspection reports with clear defect descriptions and standards references significantly
strengthen warranty claims.
###
What is the difference between a building inspection and a defect inspection?
**Short answer:** Building inspections assess general property condition
for purchase decisions, while defect inspections specifically identify construction
faults against standards and provide documentation for warranty claims.
[Pre-purchase building inspections](/pre-purchase-inspections) assess overall property condition, identifying
maintenance issues, safety hazards, and significant defects to inform buying decisions.
They cover broad aspects including structural condition, pest damage, and maintenance
requirements, providing a snapshot of current condition. Construction defect inspections
are more specialised, focusing specifically on identifying departures from construction
standards, building codes, and acceptable workmanship. They document defects with
reference to specific standards such as the NCC and relevant Australian Standards,
providing evidence suitable for warranty claims and dispute resolution. Defect
inspections are particularly relevant for new or recently constructed properties where
statutory warranty periods apply. For existing properties being purchased, a
comprehensive building inspection that includes defect identification provides
appropriate coverage.
###
Can I conduct a construction defect inspection myself?
**Short answer:** While you can observe obvious defects, professional
inspection is essential for identifying hidden issues, documenting defects to
appropriate standards, and providing reports suitable for warranty claims.
Property owners can certainly identify obvious defects such as cracking, water stains,
uneven surfaces, and finishing issues. However, professional inspection provides
significant advantages. Experienced inspectors recognise subtle indicators of serious
underlying problems that untrained observers miss. Technical equipment including thermal
imaging cameras and moisture meters detects hidden defects invisible to visual
inspection. Professional reports document defects with reference to applicable standards
and provide evidence meeting the requirements for warranty claims and tribunal
proceedings. Inspector expertise enables accurate assessment of defect severity and
appropriate remediation approaches. For properties still within warranty periods or
where significant defects are suspected, professional inspection provides essential
documentation and expertise that self-inspection cannot replicate.
###
What happens if my builder refuses to fix defects?
**Short answer:** You can lodge complaints with your state building
authority, pursue mediation, or apply to the relevant tribunal for orders requiring
remediation or compensation.
Where builders refuse to address legitimate defect claims, several escalation pathways
exist. State building authorities including NSW Fair Trading, QBCC, VBA, and Building
Commission WA accept complaints about licensed builders and can issue rectification
orders requiring remediation within specified timeframes. Mediation services offer
cost-effective dispute resolution without formal proceedings. If these approaches fail,
tribunals including NCAT (NSW), VCAT (Victoria), and QCAT (Queensland) handle building
disputes and can order remediation, compensation, or both. For larger claims exceeding
tribunal limits, court proceedings may be necessary. Throughout this process,
professional inspection reports and comprehensive documentation of defects and
communications significantly strengthen your position. Home warranty insurance may
provide coverage if the builder becomes insolvent or cannot complete remediation.
###
Should I get a defect inspection before buying an off-the-plan property?
**Short answer:** Yes, a pre-settlement defect inspection is essential for
off-the-plan purchases. This identifies defects before you take ownership, enabling you
to require remediation before settlement or negotiate compensation.
Off-the-plan purchases present unique challenges as you are purchasing a property based
on plans and display units rather than the actual finished product. Pre-settlement
inspection provides your opportunity to assess the completed property against the
contract specifications and identify defects before taking ownership. Defects identified
at this stage can be required to be rectified before settlement, or you may negotiate
retention of funds pending remediation. This is significantly more effective than
attempting to pursue defect claims after settlement when the builder's motivation to
resolve issues quickly diminishes. Inspection at this stage typically reveals finishing
defects, minor workmanship issues, and sometimes more significant problems that can be
addressed while the builder is still on site and motivated to achieve settlement.
## Key Takeaways
- Construction defects affect approximately 85% of new Australian homes, making professional inspection essential for protecting your property investment.
- Australian law provides comprehensive consumer protections including statutory warranty periods of up to 10 years for structural defects (Victoria) and 6 years in most other states.
- Key inspection components include structural evaluation, waterproofing assessment, electrical and plumbing inspection, finishing review, and compliance audit against the National Construction Code and Australian Standards.
- Waterproofing failures are the most common construction defect category, accounting for approximately 30% of building defect claims and often resulting in significant consequential damage.
- Professional inspection using thermal imaging, moisture meters, and precision measurement equipment identifies hidden defects invisible to visual assessment.
- Inspection reports documenting defects with reference to applicable standards provide essential evidence for warranty claims and dispute resolution.
- Dispute resolution pathways include direct negotiation, regulatory complaints, mediation, and tribunal proceedings, with professional documentation improving outcomes at every stage.
- Pre-settlement inspections for new properties enable defects to be addressed before you take ownership, while end-of-warranty inspections ensure issues are documented before coverage expires.
- Inspection costs of $400 to $1,500 represent minimal investment compared to potential repair costs of tens of thousands of dollars for undetected defects.
## References and Resources
- [ National Construction Code (NCC) ](https://ncc.abcb.gov.au/)
- [ Standards Australia ](https://www.standards.org.au/)
- [ Victorian Building Authority (VBA) ](https://www.vba.vic.gov.au/)
- [ Queensland Building and Construction Commission (QBCC) ](https://www.qbcc.qld.gov.au/)
- [ Building Commission Western Australia ](https://www.commerce.wa.gov.au/building-commission)
- [ Australian Institute of Building Surveyors (AIBS) ](https://www.aibs.com.au/)
- [ Engineers Australia ](https://www.engineersaustralia.org.au/)
### Expert Witnesses in Geelong Construction Cases
Source: https://ownerinspections.com.au/articles/expert-witnesses-in-geelong-construction-cases
Published: 2025-03-12 | Updated: 2026-02-09 | Category: Expert Witness
Author: Maison Azdari
An expert witness in a Geelong construction case is a qualified professional who provides independent, fact-based technical opinions to courts and tribunals about building defects, code compliance, construction methods, and project management. Their role is to help legal decision-makers understand complex construction issues by translating technical details into clear, accessible explanations. Expert witnesses do not advocate for either party. They serve the court by offering objective analysis based on evidence, industry standards, and the National Construction Code (NCC).
Geelong's construction sector continues to grow, with residential development expanding across the region. As building activity increases, so do disputes over construction quality, defects, delays, and compliance. In Victoria, many of these disputes are resolved through VCAT (Victorian Civil and Administrative Tribunal), where expert witness testimony often plays a deciding role in the outcome. This guide explains what expert witnesses do, how to select the right one, and how their testimony shapes legal results.
## What Is an Expert Witness in Construction?
Expert witnesses in construction litigation offer specialised knowledge to courts and tribunals. Their focus areas include construction practices, building code compliance, structural engineering, waterproofing, and project management. Their primary role is to impartially analyse, report on, and explain complex construction issues.
These professionals bring a deep understanding of construction principles, Australian standards, and relevant regulations. They are skilled at identifying discrepancies in construction projects and providing clear explanations that make technical issues accessible to judges, tribunal members, and legal teams who may not have a construction background.
## Key Responsibilities of an Expert Witness
## Choosing the Right Expert Witness
Selecting the right expert witness for your construction dispute, particularly for VCAT cases in Victoria, involves several considerations:
## How Expert Testimony Influences Construction Cases
Expert testimony has a measurable impact on construction dispute outcomes. Here is how:
## Expert Witness vs Regular Witness
For a detailed comparison, read our article on [fact witness vs expert witness](/articles/commercial-and-home-inspection-fact-witness-vs-expert-witness).
## Preparing for Expert Testimony
Effective preparation makes expert testimony more impactful. Legal teams and clients should follow these steps:
For a complete overview, see our [guide to expert witness reports for building disputes](/guides/expert-witness-building-disputes-guide).
### The Role of Building Codes in Defect Investigation in Melbourne
Source: https://ownerinspections.com.au/articles/the-role-of-building-codes-in-defect-investigation-in-melbourne
Published: 2025-03-12 | Updated: 2026-02-09 | Category: Defect Investigation
Author: Maison Azdari
Building codes are the benchmarks that inspectors use to identify construction defects in [Melbourne](/vic/building-inspections-melbourne). The National Construction Code (NCC) and the Building Code of Australia (BCA) set measurable standards for structural safety, fire protection, waterproofing, energy efficiency, and accessibility. When a defect investigation takes place, inspectors compare the built work against these codes to determine whether the construction meets required standards. Any departure from the code signals a potential defect that may require rectification.
Melbourne's mix of modern high-rises and heritage buildings creates a unique set of challenges for defect investigation. The city's variable climate, strict heritage overlays, and rapid growth mean that building codes play an even larger role in protecting property owners and occupants. Understanding how these codes work helps homeowners, investors, and strata managers know what to expect from an inspection and why compliance matters. For a complete overview, see our [guide to building defect investigations](/guides/building-defect-investigation-guide).
## What Are Building Codes?
Building codes are carefully developed standards that set the minimum requirements for the design, construction, and maintenance of buildings. They cover areas including structural integrity, fire safety, health and amenity, waterproofing, energy efficiency, and accessibility. Their primary purpose is to protect the safety and wellbeing of building occupants and the general public.
In Australia, building codes are not optional guidelines. They are legally enforceable requirements that builders, developers, and property owners must follow. Non-compliance can lead to fines, legal action, rectification orders, and in severe cases, demolition.
## The NCC and BCA Explained
Two key frameworks govern construction standards across Melbourne and the rest of Australia:
The BCA forms part of the NCC and is the section most relevant to residential building defect investigations. In Victoria, the [Victorian Building Authority (VBA)](https://www.vba.vic.gov.au/) and local councils are responsible for enforcing these standards.
## Why Building Codes Matter for Defect Investigations
Building inspectors rely on codes as objective, measurable benchmarks when conducting defect investigations. Without these standards, assessments would be subjective and inconsistent. Here is how codes support the investigation process:
For more on defect investigation processes, see our guide to [construction defect inspections](/articles/construction-defect-inspection).
## Common Code Violations Found in Melbourne
## Melbourne's Unique Challenges
### Unpredictable Weather
Melbourne is well known for its variable climate. Structures in the city must withstand hot summers, cold winters, heavy rain, and strong winds, sometimes all in the same week. Building codes set clear standards for weatherproofing, insulation, and ventilation to address these conditions. During defect investigations, inspectors pay close attention to issues like leaks, condensation, poor insulation, and inadequate drainage, which often result from failing to meet weather-related code provisions.
### Heritage Building Preservation
Melbourne has a large number of heritage-listed buildings. Maintaining and restoring these properties while meeting modern safety standards requires careful balancing. The building codes include provisions for heritage buildings, allowing certain modifications while making sure safety and performance standards are not compromised. Inspectors working on heritage properties must understand both the heritage overlay requirements and the applicable code standards.
### Rapid Growth and High-Density Development
Melbourne's population growth has driven a boom in apartment and high-rise construction. This rapid development has, in some cases, led to quality issues as builders work to meet tight deadlines. Defect investigation in these buildings often reveals code violations related to fire safety, waterproofing, and structural adequacy that could have been prevented with better quality control during construction.
## Consequences of Non-Compliance
Failing to meet building code standards has serious consequences for property owners and builders in Melbourne:
## How Inspectors Use Codes During Investigations
A typical defect investigation in Melbourne follows a structured process anchored by building code references:
### Depreciation Schedule Reports in Brisbane: What Property Investors Need to Know
Source: https://ownerinspections.com.au/articles/essential-insights-depreciation-schedule-reports-in-brisbane
Published: 2025-03-11 | Updated: 2026-02-09 | Category: Depreciation Schedule
Author: Maison Azdari
A [depreciation schedule](/depreciation-schedule) report is a document prepared by a qualified quantity surveyor that lists all the depreciable assets within an investment property, along with the tax deductions the owner can claim each financial year. In [Brisbane](/qld/building-inspections-brisbane), most investment properties qualify for depreciation claims covering both the building structure (capital works) and removable items like appliances, carpets, and blinds (plant and equipment). These deductions can total thousands of dollars per year, reducing taxable income and improving cash flow for property investors.
Property investment in Brisbane continues to attract both local and interstate buyers. One of the most overlooked financial benefits of owning an investment property is depreciation. Many investors either do not claim depreciation at all or significantly underestimate the deductions available to them. This guide explains how depreciation schedules work, what they include, how to get one, and the common mistakes that cost investors money.
## What Is a Depreciation Schedule?
A depreciation schedule is a detailed report that lists every component of an investment property that loses value over time, along with the annual tax deduction the owner can claim for each item. It covers everything from the building structure itself to individual items like air conditioning units, kitchen appliances, and floor coverings.
The schedule is prepared by a qualified quantity surveyor who inspects the property and calculates deductions based on the age, condition, and effective life of each asset. The resulting document is used by the property owner's accountant or tax agent when preparing their annual tax return.
## Types of Depreciation Claims
## Benefits of a Depreciation Schedule
### Maximising Tax Deductions
A depreciation schedule identifies every depreciable item in your property, making sure you claim the full amount you are entitled to. Without a schedule, investors often miss deductions worth thousands of dollars each year. The ATO allows these deductions because property assets genuinely lose value over time through normal wear and ageing.
### Improving Cash Flow
The tax savings from depreciation deductions go directly to improving your annual cash flow. For many Brisbane investors, depreciation can turn a negatively geared property into a cash-flow-neutral or even positively geared investment when combined with other deductions.
### Long-Term Financial Planning
A depreciation schedule maps out your deductions for up to 40 years, giving you a clear picture of the financial benefits over the life of your investment. This helps with budgeting, forecasting returns, and making informed decisions about when to renovate or sell.
## Eligibility for a Depreciation Schedule in Brisbane
Most investment properties in Brisbane qualify for a depreciation schedule, provided they meet these conditions:
## How to Obtain a Depreciation Schedule
The cost of a depreciation schedule in Brisbane typically ranges from $600 to $800, and the fee itself is tax-deductible.
## Common Mistakes to Avoid
## Tips for Maximising Your Deductions
### What Is a Pre-Purchase Property Inspection?
Source: https://ownerinspections.com.au/articles/pre-purchase-property-inspection
Published: 2025-03-11 | Updated: 2026-03-13 | Category: Building Inspections
Author: Maison Azdari
A pre-purchase property inspection is an independent evaluation of a building's condition carried out before the buyer completes the purchase. In Australia, the inspection follows Australian Standard AS 4349.1 and covers the structural integrity of the building, safety hazards, defects, moisture issues, and compliance with building standards. The results are documented in a written report with photos, defect descriptions, and recommendations. A standard [pre-purchase building inspection](/pre-purchase-inspections) typically costs between $400 and $800, depending on the property size and location.
Buying a property is one of the largest financial commitments most Australians will make. Without a professional inspection, buyers risk inheriting structural problems, pest infestations, or non-compliant building work that can cost tens of thousands of dollars to fix. A pre-purchase inspection gives you a clear picture of the property's true condition so you can make an informed decision, negotiate a fair price, or walk away from a bad deal.
## What Does a Pre-Purchase Inspection Cover?
A standard pre-purchase building inspection covers a wide range of areas and systems within the property.
### Interior and Exterior Assessment
### Roof and Roof Space
### Under-Floor Space
### Additional Structures
### Safety Issues
Book a
Pre-Purchase Inspection
}
buttonHref="/pre-purchase-inspections"
variant="secondary"
/>
## Why Pre-Purchase Inspections Matter
### Identifying Structural Defects and Safety Hazards
Properties may look sound on the surface, but underlying issues such as subsidence, major cracking, or weak foundations can be extremely costly to repair. A professional inspection catches these problems early, giving you the chance to factor them into your purchasing decision.
### Understanding Potential Repair Costs
Hidden issues like water damage, rising damp, or roof deterioration are common in Australian properties. Identifying these before settlement lets you budget for repairs and avoid financial surprises after moving in.
### Strengthening Your Negotiation Position
A detailed inspection report gives you evidence to negotiate a lower purchase price or request that the seller complete repairs before settlement. Sellers are often willing to adjust the price when significant defects are documented by an independent inspector.
## Common Issues Found During Inspections
See Building & Pest
Inspection Options
}
buttonHref="/building-and-pest-inspections"
variant="secondary"
/>
## The Role of Pest Inspections
A [pest inspection](/timber-pest-inspections), often conducted alongside the building inspection, assesses the property for termites, wood borers, and other destructive pests. In Australia, termite damage is one of the most expensive repair issues a homeowner can face. The inspection follows Australian Standard AS 4349.3.
## Choosing a Qualified Inspector
Selecting a licensed, experienced, and independent inspector is one of the most important steps in the pre-purchase process. Avoid using inspectors recommended by the selling agent, as their independence may be compromised.
### Questions to Ask Before Hiring an Inspector
## Understanding Your Inspection Report
A comprehensive inspection report provides a detailed breakdown of the property's condition. Key sections include:
For a detailed breakdown of inspection reports, read our guide to [understanding your property inspection report](/articles/understanding-your-property-inspection-report).
## What to Do After Receiving the Report
Talk to an
Inspector
}
buttonHref="/contact"
variant="primary"
/>
For a complete overview, see our [guide to pre-purchase building and pest inspections](/guides/pre-purchase-building-pest-inspection-guide).
### Cyclone Alfred: Property Issues to Inspect After the Storm
Source: https://ownerinspections.com.au/articles/cyclone-alfred-property-issues-inspect-after-storm
Published: 2025-03-10 | Updated: 2026-02-10 | Category: Insurance
Author: Maison Azdari
After Cyclone Alfred passed through southeastern Queensland and northern New South Wales in March 2025, homeowners should inspect their properties for roof damage, foundation shifts, water infiltration, electrical hazards, and plumbing failures. Even a Category 2 cyclone with sustained winds around 95 km/h and gusts up to 130 km/h can cause structural problems that are not visible at first glance. A professional building inspection is the most reliable way to identify hidden damage, protect your family's safety, and support any insurance claim you may need to lodge.
Cyclone Alfred brought heavy rainfall, storm surges along the Gold Coast and [Byron Bay](/nsw/building-inspections-byron-bay) coastline, and flash flooding across inland areas. Properties that survived the initial event may still have damage that worsens over time. Water can seep through hairline cracks in roofing, saturate foundations, and promote mould growth within wall cavities. Electrical systems exposed to moisture can short-circuit days or weeks after the storm. The sooner you inspect, the better your chances of catching problems early and keeping repair costs down.
This guide walks you through each area of your property that needs attention after Cyclone Alfred, explains what to look for, and outlines the steps for documenting damage for insurance purposes.
For a complete overview, see our [guide to insurance claim assessments](/guides/insurance-claim-assessment-guide).
## Cyclone Alfred Overview
Cyclone Alfred was classified as a Category 2 tropical cyclone with sustained winds of approximately 95 km/h and gusts reaching 130 km/h. Making landfall near the Queensland coast in early March 2025, it tracked southward through Brisbane and the Gold Coast before moving into northern New South Wales as an ex-tropical cyclone.
The storm's slow movement increased rainfall totals significantly. Some areas received more than 200mm of rain over several days. Rivers across the region experienced moderate to major flood warnings, and coastal areas faced dangerous surf conditions with waves reaching up to 7.7 metres in places like Byron Bay.
Even though Cyclone Alfred's winds were not as extreme as a Category 3 or above event, the combination of sustained rainfall, storm surge, and flooding created conditions that can compromise buildings in ways that are not always obvious. That is why a thorough property inspection is so important after the storm has passed.
## Why Post-Storm Inspections Matter
The visible damage from a cyclone, such as missing roof tiles or broken windows, is only part of the picture. Many of the most expensive and dangerous problems develop over time from damage that is hidden inside walls, under floors, or within roof cavities.
A professional building inspection identifies damage you might miss and produces a formal report with photographic evidence. This report is accepted by insurers and can be used to support your claim or dispute a low settlement offer.
## Roof and Gutter Damage
Cyclone-force winds can lift tiles, bend metal sheeting, tear away ridge capping, and dislodge flashing around vents and chimneys. Even if the roof looks intact from the ground, there may be displaced tiles or compromised seals that allow water into the roof cavity.
### What to Look For
### What to Do
## Windows and Doors
High winds and flying debris during a cyclone can shatter windows, damage frames, and break seals. Even if the glass has held, the frames may have shifted or the weatherproofing may have failed, allowing water to enter.
### What to Look For
### What to Do
## Structural Foundation Issues
Heavy and prolonged rainfall during Cyclone Alfred saturated the soil around many properties. When soil becomes waterlogged, it expands and shifts. As it dries, it contracts unevenly. This cycle puts pressure on foundations and can cause cracking, tilting, or settlement.
### What to Look For
### What to Do
## Flooding and Water Damage
Cyclone Alfred produced torrential rainfall and flash flooding across multiple areas. Even properties that were not directly flooded may have experienced water ingress through walls, roofs, or subfloor areas. Standing water and persistent dampness create the ideal conditions for mould, which can become a health hazard and structural concern.
### What to Look For
### What to Do
## Electrical and Plumbing Systems
Water and electricity are a dangerous combination. Cyclone damage can expose wiring, corrode connections, and compromise safety switches. Plumbing systems can also be affected by ground movement, debris, and flood contamination.
### What to Look For
### What to Do
## How to Assess Damage and Determine Next Steps
Once it is safe to inspect your property, follow a structured approach to document and prioritise the damage.
## Cyclone Damage by Area Type
The type and severity of damage from Cyclone Alfred varies depending on whether a property is in a coastal or inland location.
## Building Safety and Compliance After a Cyclone
After a major weather event like Cyclone Alfred, local councils and building authorities may introduce updated requirements or issue directives relating to property repairs and rebuilds.
### Preparing for Future Cyclones
For a complete overview, see our [guide to insurance claim assessments](/guides/insurance-claim-assessment-guide).
### What Does a Building Inspection Cover
Source: https://ownerinspections.com.au/articles/what-does-a-building-inspection-cover
Published: 2025-03-05 | Category: Building Inspections
Author: Maison Azdari
Purchasing a property represents one of the largest financial decisions most Australians
will make in their lifetime. Yet without a thorough building inspection, buyers may
unknowingly inherit expensive structural problems, safety hazards, or compliance issues that
could cost tens of thousands of dollars to rectify.
A professional building inspection serves as your critical safeguard against hidden defects,
providing a comprehensive assessment of a property's condition before you commit to
purchase. From foundations to roofing, electrical systems to plumbing, a qualified building
inspector examines every accessible component to identify existing problems and potential
future concerns.
Whether you are a first home buyer, seasoned investor, or selling a property, understanding
what a building inspection covers empowers you to make informed decisions and negotiate from
a position of knowledge. This comprehensive guide explains every aspect of the building
inspection process, what inspectors look for, and how to interpret the findings in your
inspection report.
> A building inspection is not an expense. It is an investment in peace of mind that can save
> you from purchasing a money pit. The few hundred dollars spent on an inspection can prevent
> thousands in unexpected repair costs.
## Structural Integrity Assessment
The structural integrity of a building forms the foundation of any comprehensive inspection.
Structural components bear the weight of the entire building and protect occupants from
environmental forces. Defects in these areas can compromise the safety of the entire
structure and lead to catastrophic failure if left unaddressed.
### Foundation Inspection
The foundation is the most critical structural element of any building, transferring all
loads to the ground. Building inspectors thoroughly examine foundations for signs of
distress that could indicate serious underlying problems.
- **Concrete slab foundations:** Inspectors look for cracks, heaving, settling, and moisture penetration. Hairline cracks are common and often not concerning, but wider cracks or those showing displacement require further investigation.
- **Pier and beam foundations:** These require assessment of timber condition, stump integrity, bearer and joist connections, and adequate ventilation in the subfloor area.
- **Strip footings:** Common in older Australian homes, these are checked for cracking, erosion, and adequate depth below ground level.
- **Reactive soil indicators:** Movement cracks in walls and floors may indicate foundation movement caused by reactive clay soils common throughout Australia.
### Wall Assessment
Both internal and external walls are examined for structural soundness and signs of
deterioration or damage.
- **Brick and masonry walls:** Inspectors check for cracking patterns, mortar deterioration, rising damp, efflorescence, and structural movement.
- **Timber framed walls:** Assessment includes checking for timber rot, termite damage, inadequate bracing, and proper connection to the foundation.
- **Cladding systems:** Weatherboard, fibre cement, render, and other cladding materials are examined for damage, moisture ingress, and secure attachment.
- **Retaining walls:** These critical structures are assessed for leaning, cracking, drainage adequacy, and structural stability.
### Roofing Structure and Coverings
The roof protects the entire building from weather and environmental damage. A thorough roof
inspection covers both the structural framework and the exterior coverings.
- **Roof frame inspection:** Timber trusses and rafters are examined for rot, termite damage, sagging, inadequate bracing, and proper tie-down connections.
- **Tile roofs:** Inspectors check for cracked, broken, or displaced tiles, deteriorating bedding and pointing, and proper sarking installation.
- **Metal roofing:** Assessment includes checking for rust, corrosion, deteriorating fasteners, and adequate overlap at joints.
- **Gutters and downpipes:** These are examined for blockages, corrosion, incorrect falls, and adequate capacity for the roof catchment area.
- **Flashings:** All roof penetrations and wall junctions are checked for properly installed and sealed flashings to prevent water ingress.
### Floor Structure
Floor systems must safely support occupants and furniture while maintaining levelness and
stability over time.
- **Concrete floors:** Inspectors check for cracking, unevenness, moisture issues, and signs of reinforcement corrosion.
- **Timber floors:** Assessment includes checking for springiness, squeaking, rot, termite damage, and proper support from bearers and joists.
- **Floor levelness:** Significant slopes or unevenness may indicate foundation movement or structural problems requiring investigation.
## Electrical Systems Inspection
Electrical defects pose serious safety risks including electrocution, electrical fires, and
property damage. While a building inspector is not a licensed electrician, they assess the
general condition of electrical installations and identify obvious safety hazards that
require further specialist evaluation.
### Electrical Panel Assessment
The main switchboard or electrical panel is the heart of the home's electrical system.
Inspectors examine accessible components for safety concerns.
- **Switchboard condition:** Age, type, and general condition of the switchboard are noted, including whether it contains modern safety switches (RCDs).
- **Safety switch presence:** Australian regulations require safety switches on power and lighting circuits. Their presence and apparent functionality are assessed.
- **Circuit breaker condition:** Inspectors note the type and condition of circuit protection devices and any signs of overheating or damage.
- **Labelling:** Properly labelled circuits assist with maintenance and emergency situations.
### Wiring Conditions
The visible condition of electrical wiring throughout the property provides insights into
the overall electrical system quality.
- **Wiring type and age:** Older wiring systems such as rubber-insulated or lead-sheathed wiring may be nearing the end of their safe service life.
- **Visible damage:** Exposed wiring, damaged insulation, or improper connections are noted as safety hazards.
- **DIY electrical work:** Evidence of unlicensed electrical work, which is illegal in Australia and poses significant safety risks.
### Power Points and Fixtures
Power points, light switches, and fixtures throughout the property are examined for obvious
defects.
- **Power point condition:** Cracked, damaged, or loose power points are safety hazards that require attention.
- **Outdated power points:** Two-prong power points without earth connection should be upgraded for safety.
- **Outdoor electrical:** External power points and fixtures should be weatherproof-rated and properly protected.
### Common Electrical Code Violations
Building inspectors commonly identify electrical issues that may not comply with current
Australian wiring rules:
- Missing safety switches on circuits installed after 1991
- Insufficient power points leading to overloaded circuits and extension cord misuse
- Improperly protected bathroom and kitchen power points
- Damaged or deteriorating smoke alarm systems
- Inadequate clearance between electrical components and combustible materials
## Plumbing System Evaluation
The plumbing system delivers clean water throughout the property and removes wastewater
safely. Plumbing defects can cause water damage, health hazards, and expensive repairs if
not identified and addressed promptly.
### Water Supply Pipes
The condition of water supply pipes affects water quality, pressure, and the risk of leaks
and pipe failure.
- **Pipe materials:** Inspectors identify pipe types including copper, galvanised steel, PVC, polyethylene, and older lead pipes that may require replacement.
- **Corrosion assessment:** Visible pipes are checked for corrosion, particularly at joints and connections where leaks commonly develop.
- **Water pressure:** Adequate water pressure is verified at multiple fixtures throughout the property.
- **Leak detection:** Signs of active or past leaks including water staining, mould growth, and pipe degradation are documented.
### Drainage Systems
Proper drainage prevents water damage and ensures sanitary waste removal from the property.
- **Drain function:** Sinks, basins, and floor wastes are tested for adequate drainage speed and any blockages.
- **Sewer connections:** Visible sewer lines are inspected for damage, tree root intrusion signs, and proper connections.
- **Stormwater drainage:** The property's ability to handle rainfall is assessed, including surface drainage and any stormwater systems.
### Hot Water Systems
Hot water systems are essential appliances that require regular assessment for safety and
efficiency.
- **System type and age:** Electric, gas, solar, and heat pump systems are identified along with approximate age and expected remaining service life.
- **Installation compliance:** Proper installation including clearances, relief valve drainage, and accessibility for servicing.
- **Signs of failure:** Rust, leaking, strange noises, or inadequate hot water delivery may indicate imminent replacement needs.
### Fixtures and Fittings
All plumbing fixtures are examined for condition and function.
- **Taps and mixers:** Checked for leaks, proper operation, and adequate water flow.
- **Toilets:** Flushing mechanism, base seal, and cistern condition are assessed.
- **Showers and baths:** Mixer function, drainage, and waterproofing integrity are examined.
## Interior and Exterior Conditions
Beyond the major structural and service components, building inspectors assess the overall
condition of interior and exterior finishes and features that affect the property's
liveability and value.
### Interior Assessment
The interior inspection covers all accessible rooms and spaces within the building.
#### Water Damage Detection
Water damage is one of the most common and potentially costly issues found in Australian
homes. Inspectors look for:
- Ceiling stains indicating roof leaks or plumbing failures above
- Wall discolouration suggesting water ingress through external walls
- Bubbling or peeling paint often caused by moisture behind the surface
- Warped or buckled flooring from water exposure
- Musty odours that may indicate hidden water damage
#### Mould Detection
Mould poses health risks and indicates underlying moisture problems that require attention.
- **Visible mould growth:** Any visible mould on walls, ceilings, or other surfaces is documented with its location and extent.
- **Mould-prone areas:** Bathrooms, laundries, and areas with poor ventilation receive particular attention.
- **Hidden mould indicators:** Musty smells, water staining, and condensation patterns may indicate concealed mould growth.
#### Interior Finishes
The condition of interior finishes reflects both the property's maintenance history and
potential underlying issues.
- Wall and ceiling condition including cracks, damage, and paint condition
- Floor coverings including carpet, tiles, timber, and vinyl condition
- Door and window operation, fit, and hardware condition
- Built-in joinery including kitchen cabinets, wardrobes, and storage
### Exterior Assessment
The building exterior provides the first line of defence against weather and environmental
damage.
#### External Wall Cladding
- **Brick veneer:** Mortar condition, weep hole clearance, and cracking patterns are assessed.
- **Weatherboards:** Timber condition, paint deterioration, and gaps between boards are examined.
- **Rendered surfaces:** Cracking, delamination, and moisture penetration signs are documented.
- **Fibre cement:** Sheet condition, joint sealing, and fixing integrity are checked.
#### Windows and Doors
External openings are critical for weather sealing and security.
- Frame condition including rot, corrosion, and damage
- Glazing condition and seal integrity
- Hardware function including locks, hinges, and handles
- Weather sealing and draught exclusion effectiveness
- Flyscreens and security screens condition
#### External Drainage
Proper site drainage protects the building from water damage and foundation problems.
- Ground slopes and surface drainage direction
- Garden bed levels relative to damp proof courses
- Paved area drainage and condition
- Retaining wall drainage provisions
## Major Systems: Heating, Ventilation, and Air Conditioning
Climate control systems significantly impact comfort, energy costs, and indoor air quality.
While detailed HVAC assessments require specialist technicians, building inspectors evaluate
the general condition and apparent functionality of these systems.
### Heating Systems
The various heating systems common in Australian homes are assessed for condition and
obvious defects.
- **Ducted heating:** Unit condition, duct integrity, and vent location and condition are examined.
- **Split system heating:** Indoor and outdoor unit condition, mounting security, and drainage are assessed.
- **Gas heaters:** Flue condition, clearances from combustibles, and general unit condition are checked.
- **Electric heaters:** Installation safety and general condition are noted.
### Air Conditioning Systems
Cooling systems are essential in much of Australia and represent significant value in a
property.
- **System type and capacity:** Ducted, split system, and evaporative cooling systems are identified.
- **Unit condition:** Age, visible condition, and any obvious damage or deterioration.
- **Installation quality:** Mounting, drainage, and electrical connections are visually assessed.
### Ventilation Assessment
Adequate ventilation prevents moisture buildup and maintains indoor air quality.
- **Exhaust fans:** Bathroom, kitchen, and laundry exhaust fans are tested for operation and appropriate discharge location.
- **Roof space ventilation:** Adequate ventilation prevents heat buildup and condensation in the roof cavity.
- **Subfloor ventilation:** Adequate air vents in subfloor areas prevent moisture buildup and timber decay.
### Filter and Duct Assessment
The condition of filters and ductwork affects system efficiency and air quality.
- Filter accessibility and apparent maintenance history
- Visible ductwork condition including insulation and joint sealing
- Vent grille condition and cleanliness
- Signs of moisture or mould in duct systems
## Outdoor Structures and Improvements
Outdoor structures add functionality and value to properties but may also present safety
hazards or compliance issues if not properly constructed and maintained.
### Garage Inspection
Garages require assessment for structural condition, safety, and compliance.
- **Structural condition:** Walls, roof structure, and slab condition are examined for damage and deterioration.
- **Door operation:** Manual and automatic garage doors are tested for safe operation and proper safety features.
- **Fire separation:** Where attached to the dwelling, fire separation requirements including door and wall ratings are assessed.
- **Electrical:** Lighting, power points, and automatic door openers are checked for obvious defects.
### Shed and Outbuilding Assessment
Garden sheds, workshops, and other outbuildings are included in the inspection scope.
- Structural stability and foundation condition
- Roof and cladding condition
- Door and window functionality
- Electrical installation safety if present
### Deck and Balcony Inspection
Elevated outdoor platforms require particular attention due to safety implications.
- **Structural integrity:** Support posts, bearers, joists, and connections are examined for rot, termite damage, and adequate strength.
- **Decking condition:** Board condition, fastening, and surface safety are assessed.
- **Balustrade compliance:** Height, spacing, and climbability requirements under the National Construction Code are evaluated.
- **Waterproofing:** For balconies over habitable areas, waterproofing membrane condition is critical.
### Fencing and Gates
Boundary fencing and gates are assessed for condition and, where applicable, compliance with
pool fencing requirements.
- Structural stability and post condition
- Gate operation and self-closing mechanisms
- Pool fence compliance with AS 1926.1 requirements
- Material condition and remaining service life
### Swimming Pool and Spa Assessment
Pools and spas require specific attention for safety and compliance.
- **Pool fence compliance:** Barrier height, gap sizes, gate operation, and climbable objects are assessed against current requirements.
- **Pool structure:** Shell condition, coping, and surrounding paving are examined.
- **Equipment:** Pump, filter, and chlorinator condition are noted along with compliance of electrical installations.
## Compliance with Building Codes and Regulations
Building code compliance is essential for safety, insurance validity, and resale value.
Inspectors identify apparent non-compliance issues that may require rectification or further
specialist assessment.
### National Construction Code Requirements
The National Construction Code (NCC) sets minimum standards for building construction in
Australia. Common compliance concerns include:
- **Smoke alarm requirements:** Interconnected smoke alarms meeting current standards in required locations.
- **Stair and balustrade compliance:** Height, baluster spacing, and handrail requirements for safety.
- **Pool fence compliance:** Critical safety barriers that must meet strict Australian Standards.
- **Fire separation:** Adequate fire barriers between garage and dwelling spaces.
### Identifying Code Violations
Inspectors document apparent code violations that may affect safety or require
rectification.
- **Unpermitted work:** Alterations or additions that may have been completed without proper approval.
- **Substandard construction:** Work that does not appear to meet minimum building standards.
- **Changed requirements:** Older buildings may not meet current codes but were compliant when built.
### Remediation Guidance
When non-compliance issues are identified, the inspection report provides guidance on:
- The nature and severity of the non-compliance
- Potential safety implications
- Recommended actions including specialist assessments
- Whether rectification is mandatory or advisory
## Timber Pest Inspections
[Timber pest inspections](/timber-pest-inspections) are typically conducted separately or as an add-on to building
inspections, assessing the property for termites, borers, and wood decay fungi that can
cause serious structural damage.
### Termite Detection
Termites cause approximately $1.5 billion in damage to Australian properties annually,
making detection critical.
- **Active termite detection:** Evidence of current termite activity including live termites, fresh mud tubes, and recent damage.
- **Previous termite damage:** Past infestation evidence that may have compromised structural timber.
- **Conducive conditions:** Factors that increase termite risk including moisture, timber to ground contact, and inadequate ventilation.
- **Termite management systems:** Presence and condition of existing chemical or physical barriers.
### Borer Assessment
Wood boring beetles can cause significant timber damage over time.
- Active borer infestation signs including fresh dust and exit holes
- Historical borer damage assessment
- Species identification where possible
- Extent of damage and structural implications
### Wood Decay Fungi
Fungal decay compromises timber strength and indicates moisture problems.
- **Dry rot:** Despite its name, requires moisture to develop and can severely weaken timber.
- **Wet rot:** Occurs in consistently damp timber and is common in poorly ventilated areas.
- **Moisture source identification:** Understanding the water source causing fungal growth.
### Other Pest Evidence
While not always included in timber pest inspections, evidence of other pests may be noted.
- Rodent activity signs including droppings, gnawing damage, and nesting
- Bird nesting in roof spaces
- Possum activity and damage
- General pest conducive conditions
## Building Inspection Comprehensive Checklist
The following table summarises the key areas covered in a comprehensive building inspection,
providing a reference for what to expect from a professional inspection report.
| Inspection Area | Components Examined | Common Issues Found |
| ------------------- | ---------------------------------------------- | ----------------------------------------------------- |
| Foundation | Slab, footings, stumps, piers, subfloor | Cracking, settlement, moisture, timber decay |
| External Walls | Brick, cladding, render, weatherboards | Cracking, rising damp, deterioration, movement |
| Roof Structure | Trusses, rafters, battens, bracing, tie-downs | Timber decay, termite damage, inadequate bracing |
| Roof Covering | Tiles, metal, gutters, downpipes, flashings | Broken tiles, rust, blocked gutters, poor flashings |
| Internal Walls | Plasterboard, render, timber panelling | Cracks, water damage, mould, structural movement |
| Ceilings | Plasterboard, fibrous plaster, timber | Water staining, sagging, cracking, mould |
| Floors | Concrete, timber, tiles, carpet, vinyl | Unevenness, water damage, wear, squeaking |
| Windows | Frames, glazing, hardware, seals, screens | Rot, corrosion, seal failure, operational issues |
| Doors | Frames, panels, hardware, seals, screens | Rot, damage, binding, hardware failure |
| Electrical | Switchboard, wiring, power points, fixtures | Missing RCDs, old wiring, damaged power points |
| Plumbing | Pipes, fixtures, hot water, drainage | Leaks, corrosion, poor pressure, slow drainage |
| Wet Areas | Bathrooms, laundry, kitchen waterproofing | Failed waterproofing, mould, grout deterioration |
| HVAC | Heating, cooling, ventilation systems | Age, condition, inadequate ventilation |
| Garage | Structure, doors, fire separation, electrical | Door issues, inadequate fire separation |
| Decks and Balconies | Structure, decking, balustrades, waterproofing | Timber decay, non-compliant balustrades |
| Fencing | Boundary fencing, pool fencing, gates | Leaning, rot, pool fence non-compliance |
| Site Drainage | Surface drainage, stormwater, retaining walls | Poor falls, blocked drains, retaining wall failure |
| Timber Pests | Termites, borers, wood decay fungi | Active infestation, past damage, conducive conditions |
## What the Inspection Report Contains
A professional building inspection report provides comprehensive documentation of the
inspector's findings, enabling informed decision-making for property purchases, sales, or
maintenance planning.
### Executive Summary of Findings
The report begins with a clear summary highlighting the most significant findings.
- **Overall property condition:** A general assessment of the property's condition for its age and type.
- **Major defects:** Significant issues requiring immediate attention or substantial expenditure.
- **Safety hazards:** Any immediate safety concerns that require urgent action.
- **Recommendations:** Prioritised list of actions recommended for the buyer or owner.
### Detailed Issue Descriptions with Photographs
Each defect or concern is documented thoroughly with supporting visual evidence.
- **Location:** Precise description of where the issue was found within the property.
- **Description:** Clear explanation of the defect in plain language.
- **Photographs:** Multiple images documenting the issue from relevant angles.
- **Severity rating:** Classification of the defect's seriousness and urgency.
### Professional Repair Recommendations with Cost Estimates
Quality inspection reports provide guidance on addressing identified issues.
- **Recommended repairs:** Specific actions needed to rectify each defect.
- **Tradesperson required:** The type of qualified professional needed for repairs.
- **Cost estimates:** Approximate repair costs to assist with budgeting and negotiations.
- **Priority rating:** Urgency classification from immediate to routine maintenance.
### Code Compliance Information
The report identifies apparent non-compliance with building codes and safety regulations.
- Current code requirements that may not be met
- Safety compliance issues requiring rectification
- Potentially unpermitted work requiring investigation
- Recommendations for compliance verification or rectification
### Timber Pest Inspection Results
If a [combined building and pest](/building-and-pest-inspections) inspection was conducted, pest findings are included.
- Termite activity status and locations
- Evidence of borer or fungal decay
- Conducive conditions increasing pest risk
- Existing termite management systems
- Treatment and management recommendations
### Limitations and Exclusions
Professional reports clearly state the inspection's scope and limitations.
- Areas that could not be accessed or fully inspected
- Items outside the inspection scope
- Recommendations for further specialist inspections
- Weather and site conditions affecting the inspection
## Key Takeaways
- A building inspection provides a comprehensive assessment of property condition covering structure, services, interior, exterior, and safety compliance.
- Structural integrity assessment includes foundations, walls, roofing, and floors to identify defects that could affect safety and value.
- Electrical and plumbing systems are evaluated for safety hazards, code compliance, and functional condition.
- Interior and exterior conditions including water damage, mould, and weather protection are thoroughly documented.
- Outdoor structures including garages, decks, and pools are assessed for safety, condition, and compliance.
- Building code compliance issues are identified to highlight safety concerns and potential rectification requirements.
- Timber pest inspections detect termites, borers, and wood decay that can cause serious structural damage.
- The inspection report provides detailed findings with photographs, repair recommendations, and cost estimates.
- Professional inspections protect buyers from hidden defects and provide leverage for informed negotiations.
## Frequently Asked Questions
###
How much does a building inspection cost in Australia?
**Short answer:** A standard [pre-purchase building inspection](/pre-purchase-inspections) typically
costs between $400 and $700 for a house, with combined building and pest inspections
ranging from $500 to $900.
Costs vary depending on property size, location, age, and complexity. Larger properties,
those with multiple buildings, or older homes requiring more detailed assessment may
cost more. Some inspectors charge additional fees for thermal imaging, drone roof
inspections, or detailed asbestos assessments. Given that defects found can save tens of
thousands in unexpected repairs, the inspection fee represents excellent value for
protecting your property investment.
### How long does a building inspection take?
**Short answer:** A thorough building inspection typically takes between
1.5 to 3 hours on site for an average residential property.
The duration depends on the property size, age, construction type, and accessibility of
areas such as roof spaces and subfloors. A standard three-bedroom house usually takes
around 2 hours. Larger properties, older homes, or those with multiple buildings may
require 3 to 4 hours. The inspector should not be rushed as thoroughness is essential
for identifying all potential issues. After the inspection, a detailed written report is
typically provided within 24 to 48 hours.
###
What is the difference between a building inspection and a pest inspection?
**Short answer:** A building inspection assesses the structural condition
and defects of a property, while a pest inspection specifically looks for termites,
borers, and wood decay fungi.
Building inspections cover structural elements, roofing, electrical, plumbing, interior
and exterior finishes, and compliance issues. Pest inspections focus specifically on
timber pests and conditions that attract them. Both are conducted according to different
Australian Standards: AS 4349.1 for building inspections and AS 4349.3 for timber pest
inspections. When purchasing a property, a combined building and pest inspection is
recommended to provide comprehensive coverage of potential issues.
### Can I attend the building inspection?
**Short answer:** Yes, buyers are strongly encouraged to attend the
building inspection to see issues firsthand and ask questions directly.
Attending the inspection provides valuable insights that cannot be fully conveyed in a
written report. You can see defects in context, understand their severity, and ask the
inspector questions about specific concerns. Most inspectors welcome buyer participation
and will explain their findings in plain language. Attending also helps you understand
the property's maintenance requirements and any immediate concerns that need addressing.
###
What qualifications should a building inspector have?
**Short answer:** Building inspectors should hold relevant building
qualifications, state licensing where required, and carry professional indemnity
insurance.
In Australia, inspector qualifications vary by state. Most hold qualifications such as a
Diploma of Building and Construction or equivalent. Membership in professional
associations such as the Master Builders Association or Housing Industry Association
indicates commitment to professional standards. Professional indemnity insurance is
essential to protect both inspector and client. Experienced inspectors often have
backgrounds in building, construction management, or related trades, providing practical
knowledge of construction methods and common defects.
###
What happens if major defects are found during inspection?
**Short answer:** Finding major defects gives you leverage to renegotiate
the purchase price, request repairs, or withdraw from the purchase if the issues are too
significant.
The inspection report provides documented evidence of defects that can be used in
negotiations with the vendor. Options include requesting a price reduction to cover
repair costs, asking the vendor to complete repairs before settlement, or withdrawing
from the contract during the cooling-off period. For significant structural issues,
specialist assessments from engineers or relevant tradespeople may be recommended to
fully understand the scope and cost of repairs before making final decisions.
###
Are building inspections mandatory when buying a home in Australia?
**Short answer:** Building inspections are not legally mandatory but are
strongly recommended to protect your investment and avoid unexpected repair costs.
While not required by law, most property lawyers and real estate experts strongly advise
building inspections for all property purchases. Some lenders may require an inspection
as a condition of loan approval. The inspection identifies defects that could cost
thousands to repair, provides leverage for price negotiations, and gives peace of mind
about the property's condition. Skipping an inspection to save a few hundred dollars
could result in purchasing a property with hidden problems worth tens of thousands in
repairs.
### What does a building inspection NOT cover?
**Short answer:** Building inspections do not cover concealed areas,
cosmetic finishes, appliances, or specialist systems requiring licensed assessments.
Standard building inspections are visual assessments of accessible areas only. Concealed
areas such as inside walls, under fixed floor coverings, or in locked rooms cannot be
inspected. Cosmetic finishes, paint condition, and decorative features are generally
outside the scope. Appliances, swimming pool equipment, air conditioning efficiency, and
security systems may require specialist assessment. Asbestos identification, soil
conditions, and detailed electrical or plumbing testing require licensed specialists.
The inspection report will clearly state limitations and recommend additional
inspections where warranted.
## References and Resources
- [ National Construction Code (NCC) ](https://ncc.abcb.gov.au/)
- [ Australian Building Codes Board (ABCB) ](https://www.abcb.gov.au/)
- [ Standards Australia (AS 4349.1 and AS 4349.3) ](https://www.standards.org.au/)
- [ NSW Fair Trading ](https://www.fairtrading.nsw.gov.au/)
- [ Queensland Building and Construction Commission (QBCC) ](https://www.qbcc.qld.gov.au/)
- [ Victorian Building Authority (VBA) ](https://www.vba.vic.gov.au/)
- [ Building and Energy Western Australia ](https://www.commerce.wa.gov.au/building-and-energy)
For a complete overview, see our [guide to pre-purchase building and pest inspections](/guides/pre-purchase-building-pest-inspection-guide).
### Expert Witness Testimony Process in Australia
Source: https://ownerinspections.com.au/articles/expert-witness-testimony-process
Published: 2025-02-25 | Updated: 2026-02-09 | Category: Expert Witness
Author: Maison Azdari
The expert witness testimony process in Australia involves five main stages: engagement of the expert, preparation of the expert report, submission of the report to the court, oral testimony during hearings, and cross-examination by the opposing party. Expert witnesses provide independent, fact-based opinions on technical matters such as building defects, structural integrity, construction compliance, and property valuations. Their primary duty is to assist the court, not to advocate for the party that engaged them.
Understanding the testimony process is important for anyone involved in a property dispute, whether you are a homeowner, builder, developer, or property manager. Knowing what to expect at each stage helps you prepare effectively and work productively with your expert witness to support your case.
## What Is an Expert Witness?
An expert witness is a professional with specialised knowledge in a particular field who provides independent, impartial opinions in legal proceedings. Unlike a regular witness who testifies about what they personally observed, an expert witness bases their testimony on professional expertise, analysis, and industry knowledge.
### Qualifications of an Expert Witness
### Areas of Expertise in Property and Construction
## The Five Stages of Expert Witness Testimony
The expert witness testimony process follows a structured framework to make sure legal proceedings are fair and transparent.
## Understanding the Expert Witness Report
The expert report is the foundation of the testimony and must be structured, comprehensive, and legally compliant.
### Components of an Expert Witness Report
Courts favour clear, well-documented evidence over unsupported assertions. Written evidence should include supporting data, technical explanations, and references to applicable standards and regulations.
## Expert Witness Code of Conduct
In Australia, expert witnesses must comply with codes of conduct that vary by jurisdiction. In Victoria, the Form 44A Expert Witness Code of Conduct applies to VCAT proceedings.
### Key Obligations
## Key Qualities of Effective Expert Testimony
## Expert Witness in Different Australian Jurisdictions
For a complete overview, see our [guide to expert witness reports for building disputes](/guides/expert-witness-building-disputes-guide).
### Tips for a Successful Off the Plan Property Purchase
Source: https://ownerinspections.com.au/articles/tips-for-a-successful-off-the-plan-property-purchase
Published: 2025-02-20 | Updated: 2026-02-12 | Category: Pre-Purchase Inspections
Author: Maison Azdari
Buying off the plan is an increasingly popular way to enter the Australian property market. Whether you are a first-home buyer looking for a modern home or an investor seeking capital growth and rental returns, purchasing a property before it is built can offer real advantages. Working with an experienced buyer's agent, such as [Moove](https://www.moove.com.au/), can also help buyers evaluate developments, understand contract terms, and make more informed purchasing decisions. However, it also carries unique risks that require thorough preparation.
The key to a successful off-the-plan purchase lies in doing your homework, understanding the financials, evaluating the design carefully, managing the construction waiting period, and seeking professional guidance where needed. This guide covers practical tips to help you navigate each stage of the process with confidence.
## Do Your Due Diligence
### Research the Developer
The developer is central to the success of your off-the-plan purchase. Before signing anything, take the time to research their background thoroughly.
### Research the Location
The location of your property will have a significant impact on its long-term value and liveability. Consider the following:
### Scrutinise the Contract
The contract of sale for an off-the-plan property is typically more complex than for an established home. Pay close attention to:
## Understand the Financials
### Secure Pre-Approval
Before committing to an off-the-plan purchase, obtain pre-approval from your lender. This gives you a clear understanding of your borrowing capacity and shows the developer that you are a serious buyer. Keep in mind that pre-approval is typically valid for a limited period, and your financial situation will be reassessed at settlement.
### Factor in Extra Costs
The purchase price is only part of the total cost. Budget for the following additional expenses:
### Consider Deposit Alternatives
Some developers accept deposit bonds or bank guarantees instead of a cash deposit. This can free up your funds during the construction period, allowing you to keep your money in a savings account or offset account. Discuss the available options with your solicitor and financial adviser to determine the best approach for your situation.
## Evaluate the Design and Finishes
### Review Floor Plans Carefully
Study the floor plans in detail. Consider the room sizes, layout, natural light, ventilation, and storage. Compare the plans with the display suite if one is available, keeping in mind that display suites are often styled and furnished to make spaces appear larger than they are.
### Scrutinise the Inclusions
The schedule of finishes and inclusions is a critical document. It outlines exactly what will be provided in the finished property, from the brand and model of appliances to the type of flooring, benchtops, and tapware. Review it carefully and ask questions about anything that is vague or unspecified. Ensure that what is shown in the display suite or marketing materials matches the schedule of inclusions in the contract.
### Visualise the End Product
Artist impressions and 3D renderings are marketing tools designed to present the property in its best light. They may not accurately represent the final product. Where possible, visit the developer's completed projects to get a realistic sense of their build quality and finishing standards. Ask to see a sample of the materials and finishes that will be used in your property.
## Manage the Waiting Period
### Stay in Touch with Construction Updates
Many developers provide regular construction updates to buyers, including photographs, progress reports, and milestone notifications. Stay engaged with these updates and keep records of all communications. If updates are not provided regularly, request them. Being informed about the progress of construction can help you plan ahead and identify potential issues early.
### Plan for Delays
Construction delays are common in off-the-plan purchases. Weather events, supply chain disruptions, and labour shortages can all push back completion dates. Build a financial buffer to accommodate potential delays, and avoid making commitments such as ending a lease or selling your current property based solely on the estimated completion date.
### Prepare for the Pre-Settlement Inspection
Before you settle on your off-the-plan property, you will have the opportunity to conduct a [pre-settlement inspection](/apartment-pre-settlement). This is your chance to walk through the finished property and check that it has been built in accordance with the plans and specifications. Engaging a professional building inspector for this step is highly recommended.
## Leverage Professional Guidance
Navigating an off-the-plan purchase is best done with the support of experienced professionals. Consider engaging the following:
### New Construction Methods: Which Is Right for Your Dream Home?
Source: https://ownerinspections.com.au/articles/new-construction-methods-which-is-right-for-your-dream-home
Published: 2025-02-19 | Updated: 2026-02-09 | Category: New Construction
Author: Maison Azdari
Modern methods of construction (MMC) involve manufacturing building components or entire modules in a controlled factory environment before assembling them on-site. In Australia, MMC is growing rapidly, with the prefabricated building market projected to reach USD 13.06 billion by 2029. Compared to traditional on-site construction, MMC typically delivers faster build times, improved quality control, and reduced material waste. The right construction method for your home depends on your budget, timeline, design complexity, and personal preferences.
Building a new home is one of the biggest projects most Australians will undertake. Before breaking ground, one of the most important decisions is how the home will be built. Traditional on-site construction has been the standard for decades, but modern methods are offering a compelling alternative. This guide walks you through both approaches, compares the key MMC techniques available, and helps you decide which is the best fit for your project.
## Traditional On-Site Construction
Traditional construction involves building the home entirely on the property. Workers arrive daily, materials are delivered to the site, and the home is constructed step by step from foundation through to completion.
## Modern Methods of Construction: Overview
Modern methods of construction represent a shift towards a more industrialised approach to homebuilding. The core concept is prefabrication and off-site construction, where key components of the home are manufactured in a controlled factory environment. These components are then transported to the building site for fast, efficient assembly.
### Key Benefits of MMC
## MMC Techniques Compared
## Modular Construction Explained
Modular construction is the most widely adopted form of MMC in Australia. It involves building sections of a home, from individual wall panels to complete rooms, in a controlled factory setting.
### Panelised Construction
Panelised construction prefabricates walls, floors, and roof panels to precise specifications in a factory. The panels are delivered to the site and assembled by a construction crew. This approach offers a balance between speed and customisation, as some on-site adjustments are still possible during assembly.
### Volumetric Construction
Volumetric construction takes prefabrication further by building entire three-dimensional modules in a factory. These complete rooms or sections are transported to the site and connected together. This method requires minimal on-site work, making it the fastest MMC option.
## Other MMC Techniques
### Insulating Concrete Forms (ICF)
ICF uses prefabricated forms made of insulating polystyrene foam that are stacked and then filled with concrete. The result is high-performance walls that offer superior strength, insulation, soundproofing, and fire resistance. ICF is well-suited to Australian conditions, particularly in areas prone to extreme heat, bushfire, or severe weather.
### 3D-Printed Construction
While still in its early stages in Australia, 3D-printed construction uses large-scale printers to create building structures layer by layer using concrete or other printable materials. The technology is advancing quickly and has the potential to reduce construction costs and timelines for simpler building designs.
## Traditional vs MMC Comparison
## Choosing the Right Method for Your Home
Selecting the right construction method depends on your specific project needs. Consider these factors:
### What Is Drywall? How It Works and Why It Is Used in Construction
Source: https://ownerinspections.com.au/articles/what-is-drywall
Published: 2025-02-14 | Updated: 2026-05-26 | Category: New Construction
Author: Maison Azdari
Drywall, also written as dry wall, is the panel material used to create smooth internal walls and ceilings. In Australia, drywall is more commonly called plasterboard, and many people also use the brand name Gyprock when talking about plasterboard wall and ceiling linings.
Plasterboard is lightweight, affordable, quick to install, and available in specialised types including moisture-resistant, fire-rated, and soundproof varieties. In Australia, professional installation typically costs between $30 and $60 per square metre.
Learn How to
Document Defects
}
buttonHref="/articles/document-building-defects-legal-claim"
variant="secondary"
/>
Plasterboard has been the dominant wall and ceiling material in Australian construction for decades. It replaced the older and more labour-intensive wet plaster method, offering builders and homeowners a faster, more cost-effective way to finish interior spaces. For home buyers, renovators and property owners, plasterboard is not just a wall finish. Cracks, sagging ceilings, mould marks, water stains and poor patching can point to leaks, movement, poor installation or hidden defects.
## What Is Drywall?
Drywall, also called plasterboard, gypsum board, or by the brand name Gyprock in Australia, is a gypsum-based building panel used for internal walls, ceilings and partitions. Australian and New Zealand Standard [AS/NZS 2588:2018](https://codehub.building.govt.nz/assets/_generated_pdfs/25882018-asnzs-18071.pdf) describes gypsum plasterboard as a lining material for walls, ceilings and partitions that provides a surface suitable for decorative finishes. It is used to create smooth, flat surfaces for interior walls and ceilings. The material is lightweight but strong enough to handle normal household wear.
A standard plasterboard sheet has a gypsum core pressed between paper liners. Once fixed to a frame, the joins are taped, coated with jointing compound, sanded and finished with paint or another decorative treatment.
In everyday Australian language, these terms are often used for the same type of wall lining:
| Term | Meaning in Australia |
| ------------- | ------------------------------------------------- |
| Drywall | Common overseas term, especially in North America |
| Dry wall | Search spelling variation of drywall |
| Plasterboard | Standard Australian term |
| Gyprock | Brand name often used like a generic term |
| Gypsum board | Technical material-based term |
| Plaster board | Spaced variation of plasterboard |
## Brief History of Drywall
Drywall was invented in 1916 as a faster and more affordable alternative to traditional wet plaster walls. It gained wide adoption during the housing booms of the mid-20th century, particularly after World War II, when the demand for rapid construction methods was at its peak. Today, plasterboard is a standard part of building practices across Australia and the world.
### What Is Drywall Called in Australia?
Drywall is usually called plasterboard in Australia. Gyprock is also widely used because CSR Gyprock is a leading plasterboard brand with plasterboard, compounds, cornices and finishing products used across Australian construction.
## Drywall vs Plaster
Drywall and plaster are not the same. Drywall or plasterboard is installed as sheets. Traditional plaster is applied wet over a substrate and built up in coats.
| Feature | Drywall or plasterboard | Traditional plaster |
| ------------------ | -------------------------------------------------- | -------------------------------------------------- |
| Main form | Pre-made gypsum board sheets | Wet plaster applied in layers |
| Installation speed | Faster sheet installation | Slower, more labour heavy |
| Finish | Smooth after jointing and sanding | Smooth or decorative finish |
| Repairs | Small holes and cracks are usually easier to patch | Repairs can need more trade skill |
| Common use | Modern Australian homes and commercial interiors | Older homes, heritage work and decorative finishes |
Traditional plaster can be durable, but it often takes longer to repair or replace. Plasterboard is faster to install, easier to cut and widely available for modern wall and ceiling work.
## Drywall vs Plasterboard vs Gyprock
Drywall and plasterboard generally refer to the same building product. The main difference is regional wording.
| Comparison | Answer |
| ------------------------------------ | ----------------------------------------------------------------------------- |
| Drywall vs plasterboard | Same general product, different common wording |
| Is drywall the same as plasterboard? | Yes, in most Australian home contexts |
| Is drywall the same as Gyprock? | Gyprock is a brand of plasterboard, not the only plasterboard product |
| Gypsum board vs plasterboard | Gypsum board describes the material, plasterboard is the common building term |
| Drywall Australia | Usually called plasterboard or Gyprock |
[CSR Gyprock](https://www.gyprock.com.au/products/residential-plasterboard) states that plasterboard is used as an internal wall and ceiling lining in residential and commercial lightweight framed construction.
## What is Drywall Made of?
Drywall is made mainly from gypsum plaster formed into a flat board and faced with paper liners. AS/NZS 2588:2018 covers gypsum plasterboard requirements for domestic, commercial and industrial applications.
The exact formulation changes by product type. Moisture-resistant plasterboard, fire-rated plasterboard, acoustic plasterboard and impact-resistant plasterboard use different core treatments, paper liners or additives to suit their purpose.
For example, moisture-resistant plasterboard may have a treated core, face and back to resist moisture and humidity in bathrooms, kitchens and laundries.
## Types of Drywall Panels
Different plasterboard types suit different rooms and performance needs.
| Type of plasterboard | Common use | What to check |
| ------------------------------- | ------------------------------------------------------------- | ------------------------------------------------ |
| Standard plasterboard | Bedrooms, living rooms, hallways and dry internal areas | Not suited to wet or damp areas |
| Moisture-resistant plasterboard | Bathrooms, laundries, kitchens and other wet areas | Check correct board type and waterproofing |
| Fire-rated plasterboard | Garages, separating walls, stair areas and fire-rated systems | Check product and system requirements |
| Acoustic plasterboard | Bedrooms, media rooms, offices and shared walls | Works best with the right framing and insulation |
| Impact-resistant plasterboard | Hallways, rentals, schools and busy commercial spaces | Useful where walls may be bumped or damaged |
Water-resistant boards are made with special materials to improve moisture-resistant properties in damp areas such as bathrooms and kitchens, and references AS/NZS 2588 for gypsum plasterboard.
## Common Thicknesses and Sizes
In Australia, plasterboard comes in standard thicknesses and sheet sizes:
Standard sheet sizes are 1200mm x 2400mm and 1200mm x 3000mm, though custom sizes can be ordered for specific projects.
## Common Plasterboard Thickness Australia
Plasterboard thickness in Australia depends on the product, application and framing. Common residential and commercial options include 10mm and 13mm boards, while some fire, acoustic or impact systems may use thicker or multiple layers.
| Thickness | Common Australian use | Source-backed note |
| ------------------ | ----------------------------------------------------------------- | -------------------------------------------------------------------------------------------------------------------------------------------------------------------------------------------------------------------------------------------------------------------------------------------------------------------------------------------- |
| 10mm plasterboard | General residential walls and some ceilings | Gyprock Plus is a 10mm plasterboard used as a residential wall lining and may be used on ceilings with 450mm joist centres. |
| 10mm ceiling board | Residential ceilings with suitable joist spacing | Gyprock Supaceil is a 10mm residential ceiling lining designed to span up to 600mm joist centres. |
| 13mm plasterboard | Commercial walls and ceilings, and more solid residential linings | Gyprock Standard 13mm is used as a wall and ceiling lining in commercial applications and can also be used in residential work for a more solid lining. |
The correct thickness depends on wall or ceiling use, joist spacing, fire rating, acoustic needs, moisture exposure and the manufacturer’s installation guide.
## What Is Joint Compound Called in Australia?
Joint compound is commonly called plasterboard jointing compound, plaster compound, base coat, top coat or finishing compound in Australia. Gyprock lists plasterboard, compounds, cornices and accessories as part of its product range.
Jointing compound is used over plasterboard joins, screw heads and patches. A poor jointing job may show as ridges, bubbling tape, cracking, shadow lines or uneven paint finish once light hits the wall.
## The Installation Process
Book a Defect
Investigation Report
}
buttonHref="/defect-investigation-reports"
variant="secondary"
/>
## Finishing Levels Explained
Plasterboard finish quality affects how the wall looks after painting. Poor finish work can become very clear in rooms with bright natural light, downlights or gloss paint.
| Finish level | Where it may be used |
| ------------ | ------------------------------------------------------------ |
| Level 1 | Concealed spaces or service areas |
| Level 2 | Garages or areas where appearance is less visible |
| Level 3 | Areas receiving heavy texture or some wall coverings |
| Level 4 | Common painted residential and commercial walls |
| Level 5 | High-visibility areas with strong light or glossier finishes |
## Plasterboard Defects Buyers Should Check
A plasterboard wall can look simple, but it may show clues about wider building problems.
Check for:
- Cracks along wall and ceiling joints
- Diagonal cracks around doors or windows
- Nail pops or screw pops
- Sagging plasterboard ceilings
- Water stains on walls, ceilings or cornices
- Bubbling paint or swollen skirting boards
- Mould on or near plasterboard
- Uneven surfaces or patchy repairs
- Gaps at cornices or wall junctions
- Standard board used where a moisture-resistant board should be used
NSW Government advises buyers to check for damp or mould along skirting boards, walls and ceilings, and to be cautious of paint jobs used to cover mould.
If cracks, sagging ceilings, water stains or uneven plasterboard finishes are visible, a [defect investigation report](/defect-investigation-reports) may help confirm whether the issue is cosmetic or linked to a deeper building problem.
## Wet Areas, Bathrooms and Moisture-Resistant Plasterboard
Bathrooms, laundries and kitchens need the right plasterboard type, ventilation and waterproofing. If there are mould marks, musty smells or recurring damp patches, a [mould inspection](/mould-inspections) can help identify likely moisture sources.
The Victorian Building Authority states that compliant waterproofing in wet areas helps prevent mould growth and structural damage, and it outlines NCC requirements for waterproof or water-resistant areas in buildings.
Moisture-resistant plasterboard is not a replacement for waterproofing. It is part of the wall system, while waterproofing membranes, sealants, tiles and correct installation all affect long-term performance.
## Benefits of Drywall in Construction
## Maintenance and Repair
Proper maintenance extends the life of plasterboard and prevents costly repairs:
If a room smells musty, has wall marks or feels damp, this guide to [hidden home issues](/articles/hidden-home-issues-living-room-furniture) explains why the problem may not be the furniture or paintwork alone. For more on identifying moisture-related issues, see our guide to [mould inspection techniques](/articles/mould-inspection-techniques-tools-and-methods).
## Cost Considerations
Plasterboard cost changes with location, access, sheet type, ceiling height, finish level, removal work and trade availability.
For budget checks, seek current local quotes rather than relying on a single national figure. Specialist products such as fire-rated, acoustic or moisture-resistant plasterboard may cost more than standard board. Repairs may also cost more if the plasterboard damage is caused by a leak, mould, termite activity or movement in the building.
## Why This Matters During a Building Inspection
Plasterboard often hides framing, plumbing, wiring, insulation and waterproofing. A visual inspection cannot see inside every wall, but surface defects can help guide further investigation.
Owner Inspections checks visible wall and ceiling linings during pre-purchase inspections, building and pest inspections, new construction stage inspections, mould inspections and defect investigation reports.
Common inspection notes may include:
- Visible plasterboard cracking
- Signs of moisture entry
- Mould-like staining
- Sagging ceiling lining
- Poor joint setting
- Uneven finishes
- Damaged cornices
- Possible hidden leaks
- Defects that need a builder or trade review
For property buyers, these findings can help guide repair budgeting, contract decisions and further specialist checks.
## Getting the Most Value from Your Home and Building Investment
Drywall may be a common search term, but in Australia the word most buyers, builders and inspectors use is plasterboard. Knowing the difference between drywall, plasterboard and Gyprock can help you read quotes, understand inspection reports and ask better questions before buying or renovating.
Before purchasing a home, look closely at walls and ceilings for cracking, water stains, mould, sagging, patching and uneven finishes. These signs may be minor, but they may also point to leaks, movement, poor workmanship or hidden defects.
[Owner Inspections](/) provides independent property inspections across NSW, Victoria and Queensland. Book a [pre-purchase inspection](/pre-purchase-inspections), [building and pest inspection](/building-and-pest-inspections), [new construction stage inspection](/new-construction-stage-inspections), [mould inspection](/mould-inspections) or [defect investigation report](/defect-investigation-reports) to understand what is happening behind the surface.
Contact Owner
Inspections
}
buttonHref="/contact"
variant="primary"
/>
### Building Inspection Glossary: 80+ Terms Every Australian Property Buyer Should Know
Source: https://ownerinspections.com.au/articles/building-inspection-glossary
Published: 2025-02-12 | Category: General Maintenance
Author: Maison Azdari
Building inspection reports use specialised language that can be confusing for buyers, sellers, and homeowners who do not work in the construction industry. This glossary defines more than 80 terms commonly found in Australian property inspection reports, covering inspection types, Australian Standards, defect classifications, regulatory bodies, building elements, and legal terminology used in construction disputes.
Use it as a quick reference when reading your inspection report, preparing for a property purchase, or communicating with your inspector.
## Types of Building Inspections
When buying, building, or maintaining a property in Australia, several types of inspections may be relevant depending on your situation. Each inspection serves a different purpose and may follow a specific Australian Standard.
## Australian Standards Referenced in Reports
Australian Standards provide the technical framework that inspectors follow when conducting assessments and writing reports. Your inspection report will frequently reference these standards by number.
## Defect Classifications and Severity Levels
Every inspection report classifies findings by severity. Understanding these classifications helps you prioritise which items need immediate attention and which can wait.
## Common Building Defects and Issues
These are the specific defect types and building issues you are most likely to encounter in an Australian inspection report.
## Construction Stages and Milestones
If you are building a new home, these are the key stages at which independent inspections are recommended. Each stage represents a point where defects can still be identified and corrected before the next phase of work conceals them.
## Structural Elements and Building Components
These terms describe the physical elements of a building that inspectors assess for condition, compliance, and structural adequacy.
## Building Materials and Construction Methods
Understanding how a building is constructed helps you make sense of inspection findings. These terms describe common construction methods and materials found in Australian homes.
## Moisture, Pest, and Environmental Terms
Water and pests are the two biggest threats to Australian homes. These terms cover the most common moisture and pest issues identified in inspection reports.
## Regulatory Bodies and Licensing Authorities
Each Australian state has its own authority responsible for regulating the building industry, licensing builders, and handling complaints. Your inspector should hold a current licence from the relevant body.
## Legal Terms and Dispute Resolution
If a building dispute arises, these are the terms and processes you will encounter. Understanding them helps you prepare for tribunal proceedings and communicate effectively with legal and building professionals.
## Certificates, Reports, and Documentation
These are the key documents you may encounter during the buying, building, or dispute resolution process.
## Inspection Types at a Glance
The following table compares the most common building inspection types in Australia, including when they are typically needed and which Australian Standard applies.
## Australian Standards Quick Reference
The table below lists the Australian Standards most commonly referenced in building inspection reports, along with a brief description of each.
For a complete overview, see our [guide to pre-purchase building and pest inspections](/guides/pre-purchase-building-pest-inspection-guide).
### Dilapidation Report Cost: Factors That Affect Pricing
Source: https://ownerinspections.com.au/articles/dilapidation-report-cost
Published: 2025-01-08 | Updated: 2026-05-25 | Category: Dilapidation Reports
Author: Maison Azdari
Dilapidation reports are one of the most effective ways to protect your property before nearby construction begins. But before commissioning one, most property owners want to know exactly what they will pay and what drives the final price.
The cost of a dilapidation report in Australia ranges from around $500 for a basic residential inspection to well over $5,000 for complex commercial properties. Where your report falls within that range depends on a handful of factors, including property type, location, inspection scope, and how quickly you need the report delivered.
> A dilapidation report typically costs far less than the legal fees and repair bills you could face without one. Think of it as a small investment that protects you from disputes worth tens of thousands of dollars.
Many people also search for dilapidation survey cost, dilapidation report cost [Sydney](/nsw/building-inspections-sydney), or how much does a dilapidation report cost because they want a clear price before construction, demolition, excavation, or heavy machinery begins near a property. This guide breaks down every pricing factor you should consider, compares costs across major Australian cities, and highlights hidden charges that can inflate your final bill. Whether you are a homeowner, builder, or developer, you will walk away knowing what to budget and when to book professional dilapidation reports before work starts.
Get a Dilapidation
Report Quote
}
buttonHref="/dilapidation-reports"
variant="secondary"
/>
## What Is a Dilapidation Report and What It Does?
A [dilapidation report](/articles/ultimate-guide-to-dilapidation-reports) is a detailed record of a property's existing condition before construction or demolition work starts nearby. It documents cracks, defects, surface damage, and structural features using photographs, measurements, and written descriptions.
The report acts as a baseline. If damage occurs during construction, you can compare the post-construction state against the original report to determine whether the building works caused the problem. Without this documentation, proving construction-related damage becomes extremely difficult.
The cost reflects the level of professional expertise, equipment, time on site, and the detail required in the final document. A rushed, superficial report costs less but offers weaker protection. A thorough report prepared by a licensed inspector costs more but stands up in legal proceedings and insurance claims.
## Dilapidation Survey Cost vs Dilapidation Report Cost
A dilapidation survey cost usually refers to the price of inspecting and recording a property’s existing condition, while the dilapidation report cost usually includes the final written report, photos, defect notes, and supporting documentation.
In everyday use, many owners, builders, and developers use the terms dilapidation survey and dilapidation report to mean the same thing. The key difference is that the survey is the inspection process, while the report is the finished condition record.
| Term | What it means | What affects the cost |
| ------------------------------------- | -------------------------------------------------------------------------- | -------------------------------------------------------------- |
| Dilapidation survey | The on-site inspection and condition recording process | Property size, access, number of areas, inspector time |
| Dilapidation report | The final written and photographic document | Report detail, number of photos, defect schedule, review time |
| Building dilapidation survey | A survey focused on buildings near construction, excavation, or demolition | Structural risk, neighbouring properties, site complexity |
| Construction site dilapidation report | A report prepared before works begin around a construction site | Council conditions, public land, adjoining properties, urgency |
For most clients, the quote should cover both the survey and the report. Before booking, ask whether the price includes internal and external areas, photos, measurements, return visits, and any post-construction comparison.
[NSW planning consent examples](https://www.planning.nsw.gov.au/sites/default/files/2023-03/standard-conditions-of-consent-residential.pdf) state that a dilapidation report may need to be prepared before site work starts and may need to detail the structural condition of adjoining buildings, structures, works, and public land.
## Dilapidation Report Cost by Property Type
Property type is the single biggest factor that determines how much you will pay. Larger, more complex buildings take longer to inspect and require more detailed documentation.
### Residential Properties Dipaidation Report Cost
For a standard residential property such as a house, townhouse, or unit, expect to pay between **$500 and $1,500**. The lower end of that range covers smaller homes with straightforward layouts. Larger homes with multiple storeys, extensive external areas, or unusual construction materials push the price towards the higher end.
A thorough residential report may document:
- External walls, fences, garages, driveways, paths, retaining walls, and landscaping
- Internal walls, ceilings, cornices, floors, doors, windows, and wet areas
- Existing cracks, stains, movement, gaps, settlement, and surface damage
- Photo locations, defect descriptions, and measurements where practical
- Weather, access limits, obstructions, and inspector details
A small apartment or unit with limited external exposure may cost as little as $500 to $700. A four-bedroom house on a full block with separate garage, retaining walls, and established landscaping will typically sit between $900 and $1,500.
### Commercial Dilapidation Report Cost
Commercial properties attract higher fees, typically ranging from **$1,500 to $5,000 or more**. The price reflects the scale of the building, complexity of internal layouts, and the presence of specialised features such as loading docks, car parks, plant rooms, and facade systems.
Multi-storey commercial buildings, warehouses with large floor plates, and retail complexes with multiple tenancies all sit at the upper end of the pricing scale. Heritage-listed commercial buildings can exceed $5,000 due to the additional documentation requirements for heritage features.
A commercial dilapidation report often costs more than a residential report because commercial buildings usually have larger floor areas, more access points, more tenants, and more surfaces to document. A small shop or office may only need a straightforward condition record, while a warehouse, industrial site, school, retail centre, or multi-storey building may need a much larger photo schedule.
| Commercial property feature | Why it affects price |
| ----------------------------- | ------------------------------------------------------------------------------------ |
| Multiple tenancies | Access may need to be arranged with several occupants |
| Loading docks and car parks | More external surfaces and hardstand areas need to be photographed |
| Plant rooms and service zones | More technical spaces may need documentation |
| Large facades | More time is needed to record visible cracking, movement, staining, or impact damage |
| Public land nearby | Footpaths, kerbs, pits, drains, and road edges may need to be recorded |
| Post-construction comparison | A second inspection may be needed after works are completed |
Commercial owners should compare scope, not just price. A cheap quote that excludes car parks, external walls, retaining walls, loading areas, or adjoining public assets may leave gaps in the final report.
### Cost Summary by Property Type
| Property Type | Typical Cost Range | Key Cost Drivers |
| ----------------------- | ------------------ | -------------------------------------------- |
| Apartment or unit | $500 - $700 | Limited area, fewer external surfaces |
| Standard house | $700 - $1,200 | Block size, number of storeys, outbuildings |
| Large or luxury home | $1,200 - $1,500+ | Complex layouts, extensive grounds, pools |
| Small commercial | $1,500 - $2,500 | Floor area, internal fitout complexity |
| Large commercial | $2,500 - $5,000+ | Multiple levels, specialised features |
| Heritage building | $2,000 - $5,000+ | Detailed heritage feature documentation |
| Industrial or warehouse | $1,500 - $3,500 | Large floor plates, external hardstand areas |
## Dilapidation Report Cost by City
Location plays a meaningful role in pricing. Capital cities with higher operating costs and greater demand for inspection services tend to charge more. Regional areas may offer lower base prices but can attract travel surcharges if inspectors need to travel significant distances.
### Dilapidation Report Cost Sydney
Sydney sits at the top of the pricing scale, reflecting the city's high operating costs and strong demand driven by ongoing residential and commercial development. The dilapidation report cost Sydney property owners pay is often higher because of dense building sites, access limits, major infrastructure works, and the need to record adjoining properties or public assets.
For a standard Sydney residential property, the cost often starts from around $800 and can rise above $1,500 when the property is large, access is difficult, or the report needs both internal and external coverage. For commercial sites, Sydney reports often start from around $1,800 and may increase where multiple tenancies, car parks, loading areas, or public-facing structures need documentation.
### Melbourne
Melbourne pricing is slightly below Sydney, ranging from **$750 to $2,300+**. The city's extensive suburban development and ongoing transport infrastructure projects keep demand for dilapidation reports consistently high.
Properties near level crossing removal projects and suburban rail loop works are regularly subject to mandatory dilapidation reporting requirements, which has increased the availability of providers and helped moderate pricing somewhat.
### Brisbane
Brisbane reports typically cost between **$700 and $2,000+**. The city's rapid growth, particularly in the lead-up to the 2032 Olympics, has driven significant construction activity and corresponding demand for dilapidation documentation.
Queensland Building and Construction Commission ([QBCC](https://www.qbcc.qld.gov.au/complaints-disputes/building-work-issue/damage-your-property-neighbouring-work)) explains that building work on one property can cause damage to that property or a neighbouring property, which may be treated as consequential damage. A dilapidation report can help provide a clear baseline if cracking, drainage issues, retaining wall movement, driveway damage, water penetration, or other concerns are raised after nearby work.
### Perth
Perth offers some of the more competitive pricing in the capital city market, with reports ranging from **$650 to $1,800+**. The market is influenced by the cyclical nature of Western Australia's construction industry, which is tied to mining sector activity and population growth patterns.
### Adelaide
Adelaide generally has the lowest capital city pricing, with reports costing between **$600 and $1,700+**. The smaller market and lower operating costs contribute to more affordable rates, though availability of qualified inspectors may be more limited for specialised property types.
### City-by-City Pricing Comparison
| City | Residential Range | Commercial Range | Key Market Factors |
| --------- | ----------------- | ---------------- | ------------------------------------------ |
| Sydney | $800 - $1,500+ | $1,800 - $2,500+ | High demand, major infrastructure projects |
| Melbourne | $750 - $1,400+ | $1,700 - $2,300+ | Transport projects, suburban development |
| Brisbane | $700 - $1,300+ | $1,500 - $2,000+ | Olympics preparation, population growth |
| Perth | $650 - $1,200+ | $1,400 - $1,800+ | Mining-linked cycles, competitive market |
| Adelaide | $600 - $1,100+ | $1,300 - $1,700+ | Lower operating costs, smaller market |
## What Affects the Cost of a Dilapidation Report?
The final fee comes down to seven common factors.
| Cost factor | Price impact | What to check before booking |
| -------------------- | --------------------------------------------------- | ------------------------------------------------------------ |
| Property size | Larger sites cost more | Ask what areas are included |
| Property type | Commercial costs more than standard residential | Confirm residential, strata, commercial, or industrial scope |
| Inspection scope | Interior and exterior costs more than exterior only | Ask whether internal rooms are included |
| Location | Sydney and major cities often cost more | Ask about travel and access fees |
| Urgency | Rush reports may cost more | Confirm turnaround time in writing |
| Number of properties | More properties increase total cost | Ask for a multi-property project quote |
| Report quality | Detailed photo reports cost more | Request a sample report |
The cheapest quote is not always the best value. A weak report with limited photos, vague notes, or missing areas may not help much when a damage claim arises.
## How Inspection Scope Affects Pricing
Not all dilapidation reports cover the same ground. The scope of the inspection is something you can influence, and it directly affects both the cost and the level of protection the report provides.
### Basic Exterior-Only Reports
A basic report covering only external surfaces is the most affordable option. It documents the exterior walls, fencing, driveways, footpaths, and any visible structural elements from outside the property. These reports typically cost 20 to 30 percent less than comprehensive reports.
While cheaper, exterior-only reports carry real limitations. Construction vibrations and ground movement can cause internal cracking and damage that is not visible from outside. If you rely solely on an exterior report, you may have no documented baseline for internal damage claims.
### Comprehensive Interior and Exterior Reports
A comprehensive report covers all accessible areas, both inside and out. It documents walls, ceilings, floors, doors, windows, wet areas, and any internal features that could be affected by nearby construction. This is the recommended standard for most situations.
The additional time required to inspect internal areas adds to the cost, but the protection is substantially greater. For a residential property, expect to pay an additional $200 to $400 for full interior coverage compared to an exterior-only report.
### Heritage Building Inspections
Heritage-listed buildings require specialised documentation that goes beyond a standard report. Inspectors must record ornamental features, original materials, heritage fabric, and other elements that hold cultural significance. This detailed work increases both the time on site and the reporting effort.
Heritage reports can cost 30 to 50 percent more than standard reports for comparable property sizes. The [Environmental Planning and Assessment Act 1979 (NSW)](https://legislation.nsw.gov.au/view/html/inforce/current/act-1979-203) and equivalent legislation in other states often impose specific requirements for heritage properties near construction sites.
## Professional Expertise and Its Impact on Cost
The qualifications and experience of the inspector affect both the quality of the report and the price. Choosing the cheapest option is rarely the best strategy when the report may need to hold up in tribunal or court proceedings.
### Licensed Building Inspectors
Licensed building inspectors are qualified to conduct standard dilapidation inspections for most residential and commercial properties. Their rates reflect their training, licensing fees, insurance costs, and ongoing professional development requirements.
For some NSW consent conditions, the report may need to be prepared by a suitably qualified engineer, especially where the condition asks for the structural condition of adjoining buildings, structures, works, or public land. Always check the exact wording of the development consent before choosing a provider.
An [independent dilapidation report](/articles/independent-dilapidation-report-services) prepared by a licensed inspector who has no commercial relationship with the builder or developer carries the strongest evidentiary weight. Independence is just as important as qualifications when selecting a provider.
If a certifier, engineer, building surveyor, or specialist inspector is needed, the cost may be higher than a standard visual condition report. NSW Fair Trading provides a Building Certifiers Public Register where users can search by certifier name, organisation, registration status, location, and class of registration.
### Structural Engineers
For properties where structural integrity is a particular concern, such as those near deep excavation, tunnelling, or piling works, engaging a structural engineer to prepare or review the dilapidation report may be appropriate. Structural engineers charge higher rates, typically $200 to $350 per hour, which increases the overall report cost.
Engineer involvement is most commonly warranted for commercial properties, multi-storey buildings, or residential properties on reactive soils near significant excavation works.
### Surveyors with Specialist Equipment
Some dilapidation inspections benefit from specialist equipment such as thermal imaging cameras, laser levels, moisture meters, and drone photography. Inspectors who provide these additional capabilities typically charge a premium, but the enhanced documentation can be invaluable in dispute resolution.
## Urgency and Timing Surcharges
How quickly you need the report affects what you will pay. Standard turnaround times allow inspectors to schedule efficiently and keep costs down. Rush jobs attract surcharges.
### Standard Turnaround
Most providers offer a standard turnaround of five to ten business days from inspection to report delivery. This is the most cost-effective option and suits situations where you have advance notice of upcoming construction.
### Express and Urgent Reports
If construction is about to commence and you need documentation quickly, expect to pay a premium. Express turnaround within 24 to 48 hours typically attracts a surcharge of 25 to 50 percent on top of the standard price.
At [Owner Inspections](/), we offer 24-hour report turnaround as standard, which means you do not need to pay express surcharges to get your documentation quickly. This is particularly valuable when construction timelines shift unexpectedly and you need to act fast.
### Weekend and After-Hours Inspections
Inspections conducted outside standard business hours attract additional charges. If the property is only accessible on weekends or evenings, budget an extra 20 to 30 percent above the standard inspection fee.
## Hidden Costs to Watch For
The quoted price for a dilapidation report does not always represent the total cost. Several additional expenses can emerge during or after the process.
### Multiple Visits
Some properties require more than one inspection visit. Large commercial sites, properties with restricted access areas, or buildings where tenants need to provide access at different times can all result in multiple site visits. Each additional visit adds to the cost, typically $200 to $500 per return visit depending on the property location.
Confirm with your provider upfront whether the quoted price includes a single visit or accounts for potential return visits. Arranging full access for the initial inspection is the simplest way to avoid this extra cost.
### Complex or Unusual Structures
Properties with unusual construction methods, difficult access points, or complex structural systems may attract higher fees. Homes built on steep slopes, buildings with concealed structural elements, or properties with extensive underground areas all require additional inspection time and expertise.
Discuss any unusual features with your provider before confirming the engagement so the quote accurately reflects the work involved.
### Legal Review Costs
If the dilapidation report is being prepared for use in legal proceedings or as part of a development consent condition, you may incur additional costs for legal review of the document. Solicitors reviewing the report for adequacy and compliance with consent conditions typically charge $300 to $800 for the review.
While this is not a cost charged by the inspection provider, it is a real expense that property owners should factor into their overall budget.
### Post-Construction Comparison Reports
A dilapidation report captures the pre-construction condition. After construction finishes, a comparison inspection is needed to identify any changes. This post-construction report is a separate engagement and typically costs 60 to 80 percent of the original report fee.
The [dilapidation report process](/articles/dilapidation-report-process-a-walkthrough-of-key-steps) includes both pre-construction and post-construction phases. Budget for both from the outset to avoid being caught short when the time comes to assess whether damage has occurred.
View Expert
Witness Reports
}
buttonHref="/expert-witness-reports"
variant="secondary"
/>
## When Do You Need a Dilapidation Report?
A construction site dilapidation report is especially useful before excavation, demolition, piling, heavy vehicle access, or building work close to a shared boundary. Understanding when a report is required or strongly recommended helps you plan your budget in advance. A [pre-construction dilapidation report](/articles/who-needs-pre-construction-dilapidation-report) is essential in several common scenarios.
### Council or Development Consent Requirements
Many local councils include dilapidation report requirements as conditions of development approval. If you are the property owner adjacent to approved construction, the builder or developer is often required to arrange and pay for the report. Check the development consent conditions to confirm who bears the cost.
### Voluntary Protection
Even when not mandated by council, commissioning your own dilapidation report before nearby construction is a smart investment. The cost is modest compared to the potential expense of pursuing a damage claim without baseline documentation.
### Builder and Developer Risk Management
Builders and developers who commission dilapidation reports for neighbouring properties protect themselves from unfounded damage claims. The cost of documenting existing conditions is far less than defending against claims where no baseline evidence exists. This protection is critical prior to installing [civil plumbing and drainage](https://solvecivil.com.au/civil-plumbing/), where deep trenching, shoring, and heavy compaction near boundaries can cause ground movement and impact adjacent foundations.
### Who Pays for a Dilapidation Report?
Who pays for a dilapidation report depends on why the report is being prepared. If a council condition or development consent requires the report, the builder, developer, or applicant usually arranges and pays for it. If a neighbour wants their own independent dilapidation report for extra assurance, they usually pay for that separate report.
| Situation | Who usually pays |
| ------------------------------------------------- | -------------------------------------------------- |
| Council or consent condition requires the report | Builder, developer, or applicant |
| Builder wants protection against later claims | Builder or developer |
| Neighbour wants their own independent report | Property owner |
| Commercial project covers several adjoining sites | Project owner or developer |
| Post-construction comparison is required | Usually the party named in the consent or contract |
For Victorian projects involving protection work, the VBA explains that owners proposing building work have obligations under the Building Act to protect [adjoining property from potential damage](https://www.vba.vic.gov.au/consumers/home-renovation-essentials/protecting-adjoining-properties).
## Can you suggest the best template for a dilapidation report and what it should include for a Melbourne/NSW property?
There’s no single government-issued “official” template, so the best template is a structured condition report that matches what councils and certifiers usually ask for: clear scope, measurable defects, and a photo record you can compare after the works. NSW planning conditions, for example, often require a dilapidation report before any site work that records the structural condition of adjoining buildings and public land, prepared by a suitably qualified engineer.
**Recommended template structure**
**Cover page**
- Property address, neighbouring addresses (if relevant), report date, inspection date/time
- Inspector/engineer details, qualifications, licence, insurance
**Purpose and scope**
- Pre-construction condition record (and/or post-construction comparison)
- What’s included and excluded (visual inspection, accessible areas) aligned to standard reporting conventions
**Site and project details**
- Description of proposed works (as provided), “zone of influence”, access notes
**Method**
- How defects are assessed, how cracks are measured (mm), photo method (photo IDs)
- Plans and location maps
- Simple site plan + floor plan/elevations with defect markers (Defect ID: D01, D02…)
**Condition findings (by area)**
- Exterior elevations (front/left/right/rear)
- Roof edges/gutters (include drone stills if used)
- Boundaries + council assets (footpath, kerb, pits)
- Interior rooms (walls/ceilings/floors/windows/doors) where access is granted
**Defect schedule table**
- Defect ID, exact location, description, measurement (mm), severity note, linked photo numbers
**Photo register**
- Photo number, location, description, measurement reference (gauge/ruler visible)
**Limitations and obstructions**
- Inaccessible areas, safety limits, weather, locked rooms, furniture blocking, etc.
**Declaration and sign-off**
- Statement of independence, signature, date, attachments list
### Add these sections for NSW properties
- **Consent-condition compliance statement**: confirm it’s prepared before site works and covers adjoining structures and public land as required.
- **Access not granted clause**: if a neighbour denies entry, document attempts and record what was observed externally (NSW conditions commonly address this scenario).
### Add these sections for Melbourne/Victoria properties
- **Protection of adjoining property (Protection Works context)**: where relevant, include an “adjoining property protection” section because Victorian guidance places obligations on owners to protect adjoining property from damage.
- **Council asset protection module**: if working in the City of Melbourne (or similar councils), add a dedicated schedule for municipal assets, since council records asset condition via a dilapidation report when managing bonds/securities.
## How to Choose a Provider and Get Value for Money
Not all dilapidation report providers deliver the same quality or value. Choosing wisely can save you money and ensure the report serves its purpose if a dispute arises.
### Compare Scope, Not Just Price
The cheapest quote may cover only external areas or provide limited photographic documentation. Ask each provider exactly what the report will include, how many photographs will be taken, whether internal areas are covered, and what format the final report will be delivered in.
When comparing quotes, check whether the provider offers an independent dilapidation report that covers internal areas, external areas, photos, measurements where practical, access limitations, and post-construction comparison options.
| Quote item | Why it matters |
| ---------------------------- | -------------------------------------------------------------------- |
| Interior coverage | Internal cracks may not be visible from outside |
| Exterior coverage | Walls, render, brickwork, paths, and fences are common dispute areas |
| Photo register | Photos help compare the property before and after works |
| Defect schedule | Clear defect IDs make the report easier to use later |
| Measurements | Crack widths and locations help support comparison |
| Access limitations | Locked rooms and obstructed areas should be recorded |
| Turnaround time | Reports should be ready before works begin |
| Post-construction comparison | This is often quoted separately |
Do not choose a provider based only on the lowest cost. A detailed report with clear photos, measured defects, and transparent limitations gives better value than a cheap report that does not record enough evidence.
### Check Qualifications and Insurance
Verify that the inspector holds current licensing with the relevant state building authority, such as [NSW Fair Trading](https://www.fairtrading.nsw.gov.au/) in New South Wales or QBCC in Queensland. Confirm they carry professional indemnity insurance and public liability insurance. A report prepared by an unqualified or uninsured inspector may be worthless in a dispute.
### Ask About Turnaround and Inclusions
Clarify the turnaround time for report delivery and whether the quoted price includes all costs. Ask specifically about potential surcharges for travel, difficult access, return visits, or express delivery.
### Consider Experience with Your Property Type
An inspector experienced with your type of property will work more efficiently and produce a more relevant report. Commercial property owners should seek inspectors with commercial building experience. Heritage property owners should look for inspectors familiar with heritage documentation requirements.
## Key Takeaways
- Dilapidation survey cost and dilapidation report cost are closely related, but the survey is the inspection process while the report is the final condition record.
- Residential dilapidation reports typically cost between $500 and $1,500, while commercial reports range from $1,500 to $5,000 or more depending on property size and complexity.
- Sydney is the most expensive market for dilapidation reports, with prices starting around $800 for residential properties, while Adelaide offers the most competitive capital city rates from around $600.
- Comprehensive reports covering both interior and exterior areas cost more than exterior-only reports but provide substantially stronger protection in damage disputes.
- Hidden costs including multiple site visits, legal review, and post-construction comparison reports can add significantly to the total expense if not planned for in advance.
- The cheapest report is not always the best value. Scope, photo quality, independence, qualifications, and post-construction usability matter more than price alone.
- The qualifications and independence of the inspector directly affect both the quality and legal standing of the report, making the cheapest option rarely the best value.
- Arranging reports at least two weeks before site works commence ensures the baseline documentation is in place before any construction activity could affect the property.
- Owner Inspections offers 24-hour turnaround on comprehensive dilapidation reports, eliminating the need for express surcharges.
## Protect Your Property Before Construction Starts
If construction is planned near your property, do not wait until site works begin. [Contact Owner Inspections](/dilapidation-reports) to arrange a comprehensive dilapidation report with 24-hour turnaround. Our licensed, independent inspectors document your property's condition thoroughly, giving you the baseline evidence you need to protect your investment.
Book a Dilapidation
Report
}
buttonHref="/dilapidation-reports"
variant="primary"
/>
### How to Read and Use Your Property Inspection Report
Source: https://ownerinspections.com.au/articles/understanding-your-property-inspection-report
Published: 2024-11-13 | Updated: 2026-01-30 | Category: Building Inspections
Author: Maison Azdari
A property inspection report is one of the most valuable documents you will receive during the buying, selling, or maintenance process for a home. It provides a detailed assessment of a building's condition, covering everything from the roof structure down to the subfloor.
Yet many homeowners and buyers find themselves overwhelmed by the technical language, grading systems, and lengthy observations contained in these reports. Knowing how to read and act on the findings can mean the difference between a sound investment and a costly mistake.
> Your property inspection report is not simply a checklist of problems. It is a prioritised guide that helps you make informed decisions about repairs, maintenance, and negotiations. Treat it as a roadmap for protecting your investment.
## What a Property Inspection Report Includes
A standard property inspection report in Australia follows the guidelines set out in [Australian Standard AS 4349.1](https://www.standards.org.au/). This standard defines the scope, limitations, and reporting requirements for residential building inspections.
Reports are typically divided into clearly defined sections, each covering a specific area or system within the property. The level of detail varies between inspection companies, but a thorough report will address the following areas.
### Structural Elements
The structural section is often the most critical part of the report. It covers the building's load-bearing components, including foundations, footings, floor framing, wall framing, roof trusses, and load-bearing walls.
Inspectors look for signs of movement, cracking, deflection, and deterioration. Structural issues can range from minor cosmetic cracking to significant foundation failure that threatens the safety of occupants.
If your report flags structural concerns, it is worth cross-referencing the findings with our guide on [what a building inspection covers](/articles/what-does-a-building-inspection-cover) for additional context.
### Exterior Condition
The exterior assessment examines cladding, brickwork, render, paintwork, windows, doors, balconies, decks, fencing, driveways, and retaining walls. Inspectors note any damage, deterioration, or non-compliance with building standards.
Water ingress points are given particular attention. Gaps in cladding, failed sealants around windows, and poor drainage can all lead to moisture problems that worsen over time.
### Roof and Roof Space
[Roof inspections](/roof-inspection) cover the external roof covering (tiles, metal sheeting, or other materials), guttering, downpipes, flashings, and the roof space including framing, insulation, and sarking. The inspector will note any signs of leaks, rust, broken tiles, sagging, or inadequate ventilation.
Roof defects left unaddressed can escalate quickly. A small leak can lead to timber rot, mould growth, and even structural compromise within months.
### Interior Condition
The interior section assesses walls, ceilings, floors, doors, windows, wet areas (bathrooms, laundry, kitchen), and built-in fittings. Inspectors check for cracks, moisture damage, poor ventilation, uneven floors, and signs of water staining.
Wet area assessments are particularly significant because failed waterproofing is one of the most common and expensive defects found in Australian homes.
### Subfloor Area
Where accessible, inspectors examine the subfloor for ventilation, moisture levels, timber condition, stumps or piers, and evidence of pest activity. Subfloor problems are often invisible from inside the home but can have serious implications for structural integrity.
### Electrical and Plumbing Observations
Building inspectors are not licensed electricians or plumbers. Their role is to make visual observations about the general condition of these systems. They may note outdated wiring, leaking taps, poor water pressure, or non-compliant installations.
If the report raises concerns about electrical or plumbing systems, the inspector will typically recommend engaging a licensed specialist for a detailed assessment.
### HVAC and Ventilation
Heating, ventilation, and air conditioning systems are assessed at a visual level. Inspectors check for obvious defects, age-related wear, and accessibility for servicing. They may also comment on the adequacy of ventilation in wet areas and roof spaces.
## How Reports Classify Issues
One of the most valuable aspects of a professional inspection report is its classification system. Issues are typically graded by severity, helping you distinguish between problems that need immediate attention and those that can be scheduled into a long-term maintenance plan.
The table below outlines the three main categories used in most Australian inspection reports.
| Classification | Definition | Typical Examples | Recommended Action |
| -------------------- | ------------------------------------------------------------------------------------------------------------------------------------------------- | -------------------------------------------------------------------------------------------------------------------- | ---------------------------------------------------------------------------------------- |
| **Major Defect** | A significant building deficiency that is serious in nature, requires immediate rectification, or could make the building unsafe or uninhabitable | Foundation movement, significant structural cracking, active roof leaks, failed retaining walls, major water ingress | Engage a specialist immediately; may affect purchasing decision or require urgent repair |
| **Minor Defect** | A deficiency that is not serious in nature but requires rectification to prevent further deterioration or potential escalation | Hairline cracking, minor timber decay, worn sealants, small areas of damaged render, sticking doors or windows | Schedule repairs within 3 to 12 months to prevent escalation |
| **Maintenance Item** | A condition resulting from normal wear and tear or lack of routine upkeep that does not currently affect the building's structural integrity | Peeling paint, dirty gutters, minor surface corrosion, worn grout, garden encroaching on the structure | Include in a regular maintenance schedule; address during routine upkeep |
This classification system is the backbone of your report. Focus your attention on major defects first, then work through minor defects, and finally incorporate maintenance items into your ongoing property care routine.
## Breaking Down Each Section of Your Report
Most reports follow a consistent structure. Familiarising yourself with each section will make the document far easier to interpret.
### Executive Summary
The executive summary appears at the front of the report and provides a high-level overview of the property's condition. It highlights the most significant findings and gives you an immediate sense of whether the property has serious problems.
Read this section first. It will tell you whether the report has identified any major defects that require further investigation.
### Property and Inspection Details
This section records the property address, date of inspection, weather conditions at the time, the scope of the inspection, and any limitations or exclusions. Pay close attention to the limitations section, as it explains what the inspector could not access or assess.
Common limitations include inaccessible roof spaces, locked rooms, furniture obstructing walls, and areas concealed by stored goods. If significant areas were inaccessible, you may need to arrange a follow-up inspection.
### Detailed Findings
The body of the report presents findings room by room or system by system. Each finding will typically include a description of the issue, its location, a photograph, and a severity rating.
When reading this section, focus on the pattern of defects rather than individual items in isolation. Multiple minor cracks in different locations, for example, may collectively indicate a more significant structural issue than any single crack would suggest on its own.
### Photographs and Evidence
A quality report includes clear, labelled photographs for each finding. These images serve as evidence and make it easier to communicate with tradespeople about repairs.
Check that each photograph corresponds to the written description. If something is unclear, do not hesitate to contact the inspector for clarification.
### Recommendations
The recommendations section summarises what action should be taken for each finding. This is where you will find guidance on whether to engage a structural engineer, licensed plumber, electrician, or other specialist.
For a deeper look at interpreting inspection recommendations, see our article on [decoding pre-purchase inspection reports](/articles/decoding-pre-purchase-inspection-reports).
## Distinguishing Critical Issues from Routine Maintenance
Not every item in your report requires urgent action. Learning to separate critical defects from routine maintenance will help you allocate your time and budget effectively.
### Signs of Critical Issues
Critical issues are those that affect the safety, structural integrity, or habitability of the property. Look for language in your report such as "significant," "immediate attention required," "structural concern," or "safety hazard."
Common critical issues include active termite infestation, significant foundation movement, major roof leaks, failed waterproofing in wet areas, and non-compliant electrical installations. These items should be addressed before or immediately after settlement.
### Routine Maintenance Items
Routine maintenance items are conditions resulting from normal ageing and wear. Peeling exterior paint, minor surface rust on metal fixtures, dirty gutters, and worn caulking are all examples.
While these items do not pose an immediate risk, neglecting them over time can lead to more serious problems. A blocked gutter, for instance, can cause water to pool against the fascia and eventually lead to timber rot.
## Prioritising Repairs After Receiving Your Report
Once you have read through the full report, create a prioritised action plan. This approach ensures you address the most pressing issues first and avoids the common mistake of spending money on cosmetic fixes while ignoring structural problems.
### Step 1: Address Safety Hazards
Any item that poses a risk to the health or safety of occupants should be dealt with first. This includes electrical faults, unstable structures, asbestos-containing materials, and trip hazards.
### Step 2: Tackle Major Defects
Major defects that are not immediate safety hazards but will worsen without intervention should be your next priority. Engage the recommended specialists to provide detailed assessments and quotes.
### Step 3: Schedule Minor Defect Repairs
Minor defects can typically be scheduled over the coming months. Group related repairs together where possible to reduce costs. For example, addressing all exterior sealant and render repairs at the same time is more cost-effective than handling them individually.
### Step 4: Create a Maintenance Schedule
Use the maintenance items in your report as the basis for an ongoing property care schedule. Seasonal maintenance, such as gutter cleaning before the wet season and exterior painting every few years, will protect your property and reduce the likelihood of minor issues becoming major ones.
Our [comprehensive guide to house inspections](/articles/a-comprehensive-guide-to-house-inspections) provides additional advice on establishing a long-term maintenance routine.
## Using Your Report for Property Negotiations
A detailed inspection report is a powerful negotiation tool. Whether you are buying, selling, or resolving a dispute, the documented findings give you objective evidence to support your position.
### For Buyers
Buyers can use the report to request a price reduction, ask the seller to complete repairs before settlement, or negotiate special conditions in the contract. Major defects carry the most weight in negotiations because they represent significant costs.
When presenting findings to the seller or their agent, focus on major and minor defects with clear cost implications. Obtain quotes from licensed tradespeople to support your position with concrete figures.
For buyers entering the market for the first time, our [first-time homebuyer's guide to building and pest inspections](/articles/first-time-homebuyers-building-pest-inspection-guide) covers the negotiation process in more detail.
### For Sellers
Sellers who commission a [pre-purchase inspection](/pre-purchase-inspections) before listing can address issues proactively, avoid surprises during the buyer's inspection, and demonstrate transparency.
A clean or well-managed report builds buyer confidence and can speed up the sale process. It also reduces the risk of post-settlement disputes.
### For Dispute Resolution
In cases where defects are discovered after purchase or during construction, inspection reports serve as key evidence. Reports prepared by qualified inspectors can support claims through bodies such as the NSW Civil and Administrative Tribunal (NCAT) or Queensland Building and Construction Commission (QBCC).
If your situation involves a [defect inspection](/defect-investigation-reports), the report findings may form the basis of a formal claim or [insurance assessment](/insurance-claim-assessments).
## When to Consult a Specialist
Your building inspector will often recommend engaging a specialist for specific issues identified in the report. It is essential to follow these recommendations rather than assuming the problem is minor.
### Structural Engineer
Engage a structural engineer when the report identifies significant cracking, foundation movement, wall bowing, or load-bearing concerns. A structural engineer can determine the cause, assess the severity, and recommend appropriate remediation.
### Licensed Electrician
Outdated wiring, non-compliant switchboards, and missing safety switches all warrant an electrical assessment. Electrical faults are a leading cause of house fires in Australia.
### Licensed Plumber
Leaking pipes, poor drainage, low water pressure, and non-compliant plumbing installations should be assessed by a licensed plumber. Plumbing defects can cause water damage, mould growth, and structural deterioration if left unchecked.
### Pest Inspector
If the report notes evidence of timber pest activity, such as termite workings, borer damage, or fungal decay, a specialist [pest inspection](/timber-pest-inspections) is strongly recommended. Termite damage is not covered by standard home insurance in Australia, making early detection critical.
For more on why defect inspections matter, read our article on [why property defect inspections are important for buyers](/articles/property-defect-inspection-important-for-buyers).
### Waterproofing Specialist
Failed waterproofing in bathrooms, showers, and balconies is one of the most expensive defects to rectify. If your report identifies moisture in wet areas or balcony membranes, a waterproofing specialist can determine whether remediation or full replacement is required.
## Creating a Long-Term Maintenance Plan from Your Report
Your inspection report should not sit in a drawer once you have acted on the urgent items. Use it as the foundation for a long-term property maintenance plan.
Review the maintenance items section and assign each item to a timeframe: monthly, quarterly, biannually, or annually. Common recurring tasks include clearing gutters and downpipes, checking exterior caulking, inspecting subfloor ventilation, testing smoke alarms, and servicing HVAC systems.
Keeping a record of completed maintenance also adds value when you eventually sell the property. Buyers and their inspectors will look favourably on a well-maintained home with documented upkeep.
## Common Mistakes When Reading Inspection Reports
Many homeowners make avoidable errors when interpreting their reports. Being aware of these pitfalls will help you get the most from the document.
Ignoring the limitations section is a common oversight. If the inspector could not access the roof space or subfloor, those areas remain unassessed and could harbour hidden defects.
Focusing solely on the number of items rather than their severity is another mistake. A report with 30 maintenance items and no major defects is far better than a report with five items that includes two major structural concerns.
Failing to act on recommendations is perhaps the most costly mistake. Inspectors flag issues for a reason. Delaying specialist assessments or repairs allows minor problems to escalate into major, expensive ones.
## Frequently Asked Questions
### What is included in a standard property inspection report in Australia?
A standard report covers the structural elements, exterior, interior, roof and roof space, subfloor, wet areas, and visual observations of electrical and plumbing systems. Reports follow Australian Standard AS 4349.1 and include photographs, descriptions, severity ratings, and recommendations for each finding.
### How long does it take to receive my inspection report?
Most inspection companies deliver the report within 24 to 48 hours after the inspection. Some offer same-day turnaround for urgent situations, such as properties going to auction.
### What is the difference between a major defect and a minor defect?
A major defect is a significant issue that affects the structural integrity, safety, or habitability of the building and requires immediate attention. A minor defect is less serious but still requires rectification to prevent deterioration. Maintenance items are conditions from normal wear that need routine upkeep.
### Can I use my inspection report to negotiate the purchase price?
Yes. Buyers commonly use inspection findings to negotiate a price reduction or request that the seller complete repairs before settlement. Major defects supported by specialist quotes carry the most weight in negotiations.
### What should I do if the report identifies major structural defects?
Engage a qualified structural engineer to assess the defects in detail. The engineer will determine the cause, severity, and recommended remediation. Depending on the findings, you may choose to renegotiate, request repairs, or withdraw from the purchase.
### Are electrical and plumbing systems fully assessed in a building inspection?
No. Building inspectors provide visual observations only. They are not licensed to test electrical circuits or pressure-test plumbing systems. If concerns are noted, the inspector will recommend engaging a licensed electrician or plumber for a detailed assessment.
### How often should I get a property inspection done on my home?
For an owner-occupied home, a full building inspection every three to five years is a good practice. Annual visual checks of the roof, gutters, subfloor, and exterior are also recommended. Pest inspections should be conducted annually in termite-prone areas.
### What areas of the property might not be covered by the inspection?
Common exclusions include areas concealed by furniture, stored goods, floor coverings, wall linings, and vegetation. Locked rooms, inaccessible roof spaces, and underground services are also typically excluded. The limitations section of your report will detail what could not be inspected.
### Is a building inspection the same as a pest inspection?
No. A building inspection assesses the structural and general condition of the property. A pest inspection specifically looks for evidence of timber pests, including termites, borers, and fungal decay. Many companies offer combined building and pest inspections for convenience and cost savings.
### Should I attend the inspection in person?
Attending the inspection is highly recommended. It gives you the opportunity to see the findings firsthand, ask questions, and gain a better sense of the property's condition. Most inspectors welcome buyers or owners on site during the assessment.
### What happens if defects are found after I have already purchased the property?
If defects are discovered after settlement, your options depend on the circumstances. You may have recourse through consumer protection laws, building warranty insurance, or tribunal proceedings. A [defect inspection](/defect-investigation-reports) report can serve as evidence in these situations.
### Can a property fail an inspection?
A property cannot technically fail an inspection. The report documents the current condition and identifies defects, but it does not issue a pass or fail verdict. The decision about whether to proceed with a purchase rests with the buyer based on the findings.
## Take the Next Step
If you have received an inspection report and need help interpreting the findings, or if you are looking to arrange a thorough property inspection, our team of licensed building inspectors is here to help. [Contact Owner Inspections](/pre-purchase-inspections) to book an inspection or discuss your report with a qualified professional.
For a complete overview, see our [guide to pre-purchase building and pest inspections](/guides/pre-purchase-building-pest-inspection-guide).
### Common Issues Found in Pre-Settlement Inspections
Source: https://ownerinspections.com.au/articles/common-issues-in-pre-settlement-inspections
Published: 2024-11-05 | Updated: 2026-09-14 | Category: Pre-Settlement Inspections
Author: Maison Azdari
The most common issues found in pre-settlement inspections are new damage caused while the seller moved out, missing inclusions such as appliances, blinds or remotes, agreed repairs that were never done, and faults like leaking taps, dead power points or water staining. Raise every one of them in writing through your conveyancer before settlement, because that is when you have the most leverage. If damage only shows up after settlement you can still act, but your options narrow to the contract, statutory building warranties and misrepresentation, so move quickly.
A pre-settlement inspection is the buyer’s final chance to check that the property is in the agreed condition before settlement. In Victoria, buyers are entitled to [inspect the property at any reasonable time](https://www.consumer.vic.gov.au/housing/buying-and-selling-property/buying-property/property-settlement/before-property-settlement) during the week before settlement, and the seller must hand it over in the same condition as when it was sold.
This article explains what to look for in a pre settlement inspection, how to build a clear defect list, what to do if there is damage found after settlement, and when to seek help from a building inspector, conveyancer, or property lawyer.
## What Is a Pre-Settlement Inspection?
A pre-settlement inspection is a final walkthrough before settlement. It helps buyers confirm that the property, fixtures, inclusions, appliances, and agreed repairs match the contract of sale.
It is different from a pre-purchase inspection. A pre-purchase inspection is usually done before exchange or before signing a contract, while a pre-settlement inspection happens close to settlement. [NSW Government guidance](https://www.nsw.gov.au/housing-and-construction/buying-and-selling-property/buying-property-nsw/inspecting-a-property/inspection-reports) explains that pre-purchase inspection reports can identify major defects, safety hazards, damp, cracking, roof problems, and other issues before buying.
| Inspection Type | When It Happens | Main Purpose |
| ------------------------------------------- | --------------------------------------: | ------------------------------------------------------ |
| Pre-purchase inspection | Before signing or exchanging contracts | Checks the property condition before committing |
| House inspection before settlement | During the final week before settlement | Confirms the property is still in the agreed condition |
| Handover or practical completion inspection | Before accepting a new build | Checks construction quality and incomplete work |
| Reinspection | After repairs or rectification work | Confirms agreed defects have been fixed |
Book a Defect
Investigation
}
buttonHref="/defect-investigation-reports"
variant="secondary"
/>
## What to Look for in a Pre-Settlement Inspection
A good final inspection before settlement should be practical, organised, and evidence-based.
Consumer Affairs Victoria advises buyers to check that all items included in the contract are present and in the right condition, and to request repairs if damage or non-working items are found during the final inspection.
| Area to Check | What to Look For | Why It Matters |
| ------------------- | ---------------------------------------------------- | --------------------------------------------- |
| Walls and ceilings | Cracks, water stains, sagging, fresh patching | May point to movement, leaks, or poor repairs |
| Floors | Loose tiles, scratches, swelling, uneven surfaces | Can show poor finishing or moisture issues |
| Kitchen | Cabinets, benchtops, taps, appliances, splashbacks | Confirms inclusions and workmanship |
| Bathrooms | Leaks, drainage, waterproofing signs, loose fittings | Wet areas can hide costly defects |
| Doors and windows | Locks, alignment, smooth opening and closing | Affects safety, security, and usability |
| Electrical items | Lights, switches, power points, exhaust fans | Confirms working fixtures before handover |
| Plumbing | Taps, toilets, drains, water pressure, hot water | Helps identify leaks and drainage issues |
| Outdoor areas | Fencing, gates, drainage, balconies, garages | Confirms condition of external areas |
| Shared areas | Car parks, lifts, stairwells, storage cages | Useful for apartments and strata properties |
| Contract inclusions | Appliances, blinds, remotes, keys, fixtures | Helps avoid missing items after settlement |
## Pre-Settlement Inspection Defect List
A defect list is a written record of issues found during the inspection. It should include clear notes, dated photos, room names, and the action requested.
Use a simple table so the seller, agent, conveyancer, and inspector can understand the problem quickly.
| Defect | Location | Evidence | Requested Action |
| ------------------ | ------------ | ----------------------- | -------------------------- |
| Cracked wall | Bedroom 2 | Photo and measurement | Assess and repair |
| Leaking tap | Ensuite | Photo or short video | Repair before settlement |
| Missing appliance | Kitchen | Contract inclusion list | Install or replace |
| Loose power point | Living room | Photo | Licensed electrical check |
| Scratched flooring | Hallway | Photo | Repair or agree adjustment |
| Door not closing | Main bedroom | Video | Adjust hinges or frame |
| Damaged cabinet | Kitchen | Photo | Replace or repair panel |
A building inspection report can also help buyers understand property problems before purchase and may help with price negotiations. NSW Government guidance says a pre-purchase report can help buyers use the information to negotiate a lower price and get specialist advice.
## Structural Defects: The Foundation of Your Home
This cracked stone vanity top was circled during a pre-settlement inspection. Cracks like this are easy to miss on a quick walkthrough and far harder to attribute once you have moved in.
Structural defects are serious because they can affect safety, stability, long-term repair costs, and property value.
Common structural issues found during a pre-settlement inspection include:
- Foundation cracks or movement
- Large wall or ceiling cracks
- Sagging roof areas
- Water damage near structural areas
- Poorly repaired movement cracks
- Balcony or stair movement
- Signs of termite or moisture damage
### Foundation Issues
Foundation problems can manifest as cracks in the slab, uneven surfaces, or signs of movement. In new builds, these may indicate poor site preparation, inadequate compaction, or issues with the concrete pour. Foundation defects can worsen over time and lead to significant structural problems if left unaddressed.
### Wall and Ceiling Cracks
Cracks in walls and ceilings are one of the most frequently identified issues during pre-settlement inspections. Not all cracks are structural. Hairline cracks in plaster can result from the natural settling of a new building. However, wider cracks, diagonal cracks around door and window frames, or cracks that appear in patterns can indicate structural movement or poor workmanship that requires further investigation.
### Roofing Defects
Roofing issues can include incorrectly installed tiles or sheeting, poor flashing around penetrations and junctions, inadequate sealing, and blocked or improperly graded gutters. These defects can lead to water ingress, which can cause significant damage to the internal structure and finishes of a property over time.
## Plumbing and Electrical Systems: Hidden Problems That Cost Money
Here water is ponding on balcony tiles instead of running to the floor waste. Poor falls like this cause staining and water entry over time, and they are a common after-settlement complaint in apartments.
Plumbing and electrical defects are often missed during a quick walkthrough. Buyers should test what can be safely checked during the inspection.
Common plumbing issues include:
- Leaking taps
- Moisture under sinks
- Slow-draining basins or showers
- Poor water pressure
- Running toilets
- Water stains near wet areas
- Hot water faults
Common electrical issues include:
- Lights not working
- Faulty switches
- Loose or damaged power points
- Exhaust fans not working
- Smoke alarms missing or not tested
- Exposed or unsafe wiring
### Leaking Fixtures
Leaking taps, showerheads, toilets, and pipe connections are common findings in new properties. These may result from improper installation, faulty fittings, or connections that have not been adequately tightened. While individual leaks may seem minor, they can lead to water damage and mould growth if not rectified.
### Water Pressure Issues
Low water pressure can indicate problems with the plumbing system, including undersized pipes, partially closed valves, or blockages. During the inspection, all taps and showers should be tested to ensure adequate and consistent water pressure throughout the property.
### Drainage Problems
Blocked or slow-draining sinks, basins, showers, and floor wastes are common issues. In new builds, these can result from construction debris left in the drainage system. External drainage should also be checked to ensure water flows away from the building and does not pool against the foundation.
### Non-Functional Power Points and Switches
Power points and switches that do not work are a frequent finding. This can be caused by loose connections, wiring errors, or tripped circuit breakers. All power points, switches, and light points should be tested during the inspection.
### Exposed Wiring
Any exposed or improperly enclosed wiring is a safety hazard and a non-compliance issue. This includes wiring that is visible in living spaces, incomplete junction boxes, or cables that have not been properly secured.
### Flickering Lights
Flickering or intermittent lighting can indicate loose connections, faulty light fittings, or wiring issues. While it may seem like a minor inconvenience, it can point to a more significant electrical problem that needs to be investigated by a licensed electrician.
## Cosmetic and Finishing Issues: Small Defects Can Point to Poor Workmanship
Cosmetic defects may look minor, but they can point to rushed work, poor quality control, or unfinished construction.
Common finishing defects include:
- Uneven paint
- Peeling paint
- Scratched flooring
- Chipped tiles
- Poor grout lines
- Loose handles
- Gaps around cabinetry
- Poor silicone work
- Damaged benchtops
- Misaligned cupboards
### Paintwork Defects
Common paintwork issues include uneven coverage, drips, runs, missed areas, paint on surfaces where it should not be (such as window frames or hardware), and colour inconsistencies between rooms or surfaces. These are some of the most frequently reported issues in new builds.
### Flooring Problems
Flooring defects can include uneven surfaces, gaps between boards or tiles, chipped tiles, scratched timber, poorly finished edges, and inconsistent grout lines. In carpeted areas, look for wrinkles, uneven stretching, and poorly finished transitions between different flooring types.
### Fixtures and Finishing Quality
Poorly fitted skirting boards, architraves, cornices, and door hardware can detract from the presentation of a new property. Look for gaps, uneven joins, misaligned elements, and rough or unfinished edges. While these are cosmetic, they reflect the builder's attention to detail and should be rectified before settlement.
## Fixtures and Fittings: Make Sure Everything in the Contract Is There
Fixtures and fittings are common sources of settlement disputes. Buyers should compare the property against the contract of sale, marketing material, inclusions list, and special conditions.
Check:
- Ovens, cooktops, dishwashers, and rangehoods
- Air conditioning units and remotes
- Light fittings
- Curtains, blinds, and shutters
- Door handles and locks
- Garage remotes
- Built-in wardrobes
- Bathroom fittings
- Tapware
- Keys, fobs, and access devices
### Missing Appliances or Fixtures
Check that all appliances, fixtures, and fittings listed in the contract or schedule of inclusions are present and correctly installed. Missing items can include dishwashers, ovens, rangehoods, towel rails, toilet roll holders, and shower screens. Everything specified in the contract should be in place at the time of inspection.
### Faulty Windows and Doors
Windows and doors should open, close, and lock smoothly. Common issues include windows that do not seal properly, doors that stick or swing open on their own, misaligned sliding doors, faulty locks, and damaged or missing flyscreens. These issues can affect security, weather sealing, and energy efficiency.
### Built-In Features
Check built-in features such as wardrobes, shelving, cabinetry, and storage units. Common problems include doors that do not close properly, shelves that are not level, drawers that stick, and hardware that is loose or missing. Verify that these features match the specifications in the contract.
View Expert
Witness Reports
}
buttonHref="/expert-witness-reports"
variant="secondary"
/>
## HVAC and Ventilation: Comfort, Moisture, and Mould Risk
Heating, ventilation, and air conditioning should be checked before settlement where safe and practical.
Look for:
- Air conditioning that does not turn on
- Heating that does not work
- Weak airflow
- Noisy systems
- Blocked vents
- Mould near vents
- Poor bathroom exhaust
- Rangehoods not extracting air
### Air Conditioning and Heating
Test all heating and cooling systems to ensure they operate correctly. Common issues include units that do not turn on, inconsistent temperatures between zones, unusual noises, and systems that have not been properly commissioned. In ducted systems, check that air flows from all vents and that the thermostat responds correctly.
### Blocked Vents
Ventilation openings in wet areas such as bathrooms, laundries, and kitchens should be clear and functional. Blocked or non-functional exhaust fans can lead to moisture buildup and mould growth. Sub-floor vents in homes with raised floors should also be checked to ensure adequate airflow beneath the property.
### Ductwork Issues
In properties with ducted heating or cooling, inspect accessible ductwork for disconnections, damage, or poor insulation. Poorly installed ductwork can result in air leaks, reduced efficiency, and uneven temperature distribution throughout the property.
## Common Building Areas in Apartments and Strata Properties
Apartment buyers should not only inspect the inside of the unit. Shared areas can affect safety, convenience, strata levies, and future costs.
Check:
- Lifts
- Stairwells
- Basement car parks
- Storage cages
- Security doors
- Intercoms
- Fire doors
- Drainage areas
- Shared balconies
- Common hallways
- Visitor parking
- Signs of leaks or water ponding
### Lifts and Stairwells
Check that lifts are operational and that stairwells are properly finished, well-lit, and free of defects. Common issues include incomplete painting, damaged handrails, uneven steps, and missing or faulty emergency lighting.
### Basement and Car Parking
Inspect basement areas and car parking spaces for water ingress, poor drainage, cracked or uneven surfaces, and inadequate lighting. Verify that your allocated car space and storage cage (if applicable) are correctly identified and accessible.
### Security Systems
Test security features such as intercom systems, swipe card access, CCTV, and security gates. Ensure that all access points are secure and that the systems are functioning as described in the contract or marketing materials.
## Damage Found After Settlement: What Can You Do?
If you find damage after settlement, photograph it the same day, tell your conveyancer or property lawyer, and work out which of three routes applies: a breach of the contract of sale, a statutory warranty for recent building work, or misrepresentation by the seller or agent. For an established home with no warranty and no evidence the damage existed before settlement, recovery is often difficult.
This door strikes the towel rail every time it opens. It is a small fault, but exactly the kind of item that is simple to fix before settlement and a debate afterwards.
### Step 1: Record the damage and the timing
Take dated photos and video, and compare them with your pre-settlement photos, the agent's listing images and any pre-purchase report. The strongest after-settlement claims prove the damage was already present, or was caused by the seller, before the keys changed hands.
### Step 2: Check the contract and settlement correspondence
Your conveyancer can check whether the seller breached a condition, such as handing over the property in the condition it was sold in, or failed to complete repairs they agreed to in writing. See [what to do if the vendor skips agreed repairs](/articles/vendor-skipping-agreed-repairs-before-settlement).
### Step 3: Check whether a building warranty applies
Statutory warranties for recent building work generally pass to later owners:
- **Victoria:** warranties under the Domestic Building Contracts Act apply for up to 10 years from the occupancy permit or certificate of final inspection.
- **Queensland:** the Queensland Home Warranty Scheme may cover defective work, with structural defect cover generally lasting 6 years and 6 months for policies since 28 October 2016.
- **NSW:** statutory warranties commonly run for 6 years for major defects and 2 years for other defects from completion of the work.
### Step 4: Get independent evidence before repairing
Make the property safe, but do not carry out permanent repairs until the problem has been independently documented, or you may remove the evidence a claim depends on. Owner Inspections is not a law firm and cannot advise on your legal rights, but a report can establish what the defect is, its likely cause and when it probably occurred, which is what a solicitor or tribunal needs.
| Situation | What to Do |
| ---------------------------------- | ----------------------------------------------------------- |
| Damage found before settlement | Photograph it, list it, notify the agent and conveyancer |
| Damage found after settlement | Speak to your conveyancer or lawyer quickly |
| New build defect | Check statutory warranty and builder obligations |
| Apartment defect | Check strata records, builder warranties, and defect claims |
| Serious safety issue | Get specialist advice before using the affected area |
| Repaired defect not fixed properly | Book a reinspection and update the defect list |
## Can You Still Negotiate House Price After a Pre-Settlement Inspection?
Yes, buyers may be able to negotiate repairs, a price adjustment, or another agreed outcome if the pre-settlement inspection finds a problem. The result depends on the contract, evidence, timing, and legal advice.
Consumer Affairs Victoria says that if the final inspection finds new damage or an item is not working as it was when the property was sold, buyers can request that the seller make repairs before settlement.
Common options include:
- Requesting repairs before settlement
- Asking for missing inclusions to be supplied
- Requesting a price adjustment
- Asking for money to be held until repairs are completed
- Delaying settlement if legally available
- Seeking advice from a conveyancer or property lawyer
Do not rely on a verbal promise. Put the issue in writing, attach photos, include the defect list, and ask your conveyancer to handle formal communication.
## Off-the-Plan and New Build Pre-Settlement Issues
Pre-settlement inspections are especially useful for off-the-plan apartments and new builds because the buyer may not have seen the finished property before.
Common issues include:
- Incomplete finishes
- Missing inclusions
- Poor paintwork
- Damaged flooring
- Defective cabinets
- Poor drainage
- Balcony defects
- Appliance faults
- Cracked tiles
- Poor waterproofing signs
## Pre-Settlement Inspection Checklist
Use this checklist during the final walkthrough.
| Area | Check These Items | Evidence to Capture |
| ---------------------- | -------------------------------------- | -------------------------------------- |
| Entry and keys | Door locks, keys, remotes, fobs | Photo of all supplied access items |
| Kitchen | Appliances, taps, cabinets, benchtops | Photos of damage or missing items |
| Bathrooms | Toilets, showers, basins, exhaust fans | Photos and videos of leaks or drainage |
| Bedrooms | Wardrobes, windows, flooring, walls | Photos of cracks or scratches |
| Living areas | Lights, power points, floors, walls | Photos of visible defects |
| Laundry | Taps, trough, drainage, ventilation | Video of drainage issue |
| Exterior | Fences, gates, garage, drainage | Photos of damage or missing items |
| Apartment common areas | Car park, storage, lifts, security | Photos of visible defects |
| Contract inclusions | Fixtures, fittings, appliances | Compare against contract list |
| Repairs promised | Confirm completed work | Before and after photos |
## How to Document Settlement Issues Properly
Good evidence makes it easier to raise settlement issues before handover.
Use this process:
1. Take clear photos in good light.
2. Record short videos for moving parts, leaks, or faulty systems.
3. Note the room and exact location.
4. Compare the issue with the contract or inclusion list.
5. Add each issue to the defect list.
6. Send the list to your conveyancer or agent before settlement.
7. Keep copies of all emails and replies.
8. Book a reinspection if repairs are promised.
## Legal and Financial Considerations
### Negotiate Repairs Before Settlement
If defects are identified during the pre-settlement inspection, you have several options. The most common approach is to negotiate with the builder or seller to have the defects rectified before settlement. Provide a written list of defects with supporting photographs and request a timeline for rectification. Your solicitor can advise on the best approach depending on the severity of the issues.
### Request Price Adjustments
For defects that cannot be rectified before settlement, you may be able to negotiate a price reduction or a retention of funds in a trust account until the work is completed. This approach ensures you are not left out of pocket if repairs are needed after you take possession.
### Engage Your Solicitor
Your property solicitor plays a critical role in managing defect claims and negotiations. They can advise on your legal rights, draft correspondence to the builder or developer, and ensure that any agreed rectification works are documented and enforceable.
### Know Your Rights Under Australian Consumer Law
Australian Consumer Law and state-specific building legislation provide protections for property buyers. For new builds, statutory warranties typically cover structural defects for six to seven years and non-structural defects for two years (timeframes vary by state). Understanding your rights ensures you can hold the builder or developer accountable for defective work.
## Getting the Most Value from Your Home and Building Investment
A pre-settlement inspection protects buyers from avoidable stress at the last stage of a property purchase. It helps confirm that the property is in the agreed condition, fixtures are present, repairs are complete, and defects are recorded before settlement.
### How to Dispute a Defect Investigation Report in Gold Coast
Source: https://ownerinspections.com.au/articles/how-to-dispute-a-defect-investigation-report-in-gold-coast
Published: 2024-10-23 | Updated: 2026-02-09 | Category: Defect Investigation
Author: Maison Azdari
If you disagree with a defect investigation report on the [Gold Coast](/qld/building-inspections-gold-coast), you can dispute it by thoroughly reviewing the findings, consulting with a property lawyer, commissioning an independent second inspection, drafting a formal written dispute with supporting evidence, and engaging with the original reporting body. If the dispute is not resolved directly, options include mediation, the QBCC (Queensland Building and Construction Commission) complaints process, or legal proceedings through QCAT (Queensland Civil and Administrative Tribunal).
Defect investigation reports are meant to give an accurate picture of a property's condition. However, reports can sometimes contain errors, omissions, or findings you believe are incorrect. On the Gold Coast, where properties face specific challenges from coastal weather, rapid development, and varied building ages, getting the report right matters. This guide explains the process for disputing a defect investigation report and the steps to take at each stage.
## What Is a Defect Investigation Report?
A defect investigation report is a detailed examination of a building that identifies both structural and non-structural defects. These can range from minor cosmetic issues like paint imperfections to significant concerns such as cracking foundations, waterproofing failures, or non-compliant construction work. The report references relevant building codes and standards, and is used by property owners, builders, strata managers, and legal professionals to determine the condition of a building and what repairs may be needed.
### Why It Matters on the Gold Coast
The Gold Coast has a diverse mix of older and newer properties, all exposed to coastal environmental conditions including salt air, high humidity, heavy rainfall, and intense sun. These factors accelerate wear and make accurate defect reporting especially important for protecting property values and occupant safety.
## Reasons for Disputing a Report
There are several valid reasons why a property owner might dispute a defect investigation report:
## Steps to Dispute a Defect Investigation Report
## Potential Outcomes of a Dispute
## The QBCC Complaints Process
In Queensland, the QBCC oversees building standards and handles complaints about building work and inspection services. If your dispute relates to building work carried out by a licensed builder, you can lodge a complaint with the QBCC.
## How to Prevent Future Disputes
### How Are Insurance Claims Assessed in Brisbane Construction?
Source: https://ownerinspections.com.au/articles/how-are-insurance-claims-assessed-in-brisbane-construction
Published: 2024-10-16 | Updated: 2026-02-09 | Category: Insurance
Author: Maison Azdari
Insurance claims in [Brisbane](/qld/building-inspections-brisbane) construction are assessed through a five-stage process: the affected party submits a detailed claim with supporting evidence, the insurer conducts a preliminary policy review, a qualified assessor inspects the damage on-site, evidence is gathered including photographs and expert opinions, and the insurer makes a final determination on coverage and settlement amount. Brisbane's tropical climate and rapid urban growth mean weather damage and project delays are among the most common claim triggers in the region.
Whether you are a homeowner dealing with storm damage, a builder facing project setbacks, or an investor managing a damaged rental property, understanding how the insurance claims process works in Brisbane helps you prepare properly and improve your chances of a fair outcome. This guide breaks down the assessment process, the key factors insurers consider, and practical tips for making your claim as strong as possible.
For a complete overview, see our [guide to insurance claim assessments](/guides/insurance-claim-assessment-guide).
## Why Insurance Claims Matter in Construction
Construction projects involve a significant investment of time and money. Unforeseen events such as storms, accidents, theft, or structural failures can cause major financial strain. Insurance claims provide a financial safety net that protects property owners, builders, and investors from absorbing the full cost of unexpected damage.
## The Five Stages of Claim Assessment
## Key Factors in the Assessment
### Policy Coverage
### Costs and Valuations
### Liabilities and Responsibilities
## Brisbane's Unique Considerations
Brisbane's tropical climate creates specific insurance challenges for the construction industry:
## Tips for a Strong Insurance Claim
### Documentation
### Professional Support
### Know Your Policy
## What to Do If Your Claim Is Disputed
If the insurer denies your claim, offers a settlement you believe is too low, or disputes the extent of damage:
For a complete overview, see our [guide to insurance claim assessments](/guides/insurance-claim-assessment-guide).
### Common Building Defects in Geelong: Causes and Solutions
Source: https://ownerinspections.com.au/articles/common-building-defects-in-geelong-causes-and-solutions
Published: 2024-10-09 | Updated: 2026-02-09 | Category: Building Inspections
Author: Maison Azdari
The most common building defects in [Geelong](/vic/building-inspections-geelong) include structural cracking caused by reactive soils and foundation movement, dampness and mould from inadequate ventilation and waterproofing, faulty roofing from weather exposure and material degradation, plumbing defects from ageing pipes and poor installation, and electrical issues from outdated or non-compliant wiring. Geelong's coastal location, reactive clay soils, and variable Victorian climate make properties in the region especially prone to these issues. Early detection through regular building inspections is the most effective way to prevent minor defects from becoming expensive structural problems.
Geelong is one of Victoria's fastest-growing cities, attracting homeowners and investors with its coastal lifestyle and strong property market. However, the same environmental conditions that make the region appealing also create challenges for buildings. Salty sea air, high humidity, reactive soils, and temperature swings all contribute to building deterioration. Whether you are buying, building, or maintaining a property in Geelong, understanding the common defects and their causes helps you protect your investment. For a complete overview, see our [guide to building defect investigations](/guides/building-defect-investigation-guide).
## What Is a Building Defect?
A building defect is any fault in a structure that deviates from the intended design, functionality, or building code requirements. Defects can range from minor cosmetic issues, like a poorly finished paint job, to significant structural problems such as cracking foundations or failed waterproofing. Some defects are visible to the naked eye, while others are hidden behind walls, under floors, or in roof spaces, requiring professional inspection to detect.
## Why Geelong Properties Face Specific Risks
Geelong's environment creates a unique combination of factors that increase the risk of building defects:
## Common Building Defects in Geelong
### Structural Cracking
Structural cracking is one of the most frequently reported defects in Geelong properties. These cracks appear in walls, foundations, and slabs, and can range from minor cosmetic lines to large gaps indicating serious structural movement.
**Common causes:**
**Solutions:**
### Dampness and Mould
Dampness and mould are common in Geelong homes, particularly in older properties with limited ventilation and in newer builds where waterproofing may have been inadequately applied.
**Common causes:**
**Solutions:**
For more information, see our guide to [mould inspections](/articles/mould-inspection-guide).
### Faulty Roofing
Roofing defects are widespread in Geelong due to constant exposure to sun, wind, rain, and salt air. Damaged or deteriorating roofing can lead to water ingress, insulation failure, and structural damage.
**Common causes:**
**Solutions:**
### Plumbing Defects
Plumbing problems including leaking pipes, poor drainage, and low water pressure are common in both older and newer Geelong homes.
**Common causes:**
**Solutions:**
### Electrical Issues
Outdated or non-compliant electrical wiring is a safety concern in many older Geelong properties. Even some newer builds can have electrical defects if the work was not properly inspected.
**Common causes:**
**Solutions:**
## Defect Severity Guide
## Preventative Measures
### Benefits of Independent Construction Stage Inspections in Brisbane
Source: https://ownerinspections.com.au/articles/benefits-of-independent-construction-stage-inspections-in-brisbane
Published: 2024-10-02 | Updated: 2026-02-09 | Category: Construction Inspections
Author: Maison Azdari
Independent construction stage inspections in [Brisbane](/qld/building-inspections-brisbane) involve hiring a qualified third-party inspector, separate from the builder or contractor, to assess construction work at each major phase of the build. These inspections help homeowners confirm that work complies with the National Construction Code (NCC), Queensland Building and Construction Commission (QBCC) requirements, and the building contract. The typical cost ranges from $250 to $500 per stage, and inspections are recommended at the slab, frame, lock-up, fixing, and pre-handover stages.
Building a new home in Brisbane is one of the largest financial commitments most people will make. Yet many owners rely solely on their builder's internal quality checks without realising they can engage an independent inspector at each construction stage. With Brisbane's subtropical climate putting extra pressure on materials and workmanship, independent oversight is a practical step that can prevent costly surprises down the track.
This guide explains what independent construction stage inspections involve, why they matter in Brisbane specifically, and how they protect your investment from start to finish.
## What Are Independent Construction Stage Inspections?
Independent construction stage inspections are assessments performed by a licensed third-party professional at specific milestones during a building project. The inspector is not employed by, or affiliated with, the builder or contractor, which means the evaluation is free from conflicts of interest.
At each stage, the inspector checks whether construction work meets the approved plans, the building contract specifications, relevant Australian Standards, and the NCC. If defects or non-compliant work are found, the inspector documents them in a detailed report that the homeowner can use to request rectification before the next stage begins.
### How Independent Inspections Differ from Builder Inspections
Builder inspections are typically internal quality checks performed by the construction team or their sub-contractors. While some builders do a thorough job, there is an inherent conflict of interest since the builder is effectively assessing their own work.
Independent inspections remove that conflict. A third-party inspector has no financial stake in the project and reports only to the homeowner, providing an honest picture of the construction quality.
## Why Independent Inspections Matter in Brisbane
Brisbane's building environment presents challenges that make independent oversight especially worthwhile.
An independent inspector with local Brisbane experience understands these conditions and knows what to look for at each stage.
## Key Benefits of Independent Inspections
### 1. Objective and Unbiased Assessments
Because independent inspectors have no relationship with the builder, their reports reflect the true condition of the work. They approach each inspection without assumptions, examining everything from material quality to code compliance.
This objectivity means even minor issues, such as incorrectly spaced wall ties or inadequate concrete cover over reinforcement, get picked up before they become expensive problems.
### 2. Expert Monitoring at Every Stage
Licensed independent inspectors bring specialist knowledge across structural, plumbing, electrical, and weatherproofing elements. Their training covers all major construction stages, giving them the ability to identify problems that may not be obvious to an untrained eye.
### 3. Quality Control and Early Defect Detection
One of the biggest advantages of stage inspections is catching defects early. A crack in a slab or a misaligned frame that goes undetected can lead to structural issues, water ingress, or costly rework later in the build.
### 4. Thorough Documentation and Transparency
Every independent inspection generates a detailed report, typically with photographs, descriptions of defects, references to the relevant Australian Standard or NCC clause, and recommended actions. These reports create a paper trail that is valuable for:
### 5. Long-Term Cost Savings
While each inspection carries a fee (typically $250 to $500 per stage in Brisbane), the cost of not inspecting can be far higher. Rectifying a structural defect after the build is complete can run into tens of thousands of dollars.
### 6. Peace of Mind and Safety Assurance
Knowing that a qualified professional is independently verifying the quality and safety of your home throughout construction reduces stress and uncertainty. Independent inspectors also check that all safety regulations are met, covering structural integrity, fire safety, and electrical compliance.
## When Should Inspections Be Conducted?
Independent inspections should be carried out at each major construction milestone. In Brisbane, the standard stages are:
## Cost of Independent Inspections vs Cost of Defects
The table below shows how inspection costs compare to the typical cost of rectifying defects found at each stage.
Investing around $1,500 to $2,500 for a full set of stage inspections can save you tens of thousands of dollars in defect rectification and legal costs.
## How to Choose the Right Inspector in Brisbane
Selecting the right inspector is just as important as deciding to get one. Here is what to look for:
## Brisbane-Specific Challenges in Construction
Brisbane builders face conditions that are distinct from those in southern states. Independent inspectors with local experience understand these challenges and look for related issues during inspections.
For a complete overview, see our [guide to construction stage inspections](/guides/construction-stage-inspections-guide).
### Pre-Purchase Inspections for Investment Properties in Gold Coast
Source: https://ownerinspections.com.au/articles/pre-purchase-inspections-for-investment-properties-in-gold-coast
Published: 2024-09-25 | Updated: 2026-03-13 | Category: Pre-Purchase Inspections
Author: Maison Azdari
A [pre-purchase inspection](/pre-purchase-inspections) for an investment property on the Gold Coast is a professional assessment of the building's structural condition, pest risk, and compliance with Australian standards before you commit to buying. It typically costs between $400 and $700 depending on the property size and type, follows Australian Standard AS 4349.1 for building inspections and AS 4349.3 for [timber pest inspections](/timber-pest-inspections), and can identify defects that would cost thousands to repair. For Gold Coast properties, the inspection is especially important because of salt exposure, subtropical weather, and high termite activity in the region.
The Gold Coast property market draws investors from across Australia and overseas, with its mix of beachfront apartments, suburban houses, and hinterland retreats. However, a property that looks impressive on the surface can hide serious structural defects, pest damage, or water ingress that only becomes apparent after purchase.
Whether you are buying a rental property, a holiday let, or a long-term capital growth asset, a pre-purchase inspection gives you a clear picture of the property's condition before you sign. This guide covers what is checked, what problems are most common in Gold Coast properties, and how to use the inspection report to make a confident buying decision.
## Why Pre-Purchase Inspections Matter for Investment Properties
When you buy an investment property, the purchase price is only part of the equation. Hidden defects, pest infestations, or non-compliant building work can quickly turn a profitable investment into a financial burden.
A pre-purchase inspection helps you:
For investment properties specifically, the inspection report also helps you assess whether the property will meet rental compliance requirements and remain attractive to tenants without requiring immediate, expensive repairs.
Read the
Full Guide
}
buttonHref="/guides/pre-purchase-building-pest-inspection-guide"
variant="secondary"
/>
## What Does a Pre-Purchase Inspection Cover?
A standard pre-purchase building inspection on the Gold Coast follows AS 4349.1 and assesses the property's condition across multiple areas.
A separate timber pest inspection (AS 4349.3) checks for termite activity, termite damage, fungal decay, and other wood-destroying pests. On the Gold Coast, this inspection is particularly important given the high termite risk in the region.
## Common Problems in Gold Coast Properties
Gold Coast properties face a unique combination of environmental factors that increase the risk of certain defects.
### Pest Intrusions
The Gold Coast's warm, humid subtropical climate creates ideal conditions for termites and other wood-destroying pests. Termite damage is one of the most common and costly issues found during pre-purchase inspections in the region. Properties with untreated timber, poor subfloor ventilation, or moisture problems are especially at risk.
### Salt and Moisture Damage
Properties near the coastline are exposed to salt-laden air and sea spray, which corrodes metal fixtures, deteriorates render and paintwork, and weakens structural elements over time. The closer a property is to the ocean, the more pronounced these effects tend to be.
### Water Ingress and Drainage Issues
The Gold Coast receives significant rainfall, particularly during the summer storm season. Properties with inadequate drainage, ageing roofs, or poorly maintained gutters are prone to water damage. Water ingress can affect foundations, cause mould growth, and compromise internal linings.
### Sun and UV Damage
Intense UV exposure fades exterior paint, degrades sealants, and places strain on cooling systems. Older properties without adequate shading, insulation, or UV-resistant materials may have higher ongoing maintenance costs.
## Understanding the Gold Coast Property Market
The Gold Coast property market offers a wide range of investment options, each with different inspection considerations.
Whatever type of investment property you are considering, the pre-purchase inspection should be carried out before you enter into a binding contract or before the cooling-off period expires; buyers can also review the [cooling-off period QLD](https://www.cairnsconveyancingsolicitor.com.au/blog/cooling-off-period-qld/) rules to understand the relevant timeframe and their contractual rights.
## Pre-Purchase Inspection Costs on the Gold Coast
A [combined building and pest](/building-and-pest-inspections) inspection is the most common choice for Gold Coast investment property buyers and provides the best value.
Explore Building
& Pest Inspections
}
buttonHref="/building-and-pest-inspections"
variant="secondary"
/>
## How to Choose the Right Inspector
Not all inspectors are equal. For a Gold Coast investment property, look for the following:
## Making the Most of Your Inspection Report
The inspection report is not just a list of defects. It is a decision-making tool that helps you:
Keep the report on file even after purchase. It serves as a baseline condition record for future maintenance planning and can support insurance claims if damage occurs later.
Get Your Gold Coast
Inspection Quote
}
buttonHref="/qld/building-inspections-gold-coast"
variant="primary"
/>
For a complete overview, see our [guide to pre-purchase building and pest inspections](/guides/pre-purchase-building-pest-inspection-guide).
### Expert Witness Costs vs Benefits in Brisbane Construction Disputes
Source: https://ownerinspections.com.au/articles/expert-witness-costs-vs-benefits-in-brisbane-construction
Published: 2024-09-18 | Updated: 2026-08-14 | Category: Expert Witness
Author: Maison Azdari
An expert witness in a [Brisbane](/qld/building-inspections-brisbane) construction dispute costs between $3,000 and $20,000, with most residential defect matters landing between $5,000 and $12,000. That buys a site inspection, a report written to the form Queensland courts and QCAT accept, and attendance at a hearing if the matter gets that far. The benefit is leverage, because an independent opinion on cause and rectification cost is usually what moves a builder from denial to negotiation. On any dispute above roughly $20,000, the fee is a small fraction of what is at stake.
What most cost guides leave out is that Queensland has specific rules about who can give expert evidence, how many experts you are allowed, and what an expert report must contain. Those rules are the biggest single driver of the bill, and understanding them before you engage anyone is how you avoid paying twice.
## What Does an Expert Witness Do in Construction Disputes?
An expert witness in a construction dispute is a qualified professional, usually a licensed building inspector, engineer, or construction specialist, who gives independent opinion evidence on technical matters. Unlike an ordinary witness, who can only describe what they saw, an expert is permitted to state an opinion on cause, extent, compliance and the cost to put the work right.
In practice the work is three things. They assess whether the work complies with Australian Standards and the NCC and put a rectification cost on it. They translate material specifications, structural calculations and code clauses into plain language a tribunal member can act on without a building background. And they bring pattern recognition, having seen the same failure across many properties, which lets them separate a construction defect from ordinary wear, seasonal movement or an owner maintenance issue. That last distinction is frequently the whole dispute.
Cracked and displaced brickwork above a corroding steel lintel. On its own the photograph establishes very little. What an expert adds is the finding that the cracking follows from the lintel corroding and expanding, which is what turns a photo into evidence of a defect rather than a maintenance complaint.
## How Much Does an Expert Witness Cost in Brisbane?
An expert witness in Brisbane costs $3,000 to $20,000 in total, built from a retainer of $1,000 to $3,000, a site inspection of $500 to $2,000, report preparation of $2,000 to $8,000, and hearing attendance at $1,500 to $5,000 or more per day. Most experts charge $250 to $500 per hour against those components.
Complex matters with multiple site visits, destructive testing, lengthy reports and extended hearings can run past $20,000. The conclave line is the one people forget to budget for, and it is not optional once a hearing is on foot.
## Do I Have to Lodge a QBCC Complaint Before Applying to QCAT?
Yes. For a building dispute, the QBCC states that lodging a complaint with it is a mandatory first step, and QCAT will not accept a building dispute application until you have been through that process. If the QBCC cannot assist or the matter does not resolve, it issues a letter confirming that outcome, and that letter is what lets you apply to the tribunal.
This sequence matters financially, because it determines when to spend money on an expert.
The practical lesson is that a defect investigation report, which costs far less than a full expert witness engagement, is often the right first spend. Escalate to an expert witness report when the QBCC route is exhausted and the matter is genuinely heading to a hearing.
## What Rules Must an Expert Report Follow in Queensland?
A Queensland expert report must comply with QCAT Practice Direction No 4 of 2009 and rule 428 of the Uniform Civil Procedure Rules. It must be addressed to the tribunal, signed, and set out the expert's qualifications, every material fact relied on, what was inspected and by whom, the range of opinion on contested points, and a confirmation that the expert understands and has complied with their duty.
These are not formatting preferences. A report that misses them can be given little weight or excluded, and you will have paid for it either way.
A severely corroded steel lintel, the rust layers delaminating and lifting the timber above. Rule 428 is why an expert cannot simply photograph this and call it defective. The report has to record what was inspected, what the expert relied on, and where a reasonable second opinion might differ.
## What Are the Benefits of Hiring an Expert Witness?
The benefit of an expert witness is that it converts a disagreement into documented, independent evidence of cause and cost. That changes the negotiating position, gives your solicitor a defensible number to claim, and gives the tribunal something it can act on. In most matters the settlement effect arrives long before any hearing does.
Most defect disputes are contested on cause rather than existence. Both sides agree the wall is cracked. The argument is whether it cracked because of the footing design, the workmanship, or the ground, and an expert answers that in terms a tribunal can adopt. The report also puts an independent rectification figure on the claim, which matters because without one a claimed amount is an assertion and QCAT has no basis to award it. A builder facing itemised costs and code references is markedly more likely to negotiate, and avoiding a hearing removes the largest cost in the whole process.
## What Does the Whole Dispute Cost, Not Just the Expert?
The expert is one line in a larger bill. A QCAT building dispute application under section 77(1) of the QBCC Act costs $405.60 to lodge, and an appeal costs $811.30, on the fees in force from 1 July 2026. Add legal costs, which at QCAT usually require permission to be represented, and the expert fee is typically a third to a half of the total.
Owner Inspections prepares reports and gives evidence. We do not provide legal advice, and the question of whether to run a case at all is one for a solicitor.
## Who Pays the Expert Witness and Can You Get the Money Back?
The party who engages the expert pays the fee, and at QCAT you should assume you will not get it back. Section 100 of the QCAT Act sets the default that each party bears its own costs. Section 102 allows the tribunal to order costs against a party where the interests of justice require it, but that is the exception rather than the routine outcome.
The higher courts behave differently. In the District Court and Supreme Court, costs more commonly follow the event, so a successful party has a better prospect of recovering expert fees. That difference is worth understanding before you choose a forum, and it is a conversation for your solicitor rather than your inspector.
## When Is an Expert Witness Worth It?
An expert witness is worth it when the amount in dispute clearly exceeds the fee, when the case turns on cause rather than fact, or when the other side has engaged an expert of their own. Below roughly $20,000, the fee eats too much of the claim, and QBCC dispute resolution or mediation is usually the better first move.
Broken and displaced ridge tiles with failed bedding. Defects like this are cheap to argue about and expensive to prove, which is why the size of the claim, not the drama of the photograph, should drive the decision to engage an expert.
## How to Choose the Right Expert Witness in Brisbane
Choose an expert who is licensed in Queensland, has given evidence before, is genuinely independent of both parties, and writes reports that satisfy rule 428. Because Queensland limits you to one expert per area of expertise, this choice is effectively final, and the wrong appointment cannot be quietly replaced with a better one later.
For a complete overview, see our [guide to expert witness reports for building disputes](/guides/expert-witness-building-disputes-guide).
### Building and Pest vs Pre-Purchase Inspections in Brisbane
Source: https://ownerinspections.com.au/articles/building-and-pest-vs-pre-purchase-inspections-in-brisbane
Published: 2024-09-11 | Updated: 2026-02-09 | Category: Pre-Purchase Inspections
Author: Maison Azdari
A building and pest inspection in [Brisbane](/qld/building-inspections-brisbane) is a combined assessment that covers both the structural condition of a property (following AS 4349.1) and timber pest risk (following AS 4349.3). A pre-purchase inspection is a broader term that can include a building inspection, [pest inspection](/timber-pest-inspections), or both, conducted before buying a property. In practice, most Brisbane buyers requesting a "pre-purchase inspection" receive a combined building and pest inspection, which typically costs between $500 and $700. The key difference is that "building and pest" always includes the pest component, while a standalone "[pre-purchase building inspection](/pre-purchase-inspections)" may not.
If you are buying a property in Brisbane, you have likely come across both terms and wondered whether they mean the same thing or whether you need one, the other, or both. The confusion is understandable because the terms are often used interchangeably by real estate agents and even some inspection companies.
This guide breaks down the differences, explains what each type of inspection covers, compares costs, and helps you decide which option gives you the best protection before purchasing a Brisbane property.
## What Is a Pre-Purchase Building Inspection?
A pre-purchase building inspection is a visual assessment of a property's structural and non-structural condition, carried out before you commit to buying. It follows Australian Standard AS 4349.1 and covers elements such as the foundation, walls, roof, ceilings, floors, wet areas, external cladding, drainage, and site conditions.
The inspector identifies defects, areas of concern, and items requiring maintenance or further investigation. The report helps you understand the true condition of the property and make an informed purchase decision.
A standard pre-purchase building inspection does not include a timber pest assessment unless it is specifically requested as an add-on or combined package.
## What Is a Building and Pest Inspection?
A building and pest inspection combines two assessments into a single engagement:
Both inspections are typically carried out during the same site visit by a single inspector or a team, and the results are delivered in a combined or two-part report. This is the most comprehensive pre-purchase inspection option available and is the most commonly recommended for Brisbane property buyers.
## Key Differences at a Glance
## What Does Each Inspection Cover?
### Building Inspection Coverage (AS 4349.1)
### Timber Pest Inspection Coverage (AS 4349.3)
## Why the Pest Component Matters in Brisbane
Brisbane sits within one of Australia's highest termite activity zones. The warm, humid subtropical climate creates ideal breeding conditions for subterranean termites, which can cause severe structural damage if left undetected.
Common timber pest issues found in Brisbane properties include:
A standalone building inspection may note visible timber damage, but it does not include the systematic pest assessment methodology required by AS 4349.3. Only a qualified timber pest inspector can properly identify the species, extent, and severity of pest activity and recommend appropriate treatment.
## Costs Comparison in Brisbane
Booking separate building and pest inspections typically costs more than a combined package. The combined inspection is also more convenient since both are completed in a single site visit.
## Which Inspection Do You Need?
For the majority of Brisbane property purchases, a combined building and pest inspection is the recommended option. Here is a guide to help you decide:
## How to Choose an Inspector in Brisbane
For a complete overview, see our [guide to pre-purchase building and pest inspections](/guides/pre-purchase-building-pest-inspection-guide).
### Common Mistakes to Avoid at Your Apartment Pre-Settlement Inspection
Source: https://ownerinspections.com.au/articles/avoid-mistakes-key-tips-for-apartment-pre-settlement-inspections
Published: 2024-09-05 | Updated: 2026-01-30 | Category: Pre-Settlement Inspections
Author: Maison Azdari
Buying an apartment is one of the biggest financial decisions most Australians will make. The [pre-settlement inspection](/apartment-pre-settlement) is your final opportunity to check that everything is as it should be before you hand over your money and take ownership. Yet too many buyers treat this step as a formality, rushing through or missing critical details that end up costing them dearly after settlement.
A pre-settlement inspection for an apartment differs from one for a freestanding house. You are dealing with shared spaces, body corporate areas, and often complex building systems that all need attention. Getting it right means knowing what to look for and, just as importantly, knowing which mistakes to avoid.
> The pre-settlement inspection is your last line of defence before taking legal ownership of an apartment. Once settlement occurs, the burden of proving pre-existing defects falls squarely on you as the new owner.
## Why Apartment Pre-Settlement Inspections Matter
Your contract of sale sets out the condition the apartment should be in at handover. For off-the-plan purchases, the developer's specifications and plans form the benchmark. For established apartments, the condition at the time of contract exchange is the standard.
If you miss defects during this final walkthrough, you lose significant bargaining power. After settlement, your options for recourse become far more limited and expensive. In many states, the seller or developer has minimal obligations once the property changes hands, unless major structural defects are involved.
For a detailed overview of the process itself, see our guide on [what to expect in a pre-settlement inspection](/articles/what-to-expect-in-a-pre-settlement-inspection).
## The 10 Most Common Mistakes Buyers Make
The following table summarises the key mistakes and their potential consequences. Each is explored in detail below.
| Mistake | Potential Consequence |
| ------------------------------------------------ | ------------------------------------------------------ |
| Rushing through the inspection | Missing defects that could cost thousands to repair |
| Not bringing your contract and documentation | Unable to verify inclusions and specifications |
| Skipping common areas | Inheriting shared maintenance liabilities |
| Ignoring minor defects | Small issues becoming major problems over time |
| Not testing appliances and fixtures | Discovering faulty items after settlement |
| Inspecting in poor lighting conditions | Failing to spot cosmetic and structural flaws |
| Not photographing or documenting issues | No evidence to support claims for rectification |
| Going alone without professional help | Missing technical defects only trained eyes can find |
| Not checking contractual specifications | Accepting finishes and fittings below agreed standards |
| Failing to confirm agreed repairs were completed | Settling on a property with outstanding defect work |
### 1. Rushing Through the Inspection
This is the most frequent mistake apartment buyers make. Whether due to excitement, time pressure, or the assumption that everything will be fine, many buyers spend less than 30 minutes inspecting their new apartment.
A thorough apartment inspection takes at least 60 to 90 minutes, even for a standard two-bedroom unit. Larger apartments, penthouses, or properties with extensive outdoor areas may require even more time. You need to check every room, every fixture, every surface, and every system methodically.
Do not let the selling agent or developer's representative rush you. You have a legal right to conduct a proper inspection. If someone suggests you are taking too long, politely remind them that this is a significant purchase and you intend to be thorough.
### 2. Not Bringing Your Contract and Documentation
Your contract of sale, any variations, the plan of subdivision, and the developer's specifications (for off-the-plan purchases) are essential reference documents during the inspection. Without them, you are relying on memory alone to verify that the apartment matches what was promised.
Key documents to bring include:
- The signed contract of sale and any amendments
- The developer's specifications and inclusions list
- Floor plans and architectural drawings
- Any correspondence about agreed repairs or modifications
- Previous inspection reports, if applicable
- Your own [apartment pre-settlement inspection checklist](/articles/checklist-for-apartment-pre-settlement-inspections)
Having these documents on hand allows you to cross-reference what you see against what was agreed. This is particularly important for off-the-plan apartments where the finished product may differ from what you saw in the display suite.
### 3. Skipping Common Areas
Many apartment buyers focus exclusively on their individual unit and completely overlook the common areas. The building lobby, hallways, car park, storage cages, lifts, fire stairs, gardens, pools, and gym facilities are all part of what you are buying into.
Defects in common areas become a shared financial responsibility through your strata levies. Cracked tiles in the foyer, water damage in the basement car park, or faulty lift mechanisms can all translate into special levies that may cost you thousands of dollars.
Walk through the common areas with the same level of scrutiny you apply to your apartment. Check for water stains on ceilings, cracks in walls, damaged flooring, and any signs of incomplete work. If the building is a new development, pay particular attention to waterproofing in wet areas, car park drainage, and the condition of shared facilities.
### 4. Ignoring Minor Defects
A hairline crack here, a slightly chipped tile there, a door that does not close quite right. These small issues might seem trivial in the excitement of taking ownership, but they can signal larger underlying problems or deteriorate significantly over time.
Hairline cracks in plaster can indicate structural movement. A door that sticks might point to frame misalignment caused by settling or poor construction. Chipped tiles in wet areas can allow moisture penetration that leads to serious water damage and mould growth.
Document every defect, no matter how minor it appears. You are not being difficult or unreasonable by raising these issues. You are protecting your investment. Under Australian consumer law and state-based home building legislation, you are entitled to a property that meets the agreed standard. For more on what constitutes a defect, read our guide on [construction defect inspections](/articles/construction-defect-inspection).
### 5. Not Testing Appliances and Fixtures
Every appliance and fixture in the apartment needs to be tested during the pre-settlement inspection. This includes items that buyers commonly overlook, such as exhaust fans, rangehoods, dishwashers, and intercom systems.
Work through each item systematically:
- **Kitchen:** Turn on the oven, cooktop, rangehood, and dishwasher. Run hot and cold water. Check the sink for drainage speed and leaks.
- **Bathrooms:** Flush every toilet. Run every tap and shower. Check water pressure and temperature. Look under vanities for leaks. Test exhaust fans.
- **Laundry:** Run taps, check drainage, test any built-in dryer or washing machine connections.
- **Living areas:** Test all power points with a phone charger or small device. Check light switches, dimmer controls, and ceiling fans.
- **Security:** Test the intercom, security access, garage remote, and any alarm systems.
- **Air conditioning and heating:** Run each system for several minutes to confirm proper operation.
If an appliance is not working at the time of inspection, note it as a defect. Do not accept excuses that it "just needs to be turned on at the switchboard" or "will work once the power is connected." Verify everything yourself.
### 6. Inspecting in Poor Lighting Conditions
Lighting plays a crucial role in what you can and cannot see during an inspection. Inspecting in dim conditions or at dusk means you are far more likely to miss surface defects, paint imperfections, scratches on flooring, water stains, and mould.
Schedule your inspection during daylight hours, ideally in the middle of the day when natural light is strongest. Open all blinds and curtains. Turn on every light in the apartment. If natural light is limited, bring a powerful torch to examine darker corners, under sinks, inside wardrobes, and behind appliances.
A torch angled across a wall surface (known as a raking light technique) will reveal bumps, dents, and uneven plaster that overhead lighting would hide entirely. Professional inspectors use this method routinely, and it is simple enough for anyone to replicate.
### 7. Not Photographing or Documenting Issues
Verbal observations mean nothing if you cannot back them up with evidence. Every defect, every discrepancy, and every area of concern should be photographed and described in writing during the inspection.
Use your phone to take clear, well-lit photos of each issue. Include a wider shot showing the location within the room and a close-up of the defect itself. Take video of functional issues such as slow drainage, noisy systems, or flickering lights.
Keep a written log alongside your photos. Note the room, the specific location within the room, the nature of the defect, and any relevant contract clause it relates to. This documentation becomes critical evidence if you need to pursue [pre-settlement disputes and resolution](/articles/pre-settlement-disputes-and-resolution) processes.
### 8. Going Alone Without Professional Help
While you absolutely should attend your own pre-settlement inspection, going without professional support is a risk many buyers take unnecessarily. A licensed building inspector brings trained eyes, specialised tools, and knowledge of building codes and standards that most buyers simply do not have.
Professional inspectors can identify issues that are invisible to untrained observers. These include inadequate waterproofing, non-compliant electrical work, structural defects hidden behind plaster, and drainage problems that will only become apparent during heavy rain.
For apartment purchases, particularly off-the-plan properties, the cost of a professional inspection is minimal compared to the potential cost of undetected defects. Our [pre-settlement inspection service](/pre-handover-inspections) provides a detailed report that identifies all defects and references the relevant Australian standards.
The [builder's obligations during pre-settlement inspections](/articles/builder-obligations-in-pre-settlement-inspections) are clearly defined in law. A professional inspector can help you determine whether those obligations have been met.
### 9. Missing Contractual Specifications
Off-the-plan apartment buyers are particularly vulnerable to this mistake. Developers may substitute materials, change finishes, or alter layouts from what was originally specified. These changes might be subtle, such as a different brand of tapware, a lower grade of carpet, or slightly different cabinetry hardware.
Without your contract specifications in hand, you may not notice these substitutions. And once settlement occurs, proving that a substitution was made and that it was not agreed upon becomes much harder.
Compare every detail against the specifications:
- Benchtop materials and colours
- Tapware and hardware brands and models
- Flooring type, colour, and quality
- Appliance brands and models
- Paint colours and finishes
- Tile sizes, patterns, and grout colours
- Window and door hardware
- Lighting fixtures
If you find discrepancies, raise them immediately. Under the [Australian Consumer Law](https://www.accc.gov.au/consumers/consumer-rights-guarantees), goods and services must match their description. A developer who delivers something materially different from the contractual specification is in breach.
### 10. Failing to Confirm Agreed Repairs Were Completed
If a previous inspection identified defects and the seller or developer agreed to rectify them before settlement, you must verify that this work has actually been done. Do not simply take their word for it.
Check each item on the rectification list individually. Test repaired fixtures, examine patched surfaces closely, and confirm that replacement items match the original specifications. Shoddy or incomplete repair work is common, particularly when developers are under pressure to settle quickly.
If repairs have not been completed to a satisfactory standard, you are within your rights to delay settlement until the work is done properly. Discuss this with your solicitor or conveyancer, as the specific process varies between states and territories.
## Your Legal Rights During the Inspection
Australian property law gives buyers specific rights regarding pre-settlement inspections, though these rights vary by state and territory.
In New South Wales, the standard contract for sale of land gives the buyer the right to inspect the property before settlement. The property must be in essentially the same condition as at the contract date, fair wear and tear excepted. The [NSW Fair Trading](https://www.fairtrading.nsw.gov.au/) website provides detailed guidance on buyer rights.
In Victoria, buyers typically have the right to two inspections before settlement under the standard contract conditions. Queensland, South Australia, and Western Australia each have their own provisions, so check with your conveyancer about the specific rules that apply to your purchase.
For new builds and off-the-plan purchases, additional protections apply under state-based home building legislation. These laws set minimum standards for construction quality and impose warranty obligations on builders and developers.
## Timing Your Inspection Right
Getting the timing of your pre-settlement inspection right is more important than many buyers realise. Too early and conditions may change before settlement. Too late and you have no time to address problems.
For established apartments, aim for five to seven days before settlement. This provides enough time to raise issues and negotiate repairs or price adjustments if needed.
For off-the-plan apartments, try to schedule the inspection seven to fourteen days before the proposed settlement date. New builds often have a longer list of defects, and developers may need additional time to arrange tradespeople for rectification work.
If your first inspection reveals significant defects, request a second inspection after the developer or seller claims the work is complete. You are entitled to verify that rectification has been carried out properly.
## What to Do If You Find Defects
Discovering defects during your pre-settlement inspection does not mean the purchase falls apart. It means the system is working as intended. The inspection exists precisely to catch these issues before they become your problem.
When you identify defects, take the following steps:
1. **Document everything** with photos, videos, and written descriptions.
2. **Notify the seller or developer** in writing, listing each defect clearly.
3. **Contact your solicitor or conveyancer** to discuss your options.
4. **Request rectification** before settlement, with a follow-up inspection to verify the work.
5. **Consider a professional [defect report](/defect-investigation-reports)** if the issues are significant or numerous.
In some cases, buyers negotiate a reduction in the purchase price to account for defects that the seller cannot or will not repair before settlement. This approach should only be taken with legal advice, as it can affect your rights under warranty provisions.
For substantial defects, you may be entitled to delay settlement until they are resolved. Speak with your legal representative about the specific provisions in your contract and the applicable state legislation.
## Tips for a Successful Apartment Pre-Settlement Inspection
Beyond avoiding the common mistakes listed above, these practical tips will help you get the most from your inspection.
**Create a room-by-room checklist** before you arrive. Working through each space systematically ensures you do not miss anything. Move from top to bottom (ceiling, walls, floor) and left to right around each room.
**Bring the right tools.** A phone for photos and notes, a torch, a spirit level, a tape measure, and a small electrical tester (available from any hardware store) will help you identify issues that are not visible to the naked eye.
**Check behind and beneath things.** Open every cupboard, look behind doors, check under sinks, and inspect the back of wardrobes. Defects are often hidden in places buyers do not think to look.
**Run water for several minutes.** Short bursts of water flow will not reveal drainage problems or slow leaks. Let taps run for at least two to three minutes and check under sinks and around shower bases for any signs of water escape.
**Pay attention to smells.** Musty or damp odours can indicate water damage, mould, or poor ventilation. These issues may not be visible but can be significant.
## Frequently Asked Questions
### How long should a pre-settlement inspection take for an apartment?
A thorough pre-settlement inspection for a standard apartment should take between 60 and 90 minutes. Larger apartments or those with extensive defect lists may take longer. Do not rush the process, as missed defects can be costly to address after settlement.
### Can I bring a professional building inspector to my pre-settlement inspection?
Yes, you are entitled to bring a professional building inspector to your pre-settlement inspection. In fact, it is strongly recommended, particularly for off-the-plan apartments and new builds where construction defects may be present. The cost of a professional inspection is a small price to pay for peace of mind.
### What happens if I find defects during the inspection?
If you discover defects, document them thoroughly and notify the seller or developer in writing. Your solicitor or conveyancer can advise on the best course of action, which may include requesting rectification before settlement, negotiating a price reduction, or in serious cases, delaying settlement.
### Can I delay settlement if defects are not rectified?
In many cases, yes. Your right to delay settlement depends on the terms of your contract and the applicable state legislation. Speak with your legal representative before making this decision, as delaying settlement without proper legal grounds can have financial consequences.
### Do I need to check common areas during my apartment inspection?
Absolutely. Common areas become a shared financial responsibility once you are an owner in the strata scheme. Defects in common areas can lead to special levies that all owners must contribute to, so it is in your interest to identify these issues early.
### What tools should I bring to the inspection?
Bring your phone (for photos and notes), a powerful torch, a spirit level, a tape measure, and your contract documents including specifications and floor plans. A small electrical socket tester is also useful for checking power points.
### How many pre-settlement inspections am I entitled to?
This varies by state and contract terms. In Victoria, buyers typically have the right to two inspections. In other states, at least one inspection is standard. Check your contract for the specific provisions that apply to your purchase.
### What if the developer has substituted materials or finishes?
If the developer has used different materials or finishes from those specified in the contract, this may constitute a breach. Document the discrepancies and raise them with the developer in writing. Your solicitor can advise on whether the substitutions are significant enough to warrant action.
### Should I inspect the apartment if it is raining?
Rain can actually be an advantage for inspections, as it reveals water ingress, drainage issues, and leaks that would not be visible in dry conditions. If possible, inspect during or shortly after rain to check for these problems, but ensure you also inspect in good natural light.
### Can I negotiate a price reduction instead of repairs?
Yes, price reductions (sometimes called a vendor's allowance) are a common resolution for defects found during pre-settlement inspections. Get legal advice before agreeing to this approach, as accepting a price reduction may affect your rights to claim under builder's warranty provisions for those specific defects.
### What are the most costly defects to miss in an apartment?
Waterproofing failures, structural cracking, window seal defects, and balcony drainage issues are among the most expensive defects to rectify in apartments. These can cost tens of thousands of dollars to repair and may affect other units in the building as well.
### Is the pre-settlement inspection the same as a building and pest inspection?
No, they serve different purposes. A building and pest inspection is typically conducted before you sign the contract and covers the overall condition of the property. A pre-settlement inspection confirms the property is in the agreed condition immediately before settlement. Both are important, but they occur at different stages of the buying process.
## Take the Stress Out of Your Apartment Inspection
A pre-settlement inspection does not have to be overwhelming. With the right preparation, the right documents, and the right professional support, you can walk through your new apartment with confidence.
If you want expert eyes on your apartment before you settle, our team of licensed building inspectors can conduct a detailed [pre-settlement inspection](/pre-handover-inspections) that covers every aspect of your new home. We identify defects, reference the relevant Australian standards, and provide you with a comprehensive report that gives you the evidence you need to ensure your apartment is delivered as promised.
### How to Choose a Dilapidation Inspector on the Gold Coast
Source: https://ownerinspections.com.au/articles/how-to-choose-a-dilapidation-inspector-on-the-gold-coast
Published: 2024-08-28 | Updated: 2026-02-09 | Category: Dilapidation Reports
Author: Maison Azdari
Choosing a dilapidation inspector on the [Gold Coast](/qld/building-inspections-gold-coast) means finding a licensed, experienced building professional who can thoroughly document the existing condition of your property before nearby construction, demolition, or excavation begins. The right inspector should hold a current QBCC licence or equivalent qualification, carry professional indemnity insurance, have experience with Gold Coast properties and their specific challenges (such as salt corrosion and reactive soils), and deliver a detailed photographic report within a clear timeframe. A typical [dilapidation inspection](/dilapidation-reports) on the Gold Coast costs between $500 and $1,500 depending on the property size and scope.
A dilapidation report creates a documented baseline of your property's condition at a specific point in time. If nearby building work causes damage to your property, this report becomes the evidence you need to prove the damage was not pre-existing. Without one, resolving disputes with developers, builders, or councils becomes far more difficult.
On the Gold Coast, where high-rise construction, residential development, and infrastructure projects are common, dilapidation inspections are frequently required by councils and requested by property owners. This guide explains what to look for when selecting an inspector and the questions you should ask before hiring one.
## What Is a Dilapidation Inspection?
A dilapidation inspection is a thorough assessment and documentation of the current condition of a property. It records existing defects, damage, cracking, movement, and general wear so that any changes caused by nearby construction or demolition can be clearly identified later.
The inspection is typically carried out before construction begins on an adjacent or nearby site. The resulting report includes detailed written descriptions and high-resolution photographs of every accessible area of the property, both internal and external.
## Why Dilapidation Inspections Matter on the Gold Coast
The Gold Coast is one of Australia's fastest-growing regions, with continuous construction activity across residential, commercial, and infrastructure sectors. This growth means many existing properties are located near active building sites.
## Key Factors When Choosing an Inspector
### Qualifications and Licensing
The inspector should hold a current licence recognised by the Queensland Building and Construction Commission (QBCC) or an equivalent industry accreditation. Check that their qualifications cover building inspection and condition assessment, not just a general builder's licence.
### Experience with Dilapidation Reports
Not all building inspectors have experience preparing dilapidation reports. This type of inspection requires a specific methodology, including systematic photographic documentation, written descriptions of existing conditions, and an understanding of how to record a baseline that will stand up if a dispute arises. Ask how many dilapidation reports they have completed and whether they have experience with Gold Coast properties.
### Local Knowledge
Gold Coast properties face specific challenges that a local inspector will understand:
### Professional Indemnity Insurance
Always confirm that the inspector carries professional indemnity insurance. This protects you if there is an error or omission in the report that results in a loss. A reputable inspector will be able to provide proof of insurance on request.
### Report Quality and Delivery Time
The value of a dilapidation report depends entirely on its quality. A good report includes:
### Reputation and Reviews
Check the inspector's online reviews, testimonials, and reputation. Look for consistent positive feedback about thoroughness, report quality, and professionalism. Be cautious of inspectors with recurring complaints about rushed inspections or incomplete reports.
## Questions to Ask Before Hiring
Before engaging a dilapidation inspector, ask these questions to confirm they are the right fit:
## Gold Coast-Specific Considerations
### Salt Spray Corrosion
Properties within a few kilometres of the coastline are exposed to salt-laden air that accelerates corrosion of metal elements, including reinforcement, roof sheeting, balustrades, and fixings. A dilapidation inspector familiar with the Gold Coast will specifically document the condition of these elements so that any further deterioration after nearby construction can be attributed correctly.
### Reactive and Sandy Soils
Parts of the Gold Coast have reactive clay soils or sandy ground that is sensitive to changes in moisture and loading. Construction activity nearby can alter drainage patterns and ground conditions, potentially causing movement in your property's foundations. The inspector should document existing cracks, floor levels, and any signs of previous movement.
### High-Rise and Multi-Storey Properties
The Gold Coast has a high concentration of apartment buildings and high-rise developments. Dilapidation inspections for these properties may require assessment of common areas, car parks, podium levels, and individual units. Ensure the inspector has experience with multi-storey buildings and understands body corporate requirements.
## What a Good Dilapidation Report Looks Like
## Typical Costs on the Gold Coast
Costs vary based on property size, complexity, and the scope of the inspection. Always get a clear, upfront quote before proceeding.
### Ensuring Strata Building Bond Compliance: The Role of SBBIS
Source: https://ownerinspections.com.au/articles/ensuring-strata-building-bond-compliance-for-your-apartment
Published: 2024-08-21 | Updated: 2026-02-11 | Category: Building Inspections
Author: Maison Azdari
The Strata Building Bond and Inspection Scheme (SBBIS) is one of the most significant consumer protection measures introduced for apartment buyers in New South Wales. It was designed to address the widespread problem of building defects in newly constructed residential strata buildings, a problem that has cost Australian owners billions of dollars in rectification works.
This article covers how the scheme works, who must comply, what the bond amount is, and what happens when developers fail to meet their obligations.
> The SBBIS requires developers of residential strata buildings of four or more storeys in NSW to lodge a bond equal to 2% of the total contract price. This bond is held as security against building defects identified during the statutory inspection process.
## What Is the SBBIS?
The Strata Building Bond and Inspection Scheme was introduced under Part 11 of the _Strata Schemes Management Act 2015_ (NSW) and came into effect on 1 January 2018. It applies to new residential strata buildings in NSW that are four or more storeys high.
The scheme was created in response to mounting concerns about defective building work in the apartment sector. Reports from organisations such as the City Futures Research Centre at UNSW found that up to 85% of new apartment buildings in NSW contained at least one significant defect.
Under the scheme, developers must lodge a building bond with NSW Fair Trading before an occupation certificate is issued. This bond acts as a financial safety net for owners corporations, ensuring funds are available if defects are discovered.
The bond is equal to 2% of the total contract price for the building work. It is held for a period during which independent inspections are carried out to identify any defects that need rectification.
## Who Does the SBBIS Apply To?
The scheme applies to residential strata buildings that meet all of the following criteria:
- The building is located in New South Wales.
- The building is a residential strata scheme (or a mixed-use building with a residential strata component).
- The building is four or more storeys in height.
- The building's occupation certificate was issued on or after 1 January 2018.
The obligation to lodge the bond rests with the developer. In this context, the developer is the person or entity that contracted the building work to be carried out.
Smaller residential strata buildings of three storeys or fewer are not covered by SBBIS, though they may still be subject to other warranty and defect rectification obligations under the [_Home Building Act 1989_ (NSW)](https://legislation.nsw.gov.au/view/html/inforce/current/act-1989-147).
It is worth emphasising that the scheme covers the building as a whole, not individual lots. The owners corporation (body corporate) is the entity that benefits from the bond and the inspection process. For more on how body corporates handle building disputes, see our guide on [expert witnesses in body corporate building disputes](/articles/expert-witnesses-body-corporate-building-disputes).
## How the Bond Amount Is Calculated
The bond amount is set at 2% of the total contract price for the building work. The contract price includes the full cost of the construction contract between the developer and the builder.
Here is an example of how the bond is calculated for different building sizes:
| Total Contract Price | Bond Amount (2%) | Typical Building Size |
| -------------------- | ---------------- | ------------------------------- |
| $10,000,000 | $200,000 | Small 4-storey complex |
| $25,000,000 | $500,000 | Mid-rise 6-8 storey building |
| $50,000,000 | $1,000,000 | Large 10-15 storey tower |
| $100,000,000 | $2,000,000 | Major high-rise development |
| $200,000,000 | $4,000,000 | Large-scale multi-tower project |
If there is no written contract or the contract price does not reflect the true cost of the work, the Secretary of the Department of Customer Service may determine the contract price based on a reasonable estimate.
The bond must be lodged with NSW Fair Trading before the developer can obtain an occupation certificate. It may be lodged as cash, a bank guarantee, or another form approved by NSW Fair Trading.
## Compliance Steps for Developers
Developers must follow a defined sequence of steps to comply with the SBBIS. Failing to complete any of these steps can result in serious penalties.
### Step 1: Determine Whether the Scheme Applies
The developer must assess whether the building meets the criteria outlined above. Buildings that are four or more storeys and contain a residential strata component are captured by the scheme.
### Step 2: Calculate and Lodge the Bond
Before applying for an occupation certificate, the developer must calculate the bond at 2% of the contract price and lodge it with NSW Fair Trading. The bond can be in the form of cash, a bank guarantee, or an approved alternative.
### Step 3: Provide Information to the Owners Corporation
Once the strata scheme is registered, the developer must provide the owners corporation with information about the bond, including the amount lodged and details of the building contract.
### Step 4: Cooperate with the Inspection Process
The developer must allow the appointed building inspector to access the building for the purpose of conducting the interim and final inspections. The developer is also required to respond to any defects identified in the inspection reports.
### Step 5: Rectify Identified Defects
If the inspection reports identify defects, the developer (or the builder engaged by the developer) must rectify those defects within the timeframes agreed upon or determined by the relevant authority.
### Step 6: Apply for Bond Release
After the final inspection report is completed and any identified defects have been rectified, the developer may apply for the release of the bond. If defects remain unrectified, some or all of the bond may be paid to the owners corporation.
## The Inspection Process
The SBBIS mandates two inspections of the building: an interim inspection and a final inspection. Both inspections must be carried out by a qualified building inspector appointed by the owners corporation.
The process is designed to catch defects early and give developers an opportunity to rectify them before the bond is released.
### Appointing a Building Inspector
The owners corporation is responsible for appointing the building inspector. The inspector must be suitably qualified and hold the relevant licences. It is essential that the inspector is independent and has no conflict of interest with the developer or builder.
Choosing an experienced inspector is critical. Defects in large strata buildings can be complex, ranging from waterproofing failures and structural cracking to fire safety system deficiencies. Our article on [construction defect inspections](/articles/construction-defect-inspection) provides an overview of the types of defects commonly found in new buildings.
### Timing of the Inspections
The interim inspection must be carried out between 15 and 18 months after the completion of the building work. The final inspection must be conducted between 18 and 24 months after completion.
These timeframes are designed to allow sufficient time for defects to become apparent. Many building defects, particularly those related to waterproofing and structural movement, only manifest after the building has been through at least one full cycle of seasonal weather changes.
## Interim and Final Inspection Reports
Both inspections result in detailed reports that document any defects found in the building. These reports are critical documents for the owners corporation and play a key role in determining whether the bond is released or retained.
### The Interim Report
The interim inspection report identifies defects in the building and provides the developer with an opportunity to rectify those defects before the final inspection. The report should cover:
- Structural elements, including foundations, columns, beams, and load-bearing walls.
- Waterproofing systems in wet areas, balconies, and the building envelope.
- Fire safety systems, including fire doors, sprinkler systems, and smoke detection.
- Common property areas such as corridors, car parks, lifts, and rooftops.
- External cladding and facade systems.
- Mechanical and electrical services.
The interim report is not just a snapshot. It serves as a roadmap for rectification work that must be completed before the final inspection. For more on what building inspections cover at different stages, see our [building inspection stages guide](/new-construction-stage-inspections).
### The Final Report
The final inspection report assesses whether defects identified in the interim report have been properly rectified. It also identifies any new defects that have appeared since the interim inspection.
The final report is the document that determines the fate of the bond. If all defects have been rectified satisfactorily, the bond is released to the developer. If defects remain, some or all of the bond may be claimed by the owners corporation to fund rectification works.
## The Role of Building Inspectors
Building inspectors play a central role in the SBBIS process. Their reports directly influence whether millions of dollars in bond money are released or retained.
An effective SBBIS inspector must have:
- Relevant qualifications and licensing in building inspection.
- Extensive experience with multi-storey residential construction.
- Knowledge of the Building Code of Australia (BCA) and relevant Australian Standards.
- The ability to identify defects across all building disciplines, from structural to hydraulic to fire safety.
- Experience in producing detailed, evidence-based reports that can withstand legal scrutiny.
The inspector's role is purely to identify and document defects. They do not carry out rectification work or act as a project manager. Their independence is fundamental to the integrity of the scheme.
For related information on how inspection reports are used in dispute resolution, read our article on [structural defect inspections to prevent future problems](/articles/structural-defect-inspections-to-prevent-future-problems).
## How SBBIS Protects Apartment Owners
Before the SBBIS was introduced, apartment owners in NSW had limited recourse when defects were discovered in their buildings. Pursuing rectification through the courts was expensive, time-consuming, and often unsuccessful, particularly when developers had wound up the development company after completion.
The scheme protects owners in several ways:
**Financial security.** The 2% bond provides a pool of funds that can be used for defect rectification if the developer fails to carry out the work. This removes the burden of funding repairs from individual lot owners.
**Mandatory inspections.** The requirement for independent inspections ensures that defects are identified and documented by a qualified professional, rather than relying on owners to identify problems themselves.
**Time-limited process.** The defined timeframes for inspections and rectification create accountability and prevent developers from delaying action indefinitely.
**Transparency.** The inspection reports provide the owners corporation with a clear picture of the building's condition, enabling informed decision-making about rectification priorities.
The scheme is particularly valuable for owners of apartments in buildings where defects affect common property. Common property defects, such as waterproofing failures in the building envelope or deficiencies in fire safety systems, can be extremely costly to rectify. The bond ensures funds are available without requiring special levies on individual owners.
If you are considering purchasing an apartment in a strata building, a thorough inspection is essential. Learn more about the [difference between building inspections and strata inspections](/articles/difference-between-building-inspection-and-strata-inspection) to ensure you are fully informed before buying.
## Common Compliance Mistakes
Both developers and owners corporations can make mistakes during the SBBIS process. Being aware of these pitfalls helps all parties avoid delays, disputes, and financial losses.
### Developer Mistakes
**Failing to lodge the bond on time.** The bond must be lodged before the occupation certificate is issued. Developers who overlook this requirement face penalties and delays in obtaining the OC.
**Underestimating the contract price.** Some developers attempt to minimise the bond by understating the contract price. NSW Fair Trading has the power to assess the true contract price, and penalties apply for providing misleading information.
**Ignoring interim report findings.** Developers who fail to address defects identified in the interim report risk losing the entire bond at the final inspection stage.
**Winding up the development company.** Some developers dissolve the corporate entity that carried out the development, making it difficult for the owners corporation to pursue rectification. The SBBIS bond provides protection against this tactic because the funds are already held in trust.
### Owners Corporation Mistakes
**Delaying the appointment of an inspector.** The owners corporation must appoint an inspector and schedule the interim inspection within the required timeframe. Missing this window can compromise the owners corporation's ability to claim against the bond.
**Choosing an unqualified inspector.** Engaging an inspector without relevant experience in multi-storey residential buildings can result in defects being missed. The quality of the inspection report directly impacts the owners corporation's position.
**Failing to act on the reports.** Once the inspection reports are received, the owners corporation must take steps to have defects rectified. Inaction can undermine the owners corporation's claim to the bond.
## Penalties for Non-Compliance
The penalties for failing to comply with the SBBIS are severe. The NSW Government has signalled its commitment to enforcing the scheme through substantial fines and ongoing daily penalties.
**Maximum penalty for a corporation:** Up to $1,100,000.
**Maximum penalty for an individual:** Up to $220,000.
**Daily penalties:** Up to $22,000 per day for continuing offences.
These penalties apply to a range of non-compliance behaviours, including:
- Failing to lodge the building bond before the occupation certificate is issued.
- Providing false or misleading information about the contract price.
- Obstructing or failing to cooperate with the inspection process.
- Failing to comply with a notice or direction from NSW Fair Trading.
The size of these penalties reflects the seriousness with which the NSW Government treats building defects in strata properties. Given the scale of the defect crisis in Australian apartment construction, strong enforcement is necessary to ensure the scheme achieves its objectives.
For owners dealing with building defects and disputes, our [defect inspections](/defect-investigation-reports) service provides the expert assessment needed to document issues and support claims.
## SBBIS Compliance Checklist
The following checklist summarises the key steps for both developers and owners corporations:
### For Developers
- Confirm the building is captured by the scheme (four or more storeys, residential strata, NSW).
- Calculate the bond at 2% of the total contract price.
- Lodge the bond with NSW Fair Trading before applying for the occupation certificate.
- Provide bond and contract information to the owners corporation after strata registration.
- Allow building inspector access for interim and final inspections.
- Rectify defects identified in inspection reports within required timeframes.
- Apply for bond release after the final report confirms all defects are rectified.
### For Owners Corporations
- Appoint a qualified, independent building inspector.
- Schedule the interim inspection between 15 and 18 months after completion.
- Review the interim report and notify the developer of defects requiring rectification.
- Schedule the final inspection between 18 and 24 months after completion.
- Review the final report and determine whether to apply for bond release or retention.
- If defects remain unrectified, apply to retain part or all of the bond.
Understanding the full scope of building inspections is essential for strata owners. Our article on [building inspection stages](/new-construction-stage-inspections) explains what each phase of the inspection process involves.
If you are purchasing an apartment and want to assess the property before settlement, our [pre-purchase inspections](/pre-purchase-inspections) service can help identify potential issues.
## Frequently Asked Questions
### What does SBBIS stand for?
SBBIS stands for the Strata Building Bond and Inspection Scheme. It is a statutory scheme under the _Strata Schemes Management Act 2015_ (NSW) that requires developers of qualifying residential strata buildings to lodge a security bond and submit to independent building inspections.
### Which buildings are covered by the SBBIS?
The scheme covers new residential strata buildings in NSW that are four or more storeys high and received their occupation certificate on or after 1 January 2018. Mixed-use buildings with a residential strata component are also captured.
### How much is the building bond?
The building bond is set at 2% of the total contract price for the building work. For a building with a $50 million contract price, the bond would be $1 million.
### Who pays for the building bond?
The developer is responsible for lodging the building bond with NSW Fair Trading. The cost is borne by the developer, not by the apartment purchasers or the owners corporation.
### When must the bond be lodged?
The bond must be lodged before the developer can obtain an occupation certificate for the building. No occupation certificate will be issued until the bond has been lodged.
### Who appoints the building inspector for SBBIS inspections?
The owners corporation appoints the building inspector. The inspector must be independent of the developer and the builder and must hold relevant qualifications and licences.
### When are the SBBIS inspections carried out?
The interim inspection must occur between 15 and 18 months after the building work is completed. The final inspection must occur between 18 and 24 months after completion.
### What happens if defects are found during the inspections?
Defects identified in the interim report give the developer an opportunity to carry out rectification work before the final inspection. If defects remain unrectified after the final inspection, the owners corporation may apply to retain part or all of the bond to fund the rectification.
### What are the penalties for non-compliance with the SBBIS?
Penalties for non-compliance are significant. Corporations face fines of up to $1,100,000, individuals face fines of up to $220,000, and continuing offences attract daily penalties of up to $22,000 per day.
### Can the bond be released if some defects are still present?
The bond may be partially released if only some defects remain unrectified. The portion of the bond retained will reflect the estimated cost of rectifying the outstanding defects. NSW Fair Trading may make a determination on the appropriate split.
### Does the SBBIS replace the statutory warranty period?
No. The SBBIS operates alongside the statutory warranty periods under the _Home Building Act 1989_ (NSW). Developers and builders remain liable for defects under the statutory warranty provisions, which provide a six-year warranty period for major defects and a two-year warranty period for other defects.
### What types of defects are commonly found in SBBIS inspections?
Common defects include waterproofing failures, cracking in structural elements, defective fire safety systems, poor-quality finishes in common areas, inadequate drainage, and non-compliant cladding. For a detailed look at structural issues, see our guide on [structural defect inspections](/articles/structural-defect-inspections-to-prevent-future-problems).
---
If your strata building requires an SBBIS inspection or you need expert advice on building defects, contact **Owner Inspections**. Our licensed building inspectors have extensive experience with multi-storey residential buildings across NSW and can provide the thorough, independent assessments required under the Strata Building Bond and Inspection Scheme.
### Advantages and Disadvantages of Buying Off the Plan
Source: https://ownerinspections.com.au/articles/advantages-and-disadvantages-of-buying-off-the-plan
Published: 2024-08-15 | Updated: 2026-02-10 | Category: Pre-Settlement Inspections
Author: Maison Azdari
Buying off the plan means purchasing a property before it has been built or while it is still under construction. Buyers typically make their decision based on architectural plans, artist impressions, and display suites rather than a finished product. This approach to property purchasing has become increasingly popular in Australia, particularly in major cities where new apartment developments and housing estates are regularly launched.
While buying off the plan can offer significant financial benefits and the appeal of a brand-new home, it also comes with risks that every buyer should understand. This guide breaks down the key advantages and disadvantages to help you make an informed decision.
## What Does Buying Off the Plan Mean?
When you buy off the plan, you are entering into a contract to purchase a property that has not yet been completed. The developer provides plans, specifications, and often a display suite or 3D renderings to give buyers an idea of what the finished product will look like. You typically pay a deposit upfront, with the remaining balance due upon completion of the build. Settlement occurs once the property is finished and ready for occupation.
This type of purchase is common for apartments, townhouses, and house-and-land packages in new developments across Australia.
## Advantages of Buying Off the Plan
### Secure Today's Prices
One of the most significant advantages of buying off the plan is the ability to lock in a purchase price at today's market value. If property prices rise during the construction period, which can span one to three years or more, you may end up with a property worth more than what you paid for it. This potential for capital growth is a major drawcard for both homebuyers and investors.
### Stamp Duty Savings
In many Australian states and territories, buyers of off-the-plan properties can access stamp duty concessions or exemptions. These savings can amount to thousands of dollars, making the purchase more affordable. The exact concessions vary depending on the state or territory, the value of the property, and whether the buyer is an owner-occupier or investor. It is important to check the current stamp duty rules in your jurisdiction before committing.
### Time to Save
The extended period between signing the contract and settlement gives buyers additional time to save money towards the final purchase price or to build up a financial buffer. This can be particularly helpful for first-home buyers who may need extra time to accumulate savings beyond the initial deposit.
### Customise Your Home
Many developers offer buyers the opportunity to customise certain aspects of their new home during the construction phase. This can include choosing colour schemes, fixtures, fittings, flooring, and sometimes even layout modifications. Having input into the design means your home can better reflect your personal style and preferences without the need for costly renovations after moving in.
### Brand-New Property with Lower Maintenance
A brand-new property typically comes with builder warranties and should not require significant maintenance in the early years. Everything from the plumbing and electrical systems to the appliances and finishes is new, reducing the likelihood of unexpected repair costs. In most Australian states, new homes are covered by statutory warranties that protect against structural defects for a set period.
### High Rental Yield Potential
For investors, off-the-plan properties can offer attractive rental yields. New properties tend to appeal to tenants due to modern designs, updated amenities, and energy-efficient features. Additionally, depreciation benefits on a new property can provide tax advantages for investors.
### Enter New Developments Early
Buying off the plan allows you to secure a property in a new development before it is available to the general market. Early buyers often have first pick of the best positions, views, and floor plans within a development. Some developers also offer early-bird pricing or incentives to attract initial buyers.
### Less Stressful Moving Process
Since you know the approximate completion date well in advance, you can plan your move with less urgency compared to buying an established property. There is no need to rush settlement or coordinate with a seller's timeline. This allows you to organise your finances, arrange removalists, and prepare for the transition at your own pace.
## Disadvantages of Buying Off the Plan
### Construction Delays
One of the most common frustrations with buying off the plan is the risk of construction delays. Building projects can be held up by weather events, supply chain disruptions, labour shortages, or regulatory issues. These delays can push back your move-in date by months or even years, which can be particularly problematic if you have made plans around the expected completion date.
### Uncertain Market Conditions
The property market can change significantly between the time you sign the contract and the time the property is completed. If property values decline during the construction period, you may end up paying more than the property is worth at settlement. This negative equity situation can also make it harder to secure finance, as lenders may revalue the property at a lower amount than the original purchase price.
### Risk of Changes from Plans
The finished product may not exactly match the plans, artist impressions, or display suite that you based your purchase decision on. Developers may make changes to specifications, materials, or finishes during construction. While contracts typically outline what the developer is and is not permitted to change, there can be discrepancies between what was promised and what is delivered. It is essential to review the contract carefully and understand the developer's rights to make variations.
### Limited Ability to Inspect Before Purchase
Unlike buying an established property, you cannot physically walk through the home and inspect every detail before committing. You are relying on plans, specifications, and the developer's reputation. While you will have the opportunity to conduct a [pre-settlement inspection](/apartment-pre-settlement) before final payment, this comes at the end of the process, and any issues discovered at that stage can be difficult to resolve.
### Financial Risks and Mortgage Challenges
Securing a mortgage for an off-the-plan property can be more complex than for an established home. Lenders may apply stricter criteria, and your financial situation could change between signing the contract and settlement. If your income drops, your expenses increase, or lending policies tighten, you may face difficulty obtaining final approval. This could put your deposit at risk if you are unable to settle.
### Developer Reliability
The success of your off-the-plan purchase is heavily dependent on the developer. If the developer encounters financial difficulties, the project could be delayed, reduced in scope, or in the worst case, cancelled altogether. Researching the developer's track record, financial stability, and history of completed projects is critical before committing.
### No Immediate Rental Income
For investors, there is no rental income during the construction phase. You may be paying interest on a construction loan or tying up funds in a deposit without any return until the property is completed and tenanted. This can affect your cash flow and overall investment returns.
### Body Corporate Fees
If you are buying an off-the-plan apartment or townhouse, you will be subject to body corporate (strata) fees once the property is completed. These fees cover the maintenance and management of common areas and can be substantial, particularly in developments with extensive shared amenities such as pools, gyms, and concierge services. The estimated fees provided during the sales process may not accurately reflect the actual costs once the building is operational.
## Making an Informed Decision
Buying off the plan can be a rewarding experience if approached with careful research and realistic expectations. Before committing, consider the following steps:
### Electrical Defect Inspection to Ensure Safe Wiring Systems
Source: https://ownerinspections.com.au/articles/electrical-defect-inspection-to-ensure-safe-wiring-systems
Published: 2024-08-15 | Updated: 2026-02-10 | Category: Building Inspections
Author: Maison Azdari
An electrical defect inspection is a professional assessment of a property's electrical systems, designed to identify unsafe wiring, faulty installations, non-compliant work, and potential fire hazards. In Australia, all electrical work must comply with AS/NZS 3000 (the Wiring Rules) and the National Construction Code (NCC). Electrical faults are one of the leading causes of house fires, with Fire and Rescue NSW reporting that faulty wiring and electrical equipment contribute to over 40% of residential fires. Whether you are buying a home, building a new property, or managing an investment, an electrical defect inspection is one of the most important safety checks you can arrange.
Electrical defects are not always visible. They can hide behind walls, inside ceiling cavities, and within switchboards for years before they cause a serious incident. Many homeowners only discover wiring problems after a short circuit, a power outage, or worse. A qualified inspector knows where to look and what to look for, checking everything from switchboard condition and circuit protection to earthing systems, cable runs, and power point installations. For a complete overview, see our [guide to building defect investigations](/guides/building-defect-investigation-guide).
## Why Electrical Defect Inspections Matter
Faulty electrical systems pose serious risks to people and property. According to the Electrical Safety Office Queensland, electrical incidents cause an average of 15 deaths and over 300 injuries each year in Australia. These figures do not include the hundreds of house fires caused by electrical faults annually.
An electrical defect inspection gives you a clear picture of the safety and compliance status of a property's wiring and electrical infrastructure. For buyers, it provides bargaining power. For homeowners, it provides peace of mind.
## What Does an Electrical Defect Inspection Cover?
A thorough electrical defect inspection assesses all accessible electrical components in a property. The scope will depend on whether the inspection is part of a broader building inspection or a standalone assessment, but it generally covers the following areas.
## Common Electrical Defects in Australian Homes
Certain electrical defects appear frequently in Australian properties, regardless of age. Some are cosmetic or minor, while others present immediate safety risks.
## Electrical Defects in New Builds vs Older Properties
Electrical defects differ significantly between newly constructed homes and older properties. Understanding these differences helps you know what to watch for at each stage of a property's life.
### New Build Electrical Defects
Even brand-new homes can have electrical defects. These are typically caused by rushed construction timelines, subcontractor errors, or inadequate quality control during the build.
### Older Property Electrical Defects
Older homes, particularly those built before the 1990s, often have electrical systems that were compliant at the time of installation but no longer meet current standards.
## Australian Standards and Regulations
Electrical work in Australia is governed by a combination of national standards and state-based legislation. The two most relevant standards for residential electrical inspections are:
Each state and territory also has its own electrical safety legislation and licensing requirements.
## The Inspection Process Step by Step
Understanding what happens during an electrical defect inspection helps you prepare and know what to expect.
## What Happens After Defects Are Found
When an electrical defect inspection identifies problems, the next steps depend on the severity of the defects and whether the property is a new build, an existing home, or a property being purchased.
### For Pre-Purchase Inspections
### For New Builds Under Warranty
### For Existing Homeowners
## When Should You Get an Electrical Defect Inspection?
## Costs of Electrical Defect Inspections
The cost of an electrical defect inspection in Australia varies based on the property size, location, and scope of the assessment. When included as part of a comprehensive building inspection, the electrical assessment is typically covered within the overall fee.
### What to Do When Your Building Claim Is Denied in Geelong
Source: https://ownerinspections.com.au/articles/what-to-do-when-your-building-claim-is-denied-in-geelong
Published: 2024-08-14 | Updated: 2026-02-09 | Category: Insurance
Author: Maison Azdari
If your building insurance claim has been denied in [Geelong](/vic/building-inspections-geelong), you have the right to challenge the decision. Start by requesting a written explanation of why the claim was rejected, then review your policy's Product Disclosure Statement (PDS) to check whether the insurer's reasoning is valid. You can lodge an internal complaint with the insurer through their Internal Dispute Resolution (IDR) process, and if that does not resolve the matter, escalate to the Australian Financial Complaints Authority (AFCA) at no cost. An independent building inspection report can provide the evidence needed to support your appeal and demonstrate that the damage is genuine and covered under your policy.
Having your building claim denied can be frustrating, especially when you have been paying premiums and believed you were covered. In Geelong, where weather events, ageing building stock, and coastal conditions contribute to property damage, claim denials are more common than many homeowners realise.
This guide walks you through the practical steps to take after a denial, the most common reasons insurers reject claims, and the dispute resolution options available to Geelong property owners.
For a complete overview, see our [guide to insurance claim assessments](/guides/insurance-claim-assessment-guide).
## Common Reasons Building Claims Are Denied
Understanding why your claim was denied is the first step towards challenging it. These are the most common reasons insurers reject building claims in Geelong and across Victoria:
## Immediate Steps After a Claim Denial
## The Appeal and Dispute Resolution Process
A denied claim is not final. Australian insurance regulations provide a clear pathway for challenging a decision.
### Step 1: Internal Dispute Resolution (IDR)
Every insurer in Australia is required to have an Internal Dispute Resolution process. Lodge a formal complaint in writing, clearly stating why you disagree with the decision and providing any additional evidence. The insurer must respond within 30 calendar days (or 21 days for general insurance complaints under the updated ASIC guidelines).
### Step 2: Escalate to AFCA
If the insurer's IDR response does not resolve the matter, or if they do not respond within the required timeframe, you can escalate to the Australian Financial Complaints Authority (AFCA). AFCA is a free, independent dispute resolution service. Their decisions are legally binding on the insurer.
### Step 3: Legal Action (If Needed)
If AFCA's decision is not in your favour, or if the dispute involves amounts beyond AFCA's jurisdiction, you may consider legal action. This is typically a last resort due to the costs involved, but it may be appropriate for high-value claims.
## How an Independent Inspection Report Helps
An independent building inspection report is one of the most effective tools for challenging a denied claim. Here is why:
If your insurer's assessor has underestimated the damage or attributed it to maintenance negligence, an independent report provides a second opinion backed by professional credentials.
## Geelong-Specific Claim Challenges
Geelong's location and building stock present specific issues that can complicate insurance claims:
An independent inspector with local Geelong experience understands these conditions and can provide context that helps distinguish between event-related damage and pre-existing conditions.
## Preventive Measures for Future Claims
Taking proactive steps now can reduce the risk of future claim denials.
For a complete overview, see our [guide to insurance claim assessments](/guides/insurance-claim-assessment-guide).
If your insurance dispute requires legal action, an [expert witness](/expert-witness-reports) can strengthen your case. See our [guide to expert witness reports for building disputes](/guides/expert-witness-building-disputes-guide).
### Case Studies: Success Stories with Construction Stage Inspections
Source: https://ownerinspections.com.au/articles/case-studies-construction-stage-inspections
Published: 2024-08-08 | Updated: 2026-03-06 | Category: New Construction
Author: Maison Azdari
Construction stage inspections are independent quality checks carried out at key milestones during a new home build in Australia, typically at slab, frame, lock-up, and pre-handover stages. These inspections catch defects before they are covered by the next phase of construction, saving homeowners from costly rectification work after completion. The following case studies from real Owner Inspections clients demonstrate how independent inspections identified defects that would otherwise have gone unnoticed, prevented significant financial losses, and gave homeowners the confidence that their investment was being built to Australian standards.
Building a new home is one of the largest financial commitments most Australians will make. Yet without independent oversight, construction defects can be missed by the builder's own quality checks and only surface months or years after handover. [Construction stage inspections](/new-construction-stage-inspections) provide a structured way to verify that work meets the National Construction Code (NCC), applicable Australian Standards, and the terms of the building contract at each stage. The stories below show what this looks like in practice.
## Why Do Construction Stage Inspections Matter so Much in Australia?
Each stage of construction builds on the previous one. If a defect at the slab stage goes undetected, it becomes hidden once the frame is erected. If frame defects are missed, they disappear behind plasterboard. By the time you receive the keys, any underlying problems are invisible, and fixing them becomes significantly more expensive.
Stage inspections matter so much in Australia, because:
- Once work is covered up, the cost and effort to fix it usually jumps.
- “Minimum compliance” checks are not the same as an independent workmanship check.
- Waterproofing and water ingress defects are common and expensive when missed.
- Quality issues are not rare across Australian housing stock, so owners benefit from evidence based checks.
### What is a Construction Stage Inspection?
It is an independent inspection at key milestones during a build. Its goal is to identify defects while they are visible, document them clearly, and give the owner something practical to send to the builder.
Many inspection reports in Australia follow visual inspection guidelines such as AS 4349.1 for residential buildings (plus relevant standards for the stage and element being assessed).
View the Stage
Inspections Guide
}
href="/guides/construction-stage-inspections-guide"
variant="secondary"
/>
## Evidence-Backed Case Studies From Real Customers
What does a construction stage inspection look like when there is real pressure, real risk, and a real build timeline to meet? These case studies are based on verified Google reviews from Owner Inspections clients and show how inspections can help at different points of the building journey. From pre slab deadlines to PCI concerns and full stage inspection support, each example gives readers a clearer picture of the situation, what was done, and the result.
### Case Study 1: Last Minute Pre Slab Check That Stopped Defects Being Buried
**Client:** Kay C | **Location:** New South Wales | **Service:** Pre Slab Pour Inspection (New Home Build)
Ever had a builder tell you the slab is pouring tomorrow and you’ve got one shot to check everything before it disappears under concrete? That’s exactly the pressure Kay faced. This case study shows how a last minute booking can still deliver a clear defects list fast enough to protect the most permanent part of the home.
**The challenge:** The slab pour is one of the tightest deadlines in a build because once trades are booked, the site can move from “ready” to “poured” very quickly. Kay booked at the last minute, which is common when owners get short notice. This stage matters because items like reinforcement, pods, mesh placement and service penetrations can be locked in under concrete if they are not checked properly.
**What happened:** Kay said Owner Inspections still managed to fit the inspection in without delay. The inspection was thorough, and the report arrived within four hours, which meant the defects could be sent straight to the site supervisor while the setup was still visible and fixable. Kay noted that the concreter was able to make the necessary fixes the very next day.
**The outcome:** Defects were raised at the right time, before concrete covered the work, which helped protect the long term quality of the home’s base. Kay also described the experience as peace of mind and professional support at a critical construction stage.
**Review link:** [Read Kay’s Google feedback](https://maps.app.goo.gl/zCJ4LvRD7PjAHXh86)
### Case Study 2: Pre Slab Inspection With Clear Advice and a Report You Can Act On
**Client:** Gopal Katwal | **Location:** Queensland | **Service:** Pre Slab Inspection
A pre slab inspection is one of the most time sensitive checks in a new build because once concrete is poured, the chance to fix hidden issues becomes much harder and more expensive. Gopal’s experience shows why a careful inspector, clear communication, and a timely report can make this stage far less stressful for owners.
**The challenge:** Pre slab inspections happen at a point where there is little room for delay. Owners need to know that the inspection will be detailed enough to catch issues before the pour, but also explained in a way that makes sense if they are not familiar with construction. At this stage, confidence matters because anything missed can end up buried under concrete.
**What happened:** Gopal said Owner Inspection carried out the pre slab inspection with a high level of professionalism, and that Babak Nasirpour was thorough, knowledgeable, and easy to understand. He took the time to explain everything in detail, which helped make the process clearer and less overwhelming. Gopal also noted that the report was clear, easy to follow, and delivered in a timely manner.
**The outcome:** The inspection gave Gopal confidence that nothing had been overlooked before the slab was poured. Just as importantly, the clear report and detailed explanations made it easier to understand the condition of the work and what needed attention. The review highlights the value of having an inspector who is both technically strong and able to communicate clearly at a critical build stage.
**Review link:** [Read Gopal’s Google feedback](https://maps.app.goo.gl/bbZRxYtArphZ5epQ7)
### Case Study 3: PCI Support When Workmanship Concerns Felt Dismissed
**Client:** Nathisha Paramasivam | **Location:** Victoria | **Service:** PCI (Practical Completion Inspection)
PCI is where many owners feel cornered. You are told the home is “basically finished” while you can see things that don’t look right, but you can’t always prove it. Nathisha’s experience shows what changes when you have an independent inspector who knows what to look for and is willing to raise issues directly on site.
**The challenge:** A delayed, stressful build can make owners feel like they are being talked into accepting workmanship that does not sit right, especially if you cannot name the problem clearly. Nathisha described the pressure of not knowing what to look for and feeling gaslit into believing poor workmanship was acceptable. At PCI, this pressure spikes because it is often the last structured checkpoint before handover decisions start to carry more weight.
**What happened:** Nathisha said the PCI inspector, Kosie Touretsoglou, was empathetic, extremely thorough, and had their best interests in mind. The review also noted he raised concerns directly with the site supervisor on the day, firmly, which helped Nathisha feel the issues were being taken seriously. They also provided constructive feedback about the booking and back office experience not always matching the inspector’s professionalism.
**The outcome:** Nathisha left the PCI with more confidence, clearer evidence to support defect discussions, and the feeling of having an independent advocate on site. They also said they would recommend Owner Inspections to clients in their financial planning practice who are buying family homes and investment properties.
**Review link:** [Read Nathisha’s Google feedback](https://maps.app.goo.gl/P1SQgUEnQpsSdhce6)
### Case Study 4: Five Stage Inspections for Peace of Mind From Slab to Handover
**Client:** Vin | **Location:** Victoria | **Service:** Five stage inspections across the full build
A lot of owners only think about inspection right before handover, but defects often start earlier and get covered up as the build moves from slab to frame to linings and finishes. Vin wanted consistent independent checks across five key stages so issues could be found early, documented clearly, and followed through rather than building up into a stressful end of project scramble.
**The challenge:** A lot of owners only think about inspection right before handover, but defects often start earlier and get covered up as the build moves from slab to frame to linings and finishes. Vin wanted consistent independent checks across five key stages so issues could be found early, documented clearly, and followed through rather than building up into a stressful end of project scramble.
**What happened:** Vin said Owner Inspections handled all five stages at a reasonable cost, with professional, flexible service from start to finish. The reports were described as very detailed and delivered quickly, which matters when builders are moving to the next trade. Vin also called out specific team members for genuine care and customer support, and highlighted inspectors who went the extra mile to find issues and report them clearly.
**The outcome:** Vin described the build journey as smoother and more stress free because each stage had a clear quality checkpoint. The key benefit was ongoing peace of mind at every stage, plus stronger confidence that issues were being picked up and managed before handover.
**Review link:** [Read Vin’s Google feedback](https://maps.app.goo.gl/BLW7HEHvxPvb8RFf7)
See What Happens
After Defects Are Found
}
href="/articles/what-happens-if-stage-inspection-finds-defects"
variant="secondary"
/>
## Common Defects Found During Construction Stage Inspections
Based on these case studies and broader inspection experience, the most common defects identified during construction stage inspections include:
## What to Do When a Stage Inspection Finds Defects
A simple owner action plan
[Owner Inspections](/) also explains typical rectification flow and timing expectations after defects are found.
## The Value of Independent Inspections
Book Your Next
Stage Inspection
}
href="/contact"
variant="secondary"
/>
### Who Should Prepare a Dilapidation Report in Brisbane?
Source: https://ownerinspections.com.au/articles/who-should-prepare-a-dilapidation-report-in-brisbane
Published: 2024-08-07 | Updated: 2026-02-09 | Category: Dilapidation Reports
Author: Maison Azdari
A [dilapidation report](/dilapidation-reports) in [Brisbane](/qld/building-inspections-brisbane) should be prepared by a licensed building inspector, a registered structural engineer, or a qualified building surveyor with specific experience in property condition assessments. The professional must be independent of both the property owner and the party carrying out the nearby construction work, and ideally holds a current Queensland Building and Construction Commission (QBCC) licence or equivalent accreditation. Their report documents the existing condition of a property before nearby construction, demolition, or excavation begins, creating a baseline that can be used to identify any damage caused by those works.
Brisbane's continuous construction and development activity means dilapidation reports are frequently required by Brisbane City Council as a condition of development approval. Even when not mandated, property owners and developers commission them as a protective measure.
The quality of a dilapidation report depends entirely on the qualifications and experience of the person who prepares it. This guide explains who is qualified, what each type of professional brings, and how to make sure you choose the right person for the job.
## What Is a Dilapidation Report?
A dilapidation report is a detailed record of a property's existing condition at a specific point in time, typically prepared before construction, demolition, or excavation work begins on a neighbouring or nearby site.
The report includes written descriptions and high-resolution photographs of all accessible areas, both internal and external, documenting every existing crack, defect, stain, or area of wear. This creates a baseline that can be compared against a post-construction inspection to determine whether any new damage was caused by the nearby works.
## Why the Preparer Matters
The value of a dilapidation report is only as strong as the professional who prepares it. A poorly prepared report, with low-quality photos, vague descriptions, or incomplete coverage, will not stand up in a dispute, insurance claim, or legal proceeding.
A qualified professional:
## Who Is Qualified to Prepare a Dilapidation Report?
Three types of professionals are commonly engaged to prepare dilapidation reports in Brisbane:
### Licensed Building Inspectors
Licensed building inspectors are the most commonly engaged professionals for dilapidation reports on residential and small commercial properties in Brisbane. They hold licences recognised by the QBCC and have practical experience assessing building conditions across a wide range of property types.
### Structural Engineers
Registered structural engineers are typically engaged when there are specific concerns about the structural integrity of a building, or when the nearby construction work involves deep excavation, piling, or other activities that pose a higher risk of causing structural damage.
### Qualified Surveyors
Building surveyors bring precision measurement skills and are particularly useful when boundary conditions, land levels, or the relationship between the property and surrounding infrastructure need to be documented.
## Comparing Qualified Professionals
For most residential dilapidation reports in Brisbane, a licensed building inspector provides the best balance of thoroughness, cost, and report quality. Structural engineers or surveyors may be needed in addition if the risk level is higher.
## The Process of Creating a Dilapidation Report
Understanding the process helps you evaluate whether the professional you hire is following best practices.
## What to Look for When Hiring
## When Is a Dilapidation Report Required in Brisbane?
### Role of Pest and Building Inspections in Gold Coast Property Deals
Source: https://ownerinspections.com.au/articles/role-of-pest-building-inspections-in-gold-coast-property-deals
Published: 2024-08-06 | Updated: 2026-02-09 | Category: Building Inspections
Author: Maison Azdari
Pest and building inspections are a standard part of [Gold Coast](/qld/building-inspections-gold-coast) property deals, carried out before a buyer commits to purchasing. The building inspection (following AS 4349.1) assesses the property's structural condition, while the [pest inspection](/timber-pest-inspections) (following AS 4349.3) checks for termite activity, damage, and other wood-destroying pests. Together, they give buyers a complete picture of the property's condition, provide negotiating leverage, and help sellers demonstrate transparency. On the Gold Coast, where termite risk is high and salt exposure can accelerate deterioration, these inspections are especially important for protecting both parties in a transaction.
The Gold Coast property market moves quickly, and it can be tempting to skip inspections to speed up a purchase. But buying a property without a pest and building inspection is a significant risk, particularly in a region where the subtropical climate creates ideal conditions for termite infestation, water damage, and accelerated material degradation.
This guide explains how pest and building inspections work in the context of Gold Coast property deals, what they cover, and how both buyers and sellers benefit from them.
## What Are Pest and Building Inspections?
### Building Inspection
A building inspection is a thorough visual assessment of a property's structural and non-structural condition. The inspector examines the foundation, walls, roof, ceilings, floors, wet areas, external cladding, drainage, and site conditions. The inspection follows Australian Standard AS 4349.1 and identifies defects, areas of concern, and items requiring further investigation or repair.
### Pest Inspection
A pest inspection focuses on detecting timber pests, most notably termites, but also wood borers and fungal decay. The inspector examines all accessible areas for evidence of active pest activity, previous pest damage, and conditions that make the property more susceptible to infestation. The inspection follows AS 4349.3.
Most Gold Coast buyers opt for a combined building and pest inspection, which covers both assessments in a single site visit.
## Why They Matter in Gold Coast Property Deals
The Gold Coast's warm, humid climate creates a higher risk of certain property issues compared to cooler or drier regions:
These conditions mean that properties on the Gold Coast are more likely to have hidden issues that are not visible during a standard walk-through, making professional inspections even more valuable in this market.
## Benefits for Buyers
## Benefits for Sellers
## What Inspectors Check
The inspection is visual and non-invasive, meaning the inspector assesses what is accessible without moving furniture, lifting carpets, or opening sealed areas. If the inspector suspects hidden issues, they will recommend further invasive investigation.
## Gold Coast-Specific Risks
### Termites
The Gold Coast is in one of Australia's highest termite activity zones. Subterranean termites can cause severe structural damage to a property, often without any visible external signs until the damage is advanced. Properties with timber framing, poor subfloor ventilation, or garden beds against external walls are at increased risk.
### Salt Corrosion
Properties within a few kilometres of the coast are exposed to salt-laden air that corrodes metal fixtures (roof sheeting, balustrades, reinforcement), deteriorates render, and breaks down sealants. An experienced Gold Coast inspector will check for these issues specifically.
### Water Damage and Drainage
The Gold Coast receives substantial rainfall during summer, and properties with inadequate drainage, flat sites, or ageing roofs are prone to water ingress. Water damage can affect foundations, cause mould growth, and compromise internal finishes.
### Older Properties
Many Gold Coast suburbs have properties built in the 1970s, 1980s, and 1990s that may have outdated electrical wiring, older plumbing materials, asbestos-containing materials, or original waterproofing that has deteriorated. These issues are commonly found during pest and building inspections.
## How Inspections Influence Negotiations
The inspection report is one of the most effective tools in property negotiations. Here is how it works in practice:
## Costs and Timing
Reports are typically delivered within 24 to 48 hours of the on-site inspection. Book your inspection as early as possible within the cooling-off period to allow time for the report to be reviewed and for any follow-up questions.
### Drones vs Traditional Roof Inspection Methods
Source: https://ownerinspections.com.au/articles/drones-vs-traditional-roof-inspection-methods
Published: 2024-07-24 | Updated: 2026-02-12 | Category: Building Inspections
Author: Maison Azdari
[Roof inspections](/roof-inspection) play a critical role in maintaining the structural integrity of any building. Whether you are purchasing a property, managing a maintenance schedule, or investigating storm damage, understanding the condition of your roof is essential. The two primary methods for conducting roof inspections are drone-based and traditional approaches, each with distinct strengths and limitations.
## Advantages of Drone-Based Roof Inspections
Drone technology has introduced significant improvements to the way roof inspections are carried out. The key advantages include:
### Safety
Drones eliminate the need for inspectors to climb ladders or work on scaffolding. Falls from heights remain one of the leading causes of workplace fatalities in Australia, and drone inspections remove this risk entirely from the inspection phase. The inspector operates the drone from the ground, maintaining a safe distance from the structure at all times.
### Time Efficiency
A drone can complete a roof inspection in a fraction of the time required by traditional methods. A typical residential roof that might take half a day to inspect manually can be surveyed by a drone in under an hour. This time saving benefits both the inspector and the property owner.
### Accuracy
Modern drones are equipped with advanced cameras and sensors capable of capturing high-resolution imagery. These cameras can detect minute faults such as hairline cracks, missing fixings, and early signs of weathering that may be missed during a manual inspection. Thermal imaging adds the ability to identify moisture ingress and insulation deficiencies.
### Reach
Drones can access difficult locations that are impractical or dangerous to reach by conventional means. Steep-pitched roofs, multi-storey buildings, and structures surrounded by obstacles are all easily surveyed from the air.
## Disadvantages of Drone-Based Roof Inspections
Despite their many benefits, drone inspections do have limitations.
### Cost
The cost of purchasing, maintaining, and insuring commercial-grade drones can be significant. Operator fees must also be factored in, particularly for inspections requiring specialised thermal or multispectral cameras. However, these costs are often offset by the savings from eliminating scaffolding and reducing labour hours.
### Regulations
Drone operations in Australia are governed by the Civil Aviation Safety Authority (CASA). The regulations are complex and vary by region, covering aspects such as flight altitude, proximity to people and buildings, and restricted airspace. Compliance adds an administrative layer that traditional methods do not require.
### Training and Licensing
Operating a commercial drone requires certification that can be costly and time-consuming to obtain. Drone pilots must hold a Remote Pilot Licence (RePL) and operate under a Remotely Piloted Aircraft Operator's Certificate (ReOC) or meet excluded category requirements.
## Advantages of Traditional Roof Inspections
Traditional roof inspections continue to offer value in many scenarios.
### Cost-Effectiveness
For straightforward inspections of single-storey homes with accessible roofs, traditional methods require minimal technology investment. A ladder, safety harness, and the inspector's expertise are often all that is needed.
### Experience and Human Touch
Experienced inspectors bring a tactile element to their assessment. They can physically test the integrity of materials, feel for soft spots in decking, and assess the condition of components in ways that a camera cannot replicate. This hands-on examination provides a depth of understanding that visual-only methods may miss.
### Flexibility
Traditional inspections face fewer regulatory constraints. There is no requirement for airspace clearance, CASA compliance, or weather-dependent scheduling. An inspector can arrive and begin work with minimal preparation.
### Community Acceptance
Traditional inspection methods are well understood by property owners, agents, and insurers. There is a long-established trust in the process, and the results are widely accepted across the industry.
## Disadvantages of Traditional Roof Inspections
### Safety Concerns
Working at height carries inherent risks. Falls from ladders and roofs are among the most common causes of serious injury and fatality in the Australian construction and trades sectors. Even with proper safety equipment, the risk cannot be entirely eliminated.
### Time and Reach
Traditional inspections are time-consuming, particularly for large or complex structures. Access limitations can also be a challenge. Steep roofs, multi-storey buildings, and properties with limited ground clearance may require scaffolding or elevated work platforms, adding time and cost.
## Drone vs Traditional at a Glance
Both methods have a place in the inspection process. For many properties, a combination of drone-based and traditional inspection techniques delivers the most comprehensive assessment.
### Understanding Mould Inspection Reports: A Buyer's Guide
Source: https://ownerinspections.com.au/articles/understanding-mould-inspection-reports-a-buyers-guide
Published: 2024-07-23 | Updated: 2026-02-12 | Category: Mould Inspections
Author: Maison Azdari
Mould is one of the most common and potentially costly issues that property buyers encounter in Australia. The country's climate, particularly during La Nina weather patterns that bring prolonged periods of heavy rainfall and elevated humidity, creates ideal conditions for mould growth in residential properties. For buyers, understanding [mould inspection](/mould-inspections) reports is essential for making informed purchasing decisions and avoiding properties with hidden moisture and mould problems.
A mould inspection report provides a detailed assessment of a property's moisture levels, mould presence, and the conditions that promote mould growth. However, these reports contain technical information that can be difficult to interpret without some background knowledge. This guide explains what causes mould in Australian homes, what a professional mould inspection involves, and how to read and understand the findings in a mould inspection report.
> Water damage that goes unaddressed for even a short period can lead to mould growth that spreads through wall cavities, ceiling spaces, and subfloor areas. By the time visible signs appear, the problem may already be extensive. A professional mould inspection reveals what the eye cannot see.
## Australia's Climate and Mould Growth
Australia's climate varies significantly across the continent, but many populated regions experience conditions that are conducive to mould growth. The eastern seaboard, from Queensland through New South Wales to Victoria, is particularly susceptible due to its combination of warm temperatures and high humidity.
La Nina weather patterns intensify these conditions. During La Nina events, increased rainfall, persistent cloud cover, and elevated humidity levels create a prolonged moist environment both inside and outside properties. Properties that may have been unaffected by mould during drier periods can develop significant mould problems during and after a La Nina cycle.
## Why Ignoring Water Damage Is Risky
Water damage in a property should never be dismissed as a cosmetic issue. When water intrudes into building materials and is not promptly addressed, the consequences extend far beyond surface staining.
### Physical Damage to the Property
Water that penetrates building materials causes progressive structural degradation. Timber framing can rot, steel components can corrode, plasterboard can lose structural integrity, and adhesives used in flooring and tiling can fail. Over time, these issues compromise the safety and value of the property.
### Health Risks to Occupants
Mould that grows in response to water damage releases spores and, in some species, mycotoxins into the indoor air. Exposure to mould spores can trigger allergic reactions, respiratory symptoms, asthma attacks, and in sensitive individuals, more serious health effects. Children, the elderly, and people with compromised immune systems are particularly vulnerable.
## Common Sources of Moisture in Homes
Understanding where moisture comes from helps buyers identify properties at higher risk of mould problems. The main sources of moisture in Australian homes fall into three categories.
### Rainwater Intrusion
### Household Activities
### Bathrooms and Kitchens
Bathrooms and kitchens are the areas most susceptible to mould growth due to the combination of moisture, warmth, and organic materials. Failed waterproofing in shower recesses, leaking plumbing connections, condensation on cold surfaces, and inadequate ventilation all contribute to moisture problems in these areas.
## The Damage Mould Causes
Mould causes both physical damage to the property and health problems for occupants.
### Physical Damage
### Health Effects
## Controlling and Preventing Moisture
Effective moisture control is the key to preventing mould growth. Property buyers should assess whether a property has adequate provisions for managing moisture.
## When to Have a Mould Inspection
A mould inspection should be considered in several situations:
## What Is a Mould Inspection?
A professional mould inspection is a systematic assessment of a property's moisture levels and mould presence using a combination of visual assessment and specialist equipment.
### Thermal Imaging
Thermal imaging cameras detect temperature differences on surfaces that indicate the presence of moisture. Wet or damp areas appear as cooler zones on the thermal image, allowing the inspector to identify concealed moisture behind walls, above ceilings, and beneath floors without the need for destructive investigation.
### Hygrometers
Hygrometers measure the relative humidity of the indoor environment. Elevated humidity levels indicate conditions that are conducive to mould growth, even if no moisture is currently entering the building. The inspector uses hygrometer readings to assess whether the property's ventilation and climate control are adequate to maintain safe humidity levels.
### Moisture Meters
Moisture meters measure the moisture content of building materials including timber, plasterboard, and masonry. The inspector uses both pin-type and non-invasive moisture meters to assess moisture levels in walls, floors, ceilings, and other building elements. Elevated moisture readings indicate areas where mould growth is likely to occur or is already present.
## What a Mould Report Contains
A comprehensive mould inspection report provides the information buyers need to understand the moisture and mould conditions in a property.
### Decoding Pre-Purchase Inspection Reports
Source: https://ownerinspections.com.au/articles/decoding-pre-purchase-inspection-reports
Published: 2024-07-17 | Updated: 2026-03-13 | Category: Pre-Purchase Inspections
Author: Maison Azdari
Purchasing property represents one of the most significant financial commitments most
Australians will make in their lifetime. A [pre-purchase inspection](/pre-purchase-inspections) report serves as your
essential guide to understanding the true condition of a property before you commit to
buying it.
These comprehensive reports identify structural problems, safety hazards, and potential
damage that may not be visible during a standard property viewing. However, many buyers
struggle to comprehend the technical language, severity ratings, and detailed findings
contained within these documents.
Understanding how to decode your pre-purchase inspection report empowers you to make
informed decisions, negotiate effectively with sellers, and avoid costly surprises after
settlement. This guide will walk you through every aspect of interpreting your inspection
report, from recognising significant problems to estimating repair costs and formulating
negotiation strategies.
> A pre-purchase inspection report is not just a document to file away. It is a powerful tool
> that can save you thousands of dollars and protect you from purchasing a property with
> hidden defects that could compromise your safety and investment.
## Comprehensive Report Analysis
A thorough pre-purchase inspection report examines every accessible building system and
component, from the foundations to the roof and everything in between. Understanding the
structure and content of your report is the first step towards making informed property
decisions.
### Report Structure Overview
Most pre-purchase inspection reports follow a standardised format based on Australian
Standard AS 4349.1 for pre-purchase inspections. The report typically includes:
- **Executive summary:** A brief overview of the property condition and any significant findings
- **Property details:** Address, inspection date, weather conditions, and areas inspected
- **Scope and limitations:** What the inspection covers and any areas that could not be accessed
- **Detailed findings:** Section by section assessment of all building components
- **Photographic evidence:** Images documenting defects and areas of concern
- **Summary of defects:** Categorised list of all identified issues
- **Recommendations:** Suggested actions and further investigations
### Foundation and Subfloor Assessment
The foundation section of your report addresses one of the most critical structural elements
of any building. Inspectors examine:
- Foundation type (slab, pier and beam, strip footing, or stumps)
- Signs of movement, cracking, or settlement
- Moisture levels and drainage conditions
- Subfloor ventilation adequacy
- Evidence of termite activity or previous treatment
- Condition of stumps, bearers, and joists in older properties
### Structural Frame and Walls
This section covers the primary structural elements that support the building. Key areas of
assessment include:
- Wall framing condition and integrity
- Signs of structural movement or failure
- Cracking patterns and their significance
- Brickwork, render, and external cladding condition
- Window and door frame alignment
- Internal wall finishes and defects
### Roof Structure and Covering
The roof protects the entire building from weather damage, making this section particularly
important. Inspectors assess:
- Roof framing condition and connections
- Roof covering material (tiles, metal, slate) and condition
- Signs of leaks, staining, or water damage
- Flashing and ridge cap condition
- Gutters, downpipes, and drainage systems
- Roof ventilation and insulation
### Wet Areas and Plumbing
Bathrooms, kitchens, and laundries require special attention due to their exposure to water:
- Waterproofing membrane condition and effectiveness
- Signs of water damage to floors, walls, and ceilings
- Tiling condition and grout integrity
- Visible plumbing condition and functionality
- Hot water system age and condition
- Evidence of leaks or drainage issues
### Electrical and Utilities
While building inspectors do not perform detailed electrical testing, they assess visible
electrical components:
- Switchboard condition and safety switch presence
- Visible wiring condition and type
- Power point and light switch functionality
- Smoke detector presence and operation
- Air conditioning and heating system condition
Read the Buyer
Inspection Guide
}
buttonHref="/guides/pre-purchase-building-pest-inspection-guide"
variant="secondary"
/>
## Recognising Significant Problems
Not all defects noted in an inspection report carry equal weight. Understanding the
difference between cosmetic issues and serious structural concerns is essential for
prioritising your response and negotiation strategy.
### Cosmetic Issues vs Serious Concerns
Cosmetic defects are superficial issues that affect appearance but do not impact the
structural integrity, safety, or functionality of the building. These include:
- Minor paint scuffing or chipping
- Small nail pops in plasterboard
- Superficial scratches on surfaces
- Minor grout cracking in tiles
- Faded or weathered external finishes
Serious concerns, on the other hand, can affect the structural integrity, safety, or
habitability of the property. These require immediate attention and careful consideration
before proceeding with purchase.
### Structural Failures
Structural issues are among the most serious defects an inspection can reveal. Warning signs
include:
- **Foundation movement:** Significant cracking, heaving, or settlement that affects the building structure
- **Wall failures:** Large cracks, bowing walls, or separation at corners
- **Roof structure damage:** Sagging roof lines, damaged trusses, or compromised connections
- **Floor system issues:** Bouncy floors, significant sloping, or rotting joists
- **Retaining wall failures:** Leaning, cracking, or collapsing retaining structures
### Pest Infestation
Timber pest damage, particularly from termites, represents a significant threat to
Australian properties. Signs of pest problems include:
- Active termite infestation with live insects present
- Evidence of previous termite damage and extent of structural compromise
- Borer beetle activity in timber elements
- Wood decay fungi damageing structural timbers
- Conducive conditions that increase pest risk
### Water Damage
Water intrusion can cause extensive damage and create conditions for mould growth. Key
indicators include:
- Roof leaks with visible water staining on ceilings
- Rising damp in walls and floor areas
- Failed waterproofing in wet areas
- Blocked or damaged stormwater drainage
- Plumbing leaks affecting structure
- Inadequate site drainage causing water pooling
### Roof Deterioration
An ageing or damaged roof can lead to widespread water damage throughout the property.
Serious roof issues include:
- Broken, missing, or severely weathered roof tiles
- Rusted or corroded metal roofing
- Failed or deteriorating flashing
- Blocked or damaged gutters and downpipes
- Inadequate fall causing water ponding
- Compromised roof structure requiring replacement
### Mould and Indoor Air Quality
Mould growth indicates moisture problems and can pose health risks to occupants. Areas of
concern include:
- Visible mould growth on walls, ceilings, or other surfaces
- Musty odours indicating hidden mould presence
- Water damaged materials that may harbour mould
- Poor ventilation contributing to moisture buildup
- Previous flood or water damage history
Book Your
Inspection
}
buttonHref="/pre-purchase-inspections"
variant="secondary"
/>
## Severity Levels Explained
Pre-purchase inspection reports typically categorise defects according to severity levels.
Understanding these classifications helps you prioritise issues and determine appropriate
responses.
| Severity Level | Description | Typical Examples | Recommended Action |
| -------------- | ------------------------------------------------------------------------------------ | ---------------------------------------------------------------------------------- | ------------------------------------------------------------------------------- |
| Minor | Cosmetic or maintenance items that do not affect structure or safety | Paint touch-ups, minor surface cracks, worn finishes | Address during routine maintenance; no impact on purchase decision |
| Moderate | Issues requiring repair within 6 to 12 months to prevent deterioration | Worn roof tiles, minor leaks, damaged gutters, ageing hot water system | Factor repair costs into offer; schedule repairs within first year of ownership |
| Major | Significant defects affecting structure, function, or value requiring prompt |
| attention | Structural cracking, roof replacement needed, extensive water damage, termite damage | Obtain specialist quotes; negotiate price reduction or repairs before settlement |
| Safety Concern | Issues that pose immediate risk to occupant health or safety | Electrical hazards, asbestos, structural instability, severe mould, balcony safety | Must be rectified before occupation; may warrant withdrawing from purchase |
### Understanding Minor Defects
Minor defects are common in any property and should not unduly concern buyers. These issues
are typically:
- Inexpensive to repair (generally under $500 per item)
- Cosmetic in nature with no functional impact
- Normal signs of wear for the property's age
- Easily addressed during routine maintenance
A property with only minor defects is generally considered to be in good condition. These
items should not significantly affect your purchase decision or negotiation position.
### Assessing Moderate Defects
Moderate defects require attention but are manageable with proper planning. When evaluating
moderate issues:
- Consider the total cost of all moderate repairs combined
- Assess whether you can complete repairs within your first year of ownership
- Determine if the defects will worsen if not addressed promptly
- Factor these costs into your offer price
### Responding to Major Defects
Major defects require careful consideration and may significantly impact your purchase
decision. When major issues are identified:
- Obtain detailed quotes from qualified contractors before making decisions
- Consider whether the defect affects the property's long-term value
- Assess whether repairs are straightforward or involve significant disruption
- Determine if the issue may indicate broader underlying problems
- Consult with the inspector about potential hidden damage
### Addressing Safety Concerns
Safety concerns are the most serious category and require immediate action. When safety
issues are identified:
- Do not occupy the property until the issue is resolved
- Obtain specialist assessments where recommended
- Understand the full scope and cost of rectification
- Consider whether proceeding with purchase is advisable
- If proceeding, ensure repairs are completed before settlement
## Estimating Repair Costs
Accurate cost estimates are essential for negotiating with sellers and planning your budget.
While your inspection report may provide general guidance, obtaining detailed quotes from
qualified contractors is recommended for significant defects.
### Getting Quotes from Qualified Contractors
When seeking repair estimates:
- **Use licensed professionals:** Ensure contractors hold appropriate licences for their trade in your state
- **Obtain multiple quotes:** Get at least three quotes for major work to understand the range of pricing
- **Provide the inspection report:** Share relevant sections with contractors so they understand the scope
- **Request itemised quotes:** Detailed breakdowns help you understand what is included
- **Ask about timeframes:** Understand how long repairs will take and any disruption involved
- **Clarify warranties:** Understand what guarantees are provided for the work
### Common Repair Cost Ranges
The following table provides indicative cost ranges for common repairs identified in
pre-purchase inspections. Actual costs vary based on property specifics, location, and
current market conditions.
| Repair Type | Typical Cost Range | Factors Affecting Cost |
| ------------------------------- | ------------------- | ---------------------------------------------- |
| Roof tile replacement (partial) | $500 to $3,000 | Number of tiles, accessibility, tile type |
| Complete roof replacement | $15,000 to $50,000 | Roof size, material choice, complexity |
| Termite treatment and barrier | $2,500 to $5,000 | Property size, treatment type, severity |
| Termite damage repair | $5,000 to $100,000+ | Extent of damage, structural involvement |
| Foundation crack repair | $1,000 to $10,000 | Crack severity, repair method required |
| Underpinning or restumping | $10,000 to $40,000 | House size, soil conditions, access |
| Bathroom waterproofing repair | $3,000 to $15,000 | Bathroom size, extent of damage, finishes |
| Rising damp treatment | $5,000 to $20,000 | Affected area, wall construction, method |
| Mould remediation | $2,000 to $15,000 | Affected area, source of moisture, severity |
| Electrical rewiring (full) | $8,000 to $20,000 | House size, accessibility, switchboard upgrade |
| Asbestos removal | $1,500 to $30,000+ | Material type, quantity, location, friability |
| Drainage system repair | $2,000 to $15,000 | Extent of work, site access, existing damage |
### Building a Repair Budget
When calculating total repair costs:
- Add up all identified repair costs from your quotes
- Include a contingency of 10 to 20 percent for unexpected issues
- Consider the cost of temporary accommodation if major work is required
- Factor in any specialist investigations recommended
- Account for any cosmetic repairs you wish to complete
## Strategic Negotiation with Sellers
Your pre-purchase inspection report is a valuable negotiation tool. Understanding how to
leverage your findings can result in a better purchase price or ensure defects are addressed
before settlement.
### Using Documentation and Cost Estimates
Effective negotiation requires solid evidence. Prepare your case by:
- **Compiling documentation:** Gather your inspection report, contractor quotes, and any specialist reports
- **Calculating total costs:** Present a clear summary of estimated repair costs
- **Prioritising issues:** Focus on major defects and safety concerns in your negotiation
- **Being reasonable:** Acknowledge that minor defects are expected in any property
### Negotiation Strategies
There are several approaches to negotiating after receiving your inspection report:
- **Price reduction:** Request a reduction in the purchase price equivalent to repair costs
- **Vendor repairs:** Ask the seller to complete repairs before settlement
- **Cash settlement adjustment:** Negotiate funds held back at settlement to cover repairs
- **Extended settlement:** Request additional time to complete further investigations
- **Special conditions:** Add contract conditions requiring specific work to be completed
### Presenting Your Case
When approaching the seller or their agent:
- Remain professional and avoid emotional reactions to findings
- Present information factually and let the evidence speak for itself
- Be specific about what you are requesting and why
- Provide copies of relevant documentation to support your position
- Be prepared to compromise on minor issues while standing firm on major concerns
### Working Through Your Solicitor
For significant negotiations, consider having your solicitor or conveyancer handle
communications. They can:
- Formally request repairs or price reductions in writing
- Advise on your rights under the contract
- Draft special conditions to protect your interests
- Manage the negotiation process professionally
- Ensure any agreements are properly documented
Book Your
Inspection
}
buttonHref="/pre-purchase-inspections"
variant="secondary"
/>
## Considering Alternative Options
Sometimes the findings of a pre-purchase inspection are severe enough to warrant
reconsidering the purchase entirely. Knowing when to walk away can save you from a costly
mistake.
### When to Walk Away
Consider withdrawing from a purchase when:
- **Repair costs exceed your budget:** If total repairs would stretch you financially beyond comfort
- **Structural issues are severe:** Major foundation or structural problems that may never be fully resolved
- **Hidden problems are likely:** Evidence suggests more issues may be concealed or inaccessible
- **Seller is uncooperative:** Refusal to negotiate or allow further investigations
- **Safety cannot be assured:** Issues that may pose ongoing risk to occupants
- **Value is significantly affected:** Defects that would make the property difficult to resell
### Red Flags That Warrant Extra Caution
Be particularly cautious when your report reveals:
- Active termite infestation with extensive structural damage
- Evidence of significant undisclosed repairs or cover-ups
- Multiple major defects across different building systems
- Signs of illegal building work or non-compliant additions
- Environmental hazards such as asbestos or contaminated soil
- Flood or storm damage history with inadequate repairs
### Seeking Further Investigation
Before walking away, you may want to commission additional specialist investigations to
fully understand the extent of problems:
- Structural engineer assessment for foundation or structural concerns
- Detailed timber pest inspection for suspected termite damage
- Plumbing inspection including camera survey of drains
- Electrical safety inspection and compliance check
- Geotechnical report for land stability concerns
- Asbestos survey if hazardous materials are suspected
### Protecting Your Deposit
If you decide to withdraw from the purchase:
- Review your contract for the building and pest inspection clause conditions
- Ensure you act within the specified timeframes for your cooling-off period
- Provide written notice as required by your contract
- Consult your solicitor about deposit recovery
- Document your reasons for withdrawal
## Recommendations for Report Comprehension
Getting the most value from your pre-purchase inspection report requires active engagement
with the document and, where necessary, the inspector who prepared it.
### Reading the Full Report
While it may be tempting to skip to the summary, reading the full report is important:
- Read all sections including scope and limitations
- Review all photographs and their captions
- Note any areas that could not be accessed or inspected
- Understand terminology using the glossary if provided
- Highlight any items you do not understand for follow-up
### Discussing Findings with Your Inspector
Most inspectors are happy to discuss their findings with you. When speaking with your
inspector:
- Ask for clarification on technical terminology
- Request their opinion on severity and priority of issues
- Ask about potential hidden damage related to visible defects
- Enquire about approximate repair costs if not included
- Discuss whether further specialist investigation is recommended
### Seeking Second Opinions
For significant concerns, consider obtaining a second opinion:
- Engage another qualified inspector to review specific areas of concern
- Consult relevant specialists such as structural engineers
- Discuss findings with builders experienced in the type of construction
- Research the identified issues to understand them better
## Essential Tips for Report Comprehension
Following these recommendations will help you maximise the value of your pre-purchase
inspection and make informed property decisions.
### Key Recommendations
- **Obtain reports before making offers:** Where possible, arrange your inspection during the due diligence period before you are contractually committed. This gives you maximum flexibility to negotiate or withdraw based on findings.
- **Verify inspector credentials:** Ensure your inspector is appropriately licensed and insured. Check their qualifications, experience, and that they follow Australian Standards for building inspections.
- **Discuss findings openly:** Take advantage of the opportunity to speak with your inspector after the inspection. Their insights beyond the written report can be invaluable for understanding the true condition of the property.
- **Consider second opinions:** For major defects or properties where you have concerns, a second inspection or specialist assessment provides additional confidence in your decision making.
- **Read the limitations section carefully:** Understand what areas could not be inspected and consider whether additional access or investigation is warranted.
- **Keep the report for future reference:** Your inspection report provides a baseline record of the property's condition at purchase, useful for insurance claims and future maintenance planning.
- **Act within your contract timeframes:** Ensure you make any requests or decisions based on the inspection report within the periods specified in your contract of sale.
- **Balance emotion with logic:** Do not let excitement about a property cloud your judgement when significant defects are identified. Equally, do not let minor issues derail a good purchase.
## Frequently Asked Questions
### What qualifications should a pre-purchase inspector have?
**Short answer:** Pre-purchase building inspectors should hold a builders
licence or equivalent qualification and appropriate insurance coverage.
In Australia, the qualifications required for building inspectors vary by state.
Generally, inspectors should hold a current builders licence (unrestricted or
equivalent), Certificate IV in Building and Construction or similar qualification,
professional indemnity insurance, and public liability insurance. Many inspectors are
also members of professional associations such as the Master Builders Association or
Housing Industry Association. For [timber pest inspections](/timber-pest-inspections), a separate pest control
licence is required.
### How long does a pre-purchase inspection take?
**Short answer:** A thorough pre-purchase inspection typically takes 1.5 to
3 hours depending on property size and complexity.
The inspection duration varies based on the property size, age, construction type, and
accessibility of areas like roof voids and subfloors. A standard three-bedroom home
usually takes around 2 hours. Larger properties, older homes, or those with complex
features may take longer. The written report is usually provided within 24 to 48 hours
after the inspection, with verbal feedback available immediately on request.
### Should I attend the pre-purchase inspection?
**Short answer:** Yes, attending the inspection is highly recommended as it
allows you to see defects firsthand and ask questions.
While not essential, attending your inspection provides significant benefits. You can
see exactly where defects are located, understand their severity in context, ask
questions about maintenance requirements, and get a better feel for the property
overall. Most inspectors welcome client attendance and will explain their findings as
they work through the property. If you cannot attend, arrange a phone call to discuss
the report after it is completed.
### What is not covered in a standard pre-purchase inspection?
**Short answer:** Standard inspections do not cover concealed areas,
detailed electrical or plumbing systems, pool compliance, or environmental testing.
Pre-purchase inspections are visual assessments of accessible areas only. They do not
include areas concealed by walls, floors or ceilings, detailed electrical testing beyond
visual assessment, internal plumbing or drain camera surveys, swimming pool barrier
compliance, asbestos sampling and testing, soil contamination testing, or structural
engineering assessments. These require separate specialist inspections if concerns are
identified or you require detailed assessment of specific systems.
### How do I know if a crack in the wall is serious?
**Short answer:** Crack severity depends on width, pattern, location, and
whether the crack is active or stable.
Hairline cracks up to 0.1mm are generally cosmetic and result from normal building
movement. Cracks between 0.1mm and 1mm may indicate minor movement but are rarely
structural. Cracks wider than 5mm, stair-step patterns in brickwork, cracks extending
through multiple courses, or cracks that are widening over time may indicate structural
movement requiring investigation. Your inspector will assess crack patterns and advise
whether structural engineering review is recommended.
### Can I negotiate on price based on inspection findings?
**Short answer:** Yes, inspection findings are commonly used to negotiate
price reductions or repairs before settlement.
Your pre-purchase inspection report is a legitimate negotiation tool. Focus on major
defects and safety concerns rather than minor cosmetic issues. Provide contractor quotes
to support your requested price reduction. Be aware that sellers are not obligated to
accept your requests, but well-documented defects often result in successful
negotiations. Consider the overall market conditions and property value when determining
a reasonable negotiation position.
### What happens if defects are found after I have already exchanged contracts?
**Short answer:** Your options depend on the contract terms, timing, and
nature of defects discovered.
If you have a building and pest inspection clause in your contract, you typically have a
specified period to conduct inspections and may be able to negotiate or withdraw based
on findings. If the cooling-off period has passed, your options are more limited unless
the defects were deliberately concealed or the contract has specific provisions. Consult
your solicitor immediately about your rights and options under your specific contract
terms.
### How much does a pre-purchase building inspection cost?
**Short answer:** Pre-purchase building inspections in Australia typically
cost between $400 and $700, with [combined building and pest](/building-and-pest-inspections) inspections ranging from
$500 to $800.
The cost varies based on property size, location, age, and type of construction.
Additional services such as thermal imageing, pool inspections, or detailed reports may
incur extra charges. While cost should not be the only factor in choosing an inspector,
be wary of significantly below-market pricing which may indicate less thorough
inspections. The investment in a quality inspection can save you thousands by
identifying issues before purchase.
## Key Takeaways
- Pre-purchase inspection reports are essential tools for understanding property condition before committing to purchase.
- Learn to distinguish between cosmetic issues that are part of normal property ownership and serious defects requiring immediate attention.
- Understand severity levels from minor through to safety concerns and respond appropriately to each category.
- Obtain detailed quotes from qualified contractors for significant repairs to support negotiation and budget planning.
- Use your inspection report as a negotiation tool to request price reductions or repairs before settlement.
- Know when to walk away from a purchase if defects are too severe or repair costs exceed your budget.
- Read the full report including limitations, and discuss any concerns with your inspector for clarification.
- Seek specialist assessments for significant concerns such as structural issues, termite damage, or electrical safety.
## References and Resources
- [ Standards Australia (AS 4349.1 Pre-purchase Inspections) ](https://www.standards.org.au/)
- [ NSW Fair Trading ](https://www.fairtrading.nsw.gov.au/)
- [ Consumer Affairs Victoria ](https://www.consumer.vic.gov.au/)
- [ Queensland Building and Construction Commission (QBCC) ](https://www.qbcc.qld.gov.au/)
- [ Consumer and Business Services South Australia ](https://www.cbs.sa.gov.au/)
- [ WA Building Commission ](https://www.commerce.wa.gov.au/building-commission)
For a complete overview, see our [guide to pre-purchase building and pest inspections](/guides/pre-purchase-building-pest-inspection-guide).
Contact
Our Team
}
buttonHref="/contact"
variant="primary"
/>
### Your Complete Checklist for Apartment Pre-Settlement Inspections
Source: https://ownerinspections.com.au/articles/checklist-for-apartment-pre-settlement-inspections
Published: 2024-07-10 | Updated: 2026-05-28 | Category: Pre-Settlement Inspections
Author: Maison Azdari
Buying an apartment? Your [pre settlement inspection](/apartment-pre-settlement) checklist is the last practical check before settlement, so it needs to be clear, structured and focused on the items that can cost money after handover. In Victoria, buyers are entitled to inspect the property at any reasonable time during the week before settlement, and the seller must hand over the property in the same condition as when it was sold.
This apartment inspection checklist helps buyers check the unit against the contract, inclusions, agreed repairs, fixtures, fittings, appliances, plumbing, electrical items, balconies, car spaces and storage areas. Queensland Government guidance also recommends inspecting the property 2 to 3 days before settlement and checking anything specifically included in the contract.
> A pre-settlement inspection checklist is not the same as a full pre-purchase building inspection. It is a final walkthrough to confirm the apartment is in the expected condition, that agreed items remain in place, and that no new defects have appeared before ownership changes hands. NSW Government guidance recommends checking for defects, damp, mould, windows, doors, taps, toilets, plumbing, lights, circuitry, fixtures, fittings and storage during property inspections.
Book an Apartment
Pre-Settlement Inspection
}
buttonHref="/apartment-pre-settlement"
variant="secondary"
/>
## What Is a Pre Settlement Inspection Checklist?
A pre settlement inspection checklist is a step-by-step list used before settlement to check the apartment’s condition against the contract of sale, inclusions list, floor plan, finishes schedule and any agreed repairs.
It should help you answer three questions:
| Question | What it means |
| ----------------------------------------------------------- | ------------------------------------------------------------------------------- |
| Is the apartment in the same condition as when it was sold? | Check for new damage, missing items or unfinished work |
| Are the agreed inclusions still there? | Check appliances, blinds, light fittings, remotes, storage cages and car spaces |
| Are fixtures and systems working? | Test taps, toilets, power points, lights, doors, windows and appliances |
This is why a written pre settlement checklist is better than walking through the apartment from memory. A checklist keeps the inspection focused and helps you create a clear defect list if something needs to be raised before settlement.
## What to Bring to Your Apartment Pre-Settlement Inspection
Arriving prepared makes the inspection faster and more useful. Bring the documents and basic tools you need to compare the apartment with what was promised.
| Item | Why you need it |
| --------------------------- | --------------------------------------------------------- |
| Contract of sale | To confirm fixtures, fittings and inclusions |
| Floor plan | To check layout, room sizes, car space and storage area |
| Finishes or colour schedule | To compare tiles, paint, flooring, benchtops and fittings |
| Phone or camera | To photograph defects and create a visual record |
| Phone charger | To test power points |
| Torch | To inspect cupboards, under sinks and dark corners |
| Measuring tape | To check key dimensions against the plan |
| Notebook or checklist | To record defect location and description |
| Blue painter’s tape | To mark visible defects if the builder allows it |
A second person can also help. One person can test items while the other records photos, locations and notes.
## Apartment Inspection Checklist Before Settlement
This apartment inspection checklist for buyers focuses on items that are easy to miss during a short walkthrough. Start at the front door and move through the apartment in the same order every time.
| Area | What to check | Evidence to capture |
| ------------ | ------------------------------------------------------- | ------------------------------------------ |
| Entry | Door alignment, locks, keys, intercom, doorbell | Photo or short video of operation |
| Kitchen | Appliances, taps, sink, cabinets, benchtops, splashback | Photos of defects, model numbers and leaks |
| Bathrooms | Tiles, grout, toilet, shower, drainage, exhaust fan | Photos of cracks, ponding water or leaks |
| Living area | Walls, ceilings, floors, lights, power points | Photos under natural light and torchlight |
| Bedrooms | Wardrobes, windows, blinds, flooring, power points | Photos of scratches, gaps or poor finishes |
| Laundry | Taps, drainage, ventilation, dryer duct if included | Video of water flow and drainage |
| Balcony | Balustrade, drainage, tiles, waterproofing signs | Photos of ponding, cracks or staining |
| Common areas | Lobby, lift, corridor, mailbox, access system | Photos of unfinished or damaged items |
| Car space | Number, access, dimensions, storage cage | Photo of car space and storage cage number |
## Kitchen Checklist
The kitchen is typically the most expensive room per square metre in any apartment. Defects here can be costly and disruptive to fix after settlement.
| Kitchen item | What to look for |
| ------------ | -------------------------------------------------- |
| Benchtops | Chips, cracks, uneven joins, poor sealing |
| Cupboards | Loose hinges, poor alignment, scratched panels |
| Drawers | Smooth runners, correct handles, no wobbling |
| Appliances | Correct model, working controls, no visible damage |
| Sink | Good drainage, no leaks, plug seals properly |
| Splashback | Cracked tiles, missing grout, poor silicone |
| Power points | Working outlets, correct locations |
### Benchtops
Inspect every benchtop surface carefully. Run your hands along the edges to feel for chips, rough spots, or unfinished sections. Look at stone or engineered benchtops from multiple angles to catch cracks or discolouration that only appear under certain lighting.
Check that benchtop joins are tight, level, and properly sealed. Any gaps at the wall junction or around sink cutouts could allow water ingress that leads to swelling or mould.
| Check | What to Look For |
| ----------------- | ------------------------------------------ |
| Surface condition | Chips, scratches, cracks, discolouration |
| Joins and seams | Gaps, unevenness, poor colour matching |
| Edge profiles | Consistent finish, no rough or sharp spots |
| Wall junction | Sealed properly, no gaps |
| Level | Use spirit level across the surface |
| Overhang | Consistent and matches specifications |
### Cabinetry
Open and close every drawer and cupboard door in the kitchen. Soft-close mechanisms should operate smoothly without sticking or bouncing. Drawers should glide on their runners without wobbling or catching.
Inspect the interior of cabinets for unfinished edges, sawdust, or construction debris. Look at hinges to confirm they are properly aligned and tightened. Check that all handles and knobs are firmly attached and positioned consistently.
### Appliances
Turn on every appliance. Run the oven, cooktop burners, rangehood, and dishwasher through a short cycle. Check that the rangehood fan and light both work. Open the oven door to confirm hinges hold it in position.
Verify that the model and brand of each appliance matches what was specified in the contract. Builders sometimes substitute appliances, and you are entitled to receive exactly what was agreed upon. For more on your rights, see our article about [builder obligations in pre-settlement inspections](/articles/builder-obligations-in-pre-settlement-inspections).
| Appliance | Checks |
| ----------------------- | -------------------------------------------------------- |
| Oven | Heats up, door seals, hinges hold, correct model |
| Cooktop | All burners/zones ignite or heat, controls respond |
| Rangehood | Fan operates on all speeds, light works, filters present |
| Dishwasher | Runs full cycle, no leaks, correct model |
| Microwave (if included) | Heats, turntable rotates, door latches |
### Tapware and Sink
Run both hot and cold water. Check water pressure and confirm that the mixer tap operates smoothly through its full range. Look under the sink for any signs of leaking at pipe connections or the base of the tap.
Plug the sink and fill it to check drainage speed and confirm the plug seals properly. While water is running, inspect the overflow outlet to ensure it drains correctly.
### Splashback
Examine the splashback for chips, cracks, or uneven tiling. Grout lines should be consistent, fully filled, and free of gaps. If the splashback is glass, check for scratches and confirm the colour matches your selections.
Pay close attention to where the splashback meets the benchtop. Silicone sealant should be neatly applied with no gaps or bubbling.
## Bathroom Checklist
Bathrooms are high-risk areas because water leaks, poor drainage and failed seals can lead to bigger problems later.
| Bathroom item | What to check |
| ------------------ | ----------------------------------------------------- |
| Shower | Water pressure, screen seals, drainage, fall to waste |
| Toilet | Flush, refill, leaks, loose pan |
| Vanity | Tap function, basin drainage, cabinet damage |
| Tiles | Chips, cracks, hollow sounds, uneven edges |
| Grout and silicone | Gaps, cracks, missing sections, mould staining |
| Exhaust fan | Air extraction and switch operation |
| Accessories | Towel rails, mirror, toilet roll holder, robe hooks |
### Tiles and Grouting
Tap tiles gently with your knuckle or a coin. A hollow sound indicates the tile may not be properly adhered to the substrate, which can lead to cracking or water penetration over time.
Check grout lines for consistency, completeness, and colour uniformity. Missing or cracked grout allows water behind tiles, which compromises waterproofing and can cause structural damage. Inspect corners and edges where tiles meet walls, floors, and fixtures.
| Check | What to Look For |
| ----------------- | --------------------------------------------- |
| Tile adhesion | Tap test for hollow sounds |
| Grout lines | Gaps, cracks, inconsistent colour |
| Tile alignment | Lippage (uneven edges between adjacent tiles) |
| Cuts and edges | Neat cuts around fixtures and at borders |
| Silicone joints | Movement joints properly sealed |
| Surface condition | Chips, scratches, stains |
### Waterproofing Indicators
While you cannot see the waterproofing membrane directly, you can look for signs of problems. Check for any damp patches on walls or ceilings below bathrooms (if accessible). Examine the base of shower screens and around the bath for proper sealing.
Fill the shower recess and let water sit for a few minutes if possible. Watch for any water escaping beyond the shower area. The shower floor should fall towards the drain with no ponding in corners.
### Fixtures and Fittings
Test the shower, basin taps, and toilet. Flush the toilet multiple times and check that it fills and stops correctly. Run the shower to check water pressure and temperature control.
Inspect towel rails, toilet roll holders, soap dishes, and any other accessories. Confirm they are firmly fixed and level. Check the mirror for scratches and confirm it is securely mounted.
### Drainage and Ventilation
Pour water directly over the floor waste to confirm drainage is clear and fast. Slow drainage can indicate a blockage or incorrect fall in the waste pipe.
Test the exhaust fan. It should activate with the light switch or its own switch, depending on the design. Hold a piece of tissue near the fan grille to confirm air is actually being extracted. Poor bathroom ventilation leads to mould growth, which is a serious issue in Australian apartments.
## Living Area Checklist
Living areas are where you will spend most of your time. Defects in walls, floors, and windows are not just cosmetic; they can indicate deeper structural or construction issues.
| Bathroom item | What to check |
| ------------------ | ----------------------------------------------------- |
| Shower | Water pressure, screen seals, drainage, fall to waste |
| Toilet | Flush, refill, leaks, loose pan |
| Vanity | Tap function, basin drainage, cabinet damage |
| Tiles | Chips, cracks, hollow sounds, uneven edges |
| Grout and silicone | Gaps, cracks, missing sections, mould staining |
| Exhaust fan | Air extraction and switch operation |
| Accessories | Towel rails, mirror, toilet roll holder, robe hooks |
### Walls and Ceilings
Stand at various angles and use your torch to cast light across wall and ceiling surfaces. This raking light technique reveals dents, bumps, cracks, and poor plaster finishing that are invisible under normal overhead lighting.
Check corners for straight, consistent lines. Look where walls meet ceilings for gaps or uneven cornice joins. Examine any feature walls or bulkheads for quality of finish.
| Defect Type | Where to Look |
| --------------- | -------------------------------------- |
| Cracks | Corners, around windows, ceiling joins |
| Dents and bumps | Flat wall surfaces under raking light |
| Paint defects | Drips, missed spots, colour variation |
| Cornice gaps | Wall-ceiling junctions |
| Nail pops | Plasterboard surfaces |
### Floors
Walk slowly across every floor surface. Feel for squeaks, soft spots, or unevenness underfoot. If the apartment has timber or laminate flooring, check for gaps between boards, scratches, or lifting edges.
For carpeted areas, look for ripples, poor stretching, or visible seams. Pull back the edge at a doorway if possible to check the underlay quality.
For tiled living areas, perform the same tap test described in the bathroom section. Grout should be consistent and tiles level with minimal lippage.
### Windows and Doors
Open and close every window and door. They should operate smoothly without sticking, scraping, or excessive force. Check that locks engage and disengage properly on all windows and sliding doors.
Inspect window seals and weatherstripping. Look for gaps that could allow water or air infiltration. Check glass for scratches, cracks, or failed double-glazing (condensation between panes).
Test sliding door tracks for smooth operation. Ensure flyscreen doors and windows are present where specified, undamaged, and fit correctly within their frames.
### Power Points and Switches
Bring your phone charger and test every power point by plugging it in. Confirm the USB charging outlets work if they were included in the specification.
Flick every light switch and dimmer. Confirm each switch controls the correct fitting. Check that all downlights and pendant lights are working and are the correct colour temperature.
Test data points, TV outlets, and any integrated smart home systems specified in the contract.
Read the Defect
Documentation Guide
}
buttonHref="/articles/document-building-defects-legal-claim"
variant="secondary"
/>
## Bedroom Checklist
Living areas and bedrooms can hide cosmetic defects, poor finishes and operational issues.
| Room item | What to look for |
| ------------ | ------------------------------------------------------- |
| Walls | Cracks, dents, patchy paint, poor plaster finish |
| Ceilings | Sagging, stains, cracks, gaps around fittings |
| Floors | Scratches, lifting boards, uneven tiles, carpet ripples |
| Doors | Rubbing, loose handles, poor latch alignment |
| Windows | Smooth operation, locks, seals, scratches |
| Wardrobes | Sliding tracks, shelving, handles, internal finish |
| Lights | Working fittings, correct switch control |
| Power points | Working outlets and safe placement |
### Built-in Wardrobes
Open every wardrobe door and drawer. Check that sliding doors run smoothly on their tracks without derailing. Inspect shelving for stability and correct positioning. Examine hanging rails to confirm they are firmly fixed and level.
Look inside the wardrobe with your torch. Check for unfinished edges, poor paintwork, or construction debris left behind. Confirm the wardrobe configuration matches your selections.
| Wardrobe Check | Details |
| --------------- | ----------------------------------------- |
| Doors | Smooth operation, alignment, handles firm |
| Drawers | Runners smooth, soft-close works, aligned |
| Shelving | Level, secure, correct spacing |
| Hanging rails | Firm, level, correct height |
| Interior finish | Clean, no rough edges, paint complete |
| Lighting | Internal wardrobe light works (if fitted) |
### Windows
Bedroom windows require the same checks as living area windows, with extra attention to acoustic performance. Close the window and listen for traffic noise or other external sounds. If acoustic glazing was specified, confirm the glass type matches the specification.
Check that blinds or curtains (if included) operate smoothly and block light effectively. Blackout blinds should leave no significant light gaps around the edges.
### Carpet and Flooring
Inspect carpet for consistent colour, proper stretching, and neat joins. Look at the transition strips where carpet meets hard flooring at doorways. These should be firmly fixed and present no tripping hazard.
For hard flooring, check for scratches that may have occurred during construction. Builders sometimes lay flooring before completing other work, leaving it exposed to damage from tradesperson traffic.
## Laundry Checklist
The laundry is often a compact space in apartments, but it still requires careful inspection.
### Taps and Connections
Test laundry taps for water pressure and smooth operation. Confirm hot and cold connections are correctly labelled and plumbed. Check washing machine tap connections for leaks.
If a dryer is included, verify the exhaust vent is connected and clear. Confirm the dryer matches the specified model.
### Drainage
Run water through the laundry trough and floor waste. Check that drainage is fast and there is no gurgling, which could indicate a venting problem in the waste plumbing.
### Ventilation
Confirm the laundry has adequate ventilation, whether through an openable window or a mechanical exhaust fan. Test the exhaust fan if fitted. In apartments, poor laundry ventilation contributes to moisture problems throughout the unit.
## Balcony and Exterior Apartment Checks
Balconies are exposed to weather and are common sources of water ingress into apartments. Inspect this area carefully.
| Balcony item | What to check |
| ---------------- | ------------------------------------------------- |
| Balustrade | Stable, secure, no cracked glass or loose fixings |
| Floor | Proper fall, no ponding, no loose tiles |
| Drainage | Clear drain, no blockage, no overflow marks |
| Door threshold | Sealed, no water entry signs |
| Walls and soffit | Staining, cracks, peeling paint |
| Lighting | Working external lights if included |
### Balustrades
Check balustrade height and stability. Australian Standard AS 1170.1 requires balustrades on balconies above one metre to be at least one metre high. Give the balustrade a firm push to check it does not move or flex excessively.
Inspect glass balustrades for scratches, chips, and secure fixing at the base. Metal balustrades should be free of rust, dents, and sharp edges.
### Drainage and Waterproofing
Pour water on the balcony floor and observe the drainage pattern. Water should flow towards the drain or scupper without pooling. Ponding water on a balcony can lead to waterproofing failure over time.
Check the junction between the balcony floor and the external wall. This is a critical waterproofing detail. Look for proper flashing and sealant.
Inspect the underside of the balcony slab from the apartment below (if accessible) for water stains or efflorescence, which indicate moisture penetration.
| Balcony Check | Details |
| ---------------------- | ------------------------------------- |
| Balustrade height | Minimum 1m above finished floor level |
| Balustrade stability | No excessive movement when pushed |
| Floor drainage | Water flows to drain, no ponding |
| Wall junction | Properly flashed and sealed |
| Tile/surface condition | No cracks, chips, or loose tiles |
| Ceiling (soffit) | No water stains or peeling paint |
## Buying a Unit Checklist: Extra Apartment Checks
A buying a unit checklist needs to cover more than the inside of the apartment. You are also buying into shared spaces, access systems and strata-managed areas.
| Unit-specific item | Why it matters |
| -------------------- | ---------------------------------------------- |
| Car space | Must match the contract and be usable |
| Storage cage | Should match the allocated lot or entitlement |
| Access fobs | Needed for entry, lifts, garage and facilities |
| Intercom | Confirms visitor access works |
| Mailbox | Check number, key and condition |
| Lift | Check operation, levelling and damage |
| Common corridors | Look for unfinished works or damage |
| Fire doors and exits | Do not block or alter, record visible issues |
### Lobby and Corridors
Check the condition of hallway walls, flooring, and lighting. Note any damage or unfinished work. Fire safety equipment, including extinguishers, hose reels, and exit signage, should be present and current.
Verify that intercom and security access systems work correctly from both the lobby and your apartment.
### Lifts
Test the lift. Confirm it arrives promptly, opens and closes smoothly, and stops level with the floor. Check the interior for damage or incomplete finishes.
### Car Parking and Storage
Visit your allocated car space. Confirm the space number matches your contract. Check for adequate width, ceiling height, and any obstructions such as pipes or columns that restrict access. Test the garage door remote or access system.
Locate your storage cage and verify its size and condition. Confirm the lock works and the cage is structurally sound.
| Common Area | Key Checks |
| --------------------------- | ---------------------------------------- |
| Lobby | Finishes, lighting, intercom, mailbox |
| Corridors | Walls, carpet, fire safety equipment |
| Lifts | Operation, interior condition, levelling |
| Car space | Number matches, dimensions, access |
| Storage cage | Size, lock, structural condition |
| Bin room | Access, cleanliness |
| Garden/pool (if applicable) | Condition, safety compliance |
## Electrical Systems
Electrical defects in apartments are surprisingly common and can pose safety risks.
- Test every power point, light switch, and data outlet as described earlier. Check the switchboard (meter board) to confirm all circuits are labelled correctly. RCDs (residual current devices) should be present and functional. Press the test button on each RCD to verify it trips, then reset it.
- Check smoke detectors are installed in the correct locations. Australian building regulations require interconnected smoke alarms in all bedrooms, hallways connecting bedrooms, and on each level. Press the test button to confirm they sound.
If the apartment includes a ducted air conditioning system, test heating and cooling modes. Check that air flows from every vent. Split system units should respond to the remote control and reach the set temperature.
## Plumbing
Plumbing problems can be among the most disruptive defects to fix after settlement.
- Run every tap in the apartment simultaneously to check water pressure under load. Low pressure when multiple taps are open may indicate undersized supply pipes.
- Check the hot water system location and type. Confirm it matches the specifications. Note the time hot water takes to reach distant taps; excessively long wait times can indicate poor pipe routing.
- Inspect visible pipework under sinks and in the laundry for leaks, corrosion, or incomplete connections. Look at ceiling penetrations in bathrooms and the laundry for signs of water staining, which can indicate leaking pipes in the unit above.
- Flush toilets, run showers, and fill basins simultaneously to stress-test the drainage system. Listen for gurgling sounds that might indicate blocked or poorly vented waste pipes.
## Paintwork
Paint quality is one of the most frequently reported defects in new apartment builds. Use your torch to examine walls and ceilings under raking light.
Look for:
- Roller marks and brush strokes
- Drips and runs
- Uneven coverage or missed spots
- Touch-up patches that do not match the surrounding colour
- Paint on window frames, floor surfaces, or fixtures
- Scuff marks and scratches from construction
Check that the paint colour and finish (matt, satin, or gloss) match the selections schedule. Feature walls should have clean, straight lines where colours change.
External paintwork on balconies and building facades should also be inspected for consistency and coverage.
## Final Inspection Checklist Before Settlement
Some buyers search for a final inspection checklist before settlement rather than a pre settlement inspection checklist. The intent is almost the same: check the apartment shortly before settlement and raise problems before the transaction completes.
Consumer Affairs Victoria says the seller must [hand over the property in the same condition](https://www.consumer.vic.gov.au/housing/buying-and-selling-property/buying-property/property-settlement/before-property-settlement) as when it was sold, and buyers can request a repair if something is damaged or not working as it was on the day of sale.
Use this final inspection checklist before settlement:
| Final inspection item | Checked |
| --------------------------------------------- | ------- |
| Property is clean and free of builder rubbish | ☐ |
| No new damage since contract signing | ☐ |
| Agreed repairs are complete | ☐ |
| Fixtures and inclusions remain in place | ☐ |
| Appliances turn on and match the contract | ☐ |
| Lights and power points work | ☐ |
| Taps, showers and toilets work | ☐ |
| No visible leaks under sinks or vanities | ☐ |
| Doors, windows and locks work | ☐ |
| Keys, remotes and access fobs are supplied | ☐ |
| Car space and storage cage match the contract | ☐ |
| Defects are photographed and sent in writing | ☐ |
## What to Look for in a Pre Settlement Inspection
If you are wondering what to look for in a pre settlement inspection, focus on changes, defects and contract mismatches.
Look for new damage, missing inclusions, poor finishes, leaks, blocked drainage, damaged appliances, power issues, window or door problems, and items that do not match the contract.
A professional inspection can also help where defects are not obvious. Queensland Government guidance says buyers can get building and pest inspections and should make sure the [inspector holds a current licence](https://www.qld.gov.au/law/housing-and-neighbours/buying-and-selling-a-property/buying-a-home/making-an-offer-on-a-home/inspections) from the Queensland Building and Construction Commission when buying in Queensland.
## What to Do After the Inspection
Once the inspection is complete, compile your defect list with photos, locations and clear descriptions. Send it to the builder, developer, vendor representative or agent in writing.
If the issue is technical, repeated, hidden or disputed, a [defect investigation report](/defect-investigation-reports) can help identify the defect, document the evidence and explain the likely next step. Owner Inspections’ defect investigation reports can include visual defects, safety defects, water leaks, moisture readings, thermal imaging and repair recommendations.
If the builder agrees to fix items before settlement, book a [reinspection](/reinspection) after the repair work is complete. This gives you written evidence that the defects were checked again before you proceed.
| Defect record | Example |
| ---------------- | -------------------------------- |
| Location | Bathroom 1, shower floor |
| Issue | Water ponding near corner |
| Evidence | Photo 12 and video 3 |
| Requested action | Review fall to waste and rectify |
| Sent to | Builder representative by email |
| Date sent | Add date |
## Should You Hire a Professional Inspector?
A DIY apartment inspection checklist can help you stay organised, but it does not replace an experienced inspector for technical defects.
A professional inspector can check visible building defects, moisture risk, poor finishes, drainage, balcony issues, waterproofing signs and safety concerns. In Victoria, the Building and Plumbing Commission is now the state’s building and plumbing regulator, bringing together the former VBA, Domestic Building Dispute Resolution Victoria and domestic building insurance functions.
[Owner Inspections](/articles) can provide a written report with photos, clear defect descriptions and practical next steps, which is useful when you need to raise items with the builder, vendor, agent, solicitor or conveyancer.
## Get Professional Support for Your Apartment Inspection
A pre settlement inspection checklist gives apartment buyers a clear way to check the property before settlement. It helps you confirm inclusions, test fixtures, record defects and avoid relying on memory during a short walkthrough.
A [pre-settlement inspection](/pre-handover-inspections) conducted by a licensed building inspector gives you confidence that your new apartment meets the required standards. Our team at Owner Inspections provides detailed defect reports with photographic evidence, giving you the documentation you need to hold builders accountable and protect your investment.
Contact Owner
Inspections
}
buttonHref="/contact"
variant="primary"
/>
### The Benefits of Pre-Sale Inspections for Home Sellers
Source: https://ownerinspections.com.au/articles/the-benefits-of-pre-sale-inspections-for-home-sellers
Published: 2024-07-10 | Updated: 2026-02-10 | Category: Pre-Sale Inspections
Author: Maison Azdari
A pre-sale inspection is a professional building assessment conducted before a property is listed for sale. It identifies structural defects, maintenance issues, and areas of concern that could affect the sale process or the price a buyer is willing to pay. For Australian home sellers, a pre-sale inspection typically costs between $400 and $700 and provides several benefits: it allows you to fix issues before buyers find them, reduces the chance of deals falling through due to unexpected inspection results, builds buyer confidence through transparency, and can support a higher sale price by demonstrating the property is in good condition.
Many sellers assume that an inspection is only the buyer's responsibility. While buyers do arrange their own [pre-purchase inspections](/pre-purchase-inspections), sellers who have already had their property inspected and addressed any issues are in a much stronger position during negotiations.
This guide explains how pre-sale inspections work, the specific benefits they offer to sellers, what they cost, and how they fit into the overall selling process in Australia.
## What Is a Pre-Sale Inspection?
A pre-sale inspection is a comprehensive building assessment conducted by a licensed inspector before you list the property for sale. The inspection follows the same standards used for pre-purchase inspections (AS 4349.1 for building and AS 4349.3 for timber pest) and covers the property's structural condition, external and internal elements, wet areas, roof, subfloor, drainage, and site conditions.
The report provides you with a clear, professional assessment of the property's current condition, including any defects, areas requiring repair, and items that a buyer's inspector is likely to flag. This gives you the opportunity to address issues on your own terms before the property goes on the market.
## Key Benefits for Home Sellers
### 1. Fix Issues Before Buyers Find Them
The most practical benefit of a pre-sale inspection is that it gives you advance knowledge of any problems. You can choose to repair defects before listing, which means the buyer's own inspection is less likely to uncover surprises that could derail the sale or trigger price renegotiation.
### 2. Build Buyer Confidence and Trust
Providing a recent inspection report to potential buyers demonstrates transparency. Buyers and their agents appreciate sellers who are upfront about the property's condition. This builds trust and can make buyers more willing to make a strong offer.
### 3. Reduce Negotiation Surprises
One of the most common reasons property deals stall or fall through is the buyer's pre-purchase inspection revealing issues the seller was not aware of. When this happens, the buyer often seeks a significant price reduction or walks away entirely. A pre-sale inspection removes this element of surprise.
### 4. Faster Sale Process
Properties that have been pre-inspected and are in good condition tend to sell faster. Buyers who can see a clean inspection report are more confident in making a quick decision, and there is less back-and-forth over defect-related issues.
### 5. Support a Stronger Sale Price
A well-maintained property with a clean inspection report is more attractive to buyers and can command a higher price. The report provides evidence that the property is in good condition, which supports the asking price during negotiations.
### 6. Legal and Disclosure Protection
In some Australian states, sellers are required to disclose known defects. Having a professional inspection report ensures you are aware of the property's condition and can make appropriate disclosures. This protects you against future claims from the buyer that they were misled about the property's state.
## What a Pre-Sale Inspection Covers
## How Pre-Sale Inspections Affect the Sale Price
A pre-sale inspection can influence the sale price in several ways:
## Costs and Return on Investment
The small upfront investment in a pre-sale inspection often pays for itself many times over by preventing price reductions and deal failures.
## The Pre-Sale Inspection Process
## Common Issues Found in Pre-Sale Inspections
Most of these issues can be addressed before listing at a reasonable cost, preventing them from becoming negotiating points during the sale.
### Identifying Common Mould Species in Indoor Environments
Source: https://ownerinspections.com.au/articles/identifying-common-mould-species-in-indoor-environments
Published: 2024-07-09 | Updated: 2026-02-09 | Category: Mould Inspections
Author: Maison Azdari
The most common indoor mould species found in Australian homes are Cladosporium, Penicillium, Aspergillus, Alternaria, and Stachybotrys chartarum (commonly known as black mould). These moulds grow in areas with excess moisture, such as bathrooms, kitchens, subfloor spaces, around leaking pipes, and on water-damaged materials. Health effects range from allergic reactions and respiratory irritation (for the more common species) to serious lung infections and mycotoxin exposure (for species like Aspergillus and Stachybotrys). A professional [mould inspection](/mould-inspections) can identify the species present, assess the extent of growth, and recommend remediation steps.
Mould is one of the most common indoor environmental issues in Australian homes, particularly in humid climates and properties with moisture problems. While some mould exposure is unavoidable (spores are present everywhere in the outdoor environment), indoor mould growth above normal levels indicates a moisture problem that needs to be addressed.
Understanding which mould species you are dealing with helps you assess the health risk and determine the appropriate response. This guide covers the most common indoor species, their appearance, where they grow, their health effects, and when a professional mould inspection is warranted.
## What Is Mould?
Mould is a type of fungus that grows as multicellular filaments called hyphae. It reproduces by releasing microscopic spores into the air. These spores are present in virtually all indoor and outdoor environments, but they only grow into visible mould colonies when they land on a surface with sufficient moisture.
## Why Indoor Mould Is a Concern
Indoor mould growth is a concern for two reasons: health effects and property damage.
### Health Effects
Mould releases spores and, in some cases, volatile organic compounds (VOCs) and mycotoxins into the air. Exposure can cause:
People most at risk include children, the elderly, individuals with asthma or allergies, and those with weakened immune systems.
### Property Damage
Left untreated, mould can damage building materials, weaken structural timbers, stain surfaces, degrade insulation, and ruin personal belongings such as clothing, books, and furniture. The longer mould is left to grow, the more extensive and expensive the remediation becomes.
## Common Indoor Mould Species in Australia
### Cladosporium
Cladosporium is one of the most frequently found mould species in Australian homes. It appears in black, green, brown, or grey colours and has a powdery or suede-like texture. It thrives in warm and damp areas and is most active during the warmer months.
Common locations include bathroom walls and ceilings, window sills with condensation, and air conditioning systems. Health effects are generally mild to moderate, including skin rashes, eye irritation, sinus congestion, and wheezing.
### Penicillium
Penicillium is typically blue or green with a velvety texture. It is commonly found on food, walls, insulation, and water-damaged carpet or furniture. Unlike some species, Penicillium can grow in cooler conditions and is often more prevalent during winter.
It spreads quickly and can produce musty odours. Exposure can cause allergic reactions and respiratory irritation. Some species of Penicillium produce mycotoxins.
### Aspergillus
Aspergillus is a large genus with many species, common in humid Australian environments. It can appear green, brown, black, white, or yellow. It is frequently found in air conditioning systems, on damp walls, in dust, and on stored food.
Health effects range from mild allergic reactions to serious conditions including aspergillosis (a lung infection) in individuals with compromised immune systems. Aspergillus is considered one of the more medically significant indoor mould genera.
### Stachybotrys Chartarum (Black Mould)
Stachybotrys chartarum is the species most commonly referred to as "black mould." It is dark green to black, slimy in texture, and grows on materials with high cellulose content such as plasterboard, timber, and cardboard, particularly after prolonged water damage.
While less common than Cladosporium or Penicillium, Stachybotrys is significant because some strains produce potent mycotoxins (satratoxins). Exposure can cause severe respiratory symptoms, headaches, fatigue, and immune system effects.
### Alternaria
Alternaria is commonly found in showers, bathtubs, below leaking sinks, and on damp window frames. It is typically dark brown or olive green with a woolly or velvet-like texture.
Alternaria is a common trigger for allergic reactions and asthma attacks. It spreads quickly in damp conditions and is one of the most common outdoor moulds that also grows indoors.
### Aureobasidium
Aureobasidium is typically found behind wallpaper, on painted surfaces, and on wooden frames. It starts as pink or light brown and darkens to brown or black as it matures.
It can cause infections of the skin, eyes, and nails, and triggers allergic reactions in sensitive individuals.
### Fusarium
Fusarium grows in cold, wet environments and is often found on water-damaged carpets, fabrics, and wallpaper. It can appear in shades of pink, white, or red.
Fusarium can cause skin infections and, in people with weakened immune systems, more serious systemic infections. It is commonly associated with flooding and water damage events.
### Trichoderma
Trichoderma species are usually found on wet surfaces such as damp carpet, wallpaper, and air conditioning filters. They are typically white or green with a woolly texture.
Some strains produce mycotoxins and enzymes that break down building materials, making Trichoderma particularly damaging to textiles, paper, and timber.
### Ulocladium
Ulocladium requires a significant amount of water to grow and is commonly found in kitchens, bathrooms, and basements with major water damage. It is typically dark brown or black.
Its presence usually indicates severe or prolonged water damage. Ulocladium can cause strong allergic reactions and aggravate asthma.
## Health Effects Comparison
## Common Causes of Indoor Mould Growth
Mould does not grow without moisture. Identifying and fixing the moisture source is the single most important step in preventing and remediating indoor mould.
## When to Get a Professional Mould Inspection
## What a Mould Inspection Includes
A professional mould inspection typically includes:
### Comparing Pre-Handover Inspections and Final Walkthroughs
Source: https://ownerinspections.com.au/articles/comparing-pre-handover-inspections-and-final-walkthroughs
Published: 2024-07-03 | Updated: 2026-02-09 | Category: New Construction
Author: Maison Azdari
A pre-handover inspection (also called a practical completion inspection or PCI) is a professional assessment conducted by a licensed building inspector before the builder hands over a new home. It identifies construction defects, incomplete work, and non-compliant items that the builder must rectify. A final walkthrough, by contrast, is a buyer-conducted visual check carried out on or just before settlement day to confirm that all identified defects have been fixed and the property is in the agreed condition. Both steps are recommended for Australian home buyers purchasing new construction. The pre-handover inspection catches technical and structural issues, while the final walkthrough verifies that the builder has addressed them.
Buying a newly built home is exciting, but the period between practical completion and handover is one of the most important stages of the entire process. This is your opportunity to make sure the home you are paying for matches the plans, specifications, and quality standards set out in your building contract.
Many buyers confuse the pre-handover inspection with the final walkthrough, or assume one replaces the other. In reality, they are two separate steps with different purposes, and skipping either one can leave you accepting defects that become your problem after settlement.
## What Is a Pre-Handover Inspection?
A pre-handover inspection (PCI) is a thorough assessment of a newly built home conducted by a qualified, independent building inspector before the builder declares practical completion and hands over the property to the buyer.
The inspector examines the property systematically, checking every accessible area against the approved plans, the building contract specifications, the National Construction Code (NCC), and relevant Australian Standards. Any defects, incomplete work, or non-compliant items are documented in a detailed written report with photographs.
This report is then provided to the builder as a formal list of items that must be rectified before handover or within the defects liability period.
## What Is a Final Walkthrough?
The final walkthrough is the buyer's personal inspection of the property, usually conducted on or just before the day of settlement. Unlike the pre-handover inspection, the final walkthrough is typically done by the buyer themselves, without the builder or a professional inspector present.
The primary purposes of the final walkthrough are:
If you find that defects have not been rectified or new issues have appeared, you can raise these with the builder before completing settlement.
## Key Differences at a Glance
## What Each Step Covers
### Pre-Handover Inspection Coverage
The inspector assesses all accessible areas of the property:
### Final Walkthrough Coverage
The buyer's walkthrough is less technical but still important:
## Why You Need Both
Some buyers assume the final walkthrough is sufficient and skip the professional pre-handover inspection to save money. This is a common mistake for several reasons:
## Timing in the Construction Process
## Tips for Getting the Most from Each Step
### Pre-Handover Inspection Tips
### Final Walkthrough Tips
## Common Defects Found at Pre-Handover
### Post-Inspection Long-Term Maintenance: Sustaining Property Value
Source: https://ownerinspections.com.au/articles/post-inspection-long-term-maintenance-sustaining-property-value
Published: 2024-07-02 | Updated: 2026-02-09 | Category: General Maintenance
Author: Maison Azdari
A long-term maintenance plan after a building inspection is one of the most effective ways to sustain and grow your property's value in Australia. Rather than waiting for problems to appear, a structured approach to ongoing upkeep helps prevent small issues from becoming expensive defects, keeps your home safe, and ensures compliance with Australian building standards. For most residential properties, annual maintenance budgets of 1% to 2% of the property's value are recommended by industry professionals.
Building inspections, particularly [fixing inspections](/articles/fixing-inspections-complete-guide), are a starting point. They identify defects and areas needing repair. But what happens once those fixes are done? Without a plan for continuous care, new problems develop, old repairs degrade, and property value erodes over time. This guide walks you through how to develop, budget, and manage a long-term maintenance plan suited to Australian conditions.
## Why Post-Inspection Maintenance Matters
After a fixing inspection and repairs have been completed, many property owners assume the job is done. In reality, every repair has a lifespan, and all building materials degrade over time. Without ongoing maintenance:
A long-term maintenance plan turns reactive repairs into proactive care. It reduces emergency callouts, spreads costs over time, and keeps your property in a condition that meets Australian standards including the National Construction Code (NCC).
### Benefits of Long-Term Planning
## Factors That Shape Your Maintenance Plan
No two properties are the same. Your maintenance plan should be informed by several factors specific to your building and location.
### Age and Condition of the Property
Older properties generally require more attention. A home built in the 1970s will have different maintenance demands than a property completed in 2020. Common age-related concerns include:
A property with a documented history of [structural defects](/articles/structural-defect-inspections-to-prevent-future-problems) will need more frequent monitoring than one with a clean inspection record.
### Climate and Location
Australia's diverse climate means properties in different regions face different threats:
### Type of Property
## How to Structure a Long-Term Maintenance Plan
A good maintenance plan is a living document. It should be clear, organised, and reviewed regularly.
## Maintenance Schedules by Property Type
### Residential Properties
For homes, focus on periodic checks of the areas that degrade most quickly:
### Commercial Properties
## Budgeting for Ongoing Maintenance
Poor budgeting is one of the main reasons maintenance plans fail. Many property owners underestimate costs or fail to set aside funds consistently.
## Tips for a Successful Maintenance Plan
### Get Professional Help
If you are unsure where to start, a licensed building inspector can assess your property and help you build a prioritised maintenance plan. This is especially valuable for older properties or those with a history of defects. [Construction stage inspections](/articles/construction-progress-inspections) and [defect investigation reports](/articles/construction-defect-inspection) can also inform your long-term plan.
### Communicate With Stakeholders
Whether you are a homeowner, landlord, strata manager, or commercial property operator, every person involved needs to know the plan. Share the schedule, responsibilities, and expected costs with tenants, co-owners, and contractors. Transparency prevents confusion and missed tasks.
### Stay Flexible
A maintenance plan is not set in stone. As your property ages, as regulations change, and as you learn more about the building's behaviour, adjust the plan. Annual reviews are a good practice. If a new issue appears during a routine check, add it to the schedule right away.
## Common Maintenance Tasks and Frequencies
### How Does Weather Affect Property Inspection Reports in Australia?
Source: https://ownerinspections.com.au/articles/how-weather-affects-property-inspection-reports
Published: 2024-06-20 | Updated: 2026-01-30 | Category: Building Inspections
Author: Maison Azdari
Weather plays a surprisingly significant role in the accuracy and completeness of property inspection reports across Australia. From tropical downpours in Queensland to scorching heat in Western Australia, the conditions on inspection day can determine which defects are visible and which remain hidden.
Understanding how weather affects inspections helps property buyers, sellers, and owners make informed decisions about when to schedule assessments. It also helps you interpret results more accurately when reviewing your [inspection report](/articles/a-comprehensive-guide-to-house-inspections).
This guide explores how different weather conditions influence what inspectors can and cannot detect, and how to use that knowledge to your advantage.
> Weather conditions during a property inspection can either reveal hidden defects or conceal them entirely. An experienced inspector understands these dynamics and will note weather limitations in their report, but scheduling strategically can maximise the value of your assessment.
## How Rain Affects Property Inspections
Rain is one of the most influential weather factors during a building inspection. It creates a unique set of advantages and disadvantages that every property buyer and owner should understand.
### What Rain Reveals
Rainfall during or shortly before an inspection can be remarkably useful for identifying water ingress issues. Active leaks become visible when water is flowing, making it far easier for inspectors to trace the source. Common issues that rain exposes include:
- Roof leaks through damaged tiles, flashing, or deteriorated sarking
- Window and door seal failures allowing water penetration
- Faulty or blocked guttering and downpipe systems
- Cracks in external walls that permit water entry
- Failed waterproofing in balconies and terraces
- Subfloor drainage problems and rising damp
During dry weather, many of these defects leave only subtle staining or residue that can be difficult to interpret. Active water flow during rain provides clear, undeniable evidence of a problem and helps pinpoint its exact location.
### What Rain Obscures
While rain reveals certain issues, it simultaneously hides others. Heavy rainfall can make it unsafe or impractical for inspectors to access roofs, which limits their ability to assess [roof condition and materials](/articles/understanding-different-roof-types-inspection-needs). Other limitations during wet weather include:
- Pooling water can mask ground drainage issues, making it difficult to assess site grading
- Saturated soil prevents accurate evaluation of landscaping and drainage systems
- Wet surfaces on external cladding and brickwork can hide hairline cracks
- Exterior paint condition is harder to evaluate when surfaces are wet
- Garden and yard areas become difficult to traverse and assess safely
- Subfloor access may be restricted due to standing water
### After the Rain
Inspections conducted one to three days after significant rainfall often provide the best of both worlds. Residual moisture stains and damp patches remain visible, while surfaces have dried enough to allow full access. This window allows inspectors to identify both active moisture issues and drainage performance.
## Seasonal Variations and Their Impact
Australia's distinct seasons create different inspection conditions throughout the year. Each season presents its own set of challenges and opportunities.
### Spring and Summer Inspections
The warmer months bring dense vegetation growth that can conceal structural defects. Overgrown gardens and leafy trees may hide:
- Foundation cracks and movement along external walls
- Damage to fences, retaining walls, and boundary structures
- Termite leads and entry points at ground level
- Drainage infrastructure including stormwater pits and channels
- Deterioration of external cladding at lower levels
However, spring and summer also bring benefits. Longer daylight hours provide more natural light for inspections, and warm conditions allow inspectors to test air conditioning systems under load. The higher temperatures can also reveal heat-related issues such as thermal expansion in roofing materials and inadequate insulation performance.
### Autumn and Winter Inspections
Cooler months and deciduous leaf drop provide clearer sightlines to structural elements. Inspectors can more easily assess:
- Foundation condition and any signs of ground movement
- Guttering and roof drainage systems without leaf obstruction
- External wall condition from ground level to roofline
- Fence and retaining wall integrity
- Termite activity and moisture entry points
Winter inspections also allow testing of heating systems under real conditions. Shorter days mean inspectors may need to rely more on artificial lighting, but the reduced vegetation makes for more thorough external assessments.
The [Bureau of Meteorology](http://www.bom.gov.au/) provides seasonal forecasts that can help you plan inspections during optimal weather windows for your region.
## Weather Conditions vs Inspection Impact
The following table summarises how common weather conditions affect different aspects of a property inspection.
| Weather Condition | Advantages | Disadvantages | Best For |
| ----------------- | ------------------------------------------ | ------------------------------------------------------- | ---------------------------------- |
| Light rain | Reveals active leaks, tests drainage | Limits roof access, obscures exterior cracks | Water ingress assessment |
| Heavy rain | Exposes major leaks and flooding risk | Unsafe roof access, restricted exterior inspection | Identifying serious water problems |
| Hot and dry | Full access to all areas, clear visibility | Hides moisture issues, soil shrinkage may mask movement | Structural and exterior assessment |
| Cold and dry | Clear sightlines, reduced vegetation | Shorter daylight, some materials contract | Foundation and drainage review |
| High humidity | Reveals condensation and mould risk | Moisture readings may be elevated | Ventilation and mould assessment |
| Windy conditions | Tests window and door seals | Unsafe for roof inspection, noise interference | Building envelope assessment |
| Overcast and mild | Neutral conditions, comfortable access | No extreme conditions to test systems | Comprehensive general inspection |
## Humidity, Moisture, and Mould
Australia's coastal and subtropical regions experience high humidity levels for much of the year. Humidity has a direct impact on what inspectors find during assessments, particularly when it comes to mould and moisture damage.
High humidity readings during an inspection can indicate chronic ventilation problems. When relative humidity inside a property consistently exceeds 60%, conditions become favourable for mould growth. Inspectors use moisture meters and hygrometers to measure these levels, but ambient humidity on inspection day affects baseline readings.
A [professional mould inspection](/articles/mould-inspection-guide) conducted during humid conditions may reveal active mould growth that would be dormant in drier weather. Conversely, inspections during dry spells might miss early-stage mould colonies that have not yet produced visible growth.
### Signs Inspectors Look For in Humid Conditions
- Condensation on windows, pipes, and cold surfaces
- Musty odours in enclosed spaces such as wardrobes, subfloors, and ceiling cavities
- Discolouration on walls, ceilings, and around window frames
- Swelling or warping of timber elements including door frames and skirting boards
- Corrosion on metal fixtures, fasteners, and structural connections
- Peeling paint or wallpaper due to underlying moisture
### Ventilation Assessment
Humidity levels also help inspectors evaluate whether a property's ventilation systems are adequate. Bathrooms, laundries, kitchens, and subfloor spaces all require sufficient airflow to prevent moisture accumulation. The [Australian Building Codes Board](https://www.abcb.gov.au/) sets minimum ventilation requirements through the National Construction Code, and inspections during humid weather can highlight non-compliance.
## Geographic Location and Weather Patterns
Australia's vast geography means that weather impacts vary dramatically depending on where a property is located. Inspectors must account for local climate patterns when assessing buildings.
### Coastal Properties
Properties within several kilometres of the coastline face unique weather-related challenges. Salt-laden air accelerates corrosion of metal components, including roofing screws, flashing, structural steel, and window hardware. Coastal winds drive salt spray into building materials, causing deterioration that may not be immediately obvious.
Inspectors assessing coastal properties pay particular attention to:
- Corrosion of roof fixings and metal flashing
- Salt damage to painted surfaces and timber elements
- Erosion of mortar joints in brickwork
- Condition of balcony balustrades and fixings
- Drainage systems coping with storm surge risk
For properties in cyclone-prone regions of northern Australia, inspectors also assess structural tie-down systems and roof bracing against requirements outlined for [resilient home construction](/articles/resilient-home-construction-building-for-extreme-weather-conditions).
### High-Wind Areas
Properties in exposed locations or elevated terrain face greater wind loading. Inspectors evaluate whether roof fixings, cladding attachments, and structural bracing meet the requirements for the local wind classification. Weather conditions on inspection day can highlight issues such as rattling roof sheets, poorly sealed windows, and inadequate bracing.
### Properties Near Industrial Areas
Proximity to industrial zones introduces additional environmental factors. Airborne pollutants and particulates can accelerate material deterioration, stain surfaces, and contaminate rainwater collection systems. Inspections after rainfall can reveal how industrial fallout interacts with building surfaces, as rainwater washes pollutants across cladding and roofing materials.
## The Best Time to Schedule a Property Inspection
Choosing the right time to schedule an inspection depends on your priorities and the property's location. Here are practical guidelines based on Australian conditions.
### Optimal Conditions
The ideal inspection conditions are overcast skies with mild temperatures, occurring one to two days after moderate rainfall. This combination provides:
- Residual moisture evidence from recent rain without active water flow
- Full access to roofs, subfloors, and external areas
- Comfortable working conditions for thorough assessment
- Neutral temperature readings for accurate moisture meter results
### Regional Recommendations
For properties in different Australian climate zones, consider these scheduling tips:
**Tropical north (Queensland, Northern Territory):** Schedule inspections during the dry season (May to October) when possible. Wet season inspections reveal water management issues but limit access. [Brisbane homeowners](/articles/how-roof-inspections-enhance-the-longevity-of-brisbane-homes) should aim for the transitional months of April or November for balanced conditions.
**Temperate southeast (Sydney, Melbourne, Canberra):** Autumn (March to May) typically provides the best balance of moderate weather and reduced vegetation. Avoid scheduling during extreme heat events in summer.
**Arid interior (parts of South Australia, Western Australia):** Inspections after rare rainfall events are valuable for revealing drainage and water ingress issues that may not surface for months at a time.
**Southern coastal (Tasmania, southern Victoria):** Winter inspections can be challenging due to short days and frequent rain. Late spring (October to November) usually offers reliable conditions.
### What to Do If Weather Is Poor on Inspection Day
If conditions are unfavourable on your scheduled inspection day, discuss options with your inspector. A qualified professional will:
- Note all weather limitations clearly in the report
- Recommend follow-up inspections for areas that could not be adequately assessed
- Adjust their methodology to maximise the value of the inspection despite conditions
- Advise whether rescheduling would provide materially better results
## What Inspectors Look For in Different Conditions
Experienced inspectors adapt their approach based on the weather conditions they encounter. Understanding this can help you appreciate the thoroughness of your report.
### During Wet Weather
Inspectors prioritise internal assessments, focusing on ceiling spaces for active leaks, internal wall moisture, window and door seal performance, and wet area waterproofing. They will document any areas they could not access safely and recommend follow-up where necessary.
### During Hot Weather
High temperatures cause building materials to expand. Inspectors look for evidence of thermal movement in roof tiles, metal cladding, and concrete slabs. They assess whether expansion joints are functioning correctly and whether materials show signs of heat fatigue such as cracking, warping, or delamination.
### During Cold Weather
Cold conditions cause contraction in building materials, which can open up gaps in joints, cladding connections, and around window and door frames. Inspectors check for draughts, assess insulation performance, and look for signs of condensation that suggest inadequate thermal protection.
### During Windy Conditions
Wind reveals issues with building envelope integrity. Inspectors listen for rattling or movement in roof sheeting, test windows and doors for seal integrity, and assess whether the building's structural bracing is adequate for its wind classification zone.
## Key Takeaways
- Rain during inspections can reveal active leaks and water ingress but may limit roof and exterior access.
- The ideal inspection window is one to two days after moderate rainfall under overcast, mild conditions.
- Seasonal vegetation growth in spring and summer can hide structural defects that are visible in autumn and winter.
- High humidity conditions help identify mould risk and ventilation inadequacies but can inflate moisture meter readings.
- Coastal properties face accelerated corrosion from salt spray, making weather-aware inspections especially important.
- Geographic location and local climate patterns should guide your inspection scheduling decisions.
- Experienced inspectors note all weather limitations in their reports and recommend follow-up where conditions restricted access.
- Always discuss weather-related concerns with your inspector before and after the assessment to ensure nothing is overlooked.
## Frequently Asked Questions
### Should I cancel my inspection if it is raining?
Not necessarily. Light to moderate rain can actually be beneficial, as it reveals leaks and drainage issues that would be invisible in dry weather. However, heavy rain may restrict roof access and exterior assessments. Discuss the forecast with your inspector beforehand to decide whether to proceed or reschedule.
### Does hot weather affect building inspection accuracy?
Yes. Extreme heat causes materials to expand, which can temporarily close gaps and cracks that would be visible in cooler temperatures. Heat also makes subfloor and roof cavity inspections more physically demanding, potentially limiting the time an inspector can spend in these confined spaces.
### What is the best season for a property inspection in Australia?
Autumn (March to May) generally provides the best conditions in most Australian regions. Vegetation has thinned, temperatures are moderate, and the transition from summer reduces the likelihood of extreme weather events. However, the optimal season varies by location and property type.
### Can humidity affect moisture meter readings?
Yes. High ambient humidity can elevate moisture readings in building materials, potentially producing false positives. Professional inspectors account for ambient conditions when interpreting moisture meter data and will note the humidity level at the time of inspection in their report.
### How does wind affect a building inspection?
Strong winds make roof access unsafe and can create background noise that interferes with detecting issues like water movement or pest activity. However, wind also tests the building envelope by revealing draughty windows, loose roof fixings, and inadequate sealing.
### Are coastal property inspections different from inland inspections?
Yes. Coastal inspections place additional emphasis on salt corrosion, wind loading, drainage capacity, and the condition of metal components exposed to salt spray. Inspectors familiar with coastal properties will assess these factors as standard practice.
### Does frost or cold weather impact inspections?
Cold weather causes building materials to contract, which can reveal gaps in cladding joints, around windows, and at structural connections. Frost can also highlight areas of poor insulation where heat loss melts frost on external surfaces. Cold weather inspections provide useful data about a property's thermal performance.
### Should I get a second inspection in different weather?
If your initial inspection was conducted during extreme weather that limited access to certain areas, a follow-up inspection in different conditions is worthwhile. Your inspector should clearly note any limitations in the original report. A second inspection ensures comprehensive coverage.
### How do inspectors assess drainage if it has not rained recently?
Inspectors look for indirect evidence of drainage performance, including staining patterns, soil erosion marks, sediment deposits near drainage points, and the grading of land around the property. They may also run water through gutters and downpipes to test flow and identify blockages.
### Does weather affect termite inspection accuracy?
Termites are active year-round in most Australian climates, but their surface activity increases in warm, humid conditions. Inspections during warmer months may reveal more visible evidence of termite activity, such as mud leads and swarm holes. However, professional thermal imaging and moisture detection tools allow effective termite assessment regardless of weather.
### Can I rely on a single inspection regardless of weather?
A single inspection conducted by a qualified professional provides a thorough assessment within the limitations of the conditions on that day. For high-value purchases or properties with known issues, scheduling inspections across different weather conditions provides the most comprehensive picture of a property's condition.
## Schedule Your Weather-Smart Inspection
Understanding how weather affects property inspections empowers you to make better decisions about scheduling and interpreting results. Whether you are buying, selling, or maintaining a property, timing your inspection to align with favourable weather conditions can reveal issues that might otherwise go undetected.
Our licensed building inspectors are experienced in assessing properties across all Australian weather conditions. We clearly document any weather-related limitations and provide practical recommendations for follow-up where needed.
[Contact us today](/pre-purchase-inspections) to schedule your property inspection and discuss the best timing for your specific property and location.
For a complete overview, see our [guide to pre-purchase building and pest inspections](/guides/pre-purchase-building-pest-inspection-guide).
### Lock-Up vs. Final Inspections: Knowing the Difference
Source: https://ownerinspections.com.au/articles/lock-up-vs-final-inspections-knowing-the-difference
Published: 2024-06-19 | Category: New Construction
Author: Maison Azdari
Building a new home is one of the most significant investments you will make in your
lifetime. Throughout the construction process, various inspections ensure your builder
delivers a quality product that meets Australian building standards. Two of the most
critical inspections are the lock-up inspection and the final inspection.
While both inspections play essential roles in quality assurance, they occur at different
stages of construction and focus on distinct aspects of the build. Understanding the
difference between these inspections helps you protect your investment and ensures your new
home is completed to the highest standards.
A lock-up inspection typically occurs when the building reaches approximately 80%
completion, focusing on exterior features, weatherproofing, and structural soundness. The
final inspection, conducted at practical completion, examines building code compliance,
interior finishing, and a complete systems review.
> Knowing when and why each inspection occurs empowers you to hold your builder accountable
> and ensures defects are identified before they become costly problems to rectify.
## Lock-Up Inspection Coverage
The lock-up stage, also known as the enclosed stage or weatherproof stage, marks a
significant milestone in construction. At this point, the building is approximately 80%
complete and has become weather-tight, meaning it is protected from the elements with
external walls, roof covering, windows, and external doors installed.
### Exterior Features and Weatherproofing
The primary focus of a lock-up inspection is ensuring the building is adequately protected
from weather. This includes a thorough examination of:
- **Roof covering:** Verification that tiles, metal sheeting, or other roofing materials are correctly installed with proper overlaps and secure fixing
- **External cladding:** Assessment of brickwork, weatherboards, render, or other cladding materials for correct installation and weatherproofing
- **Windows and external doors:** Checking that all openings are properly sealed with appropriate flashing and weather seals installed
- **Fascia and guttering:** Inspection of roof drainage components for correct installation and appropriate falls
### Structural Soundness
At the lock-up stage, all major structural elements should be complete and visible for
inspection before being covered by internal linings:
- **Wall framing:** Verification that studs, plates, and noggings are correctly positioned and secured according to engineering specifications
- **Roof framing:** Assessment of trusses or rafters for correct installation, bracing, and connection to wall frames
- **Bracing:** Confirmation that structural bracing meets engineering requirements and is correctly installed
- **Tie-down systems:** Verification that cyclone straps, anchor bolts, and other tie-down components are correctly installed in relevant regions
### Primary Systems Installation
The lock-up stage also involves the rough-in of primary building services inspected before
walls are closed up:
- **Electrical rough-in:** Verification of cable runs, junction boxes, and switchboard preparation
- **Plumbing rough-in:** Assessment of water supply lines, waste pipes, and fixture connection points
- **HVAC ducting:** Inspection of air conditioning and ventilation ductwork
- **Insulation:** Verification that wall and ceiling insulation meets minimum R-value requirements for the climate zone
## Final Inspection Coverage
The final inspection, also known as the practical completion inspection or PCI, occurs when
construction is complete and the builder considers the home ready for handover. This
comprehensive inspection examines every aspect of the finished building to identify defects,
incomplete work, and non-compliant elements before you take possession.
### Building Code Compliance
A critical component of the final inspection is verifying compliance with the National
Construction Code (NCC) and relevant Australian Standards:
- **Structural adequacy:** Confirmation that all structural elements meet engineering specifications and NCC requirements
- **Fire safety:** Verification of smoke alarms, fire separation between garage and living areas, and compliant emergency lighting where required
- **Health and amenity:** Assessment of ventilation, natural lighting, room heights, and wet area waterproofing
- **Energy efficiency:** Verification that the building meets minimum energy rating requirements for insulation, glazing, and services
### Interior Finishing Quality
The final inspection thoroughly examines all interior finishes for quality and completeness:
- **Plasterwork:** Assessment of wall and ceiling surfaces for cracks, bumps, joins, and finish quality
- **Paintwork:** Checking for even coverage, clean edges, appropriate finish, and freedom from runs or drips
- **Flooring:** Inspection of tiles, timber, carpet, or other floor coverings for level installation and defect-free surfaces
- **Joinery:** Assessment of kitchen cabinets, wardrobes, vanities, and other built-in elements for alignment, operation, and finish
- **Wet area finishes:** Inspection of tiling, grouting, silicone, and fixture installation in bathrooms, ensuites, and laundries
### Complete Systems Review
All building systems must be complete and operational at the final inspection stage:
- **Electrical systems:** Testing of all power points, light switches, safety switches, and smoke alarms for correct operation
- **Plumbing systems:** Verification of water pressure, drainage, hot water delivery, and fixture operation
- **HVAC systems:** Testing of air conditioning, heating, and ventilation systems for correct operation
- **External services:** Verification of stormwater drainage, driveway, paths, and landscaping completion
## Key Distinctions Between Lock-Up and Final Inspections
Understanding the differences between lock-up and final inspections helps you appreciate
their complementary roles in the construction quality assurance process.
### Comprehensive Comparison Table
| Aspect | Lock-Up Inspection | Final Inspection |
| --------------------- | --------------------------------------------------------- | ------------------------------------------------------ |
| Stage of Completion | Approximately 80% | 100% (practical completion) |
| Building Condition | Weather-tight but unfinished internally | Complete and ready for occupation |
| Primary Focus | Structure, weatherproofing, services rough-in | Finishes, compliance, systems operation |
| Structural Access | Framing visible and accessible | Concealed behind wall linings |
| Services Status | Rough-in complete, visible | Complete, concealed, operational |
| Interior Finishes | Not yet installed | Complete assessment of all finishes |
| Defect Types Found | Framing errors, installation defects, water ingress risks | Cosmetic issues, incomplete work, operational failures |
| Repair Accessibility | Easy access to structural elements | May require removal of finishes |
| Cost of Rectification | Generally lower | Higher for concealed defects |
| Payment Trigger | Lock-up stage payment (approx. 35%) | Final payment and handover |
| Documentation | Photos of exposed elements | Photos plus compliance certificates |
### Timing and Payment Milestones
The lock-up inspection happens at approximately 80% completion when the building becomes
weather-tight. The final inspection occurs at 100% completion when the builder declares
practical completion. Both inspections typically align with progress payment claims under
standard building contracts.
The lock-up stage usually triggers a significant progress payment, often around 35% of the
contract value. The final inspection precedes the final payment and handover of keys. Having
independent inspections at these stages protects your financial interests by ensuring you
only pay for work completed to an acceptable standard.
### Defect Detection Opportunities
Each inspection provides unique opportunities for defect detection:
- **Lock-up inspection:** Last opportunity to identify structural framing issues, services rough-in problems, and insulation defects before they are concealed
- **Final inspection:** First opportunity to assess finished surfaces, operational systems, and overall build quality
Missing either inspection creates blind spots in your quality assurance process. A
structural defect not found at lock-up may require expensive demolition of finishes to
repair. A finishing defect not identified at final inspection may be difficult to have
rectified after settlement.
## Benefits of Both Lock-Up and Final Inspections
Conducting both lock-up and final inspections provides comprehensive protection throughout
the construction process.
### Australian Building Code Compliance
Australian buildings must comply with the National Construction Code (NCC), which sets
minimum requirements for safety, health, amenity, and sustainability. Both inspections
verify compliance at their respective stages:
- **Lock-up inspection:** Verifies structural compliance with AS 1684 (timber framing), AS 4100 (steel structures), and relevant energy efficiency requirements before elements are concealed
- **Final inspection:** Confirms overall NCC compliance including fire safety, accessibility, waterproofing, and health and amenity requirements
Non-compliance can result in building orders, certificate refusal, and significant
rectification costs. Independent inspections identify compliance issues early when they can
be addressed efficiently.
### Financial Protection
The financial benefits of conducting both inspections extend throughout the construction
process and beyond:
- **Reduced rectification costs:** Defects found at lock-up cost significantly less to repair than the same defects discovered after completion
- **Protected progress payments:** Inspection reports provide evidence to support or dispute progress claims
- **Preserved property value:** A defect-free home maintains its value better than one with unaddressed issues
- **Warranty documentation:** Inspection reports provide evidence for warranty claims during the defects liability period
### Peace of Mind
Beyond the practical benefits, having professional inspections at both stages provides
invaluable peace of mind:
- **Independent verification:** An objective third party assesses the work without any financial interest in minimising defects
- **Expert knowledge:** Professional inspectors understand building standards and can identify issues that untrained eyes might miss
- **Comprehensive coverage:** Together, both inspections cover all aspects of construction from hidden structural elements to visible finishes
- **Confidence in handover:** Knowing the building has been thoroughly inspected allows you to take possession with confidence
## Frequently Asked Questions
###
What exactly is the lock-up stage of construction?
**Short answer:** The lock-up stage is when the building becomes
weather-tight with the roof, external walls, windows, and doors installed, typically at
about 80% completion.
At the lock-up stage, the building is protected from the weather with the roof covering
complete, external cladding installed, and all windows and external doors in place.
Internally, framing is complete and services rough-in is finished, but wall linings,
painting, and finishing have not yet commenced.
### When should I book my lock-up inspection?
**Short answer:** Book your lock-up inspection when your builder advises
that lock-up stage is complete but before internal wall linings are installed.
Timing is critical because you need to examine structural framing and services rough-in
before they are concealed behind plasterboard. The inspection should occur after the
builder has completed lock-up work but before you authorise the stage payment or allow
internal lining work to commence.
###
Do I need both a lock-up and final inspection?
**Short answer:** Yes, both inspections are strongly recommended as they
examine different elements that can only be assessed at specific stages.
The lock-up inspection is your only opportunity to assess structural framing, services
rough-in, and insulation before they are concealed. The final inspection is your only
opportunity to assess finished surfaces, operational systems, and overall quality.
Structural defects missed at lock-up become extremely expensive to repair once the
building is complete.
###
What defects are commonly found at the lock-up stage?
**Short answer:** Common lock-up defects include framing alignment issues,
missing bracing, incorrect flashing, insulation gaps, and plumbing or electrical
installation errors.
Lock-up inspections frequently identify out-of-plumb walls, missing or incorrectly
installed noggings, inadequate bracing, poor window and door flashing, incomplete
sarking, gaps in insulation, undersized or incorrectly routed services, and damaged roof
tiles or cladding. These defects are relatively easy to rectify at this stage but would
become major problems if discovered after completion.
###
What defects are commonly found at final inspection?
**Short answer:** Common final inspection defects include paint defects,
tile chips, scratched surfaces, doors not closing properly, and incomplete or missing
items.
Final inspections commonly identify paint runs and missed areas, cracked or chipped
tiles, scratched benchtops or sinks, doors that do not latch or close properly, cabinets
with alignment issues, gaps in silicone, unfinished external works, and items that were
specified but not installed.
###
Can I withhold payment if defects are found?
**Short answer:** Yes, you can generally withhold a reasonable amount to
cover rectification costs until defects are addressed, subject to your contract terms.
Most building contracts allow you to withhold funds proportionate to the cost of
rectifying identified defects. For significant defects found at lock-up, you may
withhold part of the stage payment until issues are addressed. Review your specific
contract terms and seek legal advice if disputes arise.
###
Are builder inspections sufficient or do I need an independent inspector?
**Short answer:** Independent inspections are strongly recommended as the
builder has a financial interest in minimising reported defects.
While builders conduct their own quality checks, they have an inherent conflict of
interest. An independent inspector works solely for you and provides an unbiased
assessment against Australian Standards and building codes. The cost of independent
inspections is minimal compared to the protection they provide.
###
What Australian building codes apply to new construction?
**Short answer:** The National Construction Code (NCC) and various
Australian Standards govern new construction requirements across all states and
territories.
All new construction in Australia must comply with the National Construction Code. Key
Australian Standards include AS 1684 for timber framing, AS 3740 for waterproofing,
AS/NZS 3000 for electrical installations, and AS/NZS 3500 for plumbing. State-based
legislation provides additional requirements and consumer protections.
### What is the defects liability period?
**Short answer:** The defects liability period is a warranty period after
completion during which the builder must rectify defects, typically 6 to 7 years for
major defects.
In most Australian states, major defects affecting structural soundness are covered for
6 years, while minor defects are covered for 2 years. Your inspection reports provide
documented evidence of the building's condition at completion, which is valuable when
making warranty claims.
###
What if my builder disputes the inspection findings?
**Short answer:** Document everything in writing and escalate to your state
building authority if the builder refuses to address legitimate defects.
If your builder disputes findings, request their formal written response. For persistent
disputes, contact your state building authority such as NSW Fair Trading, Victorian
Building Authority, or Queensland Building and Construction Commission. These bodies can
mediate disputes and take action against builders for substandard work.
## Key Takeaways
- Lock-up and final inspections serve different purposes and examine different aspects of construction at distinct stages.
- The lock-up inspection at approximately 80% completion examines structural framing, weatherproofing, and services rough-in before they are concealed.
- The final inspection at practical completion assesses all finishes, operational systems, and overall building code compliance.
- Defects found at lock-up are significantly cheaper to rectify than the same defects discovered after completion.
- Both inspections are essential for comprehensive quality assurance throughout the construction process.
- Independent inspections provide unbiased assessment separate from builder self-inspection.
- All new construction must comply with the National Construction Code and relevant Australian Standards.
- Inspection reports provide valuable documentation for managing defect rectification and supporting warranty claims.
## References and Resources
- [ National Construction Code (NCC) ](https://ncc.abcb.gov.au/)
- [ Standards Australia ](https://www.standards.org.au/)
- [ NSW Fair Trading ](https://www.fairtrading.nsw.gov.au/)
- [ Victorian Building Authority (VBA) ](https://www.vba.vic.gov.au/)
- [ Queensland Building and Construction Commission (QBCC) ](https://www.qbcc.qld.gov.au/)
For a complete overview, see our [guide to construction stage inspections](/guides/construction-stage-inspections-guide).
### The Benefits of the SBBIS for Developers and Builders
Source: https://ownerinspections.com.au/articles/the-benefits-of-the-sbbis-for-developers-and-builders
Published: 2024-06-12 | Updated: 2026-02-12 | Category: Building Inspections
Author: Maison Azdari
The Strata Building Bond and Inspection Scheme (SBBIS) was introduced in New South Wales in 2018 as part of broader reforms to improve building quality in strata developments. The scheme applies to strata properties of four or more storeys and requires developers to lodge a building bond equivalent to two percent of the contract value. This bond covers the rectification of defects identified within two years of the completion of construction.
While the scheme places obligations on developers and builders, it also provides significant benefits that can improve business outcomes, reduce risk, and enhance reputation in the industry.
## Background of the SBBIS
The SBBIS was introduced under the Strata Schemes Management Act 2015 and came into effect in 2018. It was designed to address ongoing concerns about building defects in strata developments across NSW. The scheme applies to new strata buildings of four or more storeys and requires the developer to lodge a bond equal to two percent of the total contract price for the building work.
An interim defect report must be completed within 15 to 18 months after the completion of building work, and a final defect report must be completed within 18 to 24 months. If defects are identified and not rectified by the developer, the bond funds can be used by the owners corporation to carry out the necessary repairs.
## Lowering Legal Risks
One of the most significant benefits of the SBBIS for developers and builders is the reduction of legal exposure associated with building defects.
## Boosting Buyer Assurance
The SBBIS enhances buyer confidence in strata developments, which can have a direct positive impact on sales and market positioning.
## Raising Brand Reputation
Consistent compliance with the SBBIS builds a developer's reputation for quality and reliability.
## Additional Advantages
Beyond legal risk reduction, buyer confidence, and brand reputation, the SBBIS offers further benefits for developers and builders.
### Brisbane Termite Infestations: When to Schedule an Inspection
Source: https://ownerinspections.com.au/articles/brisbane-termite-infestations-when-to-schedule-an-inspection
Published: 2024-05-29 | Category: Pest Inspections
Author: Maison Azdari
A Gold Coast family recently made headlines after facing over $300,000 in expenses when they
discovered their newly purchased home had extensive concealed termite damage. As reported by
ABC News, the family had no idea of the infestation until structural problems began
appearing months after settlement. Their story is a stark reminder of why termite
inspections are not just recommended in [Brisbane](/qld/building-inspections-brisbane) and South East Queensland, they are
essential.
Brisbane's warm, humid subtropical climate creates ideal conditions for termite activity
year round. With average temperatures rarely dropping below 10 degrees Celsius and humidity
levels that termites thrive in, properties throughout the greater Brisbane region face
elevated risk compared to many other parts of Australia. Understanding when to schedule a
[termite inspection](/timber-pest-inspections) can mean the difference between early detection and catastrophic
structural damage.
Whether you are a homeowner maintaining your property, a buyer conducting due diligence, or
a seller preparing for market, this comprehensive guide will help you understand the unique
termite risks facing Brisbane properties and when professional inspection is most critical.
> In South East Queensland, termites cause more damage to homes than fire, flood, and storms
> combined. Yet most home insurance policies exclude termite damage entirely, leaving
> homeowners to bear the full cost of repairs.
## Why Brisbane Properties Are at High Risk for Termite Infestations
Brisbane and the surrounding areas of South East Queensland represent one of the highest
termite risk zones in Australia. Several environmental and geographical factors combine to
create conditions that termites find irresistible.
### Climate Conditions
Brisbane's subtropical climate provides termites with their ideal living conditions
throughout the entire year. The key climate factors include:
- **Warm temperatures:** Brisbane's average temperatures range from 15 to 25 degrees Celsius in winter and 21 to 29 degrees Celsius in summer, falling within the optimal range for termite activity and reproduction
- **High humidity:** Average humidity levels of 60 to 70 percent provide the moisture termites need to survive and build their colonies
- **Consistent rainfall:** Brisbane receives approximately 1,150 millimetres of rain annually, keeping soil moisture levels high year round
- **No harsh winters:** Unlike southern states, Brisbane rarely experiences cold temperatures that slow termite activity
### Soil and Geographical Factors
The soil composition and geography of greater Brisbane also contribute to elevated termite
risk:
- Clay and loam soils retain moisture, providing ideal conditions for nest building
- Native bushland and parklands throughout suburban areas serve as natural termite habitats
- Established trees in older suburbs provide food sources and potential nest sites close to homes
- River systems and creek beds create corridors for termite activity across large areas
### Housing Stock Considerations
The characteristics of Brisbane's housing stock present additional termite vulnerabilities:
- Many older Brisbane homes feature timber construction, including weatherboard exteriors and hardwood frames
- Traditional Queenslander homes with timber subfloors provide easy termite access points
- Post-war housing stock often lacks modern termite management systems
- Even newer brick veneer homes contain substantial timber in roof trusses, frames, and internal structures
## When to Schedule a Termite Inspection in Brisbane
Knowing when to schedule a termite inspection is crucial for Brisbane property owners. While
annual inspections should be your baseline, several circumstances warrant immediate
professional assessment.
### Annual Inspections as a Preventative Measure
The Australian Standard AS 3660.2 recommends at least annual termite inspections for all
properties in high-risk areas like Brisbane. However, many pest management professionals
recommend six-monthly inspections for South East Queensland properties due to the year-round
termite activity.
Annual inspections are essential because:
- Termites can establish a colony and cause significant structural damage within 12 months
- Regular inspections allow early detection before damage becomes severe
- Chemical barriers and treatment systems require annual verification to ensure effectiveness
- Changes to your property or neighbouring properties may create new termite access points
### After Severe Weather Events
Brisbane's storm season, typically from November to March, brings heavy rainfall, flooding,
and cyclonic conditions that significantly increase termite risk. Schedule an inspection
after:
- **Heavy rainfall and flooding:** Moisture-softened soil creates easier access pathways for subterranean termites to reach your home
- **Severe storms:** Fallen branches and debris against buildings provide termite food sources and shelter tubes
- **Prolonged wet periods:** Extended moisture elevates humidity in subfloor areas, attracting termite activity
- **Any water damage:** Leaking roofs, burst pipes, or drainage problems create conditions termites actively seek out
### Before Buying a Property
A pre-purchase termite inspection is essential for any Brisbane property transaction. The
Gold Coast family mentioned in the ABC News story would have potentially avoided their
$300,000 ordeal with a thorough [pre-purchase inspection](/pre-purchase-inspections).
Pre-purchase inspections should:
- Be conducted by a licensed, independent inspector not connected to the seller
- Include thermal imaging and moisture detection equipment
- Cover all accessible areas including subfloor, roof void, and external structures
- Provide a detailed written report identifying any current activity or conducive conditions
### Before Selling a Property
As a seller in Brisbane, obtaining a current termite inspection report offers several
advantages:
- Demonstrates transparency and builds buyer confidence
- Allows you to address any issues before listing, potentially increasing sale price
- Reduces the risk of post-sale disputes or legal action
- May speed up the sale process by eliminating buyer inspection waiting periods
### Before Starting Major Renovations
Renovation work can disturb existing termite barriers and create new vulnerabilities.
Schedule an inspection before:
- Extending or adding rooms to your home
- Installing new decking or outdoor structures
- Excavating near the building foundations
- Altering drainage or landscaping around the property
- Any construction that involves soil disturbance near the building
## Warning Signs of Termite Infestation to Watch For
Termites are often called silent destroyers because they can cause significant structural
damage before becoming visible to homeowners. However, there are warning signs that may
indicate termite activity in your Brisbane home. Being vigilant about these signs can prompt
early inspection and potentially save thousands in repair costs.
| Warning Sign | What It Indicates | Where to Look |
| ------------------------------- | ------------------------------------------------------------------------------------ | ---------------------------------------------------------------------- |
| Hollow sounding wood | Termites consume timber from the inside out, leaving a thin veneer of wood or paint | Door frames, window frames, skirting boards, architraves |
| Sagging floors | Floor joists or bearers have been weakened by termite damage | Throughout the home, particularly in wet areas and near external walls |
| Cracked or bubbling paint | Moisture from termite activity causing paint to lift or crack | Walls, door frames, window frames, any painted timber surfaces |
| Mud tubes or shelter tubes | Subterranean termites build these protective tunnels to travel between soil and food |
| sources | External walls, foundations, subfloor piers, fence posts |
| Tight fitting doors and windows | Moisture produced by termites causes timber to swell and warp | All doors and windows throughout the property |
| Discarded wings | Reproductive termites (alates) shed wings after swarming, usually in spring and |
| early summer | Window sills, door frames, light fittings, spider webs |
| Frass (termite droppings) | Small pellets or fine powder indicating drywood termite activity | Near wooden furniture, window sills, beneath wooden structures |
| Clicking or rustling sounds | Worker termites eating or soldier termites head-banging to signal danger | Inside walls, particularly at night when the house is quiet |
| Power failures or flickering | Termites can damage electrical wiring insulation while tunnelling through walls | Wall cavities, roof spaces, subfloor areas |
It is important to understand that termites are extremely sneaky. They deliberately avoid
exposure to light and air, meaning they can establish large colonies and cause significant
structural damage long before any visible signs appear. By the time you notice symptoms like
sagging floors or hollow sounding timber, the infestation may have been active for months or
even years.
## The Professional Termite Inspection Process
Understanding what happens during a professional termite inspection helps you prepare for
the visit and appreciate the thoroughness required for accurate detection. A comprehensive
inspection conducted according to Australian Standard AS 4349.3 involves systematic
examination of all accessible areas.
### Initial Assessment and Planning
The inspection begins with an overview discussion where the inspector will:
- Review any previous termite inspection reports or treatment history
- Ask about any signs or concerns you have noticed
- Identify property features that may affect inspection access
- Explain what the inspection will cover and any limitations
### Exterior Inspection
The inspector examines the entire exterior perimeter of your property, looking for:
- Mud tubes on external walls, foundations, and fence lines
- Signs of termite damage to external timber elements
- Conditions conducive to termite attack, such as timber-to-ground contact
- Garden beds, mulch, or debris against walls that may harbour termites
- Tree stumps, stored timber, or firewood near the building
- Drainage issues or moisture problems around the foundation
- Condition of existing termite barriers or treatment systems
### Interior Inspection
Inside the property, the inspector systematically examines:
- All accessible rooms, checking skirting boards, door frames, and window frames
- Built-in wardrobes and cupboard interiors
- Wet areas including bathrooms, laundry, and kitchen
- Garage and storage areas
- Any visible timber structural elements
### Subfloor Inspection
For properties with accessible subfloor areas, this is often where termite activity is first
detected. The inspector will:
- Examine all timber piers, bearers, and floor joists
- Check for mud tubes on piers and foundation walls
- Assess moisture levels and ventilation conditions
- Identify any timber debris or stored materials that attract termites
### Roof Void Inspection
Access to the roof void allows inspection of:
- Roof timbers, trusses, and rafters
- Top plates and wall frames visible from above
- Signs of moisture ingress that may attract termites
- Evidence of previous or current termite activity
### Advanced Detection Technology
Modern termite inspections utilise specialised equipment to detect hidden activity that
cannot be seen with visual inspection alone:
- **Thermal imaging cameras:** Detect temperature variations behind walls and in concealed spaces that may indicate termite presence
- **Moisture meters:** Identify elevated moisture levels that both attract termites and result from their activity
- **Termatrac radar devices:** Detect movement of termites within walls without the need for invasive drilling
- **Borescopes:** Allow visual inspection inside wall cavities and other confined spaces through small holes
- **Sounding tools:** Help identify hollow areas in timber that may indicate internal damage
### Inspection Duration
A thorough termite inspection for an average-sized Brisbane home typically takes between 1
to 2 hours. Factors that may extend this timeframe include:
- Larger property size or multiple buildings
- Complex construction with many concealed spaces
- Limited accessibility requiring extra time to reach inspection areas
- Detection of termite activity requiring detailed documentation
- Extensive use of thermal imaging and other detection equipment
### The Inspection Report
Following the inspection, you will receive a detailed written report that includes:
- Areas inspected and any areas that could not be accessed
- Evidence of any current or previous termite activity
- Identification of termite species if activity is found
- Conditions conducive to termite attack
- Recommendations for treatment if required
- Recommendations for preventative measures
- Photographs documenting findings
## Types of Termites Found in Brisbane
Several termite species pose threats to Brisbane properties, each with different behaviours
and damage potential. Understanding these species helps inform appropriate treatment
strategies.
| Species | Characteristics | Damage Potential |
| ------------------------------------------ | ---------------------------------------------------------------------------------- | ------------------------------------------------------------------------------ |
| Coptotermes acinaciformis | Large colonies of up to 1 million individuals. Highly aggressive. Nest in trees, |
| stumps, or underground. | Most destructive species in Australia. Can cause severe structural damage within |
| months. |
| Schedorhinotermes species | Second most common destructive genus. Colonies typically smaller than Coptotermes. |
| Often nest in tree stumps and root crowns. | Highly destructive. Often multiple nests attack same structure. |
| Nasutitermes species | Build distinctive mounds or arboreal nests. Common throughout Brisbane suburbs. | Moderate damage potential. Attack weathered timber and may enter buildings. |
| Heterotermes ferox | Smaller species that attacks timber in contact with or close to ground. | Moderate damage to damp or decaying timber. Often first species to attack. |
| Cryptotermes species (Drywood termites) | Do not require soil contact. Live entirely within the timber they consume. | Slower damage but can infest furniture, picture frames, and structural timber |
| directly. |
| Mastotermes darwiniensis | Giant Northern termite. Occasionally found in northern Queensland. | Extremely destructive. Can destroy a home in months. Rarely found in Brisbane. |
Coptotermes acinaciformis is responsible for the majority of termite damage to Brisbane
homes. This species is particularly concerning because of its large colony sizes, aggressive
feeding behaviour, and ability to travel significant distances from the nest to find food
sources. A single Coptotermes colony can consume up to 500 grams of timber per day.
## Termite Prevention Strategies for Brisbane Homes
While regular inspections are essential for early detection, implementing prevention
strategies can significantly reduce your property's termite risk and potentially deter
infestations before they establish.
### Moisture Management
Termites require moisture to survive, making moisture management one of the most effective
prevention strategies:
- Fix leaking taps, pipes, showers, and toilets promptly
- Ensure downpipes discharge away from building foundations
- Maintain adequate drainage around the property
- Ensure air conditioning units drain away from walls
- Improve ventilation in subfloor areas to reduce humidity
- Address any rising damp or water ingress issues
- Keep gutters clear to prevent overflow against walls
### Garden and Landscaping Practices
Your garden and landscaping can either attract or deter termites:
- Remove dead trees, stumps, and timber debris from your property
- Keep mulch at least 300 millimetres away from building foundations
- Use termite-resistant mulch alternatives near buildings
- Maintain a clear inspection zone around the building perimeter
- Do not use untreated timber for garden edging or retaining walls near the house
- Store firewood well away from the home and elevated off the ground
- Trim vegetation to prevent contact with external walls
### Building Maintenance
Maintaining your building in good condition helps eliminate termite entry points:
- Ensure weep holes in brick veneer are clear and not bridged by soil or debris
- Maintain physical termite barriers and shields in good condition
- Repair cracks in concrete slabs and foundation walls
- Do not attach timber structures directly to the building without proper barriers
- Avoid storing cardboard boxes, newspapers, or timber against walls
- Seal gaps around pipes and conduits entering the building
### Professional Termite Management Systems
Consider installing professional termite management systems for ongoing protection:
- **Chemical soil treatments:** Create a treated zone around the building perimeter that kills or repels termites
- **Termite monitoring stations:** Detect termite activity early through regular checking of bait stations
- **Baiting systems:** Attract termites to bait that is then taken back to the colony, eliminating the entire nest
- **Physical barriers:** Stainless steel mesh or crusite particle barriers that termites cannot penetrate
## Cost of Termite Inspections vs Cost of Damage
Understanding the financial implications helps put the value of regular termite inspections
into perspective. The investment in prevention is minimal compared to the potential cost of
repairs.
| Item | Typical Cost Range | Notes |
| ------------------------------------- | --------------------- | ------------------------------------------------------------------ |
| Annual termite inspection | $250 to $400 | Standard residential property with thermal imaging |
| Combined building and pest inspection | $400 to $700 | Pre-purchase inspections for buyers |
| Termite treatment (chemical barrier) | $2,500 to $5,000 | Full perimeter treatment for average home |
| Termite baiting system | $2,000 to $4,000 | Installation plus annual monitoring |
| Minor termite damage repairs | $5,000 to $15,000 | Skirting boards, door frames, limited timber replacement |
| Moderate termite damage repairs | $15,000 to $50,000 | Floor joists, wall framing, subfloor structural repairs |
| Severe termite damage repairs | $50,000 to $150,000+ | Major structural repairs, restumping, reconstruction |
| Catastrophic damage | $150,000 to $300,000+ | Extensive structural failure requiring partial or complete rebuild |
The Gold Coast family facing $300,000 in expenses represents a worst-case scenario, but such
outcomes are not uncommon when termite damage goes undetected for extended periods. When you
consider that a $300 annual inspection could prevent hundreds of thousands in damage, the
return on investment is clear.
> Standard home and contents insurance in Australia does not cover termite damage. Insurance
> companies classify termite damage as a maintenance issue rather than sudden or accidental
> damage. This means homeowners bear the full financial burden of repairs, making prevention
> through regular inspections your only real protection.
## High Risk Areas for Termites in Greater Brisbane
While all Brisbane properties face elevated termite risk, certain areas and property types
warrant additional vigilance:
### Suburbs Near Bushland and Green Spaces
Properties adjacent to native bushland, parks, and green corridors face higher risk due to
natural termite populations in these areas. Brisbane suburbs with significant bushland
interfaces include:
- The Gap, Ferny Grove, and Keperra in the northwest
- Mount Coot-tha, Bardon, and Paddington near inner west bushland
- Chapel Hill, Kenmore, and Brookfield in the western suburbs
- Carindale, Belmont, and Chandler near Belmont Hills
- Redland Bay area and bayside suburbs with remnant vegetation
### Older Established Suburbs
Older Brisbane suburbs with established trees and traditional Queenslander homes often face
elevated risk:
- Character homes with timber subfloors and weatherboard construction
- Properties with mature trees that may harbour termite nests
- Older homes that may lack modern termite management systems
- Areas where previous termite activity may be established in the neighbourhood
### Flood-Prone Areas
Properties in Brisbane's flood-prone areas face increased risk during and after flooding
events:
- Areas along the Brisbane River and its tributaries
- Low-lying suburbs prone to flash flooding
- Properties with inadequate drainage that remain damp
## Frequently Asked Questions
###
How much does a termite inspection cost in Brisbane?
**Short answer:** A professional termite inspection in Brisbane typically
costs between $250 and $400 for a standard residential property.
The cost varies based on property size, accessibility of subfloor and roof void, and
whether advanced equipment like thermal imaging is included. [Combined building and pest](/building-and-pest-inspections)
inspections, often requested for property purchases, range from $400 to $700. Given that
termite damage repairs can cost tens to hundreds of thousands of dollars, the inspection
fee represents excellent value for early detection and peace of mind.
###
How often should Brisbane homeowners get termite inspections?
**Short answer:** Annual inspections are the minimum recommendation, with
many pest professionals recommending six-monthly inspections for South East Queensland
properties.
Brisbane's subtropical climate supports year-round termite activity, unlike southern
states where activity decreases in winter. Properties with previous termite history,
those near bushland, or older homes with timber subfloors should consider more frequent
inspections. The Australian Standard AS 3660.2 recommends at least annual inspections
for all properties in high-risk areas.
###
What time of year is best for termite inspections in Brisbane?
**Short answer:** Termite inspections can be conducted year-round in
Brisbane, but spring and summer are when activity is typically highest.
Unlike cooler climates, Brisbane's mild winters mean termites remain active throughout
the year. However, spring (September to November) is swarming season when reproductive
termites fly out to establish new colonies, making it an ideal time for inspection.
Post-storm inspections after the summer wet season are also particularly valuable as
increased moisture can trigger new infestations.
###
Do new homes in Brisbane need termite inspections?
**Short answer:** Yes, even new homes require annual termite inspections to
ensure protection systems remain effective and detect any new activity.
New homes built under the National Construction Code must have termite management
systems installed, but these are not permanent solutions. Chemical barriers degrade over
time, and physical barriers can be compromised by landscaping, renovations, or settling.
Annual inspections verify that protection systems remain intact and effective. Some
termite warranty programmes require annual inspections to maintain coverage.
###
Should I get a termite inspection before buying a Brisbane property?
**Short answer:** Absolutely. A pre-purchase termite inspection is
essential for any property purchase in Brisbane and South East Queensland.
The story of the Gold Coast family facing $300,000 in repair costs highlights why
pre-purchase inspections are critical. A thorough inspection by an independent, licensed
professional can identify existing termite activity, evidence of previous damage, and
conditions conducive to future infestation. The inspection cost is negligible compared
to the potential financial exposure of purchasing a termite-damaged property.
###
Can termites come back after treatment in Brisbane?
**Short answer:** Yes, termites can return after treatment, which is why
ongoing monitoring and annual inspections remain essential.
Treatment eliminates current infestations but does not guarantee permanent protection.
Chemical barriers degrade over time, typically requiring retreatment every 5 to 8 years
depending on the product used. New termite colonies in the area can attempt to access
your property. Changes to landscaping or building work can create new entry points.
Baiting systems require ongoing monitoring to remain effective. Annual inspections
ensure your property stays protected.
###
What should I do if I find termites in my Brisbane home?
**Short answer:** Do not disturb the termites. Contact a licensed pest
control professional immediately for assessment and treatment.
If you discover termites, it is crucial not to spray them with insecticide, disturb
them, or attempt DIY treatment. Disturbing termites can cause them to relocate to other
parts of your home, making treatment more difficult and potentially spreading the
damage. A professional will assess the extent of activity, identify the species, and
recommend appropriate treatment. Treatment options may include baiting systems, chemical
barriers, or a combination approach.
###
Does a building inspection include termite inspection in Brisbane?
**Short answer:** A standard building inspection does not include a termite
inspection. These are separate assessments governed by different Australian Standards.
Building inspections follow AS 4349.1 and focus on structural condition, defects, and
maintenance issues. Termite inspections follow AS 4349.3 and specifically assess timber
pest activity. For property purchases, combined building and pest inspections are
recommended to cover both aspects. Ensure your inspector is qualified to conduct both
types of assessments or engage separate specialists.
## Choosing a Qualified Termite Inspector in Brisbane
Selecting the right termite inspector is crucial for accurate assessment and reliable
results. Here are the key factors to consider when choosing an inspector in Brisbane:
### Licensing and Qualifications
- Verify the inspector holds a current Queensland pest management licence
- Check for QBCC (Queensland Building and Construction Commission) licensing where applicable
- Look for membership in professional associations such as AEPMA (Australian Environmental Pest Managers Association)
- Confirm they follow Australian Standard AS 4349.3 for timber pest inspections
### Experience and Reputation
- Choose inspectors with extensive experience in Brisbane and South East Queensland
- Request references or check online reviews from previous clients
- Ask about their experience with local termite species and conditions
- Verify how many inspections they have conducted in your area
### Equipment and Technology
- Confirm they use thermal imaging cameras for detecting concealed termite activity
- Ask about moisture meters and other detection equipment
- Enquire whether they use Termatrac or similar radar detection devices
- Modern equipment significantly improves detection rates for hidden infestations
### Insurance and Warranties
- Verify the inspector carries professional indemnity insurance
- Check for adequate public liability coverage
- Understand what is covered in their inspection and any limitations
- Ask about their report guarantee and follow-up policy
### Report Quality and Turnaround
- Request a sample report to assess thoroughness and clarity
- Confirm when you will receive the written report
- Ensure reports include photographs documenting findings
- Verify reports clearly state any areas that could not be accessed
## Key Takeaways
- Brisbane's warm, humid subtropical climate creates ideal year-round conditions for termite activity, placing all local properties at elevated risk.
- Annual termite inspections are the minimum recommendation, with many professionals suggesting six-monthly inspections for South East Queensland properties.
- Schedule additional inspections after severe weather events, before property transactions, and before major renovations.
- Warning signs include hollow sounding wood, sagging floors, cracked paint, mud tubes, and discarded wings, but termites often cause significant damage before visible signs appear.
- Professional inspections using thermal imaging and moisture detection can identify hidden infestations that visual inspection alone cannot detect.
- Standard home insurance does not cover termite damage, making prevention through regular inspection your only real financial protection.
- Inspection costs of $250 to $400 are minimal compared to potential repair costs ranging from $5,000 to over $300,000.
- Prevention strategies including moisture management, garden maintenance, and professional treatment systems complement regular inspections for comprehensive protection.
## References and Resources
- [ Queensland Building and Construction Commission (QBCC) ](https://www.qbcc.qld.gov.au/)
- [ Australian Environmental Pest Managers Association (AEPMA) ](https://www.aepma.com.au/)
- [ Standards Australia (AS 4349.3 and AS 3660.2) ](https://www.standards.org.au/)
- [ CSIRO (Commonwealth Scientific and Industrial Research Organisation) ](https://www.csiro.au/)
### Guide to Insurance Claim Assessments for Property Damage
Source: https://ownerinspections.com.au/articles/guide-to-insurance-claim-assessments-for-property-damage
Published: 2024-05-28 | Updated: 2026-02-12 | Category: Insurance
Author: Maison Azdari
Australia has experienced a sharp increase in property damage claims driven by extreme weather events. According to the Insurance Council of Australia, over 150,000 claims were lodged in a single reporting period, roughly 75% more than the previous comparable period. Storms, floods, bushfires, and cyclones are placing immense pressure on homeowners and insurers alike.
If you are dealing with property damage, understanding how [insurance claim assessments](/insurance-claim-assessments) work can make the difference between a fair payout and an inadequate one. This guide covers everything from preparing for the assessor's visit to handling disputes over settlement amounts.
For a complete overview, see our [guide to insurance claim assessments](/guides/insurance-claim-assessment-guide).
## The Rising Cost of Property Damage in Australia
Insurance premiums have climbed significantly in recent years, reflecting the growing frequency and severity of extreme weather events. Northern Australia, coastal Queensland, and flood-prone areas of New South Wales have been particularly affected.
The Insurance Council of Australia reported that natural disaster claims exceeded $7 billion in insured losses during some recent years. These figures only capture insured losses. Many homeowners are underinsured or lack cover for specific perils such as flood or storm surge.
For property owners, this means two things. Premiums are rising, and when damage does occur, the claims process is more scrutinised than ever. Insurers are under financial pressure, and assessments are becoming more thorough.
## What Happens During an Insurance Claim Assessment
When you lodge an insurance claim for property damage, your insurer will typically appoint a loss adjuster to investigate. A loss adjuster is an independent professional who inspects the damage on behalf of the insurance company.
The loss adjuster's role is to verify the cause of damage, assess its extent, review your policy coverage, and recommend a settlement figure to the insurer. They are not your advocate. Their job is to provide an impartial assessment, though they are engaged and paid by the insurer.
In straightforward cases, the insurer may handle the assessment internally without sending a loss adjuster. For larger or more complex claims, an on-site inspection is standard.
## Pre-Assessment Steps You Should Take
Preparing before the loss adjuster arrives gives you the best chance of a fair outcome. Do not wait until the assessment day to gather your evidence.
### Document the Damage Thoroughly
Photograph and video all damage as soon as it is safe to do so. Capture wide-angle shots showing the overall scope and close-up images of specific damage. Include timestamps on your photos. Document every affected room, wall, ceiling, floor, and external area.
### Review Your Insurance Policy
Read your Product Disclosure Statement carefully before the assessor visits. Understand what is covered, what is excluded, and what your excess amount is. Pay attention to sub-limits on specific categories like carpets, electronics, or temporary accommodation.
### Make Temporary Repairs
Your policy likely requires you to take reasonable steps to prevent further damage. This might include tarping a damaged roof, boarding up broken windows, or extracting standing water. Keep all receipts for materials and any emergency tradespeople you engage. Photograph the temporary repairs as well.
### Prepare for Questions
The loss adjuster will ask about the timeline of events, when the damage occurred, and what steps you have taken since. They may also ask about the property's maintenance history. Be honest and factual in your responses. Inconsistencies can raise red flags and delay your claim.
### Create an Inventory of Damaged Items
For contents claims, list every damaged item along with its approximate age, purchase price, and replacement cost. If you have receipts, warranty cards, or bank statements showing purchases, gather these as supporting evidence.
## What the Loss Adjuster Looks For
Understanding the assessor's priorities helps you anticipate their approach and ensure nothing is overlooked during the inspection.
### Detailed Physical Inspection
The loss adjuster will inspect every area of reported damage. They will examine structural elements, internal linings, fixtures, fittings, and external surfaces. They may also inspect areas you have not reported damage in, looking for hidden or secondary damage from water ingress, structural movement, or mould growth.
### Photographic Documentation
The assessor will take their own photographs and measurements. These form part of the official claim file. If their photos do not capture the full extent of damage, your own photographic evidence becomes a valuable supplement.
### Repair Cost Estimates
Loss adjusters use industry-standard costing software and their professional experience to estimate repair costs. They may obtain quotes from preferred builders or use schedule-of-rates pricing. Their estimate may differ from quotes you obtain independently, which is one of the most common sources of dispute.
### Signs of Pre-existing Damage or Neglect
One of the key things assessors look for is whether the damage pre-dates the claimed event. Peeling paint, long-term water staining, cracked tiles, or deteriorated grout may indicate that damage existed before the insured event. Lack of maintenance can also be used to reduce or deny a claim if the insurer argues that reasonable upkeep would have prevented the damage.
### Consistency with the Claimed Event
The assessor will evaluate whether the damage pattern is consistent with the event described. For example, storm damage typically shows a directional pattern, while flood damage follows water levels. If the damage does not match the claimed cause, the insurer may question the claim.
## Common Issues During Claim Assessments
Even legitimate claims can run into problems during the assessment process. Being aware of these common issues helps you respond effectively.
### Disagreements About the Extent of Damage
You may believe the damage is more extensive than the assessor acknowledges. This is particularly common with water damage, where moisture can penetrate wall cavities, subfloor areas, and insulation without visible surface signs. An independent building inspection using moisture detection equipment can identify hidden damage the loss adjuster may have missed.
### Coverage Disputes
Disputes about what your policy covers are another frequent issue. Common areas of contention include flood versus storm water damage, gradual deterioration versus sudden damage, and whether specific items fall within policy sub-limits. If you disagree with a coverage decision, request the insurer's reasoning in writing and reference the specific policy clauses.
### Low Settlement Offers
The insurer's settlement figure may not reflect the true cost of restoring your property to its pre-damage condition. This can happen when the assessor underestimates repair scope, uses below-market labour rates, or fails to account for consequential damage. Obtain your own independent quotes and, if needed, commission an independent building inspection report to support your position.
### Delays in the Assessment Process
After major weather events, loss adjusters are in high demand and assessment timelines can blow out significantly. While some delay is unavoidable, the General Insurance Code of Practice requires insurers to keep you informed of progress and handle claims within reasonable timeframes.
## Tips for a Smoother Claims Process
A well-organised approach reduces delays and strengthens your negotiating position.
### Keep Organised Records
Maintain a dedicated folder for all claim-related documents. This includes your policy, claim number, correspondence with the insurer, photos, receipts, quotes, and any reports. A clear paper trail protects you if disputes arise later.
### Follow Up Regularly
Do not assume silence means progress. Contact your insurer at regular intervals to check on the status of your claim. Note the date, time, and name of the person you speak with at each contact. Written communication by email creates a more reliable record than phone calls.
### Understand Your Dispute Rights
If you are unhappy with the assessment outcome, you can request an internal review through your insurer's complaints process. If that does not resolve the matter, you can lodge a complaint with the Australian Financial Complaints Authority (AFCA), which provides free and independent dispute resolution.
### Consider a Public Adjuster for Complex Claims
A public adjuster, sometimes called a loss assessor or claims consultant in Australia, works on your behalf rather than the insurer's. They can prepare your claim, negotiate with the insurer, and advocate for a higher settlement. Public adjusters typically charge a percentage of the claim payout, usually between 5% and 15%.
### Get Independent Expert Evidence
For significant claims, an independent building inspection report from a licensed inspector provides professional, unbiased documentation of the damage. This report can identify damage the loss adjuster missed, provide independent repair cost estimates, and serve as evidence in any dispute.
## When to Get an Independent Building Inspection
Not every claim requires an independent inspection, but there are situations where it is highly advisable.
Consider engaging a licensed building inspector if the damage is extensive or involves structural elements, the loss adjuster's assessment seems to understate the damage, there is a dispute about the cause or extent of damage, you suspect hidden damage such as moisture in wall cavities or subfloor areas, or your claim has been denied or the settlement offer seems unreasonably low.
An independent report gives you professional evidence to support your position. It also ensures that all damage is identified and documented, including issues that may not become apparent until repairs are underway.
For a complete overview, see our [guide to insurance claim assessments](/guides/insurance-claim-assessment-guide).
### The Evolution of Scott Schedules in Construction Litigation
Source: https://ownerinspections.com.au/articles/the-evolution-of-scott-schedules-in-construction-litigation
Published: 2024-05-22 | Updated: 2026-05-26 | Category: Building Inspections
Author: Maison Azdari
What happens when a construction dispute has 10, 30 or even 100 separate defect claims? Without a clear system, photos, reports, invoices, emails and builder responses can become hard to follow.
A Scott Schedule solves that problem by putting each disputed item into a structured table. In NSW, NCAT lists Scott Schedule forms for defective workmanship or materials and extras claimed in its Consumer and Commercial Division forms.
Some people search for this as a Scotts schedule or Scott’s schedule, but the standard term used by NCAT is Scott Schedule.
This guide explains the evolution of Scott Schedules in construction litigation, how the format is used in Australian building disputes, and how to prepare a strong Scott Schedule NSW example for NCAT matters.
Learn How to
Document Defects
}
buttonHref="/articles/document-building-defects-legal-claim"
variant="secondary"
/>
## What Is a Scott Schedule in Construction Disputes?
A Scott Schedule is a table that itemises disputed building defects, incomplete works, costs, responses and evidence.
NCAT describes a Scott Schedule as a form that allows parties to itemise defective and incomplete works in a home building dispute, and says these schedules are generally used in complex matters or where there are a number of defects.
In simple words, a Scott Schedule helps everyone compare the applicant’s claim, the respondent’s reply and the supporting evidence in one place.
| Scott Schedule section | What it does |
| --------------------------- | ---------------------------------------------------------------------------------- |
| Item number | Gives each defect or claim a clear reference |
| Contract or standard | Shows what should have been done |
| Applicant comments | Sets out the defect alleged |
| Applicant estimate of loss | Shows the claimed rectification cost or loss |
| Respondent comments | Allows the builder or respondent to admit, deny, not admit or raise a point of law |
| Respondent estimate of loss | Shows the respondent’s cost position, even if liability is denied |
| Tribunal comments | Leaves space for the Tribunal Member’s notes |
The [NCAT Scott Schedule template](https://ncat.nsw.gov.au/documents/forms/ccd_form_scott_schedule_defective_workmanship.pdf) uses columns for item number, contract, applicant comments, applicant estimate of loss, respondent comments, respondent estimate of loss and Tribunal Member comments.
## Where Did Scott Schedules Come From?
Scott Schedules take their name from George Scott, a court official in the United Kingdom who introduced a new way to manage complicated disputes. Before Scott Schedules existed, parties in construction litigation would submit large volumes of documents, witness statements, and reports with little structure. Judges had to piece together which claim related to which response, often across hundreds of pages.
Scott's solution was straightforward: create a table where each row represents a single claim or defect, and columns capture the claimant's description, the respondent's reply, the quantum (cost) claimed, and the quantum accepted or disputed. This format gave everyone a single document to reference during hearings.
The approach was first adopted in UK courts handling building and engineering disputes. Its success led to wider use across common law jurisdictions, including Australia, where tribunals and courts adopted it for residential and commercial construction cases.
## Why Scott Schedules Matter in Construction Litigation
Construction disputes often involve more than one issue. A homeowner may claim cracked brickwork, poor waterproofing, incomplete tiling, drainage problems, defective windows and unpaid variations in the same matter.
A Scott Schedule turns that broad dispute into a row-by-row schedule of evidence. This makes it easier to see what is admitted, what is denied, what remains unclear and what each item may cost to rectify.
NCAT’s [building dispute video](https://ncat.nsw.gov.au/publications-and-resources/videos.html) explains that documents for a building dispute can include witness statements, expert reports, photographs and a Scott Schedule.
The same NCAT material explains that the person claiming incomplete or defective work may need to write down each problem and say how much it would cost to fix or complete, after which the developer or respondent gives a response.
That is why Scott Schedules are useful in:
| Dispute type | How the Scott Schedule helps |
| ---------------------------- | --------------------------------------------------------- |
| Defective workmanship claims | Separates each defect into a clear item |
| Incomplete work claims | Shows what remains unfinished and the cost to complete |
| Variation disputes NSW | Compares claimed extras against the contract and evidence |
| Payment disputes | Links each claimed amount to a reason and response |
| Delay-related claims | Helps connect dates, events, cost impacts and evidence |
### Clarity and Organisation
Construction disputes often involve dozens or even hundreds of individual defects. Without a Scott Schedule, a tribunal would need to cross-reference multiple documents to understand a single issue. The schedule puts everything in one place, making it far easier for the decision-maker to assess each claim on its merits.
### Time and Cost Savings
Because the format is structured, hearings run more efficiently. Tribunal members can move through items methodically rather than jumping between documents. This reduces hearing days and legal costs for both parties.
### Transparency and Fairness
With both parties' positions set out side by side, it becomes difficult to misrepresent facts or avoid addressing specific claims. This transparency often encourages early settlement because parties can see the strength or weakness of their positions clearly.
## How Scott Schedules Have Changed Over Time
The early purpose of a Scott Schedule was simple: reduce confusion by putting competing claims into a table. That purpose has not changed. What has changed is the way Scott Schedules are prepared and supported.
### From Paper to Digital
Early Scott Schedules were paper documents, often typed or handwritten, and updated manually between hearings. Today, most are created in spreadsheet software or specialist legal tools that allow real-time collaboration between parties. Digital formats make it straightforward to:
### Broader Application
While Scott Schedules were originally designed for defect-related claims, they are now used for a wide range of construction disputes:
## Typical Structure of a Scott Schedule
A typical Scott Schedule format in NSW includes item numbers, the contract or standard relied on, the applicant’s comments, the applicant’s estimate of loss, the respondent’s comments, the respondent’s estimate of loss and space for Tribunal comments. Many parties also add an evidence reference column to link each item to photos, expert reports, quotes or invoices.
## Scott Schedule Format: NSW Example Table
A good Scott Schedule format should make each issue easy to read on its own. One row should usually deal with one defect, claim or disputed item.
Below is a simplified Scott Schedule NSW example based on the structure used in NCAT’s defective workmanship or material schedule.
| Item No. | Contract, standard or requirement | Applicant comments | Applicant estimate of loss | Evidence reference | Respondent comments | Respondent estimate of loss | Tribunal Member’s comments |
| -------- | ----------------------------------------------------------------------------------------------------------------- | ------------------------------------------------------------------------------------- | -------------------------: | --------------------------------------------------------- | --------------------------------------------------------------------------- | --------------------------: | -------------------------- |
| 1 | Bathroom waterproofing to comply with the contract, relevant NCC, Australian Standard or workmanship requirements | Water leak visible to ceiling below ensuite. Applicant alleges waterproofing failure. | $8,500 | Expert report section 4.1, photos 1 to 6, plumber invoice | Respondent denies liability and says leak came from owner-installed fitting | $0 | For Tribunal use |
| 2 | External brickwork to match approved plans and acceptable workmanship | Cracking visible to western wall. Applicant alleges defective workmanship. | $4,200 | Expert report section 5.3, photos 7 to 10 | Respondent admits minor cracking but disputes full replacement scope | $1,200 | For Tribunal use |
| 3 | Variation for additional retaining wall work | Applicant says variation was requested and completed but unpaid | $6,000 | Signed email approval, invoice 1045, site photos | Respondent does not admit agreement to variation price | $2,500 | For Tribunal use |
The NCAT Scott Schedule template asks the applicant to set out the defect alleged and estimate the cost of rectification or diminution in value, while the respondent’s comments should admit, deny, not admit or raise a point of law.
## How to Prepare a Scott Schedule for NCAT
### Step 1: Start With the Contract and Orders Sought
Before the first listing date, NCAT says an applicant should clearly identify the exact orders sought, the precise claims intended against the respondent, the issues the Tribunal must decide and the names of witnesses.
For a Scott Schedule, this means each row should connect to a real claim, not a vague complaint.
### Step 2: Give Each Defect Its Own Row
Do not combine several defects into one item. A waterproofing defect, a tiling defect and a window leak should usually sit in separate rows.
This helps the Tribunal compare each claim and response without mixing facts, causes and costs.
### Step 3: Add Evidence References
Each item should point to the evidence that supports it.
NCAT says building dispute documents may include witness statements, expert reports, photographs and other documents with information about what happened.
Good evidence references may include:
| Evidence type | Example reference |
| ------------- | -------------------------------------------- |
| Expert report | Expert report, section 3.2 |
| Photograph | Photo 14, ensuite wall leak, 12 March 2026 |
| Contract | Clause 7, waterproofing scope |
| Invoice | Invoice 1032, plumber attendance |
| Email | Builder email dated 4 April 2026 |
| Quote | Rectification quote from licensed contractor |
### Step 4: Use Clear Costing
The applicant’s estimate should explain the cost to rectify the defect or the loss claimed.
NCAT’s template refers to the applicant’s estimate of loss as the cost of rectification of the defect or diminution in value because of the defect.
### Step 5: Keep the Respondent Columns Open
The respondent must be able to give a clear reply.
NCAT’s template says respondent comments should admit, deny, not admit or raise a point of law, and that the respondent’s estimate of loss should be completed even if liability is denied.
View Defect
Investigation Reports
}
buttonHref="/defect-investigation-reports"
variant="secondary"
/>
## How Scott Schedules Are Used in Australian Tribunals
Scott Schedules are used in Australian building dispute matters to organise multiple defects, incomplete works, expert opinions, cost claims and responses in one clear table. The name and format can vary by state, so it is safer to say that Australian tribunals use Scott Schedules or similar defect schedules, rather than saying every tribunal uses the same document name.
| Tribunal | Correct wording | Why it matters |
| -------- | -------------------------------------------------------- | ---------------------------------------------------------------------------------------------------- |
| NCAT | Uses Scott Schedule forms for NSW home building disputes | NCAT has official Scott Schedule forms and defines their purpose |
| VCAT | May refer to a joint expert report as a Scott Schedule | VCAT’s practice note links Scott Schedules to expert evidence and areas of agreement or disagreement |
| QCAT | Uses an alleged defective work/incomplete work schedule | QCAT’s official form does not use the title “Scott Schedule” |
### NCAT Scott Schedule in NSW Building Disputes
In NSW, a NCAT Scott Schedule is used in home building disputes to itemise defective and incomplete works. NCAT defines a Scott Schedule as a form that allows parties to list defective and incomplete works that are the subject of a home building dispute, and says these schedules are generally used in complex matters or where there are a number of defects.
NCAT also lists official Scott Schedule forms for defective workmanship or materials and extras claimed in its Consumer and Commercial Division forms.
### VCAT Scott Schedule and Expert Evidence
In Victoria, VCAT’s current expert evidence practice note does not frame Scott Schedules in exactly the same way as NCAT. Instead, it says the Tribunal may direct expert witnesses to meet, try to narrow their points of difference and provide a joint report that sets out agreed matters, disputed matters and the reasons for disagreement, sometimes called a Scott Schedule.
This means the VCAT section should focus on expert evidence, expert conclaves, joint reports and areas of agreement or disagreement, rather than simply saying VCAT always requires Scott Schedules in domestic building disputes.
### QCAT Defective Work Schedule in Queensland Building Disputes
In Queensland, the safer wording is that QCAT uses a similar defect schedule, not necessarily a document formally called a Scott Schedule. [QCAT’s forms](https://www.qcat.qld.gov.au/resources/forms) page lists an Alleged defective work/incomplete work schedule for domestic and commercial building disputes under the Queensland Building and Construction Commission Act 1991.
QCAT says that if a party seeks defective work to be fixed or incomplete work to be completed, they must complete the alleged defective or incomplete work schedule and attach it to the application.
QCAT’s schedule also says each item of defective or incomplete work should be individually numbered and specific in detail.
### Why the Name Changes Between Tribunals
The purpose is similar across these tribunals: each schedule helps the parties, experts and Tribunal Member compare disputed building items side by side.
The difference is the official wording. NCAT directly uses Scott Schedule. VCAT uses the term in the context of expert evidence and joint reports. QCAT uses the title Alleged defective work/incomplete work schedule.
## Scott Schedules in Contracts and Early Dispute Prevention
Some experienced construction professionals now include Scott Schedule frameworks in their contracts from the start. By agreeing on a format for documenting potential disputes at the contract stage, both parties know what to expect if issues arise during or after construction.
This proactive approach offers several benefits:
## Common Scott Schedule Mistakes in NCAT Matters
A poor Scott Schedule can make a strong claim harder to understand. The most common problems are usually simple to fix.
| Mistake | Why it hurts the claim | Better approach |
| --------------------------------- | -------------------------------------------------------------- | ------------------------------------------------------------------- |
| Vague defect descriptions | The respondent and Tribunal may not know what is being alleged | Describe the location, issue, cause and effect |
| Several defects in one row | Makes liability and cost hard to assess | Use one row per defect or disputed item |
| No photo references | Forces readers to search through evidence | Label photos and cite them in the schedule |
| No contract or standard reference | Makes the claim look unsupported | Link the item to the contract, NCC, standard, plan or specification |
| Rounded cost guesses | May weaken the estimate of loss | Use quotes, invoices or expert costings |
| Missing respondent estimate | Leaves the competing cost position unclear | Include a respondent estimate even where liability is denied |
| Ignoring NCAT directions | May affect whether documents can be used at hearing | Track every deadline and filing requirement |
NCAT’s guideline warns that failure to provide documents in line with Tribunal directions may limit a party’s ability to rely on those documents at the hearing.
## How Photographic Evidence Supports a Scott Schedule
Photographic evidence construction disputes is worth including because photos are one of the easiest ways to connect a defect claim to the physical condition of the property.
NCAT’s building dispute material says documents for a building dispute can include photographs, expert reports and other documents about what happened.
For best use, photos should be:
| Photo practice | Why it helps |
| ---------------------------- | ------------------------------------------------- |
| Numbered | Makes each photo easy to cite in the schedule |
| Dated | Shows when the defect was recorded |
| Linked to a location | Prevents confusion about where the defect appears |
| Matched to the expert report | Keeps the report and Scott Schedule consistent |
| Clear and close enough | Helps the reader understand the defect |
Example wording:
*“Photo 3 shows water staining to the ceiling below the ensuite. See Expert Report section 4.1.”*
This is much stronger than writing “water damage throughout property” without a location, date or photo reference.
## Scott Schedules, Expert Reports and Conclaves
A Scott Schedule often works alongside an expert report. The report gives the detailed technical opinion, while the Scott Schedule summarises the disputed items in a table.
NCAT says a matter may be referred for a conclave when multiple items are in dispute, both parties have briefed experts, expert reports and Scott Schedules have been exchanged, and a conclave is considered cost-effective.
After a conclave, NCAT says a revised joint Scott Schedule may reflect the positions reached at the conclave. NCAT also states that experts are independent and their obligation is to NCAT and the Tribunal Member, not to the party instructing them.
This is why the schedule should not exaggerate or hide weak items. A clear, balanced document is more useful than one that reads like a complaint list.
## Who Can Help Prepare a Scott Schedule?
A Scott Schedule may involve input from the homeowner, builder, solicitor, building consultant, quantity surveyor or expert witness, depending on the dispute.
NCAT’s guideline defines an expert as a professional person with specialised knowledge, skills or qualifications and the ability to provide an expert opinion, and says an expert witness is not an advocate for the party.
For building defect matters, a qualified inspector or expert witness can help by:
| Support area | How it helps the schedule |
| --------------------- | ---------------------------------------------------------- |
| Defect identification | Confirms what each item is and where it appears |
| Technical wording | Explains the issue in building terms |
| Standard references | Connects the defect to contract, NCC or relevant standards |
| Evidence mapping | Matches each item to photos and report sections |
| Cost support | Helps make rectification estimates more credible |
## How the NCC and NSW Building Rules Fit Into a Scott Schedule
A Scott Schedule should not rely only on opinion. Where possible, each item should point to a contract requirement, approved plan, manufacturer instruction, Australian Standard, the National Construction Code or a statutory warranty issue.
The NSW Government says the National Construction Code is a uniform set of technical provisions for the design, construction and performance of buildings and plumbing and drainage systems across Australia.
The same NSW Government page says the NCC sets minimum requirements for structure, fire safety, access and egress, accessibility, health and amenity, and sustainability.
The Home Building Act 1989 includes statutory warranties that residential building work will be done with due care and skill, in accordance with plans and specifications, with good and suitable materials, and in accordance with the law.
For contracts signed on or after 1 February 2012, NSW Government guidance says the statutory warranty period is six years for major defects and two years for other defects, with a further six months where the loss becomes apparent in the last six months of the warranty period.
## The Future of Scott Schedules
As construction disputes grow more complex and digital tools become more capable, Scott Schedules are likely to evolve further. Potential developments include:
Regardless of how the technology changes, the core purpose of a Scott Schedule remains the same: to present complex disputes in a clear, structured, and fair format that helps all parties reach a resolution.
## Getting the Most Value from Your Home and Building Investment
A Scott Schedule is more than a table. It is a practical way to turn a messy construction dispute into a clear set of items that can be assessed one by one.
[Owner Inspections](/) can help with independent defect investigation reports and expert witness reports that support clear, evidence-based Scott Schedules for building disputes.
Contact Owner
Inspections
}
buttonHref="/contact"
variant="primary"
/>
### Common Issues Found in Fixing Inspections and Their Solutions
Source: https://ownerinspections.com.au/articles/common-issues-found-in-fixing-inspections-and-their-solutions
Published: 2024-05-21 | Updated: 2026-02-10 | Category: New Construction
Author: Maison Azdari
The fixing stage in new home construction is when internal finishes and fittings are installed. This includes plasterboard lining, skirting boards, architraves, doors, windows, cabinetry, tiling, and initial coats of paint. It is a critical stage because defects introduced or overlooked during fixing become much harder and more expensive to rectify once the build is complete.
A professional fixing inspection identifies issues while they can still be addressed by the builder at minimal cost. The following ten issues are the most commonly found during fixing inspections across Australian new builds.
## 1. Misaligned Plasterboards
Plasterboard is the most common wall and ceiling lining material in Australian residential construction. When sheets are not installed correctly, the result is uneven walls, visible joints, and a poor finish that is difficult to conceal with paint alone.
**What to look for:**
**How to address it:** Misaligned plasterboard joints should be re-taped, filled, and sanded to achieve a smooth, level finish. External corners should have metal or paper corner beads installed correctly. Where sheets are significantly out of alignment, removal and replacement may be necessary. The standard of finish should comply with the level specified in the contract (typically Level 4 for painted surfaces).
## 2. Incorrectly Installed Windows and Doors
Windows and doors that are not installed correctly create ongoing problems with operation, sealing, and security.
**What to look for:**
**How to address it:** Doors that do not sit correctly in their frames may need hinge adjustment, planning, or frame shimming. Windows that stick or fail to lock may require track cleaning, roller replacement, or frame adjustment. Missing weatherseals should be installed before completion. Any damaged glass must be replaced.
## 3. Gaps in Skirting Boards
Skirting boards are fitted along the junction of walls and floors. Gaps between the skirting and the wall or floor are a common fixing stage defect.
**What to look for:**
**How to address it:** Small gaps between skirting and walls can be filled with caulk before painting. Larger gaps indicate an uneven wall and may require the skirting to be removed and refitted with packing. Mitre joints at corners should be tight and glued. All nail holes should be filled and sanded before the final coat of paint.
## 4. Incomplete Tiling
Tiling defects at the fixing stage include unfinished work, poor alignment, and adhesion failures.
**What to look for:**
**How to address it:** Hollow tiles must be lifted and re-laid with proper adhesive coverage (minimum 80% for dry areas, 100% for wet areas). Grout should be completed to all joints and cleaned of excess. Lippage should be within the tolerances specified in AS 3958.1. Damaged tiles must be replaced. Silicone sealant must be applied at all junctions between tiled surfaces and fixtures.
## 5. Electrical and Plumbing Inconsistencies
During the fixing stage, electrical fittings and plumbing fixtures are installed. Inconsistencies between the plans and the installed work are common findings.
**What to look for:**
**How to address it:** Compare all electrical and plumbing installations against the approved plans and specifications. Discrepancies should be raised with the builder for rectification before completion. Relocating electrical points after plasterboard is installed is more disruptive than addressing issues during the fixing stage.
## 6. Nail and Screw Pops
Nail and screw pops occur when fasteners used to secure plasterboard to the framing push through the surface, creating bumps or depressions in the wall or ceiling.
**What to look for:**
**How to address it:** Popped nails should be driven back in or replaced with screws. The area should then be filled, sanded, and repainted to match the surrounding surface. Screw pops can indicate that the framing timber has dried and shrunk after the plasterboard was fixed, which is a common occurrence with green (unseasoned) timber.
## 7. Cracks in Plaster and Cornices
Cracking in plasterboard joints and at the junction between walls and ceilings (cornices) is a common finding during fixing inspections.
**What to look for:**
**How to address it:** Joint cracks indicate inadequate taping or that the joint compound was applied too thinly. The affected joints should be re-taped and re-set. Cornice cracks are often caused by timber frame movement and should be filled with a flexible compound. Cracks around openings should be assessed to determine whether they are caused by frame movement or poor installation.
## 8. Misaligned Fixtures
Fixtures including towel rails, toilet roll holders, cabinetry handles, and shower screens must be installed level, plumb, and securely fixed.
**What to look for:**
**How to address it:** Misaligned fixtures should be removed and reinstalled in the correct position. Use a spirit level during installation to confirm alignment. Ensure fixings are into solid framing or appropriate wall anchors are used. Shower screen misalignment should be corrected by the installer before silicone is applied.
## 9. Insufficient Caulking
Caulking (sealant) is used to seal gaps at junctions, around fixtures, and at transitions between different materials. Insufficient or poorly applied caulking is a very common fixing stage defect.
**What to look for:**
**How to address it:** All junctions that require caulking should be sealed with appropriate products. Use paintable acrylic caulk for internal trim junctions and silicone sealant for wet areas. Caulk should be applied in a continuous, even bead and tooled for a neat finish. Existing poor caulking should be removed and reapplied.
## 10. Paint Defects
Paint is one of the final finishes applied during the fixing stage, and defects are easily spotted under good lighting.
**What to look for:**
**How to address it:** Areas with runs, drips, or uneven coverage should be sanded back and repainted with the correct number of coats. Overspray and paint on unintended surfaces should be cleaned. Colour inconsistencies may indicate different batches of paint were used and should be corrected by repainting the affected areas with a consistent batch.
## Why Fixing Inspections Matter
For a complete overview, see our [guide to construction stage inspections](/guides/construction-stage-inspections-guide).
If defects persist after construction is complete, a formal investigation may be needed. See our [guide to building defect investigations](/guides/building-defect-investigation-guide).
### How Drones Speed Up Building Exterior Inspections
Source: https://ownerinspections.com.au/articles/how-drones-speed-up-building-exterior-inspections
Published: 2024-05-16 | Updated: 2026-02-10 | Category: Building Inspections
Author: Maison Azdari
Falls from heights account for approximately 30 percent of construction fatalities in Australia. Traditional methods of inspecting building exteriors often require ladders, scaffolding, and rope access, all of which introduce significant safety hazards. Drones are revolutionising the way exterior inspections are carried out, offering a safer, faster, and more accurate alternative.
## Why Drones for Building Exterior Inspections
Drones provide access to confined and elevated spaces that are difficult or dangerous to reach using traditional methods. Multi-storey buildings, steep roofs, and hard-to-access facades can all be inspected without the need for scaffolding or elevated work platforms. This eliminates a major source of workplace injury while ensuring thorough coverage of the building envelope.
By removing the need for scaffolding setup and dismantling, drones significantly reduce preparation time. Inspectors can deploy a drone within minutes and begin capturing detailed imagery of the entire building exterior almost immediately.
## Covering More Ground Faster
A single drone flight can capture comprehensive data across facades, roofs, chimneys, gutters, and other external features. What would traditionally take a team of inspectors several hours or even days to complete can be accomplished in a fraction of the time using drone technology.
This speed advantage is particularly valuable for large commercial buildings, apartment complexes, and heritage structures where manual access is both time-consuming and costly.
## Enhancing Safety
The most significant benefit of drone-based inspections is the reduction in risk to human life. By operating remotely from the ground, inspectors are never required to work at height. This dramatically reduces the probability of falls and other height-related accidents.
Drones also reduce the need for personnel to enter confined or structurally compromised areas, further enhancing workplace safety outcomes.
## High-Quality Data Collection
Modern inspection drones are equipped with high-definition cameras capable of capturing detailed imagery at resolutions that surpass what the human eye can detect from a distance. This allows inspectors to identify cracks, corrosion, weathering, and other defects with precision.
Thermal imaging is another powerful capability. Thermal cameras mounted on drones can detect moisture ingress, thermal inefficiencies, and insulation failures that are invisible to standard photography. This data is invaluable for identifying hidden problems before they escalate into costly repairs.
## Real-Time Inspections
Drone technology enables live monitoring of inspections. Inspectors and clients can view the footage as it is being captured, allowing for immediate detection of issues and on-the-spot decision-making. This real-time capability streamlines communication between inspectors, property owners, and project managers.
If a particular area requires closer examination, the drone can be redirected instantly, providing additional detail without the delays associated with repositioning scaffolding or access equipment.
## Cost-Effective and Less Disruptive
Drone inspections are quieter and less intrusive than traditional methods. There is no need for heavy equipment, road closures, or disruption to building occupants. This makes drones particularly suitable for inspections of occupied buildings, schools, hospitals, and commercial premises where operational continuity is important.
The cost savings are also substantial. By eliminating scaffolding hire, reducing labour hours, and shortening project timelines, drone inspections typically cost significantly less than their traditional counterparts.
## What's Next for Drone Inspections
The future of drone inspections lies in AI-powered analytics. Machine learning algorithms are being developed to automatically analyse drone imagery, identifying defects and categorising them by severity. This will further reduce the time between inspection and reporting, while improving consistency and accuracy across large portfolios of buildings.
As regulations evolve and technology advances, drones will become an even more integral part of the building inspection process in Australia.
## About Owner Inspections
Owner Inspections provides professional drone-assisted building inspections across New South Wales, Queensland, and Victoria. Our licensed inspectors combine hands-on expertise with the latest drone technology to deliver comprehensive exterior assessments. Whether you need a [roof inspection](/roof-inspection), facade assessment, or full building envelope review, our team is equipped to help.
### The Process of Conducting a Pre-Purchase Timber Pest Inspection
Source: https://ownerinspections.com.au/articles/the-process-of-conducting-a-pre-purchase-timber-pest-inspection
Published: 2024-05-15 | Updated: 2026-02-12 | Category: Building Inspections
Author: Maison Azdari
Timber pests are among the most destructive threats to Australian homes. Termites, borers, and wood decay fungi can silently compromise the structural integrity of a property, often going undetected until significant damage has occurred. A pre-purchase [timber pest inspection](/timber-pest-inspections) is one of the most important steps a buyer can take before committing to a property purchase.
## Why You Need a Pre-Purchase Timber Pest Inspection
Termites alone cause an estimated $1.5 billion in damage to Australian homes every year. According to the CSIRO, approximately one in three Australian homes will be affected by termites at some point. The cost of treating an active termite infestation typically ranges from $5,000 to $10,000, while rebuilding damaged structural elements can cost up to $500,000 in severe cases.
A pre-purchase timber pest inspection identifies active infestations, evidence of past activity, and conditions that are conducive to future pest problems. This information is essential for making an informed purchasing decision and for negotiating the sale price if issues are found.
## What Happens During a Timber Pest Inspection
A professional timber pest inspection follows a systematic process designed to examine every accessible area of the property. The inspection is conducted in accordance with Australian Standard AS 4349.3.
## What if Timber Pests Are Found
If the inspection reveals active timber pest activity or significant damage, buyers have several options. Treatment for active infestations can range from chemical barrier treatments to baiting systems, depending on the species and extent of the problem.
Buyers can use the inspection findings to negotiate with the seller. Common outcomes include a reduction in the sale price to account for treatment and repair costs, a requirement for the seller to arrange treatment before settlement, or in some cases, a decision to withdraw from the purchase altogether.
The inspection report provides the evidence needed to make these decisions with confidence.
## Why a Professional Inspection Matters
Timber pest inspections should be carried out by a qualified and experienced inspector who understands the behaviour of Australian timber pests and the conditions that promote infestation. Professional inspectors conduct their assessments in accordance with Australian Standard AS 4349.3, ensuring a consistent and thorough approach.
An experienced inspector can distinguish between active and past infestations, identify species-specific risks, and provide practical recommendations tailored to the property. This level of expertise cannot be replicated by a visual check alone.
For a complete overview, see our [guide to pre-purchase building and pest inspections](/guides/pre-purchase-building-pest-inspection-guide).
### The Importance of Sarking in Building Construction
Source: https://ownerinspections.com.au/articles/the-importance-of-sarking-in-building-construction
Published: 2024-05-09 | Updated: 2026-05-13 | Category: New Construction
Author: Maison Azdari
Hidden beneath every well-constructed roof lies a critical layer of protection that many
homeowners never see but cannot afford to ignore. Sarking, the protective membrane installed
beneath roof tiles or metal roofing, serves as your home's first line of defence against
moisture, heat, and fire.
In Australia's diverse climate, from scorching summers to torrential rain events, sarking
plays an indispensable role in maintaining building integrity and energy efficiency. This
material barrier prevents moisture, dust, and radiant heat from penetrating the home,
contributing significantly to indoor comfort and structural longevity.
Whether you are building a new home, renovating an existing property, or simply want to
understand what protects your family from the elements, this comprehensive guide explores
everything you need to know about sarking, its benefits, types, and why skipping this
essential component can lead to costly consequences.
## What is Sarking?
Sarking is a protective sheeting material installed directly beneath roof cladding, whether that be tiles, metal sheets, or other roofing materials. It creates a continuous barrier across the roof structure, sitting above the rafters or trusses and below the battens that support the roof covering.
The primary function of sarking is to prevent the infiltration of water, dust, and embers while also reflecting radiant heat away from the building. In Australian construction, sarking has become increasingly important as building standards have evolved to address our unique climate challenges and bushfire risks.
In Australian standards, sarking sits under the broader category of pliable building membranes and underlays, with material requirements covered by [AS/NZS 4200.1](https://store.standards.org.au/product/as-4200-1-2017) and installation requirements covered by [AS 4200.2](https://store.standards.org.au/product/as-4200-2-2017).
## Types of Sarking Materials
The Australian market has several sarking material options. The right one depends on climate, roof type, and what you are trying to control: water, vapour, air, heat, or ember entry.
Below is a simple comparison table to help homeowners and builders understand the common options.
| Sarking Type | Material Composition | Key Properties | Best Applications |
| ------------------------------ | ---------------------------------------------------- | --------------------------------------------------------- | ------------------------------------------------- |
| Reflective Foil Laminate | Aluminium foil bonded to polyethylene or kraft paper | High reflectivity, vapour barrier, lightweight | Hot climates, energy efficiency focus |
| Breathable Membrane | Microporous polyethylene or polypropylene | Water resistant, vapour permeable, durable | High humidity areas, condensation prone regions |
| Composite Reflective Membrane | Foil laminate with breathable backing | Combined reflectivity and breathability | Variable climates, versatile applications |
| Perforated Foil | Aluminium foil with micro perforations | Some breathability, good reflectivity, cost effective | Mild climates, budget conscious projects |
| Woven Polyethylene | Woven high density polyethylene | High tear strength, water resistant, UV stable | Construction phase protection, temporary coverage |
| Fire Rated Sarking (BAL Rated) | Specially treated materials meeting AS 3959 | Ember resistance, radiant heat protection, fire retardant | Bushfire prone areas, high risk zones |
If you are building, this is a good item to check during construction stage inspections, and to confirm again during a pre-handover inspection before you accept handover.
Book New Build
Stage Inspections
}
buttonHref="/new-construction-stage-inspections"
variant="secondary"
/>
## How Sarking Works
People often ask “what does sarking do” because it sounds like a single product with a single job. In reality, sarking can do several jobs at once, depending on the type and installation.
Water control and drainage
A roof is not perfectly sealed. Wind-driven rain can be pushed under tile laps. Condensation can form under metal roofing when the underside of the sheet cools quickly overnight.
Roof sarking provides a secondary layer that can catch and direct incidental water down toward the eaves, where it can drain away, instead of soaking insulation or ceiling linings.
Vapour control and drying potential
Some membranes slow vapour movement. Others allow vapour to escape.
This matters because trapped moisture can lead to mould, damp insulation, and timber deterioration. If there is a musty smell, staining, or ongoing dampness, a targeted mould inspection can help confirm what is happening and where the moisture is coming from.
Thermal control
Reflective membranes reduce radiant heat transfer, but they need an adjacent air space to perform well. If a reflective foil is pressed hard against another surface, performance drops.
Reducing dust and debris pathways
Many tiled roofs allow fine dust into the roof cavity through small gaps. Sarking can reduce dust entry and keep insulation cleaner for longer. In bushfire-prone areas, good roof detailing aims to reduce ember pathways at edges and penetrations. Sarking may assist as one layer within a compliant roof system, but it should not be treated as a stand-alone shield.
Is sarking required in a domestic roof?
Sometimes yes, sometimes no.
Whether roof sarking is required depends on the [National Construction Code pathway](https://ncc.abcb.gov.au/editions/ncc-2025/adopted/housing-provisions/7-roof-and-wall-cladding/part-73-roof-tiles-and-shingles) used, your climate zone, roof type, and any bushfire attack level requirements for the site. Condensation management provisions and roof space ventilation requirements can influence whether you use sarking and what type is suitable.
Requirements vary with design and location. Requirements can change with climate zone, roof construction, and bushfire conditions even within the same state.
## The Benefits of Sarking
The roof sarking benefits are easiest to understand when you think about what typically damages roof spaces over time: water, trapped moisture, heat, and dust.
### 1. Better protection from moisture
Sarking helps keep incidental water off insulation and ceiling linings. That matters because wet insulation loses performance, and damp ceiling materials can stain or sag. Moisture infiltration is one of the most damaging forces affecting Australian homes. Sarking serves as a critical moisture barrier in several ways:
- **Wind driven rain protection:** During storms, rain can be forced under roof tiles and metal sheets by strong winds. Sarking catches this water before it can reach insulation or ceiling materials.
- **Condensation management:** In regions with significant temperature differentials between day and night, condensation can form on the underside of metal roofing. Sarking prevents this moisture from dripping onto ceiling materials.
- **Leak mitigation:** If a tile cracks or a metal sheet develops a hole, sarking provides a secondary barrier that channels water to the gutters rather than into the building.
The consequences of inadequate moisture protection include mould growth, timber rot, insulation degradation, and potential structural damage. These issues can remain hidden for years while causing progressive damage to your home. It also gives the roof system more resilience during short-term issues like cracked tiles, lifting flashings, or heavy wind-driven rain. It does not replace maintenance, but it can buy time before damage shows inside.
If you suspect roof leaks or storm damage, a dedicated roof inspection can help confirm what is happening before minor water entry turns into ceiling and insulation damage.
### 2. Improved Energy Efficiency
In Australian conditions, reflective sarking can make a substantial difference to your home's energy performance and comfort levels.
#### Improved comfort in hot weather
During summer, metal roofs can reach temperatures exceeding 80 degrees Celsius. Without sarking, this heat radiates directly into the roof space, raising ceiling temperatures and forcing air conditioning systems to work harder. Reflective sarking can reduce heat transfer through the roof by up to 40 percent.
Reflective roof sarking can reduce radiant heat entering the roof space. That can reduce heat build-up, especially in homes with limited roof ventilation or darker roof colours that absorb more heat.
#### Winter Heating Benefits
In winter, sarking helps retain warmth within the building by preventing heated air from escaping through the roof structure. The air barrier created by sarking reduces convective heat loss, complementing ceiling insulation performance.
#### Energy Cost Savings
Studies conducted by the CSIRO have demonstrated that properly installed reflective sarking can reduce air conditioning energy consumption by 15 to 25 percent in summer. Over the lifetime of a building, these savings can amount to thousands of dollars while reducing the home's carbon footprint.
| Climate Zone | Estimated Summer Energy Savings | Primary Benefit |
| --------------------------------- | ------------------------------- | ---------------------------------- |
| Tropical (Darwin, Cairns) | 20 to 25 percent reduction | Radiant heat reflection |
| Subtropical (Brisbane, Sydney) | 15 to 20 percent reduction | Combined heat and moisture control |
| Temperate (Melbourne, Adelaide) | 10 to 15 percent reduction | Year round thermal performance |
| Cool Temperate (Hobart, Canberra) | 10 to 12 percent reduction | Winter heat retention |
### 3. Supports roof performance in bushfire-prone areas
For homes in bushfire-prone areas, sarking is not merely beneficial but often mandatory. [Australian Standard AS 3959 Construction of Buildings in Bushfire Prone Areas](https://hia.com.au/resources-and-advice/building-it-right/australian-standards/articles/construction-of-buildings-in-bushfire-prone-areas) specifies requirements for sarking based on the Bushfire Attack Level (BAL) rating of the property.
#### Ember Attack Protection
During bushfires, burning embers can travel kilometres ahead of the fire front. These embers can enter roof spaces through gaps in tiles, ridge capping, and roof vents. Once inside, they can ignite accumulated leaf litter, insulation, and timber framing. Fire-rated sarking creates a barrier that prevents ember entry and resists ignition from radiant heat.
#### BAL Rating Requirements
- **BAL 12.5:** Sarking recommended but not mandatory under roof tiles
- **BAL 19:** Non combustible sarking required beneath all roofing materials
- **BAL 29:** Fire rated sarking mandatory with specific ember guard requirements
- **BAL 40 and BAL FZ (Flame Zone):** Stringent sarking requirements with fire tested materials
The Building Code of Australia (NCC Volume 2) references AS 3959 for bushfire construction requirements. Non-compliance with these requirements can invalidate building insurance and create significant legal liability.
### 4. Dust and Pest Control
Sarking creates a sealed barrier that prevents various unwanted elements from entering your home through the roof structure.
#### Dust Exclusion
In many Australian regions, dust storms and high winds can carry fine particles that infiltrate homes through gaps in roofing materials. This dust settles on ceiling insulation, reducing its effectiveness, and can penetrate into living spaces through downlights and ceiling penetrations. Sarking significantly reduces this dust infiltration.
#### Pest Prevention
The roof space can be an attractive habitat for various pests including possums, birds, rodents, and insects. Sarking helps exclude these pests by eliminating entry points and creating a barrier that is difficult to penetrate. Common pests deterred by proper sarking include:
- Possums seeking shelter in roof cavities
- Birds nesting under tiles or in roof spaces
- Rats and mice entering through gaps in roofing
- Wasps and bees building hives in protected roof areas
- Cockroaches and other insects accessing the building
### 5. Structural Integrity
Beyond immediate protective benefits, sarking contributes to the long term structural integrity of the roof system and the building as a whole.
#### Roof Stability
Sarking, particularly when properly installed and taped at seams, adds rigidity to the roof structure. It helps distribute wind loads across a larger area of the roof frame, reducing stress on individual components. During high wind events, this can help prevent localised uplift damage.
#### Insulation Protection
Ceiling insulation performs optimally when kept dry and clean. Sarking protects insulation batts from moisture that would cause compression and reduce R value, dust accumulation that decreases thermal performance, and pest damage from animals nesting in roof spaces. By maintaining insulation integrity, sarking ensures your home continues to perform at its designed energy efficiency levels for decades.
#### Timber Preservation
By keeping moisture away from roof timbers, sarking helps prevent fungal decay and timber rot. This is particularly important in humid climates where condensation and moisture ingress can lead to significant structural degradation over time.
## Why You Should Not Skip Sarking
Skipping sarking can look like an easy saving during a build or re-roof, but it often creates avoidable problems that are expensive to diagnose later. Some builders or homeowners consider sarking an optional extra that can be eliminated to reduce construction costs. This approach often proves to be a false economy with serious long-term consequences.
Here are the issues an unsarked roof commonly faces:
- Higher chance of wet or dusty insulation, which reduces thermal performance.
- Greater likelihood of ceiling stains after wind-driven rain events.
- More roof space condensation risk when the roof build-up is not designed to dry out.
- More dust, pollen, and debris in the roof cavity.
- More pathways for fine debris and embers in higher-risk areas, depending on roof detailing.
This is not about fear. It is about avoiding predictable failure points in roof spaces. If you are building, a stage inspection can confirm the roof wrap and sarking installation is consistent with the intended system before it gets covered.
If moisture damage keeps returning and the cause is unclear, a defect investigation report can be the right next step because it focuses on why the issue is happening, not just what is visible on the day.
Read Stage Inspection
Case Studies
}
buttonHref="/articles/case-studies-construction-stage-inspections"
variant="secondary"
/>
## When to Use Sarking
If you are asking when to use sarking, the most practical answer is tied to timing and risk.
You get the best value when it is installed during new builds or when the roof covering is already being removed. Roof sarking is most often specified in these situations:
- **New builds:** When the roof cladding is not installed yet.
- **Re-roofing and major renovations:** When tiles or sheets are coming off anyway.
- **Metal roofing:** Where condensation can form on the underside of roof sheets.
- **Homes in cooler climate zones:** Where condensation management is a bigger concern.
- **Exposed sites (coastal, high wind, heavy weather):** Added protection against wind-driven rain is a common reason sarking is specified.
- **Low-pitch tiled roofs:** Where water can be driven under tiles in heavy weather.
- **Bushfire-prone areas:** Where the roof system detailing calls for it.
If you are maintaining an established home, a routine maintenance inspection can help spot early roof and roof space issues, including damp insulation, poor ventilation, and signs of water entry before they become expensive repairs.
| Situation | Use sarking? | Why |
| Building a new home | Usually yes | Easy access, better sealing and drainage outcomes |
| Re-roofing a tiled roof | Often yes | Improves resilience to wind-driven rain and dust |
| Metal roof in a condensation-prone area | Often yes | Helps manage dripping and moisture pathways |
| Cool climate roof spaces | Often yes, choose carefully | Condensation risk increases if vapour is trapped in the wrong build-up |
| Budget is tight | Compare total roof system risk | Skipping can increase the chance of repairs and insulation replacement later |
### Long Term Financial Value
While sarking adds to initial construction costs, typically between $1,500 and $4,000 for a standard residential home, the return on investment is substantial. Consider the following financial implications of skipping sarking:
- **Energy costs:** Without reflective sarking, expect 15 to 25 percent higher cooling costs over the life of the building
- **Insulation replacement:** Moisture damaged insulation may need replacement within 10 to 15 years, costing $3,000 to $8,000
- **Ceiling repairs:** Water damage to ceilings from condensation or leaks can cost $2,000 to $10,000 to repair
- **Mould remediation:** Professional mould removal and treatment can exceed $5,000 for significant infestations
### Risks of Poor Insulation Performance
Without sarking protecting your insulation, its effectiveness degrades over time. Wet insulation loses up to 90 percent of its thermal resistance. Even after drying, it may never regain full performance. The result is a home that is uncomfortable in extreme temperatures and expensive to heat and cool.
### Water Damage Consequences
Water entering through an unsarked roof can cause:
- Staining and deterioration of ceiling plasterboard
- Electrical hazards from water contacting wiring and fixtures
- Damage to stored items in roof spaces
- Structural timber decay requiring expensive repairs
- Health issues from mould and mildew growth
### Pest Infestation Costs
An unsarked roof is an open invitation to pests. The costs of dealing with pest infestations include:
- Professional pest removal services, ranging from $200 to $1,500
- Repair of damage caused by gnawing and nesting
- Cleaning and sanitising contaminated areas
- Ongoing monitoring and prevention treatments
- Health treatment for family members affected by pest related diseases
### Insurance and Compliance Issues
In bushfire-prone areas, lack of compliant sarking can void building insurance coverage and create legal liability issues. Insurance claims for fire damage may be denied if the building did not meet AS 3959 requirements at the time of construction.
## Choosing the Right Sarking
Choosing roof sarking is not about buying the thickest roll. It is about matching the membrane to the roof design, climate, and what you are trying to control. The wrong choice can result in condensation problems,
inadequate protection, or unnecessary expense.
A simple selection process is to ask:
- Is the main risk water entry, condensation, summer heat, or all three?
- Is the roof tiled or metal?
- Is the home in a bushfire-prone area with a defined BAL requirement?
- Does the roof space have the right ventilation design for the selected membrane?
- Does the product suit its intended control function for water, vapour, air, or thermal control?
| Your priority | What to look for | Typical product direction |
| Reduce summer heat gain | Thermal control with reflective surface, installed with an air space | Reflective foil or composite reflective membranes |
| Reduce condensation risk | Higher vapour permeance in suitable assemblies | Vapour-permeable membranes (when the design supports drying) |
| Improve weather resilience | Water control performance and correct drainage laps | Membranes installed as a water control layer with correct overlaps |
| Reduce dust and draughts | Air control with sealed overlaps | Taped and sealed membranes where specified by the system |
### Climate Considerations
Australia's diverse climate zones demand different sarking approaches. Each zone presents unique challenges that influence material selection.
#### Hot and Humid Climates (Climate Zones 1 and 2)
In tropical and subtropical regions like Darwin, Cairns, and Brisbane, the primary concerns are heat gain and moisture management. Recommended sarking for these areas includes breathable reflective membranes that allow moisture vapour to escape while reflecting radiant heat. Avoid non-breathable vapour barriers that can trap moisture and cause condensation.
#### Temperate Climates (Climate Zones 5 and 6)
Sydney, Melbourne, and Adelaide experience both hot summers and cool winters. Composite sarking products that offer reflectivity for summer and vapour permeability for winter condensation control are ideal for these regions.
#### Cool and Cold Climates (Climate Zones 7 and 8)
In areas like Hobart, the alpine regions, and parts of Canberra, winter condensation is the primary concern. Breathable membranes are essential to allow moisture vapour from inside the home to escape through the roof structure without causing condensation damage.
### Roof Type Considerations
The type of roof covering influences sarking selection and installation requirements.
#### Metal Roofing
Metal roofs are particularly prone to condensation due to their rapid temperature changes. Metal roofs can form condensation on the underside when temperatures swing, especially overnight. Sarking is especially important under metal roofing to prevent moisture dripping onto ceilings.
For metal roofing, breathable membranes are often chosen so the roof system can dry outward. Roof space ventilation design also matters, particularly in cooler regions.
#### Tiled Roofing
While tiles provide some natural ventilation through their overlapping profile, they also allow wind driven rain entry. Sarking beneath tiles should be water-resistant to catch infiltrating rain, secured to withstand wind uplift, and compatible with tile battens and fixing methods.
Tiles are not a sealed sheet system. In heavy weather, wind can push water under tile laps. Sarking helps manage that risk by forming a secondary water-shedding layer.
Pay close attention to valleys, hips, ridges, and penetrations. Those areas are where small installation shortcuts tend to turn into leaks.
#### Flat or Low Pitch Roofs
Low-pitch roofs and roofs with lots of valleys, skylights, dormers, and penetrations have more points where water and debris can enter. That is where careful sarking selection and detailing makes the biggest difference.
### Building Regulations and Standards
Australian building regulations specify minimum sarking requirements based on location and building class.
#### National Construction Code Requirements
The [NCC Volume 2 (Housing Provisions)](https://ncc.abcb.gov.au/system/files/ncc/ncc2022-combined-vol2-housing-provisions.pdf) addresses sarking requirements through energy efficiency provisions in Section J and bushfire construction requirements referencing AS 3959. Compliance with these requirements is mandatory for building approval.
#### State and Territory Variations
Some states have additional requirements. For example, Queensland's Building Act includes specific provisions for cyclone regions that affect sarking installation methods and materials. Always verify local requirements with your building certifier.
### Bushfire Zone Requirements (AS 3959)
Properties in designated bushfire-prone areas must comply with AS 3959 Construction of Buildings in Bushfire Prone Areas. The standard specifies sarking requirements based on BAL rating:
| BAL Rating | Sarking Requirement | Additional Requirements |
| ------------------- | -------------------------------------- | ------------------------------------------- |
| BAL LOW | Standard sarking acceptable | General building code compliance |
| BAL 12.5 | Sarking recommended beneath tiles | Ember protection measures |
| BAL 19 | Non combustible sarking required | All gaps greater than 3mm must be screened |
| BAL 29 | Fire tested sarking mandatory | Metal or non combustible roof covering |
| BAL 40 | AS 1530.8.1 compliant sarking required | Complete ember and radiant heat protection |
| BAL FZ (Flame Zone) | High performance fire rated sarking | Specialist fire engineering may be required |
## Installation Best Practices
Proper installation is critical to sarking performance. Even the highest quality sarking material will fail to protect your home if installed incorrectly. Understanding best practices helps ensure you get value from your investment.
These checkpoints are a practical guide for homeowners and site supervisors.
- Laps must be set to shed water down the roof, not funnel it into the structure.
- Overlaps should be consistent and taped where required for air control.
- The membrane should not be drum-tight. Controlled sag is often needed where it acts as a drainage layer.
- Penetrations such as vents, skylights, and pipes need careful detailing so water cannot track inside.
- Tears and punctures should be repaired before roof cladding is installed.
- Intended air gaps should be kept clear so thermal control and drying pathways still work.
If you are in the middle of a build, this is a good stage to book independent stage inspections so key details are checked before the roof is fully closed up.
### Preparation and Planning
- **Review specifications:** Confirm sarking type meets NCC requirements, climate zone needs, and any bushfire provisions
- **Calculate quantities:** Allow 10 to 15 percent extra for overlaps, cuts, and waste
- **Check weather forecast:** Avoid installation during rain or high winds
- **Inspect substrate:** Ensure rafters and trusses are clean, dry, and properly aligned
### Installation Sequence
1. **Start at the eaves:** Roll sarking horizontally across rafters, beginning at the lowest point of the roof
1. **Maintain sag:** Allow approximately 20 to 25mm sag between rafters to create a drainage channel if water penetrates
1. **Overlap correctly:** Horizontal overlaps should be minimum 150mm; vertical overlaps minimum 100mm
1. **Secure properly:** Use staples or cap head nails at maximum 300mm centres along rafters
1. **Seal penetrations:** Tape all joints, cuts, and penetrations with appropriate sealing tape
1. **Extend to gutters:** Sarking should extend into gutters to direct any water runoff away from fascia
### Critical Installation Points
#### Ridge and Hip Junctions
At ridges, sarking from each side should overlap by at least 150mm and be taped. For hips, cut sarking neatly and seal all joints. These junctions are common failure points if not properly addressed.
#### Valley Gutters
Valleys require particular attention as they channel significant water flow. Sarking should extend beneath valley gutter flashing and be sealed to prevent water ingress at edges.
#### Penetrations
Roof penetrations for vents, skylights, and pipes must be carefully detailed. Cut sarking neatly around penetrations and seal with appropriate flashing tape or purpose made accessories.
#### Wall Junctions
Where roofs meet walls, sarking should extend up the wall behind cladding or be sealed to wall wrap to create a continuous barrier.
### Quality Control Checks
Before roof cladding is installed, verify the following:
- All overlaps meet minimum requirements
- Seams and penetrations are properly taped
- No tears or damage occurred during installation
- Sarking extends correctly at eaves, ridges, and wall junctions
- Appropriate sag exists for drainage
- Fastening is secure without penetrating the sarking unnecessarily
## What a Building Inspector Looks for With Roof Sarking
During a [pre-purchase inspection](/pre-purchase-inspections), a [roof inspection](/roof-inspection), or a construction stage inspection, roof sarking checks usually focus on coverage, condition, and signs of moisture. What inspectors commonly look for:
| What inspectors check | Why it matters | What it can lead to |
| Missing or incomplete coverage at eaves, valleys, ridges | Weak points for water and debris entry | Ceiling stains, damp insulation, mould |
| Tears, punctures, loose sections | Allows water to reach insulation and timbers | Reduced insulation performance, timber deterioration |
| Incorrect laps or poor drainage direction | Water tracks into the structure | Hidden leaks and repeated repair work |
| Poor detailing around penetrations | Common leak and ember entry points | Localised damage and ongoing moisture issues |
| Signs of damp insulation or staining | Evidence the roof system is not managing moisture | Repair costs and indoor air quality issues |
| Roof space ventilation concerns | Can increase condensation risk in some climates | Moisture build-up and mould risk |
If you are building, a stage inspection can check sarking before the roof is completed. If you are buying, the best fit is usually a pre-purchase inspection or a building and pest inspection, depending on how much coverage you want. If defects have been repaired by the builder, a reinspection can confirm the rectification work has been completed properly.
If the roof covering is tiled, inspectors also consider the practical reality: cracked tiles or failed pointing can allow water entry. Sarking often becomes the last line of defence before damage reaches ceilings and insulation.
## Sarking vs Roof Insulation
Sarking and roof insulation serve different but complementary functions. Understanding the distinction helps ensure your home has appropriate thermal protection.
### Functional Differences
Many people search roof sarking insulation when they are trying to work out whether sarking replaces insulation. It does not.
Roof sarking is a membrane layer that can control water, vapour, airflow, and radiant heat depending on the product and installation. Ceiling insulation mainly slows heat transfer through the ceiling.
| Characteristic | Sarking | Ceiling Insulation |
| --------------------- | ----------------------------------------------- | --------------------------------------------- |
| Primary Function | Reflects radiant heat, provides weather barrier | Resists conductive heat transfer |
| Installation Location | Under roof cladding, above rafters | On ceiling joists or between rafters |
| Heat Transfer Mode | Addresses radiant and convective heat | Addresses conductive heat primarily |
| Moisture Protection | Yes, primary function | No, can be damaged by moisture |
| Performance Metric | Reflectivity percentage, vapour permeability | R value (thermal resistance) |
| Fire Protection | Available in fire rated versions | Generally requires additional fire protection |
### Why You Need Both
For optimal thermal performance, buildings require both sarking and ceiling insulation. Each addresses different heat transfer mechanisms:
- **Sarking alone:** Reduces radiant heat gain by up to 97 percent but does not prevent conductive heat transfer through the ceiling
- **Insulation alone:** Resists conductive heat transfer but allows radiant heat to warm the roof space, reducing insulation effectiveness
- **Both combined:** Sarking keeps the roof space cooler while insulation provides the final thermal barrier, maximising energy efficiency
### Combined System Performance
When properly installed together, sarking and insulation can achieve total system R values
significantly higher than either product alone. The reflective air space created by sarking
can add an effective R value of up to R1.5 to the ceiling insulation system.
## Getting the Most Value from Your Home and Building Investment
Roof sarking is simple in concept, but it needs the right product choice and correct installation to work properly.
If you are building, renovating, or buying, focus on the basics. Choose a membrane suited to your climate and roof type, make sure laps and penetrations are detailed properly, and confirm roof space ventilation is doing what it should.
To keep exploring your options, you can view the full range of Owner Inspections services or continue reading in our articles library.
Contact Owner
Inspections
}
href="/contact"
variant="primary"
/>
## Key Takeaways
- Sarking is protective sheeting installed beneath roof cladding that prevents moisture, heat, and ember infiltration into your home.
- Reflective sarking can reduce summer cooling costs by 15 to 25 percent by reflecting up to 97 percent of radiant heat.
- In bushfire prone areas with BAL 19 rating or higher, non combustible sarking is mandatory under AS 3959.
- Different sarking types suit different climates: breathable membranes for humid and cold regions, reflective foils for hot climates.
- Proper installation is critical, including adequate overlaps, sealed penetrations, and appropriate sag for drainage.
- Sarking and ceiling insulation serve complementary functions and should be used together for optimal thermal performance.
- Quality sarking typically lasts 30 to 50 years with minimal maintenance when properly installed.
- Skipping sarking to save costs often leads to expensive repairs from moisture damage, insulation degradation, and pest infestations.
- Total installed costs of $1,500 to $4,000 for a standard home represent excellent value considering lifetime energy savings and protection benefits.
### The Legal Aspects of Pre-Handover Inspections
Source: https://ownerinspections.com.au/articles/the-legal-aspects-of-pre-handover-inspections
Published: 2024-05-01 | Updated: 2026-02-09 | Category: New Construction
Author: Maison Azdari
A pre-handover inspection is a formal assessment of a newly built home carried out before the buyer takes possession and makes the final payment. Under Australian building law, this inspection is your opportunity to identify defects, incomplete work, and deviations from the building contract before the builder's obligations shift. Defect liability periods typically run 12 to 24 months from handover depending on the state, and your building contract sets out the process for reporting issues and requiring rectification.
The excitement of moving into a new home can easily overshadow the practical steps needed to protect your investment. A pre-handover inspection is not just a walkthrough. It is a legally significant event that triggers timelines, contractual obligations, and consumer protection rights. Understanding the legal framework helps you make informed decisions, document problems properly, and hold your builder accountable if something is not right.
## What Is a Pre-Handover Inspection?
A pre-handover inspection (also called a practical completion inspection or PCI) is a detailed check of a newly constructed home conducted before the buyer accepts the property and releases the final payment. Its purpose is to identify:
While buyers can walk through the property themselves, engaging a qualified [building inspector](/pre-handover-inspections) is strongly recommended. Professional inspectors have the training and tools to identify problems that most homeowners would miss, and their detailed reports carry significant weight in any dispute.
## The Building Contract and Your Rights
Your building contract is the foundation of your legal relationship with the builder. It is a legally binding document that sets out:
### Statutory Warranties
In addition to the terms of your contract, Australian state legislation provides statutory warranties that builders must meet. These cannot be contracted out of, meaning the builder is bound by them regardless of what the contract says.
## Defect Liability Periods by State
The defect liability period is the timeframe after handover during which the builder is contractually obligated to rectify defects at no additional cost to the homeowner. This period typically runs 12 to 24 months from the date of practical completion, though it varies by contract and state.
## Common Legal Disputes at Handover
Disputes at handover typically fall into the following categories:
## How to Protect Yourself Legally
### Before Signing the Contract
### During the Pre-Handover Inspection
### After Handover
## When to Seek Legal Advice
Not every defect requires a lawyer, but certain situations call for professional legal guidance:
In many cases, state fair trading bodies offer free mediation and dispute resolution services before you need to engage a lawyer or file a tribunal application.
## DIY vs Professional Pre-Handover Inspections
Professional inspectors can identify issues such as [electrical defects](/articles/electrical-defect-inspection-to-ensure-safe-wiring-systems), [plumbing problems](/articles/plumbing-defect-inspection-to-identify-water-issues), and [structural concerns](/articles/structural-defect-inspections-to-prevent-future-problems) that are not visible to untrained eyes. Their reports reference Australian Standards and the NCC, which strengthens your position in any dispute.
### Common Frame Defects and How to Address Them
Source: https://ownerinspections.com.au/articles/common-frame-defects-and-how-to-address-them
Published: 2024-04-24 | Category: Building Inspections
Author: Maison Azdari
A home's framing system serves as its structural skeleton, determining the shape of the
building, providing support for all loads, and ensuring long-term stability. A strong frame
is crucial for a safe and sound dwelling, and ignoring framing defects can compromise
structural integrity and significantly decrease property value.
The frame of a building encompasses all the structural timber or steel members that form the
skeleton of the structure. This includes wall frames, floor joists, roof trusses, bearers,
and all the connections that hold these elements together. When any component of this system
fails or underperforms, the effects can cascade throughout the entire building.
Understanding common frame defects, their causes, and appropriate remediation strategies
empowers property owners to protect their investments. Early identification and professional
assessment of framing issues can prevent minor problems from developing into major
structural failures requiring extensive and costly repairs. For a complete overview, see our [guide to building defect investigations](/guides/building-defect-investigation-guide).
> The cost of identifying a framing defect early is minimal compared to the expense of
> repairing damage that has been allowed to progress unchecked. Prevention through regular
> inspection and prompt remediation is always more economical than extensive structural
> repairs.
## Types of Frame Defects
Frame defects can manifest in numerous ways, each with distinct causes and implications for
building safety. Understanding these different types helps property owners recognise warning
signs and appreciate the importance of professional assessment.
### Foundation Issues
While foundations are not technically part of the frame, foundation problems directly affect
framing integrity by causing movement and stress throughout the structure. Foundation issues
are among the most serious defects because they impact every element above them.
Common signs of foundation issues include:
- **Cracks in foundations and walls:** Visible cracking in concrete foundations, slab floors, or masonry walls indicating movement or settlement
- **Uneven floors:** Floor surfaces that slope noticeably or have areas that feel bouncy or unstable underfoot
- **Sticky doors or windows:** Doors and windows that suddenly become difficult to open or close, or that no longer fit properly in their frames
Causes of foundation problems include soil settling over time, poor soil quality at the
building site, inadequate drainage allowing water to affect the foundation, and reactive
soils that expand and contract with moisture changes. Australian properties are particularly
susceptible to foundation movement due to the prevalence of reactive clay soils across much
of the country.
### Weak Framing
Weak framing occurs when structural members are inadequate for the loads they must support.
This can result from poor original construction, subsequent modifications, or deterioration
over time. Weak framing is particularly dangerous because it may not be immediately apparent
until significant damage has occurred.
Indicators of weak framing include:
- **Sagging walls or ceilings:** Visible drooping or bowing in walls or ceiling surfaces indicating inadequate support
- **Gaps around openings:** Spaces appearing around door and window frames where the framing has deflected or moved
- **Creaking floors:** Floors that creak, groan, or feel springy when walked upon, suggesting inadequate joist sizing or support
Sources of weak framing problems include:
- **Low-grade timber:** Use of timber that does not meet required structural grades or specifications
- **Improper spacing:** Studs, joists, or rafters spaced too far apart for the loads they must carry
- **Construction shortcuts:** Omission of required bracing, blocking, or connection hardware
- **Overloading:** Addition of loads the original frame was not designed to support, such as heavy roof-mounted equipment or additional storeys
### Inadequate Sheathing
Sheathing materials provide a protective layer over the structural frame, adding rigidity
and protecting framing members from the elements. When sheathing is inadequate or
compromised, it can allow moisture intrusion that leads to serious framing damage.
Symptoms of sheathing problems include:
- **Warped panels:** Sheathing that has buckled, bowed, or delaminated due to moisture exposure
- **Peeling paint:** Paint that bubbles or peels from exterior surfaces, often indicating moisture trapped behind the finish
- **Mould growth:** Visible mould on interior or exterior surfaces suggesting moisture penetration
- **Water damage:** Staining, discolouration, or soft spots in wall or ceiling linings
Compromised sheathing allows water intrusion into wall cavities and roof spaces. This
moisture can cause wood rot in framing members, promote mould growth affecting indoor air
quality, and lead to progressive structural damage if not addressed promptly.
### Rot and Insect Damage
Timber framing is susceptible to both rot caused by fungal decay and damage from
wood-destroying insects. These problems often develop together, as moisture conditions that
promote rot also attract many pest species.
Rot typically occurs when timber is exposed to persistent moisture without adequate
ventilation. Common locations include:
- Subfloor framing in poorly ventilated areas
- Wall framing around bathroom and laundry areas
- Roof framing where leaks have occurred
- External framing at ground contact points
Insect damage in Australian buildings is most commonly caused by termites, though borers and
other wood-destroying insects can also affect framing. Termite damage can be particularly
destructive because it often occurs hidden within timbers, leaving the external surface
intact while hollowing out the structural core.
### Faulty Connections and Insufficient Bracing
Structural connections and bracing systems are critical for transferring loads through the
frame and resisting lateral forces from wind and seismic activity. Deficiencies in these
systems can compromise the entire structure's ability to withstand environmental loads.
Connection problems include:
- Missing or inadequate tie-down hardware at wall-to-floor and roof-to-wall junctions
- Insufficient nailing or fastening at framing connections
- Corroded or deteriorated metal connectors
- Connections that have loosened or pulled apart over time
Bracing deficiencies include:
- Missing diagonal bracing in wall frames
- Inadequate bracing for wind loads in the relevant wind region
- Bracing elements that have been removed or damaged during renovations
- Insufficient blocking and bridging between floor joists
These deficiencies reduce the building's resistance to wind and earthquake forces,
potentially leading to structural failure during extreme weather events or seismic activity.
## Frame Defect Classification
Understanding the severity of different frame defects helps property owners prioritise
remediation efforts and allocate resources appropriately.
| Defect Type | Severity Level | Typical Indicators | Recommended Action |
| ------------------------- | ----------------------- | ----------------------------------------------------------- | --------------------------------------------------------- |
| Minor settling cracks | Minor | Hairline cracks in plaster, slight gaps at corners | Monitor annually, cosmetic repair if desired |
| Moderate floor deflection | Moderate | Noticeable bounce, creaking, slopes up to 10mm over 3m | Professional assessment, joist reinforcement or support |
| Sheathing deterioration | Moderate to Significant | Warped panels, water staining, soft spots | Identify moisture source, replace affected materials |
| Localised timber rot | Moderate to Significant | Soft or spongy timber, discolouration, fungal growth | Remove moisture source, replace damaged timber |
| Termite damage | Significant to Critical | Hollow-sounding timber, mud tubes, visible damage | Immediate pest treatment, structural assessment |
| Foundation movement | Significant to Critical | Multiple crack patterns, severe floor slopes, binding doors | Engineering assessment, underpinning or restumping |
| Inadequate bracing | Significant | Wall racking, excessive movement in wind, loose connections | Install additional bracing, upgrade connections |
| Structural member failure | Critical | Broken or severely cracked framing, visible collapse | Immediate shoring, evacuation if necessary, major repairs |
## Solutions and Repairs
Addressing frame defects requires appropriate diagnosis followed by targeted repairs. The
specific remediation approach depends on the type and severity of the defect, the building's
construction type, and the root cause of the problem.
### Professional Assessment
Before undertaking any repairs, professional assessment is essential. Structural engineers
and experienced building inspectors can diagnose root causes of framing problems and
recommend appropriate repairs that address the underlying issues rather than just the
visible symptoms.
Professional assessment provides:
- Accurate diagnosis of defect causes
- Assessment of defect severity and safety implications
- Recommendations for appropriate repair methods
- Specifications for materials and workmanship
- Guidance on whether permits or engineering certification is required
Attempting repairs without proper diagnosis often results in wasted money on ineffective
solutions or, worse, repairs that mask ongoing problems while damage continues to
accumulate.
### Foundation Repair Methods
Foundation repairs address the underlying support issues that cause frame movement and
stress. Common foundation repair methods include:
- **Hydraulic jacking:** Lifting settled sections of the building back to level using hydraulic equipment
- **Concrete or steel piers:** Installing deep piers to transfer building loads to stable soil below the reactive zone
- **Underpinning:** Extending existing foundations to greater depth or width to improve support
- **Restumping:** Replacing deteriorated or settled stumps with new concrete or steel stumps at correct levels
Foundation repairs typically require engineering design and certification, particularly for
significant underpinning works. Building permits are usually required for foundation
modifications.
### Weak Framing Repairs
Weak framing can be strengthened through various methods depending on the specific
deficiency:
- **Additional bracing:** Installing diagonal bracing, metal strapping, or structural ply bracing to improve lateral resistance
- **Sistering timber:** Attaching new timber members alongside existing inadequate members to increase load capacity
- **Section replacement:** Removing and replacing framing sections that are too deteriorated or undersized to reinforce
- **Additional supports:** Installing new posts, bearers, or supports to reduce spans and deflection
### Sheathing Repairs
Sheathing repairs address both the damaged material and the moisture source:
- **Replacement:** Removing and replacing damaged sheathing panels with appropriate new materials
- **Improved flashing:** Installing or upgrading flashings at vulnerable junctions to prevent water entry
- **Sealing:** Applying appropriate sealants and weatherproofing to prevent moisture penetration
- **Ventilation improvements:** Ensuring adequate ventilation in wall cavities and roof spaces to allow moisture escape
### Rot and Infestation Repairs
Addressing rot and insect damage requires both eliminating the cause and repairing the
damage:
- **Professional pest control:** Engaging licensed pest controllers to eliminate active infestations and implement preventive treatments
- **Damaged wood replacement:** Cutting out and replacing all affected timber with appropriate treated or naturally durable species
- **Moisture management:** Addressing drainage, ventilation, and waterproofing issues that created conditions for rot or attracted pests
- **Preventive treatments:** Applying preservative treatments to remaining timber and installing physical or chemical termite barriers
## Prevention Strategies
Preventing frame defects is far more cost-effective than repairing them. Implementing
appropriate prevention strategies during construction and throughout the building's life
minimises the risk of serious framing problems.
### Material Selection
Appropriate material selection is the first line of defence against frame defects:
- **Pressure-treated timber:** Use preservative-treated timber for all framing exposed to moisture or ground contact
- **Appropriate sheathing:** Select sheathing materials suitable for the local climate and exposure conditions
- **Correct structural grades:** Ensure all structural timber meets required stress grades for its intended purpose
- **Durable species:** Consider naturally durable timber species for exposed applications
### Quality Construction
Quality construction practices prevent many frame defects:
- **Reputable builders:** Engage licensed builders with proven track records and appropriate insurance
- **Building code compliance:** Ensure all work complies with the National Construction Code and relevant Australian Standards
- **Proper inspections:** Conduct stage inspections during construction to verify compliance before work is covered up
- **Quality hardware:** Use appropriate connectors, fasteners, and hardware specified for the application
### Ongoing Maintenance
Regular maintenance prevents minor issues from becoming major defects:
- **Regular inspections:** Conduct annual visual inspections and professional inspections every 3 to 5 years
- **Prompt water repairs:** Address any water leaks, drainage issues, or moisture problems immediately
- **Pest management:** Maintain termite barriers and conduct regular pest inspections, particularly in high-risk areas
- **Ventilation maintenance:** Keep subfloor and roof ventilation clear and functioning
## Frequently Asked Questions
###
What maintenance practices help prevent frame defects?
**Short answer:** Regular inspections, prompt moisture repairs, maintained
ventilation, and ongoing pest management are the key maintenance practices for
preventing frame defects.
Conduct visual inspections of accessible framing areas at least annually, looking for
signs of moisture, pest activity, or movement. Address any water leaks or drainage
problems immediately to prevent moisture damage to framing. Ensure subfloor and roof
space ventilation remains unobstructed. Maintain termite barriers and conduct regular
[pest inspections](/timber-pest-inspections), particularly in areas prone to termite activity. Keep gutters clear
and ensure water drains away from the building.
###
How do building codes address framing requirements?
**Short answer:** The National Construction Code and Australian Standards
specify minimum requirements for framing materials, member sizes, spacing, bracing, and
connections to ensure structural adequacy.
Australian building codes set performance requirements that framing systems must meet,
while Australian Standards provide deemed-to-satisfy solutions specifying exact
requirements. Key standards include AS 1684 for residential timber-framed construction,
which covers member sizing, span tables, bracing requirements, and connection details.
Compliance with these standards is mandatory for new construction and significant
renovations. Buildings constructed before current codes may not meet modern standards
but are generally acceptable unless modifications are made.
###
What environmental factors affect framing integrity?
**Short answer:** Moisture exposure, temperature extremes, humidity
fluctuations, soil conditions, and termite pressure are the primary environmental
factors affecting framing integrity in Australia.
Moisture is the most damaging environmental factor, causing rot, promoting termite
activity, and contributing to foundation movement in reactive soils. Temperature and
humidity variations cause expansion and contraction that can loosen connections over
time. Reactive clay soils prevalent across Australia cause foundation movement that
stresses framing. Coastal locations expose framing to salt-laden air that accelerates
corrosion of metal components. Wind loads vary significantly by location and must be
considered in bracing design.
###
How do home remodelling projects impact existing framing?
**Short answer:** Renovations can significantly impact framing through
removal of structural elements, addition of loads, modification of bracing, and
introduction of moisture pathways.
Removing walls, even those thought to be non-structural, can eliminate important bracing
or load paths. Adding second storeys, heavy fixtures, or equipment imposes loads the
original frame may not have been designed to support. Bathroom and kitchen renovations
can introduce moisture risks if waterproofing is inadequate. Opening up spaces by
removing walls often requires engineered beams and upgraded connections. Any structural
modifications should be designed by a structural engineer and inspected during
construction.
###
How should timber be stored before construction to prevent defects?
**Short answer:** Store timber off the ground on level supports, under
cover, with good air circulation, and away from moisture sources to prevent warping,
checking, and fungal attack.
Proper timber storage prevents many construction defects. Stack timber horizontally on
flat bearers at least 100mm off the ground, with spacers between layers allowing air
circulation. Keep stored timber under cover, protected from rain and direct sunlight.
Store away from sprinklers, hoses, and other moisture sources. Do not store timber
against wet concrete. Use timber reasonably promptly after delivery, as prolonged
storage increases the risk of deterioration. Check stored timber for warping, twist, or
fungal growth before use.
###
How do different wood types react to moisture and temperature?
**Short answer:** Different timber species have varying dimensional
stability, durability, and resistance to moisture, affecting their suitability for
different framing applications.
Softwoods like pine are commonly used for internal framing but require preservative
treatment for exposed applications. Hardwoods generally offer better natural durability
but vary significantly between species. Dense hardwoods are more dimensionally stable
but can be harder to nail and work. Engineered timber products like LVL and glulam offer
consistent properties and dimensional stability. Timber moisture content should be
appropriate for the installation environment, typically 10-15% for internal framing.
Species selection should consider the specific exposure conditions and durability
requirements.
###
What technologies are used to detect hidden frame defects?
**Short answer:** Moisture meters, thermal imaging cameras, borescopes, and
acoustic testing devices help detect hidden frame defects without destructive
investigation.
Moisture meters measure timber moisture content, identifying areas at risk of rot or
pest attack. Thermal imaging cameras detect temperature variations indicating moisture,
missing insulation, or air leaks. Borescopes allow visual inspection inside wall
cavities through small holes. Acoustic sounding techniques identify hollow or
deteriorated timber by differences in sound when tapped. Termatrac devices detect
termite movement within walls. These technologies enable inspectors to identify problems
before they become visible, allowing proactive remediation.
###
What role does insulation play in protecting framing?
**Short answer:** Properly installed insulation protects framing by
moderating temperature extremes and managing condensation, but incorrect installation
can trap moisture and cause problems.
Insulation reduces temperature variations that cause timber movement and stress on
connections. By maintaining more stable conditions, insulation reduces condensation risk
within wall cavities. However, insulation installed without appropriate vapour
management can trap moisture against framing, promoting rot and mould. Insulation should
not block ventilation pathways in roof spaces or subfloor areas. Bulk insulation should
not be compressed or installed in direct contact with roofing materials. Proper
installation following manufacturer guidelines is essential for insulation to protect
rather than harm framing.
###
When should complete frame replacement be considered?
**Short answer:** Complete frame replacement should be considered when
damage is too extensive to economically repair, when the original framing was
fundamentally inadequate, or when major renovation goals cannot be achieved with the
existing frame.
Frame replacement is typically warranted when more than 30-40% of framing members
require replacement, as the cost approaches complete replacement while leaving
potentially compromised sections. Severe termite damage affecting multiple areas often
makes replacement more practical than piecemeal repairs. When renovations require
significant layout changes, rebuilding may be more economical than modifying existing
framing. Buildings with fundamental structural inadequacies, such as missing bracing
systems or grossly undersized members, may be more effectively demolished and rebuilt to
modern standards.
## Key Takeaways
- A building's framing system is its structural skeleton, and defects can compromise structural integrity and decrease property value.
- Common frame defects include foundation issues, weak framing, inadequate sheathing, rot and insect damage, and faulty connections or insufficient bracing.
- Warning signs of framing problems include cracks in walls, uneven floors, sticky doors and windows, sagging surfaces, and creaking when walking.
- Professional assessment by structural engineers or experienced inspectors is essential before undertaking any framing repairs.
- Repair methods vary by defect type and include underpinning, sistering timber, sheathing replacement, and professional pest treatment.
- Prevention through appropriate material selection, quality construction, and regular maintenance is more cost-effective than repairs.
- Regular inspections, prompt moisture repairs, maintained ventilation, and ongoing pest management help prevent frame defects.
- Complete frame replacement may be warranted when damage is too extensive for economical repair or when fundamental structural inadequacies exist.
## References and Resources
- [ National Construction Code (NCC) ](https://ncc.abcb.gov.au/)
- [ Standards Australia ](https://www.standards.org.au/)
- [ Timber Development Association NSW ](https://www.timber.org.au/)
- [ NSW Fair Trading ](https://www.fairtrading.nsw.gov.au/)
- [ Queensland Building and Construction Commission (QBCC) ](https://www.qbcc.qld.gov.au/)
- [ Victorian Building Authority (VBA) ](https://www.vba.vic.gov.au/)
### Eco-Friendly Timber Pest Prevention: Sustainable Living Tips
Source: https://ownerinspections.com.au/articles/eco-friendly-timber-pest-prevention-sustainable-living-tips
Published: 2024-04-16 | Updated: 2026-02-10 | Category: Building Inspections
Author: Maison Azdari
Timber homes are a beloved part of the Australian housing landscape. They offer natural beauty, excellent insulation, and a lower carbon footprint compared to many other building materials. However, timber is also a target for pests including termites, wood-boring beetles, and wood-decay fungi. Protecting your home from these threats does not have to mean relying on harsh chemicals. Eco-friendly pest prevention methods can be just as effective while keeping your family, pets, and the environment safe.
This guide explores sustainable strategies for preventing timber pests, from simple household adjustments to natural treatments and smart landscaping choices.
## The Power of Prevention
The most effective and environmentally responsible approach to timber pest management is preventing infestations before they start. A few simple adjustments around your home can significantly reduce the risk.
### Reduce Moisture
Timber pests thrive in moist environments. Termites in particular are attracted to damp timber and soil. To reduce moisture around your home:
### Sunlight
Sunlight is a natural disinfectant and deterrent for many timber pests. Fungi and some insects prefer dark, damp conditions and will avoid areas with regular sun exposure. Where possible, trim back vegetation that creates excessive shade around the base of your home, and open up subfloor areas to allow airflow and natural light.
### Keep Wood Off the Ground
Direct contact between timber and soil creates an easy entry point for subterranean termites. To minimise risk:
## Natural Barriers
When prevention alone is not enough, natural barriers offer an eco-friendly layer of protection against timber pests.
### Boric Acid
Boric acid is a naturally occurring mineral compound that is far less toxic to humans and pets than conventional pesticides. It works by disrupting the digestive systems of termites and other wood-boring insects. Boric acid can be applied as a solution to exposed timber or used as a dust in subfloor areas and wall cavities. While it is lower in toxicity than synthetic chemicals, it should still be handled with care and kept away from food preparation areas.
### Beneficial Nematodes
Beneficial nematodes are microscopic worms that are natural predators of many soil-dwelling pests, including termite larvae and beetle grubs. They can be purchased from specialist suppliers and applied to the soil around your home. Nematodes are completely harmless to humans, pets, and plants, making them an excellent eco-friendly option. They work best in moist, warm soil conditions, which aligns well with the conditions that attract timber pests.
### Orange Oil
Orange oil, which contains the active compound d-limonene, is an effective natural treatment for localised drywood termite infestations. It works by dissolving the exoskeletons of termites on contact. Orange oil is applied by drilling small holes into infested timber and injecting the oil directly. While effective for small, accessible infestations, it is not suitable for large-scale or subterranean termite problems.
## DIY Pest Repellents
Several household and natural products can serve as timber pest repellents when used as part of a broader prevention strategy.
### Essential Oils
Certain essential oils have natural insect-repelling properties. Cedarwood oil, clove oil, and tea tree oil are among the most effective against timber pests. These oils can be diluted with water and sprayed around entry points, window frames, and the perimeter of your home. While they will not eliminate an established infestation, they can help deter pests from setting up camp in the first place.
### Diatomaceous Earth
Diatomaceous earth is made from fossilised algae and works by damaging the exoskeletons of insects, causing them to dehydrate. Food-grade diatomaceous earth can be sprinkled around the foundation of your home, in subfloor areas, and around any timber structures. It is non-toxic to humans and pets but should be applied in dry conditions for best results.
### Cayenne Pepper and Vinegar
A mixture of cayenne pepper and white vinegar can serve as a simple, natural deterrent when sprayed around potential entry points. While this is one of the less potent options, it can be a useful supplement to other preventative measures, particularly for minor pest activity around garden structures and outdoor timber.
## Smart Landscaping
The way you design and maintain your garden can have a significant impact on timber pest risk.
### Plant Selection
Choose pest-resistant native plants for areas close to your home. Many Australian native species are naturally less attractive to termites and other timber pests. Avoid planting species that are known to harbour pests or that produce excessive leaf litter near the foundation of your home.
### Maintain Distance
Keep tree branches and shrubs trimmed back from the exterior walls and roof of your home. Overhanging branches can provide a bridge for pests to access your home and create shaded, damp conditions that favour termite and fungal activity. A clearance of at least one metre between vegetation and the building is recommended.
### Mulch Matters
Mulch is a common element in Australian gardens, but it can also attract termites if not managed carefully. Use chunky, coarse mulch rather than fine-grade material, as it retains less moisture. Keep mulch at least 300 millimetres away from the foundation of your home, and avoid piling it against external walls or timber cladding.
## When to Seek Professional Help
Eco-friendly prevention methods are highly effective as a first line of defence, but there are times when professional intervention is necessary.
### Signs of Infestation
If you notice any of the following signs, contact a licensed pest inspector promptly:
### Eco-Conscious Exterminators
When professional treatment is required, look for pest management companies that practise Integrated Pest Management (IPM). IPM techniques prioritise the least toxic methods first and combine physical barriers, biological controls, and targeted chemical applications only when necessary. Many Australian pest control companies now offer eco-friendly options, so ask about their approach before engaging their services.
## Benefits of Eco-Friendly Pest Prevention
Adopting sustainable timber pest prevention methods offers several important benefits:
### What You Need to Know About Pre-Settlement Inspections
Source: https://ownerinspections.com.au/articles/what-you-need-to-know-about-pre-settlement-inspections
Published: 2024-04-12 | Updated: 2026-02-13 | Category: Pre-Settlement Inspections
Author: Maison Azdari
A [pre-settlement inspection](/apartment-pre-settlement) is the final review of a property before the sale is completed and ownership is transferred. It is your last chance to confirm that the property is in the condition you agreed to when you signed the contract. Whether you are buying an established home, a new build, or an off-the-plan apartment, this inspection is a critical step that should never be skipped.
Many buyers treat the pre-settlement inspection as a formality, but it is far more than a quick walkthrough. Damage can occur between contract exchange and settlement. Builders may leave defects unresolved. Inclusions listed in the contract may be missing or damaged. Identifying these issues before settlement gives you the legal leverage to have them addressed. After settlement, your options become significantly more limited.
This guide covers everything you need to know about pre-settlement inspections, including what to check, who should conduct it, a detailed checklist, and how to handle any problems you discover.
## What Is a Pre-Settlement Inspection?
A pre-settlement inspection, also referred to as a final inspection or handover inspection, is a walkthrough of the property conducted shortly before the settlement date. The purpose is to verify that the property remains in the same condition as when the contract was signed, or in the case of new builds, that the construction has been completed to the agreed standard.
This inspection is not the same as a [pre-purchase building inspection](/pre-purchase-inspections). A pre-purchase inspection is a detailed technical assessment conducted before you sign the contract, designed to identify major defects and inform your buying decision. A pre-settlement inspection occurs after you have committed to the purchase and focuses on confirming that the property condition has not changed and that all contractual obligations have been met.
## What to Check: Structural Elements
The structural components of a property are the most important elements to assess during a pre-settlement inspection. While a detailed structural assessment requires a qualified building inspector, you should look for obvious signs of problems.
For new builds, structural defects may include uneven concrete slabs, poorly aligned walls, inadequate waterproofing membranes, or framing defects that are visible before internal linings are completed. These should be documented and raised with the builder before settlement.
## What to Check: Utilities and Systems
All utilities and systems should be tested during the pre-settlement inspection to confirm they are operational and in the condition expected under the contract.
### Electrical
### Plumbing
### Heating and Cooling
### Gas
## What to Check: Finishes and Fixtures
Finishes and fixtures are often where the most visible issues are found during pre-settlement inspections. Pay close attention to the quality of workmanship and whether everything matches what was specified in the contract.
For new builds, also check that the specified materials and finishes match what was agreed in the contract. Builders sometimes substitute materials, and if the substitution was not approved, you are within your rights to request the agreed product be installed.
## Who Should Conduct the Inspection?
While any buyer can conduct a pre-settlement inspection themselves, engaging a qualified building inspector provides a significantly more thorough assessment. A professional inspector has the training and experience to identify issues that an untrained eye would miss.
### Qualifications to Look For
The inspector you engage should hold appropriate credentials for the state in which the property is located:
In addition to state licensing, look for inspectors who have specific experience with pre-settlement inspections. This is a distinct type of inspection that requires knowledge of contractual obligations, building standards, and the settlement process.
## Comprehensive Pre-Settlement Checklist
The following checklist covers 15 key categories for a thorough pre-settlement inspection. Use it as a guide whether you are conducting the inspection yourself or working alongside a professional inspector.
## Timing Your Pre-Settlement Inspection
Getting the timing right for your pre-settlement inspection is important. Schedule too early and new issues could arise before settlement. Schedule too late and you may not have time to address problems.
For established homes, scheduling about one week before settlement gives you enough time to raise any issues with the vendor's solicitor and negotiate a resolution before the settlement date. For new builds, allow a longer lead time because the builder may need time to rectify any defects identified during the inspection.
The inspection itself typically takes between one and three hours, depending on the size of the property and the number of issues found. Do not rush the process. A thorough inspection is far more valuable than a quick walkthrough.
## What to Do If You Find Problems
Discovering issues during a pre-settlement inspection does not necessarily mean you should delay or cancel the settlement. The appropriate course of action depends on the nature and severity of the problems.
### The Most Common Building Defects in Sydney
Source: https://ownerinspections.com.au/articles/the-most-common-building-defects-in-sydney
Published: 2024-04-10 | Category: Building Inspections
Author: Maison Azdari
[Sydney](/nsw/building-inspections-sydney)'s construction boom over the past two decades has transformed the city's skyline, but
it has also exposed systemic problems in building quality. Research from the University of
New South Wales indicates that up to 85% of new apartment buildings in Sydney contain at
least one significant defect, with waterproofing failures and structural issues being the
most prevalent. Understanding these common defects is essential for property buyers, owners,
and strata committees seeking to protect their investments. For a complete overview, see our [guide to building defect investigations](/guides/building-defect-investigation-guide).
The high-profile evacuations of Opal Tower in 2018 and Mascot Towers in 2019 brought
national attention to building defects in Sydney, prompting significant regulatory reforms.
These incidents, which displaced hundreds of residents and resulted in remediation costs
exceeding $100 million, demonstrated the real consequences of construction failures and
inadequate oversight.
Sydney's unique combination of coastal climate, reactive clay soils, and rapid construction
has created conditions where building defects are particularly common. The city receives an
average of 1,213 millimetres of rainfall annually, much of it in intense summer storms that
stress waterproofing systems. Salt-laden coastal air accelerates concrete deterioration in
many suburbs, while the clay soils of Western Sydney cause significant foundation movement.
> The cost of rectifying building defects in NSW residential construction has been estimated
> at over $1 billion annually. Early identification through professional inspection remains
> the most cost-effective approach to managing these risks.
## Australian Regulatory Framework for Building Defects
Understanding the legal framework governing building construction in New South Wales helps
property owners recognise their rights and the obligations of builders and developers.
Several key pieces of legislation establish standards and provide remedies for building
defects.
### Home Building Act 1989 (NSW)
The Home Building Act 1989 (NSW) is the primary legislation governing residential building
work in New South Wales. It establishes statutory warranties that apply automatically to
residential building work, providing property owners with legal recourse when defects are
discovered:
- **Major defects warranty:** Six years from completion for defects that cause or are likely to cause the inability to inhabit or use the building, the destruction of the building, or a threat of collapse
- **General defects warranty:** Two years from completion for all other defects and non-completion of work
- **Workmanship warranty:** Work must be done with due care and skill and in accordance with plans and specifications
- **Materials warranty:** Materials must be suitable and new unless otherwise agreed
These warranties apply to all residential building work over $5,000 and cannot be contracted
out of. Home warranty insurance, obtained by the builder before work commences, provides
coverage if the builder dies, disappears, or becomes insolvent.
### Strata Schemes Management Act 2015 (NSW)
For apartment buildings and townhouse complexes, the Strata Schemes Management Act 2015
(NSW) governs the obligations of owners corporations regarding building maintenance and
defect rectification:
- Owners corporations must maintain and repair common property in good condition
- A capital works fund must be established to cover anticipated major repairs and maintenance
- Strata committees have duties to manage defect claims against developers and builders
- Special levies may be raised to fund defect rectification work
The interaction between the Home Building Act and Strata Schemes Management Act creates a
complex regulatory environment for apartment defects, often requiring specialist legal
advice.
### Design and Building Practitioners Act 2020 (NSW)
Following the Opal Tower and Mascot Towers incidents, the Design and Building Practitioners
Act 2020 (NSW) introduced significant reforms to improve building quality:
- **Practitioner registration:** Designers, engineers, and builders must be registered and demonstrate competency
- **Declaration requirements:** Practitioners must declare that building work complies with the Building Code of Australia
- **Design documentation:** Detailed design documents must be provided and maintained
- **Duty of care:** Building practitioners owe a statutory duty of care to current and future owners
This legislation represents a significant shift towards accountability in the construction
industry, with potential personal liability for practitioners who fail to meet their
obligations.
### Relevant Australian Standards
Australian Standards establish the technical requirements for building work. Key standards
relevant to common Sydney building defects include:
- **AS 3740 Waterproofing of domestic wet areas:** Specifies requirements for waterproofing in bathrooms, laundries, and other wet areas
- **AS 4349.1 Inspection of buildings Part 1: Pre-purchase inspections:** Provides guidance for building inspection methodology and reporting
- **AS 4349.3 Inspection of buildings Part 3: Timber pest inspections:** Covers inspection for termites and other timber pests
- **AS 2870 Residential slabs and footings:** Governs foundation design for different soil conditions
- **AS 3600 Concrete structures:** Specifies requirements for concrete construction including reinforcement cover
The National Construction Code (NCC), adopted in New South Wales as the Building Code of
Australia, references these standards and establishes minimum performance requirements for
all building work.
## Major Building Defects in Sydney Properties
Building defects in Sydney range from minor cosmetic issues to serious structural failures
requiring urgent intervention. Understanding the nature, causes, and implications of these
defects helps property owners and buyers make informed decisions.
### Water Leaks and Waterproofing Failures
Waterproofing defects are the most common building defect category in Sydney, accounting for
approximately 40% of all reported defects in new apartment buildings. Sydney's significant
rainfall, humidity, and driving rain during storms create continuous stress on waterproofing
systems.
Common waterproofing failure locations include:
- **Balconies and terraces:** Exposed to weather, these areas require robust waterproofing membranes and proper drainage. Failures cause water ingress to apartments below and can lead to concrete deterioration
- **Bathrooms and wet areas:** Non-compliant waterproofing under tiles allows water penetration into floor and wall structures, causing timber rot and mould growth
- **Window and door openings:** Inadequate flashing and sealing around openings permits water entry during rain events
- **Roof junctions and penetrations:** Complex roof geometries and service penetrations are common failure points
- **Basement and below-ground areas:** Hydrostatic pressure from groundwater requires tanking systems that are frequently defective
> A study by the City Futures Research Centre found that 72% of surveyed strata buildings had
> experienced waterproofing defects, with remediation costs averaging $200,000 per building.
The consequences of waterproofing failures extend beyond water damage. Moisture promotes
mould growth, which affects indoor air quality and poses health risks. Ongoing dampness
causes timber framing to rot, reducing structural capacity. Water penetrating concrete
accelerates reinforcement corrosion, leading to concrete cancer.
### Concrete Cancer (Concrete Spalling)
Concrete cancer, technically known as concrete spalling, occurs when steel reinforcement
within concrete rusts and expands. The expansion cracks the surrounding concrete, which then
flakes away exposing more steel to corrosion. This creates a self-perpetuating cycle of
deterioration that accelerates without intervention.
Sydney's coastal environment significantly increases concrete cancer risk. Salt-laden air
penetrates concrete and attacks reinforcement, particularly where concrete cover is
inadequate. AS 3600 specifies minimum cover requirements based on exposure conditions, but
many older buildings and even some new constructions fail to meet these standards.
High-risk areas for concrete cancer include:
- Balcony slabs and balustrade walls
- Carpark structures, particularly in coastal suburbs
- Exposed concrete facades and feature elements
- Basement walls subject to water ingress
- Pool surrounds and water features
Remediation typically involves removing deteriorated concrete, treating or replacing
corroded reinforcement, and applying protective coatings. Costs for extensive concrete
cancer repair in apartment buildings routinely exceed $500,000 and can reach several million
dollars for severe cases.
### Structural Cracking and Movement
Cracking in building structures ranges from harmless hairline cracks caused by material
shrinkage to serious structural failures requiring urgent engineering intervention.
Distinguishing between cosmetic and structural cracking requires professional assessment.
Causes of structural cracking in Sydney buildings include:
- **Foundation movement:** Sydney's clay soils, particularly in Western Sydney suburbs, expand when wet and shrink when dry. This cyclical movement stresses foundations not designed for reactive soil conditions
- **Inadequate structural design:** Under-designed elements may crack under normal service loads
- **Poor construction practices:** Premature loading of concrete before adequate curing, inadequate reinforcement placement, and other construction errors cause cracking
- **Differential settlement:** Buildings founded on variable ground conditions settle unevenly, causing diagonal cracking patterns
The Opal Tower evacuation in December 2018 resulted from cracking in pre-cast concrete
panels, later attributed to design and construction issues. The incident affected 51
apartments directly and caused temporary evacuation of the entire 36-storey building.
Remediation costs exceeded $30 million.
### Fire Safety Deficiencies
Fire safety defects pose life-threatening risks and are common in both new and older Sydney
buildings. The Grenfell Tower fire in London in 2017 prompted widespread audits of
Australian buildings, revealing extensive use of non-compliant cladding and other fire
safety deficiencies.
Common fire safety defects include:
- **Combustible cladding:** Aluminium composite panels with polyethylene cores, banned following Grenfell, remain on many Sydney buildings
- **Inadequate fire separation:** Gaps in fire-rated walls and penetrations not properly sealed compromise compartmentation
- **Non-compliant fire doors:** Fire doors that fail to seal properly or have been modified reduce their effectiveness
- **Defective fire services:** Non-functional sprinklers, smoke detectors, and emergency warning systems
The NSW Cladding Taskforce identified over 1,000 buildings in Greater Sydney with
potentially combustible cladding requiring assessment or remediation.
### Electrical Deficiencies
Electrical defects present fire and electrocution hazards. Common issues in Sydney
properties include:
- **Outdated wiring:** Properties built before 1970 may have rubber-insulated or lead-sheathed wiring that has deteriorated
- **Overloaded circuits:** Modern appliance loads exceeding original circuit capacity cause overheating
- **Inadequate earthing:** Older installations may lack effective earthing and safety switches
- **Non-compliant modifications:** DIY electrical work frequently fails to meet Australian Standards
- **Water ingress:** Moisture in electrical enclosures creates short-circuit and shock hazards
NSW legislation requires residual current devices (safety switches) on all power and
lighting circuits in new construction. Properties without these devices have elevated
electrocution risk. Professional electrical inspection is recommended for any property more
than 25 years old.
### Plumbing and Drainage Defects
Plumbing defects cause water damage, affect amenity, and create health hazards through sewer
gas exposure or contaminated water supply. Common plumbing issues include:
- **Leaking pipes:** Corrosion in copper pipes, failed joints, and movement damage cause leaks that may go undetected in wall cavities
- **Polybutylene pipes:** Used in 1980s and 1990s construction, these pipes are prone to failure and often require complete replacement
- **Blocked drains:** Tree root intrusion, incorrect falls, and accumulated debris cause drainage blockages
- **Defective hot water systems:** Corroded tanks, failed pressure relief valves, and inadequate tempering create safety risks
- **Cross-connections:** Improper connections between potable and non-potable water supplies contaminate drinking water
In strata buildings, plumbing defects affecting common property can result in water damage
to multiple lots, complicating responsibility and insurance claims.
### Roof and External Envelope Defects
The building envelope protects against weather and comprises the roof, walls, windows, and
doors. Envelope defects permit water ingress and thermal transfer, affecting comfort and
causing damage.
Common roof defects in Sydney include:
- Displaced, cracked, or missing tiles and metal sheeting
- Deteriorated or incorrectly installed flashings
- Blocked or leaking gutters and downpipes
- Failed ridge capping and valley flashings
- Deteriorated sarking and underlayment
Facade defects include:
- Cracked or hollow rendered finishes
- Failed expansion joints allowing water penetration
- Deteriorated sealants around openings
- Damaged or loose cladding elements
## Building Defect Classification
Building defects are classified according to their severity, impact on building function,
and urgency of required remediation. Understanding these classifications helps property
owners prioritise repairs and allocate budgets appropriately.
| Defect Type | Severity Level | Typical Cost Range | Affected Building Ages |
| --------------------------------- | ----------------------- | ------------------------------ | --------------------------------------------- |
| Waterproofing failures (bathroom) | Moderate to Significant | $5,000 to $30,000 per bathroom | All ages, peak in 10 to 25 year old buildings |
| Balcony waterproofing failures | Significant | $15,000 to $60,000 per balcony | Buildings 5 to 20 years old |
| Concrete cancer (minor) | Moderate | $10,000 to $50,000 | Buildings over 15 years, coastal areas |
| Concrete cancer (extensive) | Significant to Critical | $200,000 to $2,000,000+ | Buildings over 25 years, coastal areas |
| Structural cracking (moderate) | Significant | $20,000 to $100,000 | All ages, especially on reactive soils |
| Structural failure (major) | Critical | $500,000 to $10,000,000+ | Variable, including new construction |
| Combustible cladding remediation | Critical (fire safety) | $500,000 to $5,000,000+ | Buildings from 1990s to 2010s |
| Fire safety deficiencies | Significant to Critical | $50,000 to $500,000 | All ages |
| Electrical rewiring | Moderate to Significant | $10,000 to $30,000 (house) | Buildings over 40 years |
| Complete roof replacement | Moderate to Significant | $15,000 to $50,000 (house) | Buildings over 30 years |
| Foundation underpinning | Significant to Critical | $30,000 to $150,000 | Buildings on reactive soils, all ages |
## Notable Sydney Building Defect Cases
Several high-profile building defect cases in Sydney have shaped public awareness and driven
regulatory reform. These cases illustrate the potential consequences of construction
failures and the importance of thorough inspection.
### Opal Tower (2018)
On Christmas Eve 2018, residents of Opal Tower in Sydney Olympic Park heard loud cracking
sounds and observed significant cracking in a pre-cast concrete panel. The 36-storey
building was evacuated, displacing 3,000 residents from 392 apartments.
Subsequent investigations identified multiple causes including inadequate design of pre-cast
panels, installation issues, and construction defects. The incident prompted a state
government review that led to the Design and Building Practitioners Act 2020. Remediation
costs exceeded $30 million.
### Mascot Towers (2019)
In June 2019, 132 apartments in Mascot Towers were evacuated after cracks appeared in the
building's primary support structure. Unlike Opal Tower, the building remains unoccupied
years later, with remediation costs estimated to exceed $100 million.
The owners corporation and individual owners face ongoing financial hardship, with many
unable to sell their properties and continuing to pay mortgages and levies on uninhabitable
apartments. The case demonstrates the devastating financial impact building defects can have
on individual owners.
### Lessons from Major Incidents
These cases highlight several important lessons:
- Even new buildings can have serious structural defects requiring immediate evacuation
- Defect rectification costs can exceed the original construction value
- Individual owners may bear significant financial burden when builders and developers cannot or will not pay for rectification
- Pre-purchase building inspections are essential, even for new or near-new apartments
- Strata committees should commission independent building assessments during defect warranty periods
## Sydney Climate and Environmental Factors
Sydney's climate and environment create specific challenges for building durability and
contribute to particular defect patterns.
### Coastal Exposure
Approximately 70% of Sydney's population lives within 20 kilometres of the coast. Salt-laden
air from the ocean accelerates corrosion of metal elements and penetrates concrete to attack
steel reinforcement. Buildings within 1 kilometre of the coast are particularly vulnerable
and require enhanced protective measures specified in AS 3600.
Coastal suburbs experiencing elevated defect rates include:
- Eastern Suburbs: Bondi, Coogee, Maroubra, Randwick
- Northern Beaches: Manly, Dee Why, Narrabeen
- Inner West: Pyrmont, Glebe, Balmain
- Sutherland: Cronulla, Caringbah
### Rainfall and Humidity
Sydney receives over 1,200 millimetres of rainfall annually, with intense storms common in
summer months. The combination of rainfall and humidity creates ideal conditions for:
- Mould growth in poorly ventilated spaces
- Timber rot in moisture-affected framing
- Waterproofing failures under sustained water exposure
- Stormwater system overloading and subsequent flooding
### Reactive Clay Soils
Much of Western Sydney is built on highly reactive clay soils that expand significantly when
wet and shrink when dry. This seasonal movement causes foundation distress in buildings not
designed for reactive conditions. Affected areas include:
- Penrith and surrounding suburbs
- Liverpool and Fairfield
- Blacktown and Hills District
- Campbelltown and Camden
Buildings on these soils require foundations designed to Australian Standard AS 2870 for the
specific site classification. Inadequate foundation design is a common defect in project
home construction.
## Strata and Apartment Building Defects
Strata-titled apartment buildings present unique challenges for defect identification,
responsibility allocation, and rectification. The shared ownership structure complicates
decision-making and funding, while the interaction between lot property and common property
creates jurisdictional questions.
### Common Property vs Lot Property
Understanding the distinction between common property (owned collectively by all lot owners)
and lot property (owned individually) is essential for determining responsibility for defect
rectification:
- **Common property:** Structural elements, building envelope, shared services, common areas. The owners corporation is responsible for maintenance and repair
- **Lot property:** Internal finishes, fixtures within the lot. Individual owners are responsible
- **Boundary issues:** Waterproofing membranes, pipes within walls, and windows may have unclear ownership requiring strata plan interpretation
### Defect Claims Process for Strata
Pursuing defect claims in strata buildings requires coordinated action by the owners
corporation:
- Commission independent building inspection by a qualified building consultant
- Obtain legal advice on claim viability and strategy
- Issue defect notices to the builder and developer within warranty periods
- Pursue claims through NSW Civil and Administrative Tribunal or courts if necessary
- Coordinate remediation work affecting both common and lot property
The Strata Building Bond and Inspections Scheme, introduced in 2018 for new buildings,
requires developers to lodge a bond of 2% of contract price and mandates independent
inspections during the first two years.
## Defect Detection and Professional Inspection
Early identification of building defects minimises damage progression and reduces
remediation costs. Professional inspection using appropriate methodology and equipment
provides the best chance of detecting defects before they cause extensive damage.
### When to Commission Inspections
Building inspections should be commissioned:
- Before purchasing any property, including new apartments
- Before expiry of statutory warranty periods (2 years for general defects, 6 years for major defects)
- Following weather events that may have caused damage
- When visible signs of defects appear
- Periodically (every 3 to 5 years) for proactive maintenance planning
- Before selling, to identify issues that may affect sale
### Inspection Methodology
Comprehensive building inspections in accordance with AS 4349.1 include:
- **Visual assessment:** Systematic examination of all accessible areas including interior rooms, roof void, subfloor, and exterior
- **Moisture testing:** Use of moisture meters to detect elevated moisture in walls, floors, and ceilings
- **Thermal imaging:** Infrared cameras detect moisture, insulation defects, and electrical hotspots
- **Level surveys:** Laser levels measure floor slopes indicating structural movement
- **Documentation:** Comprehensive reporting with photographs and recommendations
### Specialist Assessments
Some defects require specialist assessment beyond general building inspection:
- **Structural engineering:** For cracking, foundation issues, and load-bearing element assessment
- **Facade engineering:** For cladding, glazing, and external envelope systems
- **Hydraulic engineering:** For complex plumbing and drainage issues
- **Fire safety:** For fire service compliance and cladding assessment
- **Geotechnical:** For foundation and ground condition assessment
## Frequently Asked Questions
###
What is the statutory warranty period for building defects in NSW?
**Short answer:** Six years for major defects and two years for all other
defects from completion of work under the Home Building Act 1989 (NSW).
The Home Building Act 1989 (NSW) provides statutory warranties that apply automatically
to all residential building work over $5,000. Major defects that cause or are likely to
cause inability to inhabit the building, destruction, or threat of collapse are covered
for six years. All other defects, including incomplete work and workmanship issues, are
covered for two years. These periods commence from completion of the work, not from
occupation or settlement. Warranty claims must be made within these periods, so property
owners should commission building inspections before warranty expiry to identify any
defects requiring rectification.
###
Who is responsible for building defects in a strata apartment?
**Short answer:** The developer and builder are liable during warranty
periods. After warranty expiry, the owners corporation is responsible for common
property defects, and individual owners for lot property defects.
During statutory warranty periods, the developer and builder remain liable for defects
in their work. The owners corporation should pursue claims for common property defects
(structural elements, facade, shared services) while individual owners may claim for
lot-specific issues. After warranty expiry, the owners corporation must fund repairs to
common property through the capital works fund or special levies. The Strata Schemes
Management Act 2015 requires owners corporations to maintain common property in good
repair. Determining whether a defect affects common property or lot property often
requires interpretation of the strata plan and may involve legal advice.
###
Can I claim on home warranty insurance for building defects?
**Short answer:** Only if the builder has died, disappeared, or become
insolvent. Home warranty insurance is a last resort, not first line of compensation.
Home warranty insurance in NSW, required for residential work over $20,000, covers
homeowners when builders cannot fulfil their warranty obligations due to death,
disappearance, or insolvency. It does not provide direct compensation for defects while
the builder remains in business. The first recourse is always to require the builder to
rectify defective work under their statutory warranty obligations. If the builder
refuses, homeowners can apply to NSW Civil and Administrative Tribunal for orders
requiring rectification. Only when these remedies are exhausted due to builder
unavailability does home warranty insurance apply. Coverage is capped at $340,000 per
dwelling for structural defects.
###
How do I know if cracking in my property is serious?
**Short answer:** Cracks wider than 5 millimetres, diagonal or stair-step
patterns, accompanied by other signs like sticking doors, or actively widening require
professional assessment.
Hairline cracks under 1 millimetre are common and typically result from normal material
shrinkage or minor settlement. However, certain characteristics indicate potentially
serious structural issues. Concerning signs include cracks wider than 5 millimetres,
diagonal or stair-step patterns through masonry, cracks that extend through the full
wall thickness, cracks accompanied by doors and windows sticking, and cracks that are
widening over time. In Sydney, cracking is particularly common in Western Sydney suburbs
with reactive clay soils, where seasonal soil movement stresses foundations.
Professional building inspection can distinguish cosmetic cracking from structural
issues requiring engineering assessment and remediation.
###
Should I get a building inspection on a new apartment?
**Short answer:** Yes. Research indicates up to 85% of new Sydney
apartments have defects. [Pre-purchase inspection](/pre-purchase-inspections) identifies issues for negotiation or
decision-making.
New apartments commonly contain defects despite being recently constructed. Studies by
the University of NSW City Futures Research Centre found that the majority of new
apartment buildings in Sydney have significant defects. High-profile failures at Opal
Tower and Mascot Towers demonstrate that even new buildings can have serious structural
issues. Pre-purchase inspection of new apartments identifies visible defects that should
be rectified by the developer before settlement, provides documentation for warranty
claims if issues emerge later, and informs your purchase decision. For off-the-plan
purchases, a [pre-settlement inspection](/apartment-pre-settlement) before handover is essential to identify defects
while the developer is still obligated to rectify them.
###
What is the Strata Building Bond and Inspections Scheme?
**Short answer:** A scheme requiring developers to lodge a 2% bond and
mandating independent building inspections at 15 to 18 months after occupation for
buildings with construction certificates issued after 2018.
The Strata Building Bond and Inspections Scheme was introduced following concerns about
building quality in new apartments. Developers must lodge a bond equal to 2% of the
contract price for building work. A mandatory interim inspection by a qualified building
inspector must occur between 15 and 18 months after the occupation certificate is
issued. If defects are identified, the developer must rectify them or the bond may be
used to fund rectification. A final inspection occurs between 18 and 24 months, after
which the bond is released if defects have been addressed. The scheme applies to
buildings with construction certificates issued on or after 1 July 2018 with at least
two lots.
###
How much does building defect rectification typically cost in Sydney?
**Short answer:** Costs range from a few thousand dollars for minor defects
to tens of millions for major structural issues in large buildings.
Rectification costs vary enormously depending on defect type, extent, and building
complexity. Minor waterproofing repairs may cost $5,000 to $10,000, while complete
bathroom waterproofing replacement can exceed $30,000. Concrete cancer remediation
ranges from $20,000 for minor repairs to several million dollars for extensive
deterioration in large buildings. Structural repairs requiring underpinning or
reinforcement typically start at $30,000 for houses and can reach tens of millions for
apartment buildings. Mascot Towers remediation estimates exceed $100 million.
Combustible cladding replacement commonly costs $1 million to $5 million for affected
buildings. Early detection through regular inspection significantly reduces costs by
enabling intervention before damage progresses.
###
What is concrete cancer and how is it treated?
**Short answer:** Concrete cancer is spalling caused by rusting
reinforcement. Treatment involves removing damaged concrete, treating or replacing
steel, and applying protective coatings.
Concrete cancer, technically called spalling, occurs when steel reinforcement within
concrete rusts. Rust expands to approximately four times the volume of the original
steel, creating internal pressure that cracks and detaches the surrounding concrete. The
process is accelerated by inadequate concrete cover, carbonation of concrete, and
chloride penetration from salt air or de-icing salts. Treatment involves breaking out
all deteriorated and contaminated concrete to expose the reinforcement, treating
corroded steel with rust inhibitor or replacing severely affected bars, applying bonding
agents and patch repair mortars, and protecting the finished repair with coatings that
prevent future water and chloride ingress. In Sydney's coastal environment, buildings
should be assessed for concrete cancer indicators from approximately 15 years of age.
###
Where can I lodge a complaint about building defects in NSW?
**Short answer:** NSW Fair Trading for builder complaints and NSW Civil and
Administrative Tribunal for disputes and orders requiring rectification.
For initial complaints about residential building work, contact NSW Fair Trading, which
administers the Home Building Act 1989. Fair Trading can mediate disputes and issue
compliance notices to builders. If mediation fails, applications can be made to NSW
Civil and Administrative Tribunal (NCAT) for orders requiring defect rectification,
compensation, or contract termination. NCAT handles residential building disputes valued
up to $500,000 (or higher by consent). For larger claims or complex matters, proceedings
in the Supreme Court may be appropriate. The NSW Building Commissioner also has powers
to investigate and take action against practitioners under the Design and Building
Practitioners Act 2020. Strata disputes may involve the Office of the NSW Civil and
Administrative Tribunal (Fair Trading line).
###
Does my building have combustible cladding?
**Short answer:** Buildings constructed between 1990 and 2018 may have
combustible cladding. The NSW Cladding Taskforce has assessed many buildings, and your
owners corporation should have documentation.
Aluminium composite panels with polyethylene cores were widely used in Australian
construction from the 1990s until their risks became apparent following the Grenfell
Tower fire in 2017. The NSW Government established a Cladding Taskforce that has
registered and assessed buildings with potentially combustible cladding. Building owners
were required to register buildings over two storeys with any aluminium composite
cladding. If your building was constructed between 1990 and 2018 and has external
cladding, you should contact your owners corporation or building manager to determine if
the building has been assessed and what, if any, remediation is required. The NSW
Building Commissioner maintains a register of buildings with assessed risk and required
actions.
## Key Takeaways
- Up to 85% of new Sydney apartment buildings contain at least one significant defect, with waterproofing failures being the most common issue.
- The Home Building Act 1989 (NSW) provides statutory warranties of six years for major defects and two years for general defects from completion of work.
- High-profile incidents at Opal Tower and Mascot Towers demonstrated that even new buildings can have serious structural defects requiring evacuation.
- Sydney's coastal climate, rainfall, and reactive clay soils create specific challenges for building durability and contribute to defect patterns.
- The Design and Building Practitioners Act 2020 (NSW) introduced practitioner registration and a statutory duty of care following major building failures.
- Professional building inspections should be commissioned before purchase, before warranty expiry, and periodically for proactive maintenance planning.
- Defect rectification costs range from thousands of dollars for minor issues to tens of millions for major structural failures in apartment buildings.
- The Strata Building Bond and Inspections Scheme requires developers to lodge a 2% bond and mandates independent inspections for new strata buildings.
- NSW Fair Trading and the NSW Civil and Administrative Tribunal provide avenues for building defect complaints and dispute resolution.
- Early detection through professional inspection significantly reduces remediation costs and protects property investment value.
## References and Resources
- [ NSW Building Commissioner ](https://www.nsw.gov.au/building-commissioner)
- [ National Construction Code (NCC) ](https://ncc.abcb.gov.au/)
- [ Home Building Act 1989 (NSW) ](https://www.legislation.nsw.gov.au/view/html/inforce/current/act-1989-147)
- [ Strata Schemes Management Act 2015 (NSW) ](https://www.legislation.nsw.gov.au/view/html/inforce/current/act-2015-050)
- [ Design and Building Practitioners Act 2020 (NSW) ](https://www.legislation.nsw.gov.au/view/html/inforce/current/act-2020-007)
- [ Standards Australia ](https://www.standards.org.au/)
- [ NSW Civil and Administrative Tribunal (NCAT) ](https://www.ncat.nsw.gov.au/)
### Pre-Sale Inspections vs. Appraisals: Understanding Differences
Source: https://ownerinspections.com.au/articles/pre-sale-inspections-vs-appraisals-understanding-differences
Published: 2024-04-09 | Updated: 2026-01-16 | Category: Pre-Sale Inspections
Author: Maison Azdari
When preparing to sell a property in Australia, two terms frequently arise that are often
confused: [pre-sale inspections](/pre-sale-inspections) and property appraisals. While both play important roles in
the selling process, they serve fundamentally different purposes and are conducted by
different professionals using distinct methodologies.
Understanding the difference between these two assessments is essential for vendors who want
to maximise their sale price, minimise surprises during negotiations, and ensure a smooth
transaction. A pre-sale inspection examines the physical condition of a property,
identifying defects and maintenance issues, while an appraisal determines the property's
market value based on comparable sales, location factors, and current market conditions.
Both assessments provide valuable information, but they answer different questions. A
pre-sale inspection answers "What condition is the property in?" while an appraisal answers
"What is the property worth?" Smart vendors often obtain both to ensure they are fully
informed before listing their property on the market.
> A pre-sale inspection is one of the most effective ways to take control of the selling
> process. By identifying issues before buyers do, you can address problems on your terms
> rather than facing last-minute renegotiations or failed settlements.
## What is a Pre-Sale House Inspection?
A pre-sale building inspection, also known as a vendor inspection, is a comprehensive
assessment of a property's physical condition conducted before listing for sale. The
inspection is performed by a qualified building inspector who examines structural elements,
building systems, and overall condition to identify defects, maintenance issues, and
potential safety concerns.
### Purpose of Pre-Sale Inspections
The primary purpose of a pre-sale inspection is to give vendors a clear understanding of
their property's condition before potential buyers conduct their own inspections. This
knowledge enables vendors to:
- **Identify and address issues proactively:** Discover problems before listing so you can choose whether to repair them, factor them into pricing, or disclose them upfront
- **Set realistic expectations:** Understand what buyers' inspectors will likely find and prepare accordingly
- **Strengthen negotiating position:** Demonstrating transparency through a pre-sale inspection can build buyer confidence and reduce price negotiations
- **Avoid sale disruptions:** Prevent last-minute surprises that could delay settlement or cause contracts to fall through
- **Meet disclosure obligations:** Fulfil your legal duty to disclose known material defects under Australian Consumer Law
### What Does a Pre-Sale Inspection Cover?
A comprehensive pre-sale inspection examines all accessible areas of a property to assess
its current condition. The inspection typically includes:
#### Structural Elements
- Foundation and footings for signs of movement, cracking, or deterioration
- Load-bearing walls and structural framing
- Roof structure including trusses, rafters, and battens
- Floor systems including joists, bearers, and subfloor condition
- Retaining walls and their structural integrity
#### Building Envelope
- Roof covering including tiles, metal sheeting, or other materials
- Gutters, downpipes, and stormwater drainage
- External wall cladding and finishes
- Windows, doors, and their frames
- Flashings, weatherproofing, and sealants
#### Interior Components
- Internal walls, ceilings, and floor surfaces
- Wet areas including bathrooms, laundries, and kitchens
- Built-in fixtures and fittings
- Visible plumbing fixtures and connections
- Visible electrical installations and safety switches
#### External Areas
- Driveways, paths, and paved areas
- Fencing and gates
- Carports, garages, and outbuildings
- Decking and outdoor structures
- Site drainage and grading
### What Pre-Sale Inspections Do Not Include
It is important to understand the limitations of a standard pre-sale building inspection.
The following are typically not included and may require specialist assessments:
- Timber pest inspections (termites and borers) require a separate assessment
- Property valuation or market value opinion
- Concealed areas that cannot be safely accessed
- Detailed assessment of electrical, plumbing, or gas systems
- Swimming pool compliance assessment
- Asbestos identification or testing
- Soil testing or geotechnical assessment
## What is a House Appraisal?
A property appraisal, also known as a property valuation, is a professional assessment of a
property's market value conducted by a qualified valuer or real estate agent. The appraisal
determines what price the property is likely to achieve in the current market based on
analysis of comparable sales, property characteristics, and market conditions.
### Types of Property Appraisals
In Australia, there are two main types of property appraisals that vendors may encounter:
#### Formal Property Valuation
A formal valuation is conducted by a Certified Practising Valuer (CPV) who is a member of
the Australian Property Institute (API). This type of valuation:
- Provides a legally recognised assessment of market value
- Is required by lenders for mortgage purposes
- Follows Australian Valuation Standards
- Results in a formal valuation report with supporting evidence
- Carries professional indemnity insurance protection
- Typically costs between $300 and $600 for residential properties
#### Real Estate Agent Appraisal
A real estate agent appraisal, often called a market appraisal or comparative market
analysis, is an informal estimate provided by a licensed real estate agent. This type of
appraisal:
- Is usually provided free of charge as part of the listing process
- Based on the agent's local market knowledge and recent sales
- Not a formal valuation and has no legal standing
- May be influenced by the agent's desire to win the listing
- Useful for initial pricing guidance but should be verified
### Purpose of Property Appraisals
Property appraisals serve several important purposes for vendors preparing to sell:
- **Establish listing price:** Determine a realistic asking price or auction reserve based on current market conditions
- **Support financing:** Lenders require formal valuations to approve mortgages for potential buyers
- **Inform decision-making:** Help vendors decide whether it is the right time to sell or whether to make improvements first
- **Settlement calculations:** Used for stamp duty, capital gains tax, and other financial calculations
- **Estate and legal matters:** Required for deceased estates, family law settlements, and other legal proceedings
### Factors Considered in Property Appraisals
A property appraiser or valuer considers numerous factors when determining market value:
#### Property Characteristics
- Land size and dimensions
- Building size and number of bedrooms, bathrooms, and living areas
- Age and condition of the property
- Quality of construction and finishes
- Recent renovations or improvements
- Parking, outdoor areas, and additional features
#### Location Factors
- Suburb and street appeal
- Proximity to schools, transport, and amenities
- Views, aspect, and orientation
- Zoning and development potential
- Neighbourhood characteristics and demographics
#### Market Conditions
- Recent comparable sales in the area
- Current supply and demand dynamics
- Interest rates and lending conditions
- Seasonal market trends
- Local and national economic factors
## Key Differences: Pre-Sale Inspection vs House Appraisal
Understanding the fundamental differences between these two assessments helps vendors
determine which services they need and when to obtain them.
| Aspect | Pre-Sale Inspection | House Appraisal |
| --------------------- | --------------------------------------------------------- | ------------------------------------------------------- |
| Primary Purpose | Assess physical condition and identify defects | Determine market value for pricing |
| Conducted By | Licensed building inspector | Certified valuer or real estate agent |
| Key Question Answered | What condition is the property in? | What is the property worth? |
| Focus Areas | Structure, building systems, defects, safety | Comparable sales, location, market trends |
| Typical Duration | 2 to 4 hours on site | 30 minutes to 1 hour on site |
| Typical Cost | $400 to $800 depending on property size | $300 to $600 formal; agent appraisals often free |
| Report Deliverable | Detailed condition report with photos and recommendations | Valuation certificate with market value and comparables |
| Legal Standing | Supports disclosure obligations under ACL | Formal valuations accepted by lenders and courts |
| Best Timing | Before listing; allows time for repairs | Close to listing for current market accuracy |
## Australian Legal Framework for Property Sales
Understanding the legal context surrounding property sales in Australia helps vendors
appreciate why both pre-sale inspections and appraisals are valuable tools in the selling
process.
### Australian Consumer Law and Disclosure Obligations
Under the Australian Consumer Law (ACL), which is Schedule 2 of the Competition and Consumer
Act 2010, vendors have obligations regarding the information they provide to potential
buyers. While the ACL primarily focuses on consumer transactions, its provisions around
misleading and deceptive conduct apply to property sales.
Key principles include:
- **Prohibition on misleading conduct:** Section 18 of the ACL prohibits conduct that is misleading or deceptive, or is likely to mislead or deceive
- **False representations:** Section 29 prohibits false or misleading representations about goods or services, which can apply to property sales
- **Silence can be misleading:** In some circumstances, failing to disclose known defects can constitute misleading conduct
### State-Specific Vendor Disclosure Requirements
Each Australian state and territory has its own property legislation that governs vendor
disclosure requirements. Key legislation includes:
#### New South Wales
Under the Conveyancing (Sale of Land) Regulation 2022, vendors must provide certain
disclosures before contracts are exchanged. While there is no mandatory vendor statement,
vendors must answer buyer enquiries honestly. The Property and Stock Agents Act 2002
regulates real estate agents and their conduct.
#### Victoria
The Sale of Land Act 1962 and Estate Agents Act 1980 govern property sales. Vendors must
provide a Section 32 Statement (Vendor Statement) disclosing specific information about the
property including any building permits issued in the past seven years and any owner-builder
work conducted.
#### Queensland
The Property Law Act 1974 and Body Corporate and Community Management Act 1997 apply to
property sales. Sellers must complete a warning statement and provide disclosure for
properties in community title schemes. The Property Occupations Act 2014 regulates agents.
#### South Australia
The Land and Business (Sale and Conveyancing) Act 1994 requires vendors to provide a Form 1
Vendor Statement disclosing information about encumbrances, zoning, and building work.
#### Western Australia
The Sale of Land Act 1970 and Real Estate and Business Agents Act 1978 govern property
transactions. While no formal vendor statement is required, vendors must not make false or
misleading representations.
> A pre-sale inspection provides documented evidence of a property's condition at the time of
> sale. This documentation can protect vendors from claims of non-disclosure and demonstrate
> good faith in the transaction.
### Real Estate Institute Guidelines
The Real Estate Institute of Australia (REIA) and state-based institutes provide guidelines
and codes of conduct for property sales. These guidelines encourage:
- Accurate and honest property descriptions in marketing materials
- Disclosure of known material defects that could affect a buyer's decision
- Transparent communication about property condition
- Fair dealing in all aspects of the transaction
Real estate agents who are members of these institutes are bound by their codes of conduct,
which can provide additional protections for both vendors and buyers.
## Benefits of Obtaining a Pre-Sale Inspection
Investing in a pre-sale inspection before listing your property offers numerous advantages
that can lead to a faster sale, better price, and smoother transaction.
### Take Control of the Narrative
When you know your property's condition, you control how issues are presented to buyers.
Rather than being surprised by a buyer's inspection report, you can:
- Address significant issues before listing to present the property in best condition
- Obtain quotes for repairs to demonstrate realistic costs to buyers
- Adjust your asking price to reflect the property's actual condition
- Prepare documentation explaining any issues and actions taken
### Build Buyer Confidence
Providing a pre-sale inspection report to potential buyers demonstrates transparency and can
increase buyer confidence. Benefits include:
- Buyers appreciate vendors who are upfront about property condition
- Reduces buyer anxiety about unknown issues
- May attract more serious buyers who appreciate transparency
- Can lead to faster decision-making by removing uncertainty
### Strengthen Negotiating Position
Knowledge is power in property negotiations. A pre-sale inspection helps you:
- Justify your asking price with documented property condition
- Counter inflated repair cost claims from buyers
- Negotiate from an informed position rather than reacting to surprises
- Demonstrate that disclosed issues have been considered in pricing
### Reduce Risk of Failed Settlements
One of the most frustrating experiences for vendors is having a sale fall through due to
issues discovered during the buyer's inspection. A pre-sale inspection reduces this risk by:
- Identifying major issues that could cause buyers to withdraw
- Allowing you to address problems before they derail a sale
- Setting realistic expectations from the outset
- Reducing the likelihood of last-minute renegotiations
## Timing and Costs
Understanding when to obtain each assessment and what costs to expect helps vendors plan
effectively and budget for the selling process.
### When to Obtain a Pre-Sale Inspection
The ideal time to obtain a pre-sale inspection is several weeks before you plan to list your
property. This timing allows you to:
- Review the inspection findings thoroughly
- Decide which repairs to undertake and obtain quotes
- Complete any repair work before photography and open homes
- Incorporate findings into your pricing strategy
- Prepare disclosure documentation if needed
As a general guide, obtaining your pre-sale inspection four to six weeks before listing
provides adequate time to address findings without significantly delaying your sale
timeline.
### When to Obtain a Property Appraisal
Property values can change quickly in active markets, so appraisals should be obtained
closer to your intended listing date. Consider:
- **Agent appraisals:** Obtain two to three agent appraisals to compare opinions and assess market conditions
- **Formal valuations:** If required for legal or financial purposes, obtain within four weeks of your decision point
- **Market monitoring:** Continue monitoring comparable sales even after receiving appraisals to stay informed of market movements
### Cost Comparison
The following table provides a guide to typical costs for pre-sale inspections and
appraisals in Australia:
| Service | Typical Cost Range | Factors Affecting Cost |
| ------------------------------------- | ------------------ | ------------------------------------------------ |
| Pre-Sale Building Inspection | $400 to $800 | Property size, age, accessibility, location |
| Combined Building and Pest Inspection | $500 to $900 | Property size, pest risk level, subfloor access |
| Formal Property Valuation | $300 to $600 | Property value, complexity, purpose of valuation |
| Real Estate Agent Appraisal | Usually free | Provided as part of listing pitch |
While these costs may seem significant, they represent a small investment relative to the
value of most properties. A pre-sale inspection that helps you achieve even a slightly
better sale price or avoid a failed settlement will more than pay for itself.
## How Pre-Sale Inspections and Appraisals Work Together
Rather than choosing one assessment over the other, savvy vendors recognise that pre-sale
inspections and appraisals serve complementary purposes and are most effective when used
together.
### Inspection Findings Inform Pricing
The condition of a property directly affects its value. A pre-sale inspection identifies
issues that may need to be factored into pricing:
- Major structural issues will significantly impact value and must be disclosed
- Deferred maintenance may lead to price negotiations
- Recent repairs and improvements can support higher pricing
- Safety issues may need to be addressed before sale
### Appraisal Provides Market Context
An appraisal places your property in the context of the current market:
- Comparable sales establish what similar properties have achieved
- Market conditions indicate buyer demand and competition
- Location factors highlight advantages and disadvantages
- Timing considerations may affect optimal listing strategy
### Combined Approach Benefits
Using both assessments together allows you to:
- Set a realistic price that reflects both condition and market value
- Make informed decisions about pre-sale repairs based on return on investment
- Present a complete picture to potential buyers
- Negotiate confidently with documented evidence
## Frequently Asked Questions
###
Should I get a pre-sale inspection before listing my property?
**Short answer:** Yes, a pre-sale inspection is highly recommended as it
gives you control over how property issues are addressed and presented to buyers.
A pre-sale inspection allows you to discover any defects or maintenance issues before
potential buyers do. This knowledge enables you to repair problems, adjust your asking
price accordingly, or prepare documentation explaining known issues. The inspection
report can also be provided to interested buyers to demonstrate transparency and build
confidence. Properties sold with vendor-provided inspection reports often experience
smoother negotiations and fewer failed settlements because buyers appreciate the upfront
disclosure.
###
Can I use a pre-sale inspection report to increase my property's value?
**Short answer:** A pre-sale inspection does not directly increase value,
but it can help you maximise your sale price by identifying issues to address and
demonstrating transparency.
The inspection itself does not add value to your property. However, it identifies issues
that, if addressed, may allow you to command a higher price. For example, repairing a
leaking roof or fixing structural defects before listing prevents these issues from
becoming negotiation points. Additionally, providing a clean inspection report or
demonstrating that identified issues have been addressed can give buyers confidence to
offer closer to your asking price rather than making lowball offers to account for
unknown risks.
###
What is the difference between a formal valuation and an agent appraisal?
**Short answer:** A formal valuation is conducted by a certified valuer and
has legal standing, while an agent appraisal is an informal market estimate provided by
a real estate agent.
Formal valuations are conducted by Certified Practising Valuers who are members of the
Australian Property Institute and follow Australian Valuation Standards. These
valuations are accepted by lenders, courts, and government bodies. Agent appraisals,
while useful for gauging market interest, are informal estimates based on the agent's
market knowledge and recent sales data. Agent appraisals are often provided free as part
of the listing process, but may be influenced by the agent's desire to win your listing.
For important financial decisions, a formal valuation provides greater certainty.
###
Am I legally required to disclose defects found in a pre-sale inspection?
**Short answer:** While requirements vary by state, the Australian Consumer
Law prohibits misleading conduct, and failing to disclose known material defects can
constitute misleading behaviour.
Vendor disclosure obligations differ across Australian states and territories. However,
under the Australian Consumer Law, vendors must not engage in misleading or deceptive
conduct. If you know about significant defects that would affect a buyer's decision and
deliberately conceal them, you could face legal consequences. The safest approach is to
disclose known material defects, either by addressing them before sale, adjusting your
price to reflect them, or providing clear disclosure documentation. Your conveyancer or
solicitor can advise on your specific obligations in your state.
###
How long is a pre-sale inspection report valid for?
**Short answer:** There is no set expiry, but reports are generally
considered current for three to six months, or until significant changes occur to the
property.
A pre-sale inspection report reflects the property's condition at the time of
inspection. If the property remains largely unchanged, the report will still provide
useful information for several months. However, if there has been water damage,
renovations, or other significant changes since the inspection, a new report may be
warranted. If your property does not sell within six months and market conditions or
property condition have changed, consider obtaining an updated inspection to maintain
credibility with buyers and ensure you are aware of any new issues.
###
Should I repair all defects identified in the pre-sale inspection?
**Short answer:** Not necessarily. Focus on safety issues and major
defects, then weigh the cost of other repairs against their likely impact on sale price.
Some defects should always be addressed, particularly safety issues like faulty
electrical work or structural problems that could pose risks to occupants. For other
issues, consider the cost of repairs versus the likely impact on sale price and buyer
perception. Minor maintenance items may not be worth addressing, while significant
defects that will concern buyers are often worth repairing. Your inspector's report
should indicate the severity of each issue, and a real estate agent can provide market
insight into what local buyers expect and what repairs offer the best return on
investment.
###
Can a buyer still conduct their own inspection if I provide a pre-sale report?
**Short answer:** Yes, buyers can and often will still conduct their own
inspection, but your pre-sale report sets expectations and demonstrates transparency.
Providing a pre-sale inspection report does not prevent buyers from obtaining their own
inspection, and most buyers will still want an independent assessment. However, your
report establishes a baseline and shows that you have been transparent about the
property's condition. If the buyer's inspection finds similar issues to your report, it
validates your disclosure. If the buyer's inspector finds additional issues, you may
need to negotiate, but you are in a better position than if the issues had come as a
complete surprise. Some buyers may feel confident enough with your report that they do
not conduct a separate inspection.
###
What happens if my property appraisal comes in lower than expected?
**Short answer:** Consider getting a second opinion, review the comparable
sales used, and decide whether to adjust your expectations or make improvements to
justify a higher price.
If an appraisal comes in lower than expected, first review the comparable sales used to
ensure they are truly comparable to your property. If you believe the appraisal has not
adequately considered positive features or has used inappropriate comparables, discuss
this with the valuer or seek a second opinion. You might also consider whether the
appraisal is realistic and whether your expectations were based on outdated market
conditions. Finally, if there are cost-effective improvements that could genuinely
increase value, consider completing these before listing.
###
Do I need a [pest inspection](/timber-pest-inspections) as well as a building inspection?
**Short answer:** Yes, particularly in Australia where termite damage is
common. A combined building and pest inspection provides comprehensive coverage.
Timber pests, particularly termites, cause significant damage to Australian properties
each year. A standard building inspection assesses structural condition but does not
include detailed timber pest assessment. A separate pest inspection, or a combined
building and pest inspection, examines the property for evidence of termites, borers,
and wood decay fungi. Given the prevalence of termite activity across Australia and the
significant cost of termite damage, a pest inspection is highly recommended as part of
your pre-sale assessment. Many inspection companies offer combined building and pest
inspections at a reduced rate compared to booking separately.
###
How do I choose a qualified building inspector for my pre-sale inspection?
**Short answer:** Look for licensed, experienced inspectors with
professional indemnity insurance who follow Australian Standard AS 4349.1.
When selecting a building inspector, verify that they hold the appropriate licence for
your state and have professional indemnity insurance. Ask about their experience,
particularly with properties similar to yours. A qualified inspector should conduct
inspections in accordance with Australian Standard AS 4349.1 for pre-purchase
inspections. Request a sample report to assess the level of detail and clarity provided.
Read online reviews and ask for references if possible. Avoid choosing solely on price,
as a thorough inspection by an experienced professional provides better value than a
cheap, superficial assessment that misses important issues.
## Key Takeaways
- Pre-sale inspections and property appraisals serve different purposes: inspections assess physical condition while appraisals determine market value.
- A pre-sale inspection allows vendors to identify and address issues before buyers discover them, strengthening negotiating position and reducing sale disruption risk.
- Formal property valuations conducted by certified valuers have legal standing and are required by lenders, while agent appraisals are informal market estimates.
- Australian Consumer Law and state property legislation create disclosure obligations that vendors should understand and comply with.
- Obtaining a pre-sale inspection four to six weeks before listing allows time to address findings, while appraisals should be obtained closer to listing for market accuracy.
- Pre-sale inspections typically cost $400 to $800, while formal valuations cost $300 to $600, representing a small investment relative to property values.
- Using both assessments together provides the most complete picture, allowing vendors to set realistic prices reflecting both condition and market value.
- Transparency through providing pre-sale inspection reports can build buyer confidence and lead to smoother negotiations.
- Combined building and pest inspections are recommended in Australia due to the prevalence of termite damage.
## References and Resources
For more information on property sales, inspections, and valuations in Australia, refer to
the following authoritative sources:
### Federal Resources
- **Australian Competition and Consumer Commission (ACCC):** Information on Australian Consumer Law and consumer rights in property transactions. [ www.accc.gov.au ](https://www.accc.gov.au)
- **Australian Property Institute (API):** The peak professional body for property valuers in Australia. [ www.api.org.au ](https://www.api.org.au)
- **Real Estate Institute of Australia (REIA):** National peak body representing real estate professionals. [ www.reia.com.au ](https://www.reia.com.au)
### State Consumer Affairs Offices
- **NSW Fair Trading:** [ www.fairtrading.nsw.gov.au ](https://www.fairtrading.nsw.gov.au)
- **Consumer Affairs Victoria:** [ www.consumer.vic.gov.au ](https://www.consumer.vic.gov.au)
- **Queensland Office of Fair Trading:** [ www.qld.gov.au/law/fair-trading ](https://www.qld.gov.au/law/fair-trading)
- **Consumer and Business Services SA:** [ www.cbs.sa.gov.au ](https://www.cbs.sa.gov.au)
- **Department of Mines, Industry Regulation and Safety WA:** [ www.commerce.wa.gov.au ](https://www.commerce.wa.gov.au)
### Australian Standards
- **AS 4349.1:** Inspection of buildings, Part 1: Pre-purchase inspections of residential buildings
- **AS 4349.3:** Inspection of buildings, Part 3: Timber pest inspections
- **Australian Valuation Standards:** Published by the Australian Property Institute for property valuation practice
### Contact Us
For professional pre-sale inspection services across Australia, contact Owner Inspections:
- **Phone:** [ 1300 471 805 ](tel:1300471805)
- **Email:** [ enquiries@ownerinspections.com.au ](mailto:enquiries@ownerinspections.com.au)
### How Can Expert Witnesses Help You Win NCAT Building Disputes?
Source: https://ownerinspections.com.au/articles/navigating-ncat-building-disputes-with-expert-witness-support
Published: 2024-04-03 | Updated: 2026-01-30 | Category: Expert Witness
Author: Maison Azdari
Building disputes in New South Wales are more common than most homeowners expect. When a disagreement between a homeowner and a builder cannot be resolved through negotiation or mediation, the matter often ends up before the NSW Civil and Administrative Tribunal, commonly known as [NCAT](/articles/understanding-nsw-civil-and-administrative-tribunal-ncat). In these proceedings, expert witnesses can be the deciding factor between a successful outcome and a disappointing one.
An expert witness brings independent, specialised knowledge to the tribunal. Their role is not to advocate for either party but to help the tribunal understand the technical issues at the heart of the dispute. From structural defects and waterproofing failures to code compliance breaches and incomplete works, expert witnesses provide the objective analysis that tribunal members rely on when making their decisions.
This guide explains how NCAT handles building disputes, when you should engage an expert witness, how to choose the right one, and what to expect during the tribunal process.
> **Key Takeaway:** Expert witnesses owe their duty to the tribunal, not to the party that engaged them. Their independence and objectivity are what give their evidence weight in NCAT proceedings. A well-prepared expert report can significantly strengthen your position in a building dispute.
## What Is NCAT and How Does It Handle Building Disputes?
The NSW Civil and Administrative Tribunal (NCAT) is an independent body established under the [Civil and Administrative Tribunal Act 2013](https://legislation.nsw.gov.au/view/html/inforce/current/act-2013-002). It resolves a wide range of disputes, including those related to residential building work. NCAT's Consumer and Commercial Division handles most building and construction disputes in NSW.
NCAT provides a faster and less formal alternative to the courts. Proceedings are generally less expensive than Supreme Court or District Court litigation, and the rules of evidence are applied with greater flexibility. However, this does not mean that the quality of evidence matters less. Tribunal members still need clear, well-supported evidence to make sound decisions.
Building disputes at NCAT typically involve claims under the [Home Building Act 1989](https://legislation.nsw.gov.au/view/html/inforce/current/act-1989-147), which governs residential building work in NSW. Claims can relate to defective work, incomplete work, delays, variations, and breaches of statutory warranties. The tribunal can award compensation, order rectification work, or make other appropriate orders.
For disputes involving amounts up to $500,000, NCAT generally has jurisdiction. For larger claims, the matter may need to be heard in the courts. [NSW Fair Trading](https://www.fairtrading.nsw.gov.au/) also plays a role in the early stages, as homeowners are often encouraged to attempt resolution through Fair Trading before lodging a tribunal application.
## The Role of Expert Witnesses in NCAT Proceedings
Expert witnesses serve a specific and well-defined purpose in tribunal proceedings. Unlike ordinary witnesses who give evidence about what they saw or experienced, expert witnesses are permitted to offer opinions within their area of expertise. This distinction is significant because opinion evidence from a lay person is generally not admissible.
In building disputes, expert witnesses are typically licensed building inspectors, structural engineers, hydraulic consultants, or other construction professionals. They inspect the property, review relevant documentation, and prepare a detailed report that sets out their findings and opinions. This report becomes part of the evidence before the tribunal.
The expert's overriding duty is to the tribunal. This principle is set out in the [Uniform Civil Procedure Rules 2005](https://legislation.nsw.gov.au/view/html/inforce/current/sl-2005-0418) and is reinforced by NCAT's own practice directions. An expert who appears to be acting as an advocate for one party rather than an independent assessor will quickly lose credibility. For a deeper understanding of how these reports are structured, see our guide on [Expert Witness Reports Explained](/articles/legal-expert-witness-reports-explained).
### What Expert Witnesses Actually Do
The work of an expert witness in a building dispute extends well beyond simply inspecting a property. Their responsibilities typically include:
- Conducting a thorough site inspection and documenting all relevant findings
- Reviewing building plans, specifications, contracts, and correspondence
- Identifying defects and assessing them against the Building Code of Australia (BCA) and relevant Australian Standards
- Preparing a written report that complies with tribunal requirements
- Attending conclave meetings with opposing experts to narrow the issues in dispute
- Giving oral evidence at the hearing and responding to cross-examination
## When Should You Engage an Expert Witness?
Not every building dispute requires an expert witness. For straightforward matters involving minor defects or simple contractual disagreements, the parties may be able to present their case without expert evidence. However, there are several situations where engaging an expert witness becomes highly advisable.
### Technical Disputes
When the dispute involves technical questions about whether work complies with the BCA, Australian Standards, or the manufacturer's installation requirements, an expert witness is almost always necessary. Tribunal members, while experienced in dispute resolution, are not necessarily building professionals. They need expert guidance to understand whether a particular construction method meets the required standard.
### Structural Defects
Disputes involving structural defects such as cracking, foundation movement, load-bearing wall modifications, or roof framing issues require expert analysis. Structural defects can have serious safety implications, and the tribunal will want to understand the cause, the severity, and the cost of rectification. Our article on [structural defect inspections](/articles/structural-defect-inspections-to-prevent-future-problems) provides more background on how these assessments work.
### Waterproofing and Moisture Issues
Waterproofing failures are among the most common building defects in NSW. Disputes about leaking showers, rising damp, roof leaks, and inadequate drainage almost always benefit from expert evidence. The expert can determine whether the waterproofing was installed in accordance with AS 3740 and whether the defect is likely to cause ongoing damage.
### Quantifying Damages
Even when liability is not in dispute, the parties may disagree about the cost of rectification. An expert witness can prepare a detailed scope of work and cost estimate, often presented in the form of a [Scott Schedule](/articles/how-scott-schedules-strengthen-construction-dispute-cases). This document itemises each defect, the proposed rectification method, and the estimated cost, making it easier for the tribunal to assess the claim.
## Fact Witnesses vs Expert Witnesses
Understanding the difference between a fact witness and an expert witness is important for anyone involved in NCAT proceedings. The two roles are distinct, and confusing them can undermine your case.
| Aspect | Fact Witness | Expert Witness |
| --------------------------- | ----------------------------------------------------------- | -------------------------------------------------------------------------- |
| **What they provide** | Evidence about what they personally observed or experienced | Opinions based on specialised knowledge, training, or experience |
| **Duty** | To tell the truth about what they saw or did | Overriding duty to the tribunal to provide independent, objective opinions |
| **Qualifications required** | None beyond having relevant knowledge of the facts | Must have recognised qualifications and experience in their field |
| **Can they give opinions?** | Generally no, unless it is a common-sense observation | Yes, within their area of expertise |
| **Report format** | Witness statement or statutory declaration | Formal expert report complying with tribunal practice directions |
| **Cross-examination** | Can be cross-examined on the facts they observed | Can be cross-examined on their methodology, reasoning, and opinions |
A homeowner can give evidence as a fact witness about what they observed (for example, water appearing on the floor after rain). But they cannot give an expert opinion about whether the waterproofing membrane was incorrectly installed. That is the role of the expert witness.
For further reading on how [expert witness reports](/expert-witness-reports) differ from standard inspection reports, see our comparison of [Expert Witness vs Routine Inspection Reports](/articles/expert-witness-vs-routine-inspection-reports).
## How to Choose the Right Expert Witness
Selecting the right expert witness can make a substantial difference to the outcome of your case. Not all building professionals are suited to the expert witness role, and the cheapest option is rarely the best.
### Qualifications and Licensing
Your expert should hold relevant qualifications and, where applicable, a current licence issued by [NSW Fair Trading](https://www.fairtrading.nsw.gov.au/). For building disputes, a licensed builder or building inspector with experience in the type of construction at issue is typically appropriate. For structural matters, a qualified structural engineer is often necessary.
### Tribunal Experience
An expert who has given evidence at NCAT before will understand the procedures, the expectations of tribunal members, and the standard of report that is required. Experience with cross-examination is particularly valuable. An expert who becomes flustered or defensive under questioning can weaken your case, regardless of the quality of their written report.
### Independence and Objectivity
The best expert witnesses are those who call it as they see it, even when their findings do not entirely support the case of the party who engaged them. Tribunal members are skilled at identifying experts who have shaded their opinions to favour one side. An expert who acknowledges weaknesses in the case actually enhances their credibility.
### Communication Skills
The ability to explain complex technical concepts in plain language is essential. An expert who buries their opinions in jargon will not help the tribunal reach a clear understanding of the issues. Look for an expert who can communicate effectively in both their written report and their oral evidence.
### Specialisation
Building disputes cover a wide range of issues. An expert who specialises in waterproofing may not be the right choice for a dispute about structural steel connections. Make sure the expert you choose has specific experience with the type of defect or construction issue at the centre of your dispute.
## Preparing Expert Witness Reports for NCAT
The expert witness report is often the single most important piece of evidence in a building dispute. A well-prepared report can resolve issues before the hearing even begins. A poorly prepared report can cost you the case.
### Report Structure
NCAT expects expert reports to follow a particular structure. While the exact requirements may vary depending on the division and the nature of the dispute, a typical expert report includes:
- The expert's qualifications and experience
- A declaration of the expert's duty to the tribunal
- The instructions received and the documents reviewed
- A description of the site inspection and the methodology used
- Detailed findings, supported by photographs and measurements
- Opinions on each issue, with clear reasoning
- A statement of any assumptions made
- A summary of conclusions
### The Scott Schedule
In many building disputes, the tribunal will direct the parties to prepare a Scott Schedule. This is a table that lists each defect, the claimant's description, the respondent's response, and the expert's opinion. Scott Schedules are an efficient way to organise complex disputes with multiple defects and can significantly streamline the hearing process. For more detail on how these documents work, see our article on [Scott Schedules](/articles/how-scott-schedules-strengthen-construction-dispute-cases).
### Joint Expert Conclaves
NCAT frequently directs the experts engaged by each party to meet in a conclave. The purpose of the conclave is to identify the issues on which the experts agree and those on which they disagree. The experts prepare a joint report that sets out their areas of agreement and disagreement, along with brief reasons for any disagreement.
Conclaves are conducted without the parties or their lawyers present. This is intended to encourage frank discussion between the experts without external pressure. The joint report produced after a conclave can narrow the issues for hearing and sometimes leads to settlement.
## Cross-Examination and the Hearing Process
Giving oral evidence at NCAT can be challenging, even for experienced expert witnesses. Understanding the process helps both the expert and the party engaging them prepare effectively.
### How the Hearing Works
At the hearing, each party presents their case. The applicant (the party who brought the claim) goes first, followed by the respondent. Expert witnesses are typically called to give evidence after the fact witnesses. The expert's report stands as their evidence-in-chief, which means they do not usually need to repeat everything in the report. Instead, they may be asked to summarise their key findings and address any updates since the report was prepared.
### Cross-Examination
After giving their evidence, the expert will be cross-examined by the other party or their legal representative. Cross-examination is designed to test the expert's opinions, methodology, and credibility. Common cross-examination techniques include:
- Challenging the expert's qualifications or experience with the specific type of defect
- Questioning the methodology used during the inspection
- Putting alternative interpretations of the evidence to the expert
- Highlighting any inconsistencies between the written report and oral evidence
- Asking the expert to comment on the opposing expert's findings
A good expert witness remains calm, listens carefully to each question, and provides clear, measured responses. They do not become argumentative or defensive, and they are willing to make concessions where the evidence supports it.
### Hot-Tubbing
NCAT sometimes uses a process called "hot-tubbing" or concurrent evidence, where both experts give evidence at the same time. The tribunal member asks questions, and the experts respond in turn. This process allows the tribunal to compare the experts' views directly and can be highly effective at getting to the heart of technical disagreements.
## Common Types of Building Disputes at NCAT
Building disputes at NCAT cover a broad range of issues. Understanding the most common types can help you assess whether your situation is likely to benefit from expert witness support.
### Defective Residential Building Work
This is the most common category of building dispute at NCAT. Claims typically involve defects such as cracking walls, water ingress, poorly finished work, non-compliant installations, and structural inadequacies. The [Home Building Act 1989](https://legislation.nsw.gov.au/view/html/inforce/current/act-1989-147) provides statutory warranties that protect homeowners against defective work for specified periods.
### Incomplete Work
Disputes arise when a builder fails to complete the contracted work. This can occur when a builder abandons a project, when the relationship between the parties breaks down, or when there is a disagreement about what was included in the scope of work. Expert evidence can help establish the extent of incomplete work and the cost of completion.
### Variations and Extras
Disagreements about variations to the original contract are common. A homeowner may claim that additional work was included in the contract price, while the builder says it was an extra. Expert witnesses can provide opinions on whether the work in question falls within the original scope or constitutes a variation.
### Strata and Body Corporate Disputes
Building disputes in strata schemes can involve the owners corporation, individual lot owners, and the original builder or developer. These disputes often concern common property defects, and expert witnesses play an important role. For more on this topic, see our article on [Expert Witnesses in Body Corporate Disputes](/articles/expert-witnesses-body-corporate-building-disputes).
### Insurance Claims
When building defects are covered by home building compensation insurance or other policies, disputes can arise about the scope of the insured work, the cause of the defect, or the cost of rectification. Expert witnesses help clarify these issues for the tribunal.
## Cost Considerations for Expert Witnesses
Engaging an expert witness involves costs, and it is important to understand what these are before committing to the process.
### Typical Cost Components
Expert witness costs generally include fees for the initial site inspection, report preparation, attendance at conclaves, and appearance at the hearing. Fees vary depending on the complexity of the dispute, the number of defects, the size of the property, and the experience of the expert.
For straightforward residential disputes, a basic expert report might cost between $2,000 and $5,000. More complex matters involving multiple defects, large properties, or specialist issues such as structural engineering assessments can cost significantly more.
### Can You Recover Expert Costs?
If you are successful at NCAT, you may be able to recover some or all of your expert witness costs from the other party. NCAT has the power to make costs orders, although the tribunal generally follows a principle that each party bears their own costs in the Consumer and Commercial Division. In certain circumstances, such as where one party has acted unreasonably, the tribunal may order that party to pay the other's costs, including expert fees.
### Weighing the Cost Against the Benefit
The cost of an expert witness should be weighed against the potential benefit. In a dispute involving tens or hundreds of thousands of dollars in defective work, the cost of an expert report is a relatively small investment. Without expert evidence, you may struggle to prove the technical aspects of your case, and the tribunal may not have sufficient information to award the full amount of your claim.
## Tips for Working With Your Expert Witness
To get the best outcome from your expert witness engagement, keep the following points in mind:
- Provide all relevant documents to the expert at the outset, including the building contract, plans, specifications, variations, correspondence, and any previous reports
- Be upfront about both the strengths and weaknesses of your case
- Allow the expert sufficient time to conduct a thorough inspection and prepare their report
- Do not attempt to influence the expert's opinions or ask them to change their findings
- Discuss the expert's findings with your lawyer before the hearing so that you understand how the evidence fits into your overall case strategy
## Frequently Asked Questions
### What is NCAT and what types of building disputes does it handle?
NCAT is the NSW Civil and Administrative Tribunal, an independent body that resolves disputes including those related to residential building work.
NCAT's Consumer and Commercial Division handles most building and construction disputes in New South Wales. These include claims for defective building work, incomplete work, variations disputes, and breaches of statutory warranties under the Home Building Act 1989.
The tribunal provides a less formal and generally less expensive alternative to court proceedings. Homeowners, builders, and contractors can bring claims to NCAT for matters involving up to $500,000. For a more detailed overview, see our guide on [Understanding NCAT](/articles/understanding-nsw-civil-and-administrative-tribunal-ncat).
### Do I need an expert witness for my NCAT building dispute?
Not every building dispute requires an expert witness, but most disputes involving technical issues will benefit from one.
If your dispute involves questions about whether building work complies with the BCA, Australian Standards, or the manufacturer's specifications, expert evidence is strongly recommended. The same applies to disputes involving structural defects, waterproofing failures, or any issue where the tribunal needs specialised knowledge to understand the problem.
For simple contractual disputes, such as a disagreement about whether a particular item was included in the contract, you may be able to present your case without expert evidence. However, even in these situations, an expert opinion on the quality of the work can strengthen your position.
### How much does an expert witness cost for an NCAT building dispute?
Expert witness fees vary depending on the complexity of the dispute, but a basic report for a residential matter typically costs between $2,000 and $5,000.
More complex disputes involving multiple defects, large properties, or specialist assessments can cost considerably more. The total cost will also depend on whether the expert needs to attend a conclave, prepare a supplementary report, or give oral evidence at the hearing. It is worth discussing fees and payment arrangements with your chosen expert before the engagement begins.
### Can I recover expert witness costs if I win at NCAT?
NCAT has the power to make costs orders, but the general principle in the Consumer and Commercial Division is that each party bears their own costs.
In certain circumstances, such as where one party has acted unreasonably or has caused unnecessary delay, the tribunal may order that party to pay the other's costs. If costs are awarded, they may include reasonable expert witness fees. It is worth discussing the likelihood of a costs order with your legal representative.
### What qualifications should an expert witness have?
An expert witness should hold relevant qualifications and licensing in their area of expertise, along with practical experience in the type of construction at issue.
For building disputes, a licensed builder or building inspector with experience in residential construction is typically appropriate. For structural issues, a qualified structural engineer is usually required. The expert should also have experience preparing reports for tribunal proceedings and giving oral evidence under cross-examination. A strong track record of independence and objectivity is just as important as technical qualifications.
### What is a Scott Schedule and why is it used?
A Scott Schedule is a tabular document that itemises each defect, the parties' positions, and the expert's opinion, making it easier for the tribunal to assess complex claims.
NCAT frequently directs parties to prepare a Scott Schedule in building disputes involving multiple defects. The schedule typically includes columns for the defect description, the claimant's position, the respondent's position, the expert's opinion, and the estimated cost of rectification. This format allows the tribunal to work through each issue systematically. For a detailed explanation, see our article on [Scott Schedules](/articles/how-scott-schedules-strengthen-construction-dispute-cases).
### What happens during cross-examination of an expert witness?
Cross-examination is the process by which the opposing party tests the expert's opinions, methodology, and credibility through questioning.
During cross-examination, the other party or their legal representative will ask questions designed to challenge the expert's findings. They may question the inspection methodology, point out inconsistencies, suggest alternative interpretations, or challenge the expert's qualifications. A well-prepared expert witness will remain calm, answer questions directly, and make reasonable concessions where the evidence supports them. The quality of an expert's performance under cross-examination can significantly influence the tribunal's assessment of their evidence.
### What is the difference between a fact witness and an expert witness?
A fact witness gives evidence about what they personally saw or experienced, while an expert witness provides opinions based on specialised knowledge and qualifications.
Homeowners typically act as fact witnesses in building disputes. They can describe what they observed, such as water appearing on a floor or cracks developing in walls. However, they cannot give opinions about the cause of the defect or whether the work complies with building standards. That is the role of the expert witness, who draws on their training, qualifications, and experience to form professional opinions. For more on this distinction, see our guide on [Expert Witness vs Routine Inspection Reports](/articles/expert-witness-vs-routine-inspection-reports).
### Can both parties use the same expert witness?
Yes, NCAT can appoint a single expert to report on the issues in dispute, and the parties can also agree to use a jointly appointed expert.
A single expert can reduce costs and streamline proceedings. However, in more complex disputes, each party usually engages their own expert. When there are two experts, NCAT will often direct them to meet in a conclave to identify areas of agreement and disagreement. The resulting joint report helps the tribunal focus on the genuinely contested issues.
### How long does an NCAT building dispute take to resolve?
The timeline varies depending on the complexity of the dispute, but most building disputes at NCAT take between three and twelve months from lodgement to final determination.
Simpler matters may be resolved at an early directions hearing or through mediation. More complex disputes involving expert evidence, conclaves, and a contested hearing will take longer. Factors that can extend the timeline include the availability of experts, the need for supplementary reports, and the tribunal's hearing schedule. NCAT aims to resolve matters as efficiently as possible, but parties should be prepared for the process to take several months.
### What is hot-tubbing in NCAT proceedings?
Hot-tubbing, also called concurrent evidence, is a process where both experts give evidence at the same time, allowing the tribunal to compare their views directly.
In a hot-tubbing session, the tribunal member asks questions on specific issues, and each expert responds in turn. The experts may also question each other. This process can be highly effective at clarifying technical disagreements and helping the tribunal understand where the experts genuinely differ. It is becoming increasingly common in NCAT building disputes as a way to make the hearing process more efficient.
### Should I get legal representation for my NCAT building dispute?
While you are not required to have a lawyer at NCAT, legal representation can be beneficial, especially in complex disputes involving significant amounts.
A lawyer experienced in building and construction disputes can help you understand your rights, prepare your case, engage the right expert witness, and present your arguments effectively at the hearing. For smaller claims, you may choose to represent yourself, but it is still worth obtaining legal advice before the hearing to ensure you understand the process and the strength of your case.
## Key Takeaways
- NCAT is the primary tribunal for resolving residential building disputes in NSW, handling claims up to $500,000 under the Home Building Act 1989.
- Expert witnesses provide independent, objective opinions to help the tribunal understand technical building issues that fall outside ordinary knowledge.
- Engaging an expert witness is strongly recommended for disputes involving structural defects, waterproofing failures, code compliance issues, or the quantification of damages.
- The expert's overriding duty is to the tribunal, not to the party who engaged them, and their independence is what gives their evidence weight.
- A well-prepared expert report that complies with NCAT's requirements can be the most influential piece of evidence in your case.
- Scott Schedules and expert conclaves are common tools used in NCAT building disputes to organise evidence and narrow the issues.
- When choosing an expert witness, look for relevant qualifications, tribunal experience, communication skills, and a reputation for independence.
- The cost of an expert witness is generally a worthwhile investment when weighed against the potential value of the claim.
If you are dealing with a building dispute in NSW, [contact Owner Inspections](/expert-witness-reports) to speak with a licensed building inspector who can provide expert witness support for your NCAT case.
For a complete overview, see our [guide to expert witness reports for building disputes](/guides/expert-witness-building-disputes-guide).
### Black Mould Myths: Separating Fact from Fiction in Mould Inspections
Source: https://ownerinspections.com.au/articles/black-mold-myths-unveiling-the-truth-in-mould-inspections
Published: 2024-04-02 | Updated: 2026-01-30 | Category: Mould Inspections
Author: Maison Azdari
Black mould has earned a fearsome reputation among Australian homeowners. The very mention of it conjures images of toxic spores, condemned houses, and serious illness. While mould growth should always be taken seriously, much of what people believe about black mould is exaggerated or outright wrong.
Misinformation about mould leads to two equally dangerous outcomes. Some property owners panic and spend thousands on unnecessary treatments, while others dismiss genuine mould problems because they do not see the dreaded "black" variety. Both responses can cause harm to your health and your property.
> According to NSW Health, prolonged exposure to any type of indoor mould can trigger respiratory symptoms, allergic reactions, and worsen asthma. The colour of the mould is not a reliable indicator of how dangerous it is.
This article tackles the most persistent myths about black mould, presents the facts backed by Australian health authorities and building science, and explains why [professional mould inspections](/mould-inspections) are the only reliable way to assess mould risk in your property.
## Myth 1: Only Black Mould Is Dangerous
This is arguably the most widespread and harmful myth about mould. Many people believe that unless mould appears black, it poses no real threat. This belief is completely false.
Mould comes in a wide range of colours, including white, green, grey, brown, orange, and black. The colour of mould depends on the species, the surface it grows on, and environmental conditions. A single mould species can even appear in different colours depending on these factors.
### The Truth About Mould Colours
The species most commonly referred to as "black mould" is _Stachybotrys chartarum_. It produces mycotoxins that can cause health problems with prolonged exposure. But _Stachybotrys_ is just one of thousands of mould species that can grow indoors.
_Aspergillus_, which often appears green or white, is one of the most common indoor moulds in Australia and can cause serious respiratory infections, particularly in people with weakened immune systems. _Cladosporium_, typically olive-green or brown, is another frequent offender that triggers allergic reactions and asthma attacks.
Relying on colour alone to judge danger is a mistake. A [comprehensive mould inspection](/articles/mould-inspection-guide) uses laboratory analysis to identify the exact species present and assess the actual risk to occupants.
## Myth 2: Black Mould Causes Cancer
Fear-driven media reports have led many Australians to believe that black mould exposure directly causes cancer. Current scientific evidence does not support this claim.
The International Agency for Research on Cancer (IARC), which operates under the World Health Organisation, has not classified any mould species as a known or probable human carcinogen. While some mycotoxins produced by certain moulds have shown carcinogenic potential in animal studies at extremely high doses, these conditions do not reflect typical household exposure.
### What Black Mould Actually Does to Your Health
That said, mould exposure is far from harmless. The genuine health risks associated with indoor mould are serious enough without exaggeration. According to [NSW Health](https://www.health.nsw.gov.au/environment/factsheets/Pages/mould.aspx), common health effects of mould exposure include:
- Nasal congestion and sinus irritation
- Coughing, wheezing, and shortness of breath
- Eye irritation and watery eyes
- Skin rashes and irritation
- Worsening of existing asthma
- Allergic reactions ranging from mild to severe
- Respiratory infections in immunocompromised individuals
People with pre-existing respiratory conditions, allergies, or weakened immune systems are at greater risk. Young children and the elderly are also more vulnerable to mould-related health effects.
The focus should be on reducing all indoor mould exposure, not just worrying about one particular colour.
## Myth 3: Small Amounts of Mould Are Harmless
Some property owners spot a small patch of mould on a bathroom ceiling or window sill and assume it is not worth worrying about. This casual attitude can lead to much bigger problems down the track.
Visible mould is often just the tip of the iceberg. A small patch on a surface frequently indicates a larger colony growing behind walls, under flooring, or within ceiling cavities. Mould spreads through microscopic spores that travel through the air and settle on new surfaces, meaning a minor visible issue can represent a significant hidden infestation.
### Why Small Mould Growth Matters
Even genuinely small amounts of mould release spores into your indoor air. In a sealed modern home with limited ventilation, these spores accumulate and degrade air quality over time.
A study referenced by the [Australian Institute of Health and Welfare](https://www.aihw.gov.au) found that Australians spend approximately 90% of their time indoors. That means any mould growth, no matter how small, contributes to the air you breathe for most of the day.
Small mould patches also indicate a moisture problem. Where there is enough moisture to support visible mould, conditions are right for more extensive growth in concealed areas. A [professional mould inspection](/articles/mould-inspection-techniques-tools-and-methods) can determine whether surface mould is an isolated issue or a symptom of a deeper problem.
## Myth 4: Bleach Kills All Mould
Reaching for a bottle of bleach is the default response for many homeowners who discover mould. While bleach can remove mould stains from hard, non-porous surfaces, it is far less effective than most people think.
### Why Bleach Falls Short
Bleach works on the surface only. On porous materials such as timber, plasterboard, grout, and carpet, bleach cannot penetrate deep enough to reach mould roots (called hyphae) that grow into the material. The surface appears clean, but the mould regrows within days or weeks.
Bleach is primarily water. Once the chlorine component evaporates, the remaining water actually adds moisture to the affected area, potentially feeding the mould you are trying to eliminate.
Using bleach on mould also creates a false sense of security. The visible stain disappears, so the homeowner assumes the problem is solved. In reality, the mould continues to grow and release spores beneath the surface.
Professional mould remediation uses specialised antifungal treatments designed to penetrate porous materials and eliminate mould at its source. For properties in humid climates, such as those in [Sydney](/articles/key-to-combatting-mould-growth-in-sydney-homes) or along the [Gold Coast](/articles/mould-inspections-your-key-to-a-healthy-gold-coast-home), professional treatment is particularly important because conditions favour rapid regrowth.
## Myth 5: Homes Can Be 100% Mould-Free
Some mould remediation companies market their services with the promise of a completely mould-free home. This is misleading at best.
[Mould](https://en.wikipedia.org/wiki/Mold) spores are a natural part of the environment. They exist in outdoor air, and they enter homes through doors, windows, ventilation systems, and on clothing and pets. It is impossible to eliminate all mould spores from any indoor environment.
### What Is Achievable
The realistic goal is not a mould-free home but a mould-controlled home. This means keeping indoor mould spore levels at or below outdoor ambient levels, eliminating active mould colonies, and controlling moisture to prevent new growth.
Achieving this requires a combination of strategies:
- Maintaining indoor humidity below 60% (ideally between 30% and 50%)
- Ensuring adequate ventilation in bathrooms, kitchens, and laundry areas
- Fixing plumbing leaks and water ingress promptly
- Using exhaust fans and ensuring they vent to the outside, not into roof cavities
- Cleaning and maintaining air conditioning systems regularly
- Addressing condensation issues on windows and cold surfaces
A professional mould inspection establishes a baseline of your indoor mould levels and identifies specific areas requiring attention. This data-driven approach is far more effective than chasing the impossible goal of zero mould.
## The Mould Myths vs Facts at a Glance
| Myth | Fact |
| -------------------------------------- | --------------------------------------------------------------------------------------------------------- |
| Only black mould is dangerous | Mould of any colour can cause health problems. Species identification requires lab testing. |
| Black mould causes cancer | No mould species is classified as a known human carcinogen by the IARC. |
| Small amounts of mould are harmless | Even small visible patches indicate moisture problems and release spores that affect air quality. |
| Bleach kills all mould | Bleach only works on non-porous surfaces and cannot reach mould roots in porous materials. |
| Homes can be 100% mould-free | Mould spores exist naturally in the environment. The goal is control, not elimination. |
| You can identify mould type by colour | Mould colour varies by species, surface, and conditions. Lab analysis is needed for identification. |
| Mould only grows in old homes | New homes with poor ventilation or building defects are equally susceptible to mould growth. |
| Painting over mould solves the problem | Paint traps moisture and mould continues to grow underneath, eventually breaking through the new coating. |
## How Moisture Drives Mould Growth
Every mould myth traces back to one fundamental truth: mould needs moisture to grow. Without addressing moisture, no amount of cleaning, painting, or treating will solve a mould problem permanently.
### Common Moisture Sources in Australian Homes
Australian homes face specific moisture challenges depending on their location and construction type. Coastal properties deal with salt air and high ambient humidity. Homes in subtropical regions such as Brisbane and the Gold Coast experience prolonged periods of warm, humid weather. Even properties in cooler climates like Melbourne and Hobart can develop condensation-related mould during winter.
The most common sources of moisture that lead to mould growth include:
- Leaking roofs and deteriorated flashing
- Rising damp from inadequate damp-proof courses
- Plumbing leaks in concealed pipework
- Poor drainage around foundations
- Inadequate bathroom and kitchen ventilation
- Blocked or absent subfloor ventilation
- Air conditioning condensate issues
- Flooding and storm damage
A thorough [mould inspection](/articles/mould-inspection-for-home-damage) identifies the moisture source driving mould growth. Without finding and fixing the source, remediation efforts will only provide temporary relief.
## Why Professional Mould Inspections Matter
Given the myths and misinformation surrounding mould, professional inspections provide the objective, science-based assessment that property owners need to make informed decisions.
### What a Professional Inspection Includes
A qualified mould inspector uses [specialised tools and techniques](/articles/mould-inspection-techniques-tools-and-methods) to assess your property thoroughly. The inspection typically covers:
- Visual assessment of all accessible areas, including roof cavities, subfloor spaces, and wall cavities where possible
- Moisture mapping using thermal imaging cameras and pin-type or pinless moisture meters
- Air sampling to measure airborne mould spore concentrations
- Surface sampling of suspected mould growth for laboratory identification
- Assessment of ventilation systems and humidity levels
- Identification of moisture sources and water ingress points
- Detailed reporting with species identification, risk assessment, and remediation recommendations
### The Value of Accurate Information
Professional inspections replace guesswork and fear with data. Instead of assuming that dark discolouration is deadly black mould, you get laboratory confirmation of exactly which species are present and at what concentrations. This information determines whether remediation is urgent, what methods are appropriate, and whether the property is safe for occupants during the process.
For landlords and property managers, professional inspection reports also provide documentation that may be needed to demonstrate compliance with tenant health and safety obligations under Australian residential tenancy laws.
## Identifying High-Risk Areas in Your Property
Some areas of your home are more prone to mould growth than others. Knowing where to look can help you catch problems early, but a professional inspection remains essential for areas you cannot easily access or assess.
### Bathrooms and Ensuites
These rooms combine warmth, moisture, and organic materials (grout, sealant, timber framing). Mould commonly develops on ceiling surfaces, in tile grout, behind shower walls, and under vanity units. Extractor fans that vent into the roof cavity rather than outside are a frequent cause of mould in ceiling spaces.
### Kitchens and Laundries
Steam from cooking and clothes drying creates elevated humidity. Dishwasher and washing machine connections are common leak points. Mould often grows behind appliances and inside cabinets against external walls.
### Bedrooms and Living Areas
Bedrooms generate significant moisture from breathing during sleep. Wardrobes against external walls are prone to condensation and mould, especially in poorly insulated homes. Carpeted areas near external walls can harbour mould growth that is invisible from the surface.
### Roof Cavities and Subfloors
These areas are rarely inspected by homeowners but are among the most common locations for extensive mould growth. Roof leaks, condensation from uninsulated ductwork, and inadequate subfloor ventilation create ideal conditions for mould to thrive undetected.
## When to Book a Mould Inspection
Certain situations call for an immediate professional mould assessment. Do not rely on visual inspection alone in any of these circumstances:
- You notice a persistent musty or earthy smell in any part of the property
- Visible mould appears on walls, ceilings, or other surfaces
- The property has experienced flooding, a burst pipe, or a roof leak
- Occupants report unexplained respiratory symptoms, allergic reactions, or skin irritation
- You are purchasing a property and want to assess mould risk before settlement
- The property has been unoccupied for an extended period
- Renovations have revealed mould behind walls or under flooring
- Condensation regularly forms on windows and cold surfaces
Early detection saves money and protects health. A mould problem caught at the inspection stage is far cheaper and simpler to address than one discovered after it has spread throughout wall cavities and structural timbers.
## Frequently Asked Questions
### What are the signs of hidden mould in a property?
Hidden mould often reveals itself through musty or earthy odours that persist even after cleaning. Unexplained health symptoms among occupants, such as recurring sinus infections, coughing, or skin irritation, can also indicate concealed mould. Physical signs include bubbling or peeling paint, warped skirting boards, and discolouration on walls or ceilings. Elevated humidity readings in specific areas and condensation on windows are also indicators.
### How often should a mould inspection be carried out?
For most Australian homes, an annual mould inspection is sufficient as a preventive measure. Properties in high-humidity areas such as coastal Queensland or tropical regions benefit from inspections every six months. Any property that has experienced water damage, flooding, or a known leak should be inspected as soon as possible after the event, regardless of when the last inspection occurred.
### Can mould grow in cold environments?
Yes. While mould grows faster in warm conditions, many species can grow at temperatures as low as 2 degrees Celsius. In colder climates, mould frequently develops on surfaces where warm indoor air meets cold external walls, creating condensation. This is common in poorly insulated homes during winter months in Melbourne, Canberra, and Hobart.
### What should I do if renovations reveal mould behind walls?
Stop work immediately and ventilate the area by opening windows and doors. Do not attempt to scrape or disturb the mould, as this releases large quantities of spores into the air. Contact a professional mould inspector to assess the extent of the growth, identify the species, and recommend a remediation plan before construction resumes. Disturbing large mould colonies without proper containment can contaminate the entire property.
### Is dead mould still a health risk?
Yes. Dead mould spores remain allergenic and can still trigger respiratory symptoms, allergic reactions, and asthma attacks. Simply killing mould with chemicals is not enough. The dead material must be physically removed from the affected surfaces. This is one reason why professional remediation is recommended over DIY approaches that focus only on killing mould.
### What are the legal implications of mould in rental properties?
In Australia, landlords have a legal obligation to provide properties that are fit for habitation. Under the Residential Tenancies Act in each state and territory, tenants can request repairs for mould caused by building defects such as leaks or inadequate ventilation. If a landlord fails to address mould issues after being notified, tenants may apply to the relevant tribunal for orders. Landlords who ignore mould problems risk compensation claims, tribunal orders, and potential penalties.
### How do I prevent mould growth after flooding?
Time is critical after flooding. Remove standing water as quickly as possible using pumps and wet vacuums. Strip out saturated carpets, underlay, and any plasterboard that has absorbed water. Run dehumidifiers and fans continuously until all materials are completely dry, which typically takes several days. Do not seal up the affected area until a professional has confirmed that moisture levels have returned to acceptable ranges. Mould can begin growing within 24 to 48 hours of water exposure.
### Which building materials are most vulnerable to mould?
Porous and organic materials are most susceptible. Plasterboard (gyprock) is particularly vulnerable because it absorbs moisture readily and the paper facing provides a food source for mould. Timber framing, MDF, particle board, carpet, and carpet underlay are also high-risk materials. Natural fibre insulation, ceiling tiles, and wallpaper provide ideal conditions for mould growth when moisture is present.
### Is it safe to stay in a property during mould remediation?
It depends on the scale of the remediation and the species involved. For small, localised areas being treated professionally, occupants can typically remain in other parts of the property while the affected area is sealed with containment barriers. For larger remediation projects or where toxic species such as _Stachybotrys chartarum_ are confirmed, temporary relocation may be recommended, particularly for children, elderly occupants, pregnant women, and anyone with respiratory conditions or compromised immune systems.
### Can mould return after professional remediation?
Mould can return if the underlying moisture source is not resolved. Professional remediation removes existing mould and treats affected surfaces, but it cannot prevent future growth if conditions remain favourable. Successful long-term mould prevention requires fixing the moisture source, improving ventilation, and maintaining appropriate indoor humidity levels. A good mould remediation company will address the root cause as part of their service, not just treat the symptoms.
### How accurate are DIY mould testing kits?
DIY mould testing kits available from hardware stores have significant limitations. Settle plate tests (petri dish kits) collect whatever spores happen to land on them, providing unreliable results that do not represent actual indoor air quality. They cannot identify species or quantify spore concentrations accurately. Professional air sampling and surface swab analysis conducted by accredited laboratories provide far more accurate and actionable results.
### Does insurance cover mould damage in Australia?
Most standard home insurance policies in Australia do not cover mould damage that results from gradual deterioration, poor maintenance, or lack of ventilation. Mould caused by a sudden, accidental event such as a burst pipe or storm damage may be covered under building or contents insurance, depending on your policy. Check your Product Disclosure Statement or contact your insurer for specific details. Documenting mould issues with a professional inspection report strengthens any insurance claim.
## Take the Next Step
If you suspect mould in your property or simply want peace of mind, a professional mould inspection provides the clarity you need. Our licensed inspectors use laboratory-grade testing and thermal imaging to identify mould species, locate moisture sources, and deliver a detailed report with actionable recommendations.
[Book a professional mould inspection](/mould-inspections) today and get the facts about your property's mould risk.
### The Importance of Home and Building Inspections
Source: https://ownerinspections.com.au/articles/the-importance-of-home-and-building-inspections
Published: 2024-03-26 | Updated: 2026-02-09 | Category: Building Inspections
Author: Maison Azdari
A building inspection is a detailed visual assessment of a property's structural condition, major systems, and overall state, carried out by a qualified inspector following Australian Standard AS 4349.1. In Australia, where the NSW Government found that 53% of buildings registered between July 2016 and June 2022 had serious defects, inspections are one of the most effective ways to identify hidden problems before they cost you thousands of dollars. Whether you are buying, selling, or maintaining a property, a professional inspection gives you the facts you need to make informed decisions.
Purchasing a home is one of the largest financial commitments most Australians will make. Even properties that appear flawless on the surface can hide costly structural defects, pest activity, faulty wiring, or plumbing problems. A building inspection removes the guesswork. It gives buyers leverage in negotiations, gives sellers transparency, and gives homeowners a clear picture of what needs attention now and what can wait.
## What Is a Building Inspection?
A building inspection is a comprehensive visual examination of a property's accessible areas, conducted by a licensed and qualified inspector. The inspector assesses structural soundness, identifies defects, checks compliance with building standards, and documents findings in a detailed report with photographs and recommendations.
In Australia, building inspections follow Australian Standard AS 4349.1, which outlines the scope, methodology, and reporting requirements. The inspector examines all reasonably accessible areas of the property but does not carry out invasive testing such as drilling into walls or lifting floor coverings unless specifically agreed.
## Types of Building Inspections
## Benefits for Buyers
A [pre-purchase inspection](/articles/pre-purchase-inspections-guide-sydney) is one of the smartest investments you can make before buying a property.
## Benefits for Sellers
A [pre-sale inspection](/articles/pre-sale-property-inspection) helps sellers take control of the process.
## Benefits for Property Owners
Even if you are not buying or selling, regular inspections protect your investment.
## What Does a Building Inspector Check?
A qualified building inspector examines the following areas during a standard inspection:
### Structural Components
### Exterior
### Interior
### Systems
### Other
## Choosing the Right Building Inspector
Not all inspectors are equal. When selecting a building inspector, consider the following:
For a complete overview, see our [guide to pre-purchase building and pest inspections](/guides/pre-purchase-building-pest-inspection-guide).
### How Do Scott Schedules Strengthen Construction Dispute Cases?
Source: https://ownerinspections.com.au/articles/how-scott-schedules-strengthen-construction-dispute-cases
Published: 2024-03-21 | Updated: 2026-01-30 | Category: Expert Witness
Author: Maison Azdari
Construction disputes in Australia often involve dozens of individual defect claims, each with its own set of facts, evidence, and costings. Without a clear system for organising these claims, tribunal and court proceedings can become disjointed and difficult to follow. This is where Scott Schedules come into play.
A Scott Schedule is a tabular document that presents each item of claim alongside the corresponding response from the opposing party. It forces both sides to address each issue individually, creating a clear framework for decision-makers. In jurisdictions such as New South Wales, the [NSW Civil and Administrative Tribunal (NCAT)](https://ncat.nsw.gov.au/) regularly directs parties to prepare Scott Schedules in building and construction matters.
This guide explains the origin, structure, and practical application of Scott Schedules in Australian construction disputes. Whether you are a homeowner pursuing a defect claim or a builder responding to allegations, understanding how to use a Scott Schedule effectively can significantly improve your position.
> A well-prepared Scott Schedule does more than list defects. It tells the story of each claim in a structured format that allows a tribunal member or judge to assess liability and quantum item by item, without having to piece together information from multiple sources.
## What is a Scott Schedule?
A Scott Schedule is a structured table used in construction litigation and dispute resolution to present individual items of claim in an organised, side-by-side format. Each row represents a single issue or defect, with columns allowing both the claimant and respondent to set out their respective positions.
The format takes its name from a practice direction issued by George Scott, an Official Referee in the United Kingdom courts, during the early twentieth century. Scott recognised that construction disputes often involve numerous small claims that, when presented in traditional pleading format, became unwieldy and confusing. His tabular approach allowed courts to deal with each item efficiently.
### Adoption in Australia
Australian courts and tribunals adopted the Scott Schedule format because it addresses the same challenges present in local construction disputes. The [NCAT](https://ncat.nsw.gov.au/) frequently orders parties to prepare Scott Schedules in its Consumer and Commercial Division, particularly in home building disputes under the _Home Building Act 1989_ (NSW).
The format is also used in the NSW Supreme Court and District Court, as well as in tribunals across other states including VCAT in Victoria and QCAT in Queensland. Its widespread adoption reflects the practical benefits it offers in managing multi-item disputes.
## Structure and Columns of a Scott Schedule
A typical Scott Schedule contains several columns that allow each party to present their case on every individual item. While the exact format may vary depending on the directions of the tribunal or court, the following structure is standard.
| Column | Purpose | Who Completes It |
| ------------------------- | ---------------------------------------------------------------------------------- | ---------------- |
| **Item Number** | Sequential numbering of each defect or claim | Claimant |
| **Description of Claim** | Detailed description of the defect, breach, or issue | Claimant |
| **Claimant's Evidence** | References to photographs, reports, and witness statements supporting the claim | Claimant |
| **Quantum (Claimant)** | The dollar amount claimed for rectification or damages | Claimant |
| **Respondent's Response** | The builder or respondent's position on the claim, including admissions or denials | Respondent |
| **Respondent's Evidence** | References to evidence relied upon by the respondent | Respondent |
| **Quantum (Respondent)** | The respondent's assessment of cost, if different from the claimant | Respondent |
| **Decision** | The tribunal or court's finding on each item | Decision-maker |
### Example Scott Schedule Entry
The following table shows how a single defect item might appear in a completed Scott Schedule.
| Item | Claim | Response | Evidence | Quantum (Claimed) | Quantum (Assessed) | Decision |
| ---- | ------------------------------------------------------------------------------- | --------------------------------------------------------------------------- | -------------------------------------------------- | ----------------- | ------------------ | --------------------------------------------------------------------- |
| 1 | Cracking to external brick wall exceeding acceptable tolerances under AS 4773.2 | Deny. Cracking is within acceptable limits and is due to normal settlement. | Photos 1 to 5, Expert Report (Dr Smith), AS 4773.2 | $8,500 | $0 | Allowed: $7,200. Cracking exceeds tolerances. Rectification required. |
| 2 | Waterproofing failure to main bathroom causing water damage to ceiling below | Admit defect. Dispute quantum. | Photos 6 to 10, Moisture readings report | $4,200 | $2,800 | Allowed: $3,600. Respondent's quote did not include ceiling repair. |
| 3 | Non-compliant balustrade height (below 1000mm as required by NCC) | Deny. Balustrade height is compliant. | Measurement report, Building surveyor certificate | $3,100 | $0 | Dismissed. Measurements confirm compliance. |
This format allows the decision-maker to see at a glance what is in dispute, what evidence supports each position, and the respective costings.
## Benefits of Using Scott Schedules
### Clarity and Organisation
Construction disputes frequently involve 20, 50, or even 100 individual defect items. Presenting these in narrative form through affidavits and submissions can make it extremely difficult for a tribunal member to track each issue. A Scott Schedule eliminates this problem by assigning each claim its own row.
This clarity benefits all parties. The claimant can ensure every issue is captured. The respondent can address each item without risk of overlooking claims. The decision-maker can work through the schedule methodically, making findings on each item in turn.
### Efficiency in Proceedings
Tribunals such as [NCAT](https://ncat.nsw.gov.au/) operate under time constraints. Hearings in the Consumer and Commercial Division are often listed for one to three days, and parties must use that time effectively. A Scott Schedule allows the hearing to focus on genuinely disputed items, as agreed or partially agreed items can be identified quickly.
This efficiency also applies to preparation. Legal representatives and [expert witnesses](/articles/legal-expert-witness-reports-explained) can structure their evidence around the Scott Schedule, ensuring that reports and testimony directly address the items in dispute.
### Improved Communication Between Parties
The Scott Schedule process requires each party to engage with the other side's position on every item. This can promote narrowing of issues before the hearing. When a respondent admits certain defects but disputes the cost, the parties may reach agreement on quantum without needing a determination on those items.
This structured exchange often leads to partial settlements, reducing the number of items that need to be heard. In [NCAT building disputes](/articles/navigating-ncat-building-disputes-with-expert-witness-support), this process can save significant time and cost for both parties.
### Stronger Case Presentation
A properly completed Scott Schedule demonstrates preparation and professionalism. Tribunal members and judges appreciate parties who present their case in a clear, logical format. It signals that the claims have been carefully considered and are supported by evidence.
Conversely, a poorly prepared Scott Schedule, with vague descriptions, missing evidence references, or unsupported costings, can undermine credibility. The format itself creates accountability because each claim must stand on its own merits within the table.
## Limitations of Scott Schedules
### Complexity for Self-Represented Parties
While the format appears straightforward, preparing a comprehensive Scott Schedule requires skill. Self-represented litigants may struggle to describe defects with sufficient technical detail, reference appropriate standards, or provide accurate costings. Without professional guidance, important claims may be inadequately presented.
This is one reason why engaging a qualified building inspector or [expert witness](/articles/expert-witness-vs-routine-inspection-reports) early in the process is valuable. A professional can help identify and describe defects in terms that meet the requirements of the Scott Schedule format.
### Time-Intensive Preparation
Preparing a thorough Scott Schedule takes considerable time. Each item must be described accurately, supported by evidence, and costed appropriately. For disputes involving many defect items, this process can take weeks of preparation.
The respondent must then go through each item and provide their position, which requires its own investment of time and resources. While this preparation ultimately benefits the proceedings, it adds to the front-end cost of litigation.
### Risk of Oversimplification
The tabular format, while promoting clarity, can sometimes oversimplify complex issues. Certain defects may have interconnected causes or cumulative effects that are difficult to capture in a single row. For example, a systemic waterproofing failure may manifest in multiple locations but stem from a single design or construction error.
Parties need to consider whether certain items should be grouped or whether the schedule should include a narrative section explaining relationships between items.
## Application in NSW and NCAT Proceedings
### NCAT Directions
In the Consumer and Commercial Division of [NCAT](https://ncat.nsw.gov.au/), the tribunal regularly issues directions requiring the preparation of a Scott Schedule. These directions typically specify the format, the deadline for the claimant to complete their columns, and the deadline for the respondent to complete their response columns.
Failure to comply with these directions can have consequences. A party who does not complete their portion of the Scott Schedule may find that items are struck out or that adverse inferences are drawn. The tribunal takes compliance with directions seriously, and the Scott Schedule is often central to the management of building dispute proceedings.
For more on how [NCAT handles building disputes](/articles/understanding-nsw-civil-and-administrative-tribunal-ncat), understanding the procedural framework is essential for effective participation.
### Interaction with Expert Evidence
Scott Schedules work hand in hand with [expert witness reports](/expert-witness-reports). In many cases, the expert report provides the technical foundation for the claims set out in the schedule. The expert identifies defects, assesses them against relevant standards such as the [National Construction Code](https://ncc.abcb.gov.au/) and [Australian Standards](https://www.standards.org.au/), and provides costings for rectification.
The Scott Schedule then distils this information into a format that allows the tribunal to deal with each item efficiently. The expert may be called to give evidence on specific disputed items, with the Scott Schedule serving as the roadmap for their testimony.
This relationship between expert reports and Scott Schedules underscores the importance of engaging a qualified professional early. An [expert witness report](/articles/legal-expert-witness-reports-explained) that is structured to align with the Scott Schedule format will be far more effective than one prepared without regard to the eventual format of the proceedings.
## Who Prepares a Scott Schedule?
### Legal Representatives
Solicitors and barristers experienced in construction litigation are typically responsible for the overall preparation of the Scott Schedule. They ensure that each item is described in terms that are legally sufficient and that evidence references are properly documented.
### Expert Witnesses and Building Inspectors
The technical content of the Scott Schedule is usually informed by expert evidence. A building inspector or expert witness will identify defects, describe their nature and severity, reference applicable standards, and provide costings. This technical input forms the backbone of the claimant's columns in the schedule.
In [body corporate disputes](/articles/expert-witnesses-body-corporate-building-disputes), the expert may need to address common property defects that affect multiple lot owners, adding an additional layer of complexity to the schedule.
### The Parties Themselves
In some cases, particularly in NCAT proceedings where legal representation is not mandatory, parties prepare their own Scott Schedules. While this is permissible, the quality of a self-prepared schedule rarely matches that of a professionally prepared one. Parties who choose this route should at minimum obtain a professional building inspection report to support their claims.
## Common Mistakes in Scott Schedule Preparation
### Vague Defect Descriptions
One of the most frequent errors is describing defects in general terms rather than with specificity. A description such as "bad tiling in bathroom" is insufficient. A proper description would state: "Lippage exceeding 2mm between adjacent floor tiles in main bathroom, non-compliant with AS 3958.1, requiring removal and replacement of approximately 12 square metres of floor tiling."
### Missing Evidence References
Each claim in a Scott Schedule should reference the supporting evidence. This includes photographs, measurement data, expert reports, correspondence, and any other material that substantiates the claim. Failing to include these references weakens the claim and makes it harder for the decision-maker to assess.
### Unrealistic Costings
Costings must be based on genuine quotations or expert assessments, not estimates plucked from thin air. Inflated or unsupported costings undermine credibility and may result in the tribunal awarding significantly less than claimed. Conversely, costings that are too low may result in an inadequate award.
### Failure to Reference Applicable Standards
Building defects should be assessed against relevant standards such as the National Construction Code, Australian Standards (e.g., AS 4773.2 for masonry, AS 3740 for waterproofing), and manufacturer specifications. Without these references, the tribunal may have difficulty determining whether a defect actually exists.
### Mixing Multiple Defects in One Item
Each row of the Scott Schedule should deal with a single, discrete issue. Combining multiple defects into one item makes it difficult for the respondent to reply and for the tribunal to make findings. If a bathroom has both waterproofing and tiling issues, these should be separate items.
## Relationship Between Scott Schedules and Expert Witness Reports
The connection between a Scott Schedule and an [expert witness report](/articles/legal-expert-witness-reports-explained) is fundamental to effective dispute resolution. While the two documents serve different purposes, they should be prepared with reference to each other.
An expert witness report provides the detailed technical analysis that supports each item in the Scott Schedule. It sets out the expert's qualifications, methodology, observations, and opinions. The Scott Schedule then condenses this analysis into a format suitable for tribunal proceedings.
When an expert prepares their report knowing that a Scott Schedule will be required, they can structure their findings to align with the schedule format. This means numbering defects consistently, providing individual costings for each item, and referencing applicable standards for each defect.
The distinction between an [expert witness report and a routine inspection report](/articles/expert-witness-vs-routine-inspection-reports) is important here. A standard building inspection report may identify defects but not in the detail or format required for litigation. An expert witness report prepared for use in a Scott Schedule must meet the evidentiary standards of the relevant court or tribunal.
## Tips for Preparing an Effective Scott Schedule
1. **Engage a qualified expert early.** The expert can identify and document defects before the Scott Schedule is required, ensuring that the technical foundation is solid.
2. **Be specific in descriptions.** Use precise language, measurements, and references to standards. Avoid subjective terms and generalisations.
3. **Support every item with evidence.** Photographs, measurement data, expert reports, and correspondence should be referenced for each claim.
4. **Obtain genuine costings.** Use quotations from licensed tradespeople or quantity surveyors rather than rough estimates.
5. **Keep items discrete.** Each row should address a single defect or issue. Group related items if necessary but ensure each can be assessed independently.
6. **Follow tribunal directions precisely.** Comply with the format and deadlines specified in the directions. Non-compliance can result in items being excluded.
7. **Consider the respondent's perspective.** Anticipate likely responses and ensure your evidence addresses potential defences.
8. **Review and refine.** Before filing, review the schedule for consistency, accuracy, and completeness. A second set of eyes, whether from a solicitor or expert, can identify gaps.
## Frequently Asked Questions
###
What is a Scott Schedule in construction disputes?
**Short answer:** A Scott Schedule is a tabular document used in construction litigation to present individual defect claims and responses in an organised, side-by-side format.
A Scott Schedule lists each defect or claim as a separate item, with columns for the claimant's description, evidence, and costings alongside the respondent's position on each item. The format originated in the United Kingdom courts and has been widely adopted in Australian jurisdictions including NCAT, VCAT, and various state courts. It allows decision-makers to assess each item of claim individually rather than navigating lengthy narrative submissions.
###
Is a Scott Schedule mandatory in NCAT building disputes?
**Short answer:** It is not automatically mandatory, but NCAT regularly directs parties to prepare one in building and construction matters.
The tribunal has the power to issue directions about how claims should be presented. In the Consumer and Commercial Division, particularly for home building disputes, a Scott Schedule is the standard format. If the tribunal issues a direction requiring a Scott Schedule, compliance is mandatory. Failure to comply can result in items being struck out or adverse inferences being drawn at the hearing.
###
Who fills in the Scott Schedule first?
**Short answer:** The claimant typically completes their columns first, after which the schedule is provided to the respondent to complete their response columns.
The tribunal's directions will specify deadlines for each party. The claimant describes each defect, provides evidence references, and sets out the quantum claimed. The respondent then addresses each item, either admitting, denying, or partially admitting the claim, and provides their own evidence and quantum assessment. The completed schedule is then filed with the tribunal before the hearing.
###
Can I prepare a Scott Schedule without a lawyer?
**Short answer:** Yes, self-represented parties can prepare their own Scott Schedule, but professional assistance significantly improves the quality and effectiveness of the document.
While NCAT is designed to be accessible to self-represented parties, the technical nature of building defect claims means that professional input is highly beneficial. A qualified building inspector can help identify and describe defects accurately, while a solicitor can ensure the schedule meets procedural requirements. At minimum, obtaining a professional building inspection report will provide the technical foundation needed for the schedule.
###
How many items should a Scott Schedule contain?
**Short answer:** There is no fixed limit, but each item should represent a genuine, discrete defect or claim supported by evidence.
Some Scott Schedules contain fewer than 10 items, while others in large disputes may contain 100 or more. The key is that each item must be a separate, identifiable issue. Avoid padding the schedule with trivial or overlapping claims, as this can frustrate the tribunal and dilute stronger claims. Equally, do not omit legitimate claims to keep the schedule short.
###
How does a Scott Schedule relate to an expert witness report?
**Short answer:** The expert witness report provides the technical foundation and evidence that supports the claims set out in the Scott Schedule.
An [expert witness report](/articles/legal-expert-witness-reports-explained) identifies defects, assesses them against relevant standards, and provides rectification costings. The Scott Schedule then presents this information in a condensed, tabular format suitable for tribunal proceedings. The two documents should be prepared in conjunction so that defect numbering, descriptions, and costings are consistent between them.
###
What happens if the respondent does not complete their part of the Scott Schedule?
**Short answer:** The tribunal may draw adverse inferences, meaning it may accept the claimant's position on items that the respondent has not addressed.
Non-compliance with tribunal directions is taken seriously. If a respondent fails to complete their columns of the Scott Schedule by the specified deadline, the tribunal may proceed on the basis that the claims in those items are not contested. This can result in findings against the respondent on items they chose not to address.
###
Can a Scott Schedule be amended after filing?
**Short answer:** Amendments are possible but generally require the tribunal's leave, particularly if the hearing is approaching.
If new defects are discovered or costings change, a party may apply to amend the Scott Schedule. The tribunal will consider whether the amendment causes prejudice to the other party and whether there is sufficient time for the respondent to address the changes. Early identification and thorough preparation reduce the need for amendments.
###
What standards should be referenced in a Scott Schedule?
**Short answer:** Relevant Australian Standards, the National Construction Code, manufacturer specifications, and applicable state legislation should be referenced for each item.
Common standards referenced in building defect Scott Schedules include AS 3740 (waterproofing), AS 4773.2 (masonry), AS 3958.1 (tiling), AS 1684 (timber framing), and the [National Construction Code](https://ncc.abcb.gov.au/). Referencing the specific clause or section that the work fails to comply with strengthens the claim and assists the tribunal in making its determination.
###
How long does it take to prepare a Scott Schedule?
**Short answer:** Preparation typically takes several weeks, depending on the number of items and the complexity of the defects.
The process involves inspecting the property, documenting defects with photographs and measurements, obtaining expert reports, gathering quotations for rectification, and drafting the schedule itself. For a dispute with 20 to 30 items, expect the process to take two to four weeks from initial inspection to completed schedule. Larger or more complex disputes will take longer.
###
Are Scott Schedules used outside of New South Wales?
**Short answer:** Yes, Scott Schedules are used across Australian jurisdictions including Victoria (VCAT), Queensland (QCAT), and in federal courts.
While the format may vary slightly between jurisdictions, the fundamental concept remains the same. Some tribunals use their own templates or naming conventions, but the side-by-side tabular presentation of claims and responses is a common feature of construction dispute management across Australia.
## Key Takeaways
- A Scott Schedule is a tabular document that organises individual defect claims and responses in a structured format, allowing decision-makers to assess each item independently.
- The format originated in the United Kingdom and has been widely adopted in Australian courts and tribunals, including NCAT, VCAT, and QCAT.
- Each row of the schedule addresses a single defect, with columns for description, evidence, quantum, response, and the tribunal's decision.
- Scott Schedules promote clarity, efficiency, and improved communication between parties, often leading to narrowing of issues and partial settlements before hearing.
- Engaging a qualified expert witness or building inspector early ensures that defect descriptions, evidence, and costings are accurate and professionally presented.
- Common mistakes include vague descriptions, missing evidence references, unrealistic costings, failure to reference applicable standards, and combining multiple defects in a single item.
- The Scott Schedule and expert witness report should be prepared in conjunction, with consistent numbering, descriptions, and costings across both documents.
- Compliance with tribunal directions regarding Scott Schedule preparation and filing deadlines is essential to avoid adverse consequences.
## Take the Next Step
If you are involved in a construction dispute and need professional assistance with defect identification, expert reports, or Scott Schedule preparation, our team of licensed building inspectors can help. We provide detailed building inspection reports and expert witness services that align with the requirements of NCAT and other Australian tribunals.
[Contact us today](/expert-witness-reports) to discuss your dispute and learn how a thorough, professionally prepared Scott Schedule can strengthen your case.
## References and Resources
- [NSW Civil and Administrative Tribunal (NCAT)](https://ncat.nsw.gov.au/)
- [National Construction Code (NCC)](https://ncc.abcb.gov.au/)
- [Standards Australia](https://www.standards.org.au/)
- [Home Building Act 1989 (NSW)](https://legislation.nsw.gov.au/view/html/inforce/current/act-1989-147)
For a complete overview, see our [guide to expert witness reports for building disputes](/guides/expert-witness-building-disputes-guide).
### Termite Trouble: Proven Strategies to Protect Your Aussie Home
Source: https://ownerinspections.com.au/articles/termite-trouble-proven-strategies-to-protect-your-aussie-home
Published: 2024-03-19 | Updated: 2026-02-09 | Category: Mould & Pests
Author: Maison Azdari
Termites cause an estimated $1.5 billion or more in damage to Australian homes every year, and most standard homeowners insurance policies do not cover termite damage. The best protection is a combination of annual professional inspections under Australian Standard AS 4349.3, moisture control around your property, removing timber food sources near the building, and maintaining chemical or physical barriers. Early detection through regular inspections is far cheaper than repairing structural damage after an infestation has taken hold.
Australia's warm, humid climate makes it one of the most termite-prone countries in the world. Species like Coptotermes acinaciformis, Schedorhinotermes, and the Mastotermes darwiniensis (Giant Northern Termite) are responsible for widespread damage to residential properties. These insects work silently inside walls, floors, and roof structures, often causing severe damage before any visible signs appear on the surface. This guide will walk you through how to identify termite activity, prevent infestations, and choose the right treatment if you find them.
## Understanding the Threat
### Common Termite Species in Australia
Australia is home to over 300 termite species, but only a handful cause serious damage to buildings. The most destructive include:
### Why Australia Is High Risk
Australia's climate creates ideal conditions for termites. Warm temperatures, high humidity, and seasonal rainfall provide the moisture and warmth that termites need to thrive. Unlike in colder climates where termite activity slows or stops in winter, Australian termites can remain active and reproduce year-round in many regions, particularly in QLD, northern NSW, and the Northern Territory.
## Signs of Termite Activity
Knowing what to look for can help you catch an infestation before it causes serious structural damage.
## Prevention Strategies That Work
Prevention is always cheaper than treatment and repair. The following strategies significantly reduce your risk of termite infestation.
### Moisture Control
Termites need moisture to survive. Reducing moisture around your home removes one of their primary attractants.
### Remove Food Sources
### Reduce Entry Points
### Regular Professional Inspections
Annual [termite inspections](/articles/termite-inspection-to-protect-your-home) carried out by a qualified pest inspector following AS 4349.3 are the single most effective way to detect termite activity early. In high-risk areas (QLD, northern NSW, Northern Territory), inspections every six months may be warranted.
## Treatment Options for Active Infestations
If termites are found, several treatment options are available depending on the species, extent of infestation, and property type.
## DIY vs Professional Termite Control
## Termite-Resistant Building Materials
When building or renovating, material choices can significantly reduce termite risk.
## Insurance and Termite Damage
Most standard home and contents insurance policies in Australia do not cover termite damage. This is because insurers classify termite damage as a maintenance issue rather than a sudden or accidental event. Some specialist insurers offer termite damage cover, but premiums can be high and conditions strict.
The best financial protection is prevention. Annual inspections costing $250 to $400 are a fraction of the average termite repair bill, which can range from $5,000 to over $100,000 for severe structural damage.
### What Role Do Expert Witnesses Play in Sydney Construction Disputes?
Source: https://ownerinspections.com.au/articles/the-role-of-expert-witnesses-in-sydneys-construction-disputes
Published: 2024-03-15 | Updated: 2026-01-30 | Category: Expert Witness
Author: Maison Azdari
Sydney's construction industry is one of the largest and most active in Australia. With thousands of residential and commercial projects under way at any given time, disputes between homeowners, builders, developers, and contractors are an unavoidable reality. When these disagreements reach the point where informal resolution is no longer possible, expert witnesses become an essential part of the process.
An expert witness in a construction dispute provides independent, technically grounded evidence to assist a tribunal or court in reaching a fair outcome. Their role is not to advocate for either party. Instead, they owe a duty to the tribunal itself, offering objective analysis that helps decision-makers understand complex building and construction matters.
This guide explains how expert witnesses function within Sydney's construction dispute framework, what qualifications they need, how hearings are prepared for, and what types of disputes commonly require expert involvement.
> The value of an expert witness lies in their independence. A report that reads like advocacy will be given little weight by the tribunal. The strongest expert evidence is that which presents the facts plainly and lets the technical findings speak for themselves.
## The Nature of Construction Disputes in Sydney
Sydney has experienced rapid urban growth over the past two decades. High-density residential developments, large infrastructure projects, and suburban housing estates have driven a construction boom. With that growth, the volume and complexity of disputes have increased.
### Why Disputes Arise
Construction disputes in Sydney commonly stem from a combination of contractual, technical, and financial factors. Poor communication between parties, ambiguous contract terms, and pressure to meet tight deadlines all contribute to disagreements.
The types of issues that trigger disputes include:
- **Defective workmanship** that fails to meet the standards required under the Home Building Act 1989 (NSW)
- **Delays to project completion** caused by weather, supply chain disruptions, or mismanagement
- **Variations and scope changes** that were not properly documented or agreed upon
- **Non-payment or disputed payment claims** between principals and contractors
- **Non-compliance with the National Construction Code** or relevant [Australian Standards](https://www.standards.org.au/)
Many of these disputes involve technical questions that fall outside the knowledge of legal practitioners and tribunal members. That is precisely where expert witnesses become necessary.
### Common Building Defects in Sydney
Sydney properties are subject to particular environmental and construction challenges. Reactive clay soils in the western suburbs, coastal salt exposure in the eastern suburbs, and water table issues across the basin all influence the types of defects that arise.
For a detailed overview of defect types specific to the region, see our guide on [common building defects in Sydney](/articles/the-most-common-building-defects-in-sydney).
## How NCAT Handles Construction Disputes
The [NSW Civil and Administrative Tribunal (NCAT)](https://www.ncat.nsw.gov.au/) is the primary forum for resolving residential building disputes in New South Wales. It provides a more accessible and cost-effective alternative to the courts for homeowners and builders.
### NCAT's Jurisdiction
NCAT's Consumer and Commercial Division handles most residential building disputes in Sydney. Its jurisdiction covers:
- Claims relating to defective residential building work
- Disputes about incomplete or abandoned construction projects
- Payment disputes between homeowners and licensed builders
- Claims under statutory warranties provided by the Home Building Act 1989
For disputes involving amounts above certain thresholds, or commercial construction matters, proceedings may instead be filed in the NSW District Court or Supreme Court. However, for the majority of homeowner and builder disputes, NCAT is the appropriate venue.
For a broader explanation of how the tribunal operates, read our article on [understanding NCAT](/articles/understanding-nsw-civil-and-administrative-tribunal-ncat).
### The Tribunal's Reliance on Expert Evidence
NCAT members are typically legally trained, but they do not hold building or engineering qualifications. When a dispute involves questions about whether work complies with the National Construction Code, whether a defect is structural or cosmetic, or what the reasonable cost of rectification should be, the tribunal depends on expert evidence.
In many NCAT proceedings, each party engages their own expert. The tribunal may also appoint a single expert or direct that a joint expert conference take place to narrow the issues in dispute.
## Qualifications and Duties of an Expert Witness
Not every building professional is suited to serve as an expert witness. The role carries specific requirements regarding qualifications, experience, and ethical obligations.
### Required Qualifications
An expert witness in Sydney construction disputes should hold:
- A relevant tertiary qualification in building, construction management, architecture, or engineering
- Current licensing or registration with [NSW Fair Trading](https://www.fairtrading.nsw.gov.au/) where applicable
- Substantial practical experience in the specific area of construction at issue
- Familiarity with the National Construction Code, Australian Standards, and NSW building legislation
Experience as a practitioner is not enough on its own. The expert must also be able to communicate their opinions clearly, both in writing and under oral examination.
### The Expert's Duty to the Tribunal
Under the NCAT rules and the Uniform Civil Procedure Rules 2005 (NSW), an expert witness has an overriding duty to assist the tribunal. This duty takes precedence over any obligation to the party who engaged and is paying them.
In practical terms, this means the expert must:
- Provide opinions that are genuinely held and based on their specialised knowledge
- Disclose all material facts, including those that may be unfavourable to the engaging party
- Clearly distinguish between matters of fact and matters of opinion
- Acknowledge the limits of their expertise and not stray beyond their area of competence
- Notify the tribunal if their opinion changes at any stage
Failure to comply with these duties can result in the expert's evidence being disregarded entirely, which may have serious consequences for the party relying on it.
## Types of Construction Disputes Requiring Expert Witnesses
Expert witnesses are engaged across a broad range of construction dispute types. Each category presents its own technical challenges and requires specific expertise.
### Contract Disputes
Contract disputes arise when the parties disagree about the scope, terms, or performance of a building contract. An expert witness in a contract dispute may be asked to assess:
- Whether the work described in the contract was actually performed
- Whether variations were within or outside the original scope
- Whether the quality of work met the contractual specifications
- The reasonable cost of completing unfinished work
### Delay Disputes
Delays are among the most contentious issues in Sydney construction. An expert in delay analysis may use methodologies such as the "as-planned versus as-built" approach or the "impacted as-planned" method to determine:
- The causes of delay and which party is responsible
- Whether extensions of time were justified
- The financial impact of delay on both parties
### Quality and Defect Disputes
These are the most common disputes heard at NCAT. An expert witness assessing quality and defects will typically:
- Conduct a thorough site inspection
- Document defects using photographs, measurements, and testing
- Assess each defect against the relevant Australian Standard or NCC requirement
- Prepare a [Scott Schedule](/articles/how-scott-schedules-strengthen-construction-dispute-cases) listing each defect, its cause, and the estimated cost of rectification
### Payment Disputes
Payment disputes may involve claims under the Building and Construction Industry Security of Payment Act 1999 (NSW). Expert evidence in these matters often addresses:
- The value of work completed to date
- Whether claimed variations were authorised and reasonably priced
- The cost of rectifying defective work that should be offset against amounts claimed
The following table summarises the key dispute types and the role of the expert witness in each.
| Dispute Type | Common Issues | Expert's Role |
| --------------------------- | -------------------------------------------------------------- | ------------------------------------------------------------------------------------------- |
| Contract disputes | Scope disagreements, variation claims, incomplete work | Assess whether work matches contractual specifications and quantify outstanding obligations |
| Delay disputes | Late completion, extension of time claims, liquidated damages | Analyse the construction programme, identify delay causes, and attribute responsibility |
| Quality and defect disputes | Defective workmanship, non-compliance with codes and standards | Inspect, document, and cost defects against NCC and Australian Standards |
| Payment disputes | Progress claims, valuation of variations, set-off claims | Value completed work and assess the reasonableness of claimed amounts |
## Preparing an Expert Witness Report
The [expert witness report](/expert-witness-reports) is the centrepiece of expert evidence. A poorly prepared report can undermine an otherwise strong case. A well-structured report provides the tribunal with a clear, logical foundation for its decision.
### Report Structure and Requirements
An expert witness report for NCAT proceedings should include:
- **Expert's qualifications and experience** with a curriculum vitae attached
- **Instructions received** from the engaging party or their solicitor
- **Documents and materials reviewed** including plans, contracts, correspondence, and inspection records
- **Site inspection findings** supported by photographs, measurements, and test results
- **Technical analysis** referencing the applicable standards, codes, and regulations
- **Opinions and conclusions** clearly stated and supported by the evidence
- **Declaration** confirming the expert understands their duty to the tribunal
The report must comply with the requirements set out in Schedule 4 of the NCAT rules and, where applicable, the Expert Witness Code of Conduct under the Uniform Civil Procedure Rules.
For a comprehensive guide to structuring these reports, see [expert witness reports explained](/articles/legal-expert-witness-reports-explained).
### The Scott Schedule
In defect disputes, NCAT frequently requires parties to present their claims in a Scott Schedule format. This is a tabular document that lists each alleged defect, the claimant's description and costings, and the respondent's response.
Expert witnesses play a central role in preparing Scott Schedules. Their technical assessments form the basis of the defect descriptions, causation analysis, and rectification costings that populate each row of the schedule.
Learn more about how this tool supports construction claims in our article on [Scott Schedules](/articles/how-scott-schedules-strengthen-construction-dispute-cases).
## Cross-Examination of Expert Witnesses
Preparing a report is only part of the expert's role. In most NCAT hearings, the expert will be required to give oral evidence and face cross-examination by the opposing party or their legal representative.
### What to Expect During Cross-Examination
Cross-examination is designed to test the reliability and credibility of the expert's evidence. The opposing party will typically:
- Challenge the expert's qualifications or experience in the specific area
- Question the methodology used to reach their conclusions
- Highlight any inconsistencies between the report and oral evidence
- Present alternative explanations for defects or failures
- Attempt to demonstrate bias or partiality
### How Experts Should Prepare
Effective preparation for cross-examination involves:
- **Thorough familiarity with the report.** The expert must know the contents of their report in detail and be able to explain every opinion without referring to notes excessively.
- **Understanding the opposing expert's report.** Knowing where the two experts disagree allows the witness to anticipate lines of questioning.
- **Staying within their expertise.** An expert who speculates beyond their area of knowledge risks damaging their credibility.
- **Remaining calm and objective.** Cross-examination can be adversarial. The most effective witnesses answer questions directly without becoming defensive.
### Joint Expert Conferences
NCAT may direct the experts to meet and confer before the hearing. The purpose of a joint expert conference is to:
- Identify the matters on which the experts agree
- Narrow the matters on which they disagree
- Produce a joint report setting out areas of agreement and disagreement
These conferences can significantly reduce hearing time and help the tribunal focus on the genuinely contested technical issues.
## Key Takeaways
- Expert witnesses in Sydney construction disputes owe their primary duty to the tribunal, not to the party that engaged them.
- NCAT is the main forum for residential building disputes in NSW and relies heavily on expert evidence to decide technical questions.
- Qualified expert witnesses hold relevant tertiary qualifications, current licensing, and substantial practical experience in the construction field.
- The expert witness report must be structured, compliant with tribunal rules, and supported by evidence including site inspection findings and applicable standards.
- Scott Schedules are a standard tool in defect disputes, and expert witnesses are central to their preparation.
- Cross-examination tests the reliability and objectivity of expert evidence, making thorough preparation essential.
- Joint expert conferences can narrow disputed issues and reduce hearing time.
## Frequently Asked Questions
### What is an expert witness in a construction dispute?
An expert witness is a qualified professional who provides independent technical evidence to assist a tribunal or court in understanding complex building and construction matters. Their duty is to the tribunal, not to the party who engaged them.
### When is an expert witness needed in a Sydney building dispute?
An expert witness is typically needed when a dispute involves technical questions such as whether work is defective, whether it complies with building codes, what caused a defect, or what it would cost to rectify. Most NCAT defect claims involve at least one expert witness.
### What qualifications should a construction expert witness have?
A construction expert witness should hold relevant tertiary qualifications in building, engineering, or architecture, along with current licensing and substantial industry experience. They must also be capable of communicating their opinions clearly in both written and oral form.
### How does NCAT use expert evidence?
NCAT relies on expert evidence to understand technical aspects of building disputes that fall outside the tribunal members' own knowledge. Expert reports and oral testimony help the tribunal determine whether work is defective, what caused the problem, and what the appropriate remedy should be.
### What is a Scott Schedule and how does an expert witness use it?
A Scott Schedule is a tabular document that lists each alleged defect alongside descriptions, costings, and the respondent's reply. Expert witnesses prepare the technical content of these schedules, including defect descriptions, causation analysis, and rectification cost estimates.
### Can both parties have their own expert witness?
Yes. In most NCAT proceedings, each party engages their own expert witness. The tribunal may also appoint a single expert or direct joint expert conferences to narrow the issues in dispute.
### What happens during cross-examination of an expert witness?
During cross-examination, the opposing party questions the expert to test the reliability of their evidence. This may include challenging their methodology, highlighting inconsistencies, or questioning their qualifications in the specific area of dispute.
### How much does it cost to engage an expert witness in Sydney?
Costs vary depending on the complexity of the matter, the number of inspections required, and the length of the hearing. Expert witness fees in [Sydney](/nsw/building-inspections-sydney) typically range from a few thousand dollars for a straightforward report to tens of thousands for complex multi-issue disputes.
### What is the difference between an expert witness and a building inspector?
A building inspector conducts inspections and produces reports for commercial purposes, such as [pre-purchase inspections](/pre-purchase-inspections). An expert witness prepares evidence specifically for legal proceedings and owes a duty to the court or tribunal, not to the client.
### Can an expert witness report be challenged in NCAT?
Yes. The opposing party can challenge the report through cross-examination, by engaging their own expert, or by highlighting deficiencies in the report's methodology or compliance with tribunal rules. A report that fails to comply with the Expert Witness Code of Conduct may be given reduced weight or excluded entirely.
### What types of building disputes are most common in Sydney?
The most common building disputes in Sydney involve defective workmanship, water ingress, structural cracking, non-compliant work, incomplete projects, and payment disagreements. Environmental factors such as reactive soils and coastal exposure contribute to many defect-related claims.
## Get Expert Witness Support for Your Construction Dispute
If you are involved in a construction dispute in Sydney and need independent expert evidence, our licensed building inspectors can assist. We prepare expert witness reports that comply with NCAT requirements and provide clear, objective technical assessments.
[Contact us today](/expert-witness-reports) to discuss your matter and find out how we can support your case.
For a complete overview, see our [guide to expert witness reports for building disputes](/guides/expert-witness-building-disputes-guide).
### The Role of Expert Witnesses in Construction Disputes
Source: https://ownerinspections.com.au/articles/expert-witnesses-in-construction
Published: 2024-03-14 | Updated: 2026-02-13 | Category: Expert Witness
Author: Maison Azdari
Construction disputes in Australia are rarely straightforward. Whether the disagreement centres on defective workmanship, cost overruns, or project delays, the technical nature of building work means that tribunals and courts need specialised knowledge to reach fair outcomes. That is where expert witnesses come in.
An [expert witness](/expert-witness-reports) is an independent professional who provides objective technical analysis and opinion in legal proceedings. Their job is not to take sides. It is to help the decision-maker understand the facts. In Australian construction disputes, expert witnesses are often the single most influential factor in determining the outcome of a case.
This guide explains the types of expert witnesses used in construction disputes, their primary functions, when you need one, and how they operate within Australian tribunals.
## A Real-World Example: Perth's Shenton Quarter
To understand why expert witnesses matter, consider the Shenton Quarter development in Perth. This large-scale project became the subject of significant dispute when defects were identified in the building's construction. Structural engineers, building code specialists, and cost estimators were all called upon to provide independent analysis.
The expert witnesses assessed whether the construction met the requirements of the National Construction Code and relevant Australian Standards. They quantified the cost of rectification and provided opinions on the cause of the defects. Without their input, the tribunal would have had no reliable basis on which to assess the competing claims.
This case highlights a common pattern in Australian construction disputes. The issues are too technical for a tribunal member or judge to assess without professional guidance. Expert witnesses bridge that gap between technical complexity and legal decision-making.
## Types of Expert Witnesses in Construction Disputes
Different disputes call for different types of expertise. The following are the most commonly engaged expert witnesses in Australian construction matters.
### Structural and Civil Engineers
Structural engineers assess load-bearing elements, foundation systems, concrete work, and steel framing. They determine whether structural components comply with Australian Standards and the Building Code of Australia (BCA). When disputes involve cracking, subsidence, or structural failure, a structural engineer's opinion is typically required.
### Architects
Architects provide expert evidence on design intent, compliance with planning approvals, and whether the built form matches the approved plans and specifications. They are particularly useful in disputes about variations, design deficiencies, or departures from the contract documentation.
### Quantity Surveyors and Cost Estimators
Cost disputes are common in construction. Quantity surveyors and cost estimators assess the reasonable cost of rectification work, the value of incomplete work, and whether claimed costs are fair and reasonable. Their evidence is often central to the quantum (financial amount) of a claim.
### Project Managers
When disputes involve delays, scheduling failures, or poor project coordination, a project management expert can analyse the construction programme, identify the causes of delay, and apportion responsibility between the parties.
### Building Code Specialists
Building code specialists focus on compliance with the National Construction Code, the BCA, and relevant Australian Standards. They assess whether completed work meets the minimum performance requirements and identify specific non-compliances. For more on how these reports are prepared, see our guide on [expert witness reports explained](/articles/legal-expert-witness-reports-explained).
## Three Primary Functions of Expert Witnesses
Expert witnesses serve three distinct functions in construction disputes. Each function contributes to the tribunal's ability to make a well-informed decision.
### Impartial Analysis
The expert's overriding duty is to the tribunal, not to the party that engaged them. This principle is reinforced by tribunal practice directions and the [Uniform Civil Procedure Rules](https://legislation.nsw.gov.au/view/html/inforce/current/sl-2005-0418) in each state. An expert witness must provide an honest, unbiased assessment of the issues, even if their findings do not support the position of the party paying their fees.
This independence is what gives expert evidence its weight. A tribunal member can rely on an impartial expert's opinion in a way that they cannot rely on the opinions of the disputing parties.
### Technical Reports
Expert witnesses prepare detailed written reports that set out their qualifications, methodology, findings, and opinions. These reports must comply with the relevant tribunal's requirements and are typically the most substantial piece of technical evidence in a construction dispute.
A well-structured expert report will identify each defect or issue, reference the applicable standard or code provision, explain the basis for the expert's opinion, and provide a cost estimate for rectification where relevant. For an understanding of how these reports differ from standard inspection reports, see our comparison of [expert witness vs routine inspection reports](/articles/expert-witness-vs-routine-inspection-reports).
### Credible Testimony
Expert witnesses may be required to give oral evidence at the hearing and respond to cross-examination from the opposing party. The ability to explain complex technical issues in plain language, remain composed under questioning, and make appropriate concessions where the evidence warrants it are all hallmarks of a credible expert witness.
Tribunal members pay close attention to how an expert presents under cross-examination. An expert who becomes defensive or appears to be advocating for one party will lose credibility quickly.
## Why Expert Witnesses Matter
### Clarifying Complex Issues
Construction disputes almost always involve technical questions that fall outside ordinary knowledge. Whether the issue is the adequacy of waterproofing, the compliance of a fire separation wall, or the cause of concrete cracking, expert witnesses translate these technical matters into evidence that a tribunal can assess and act upon.
### Supporting Legal Arguments
A party's legal arguments are only as strong as the evidence that supports them. Expert evidence provides the factual foundation for claims about defective work, non-compliance, or unreasonable costs. Without expert support, legal arguments about technical matters are effectively unsupported assertions.
### Aiding Fair Resolution
Australian tribunals aim to resolve disputes fairly and on their merits. Expert witnesses support this objective by providing the independent, technically sound evidence that tribunals need to make well-reasoned decisions. The quality of expert evidence often determines whether the outcome reflects the true nature and extent of the issues in dispute.
## When Do You Need an Expert Witness?
Not every construction disagreement requires expert evidence. However, there are several common scenarios where engaging an expert witness is strongly recommended.
### Construction Defects
Disputes about defective building work are the most common reason for engaging an expert witness. Defects may involve structural elements, waterproofing, tiling, plastering, roofing, electrical work, or plumbing. An expert can identify each defect, assess its severity, determine its cause, and estimate the cost of rectification. For more background, see our article on [construction defect inspections](/articles/construction-defect-inspection).
### Cost Overruns
When a project exceeds the agreed budget, disputes arise about whether the additional costs are reasonable and who should bear them. A quantity surveyor or cost estimator can assess whether claimed costs align with industry rates and whether the additional work was within the scope of the original contract.
### Project Delays
Delays are a frequent source of construction disputes. A project management expert can analyse the construction programme, identify which party caused the delay, and calculate the financial impact. This type of analysis is particularly important in commercial construction disputes where delay costs can be substantial.
### Breach of Contract
When one party alleges that the other has failed to meet their contractual obligations, expert evidence can demonstrate whether the work was performed in accordance with the contract, plans, and specifications. Building code specialists and architects are commonly engaged for these disputes.
### Insurance Claims
Disputes with insurers about building defects often require expert evidence to establish the cause, extent, and cost of the defective work. Expert witnesses help differentiate between defects caused by poor workmanship and damage caused by other factors such as weather or ground movement. See our guide on [insurance claim assessments](/insurance-claim-assessments) for more information.
## Expert Witnesses in Australian Tribunals
Construction disputes in Australia are frequently heard by state and territory tribunals rather than courts. These tribunals provide a more accessible and less formal avenue for dispute resolution, but they still rely heavily on expert evidence.
### NCAT (New South Wales)
The NSW Civil and Administrative Tribunal handles building disputes under the [Home Building Act 1989](https://legislation.nsw.gov.au/view/html/inforce/current/act-1989-147). NCAT has specific practice directions governing expert evidence, including requirements for expert reports and provisions for expert conclaves (meetings between opposing experts). For a detailed overview, see our guide on [NCAT building disputes](/articles/navigating-ncat-building-disputes-with-expert-witness-support).
### VCAT (Victoria)
The Victorian Civil and Administrative Tribunal resolves building disputes under the [Domestic Building Contracts Act 1995](https://www.legislation.vic.gov.au/in-force/acts/domestic-building-contracts-act-1995) and the [Building Act 1993](https://www.legislation.vic.gov.au/in-force/acts/building-act-1993). VCAT frequently uses expert evidence in building disputes, and its procedures for managing expert evidence are well established.
### QCAT (Queensland)
The Queensland Civil and Administrative Tribunal handles building disputes under the [Queensland Building and Construction Commission Act 1991](https://www.legislation.qld.gov.au/view/html/inforce/current/act-1991-098). Like its counterparts in other states, QCAT relies on expert evidence to resolve technical disputes about building work.
Each tribunal has its own rules and practice directions for expert evidence. It is important to ensure that your expert witness is familiar with the specific requirements of the tribunal hearing your matter.
## Frequently Asked Questions
### What qualifications does an expert witness need in a construction dispute?
An expert witness must hold qualifications and experience relevant to the subject matter of the dispute. For building defect disputes, this typically means a licensed builder or building inspector with extensive practical experience. For structural issues, a qualified structural engineer is usually required.
Beyond technical qualifications, the expert should have experience preparing reports for tribunal or court proceedings and giving oral evidence. Tribunals assess an expert's credibility based on their qualifications, experience, methodology, and independence.
### How do I select the right expert witness for my case?
Start by identifying the specific technical issues in your dispute. Match those issues to an expert with demonstrated experience in that area. Ask about their tribunal experience, request examples of previous reports, and check that they understand their duty to the tribunal rather than to the party engaging them.
Your solicitor or building lawyer can often recommend experts they have worked with previously. Choose someone who communicates clearly and can explain technical issues in plain language.
### Can an expert witness have a conflict of interest?
Yes, and conflicts of interest must be disclosed. If an expert has a prior relationship with either party, a financial interest in the outcome, or any other factor that could compromise their independence, they must declare it. Failure to disclose a conflict can undermine the expert's credibility and, in serious cases, result in their evidence being excluded entirely.
### What procedures do expert witnesses follow in tribunal proceedings?
Expert witnesses typically conduct a site inspection, review relevant documentation, and prepare a written report. If both parties have engaged experts, the tribunal may direct them to attend a conclave to identify areas of agreement and disagreement. The experts then prepare a joint report summarising their respective positions.
At the hearing, experts may give oral evidence and be cross-examined. Some tribunals also use "hot-tubbing," where both experts give evidence concurrently and respond to questions from the tribunal member. For more on how [Scott Schedules](/articles/how-scott-schedules-strengthen-construction-dispute-cases) are used to organise this evidence, see our related guide.
### How does impartiality affect an expert's evidence?
Impartiality is the foundation of credible expert evidence. An expert who appears to be advocating for one party rather than providing an objective assessment will lose credibility with the tribunal. Practice directions in all Australian jurisdictions reinforce that the expert's primary duty is to the tribunal.
Tribunal members are experienced at identifying experts who have crossed the line from independent analysis to advocacy. An expert who makes reasonable concessions and acknowledges the limitations of their opinion is generally viewed as more credible than one who refuses to concede any point.
### Can an expert witness change their opinion during proceedings?
Yes. An expert witness can and should update their opinion if new information comes to light or if a conclave discussion reveals a flaw in their original reasoning. Changing an opinion is not a sign of weakness. It demonstrates intellectual honesty and reinforces the expert's commitment to objectivity.
However, an expert who frequently changes their opinion without good reason, or who appears to shift their position to align with their client's case, will lose credibility.
### What is the scope of an expert witness's role?
The scope of an expert witness's role is defined by the issues in dispute and the instructions they receive. An expert should only provide opinions within their area of expertise and qualifications. They should not stray into areas outside their competence, comment on legal questions, or express opinions on matters they have not been asked to address.
A clear and well-defined scope of engagement helps the expert focus their analysis and ensures that their report addresses the relevant issues efficiently.
### How is an expert witness's credibility assessed?
Tribunals assess credibility based on several factors: the expert's qualifications and experience, the thoroughness of their methodology, the clarity and logic of their reasoning, their independence and objectivity, and their performance under cross-examination. An expert who has inspected the site thoroughly, referenced the applicable standards, and provided clear reasoning for their opinions will generally be viewed as credible.
### Can an expert witness be held liable for their opinions?
Expert witnesses have immunity from civil liability for evidence given in tribunal or court proceedings. This immunity exists to encourage frank and honest testimony. However, this immunity does not extend to negligent report preparation outside of proceedings. An expert who prepares a negligent report that causes loss may be exposed to a professional negligence claim.
### What impact can an expert witness have on the outcome of a dispute?
The impact can be significant. In many construction disputes, the expert's report and testimony are the primary basis on which the tribunal makes its findings of fact. A well-prepared, credible expert can substantiate claims worth tens or hundreds of thousands of dollars. Conversely, a poorly prepared or biased expert can undermine an otherwise strong case.
Studies of tribunal decisions in building disputes consistently show that the quality and credibility of expert evidence is one of the strongest predictors of the outcome. Investing in a qualified, experienced, and independent expert witness is one of the most effective steps a party can take to strengthen their position.
### Do both parties always engage separate expert witnesses?
Not necessarily. In some cases, the tribunal may appoint a single joint expert, or the parties may agree to share one expert to reduce costs. Single experts are more common in smaller disputes where the cost of two experts would be disproportionate to the amount in dispute. In more complex cases, each party usually engages their own expert, and the tribunal manages the process through conclaves and joint reports.
### How much does an expert witness cost in an Australian construction dispute?
Fees vary depending on the type of expert, the complexity of the dispute, and the number of defects or issues involved. For a standard residential building dispute, a basic expert report typically costs between $2,000 and $5,000. Complex disputes involving structural engineering assessments, multiple defects, or large commercial properties can cost considerably more. Additional costs may apply for conclave attendance, supplementary reports, and hearing appearances.
For a complete overview, see our [guide to expert witness reports for building disputes](/guides/expert-witness-building-disputes-guide).
### Understanding the 5 Stages of a Construction Project
Source: https://ownerinspections.com.au/articles/understanding-the-5-stages-of-a-construction-project
Published: 2024-03-12 | Updated: 2026-02-09 | Category: New Construction
Author: Maison Azdari
A construction project in Australia follows five distinct stages: project initiation and conception, design (pre-construction), procurement, construction and monitoring, and post-construction closeout. Each stage has specific deliverables, compliance requirements under the National Construction Code (NCC), and inspection points that determine whether the project meets quality and safety standards. Understanding these stages helps homeowners, developers, and builders anticipate challenges, manage budgets, and avoid costly defects.
Whether you are building a new family home, a commercial development, or a major renovation, the process follows the same fundamental sequence. Knowing what happens at each stage, and what to look out for, puts you in a stronger position to protect your investment and hold your building team accountable. This guide breaks down each stage, explains the key activities and risks, and highlights where [construction stage inspections](/articles/construction-stage-inspections-in-geelong) play a role.
## Stage 1: Project Initiation and Conception
This is where the entire project begins. The project owner defines what they want to build, determines whether the project is feasible, and assembles the team that will bring the vision to life.
### Key Activities
## Stage 2: Design (Pre-Construction)
The design stage turns the project concept into detailed plans and technical documents that the construction team will follow.
### Schematic Design
The architect creates initial drawings that establish the building's overall layout, spatial relationships, and aesthetic direction. These are reviewed and refined with the project owner before moving to the next phase.
### Detailed Design
The approved schematic design is developed into full technical documentation: blueprints, engineering calculations, material specifications, and construction details. These documents form the basis of the building contract and are used for permit applications.
### Permitting and Approvals
No construction can legally begin without the proper permits. Plans are submitted to the local council or a private certifier for assessment against the NCC, state building regulations, and local planning requirements. Approval may take several weeks to several months depending on the complexity of the project and the local authority.
## Stage 3: Procurement
With plans approved, the focus shifts to sourcing the materials, labour, and subcontractors needed to build the project.
### Sourcing Materials and Labour
Materials are ordered based on the specifications in the design documents. Subcontractors specialising in trades such as electrical, plumbing, tiling, and plastering are engaged.
### Bidding and Contracts
Builders and subcontractors submit bids outlining their costs and timelines. The bidding process helps select the most suitable contractors. Clear, detailed contracts protect all parties by defining the scope of work, prices, payment schedules, and dispute resolution procedures.
### Budgeting and Scheduling
Final budgets are confirmed, incorporating all material costs, labour, margins, and contingencies. A detailed construction schedule is created to sequence every activity from site preparation through to handover.
## Stage 4: Construction and Monitoring
This is the longest and most visible stage. The physical building takes shape, and regular monitoring and inspections keep the project on track.
### Site Preparation
The land is cleared, levelled, and prepared for construction. Temporary services such as power and water are connected. Excavation for footings and foundations begins.
### Building the Structure
The project progresses through defined construction milestones:
### Monitoring and Inspections
Regular [construction stage inspections](/articles/construction-progress-inspections) verify that the work meets the approved plans, the NCC, and Australian Standards. Independent inspectors can identify defects at each stage before they are covered up by subsequent work.
## Stage 5: Post-Construction (Closeout)
The final stage covers everything that happens after construction is physically complete.
### Final Inspections and Walkthroughs
A [pre-handover inspection](/articles/pre-handover-construction-inspection-final-checks) identifies any outstanding defects, incomplete work, or items that do not meet the contract specifications. This is the homeowner's last opportunity to document issues before accepting the property.
### Commissioning Systems
Mechanical and electrical systems including HVAC, hot water, and fire safety equipment are tested, calibrated, and confirmed to be operating correctly.
### Project Handover
Ownership is officially transferred. The builder provides all warranties, operating manuals, compliance certificates, and as-built drawings. The defect liability period begins from this date.
## Inspections at Each Construction Stage
For a complete overview, see our [guide to construction stage inspections](/guides/construction-stage-inspections-guide).
### Switching Seasons: Prep Your Pool for Winter and Summer
Source: https://ownerinspections.com.au/articles/switching-seasons-prep-your-pool-for-winter-and-summer
Published: 2024-03-07 | Updated: 2026-02-10 | Category: General Maintenance
Author: Maison Azdari
Preparing your swimming pool for the changing Australian seasons involves winterising before the cold months (lowering water level, balancing chemicals, draining and storing equipment, and fitting a cover) and reopening for summer (inspecting for damage, refilling, rebalancing water chemistry, and restarting equipment). Proper seasonal maintenance protects your pool's structure, filtration system, and surrounding equipment from damage, extends its lifespan, and keeps repair costs down.
Owning a pool is one of the great benefits of Australian living. But pool ownership also means year-round responsibility. Australia's climate varies from tropical in the north to temperate in the south, and your pool needs different care depending on the season and your location. Skipping seasonal maintenance can lead to cracked pipes, algae outbreaks, damaged equipment, and expensive repairs. With some planning and a consistent routine, you can keep your pool in top condition and enjoy it for years to come.
## Winterising Your Pool
### Why Winterise?
Even in Australia, winter temperatures in southern states like Victoria, South Australia, and parts of NSW can drop low enough to cause problems for pool equipment and plumbing. Water left in pipes and pumps can expand in cold conditions, potentially cracking components. Winterising reduces these risks and keeps your pool in good shape for reopening in spring.
### Step-by-Step Winter Preparation
## Opening Your Pool for Summer
When the warmer months return, a structured reopening process ensures your pool is safe and ready for swimming.
## Seasonal Maintenance Checklist
## Pool Equipment Care by Season
## When to Get a Professional Pool Inspection
A professional [pool inspection](/articles/common-swimming-pool-defects-what-you-need-to-know) is recommended in the following situations:
## Energy Efficiency Tips
### Preparing for a DBDRV Inspection: A Quick Guide for Homeowners
Source: https://ownerinspections.com.au/articles/preparing-for-a-dbdrv-inspection-a-quick-guide-for-homeowners
Published: 2024-03-05 | Updated: 2026-02-12 | Category: Building Inspections
Author: Maison Azdari
The Domestic Building Dispute Resolution Victoria (DBDRV) is the official body that helps resolve disputes between homeowners and builders in Victoria. When a dispute cannot be resolved directly between the parties, the DBDRV may arrange a building inspection as part of its conciliation process. This inspection provides an independent assessment of the building work in question and forms the basis for further discussions or recommendations.
Preparing properly for a DBDRV inspection is essential. A well-prepared homeowner can help the inspector conduct a thorough assessment, ensure that all relevant issues are documented, and avoid delays that could extend the dispute resolution process. This guide walks you through what to do before, during, and after a DBDRV inspection.
## What Is the DBDRV?
The Domestic Building Dispute Resolution Victoria (DBDRV) was established under the Domestic Building Contracts Act 1995 to provide a free and accessible dispute resolution service for domestic building work in Victoria. The DBDRV handles disputes between homeowners and registered building practitioners, including builders, subcontractors, and tradespeople.
The DBDRV process typically involves:
The inspection component is one of the most important parts of this process. It provides an objective technical assessment that both parties and the conciliator rely on to understand the issues in dispute.
## Before the Inspection: Gather Your Information
Thorough preparation before the inspection ensures that the inspector has everything they need to conduct a comprehensive assessment. Start by gathering and organising the following documents and information.
### Understand the Scope of Your Dispute
Before the inspector arrives, you should have a clear understanding of what issues you want assessed. Make a written list of all the defects, incomplete work, or other problems you have identified. Be specific about locations within the property and describe each issue clearly.
### Gather Your Documents
The inspector may need to reference various documents to assess whether the building work meets the required standards. Have the following ready:
## Before the Inspection: Schedule and Access
The practical aspects of scheduling and access can significantly affect the quality of the inspection. Take these steps to ensure the inspector can conduct a thorough assessment.
### Clear the Path
The inspector needs to access all areas relevant to the dispute. This may include interior rooms, roof spaces, subfloor areas, external walls, and the surrounding site.
### Choose a Dry Day
Weather conditions can affect what the inspector is able to assess and document. While you cannot always control the scheduling, keep the following in mind:
## Before the Inspection: General Maintenance
While you should not attempt to repair disputed defects before the inspection, some general maintenance steps can help the inspector focus on the genuine issues rather than being distracted by unrelated matters.
### Small Fixes That Help
### Improve Accessibility
Make it as easy as possible for the inspector to access all relevant areas. If there are areas that are difficult to reach, let the inspector know in advance so they can bring appropriate equipment. Ensure that pets are secured and will not interfere with the inspection process.
## During the Inspection
The inspection itself is your opportunity to ensure that all relevant issues are thoroughly documented. Your role during the inspection is to facilitate the process without interfering with the inspector's professional assessment.
### Be Present
### Take Your Own Notes
While the inspector will prepare their own documentation, it is wise to keep your own record of the inspection:
Be respectful of the inspector's process. Allow them to conduct their assessment without pressure or argument. If you disagree with something the inspector says during the inspection, note it down and raise it through the proper channels after the report is issued.
## After the Inspection
Once the inspection is complete, there are several important steps to take to make the most of the process.
### Review the Report Thoroughly
When you receive the inspection report, read it carefully and compare the findings with your original list of defects. Check whether all the issues you raised have been addressed in the report. If any issues appear to have been missed, contact the DBDRV case manager to discuss.
## Common Findings in DBDRV Inspections
DBDRV inspections commonly identify issues across several categories. Understanding these can help you prepare your defect list and set realistic expectations for the inspection.
### Structural Issues
### Plumbing Issues
### Electrical Issues
### Code Violations
## Choosing the Right Inspector
If you are engaging your own independent inspector to support your DBDRV dispute, choosing the right professional is essential. The following criteria will help you make an informed decision.
For a complete overview, see our [guide to expert witness reports for building disputes](/guides/expert-witness-building-disputes-guide).
### Financial Benefits of Roof Inspections in Australia
Source: https://ownerinspections.com.au/articles/financial-benefits-of-roof-inspections-in-australia
Published: 2024-02-28 | Updated: 2026-02-09 | Category: Roof Inspections
Author: Maison Azdari
A professional [roof inspection](/roof-inspection) in Australia typically costs $200 to $500 and can save homeowners thousands by identifying problems such as cracked tiles, damaged flashing, blocked gutters, and early signs of water ingress before they escalate into major structural repairs. According to industry data, the average cost of roof repairs in Australia ranges from $1,000 to $12,500 depending on the severity of the damage, making annual inspections one of the most cost-effective forms of property maintenance available.
Your roof is your home's first line of defence against Australia's harsh climate. Intense heat, UV radiation, heavy storms, and coastal salt air all take a toll on roofing materials over time. A missing tile or cracked flashing might seem minor, but left unchecked, it can lead to water damage, mould growth, rotting timber, and compromised structural integrity. These problems cost far more to fix than the inspection that would have caught them early. This guide breaks down the financial benefits of regular roof inspections and explains why they are a smart investment for every Australian homeowner.
## Catching Problems Early Saves Money
A cracked tile, a loose piece of flashing, or a blocked downpipe might not seem like much on its own. But small problems compound quickly. A single cracked tile allows rainwater into the roof cavity, where it soaks into timber framing, insulation, and ceiling linings. Over weeks or months, this leads to:
A professional [roof inspection](/articles/roof-inspection-guide) can identify that cracked tile and have it repaired for a fraction of the cost of dealing with the downstream damage. Early detection is the single biggest financial benefit of regular inspections.
## Preventing Water Damage
Water is the most common cause of roof-related repair costs. Even a small leak, left undetected, can affect:
Inspections identify the most common water entry points before they cause damage:
## Avoiding Secondary and Structural Damage
Think of a roof problem as a chain reaction. A minor leak near a roof truss can go unnoticed for months. During that time, moisture weakens the timber, attracts termites, and promotes mould growth. Over time, this can lead to:
Regular inspections break this chain by catching the initial problem before secondary damage develops. This proactive approach saves you money and preserves the structural integrity of your home.
## Extending Your Roof's Lifespan
A well-maintained roof lasts significantly longer than a neglected one. Different roofing materials have different expected lifespans, but all benefit from regular inspection and maintenance.
By identifying and fixing small problems regularly, you extend the roof's useful life and delay the cost of a full replacement, which can range from $10,000 to $50,000 or more depending on the size and material.
## Roof Inspection Costs vs Repair Costs
The numbers make the case clearly: spending $200 to $500 on an annual inspection can prevent repairs costing thousands.
## Insurance Benefits
Regular roof inspections can positively affect your home insurance in several ways:
## Australia's Climate and Your Roof
Australia's climate presents unique challenges for roofs depending on location:
Given these conditions, annual inspections (or more frequently in high-risk areas) are a practical investment. [Drone-based inspections](/articles/drones-vs-traditional-roof-inspection-methods) are increasingly popular for accessing hard-to-reach or steep roofs safely and efficiently.
### How Often Are Buildings Inspected in Australia?
Source: https://ownerinspections.com.au/articles/how-often-are-buildings-inspected-in-australia
Published: 2024-02-27 | Updated: 2026-06-05 | Category: Building Inspections
Author: Maison Azdari
How often are buildings inspected in Australia? The answer depends on whether the property is being bought, built, renovated, rented, maintained, or used for commercial purposes.
For a buyer, a building inspection may happen before signing a contract or during a cooling-off period. For a new build, inspections happen at set construction stages. For an existing home, building [maintenance inspection](/maintenance-inspections) frequency depends on the age, condition, location, pest risk, and signs of structural movement.
Building inspections are a fundamental component of property ownership and construction in Australia. From mandatory compliance checks during new construction to voluntary maintenance assessments for existing buildings, understanding inspection requirements and recommended frequencies helps property owners protect their investments and ensure occupant safety.
Book a Defect
Investigation
}
buttonHref="/defect-investigation-reports"
variant="secondary"
/>
The Australian building inspection framework operates across multiple levels of government. The National Construction Code (NCC) establishes baseline requirements that apply nationwide, while individual states and territories implement their own Building Acts and regulations that specify when inspections must occur and who may conduct them. Local councils add another layer through development approvals and ongoing compliance monitoring.
This guide explains building inspection frequency in Australia, including mandatory inspections, NCC building inspections, new building inspection timing, pest checks, structural checks and when to book an independent inspection.
## How Often Should Inspections Be Conducted?
For most established homes, a professional building inspection every 2 to 3 years is a practical baseline, with annual [termite inspections](/timber-pest-inspections) where termite risk applies. The Australian Government’s YourHome guide recommends an annual termite inspection by a reputable licensed inspector, and says regular maintenance helps prevent or identify problems early.
For a property purchase, inspection should happen before committing fully to the purchase, because NSW Government guidance tells buyers to understand the condition of a home before buying to avoid later problems and extra costs.
| Situation | Recommended inspection frequency | Why it matters |
| -------------------------------- | ----------------------------------------: | -------------------------------------------------------------------------------------------------------------------------- |
| Buying a home | Before contract becomes unconditional | Helps identify defects, structural problems, damp, drainage issues, and repair risk before purchase. |
| New building inspection | At key construction stages | Mandatory and independent checks help confirm work matches approved plans and building standards. |
| Existing home, 5 to 15 years old | Every 2 to 3 years | Helps track roof, drainage, wet area, cladding, movement, and maintenance issues. |
| Older home, 15 years plus | Every 1 to 2 years | Older homes have higher risk of damp, ageing services, roof wear, pest damage, and movement. |
| Timber pest inspection | Annually in termite-risk areas | Yearly inspections are recommended as protection against termites. |
| Commercial building inspection | Based on use, risk, and compliance duties | Some commercial buildings need annual essential safety measures reporting. |
## Building Inspection Frequency in Australia: What Changes the Timing?
Building inspection frequency is not the same for every property. A new townhouse in Melbourne, a coastal home in Queensland, a 1970s brick house in Sydney, and a commercial building with fire safety systems all carry different inspection needs.
The main factors are:
- Property age
- Construction type
- Location and weather exposure
- Soil movement
- Termite risk
- Drainage and moisture history
- Renovation or extension work
- Whether the property is being bought, sold, leased, or insured
- Whether the building is residential, strata, or commercial
Look for signs such as damp, mould, sagging ceilings, buckling walls, windows and doors that do not open easily, plumbing damage, and structural problems during personal inspections.
## New Building Inspection: When Should It Happen?
A new building inspection should happen at key stages before defects become hidden. Mandatory certifier checks focus on compliance. Independent stage inspections focus on the owner’s interests, workmanship, and defect risk.
In NSW, a [principal certifier](https://www.service.nsw.gov.au/transaction/appoint-a-principal-certifier-pc) oversees the construction phase and completes mandatory building inspections, also called critical stage inspections, to check that building standards are met.
In Queensland, building certifiers check that the builder has [complied with approved](https://www.qbcc.qld.gov.au/home-owner-hub/build-renovate/doing-work/building-approvals-certification) plans and building provisions, and certification during key stages helps confirm the project is safe, compliant, and structurally sound.
### Suggested new building inspection schedule
| Stage | When to inspect | What to check |
| -------------------------------- | --------------------------------------------------- | ------------------------------------------------------------------------------------------- |
| Pre-slab or footing | Before concrete is poured | Excavation, reinforcement, vapour barrier, set-out, termite management, drainage provisions |
| Frame | After frame is complete and before internal linings | Bracing, tie-downs, framing alignment, roof trusses, structural connections |
| Lock-up or pre-lining | Before walls and ceilings are covered | Windows, external cladding, flashings, services, insulation, wall wrap |
| Waterproofing | Before tiles or finishes cover wet areas | Membrane coverage, floor falls, penetrations, shower zones, waterstops |
| Practical completion or handover | Before final payment or settlement | Finishes, fixtures, doors, windows, drainage, defects, compliance documents |
Queensland requires dwelling inspections at excavation, footing, slab, frame, and final stages.
## Mandatory Inspections and NCC Building Inspections
Mandatory inspections are compliance checks required by the building approval, building permit, or state rules. They are not the same as a full independent building inspection.
The National Construction Code sets requirements for the design and construction of buildings in Australia, including plumbing and drainage work.
That means NCC building inspections are not routine inspections of every part of a home. They are checks against approved plans, building rules, and minimum standards at required points.
- **In NSW**, the principal certifier completes mandatory critical stage inspections and may issue the final occupation certificate when the work is finished and requirements are satisfied.
- **In Victoria**, the relevant building surveyor must nominate mandatory inspections required for the stage of building work under regulation 171.
- **In Queensland**, on-site building inspections check that construction work complies with approved plans and recognised building standards, including the Building Code of Australia.
## Australian Legal Framework for Building Inspections
Building inspections in Australia are governed by a hierarchical framework of national codes, state legislation, and local council requirements. Understanding this framework helps property owners navigate their obligations and rights.
### National Construction Code Requirements
The National Construction Code (NCC) is Australia's primary regulatory framework for building construction. Developed and maintained by the Australian Building Codes Board (ABCB), the NCC sets minimum performance standards that all buildings must meet. While the NCC itself does not mandate specific inspection frequencies, it establishes the standards
against which buildings are assessed during mandatory inspections.
Key NCC provisions relevant to inspections include:
- **Structural provisions (Section B):** Requirements for structural adequacy that must be verified through foundation and frame inspections
- **Fire safety provisions (Section C):** Fire resistance and compartmentation requirements assessed during construction
- **Health and amenity provisions (Section F):** Wet area waterproofing standards verified through dedicated inspections
- **Energy efficiency provisions (Section J):** Insulation and glazing requirements checked at lockup stage
### State and Territory Building Acts
Each Australian state and territory has enacted its own Building Act that governs construction, inspections, and certification within its jurisdiction. These Acts specify mandatory inspection points, who may conduct inspections, and the consequences of non-compliance.
| State/Territory | Primary Legislation | Regulatory Authority | Mandatory Stages |
| ------------------ | ------------------------------------------------- | ------------------------------------------- | ---------------- |
| New South Wales | Environmental Planning and Assessment Act 1979 | NSW Fair Trading | Up to 6 stages |
| Victoria | Building Act 1993 | Victorian Building Authority | 4 to 5 stages |
| Queensland | Building Act 1975 | QBCC | 4 to 6 stages |
| South Australia | Planning, Development and Infrastructure Act 2016 | SA Government | 3 to 5 stages |
| ACT | Building Act 2004 | Access Canberra | 4 to 5 stages |
| Western Australia | Building Act 2011 | DMIRS Building and Energy | 3 to 4 stages |
| Tasmania | Building Act 2016 | Consumer Building and Occupational Services | 3 to 5 stages |
| Northern Territory | Building Act 1993 | NT Building Advisory Services | 3 to 4 stages |
## How Many Inspections Per Year NSW?
For an existing private home in NSW, there is no single rule that says every homeowner must book a set number of building inspections each year. The better question is: what risk level does the property carry?
A typical NSW homeowner may use this schedule:
| Property type or condition | Suggested frequency |
| ---------------------------------------------- | --------------------------------------: |
| Low-risk established home | Every 2 to 3 years |
| Older home or visible defects | Every 1 to 2 years |
| Coastal, damp, or high termite-risk property | Annually |
| Property with previous termite activity | Every 6 to 12 months |
| Before buying or selling | Before contract, settlement, or listing |
| After storm, flood, fire, or nearby excavation | As soon as safe and practical |
Balconies, decks, balustrades and railings must be inspected and maintained regularly for safety, and landlords must keep rented premises in a reasonable state of repair.
## Mandatory Inspections for New Buildings
New constructions in Australia must undergo several compliance inspections at key stages. These mandatory inspections, conducted by council officers or registered private certifiers, ensure that construction meets NCC standards and the approved building plans before work can proceed to the next phase.
### Pre-Slab or Footing Inspection
The pre-slab inspection is the first mandatory checkpoint in residential construction. This critical assessment must occur after excavation, formwork installation, and reinforcement placement, but before concrete is poured.
**What inspectors verify:**
- **Excavation depth and dimensions:** Verification that excavation matches approved engineering drawings and site classification requirements
- **Steel reinforcement placement:** Assessment of rebar sizing, spacing, lap lengths, and positioning using bar chairs to achieve correct cover
- **Formwork integrity:** Inspection of edge boards, bracing, and form ties to ensure concrete containment during pour
- **Underground services:** Verification that plumbing, electrical conduits, and other services are correctly positioned and protected
- **Vapour barriers:** Confirmation that moisture barriers are installed as specified in engineering documentation
- **Soil classification compliance:** Verification that foundation design matches the [geotechnical site classification](/articles/soil-testing-construction-importance) (A, S, M, H1, H2, E, P)
In reactive soil areas prevalent throughout Australia, particularly in Victoria, South Australia, and parts of New South Wales, foundation design is critical. The pre-slab inspection ensures that the foundation system appropriately addresses soil movement characteristics.
### Frame Inspection
The frame inspection occurs once the structural skeleton of the building is complete, including wall frames, floor joists for multi-storey construction, and roof trusses. This inspection must take place before any cladding, insulation, or internal linings are installed.
**What inspectors verify:**
- **Timber or steel member sizing:** Confirmation that studs, plates, beams, and lintels match engineering specifications and span tables
- **Member spacing:** Verification of stud spacing (typically 450mm or 600mm centres) and noggin placement
- **Connection details:** Assessment of nail patterns, connector plates, bolts, and brackets securing frame members
- **Bracing systems:** Inspection of diagonal bracing, sheet bracing, or structural plywood providing racking resistance
- **Tie-down systems:** Verification of cyclone straps, hold-down bolts, and connections resisting uplift forces (particularly important in cyclonic regions of Queensland and Northern Australia)
- **Roof truss installation:** Confirmation of truss spacing, bearing points, bracing, and apex connections
- **Opening compliance:** Verification that window and door openings match approved plans and have appropriate lintels
### Lockup Inspection
The lockup inspection occurs when the building envelope is complete and weather-tight. At this stage, external cladding, roofing, and windows are installed, creating a secure, weather-protected structure. This is the final opportunity to inspect elements that will be concealed by internal linings.
**What inspectors verify:**
- **External cladding installation:** Assessment of brick, weatherboard, rendered masonry, or other cladding systems for correct fixing and weatherproofing
- **Roof covering:** Verification of tile or metal roofing installation, including flashings, valleys, and ridge capping
- **Window and door installation:** Confirmation of correct flashing, sealing, and weather strip installation
- **Wall sarking and building wrap:** Inspection of weather barrier installation and correct lapping
- **Insulation installation:** Verification that thermal insulation meets NCC requirements for the relevant climate zone (R-values ranging from R2.0 to R6.0 depending on location)
- **Electrical rough-in:** Visual inspection of wiring, conduit, and junction box placement (detailed testing by licensed electrician required separately)
- **Plumbing rough-in:** Assessment of water supply and drainage pipework installation
### Waterproofing Inspection
Waterproofing inspection is mandatory for wet areas in most jurisdictions. This assessmentmust occur after waterproofing membranes are applied but before tiling or other floor andwall finishes are installed. Waterproofing failures are among the most common and expensive defects in Australian buildings.
**What inspectors verify under AS 3740:**
- **Membrane application:** Verification that waterproofing membrane is correctly applied to all required surfaces with appropriate thickness
- **Wall turnups:** Confirmation that membrane extends at least 150mm up walls in general wet areas and at least 1800mm in shower areas
- **Penetration sealing:** Assessment of waterproofing around pipes, drains, and other penetrations using appropriate collars or flanges
- **Corner and junction treatment:** Inspection of reinforcing at internal and external corners, wall-floor junctions
- **Floor falls:** Verification that floor gradients direct water to floor wastes (typically 1:100 minimum fall)
- **Hob or step-down installation:** Where required, confirmation of water containment barriers at door openings
### Final or Handover Inspection
The final inspection, also known as the practical completion inspection, is the comprehensive assessment conducted before occupancy. This inspection verifies that all construction is complete, all systems are operational, and the building complies with the approved plans and relevant codes.
**What inspectors verify:**
- **Completion of all building work:** Confirmation that all construction specified in the approved plans is complete
- **Internal finishes:** Assessment of plasterwork, painting, tiling, flooring, joinery, and fixtures
- **Fixture functionality:** Testing of taps, toilets, doors, windows, locks, and all installed hardware
- **Electrical completion:** Verification of power points, lighting, smoke alarms, and safety switch operation
- **Plumbing completion:** Testing of water supply, drainage, hot water system, and gas installations
- **External works:** Assessment of driveways, paths, fencing, retaining walls, and landscaping as per approval
- **Compliance documentation:** Collection of certificates for electrical, plumbing, waterproofing, and other regulated work
| Inspection Stage | Purpose | Critical Timing | Consequence of Missing |
| ---------------- | --------------------------------------------------- | ---------------------------------- | ---------------------------------------------- |
| Pre-Slab | Verify foundation will adequately support structure | Before concrete pour | Foundation defects impossible to rectify |
| Frame | Confirm structural integrity and wind resistance | Before cladding and lining | Structural issues concealed behind walls |
| Lockup | Assess services and insulation before concealment | Before wall linings installed | Service defects require wall removal to access |
| Waterproofing | Verify wet area protection before tiling | Before tiles or finishes applied | Leaks cause extensive damage and mould |
| Final | Comprehensive completion verification | Before occupancy and final payment | Loss of leverage for defect rectification |
## State-Specific Inspection Requirements
While the NCC provides national standards, each state implements inspection requirements through its own legislation. Understanding your state's specific requirements ensures compliance and protects your rights.
### New South Wales
Under the Environmental Planning and Assessment Act 1979 and the Home Building Act 1989, NSW
has one of Australia's most prescriptive inspection regimes for residential construction.
- **Mandatory critical stage inspections:** Pre-slab, frame, pre-lining, and final inspections are required for all Class 1 and 2 buildings
- **Principal certifier requirements:** A Principal Certifier (council or registered private certifier) must be appointed before construction commences
- **Occupation certificate:** An occupation certificate must be issued before the building can be legally occupied
- **Statutory warranty:** 6 years for major defects, 2 years for non-structural defects under the Home Building Act
### Victoria
The Building Act 1993 and Building Regulations 2018 govern building inspections in Victoria. The state has implemented reforms following the cladding crisis to strengthen inspection oversight.
- **Mandatory inspection stages:** Footings, frame, and final inspections required as a minimum for domestic construction
- **Building permit conditions:** Additional inspections may be mandated as conditions of the building permit based on project complexity
- **Relevant building surveyor:** Must be appointed before work commences and is responsible for conducting or organising inspections
- **Occupancy permit:** Required before occupation, confirming compliance with the building permit and relevant codes
- **Statutory warranty:** 6 years for structural defects, 2 years for non-structural defects under the Domestic Building Contracts Act 1995
### Queensland
The Building Act 1975 and Building Regulation 2021 establish inspection requirements in Queensland. The QBCC provides extensive guidance on mandatory inspection stages.
- **Mandatory inspection stages:** Typically include foundation, frame, pre-lining, and final stages
- **Private certification:** Registered building certifiers conduct most inspections in Queensland
- **Form 21 certificate:** Final inspection certificate confirming building complies with approval and building codes
- **Cyclone requirements:** Additional tie-down and structural connection inspections in cyclonic areas
- **Statutory warranty:** 6 years 6 months for structural defects, 6 months for non-structural defects under the QBCC Act
### South Australia
The Planning, Development and Infrastructure Act 2016 and related regulations govern building work in South Australia. The state transitioned to a new planning system in 2021.
- **Mandatory notifications:** Builders must notify the relevant authority at key stages including foundation, frame, and completion
- **Building rules consent:** Required before construction, specifying which inspections are mandatory for the project
- **Statement of Compliance:** Required at completion confirming building work meets the approved plans and relevant codes
- **Statutory warranty:** 5 years for structural defects under the Building Work Contractors Act 1995
### Australian Capital Territory
The Building Act 2004 and Building (General) Regulation 2008 establish the ACT's building inspection framework.
- **Mandatory inspection stages:** Foundation, frame, and final stages are required for residential construction
- **Certifier requirements:** A building certifier must be engaged before construction commences
- **Certificate of occupancy:** Required before legal occupation of completed buildings
- **Owner notification:** Builders must provide written notice to owners at each mandatory inspection stage
Get an Expert
Witness Report
}
buttonHref="/expert-witness-reports"
variant="secondary"
/>
## Recommended Inspection Frequencies for Existing Buildings
While inspections during construction are mandatory, ongoing inspections for existing buildings are generally voluntary. However, regular professional assessments are strongly recommended to maintain building condition, protect property value, and identify issues before they become costly problems.
### Newer Buildings (1 to 5 Years Old)
Buildings in their first five years experience the greatest amount of settlement and material stabilisation. During this period, construction defects typically become apparent and warranty periods are in effect.
- **Recommended frequency:** Annual inspections for the first 3 years, then every 2 years
- **Warranty inspections:** Conduct a thorough inspection at 3 months (end of defect liability period) and before warranty expiry
- **Key focus areas:** Settlement cracks, door and window operation, waterproofing performance, drainage issues
### Established Buildings (5 to 15 Years Old)
Buildings in this age range have generally stabilised but are beginning to show wear and may require maintenance intervention. Regular inspections help identify issues at early stages when they are most cost-effective to address.
- **Recommended frequency:** Every 2 to 3 years for comprehensive building inspection
- **Annual pest inspection:** Timber pest inspections should be conducted annually regardless of building age
- **Key focus areas:** Roofing condition, external cladding, wet area integrity, structural movement, pest activity
### Older Buildings (15+ Years Old)
Older buildings require more frequent monitoring as building components approach or exceed their design life. Regular inspections become increasingly important to identify deterioration and plan maintenance.
- **Recommended frequency:** Annual comprehensive inspections
- **Systems assessments:** Electrical, plumbing, and structural systems should be assessed by relevant specialists
- **Key focus areas:** Structural integrity, roof condition, rising damp, pest damage, services condition, safety compliance
| Building Age | Recommended Frequency | Pest Inspections | Priority Focus |
| -------------- | --------------------- | --------------------------------- | ---------------------------------------------------------- |
| 0 to 3 years | Annually | Annually | Settlement, warranty defects, waterproofing |
| 3 to 5 years | Every 2 years | Annually | Emerging defects, drainage, structural movement |
| 5 to 15 years | Every 2 to 3 years | Annually | Roofing, cladding, wet areas, pest activity |
| 15 to 30 years | Every 1 to 2 years | Annually | Services, structural integrity, damp, maintenance planning |
| 30+ years | Annually | Every 6 months in high risk areas | All systems, structural assessment, safety compliance |
## Building Maintenance Inspection for Existing Homes
A building maintenance inspection checks how the property is ageing. It is different from a [pre-purchase inspection](/pre-purchase-inspections) because the goal is not only to decide whether to buy. The goal is to prevent small defects becoming expensive repairs.
A maintenance inspection should check:
- Roof coverings, flashings, gutters, downpipes, and stormwater flow
- External walls, cladding, render, brickwork, and cracking
- Wet areas, shower leaks, damp, mould, and ventilation
- Subfloor ventilation, timber condition, and moisture
- Retaining walls, paths, paving, and site drainage
- Doors and windows that bind, which may indicate movement
- Balconies, decks, stairs, handrails, and balustrades
- Signs of termite activity or conducive termite conditions
A regular maintenance schedule, an annual schedule for inside and outside the home, and expert advice for problems such as leaks, cracks, settlement, damp, salt, and termites.
## Factors Affecting Inspection Frequency
While the age-based recommendations above provide a useful baseline, several factors should influence your specific inspection schedule. Properties with higher risk factors may require more frequent professional assessment.
### Geographic and Environmental Factors
Location significantly impacts the stresses a building experiences and the types of issues it may develop:
- **Coastal areas:** Salt air accelerates corrosion of metal components, deterioration of timber, and weathering of external finishes. Properties within 1km of the coast should be inspected more frequently
- **High humidity regions:** Increased moisture promotes mould growth, timber decay, and pest activity. Northern Australia and coastal Queensland properties require heightened vigilance
- **Reactive soil areas:** Properties built on expansive clay soils (common in Victoria, South Australia, and Western Sydney) experience more movement and require monitoring for structural cracking
- **Bushfire prone areas:** Properties in bushfire zones should be inspected for ember defence, vegetation clearance, and condition of fire-rated materials
- **Flood prone areas:** Post-flood inspections are essential, and pre-emptive assessment of drainage and sub-floor condition is advisable
### Pest Risk Factors
Timber pest activity, particularly termite infestation, poses significant risk to Australian buildings:
- **High risk zones:** Most of Australia except Tasmania and the arid interior is classified as high termite risk
- **Adjacent vegetation:** Properties near bushland, gardens with timber retaining walls, or large trees require more frequent pest inspection
- **Previous pest activity:** Properties with previous termite history should be inspected every 6 months
- **Timber construction:** Timber-framed and weatherboard properties face higher risk than masonry construction
### Building Type and Use
Different building types and uses create varying inspection priorities:
- **Investment properties:** Rental properties should be inspected at each tenancy change and annually during long-term tenancies
- **Strata properties:** Common property inspections are typically managed by the owners corporation, but individual lot inspections remain the owner's responsibility
- **Heritage buildings:** Older heritage-listed properties require specialist assessment and more frequent monitoring of period-specific issues
- **Commercial properties:** Subject to additional compliance requirements including fire safety, accessibility, and essential services testing
### Event-Triggered Inspections
Certain events should trigger an inspection regardless of your regular schedule:
- **Natural disasters:** Following storms, floods, earthquakes, or bushfires, immediate inspection is essential to assess damage
- **Renovations:** Before and after significant renovation work to document existing condition and verify renovation quality
- **Property transactions:** Pre-purchase inspections for buyers and [pre-sale inspections](/pre-sale-inspections) for vendors
- **Insurance claims:** Professional inspection to document damage and support insurance claims
- **Signs of problems:** New cracks, water stains, musty odours, door or window binding, or any unexplained changes warrant investigation
## Types of Building Inspections Available
Different inspection types serve different purposes. Understanding the available options helps you select appropriate inspections for your circumstances.
| Inspection Type | Purpose | Typical Duration | Approximate Cost |
| -------------------------- | -------------------------------------------------- | ----------------- | ----------------- |
| Pre-Purchase Inspection | Comprehensive assessment before property purchase | 2 to 3 hours | $400 to $700 |
| Timber Pest Inspection | Detection of termites and other timber pests | 1 to 2 hours | $250 to $400 |
| Combined Building and Pest | Comprehensive building plus pest assessment | 3 to 4 hours | $500 to $900 |
| New Construction Stages | Progress inspections during construction | 1 to 2 hours each | $300 to $600 each |
| Handover/PCI Inspection | Defect identification before settlement | 2 to 4 hours | $400 to $800 |
| Maintenance Inspection | Routine condition assessment | 1 to 2 hours | $300 to $500 |
| Dilapidation Report | Document condition before adjacent construction | 1 to 2 hours | $400 to $700 |
| Strata Inspection | Common property assessment for owners corporations | Variable | $500 to $2,000+ |
## Inspection of Buildings and Structures: What Should Be Checked?
A building structure inspection looks for visible signs that may point to movement, settlement, poor load transfer, moisture damage, termite damage, or unsafe building elements.
Common signs include:
- Step cracking in brickwork
- Wide or growing cracks
- Sloping floors
- Doors or windows sticking
- Sagging ceilings
- Bowed walls
- Rusted lintels
- Damaged stumps, piers, or bearers
- Damp subfloors
- Deck or balcony movement
Look for structural warning signs such as sagging ceilings, buckling walls, damp, mould, and doors or windows that do not open easily during property inspections.
## Benefits of Regular Building Inspections
Maintaining a regular inspection schedule provides substantial benefits that far outweigh the modest cost of professional assessments.
### Early Detection of Defects and Deterioration
Regular inspections identify issues in their early stages when they are most cost-effective to address. Small cracks, minor water damage, or early signs of pest activity can be resolved before they escalate into major structural concerns. The cost of early intervention is typically a fraction of major repair costs.
### Protection of Property Value
Properties with documented inspection histories and well-maintained conditions command higher market values. Regular inspections demonstrate responsible ownership and provide confidence to potential purchasers. Undetected defects can significantly impact property value when eventually discovered during a sale process.
### Safety Assurance for Occupants
Regular professional assessments ensure buildings remain safe for occupants. Structural issues, electrical hazards, and other safety concerns are identified and addressed promptly. This is particularly important for landlords who have legal obligations to provide safe premises for tenants.
### Insurance and Warranty Support
Inspection reports provide documented evidence of building condition that supports insurance claims and warranty actions. Without professional documentation, proving when damage occurred or that maintenance was adequate can be difficult.
### Maintenance Planning and Budgeting
Regular inspections enable proactive maintenance planning rather than reactive emergency repairs. Understanding the condition of building components allows owners to budget for upcoming maintenance and avoid unexpected major expenses.
## Council Building Inspection vs Independent Building Inspection
A council building inspection or certifier inspection is usually about compliance with the building approval, approved plans, and minimum standards. An independent inspection gives the owner or buyer a more detailed view of defects, workmanship, and future repair risk.
| Inspection type | Who it serves | Main purpose |
| ------------------------------- | --------------------------------- | ----------------------------------------------------------------------------- |
| Council or certifier inspection | Regulatory process | Confirms required stages meet approval and building standards |
| Independent building inspection | Buyer, owner, or investor | Identifies visible defects, safety issues, maintenance needs, and repair risk |
| Pest inspection | Buyer or owner | Checks for timber pest activity, damage, and termite risk |
| Structural inspection | Owner, buyer, insurer, or builder | Reviews visible structural concerns and may recommend engineer review |
### Mandatory Compliance Inspections
Council officers or registered private certifiers conduct mandatory inspections to verify compliance with building approvals and the National Construction Code. These inspections:
- Focus primarily on code compliance rather than overall quality
- Are conducted efficiently due to high workload and time constraints
- Represent the interests of the regulatory system, not the property owner
- May not examine all accessible areas during each stage
- Result in approval to proceed or occupancy, not detailed quality assessment
### Independent Building Inspections
Independent inspections conducted by a building inspector engaged by the property owner provide a different perspective:
- Act solely in the client's interest
- Provide comprehensive assessment of workmanship quality
- Identify defects that may comply with minimum code requirements but still represent poor practice
- Include detailed reports with photographs and recommendations
- Provide documentation supporting defect claims against builders
- Examine all accessible areas during each inspection
> Mandatory certifier inspections and independent building inspections serve different purposes. Certifier inspections verify minimum code compliance. Independent inspections assess overall construction quality and protect the property owner's interests.
## How Long Is a Building and Pest Inspection Valid For?
A building and pest inspection report is best treated as a point-in-time report. It records visible and accessible conditions on the day of inspection.
There is no national rule that makes a building and pest inspection valid for one fixed period across Australia. Conditions can change after heavy rain, storm damage, termite activity, plumbing leaks, nearby building work, or owner repairs.
For buyers, a [newer report](https://www.nsw.gov.au/housing-and-construction/buying-and-selling-property/buying-property-nsw/inspecting-a-property) is safer than relying on an old report. NSW Government says buyers can arrange property inspection reports, such as a building inspection report, and that agents must tell prospective buyers about previous property inspection reports.
For timber pests, [AS 4349.3](https://store.standards.org.au/product/as-4349-3-2010) covers minimum requirements for non-invasive inspection of buildings for timber pest activity and associated reports.
## Getting the Most Value from Your Home and Building Investment
The right inspection frequency depends on the property, not just the calendar. New builds need checks at construction stages. Existing homes need regular maintenance inspections. Timber pest inspections should be annual in termite-risk areas. Older, coastal, damp, or visibly damaged properties need closer monitoring.
For [Owner Inspections](/), this page should now act as the main guide for building inspection frequency in Australia. Link readers to the right service pages for pre-purchase inspections, building and pest inspections, new construction stage inspections, maintenance inspections, timber pest inspections, structural inspections, and [commercial property inspections](/commercial-property-inspections).
Contact Owner
Inspections
}
buttonHref="/contact"
variant="primary"
/>
## Key Takeaways
- Mandatory building inspections are required during new construction at pre-slab, frame, lockup, waterproofing, and final stages, with specific requirements varying by state.
- Each Australian state has its own Building Act governing inspection requirements, with NSW, Victoria, and Queensland having particularly detailed frameworks.
- For existing buildings, comprehensive inspections every 2 to 3 years combined with annual timber pest inspections is the recommended baseline.
- Building age, location, environmental factors, and previous issues should all influence your specific inspection frequency.
- Coastal properties, those in high termite risk areas, and buildings on reactive soils require more frequent inspection than standard recommendations.
- Independent building inspections complement mandatory certifier inspections by providing detailed quality assessment in the property owner's interest.
- The cost of regular inspections is minimal compared to the expense of repairing defects that have been allowed to progress undetected.
- Natural disasters, property transactions, visible damage, and adjacent construction should trigger unscheduled inspections regardless of regular schedule.
- Documented inspection history supports property value, insurance claims, warranty actions, and demonstrates responsible property ownership.
For a complete overview, see our [guide to pre-purchase building and pest inspections](/guides/pre-purchase-building-pest-inspection-guide).
### DIY vs Professional Timber Pest Inspections
Source: https://ownerinspections.com.au/articles/diy-vs-professional-timber-pest-inspections
Published: 2024-02-22 | Updated: 2026-02-10 | Category: Building Inspections
Author: Maison Azdari
Timber pests are among the most destructive threats to Australian homes. Termites, wood-boring beetles, and wood-decay fungi collectively cause billions of dollars in structural damage each year across the country. With such high stakes, regular inspections are essential to catch infestations early and protect your property.
Homeowners often face a key decision when it comes to [timber pest inspections](/timber-pest-inspections): should you do it yourself or hire a professional? Both approaches have their merits, and the right choice depends on your property, budget, and the severity of any suspected issues. This guide breaks down the case for each approach so you can make an informed decision.
## The Case for DIY Timber Pest Inspections
There are several reasons homeowners may choose to conduct their own timber pest inspections, particularly as a first line of defence between professional visits.
### Cost Savings
Professional timber pest inspections in Australia typically cost between $250 and $500 depending on the size and location of the property. For homeowners on a tight budget, performing basic visual checks yourself can help reduce costs while still maintaining some level of vigilance against timber pests.
### Control and Flexibility
DIY inspections allow you to check your property on your own schedule. You can inspect as frequently as you like, which is particularly useful during warmer months when termite activity increases. This flexibility means you can respond quickly to any changes you notice around your home.
### Basic Inspection Knowledge
With some research and preparation, homeowners can learn to identify common signs of timber pest activity. These include mud tubes along foundations, hollow-sounding timber, frass (sawdust-like droppings from wood-boring beetles), and signs of moisture damage that may indicate fungal decay. Keeping an eye out for these indicators during routine maintenance can help catch problems early.
## Limitations of DIY Inspections
While DIY inspections have their place, there are significant limitations that homeowners should be aware of.
### Limited Experience and Risk of Misidentification
Identifying timber pest species and the extent of their damage requires training and experience. Homeowners may confuse termite damage with water damage, or misidentify harmless insects as destructive pests. Equally, active infestations can be easy to miss without knowing exactly what to look for.
### Missed Areas
Many of the most vulnerable parts of a home are difficult to access without specialised equipment. Crawl spaces, subfloor areas, roof voids, and wall cavities are common hiding spots for timber pests. Without thermal imaging cameras, moisture meters, and other professional tools, these areas may go unchecked during a DIY inspection.
### Treatment Issues
Even if you identify a pest problem, treating it effectively requires specialised knowledge. Over-the-counter treatments may provide temporary relief but are rarely sufficient for established infestations. Incorrect application of treatments can also pose health risks and may fail to address the root cause of the problem.
## When a Professional Inspection Is Essential
There are certain situations where a professional timber pest inspection is not just recommended but essential.
## DIY vs Professional Comparison
## Additional Considerations
### Regional Differences
Timber pest risk varies significantly across Australia. Northern regions with warmer, more humid climates tend to have higher termite activity than cooler southern areas. Homeowners in high-risk zones such as Queensland, the Northern Territory, and northern New South Wales should consider more frequent professional inspections. Your local council or state pest management authority can provide guidance on risk levels in your area.
### A Hybrid Approach
For many homeowners, the most practical strategy combines both DIY and professional inspections. Conduct your own visual checks every few months, looking for common signs of timber pest activity around the perimeter of your home, in the subfloor (where accessible), and around any timber structures. Then schedule a comprehensive professional inspection annually or as recommended for your region. This hybrid approach balances cost savings with thorough coverage.
### Is Buying Off the Plan a Smart Investment Strategy?
Source: https://ownerinspections.com.au/articles/is-buying-off-the-plan-a-smart-investment-strategy
Published: 2024-02-21 | Updated: 2026-02-09 | Category: New Construction
Author: Maison Azdari
Buying off the plan in Australia involves purchasing a property before construction is complete, typically based on architectural drawings, a display suite, and the developer's marketing materials. It can be a smart strategy when market conditions favour price growth, as you lock in today's price for a property delivered in the future. However, the risks are significant: construction delays, market downturns, quality discrepancies, and developer insolvency can all affect your outcome. A [pre-settlement inspection](/articles/checklist-for-apartment-pre-settlement-inspections) before handover is one of the most important steps you can take to protect your investment.
The Australian off-the-plan market has grown rapidly in recent years, particularly for apartments in Sydney, Melbourne, Brisbane, and the Gold Coast. For some buyers, the potential for capital gains, tax depreciation benefits, and the ability to customise finishes make it an attractive option. For others, the uncertainty of buying something that does not yet exist, combined with the risk of defects in new builds, makes it a gamble. This guide helps you weigh both sides so you can make an informed decision.
## What Does Buying Off the Plan Mean?
When you buy off the plan, you enter into a contract to purchase a property that has not yet been built, or is still under construction. You typically pay a deposit (usually 10% of the purchase price) and then wait for the development to be completed before settling and taking possession.
During the construction period, which can range from one to three years or more, the developer builds the property according to approved plans and specifications. The final product you receive should match the contract documents, but in practice, there are often differences between what was promised and what is delivered.
## The Advantages
### Potential for Capital Gains
The most commonly cited advantage of buying off the plan is the opportunity for capital growth during the construction period.
### Tax Benefits
Off-the-plan purchases can offer specific tax advantages for investors:
### Customisation
Buying early in the development process may allow you to choose certain finishes and layouts:
## The Risks
### Construction Delays
Construction projects are subject to delays from weather, supply chain issues, labour shortages, and regulatory hold-ups. Delays can mean:
### Market Risk
Property values can decline during the construction period. If the market drops:
### Quality and Defects
Buying something that does not yet exist introduces uncertainty about the final product:
## Advantages vs Risks at a Glance
## Practical Tips for Off-the-Plan Buyers
## The Role of Pre-Settlement Inspections
A [pre-settlement inspection](/apartment-pre-settlement) is your opportunity to verify that the finished property matches the contract specifications and meets Australian building standards. Given that the NSW Government found 53% of buildings registered between 2016 and 2022 had serious defects, this step is not optional for informed buyers.
The inspection report gives you evidence to present to the developer for rectification before settlement, or to negotiate with confidence.
### What Are the Different Roof Types and Their Inspection Needs?
Source: https://ownerinspections.com.au/articles/understanding-different-roof-types-inspection-needs
Published: 2024-02-20 | Updated: 2026-01-30 | Category: Building Inspections
Author: Maison Azdari
Your roof is the first line of defence against Australia's harsh climate. From scorching summer heat to heavy tropical downpours and coastal salt spray, every roof endures significant stress throughout its lifespan. Understanding the type of roof on your property and its specific inspection needs is essential for protecting your investment and ensuring the safety of your household.
Different roof types and materials come with distinct advantages, vulnerabilities, and maintenance requirements. A flat roof in Brisbane faces very different challenges compared to a tiled hip roof in Melbourne or a metal gable roof in Perth. Knowing what to look for and when to call in a professional can save you thousands of dollars in preventable repairs.
This guide walks you through the five most common roof types found on Australian homes, compares popular roofing materials, and explains what a qualified building inspector checks during a roof assessment. Whether you are buying a new property, maintaining your current home, or planning a renovation, this information will help you make informed decisions about your roof.
> A well-maintained roof can last decades longer than a neglected one. Regular inspections are the most cost-effective way to extend roof life and avoid unexpected failures during severe weather events.
## Why Roof Inspections Matter
[Roof inspections](/roof-inspection) are not just about spotting visible damage. They are a preventative measure that identifies small issues before they become expensive problems. A cracked tile left unattended can allow moisture to penetrate the roof structure, leading to timber rot, mould growth, and even structural compromise over time.
In Australia, the [National Construction Code](https://www.abcb.gov.au/national-construction-code) published by the Australian Building Codes Board sets the minimum performance requirements for roofing systems. These requirements cover structural adequacy, weatherproofing, and energy efficiency. A professional inspection ensures your roof meets these standards and remains compliant.
Insurance is another important consideration. Many home insurance policies require evidence of regular maintenance. If a claim arises from a roof failure that could have been prevented through routine inspection, your insurer may reduce or deny the payout. This makes regular roof assessments a smart financial decision as well as a practical one.
For more on how weather conditions influence inspection outcomes, see our guide on [weather and inspections](/articles/how-weather-affects-property-inspection-reports).
## The Five Common Roof Types
### Gable Roof
The gable roof is one of the most recognisable roof styles in Australia. It features two sloping sides that meet at a central ridge, forming a triangular shape at each end. This simple design allows for excellent water runoff and ventilation, making it well suited to regions with heavy rainfall.
Gable roofs are relatively affordable to build and provide generous attic space. However, they can be vulnerable to wind damage in cyclone-prone areas because the flat gable end acts like a sail in strong gusts. In northern Queensland and other high-wind regions, additional bracing is often required to meet Australian standards.
**Inspection focus areas:** Ridge capping condition, gable end structural bracing, fascia and barge board integrity, ventilation adequacy, and flashing around the ridge line.
### Hip Roof
Hip roofs have slopes on all four sides that converge at a ridge or peak. This design is inherently more stable than a gable roof in high winds because there are no flat vertical ends to catch wind. Hip roofs are extremely popular across Australia, particularly in suburban housing developments built from the 1970s onwards.
The additional slopes create more surface area, which means more material and higher construction costs compared to gable roofs. The multiple ridges and hips also create more opportunities for water ingress if flashings deteriorate.
**Inspection focus areas:** Hip and ridge flashing, valley gutters, uniform tile or sheet alignment, eaves condition, and the integrity of multiple junction points.
### Flat Roof
Despite the name, flat roofs are not completely flat. They have a slight pitch, typically between one and five degrees, to allow water drainage. Flat roofs are common on modern architectural homes, commercial buildings, carports, and extensions in Australia.
Flat roofs require careful waterproofing because water does not run off as quickly as it does on a pitched roof. Ponding, where water collects in low spots, is a frequent issue. Over time, ponding can degrade the waterproof membrane and lead to leaks. Flat roofs also tend to accumulate debris, which can block drainage outlets and worsen ponding.
**Inspection focus areas:** Membrane condition and integrity, ponding areas, drainage outlet function, parapet wall flashing, and signs of UV degradation on exposed membranes.
### Gambrel Roof
The gambrel roof, sometimes called a barn roof, features two slopes on each side. The lower slope is steeper than the upper slope, creating additional usable space in the upper level. While more common in rural and heritage properties, gambrel roofs do appear in Australian residential architecture, particularly in farmhouse-style homes.
The transition point between the two slopes is a critical area for potential water ingress. The steeper lower section can also shed water at higher velocity, placing additional stress on guttering systems.
**Inspection focus areas:** Transition point flashing, lower slope water velocity impact on gutters, structural integrity of the dual-slope framing, and weatherproofing at the slope change.
### Mansard Roof
The mansard roof has slopes on all four sides, with each side having two slopes. The lower slope is almost vertical, while the upper slope is nearly flat. This design maximises interior space and is often seen on French-inspired architecture and some period homes in older Australian suburbs.
Mansard roofs are complex structures with many junction points, making them more susceptible to leaks if not properly maintained. The near-vertical lower sections can also be affected by wind-driven rain in ways that conventional pitched roofs are not.
**Inspection focus areas:** Dormer window flashing, near-vertical cladding condition, upper slope drainage, multiple junction point integrity, and structural adequacy of the complex framing system.
## Roof Types Comparison
| Roof Type | Wind Resistance | Water Drainage | Interior Space | Construction Cost | Maintenance Level |
| --------- | --------------- | -------------- | -------------- | ----------------- | ----------------- |
| Gable | Moderate | Excellent | Good | Low | Low |
| Hip | High | Very Good | Moderate | Moderate | Moderate |
| Flat | High | Poor to Fair | N/A | Low to Moderate | High |
| Gambrel | Low to Moderate | Good | Excellent | Moderate to High | Moderate to High |
| Mansard | Low to Moderate | Fair | Excellent | High | High |
## Common Roofing Materials in Australia
### Asphalt Shingles
Asphalt shingles are less common in Australia than in North America, but they are gaining popularity in some regions. They consist of a fibreglass or organic base coated with asphalt and surfaced with mineral granules. Shingles are lightweight, affordable, and available in a wide range of colours and styles.
In the Australian climate, asphalt shingles can suffer from UV degradation faster than in cooler climates. The granule surface helps reflect some solar radiation, but prolonged exposure to extreme heat can cause curling, cracking, and premature ageing.
**Inspection priorities:** Granule loss, curling or buckling, cracked or missing shingles, flashing condition at penetrations, and UV degradation patterns.
### Metal Roofing
Metal roofing, particularly Colorbond steel, is arguably the most popular roofing material in Australia. It is lightweight, durable, fire resistant, and available in a broad palette of colours designed to suit the Australian landscape. Metal roofing performs well in bushfire-prone areas and meets the Bushfire Attack Level (BAL) requirements specified in [AS 3959](https://www.standards.org.au/) published by Standards Australia.
Corrugated iron, standing seam, and klip-lok profiles are the most common metal roofing configurations. Each has different fixing methods and expansion tolerances. Metal roofs can last 50 years or more with proper maintenance but are susceptible to corrosion, particularly in coastal environments where salt spray is a factor.
**Inspection priorities:** Corrosion spots, loose or missing fasteners, sealant deterioration, expansion joint condition, flashing integrity, and gutter alignment. For details on how [sarking](/articles/the-importance-of-sarking-in-building-construction) works beneath metal roofing, see our dedicated guide.
### Tile Roofing
Concrete and terracotta tiles are staples of Australian residential roofing. Terracotta tiles have been used on Australian homes for well over a century, while concrete tiles became widespread from the 1960s onwards. Both types are durable, fire resistant, and provide excellent thermal mass, helping to regulate indoor temperatures.
Tiles are heavy, which means the roof structure must be designed to support the additional load. Cracked, chipped, or displaced tiles are common issues, often caused by foot traffic during maintenance, storm damage, or thermal movement over time. Bedding and pointing (the mortar that holds ridge and hip caps in place) deteriorate with age and require periodic repointing.
**Inspection priorities:** Cracked or broken tiles, displaced tiles, bedding and pointing condition, sarking integrity beneath tiles, valley flashing, and structural adequacy for tile weight.
### Slate Roofing
Slate is a premium natural stone roofing material with an expected lifespan of 75 to 100 years or more. It is found on heritage homes, churches, and prestige properties throughout Australia. Slate roofs are exceptionally durable, fire resistant, and virtually maintenance free when properly installed.
The main challenges with slate are cost and weight. Slate is significantly heavier than other roofing materials and requires specialist installation skills. Replacement slates can be difficult to source, particularly for heritage restoration projects where matching the original stone is important.
**Inspection priorities:** Cracked or delaminating slates, corroded fixings (often the fixings fail before the slate does), flashing condition, structural adequacy for the heavy load, and evidence of past repairs using incompatible materials.
## Roofing Materials Comparison
| Material | Lifespan | Cost Range (per sqm) | Pros | Cons |
| -------------------------- | ---------------- | -------------------- | ----------------------------------------------------- | -------------------------------------------------------- |
| Asphalt Shingles | 15 to 30 years | $25 to $50 | Affordable, lightweight, easy to install | UV degradation, shorter lifespan in hot climates |
| Metal (Colorbond) | 40 to 60+ years | $30 to $70 | Durable, fire resistant, lightweight, recyclable | Can dent, corrosion risk in coastal areas, noise in rain |
| Tile (Concrete/Terracotta) | 50 to 80+ years | $40 to $80 | Excellent thermal mass, fire resistant, long lasting | Heavy, requires strong structure, tiles can crack |
| Slate | 75 to 100+ years | $100 to $250+ | Exceptional longevity, natural beauty, fire resistant | Very expensive, heavy, specialist installation required |
## What Do Inspectors Check During a Roof Assessment?
A comprehensive [roof inspection](/articles/how-roof-inspections-enhance-the-longevity-of-brisbane-homes) covers far more than simply looking for missing tiles or visible leaks. Professional building inspectors follow a systematic process that evaluates the entire roofing system, from the external surface down to the internal ceiling lining.
### External Inspection
The external inspection covers all visible roof surfaces, including:
- **Roof covering condition:** Checking for cracked, broken, displaced, or deteriorated roofing materials
- **Flashings:** Inspecting all flashing points around chimneys, vents, skylights, walls, and roof junctions
- **Ridge and hip capping:** Assessing the condition of mortar bedding, pointing, and mechanical fixings
- **Gutters and downpipes:** Checking for blockages, corrosion, incorrect falls, and secure fixings
- **Eaves and fascias:** Looking for rot, pest damage, paint failure, and structural adequacy
- **Roof penetrations:** Examining seals around pipes, aerials, air conditioning units, and solar panel mounts
### Internal Inspection
Where accessible, inspectors examine the roof space from inside:
- **Roof framing:** Checking for cracked, bowed, or undersized structural members
- **Sarking and insulation:** Assessing the condition and coverage of sarking membranes and insulation batts
- **Ventilation:** Evaluating whether roof space ventilation is adequate to prevent condensation and heat buildup
- **Signs of leaks:** Looking for water staining, mould growth, or active moisture on timbers
- **Pest activity:** Identifying evidence of termite damage, possum access, or bird nesting
For a broader understanding of what a complete building inspection covers, refer to our [comprehensive guide to house inspections](/articles/a-comprehensive-guide-to-house-inspections).
## DIY Roof Checks vs Professional Inspections
Homeowners can and should perform basic visual checks on their roof throughout the year. From ground level, you can observe missing or displaced tiles, sagging ridge lines, blocked gutters, and obvious damage after storms. These observations are valuable for catching urgent issues early.
However, DIY checks have significant limitations. Walking on a roof without proper training and safety equipment is dangerous and can cause additional damage, particularly on tile roofs where foot traffic cracks tiles. Internal roof space inspections require knowledge of structural systems, electrical hazards, and safe access methods.
Professional inspectors bring specialised tools such as moisture meters, thermal imaging cameras, and drone technology for hard-to-access areas. They understand the relevant Australian Standards and can identify issues that an untrained eye would miss entirely.
**When DIY is appropriate:**
- Ground-level visual checks after storms
- Clearing accessible gutters (with proper ladder safety)
- Observing ceiling stains or drips from inside the home
**When you need a professional:**
- Pre-purchase property inspections
- After significant weather events (see our guide on [resilient home construction](/articles/resilient-home-construction-building-for-extreme-weather-conditions))
- Suspected structural issues or persistent leaks
- Insurance claim documentation
- Periodic maintenance inspections (recommended every two to three years)
## How Much Does a Roof Inspection Cost?
Roof inspection costs in Australia generally range from $100 to $500, depending on several factors:
- **Property size:** Larger homes with more roof area take longer to inspect
- **Roof complexity:** Multi-level homes with numerous penetrations, valleys, and junctions require more time
- **Access difficulty:** Steep pitches, multi-storey buildings, or roofs requiring drone access may incur additional fees
- **Scope of inspection:** A standalone roof inspection is less expensive than a full building inspection that includes the roof
- **Location:** Metropolitan areas typically have more competitive pricing than regional or remote locations
A standalone visual roof inspection for a standard three-bedroom home typically costs between $150 and $300. A comprehensive roof inspection including thermal imaging and a detailed written report may cost $300 to $500. These costs are modest compared to the potential expense of undetected roof failures, which can run into tens of thousands of dollars.
## Insurance Implications of Roof Condition
Your roof's condition directly affects your home insurance in several ways. Insurance companies assess risk based on the age, type, and condition of your roof when setting premiums. A roof in poor condition or made from materials with known vulnerabilities may attract higher premiums or specific exclusions.
If you lodge a claim for water damage or storm damage, your insurer will investigate whether the damage resulted from a sudden event or from gradual deterioration due to lack of maintenance. Claims arising from deferred maintenance are commonly denied. Having documented evidence of regular professional inspections strengthens your position in the event of a claim.
Some insurers offer premium discounts for homes with newer roofs or roofs made from resilient materials such as Colorbond steel. If you are replacing your roof, it is worth discussing material choices with your insurer to understand any potential premium benefits.
## When to Call a Professional
Certain signs warrant an immediate call to a qualified building inspector or roofing professional:
- Water stains appearing on ceilings or walls
- Visible sagging in the roof line
- Missing, cracked, or displaced roofing materials after storms
- Persistent musty smells suggesting hidden moisture or mould
- Evidence of pest activity in the roof space
- Roof age exceeding 25 years without a recent professional assessment
- Before purchasing a property (always include a roof inspection in your pre-purchase assessment)
Acting quickly when you notice these signs can prevent minor issues from escalating into major structural problems. For more on what to expect from a professional assessment, visit our [house inspections guide](/articles/a-comprehensive-guide-to-house-inspections).
## Key Takeaways
- **Different roof types have different vulnerabilities.** Gable roofs are susceptible to wind, flat roofs to ponding, and complex designs like mansard roofs to junction leaks.
- **Material choice affects lifespan and maintenance.** Metal roofing offers the best balance of durability and cost for most Australian conditions.
- **Regular inspections prevent costly repairs.** Small issues caught early cost a fraction of what major failures cost to fix.
- **Professional inspections are essential.** DIY checks complement but cannot replace qualified assessments with proper tools and expertise.
- **Insurance depends on maintenance.** Documented inspection history supports insurance claims and may reduce premiums.
- **Australian conditions are demanding.** UV exposure, extreme heat, coastal salt, and severe storms all accelerate roof deterioration.
- **Inspection costs are modest.** Expect to pay between $100 and $500, a small investment compared to the cost of roof failure.
## Frequently Asked Questions
### How often should I have my roof inspected?
Most roofing professionals and building inspectors recommend a full roof inspection every two to three years. Homes in harsh environments such as coastal areas, cyclone regions, or bushfire zones may benefit from annual inspections. You should also arrange an inspection after any significant weather event.
### Can I inspect my own roof?
You can perform basic visual checks from ground level, which is helpful for spotting obvious issues like missing tiles or blocked gutters. However, a professional inspection is necessary for a thorough assessment. Walking on roofs without training is dangerous and can cause damage, particularly on tile roofs.
### What is the most durable roofing material for Australian conditions?
For most Australian conditions, Colorbond steel offers the best combination of durability, fire resistance, weight, and value. Slate is the most durable overall but comes at a significantly higher cost. Terracotta tiles also perform exceptionally well and can last 80 years or more.
### How long does a roof inspection take?
A typical roof inspection for a standard residential property takes between one and two hours. Larger or more complex properties may take longer. The inspector will examine external surfaces, internal roof spaces (where accessible), gutters, flashings, and all associated components.
### Does a building inspection include the roof?
Yes. A standard [pre-purchase building inspection](/pre-purchase-inspections) in Australia includes an assessment of the roof. However, the depth of the roof assessment can vary between providers. If roof condition is a particular concern, consider requesting a dedicated roof inspection in addition to the general building inspection.
### What are the signs that my roof needs replacing rather than repairing?
Signs that suggest replacement include widespread deterioration across more than 30 percent of the roof surface, structural sagging, repeated leaks in multiple locations despite repairs, and roof age approaching or exceeding the expected lifespan for the material. A qualified inspector can advise whether repair or replacement is the more cost-effective option.
### Are metal roofs noisier than tile roofs?
Metal roofs can be noisier during heavy rain, but modern installation techniques significantly reduce this issue. Proper sarking, insulation, and ceiling linings absorb much of the sound. Many homeowners with well-insulated metal roofs report no noticeable noise difference compared to tile.
### Do flat roofs leak more than pitched roofs?
Flat roofs are not inherently more prone to leaking, but they do require more diligent maintenance. Because water drains more slowly on flat roofs, any defect in the waterproof membrane or drainage system can lead to ponding and eventual leaks. Regular inspection and prompt repairs are critical for flat roof longevity.
### What qualifications should a roof inspector have?
In Australia, building inspectors should hold a relevant licence issued by their state or territory building authority. Look for inspectors with qualifications in building inspection or construction management, professional indemnity insurance, and membership in a recognised industry body. Experience with your specific roof type is also valuable.
### Can roof damage affect my home's structural integrity?
Yes. Prolonged roof leaks can cause timber framing to rot, weaken structural connections, and allow mould to spread through wall and ceiling cavities. In severe cases, undetected roof damage has led to partial ceiling collapses. This is why routine inspections are so important for maintaining overall [structural integrity](/articles/structural-integrity-inspection).
### How does extreme weather affect roof inspection timing?
Inspections should ideally be conducted in dry, calm conditions for safety and accuracy. However, post-storm inspections are sometimes necessary regardless of conditions. Inspectors may use drones or other remote methods when direct roof access is unsafe. For more on this topic, see our article on [weather and inspections](/articles/how-weather-affects-property-inspection-reports).
## Protect Your Home With a Professional Roof Inspection
Your roof is one of the most critical components of your home, and it deserves regular professional attention. Whether you are concerned about an ageing roof, planning to buy a property, or simply want peace of mind ahead of storm season, a qualified inspection is the best place to start.
Our licensed building inspectors have extensive experience assessing all roof types and materials across Australia. We provide detailed, easy-to-understand reports with photographic evidence and clear recommendations.
[Contact us today](/roof-inspection) to book your roof inspection and protect your most valuable asset.
### Expert Witnesses Balancing Homeowner vs Insurance Disputes
Source: https://ownerinspections.com.au/articles/expert-witnesses-balancing-homeowner-vs-insurance-disputes
Published: 2024-02-15 | Updated: 2026-04-08 | Category: Expert Witness
Author: Maison Azdari
When a homeowner lodges a property damage claim, the insurance company deploys its own assessors, engineers, and loss adjusters to evaluate the situation. These professionals work for the insurer, not the homeowner. The result is often a significant imbalance of expertise and resources that can leave homeowners struggling to achieve a fair outcome.
Expert witnesses serve as independent professionals who provide objective, evidence-based analysis of property damage and building defects. Their role is not to advocate for either party but to present factual findings that help resolve disputes efficiently and fairly. In homeowner vs insurance company disputes, this independence is what makes expert witnesses so valuable.
Whether your insurer has undervalued your claim, denied it outright, or you simply disagree with their assessment, engaging an expert witness can be the difference between accepting an inadequate settlement and receiving the compensation you are entitled to.
Insurance Claim
Assessment Guide
}
buttonHref="/guides/insurance-claim-assessment-guide"
variant="secondary"
/>
## Understanding Homeowner vs Insurance Disputes
Disputes between homeowners and insurance companies typically arise when there is a disagreement about the cause, extent, or cost of property damage. These conflicts can be stressful, time-consuming, and financially draining for homeowners who often lack the technical expertise to challenge an insurer's assessment.
Common reasons homeowner vs insurance disputes occur include:
Insurance companies have dedicated claims teams with access to engineers, quantity surveyors, and legal professionals. Homeowners, on the other hand, may have limited knowledge of building standards, construction costs, and insurance policy interpretation. This imbalance is where expert witnesses play a critical balancing role.
> For example, a homeowner may be told roof damage is due to wear and tear, while an independent inspection finds recent storm-driven water entry and hidden internal damage. That kind of technical disagreement is where expert evidence can change the direction of a claim.
## The Role of Expert Witnesses in Insurance Disputes
An expert witness in a homeowner vs insurance dispute provides independent, professional opinions on the technical aspects of the claim. Their role is to present objective findings based on their qualifications, experience, and thorough investigation of the property.
Expert witnesses in insurance disputes may be called upon to:
The key distinction between an expert witness and other building professionals is the expert's duty to the court. While an insurer's assessor works for the insurance company and a homeowner's builder works for the homeowner, an expert witness owes their primary duty to the tribunal or court. This obligation to independence gives their evidence significant weight in dispute resolution.
An expert witness does not decide the insurance outcome. Their job is to provide impartial technical evidence that may support negotiations, AFCA complaints, or tribunal proceedings.
## Independent Analysis and Case Evaluation
The foundation of an expert witness's contribution to an insurance dispute is their independent analysis. This process involves a thorough evaluation of the property, the damage, and the competing claims made by the homeowner and the insurer.
A useful expert report usually combines four things: site evidence, document review, causation analysis, and repair costing. In practice, that means inspecting the property, reviewing the insurer’s scope and correspondence, identifying where the evidence agrees or differs, and setting out a clear schedule of repair work with reasons.
### Site Inspection and Documentation
The expert witness conducts a comprehensive site inspection that goes well beyond what a standard [insurance assessment](/insurance-claim-assessments) typically covers. This includes:
### Cause and Origin Analysis
One of the most contested aspects of insurance disputes is the cause of the damage. Insurers may argue that damage was caused by lack of maintenance, wear and tear, or a non-covered event. The expert witness provides an independent assessment of causation based on their professional experience and the physical evidence.
This analysis considers factors such as weather records, building age and construction methods, maintenance history, and the pattern of damage observed. The expert's findings on causation can be decisive in determining whether a claim is valid and what the insurer is liable for.
### Scope and Cost Assessment
Expert witnesses provide detailed assessments of the scope of work required to properly rectify the damage. This typically includes a comprehensive schedule of works and independent cost estimates based on current market rates. Their costings are based on what is reasonably required to restore the property to its pre-damage condition, which may differ significantly from the insurer's estimate.
## Settlement Recommendations
A well-prepared expert report can give a homeowner a stronger basis for negotiation by clarifying the likely cause of damage, the repair scope, and a reasonable cost range. It may also help AFCA or a tribunal understand the technical issues more quickly. Their recommendations are based on:
Having an independent expert's assessment of the appropriate settlement figure gives the homeowner a credible basis for negotiation. Insurance companies are more likely to revise their position when confronted with a well-documented, independent expert opinion that they know would carry weight in tribunal proceedings.
## Mediation and Dispute Resolution
Many insurance disputes are resolved through mediation before they reach a tribunal or court. Mediation is a structured negotiation process where a neutral mediator helps the parties reach a mutually acceptable agreement. Expert witnesses play an important role in this process.
### How Expert Witnesses Support Mediation
During mediation, the expert witness can:
The presence of a credible expert witness at mediation often encourages more reasonable negotiation from both sides. The insurer knows that if mediation fails, the expert's evidence will be presented at a hearing. This reality check can significantly improve the prospects of settlement.
### Complaint Pathways Before Tribunal: AFCA
If you cannot resolve the dispute directly with the insurer, AFCA may be an option before tribunal action. AFCA handles [complaints about general insurance](https://www.afca.org.au/make-a-complaint/insurance) and can consider independent expert evidence as part of its process.
### Escalation to Tribunal or Court
If mediation is unsuccessful, the dispute may proceed to a tribunal such as NCAT in New South Wales, VCAT in Victoria, or QCAT in Queensland. In these proceedings, the [expert witness report](/expert-witness-reports) becomes formal evidence, and the expert may be required to give oral evidence and face cross-examination.
Expert witnesses who have experience in tribunal proceedings understand the procedural requirements and can present their evidence effectively. Their familiarity with the process adds credibility and ensures that the technical evidence is communicated clearly to the decision-maker.
## Tips for Hiring an Expert Witness
Choosing the right expert witness is critical to the success of your insurance dispute. The following considerations will help you make an informed decision.
### Check Credentials and Qualifications
How to Choose
the Right Expert Witness
}
buttonHref="/articles/how-to-choose-a-legal-expert-witness"
variant="secondary"
/>
### What to Avoid When Hiring an Expert Witness
## Insurance Dispute Pathways by State
For most homeowner versus insurer disputes, the first external complaint pathway is AFCA. That is because AFCA handles many consumer complaints about general insurance, including home and contents issues. State tribunals may still become relevant where the dispute involves home building insurance, warranty insurance, defective building work, or a related review process.
| State | Main external complaint pathway | Tribunal or review pathway that may also apply | Where expert evidence fits |
| --- | --- | --- | --- |
| NSW | AFCA for most consumer home and general insurance complaints | NCAT may also be relevant for home building matters, including some insurance claim appeals under the [*Home Building Act 1989*](https://legislation.nsw.gov.au/view/html/inforce/current/act-1989-147) | An expert report can help explain causation, the extent of damage, the repair scope, and a reasonable rectification cost. NCAT also has formal procedures for expert evidence. |
| Victoria | AFCA for most consumer home and general insurance complaints | VCAT may also be relevant for building and construction disputes, including disputes between a property owner and a warranty insurer | Expert reports should stay within the expert’s actual field of knowledge and remain independent. In VCAT matters, an expert’s duty is to the Tribunal, not the party who engaged them. |
| Queensland | AFCA for most consumer home and general insurance complaints | QCAT may also be relevant for domestic and commercial building disputes. For some QBCC home warranty insurance decisions, the review pathway can run through QBCC internal review and then QCAT |
Expert evidence is often used to address building defects, technical cause, repair scope, and rectification cost. In QCAT matters, the expert’s role is to assist the tribunal rather than act as an advocate. |
**The key point for homeowners is this:** if the dispute is mainly about a standard insurance claim decision, AFCA is often the main external pathway. If the dispute also involves building defects, statutory warranty insurance, or a reviewable building-related decision, a state tribunal may also come into play.
In either pathway, a clear and independent expert report can help explain what happened, what repairs are actually needed, and whether the insurer’s scope matches the evidence.
For a complete overview, see our [guide to expert witness reports for building disputes](/guides/expert-witness-building-disputes-guide).
Dealing with a property damage insurance dispute? See our [guide to insurance claim assessments](/guides/insurance-claim-assessment-guide) for practical steps to get a fair outcome.
### The Role of Clear Contracts in Avoiding Construction Disputes
Source: https://ownerinspections.com.au/articles/the-role-of-clear-contracts-in-avoiding-construction-disputes
Published: 2024-02-15 | Updated: 2026-02-09 | Category: Expert Witness
Author: Maison Azdari
A clear, well-structured construction contract is the most effective tool for preventing building disputes in Australia. The contract should define the scope of work, payment terms tied to construction milestones, a formal change order process, specific material and quality standards, and a staged dispute resolution procedure. According to the Australian Bureau of Statistics, construction disputes remain a consistent challenge, with the December quarter of 2023 alone recording 67 disputes involving 18,600 employees and 44,200 working days lost.
Construction projects involve multiple parties, large sums of money, and months or years of work. Without a clear written agreement, misunderstandings about scope, cost, timelines, and quality are almost inevitable. These misunderstandings turn into disputes, which lead to delays, cost blowouts, damaged relationships, and expensive tribunal or court proceedings. A well-drafted contract does not guarantee a dispute-free project, but it significantly reduces the risk and provides a clear framework for resolving problems when they do arise.
## Why Clear Contracts Matter
### Preventing Misunderstandings
Vague or poorly worded contract language is one of the most common causes of construction disputes. When terms are open to interpretation, parties may disagree later about what was originally intended. This can lead to costly arguments about deadlines, materials, scope, and quality standards.
A clear contract removes ambiguity by specifying exactly what is to be done, how, when, and at what cost. Every stakeholder, including owners, builders, and subcontractors, can refer back to the same document to confirm expectations.
### Acting as a Reference Point
Throughout a construction project, questions arise about scope, responsibilities, and standards. A detailed contract serves as the single source of truth that all parties can refer to. This consistent reference reduces the risk of misaligned expectations and provides a basis for resolving disagreements quickly.
### Supporting Communication
When all parties share a clear understanding of the contract terms, communication becomes more effective. Questions can be addressed by reference to specific clauses, potential problems can be identified early, and collaboration replaces conflict.
## Key Elements of a Construction Contract
## Common Contract Pitfalls
## How Contracts Prevent Specific Disputes
### Scope Disputes
A detailed scope of work clause eliminates arguments about what was agreed. If the builder claims certain work was not included, the contract provides a clear answer.
### Payment Disputes
Milestone-based payment schedules ensure that payments align with completed stages of work. This prevents situations where homeowners pay for work that has not been done or builders are left unpaid for completed work.
### Quality Disputes
Specifying materials, brands, finishes, and reference to the National Construction Code (NCC) and Australian Standards sets a measurable benchmark for quality. If the finished work does not meet these specifications, the homeowner has clear grounds for requiring rectification.
### Variation Disputes
A formal change order process means that any addition or modification to the original scope is documented, costed, and approved in writing before work begins. This prevents disputes about costs for additional work that was never formally agreed.
## Dispute Resolution Clauses
Most construction contracts include a staged dispute resolution process:
## The Role of Building Inspectors in Contract Enforcement
Building inspectors play a practical role in enforcing construction contracts. They provide independent, evidence-based assessments of whether the work meets the contract specifications, building codes, and safety regulations.
Independent inspections give both parties an objective assessment, which often helps resolve disputes without escalation.
For a complete overview, see our [guide to expert witness reports for building disputes](/guides/expert-witness-building-disputes-guide).
### Bored Piers vs Driven Piles: Understanding the Difference
Source: https://ownerinspections.com.au/articles/bored-piers-vs-driven-piles-understanding-the-difference
Published: 2024-02-14 | Updated: 2026-05-20 | Category: New Construction
Author: Maison Azdari
Bored piers and driven piles both support buildings by transferring loads from the structure into stronger ground below. The main difference is how they are installed. Bored piers are drilled, reinforced and filled with concrete in place, while driven piles are pushed, hammered or driven into the ground as prefabricated or partly prefabricated elements.
For Australian homes, townhouses, apartments and commercial buildings, the right foundation type depends on soil conditions, site access, structural loads, vibration limits, engineering design and local building requirements. AS 2870 covers residential slabs and footings, while AS 2159 is referenced for piling design and installation in Australian piling specifications.
For property buyers, the concern is not only whether a home has bored piers or driven piles. The bigger issue is whether the foundation system shows signs of movement, cracking, poor drainage, settlement or hidden construction defects. A [pre-purchase inspection](/pre-purchase-inspections) can help identify visible defects, structural concerns, moisture damage and safety issues before a buyer commits to the property. Owner Inspections’ pre-purchase service page says the inspection helps identify defects and safety concerns before purchase, including structural issues, moisture damage and pest concerns.
## What Are Bored Piers?
Bored piers are deep foundation supports made by drilling cylindrical holes into the ground, placing steel reinforcement inside the holes and pouring concrete into them. In technical documents, this type of work may be described as cast-in-place reinforced concrete piling. [Austroads ATS 5240](https://austroads.gov.au/publications/test-methods/ats-5240) sets out requirements for piles constructed with cast-in-place reinforced concrete, including unlined piles and piles with steel lining.
A bored pier helps transfer building loads through weaker surface soil and into stronger soil or rock below. This makes bored piers useful on sites with reactive clay, fill, soft ground, sloping land, nearby structures or areas where vibration from driven piles may create risk.
### How Bored Piers Are Constructed
| Step | What Happens | Why It Matters |
| ------------- | ---------------------------------------------------------------------- | ----------------------------------------------- |
| Site set-out | Pier locations are marked from engineering drawings | Keeps the bored piers aligned with the design |
| Drilling | A rig drills each bore hole to the required depth and diameter | Helps reach the required founding material |
| Bore support | Casing or support methods may be used in unstable ground | Reduces collapse risk before concrete placement |
| Reinforcement | Steel reinforcement cages are placed inside the bore | Helps the pier resist structural forces |
| Concrete pour | Concrete is placed into the drilled hole | Forms the finished concrete bored pier |
| Connection | The pier is connected to a slab, footing beam, pile cap or ground beam | Transfers building loads into the pier |
Austroads ATS 5240 includes requirements for pile hole inspection, founding level, reinforcement, concrete placement, pile testing, records and certification, which shows why bored piers construction needs proper site control.
### Advantages of Bored Piers
### Limitations of Bored Piers
## What Are Driven Piles?
Driven piles are foundation elements installed by driving prefabricated or partly prefabricated piles into the ground. Austroads ATS 5230 covers driven piles, including prestressed concrete piles, reinforced concrete piles, steel piles, tubular piles and composite piles.
Driven piles are often used where ground conditions allow efficient driving and where the project needs faster installation. The pile is driven until it reaches the required depth, resistance or founding condition set by the engineering design.
### How Driven Piles Are Constructed
| Step | What Happens | Why It Matters |
| -------------- | ----------------------------------------------------------- | --------------------------------------------------- |
| Pile selection | The engineer selects the pile type, length and size | Matches the foundation to the loads and ground |
| Delivery | Piles are brought to site before installation | Saves time compared with forming each pile in place |
| Positioning | A rig or crane places the pile at the set-out point | Helps keep the pile layout accurate |
| Driving | The pile is driven into the ground using suitable equipment | Transfers loads to stronger ground |
| Monitoring | Driving behaviour and resistance are recorded | Helps confirm installation performance |
| Connection | The pile head is cut and connected to the structure above | Completes the load path |
Austroads ATS 5230 includes monitoring of pile driving, acceptance of piles, pile testing, installation records and certification of conformance.
### Advantages of Driven Piles
### Limitations of Driven Piles
## Bored Piers vs Driven Piles Comparison
The biggest difference between bored and driven piles is the installation method. Bored piles or bored piers are drilled and concreted in place, while driven piles are installed by driving a pile into the ground.
| Factor | Bored Piers | Driven Piles |
| ------------------- | ------------------------------------------------------------------ | --------------------------------------------------------- |
| Installation method | Drilled, reinforced and concreted in place | Driven, hammered or pushed into the ground |
| Noise | Usually lower than driven piles | Can be noisy during installation |
| Vibration | Usually lower | Can create vibration near nearby buildings |
| Spoil | Produces soil and rock spoil | Usually produces less spoil |
| Best use | Complex ground, tight sites, lower-vibration sites, rock sockets | Suitable soils, larger projects, faster programmes |
| Main risk | Hidden defects inside the bore or concrete | Noise, vibration, pile damage or refusal |
| Inspection need | Bore depth, base cleanliness, cage position and concrete placement | Driving records, pile condition, alignment and acceptance |
Austroads includes noise, vibration and property damage considerations in both cast in place pile and driven pile specifications, which is why nearby buildings and site conditions matter when choosing between bored piers and driven piles.
## Piers vs Piles: What Is the Difference?
In simple terms, a pier is a vertical support that carries building loads down into the ground, while a pile is usually a deeper foundation element that transfers loads into stronger soil or rock below the surface.
In residential construction, the term “bored pier” is often used for a drilled concrete foundation support. In engineering documents, the same support may be described as a bored pile, especially where it forms part of a deeper or larger foundation system.
| Term | Plain-English Meaning | Common Use |
| ----------- | -------------------------------------------- | ----------------------------------------------- |
| Pier | A vertical foundation support | Residential building language |
| Bored pier | A drilled concrete pier formed in the ground | House foundations, slabs, extensions |
| Pile | A deep foundation element | Engineering and commercial construction |
| Driven pile | A pile driven into the ground | Civil, commercial and some residential projects |
| Bored pile | A drilled and concreted pile | Larger deep foundation works |
The key difference between piers and piles is usually depth, design language and project type. For property buyers, the more practical question is whether the foundation shows signs of cracking, movement, settlement or poor drainage.
## When to Choose Bored Piers
## Bored Piles Advantages and Disadvantages
| Advantages of Bored Piles and Bored Piers | Disadvantages of Bored Piles and Bored Piers |
| --------------------------------------------------- | -------------------------------------------------- |
| Useful where weak surface soils need to be bypassed | Can be slower than driven piles |
| Lower vibration than many driven pile methods | Produces spoil that must be removed |
| Can be designed for different depths and diameters | Needs careful inspection before concrete placement |
| Useful for rock sockets and complex ground | Defects can be hidden below ground |
| Suitable for many tight urban sites | May need casing, support fluid or water control |
Austroads ATS 5240 covers cast in place reinforced concrete piles, including pile construction, drilling support fluids, steel liners, founding level, reinforcement, concrete placement, pile testing and records.
## When to Choose Driven Piles
## Driven Piles Advantages and Disadvantages
| Advantages of Driven Piles | Disadvantages of Driven Piles |
| ------------------------------------------------ | ----------------------------------------- |
| Fast installation in suitable ground | Noise can affect nearby properties |
| Factory-made pile quality can be consistent | Vibration can affect nearby structures |
| Usually produces less spoil than bored piers | Obstructions or rock can cause refusal |
| Driving records provide useful installation data | Pile damage can occur during installation |
| Useful for civil and commercial projects | Access and headroom can limit use |
Austroads ATS 5230 covers driven pile supply and installation, including concrete piles, steel piles, tubular piles, monitoring of pile driving, pile acceptance, pile testing, installation records and certification.
## Concrete Bored Piers and Bored Pier Footing
Concrete bored piers are formed by drilling a hole, placing steel reinforcement and filling the shaft with concrete. Once cured, the pier acts as a vertical support below the structure.
A bored pier footing is the part of the foundation system where the bored pier connects to the slab, ground beam, pile cap or footing above. This connection matters because it transfers the building load into the pier and then into stronger ground.
The Victorian Building Authority explains that [footings support the building](https://www.vba.vic.gov.au/__data/assets/pdf_file/0020/33536/Minimising-foundation-movement-and-damage-to-your-house-info-sheet.pdf), while the foundation is the soil or rock that supports the footings.
Common bored pier footing issues include:
- Incorrect pier depth
- Poor reinforcement placement
- Loose material at the base of the bore
- Water inside the drilled hole
- Poor concrete placement
- Missing inspection records
- Moor connection between the pier and footing beam
These issues can be hard to see once concrete is poured, which is why pre-pour checks matter during bored piers construction.
## Bored Piers Australian Standards and Compliance Checks
For Australian residential work, bored piers and footing systems should be designed around the site’s soil conditions, engineering requirements and relevant Australian Standards.
AS 2870 applies to residential slabs and footings. Standards Australia lists [AS 2870-2011](https://www.standards.org.au/standards-catalogue/standard-details?designation=as-2870-2011) as the standard for residential slabs and footings. AS 2159 applies to piling design and installation, and [Austroads piling specifications](https://austroads.gov.au/publications/test-methods/ats-5240) refer to AS 2159 for pile installation and testing unless contract documents state otherwise.
Consumer Affairs Victoria says building plans should consider foundation data, including soil tests, to work out suitable foundation depth, excavation costs and an adequate footing system.
### What Should Be Checked Before Concrete Is Poured?
| Check | Why It Matters |
| ------------------ | -------------------------------------------------------- |
| Pier location | Confirms the bored pier matches the engineering drawings |
| Pier depth | Confirms the bore reaches the required founding level |
| Pier diameter | Confirms the pier has the correct size |
| Clean bore base | Reduces weak bearing risk |
| Reinforcement cage | Confirms steel size, cover and position |
| Water or collapse | Identifies unstable ground before concrete placement |
| Concrete placement | Helps reduce voids and weak spots |
| Inspection records | Supports future verification if defects appear |
Consumer Affairs Victoria also says a building surveyor checks minimum building regulations, but does not check whether the work meets the standard agreed in the contract. Owners can engage an independent building consultant to assess whether work meets contract requirements.
## Soil Conditions and Foundation Choice
Soil conditions can change across suburbs, streets and even different parts of the same block. Reactive clay, sand, fill, rock, groundwater and sloping land can all affect whether bored piers or driven piles are suitable.
Reactive clay soil can shrink and swell as moisture levels change. The Victorian Building Authority says changes in foundation moisture can contribute to cracking in walls and floors due to movement.
| Ground Condition | Possible Foundation Risk | Common Engineering Response |
| ---------------- | ------------------------------ | ---------------------------------------------- |
| Reactive clay | Shrink and swell movement | Deeper footings, bored piers, moisture control |
| Loose sand | Settlement | Piles or engineered footing design |
| Fill | Unreliable bearing | Piers through fill into natural ground |
| Rock | Early refusal for driven piles | Bored piers or rock sockets |
| High groundwater | Bore collapse or water inflow | Casing, dewatering or alternate piling method |
| Tight urban site | Vibration and access limits | Bored piers or low-vibration methods |
Foundation choice should be based on soil data, engineering design and site conditions rather than a simple preference for one system.
## The Importance of Geotechnical Surveys
A geotechnical survey, also called a soil investigation, checks the ground before the foundation is designed. It may include boreholes, test pits, soil classification, groundwater observations and laboratory testing.
Consumer Affairs Victoria says foundation data, including soil tests, helps determine foundation depth, excavation costs and an adequate footing system.
A geotechnical report can help identify:
- Soil type
- Bearing capacity
- Reactive soil classification
- Groundwater level
- Fill or uncontrolled ground
- Rock depth
- Excavation conditions
- Foundation design risks
For bored piers, the geotechnical report helps the engineer decide pier depth, pier diameter, reinforcement requirements and founding material.
## Foundation Inspections for Property Buyers and Owners
For property buyers, foundation issues are usually identified through visible signs rather than direct inspection of concealed bored piers or driven piles. A pre-purchase inspection can help identify visible warning signs before purchase, while a [defect investigation report](/pre-purchase-inspections) may be more suitable when cracking, movement or unusual property issues need closer assessment. Owner Inspections says defect reports examine the sources of defects and recommend repair solutions beyond a standard home inspection.
NSW Government says a building inspection report is a [written account of a property’s condition](https://www.nsw.gov.au/housing-and-construction/buying-and-selling-property/buying-property-nsw/inspecting-a-property/inspection-reports) and can include significant defects such as wall movement, cracking, rising damp, safety hazards and roof faults.
Warning signs that may point to foundation movement include:
- Diagonal cracking from window or door corners
- Stepped cracking in brickwork
- Uneven or sloping floors
- Doors or windows that stick
- Gaps around skirtings, walls or cornices
- Water ponding near the building
- Drainage falling towards the home
- Visible settlement around paths or paving
A standard pre-purchase building inspection usually does not confirm the condition of concealed bored piers, driven piles or footings. NSW Government notes that a building inspector would not normally check footings or other parts that were not or could not be inspected.
## Getting the Most Value from Your Home and Building Investment
Bored piers and driven piles can both support safe, long-lasting buildings when they are designed, installed and checked correctly. The right option depends on the site, soil, engineering design and construction conditions.
For buyers and owners, the main concern is not just which foundation type was used. The bigger question is whether the home shows signs of movement, poor drainage, cracking, settlement or construction defects that need further review.
[Owner Inspections](/) helps property buyers, owners, builders and real estate professionals identify visible defects, structural warning signs, drainage problems and risks that may need further advice. Book a building inspection before buying, building or ignoring cracks that may point to foundation movement.
### Keep Termites at Bay with Top-notch Construction Tactics
Source: https://ownerinspections.com.au/articles/keep-termites-at-bay-with-top-notch-construction-tactics
Published: 2024-02-08 | Updated: 2026-02-09 | Category: Mould & Pests
Author: Maison Azdari
Termites cause an estimated $3.9 billion in damage across Australia every five years, with the average infested home costing around $10,000 to repair. The most effective way to protect your property is to build termite prevention into the construction process from the start. This includes using termite-resistant materials, installing physical and chemical barriers, managing moisture around the structure, reducing wood-to-ground contact, and scheduling regular professional inspections under Australian Standard AS 4349.3.
According to the Australian Environmental Pest Managers Association, termites affect roughly 650,000 homes every five years. Modern construction methods and the gradual breakdown of older chemical treatments leave many homes more vulnerable than owners realise. If your home is your biggest financial investment, termite prevention should be at the top of your priorities list during the build.
## Termite-Resistant Building Materials
Choosing the right materials during construction is one of the simplest and most effective ways to deter termites. Not all building materials attract termites equally, and selecting wisely at the design stage can save you thousands in future repairs.
### Treated Wood
Pressure-treated wood is infused with preservative chemicals that make it unpalatable and toxic to termites. It is widely available across Australia and commonly used for structural components such as bearers, joists, and framing. When specifying treated timber, look for H2 or H3 hazard class ratings as defined by Australian Standard AS 1604.1, which indicates suitability for above-ground or in-ground use.
### Concrete and Steel Framing
Concrete and steel are naturally unappealing to termites. While the upfront cost is higher than timber framing, these materials offer long-term peace of mind in termite-prone regions such as coastal Queensland and northern NSW. Steel framing in particular has become increasingly popular in new residential builds across Australia.
### Termite-Resistant Hardwoods
Certain Australian hardwood species, including cypress pine, ironbark, and specific eucalypt varieties, have natural resistance to termite attack. These timbers contain oils and resins that termites find difficult to consume. However, natural resistance varies between species and even between individual trees, so they should be used as part of a broader prevention strategy rather than as a standalone solution.
## Creating Barriers Against Termites
Barriers are one of the most reliable construction-phase defences against termite entry. They work by either physically blocking or chemically deterring termites from reaching the building's structural elements.
### Physical Barriers
Physical termite barriers, often made from stainless steel mesh or crushed granite particles, are installed at strategic points during construction. These include around plumbing penetrations, at the slab edge, and between the foundation and framing. Products such as Termimesh and Granitgard are commonly specified in Australian builds. Physical barriers do not degrade over time and do not require chemical top-ups, making them a low-maintenance option.
### Chemical Soil Treatments
Chemical soil treatments involve applying a liquid termiticide to the soil surrounding and beneath the foundation. This creates a treated zone that either kills or repels termites attempting to reach the structure. These treatments typically last 5 to 10 years, depending on the product used and soil conditions, and must comply with Australian Standard AS 3660.1.
### Reticulation Systems
Reticulation systems are networks of perforated pipes installed beneath the slab or around the perimeter during construction. They allow for the scheduled replenishment of chemical soil treatments without digging up the ground. This makes retreatment faster, less disruptive, and more cost-effective over the building's lifetime.
## Moisture Management Is Key
Termites are attracted to moisture. A damp subfloor, leaking pipe, or poorly drained site can turn an otherwise well-protected home into a termite magnet. Managing moisture during and after construction is a simple but powerful prevention strategy.
### Proper Drainage and Grading
The ground around your home should slope away from the foundation so that stormwater drains away rather than pooling against the structure. During construction, ensure the builder grades the site correctly and installs appropriate drainage, including agricultural drains and stormwater pits where needed.
### Fixing Leaks and Addressing Water Pooling
Even small plumbing leaks inside wall cavities or under slabs create the damp conditions termites thrive in. Address any plumbing issues immediately during and after construction. Watch for areas where water collects near the building, such as under downpipes without splash blocks or near air conditioning units.
### Adequate Ventilation
Good ventilation in crawl spaces and subfloor areas prevents moisture buildup. The NCC sets minimum ventilation requirements for subfloor spaces. During construction, make sure vents are correctly sized and positioned, and that they are not blocked by landscaping, stored items, or debris after the build is complete.
## Reduce Wood-to-Ground Contact
Direct contact between structural timber and the ground gives termites an open invitation into your home. Minimising or eliminating wood-to-ground contact during construction reduces the number of entry points available to termites.
### Elevated Foundations
In areas where pier-and-beam construction is common, elevated foundations create a gap between the ground and the structural timber. This gap makes termite activity easier to detect during inspections and harder for termites to bridge unnoticed. Minimum clearances are specified in AS 3660.1 and the NCC.
### Eliminate Wood in Landscaping Near the Home
Wood mulch, garden sleepers, and landscaping timbers placed directly against the house provide termites with an easy bridge to the building's structure. Keep all timber and cellulose-based materials at least 150mm away from the external walls. Use stone, gravel, or rubber mulch as alternatives in garden beds adjacent to the house.
## The Importance of Regular Inspections
Even with the best preventive measures in place, regular professional inspections are the most reliable way to catch termite activity early before it causes significant damage.
### Professional Inspections
The Australian Standard AS 4349.3 recommends annual [timber pest inspections](/timber-pest-inspections) carried out by a qualified inspector. These inspections cover the interior, exterior, subfloor, roof void, and surrounding grounds. Inspectors use moisture meters, thermal imaging cameras, and sometimes radar devices to detect concealed termite activity behind walls and in areas not visible to the naked eye.
### Signs of Termite Activity to Watch For
Between professional inspections, homeowners should stay alert to common signs of termite presence:
## Construction Phase Termite Checklist
Before and during your build, work through the following checklist with your builder and pest management professional:
## Cost Comparison: Prevention vs Treatment
Investing in termite prevention during construction is significantly cheaper than treating an infestation and repairing the resulting damage after the fact.
### When to Replace Your Roof in Australia
Source: https://ownerinspections.com.au/articles/when-to-replace-your-roof-in-australia
Published: 2024-02-07 | Updated: 2026-02-09 | Category: Roof Inspections
Author: Maison Azdari
Most Australian roofs last between 20 and 50+ years depending on the material. Concrete tiles can last over 50 years, metal roofs typically last 30 to 50 years, and asphalt shingles last 15 to 25 years. You should consider replacing your roof when you notice cracked or missing tiles, persistent leaks, a sagging roofline, rising energy bills, or when the roof is more than 20 years old and showing visible deterioration. A professional [roof inspection](/roof-inspection) is the best way to confirm whether repair or replacement is the right course of action.
Your roof is your home's first line of defence against Australia's harsh climate. The Bureau of Meteorology reports that extreme weather events including heatwaves, intense rainfall, and cyclones are becoming more frequent across the country. These conditions accelerate roof wear and make it more important than ever for homeowners to understand when their roof has reached the end of its serviceable life.
## Factors Affecting Roof Lifespan
Several factors determine how long your roof will last. Understanding these helps you plan ahead and avoid unexpected failures.
### Roofing Material
The material your roof is made from is the single biggest factor in its lifespan. Each material has a different level of durability, maintenance requirement, and resistance to Australian weather conditions.
### Weather Conditions
Australia's climate puts enormous stress on roofing materials. Intense UV radiation causes fading, cracking, and degradation of roof coatings over time. Severe storms and hailstones cause direct impact damage such as cracked tiles and dented metal. Coastal properties face additional corrosion risks from salt spray, which is particularly harsh on metal roofs without marine-grade coatings.
### Maintenance History
A roof that receives regular maintenance will last significantly longer than one that is neglected. Simple actions like clearing gutters, removing debris, and replacing broken tiles early all contribute to extending the roof's serviceable life.
## Roof Lifespan by Material
## Signs Your Roof May Need Replacing
Knowing the warning signs helps you act before minor issues become major structural problems.
### Age of the Roof
If your roof is over 20 years old, it is worth scheduling a professional inspection even if there are no visible issues. Many roofing problems develop gradually and are not visible from the ground until significant damage has already occurred.
### Visible Damage
Inspect your roof from ground level for obvious signs of wear:
### Leaks and Water Damage
Water stains on ceilings, damp patches in the roof cavity, and water pooling at the base of the house are all indicators that the roof is no longer performing its primary function. Even small leaks can cause significant damage to insulation, framing, and internal linings if left unaddressed.
### Sagging Roofline
A visibly sagging roofline is a serious warning sign that may indicate structural failure in the rafters, trusses, or supporting framework. This requires immediate professional assessment as it can pose a safety risk.
### Rising Energy Bills
When a roof's insulation or reflective coating degrades, your home becomes harder to heat in winter and cool in summer. If your energy bills have increased without a clear explanation, your roof's thermal performance may have declined.
## The Benefits of Timely Roof Replacement
Replacing your roof at the right time saves you money and protects your property in the long run.
## How to Choose the Right Time for Replacement
### Get a Professional Assessment
A qualified building inspector or roofing specialist can accurately assess your roof's condition using tools like thermal imaging, moisture meters, and drone photography. They can tell you whether targeted repairs will extend the roof's life or whether a full replacement is the better investment.
### Weigh Cost Against Risk
Consider the ongoing cost of patching and repairing an ageing roof compared to the one-off cost of replacement. If you are spending money on repairs every year or two, replacement often works out cheaper over a five to ten year period.
### Choose the Right Season
Spring and early autumn are generally the best times for roof replacement in Australia. The weather is milder, there is less chance of rain delays, and tradespeople are often more available than during the peak summer building season.
### Check Financing Options
If the upfront cost of a full roof replacement is a concern, explore financing options. Some roofing companies offer payment plans, and many homeowners use home equity or renovation loans to spread the cost.
### How Do Insurance Companies Assess Claims in Australia?
Source: https://ownerinspections.com.au/articles/how-do-insurance-companies-assess-claims-in-australia
Published: 2024-02-06 | Updated: 2026-02-12 | Category: Insurance
Author: Maison Azdari
Filing an insurance claim for property or construction damage can be a stressful experience. Whether you are a homeowner dealing with storm damage, a builder managing a construction defect claim, or a contractor facing liability issues, understanding how insurers assess claims gives you a significant advantage.
In Australia, insurance companies follow a structured process when evaluating claims. This process involves multiple stages, several parties, and detailed documentation requirements. Knowing what to expect at each stage helps you prepare a stronger claim and avoid the common mistakes that lead to delays, underpayment, or outright denial.
For a complete overview, see our [guide to insurance claim assessments](/guides/insurance-claim-assessment-guide).
## The Six Stages of Insurance Claim Assessment
Australian insurers follow a broadly consistent process when handling property and construction claims. While the specifics may vary between companies, the general framework includes six stages that move from initial lodgement through to final settlement.
Understanding these stages allows you to anticipate what the insurer needs at each point and provide the right information at the right time.
## Stage 1: Claim Lodgement
The process begins when you notify your insurer of the loss or damage. Most Australian insurers provide 24-hour claims hotlines, online portals, and mobile apps for lodging claims. At this stage, the insurer collects basic information about the incident, including the date and time of the event, the type of damage, and a brief description of what occurred.
Prompt lodgement matters. Many policies require notification within a reasonable timeframe, and delays can weaken your position. When you lodge the claim, you will receive a claim reference number that you should keep for all future correspondence.
## Stage 2: Appointment of Specialist Assessor
For anything beyond minor claims, the insurer will appoint a specialist assessor, typically a loss adjuster or building consultant. Loss adjusters are independent professionals who investigate claims on behalf of the insurer. Their job is to determine what happened, assess the extent of damage, and recommend a settlement amount.
For construction-related claims, the insurer may also appoint structural engineers, quantity surveyors, or forensic building experts depending on the nature and complexity of the damage.
The assessor will contact you to arrange a site visit. This visit usually occurs within one to two weeks of lodgement, though natural disaster events can push this out significantly due to high claim volumes.
## Stage 3: Investigation and Evidence Gathering
This is the most detailed stage of the process. The appointed assessor conducts a thorough on-site inspection, documenting damage through photographs, measurements, and written observations. They will examine structural elements, services, fixtures, and any contents affected by the incident.
The investigation typically includes:
- A visual assessment of all affected areas
- Photographic and video documentation
- Review of maintenance records and building history
- Interviews with property owners, tenants, builders, or witnesses
- Assessment of the cause and origin of the damage
- Identification of any pre-existing conditions
The assessor may also request access to building plans, previous inspection reports, council approvals, and any contracts with builders or tradespeople. If you have an independent building inspection report, this is the stage where it becomes particularly valuable as supporting evidence.
## Stage 4: Coverage Determination
Once the investigation is complete, the insurer reviews your policy to determine exactly what is covered. This stage involves detailed analysis of the policy wording, including coverage limits, exclusions, conditions, and any endorsements or special provisions.
Common exclusions in Australian construction and property policies include:
- Wear and tear or gradual deterioration
- Damage caused by poor maintenance or neglect
- Settling, shrinkage, or ground movement (unless specifically covered)
- Faulty workmanship (though consequential damage may be covered)
- Flood damage (unless flood cover is included)
## Stage 5: Valuation of Loss or Damage
After confirming coverage, the insurer calculates the financial value of the claim. This valuation considers repair costs, replacement costs, temporary accommodation or business interruption expenses, and any other consequential losses covered by the policy.
The insurer may obtain independent repair quotes, use their own panel of builders, or rely on the loss adjuster's cost estimate. Discrepancies between the insurer's valuation and your own builder's quote are common and can be a source of dispute.
| Valuation Method | How It Works | When It Is Used |
| -------------------- | ---------------------------------------------------------------------------- | ----------------------------------------------- |
| Repair cost estimate | Assessor calculates the cost to restore the property to pre-damage condition | Most property damage claims |
| Replacement value | Cost to replace damaged items with new equivalents | Contents claims and total loss scenarios |
| Indemnity value | Current market value accounting for age and depreciation | Older properties or items with significant wear |
| Agreed value | Pre-determined amount agreed when the policy was taken out | Specialty or high-value items |
## Stage 6: Decision and Settlement
The insurer makes a final decision based on all gathered information. Claims can be approved in full, approved in part, or denied. If approved, settlement may take the form of a cash payment, managed repairs using the insurer's preferred contractors, or a combination of both.
Under the General Insurance Code of Practice, insurers must inform you of their decision within specific timeframes. If your claim is denied or only partially approved, the insurer must provide written reasons and advise you of your dispute resolution options.
## Chain of Responsibility in Construction Claims
Construction insurance claims often involve multiple parties, and determining who is responsible for what can be complicated. The chain of responsibility in a construction project typically includes the property owner, head contractor, subcontractors, architects, engineers, and product manufacturers.
When damage occurs during or after construction, the insurer must determine which party's actions or products caused the problem. This analysis considers:
- Contractual obligations between parties
- Compliance with the Building Code of Australia (BCA)
- Adherence to Australian Standards
- State and territory building legislation
- Product warranties and manufacturer responsibilities
## Building Defects Insurance
In several Australian states, builders are required to hold building defects insurance (also known as home warranty insurance or domestic building insurance). This insurance protects property owners if the builder dies, disappears, or becomes insolvent and is unable to fix defects or complete work.
Coverage periods vary by state. In New South Wales, for example, the Home Building Compensation Fund covers structural defects for six years and non-structural defects for two years from completion. Victoria has similar provisions under the Domestic Building Insurance scheme.
It is worth noting that building defects insurance is a last resort. It only applies when the builder cannot be pursued directly. If the builder is still operating, the first step is to seek rectification from them under the building contract and relevant consumer protection laws.
## Alternative Dispute Resolution
If you disagree with the outcome of your [insurance claim assessment](/insurance-claim-assessments), you do not have to accept the insurer's decision. Australia has a well-established framework for resolving insurance disputes without going to court.
**Internal Dispute Resolution (IDR):** Every insurer must have a formal complaints process. You can request a review of the claim decision, and the insurer must respond within 30 calendar days.
**Australian Financial Complaints Authority (AFCA):** If the internal process does not resolve the dispute, you can escalate to AFCA. This is a free, independent service that can make binding decisions on insurers for claims up to $1 million. AFCA considers whether the insurer acted fairly and in accordance with the policy terms.
**State tribunals and courts:** For disputes outside AFCA's jurisdiction or where you prefer a different process, state consumer tribunals (such as NCAT in NSW or VCAT in Victoria) offer accessible dispute resolution pathways.
**Mediation and expert determination:** Some policies include provisions for mediation or expert determination, where an independent third party helps resolve disagreements about claim valuation or coverage.
Having strong documentation and an independent building inspection report can be a deciding factor in disputes. Professional, impartial evidence carries significant weight in all of these forums.
## How to Prepare for an Insurance Claim Assessment
Good preparation can make the difference between a smooth claim experience and a drawn-out dispute. The following recommendations apply whether you are making a claim for storm damage, construction defects, or any other insured event.
**Document everything immediately.** As soon as it is safe to do so, photograph and video all damage from multiple angles. Include wide shots for context and close-ups for detail. Record dates and times.
**Prevent further damage.** Take reasonable steps to stop the damage from getting worse. Tarp a leaking roof, board up broken windows, or turn off water at the mains if pipes have burst. Keep all receipts for materials and emergency repairs.
**Gather your records.** Pull together your insurance policy, building contracts, previous inspection reports, maintenance records, and receipts for any items you plan to claim. The more organised your documentation, the faster the assessment proceeds.
**Get an independent assessment.** Engaging a licensed building inspector to document the damage independently gives you a professional report that supports your claim. This is particularly valuable if you anticipate any disagreement with the insurer's assessment.
**Keep a claims diary.** Record every phone call, email, and interaction with your insurer, including the date, the person you spoke with, and what was discussed. This record protects you if disputes arise later about what was communicated.
**Review your policy before the assessor visits.** Understanding your coverage limits, excess amounts, and any exclusions helps you set realistic expectations and ask informed questions during the assessment.
For a complete overview, see our [guide to insurance claim assessments](/guides/insurance-claim-assessment-guide).
### Pre Inspection vs. Full Inspection: What
Source: https://ownerinspections.com.au/articles/pre-inspection-vs-full-inspection-whats-the-difference
Published: 2024-02-01 | Category: Building Inspections
Author: Maison Azdari
When purchasing a property, one of the most important decisions you will make is how
thoroughly you want it inspected before committing to the sale. Understanding the difference
between a pre-inspection and a full inspection can help you make informed choices that
protect your investment and give you peace of mind.
Both types of inspections serve valuable purposes in the property buying process, but they
differ significantly in scope, timing, cost, and the level of detail provided. Choosing the
right inspection type depends on your circumstances, the property market conditions, and
your risk tolerance.
In this comprehensive guide, we will explore the key differences between pre-inspections and
full inspections, help you understand when each type is most appropriate, and provide
practical guidance on making the best choice for your property purchase.
> Whether you opt for a pre-inspection, a full inspection, or both, having professional eyes
> assess a property before you buy is one of the smartest investments you can make in your
> property purchasing journey.
## What Is a Pre-Inspection?
A pre-inspection, sometimes called a preliminary inspection or walkthrough inspection, is a
preliminary assessment of a property conducted before you make a formal offer. This type of
inspection is designed to give you a quick overview of the property's condition and identify
any obvious red flags that might affect your decision to proceed.
Pre-inspections are typically shorter in duration, less comprehensive, and more affordable
than full building inspections. They provide a general snapshot of the property rather than
an exhaustive analysis of every system and component.
### Key Characteristics of Pre-Inspections
- **Preliminary walkthrough:** A visual assessment of the property's main features and accessible areas
- **Identifies obvious issues:** Focuses on visible defects, structural concerns, and major red flags
- **Quick turnaround:** Typically completed within 30 to 60 minutes
- **Lower cost:** Generally 40 to 60 percent less expensive than a full inspection
- **Limited scope:** Does not cover detailed analysis of all building systems
- **Before offer:** Conducted prior to making a formal purchase offer
### What Pre-Inspections Cover
During a pre-inspection, a qualified inspector will conduct a visual assessment of the
property's main areas and systems. While not as detailed as a full inspection, this
preliminary review typically includes:
- Visual assessment of the roof condition from ground level
- Exterior walls and cladding for obvious damage or deterioration
- Foundation and subfloor areas for visible signs of movement or damage
- General structural integrity observations
- Obvious signs of water damage, dampness, or mould
- Visible electrical hazards or outdated wiring
- Basic plumbing functionality checks
- Signs of pest activity or timber damage
- General property condition and maintenance level
### What Pre-Inspections Do Not Cover
It is important to understand the limitations of a pre-inspection. These preliminary
assessments do not include:
- Detailed roof inspections requiring ladder access
- Comprehensive subfloor and crawl space inspections
- Thorough testing of all electrical circuits and safety devices
- Complete plumbing system pressure testing and drainage checks
- HVAC system performance testing and analysis
- Detailed appliance testing and assessment
- Comprehensive moisture testing and thermal imaging
- Detailed written reports with photographs and recommendations
## What Is a Full Inspection?
A full building inspection, also known as a comprehensive property inspection or building
and [pest inspection](/timber-pest-inspections), is a thorough and detailed evaluation of a property's condition. This
inspection is typically conducted after your offer has been accepted, during the due
diligence period, and provides an exhaustive assessment of all accessible areas and systems.
Full inspections are conducted according to Australian Standard AS 4349.1 for building
inspections and AS 4349.3 for timber pest inspections. These standards ensure a consistent
and comprehensive approach to property assessment across Australia.
### Key Characteristics of Full Inspections
- **Comprehensive evaluation:** Detailed assessment of all accessible building elements and systems
- **Detailed reporting:** Written report listing all defects, potential issues, safety concerns, and recommendations
- **Negotiating leverage:** Findings can be used to negotiate purchase price or request repairs
- **Longer duration:** Typically takes 2 to 4 hours depending on property size
- **Higher cost:** More expensive but provides comprehensive coverage
- **After offer acceptance:** Conducted during the cooling off or due diligence period
- **Standards compliant:** Follows Australian Standard requirements
### What Full Inspections Cover
A full building inspection provides a comprehensive assessment of the property, including:
- **Structural elements:** Foundation, footings, walls, floors, ceilings, and roof structure
- **Roof exterior:** Roof covering, flashings, gutters, downpipes, and ventilation
- **Exterior:** Cladding, windows, doors, balconies, decks, and verandahs
- **Interior:** All rooms, fixtures, fittings, and internal finishes
- **Subfloor:** Stumps, bearers, joists, and subfloor ventilation
- **Roof void:** Framing, insulation, ventilation, and signs of leaks
- **Electrical systems:** Switchboard, safety switches, wiring, and power points
- **Plumbing:** Hot water system, visible pipes, fixtures, and drainage
- **HVAC:** Heating and cooling systems functionality
- **Moisture assessment:** Testing for dampness, water ingress, and leaks
- **Safety hazards:** Asbestos presence, smoke alarms, and other safety concerns
### Detailed Inspection Reports
One of the most valuable aspects of a full inspection is the comprehensive written report
you receive. A quality inspection report includes:
- Executive summary of key findings and recommendations
- Detailed assessment of each building element inspected
- Photographic evidence of all identified defects
- Classification of defects by severity (minor, significant, major)
- Safety concerns requiring immediate attention
- Maintenance recommendations for future care
- Areas that could not be inspected and reasons why
- Recommendations for further specialist inspections if required
## Pre-Inspection vs Full Inspection Comparison
The following table provides a side by side comparison of pre-inspections and full
inspections to help you understand the key differences:
| Aspect | Pre-Inspection | Full Inspection |
| -------------------- | ------------------------------------------- | ------------------------------------------------------------ |
| Scope | Preliminary visual assessment of main areas | Comprehensive evaluation of all accessible areas and systems |
| Timing | Before making an offer | After offer accepted, during due diligence |
| Duration | 30 to 60 minutes | 2 to 4 hours |
| Cost | $150 to $300 | $400 to $800 |
| Detail Level | General overview, identifies obvious issues | Detailed analysis with comprehensive reporting |
| Report | Brief summary or verbal feedback | Detailed written report with photos |
| Best Suited For | Quick decisions in competitive markets | Thorough due diligence before purchase |
| Negotiating Power | Limited, findings not detailed enough | Strong, detailed evidence for negotiations |
| Standards Compliance | Not required to follow standards | Follows AS 4349.1 and AS 4349.3 standards |
| Specialist Areas | Basic timber pest indicators only | Can include comprehensive pest inspection |
## Key Areas Examined in Both Inspection Types
While the depth of assessment varies significantly between pre-inspections and full
inspections, both types examine certain key areas of the property. Understanding what is
assessed can help you appreciate the value each inspection type provides.
### Foundation Integrity
The foundation is one of the most critical elements of any building. Foundation problems can
be extremely expensive to repair and may affect the entire structure.
- **Pre-inspection:** Visual check for obvious signs of foundation movement, cracking, or settling from accessible areas
- **Full inspection:** Comprehensive assessment including subfloor inspection, measurement of floor levels, crack analysis, and assessment of foundation type and condition
### Roof Condition
The roof protects the entire property from weather damage. Roof defects can lead to water
ingress, structural damage, and costly repairs.
- **Pre-inspection:** Ground level visual assessment of roof covering, gutters, and any visible damage or deterioration
- **Full inspection:** Detailed assessment including roof access where safe, examination of roof covering, flashings, valleys, gutters, downpipes, and roof void inspection
### Electrical Safety
Electrical defects pose serious safety risks including fire and electrocution hazards.
Outdated or faulty electrical systems often require significant investment to bring up to
current standards.
- **Pre-inspection:** Visual check of switchboard, presence of safety switches, obvious wiring concerns, and general power point condition
- **Full inspection:** Assessment of switchboard condition and capacity, testing of safety switches, examination of visible wiring, testing of power points and light switches, and identification of electrical hazards
### Plumbing Systems
Plumbing problems can cause significant damage to a property and can be expensive to repair,
particularly if pipes are concealed within walls or under floors.
- **Pre-inspection:** Basic functionality check of taps and toilets, visual inspection for obvious leaks, and assessment of hot water system type and age
- **Full inspection:** Comprehensive testing of water pressure, drainage, visible pipe condition, hot water system assessment, and identification of outdated or problematic plumbing materials
### HVAC Functionality
Heating, ventilation, and air conditioning systems are significant investments and important
for comfort. Understanding their condition helps you budget for potential replacement or
repairs.
- **Pre-inspection:** Visual check of unit condition and basic functionality test if easily accessible
- **Full inspection:** Testing of heating and cooling functions, assessment of system age and condition, check of ductwork where accessible, and identification of maintenance needs
### Appliances
If appliances are included in the sale, understanding their condition helps you assess the
overall value of the property and budget for potential replacements.
- **Pre-inspection:** Visual assessment of appliance condition and age
- **Full inspection:** Functional testing of included appliances, assessment of age and remaining useful life, and identification of any defects or concerns
### Interior and Exterior Elements
Walls, windows, doors, cladding, and other interior and exterior elements contribute to the
property's functionality, appearance, and weatherproofing.
- **Pre-inspection:** General visual assessment of interior and exterior condition, obvious defects, and maintenance level
- **Full inspection:** Detailed examination of all interior and exterior elements, testing of windows and doors, assessment of cladding and weatherproofing, and identification of all defects and maintenance requirements
## When to Choose a Pre-Inspection
Pre-inspections are particularly valuable in certain circumstances. Understanding when a
pre-inspection is the right choice can help you make strategic decisions in your property
search.
### Competitive Markets
In hot property markets where homes sell quickly and often attract multiple offers,
conducting a full inspection before making an offer may not be practical. A pre-inspection
allows you to:
- Quickly assess properties of interest before auction or offer deadline
- Identify major issues that would eliminate a property from consideration
- Make more informed decisions about how aggressively to bid or offer
- Reduce the risk of purchasing a property with significant hidden problems
### Multiple Property Comparisons
When you are comparing several properties and have not yet decided which one to pursue, pre-
inspections provide a cost effective way to:
- Screen multiple properties without the expense of full inspections
- Narrow down your shortlist based on condition as well as features
- Identify which properties warrant further investigation with a full inspection
- Make more informed decisions about where to focus your time and resources
### Budget Constraints
If you are watching your expenses during the property buying process, a pre-inspection can
provide valuable insights at a lower cost. However, it is important to note that:
- A pre-inspection should not replace a full inspection before settlement
- The money saved on pre-inspection should be applied to a full inspection once you are serious about a property
- The cost of missing a significant defect far exceeds the cost difference between inspection types
### Quick Decision Making
When you need to make fast decisions about a property, a pre-inspection offers:
- Same day or next day availability in most cases
- Quick turnaround on findings, often verbal feedback on site
- Enough information to make an informed decision about whether to proceed with an offer
- A foundation for subject to inspection clauses in your offer
## When to Choose a Full Inspection
A full inspection is the standard practice for property purchases in Australia and is
strongly recommended in most circumstances. Here is when a full inspection is essential:
### After Offer Acceptance
Once your offer has been accepted and you have entered into a contract, a full inspection
should be conducted during the cooling off or due diligence period. This is your opportunity
to:
- Thoroughly assess the property before committing to the purchase
- Identify any defects that may affect the property's value or your decision to proceed
- Gather evidence to negotiate price reductions or repairs
- Make an informed decision about whether to proceed with the purchase
### High Value Purchases
When purchasing a high value property, the investment in a full inspection is negligible
compared to the potential cost of undiscovered defects. For expensive properties:
- The financial stakes are higher, justifying more thorough investigation
- Complex homes often have more systems and features requiring assessment
- Luxury finishes and materials may require specialist knowledge to assess properly
- A comprehensive report provides confidence and documentation of the property's condition
### Older Properties
Properties built more than 30 years ago often have issues related to age and historical
building practices. A full inspection is crucial for older homes to:
- Identify deterioration of structural elements and building materials
- Assess electrical and plumbing systems that may need upgrading
- Detect asbestos containing materials common in pre-1990 construction
- Evaluate past repairs and renovations that may not meet current standards
- Identify maintenance that has been deferred over the years
### Properties with Visible Issues
If you have noticed any concerns during your own viewing of the property, a full inspection
is essential to:
- Investigate the cause and extent of visible problems
- Determine whether issues are cosmetic or structural
- Assess the cost of repairs and whether they are feasible
- Identify any related or underlying problems
### First Home Buyers
If you are buying your first home, a full inspection is particularly important because:
- You may lack experience in identifying property defects
- The inspector can explain issues and their significance
- The detailed report provides a maintenance guide for your new home
- Understanding the property's condition helps you budget for future expenses
## Cost Comparison and Value Analysis
Understanding the costs involved in each inspection type helps you make informed decisions
about where to invest in your property purchase process.
### Pre-Inspection Costs
Pre-inspections are typically priced between $150 and $300 depending on the property size
and location. This includes:
- A 30 to 60 minute on site assessment
- Verbal feedback or brief written summary
- General overview of major concerns
### Full Inspection Costs
Full building inspections typically cost between $400 and $800, with combined building and
pest inspections ranging from $500 to $900. This investment provides:
- A comprehensive 2 to 4 hour inspection
- Detailed written report with photographs
- Assessment of all accessible areas and systems
- Classification of defects by severity
- Recommendations for repairs and maintenance
### Return on Investment
When considering the cost of inspections, it is important to weigh this against the
potential savings and risk mitigation they provide:
- **Negotiating power:** Full inspection findings often result in price reductions of $5,000 to $50,000 or more, far exceeding the inspection cost
- **Avoiding costly surprises:** Major defects like structural issues, roof replacement, or asbestos removal can cost $20,000 to $100,000 or more
- **Peace of mind:** Knowing the true condition of a property is invaluable when making such a significant purchase
- **Decision making:** A full inspection may reveal issues that lead you to walk away from a problematic property entirely
| Inspection Type | Typical Cost | Potential Savings | ROI Potential |
| -------------------------- | ------------ | ------------------------------------------------------ | ------------- |
| Pre-Inspection | $150 to $300 | Avoids pursuing properties with major issues | Moderate |
| Full Inspection | $400 to $800 | $5,000 to $100,000+ in negotiations or avoided repairs | Very High |
| Combined Building and Pest | $500 to $900 | As above plus protection from timber pest damage | Very High |
## Benefits of Each Inspection Approach
Both pre-inspections and full inspections offer distinct benefits. Understanding these
advantages helps you leverage each inspection type effectively in your property search.
### Benefits of Pre-Inspections
- **Speed:** Quick assessment allows rapid decision making in fast moving markets
- **Cost efficiency:** Lower cost allows inspection of multiple properties during your search
- **Early warning:** Identifies major red flags before you invest time and emotion in a property
- **Competitive advantage:** Gives you confidence to act quickly when a good property comes on the market
- **Informed offers:** Helps you make offers with knowledge of the property's general condition
- **Flexibility:** Easy to schedule at short notice during your property search
### Benefits of Full Inspections
- **Comprehensive coverage:** Thorough assessment of all accessible areas and systems
- **Detailed documentation:** Written report provides evidence for negotiations and future reference
- **Negotiating leverage:** Specific findings support requests for price reductions or repairs
- **Legal protection:** Standards compliant inspection provides documentation if disputes arise
- **Maintenance planning:** Report serves as a guide for future property maintenance
- **Peace of mind:** Confidence that the property has been thoroughly assessed by a professional
- **Hidden defect detection:** Identifies issues that are not visible during casual viewing
- **Expert interpretation:** Inspector explains significance of findings and provides recommendations
## Protecting Buyers from Unexpected Expenses
One of the primary purposes of property inspections is to protect buyers from unexpected
expenses after purchase. Understanding how inspections provide this protection helps you
appreciate their value.
### Identifying Hidden Defects
Many significant property defects are not visible during a casual viewing. Professional
inspectors are trained to identify:
- Structural movement and foundation issues
- Concealed water damage and moisture problems
- Timber pest activity and damage
- Electrical hazards and non compliant wiring
- Plumbing defects and drainage issues
- Roof defects and potential leak points
- Asbestos containing materials
- Building defects concealed by recent cosmetic renovations
### Budgeting for Repairs
Even when defects do not prevent a purchase, knowing about them helps you budget for repairs
and maintenance. A thorough inspection report allows you to:
- Plan and prioritise repairs based on urgency and severity
- Obtain quotes for work before committing to the purchase
- Factor repair costs into your overall budget for the property
- Avoid financial stress from unexpected major expenses after settlement
### Negotiating Outcomes
Inspection findings provide leverage in purchase negotiations. With documented evidence of
defects, you can:
- Request a price reduction reflecting the cost of required repairs
- Ask the vendor to complete repairs before settlement
- Negotiate retention of funds in trust until specified work is completed
- Walk away from the purchase if issues are too significant or costly
### Insurance and Warranty Considerations
Understanding a property's condition through inspection also helps with insurance and
warranty matters:
- Accurate disclosure of property condition for insurance purposes
- Documentation of existing defects for future reference
- Identification of issues that may affect building warranty claims
- Evidence of property condition at purchase if disputes arise later
## A Strategic Approach: Using Both Inspection Types
For many buyers, the most effective approach is to use both pre-inspections and full
inspections strategically throughout their property search and purchase process.
### Phase 1: Property Search
During your property search phase, use pre-inspections to screen properties of interest:
- Arrange pre-inspections for properties you are seriously considering
- Use findings to eliminate properties with major obvious issues
- Narrow your shortlist to properties worth pursuing further
- Make more confident decisions about which properties to submit offers on
### Phase 2: Due Diligence
Once your offer is accepted, proceed with a full inspection during the due diligence period:
- Book a comprehensive building and pest inspection promptly after contract signing
- Review the detailed report thoroughly
- Discuss findings with the inspector to understand their significance
- Make informed decisions about proceeding with the purchase
### Phase 3: Negotiation
Use full inspection findings to negotiate the best outcome:
- Present documented defects to the vendor or their agent
- Request appropriate remedies such as price reduction or repairs
- Ensure any agreements are documented in writing
- Proceed to settlement with confidence in your purchase
## Frequently Asked Questions
###
Can I skip the full inspection if I have had a pre-inspection done?
**Short answer:** No, a pre-inspection should not replace a full inspection
before you commit to purchasing a property.
Pre-inspections are designed to give you a quick overview and identify obvious issues,
but they do not provide the comprehensive assessment needed to fully understand a
property's condition. Many significant defects are only discovered during a thorough
full inspection. Think of a pre-inspection as a screening tool and a full inspection as
the essential due diligence step before purchase.
###
How quickly can I get a pre-inspection arranged?
**Short answer:** Most inspection companies can arrange pre-inspections
within 24 to 48 hours, and sometimes same day if schedules permit.
Pre-inspections are designed to be quick and flexible, which is one of their key
advantages in competitive markets. Because they take less time to complete than full
inspections, inspectors can often fit them into their schedules at short notice. When
you find a property you are interested in, contact an inspection company immediately to
check availability.
###
What happens if a full inspection reveals major problems after I have made an offer?
**Short answer:** You can typically negotiate with the vendor, request
repairs, seek a price reduction, or withdraw from the contract during the cooling off
period.
This is exactly why full inspections are conducted during the due diligence or cooling
off period. If significant defects are discovered, you have options. You can negotiate
with the vendor for repairs or a price reduction that reflects the cost of addressing
the issues. If the problems are too severe, you can exercise your cooling off rights to
withdraw from the contract, although you may forfeit a small deposit. Always consult
your solicitor or conveyancer about your specific rights and options.
###
Should I attend the inspection or just wait for the report?
**Short answer:** Attending the inspection, particularly for a full
inspection, is highly recommended as it allows you to see issues firsthand and ask
questions.
While you will receive a detailed report, attending the inspection provides valuable
benefits. You can see defects firsthand rather than just in photos. The inspector can
explain issues in context and answer your questions on the spot. You get a better sense
of the property's overall condition and maintenance level. For pre-inspections, on site
verbal feedback is often the primary deliverable, making attendance essential.
###
Are pre-inspections worth the money if I am going to get a full inspection anyway?
**Short answer:** Yes, in competitive markets or when comparing multiple
properties, pre-inspections can save you time, money, and heartache.
A pre-inspection can identify major issues before you make an offer and become
emotionally invested in a property. If the pre-inspection reveals significant problems,
you save the cost of a full inspection and the time involved in the offer and due
diligence process. In fast moving markets, pre-inspections also give you confidence to
make competitive offers knowing you have at least a general understanding of the
property's condition.
###
Do inspection findings guarantee there are no other problems with the property?
**Short answer:** No, inspections assess visible and accessible areas only
and cannot guarantee the absence of concealed or future defects.
Both pre-inspections and full inspections have limitations. Inspectors can only assess
areas that are accessible and visible at the time of inspection. Defects concealed
within walls, under floor coverings, or in inaccessible spaces may not be detected.
Future issues that have not yet manifested cannot be predicted. This is why reputable
inspectors clearly state the limitations of their inspection and recommend further
investigation when they identify concerns that warrant specialist assessment.
## Choosing the Right Building Inspector
Whether you opt for a pre-inspection, a full inspection, or both, choosing a qualified and
experienced inspector is essential for getting accurate and useful results.
### Qualifications to Look For
- **Licensing:** Ensure the inspector holds appropriate building inspection licences for your state
- **Insurance:** Professional indemnity and public liability insurance protects you and the inspector
- **Experience:** Look for inspectors with extensive experience in the type of property you are purchasing
- **Membership:** Membership of professional bodies such as the Master Builders Association indicates commitment to standards
- **Pest qualifications:** If you need a combined building and pest inspection, ensure the inspector or their team holds timber pest inspection qualifications
### Questions to Ask
- What qualifications and licences do you hold?
- How long have you been conducting building inspections?
- Do you carry professional indemnity insurance?
- What does your inspection include and exclude?
- How long will the inspection take?
- When will I receive the report?
- Can I attend the inspection?
- What equipment do you use?
## Key Takeaways
- Pre-inspections provide a quick, affordable preliminary assessment ideal for competitive markets and screening multiple properties.
- Full inspections are comprehensive evaluations that should be conducted during the due diligence period before committing to purchase.
- Pre-inspections cost $150 to $300 and take 30 to 60 minutes, while full inspections cost $400 to $800 and take 2 to 4 hours.
- Both inspection types examine key areas including foundation, roof, electrical, plumbing, HVAC, and structural elements, but at different levels of detail.
- Full inspections provide detailed reports with photographs, defect classifications, and recommendations that support purchase negotiations.
- Using both inspection types strategically throughout your property search provides the best protection and value.
- A pre-inspection should never replace a full inspection, as many significant defects are only identified through comprehensive assessment.
- Choose qualified, licensed, and insured inspectors to ensure accurate and reliable results from either inspection type.
## References and Resources
- [ NSW Fair Trading ](https://www.fairtrading.nsw.gov.au/)
- [ Consumer Affairs Victoria ](https://www.consumer.vic.gov.au/)
- [ Queensland Building and Construction Commission (QBCC) ](https://www.qbcc.qld.gov.au/)
- [ Australian Building Inspection Services ](https://www.abis.com.au/)
- [ Standards Australia (AS 4349.1 and AS 4349.3) ](https://www.standards.org.au/)
### The Guide to Energy-Efficient Home Construction in Australia
Source: https://ownerinspections.com.au/articles/the-guide-to-energy-efficient-home-construction-in-australia
Published: 2024-01-30 | Updated: 2026-02-09 | Category: New Construction
Author: Maison Azdari
An energy-efficient home in Australia uses passive solar design, high-performance insulation, airtight construction, efficient heating and cooling systems, and renewable energy to reduce electricity and gas consumption. Under the National Construction Code (NCC), all new homes must meet minimum energy performance requirements, currently a 7-star NatHERS rating in most states. Building to higher efficiency standards reduces energy bills by 30% to 50% compared to standard homes, while also improving indoor comfort and lowering your carbon footprint.
With residential electricity prices continuing to rise across Australia, as documented by the ACCC's Electricity Market Inquiry Report, energy efficiency has become one of the most practical ways homeowners can control their running costs. An energy-efficient home is not just better for the environment. It is also more comfortable to live in and costs significantly less to run over its lifetime.
## Key Principles of Energy-Efficient Design
Getting the fundamentals right during the design stage is the most cost-effective way to build an energy-efficient home. Retrofitting later is always more expensive and less effective than building it in from the start.
### Orientation and Passive Solar Design
In the Southern Hemisphere, maximising northern exposure is the foundation of passive solar design. Design your home with large north-facing windows to capture winter sunlight for natural heating. Use eaves, pergolas, or external shade structures to block high-angle summer sun and prevent overheating.
Living areas should ideally face north, while utility rooms, bathrooms, and garages can be placed on the south side where solar gain is less important. The correct orientation alone can reduce heating and cooling energy needs by up to 30%.
### Insulation
High-quality insulation slows heat transfer through your walls, ceiling, and floor, keeping your home warmer in winter and cooler in summer. Common insulation types used in Australian homes include fibreglass batts, cellulose, rigid foam boards, and mineral wool.
The effectiveness of insulation is measured by its R-value, which indicates resistance to heat flow. Higher R-values mean better insulating performance. The NCC specifies minimum R-values for different climate zones across Australia, but building above these minimums delivers even better performance.
### Airtightness
A well-insulated home loses much of its benefit if air leaks through gaps around windows, doors, power points, and service penetrations. Airtightness is about sealing these gaps to prevent uncontrolled air movement while still providing controlled ventilation.
Use caulk, weatherstripping, and expanding foam to seal gaps during construction. Pay particular attention to areas where walls meet ceilings and floors, around plumbing and electrical penetrations, and at window and door frames.
## Building Materials and Systems
### Energy-Efficient Windows and Doors
Windows are one of the biggest sources of heat gain in summer and heat loss in winter. Upgrading to double-glazed or triple-glazed windows with low-E (low emissivity) coatings makes a significant difference.
### High-Efficiency Appliances
Appliances with high energy star ratings use significantly less electricity than standard models. When building a new home, specify energy-efficient refrigerators, washing machines, dishwashers, and air conditioning systems. The energy savings compound over the lifetime of each appliance.
### Sustainable Materials
Consider the embodied energy of your building materials. Locally sourced timber, recycled steel, and low-emission concrete all reduce the overall environmental impact of your build. Bamboo flooring, recycled content insulation, and sustainably harvested timber are popular choices in Australian energy-efficient homes.
## Heating, Cooling, and Ventilation
### Efficient Heating and Cooling Systems
Heat pumps, both air-source and ground-source, are among the most efficient heating and cooling options available. Reverse-cycle air conditioning systems, which are heat pumps, can deliver three to five units of heating or cooling energy for every one unit of electrical energy consumed.
Hydronic heating systems circulate heated water through underfloor pipes or radiators, offering zoned comfort and energy efficiency. Always ensure your heating and cooling system is correctly sized for your home. An oversized system wastes energy, while an undersized one cannot maintain comfortable temperatures.
### Ventilation
A well-sealed home needs a planned ventilation strategy to maintain indoor air quality. Heat recovery ventilators (HRVs) and energy recovery ventilators (ERVs) exchange stale indoor air for fresh outdoor air while recovering most of the heating or cooling energy that would otherwise be lost.
### Smart Home Technology
Programmable thermostats and smart home automation systems optimise energy use by running heating, cooling, and lighting only when needed. Smart systems can respond to occupancy, time of day, and outdoor temperature to minimise energy waste without sacrificing comfort.
## Renewable Energy Options
### Solar Power Systems
Solar photovoltaic (PV) panels convert sunlight into electricity and are one of the most popular renewable energy investments in Australia. Assess your roof's suitability based on orientation (north-facing is ideal), pitch, and shading.
Solar panel types include monocrystalline (highest efficiency), polycrystalline (good value), and thin-film (best for unconventional roof shapes). Government incentives, including Small-scale Technology Certificates (STCs), can significantly reduce the upfront cost of a solar system.
### Solar Hot Water
Solar hot water systems use the sun's energy to heat water, reducing the energy consumed by one of the biggest energy users in the average Australian home. These systems include flat plate collectors and evacuated tube collectors, often paired with a gas or electric booster for cloudy days.
### Battery Storage
Home battery systems store excess solar-generated electricity for use in the evening and at night, increasing your energy self-sufficiency. Battery storage makes solar power more useful by shifting your solar generation to match your consumption patterns.
## Energy Ratings and Regulations
### NatHERS Star Ratings
The Nationwide House Energy Rating Scheme (NatHERS) rates a home's thermal performance on a scale of 0 to 10 stars. A higher rating means lower heating and cooling energy needs. The NCC currently requires a minimum 7-star NatHERS rating for new homes in most states, though some states and developments set higher targets.
### National Construction Code Requirements
The NCC sets minimum energy efficiency requirements for all new homes and major renovations in Australia. These include requirements for insulation R-values, glazing performance, building sealing, lighting efficiency, and the energy performance of hot water systems. Your builder and designer should ensure your project meets or exceeds these standards.
## Benefits of Energy-Efficient Construction
### How to Build a Resilient Home for Extreme Weather in Australia
Source: https://ownerinspections.com.au/articles/resilient-home-construction-building-for-extreme-weather-conditions
Published: 2024-01-25 | Updated: 2026-01-30 | Category: New Construction
Author: Maison Azdari
Australia is no stranger to extreme weather. From the devastating bushfire seasons that sweep through New South Wales and Victoria to the cyclones battering Queensland's coastline, homeowners face a growing list of climate hazards. Building a resilient home is no longer a luxury. It is a necessity.
Resilient construction focuses on designing and building homes that can withstand, adapt to, and recover quickly from extreme weather events. Whether you are planning a new build or looking to retrofit an existing property, understanding the principles of resilient construction can save you significant costs, protect your family, and preserve the long-term value of your home.
This guide walks through the essential strategies for building a home that stands up to Australia's harshest conditions.
## Why Resilient Construction Matters in Australia
Australia's climate is becoming more volatile. The Bureau of Meteorology has recorded rising average temperatures, longer drought periods, and more intense rainfall events over the past two decades. These changes translate directly into increased risk for homeowners.
Insurance claims related to natural disasters have surged. The [Insurance Council of Australia](https://insurancecouncil.com.au/) has reported billions of dollars in claims from storms, floods, and bushfires in recent years alone. Homes built without resilience in mind suffer disproportionately.
> "Investing in resilient construction at the design stage typically adds 5 to 10 per cent to build costs, but can reduce long-term repair and insurance expenses by 30 per cent or more. It is one of the most cost-effective decisions a homeowner can make."
The [Australian Building Codes Board (ABCB)](https://www.abcb.gov.au/) sets minimum standards through the National Construction Code (NCC), but building beyond minimum compliance is strongly recommended for properties in high-risk areas.
## Site Selection and Preparation
### Choosing the Right Location
Before a single footing is poured, the site itself plays a critical role in your home's resilience. Key considerations include:
- **Flood mapping.** Check local council flood maps and avoid building in designated flood zones wherever possible.
- **Bushfire Attack Level (BAL).** Properties in bushfire-prone areas receive a BAL rating under [AS 3959](https://www.standards.org.au/standards-catalogue/sa-snz/building/fp-020/as--3959-colon-2018), which determines construction requirements.
- **Soil type and stability.** Reactive clay soils expand and contract with moisture changes, placing stress on foundations.
- **Topography.** Hilltop and ridgeline sites face higher wind loads, while low-lying areas are more flood-prone.
### Site Preparation Best Practices
Proper site preparation reduces long-term risk. This includes clearing vegetation to create defensible space around the home (particularly important for bushfire zones), ensuring adequate drainage away from the building envelope, and conducting thorough geotechnical surveys to understand soil conditions.
A professional [building inspection at the site preparation stage](/new-construction-stage-inspections) can identify potential issues before construction begins.
## Structural Fortification
### Foundations Built to Last
The foundation is your home's first line of defence against extreme weather. In cyclone-prone regions of northern Australia, engineered slab-on-ground or deep pier foundations are commonly specified to resist uplift forces.
For flood-prone areas, raising the floor level above the defined flood level is essential. The NCC provides guidance on minimum floor heights, but building above these minimums offers additional protection.
Reactive soil sites benefit from waffle pod or stiffened raft slab systems that distribute loads evenly and accommodate ground movement.
### Reinforced Framing
Standard timber framing may not provide adequate resistance in high-wind zones. Options for reinforced framing include:
- **Steel framing** for superior strength-to-weight ratios and termite resistance.
- **Engineered timber** products such as laminated veneer lumber (LVL) that offer consistent structural performance.
- **Cyclone tie-down systems** that connect the roof to the walls and walls to the foundations, creating a continuous load path.
The [Housing Industry Association (HIA)](https://hia.com.au/) provides resources for builders on compliant tie-down and bracing systems for various wind classifications.
### Roof Construction and Wind Resistance
The roof is the most vulnerable element of a home during storms and cyclones. A well-designed roof can mean the difference between minor repairs and catastrophic failure.
Key design principles include:
- Hip roof profiles perform better in high winds than gable roofs, as they present less surface area to wind forces.
- Roof pitch between 25 and 35 degrees offers a good balance of wind resistance and water shedding.
- Triple-grip brackets and structural screws at every rafter-to-top-plate connection provide additional security.
Understanding [different roof types and their inspection needs](/articles/understanding-different-roof-types-inspection-needs) is vital when planning a resilient build. Regular inspections help ensure that connections remain secure over the life of the building. For homeowners in Queensland, [professional roof inspections](/articles/how-roof-inspections-enhance-the-longevity-of-brisbane-homes) can identify vulnerabilities before storm season arrives.
## Resilient Construction Strategies by Hazard Type
| Hazard | Key Strategies | Relevant Standards |
| ------------- | ---------------------------------------------------------------------------------- | --------------------------------- |
| Bushfire | Non-combustible cladding, ember guards, BAL-rated windows, defendable space | AS 3959, NCC Section G5 |
| Flooding | Elevated floor levels, water-resistant materials below flood line, backflow valves | NCC, local council overlays |
| Cyclone/Storm | Continuous tie-down systems, hip roofs, impact-resistant glazing | AS/NZS 1170.2 (Wind Actions) |
| Heatwave | High-performance insulation, reflective roofing, cross-ventilation | NCC Section J (Energy Efficiency) |
| Hail | Impact-rated roofing materials, protected skylights, hail guards on equipment | AS 2049 (Roof Tiles) |
| Earthquake | Reinforced masonry, flexible connections, braced frames | AS 1170.4 (Earthquake Actions) |
## Water Intrusion Protection
Water damage is one of the most common and costly issues in Australian homes. Resilient construction addresses water intrusion at every level.
### External Waterproofing
The building envelope must shed water effectively. This involves:
- Quality [sarking and building wrap](/articles/the-importance-of-sarking-in-building-construction) installed correctly beneath cladding and roofing to act as a secondary moisture barrier.
- Properly detailed flashings at all wall-to-roof junctions, window heads, and penetrations.
- Adequate eave overhangs (minimum 450mm) to protect walls from driving rain.
### Drainage and Stormwater
On-site stormwater management is a critical but often overlooked element. Adequate sizing of gutters, downpipes, and stormwater drains prevents overflows during intense rainfall. Permeable paving and rain gardens can reduce runoff and lower the burden on municipal drainage systems.
### Internal Moisture Control
Condensation causes hidden damage within wall and roof cavities. Effective vapour barriers, adequate ventilation, and correct insulation placement work together to manage internal moisture. Understanding [how weather affects building performance](/articles/how-weather-affects-property-inspection-reports) helps homeowners plan maintenance schedules and identify warning signs early.
## Fire-Resistant Design Under AS 3959
For properties in bushfire-prone areas, compliance with [AS 3959 (Construction of Buildings in Bushfire-Prone Areas)](https://www.standards.org.au/standards-catalogue/sa-snz/building/fp-020/as--3959-colon-2018) is mandatory. The standard assigns a Bushfire Attack Level (BAL) based on vegetation type, slope, and distance from the hazard.
### BAL Ratings and Their Requirements
BAL ratings range from BAL-LOW (minimal risk) to BAL-FZ (flame zone, direct flame contact expected). Higher BAL ratings require increasingly robust construction methods:
- **BAL 12.5 to BAL 19.** Ember protection is the primary concern. Mesh screens on openings, non-combustible gutters, and tempered glass windows are required.
- **BAL 29.** Increased radiant heat exposure demands fire-rated external walls, bushfire-rated windows, and enclosed subfloor spaces.
- **BAL 40 and BAL-FZ.** Construction must withstand direct flame contact. Non-combustible external materials throughout, bushfire shutters, and metal or concrete construction are typically necessary.
### Practical Fire-Resistant Design Elements
Beyond code compliance, practical steps include:
- Installing ember-proof seals on all external doors.
- Using steel or fibre cement cladding instead of timber.
- Fitting 2mm aluminium mesh over all vents, weep holes, and openings.
- Creating and maintaining an Asset Protection Zone (APZ) around the home with low-fuel landscaping.
## Energy Efficiency and Sustainability
Resilient homes are also energy-efficient homes. A well-insulated, well-sealed building envelope not only withstands extreme weather but also reduces heating and cooling costs significantly.
### High-Performance Building Envelope
Achieving a high NatHERS star rating (7 stars or above) aligns closely with resilience goals. Strategies include:
- Double-glazed or low-E windows that reduce heat transfer while providing impact resistance.
- Bulk and reflective insulation in walls, ceilings, and floors exceeding minimum R-values.
- Airtight construction with controlled ventilation to manage both energy use and moisture.
### Renewable Energy and Backup Systems
Solar panels paired with battery storage provide energy independence during grid outages caused by storms or bushfires. A resilient home should include provisions for backup power to run essential systems such as water pumps, refrigeration, and communications.
Rainwater harvesting systems with adequate storage capacity supplement mains water supply and provide an independent water source during emergencies.
## Smart Home Technology for Resilience
Modern technology offers homeowners additional layers of protection and awareness.
- **Weather monitoring systems** provide real-time alerts for approaching storms, extreme heat events, or bushfire conditions.
- **Automated bushfire sprinkler systems** activate when ember attack is detected.
- **Leak detection sensors** alert homeowners to water intrusion before significant damage occurs.
- **Smart shutters and blinds** close automatically in response to high wind or heat events.
These technologies complement physical resilience measures and give homeowners greater control over their property's safety.
## Benefits of Resilient Home Construction
### Property Preservation
Homes built to withstand extreme weather maintain their structural integrity and aesthetic value over time. This reduces ongoing maintenance costs and avoids the disruption and expense of major repairs after weather events.
### Insurance Savings
Many insurers offer premium reductions for homes that exceed minimum building code requirements. Documenting resilient construction features and maintaining records of inspections can support applications for lower premiums.
### Peace of Mind
Knowing your home is designed and built to handle the worst that Australian weather can deliver provides genuine peace of mind. During emergency events, a resilient home is a safer place to shelter.
### Increased Property Value
Buyers are increasingly aware of climate risk. A demonstrably resilient home commands higher resale values, particularly in areas with a history of natural disasters.
## Financing Resilient Construction
Building beyond minimum code adds cost, but several options can help manage the investment:
- **Green home loans.** Some lenders offer discounted rates for homes that meet sustainability and resilience benchmarks.
- **Government grants and rebates.** Programs such as the Clean Energy Finance Corporation initiatives and state-based schemes may offset costs for energy-efficient and resilient features.
- **Staged upgrades.** For retrofits, prioritise the highest-risk elements first and address additional items over time.
[Master Builders Australia](https://www.masterbuilders.com.au/) can connect homeowners with accredited builders experienced in resilient construction techniques.
## Retrofitting Existing Homes for Resilience
Not everyone is building new. Fortunately, many resilience upgrades can be applied to existing homes.
### Priority Retrofits
The most impactful retrofits for existing homes include:
1. **Roof tie-down upgrades.** Adding cyclone straps or brackets to secure the roof structure to walls.
2. **Window protection.** Installing shutters, impact-resistant film, or upgrading to BAL-rated windows in bushfire zones.
3. **Sealing gaps.** Closing openings where embers, water, or pests can enter the building envelope.
4. **Drainage improvements.** Upgrading gutters, downpipes, and site drainage to handle increased rainfall intensity.
5. **Subfloor enclosure.** Closing off open subfloor areas to prevent ember entry and reduce flood damage potential.
### Getting a Professional Assessment
A qualified building inspector can assess your home's current resilience and recommend targeted improvements. This approach ensures you invest in the upgrades that deliver the greatest benefit for your specific location and risk profile.
## Key Takeaways
- **Site selection is foundational.** Choosing an appropriate location and understanding local hazards sets the stage for a resilient home.
- **Structural continuity matters.** A continuous load path from roof to foundation is essential for wind resistance.
- **Water management is multi-layered.** Effective sarking, flashing, drainage, and moisture control work together to prevent water damage.
- **AS 3959 compliance is mandatory in bushfire areas.** Building beyond the minimum BAL requirements provides additional safety margins.
- **Energy efficiency and resilience go hand in hand.** A high-performance building envelope serves both goals simultaneously.
- **Retrofitting is worthwhile.** Even modest upgrades to existing homes can significantly reduce vulnerability to extreme weather.
- **Professional inspections are essential.** Regular inspections at every stage of construction and throughout the life of the building ensure resilience measures remain effective.
## Frequently Asked Questions
### What is resilient home construction?
Resilient home construction refers to design and building practices that enable a home to withstand, adapt to, and recover from extreme weather events such as bushfires, floods, storms, and heatwaves. It goes beyond minimum building code requirements to provide enhanced protection.
### How much extra does it cost to build a resilient home in Australia?
Building a resilient home typically adds 5 to 15 per cent to standard construction costs, depending on the level of protection and local hazard requirements. This additional investment is often recovered through lower insurance premiums, reduced maintenance costs, and higher property values.
### What is a Bushfire Attack Level (BAL) rating?
A BAL rating is an assessment under AS 3959 that classifies the level of bushfire threat to a building site. Ratings range from BAL-LOW to BAL-FZ (flame zone) and determine the construction requirements for external walls, windows, doors, roofing, and other elements.
### Can I retrofit my existing home for resilience?
Yes. Many resilience measures can be added to existing homes, including roof tie-down upgrades, window protection, improved drainage, sealing of gaps and openings, and installation of bushfire sprinkler systems. A professional inspection helps identify the most effective upgrades for your property.
### What roof shape is most resistant to wind?
Hip roofs, which slope inward on all four sides, generally perform best in high-wind conditions. They present less surface area to wind forces compared to gable roofs and distribute wind loads more evenly across the structure.
### Does resilient construction improve my home's energy efficiency?
Yes. Many resilience strategies, such as high-performance insulation, quality glazing, and airtight construction, directly improve energy efficiency. A resilient home typically achieves a higher NatHERS star rating and lower running costs.
### Are there government incentives for building resilient homes?
Various federal and state government programmes offer grants, rebates, or low-interest loans for energy-efficient and disaster-resilient construction. The availability and scope of these programmes change regularly, so check with your local council and state government for current offerings.
### How often should a resilient home be inspected?
Annual inspections are recommended, with additional checks before and after severe weather seasons. Key areas to monitor include roof connections, drainage systems, seals around openings, and the condition of fire-resistant elements.
### What materials are best for bushfire-prone areas?
Non-combustible materials such as steel framing, fibre cement cladding, concrete or clay roof tiles, and tempered or toughened glass are preferred in bushfire zones. Timber can be used in lower BAL zones with appropriate treatment and detailing.
### Does building a resilient home affect insurance premiums?
Many insurers recognise resilient construction features and may offer reduced premiums. Providing documentation of your home's resilience measures, including inspection reports and compliance certificates, strengthens your case for premium reductions.
### What is a continuous load path and why is it important?
A continuous load path is a structural system that transfers forces from the roof through the walls and into the foundations without interruption. It is critical for resisting uplift and racking forces during high-wind events such as cyclones and severe storms.
### How does climate change affect home construction requirements in Australia?
Climate change is increasing the frequency and intensity of extreme weather events across Australia. This is driving updates to the National Construction Code and state planning regulations, with higher standards for wind resistance, bushfire protection, flood resilience, and energy efficiency.
## Build with Confidence
Extreme weather is an unavoidable reality for Australian homeowners. The good news is that proven construction methods and materials exist to protect your home and family from the worst that nature can deliver.
Whether you are planning a new build or upgrading an existing property, professional guidance makes a significant difference. Our licensed building inspectors can assess your site, review your plans, and ensure your home meets or exceeds the standards required for your specific hazard profile.
**[Contact Owner Inspections today](/contact)** to discuss how we can help you build or retrofit a home that stands strong through every season.
### Waterproofing Inspections: Prevent Water Damage and Save Costs
Source: https://ownerinspections.com.au/articles/waterproofing-inspections-prevent-water-damage-and-save-costs
Published: 2024-01-24 | Updated: 2026-02-12 | Category: Building Inspections
Author: Maison Azdari
Water damage is one of the most common and costly issues faced by property owners in Australia. From leaking roofs and rising damp to failed bathroom membranes, water ingress can compromise the structural integrity of a building and create serious health hazards through mould growth. A waterproofing inspection is a proactive measure that identifies vulnerabilities before they become expensive problems.
Whether you own a residential home, a commercial property, or an investment unit, understanding the importance of waterproofing inspections can save you thousands of dollars in repairs and protect the long-term value of your asset. For a complete overview, see our [guide to building defect investigations](/guides/building-defect-investigation-guide).
## Benefits of Waterproofing Inspections
A waterproofing inspection delivers several key benefits that make it an essential part of property ownership and maintenance.
## When to Get a Waterproofing Inspection
There are several situations where a waterproofing inspection is particularly important.
## What a Waterproofing Inspection Entails
A comprehensive waterproofing inspection covers multiple areas of a property to identify current and potential sources of water ingress.
## Finding a Qualified Inspector
Choosing the right inspector is essential to getting an accurate and thorough assessment of your property's waterproofing condition.
### What Are the Types of Construction Disputes?
Source: https://ownerinspections.com.au/articles/what-are-the-types-of-construction-disputes
Published: 2024-01-23 | Updated: 2026-02-09 | Category: Building Inspections
Author: Maison Azdari
The most common types of construction disputes in Australia are payment disputes, scope disputes, schedule disputes, design disputes, and quality disputes. These disagreements can arise between homeowners, builders, contractors, and subcontractors at any stage of a project. In most Australian states, disputes are resolved through internal negotiation, mediation, or formal proceedings at tribunals such as NCAT (NSW), VCAT (Victoria), or QCAT (Queensland). Understanding the different dispute types helps project stakeholders identify risks early and take preventive action.
Australia's construction industry has seen a rise in builder insolvencies in recent years, highlighting the financial and legal pressures that often trigger disputes. Whether you are building a new home, renovating, or managing a commercial project, disagreements over money, timelines, and workmanship are among the most common issues that can derail a build.
## Payment Disputes
Payment disputes are among the most frequent construction disagreements in Australia. They centre around the financial obligations outlined in the building contract and can arise for several reasons.
### Disagreements Over the Value of Completed Work
An owner may believe a completed stage of construction does not match the amount invoiced by the contractor. This can happen when the quality of work does not meet expectations, the scope appears incomplete, or the work does not align with the approved plans and specifications.
### Outstanding Invoices
If a contractor has completed work according to the agreed schedule but has not been paid on time, a dispute can arise. This may be caused by delays in the owner's payment process, cash flow issues, or disagreements over whether the work was completed to a satisfactory standard.
### Claims for Extra Work (Variations)
Unforeseen circumstances during construction often require additional work beyond the original contract scope. Disagreements frequently arise over whether the extra work was authorised, what the fair rate for the work should be, and whether the owner was properly notified before the additional work was carried out.
## Scope Disputes
Scope disputes occur when there is disagreement about the extent of work covered by the building contract. These are common on projects where the documentation is incomplete or ambiguous.
### Miscommunication
If early discussions between the owner and contractor did not clearly define the project's boundaries, confusion about what is included and excluded from the contract is almost inevitable. Verbal agreements that were never documented in writing are a frequent source of scope disputes.
### Unclear Contracts
Vague or poorly drafted contracts leave room for interpretation. When the contract does not clearly specify the inclusions, allowances, and finishing standards, both parties may have different understandings of what the final product should look like.
### Project Changes
Many projects evolve during construction. The owner may request additions or modifications, while the contractor may view these changes as falling outside the original scope and requiring additional payment. Change orders, which formally document agreed-upon modifications, can help prevent these disputes, but disagreements over their terms or necessity still occur.
## Schedule Disputes
Schedule disputes involve disagreements about the project timeline and responsibility for delays.
### Delays and Disruptions
Unexpected events such as severe weather, material shortages, or supply chain issues can throw a project schedule off track. The dispute typically centres on who is responsible for the delay and who should bear the associated costs, such as extended site costs and rental expenses.
### Unrealistic Timelines
An overly ambitious schedule agreed to at the start of a project can lead to problems later. The contractor may struggle to meet unrealistic deadlines, while the owner may become frustrated with what appears to be slow progress.
### Critical Path Delays
The critical path is the sequence of activities that must be completed on time for the project to finish by its planned completion date. Disputes arise when there is disagreement about which activities are on the critical path and whether a delay in one task justifies extending the overall project timeline.
## Design Disputes
Design disputes centre on disagreements about the project's design and how it is executed during construction.
### Faulty Design
If the architect's or designer's plans contain errors or omissions, problems emerge during construction. Disputes typically focus on who is responsible for correcting the design flaws and who pays for the additional costs and delays caused by the errors.
### Design Changes
The owner may decide to modify the design during construction. While design changes can improve the final product, they often lead to disputes over additional costs, extended timelines, and whether the changes were properly authorised and documented.
### Misinterpretation of Plans
Even well-prepared plans can contain ambiguities. The contractor may interpret the drawings differently from the designer's intent, leading to disagreements about materials, finishes, or construction methods.
## Quality Disputes
Quality disputes focus on whether the completed construction work meets the standards outlined in the contract, applicable building codes, and Australian Standards.
### Poor Workmanship
If the construction does not meet the quality standards specified in the contract or the requirements of the National Construction Code, the owner has grounds to dispute the work. Common examples include uneven tiling, poorly finished joinery, incorrect waterproofing, and defective rendering.
### Use of Inferior Materials
Substituting cheaper materials for those specified in the contract without the owner's approval is a common source of quality disputes. This affects durability, appearance, and compliance with building standards.
### Non-Compliance with Building Codes
All construction work in Australia must comply with the NCC and relevant Australian Standards. If council inspectors or independent building inspectors identify code violations, the builder is typically required to carry out rectification work at their own cost.
## Other Types of Construction Disputes
Beyond the five main categories above, other types of disputes can emerge during a construction project:
## How to Prevent Construction Disputes
Most construction disputes can be avoided or minimised with careful planning, clear documentation, and proactive communication.
## Dispute Resolution Options in Australia
If a dispute cannot be resolved through direct negotiation, several formal resolution pathways are available.
For a complete overview, see our [guide to expert witness reports for building disputes](/guides/expert-witness-building-disputes-guide).
### What Buyers Look for in Pre-Sale House Inspections
Source: https://ownerinspections.com.au/articles/what-buyers-look-for-in-pre-sale-house-inspections
Published: 2024-01-18 | Updated: 2026-02-09 | Category: Pre-Sale Inspections
Author: Maison Azdari
Understanding what buyers look for during pre-sale house inspections is essential for anyone
navigating the Australian property market. Whether you are a seller preparing your property
for sale or a buyer conducting due diligence, knowing the critical inspection areas can help
you make informed decisions and avoid costly surprises.
[Pre-sale inspections](/pre-sale-inspections) have become increasingly important in Australia, where property
represents a significant financial commitment for most families. These inspections follow
established protocols under Australian Standard AS 4349.1 for [pre-purchase inspections](/pre-purchase-inspections),
ensuring consistent and thorough assessments across the industry.
This comprehensive guide examines the key areas buyers focus on during property inspections,
the Australian regulations that govern building standards, and how inspection findings
influence purchase decisions and price negotiations.
> A thorough pre-sale inspection is not just about identifying defects. It provides buyers
> with a complete picture of the property's condition, helping them understand maintenance
> requirements, potential costs, and the true value of their investment.
## Australian Regulatory Framework
Pre-sale house inspections in Australia operate within a comprehensive regulatory framework
designed to protect both buyers and sellers. Understanding these regulations helps you
appreciate the standards that qualified inspectors must meet and the legal protections
available to property purchasers.
### Australian Standard AS 4349.1
The Australian Standard AS 4349.1 sets out the requirements for pre-purchase inspections of
residential buildings. This standard provides a consistent framework for inspectors across
Australia, covering:
- **Scope of inspections:** Defines what areas must be inspected and the depth of assessment required
- **Reporting requirements:** Specifies how findings must be documented and communicated to clients
- **Inspector competencies:** Establishes the qualifications and skills required to conduct inspections
- **Limitations and exclusions:** Clarifies what is not included in a standard inspection
AS 4349.3 specifically covers [timber pest inspections](/timber-pest-inspections), which are typically conducted
alongside building inspections given the prevalence of termite activity across Australia.
### State-Specific Buyer Protection Laws
Each Australian state and territory has specific legislation governing property transactions
and buyer protections:
- **New South Wales:** The Conveyancing Act 1919 and Property and Stock Agents Act 2002 govern property sales, with cooling-off periods of five business days for residential properties
- **Victoria:** The Sale of Land Act 1962 requires vendor statements (Section 32) disclosing known defects and provides three business days cooling-off
- **Queensland:** The Property Law Act 1974 and Body Corporate and Community Management Act 1997 regulate property transactions with five business days cooling-off
- **South Australia:** The Land and Business (Sale and Conveyancing) Act 1994 provides two clear business days cooling-off for residential sales
- **Western Australia:** No statutory cooling-off period exists, making pre-purchase inspections even more critical before signing contracts
### Australian Consumer Law
The Australian Consumer Law (ACL), contained within the Competition and Consumer Act 2010,
provides additional protections for property buyers. While real estate transactions have
some exemptions, the ACL prohibits:
- Misleading or deceptive conduct regarding property condition
- False representations about a property's characteristics or history
- Unconscionable conduct in property transactions
Sellers and agents can face significant penalties for deliberately concealing known defects
or misrepresenting property conditions. This makes honest disclosure and professional
inspections beneficial for all parties.
### Work Health and Safety Regulations
The Work Health and Safety Act 2011 (WHS Act) has particular relevance for properties
containing hazardous materials, especially asbestos. Key requirements include:
- Properties built before 1990 are presumed to contain asbestos unless proven otherwise
- Asbestos containing materials (ACMs) must be identified and managed appropriately
- Removal of friable asbestos must be conducted by licensed removalists
- Non-friable (bonded) asbestos over 10 square metres requires Class B licensed removal
Inspectors must identify suspected asbestos containing materials during inspections, though
laboratory testing is required for definitive identification.
## Key Inspection Focus Areas
Buyers evaluating Australian properties focus on specific areas that indicate the overall
condition and value of a home. Understanding these focus areas helps both buyers prepare for
inspections and sellers address issues before listing their property.
### Structural Integrity
Structural integrity is the cornerstone of any property inspection. Inspectors
systematically examine the building's structural elements to identify any defects that could
compromise safety, functionality, or long term durability.
#### Foundation Assessment
The foundation supports the entire building structure and is critical to long term
stability. Inspectors assess:
- **Slab foundations:** Checking for cracking, heaving, or settlement that indicates ground movement or inadequate construction
- **Pier and beam systems:** Examining stumps, bearers, and joists for decay, damage, or inadequate support
- **Strip footings:** Assessing for cracking, erosion, or movement in older masonry construction
- **Subfloor conditions:** Evaluating ventilation, drainage, and access for maintenance
Foundation problems are among the most expensive defects to rectify, with underpinning or
restumping costs typically ranging from $10,000 to $40,000 depending on the extent of work
required.
#### Wall Structure
Load bearing and non-load bearing walls are assessed for:
- Cracking patterns that may indicate structural movement or settlement
- Bowing, leaning, or bulging that suggests structural failure
- Separation at corners or junctions indicating differential movement
- Condition of wall ties in cavity brick construction
- Render or cladding defects that may allow water penetration
#### Roof Structure
The roof structure protects the building from weather and supports the roof covering:
- Truss or rafter condition and connections
- Ridge, hip, and valley beam integrity
- Tie-down and bracing adequacy for wind loads
- Evidence of sagging, spreading, or structural damage
- Previous repairs or modifications and their quality
> Structural defects often manifest gradually over time. What appears as a minor crack today
> could indicate progressive foundation movement that will worsen without intervention. Early
> identification through professional inspection is essential for informed decision making.
### Essential Building Systems
Modern homes rely on complex systems for water supply, waste disposal, electrical power, and
climate control. While building inspectors conduct visual assessments, their findings often
prompt recommendations for specialist evaluations.
#### Plumbing Systems
Plumbing assessments cover visible components including:
- **Supply pipes:** Checking for corrosion in copper, galvanised steel, or older lead pipes; assessing polybutylene pipes (common in 1970s and 1980s homes) for degradation
- **Waste and drainage:** Examining visible drains, checking fall (gradient), and identifying potential blockage points
- **Hot water systems:** Assessing age, condition, compliance (tempering valves), and remaining service life
- **Fixtures and fittings:** Checking taps, toilets, and basins for leaks and functionality
Internal pipe conditions cannot be assessed visually. CCTV drain inspections are recommended
for properties over 30 years old or where drainage concerns are identified.
#### Electrical Systems
Building inspectors conduct visual electrical assessments, but detailed testing requires a
licensed electrician. Visual inspection includes:
- **Switchboard condition:** Age, capacity, presence of safety switches (RCDs), and circuit breaker types
- **Wiring type:** Identifying older wiring systems such as VIR (rubber insulated), TPS condition, and any exposed or damaged cables
- **Power points and switches:** Checking for damage, loose fittings, or non-compliant installations
- **Smoke alarm compliance:** Verifying presence, placement, and type as required by state legislation
Properties with older electrical systems, particularly those with ceramic fuses or VIR
wiring, typically require significant upgrades to meet current safety standards. Full
rewiring can cost between $8,000 and $20,000 for an average three bedroom home.
#### Climate Control Systems
Heating and cooling systems are assessed for:
- Age and expected remaining service life
- Visible condition and maintenance history
- Functionality (where safe to test)
- Gas appliance compliance and safety
- Ducted system condition where accessible
### Safety Hazards
Safety concerns receive particular attention during pre-sale inspections as they can pose
immediate risks to occupants and may require urgent remediation before a property is
habitable.
#### Asbestos Containing Materials
Asbestos was widely used in Australian construction from the 1940s until its ban in 2003.
Common locations include:
- **Fibro sheeting:** External and internal wall cladding, particularly in homes built between 1945 and 1980
- **Eaves and soffits:** Flat sheet lining under roof overhangs
- **Roofing:** Corrugated asbestos cement (Super Six) roofing sheets
- **Fencing:** Asbestos cement fence panels
- **Floor tiles:** Vinyl floor tiles and backing from certain eras
- **Wet area linings:** Bathroom and laundry wall sheeting
While intact asbestos cement products pose minimal risk, damaged, friable, or deteriorating
materials require professional management or removal. Buyers should factor potential
asbestos management costs into their purchase decisions.
#### Lead Paint
Lead based paints were commonly used in Australian homes built before 1970. Key
considerations include:
- Homes built before 1970 have a high likelihood of lead paint presence
- Deteriorating paint (peeling, flaking, chalking) poses the greatest risk
- Friction surfaces (windows, doors) generate lead dust through normal use
- Professional testing is required for definitive identification
#### Smoke Alarm Compliance
Australian states have specific smoke alarm requirements that sellers must meet before
property transfer:
- Queensland requires interconnected photoelectric alarms in all bedrooms, hallways, and on each level
- NSW requires working smoke alarms on each level, with interconnection required for new builds and major renovations
- Victoria requires smoke alarms in sleeping areas, hallways, and on each storey
Non-compliant smoke alarm installations can delay settlement and represent an immediate
safety risk for occupants.
#### Pool and Spa Safety
Properties with swimming pools or spas must comply with state pool fencing regulations.
Non-compliant barriers are a significant safety concern, particularly for families with
young children. Pool barrier compliance certificates are required in most states before
settlement.
### Timber Pest Activity
Australia has one of the highest rates of termite activity in the world, making timber pest
inspections essential for property purchases. Inspectors conduct assessments in accordance
with AS 4349.3 Timber Pest Inspections.
#### Termite Species and Risk
Several destructive termite species operate across Australia:
- **Coptotermes species:** The most destructive termites in Australia, responsible for the majority of structural damage
- **Schedorhinotermes species:** Common in coastal regions and highly destructive to structural timbers
- **Nasutitermes species:** Build distinctive mound nests and can cause significant damage
#### Signs of Termite Activity
Inspectors look for evidence of current or previous termite activity:
- Mud shelter tubes on foundations, walls, or stumps
- Hollow sounding or damaged timber
- Frass (termite droppings) near timber elements
- Workings or galleries within accessible timbers
- Live termites in or around the property
- Previous treatment evidence and records
#### Conducive Conditions
Conditions that increase termite risk are documented even when no active infestation is
present:
- Timber in ground contact
- Stored timber or debris against the building
- Garden beds against external walls
- Inadequate subfloor ventilation
- Leaking plumbing or drainage creating moisture
- Absence of physical or chemical termite barriers
### Moisture and Water Damage
Water intrusion is one of the most common and damageing defects found in Australian
properties. Moisture problems can affect structural timbers, promote mould growth, and
create unhealthy living conditions.
#### Sources of Moisture Problems
- **Roof leaks:** Failed flashings, damaged tiles, corroded metal roofing, or blocked gutters allowing water entry
- **Rising damp:** Ground moisture wicking up through masonry walls due to failed or absent damp proof courses
- **Lateral damp:** Water penetrating through retaining walls or subfloor areas
- **Plumbing leaks:** Leaking pipes, fixtures, or fittings causing localised water damage
- **Failed waterproofing:** Particularly in wet areas such as bathrooms, laundries, and balconies
- **Poor drainage:** Site drainage directing water towards rather than away from the building
#### Mould and Indoor Air Quality
Mould growth indicates chronic moisture problems and can affect occupant health. Inspectors
document:
- Visible mould growth on surfaces
- Musty odours indicating hidden mould
- Water staining suggesting past or ongoing moisture issues
- Conditions conducive to mould growth (poor ventilation, high humidity)
Significant mould contamination may require professional remediation costing between $2,000
and $15,000 depending on the extent of affected areas.
## Common Issues by Property Age
The age of a property significantly influences the types of defects buyers are likely to
encounter. Understanding these patterns helps buyers anticipate potential issues and budget
accordingly.
| Property Era | Common Issues | Key Concerns |
| ----------------------------------- | ------------------------------------------------------------------------------------ | ------------------------------------------------------------------------------- |
| Pre-1920 (Federation and Victorian) | Foundation movement, deteriorated stumps, lead paint, original timber framing decay | Restumping, lead paint management, heritage compliance for renovations |
| 1920s to 1940s (Inter-war) | Rising damp in masonry, obsolete electrical, asbestos products, timber decay | Damp course installation, electrical upgrade, asbestos management |
| 1950s to 1970s (Post-war) | Extensive asbestos use (fibro), galvanised plumbing corrosion, original roofing wear | Asbestos assessment and management, replumbing, roof replacement |
| 1980s to 1990s | Polybutylene plumbing failures, wet area waterproofing issues, slab heave | Plumbing assessment, bathroom renovations, foundation monitoring |
| 2000s to 2010s | Building defects in apartments (combustible cladding era), waterproofing failures | Strata building defect reports, cladding assessments for multi-storey buildings |
| 2015 and newer | Defective construction, poor workmanship, non-compliant work, warranty items | Review of builder warranty coverage, defect rectification claims |
## Inspection Costs and Value
Understanding the costs associated with property inspections and potential repairs helps
buyers budget appropriately and assess the true value of their purchase.
### Pre-Sale Inspection Costs
| Inspection Type | Typical Cost Range | What Is Included |
| --------------------------- | ------------------ | ------------------------------------------------------------------------ |
| Building inspection only | $400 to $600 | Structural assessment, visual inspection of all accessible areas |
| Timber pest inspection only | $250 to $400 | Termite and timber pest assessment per AS 4349.3 |
| Combined building and pest | $500 to $800 | Comprehensive assessment including both building and pest components |
| Pool barrier inspection | $150 to $300 | Pool fence compliance assessment against state regulations |
| Thermal imageing add-on | $100 to $200 | Infrared scanning for moisture, electrical faults, and insulation issues |
| CCTV drain inspection | $300 to $500 | Camera survey of internal drainage condition |
### Common Repair Cost Estimates
The following table provides indicative costs for common repairs identified during pre-sale
inspections. Actual costs vary based on property specifics, location, and market conditions.
| Repair Category | Typical Cost Range | Influencing Factors |
| -------------------------- | ------------------- | -------------------------------------------------------- |
| Roof repairs (partial) | $500 to $5,000 | Extent of damage, material type, accessibility |
| Full roof replacement | $15,000 to $50,000 | Roof size, material choice, asbestos removal if required |
| Restumping or underpinning | $10,000 to $40,000 | House size, access, soil conditions, number of stumps |
| Termite treatment | $2,500 to $5,000 | Property size, treatment type, barrier system |
| Termite damage repairs | $5,000 to $100,000+ | Extent of structural damage, accessibility |
| Rising damp treatment | $5,000 to $20,000 | Wall length, construction type, method used |
| Bathroom waterproofing | $3,000 to $15,000 | Bathroom size, extent of damage, finish quality |
| Electrical rewiring | $8,000 to $20,000 | House size, accessibility, switchboard upgrade |
| Asbestos removal | $1,500 to $30,000+ | Material type, quantity, friability, location |
| Replumbing (full) | $10,000 to $25,000 | House size, accessibility, material choice |
## Using Inspection Results Effectively
A pre-sale inspection report is a valuable tool that extends well beyond simply identifying
defects. Understanding how to leverage your inspection findings can significantly impact
your purchase outcome.
### Price Negotiation Strategies
Inspection findings provide legitimate grounds for price negotiations:
- **Document repair costs:** Obtain quotes from licensed tradespeople for identified defects to support your negotiation position
- **Focus on major issues:** Concentrate negotiations on significant defects rather than minor cosmetic items
- **Request vendor repairs:** Ask the seller to rectify specific issues before settlement as an alternative to price reduction
- **Consider market conditions:** Your negotiating position depends partly on local market demand and competition
### Contract Conditions
Work with your solicitor or conveyancer to include appropriate contract conditions:
- Building and pest inspection clauses allowing withdrawal if significant defects found
- Special conditions requiring specific repairs before settlement
- Retention of funds at settlement to cover identified repairs
- Extended settlement periods to allow further investigations
### Future Maintenance Planning
Your inspection report serves as a baseline for future property maintenance:
- Prioritise repairs based on severity and safety implications
- Create a maintenance schedule addressing identified issues
- Budget for both immediate repairs and future maintenance requirements
- Keep the report for reference when engageing tradespeople
> The best negotiation approach is professional and fact based. Present documented evidence of
> defects and repair costs without emotional arguments. This approach is more likely to result
> in a fair outcome for both parties.
## What to Expect During the Inspection
Understanding the inspection process helps buyers prepare appropriately and maximise the
value they receive from the assessment.
### Inspection Duration
A thorough pre-sale inspection typically takes between 1.5 and 3 hours depending on:
- Property size and number of buildings on site
- Property age and construction complexity
- Accessibility of roof void, subfloor, and other areas
- Number and severity of issues encountered
A standard three bedroom home typically requires approximately 2 hours for a combined
building and pest inspection.
### Attending the Inspection
Buyers are strongly encouraged to attend their inspection. Benefits include:
- Seeing defects firsthand and understanding their location and severity
- Asking questions in real time as issues are discovered
- Receiving verbal explanations that may not fully translate to written reports
- Learning about maintenance requirements and practical care of the property
- Getting a better overall feel for the property condition
If you cannot attend, arrange a phone call with your inspector after they complete the
assessment to discuss their findings before the written report is prepared.
### Post-Inspection Report
Written reports are typically delivered within 24 to 48 hours of the inspection. A quality
report includes:
- Executive summary highlighting significant findings
- Detailed section by section assessment of all areas inspected
- Photographic evidence of defects and concerns
- Recommendations for repairs, further investigation, or monitoring
- Clear explanation of any limitations or inaccessible areas
## Essential Tips for Buyers
Following these recommendations will help you maximise the value of your pre-sale inspection
and make informed property decisions.
### Key Recommendations
- **Verify inspector qualifications:** Ensure your inspector holds appropriate licences for your state, has professional indemnity insurance, and follows Australian Standards. Check for membership in professional associations such as the Master Builders Association or Housing Industry Association.
- **Book combined inspections:** A combined building and pest inspection is more cost effective than separate appointments and ensures comprehensive assessment of the property.
- **Attend in person:** Being present during the inspection provides invaluable insights that written reports cannot fully capture. Plan to spend the full inspection time at the property.
- **Read the full report:** Do not rely solely on the summary. Read all sections including scope and limitations to understand what was and was not inspected.
- **Ask questions:** Good inspectors welcome questions about their findings. Do not hesitate to seek clarification on technical terms or severity assessments.
- **Get repair quotes:** For significant defects, obtain written quotes from licensed tradespeople to understand true costs and support negotiations.
- **Consider property age:** Understand the typical issues associated with the property era and factor these into your expectations and budget.
- **Act within contract timeframes:** Ensure you complete inspections and make any decisions within the periods specified in your contract of sale.
- **Keep the report:** Your inspection report provides a baseline record of property condition useful for future maintenance, insurance claims, and resale.
## Frequently Asked Questions
###
What is the difference between a building inspection and a pest inspection?
**Short answer:** Building inspections assess structural condition and
defects while pest inspections focus specifically on timber pest activity and damage.
A building inspection conducted under AS 4349.1 examines the structural elements,
condition of building systems, safety concerns, and general defects throughout the
property. A timber pest inspection under AS 4349.3 specifically assesses for termite
activity, borer damage, wood decay fungi, and conditions conducive to pest attack. Most
buyers opt for a combined inspection as timber pest damage significantly affects
structural integrity and overall property condition.
###
Should I get an inspection before or after making an offer?
**Short answer:** Ideally during the due diligence period after your offer
is accepted but before you are unconditionally committed to purchase.
In most Australian states, contracts include a building and pest inspection clause that
allows you to withdraw or negotiate if significant defects are found. This approach is
more cost effective than inspecting multiple properties before making offers. However,
in competitive markets or at auctions, some buyers choose to inspect beforehand to make
unconditional offers. Work with your solicitor or conveyancer to understand your rights
under the specific contract terms.
###
What areas cannot be inspected during a standard inspection?
**Short answer:** Concealed areas, internal pipe systems, detailed
electrical components, and areas without safe access are excluded from standard
inspections.
Standard pre-sale inspections are visual assessments of accessible areas only. They do
not include areas concealed by walls, floors, ceilings, furniture, or stored items.
Internal plumbing (requiring CCTV), detailed electrical testing, swimming pool
compliance, asbestos sampling, soil testing, and structural engineering assessments
require separate specialist inspections. Your report will document any areas that could
not be accessed and may recommend further investigation where concerns exist.
###
How can I tell if an inspector is properly qualified?
**Short answer:** Check for appropriate state licences, insurance coverage,
and professional association memberships.
Building inspectors should hold a current builders licence or equivalent qualification
for your state, plus professional indemnity insurance and public liability insurance.
For timber pest inspections, a separate pest control licence is required. Many qualified
inspectors maintain membership with professional associations such as the Master
Builders Association, Housing Industry Association, or Australian Institute of Building
Surveyors. Ask to see credentials before engageing an inspector and verify their licence
status through your state's licensing authority.
###
What should I do if the inspection reveals asbestos?
**Short answer:** Assess the condition and location, understand management
options, and factor costs into your purchase decision.
Asbestos containing materials that are in good condition and undisturbed pose minimal
health risk. Options include leaving materials in place with appropriate management,
encapsulation, or removal by licensed professionals. Friable (crumbly) asbestos requires
licensed Class A removal, while bonded asbestos over 10 square metres requires Class B
removal. Obtain quotes for management or removal if you intend to renovate or if
materials are deteriorating. Factor these costs into your offer and consider specialist
advice for properties with extensive asbestos presence.
###
Can I withdraw from a purchase based on inspection findings?
**Short answer:** Yes, if your contract includes a building and pest
inspection clause and you act within the specified timeframe.
Most residential property contracts in Australia include a subject to building and pest
inspection clause. This clause typically allows you to withdraw from the purchase if
defects are identified that you consider unsatisfactory. You must act within the
timeframe specified in the clause (usually 7 to 14 days) and provide written notice as
required. If you are outside cooling-off periods or have an unconditional contract, your
options are more limited. Always consult your solicitor or conveyancer about your
specific contractual rights.
###
How long does a pre-sale inspection report remain valid?
**Short answer:** Reports provide a snapshot at the time of inspection and
may not reflect subsequent changes to property condition.
An inspection report is only valid for the date it was conducted. Property conditions
can change due to weather events, ongoing deterioration, or undisclosed work by owners.
If there is a significant delay between inspection and settlement, or if circumstances
change (such as severe weather), a re-inspection may be advisable. Termite inspections
are typically recommended annually as new infestations can occur at any time. For
properties you are seriously considering, ensure inspections are conducted close to your
intended purchase date.
###
What is the difference between minor, moderate, and major defects?
**Short answer:** Defect severity indicates the urgency, cost, and
potential impact on property safety and value.
Minor defects are cosmetic or maintenance items that do not affect structure or safety,
typically costing under $500 each to address. Moderate defects require repair within 6
to 12 months to prevent deterioration, such as worn roof tiles or ageing hot water
systems. Major defects significantly affect structure, function, or value and require
prompt attention, including structural cracking or extensive water damage. Safety
concerns pose immediate risk to occupants and must be rectified before occupation, such
as electrical hazards, significant asbestos deterioration, or structural instability.
###
Should I commission a structural engineer report as well?
**Short answer:** Only if your building inspection identifies significant
structural concerns requiring specialist assessment.
A qualified building inspector can identify signs of structural problems, but
determining exact causes, extent of damage, and appropriate remediation often requires a
structural engineer. If your inspection report recommends structural engineering
assessment for issues such as significant foundation movement, major cracking, or
structural alterations, this additional investment is worthwhile. Structural engineer
reports typically cost between $500 and $1,500 but can save you from purchasing a
property with serious underlying problems or help you accurately estimate repair costs.
###
Are there any warranties or guarantees on inspection reports?
**Short answer:** Inspectors carry professional indemnity insurance that
covers negligent errors or omissions in their assessments.
Reputable inspectors maintain professional indemnity insurance that provides coverage if
their negligence results in financial loss to clients. This insurance does not guarantee
that all defects will be found, as inspections are limited to accessible and visible
areas. Always engage inspectors with current insurance coverage and check the policy
limits are adequate. If you believe an inspector missed defects that should have been
identified during a competent inspection, you may have recourse through their insurance
or through fair trading complaints processes in your state.
## Key Takeaways
- Pre-sale inspections follow Australian Standard AS 4349.1 for building assessments and AS 4349.3 for timber pest inspections, ensuring consistent and thorough evaluations.
- Structural integrity, essential building systems, safety hazards, timber pest activity, and moisture issues are the primary focus areas for buyers.
- Property age significantly influences the types of defects likely to be encountered, with each era having characteristic issues.
- Australian Consumer Law and state-specific legislation provide buyer protections against misrepresentation and concealed defects.
- Work Health and Safety regulations govern the management of hazardous materials, particularly asbestos, in properties built before 1990.
- Inspection findings provide legitimate grounds for price negotiation and contract conditions when documented with professional quotes.
- Always verify inspector qualifications, attend the inspection in person, and read the complete report including limitations.
- Act within contract timeframes to exercise your rights under building and pest inspection clauses.
- Retain your inspection report as a baseline for future maintenance planning and potential insurance claims.
## References and Resources
- [ Standards Australia (AS 4349.1 Pre-purchase Inspections, AS 4349.3 Timber Pest Inspections) ](https://www.standards.org.au/)
- [ Australian Competition and Consumer Commission (ACCC) Consumer Rights ](https://www.accc.gov.au/consumers/consumer-rights-guarantees)
- [ Safe Work Australia Asbestos Information ](https://www.safeworkaustralia.gov.au/safety-topic/hazards/asbestos)
- [ Consumer Affairs Victoria ](https://www.consumer.vic.gov.au/)
- [ Queensland Building and Construction Commission (QBCC) ](https://www.qbcc.qld.gov.au/)
- [ Consumer and Business Services South Australia ](https://www.cbs.sa.gov.au/)
- [ WA Building Commission ](https://www.commerce.wa.gov.au/building-commission)
### Essential Home Building Inspections in Australia
Source: https://ownerinspections.com.au/articles/essential-home-building-inspections-in-australia
Published: 2024-01-16 | Category: Building Inspections
Author: Maison Azdari
Australia's construction industry continues to experience steady growth, with projections
extending through 2029. As the industry expands, quality assurance during building processes
becomes increasingly vital for homeowners, investors, and developers alike.
Building inspections function as protective mechanisms, safeguarding property buyers from
hidden defects and ensuring new constructions meet the stringent standards set by Australian
building codes. Whether you are purchasing an established property or building a new home,
understanding the inspection landscape is essential for protecting your investment.
This comprehensive guide explores the two primary categories of building inspections in
Australia, detailing what each inspection covers, when they are required, and why they
matter for your property journey. From mandatory [new build inspections](/new-construction-stage-inspections) to recommended
pre-purchase assessments, we cover everything you need to know to make informed decisions.
> Building inspections are not merely a formality. They represent a critical investment in
> your property's safety, structural integrity, and long-term value. Skipping or rushing
> inspections can lead to costly surprises that far exceed the inspection fee.
## Two Primary Inspection Categories
Building inspections in Australia fall into two distinct categories, each serving different
purposes and occurring at different stages of the property ownership journey.
### New Build Inspections (Mandatory)
For new constructions, a series of mandatory inspections are required at critical stages of
the building process. These inspections are mandated by state and territory building
regulations and must be completed before work can progress to the next stage. A licensed
building surveyor or certifier conducts these inspections to verify compliance with the
approved building plans and the National Construction Code.
Mandatory inspections protect homeowners by ensuring builders follow approved plans and
construction methods. They provide legal documentation of compliance and create a paper
trail should issues arise in the future. Without these inspections, obtaining an occupancy
certificate is not possible, meaning you cannot legally move into your new home.
### Pre-Purchase Inspections (Recommended)
When purchasing an existing property, [pre-purchase building inspections](/pre-purchase-inspections) are strongly
recommended but not legally required. These inspections provide buyers with an independent
assessment of the property's condition before committing to the purchase. A qualified
building inspector examines the property for structural defects, maintenance issues, and
potential problems that may not be visible to the untrained eye.
While not mandatory, pre-purchase inspections are considered essential by property experts
and conveyancers. They provide valuable information for negotiating the purchase price and
help buyers avoid properties with significant hidden problems. The small investment in an
inspection can save tens of thousands of dollars in unexpected repair costs.
| Aspect | New Build Inspections | Pre-Purchase Inspections |
| ----------------- | ------------------------------------- | ------------------------------------- |
| Legal Requirement | Mandatory | Recommended |
| Purpose | Verify compliance with building codes | Assess condition of existing property |
| Who Conducts | Building surveyor or certifier | Independent building inspector |
| When Performed | During construction stages | Before property purchase |
| Typical Cost | Included in building costs | $400 to $800 |
## Essential New Build Inspections (Mandatory)
When constructing a new home in Australia, several mandatory inspections must be completed
at key stages. These inspections ensure the building meets structural requirements, safety
standards, and complies with the approved plans. The following inspections are required
across most Australian states and territories.
### Footing and Foundation Inspection
The footing inspection is one of the most critical stages in the construction process. It
occurs after the footings have been excavated but before concrete is poured. The inspector
verifies that the footings meet the engineering specifications and will adequately support
the structure above.
Key elements examined during the footing inspection include:
- **Correct depth:** Footings must reach the specified depth to ensure stability and load-bearing capacity, typically below the frost line and into stable soil
- **Proper sizing:** Width and dimensions of footings are verified against engineering plans to ensure they can support the anticipated loads
- **Reinforcement specifications:** Steel reinforcement bars must be correctly positioned, tied, and spaced according to structural engineering requirements
- **Soil conditions:** The inspector assesses whether the soil type matches the geotechnical report and is suitable for the proposed foundation design
- **Structural stability:** Overall assessment of the excavation to ensure it provides a stable base for the concrete pour
- **Drainage provisions:** Verification that appropriate drainage systems are in place to prevent water accumulation around footings
> The foundation is literally what your entire home rests upon. Problems at this stage can
> lead to structural issues that are extremely difficult and expensive to rectify later. Never
> rush the footing inspection.
### Slab Inspection
The slab inspection occurs before the concrete slab is poured for the main floor of the
building. This inspection ensures the concrete base will be level, properly reinforced, and
capable of supporting the structure above. For homes with suspended floors, this inspection
covers the bearer and joist system instead.
The slab inspection verifies:
- **Levelness:** The formwork and preparation must be level to ensure a flat finished floor surface
- **Thickness specifications:** Slab thickness must meet engineering requirements, typically ranging from 85mm to 150mm depending on design
- **Reinforcement mesh placement:** Steel reinforcing mesh must be properly positioned with correct bar chairs to maintain cover depth
- **Edge beams:** Perimeter edge beams must be correctly formed and reinforced
- **Plumbing and services:** Verification that all under-slab plumbing, conduits, and services are correctly installed and tested
- **Vapour barrier:** Plastic membrane must be correctly installed to prevent moisture rising through the slab
- **Curing quality provisions:** Assessment that appropriate curing methods will be employed to ensure concrete strength development
| Slab Type | Application | Key Inspection Points |
| ----------------- | --------------------------- | -------------------------------------------- |
| Raft slab | Reactive or unstable soils | Edge beam depth, internal beams, stiffening |
| Waffle pod slab | Moderate reactive soils | Pod placement, beam locations, reinforcement |
| Conventional slab | Stable ground conditions | Thickness, mesh cover, edge treatment |
| Suspended slab | Upper floors, sloping sites | Formwork, reinforcement, support structure |
### Framing Inspection
The framing inspection is conducted once the structural framework of the building is
complete but before internal linings, cladding, and insulation are installed. This is a
critical inspection as it assesses the structural skeleton of your home, including walls,
roof structure, and floor systems.
The framing inspection examines:
- **Wall framing:** Verification that wall studs, plates, and noggins are correctly sized, spaced, and fixed according to engineering specifications
- **Roof trusses:** Assessment of truss installation, including spacing, fixing, bracing, and connection to wall plates
- **Floor joists:** For raised floors, verification of joist size, spacing, bearings, and blocking
- **Structural compliance:** Overall assessment that the frame matches approved plans and engineering specifications
- **Bracing:** Verification that structural bracing systems are correctly installed to resist lateral forces
- **Tie-down systems:** Assessment of connections designed to resist uplift forces from wind loads
- **Window and door openings:** Verification that lintels and headers are correctly sized and installed
- **Load paths:** Assessment that loads are properly transferred from roof to foundations
The framing inspection is your last opportunity to identify structural issues before they
are concealed behind wall linings. Any defects found at this stage can be rectified
relatively easily compared to discovering problems after completion.
### Waterproofing Inspection
Waterproofing inspections are mandatory in New South Wales and Queensland, and increasingly
required or recommended in other states. This inspection verifies that wet areas such as
bathrooms, laundries, and shower recesses have been properly waterproofed before tiling
begins.
Waterproofing failures are one of the most common and costly defects in Australian
buildings. Problems with waterproofing can lead to structural damage, mould growth, and
costly repairs. The inspection ensures:
- **Membrane application:** Waterproof membrane has been correctly applied to all required surfaces
- **Coverage:** Membrane extends to appropriate heights on walls and fully covers floor areas
- **Penetrations:** All pipe penetrations and floor wastes are properly sealed
- **Junctions:** Internal corners, wall-floor junctions, and changes in materials are correctly treated
- **Falls:** Floors have adequate fall to drains to prevent water ponding
- **Curing:** Membrane has been allowed to cure properly before tiling
| Area | Minimum Membrane Height | Additional Requirements |
| -------------- | --------------------------------- | ---------------------------------- |
| Shower recess | 1800mm above finished floor level | Full floor coverage, hob treatment |
| Bathroom floor | 150mm up walls | Full floor area, step-down at door |
| Laundry | 150mm up walls | Tub waste, washing machine area |
| Balcony | 150mm up walls and door threshold | Drainage, flashing integration |
### Final Inspection (Pre-Handover)
The final inspection, also known as the pre-handover or completion inspection, is the last
mandatory inspection before you take possession of your new home. This comprehensive
assessment verifies that all construction work has been completed to the required standard
and in accordance with the approved building plans.
The final inspection covers:
- **Alignment with building plans:** Verification that the completed building matches the approved plans and any variations have been properly documented
- **Outstanding defects:** Identification of any construction defects, incomplete work, or items requiring rectification
- **Compliance verification:** Confirmation that all previous inspection items have been addressed and the building complies with the National Construction Code
- **Safety systems:** Testing of smoke alarms, safety switches, and emergency lighting where required
- **Finishes:** Assessment of paintwork, tiling, carpentry, and other visible finishes
- **Fixtures and fittings:** Verification that all specified fixtures and fittings are installed and operational
- **External works:** Assessment of driveways, paths, landscaping, and fencing as specified in the contract
> The final inspection is your opportunity to identify defects before you sign off on the
> completed building. It is far easier to have the builder rectify issues before handover than
> to pursue defect claims afterwards.
## New Build Inspection Stages Summary
The following table provides an overview of the mandatory inspection stages, what each
inspection covers, and when it occurs during the construction process.
| Inspection Stage | When It Occurs | What It Covers | Key Focus Areas |
| ------------------ | -------------------------- | ------------------------------------------- | --------------------------------------------- |
| Footing/Foundation | Before concrete pour | Excavations, reinforcement, soil conditions | Depth, sizing, steel placement, drainage |
| Slab | Before slab pour | Formwork, mesh, services, vapour barrier | Thickness, levelness, reinforcement, plumbing |
| Framing | Before lining and cladding | Wall frames, roof trusses, floor joists | Structural compliance, bracing, tie-downs |
| Waterproofing | Before tiling wet areas | Bathrooms, laundry, balconies | Membrane application, coverage, penetrations |
| Final | Before handover | Complete building assessment | Plan compliance, defects, safety systems |
## Pre-Purchase Property Inspections
When buying an existing property, a pre-purchase building inspection provides invaluable
information about the property's condition. Unlike mandatory new build inspections, these
assessments are conducted by independent building inspectors engaged by the buyer to provide
an unbiased evaluation.
A comprehensive pre-purchase inspection examines all accessible areas of the property,
identifying existing defects, maintenance issues, and potential problems. The inspection
follows Australian Standard AS 4349.1 for pre-purchase inspections for existing buildings.
### Roofing Assessment
The roof is one of the most critical elements of any building, protecting the structure from
weather damage. A thorough [roof inspection](/roof-inspection) includes:
- Roof covering condition, whether tiles, metal, or other materials
- Evidence of leaks, rust, or deterioration
- Flashing condition around penetrations and junctions
- Gutter and downpipe condition and function
- Roof space assessment including framing, insulation, and ventilation
- Signs of previous repairs or alterations
### Foundation and Structural Assessment
Foundation problems can be among the most serious and expensive issues in a property. The
inspection assesses:
- Evidence of foundation movement, including cracks in walls and floors
- Subfloor condition where accessible, including stumps, bearers, and joists
- Signs of subsidence or heave
- Drainage adequacy around the building
- Structural integrity of supporting elements
- Evidence of past or ongoing movement
### Interior Structure Assessment
The interior inspection examines all accessible internal areas for signs of defects and
deterioration:
- Wall and ceiling condition, including cracks, stains, and damage
- Floor condition and levelness
- Door and window operation and condition
- Built-in fittings and cabinetry
- Wet area condition including bathrooms and laundry
- Evidence of moisture, leaks, or water damage
### Electrical Systems Overview
While a building inspector is not an electrician, they assess visible electrical
installations for obvious safety concerns:
- Switchboard condition and safety switch presence
- Visible wiring condition
- Power point and light switch condition
- Smoke alarm presence and compliance
- Evidence of amateur or non-compliant electrical work
For a comprehensive electrical assessment, a licensed electrician should be engaged
separately to test the electrical installation.
### Plumbing Systems Overview
Similarly, visible plumbing is assessed for obvious defects and concerns:
- Hot water system type, age, and condition
- Visible pipe condition and materials
- Evidence of leaks under sinks and in wet areas
- Drainage function
- Tap and fixture condition
A licensed plumber can provide detailed assessment of plumbing systems, including camera
inspection of drains and pressure testing.
## Pest Inspections
While building inspections assess structural condition and defects, pest inspections
specifically look for evidence of timber pest activity. A pest inspection is optional but
highly recommended for any property purchase in Australia, particularly given the prevalence
of termites and other wood-destroying organisms.
### Termite Activity
Termites are responsible for approximately $1.5 billion in property damage annually in
Australia. A pest inspection looks for:
- Active termite infestations
- Evidence of past termite activity
- Termite damage to structural and non-structural timbers
- Conditions conducive to termite attack
- Existing termite management systems
### Wood Borers
Various species of wood-boring beetles can damage timber in buildings. The inspection
identifies:
- Active borer infestations
- Evidence of past borer activity
- Extent of borer damage
- Timber types at risk
### Wood Decay Fungi
Fungal decay can weaken timber structural elements. The inspection assesses:
- Evidence of fungal decay in accessible timbers
- Moisture conditions that promote fungal growth
- Extent of decay damage
> Standard home insurance policies typically do not cover termite damage. A pest inspection
> before purchase can identify existing problems and help you understand ongoing prevention
> requirements.
| Pest Type | Signs of Activity | Risk Level | Recommended Action |
| ---------------- | ----------------------------------------- | ---------------- | --------------------------------- |
| Termites | Mud tubes, hollow timber, damaged wood | Very High | Immediate treatment required |
| Wood borers | Small holes, fine sawdust, damaged timber | Moderate to High | Assessment and targeted treatment |
| Wood decay fungi | Soft or crumbly timber, discolouration | Moderate | Address moisture, replace timber |
## Why Professional Inspections Matter
Whether you are building a new home or purchasing an existing property, professional
building inspections provide essential protection for what is likely your largest financial
investment. Understanding the value of professional inspections helps justify the relatively
modest cost.
### Early Detection of Problems
Professional inspectors are trained to identify issues that untrained eyes would miss. Early
detection allows problems to be addressed before they escalate into major defects requiring
expensive repairs. For new builds, catching problems during construction is far easier and
cheaper than rectifying them after completion.
### Negotiation Power
A detailed inspection report provides valuable leverage in negotiations. For property
purchases, identified defects can be used to negotiate a reduced purchase price or require
the vendor to complete repairs before settlement. For new builds, documented defects must be
rectified by the builder before you accept handover.
### Documentation and Protection
Professional inspection reports create a documented record of the property's condition at a
specific point in time. This documentation can be invaluable for:
- Insurance claims
- Warranty claims against builders
- Legal proceedings if disputes arise
- Future sale of the property
- Planning maintenance and repairs
### Peace of Mind
Perhaps most importantly, a thorough professional inspection provides peace of mind. Knowing
that your new home has been properly constructed or that you understand the condition of the
property you are purchasing allows you to proceed with confidence.
### Cost Comparison
Consider the cost of professional inspections against the potential cost of undetected
problems:
| Item | Typical Cost |
| ------------------------------------- | --------------------------- |
| Pre-purchase building inspection | $400 to $600 |
| Combined building and pest inspection | $500 to $800 |
| New build stage inspections | $300 to $600 per inspection |
| Foundation repair | $10,000 to $50,000+ |
| Termite damage repair | $5,000 to $100,000+ |
| Waterproofing failure repair | $15,000 to $40,000+ |
| Major structural repairs | $20,000 to $100,000+ |
## Choosing the Right Inspector
Selecting a qualified and experienced building inspector is crucial for obtaining an
accurate and useful assessment. Not all inspectors are equal, and choosing the right one can
make a significant difference to the value you receive.
### Qualifications and Licensing
Building inspectors should hold relevant qualifications and licensing for your state or
territory. Look for:
- **Builder's licence:** Many states require inspectors to hold a current builder's licence
- **Relevant qualifications:** Diploma or Certificate IV in Building and Construction, or equivalent
- **Professional memberships:** Membership in professional bodies such as the Australian Institute of Building Surveyors or Master Builders Association
- **Pest inspection licence:** For timber pest inspections, a separate pest control licence is required
### Insurance Coverage
Reputable inspectors carry appropriate insurance to protect both themselves and their
clients:
- **Professional indemnity insurance:** Covers claims arising from professional advice or services
- **Public liability insurance:** Covers injury or property damage during inspections
Request evidence of current insurance coverage before engaging an inspector.
### Experience and Local Knowledge
Experience matters in building inspection. Look for inspectors with:
- Several years of inspection experience
- Background in building or construction trades
- Familiarity with local building practices and common issues
- Experience with the type of property you are purchasing or building
### Inspection Standards
Ensure the inspector follows relevant Australian Standards:
- **AS 4349.1:** Inspection of buildings, Part 1: Pre-purchase inspections for existing buildings
- **AS 4349.3:** Inspection of buildings, Part 3: Timber pest inspections
### Report Quality
Ask to see a sample report before booking. A quality inspection report should include:
- Clear photographs of identified issues
- Detailed descriptions of defects and their significance
- Recommendations for repairs or further investigation
- Assessment of major versus minor defects
- Clear, easy to understand language
### Questions to Ask
When engaging an inspector, ask the following questions:
- What qualifications and licences do you hold?
- How many years of inspection experience do you have?
- Do you carry professional indemnity and public liability insurance?
- What does your inspection cover and what are the limitations?
- How long will the inspection take?
- When will I receive the report?
- Can I attend the inspection?
- What equipment do you use?
## Frequently Asked Questions
###
What is the difference between a building inspection and a building survey?
**Short answer:** A building inspection assesses the physical condition of
a property, while a building survey is a detailed assessment that may include
measurements, drawings, and more comprehensive structural analysis.
Standard pre-purchase building inspections focus on identifying visible defects and
maintenance issues. Building surveys are more comprehensive and may include detailed
measurements, assessment of boundaries, and more thorough structural analysis. For most
residential purchases, a standard building inspection is sufficient. Building surveys
are typically required for commercial properties, heritage buildings, or properties with
complex structural concerns.
###
Are building inspections mandatory when buying a house in Australia?
**Short answer:** No, pre-purchase building inspections are not legally
mandatory, but they are strongly recommended by property experts and conveyancers.
While you can purchase a property without obtaining a building inspection, doing so
carries significant risk. Hidden defects can cost tens of thousands of dollars to
repair, and without an inspection, you have no way of knowing the property's true
condition. Most conveyancers and property lawyers strongly advise obtaining a building
inspection during the due diligence period. Some lenders may also require an inspection
before approving a mortgage.
###
How much does a building inspection cost in Australia?
**Short answer:** Pre-purchase building inspections typically cost between
$400 and $800, depending on property size, location, and the scope of the inspection.
Inspection costs vary based on several factors including property size, type of
construction, location, and whether additional services such as pest inspection are
included. Combined building and pest inspections usually offer better value than booking
separately. While the cost may seem significant, it is a small price to pay compared to
the potential cost of undetected defects. Some inspectors charge extra for thermal
imaging or other specialised assessments.
### What does a building inspection not cover?
**Short answer:** Building inspections have limitations and typically do
not include testing of services, assessment of concealed areas, or specialist trades
such as electrical and plumbing certification.
Standard building inspections are visual assessments of accessible areas. They do not
include testing of electrical installations, detailed plumbing assessments, asbestos
testing, structural engineering reports, or assessment of areas that are concealed,
inaccessible, or covered by furniture and stored items. Swimming pools, septic systems,
and air conditioning systems typically require specialist assessment. The inspection
report will clearly state limitations and recommend further specialist investigations
where warranted.
###
Should I get a building inspection for a new build?
**Short answer:** Yes, independent stage inspections are highly recommended
for new builds, even though mandatory council inspections are conducted.
Mandatory inspections by building surveyors focus on compliance with building codes and
approved plans. They do not necessarily identify all defects or quality issues.
Independent stage inspections by a building inspector working on your behalf provide an
additional layer of protection. These inspections focus on workmanship quality and
identifying defects before they are concealed. Many defects are identified by
independent inspectors that pass mandatory inspections.
### Can I do my own building inspection?
**Short answer:** While you can conduct your own assessment, professional
inspectors have the training, experience, and equipment to identify issues that most
people would miss.
Professional building inspectors have years of training and experience in identifying
defects. They understand construction methods, common failure points, and use
specialised equipment such as moisture meters and thermal cameras to detect hidden
problems. An untrained person may overlook significant issues or misinterpret what they
see. Given the value of property purchases, the cost of professional inspection is a
wise investment in protecting your interests.
### How long does a building inspection take?
**Short answer:** A thorough building inspection typically takes 1.5 to 3
hours for a standard residential property.
The duration depends on property size, age, construction type, and accessibility of
areas such as the roof void and subfloor. Larger properties or those with complex
construction take longer. A rushed inspection is likely to miss important issues, so be
wary of inspectors who spend less than an hour on site. Most inspectors will provide an
estimated duration when you book. The written report is usually delivered within 24 to
48 hours after the inspection.
## Key Takeaways
- Building inspections in Australia fall into two categories: mandatory new build inspections and recommended pre-purchase inspections for existing properties.
- New build inspections at footing, slab, framing, waterproofing, and final stages are required to ensure compliance with building codes and approved plans.
- Pre-purchase inspections, while not legally required, are essential for understanding a property's true condition before committing to purchase.
- Pest inspections are optional but highly recommended, particularly given Australia's high termite activity and the fact that standard insurance does not cover termite damage.
- Professional inspections provide early problem detection, negotiation power, documentation, and peace of mind for property buyers and builders.
- The cost of professional inspections is minimal compared to the potential cost of undetected defects, which can run into tens or hundreds of thousands of dollars.
- Choose inspectors based on qualifications, licensing, insurance, experience, and report quality rather than price alone.
- Building inspections are an essential investment in protecting your property purchase or new construction, providing valuable information and long-term peace of mind.
## References and Resources
- [ Australian Building Codes Board (ABCB) ](https://www.abcb.gov.au/)
- [ NSW Fair Trading ](https://www.fairtrading.nsw.gov.au/)
- [ Victorian Building Authority (VBA) ](https://www.vba.vic.gov.au/)
- [ Queensland Building and Construction Commission (QBCC) ](https://www.qbcc.qld.gov.au/)
- [ Standards Australia (AS 4349.1 and AS 4349.3) ](https://www.standards.org.au/)
- [ Master Builders Australia ](https://www.masterbuilders.com.au/)
For a complete overview, see our [guide to construction stage inspections](/guides/construction-stage-inspections-guide).
### What to Expect from a Professional Dilapidation Report
Source: https://ownerinspections.com.au/articles/what-to-expect-from-a-professional-dilapidation-report
Published: 2024-01-11 | Updated: 2026-02-13 | Category: Dilapidation Reports
Author: Maison Azdari
A professional [dilapidation report](/dilapidation-reports) is one of the most effective tools for protecting your property before nearby construction begins. It provides a detailed, time-stamped record of your property's condition that can be used to resolve disputes, support insurance claims, and give you peace of mind throughout the construction process.
Whether you are a homeowner concerned about a neighbouring development or a builder looking to protect yourself from unfounded damage claims, understanding what goes into a dilapidation report helps you get the most value from the process.
## What Is a Dilapidation Report?
A dilapidation report is a detailed record of a neighbouring property's existing condition before construction, demolition, or excavation work begins nearby. It captures every visible defect, from hairline cracks in plaster walls to staining on ceilings, chipped tiles, and settling in foundations.
The report serves as a baseline. If the property owner later claims that construction caused damage, the dilapidation report provides objective evidence of what the property looked like before any work started. This makes it an extremely valuable document for both property owners and builders.
Dilapidation reports are sometimes required by local councils as a condition of development approval. Even when not mandated, they are strongly recommended whenever construction activity involves excavation, demolition, piling, or heavy machinery near a property boundary.
## Why You Should Obtain a Dilapidation Report
### Preventing Neighbour Disputes
Construction projects often create tension between neighbours. Vibration, noise, dust, and changes to drainage can all affect surrounding properties. Without documented evidence of pre-existing conditions, disagreements about what damage existed before construction can quickly escalate into costly disputes.
A dilapidation report removes ambiguity. Both parties can refer to the documented baseline rather than relying on memory or assumptions.
### Documenting Pre-Existing Damage
Many properties already have cracks, moisture damage, or cosmetic wear before any construction takes place. A dilapidation report captures these existing issues in detail. This protects builders from claims that pre-existing damage was caused by their work, and it protects property owners by establishing a clear record against which any new damage can be measured.
### Supporting Insurance Claims
If construction does cause damage to your property, an insurance claim is much stronger when supported by a professional dilapidation report. Insurers and loss adjusters look for documented baseline evidence when assessing claims. Without it, proving the cause and timing of damage becomes significantly harder.
### Legal Protection
Dilapidation reports prepared by qualified, independent inspectors are admissible in court and tribunal proceedings across Australia, including NCAT, VCAT, and QCAT. Having a professionally prepared report strengthens your position in any legal dispute related to construction damage.
## What Does a Dilapidation Report Include?
A thorough dilapidation report covers every accessible area of the property. The inspector examines both interior and exterior spaces, documenting the current condition with written descriptions and high-quality photographs.
### Exterior Inspection
The inspector examines all external surfaces and features, including:
- **Walls and facades:** Cracks, staining, paint deterioration, render damage, and mortar joint condition
- **Roof and guttering:** Visible damage to roof tiles or sheeting, gutter alignment, downpipe condition, and flashing integrity
- **Windows and doors:** Frame condition, glass integrity, sealant condition, and operation
- **Driveways and paths:** Cracking, settling, lifting, and surface wear
- **Fences and retaining walls:** Lean, cracking, timber rot, and structural condition
- **Landscaping and drainage:** Ground levels, garden beds near structures, and stormwater drainage features
### Interior Inspection
Inside the property, the inspector documents the condition of each room and common area:
- **Walls:** Cracks, nail pops, plaster damage, paint condition, and moisture staining
- **Floors:** Tile cracking, timber floor movement, carpet condition, and level changes
- **Ceilings:** Cracks, sagging, staining, cornicing condition, and access panel locations
- **Doors and windows:** Frame alignment, hardware operation, and seal condition
- **Wet areas:** Bathrooms, kitchens, and laundries are checked for moisture damage, tile grout condition, and sealant integrity
### Photographic Evidence
One of the most important elements of any dilapidation report is the photographic documentation. A professional report includes hundreds of high-resolution, time-stamped photographs that clearly show the condition of every inspected area.
Each photograph is labelled with its location within the property, the feature being documented, and the date of inspection. This level of detail ensures the photographic record is useful as evidence in any future dispute or claim.
### Written Descriptions
Alongside photographs, the inspector provides written descriptions of each defect or feature. These descriptions include the type of defect, its location, approximate dimensions where relevant, and an assessment of its current state. Written descriptions add context that photographs alone cannot always provide.
## The Inspection Process Step by Step
Understanding the inspection process helps you prepare and ensures the report is as comprehensive as possible.
### Scheduling and Access Arrangements
The process begins with scheduling. You will need to arrange access to the property being inspected. For your own property, this is straightforward. If the report covers a neighbouring property, the neighbour's cooperation is needed. Most neighbours are willing to participate, particularly when they understand the report protects them as well.
Allow at least two weeks before construction begins to schedule the inspection. This provides a buffer for any access delays or weather disruptions.
### The On-Site Inspection
The inspector conducts a thorough, systematic examination of the property. A standard residential inspection typically takes between one and three hours, depending on property size and complexity. Commercial properties may require a full day or more.
The inspector moves methodically through each area, photographing and noting every visible defect. They use measuring tools to record crack widths, levels, and other dimensions. The inspection is non-invasive, meaning no walls are opened, no fixtures are removed, and no damage is caused.
### Transparent Communication
A professional inspector maintains open communication throughout the process. They explain what they are documenting, answer questions from the property owner, and provide an overview of their findings at the conclusion of the on-site visit.
If the inspector identifies anything that warrants immediate attention, such as significant structural movement or active water ingress, they will bring it to your attention during the inspection.
### Report Preparation and Delivery
After the on-site inspection, the inspector compiles the findings into a structured report. This includes organising photographs, writing descriptions, and formatting the document for clarity and completeness.
Turnaround times vary between providers. Some deliver within 24 hours, while others may take up to a week. If you need the report urgently, confirm the delivery timeline before engaging the inspector.
The final report is typically delivered as a PDF document, often accompanied by a digital photo archive. It should include the inspector's qualifications, insurance details, and a declaration of independence.
## Key Benefits of a Professional Dilapidation Report
### Clear Communication with Neighbours
A dilapidation report creates a shared reference point between you and your neighbours. Rather than debating what damage existed before construction, both parties can review the documented evidence. This transparency reduces misunderstandings and helps maintain positive neighbour relationships during what can be a disruptive period.
### Documented Evidence for Disputes
If a dispute does arise, a professional dilapidation report provides the strongest possible evidence base. Courts and tribunals place significant weight on independent, documented condition assessments. A well-prepared report can resolve disputes quickly and cost-effectively, often without the need for a hearing.
### Peace of Mind
Knowing that your property's condition has been professionally documented gives you confidence throughout the construction period. If damage does occur, you have the evidence to support your position. If it does not, the report confirms that the construction had no adverse effect.
### Cost Savings
The cost of a dilapidation report is modest compared to the potential expense of unresolved property damage disputes. Legal proceedings, expert forensic assessments, and repair cost disputes can easily run into tens of thousands of dollars. A report costing a few hundred to a few thousand dollars provides significant financial protection.
## How to Choose a Qualified Inspector
### Check Qualifications and Licensing
The inspector should hold current licensing with the relevant state building authority. In New South Wales, this means registration with [NSW Fair Trading](https://www.fairtrading.nsw.gov.au/). In Queensland, the inspector should be licensed through the [QBCC](https://www.qbcc.qld.gov.au/). In Victoria, check registration with the [Victorian Building Authority](https://www.vba.vic.gov.au/).
Professional indemnity insurance and public liability insurance are also necessary. An unqualified or uninsured inspector produces a report that may hold no weight in legal proceedings.
### Read Customer Reviews
Look for inspectors with consistently positive reviews from previous clients. Pay attention to feedback about the thoroughness of the report, the quality of communication, and the professionalism of the inspector. Reviews from clients who have used the report in a dispute or claim are particularly informative.
### Confirm Transparent Pricing
Ask for a clear, itemised quote before engaging an inspector. The quote should specify exactly what the inspection covers, whether interior and exterior areas are both included, the number of photographs, the turnaround time, and any potential additional charges.
Be cautious of providers who quote very low prices but exclude interior areas or provide minimal photographic documentation. A cheap report that does not adequately document the property's condition offers poor value.
### Ask About Experience
An inspector who has prepared hundreds of dilapidation reports will produce a more thorough and reliable document than one who treats it as a side service. Ask how many dilapidation reports they complete each year and whether they have experience providing evidence in dispute resolution.
### Drug Residues in Homes, Health Risks and Testing
Source: https://ownerinspections.com.au/articles/drug-residues-in-homes-health-risks-testing
Published: 2024-01-10 | Updated: 2026-02-11 | Category: Building Inspections
Author: Maison Azdari
Drug contamination in residential properties is a growing concern across Australia. Research indicates that approximately 16% of homes tested each month return positive results for methamphetamine residues. What surprises many people is that 80% of these contaminated properties result from drug use rather than manufacturing. Even casual smoking of methamphetamine inside a home can leave behind harmful chemical residues that persist for years.
These residues accumulate on surfaces throughout the property, embedding themselves into walls, carpets, curtains, and ventilation systems. Without proper testing and remediation, occupants can be exposed to these chemicals through skin contact, inhalation, and ingestion, often without realising the source of their health problems.
> Methamphetamine residues can remain in a property for years after the last exposure event. Standard cleaning methods are not sufficient to remove contamination, and professional testing is the only reliable way to confirm whether a property is safe for habitation.
## Types of Drug Residues Found in Homes
While a range of illicit substances can leave behind residues, methamphetamine is by far the most common contaminant found in Australian homes. Its chemical properties make it particularly persistent and difficult to remove.
### Methamphetamine
Methamphetamine, commonly referred to as meth, ice, or crystal meth, is the primary drug residue of concern in Australian properties. When smoked or manufactured inside a home, methamphetamine vapour settles on virtually every surface. The chemical compounds bind to porous materials such as plasterboard, carpet, timber, and soft furnishings, making standard cleaning ineffective.
Australian guidelines set the safe residue level for methamphetamine at 0.5 micrograms per 100 square centimetres. Properties exceeding this threshold require professional remediation before they can be considered safe for habitation.
### Heroin
Heroin residues can also be present in properties where the drug has been used or prepared. While less common than methamphetamine contamination, heroin residues can settle on surfaces and pose health risks through skin absorption and inhalation of contaminated dust particles.
### Cocaine
Cocaine residues are less frequently encountered in Australian residential properties compared to methamphetamine. However, in properties where cocaine has been used regularly, fine powder residues can accumulate on surfaces and within ventilation systems.
## How Drug Residues Contaminate a Property
Understanding how drug residues enter and persist in a property is essential for recognising the risk and knowing where contamination is likely to be concentrated.
### Manufacturing (Clandestine Laboratories)
Properties used for manufacturing methamphetamine, known as clandestine labs or clan labs, experience the highest levels of contamination. The chemical process involved in producing methamphetamine generates toxic byproducts including hydrochloric acid, phosphine gas, and volatile organic compounds. These chemicals permeate every surface and material in the property, often requiring extensive remediation or in some cases demolition.
### Smoking and Use
The more common source of contamination, responsible for approximately 80% of positive test results, is drug use within the property. When methamphetamine is smoked, the heated vapour disperses throughout the room and settles on walls, ceilings, floors, soft furnishings, and air conditioning systems. Repeated use leads to a cumulative buildup of residues that can exceed safe levels.
## Health Risks of Drug Residue Exposure
Exposure to drug residues in a contaminated property can cause a range of health effects, from mild short-term symptoms to serious long-term conditions. The severity of health impacts depends on the level of contamination, the duration of exposure, and the vulnerability of the occupants.
### Short-Term Health Effects
Occupants of contaminated properties often experience symptoms that they may initially attribute to other causes. Common short-term effects include:
### Long-Term Health Effects
Prolonged exposure to methamphetamine residues and the chemical byproducts of drug manufacturing poses more serious health risks:
## When to Test for Drug Residues
There are several situations where [drug residue testing](/drug-residue-testing) should be considered an essential part of your due diligence.
## The Drug Residue Testing Process
Professional drug residue testing follows a systematic process designed to accurately determine whether a property is contaminated and to what extent.
## Remediation of Contaminated Properties
When a property tests positive for drug residues above the safe threshold, professional remediation is required. The scope and cost of remediation depend on the level and extent of contamination.
Remediation typically involves removing and disposing of contaminated materials such as carpet, underlay, curtains, and in severe cases plasterboard. Remaining surfaces are cleaned using specialist chemical treatments. Following remediation, the property must be retested to confirm that residue levels have been reduced below the safe threshold before it can be reoccupied.
### Your Property's Health Check: Tips for a Thorough Site Inspection
Source: https://ownerinspections.com.au/articles/your-propertys-health-check-tips-for-a-thorough-site-inspection
Published: 2024-01-10 | Updated: 2026-02-09 | Category: Building Inspections
Author: Maison Azdari
A thorough property site inspection in Australia should cover the foundation, walls, ceilings, flooring, plumbing, electrical systems, roof, exterior cladding, gutters, drainage, and landscaping. It is recommended to conduct a full property health check at least once a year, with additional inspections after severe weather events. While homeowners can perform basic visual checks, a professional building inspection under Australian Standard AS 4349.1 provides a far more detailed and reliable assessment of your property's condition.
Regular property maintenance is not just about keeping your home looking good. It is about catching small issues before they turn into costly repairs. A cracked tile left unchecked can lead to water damage in the subfloor. A minor plumbing leak behind a wall can cause mould growth and structural timber decay. By conducting regular inspections, you protect both your investment and the safety of everyone living in the property.
## Preparing for Your Inspection
Before you start your property health check, a little preparation makes the process more effective and thorough.
## Inspecting the Interior
The interior inspection covers your home's structural elements, services, and safety features. Work through each area systematically.
### Foundation
Start from the ground up. Look for cracks in foundation walls or floors, signs of water leakage or staining, and uneven surfaces. Hairline cracks in concrete are common and usually cosmetic, but wider cracks (over 5mm) or cracks that change direction may indicate structural movement that needs professional assessment.
### Walls and Ceilings
Check walls and ceilings throughout the home for cracks, water stains, bubbling paint, and any signs of mould growth. Horizontal cracks in plasterboard can indicate foundation movement. Water stains on ceilings often point to a roof leak or plumbing issue above. Early detection of these problems prevents far more expensive repairs later.
### Flooring
Inspect floors for warping, buckling tiles, loose floorboards, or soft spots. These can create tripping hazards and often indicate moisture problems underneath. In wet areas like bathrooms and laundries, check for any signs of failed waterproofing such as discolouration or lifting tiles.
### Doors and Windows
Test that all doors and windows open and close smoothly. Check for draughts that may indicate poor sealing or gaps in the frames. Examine window and door frames for any rot, swelling, or damage. Draughty windows and doors increase your energy bills and reduce indoor comfort.
### Plumbing
Look for visible leaks around pipes, taps, and drains. Check for rust on fixtures and fittings. Test that all sinks, showers, and toilets drain properly. Slow drainage may indicate a blockage in the waste pipes. Look under sinks and in the laundry for any damp patches or water staining that suggest a hidden leak.
### Electrical
Visually inspect for exposed wires, flickering lights, discoloured power points, or warm-to-touch switch plates. Check that all power points and light switches function correctly. For a thorough assessment of your electrical system, always engage a licensed electrician, as electrical work is not something to tackle yourself.
### HVAC and Ventilation
Check air conditioning filters for dust buildup and replace them if needed. Inspect vents for proper airflow and make sure exhaust fans in bathrooms and kitchens are working. Good ventilation reduces moisture buildup and helps prevent mould growth. Consider scheduling professional maintenance for your heating and cooling systems at least once a year.
### Fire Safety
Test smoke alarms by pressing the test button. Replace batteries if needed and check the manufacture date, as smoke alarms must be replaced every 10 years under Australian regulations. Check that fire extinguishers are within their service date. Make sure everyone in the household knows the escape routes.
## Inspecting the Exterior
Your property health check should extend to every area outside the building envelope.
### Roof
The roof is your home's primary defence against weather. From the ground, look for missing or damaged tiles, loose or corroded flashing around chimneys and vents, and any visible sagging. If safe to access, inspect the roof cavity from inside for daylight penetrating through gaps, water stains on timbers, and signs of pest activity.
### Cladding and Gutters
Inspect external cladding (brick, weatherboard, render, or fibre cement) for cracks, gaps, damage, or signs of moisture intrusion. Check gutters and downpipes for blockages, rust, or damage. Blocked gutters cause water to overflow and pool against the building, which can lead to foundation issues and rising damp.
### Driveways and Pathways
Look for cracks in concrete or pavers, uneven surfaces that could create tripping hazards, and any areas where the surface has sunk or shifted. Poor drainage around pathways can direct water towards the building rather than away from it.
### Foundation (Exterior)
Walk around the outside of the building and check the foundation for visible cracks, erosion around the base, or soil buildup that covers the damp-proof course or slab edge. The base of the building should always remain visible for inspection, particularly in termite-prone areas.
### Landscaping and Drainage
Check that the ground slopes away from the building to prevent water pooling against the foundation. Look for overgrown vegetation that blocks subfloor vents, conceals the building base, or presses against external walls. Remove dead trees or large branches that could fall on the building during storms.
## Additional Considerations
### Local Building Regulations
Before carrying out any repairs identified during your inspection, check with your local council about permit requirements. Some repairs, particularly structural work or changes to the building envelope, may require a building permit or development application.
### When to Call a Professional
While a DIY property health check is valuable for ongoing maintenance, certain areas require professional expertise:
## DIY vs Professional Property Inspection
A professional building inspection conducted under AS 4349.1 provides a far more detailed and reliable assessment than a DIY check. Inspectors use moisture meters, thermal imaging cameras, and other specialist tools to identify issues hidden behind walls, under floors, and in roof cavities that are not visible to the naked eye.
### Your Ultimate Guide to Regular Swimming Pool Maintenance
Source: https://ownerinspections.com.au/articles/your-ultimate-guide-to-regular-swimming-pool-maintenance
Published: 2024-01-05 | Updated: 2026-02-09 | Category: Pool Inspections
Author: Maison Azdari
Regular swimming pool maintenance in Australia involves running the pump for at least 8 hours daily, skimming and vacuuming weekly, testing and balancing water chemistry at least once a week (maintaining pH between 7.4 and 7.6, chlorine between 1.5 and 3.0 ppm, and alkalinity between 80 and 120 ppm), and scheduling a professional pool inspection at least annually. Proper maintenance keeps the water safe for swimming, protects pool equipment from damage, prevents algae growth, and ensures compliance with state pool safety regulations.
Over 3.1 million Australians live in a home with a swimming pool or spa. A pool is a great addition to any property, but it comes with ongoing responsibilities. Without consistent maintenance, pool water can quickly become unhealthy and unsafe. Understanding the basics of pool care helps you protect your family, extend the life of your pool equipment, and avoid expensive repair bills.
## The Basics of Pool Circulation
Proper water circulation is the foundation of good pool maintenance. Without it, your filter cannot clean the water, chemicals cannot distribute evenly, and algae will grow in stagnant areas.
Run your pool pump for at least 8 hours per day. In hotter climates such as Queensland and northern NSW, or during periods of heavy use, you may need to run it for 10 to 12 hours. In cooler climates with less frequent swimming, slightly shorter pump times may be sufficient, but the pump should always run long enough to turn over the entire pool volume at least once per day.
## Weekly Cleaning Routine
A consistent weekly routine keeps your pool clean and prevents problems from building up.
### Skimming Surface Debris
Use a net skimmer to remove leaves, insects, and floating debris from the surface at least every few days, and after every storm. Debris that sinks to the bottom is harder to remove and can clog your filter.
### Brushing Walls and Floors
Brush the pool walls, floor, steps, and behind ladders weekly to loosen algae, dirt, and sediment. Use a stiff-bristled brush for concrete and pebblecrete pools and a softer brush for fibreglass and vinyl-lined pools. Regular brushing prevents algae from establishing on surfaces.
### Vacuuming
A pool vacuum cleans settled dirt and debris from the bottom of the pool. You can use a manual vacuum attached to the filtration system or an automatic robotic cleaner that moves across the pool floor independently. Vacuuming once a week prevents sediment from building up and clouding the water.
### Maintaining Water Levels
The ideal water level sits between the bottom of the skimmer opening and halfway up the skimmer weir. If the water level is too low, the pump can suck in air and lose prime. If it is too high, the skimmer cannot effectively collect surface debris. Top up with a garden hose when needed, and drain excess water after heavy rain.
## Chemical Balancing
Balanced pool chemistry is important for swimmer comfort and equipment protection. Incorrect chemical levels can cause skin and eye irritation, reduce chlorine effectiveness, and damage pool surfaces and equipment.
### Key Chemical Levels
### Testing Your Water
Test your pool water at least once a week using a home test kit or test strips. During summer and periods of heavy use, test every two to three days. Take water samples from about elbow depth away from return jets for the most accurate readings.
### Shocking Your Pool
Pool shocking involves adding a large dose of chlorine to eliminate combined chlorine (chloramines), organic waste, and bacteria that regular chlorination may not remove. Shock your pool once a week during peak swimming season and every two weeks during the off-season. Always shock in the evening so the sun does not burn off the chlorine before it has time to work.
## Additional Maintenance Tips
## Pool Safety Compliance in Australia
Pool safety is regulated at the state level in Australia. All pools and spas must comply with fencing and barrier requirements designed to prevent drowning, particularly among young children.
## When to Schedule a Professional Pool Inspection
While regular DIY maintenance keeps your pool in good condition day to day, a professional pool inspection provides a thorough assessment of the pool's structure, equipment, safety barriers, and compliance with Australian standards.
Schedule a professional inspection:
### Timber Frame vs Steel Frame: A Comparison in Home Construction
Source: https://ownerinspections.com.au/articles/timber-frame-vs-steel-frame-a-comparison-in-home-construction
Published: 2024-01-04 | Updated: 2026-02-09 | Category: New Construction
Author: Maison Azdari
Timber framing is generally more affordable, provides natural insulation, and is faster to assemble on site. Steel framing is more durable, completely resistant to termites, fire resistant, and requires less long-term maintenance. The best choice for your Australian home depends on your budget, location, climate zone, bushfire rating, and design requirements. Both materials must comply with the National Construction Code (NCC), and a frame stage inspection by an independent building inspector is recommended for either option.
The frame of your home is its structural skeleton. It supports the roof, walls, floors, and everything in between. Selecting the right framing material affects the home's strength, lifespan, energy performance, and ongoing maintenance costs. In Australia, timber and steel are the two most common framing options for residential construction.
## Timber Frame Construction
Timber framing has been the dominant construction method in Australia for over a century. It remains the most popular choice for residential builds due to its affordability, availability, and ease of use.
### Advantages of Timber Framing
Treated timber (H2 hazard class for above-ground framing) is commonly used in Australian residential construction to provide protection against termites and borers. However, treatment alone does not eliminate the need for regular [timber pest inspections](/timber-pest-inspections).
## Steel Frame Construction
Steel framing has grown significantly in popularity across Australia, particularly in new housing estates and areas with high termite or bushfire risk.
### Advantages of Steel Framing
Steel frames used in Australian residential construction are typically made from galvanised or zinc-coated steel (BlueScope TRUECORE or equivalent) to protect against corrosion. In coastal areas, higher corrosion protection ratings may be required.
## Side-by-Side Comparison
## Choosing Between Timber and Steel
The right framing material depends on your specific circumstances. Consider the following factors when making your decision:
### Budget
Timber framing is typically 10% to 20% cheaper than steel framing for standard residential builds. However, steel's longer lifespan and lower maintenance costs can offset the higher upfront investment over time.
### Location and Climate
In termite-prone areas such as coastal Queensland and northern NSW, steel framing removes termite risk entirely. In bushfire-prone areas with higher BAL (Bushfire Attack Level) ratings, steel framing meets fire resistance requirements more easily. In cooler climates where energy efficiency is the priority, timber's natural insulation advantage may be more valuable.
### Design Requirements
If your home design includes wide open-plan living areas, large window openings, or cantilevered structures, steel framing's superior strength-to-weight ratio makes these features easier to achieve. For more traditional designs, timber framing is typically sufficient and more cost-effective.
### Sustainability Priorities
Timber is a renewable resource with lower embodied energy, making it a better option for environmentally conscious builders who source from sustainably managed forests. Steel is fully recyclable at the end of its life, which partially offsets its higher embodied energy during production.
## Why a Frame Inspection Matters
Regardless of whether you choose timber or steel, a frame stage inspection by an independent building inspector is one of the most important inspections during construction. The frame is hidden once wall linings, insulation, and cladding are installed, so any defects missed at this stage become much harder and more expensive to fix later.
A frame inspection checks for:
### Lock Up vs. Fixing Stage: Distinguishing the Differences in Construction
Source: https://ownerinspections.com.au/articles/lock-up-vs-fixing-stage-learning-the-differences-in-construction
Published: 2024-01-03 | Updated: 2026-02-09 | Category: New Construction
Author: Maison Azdari
When building a new home or undertaking major renovations, understanding the distinct stages
of construction is essential for effective project management and quality assurance. Two
critical phases that often cause confusion are the lock-up stage and the fixing stage, each
serving fundamentally different purposes in the construction process.
The lock-up stage marks a significant milestone where major structural elements are
completed, creating a secure and weatherproof environment. In contrast, the fixing stage
focuses on interior finishing work, addressing defects, and preparing the building for
handover.
Knowing the differences between these stages helps homeowners, investors, and project
managers make informed decisions about inspections, progress payments, and quality control.
Each stage requires specific expertise and presents unique opportunities for defect
detection that, if missed, can lead to costly rectification works down the track.
> Understanding the distinction between lock-up and fixing stages is not just about
> construction terminology. It directly impacts your ability to identify defects at the right
> time and ensure your builder delivers quality workmanship throughout the project.
## Understanding the Lock-Up Stage
The lock-up stage, also known as the enclosed stage or weather-tight stage, represents a
pivotal point in residential construction. At this stage, the building has progressed to the
point where it is secure from the elements and can be locked to prevent unauthorised access.
### Definition and Timing
Lock-up typically occurs after the frame has been erected, external cladding installed,
roofing completed, and external windows and doors fitted. The building envelope is now
complete, providing protection from weather conditions such as rain, wind, and extreme
temperatures.
In a standard residential build, the lock-up stage usually occurs approximately 12 to 16
weeks after construction commences, depending on the size and complexity of the project.
This timing can vary based on weather conditions, material availability, and the efficiency
of the construction team.
### Key Activities Completed at Lock-Up
Several major construction elements must be completed before a building reaches lock-up
stage. These include the following essential components.
| Component | Description | Quality Indicators |
| ----------------- | -------------------------------------------------------------- | ------------------------------------------------------------ |
| Structural Frame | Complete wall framing, roof trusses, and load-bearing elements | Straight walls, level floors, plumb door frames |
| Roofing | Roof covering, sarking, gutters, and downpipes installed | Watertight, properly fixed tiles or sheeting, adequate falls |
| External Cladding | Brick veneer, rendered walls, weatherboards, or other cladding | Consistent finish, proper flashings, weep holes functional |
| Windows and Doors | External windows and doors installed with weather seals | Properly sealed, operable locks, weatherstripping intact |
| Fascias and Eaves | Fascia boards, eave linings, and external trims completed | Straight lines, proper paint finish, adequate ventilation |
### Structural Significance of Lock-Up
The lock-up stage is significant because it marks the completion of the building's
structural shell. At this point, the major load-bearing elements, including the foundation,
frame, and roof structure, are in place and can be assessed for quality and compliance with
engineering specifications.
- **Weather protection:** The building is now protected from rain, wind, and temperature extremes, allowing interior work to proceed regardless of weather conditions
- **Secure environment:** With lockable doors and windows, the site becomes more secure, reducing risk of theft or vandalism of materials and fixtures
- **Progress payment milestone:** Lock-up typically triggers a significant progress payment under most building contracts, making inspection particularly important
- **Inspection opportunity:** This is the last opportunity to inspect structural elements before they are covered by internal linings
### Common Activities During Lock-Up Stage
While the building becomes weatherproof at lock-up, several important activities occur
during and immediately following this stage to prepare for interior finishing work.
#### Insulation Installation
With the building envelope complete, insulation can be installed in walls and ceilings. This
includes bulk insulation batts, reflective foil sarking, and acoustic insulation where
required. Proper installation is critical for thermal performance and compliance with energy
efficiency requirements under the National Construction Code.
#### Rough-In Services
Plumbing and electrical rough-in work typically occurs around lock-up stage. This involves
running pipes, cables, and conduits through the frame before wall linings are installed. The
rough-in stage is critical for detecting defects in services that will become hidden once
plasterboard is fixed.
- Water supply pipes and drainage installed to correct positions
- Electrical cables run through frame with switch and power point boxes positioned
- HVAC ductwork installed where applicable
- Communication and data cabling roughed in
#### Drywall and Flooring Preparation
Preparation for internal linings begins at lock-up stage. This includes installing flooring
underlayment, preparing surfaces for plasterboard, and ensuring all structural elements are
ready for finishing work. Any frame adjustments needed for straight walls and level ceilings
should be addressed before plasterboard installation.
#### Initial Paint and Protective Coatings
External elements that require paint protection, such as fascias, bargeboards, and timber
trim, receive their initial coats during the lock-up stage. This protects these elements
from weather damage while internal work proceeds.
## Understanding the Fixing Stage
The fixing stage represents the transition from structural construction to finishing work.
This stage focuses on installing fixtures, addressing defects, and completing the interior
to a standard ready for occupation. The name derives from the process of attaching or fixing
interior elements to the structure.
### Definition and Timing
The fixing stage typically follows the completion of internal wall linings, including
plasterboard installation, cornice fitting, and initial painting. It represents the final
push towards practical completion, where the dwelling becomes suitable for habitation.
In most residential construction projects, the fixing stage occurs approximately 4 to 8
weeks after lock-up, depending on the scope of interior finishes and the complexity of
fixture installation. This stage can take anywhere from 4 to 12 weeks to complete.
### Key Activities During Fixing Stage
The fixing stage encompasses a wide range of finishing activities that transform the
building shell into a liveable home.
| Activity | Description | Quality Considerations |
| -------------------------------- | ---------------------------------------------------------------------- | ---------------------------------------------------------------- |
| Defect Rectification | Addressing issues identified in previous stage inspections | Verify all noted defects have been properly corrected |
| Trim and Architrave Installation | Door architraves, skirting boards, window sills, and decorative trim | Tight joints, consistent reveal, proper mitres, no gaps |
| Fixture Hookups | Connecting plumbing fixtures, power points, and appliances | Watertight connections, correct wiring, functional operation |
| Flooring Installation | Timber, tiles, carpet, vinyl, or other floor coverings | Level surface, proper adhesion, consistent patterns, clean cuts |
| Paint Touch-Ups | Final paint coats and touch-ups after fixture installation | Consistent colour, no runs or drips, clean edges around fixtures |
| Final Cleaning | Builder's clean to remove construction debris and prepare for handover | Clean windows, clear debris, remove labels and protective films |
### Detailed Breakdown of Fixing Stage Activities
#### Addressing Defects from Previous Stages
A critical component of the fixing stage is rectifying defects identified during earlier
inspections. This includes addressing frame alignment issues visible in plasterboard, fixing
waterproofing concerns in wet areas, and correcting any structural deficiencies noted at
lock-up.
Defect rectification during fixing stage should be thorough because this is often the last
opportunity before practical completion. Issues that remain unaddressed may become subject
to warranty claims or disputes during the defects liability period.
#### Completing Interior Trim Work
The fixing stage sees the installation of all decorative and functional trim elements that
give the home its finished appearance.
- **Door architraves:** Timber or MDF trim surrounding door frames, requiring precise mitred corners and consistent reveals
- **Skirting boards:** Base trim connecting walls to floors, hiding expansion gaps and providing a finished transition
- **Window sills and reveals:** Interior trim completing window installations with proper falls for condensation drainage
- **Cornices:** While often installed earlier, cornice joints and corners are finished during fixing stage
#### Final Fixture Hookups
The rough-in work completed at lock-up stage now receives its final fixtures and
connections.
- **Plumbing fixtures:** Basins, toilets, showers, baths, and tapware installed and connected to water supply and drainage
- **Electrical fixtures:** Switches, power points, light fittings, and exhaust fans connected and tested
- **Kitchen appliances:** Cooktop, oven, rangehood, and dishwasher installed and connected
- **Laundry equipment:** Washing machine taps, dryer vents, and trough connections completed
#### Flooring Installation
Floor coverings are typically one of the last elements installed to prevent damage from
ongoing construction activities. The fixing stage sees the completion of all flooring types
specified in the building contract.
- Timber and laminate floating floors with appropriate expansion gaps
- Ceramic and porcelain tiles with consistent grout lines and proper adhesion
- Carpet installation with correct underlay and professionally stretched fitting
- Vinyl and resilient flooring with seamless joints and proper edge treatment
#### Final Painting and Touch-Ups
While initial painting occurs before fixing stage, the installation of fixtures and trim
inevitably causes minor damage that requires attention.
- Touch-up painting around door frames and hardware
- Final coat on skirting boards and architraves
- Repair of scuffs and marks from fixture installation
- External paint completion and touch-ups as needed
#### Final Cleaning and Preparation
The fixing stage concludes with a comprehensive builder's clean that prepares the dwelling
for handover.
- Removal of all construction debris, packaging, and materials
- Cleaning of all windows, mirrors, and glass surfaces
- Removal of protective films from appliances and fixtures
- Vacuuming of all floor surfaces and wiping of benchtops
- External site clean-up and removal of temporary structures
## Key Differences Between Lock-Up and Fixing Stages
Understanding the fundamental differences between these two construction stages is essential
for effective project management and quality control. While both represent important
milestones, their focus, activities, and implications for defect detection differ
significantly.
### Structural Focus vs. Detail Focus
The most fundamental difference between lock-up and fixing stages lies in their respective
focus areas.
| Aspect | Lock-Up Stage | Fixing Stage |
| ------------------- | -------------------------------------------------- | ----------------------------------------------- |
| Primary Focus | Structural integrity and weather protection | Interior finishing and aesthetic completion |
| Work Type | Major construction and building envelope | Fine details and finishing touches |
| Defect Impact | Structural defects, long-term building performance | Aesthetic defects, functionality of fixtures |
| Rectification Cost | High cost if defects found later | Generally lower cost to rectify |
| Inspection Priority | Frame alignment, roof integrity, waterproofing | Finish quality, fixture operation, completeness |
| Timeline Position | Mid-construction, approximately 60% complete | Near completion, approximately 90% complete |
| Progress Payment | Typically 35% to 40% of contract value | Typically 15% to 20% of contract value |
### Significant Construction vs. Finishing Tasks
The nature of work at each stage differs dramatically in scale, complexity, and the
tradespeople involved.
#### Lock-Up Stage Characteristics
- **Heavy construction:** Work involves structural elements like framing, roofing, and external cladding that form the building's skeleton
- **Multiple trades simultaneously:** Framers, roofers, bricklayers, and window installers often work concurrently
- **Weather dependent:** External work can be affected by rain, wind, and temperature extremes
- **Major equipment required:** Cranes, scaffolding, and heavy machinery are commonly used
- **Significant material deliveries:** Large quantities of timber, steel, bricks, and roofing materials arrive on site
#### Fixing Stage Characteristics
- **Interior focus:** Work occurs primarily inside the weatherproof building envelope
- **Sequential trades:** Work tends to follow a sequence, with plasterers preceding painters, who precede floor layers
- **Weather independent:** Most work can proceed regardless of external conditions
- **Hand tools predominant:** Work involves hand tools and smaller power tools rather than heavy equipment
- **Fixture deliveries:** Smaller, more frequent deliveries of fixtures, appliances, and finishing materials
### Inspection Priorities at Each Stage
The inspection focus differs significantly between lock-up and fixing stages, reflecting the
different risks and opportunities at each point.
#### Lock-Up Inspection Priorities
- Frame alignment using laser levels and plumb bobs
- Roof installation quality, including tile bedding and flashing
- Window and door installation, including weatherseals and hardware
- External cladding, including weep holes and cavity clearance
- Sarking and insulation installation compliance
- Rough-in plumbing and electrical before wall closure
#### Fixing Stage Inspection Priorities
- Plasterboard quality, including joints, corners, and finish
- Paint finish consistency and coverage
- Trim installation, including mitres, reveals, and gaps
- Fixture operation and connection quality
- Flooring installation and transitions
- Overall completion and readiness for handover
### Consequences of Missing Defects
The implications of failing to identify defects differ substantially between the two stages.
#### Lock-Up Stage Defect Consequences
Defects missed at lock-up stage often become hidden behind wall linings and can have severe
long-term consequences.
- **Frame misalignment:** Results in doors that do not close properly, cracked plasterboard, and uneven floors throughout the building's life
- **Roofing defects:** Lead to water ingress, ceiling damage, mould growth, and timber rot that may not become apparent for years
- **Waterproofing failures:** Cause structural damage, mould issues, and potential health hazards that are extremely expensive to rectify
- **Plumbing rough-in issues:** Can result in concealed leaks causing timber rot, mould, and eventual failure
#### Fixing Stage Defect Consequences
While still important, defects at fixing stage are generally more visible and easier to
rectify.
- **Paint defects:** Can be touched up or repainted relatively easily
- **Trim issues:** Gaps and poor mitres can be corrected without major disruption
- **Fixture problems:** Can usually be adjusted or replaced with minimal impact on other work
- **Flooring defects:** May require section replacement but are generally accessible for repair
## Recommendations for Managing Lock-Up and Fixing Stages
Effective management of both stages requires proactive communication, careful scheduling,
and engagement of professional inspectors. The following recommendations will help ensure
quality outcomes at each stage.
### Communication with Your Builder
Clear, consistent communication with your builder is essential throughout the construction
process, but particularly at these key stages.
- **Request advance notice:** Ask your builder to provide at least one week's notice before reaching lock-up and fixing stages to allow time to arrange inspections
- **Document discussions:** Follow up verbal conversations with written confirmation via email to create a clear record of agreements
- **Clarify inclusions:** Ensure you understand exactly what is included at each stage under your building contract to avoid disputes about completeness
- **Request progress photos:** Regular photographic updates help you monitor progress and identify potential issues before stage inspections
- **Attend site meetings:** Where possible, attend regular site meetings to discuss progress, address concerns, and maintain a positive working relationship
### Scheduling and Timeline Management
Proper scheduling ensures inspections occur at the optimal time and that any defects can be
addressed before work proceeds.
- **Book inspectors early:** Engage your independent inspector before construction begins so they can schedule inspections at critical points
- **Allow rectification time:** Build buffer time into your schedule for defect rectification between stages
- **Coordinate with progress payments:** Time inspections to occur before progress payments are due, giving you leverage for defect rectification
- **Plan for weather delays:** Recognise that lock-up stage in particular may be affected by weather, so maintain flexibility in scheduling
- **Track milestone dates:** Maintain a record of when each stage is reached for warranty and contract purposes
### Inspection Protocols
Establishing clear inspection protocols maximises the value of professional inspections at
each stage.
- **Use qualified inspectors:** Engage inspectors with appropriate qualifications, licensing, and professional indemnity insurance
- **Attend inspections when possible:** Being present allows you to see defects firsthand and ask questions about their significance
- **Request detailed reports:** Ensure reports include photographs, specific locations, and severity assessments for all identified defects
- **Compare reports to contract:** Review inspection findings against your building contract specifications to identify non-compliance
- **Follow up systematically:** Create a defect register and track rectification progress until all items are satisfactorily addressed
### Engaging Professional Inspectors
Professional independent inspectors provide expertise and objectivity that protects your
investment throughout construction.
#### Why Professional Inspections Matter
- **Technical expertise:** Licensed inspectors understand Australian Standards, the National Construction Code, and industry best practices
- **Specialised equipment:** Professionals use laser levels, moisture meters, thermal imaging, and other tools to detect defects not visible to the untrained eye
- **Independence:** Unlike council or certifier inspections, independent inspectors work solely in your interests without conflicts
- **Documentation:** Professional reports provide evidence for defect claims and protect your position in any disputes
- **Experience:** Experienced inspectors have seen countless builds and can quickly identify common defects and areas of concern
#### What to Look for in an Inspector
- Relevant building or engineering qualifications
- Current professional indemnity insurance
- Membership in professional associations
- Positive reviews and references from previous clients
- Clear fee structure and scope of service
- Availability to conduct inspections at short notice when needed
#### Inspection Package Considerations
Many inspection companies offer packages covering multiple construction stages at a reduced
overall cost compared to booking individually. A typical comprehensive inspection package
might include the following stages.
- Slab inspection before concrete pour
- Frame stage inspection
- Lock-up stage inspection
- Waterproofing inspection in wet areas
- Fixing stage inspection
- Practical completion inspection
### Progress Payment Considerations
Both lock-up and fixing stages typically trigger progress payments under standard building
contracts. Managing these payments strategically helps ensure defects are addressed.
- **Review contract terms:** Understand exactly what must be completed before each progress payment becomes due
- **Inspect before paying:** Always complete your inspection before making progress payments to maintain leverage for rectification
- **Document incompleteness:** If work is not fully complete at the claimed stage, document this in writing before making any payment
- **Withhold proportionally:** Your contract may allow you to withhold an amount proportional to identified defects until rectification
- **Seek advice if uncertain:** If disputes arise over stage completion or defects, seek advice from a building dispute resolution service or construction lawyer
## Frequently Asked Questions
###
What is the main difference between lock-up and fixing stages?
**Short answer:** Lock-up focuses on completing the weatherproof building
envelope, while fixing stage focuses on interior finishing and fixture installation.
The lock-up stage marks the completion of major structural work including framing,
roofing, external cladding, and window and door installation. At this point, the
building is secure and weatherproof. The fixing stage occurs later and involves
completing interior finishes including trim work, fixture hookups, flooring, final
painting, and addressing any defects from earlier stages. Lock-up is about building the
shell; fixing is about completing the interior.
###
How long after lock-up does the fixing stage typically occur?
**Short answer:** The fixing stage typically begins 4 to 8 weeks after
lock-up, following completion of internal wall linings and initial painting.
After lock-up, several activities must occur before fixing stage begins. These include
completion of rough-in services inspection, installation of insulation, fitting of
plasterboard wall and ceiling linings, cornice installation, and initial painting. Once
these elements are complete, the fixing stage can commence with trim installation,
fixture hookups, and finishing work. The exact timeline depends on project size,
complexity, and the efficiency of the construction team.
###
Which [stage inspection](/new-construction-stage-inspections) is more important, lock-up or fixing?
**Short answer:** Lock-up inspection is generally more critical because
structural and services defects become hidden once wall linings are installed.
While both inspections are valuable, the lock-up inspection provides the last
opportunity to examine structural elements before they are concealed. Frame alignment,
roofing quality, waterproofing, and rough-in services can all be assessed at lock-up but
become hidden after plasterboard installation. Defects in these areas are significantly
more expensive to rectify once the building is complete. The fixing stage inspection
remains important for assessing finish quality and completeness but deals primarily with
more readily correctable issues.
###
What are the most common defects found at lock-up stage?
**Short answer:** Common lock-up defects include frame misalignment,
inadequate roofing installation, poor window sealing, and rough-in plumbing or
electrical issues.
Lock-up inspections frequently identify frame elements that are out of plumb or level,
which will cause problems with doors, windows, and finishes. Roofing defects including
gaps between tiles, inadequate flashing, and poor gutter installation are also common.
Windows and doors may have inadequate weathersealing or hardware issues. Rough-in
services often reveal pipes or cables in incorrect positions, inadequate support, or
non-compliant installations. Sarking and insulation deficiencies are also regularly
identified.
###
What are the most common defects found at fixing stage?
**Short answer:** Common fixing stage defects include poor paint finish,
gaps in trim work, fixture installation issues, flooring problems, and incomplete items.
Fixing stage inspections commonly find paint defects including missed areas, drips,
inconsistent colour, and damage from subsequent work. Trim installation issues such as
poor mitred corners, gaps, and inconsistent reveals are frequently identified. Plumbing
and electrical fixtures may have operational problems or poor connections. Flooring
defects including uneven surfaces, poor tile alignment, and inadequate transitions are
common. Incomplete items that should have been finished before fixing stage are also
regularly noted.
###
Can I conduct my own lock-up or fixing stage inspection?
**Short answer:** While you can conduct your own visual inspection, a
professional inspector will identify defects that untrained observers typically miss.
Homeowners can certainly walk through the site and note obvious issues like crooked
walls or scratched surfaces. However, professional inspectors bring technical knowledge,
specialised equipment, and extensive experience that enables them to identify defects
invisible to the untrained eye. Items like frame alignment within tolerance, correct
roofing installation, adequate insulation coverage, and compliant electrical work
require professional assessment. Given the relatively low cost of inspections compared
to potential defect rectification costs, professional inspections represent excellent
value.
###
What progress payment percentage is typical at lock-up and fixing stages?
**Short answer:** Lock-up typically triggers a progress payment of 35% to
40% of the contract value, while fixing stage triggers approximately 15% to 20%.
Standard building contracts in Australia typically structure progress payments around
key construction milestones. A common payment schedule might include a deposit of 5% to
10%, base stage payment of 10% to 15%, frame stage payment of 15% to 20%, lock-up stage
payment of 35% to 40%, fixing stage payment of 15% to 20%, and final payment of 5% at
practical completion. The exact percentages vary by contract and state. Always review
your specific contract to understand payment obligations.
###
Should I withhold progress payments if defects are found at these stages?
**Short answer:** You have the right to withhold payment proportional to
defects, but should communicate clearly with your builder and understand your contract
terms.
Most building contracts require the builder to complete each stage to a satisfactory
standard before payment is due. If your independent inspection identifies defects, you
are generally entitled to request rectification before releasing payment. Communicate
defects in writing with supporting photographs and inspection reports. For minor defects
that do not affect structural integrity or subsequent work, you might agree to a
timeline for rectification while releasing most of the payment. For significant defects,
particularly structural issues identified at lock-up, withholding payment until
rectification is reasonable and protects your interests.
###
What happens if my builder claims lock-up but it is not truly weatherproof?
**Short answer:** Document the incompleteness in writing, arrange an
independent inspection, and withhold payment until true lock-up is achieved.
Lock-up requires the building to be genuinely weatherproof and secure. If windows are
missing, external doors are not installed, roofing is incomplete, or significant gaps
exist in the building envelope, true lock-up has not been achieved. Document the
incomplete items with photographs and written correspondence. Your independent inspector
can provide a professional opinion on whether lock-up requirements have been met. Until
the building is genuinely weatherproof and lockable, the lock-up progress payment should
not be released. If disputes arise, seek advice from your state's building authority.
###
How does waterproofing inspection relate to lock-up and fixing stages?
**Short answer:** Waterproofing inspection is a separate critical
inspection that typically occurs between lock-up and fixing stages in wet areas.
Waterproofing in wet areas such as bathrooms, laundries, and balconies must be inspected
after membrane application but before tiling. This inspection often occurs after lock-up
when internal wet area preparation begins but before fixing stage when tiles are
installed. Waterproofing inspection verifies compliance with AS 3740 and is often
mandated by councils or certifiers. Given that waterproofing failures are among the most
common and expensive defects in Australian homes, this inspection is critical even
though it falls between the traditional lock-up and fixing stage milestones.
###
Can defects from lock-up stage still be fixed during fixing stage?
**Short answer:** Some lock-up defects can be addressed during fixing
stage, but many become significantly more expensive or impossible to fully rectify.
Minor lock-up defects that remain visible, such as external cladding issues or window
adjustments, can often be addressed during fixing stage. However, defects that become
concealed behind wall linings are much more problematic. Frame alignment issues
manifesting as cracked plasterboard are difficult to properly fix without demolition.
Rough-in plumbing or electrical defects may require removing wall linings to access.
This is why lock-up inspection is so critical, as identifying defects before concealment
allows for efficient and complete rectification.
###
What equipment do inspectors use at lock-up vs fixing stages?
**Short answer:** Lock-up inspections rely heavily on laser levels,
moisture meters, and structural assessment tools, while fixing inspections focus more on
visual assessment and fixture testing.
At lock-up stage, inspectors use laser levels and plumb bobs to verify frame alignment,
moisture meters to check for water ingress, and various measurement tools to confirm
compliance with specifications. Thermal imaging may detect insulation gaps. At fixing
stage, inspectors focus more on visual assessment of finish quality, testing of fixtures
and fittings, measurement of gaps and reveals in trim work, and verification of flooring
levels. Both stages benefit from comprehensive photographic documentation to support
written reports.
###
Is there an inspection stage between lock-up and fixing?
**Short answer:** Yes, the pre-plaster or internal lining inspection occurs
between lock-up and fixing to check rough-in services before walls are closed up.
The pre-plaster inspection, also known as the pre-lining or internal lining inspection,
is a critical stage between lock-up and fixing. This inspection examines rough-in
plumbing, electrical, HVAC, insulation, and sarking before plasterboard is installed.
Once wall linings are fixed, these elements become inaccessible without demolition. The
pre-plaster inspection is often the most critical of all construction stage inspections
because it is the last opportunity to identify and rectify services defects before
concealment.
###
How do lock-up and fixing stage definitions vary between states?
**Short answer:** Stage definitions are generally consistent across
Australia, though specific contract terms and regulatory requirements may vary by state.
The fundamental concepts of lock-up and fixing stages are consistent nationwide, based
on industry practice and standard building contracts. However, specific requirements may
vary. Different states have different home building contract regulations, with NSW, Qld,
Vic, and SA each having their own consumer protection frameworks. Progress payment
schedules may be regulated differently between states. Building approval and inspection
requirements through councils or private certifiers also vary. Always review your
specific building contract and consult your state's building authority for local
requirements.
###
What should I do if I missed the lock-up inspection?
**Short answer:** Arrange an inspection as soon as possible, even if wall
linings are being installed, to assess what is still visible and document any concerns.
If construction has progressed past lock-up without an inspection, arrange one
immediately. Even if some elements are now concealed, an experienced inspector can still
assess external elements, any areas where wall linings have not yet been installed, and
visible indicators of potential problems. Request that the builder delays further wall
lining installation until inspection is complete where possible. Document any concerns
about concealed work in writing to your builder. While not ideal, a late inspection is
always better than no inspection at all.
## Key Takeaways
- The lock-up stage marks completion of the building envelope, creating a secure, weatherproof structure with frame, roofing, cladding, and external windows and doors in place.
- The fixing stage focuses on interior finishing including trim work, fixture hookups, flooring, final painting, defect rectification, and preparation for handover.
- Lock-up inspection is critical because structural and services defects become hidden once wall linings are installed, making later rectification extremely expensive.
- Fixing stage defects are generally more visible and accessible for repair compared to concealed lock-up stage defects.
- Professional independent inspections at both stages protect your investment and provide leverage for defect rectification before progress payments.
- Clear communication with your builder, proper scheduling, and systematic defect tracking are essential for quality outcomes.
- Lock-up typically triggers a progress payment of 35% to 40% of contract value, while fixing stage triggers approximately 15% to 20%.
- Engaging qualified inspectors with appropriate licensing, insurance, and experience provides technical expertise and objective assessment throughout construction.
## References and Resources
- [ National Construction Code (NCC) ](https://ncc.abcb.gov.au/)
- [ Standards Australia ](https://www.standards.org.au/)
- [ Queensland Building and Construction Commission (QBCC) ](https://www.qbcc.qld.gov.au/)
- [ Victorian Building Authority (VBA) ](https://www.vba.vic.gov.au/)
- [ Master Builders Australia ](https://www.masterbuilders.com.au/)
- [ Housing Industry Association (HIA) ](https://www.hia.com.au/)
For a complete overview, see our [guide to construction stage inspections](/guides/construction-stage-inspections-guide).
### Cost-Saving Strategies for the Lock Up Stage in Construction
Source: https://ownerinspections.com.au/articles/cost-saving-strategies-for-the-lock-up-stage-in-construction
Published: 2023-12-28 | Category: New Construction
Author: Maison Azdari
The lock up stage represents a critical milestone in any construction project, marking the
point where your building becomes weather tight with windows, external doors, and roofing
installed. This phase involves substantial expenses that, without careful planning, can
quickly exceed your budget and derail your entire project.
Understanding how to manage costs effectively during the lock up stage is essential for
owner builders and project managers alike. The decisions you make regarding windows, doors,
insulation, and external cladding will impact not only your immediate budget but also the
long term energy efficiency and maintenance costs of your building.
According to industry data from the Housing Industry Association (HIA), the lock up stage
typically accounts for 15 to 25 percent of the total construction cost for residential
projects. With careful planning and strategic decision making, you can achieve significant
savings without compromising on quality or compliance with Australian building standards.
> The lock up stage is where smart planning pays off. Every dollar saved through careful
> material selection and supplier negotiation compounds into substantial savings across the
> entire project.
## Understanding the Lock Up Stage
The lock up stage, sometimes called the enclosed stage or weather tight stage, is reached
when the external building envelope is complete. At this point, the structure is protected
from the elements and can be securely locked. This milestone triggers a progress payment
under most building contracts in Australia.
Key components installed during the lock up stage include:
- **External windows and glazing:** All window frames, glass panels, and associated hardware
- **External doors:** Entry doors, garage doors, and any other external access points
- **Roof covering:** Final roofing materials including tiles, metal sheets, or membrane systems
- **External cladding:** Wall cladding, render, or brick veneer completion
- **Insulation:** Wall and ceiling insulation installed before internal linings
- **Fascias and guttering:** Drainage systems and roof edge finishes
## Lock Up Stage Budget Planning
Effective budget planning for the lock up stage requires understanding the typical cost
breakdown and identifying areas where savings can be achieved without compromising quality.
| Component | Typical Cost Range | Potential Savings | Risk Level |
| --------------------- | ------------------ | ----------------- | ---------- |
| Windows and Glazing | 30 to 40% | 15 to 25% | Medium |
| External Doors | 10 to 15% | 10 to 20% | Low |
| Roofing Materials | 20 to 30% | 10 to 15% | High |
| Insulation | 5 to 10% | 10 to 20% | Medium |
| External Cladding | 15 to 25% | 10 to 20% | Medium |
| Fascias and Guttering | 5 to 8% | 5 to 15% | Low |
## Proactive Planning for Cost Management
The foundation of successful cost management during the lock up stage begins long before
materials are ordered or contractors engaged. Proactive planning involves creating
comprehensive budgets, establishing financial buffers, and utilising modern tools to track
and manage expenses.
### Developing Comprehensive Budgets
A comprehensive budget for the lock up stage should detail every component, from major items
like windows and roofing to smaller elements like flashings and sealants.
Your comprehensive budget should include:
- **Material costs:** Itemised costs for all materials with quantities and unit prices
- **Labour costs:** Installation costs for each trade including windows, roofing, and insulation
- **Delivery and logistics:** Transport costs for materials, crane hire if required, and staging
- **Permits and inspections:** Any additional inspection or certification costs
- **Contingency allowance:** Buffer for unexpected costs and variations
### Establishing a Financial Buffer
Industry best practice recommends maintaining a financial buffer of 5 to 10 percent of the
lock up stage budget. This contingency fund covers unexpected costs such as price increases,
delivery delays requiring alternative suppliers, or minor design changes required by site
conditions.
#### Financial Buffer Guidelines
- **5% buffer:** Suitable for straightforward projects with confirmed pricing
- **7.5% buffer:** Recommended for most residential projects with custom elements
- **10% buffer:** Advisable for complex projects or volatile market conditions
### Utilising Construction Management Software
Modern construction management software provides powerful tools for budget tracking, cost
comparison, and financial forecasting. Key features to look for include:
- **Real time budget tracking:** Monitor actual versus budgeted costs as expenses occur
- **Supplier comparison tools:** Compare quotes from multiple suppliers side by side
- **Change order management:** Track variations and their impact on the overall budget
- **Reporting and forecasting:** Generate reports to identify trends and predict final costs
Popular options in Australia include Procore, Buildertrend, and CoConstruct for larger
projects, with simpler tools like Buildxact suitable for smaller residential builds.
## Cost Reduction Tactics for the Lock Up Stage
With a solid planning foundation in place, you can implement specific tactics to reduce
costs during the lock up stage. These strategies focus on material selection, supplier
relationships, and avoiding costly mistakes.
### Evaluating Window Types and Materials
Windows represent one of the largest expenses during the lock up stage, but they also offer
significant opportunities for cost savings.
| Frame Material | Relative Cost | Advantages | Considerations |
| ------------------- | -------------- | ----------------------------- | ------------------------ |
| Aluminium | Low to Medium | Durable, low maintenance | Poor thermal performance |
| uPVC | Low to Medium | Excellent thermal performance | Limited colour options |
| Timber | Medium to High | Natural aesthetics | Requires maintenance |
| Aluminium Composite | High | Best of both materials | Higher initial cost |
Cost saving strategies for windows include:
- **Standardise sizes:** Using standard window sizes rather than custom dimensions can reduce costs by 20 to 30 percent
- **Reduce opening windows:** Fixed glazing is significantly cheaper than operable windows while providing the same light and views
- **Consider uPVC:** For projects where thermal performance is important, uPVC often provides better value than thermally broken aluminium
- **Optimise glazing specification:** Match glazing performance to actual requirements rather than over specifying for all windows
### Negotiating Supplier Rates
Effective negotiation with suppliers can yield significant savings during the lock up stage.
Many owner builders leave money on the table by accepting initial quotes without
negotiation.
- **Obtain multiple quotes:** Always source at least three quotes for major items to understand the market and create competition
- **Timing matters:** Suppliers may offer better rates during slower periods or towards the end of financial quarters
- **Build relationships:** Establishing a relationship with a supplier across multiple purchases can unlock preferential pricing
- **Ask for trade pricing:** If you are an owner builder with a builder owner permit, many suppliers will offer trade rates
### Leveraging Bulk Purchase Discounts
Purchasing materials in bulk can achieve significant discounts, particularly for items used
throughout the lock up stage.
- **Insulation batts:** Bulk orders often attract 10 to 15 percent discounts
- **Roofing materials:** Order all roofing, flashings, and fixings together
- **Sealants and adhesives:** Bulk purchasing reduces unit costs
- **Hardware and fixings:** Screws, brackets, and connectors purchased in bulk offer substantial savings
### Avoiding Post Finalisation Design Changes
Design changes after specifications have been finalised are one of the most significant
sources of cost overruns during the lock up stage. Changes at this point often incur
restocking fees, reordering costs, and project delays.
Strategies to prevent costly design changes include:
- **Thorough design review:** Conduct comprehensive reviews of all specifications before orders are placed
- **Visual aids:** Use 3D renderings, samples, and mock ups to confirm choices
- **Decision deadlines:** Establish clear deadlines for final decisions
- **Change order process:** Implement a formal process that requires cost and schedule impact assessment before approving changes
## Balancing Economy with Quality
Cost savings should never come at the expense of quality that affects structural integrity,
weather protection, or compliance with Australian building standards.
### Understanding Where Quality Matters Most
- **Critical quality areas:** Roofing membranes, window flashing, weatherproof sealants, and structural fixings must meet or exceed specifications
- **Moderate flexibility areas:** Window frame materials, insulation brands, and cladding finishes offer more flexibility for cost optimisation
- **Aesthetic driven areas:** Hardware finishes, colour choices, and decorative elements can accommodate cost effective alternatives
### Cost Effective Alternatives That Maintain Standards
| Premium Option | Cost Effective Alternative | Typical Savings |
| -------------------------- | -------------------------- | --------------- |
| Concrete roof tiles | Colorbond steel roofing | 15 to 25% |
| Thermally broken aluminium | Quality uPVC windows | 20 to 35% |
| Hardwood timber entry door | Engineered timber or steel | 30 to 50% |
| Glass wool insulation | Polyester insulation | 10 to 20% |
### Compliance with Australian Building Standards
All cost saving measures must maintain compliance with the National Construction Code (NCC)
and relevant Australian Standards. Key standards relevant to the lock up stage:
- **AS 2047:** Windows and external glazed doors in buildings
- **AS 4055:** Wind loads for housing
- **AS/NZS 4859.1:** Thermal insulation materials for buildings
- **NCC Section J:** Energy efficiency requirements for building fabric
- **AS 1562:** Design and installation of sheet roof and wall cladding
## Budget Management Tips for the Lock Up Stage
Effective ongoing budget management ensures that planning and cost reduction efforts
translate into actual savings.
### Track Expenses in Real Time
- Record all expenses as they occur, including small items that can accumulate
- Compare actual versus budgeted costs weekly at minimum
- Investigate any variance greater than 5 percent immediately
- Update forecasts based on actual costs to predict final outcomes
### Manage Cash Flow Carefully
- Map out expected payments against available funds throughout the stage
- Negotiate payment terms that align with your cash flow position
- Consider supplier finance options for large purchases if beneficial
- Maintain a cash reserve for unexpected expenses beyond the contingency budget
### Document Everything
- Retain all quotes, orders, invoices, and delivery dockets
- Photograph materials on delivery to document condition and quantities
- Record any variations or changes with associated cost impacts
- Maintain a log of communications with suppliers and contractors
## Frequently Asked Questions
###
What is included in the lock up stage of construction?
**Short answer:** The lock up stage includes installation of all external
windows, doors, roofing, cladding, insulation, and guttering to make the building
weather tight and secure.
At lock up, the building envelope is complete and the structure is protected from the
elements. This milestone typically includes all external windows and glazing, external
doors including garage doors, completed roof covering with flashings and sarking, wall
insulation, external cladding or render, and fascias with guttering and downpipes.
###
How much should I budget for the lock up stage?
**Short answer:** The lock up stage typically represents 15 to 25 percent
of total construction costs, varying based on design complexity and material choices.
For a standard residential build, budget approximately 20 percent of total construction
cost for the lock up stage. Projects with extensive glazing, premium materials, or
complex roof designs may trend towards the higher end. Always obtain detailed quotes for
your specific design before finalising budgets.
###
What are the biggest cost saving opportunities during lock up?
**Short answer:** Windows and glazing offer the greatest savings potential
through material selection, standardised sizes, and supplier negotiation.
As windows typically represent 30 to 40 percent of lock up costs, this area offers the
most significant savings opportunity. Using standard sizes instead of custom dimensions,
limiting the number of operable windows, and choosing cost effective frame materials
like uPVC can achieve savings of 15 to 25 percent on window costs alone.
###
How can I save on windows without compromising quality?
**Short answer:** Use standard sizes, limit operable windows, consider uPVC
frames, and match glazing specifications to actual requirements for each window.
Custom window sizes can cost 20 to 30 percent more than standard dimensions, so
designing around standard sizes offers immediate savings. Fixed windows cost
significantly less than operable windows while providing the same light and views.
###
Should I use cheaper roofing materials to save money?
**Short answer:** Exercise caution with roofing savings as the roof is
critical for weather protection, but cost effective alternatives like quality metal
roofing can be appropriate.
Roofing is a high risk area for cost cutting because failures lead to water damage
throughout the building. Quality Colorbond steel roofing is often more cost effective
than concrete tiles while providing excellent durability and weather resistance.
###
How important is a financial buffer for the lock up stage?
**Short answer:** A 5 to 10 percent contingency buffer is essential for
managing unexpected costs and price variations during the lock up stage.
Even well planned projects encounter unexpected costs during the lock up stage. Material
price increases, delivery damage requiring replacement, and minor design adjustments all
can impact the budget. The buffer should be treated as a last resort rather than
available spending money.
###
Can I negotiate prices with window and door suppliers?
**Short answer:** Yes, suppliers expect negotiation, and obtaining multiple
quotes, building relationships, and timing purchases strategically can achieve
meaningful discounts.
Most suppliers build negotiation margin into their initial quotes. Start by obtaining at
least three competitive quotes to understand market pricing and create leverage.
Approach suppliers during slower periods or towards the end of financial quarters when
they may be more motivated to close sales.
###
What happens if I change my mind about specifications after ordering?
**Short answer:** Post order changes typically incur significant costs
including restocking fees, cancellation charges, and reordering at potentially higher
prices.
Changing specifications after orders are placed is one of the most expensive mistakes in
construction. Custom items like windows and doors may have cancellation fees of 50
percent or more. The best strategy is thorough review and confirmation of all
specifications before ordering.
###
How can bulk buying reduce lock up stage costs?
**Short answer:** Bulk purchases of insulation, roofing materials,
sealants, and hardware can achieve discounts of 10 to 20 percent compared to smaller
orders.
Suppliers offer volume discounts because bulk orders reduce their handling, packaging,
and administrative costs. Items well suited for bulk purchasing during lock up include
insulation batts, roofing materials and accessories ordered together, sealants and
adhesives, and hardware like screws and brackets.
###
What should I inspect before making the lock up stage payment?
**Short answer:** Verify all windows and doors are correctly installed and
operational, roofing is complete with proper flashings, insulation is installed
correctly, and the building is genuinely weather tight.
Before releasing the lock up stage payment, conduct a thorough inspection or engage a
professional building inspector. Check that all windows and doors open, close, and lock
correctly with no gaps or defects. Verify roofing is complete with all flashings, ridge
capping, and guttering installed properly.
## Key Takeaways
- The lock up stage typically represents 15 to 25 percent of total construction costs, with windows and glazing being the largest expense category.
- Comprehensive budget planning with a 5 to 10 percent contingency buffer provides the foundation for effective cost management.
- Construction management software improves budget tracking, supplier comparison, and change order management for larger projects.
- Standardising window sizes, limiting operable windows, and considering uPVC frames can achieve significant savings without quality compromise.
- Supplier negotiation, bulk purchasing, and strategic timing can reduce material costs by 10 to 20 percent across the lock up stage.
- Avoiding post finalisation design changes prevents restocking fees, delays, and budget overruns.
- Cost effective alternatives exist for many premium materials while maintaining compliance with Australian building standards.
- Professional inspections before lock up stage payment ensure quality standards are met and protect your investment.
For a complete overview, see our [guide to construction stage inspections](/guides/construction-stage-inspections-guide).
### Ultimate Guide to Dilapidation Reports
Source: https://ownerinspections.com.au/articles/ultimate-guide-to-dilapidation-reports
Published: 2023-12-28 | Category: Dilapidation Reports
Author: Maison Azdari
Australia's construction market was valued at approximately AUD 228.68 billion in 2023 and
is projected to reach AUD 298.63 billion by 2028. This remarkable growth brings with it an
urgent need to safeguard properties adjacent to construction sites from potential damage.
[Dilapidation reports](/dilapidation-reports) have become an essential tool for property owners, builders, and
developers seeking to protect their interests and maintain accountability throughout the
construction process.
Whether you are a homeowner concerned about a neighbouring development, a builder wanting to
protect yourself from unfounded damage claims, or a developer managing a large-scale
project, understanding dilapidation reports is crucial. This comprehensive guide will walk
you through everything you need to know about dilapidation reports in Australia, from their
purpose and process to how to read and use them effectively.
Construction activities can cause significant disruption to surrounding properties. From
vibrations that crack walls to excavation work that shifts foundations, the potential for
damage is real and often costly. A dilapidation report provides the documented evidence
needed to establish what existed before construction began, creating a clear baseline for
any future comparisons.
> A dilapidation report is not just a document; it is your insurance policy against
> construction-related disputes. Without one, proving whether damage occurred before or after
> construction becomes virtually impossible.
## What is a Dilapidation Report?
A dilapidation report, also known as a condition report or survey, is an independent
document that records the existing condition of a property before nearby construction work
begins. It serves as an objective baseline that can be used for comparison after
construction is completed, helping to determine whether any damage has occurred as a result
of the building works.
The report is typically prepared by a qualified building inspector who conducts a thorough
examination of the property, documenting all existing defects, cracks, damage, and wear.
This documentation includes detailed written descriptions, photographs, and measurements
that create an irrefutable record of the property's condition at a specific point in time.
Dilapidation reports are commonly commissioned for properties within a certain radius of
proposed construction works. The distance typically depends on the scale and nature of the
construction, with major projects often requiring reports for properties within 50 metres or
more of the site boundary.
### Key Components of a Dilapidation Report
A comprehensive dilapidation report typically includes the following elements:
- **Property identification:** Full address, property type, and description of the building including its age, construction type, and general characteristics.
- **Date and time of inspection:** Establishing exactly when the report was prepared to create a clear timeline.
- **Weather conditions:** Noting environmental factors that may affect the inspection or the property's condition.
- **Photographic evidence:** High-resolution photographs documenting all areas of the property, with particular attention to existing defects.
- **Written descriptions:** Detailed narrative descriptions of each area inspected and any defects observed.
- **Measurements:** Where applicable, measurements of cracks, gaps, or other defects to allow for quantitative comparison.
- **Inspector credentials:** Details of the inspector's qualifications, licensing, and professional indemnity insurance.
## Purpose of Dilapidation Reports
Dilapidation reports serve multiple important purposes in the construction industry,
benefiting property owners, builders, and the broader community. Understanding these
purposes helps stakeholders appreciate the value of investing in a quality report.
### Protecting Property Owners from Construction Damages
For property owners, a dilapidation report provides crucial evidence should damage occur to
their property during nearby construction. Without a pre-construction record, it becomes
extremely difficult to prove that damage was caused by construction activities rather than
pre-existing conditions or natural deterioration.
The report allows property owners to make informed claims for compensation or repairs,
backed by documented evidence. This protection extends to all aspects of the property,
including structural elements, finishes, landscaping, fencing, driveways, and any other
features that could potentially be affected by construction activities.
### Defending Builders Against Exaggerated Claims
Builders and construction companies benefit equally from dilapidation reports. By
documenting existing conditions before work begins, builders protect themselves from
unfounded or exaggerated damage claims. Property owners may sometimes attribute pre-existing
defects to construction activities, either intentionally or through genuine
misunderstanding.
A comprehensive dilapidation report provides builders with documentary evidence to defend
against such claims, potentially saving significant costs in disputed compensation or legal
proceedings. This protection is particularly valuable given the high stakes involved in
construction projects.
### Promoting Construction Safety and Accountability
Beyond protecting individual interests, dilapidation reports contribute to broader
construction safety and accountability. They encourage builders to implement appropriate
protective measures and construction methods to minimise impacts on neighbouring properties.
The knowledge that property conditions have been documented creates an additional layer of
accountability. Construction teams are more likely to take care when they know that any
damage can be objectively measured and attributed. This ultimately leads to better
construction practices and reduced incidents of property damage.
## When and Why Dilapidation Reports Are Needed
Dilapidation reports are recommended or required in various circumstances, depending on the
nature and scale of construction activities. Understanding when these reports are necessary
helps property owners and builders plan appropriately.
### Major Construction Projects
Large-scale construction projects, including the construction of new buildings, major
renovations, and works involving heavy machinery, typically warrant dilapidation reports for
adjacent properties. These projects generate significant vibrations, noise, and ground
disturbance that can affect neighbouring structures.
New high-rise developments, for example, involve extensive foundation work, piling, and
heavy crane operations that can transmit vibrations through the ground over considerable
distances. Even smaller projects involving excavators, concrete trucks, and other heavy
equipment can cause damage to nearby properties if appropriate precautions are not taken.
### Underground Work
Infrastructure projects involving underground work present particular risks to surrounding
properties. This includes tunnel construction, underground railway developments, deep
basement excavations, and utility installations. Such works can cause ground movement, soil
displacement, and vibrations that affect nearby building foundations.
The risks associated with underground work extend beyond immediate vibration damage. Changes
to groundwater levels, soil compaction, and earth movement can cause settlement and
subsidence in neighbouring properties, sometimes manifesting months or even years after the
original construction work.
### Demolition and Excavation
Demolition activities and major excavation works create significant risks for adjacent
properties. Demolition involves controlled destruction of structures, generating vibrations,
debris, and dust that can affect neighbouring buildings. Excavation work, particularly for
deep foundations or basements, can lead to soil slippage, erosion, and undermining of
adjacent structures.
Properties near demolition sites are at risk from flying debris, dust infiltration, and
structural vibrations. Even with careful management, demolition activities can cause cracks
in walls, damage to windows, and other defects in nearby properties.
## What Dilapidation Reports Cover
A thorough dilapidation report examines all aspects of a property that could potentially be
affected by nearby construction activities. The following table outlines the key areas
typically covered in a comprehensive report.
| Area | Elements Inspected | Common Defects Documented |
| ------------------- | -------------------------------------------------- | ------------------------------------------------------------ |
| External Walls | Brickwork, render, cladding, paint finishes | Cracks, spalling, staining, weathering, mortar deterioration |
| Internal Walls | Plasterboard, brick, paint, wallpaper | Cracks, nail pops, water damage, settlement marks |
| Ceilings | Plaster, plasterboard, cornices, ceiling roses | Cracks, sagging, water stains, cornice separation |
| Floors | Tiles, timber, carpet, concrete, vinyl | Cracks, unevenness, tile lifting, grout deterioration |
| Foundations | Visible foundation walls, stumps, slab edges | Cracking, settlement, dampness, erosion |
| Roof | Tiles, metal sheeting, gutters, flashings | Cracked tiles, rust, loose fittings, damaged flashings |
| Windows and Doors | Frames, glass, seals, hardware, screens | Cracks, seal failure, sticking, alignment issues |
| Driveways and Paths | Concrete, pavers, asphalt, gravel | Cracking, settlement, heaving, edge damage |
| Fencing | Timber, colorbond, brick, chain link | Leaning, damaged panels, rust, deterioration |
| Retaining Walls | Concrete, timber, block, stone | Cracking, bulging, leaning, drainage issues |
| Swimming Pools | Shell, coping, surrounding paving, equipment | Cracking, tile damage, equipment defects, coping issues |
| Landscaping | Garden beds, trees, irrigation, outdoor structures | Ground level changes, tree damage, irrigation defects |
## The Dilapidation Report Process
Understanding the dilapidation report process helps property owners and builders know what
to expect and how to prepare. The process typically involves five key stages, each
contributing to the creation of a comprehensive and reliable document.
### Step 1: Initial Survey
The dilapidation report process begins with an initial survey conducted by a licensed
building inspector. During this survey, the inspector visits the property to document its
condition, examining both interior and exterior elements. The inspector works systematically
through the property, ensuring no area is overlooked.
Before the inspection, the property owner should be notified and ideally present during the
survey. This allows the owner to point out any areas of particular concern and ensures
access to all parts of the property. The inspector will need access to all rooms, the roof
space (where safe and accessible), subfloor areas, and all external areas including gardens,
driveways, and outbuildings.
The initial survey typically takes between one and three hours for a standard residential
property, with larger or more complex properties requiring additional time. Commercial and
industrial properties may require significantly longer inspection periods.
### Step 2: Documentation
Thorough documentation is the foundation of a reliable dilapidation report. The inspector
captures detailed photographic evidence of the entire property, with particular attention to
any existing defects, cracks, damage, or areas of concern. Modern inspectors typically use
high-resolution digital cameras and specialised equipment such as crack monitors and
measuring devices.
Photographs are taken systematically, often using a room-by-room approach for interiors and
an elevation-by-elevation approach for exteriors. Close-up photographs document specific
defects, while wider shots provide context. The inspector also makes detailed written notes
describing each area and any defects observed.
Documentation extends beyond visual recording to include measurements of cracks, gaps, and
other quantifiable defects. These measurements provide objective data that can be compared
with post-construction assessments to determine whether changes have occurred.
### Step 3: Measurement and Analysis
The measurement and analysis phase involves the inspector recording precise measurements of
existing defects and analysing their potential implications. This includes measuring crack
widths and lengths, recording floor level variations, and noting the extent of any
settlement or movement patterns.
Analysis during this phase helps establish the likely causes of existing defects and
distinguish between issues related to normal building behaviour, maintenance neglect, or
previous construction activities. This analysis provides important context for any future
comparisons.
For properties with significant existing issues, the inspector may recommend additional
investigations such as structural engineer assessments or geotechnical surveys. These
supplementary reports can provide valuable baseline data for complex situations.
### Step 4: Report Compilation
Following the on-site inspection, the inspector compiles the collected information into a
formal dilapidation report. This report brings together photographs, written descriptions,
measurements, and expert assessments into a coherent document that provides a complete
record of the property's condition.
The report is typically structured to allow easy navigation and reference. It includes an
executive summary, property details, methodology description, detailed findings organised by
area, photographic appendices, and any relevant attachments such as drawings or previous
reports.
Professional report compilation ensures that the document will be useful for its intended
purpose, whether for reference during construction, evidence in dispute resolution, or legal
proceedings if required.
### Step 5: Delivery and Discussion
The final stage involves delivering the completed report to the client and discussing its
contents. The inspector should be available to explain findings, answer questions, and
clarify any aspects of the report that may be unclear.
The report serves as a reference point for both property owners and construction companies.
Property owners can use it to monitor their property during construction and identify any
changes that may have occurred. Construction companies can refer to it to verify conditions
before commencing work and defend against any subsequent claims.
Copies of the report should be retained by all relevant parties, including the property
owner, the construction company, and where applicable, the local council or certifying
authority. Safe storage of the report ensures it remains available for future reference.
## Reading and Using Your Dilapidation Report
Receiving a dilapidation report is only the first step. Understanding how to read and use
the report effectively is essential to maximising its value. The following guidance will
help you make the most of your dilapidation report.
### Comparing Pre and Post Construction Conditions
The primary purpose of a dilapidation report is to enable comparison between pre and post
construction conditions. After construction is completed, you should arrange a follow-up
inspection using the original report as a baseline. This comparison inspection documents any
changes to the property's condition.
When comparing conditions, it is important to distinguish between changes that are likely
related to construction activities and those that may have other causes such as normal
weathering, maintenance neglect, or natural building movement. An experienced inspector can
help interpret changes and provide professional opinions on their likely causes.
### Focusing on Highlighted Areas
Quality dilapidation reports highlight areas of particular concern or significance. These
may include existing cracks that could potentially worsen, areas of structural
vulnerability, or elements that are particularly susceptible to construction-related damage.
Pay special attention to these highlighted areas when monitoring your property during
construction. Regular visual checks of these areas can help identify problems early,
allowing for prompt action before damage becomes more serious.
### Seeking Expert Consultation
If you are unsure about any aspect of your dilapidation report, or if you have concerns
about potential damage during construction, seek expert consultation. The inspector who
prepared the report should be your first point of contact, as they are most familiar with
the document and the property's condition.
For complex issues, you may need to engage additional experts such as structural engineers,
geotechnical consultants, or legal advisers. These professionals can provide specialised
advice on technical matters or help navigate dispute resolution processes if required.
### Planning Repairs
If post-construction inspection reveals damage attributable to construction activities, the
dilapidation report becomes essential evidence for planning repairs. The report documents
the original condition, allowing accurate assessment of the extent of damage and the repairs
required to restore the property.
When planning repairs, it is advisable to obtain quotes from multiple contractors and have
the repair scope reviewed by a building professional. This ensures that repairs adequately
address all damage and that costs are reasonable and justifiable.
## Professional Involvement in Dilapidation Reports
Engaging qualified professionals for dilapidation reports is essential for ensuring the
report's reliability and usefulness. Professional involvement brings several important
benefits that justify the investment.
### Objective Assessment
Professional building inspectors provide objective, unbiased assessments of property
condition. Unlike property owners who may overlook familiar defects or construction
companies who may have interests in minimising recorded issues, independent inspectors have
no stake in the outcome beyond providing an accurate report.
This objectivity is particularly important if the report is ever needed for dispute
resolution or legal proceedings. Courts and tribunals place greater weight on reports
prepared by independent professionals than on documentation prepared by interested parties.
### Expert Knowledge
Professional inspectors bring expert knowledge of building construction, defect assessment,
and damage mechanisms. This expertise enables them to identify defects that may not be
apparent to untrained observers and to assess the significance of observed conditions.
Expert knowledge also helps inspectors distinguish between different types of defects and
their likely causes. This distinction is important when determining whether
post-construction changes are related to construction activities or have other explanations.
### Compliance Assurance
Professional dilapidation reports are prepared in accordance with industry standards and
best practices. This compliance assurance ensures that reports will be accepted by councils,
insurers, lawyers, and other stakeholders who may need to rely on them.
Reports prepared by unqualified individuals may be challenged on methodological grounds or
rejected entirely by parties who require professional documentation. Investing in a
professional report from the outset avoids these potential problems.
## Selecting Qualified Inspectors
Choosing the right inspector is crucial for obtaining a reliable and useful dilapidation
report. The following considerations will help you select a qualified professional.
### Licensing and Qualifications
In Australia, building inspectors should hold appropriate licensing for their state or
territory. This typically includes registration with bodies such as NSW Fair Trading, the
Victorian Building Authority (VBA), or the Queensland Building and Construction Commission
(QBCC). Verify that your chosen inspector holds current licensing before engaging their
services.
Relevant qualifications typically include a Diploma of Building and Construction or
equivalent, with additional training or certification in building inspection. Some
inspectors hold additional qualifications in structural engineering or related fields, which
can be valuable for complex properties.
### Professional Indemnity Insurance
Professional indemnity insurance protects both the inspector and the client in case of
errors or omissions in the report. Always verify that your inspector holds current
professional indemnity insurance with adequate coverage for the value of the properties
being inspected.
Insurance coverage demonstrates that the inspector operates as a professional and provides
recourse if the report is found to be deficient. Inspectors without adequate insurance
coverage should be avoided.
### Experience and Reputation
Experience in preparing dilapidation reports is important for ensuring comprehensive and
reliable documentation. Ask potential inspectors about their experience with similar
properties and construction types, and request references from previous clients.
Online reviews and professional referrals can provide insight into an inspector's reputation
and the quality of their work. Look for inspectors with consistently positive feedback and a
track record of professional service.
### Report Quality and Turnaround
Request sample reports to assess the quality and comprehensiveness of the inspector's work.
Quality reports should be well-organised, clearly written, and supported by extensive
photographic documentation. They should also be delivered within a reasonable timeframe.
Discuss turnaround times before engaging an inspector, particularly if you are working to
tight construction schedules. Most professional inspectors can deliver reports within three
to five business days, with expedited options available for urgent requirements.
## Frequently Asked Questions
###
What is the difference between a dilapidation report and a standard building inspection?
**Short answer:** A dilapidation report documents existing conditions
before construction begins for comparison purposes, while a standard building inspection
assesses overall property condition for purchase or maintenance decisions.
Dilapidation reports focus specifically on creating a baseline record that can be
compared after nearby construction activities. They emphasise detailed documentation of
all existing defects, cracks, and conditions that could potentially change due to
construction impacts. Standard building inspections, such as [pre-purchase inspections](/pre-purchase-inspections),
assess the overall condition of a property to inform buying decisions, identifying major
defects, maintenance issues, and safety concerns. While there is overlap in the
inspection process, the purpose and focus of each report type differs significantly.
###
Is a dilapidation report necessary for residential construction projects?
**Short answer:** Yes, dilapidation reports are highly recommended for any
construction project that could potentially affect neighbouring properties, regardless
of size.
Even small residential projects can cause damage to neighbouring properties through
vibrations, ground movement, or construction activities. A new home build, major
renovation, or extension work may involve excavation, piling, or heavy machinery that
transmits vibrations to adjacent properties. Without a pre-construction dilapidation
report, it becomes virtually impossible to determine whether damage was caused by
construction activities or existed beforehand. Many councils and development consent
conditions now require dilapidation reports for neighbouring properties as a standard
condition of approval.
###
How can I verify that my inspector is properly qualified?
**Short answer:** Check their state licensing registration, verify
professional indemnity insurance, and confirm relevant qualifications and industry
memberships.
In NSW, you can verify building inspector licensing through the NSW Fair Trading
website. Victorian inspectors should be registered with the Victorian Building Authority
(VBA), and Queensland inspectors with QBCC. Request copies of current licensing
certificates, professional indemnity insurance policies, and qualification certificates.
Membership in professional bodies such as the Master Builders Association or Housing
Industry Association indicates commitment to professional standards. Ask for references
from recent clients and review online testimonials to confirm the inspector's reputation
and experience.
###
How are disputes resolved when damage is claimed after construction?
**Short answer:** Disputes are typically resolved through comparison of pre
and post construction reports, negotiation between parties, mediation, or if necessary,
through tribunal or court proceedings.
When damage is alleged, the first step is usually a comparison inspection using the
original dilapidation report as a baseline. This comparison identifies any changes and
provides evidence for negotiations between the property owner and the construction
company. Many disputes are resolved through direct negotiation or mediation without
formal legal proceedings. If agreement cannot be reached, the matter may proceed to a
state tribunal such as NCAT in NSW or QCAT in Queensland, or to court. The dilapidation
report becomes crucial evidence in these proceedings, demonstrating the property's
condition before construction began.
###
Are interior inspections as important as exterior inspections?
**Short answer:** Yes, interior inspections are equally important as
construction activities can cause internal damage through vibrations, settlement, and
structural movement.
Construction vibrations can cause internal wall cracks, ceiling damage, and displacement
of fixtures and fittings. Ground movement and settlement can affect internal floors,
walls, and door frames. Interior elements such as plasterboard walls and cornices are
often more susceptible to vibration damage than exterior masonry elements. A
comprehensive dilapidation report should document all internal areas, including walls,
ceilings, floors, doors, windows, and any visible services. Interior inspection also
provides evidence of water damage, which can result from construction impacts on
drainage or waterproofing systems.
###
How often should dilapidation reports be updated during construction?
**Short answer:** A pre-construction report and post-construction
comparison are essential, with interim inspections recommended for long-duration
projects or when specific concerns arise.
For standard construction projects, a pre-construction dilapidation report and a
post-construction comparison inspection are the minimum requirements. For major projects
lasting more than 12 months, interim inspections at six-monthly intervals or at key
construction milestones can help identify damage early and establish when it occurred.
If a property owner notices potential damage during construction, an interim inspection
should be arranged promptly to document conditions before they potentially worsen. Some
development consents specify monitoring requirements that must be followed.
###
What are the insurance implications of dilapidation reports?
**Short answer:** Dilapidation reports support insurance claims by
providing evidence of property condition before damage occurred, and may be required by
builders' insurance policies.
For property owners claiming construction-related damage, a dilapidation report provides
essential evidence for insurance claims. Without pre-construction documentation,
insurers may dispute whether damage resulted from construction activities or
pre-existing conditions. For builders and developers, construction insurance policies
often require dilapidation reports as a condition of coverage for third-party property
damage claims. The cost of dilapidation reports is minimal compared to the potential
insurance benefits and protection they provide. Keep copies of dilapidation reports with
your insurance documentation for easy reference if needed.
###
What role do local councils play in dilapidation reports?
**Short answer:** Local councils often require dilapidation reports as
conditions of development consent and may specify which properties must be surveyed.
Many local councils include dilapidation report requirements in development consent
conditions, particularly for larger projects or those involving demolition, excavation,
or construction close to neighbouring properties. Council conditions typically specify
the radius within which properties must be surveyed and may require copies of reports to
be submitted before construction commences. Some councils maintain their own
requirements for public infrastructure such as footpaths, kerbs, and road surfaces that
may be affected by construction traffic. Check your local council's development consent
conditions carefully to ensure compliance with all dilapidation report requirements.
###
Can I request a dilapidation report for neighbouring properties I do not own?
**Short answer:** Builders and developers can commission dilapidation
reports for neighbouring properties, but require property owner consent for interior
access.
Builders and developers typically arrange dilapidation reports for properties
potentially affected by their construction activities. While external areas visible from
public spaces can be documented without owner cooperation, access to private property
and interiors requires owner consent. Property owners are usually cooperative when
approached professionally, as the report also protects their interests. If a neighbour
refuses access, document the refusal in writing and conduct the most thorough external
assessment possible. Some development consents require proof that neighbours were
offered the opportunity to participate in dilapidation surveys, even if they declined.
###
What Australian formatting standards apply to dilapidation reports?
**Short answer:** Dilapidation reports should follow Australian Standard AS
4349.0 general requirements for property inspections, using metric measurements and
Australian terminology.
Professional dilapidation reports in Australia follow the general principles of AS
4349.0, which establishes requirements for property inspection reports. This includes
using metric measurements (millimetres for cracks, metres for dimensions), Australian
Standard terminology for building elements and defect descriptions, and clear reporting
formats. Reports should reference relevant Australian Standards and the National
Construction Code where applicable. Photographs should include date stamps and
measurement scales where appropriate. Professional inspectors are familiar with these
requirements and ensure their reports meet accepted Australian standards for format,
content, and presentation.
###
How far from a construction site should properties be surveyed?
**Short answer:** The survey distance depends on construction type, but
typically ranges from 15 metres for minor works to 100 metres or more for major
infrastructure projects.
The appropriate survey distance depends on the nature and scale of construction
activities. For residential construction projects, properties within 15 to 30 metres are
commonly surveyed. Major commercial developments may require surveys within 50 metres.
Infrastructure projects involving tunnelling, piling, or major excavation can affect
properties much further away, with survey distances of 100 metres or more sometimes
specified. Development consent conditions often specify required survey distances. When
in doubt, it is better to survey additional properties than to risk missing potential
damage. The cost of additional reports is minimal compared to the potential cost of
unsubstantiated damage claims.
###
What happens if damage is discovered before the comparison inspection?
**Short answer:** If you notice potential damage during construction,
document it immediately with photographs and dates, then arrange an interim inspection
as soon as possible.
Early identification of damage is important for several reasons. It allows prompt
notification to the construction company, who may be able to modify their methods to
prevent further damage. It also creates a clearer timeline linking damage to specific
construction activities. If you notice new cracks, changes to door operation, or other
potential damage during construction, take dated photographs immediately and contact
your building inspector for advice. An interim inspection can document the damage and
provide evidence of when it occurred. Prompt action also supports any subsequent
insurance claims or compensation negotiations.
###
Are dilapidation reports legally required in Australia?
**Short answer:** While not universally mandated by legislation,
dilapidation reports are often required by development consent conditions, council
requirements, or construction contracts.
Australian building legislation does not universally mandate dilapidation reports, but
they are frequently required through other mechanisms. Local councils commonly include
dilapidation report requirements in development consent conditions, particularly for
developments near property boundaries or involving significant excavation or demolition.
Some construction contracts specifically require dilapidation surveys as a condition of
the agreement. Even where not legally required, dilapidation reports are strongly
recommended as prudent risk management. The cost of a report is minimal compared to the
potential cost of property damage disputes without baseline documentation.
###
How much does a dilapidation report cost in Australia?
**Short answer:** Dilapidation reports typically cost between $400 and
$1,200 for residential properties, with commercial and complex properties costing more.
The cost of a dilapidation report depends on several factors including property size,
complexity, location, and the level of detail required. Standard residential properties
typically cost between $400 and $800 for a comprehensive interior and exterior survey.
Larger properties, heritage buildings, or those with complex features may cost $800 to
$1,200 or more. Commercial and industrial properties vary widely based on size and
complexity. Comparison inspections after construction are usually priced similarly to
the original report. When obtaining quotes, ensure you are comparing like-for-like
services and that the quote includes comprehensive interior and exterior documentation.
###
Can dilapidation reports be used in court proceedings?
**Short answer:** Yes, professionally prepared dilapidation reports are
admissible as evidence in court and tribunal proceedings and carry significant weight in
construction damage disputes.
Dilapidation reports prepared by qualified professionals are admissible evidence in
court and tribunal proceedings. The report provides objective, dated documentation of
property condition that can be compared with post-construction evidence to demonstrate
damage. For reports to carry maximum weight, they should be prepared by appropriately
qualified and licensed inspectors, include comprehensive documentation, and follow
accepted professional standards. The inspector may be required to provide expert witness
testimony explaining their findings. Courts and tribunals generally prefer documentary
evidence over verbal testimony alone, making dilapidation reports valuable evidence in
property damage disputes.
## Key Takeaways
- Dilapidation reports provide essential baseline documentation of property condition before nearby construction begins, protecting both property owners and builders.
- The reports are commonly required for properties adjacent to major construction projects, underground work, demolition, and excavation activities.
- A comprehensive report includes photographic evidence, written descriptions, measurements, and expert assessments covering all interior and exterior areas.
- Professional involvement ensures objective assessment, expert knowledge, and compliance with industry standards.
- When selecting an inspector, verify licensing, professional indemnity insurance, qualifications, and experience with similar properties.
- Comparison inspections after construction completion allow identification of any changes and support compensation claims if damage has occurred.
- Local councils often require dilapidation reports as conditions of development consent, specifying which properties must be surveyed.
- The cost of a dilapidation report is minimal compared to the potential cost of property damage disputes without baseline documentation.
- Professionally prepared reports are admissible evidence in court and tribunal proceedings and carry significant weight in damage disputes.
## References and Resources
- [ National Construction Code (NCC) ](https://ncc.abcb.gov.au/)
- [ Australian Building Codes Board (ABCB) ](https://www.abcb.gov.au/)
- [ NSW Fair Trading ](https://www.fairtrading.nsw.gov.au/)
- [ Queensland Building and Construction Commission (QBCC) ](https://www.qbcc.qld.gov.au/)
- [ Victorian Building Authority (VBA) ](https://www.vba.vic.gov.au/)
- [ Consumer and Business Services South Australia ](https://www.cbs.sa.gov.au/)
- [ Standards Australia ](https://www.standards.org.au/)
### What are The Types of Ceiling Materials?
Source: https://ownerinspections.com.au/articles/what-are-the-types-of-ceiling-materials
Published: 2023-12-27 | Updated: 2026-05-21 | Category: Building Inspections
Author: Maison Azdari
Choosing the right ceiling materials can change how a room looks, feels and performs. A ceiling is not just a surface above your head. It can affect moisture control, sound, lighting, insulation, fire performance and the long-term condition of the home. Roof and ceiling insulation can also make a major difference to heating and cooling costs in Australian homes.
Many homeowners ask the same simple question: what are ceilings made of? In Australian houses, common ceiling materials include plasterboard, moisture-resistant ceiling board, fibre cement, timber lining, metal panels, PVC panels, acoustic tiles, suspended ceiling systems and decorative plaster. Plasterboard is widely used as an internal wall and ceiling lining, and CSR Gyprock describes it as a gypsum core with resilient paper facing.
This guide explains the main types of ceiling materials, the best room-by-room options, the difference between ceiling boards and ceiling finishes, and what to check before renovating or buying a property. NSW Government also recommends checking for damp, mould and sagging ceilings during a property inspection.
> The ceiling is often called the fifth wall of a room. Choosing the right material can
> transform a space from ordinary to extraordinary while providing practical benefits for
> years to come.
## Ceiling Materials List
A clear ceiling materials list helps homeowners compare the most common ceiling materials before choosing a finish. The best material for ceiling use depends on the room, moisture exposure, design style, budget, ceiling height and whether access to services is needed.
| Ceiling material | Best for | Main benefit | Watch out for |
|---|---|---|---|
| Plasterboard or gypsum board | Bedrooms, living rooms, hallways | Smooth, affordable, easy to paint | Standard board is not ideal for wet areas |
| Moisture-resistant ceiling board | Bathrooms, laundries, ensuites | Better resistance to moisture and humidity | Still needs correct ventilation and waterproofing |
| Fibre cement sheet | Wet areas, eaves, garages, high-moisture spaces | Durable and moisture resistant | Heavier and harder to cut than plasterboard |
| Timber lining | Living rooms, feature ceilings, verandahs | Warm look and good acoustic character | Needs protection from termites, moisture and movement |
| Metal ceiling panels | Heritage homes, commercial spaces, wet-prone areas | Durable and decorative | Can corrode if poorly coated or installed in damp areas |
| PVC ceiling panels | Bathrooms, laundries, budget renovations | Lightweight and water resistant | Can look less premium than plasterboard or timber |
| Acoustic ceiling tiles | Apartments, media rooms, offices | Helps reduce echo and noise | Usually suits suspended systems more than standard home ceilings |
| Suspended ceiling system | Offices, basements, commercial spaces | Allows access to wiring, ducts and services | Reduces ceiling height |
Book a Defect
Investigation
}
buttonHref="/defect-investigation-reports"
variant="secondary"
/>
## What Are Ceilings Made Of?
Most ceilings are made from plasterboard, fibre cement, timber lining, metal panels, PVC panels or ceiling tiles fixed to timber or steel framing. In many Australian homes, plasterboard is the most common ceiling material because it creates a smooth painted finish and suits bedrooms, living rooms, hallways and other dry internal spaces.
The main materials used for ceiling construction include ceiling boards, framing, insulation, fixings, jointing compound, cornices, paint and access panels. Timber and steel are common ceiling frame materials in Australian homes.
A ceiling can also include insulation above the lining, especially where thermal comfort and energy efficiency matter. Moisture-resistant materials are better suited to bathrooms, laundries and other wet areas.
## Types of Ceiling Materials
The main types of ceiling materials used in Australian homes are plasterboard, plaster, timber, metal, ceiling tiles, suspended ceilings, fibre cement, PVC panels and acoustic panels.
### Plasterboard Ceiling
Plasterboard, also called drywall, gypsum board or Gyprock, is the most common ceiling material for many Australian homes. It gives a flat, smooth surface that can be painted in almost any colour. Gyprock says plasterboard is a durable material with a gypsum core and paper facing, and it is commonly used as a wall and ceiling lining.
Plasterboard is a strong option for bedrooms, living rooms, dining rooms and hallways. It is also easy to repair compared with many decorative ceiling finishes.
For wet areas, use a moisture-resistant ceiling board instead of standard plasterboard. Gyprock Aquachek is treated through the core, face and back to resist moisture and humidity, and it is designed for residential bathrooms, laundries, ensuites and toilets.
#### Benefits of Drywall Ceilings
- **Budget friendly:** Drywall is one of the most affordable ceiling materials available, making it accessible for projects of all sizes
- **Sound insulation:** When combined with insulation batts, drywall provides effective acoustic separation between floors
- **Versatile aesthetics:** The smooth surface can be painted any colour, textured, or finished with decorative treatments
- **Fire resistance:** Standard drywall provides a degree of fire resistance, with specialised fire-rated options available for enhanced protection
- **Easy repairs:** Damaged sections can be patched or replaced without affecting the entire ceiling
#### Considerations for Plasterboard Ceiling
While drywall offers numerous advantages, it is not suitable for all applications. Bathrooms, laundries, and other moisture-prone areas require moisture-resistant variants to prevent water damage and mould growth. Standard drywall can sag or deteriorate when exposed to humidity over extended periods.
Installation quality is crucial for achieving a professional finish. Poorly installed drywall can show visible joints, nail pops, or cracks, particularly in homes subject to settlement or movement. Engaging qualified tradespeople and using proper jointing compounds helps ensure a lasting result.
### Plaster Ceiling
Plaster ceilings represent a traditional craftsmanship approach that has been used in Australian homes for over a century. Unlike drywall, which comes in prefabricated sheets, plaster is applied wet and hardens to create a seamless, monolithic surface that exudes elegance and refinement.
Plaster can look more refined than standard plasterboard, but it needs skilled repair when cracks, water damage or sagging appear. [NSW Government recommends checking](https://www.nsw.gov.au/housing-and-construction/buying-and-selling-property/buying-property-nsw/inspecting-a-property) for sagging ceilings, buckling walls, damp and mould during a property inspection.
#### Benefits of Plaster Ceilings
- **Seamless elegance:** Plaster creates a unified surface without visible joints or seams
- **Durability:** When properly maintained, plaster ceilings can last for decades without significant degradation
- **Fire resistance:** Plaster provides excellent fire resistance, helping to slow the spread of flames
- **Acoustic performance:** The density of plaster contributes to effective sound dampening
- **Design flexibility:** Skilled plasterers can create intricate mouldings, ceiling roses, and decorative patterns
- **Heritage value:** Ornate plaster ceilings can significantly increase property value in period homes
#### Types of Plaster Finishes
Modern plaster ceilings can incorporate various finishes to suit different aesthetic preferences and functional requirements:
- **Smooth finish:** A perfectly level surface ideal for contemporary minimalist interiors
- **Textured finish:** Various textures including stipple, swirl, or knockdown patterns
- **Ornamental plasterwork:** Decorative cornices, ceiling roses, and mouldings for heritage restoration or period-style homes
- **Coffered plaster:** Recessed panels that add architectural interest and visual depth
#### Maintenance and Repair
Plaster ceilings require careful maintenance to preserve their appearance and structural integrity. Hairline cracks may develop over time due to building movement or temperature fluctuations. These can typically be filled and repainted by a skilled tradesperson.
More significant damage, such as sagging or water damage, requires professional assessment. Older plaster ceilings may be attached with traditional lime-based methods that differ from modern techniques, necessitating specialist restoration work to maintain heritage integrity.
### Wood or Timber Ceiling
Wood ceiling or timber ceiling brings natural warmth and character to interior spaces, creating an inviting atmosphere that synthetic materials struggle to replicate. The organic grain patterns, varied tones, and tactile qualities of timber make wood ceilings a popular choice for Australian homes seeking a connection to nature.
From rustic beach houses featuring weathered boards to sophisticated urban apartments with sleek timber panels, wood ceilings offer remarkable versatility in design. The material works equally well in traditional and contemporary settings, adapting to various architectural styles with appropriate selection and finishing.
#### Popular Wood Species for Ceilings
- **Blackbutt:** An Australian hardwood with a pale blonde colour and subtle grain, ideal for modern interiors
- **Spotted Gum:** Features distinctive markings and warm brown tones, providing visual interest
- **Western Red Cedar:** Lightweight with natural insect resistance, popular for its aromatic qualities
- **Pine:** An affordable softwood option that can be stained or painted to achieve various looks
- **Mahogany:** Rich, deep tones and fine grain for a luxurious appearance
- **Tasmanian Oak:** Versatile Australian hardwood with warm honey tones
#### Benefits of Wood Ceilings
- **Natural warmth:** Timber creates an inviting, comfortable atmosphere in any room
- **Acoustic benefits:** Wood absorbs and diffuses sound, improving room acoustics and reducing echo
- **Environmental sustainability:** When sourced from certified sustainable forests, wood is a renewable resource with lower embodied energy than many alternatives
- **Thermal performance:** Wood has natural insulating properties that can contribute to energy efficiency
- **Unique character:** Each piece of timber is unique, adding individuality to your space
- **Longevity:** Quality timber ceilings can last for generations with proper maintenance
#### Installation Options
Wood ceilings can be installed in several configurations:
- **Tongue and groove:** Interlocking boards that create a continuous surface with minimal visible fasteners
- **Plank systems:** Individual boards fixed directly to joists or battens
- **Panel systems:** Prefabricated panels for faster installation
- **Slatted designs:** Spaced timber battens that allow glimpses of the structure above, creating visual depth
### Metal Ceiling
Metal ceilings have experienced a resurgence in popularity, moving beyond their traditional role in commercial buildings to become a sought-after feature in residential properties. The durability, fire resistance, and distinctive aesthetic of metal make it an attractive option for homeowners seeking something beyond conventional ceiling materials.
In Australia, pressed metal ceilings hold particular heritage significance. Many Victorian and Federation-era buildings feature ornate pressed tin or steel ceilings that have survived for over a century. Today, both reproduction heritage patterns and contemporary metal ceiling designs are available to suit various architectural styles.
#### Types of Metal Ceiling Materials
- **Pressed tin:** Traditional decorative panels with intricate embossed patterns, ideal for heritage restoration
- **Aluminium:** Lightweight and corrosion resistant, suitable for coastal environments and wet areas
- **Steel:** Durable and economical, available in various finishes including galvanised and powder coated
- **Copper:** Premium material that develops a distinctive patina over time
- **Zinc:** Excellent corrosion resistance with a contemporary industrial aesthetic
#### Benefits of Metal Ceilings
- **Corrosion resistance:** Properly finished metal ceilings resist moisture damage in humid environments
- **Fire safety:** Metal is non-combustible, providing enhanced fire protection
- **Light reflection:** Polished or light-coloured metal surfaces reflect light, enhancing room brightness
- **Minimal maintenance:** Metal ceilings require little ongoing care beyond occasional cleaning
- **Durability:** Resistant to cracking, warping, and pest damage
- **Recyclability:** Metal ceiling materials can be recycled at the end of their service life
#### Design Considerations
Metal ceilings work particularly well in industrial-style interiors, commercial spaces, and contemporary homes seeking a distinctive aesthetic. In heritage properties, reproduction pressed metal panels can restore original features or add period-appropriate character.
Acoustic performance varies depending on the metal type and installation method. Perforated metal panels with acoustic backing can provide excellent sound absorption, while solid metal surfaces may require additional acoustic treatment to prevent sound reflection.
### Tile Ceilings
Ceiling tiles offer a practical solution for spaces requiring easy access to services, moisture resistance, or specific acoustic properties. Available in a diverse range of materials and designs, ceiling tiles can suit applications from residential bathrooms to commercial office environments.
The modular nature of tile ceilings allows for straightforward installation and simple replacement of damaged sections. This makes them particularly popular in areas where regular maintenance access is required or where water damage might necessitate occasional panel replacement.
#### Types of Ceiling Tiles
- **Ceramic tiles:** Water-resistant and easy to clean, ideal for bathrooms, kitchens, and laundries
- **Mineral fibre tiles:** Excellent acoustic properties, commonly used in commercial and office settings
- **PVC tiles:** Lightweight, moisture-resistant, and available in various colours and patterns
- **Tin tiles:** Decorative metal tiles that add character and reflect light
- **Fibreglass tiles:** Good thermal and acoustic insulation properties
- **Gypsum tiles:** Fire-resistant and paintable for a seamless appearance
#### Benefits of Tile Ceilings
- **Water resistance:** Many tile types are specifically designed for moisture-prone areas
- **Easy maintenance:** Individual tiles can be cleaned or replaced without affecting the entire ceiling
- **Design variety:** Available in numerous colours, patterns, and textures to suit any interior
- **Service access:** Drop-in tile systems allow easy access to electrical, plumbing, and HVAC services
- **Acoustic control:** Specialised acoustic tiles can significantly reduce noise transmission
- **Fire rating:** Many tile types meet fire safety requirements for commercial buildings
#### Installation Methods
Ceiling tiles can be installed using various methods depending on the application and desired appearance:
- **Suspended grid system:** Tiles drop into a visible metal grid framework
- **Concealed grid system:** The supporting framework is hidden for a cleaner appearance
- **Direct fix:** Tiles are adhered or mechanically fixed directly to the ceiling substrate
- **Clip-in systems:** Tiles clip into concealed tracks for easy removal and replacement
### Suspended Ceilings
Suspended ceilings, also known as drop ceilings or false ceilings, create a secondary ceiling surface below the structural ceiling. This system consists of a metal grid suspended from the building structure, with panels or tiles filling the grid openings.
The space between the suspended ceiling and the structure above, known as the plenum, provides a convenient zone for routing electrical cables, plumbing, air conditioning ducts, and other building services. This hidden infrastructure area simplifies both initial installation and future modifications or repairs.
Ceiling height matters because it affects comfort, ventilation and natural light. [NSW apartment design guidance](https://www.planning.nsw.gov.au/sites/default/files/2023-03/apartment-design-guide-part-4-designing-the-building.pdf) sets minimum ceiling heights for apartment and mixed-use buildings, including 2.7m for habitable rooms and 2.4m for non-habitable rooms.
#### Benefits of Suspended Ceilings
- **Conceals infrastructure:** Hides unsightly pipes, wiring, and ductwork from view
- **Easy service access:** Panels can be lifted to access building services for maintenance or modifications
- **Acoustic benefits:** The air gap and acoustic panels significantly reduce noise transmission
- **Energy efficiency:** Reducing ceiling height can lower heating and cooling costs
- **Lighting integration:** Easy installation of recessed lighting, LED panels, and light diffusers
- **Quick installation:** Suspended systems can be installed faster than many fixed ceiling types
#### Applications
Suspended ceilings are commonly used in commercial buildings, offices, retail spaces, and healthcare facilities. However, they are increasingly finding applications in residential settings, particularly in:
- Home offices and media rooms requiring acoustic treatment
- Basement renovations where services need to remain accessible
- Older homes where the structural ceiling is damaged or unattractive
- Spaces requiring integrated lighting solutions
#### Design Considerations
While traditional suspended ceilings with visible grids have a distinctly commercial appearance, modern systems offer sleeker alternatives. Concealed grid systems, linear panel designs, and custom finishes can create a more sophisticated look suitable for residential applications.
Ceiling height is an important consideration. Suspended ceilings typically require a minimum drop of 100mm to 150mm below the structure, which may not be feasible in rooms with limited headroom. Building codes specify minimum ceiling heights that must be maintained.
### Beamed Ceilings
Beamed ceilings add architectural interest and visual drama to interior spaces. Whether featuring genuine structural timbers or decorative false beams, this ceiling style creates a sense of height, character, and craftsmanship that flat ceilings simply cannot match.
In Australian homes, beamed ceilings are particularly popular in living areas, kitchens, and outdoor entertaining spaces. The style suits various architectural approaches, from rustic farmhouse aesthetics to refined contemporary designs with clean-lined timber elements.
#### Types of Beamed Ceilings
- **Exposed structural beams:** Genuine load-bearing timbers that form part of the building structure
- **Decorative solid beams:** Non-structural solid timber beams added for aesthetic purposes
- **Hollow box beams:** Lightweight hollow constructions that provide the appearance of solid beams
- **Faux beams:** Polyurethane or foam beams that replicate timber appearance at reduced weight and cost
- **Steel beams:** Industrial-style exposed steel for contemporary or loft aesthetics
#### Benefits of Beamed Ceilings
- **Architectural interest:** Creates visual depth and draws the eye upward
- **Space definition:** Beams can define different functional zones within open-plan spaces
- **Character and warmth:** Timber beams add natural warmth and personality to interiors
- **Increased perceived height:** Running beams can make rooms feel larger and more spacious
- **Heritage appeal:** Suits both period properties and contemporary homes seeking a connection to traditional craftsmanship
- **Value addition:** Well-executed beamed ceilings can increase property appeal and value
#### Design Considerations
The success of a beamed ceiling depends on appropriate scale and proportion. Beams that are too small may look flimsy, while oversized beams can overwhelm a room. The beam spacing, direction, and finish should complement the overall interior design scheme.
Colour selection significantly impacts the final appearance. Dark-stained beams create contrast against light ceilings, making a bold statement. Natural or whitewashed finishes provide a softer, more casual look. The choice should consider the room's size, natural light levels, and overall colour palette.
View Expert Witness
Reports
}
buttonHref="/expert-witness-reports"
variant="secondary"
/>
## Ceiling Board Materials
A ceiling board is the flat sheet or panel fixed to framing to create the ceiling surface. Common different types of ceiling board materials include plasterboard, moisture-resistant plasterboard, fire-rated plasterboard, fibre cement board, plywood, timber lining boards, PVC board and acoustic ceiling board.
| Material | Key Benefits | Best For | Maintenance |
| --------- | ------------------------------------------------------------------- | ----------------------------------------------------- | -------------------------------------------------------------- |
| Drywall | Cost effective, versatile, easy repairs, fire resistant | General residential use, bedrooms, living areas | Low: occasional painting, crack repairs |
| Plaster | Seamless finish, decorative options, durable, fire resistant | Heritage homes, high-end finishes, ornate designs | Medium: periodic inspection, crack filling, specialist repairs |
| Wood | Natural warmth, acoustic benefits, sustainable, unique character | Living areas, outdoor spaces, feature rooms | Medium: periodic oiling or sealing, dust removal |
| Metal | Durable, fire safe, reflective, heritage appeal | Heritage restoration, industrial style, wet areas | Low: occasional cleaning, rust prevention in some environments |
| Tile | Water resistant, easy to replace, design variety, acoustic options | Bathrooms, kitchens, commercial spaces | Low: regular cleaning, individual tile replacement as needed |
| Suspended | Hides services, acoustic control, easy access, energy efficient | Offices, basements, media rooms, commercial buildings | Low: panel replacement, grid cleaning |
| Beamed | Architectural interest, space definition, character, value addition | Open plan living, feature rooms, high ceilings | Medium: dusting, periodic refinishing for timber |
## Ceiling Frame Materials List
Most ceilings are made from plasterboard, fibre cement, timber lining, metal panels, PVC panels or ceiling tiles fixed to timber or steel framing. In many Australian homes, plasterboard is the most common ceiling material because it creates a smooth painted finish and suits bedrooms, living rooms, hallways and other dry internal spaces.
The main materials used for ceiling construction include ceiling boards, framing, insulation, fixings, jointing compound, cornices, paint and access panels. Timber and steel are common ceiling frame materials in Australian homes.
A ceiling can also include insulation above the lining, especially where thermal comfort and energy efficiency matter. Moisture-resistant materials are better suited to bathrooms, laundries and other wet areas.
| Ceiling frame material | Common use | Main consideration |
|---|---|---|
| Timber joists | Traditional houses and many renovations | Check for termites, rot, movement and moisture stains |
| Steel framing | New homes, termite-prone areas and commercial spaces | Needs correct corrosion protection |
| Metal battens or furring channels | Plasterboard ceilings and suspended systems | Helps create a straight fixing surface |
| Hangers and suspension clips | Suspended ceilings | Must suit the load and ceiling system |
| Fixings and screws | All ceiling board types | Poor fixing can lead to cracking or sagging |
## Ceiling Finishes Materials
Ceiling finishes materials are the visible finishes applied to the ceiling board or ceiling system. These include paint, set plaster, decorative plaster, timber stain, clear coating, pressed metal paint, acoustic fabric, textured coatings and decorative panels.
Popular types of ceiling finishes include:
- Smooth painted plasterboard
- Set plaster finish
- Timber lining with clear coat or stain
- Decorative plaster cornices and ceiling roses
- Pressed metal panels
- Acoustic panels
- Coffered ceilings
- Raked ceilings
- Exposed beams
- Suspended tile finish
For older ceilings, be careful with textured coatings and patching compounds. The Asbestos Safety and Eradication Agency lists plaster patching compounds and textured paint among possible asbestos-containing materials in older homes.
## Best Ceiling Material by Room
The best ceiling material depends on the room. A bathroom ceiling has different needs from a bedroom, living room or garage.
| Room | Best ceiling material | Why it works |
|---|---|---|
| Bedroom | Plasterboard or acoustic plasterboard | Smooth finish, easy to paint and suitable for insulation upgrades |
| Living room | Plasterboard, timber lining or decorative plaster | Flexible design options and strong visual appeal |
| Bathroom | Moisture-resistant plasterboard, fibre cement or PVC | Better suited to humidity and moisture exposure |
| Laundry | Moisture-resistant plasterboard, fibre cement or PVC | Helps manage steam and damp conditions |
| Kitchen | Plasterboard, moisture-resistant board or metal feature panels | Suits cleanable finishes and steam-prone areas |
| Garage | Fire-rated plasterboard or fibre cement | Better suited to tougher conditions and selected fire-rated systems |
| Apartment | Acoustic plasterboard or suspended acoustic ceiling | Helps reduce noise and echo |
| Heritage home | Plaster, timber or pressed metal | Supports period character |
| Commercial space | Suspended ceiling tiles or metal panels | Allows access to services, wiring and ducts |
## What to Consider Before Choosing Ceiling Materials
### Moisture and Condensation
Moisture is one of the biggest causes of ceiling damage. Condensation happens when humid air meets a cooler surface, and it can cause damp, mould and rot in homes.
Bathrooms, laundries and kitchens need moisture-resistant materials, exhaust ventilation and correct waterproofing. Gyprock notes that mould and mildew can grow on walls and ceilings where humidity and poor ventilation are present.
### Insulation and Energy Use
The ceiling and roof space have a major effect on comfort. YourHome says adding insulation to ceilings, walls and floors can be an effective renovation measure, and roof and ceiling insulation can save up to 45% or more on heating and cooling costs.
In most climates, YourHome says ceiling insulation is placed between joists, with suitable bulk insulation including batts, loose-fill and rigid foam boards.
### Sound Control
If the home is multi-storey, attached or close to traffic, acoustic performance matters. Timber, acoustic tiles, acoustic plasterboard and insulation can help reduce echo and sound transfer.
WoodSolutions says timber’s natural acoustic properties can reduce echo and reverberation, which is why acoustic timber panels and spaced battens are used in public buildings, walls and ceilings.
### Building Age
Older homes need extra care. If the property was built or renovated before 1990, it may contain asbestos materials, including ceiling sheeting, wall panels, textured paint or plaster patching compounds.
A ceiling that looks simple may still hide old wiring, insulation, water damage, sagging framing or asbestos risk. For this reason, pre-purchase and renovation inspections are worth doing before major work.
### Ceiling Condition
Before repairing or replacing a ceiling, check for sagging, cracks, damp marks, mould, stains around exhaust fans and signs of roof leaks.
NSW Government lists damp or mould on walls and ceilings, sagging ceilings and buckling walls as internal factors to check when inspecting a property.
QBCC also lists leaking ceilings, mould problems, faulty roofs, lack of waterproofing and drainage issues as matters that may be found during a pre-purchase building inspection.
## Ceiling Material Comparison
| Ceiling material | Cost level | Moisture resistance | Acoustic value | Best use |
| ------------------------------- | -------------- | ------------------------------------------- | ---------------------- | ----------------------------------- |
| Plasterboard | Low to medium | Low unless moisture-resistant board is used | Medium with insulation | General internal ceilings |
| Moisture-resistant plasterboard | Medium | Good for wet areas when installed correctly | Medium | Bathrooms and laundries |
| Fibre cement | Medium | High | Low to medium | Wet areas, eaves, garages |
| Timber lining | Medium to high | Medium if sealed | Good for reducing echo | Feature ceilings and living spaces |
| Metal panels | Medium to high | Good if coated correctly | Low unless backed | Heritage or feature ceilings |
| PVC panels | Low to medium | High | Low | Budget wet areas |
| Acoustic tiles | Medium | Varies by product | High | Offices, apartments and media rooms |
| Suspended ceilings | Medium | Varies by tile | Medium to high | Commercial and service-heavy spaces |
## Common Ceiling Problems to Check
A ceiling should be inspected before repainting, recladding or covering it with a new system.
Check for:
- Sagging ceiling board
- Water stains
- Mould around corners, vents and skylights
- Cracks near cornices
- Rust marks around fixings
- Uneven joins
- Paint bubbling
- Signs of roof leaks
- Old ceiling sheets in pre-1990 homes
- Gaps around downlights or exhaust fans
NSW Government recommends checking for damp, mould, sagging ceilings and other internal defects during property inspections.
QBCC recommends getting a pre-purchase building and pest inspection before buying and making the contract subject to satisfactory inspection results.
## Australian Building Code Considerations
Ceiling installations in Australia must comply with the National Construction Code (NCC) and relevant Australian Standards. Key considerations include:
- **Fire ratings:** Certain building types and locations require fire-rated ceiling assemblies
- **Minimum ceiling heights:** Habitable rooms require minimum ceiling heights of 2.4 metres, with some variations allowed
- **Bushfire requirements:** Properties in bushfire-prone areas have specific requirements under AS 3959
- **Acoustic requirements:** Multi-unit dwellings have specific sound insulation requirements
- **Structural adequacy:** Ceiling systems must be appropriately fixed and capable of supporting their own weight plus any imposed loads
Always consult with a qualified building professional or your local council to ensure your ceiling installation meets all applicable requirements.
## Getting the Most Value from Your Home and Building Investment
The right ceiling materials can improve comfort, moisture control, appearance, acoustic performance and long-term maintenance. Plasterboard is a strong all-round choice for dry rooms, moisture-resistant ceiling board is better for wet areas, timber adds warmth, metal suits heritage and feature spaces, and acoustic ceiling materials help where sound matters.
Before updating a ceiling, check the condition of the roof space, insulation, framing, ventilation and existing ceiling board. This is especially important in older Australian homes, where asbestos, water stains, mould, sagging or hidden defects may be present.
If you are buying, renovating or repairing a property, Owner Inspections can inspect the ceiling, roof space and visible building elements before you commit to major work. Book a pre-purchase inspection, building and pest inspection, [mould inspection](/mould-inspections) or defect investigation report to get clear findings before small ceiling problems become expensive repairs.
Contact Owner
Inspections
}
buttonHref="/contact"
variant="primary"
/>
### Maintaining Indoor Air Quality: Tips for a Healthier Home
Source: https://ownerinspections.com.au/articles/maintaining-indoor-air-quality-tips-for-a-healthier-home
Published: 2023-12-21 | Updated: 2026-02-09 | Category: General Maintenance
Author: Maison Azdari
Indoor air quality (IAQ) in Australian homes can be improved through regular ventilation, effective cleaning with HEPA-filtered vacuums, reducing volatile organic compounds (VOCs) from household products, controlling moisture to prevent mould, and using air purifiers where needed. CSIRO estimates the cost of poor indoor air quality in Australia at up to $12 billion annually. Simple changes to ventilation habits, cleaning routines, and product choices can significantly reduce indoor pollutants and improve the health of everyone in the home.
Most Australians spend around 90% of their time indoors, whether at home, at work, or in other buildings. This means the air quality inside your home has a direct impact on your respiratory health, energy levels, and overall wellbeing. Indoor air can contain higher concentrations of certain pollutants than outdoor air, including dust mites, mould spores, pet dander, and chemicals from cleaning products and building materials.
## Common Indoor Air Pollutants
Understanding the sources of indoor pollution is the first step towards fixing the problem.
These pollutants can cause a range of health problems, from mild irritation to chronic respiratory conditions. People with asthma, allergies, or compromised immune systems are particularly vulnerable.
## Ventilation Strategies
Fresh air is one of the simplest and most effective ways to improve indoor air quality. Ventilation dilutes and removes pollutants that build up inside a closed home.
### Natural Ventilation
### Exhaust Fans
Use exhaust fans in bathrooms and kitchens every time you cook, shower, or bathe. These fans remove moisture and cooking fumes directly to the outside. Keep the fan running for at least 10 to 15 minutes after you finish to ensure moisture and pollutants are fully cleared.
### Mechanical Ventilation
In well-sealed, energy-efficient homes, mechanical ventilation systems such as heat recovery ventilators (HRVs) provide continuous fresh air exchange while recovering heating or cooling energy. These systems are particularly valuable in apartments and townhouses where natural ventilation options may be limited.
## Cleaning Techniques for Better Air Quality
Regular, effective cleaning removes dust, allergens, and pollutants from surfaces and soft furnishings before they become airborne.
## Air Purifiers
Air purifiers provide an additional layer of filtration for homes where ventilation alone is not sufficient to maintain good air quality. They are particularly useful for people with allergies, asthma, or respiratory conditions.
## Reducing VOCs in Your Home
Volatile organic compounds are chemicals released into the air from many everyday household products. They can cause headaches, dizziness, and respiratory irritation, particularly in poorly ventilated spaces.
## Mould and Moisture Control
Mould is one of the most common indoor air quality problems in Australian homes, particularly in humid coastal areas and homes with poor ventilation. Mould spores become airborne and can cause respiratory irritation, allergic reactions, and chronic health problems when inhaled over time.
### Preventing Mould Growth
### Signs of Mould Problems
## When to Get a Professional Inspection
A professional mould inspection or indoor air quality assessment is recommended if you notice persistent musty smells, visible mould, condensation problems, or if occupants experience ongoing respiratory symptoms. Professional inspectors use moisture meters, hygrometers, and air sampling equipment to identify moisture sources, mould contamination, and other air quality issues that are not visible to the naked eye.
Schedule an inspection:
### Basics of Basement Maintenance: Preventing Leaks and Damage
Source: https://ownerinspections.com.au/articles/basics-of-basement-maintenance-preventing-leaks-and-damage
Published: 2023-12-20 | Updated: 2026-02-09 | Category: General Maintenance
Author: Maison Azdari
Basement maintenance in Australia involves keeping water out through proper drainage and grading, inspecting for cracks and structural issues, controlling moisture with ventilation and dehumidifiers, and addressing leaks promptly before they cause mould or structural damage. Proactive basement care prevents expensive repairs, protects your home's foundation, and creates a healthy living environment. Water damage remediation can cost thousands of dollars, making regular maintenance far more cost-effective than reactive repairs.
Basements and below-ground spaces provide valuable extra living or storage area, but they are naturally vulnerable to water intrusion and moisture problems because they sit below grade level. Ignoring basement maintenance can lead to water damage, musty odours, mould growth, damaged belongings, and even weakened foundations. Australian homeowners with basements or lower-ground-level rooms should treat regular maintenance as a priority rather than an afterthought.
## Keeping Water Out: Preventing Leaks
The most effective approach to basement maintenance is preventing water from reaching the foundation in the first place. Proper drainage and grading are the first line of defence.
### Gutters and Downpipes
Gutters collect rainwater from the roof and direct it to downpipes, which should discharge well away from the foundation. Keep gutters clean and free of debris so they function properly. Downpipes should extend at least 1.5 to 2 metres away from the foundation, directing water onto a grassed or garden area that slopes away from the building.
### Grading Around the Foundation
The soil surrounding your foundation should slope away from the house at a minimum grade of 50mm per metre for the first 1 to 2 metres. This allows rainwater to drain naturally away from the foundation rather than pooling against the basement walls. Over time, soil can settle and change the grade, so check it at least once a year and add fill as needed.
### Surface Water Management
## Detecting and Addressing Existing Leaks
Even with good drainage, leaks can develop over time. Early detection is the key to preventing minor issues from becoming major problems.
### Signs of Basement Leaks
### Repair Options
## Maintaining Structural Integrity
Your basement walls and floor slab form part of your home's foundation. Structural issues here can affect the entire building. Regular inspections help you catch problems early.
### What to Look For
### When to Call a Professional
Common professional repair methods for foundation issues include:
## Moisture Control and Mould Prevention
Basements are naturally prone to higher humidity levels because they sit below ground. Controlling moisture is the most effective way to prevent mould growth and maintain a healthy environment.
### Ventilation
Good airflow reduces moisture buildup. Open windows when weather permits, and use exhaust fans in basement laundries or bathrooms. In enclosed basements without windows, a mechanical ventilation system may be needed to maintain adequate air exchange.
### Dehumidifiers
In humid climates such as coastal NSW and Queensland, a dehumidifier helps regulate indoor humidity. Aim for a relative humidity level between 30% and 50% in your basement. A dehumidifier with an automatic drain function can run continuously without needing to be manually emptied.
### Preventing Mould
## Basement Maintenance Checklist
Use this checklist as a seasonal guide to keep your basement in good condition.
### Understanding the Basics of Home Plumbing: Tips and Tricks
Source: https://ownerinspections.com.au/articles/understanding-the-basics-of-home-plumbing-tips-and-tricks
Published: 2023-12-19 | Updated: 2026-02-09 | Category: General Maintenance
Author: Mehdi Hosseinzadeh
Every Australian home relies on a network of pipes, valves, and fixtures to deliver clean water and remove waste. Understanding the basics of home plumbing helps homeowners spot problems early, handle minor fixes without calling a tradesperson, and avoid costly water damage. In Australia, plumbing work must comply with AS/NZS 3500 (the national Plumbing and Drainage standard), and any work beyond basic maintenance must be carried out by a licensed plumber in every state and territory.
This guide walks you through the key components of a residential plumbing system, shows you how to prevent the most common problems, and explains when a job crosses the line from DIY territory into work that legally requires a licensed professional.
## How Residential Plumbing Works
A typical Australian home has two main plumbing subsystems. The **supply system** brings pressurised clean water into the house from the mains or a tank. The **drainage system** removes wastewater through gravity-fed pipes that lead to the sewer or a septic system. Between these two systems sit the fixtures you use every day: taps, toilets, showers, dishwashers, and washing machines.
Understanding this basic split makes it much easier to diagnose problems. If water pressure drops across the whole house, the issue is on the supply side. If a single sink drains slowly, the problem is in the drainage system close to that fixture.
## Knowing Your System
### Water Shutoff Valve
The most important thing any homeowner should know is where the main water shutoff valve is located. In a plumbing emergency such as a burst pipe or major leak, turning off this valve stops water flowing into the entire house and can prevent thousands of dollars in water damage.
In most Australian homes the main shutoff valve (sometimes called the stopcock) is located:
Most shutoff valves are either a gate valve (round wheel handle, turn clockwise to close) or a ball valve (lever handle, turn 90 degrees to close). Test yours every six months to make sure it is not seized.
### Fixtures and Isolation Valves
Beyond the main shutoff, most modern Australian homes have individual isolation valves (also called mini stop valves) at each fixture. These small taps, usually located under the sink or behind the toilet, let you shut off water to a single fixture without affecting the rest of the house. Check that you know where each one is and that they turn freely.
## Types of Pipes in Australian Homes
The pipes running through your walls and under your floors vary depending on when the house was built and what it was built for. Here is a quick comparison of the most common types found in Australian properties.
## Preventative Maintenance
### Avoiding Clogs
Blocked drains are one of the most common plumbing call-outs in Australia. Most blockages are preventable with a few simple habits.
**What to keep out of your drains:**
**Simple drain maintenance routine:**
## Leak Detection and Repair
Water leaks waste money, promote mould growth, and can cause serious structural damage if left unchecked. According to the Bureau of Meteorology's water usage data, a single dripping tap can waste more than 20,000 litres per year.
### Signs of a Hidden Leak
### The Water Meter Test
A quick way to check for hidden leaks is to note your water meter reading, avoid using any water for two hours, then check the meter again. If the reading has changed, there is a leak somewhere in the system.
## Water Heater Maintenance
Your hot water system is one of the hardest-working appliances in the house. Whether you have a storage tank, continuous flow (instantaneous), heat pump, or solar system, regular maintenance extends its life and keeps it running efficiently.
### Water Heater Tips
## DIY Plumbing Projects You Can Handle
In Australia, unlicensed plumbing work is illegal and can void your home insurance. However, there are a few minor maintenance tasks that homeowners are generally permitted to do themselves.
### Clearing a Blocked Drain
For a minor blockage that has not completely stopped flow, try these steps in order:
### Replacing a Tap Washer
A dripping tap is usually caused by a worn washer. To replace it:
## When to Call a Licensed Plumber
While minor maintenance is fine to handle yourself, some situations demand a professional. Call a licensed plumber if you notice any of the following:
## Australian Plumbing Regulations by State
Plumbing in Australia is governed nationally by AS/NZS 3500 and the National Construction Code (NCC), but each state and territory has its own licensing authority and compliance requirements.
### Tips for Maintaining an Older Home in Australia
Source: https://ownerinspections.com.au/articles/essential-tips-for-maintaining-an-older-home
Published: 2023-12-14 | Updated: 2026-02-09 | Category: General Maintenance
Author: Maison Azdari
Maintaining an older Australian home involves regular roof checks, [termite inspections](/timber-pest-inspections), moisture management, plumbing and electrical system reviews, weatherproofing, and preserving original heritage features. Homes built before the 1980s often have materials and systems that require more frequent attention, including potential asbestos-containing materials, outdated wiring, and foundations susceptible to movement. Scheduling a professional building inspection at least once a year helps catch problems early and protects the long-term value of your property.
Australia's older homes, from Victorian terraces and Federation houses to weatherboard cottages and Art Deco apartments, carry character and craftsmanship that modern builds rarely match. High ceilings, ornate cornices, original timber floors, and period detailing make these homes attractive to buyers and cherished by their owners. However, the same age that gives them their charm also means their materials and systems have been exposed to decades of Australia's harsh climate, including intense UV radiation, seasonal moisture swings, storms, and termite activity.
## Understanding Your Older Home
Before tackling maintenance, it helps to understand your home's history, materials, and the specific challenges associated with its era of construction.
### Research Your Home's Era
Knowing when your home was built gives you valuable clues about the materials used and the common issues to watch for. Colonial and Victorian homes often feature bluestone foundations, lime mortar, and timber framing without modern treatments. Federation and interwar homes commonly use brick, timber weatherboards, and terracotta roof tiles. Post-war homes from the 1950s to 1970s may contain asbestos in cladding, eaves, and wet areas.
### Conduct a Thorough Inspection
Walk through the property systematically, checking the roof, walls, ceilings, floors, plumbing fixtures, and electrical fittings. Look for cracks in walls and ceilings, water stains, damaged or missing roof tiles, signs of timber decay, and any safety hazards like outdated wiring or loose fixtures.
### Identify Climate-Related Vulnerabilities
Australia's climate presents specific challenges for older homes. Intense summer heat can cause roof damage and timber shrinkage. Seasonal moisture changes contribute to foundation movement, rising damp, and mould growth. Coastal properties face salt spray corrosion, while homes in bushfire-prone areas may need additional fire protection measures.
## Preventative Maintenance Strategies
Preventative maintenance is always cheaper than reactive repairs. A proactive approach saves money and keeps your home safe and comfortable.
### Schedule Regular System Checks
### Develop a Cleaning and Inspection Routine
Regular cleaning gives you an opportunity to spot problems early. Pay attention to areas prone to moisture, such as under sinks, around toilet bases, and in subfloor spaces. Check for new cracks in walls or ceilings, sticky doors and windows (which may indicate foundation movement), and any signs of pest activity.
### Weatherproofing
Sealing around windows and doors prevents dust, draughts, and moisture from entering the building. Inspect and re-seal window frames, door frames, and any penetrations in the building envelope at least once a year. Check that roof flashings are intact and that the roof covering is free of cracks or corrosion.
## Maintenance for Australian Conditions
### Roof Care
Your roof is the most exposed element of the building. Schedule professional [roof inspections](/roof-inspection) at least every two to three years. Check for missing or cracked tiles, corroded metal sheets, deteriorating ridge capping, and blocked gutters. Clear leaves and debris from gutters and downpipes regularly to prevent water pooling and overflow.
### Moisture and Rising Damp
Older homes, particularly those with stone or solid brick walls sitting on shallow footings, are susceptible to rising damp. Signs include salt deposits on interior walls, peeling paint at the base of walls, and a persistent musty smell. Address rising damp by improving drainage around the foundation, installing or replacing damp-proof courses, and ensuring adequate subfloor ventilation.
### Termite Control
Termites are one of the biggest threats to older timber-framed homes in Australia. Schedule professional timber pest inspections at least annually under AS 4349.3. Look for mud tubes on foundations, hollow-sounding timber, and discarded wings near windows. Consider installing a termite barrier or reticulation system, particularly if your home does not have an existing termite management system.
### Asbestos Awareness
Homes built or renovated before 1990 may contain asbestos in cladding, eave linings, bathroom walls, laundry splashbacks, and vinyl flooring. Do not disturb, cut, or sand suspected asbestos materials. If you are planning renovations, have the material tested by a licensed asbestos assessor before any work begins.
## Repair vs Replace
When maintaining an older home, the question of whether to repair or replace comes up frequently. Preserving original features adds to the home's value and character, but sometimes replacement is the practical choice.
### Prioritise Repair of Original Features
Original elements such as ornate cornices, timber sash windows, decorative ceiling roses, and cast-iron fireplaces are what give older homes their distinctive character. Whenever possible, repair these features rather than replacing them. Skilled restoration tradespeople can restore timber joinery, re-plaster ornamental ceilings, and refurbish original hardware.
### When to Replace
Replacement becomes necessary when an element is beyond repair, presents a safety risk, or no longer meets building standards. Common examples include replacing old lead or galvanised plumbing with copper or PEX, upgrading outdated electrical wiring to meet current AS/NZS 3000 standards, and replacing severely damaged roof tiles or corroded metal roofing.
## Finding the Right Tradespeople
Older homes require tradespeople with specific experience and skills. Not all builders, plumbers, or electricians are familiar with the materials and techniques used in period construction.
### How to Get the Most Out of Your Dilapidation Report in Sydney
Source: https://ownerinspections.com.au/articles/how-to-get-the-most-out-of-your-dilapidation-report-in-sydney
Published: 2023-12-13 | Updated: 2026-02-09 | Category: Dilapidation
Author: Maison Azdari
A [dilapidation report](/dilapidation-reports) in Sydney records the existing condition of neighbouring properties before construction work begins. To get the most value from the report, commission it before any site work starts, share findings with neighbours and your local council, integrate the report into your construction planning, maintain ongoing documentation during the build, and commission a post-construction report to compare conditions. This approach prevents disputes, protects property values, and provides clear evidence if damage claims arise.
Sydney's construction activity continues to grow, with new developments, renovations, and infrastructure projects progressing across the city. As property values remain high, the risk of disputes between construction projects and neighbouring property owners increases. A well-prepared dilapidation report is one of the most effective tools available to builders, developers, and homeowners for preventing these disputes and protecting all parties involved.
## What Is a Dilapidation Report?
A dilapidation report is a detailed record of the existing condition of one or more properties, typically prepared before nearby construction, demolition, or excavation work begins. It documents the current state of structures including walls, foundations, driveways, fences, and other elements through photographs and written descriptions.
The report serves as a baseline record. If a neighbouring property owner later claims that construction work caused damage to their property, the dilapidation report provides evidence of what the property looked like before the work started. This makes it one of the most practical tools for preventing and resolving property damage disputes.
### Why Dilapidation Reports Matter in Sydney
With high property values across Sydney and ongoing construction activity in suburbs from the Inner West to the North Shore and Western Sydney, the potential for disputes over construction-related damage is significant. Many Sydney councils require dilapidation reports as a condition of development consent, particularly for projects involving excavation, demolition, or works near heritage structures.
## Key Components of a Dilapidation Report
A thorough dilapidation report includes several key elements that together create a comprehensive record of a property's pre-construction condition.
## How to Use Your Dilapidation Report Effectively
Simply having a dilapidation report on file is not enough. To get the most value from it, use it actively throughout your construction project.
### For Dispute Prevention
Share the completed dilapidation report with neighbouring property owners and your local council before construction begins. This demonstrates transparency and shows that you have taken responsible steps to document the area's condition. When neighbours know their property has been thoroughly recorded, they are less likely to make unfounded damage claims.
### For Dispute Resolution
If a disagreement arises about whether construction caused damage to a neighbouring property, the dilapidation report provides an impartial reference point. Comparing the pre-construction photographs and descriptions with the current state of the property makes it possible to determine whether damage was pre-existing or resulted from the construction work.
### For Council and Regulatory Compliance
Many [Sydney](/nsw/building-inspections-sydney) councils require dilapidation reports as part of the development approval process. Having a comprehensive report prepared by a licensed and experienced inspector ensures you meet council conditions and avoids delays in your project timeline.
## Integrating the Report into Construction Planning
Use the dilapidation report findings to inform your construction methodology.
## Addressing Issues Identified in the Report
### Prioritising Repairs
When the dilapidation report identifies defects in your own property, prioritise repairs based on severity. Structural issues, safety hazards, and problems that could worsen during construction should be addressed first. Cosmetic issues can be scheduled for later. Consult with a building professional or structural engineer for guidance on the best repair methods.
### Using Expert Advice
Engaging qualified professionals to review the report's findings ensures that repairs are carried out correctly and that any at-risk areas are monitored throughout the construction process. This proactive approach reduces the likelihood of problems developing during the build.
## Post-Construction Follow-Up
### Why a Post-Construction Report Matters
A post-construction dilapidation report compares the current condition of neighbouring properties with the baseline documented before construction began. This comparison clearly shows whether any new damage has occurred and, if so, whether it can be attributed to the construction activities.
### Resolving Any Issues
If the post-construction report identifies new damage, it provides the evidence needed to resolve the matter fairly. This may involve the builder or developer paying for repairs, negotiating a settlement, or providing the report to insurers. Having clear before-and-after documentation makes resolution faster and less contentious.
### Expert Witnesses vs Technical Consultants in Melbourne's Construction Cases
Source: https://ownerinspections.com.au/articles/expert-witnesses-vs-technical-consultants-in-melbournes-construction-cases
Published: 2023-12-07 | Updated: 2026-02-09 | Category: Expert Witness
Author: Maison Azdari
Expert witnesses provide independent, specialised opinions in court or tribunal proceedings, while technical consultants advise on construction projects outside of legal settings to prevent disputes and ensure compliance. In Melbourne's construction sector, expert witnesses are engaged after a dispute has arisen to present evidence at VCAT or in court, whereas technical consultants are typically involved from the early stages of a project to identify risks and guide decision-making. Choosing the right professional depends on whether you are managing an active dispute or trying to prevent one.
Melbourne's construction industry is one of the busiest in Australia, and legal disputes over building defects, project delays, and contract disagreements are common. In these situations, two types of professionals play important but distinct roles: expert witnesses, who provide evidence in legal proceedings, and technical consultants, who advise on technical matters during the project itself. Understanding the difference between these roles helps homeowners, builders, developers, and legal teams engage the right support at the right time.
## The Role of Expert Witnesses
Expert witnesses bring specialised knowledge and professional experience to legal proceedings. In Melbourne's construction disputes, they are called upon to explain complex technical issues in clear, accessible language so that judges, tribunal members, and other parties can make informed decisions.
### What Expert Witnesses Do
### Their Impact on Construction Disputes
Expert witnesses can have a significant influence on the outcome of a construction dispute. Their independent assessment of building defects, compliance with the NCC and Australian Standards, contract fulfilment, and the cause and extent of damage provides the factual foundation on which legal decisions are made.
## The Role of Technical Consultants
Technical consultants work alongside construction firms, legal teams, and property owners to provide advice on the technical aspects of construction projects. Unlike expert witnesses, their primary role is outside the courtroom.
### What Technical Consultants Do
### Their Preventative Role
Technical consultants play a preventative role by identifying potential problems before they become disputes. By reviewing designs, checking compliance, and monitoring construction quality, they help keep projects on track and reduce the risk of defects, delays, and disagreements.
## Key Differences Compared
## When You Need an Expert Witness
An expert witness is the right choice when a dispute has already arisen and legal proceedings are either underway or likely.
## When You Need a Technical Consultant
A technical consultant is the right choice when you want to prevent problems before they occur or need ongoing technical guidance during a project.
## Selecting the Right Professional
Choosing between an expert witness and a technical consultant depends on three key factors:
### 1. The Nature of Your Situation
If you are already in a dispute or expect one to arise, an expert witness is needed. If you are managing a project and want to reduce the risk of disputes, a technical consultant is the better choice.
### 2. The Stage of Your Project
Engage a technical consultant early in the project for preventative guidance. An expert witness becomes relevant once a dispute has reached a stage where formal evidence is required.
### 3. Qualifications and Experience
Both expert witnesses and technical consultants should hold relevant qualifications and experience. In Victoria, look for professionals who are registered with the Victorian Building Authority (VBA) and have demonstrated experience in the specific type of construction or defect at issue. For expert witnesses, check that they have experience giving evidence at VCAT or in court and understand their duties under the relevant practice notes.
For a complete overview, see our [guide to expert witness reports for building disputes](/guides/expert-witness-building-disputes-guide).
### Managing Dilapidation Risks in Melbourne's Construction Boom
Source: https://ownerinspections.com.au/articles/managing-dilapidation-risks-in-melbournes-construction-boom
Published: 2023-12-06 | Updated: 2026-02-09 | Category: Dilapidation
Author: Maison Azdari
Dilapidation risks in Melbourne's construction boom refer to the potential for nearby construction work to damage existing buildings and infrastructure. Managing these risks requires pre-construction dilapidation surveys, compliance with Part 7 of the Building Act 1993 (VIC), clear communication with neighbours, and ongoing monitoring throughout the build. A professional [dilapidation report](/dilapidation-reports) documents the condition of surrounding properties before work begins, creating a baseline that protects both developers and property owners from costly disputes.
Melbourne's property market continues to grow, with new residential and commercial projects reshaping suburbs across the city. While this growth brings opportunity, it also increases the chance of construction activity causing cracks, vibration damage, settlement, and other structural impacts on neighbouring properties. For developers, builders, and homeowners, understanding how to manage dilapidation risks is not optional. It is a legal and practical requirement.
## What Are Dilapidation Risks?
Dilapidation risks describe the possibility of damage to existing buildings and structures caused by nearby construction activity. This can include cracking to walls and ceilings, foundation settlement, damage to driveways and fencing, and disruption to underground services such as plumbing and drainage.
These risks affect both new development sites and the older properties surrounding them. When heavy machinery operates nearby, when excavation alters soil conditions, or when piling sends vibrations through the ground, adjacent properties can suffer measurable harm.
## Why Melbourne's Construction Boom Increases the Risk
Melbourne has experienced sustained population growth and housing demand for over a decade. According to the Australian Bureau of Statistics, Victoria approved over 60,000 new dwellings in the 2023 to 2024 financial year, with a large share concentrated in Melbourne's inner and middle suburbs.
This density of construction activity means more projects are happening on smaller lots, closer to existing buildings, and often involving deep excavation or demolition of older structures. The result is a higher likelihood of neighbouring properties being affected.
## Legal Responsibilities Under the Building Act 1993
In Victoria, Part 7 of the Building Act 1993 sets out clear obligations for anyone undertaking building work that may affect adjoining properties. This legislation is designed to protect neighbouring owners from construction-related damage.
Under this legislation, the building owner must:
Failure to comply can result in fines, stop-work orders, and liability for all repair costs to damaged properties. The Victorian Building Authority (VBA) oversees enforcement of these provisions.
## The Role of Dilapidation Surveys
A dilapidation survey is a detailed inspection and photographic record of the condition of neighbouring properties before construction begins. It creates a legally defensible baseline that shows exactly what condition the surrounding buildings were in prior to any work starting.
This baseline is used to:
Without a dilapidation report, it becomes extremely difficult to prove whether damage existed before the project started or was caused by the construction.
## What a Dilapidation Survey Covers
A thorough dilapidation survey inspects and records the current condition of all elements that could be affected by nearby construction. The scope depends on the type and scale of the proposed works.
## Best Practices for Managing Dilapidation Risks
Managing dilapidation risks well requires action before, during, and after construction. The following steps help developers, builders, and homeowners stay compliant and avoid disputes.
### Before Construction
### During Construction
### After Construction
## Technology in Modern Dilapidation Assessments
Modern dilapidation surveys have moved well beyond simple written notes and photographs. Today's inspectors use advanced tools that improve accuracy, speed, and the quality of evidence collected.
These technologies strengthen the evidentiary value of a dilapidation report and make it far more difficult for any party to dispute the findings.
## Common Types of Construction-Related Damage
Understanding the types of damage that construction can cause helps property owners recognise problems early and take action.
### Are Home Inspections Mandatory in Australia?
Source: https://ownerinspections.com.au/articles/are-home-inspections-mandatory-in-australia
Published: 2023-12-05 | Updated: 2026-02-10 | Category: Building Inspections
Author: Maison Azdari
Home inspections are not universally mandatory for buying an existing property in Australia. However, for new residential construction, inspections at specific stages are required under state and territory building legislation to confirm compliance with the National Construction Code (NCC). While [pre-purchase building inspections](/pre-purchase-inspections) for existing homes are technically optional, they are strongly recommended by consumer protection bodies in every state and are a standard part of due diligence for most property transactions.
Whether you are building a new home, buying an existing property, or planning a major renovation, understanding when inspections are legally required and when they are simply a smart decision can save you from costly surprises. The rules differ by state and territory, and the 2018 Building Confidence Report has been pushing for greater consistency across the country.
## Understanding Home Inspections in Australia
A home inspection is a professional assessment of a property's physical condition. Conducted by a licensed or certified inspector, it examines everything from the structure and roof to plumbing, electrical systems, and timber pest activity.
The main types of home inspections include:
## When Are Inspections Legally Required?
The short answer is: it depends on what type of property transaction you are involved in.
## State-by-State Inspection Requirements
Each Australian state and territory has its own building legislation that governs when and how inspections must occur during construction.
### Victoria (VIC)
Under the Building Act 1993 and the Domestic Building Contracts Act 1995, prescribed inspections are required at specific stages of new residential construction. The Victorian Building Authority (VBA) oversees compliance. Homeowners can appoint a private building inspector (registered building practitioner) in addition to the building surveyor.
### New South Wales (NSW)
The Environmental Planning and Assessment Act 1979 and the Home Building Act 1989 require mandatory inspections at construction stages for new builds. NSW Fair Trading provides consumer protections for home building. The Strata Building Bond and Inspection Scheme adds further inspection requirements for new strata buildings.
### Queensland (QLD)
The Queensland Building and Construction Commission Act 1991 requires building certifiers to inspect construction at prescribed stages. The QBCC regulates builders and provides dispute resolution services. Queensland also has specific requirements for [pest inspections](/timber-pest-inspections) in high-risk termite zones.
### South Australia (SA)
The Building Work Contractors Act 1995 and the Planning, Development and Infrastructure Act 2016 govern building inspections. Consumer and Business Services SA oversees compliance for residential construction.
### ACT
The Building Act 2004 (ACT) mandates inspections at specific construction stages. The ACT Planning and Land Authority manages building approvals and compliance.
## The Building Confidence Report and National Reforms
The Building Confidence Report (BCR), published in 2018 by Professor Peter Shergold and Bronwyn Weir, reviewed the effectiveness of building regulations across all Australian states and territories. The report found significant gaps in compliance and enforcement and made 24 recommendations to improve the system.
Key recommendations included:
Since 2018, state governments have been progressively implementing these recommendations. The result is a trend towards more frequent and more rigorous inspections during construction, which ultimately benefits homeowners and buyers.
## Pre-Purchase Inspections for Existing Homes
While not legally required, a pre-purchase building inspection is one of the most important steps a buyer can take. It follows Australian Standard AS 4349.1 and provides a professional assessment of the property's condition before you commit to the purchase.
A standard pre-purchase inspection covers:
Most property sale contracts in Australia include a "subject to building inspection" clause that allows the buyer to arrange an inspection within a set period (usually five to seven business days) and withdraw from the contract if significant defects are found.
## The Buyer's Perspective
For buyers, a home inspection is a practical tool for making informed decisions. Knowing the true condition of a property before you sign the contract gives you the ability to:
The typical cost of a pre-purchase building and pest inspection in Australia ranges from $400 to $800 depending on the property's size and location. That is a small price compared to the potential cost of undiscovered defects.
## The Seller's Perspective
Sellers can also benefit from arranging a [pre-sale inspection](/pre-sale-inspections) before listing. This proactive approach allows you to:
A property that has been inspected and repaired in advance signals quality and transparency, which can attract stronger offers and a quicker sale.
## New Constructions and Renovations
For new homes and significant renovations, inspections are required at specific construction stages. These typically include:
## Choosing the Right Home Inspector
Selecting a qualified inspector is the foundation of a useful inspection. Here is what to look for:
For a complete overview, see our [guide to pre-purchase building and pest inspections](/guides/pre-purchase-building-pest-inspection-guide).
### Ensuring Quality at Every Step in Construction Stage Inspections
Source: https://ownerinspections.com.au/articles/quality-in-construction-stage-inspections
Published: 2023-12-01 | Updated: 2026-02-12 | Category: Construction Inspections
Author: Maison Azdari
[Construction stage inspections](/new-construction-stage-inspections) are systematic evaluations carried out at defined phases of a building project to verify structural integrity, compliance with the National Construction Code (NCC) and Australian Standards, and overall workmanship quality. In Australia, these inspections are conducted by registered building inspectors, structural engineers, or council-appointed certifiers who provide independent verification that each phase of construction meets the required standards before the next stage begins. Stage inspections typically start from $400+GST per stage and represent one of the most effective ways to detect defects early, protect your investment, and ensure the finished home meets both contractual and regulatory requirements.
Whether you are building a new home, undertaking a major renovation, or investing in a property under construction, stage inspections give you an independent set of eyes at every point where defects could be concealed by subsequent work. Without these inspections, problems with foundations, framing, waterproofing, or finishing work may go unnoticed until they cause serious structural damage or costly rectification after handover.
This guide explains the five key construction stages where inspections should occur, who is qualified to conduct them, the benefits of engaging professional inspectors, and what to expect throughout the process.

## What Are Construction Stage Inspections?
Construction stage inspections are formal assessments carried out at predetermined milestones during the building process. Each inspection evaluates whether the completed work at that stage complies with the approved building plans, the NCC, and the relevant Australian Standards.
The purpose of these inspections is to:
Stage inspections differ from a single final inspection because they catch problems progressively. A defect in the foundation stage that goes undetected will be buried under concrete, framing, and finishes. By the time it manifests as a crack in a wall or an uneven floor, the rectification cost may be ten or twenty times what it would have been to fix during construction.
## The Five Key Construction Stage Inspections
Each construction stage has specific elements that must be assessed. The following breakdown covers the five stages where independent inspections deliver the greatest value.
### 1. Foundation Stage Inspection
The foundation stage is the starting point for the entire structure. Errors at this stage affect every subsequent phase of construction.
A foundation stage inspection covers:
The foundation inspection must occur after reinforcement is placed but before concrete is poured. Once the concrete is in, the reinforcement cannot be visually inspected, and any errors become permanently embedded in the structure.
### 2. Frame Stage Inspection
The frame stage establishes the skeleton of the building. This inspection verifies that the structural frame will safely carry all loads throughout the life of the building.
A frame stage inspection covers:
The frame inspection takes place after all framing, bracing, and tie-down work is complete but before any external cladding or internal linings are installed. Framing defects discovered after the walls are lined require the linings to be removed, which adds significant cost and delays.
### 3. Lock-Up Stage Inspection
The lock-up stage marks the point where the building is enclosed and secure. External walls, windows, doors, and roofing are all in place, and the building envelope should be sealed and watertight.
A lock-up inspection assesses:
Water ingress through poorly sealed windows, inadequate flashing, or defective roofing is one of the most common and costly defects in Australian residential construction. The lock-up inspection is the last opportunity to identify these issues before internal finishing work begins.
### 4. Fixing Stage Inspection
The fixing stage covers internal finishing work. This inspection ensures that internal linings, wet area waterproofing, fixtures, and fittings are installed correctly.
A fixing stage inspection covers:
Waterproofing is one of the most critical elements assessed at the fixing stage. A waterproofing failure in a bathroom can cause extensive damage to structural framing, flooring, and adjacent rooms. The cost of rectifying a waterproofing defect after tiling is complete can exceed $15,000 to $25,000, compared to a few hundred dollars to fix the membrane before tiling begins.
### 5. Practical Completion Inspection (PCI)
The practical completion inspection is the final assessment before the property is handed over from the builder to the owner. It is the last opportunity to identify and document any defects, incomplete work, or items that do not meet the quality expectations set out in the building contract.
A PCI covers:
The PCI report forms the basis for the defects list that the builder must address before final payment is made. In most states, the building contract provides for retention of a percentage of the contract price until defects identified at practical completion are rectified.
## Summary of the Five Key Inspection Stages
| Stage | Key Focus Areas | Relevant Standard | Common Defects Found |
| --- | --- | --- | --- |
| Foundation | Soil compaction, reinforcement, drainage, formwork | AS 2870 | Incorrect reo spacing, poor soil compaction, missing drainage |
| Frame | Alignment, bracing, tie-downs, load paths | AS 1684, NCC | Missing bracing, undersized members, incorrect fixing |
| Lock-Up | Cladding, windows, doors, roofing, watertightness | NCC | Poor window flashing, inadequate sealing, roofing defects |
| Fixing | Linings, waterproofing, fixtures, cabinetry | AS 3740, NCC | Waterproofing failures, poor plasterboard finishing |
| PCI | All finishes, contract compliance, operation | Building contract | Paint defects, incomplete items, cosmetic damage |
## Why Construction Stage Inspections Matter
### Early Defect Detection
Defects identified during construction are far cheaper and simpler to rectify than those discovered after handover. A reinforcement error caught at the foundation stage might cost a few hundred dollars to fix. The same error discovered years later as a cracking slab could cost $20,000 or more to remediate.
### Compliance with Building Codes and Standards
The NCC and Australian Standards set minimum performance requirements for structural adequacy, fire safety, weatherproofing, energy efficiency, and accessibility. Stage inspections confirm that the work at each phase meets these requirements, reducing the risk of non-compliance issues that could prevent the issue of an occupancy certificate.
### Improved Construction Quality
When builders and subcontractors know that an independent inspector will review their work at each stage, the standard of workmanship tends to improve. The accountability created by independent inspections encourages trades to self-check their work more carefully.
### Risk Mitigation for Homeowners
For homeowners, stage inspections provide documented evidence of construction quality at every phase. This documentation is valuable if disputes arise with the builder, if insurance claims need to be supported, or if the property is sold in the future. An independently verified construction record adds measurable value to the property.
## Cost Comparison: Inspections vs Defect Rectification
| Scenario | Estimated Cost |
| --- | --- |
| Single stage inspection | From $400+GST |
| Full set of five stage inspections | $2,000 to $3,500+GST |
| Rectifying a waterproofing failure after tiling | $15,000 to $25,000 |
| Rectifying a foundation defect after completion | $20,000 to $50,000+ |
| Rectifying framing defects after lining | $8,000 to $20,000 |
| Rectifying roofing and flashing defects | $5,000 to $15,000 |
The cost of a complete set of stage inspections is a fraction of the cost of rectifying a single serious defect discovered after handover.
## Who Conducts Construction Stage Inspections?
Three types of professionals conduct stage inspections in Australia, each with a different scope and purpose.
### Registered Building Inspectors
Registered building inspectors are accredited professionals who hold licences issued by their state or territory building authority. They are independent of the builder and provide unbiased assessments of construction quality and compliance.
In Australia, building inspector licensing is administered by:
Registered inspectors typically hold a Certificate IV or Diploma in Building and Construction, carry professional indemnity and public liability insurance, and have extensive practical experience in residential construction.
### Structural Engineers
Structural engineers are engaged for complex projects where specialist knowledge of load-bearing systems, soil conditions, and structural design is required. They provide calculations and assessments that go beyond the scope of a standard building inspection.
Structural engineers are commonly involved when:
### Government and Council Inspectors
Government or council-appointed building surveyors (also called building certifiers in some states) conduct mandatory inspections at prescribed hold points during construction. These inspections are required before an occupancy certificate can be issued.
Council inspectors verify compliance with the building permit conditions and the NCC at stages mandated by state legislation. Their scope is limited to regulatory compliance at specific milestones and does not cover the detailed trade-by-trade assessment that an independent building inspector provides.
| Inspector Type | Role | Independence | Scope |
| --- | --- | --- | --- |
| Registered Building Inspector | Independent quality assessment | Fully independent of builder | All trades, all stages |
| Structural Engineer | Structural design and compliance | Independent specialist | Structural systems, foundations, load paths |
| Government/Council Inspector | Regulatory compliance certification | Government authority | Mandatory hold points, occupancy certificate |
## Benefits of a Professional Inspection Service
Engaging a professional building inspection service for your construction stage inspections provides several advantages:
## Key Takeaways
### Third-Party Construction Stage Inspections in Melbourne
Source: https://ownerinspections.com.au/articles/third-party-construction-stage-inspections-in-melbourne
Published: 2023-11-30 | Updated: 2026-02-12 | Category: Construction Inspections
Author: Maison Azdari
Third-party [construction stage inspections](/new-construction-stage-inspections) in [Melbourne](/vic/building-inspections-melbourne) are independent assessments carried out by licensed building inspectors who have no financial or contractual relationship with the builder or developer. These inspections occur at defined milestones during the construction process, from foundation through to handover, and evaluate whether the work meets the Building Code of Australia (BCA), Australian Standards, and the approved building plans. In Victoria, the Domestic Building Contracts Act 1995 governs residential building work and provides homeowners with protections that are strengthened considerably when supported by independent inspection documentation.
Melbourne's residential construction sector has grown rapidly over the past decade, with thousands of new dwellings approved each year across the metropolitan area. With this volume of building activity, quality control has become a significant concern. Research from the University of New South Wales found that approximately 85% of new Australian homes contain defects, many of which could have been identified and rectified if caught at the appropriate construction stage.
> A defect that costs a few hundred dollars to fix at the frame stage can escalate to tens of thousands of dollars once walls are lined, tiles are laid, and the home is occupied. Independent stage inspections catch problems when they are still affordable to resolve.
## What Are Construction Stage Inspections?
Construction stage inspections are systematic checks performed at key points during the building process. Each inspection corresponds to a milestone where specific structural elements, services, or finishes are visible and accessible before they are covered by subsequent work. The purpose is to verify that the builder's work complies with the approved plans, relevant Australian Standards, and the BCA (now part of the National Construction Code).
In Victoria, the building surveyor (formerly known as the building inspector) is required by law to inspect certain stages before issuing permits and occupancy certificates. However, these statutory inspections focus on regulatory compliance and do not assess overall build quality or workmanship to the same depth that a private third-party inspector would.
## Key Construction Stages Inspected
The following table outlines the primary inspection stages for a typical residential build in Melbourne, along with what each inspection covers and the optimal timing.
| Stage | What Is Inspected | When It Occurs |
| --------------------- | ------------------------------------------------------------------------------------------ | --------------------------------------------------------- |
| Foundation / Pre-Slab | Excavation depth, soil preparation, reinforcement placement, formwork, plumbing rough-ins | After formwork and rebar are placed, before concrete pour |
| Frame | Wall frames, roof trusses, bracing, tie-downs, window and door openings, structural steel | After framing is complete, before cladding and lining |
| Lock-Up / Pre-Plaster | External cladding, windows, doors, insulation, electrical and plumbing rough-ins, sarking | After lock-up, before internal wall linings are installed |
| Waterproofing | Wet area membranes in bathrooms, laundries, and balconies; puddle flanges; shower recesses | After membrane application, before tiling |
| Final / Handover | All completed works including finishes, fixtures, fittings, site drainage, external works | Before practical completion and settlement |
### Foundation and Pre-Slab Inspection
The foundation inspection is arguably the most important checkpoint because everything above depends on what lies beneath. A third-party inspector will confirm that the excavation matches the geotechnical report, that rebar spacing and cover comply with engineering drawings, and that all underground plumbing and electrical conduits are correctly positioned. Once the concrete slab is poured, these elements become permanently concealed.
### Frame Stage Inspection
At the frame stage, the structural skeleton of the home is exposed. The inspector checks that wall studs, top and bottom plates, roof trusses, and bracing conform to the engineering specifications and AS 1684 (Residential Timber-Framed Construction). In Melbourne, wind classifications and bracing requirements are particularly important due to varying terrain categories across the metropolitan area.
### Lock-Up and Pre-Plaster Inspection
The lock-up inspection occurs once the building is enclosed with external cladding, windows, and doors. At this point, internal services such as electrical wiring, plumbing pipes, and insulation batts are visible before plasterboard is installed. This stage represents the last practical opportunity to identify and correct issues with services and insulation.
### Waterproofing Inspection
Waterproofing failures are among the most common and costly defects in Australian residential construction. The inspector verifies that membranes in wet areas are correctly installed in accordance with AS 3740 (Waterproofing of Domestic Wet Areas), including proper overlap at joints, correct height up walls, and adequate treatment around penetrations.
### Final and Handover Inspection
The final inspection assesses the completed home against the approved plans and contract specifications. This includes checking all surfaces, fixtures, fittings, joinery, paint, tiling, site drainage, driveways, landscaping, and any other items specified in the building contract.
## Third-Party Inspectors vs Municipal Building Surveyors
Many homeowners assume that the mandatory inspections performed by the building surveyor (either council-employed or private) provide a thorough quality check. In practice, these inspections serve a different purpose. The table below illustrates the differences.
## How Findings Are Communicated
After each stage inspection, the third-party inspector prepares a detailed written report that includes photographs of any defects or areas of concern, references to the applicable Australian Standard or BCA clause, a severity rating for each item, and recommendations for rectification. These reports are typically delivered within 24 to 48 hours and can be shared directly with the builder to facilitate prompt corrections.
## Do Third-Party Inspections Delay the Build?
One of the most common concerns among homeowners is whether engaging an independent inspector will slow down construction. In most cases, the answer is no. A well-organised inspector can attend the site within 24 to 48 hours of being notified that a stage is ready. The inspection itself typically takes one to three hours, and the builder can continue working on unrelated tasks during or immediately after the inspection. In fact, catching defects early often prevents delays later in the build that would result from having to strip back finished work to access concealed problems.
## Choosing the Right Third-Party Inspector in Melbourne
Selecting a qualified and experienced inspector is a significant decision. The following criteria will help you make an informed choice.
## Are Third-Party Inspections Legally Required?
Third-party inspections are not legally mandated for residential construction in Victoria. The mandatory inspections required under the Building Act 1993 are performed by the relevant building surveyor. However, Victorian homeowners have the right to engage their own independent inspector at any time during construction. Under section 37 of the Domestic Building Contracts Act 1995, the owner (or their representative) has a right of access to the building site at reasonable times to inspect work.
While not compulsory, third-party inspections are strongly recommended because they provide the independent documentation that supports warranty claims, dispute resolution through Domestic Building Dispute Resolution Victoria (DBDRV), and potential claims at VCAT.
## Case Studies from Melbourne Homeowners
### Lisa's Experience in Melbourne's Western Suburbs
Lisa engaged a third-party inspector for her new four-bedroom home in Tarneit. At the frame stage inspection, the inspector identified that several roof truss connections were missing required gang nail plates, and bracing was not installed in accordance with the engineer's specifications. Without this inspection, these defects would have been concealed by ceiling and wall linings. The builder rectified the issues at no cost, and Lisa's home was completed to the required standard. The total cost of her five-stage inspection package was approximately $2,500, a small fraction of her $480,000 build contract.
### Julz's Story in Melbourne's South-East
Julz was building a townhouse in Berwick and opted for independent inspections after hearing about defect issues from neighbours in a nearby estate. At the waterproofing stage, the inspector found that the membrane in the ensuite had not been carried up the wall to the required 150mm height behind the shower, and the puddle flange was incorrectly seated. These issues were photographed and documented with reference to AS 3740. The builder's waterproofer returned and corrected the work before tiling commenced. Had these defects gone unnoticed, Julz could have faced water damage to the timber framing and adjoining rooms within a few years.
## Costs of Third-Party Stage Inspections in Melbourne
Inspection costs vary depending on the size and complexity of the build, the number of stages inspected, and the inspector's experience. The table below provides a general guide for Melbourne.
| Service | Typical Cost (incl. GST) |
| --------------------------------------- | ------------------------ |
| Single stage inspection | $350 to $650 |
| Five-stage inspection package | $2,000 to $3,500 |
| Final / handover inspection only | $450 to $750 |
| Waterproofing inspection (standalone) | $250 to $450 |
| Reinspection after defect rectification | $150 to $300 |
These costs represent a small percentage of the overall build cost and are generally considered excellent value given the potential savings from early defect detection. A single waterproofing defect left undetected can cost $20,000 or more to rectify once tiling and fixtures are in place.
For a complete overview, see our [guide to construction stage inspections](/guides/construction-stage-inspections-guide).
### Investing Wisely: Construction Stage Inspections in Sydney
Source: https://ownerinspections.com.au/articles/investing-wisely-construction-stage-inspections-in-sydney
Published: 2023-11-28 | Updated: 2026-02-03 | Category: Construction Inspections
Author: Maison Azdari
[Construction stage inspections](/new-construction-stage-inspections) in [Sydney](/nsw/building-inspections-sydney) are independent assessments carried out at eight defined points during a residential build to verify that work complies with the approved plans, the National Construction Code (NCC), and the relevant Australian Standards. With Sydney's property market forecasting growth of 4 to 7 per cent (or a potential decline of up to 4 per cent depending on conditions) and rental availability sitting at just 1.7 per cent, the financial stakes of a new build have never been higher. Stage inspections typically cost between $300 and $800 each, a fraction of the cost of rectifying defects discovered after handover. They are available for all residential projects across Greater Sydney and are conducted by licensed building inspectors.
Whether you are building your first home, investing in a duplex development, or constructing a granny flat, each stage of the build presents opportunities for errors that can go unnoticed until they become expensive problems. Timber framing concealed behind plasterboard, waterproofing membranes hidden beneath tiles, and reinforcement buried in concrete are all examples of work that cannot be visually checked once the next trade begins.
This guide walks you through all eight construction stage inspections relevant to Sydney residential builds, explains what each one covers, and outlines why they represent one of the smartest investments you can make during the construction process.
## Why Stage Inspections Matter in Sydney's Property Market
Sydney's property market is one of the most competitive in Australia. Median house prices remain among the highest in the country, and the cost of construction materials and labour continues to rise. In this environment, a building defect that costs $500 to fix during construction can easily become a $15,000 rectification project after the home is complete.
Under the Home Building Act 1989 (NSW), residential builders must provide statutory warranties covering structural defects for six years and non-structural defects for two years from completion. When a defect emerges during these warranty periods, it is the builder's responsibility to fix it. However, for the homeowner, dealing with warranty claims means disruption, delays, and the stress of living in a home that needs repair work.
Stage inspections give you independent verification at every point in the build where work is about to be concealed. They provide documented evidence of construction quality and give you leverage to have issues addressed while the responsible trade is still on site.
| Market Indicator | Current Sydney Figure |
| --- | --- |
| Forecast property growth | 4 to 7 per cent |
| Potential decline scenario | Up to 4 per cent |
| Rental availability | 1.7 per cent |
| Statutory warranty (structural, NSW) | 6 years |
| Statutory warranty (non-structural, NSW) | 2 years |
## The 8 Construction Stage Inspections Explained
Each inspection stage targets specific elements of the build that will be concealed or inaccessible once the next phase of construction begins. Here is what each stage involves and why it matters.
### Stage 1: Bored Piers and Screw Piles
The foundation is the most important structural element of any building. Bored piers and screw piles transfer the weight of the structure down to stable ground, and their correct installation determines the long-term stability of the entire home.
During this inspection, a licensed inspector assesses:
- Pier depth and alignment against the engineering specifications
- Load transfer capacity based on soil conditions
- Reinforcement cage placement within each pier
- Spacing and positioning relative to the approved plans
- Ground conditions and any evidence of fill, rock, or water table issues
Sydney's geology varies significantly across suburbs. Homes built on clay soils in Western Sydney face different foundation challenges than those on sandstone in the Eastern Suburbs or sandy soils along the Northern Beaches. Getting the foundation right is not optional.
### Stage 2: Slab Pre-Pour
The slab pre-pour inspection takes place after all formwork, reinforcement, and embedded services are in position but before the concrete is poured. Once the concrete is placed, none of these elements can be visually inspected or easily corrected.
Key assessment areas include:
- Reinforcement bar (reo) spacing, size, and placement per the engineering drawings
- Formwork dimensions, edge beams, and internal beams
- Vapour barrier installation and continuity
- Embedded utilities including plumbing, electrical conduits, and stormwater pipes
- Slab edge setdowns for wet areas
- Chair and bar support heights to ensure correct concrete cover
A slab that does not meet the engineering specifications can lead to cracking, uneven floors, and structural compromise that is extraordinarily expensive to remedy after the fact.
### Stage 3: Frame
The frame inspection occurs after the structural frame (timber or steel) is erected but before internal linings, external cladding, or insulation are installed. The frame is the skeleton of the building, and errors at this stage affect everything that follows.
Inspectors assess:
- Beam and post placement against the approved structural plans
- Design conformity including member sizes, spans, and connections
- Load-bearing wall locations and support points
- Bracing installation per AS 1684 (timber framing) or engineering specifications
- Tie-down straps and connections to the slab or footings
- Window and door opening dimensions
- Roof truss placement and fixing
Frame defects that go unnoticed can cause walls to bow, roofs to sag, and doors and windows to bind or stick. These are not just cosmetic issues; they indicate structural problems that worsen over time.
### Stage 4: Lockup and Pre-Plaster
The lockup stage marks the point where the building envelope is sealed. External walls, windows, doors, and roofing are all installed, making the building weathertight. The pre-plaster component of this inspection occurs before internal wall and ceiling linings are fixed, giving the inspector access to the frame, services, and insulation.
This inspection covers:
- Window and door installation, flashing, and sealing
- Roofing installation including sarking, flashing, and gutter alignment
- External cladding or brickwork quality
- Watertightness of the building envelope
- Insulation placement and R-value compliance
- Electrical and plumbing rough-in before concealment
For a detailed breakdown of this stage, see our [lock-up and pre-plaster inspection guide](/articles/lock-up-pre-plaster-inspection-guide).
### Stage 5: Fixing
The fixing stage covers the installation of all internal fittings, fixtures, and finished elements. This is when the house starts to look like a home, and it is also when a large number of cosmetic and functional defects can occur.
Items assessed during the fixing inspection include:
- Kitchen cabinets, countertops, and splashback installation
- Internal doors, handles, and hardware
- Bathroom fixtures including vanities, toilets, taps, and shower screens
- Built-in wardrobes and storage
- Architraves, skirting boards, and mouldings
- Staircase construction and balustrade compliance
Each element is checked for alignment, operation, and finish quality. A cabinet door that does not close properly or a countertop with uneven joins may seem minor during construction, but they become a source of frustration for the homeowner after handover.
### Stage 6: Waterproofing
Waterproofing is one of the most failure-prone elements in residential construction. A membrane that is incorrectly applied, insufficiently lapped, or damaged during subsequent work can lead to water penetration that destroys floor coverings, wall linings, and structural timber in the rooms below.
The waterproofing inspection assesses:
- Membrane application in bathrooms, ensuites, laundries, and kitchens
- Hob heights and step-down compliance per AS 3740
- Junction detailing at wall-floor intersections
- Penetration sealing around pipes, drains, and fixtures
- Membrane continuity and overlap at sheet joins
- Floor falls directing water towards drains
In NSW, waterproofing must comply with AS 3740 (Waterproofing of domestic wet areas). This inspection must take place after the membrane is applied but before any tiling or floor coverings begin.
### Stage 7: Pre-Handover (PCI)
The pre-handover inspection, also known as the Practical Completion Inspection (PCI), is the final comprehensive assessment before the property is handed over to the owner. This is your last opportunity to have defects rectified by the builder before you accept the property.
The PCI covers:
- Full assessment against the approved plans and specifications
- Paint finish quality including coverage, runs, and overspray
- Installation errors across all trades
- Door and window operation
- Tiling quality, grout lines, and adhesion
- External works including driveways, paths, fencing, and landscaping
- Compliance with any contract variations or change orders
For more on what this inspection involves, see our [pre-handover construction inspection guide](/articles/pre-handover-construction-inspection-final-checks).
### Stage 8: Post-Handover Maintenance
The post-handover maintenance inspection is conducted approximately one year after you move in. This inspection identifies defects that have emerged during the first year of occupation, including settlement cracks, material shrinkage, and wear-related issues that are covered under the builder's statutory warranty.
Common items identified during this inspection include:
- Hairline cracks in walls and ceilings from normal settlement
- Doors and windows that have shifted and no longer close properly
- Grout cracking or tile movement
- Paint defects that have become visible over time
- Plumbing issues such as slow drains or minor leaks
- External drainage or landscaping problems
This inspection should be completed within the two-year non-structural warranty period under the Home Building Act 1989 (NSW) to allow time for the builder to complete rectification works before the warranty expires.
## What Each Inspection Stage Covers at a Glance
| Stage | Key Focus Areas | Why It Matters |
| --- | --- | --- |
| 1. Bored Piers/Screw Piles | Depth, alignment, reinforcement, load transfer | Foundation stability for the entire structure |
| 2. Slab Pre-Pour | Reo placement, formwork, vapour barrier, utilities | Cannot be corrected once concrete is poured |
| 3. Frame | Beam/post placement, bracing, tie-downs, openings | Structural skeleton affects all subsequent work |
| 4. Lockup/Pre-Plaster | Windows, doors, roofing, insulation, rough-in | Building envelope watertightness and concealed services |
| 5. Fixing | Cabinets, countertops, doors, bathroom fixtures | Cosmetic and functional quality of finished elements |
| 6. Waterproofing | Membranes, hob heights, falls, penetrations | Prevents water damage to structure and finishes |
| 7. Pre-Handover PCI | Plans compliance, paint, installation quality | Last chance to have defects fixed before handover |
| 8. Post-Handover | Settlement, warranty defects, wear issues | Catches problems within statutory warranty periods |
## Cost of Stage Inspections vs Defect Rectification
The financial argument for stage inspections is compelling. Here is a comparison of typical inspection costs versus what it costs to fix defects after the build is complete.
| Defect Type | Stage Inspection Cost | Rectification Cost After Completion |
| --- | --- | --- |
| Foundation misalignment | $400 to $700 | $20,000 to $80,000 |
| Slab reinforcement error | $400 to $700 | $15,000 to $50,000 |
| Frame bracing deficiency | $400 to $700 | $8,000 to $25,000 |
| Waterproofing failure | $400 to $700 | $12,000 to $30,000 |
| Fixing defects (cabinets, doors) | $400 to $700 | $3,000 to $10,000 |
| Paint and finish defects | $400 to $700 | $4,000 to $12,000 |
A complete set of eight stage inspections for a typical Sydney residential build costs between $3,200 and $5,600. A single undetected waterproofing failure can cost more than the entire inspection programme to rectify.
## How to Choose a Stage Inspection Provider in Sydney
Not all inspection providers offer the same level of service. When selecting an inspector for your Sydney build, consider the following:
- **Licensing:** The inspector should hold a licence issued by NSW Fair Trading. Ask for the licence number and verify it online.
- **Insurance:** Confirm they carry professional indemnity insurance and public liability insurance.
- **Experience:** Look for inspectors with specific experience in residential new construction, not just pre-purchase inspections on established homes.
- **Reporting:** Ask to see a sample report. It should include photographs, descriptions of each defect, and references to the relevant Australian Standard or NCC provision.
- **Independence:** The inspector must be fully independent from the builder, developer, and any trades working on the project.
## Common Defects Found at Each Stage in Sydney
Sydney's unique combination of soil types, weather patterns, and construction methods produces recurring defect patterns at each stage.
**Foundation stage:** Piers not reaching the specified depth due to unexpected rock or groundwater. Reinforcement cages misaligned or with insufficient concrete cover.
**Slab stage:** Reo chairs displaced during the pour preparation, resulting in reinforcement sitting too low. Vapour barriers torn or inadequately lapped at joins.
**Frame stage:** Missing or incorrectly positioned bracing. Tie-down straps not connected to the slab bolts. Truss spacings exceeding the engineering specification.
**Lockup stage:** Window flashing not installed or incorrectly lapped. Sarking (roof underlay) not extending into gutters. Gaps in the building envelope at penetrations.
**Fixing stage:** Cabinet doors misaligned. Countertop joins visible or uneven. Bathroom fixtures not level or not securely fixed.
**Waterproofing stage:** Membrane not extending to the required height on walls. Insufficient overlap at sheet joins. Floor falls directing water away from drains.
**Pre-handover:** Paint defects including runs, missed areas, and overspray on fixtures. Scratched glass. Incomplete external works.
**Post-handover:** Settlement cracks in plasterboard at doorways and windows. Grout cracking in wet areas. Doors sticking due to frame movement.
## Frequently Asked Questions
## Key Takeaways
## References
For a complete overview, see our [guide to construction stage inspections](/guides/construction-stage-inspections-guide).
### How Mould Inspections Contribute to Healthy Living in Brisbane
Source: https://ownerinspections.com.au/articles/how-mould-inspections-contribute-to-healthy-living-in-brisbane
Published: 2023-11-23 | Updated: 2026-02-12 | Category: Mould Inspections
Author: Maison Azdari
[Mould inspections](/mould-inspections) in [Brisbane](/qld/building-inspections-brisbane) are professional assessments that identify hidden and visible mould growth, measure moisture levels, and evaluate indoor air quality in residential properties. Brisbane's subtropical climate, with average summer rainfall exceeding 426mm, creates warm and humid conditions that make homes particularly vulnerable to mould colonisation. A professional mould inspection typically costs between $300 and $600, and it can detect contamination that poses serious health risks including asthma attacks, allergic reactions, and chronic respiratory conditions. For Brisbane homeowners, scheduling regular mould inspections is one of the most effective ways to protect both the health of occupants and the long-term value of the property.
Mould does not need much to thrive. A combination of moisture, warmth, and an organic food source such as timber framing, plasterboard, carpet, or even dust is enough for spores to take hold and multiply rapidly. In South East Queensland, where relative humidity regularly exceeds 70 percent during the warmer months, these conditions exist in most homes for significant portions of the year. What makes mould particularly dangerous is that large colonies can establish themselves inside wall cavities, under flooring, and within roof spaces without any visible signs until the contamination becomes severe.
This guide covers how mould inspections work, the health risks associated with mould exposure, professional inspection methods, real case study findings, prevention strategies, and when Brisbane homeowners should book an inspection.
## Why Brisbane Homes Are at High Risk for Mould
Brisbane sits in a subtropical climate zone classified as Zone 2 under the National Construction Code. The city receives an average annual rainfall of around 1,150mm, with the heaviest falls concentrated during summer. The combination of heat and moisture creates conditions where mould can germinate and spread within 24 to 48 hours of a surface becoming damp.
Several factors make Brisbane homes particularly susceptible:
- **High summer rainfall:** Average December to February rainfall of approximately 426.6mm saturates the ground and increases ambient moisture levels around buildings
- **Sustained humidity:** Relative humidity in Brisbane frequently sits above 60 percent year-round and can exceed 80 percent during summer
- **Poor ventilation in older homes:** Many Brisbane properties built before the 1990s lack adequate subfloor ventilation and exhaust systems in wet areas
- **Air conditioning usage patterns:** Homes that are sealed tightly for air conditioning can trap moisture indoors, creating condensation on cooler surfaces
- **Flooding history:** Properties in flood-prone areas of Brisbane, including parts of Rocklea, Graceville, and Ipswich, carry elevated long-term mould risk
## Health Risks of Mould Exposure
Mould affects human health through three primary pathways: inhalation of airborne spores, direct skin contact with contaminated surfaces, and ingestion. The health impacts range from mild irritation to serious chronic conditions, depending on the species of mould, the concentration of spores, and the individual's sensitivity.
| Health Impact | Symptoms | At-Risk Groups |
| --- | --- | --- |
| Allergic reactions | Sneezing, runny nose, itchy eyes, skin rash | People with existing allergies or hay fever |
| Asthma exacerbation | Wheezing, chest tightness, shortness of breath | Asthmatics (particularly children) |
| Respiratory infections | Persistent cough, sinus congestion, bronchitis | Elderly, immunocompromised individuals |
| Hypersensitivity pneumonitis | Fever, chills, muscle aches, lung inflammation | Occupants with prolonged exposure |
| Mycotoxin exposure | Fatigue, headaches, cognitive impairment | All occupants in heavily contaminated homes |
According to the Australian Institute of Health and Welfare, asthma affects approximately 2.7 million Australians, and indoor mould is recognised as a significant trigger for asthma symptoms. The World Health Organisation has also identified dampness and mould in buildings as a contributor to a 30 to 50 percent increase in respiratory and asthma-related health outcomes.
Children, elderly residents, and people with compromised immune systems are most vulnerable. However, even healthy adults can develop symptoms when exposed to high concentrations of mould spores over extended periods.
## Professional Mould Inspection Methods
A professional mould inspection goes well beyond a visual check of surfaces. Licensed inspectors use a combination of techniques to assess the full extent of mould contamination, identify moisture sources, and determine the species present.
### Visual Examination
The inspector conducts a systematic room-by-room assessment, checking all visible surfaces including walls, ceilings, floors, window frames, skirting boards, and joinery. They also inspect concealed areas where mould commonly hides, such as behind furniture, inside wardrobes, under sinks, and around plumbing penetrations. Discolouration, staining, peeling paint, and bubbling wallpaper are all indicators of moisture problems that may support mould growth.
### Moisture Meter Readings
Pin-type and pinless moisture meters are used to measure moisture content in building materials. Elevated moisture readings in plasterboard, timber, or concrete indicate conditions favourable for mould growth, even where no visible mould is present. Inspectors map moisture readings across the property to identify patterns and locate the source of water ingress.
### Thermal Imaging
Infrared thermal imaging cameras detect temperature variations in building surfaces that indicate hidden moisture. Cool spots on walls or ceilings often correspond to areas of dampness that are not visible to the naked eye. Thermal imaging is particularly effective for identifying moisture in wall cavities, around leaking pipes, and in areas affected by rising damp or condensation.
### Air Quality Sampling
Air samples are collected from multiple locations within the home and compared against an outdoor control sample. The samples are sent to a NATA-accredited laboratory for analysis, which identifies the species and concentration of mould spores present in the indoor air. This data provides an objective measure of indoor air quality and helps determine whether the spore levels exceed safe thresholds.
### Surface and Bulk Sampling
Where visible mould is present, the inspector may collect surface swabs or tape lifts for laboratory analysis. In some cases, bulk samples of contaminated materials such as carpet, plasterboard, or insulation are taken for more detailed assessment. Laboratory results confirm the mould species and help guide the appropriate remediation strategy.
| Inspection Method | What It Detects | Best Used For |
| --- | --- | --- |
| Visual examination | Surface mould, staining, moisture damage | Initial assessment of all rooms |
| Moisture meter | Elevated moisture in building materials | Locating hidden damp and water ingress |
| Thermal imaging | Temperature anomalies indicating dampness | Wall cavities, ceilings, concealed pipes |
| Air quality sampling | Airborne spore species and concentration | Measuring overall indoor air quality |
| Surface sampling | Mould species on contaminated surfaces | Confirming species for remediation planning |
## Case Study: Severe Mould Contamination in Pimpama
One of the most striking examples of hidden mould contamination involved Chrissy and Lee Butler, homeowners in Pimpama on the Gold Coast. The family had been experiencing persistent health symptoms including respiratory issues and allergic reactions. A professional mould inspection revealed alarming results.
Air quality testing found that airborne mould spore concentrations inside the home were approximately 150 times above safe levels. Carpet sampling was even more concerning, with contamination levels reaching 5,000 times the safe limit. The family had been living in these conditions without realising the extent of the problem, as much of the mould was hidden beneath floor coverings and within wall cavities.
In addition to the mould contamination, inspectors from Owner Inspections identified six major safety defects and five structural defects in the property. These findings highlighted how mould problems often coincide with broader building defects, particularly in homes where water ingress has gone unaddressed.
The case demonstrates why professional inspection is so important. Surface cleaning and DIY mould removal would not have resolved the underlying contamination, and the health risks would have continued. Professional remediation, guided by laboratory results and a detailed inspection report, was required to bring the property back to safe living conditions.
## When to Schedule a Mould Inspection in Brisbane
Knowing when to book a mould inspection can prevent minor moisture problems from becoming serious health hazards. The following situations should prompt Brisbane homeowners to arrange an inspection:
- **Musty or earthy odours:** A persistent smell that you cannot trace to a specific source often indicates hidden mould behind walls, under floors, or in roof spaces
- **Visible mould growth:** Any mould on walls, ceilings, window frames, or grout lines, even small patches, may indicate a larger hidden colony
- **Allergic reactions at home:** Unexplained sneezing, itchy eyes, skin rashes, or respiratory symptoms that improve when you leave the house
- **After water damage or flooding:** Any property that has experienced water ingress from storms, plumbing failures, or flooding should be inspected within 48 hours
- **Condensation on windows:** Regular condensation on glass or window frames indicates excess indoor moisture
- **Before purchasing a property:** A pre-purchase mould inspection can reveal contamination that a standard building inspection may not assess in detail
- **Annual maintenance check:** Scheduling a mould inspection at the end of summer or in early autumn captures the peak growth period and allows remediation before winter
The best time for a routine mould inspection in Brisbane is late February through April, after the peak of the wet season when moisture accumulation is at its highest.
## Preventing Mould Growth in Brisbane Homes
Prevention is always more cost-effective than remediation. Brisbane homeowners can take several practical steps to reduce the risk of mould growth.
### Ventilation
Ensure all wet areas including bathrooms, kitchens, and laundries have functioning exhaust fans that vent to the outside. Open windows when weather permits to allow cross-ventilation. Subfloor ventilation should be maintained and not blocked by landscaping or stored items.
### Moisture Control
Use dehumidifiers in rooms where humidity consistently exceeds 60 percent. Avoid drying clothes indoors without ventilation. Fix any plumbing leaks, roof leaks, or drainage issues as soon as they are identified. Ensure gutters and downpipes are clear and directing water away from the building.
### Building Maintenance
Maintain external caulking around windows and doors. Check roof flashings and valleys annually. Ensure waterproofing in wet areas remains intact, particularly in bathrooms older than 15 years. Address any cracking in external render or brickwork that could allow water ingress.
### Air Conditioning Maintenance
Service air conditioning systems annually. Clean filters regularly and ensure condensate drain lines are clear. Set the system to a temperature that minimises condensation on internal surfaces. Consider running the fan mode periodically to circulate air even when cooling is not needed.
| Prevention Strategy | Action | Frequency |
| --- | --- | --- |
| Exhaust fan maintenance | Clean and test all exhaust fans | Every 6 months |
| Dehumidifier use | Run in high-humidity rooms | Daily during summer |
| Plumbing checks | Inspect visible pipes for leaks | Every 3 months |
| Gutter cleaning | Clear gutters and downpipes | Every 6 months |
| Air conditioning service | Professional service and filter clean | Annually |
| Subfloor inspection | Check ventilation and moisture levels | Annually |
| Waterproofing check | Inspect wet area membranes | Every 2 to 3 years |
## Choosing a Mould Inspection Service in Brisbane
Selecting the right inspection provider makes a significant difference in the quality and reliability of the assessment. When choosing a mould inspection service in Brisbane, look for the following:
- **Licenced inspectors:** The inspector should hold a building inspection licence issued by the QBCC or equivalent authority
- **Subtropical experience:** Inspectors familiar with Brisbane's climate understand the specific mould risks and moisture patterns common to the region
- **Comprehensive moisture measurement:** The service should include pin and pinless moisture meters, not just a visual check
- **Air quality testing capability:** Look for providers who collect air samples and use NATA-accredited laboratories for analysis
- **Thermal imaging equipment:** Infrared cameras are a standard tool for professional mould inspections and should be included
- **Detailed reporting:** The inspection report should include moisture maps, laboratory results, photographs, and clear recommendations for remediation
### How Do Roof Inspections Protect and Extend the Life of Brisbane Homes?
Source: https://ownerinspections.com.au/articles/how-roof-inspections-enhance-the-longevity-of-brisbane-homes
Published: 2023-11-22 | Updated: 2026-01-30 | Category: Building Inspections
Author: Maison Azdari
Your roof is the first line of defence against everything Brisbane's climate throws at your home. From scorching summer heat to violent hailstorms and persistent humidity, the demands placed on roofing materials in South East Queensland are relentless.
Yet many [Brisbane](/qld/building-inspections-brisbane) homeowners overlook regular [roof inspections](/roof-inspection) until water is dripping through the ceiling or tiles are scattered across the yard after a storm. By that point, the damage is extensive and the repair bill is significant.
This guide explains how routine roof inspections protect your property, what they involve, when to schedule them, and how they can save you thousands of dollars over the life of your home.
## Why Brisbane's Climate Is Tough on Roofs
Brisbane sits in a subtropical zone that delivers a unique combination of weather challenges. Understanding these pressures helps explain why roof inspections are not optional for local homeowners.
### Extreme Heat and UV Exposure
Brisbane regularly records summer temperatures above 35 degrees Celsius, with roof surface temperatures climbing far higher. The [Bureau of Meteorology](http://www.bom.gov.au/climate/averages/tables/cw_040913.shtml) confirms that Brisbane receives some of the highest UV index readings in the country. This relentless UV exposure degrades roofing materials over time, causing metal to oxidise, tiles to become brittle, and protective coatings to break down.
### Severe Storms and Hail
The storm season from October to March brings intense thunderstorms, damaging winds, and hail events. In recent years, Brisbane has experienced multiple severe hail events that caused hundreds of millions of dollars in insured losses. Wind gusts during supercell thunderstorms can exceed 100 kilometres per hour, dislodging tiles, lifting metal sheeting, and driving rain into the smallest gaps.
### High Humidity and Moisture
Brisbane's average humidity sits between 50 and 70 percent for much of the year. This persistent moisture encourages mould growth, timber rot in roof framing, and corrosion of metal fixings. Without regular inspection, these hidden issues can compromise structural integrity long before any visible signs appear inside the home.
### Seasonal Temperature Swings
The cycle of heating and cooling causes roofing materials to expand and contract repeatedly. Over years, this thermal movement loosens fixings, cracks mortar bedding on tile roofs, and opens gaps in flashing. These small openings become entry points for water during the next downpour.
## Types of Roof Inspections
Not all roof inspections are the same. The level of detail depends on the method used and the expertise of the inspector. For a broader look at how different roofing materials influence inspection requirements, see our guide on [roof types and inspections](/articles/understanding-different-roof-types-inspection-needs).
### Visual Roof Inspection
A visual inspection is the most common starting point. The inspector examines the roof from ground level, from a ladder at the eaves, and where safe, by walking on the roof surface. This type of inspection covers:
- Condition of tiles, metal sheeting, or other cladding
- State of ridge capping and mortar bedding
- Flashing around penetrations such as vents, skylights, and chimneys
- Gutters, downpipes, and drainage
- Visible signs of rust, cracking, or displacement
- Condition of the roof cavity (where accessible)
A visual inspection is suitable for annual maintenance checks and provides a good overview of the roof's general condition.
### In-Depth Inspection with Technology
For a more thorough assessment, licensed inspectors use advanced tools that reveal problems invisible to the naked eye.
**Drone Inspections** allow detailed examination of steep or multi-storey roofs without risk to the inspector. High-resolution cameras capture close-up images of every section, including areas that are difficult or dangerous to access on foot.
**Thermal Imaging** detects moisture trapped beneath roofing materials, within insulation, or in the roof cavity. Wet areas show up as distinct temperature variations on a thermal camera. This technology identifies leaks that have not yet caused visible water stains inside the home.
**Moisture Meters** provide precise readings of moisture content in timber framing, confirming whether rot or fungal decay is present or likely to develop.
| Feature | Visual Inspection | In-Depth Inspection |
| ---------------------------- | ------------------------------- | ------------------------------------------ |
| **Method** | Ground level, ladder, roof walk | Drone, thermal imaging, moisture meters |
| **Time Required** | 30 to 60 minutes | 1.5 to 3 hours |
| **Detects Hidden Leaks** | Limited | Yes, through thermal imaging |
| **Suitable for Steep Roofs** | Restricted access | Full coverage via drone |
| **Structural Assessment** | Surface level only | Includes framing and cavity |
| **Report Detail** | Summary with photos | Comprehensive with thermal images and data |
| **Typical Cost Range** | $200 to $400 | $500 to $900+ |
| **Best Used For** | Annual maintenance checks | Pre-purchase, post-storm, ageing roofs |
## Key Benefits of Regular Roof Inspections
### Preventing Small Problems from Becoming Major Repairs
A cracked tile costs a few dollars to replace. Left undetected, it allows water to reach the sarking, timber battens, and eventually the ceiling. Within a few storm seasons, what was a $50 fix becomes a $5,000 repair involving timber replacement, replastering, and repainting. To understand how sarking plays a protective role in your roof system, read about [the importance of sarking in building construction](/articles/the-importance-of-sarking-in-building-construction).
> "The most expensive roof repair is the one you did not catch early. In Brisbane's climate, a single storm season can turn a minor crack into a major structural problem."
### Protecting Structural Safety
Roof framing carries significant loads, including the weight of the cladding, any solar panel installations, and the forces generated by wind uplift during storms. Timber rot caused by undetected leaks weakens this framing. In severe cases, compromised roof structures have collapsed during storms, putting occupants at serious risk.
Regular inspections verify that framing connections remain sound, that timber is free from rot and termite damage, and that the roof can withstand the wind loads it was designed to resist.
### Improving Energy Efficiency
A roof in poor condition directly affects your energy bills. Gaps in roofing materials or damaged insulation allow conditioned air to escape and external heat to enter. In Brisbane, where air conditioning runs for months at a time, even small reductions in roof performance translate to noticeably higher electricity costs.
Inspections identify insulation displacement, ventilation issues, and gaps that reduce your home's thermal envelope. Addressing these issues can lower cooling costs by 10 to 20 percent in many homes.
### Extending Roof Lifespan
A well-maintained tile roof in Brisbane can last 50 years or more. A neglected one may need full replacement within 25 to 30 years. Metal roofing, when regularly inspected and maintained, can exceed 40 years of service life. The difference between these timelines often comes down to whether minor issues were identified and resolved promptly through regular inspections.
### Supporting Insurance Claims
Insurance companies expect homeowners to maintain their properties in reasonable condition. If a storm damages your roof and the insurer's assessor finds evidence of pre-existing neglect, your claim may be reduced or denied. A documented history of regular inspections demonstrates that you have met your maintenance obligations, strengthening your position when making a claim. For more context on how weather events interact with property assessments, see our article on [how weather affects property inspection reports](/articles/how-weather-affects-property-inspection-reports).
## When to Schedule Roof Inspections in Brisbane
### Annual Inspections
At minimum, Brisbane homeowners should have their roof inspected once per year. This provides a baseline record of the roof's condition and catches developing issues before they worsen.
### Spring and Autumn Timing
The ideal times for scheduled inspections are spring (September to October) and autumn (March to April).
A **spring inspection** prepares your roof for the storm season ahead. Any damage from winter weather is identified and repaired before the first major thunderstorms arrive.
An **autumn inspection** assesses any storm damage sustained during summer and addresses issues before the cooler, drier months provide ideal conditions for repairs.
### After Severe Weather Events
Do not wait for your next scheduled inspection if your area has experienced a significant weather event. After any severe storm, hail, or sustained high winds, arrange an inspection as soon as possible. Early detection of storm damage prevents secondary water ingress that can cause far greater harm than the original impact.
### Before and After Major Work
If you are installing solar panels, adding a room, or making any modifications that affect the roof structure, an inspection before and after the work is essential. This documents the pre-existing condition and confirms that new work has not compromised the roof's integrity.
## Warning Signs That Demand Immediate Attention
Between scheduled inspections, stay alert for these indicators that something may be wrong with your roof.
| Warning Sign | Possible Cause | Recommended Action |
| ------------------------------------- | ---------------------------------------- | ------------------------------------------- |
| Water stains on ceilings or walls | Roof leak, flashing failure | Arrange inspection within 48 hours |
| Sagging or dipping roofline | Structural timber damage, overloading | Urgent professional assessment required |
| Mould or musty odours in upper rooms | Moisture ingress, poor ventilation | Inspection with thermal imaging |
| Tiles visibly cracked or displaced | Storm damage, age, thermal movement | Repair and full inspection |
| Rust stains running down walls | Corroded metal roofing or fixings | Inspection to assess extent of corrosion |
| Increased energy bills | Insulation damage, gaps in roof envelope | Inspection including cavity assessment |
| Granules from roof coating in gutters | Protective coating breaking down | Inspection to assess remaining coating life |
| Daylight visible through roof cavity | Gaps in cladding, missing tiles | Immediate repair needed |
## Choosing a Roof Inspection Service in Brisbane
### Verify Licensing
In Queensland, building inspectors must hold the appropriate licence issued by the [Queensland Building and Construction Commission (QBCC)](https://www.qbcc.qld.gov.au/). Always verify your inspector's licence before engaging their services. Unlicensed inspectors may miss critical defects, and their reports carry no regulatory standing.
### Check Insurance and Qualifications
A reputable inspection service carries professional indemnity insurance and public liability insurance. Ask to see current certificates of insurance. Look for inspectors with qualifications in building and construction, and specific experience with Queensland roofing systems and the requirements of the [Australian Building Codes Board (ABCB)](https://www.abcb.gov.au/) National Construction Code.
### Ask About Technology
Inspectors who use thermal imaging, drones, and moisture detection equipment provide a more thorough assessment than those relying on visual inspection alone. Ask what tools are included in the service and whether thermal imaging incurs an additional charge.
### Request Sample Reports
A quality inspection report includes photographs, clear descriptions of each defect found, an assessment of severity, and recommended actions with timeframes. Ask to see a sample report before booking. Vague or generic reports provide little value. For a comprehensive overview of what to expect from a building inspection, refer to our [comprehensive guide to house inspections](/articles/a-comprehensive-guide-to-house-inspections).
## Understanding Roof Inspection Costs in Brisbane
The cost of a roof inspection in Brisbane varies depending on the property size, roof complexity, and the level of technology used.
For a standard visual inspection on a single-storey home, expect to pay between $200 and $400. Larger or multi-storey properties with complex roof designs will sit at the higher end.
In-depth inspections that include drone surveys and thermal imaging typically range from $500 to $900 or more. While the upfront cost is higher, these inspections detect hidden issues that a visual check cannot identify.
Consider these costs against the alternative. A full roof replacement on a Brisbane home commonly costs between $15,000 and $40,000 depending on the size and materials. An annual inspection costing a few hundred dollars that extends your roof's life by even five years represents a significant return on investment.
## How Inspections Support Resilient Home Ownership
Brisbane's growth and the increasing frequency of severe weather events make resilient home construction and maintenance more important than ever. Our article on [resilient home construction for extreme weather](/articles/resilient-home-construction-building-for-extreme-weather-conditions) explores how modern building practices address these challenges.
Roof inspections fit within a broader strategy of proactive property maintenance. Rather than reacting to failures as they occur, regular inspections allow you to plan and budget for maintenance, prioritise repairs based on severity, and maintain your home's value over the long term.
For homeowners approaching retirement, this approach is particularly valuable. A well-documented maintenance history that includes regular roof inspections makes a property more attractive to buyers and can positively influence the sale price when the time comes.
## Key Takeaways
1. **Brisbane's subtropical climate** subjects roofs to UV degradation, storm damage, high humidity, and thermal cycling, making regular inspections essential rather than optional.
2. **Two inspection levels exist.** Visual inspections suit annual maintenance checks, while in-depth inspections with thermal imaging and drones are necessary for ageing roofs, post-storm assessments, and pre-purchase evaluations.
3. **Early detection saves money.** A minor repair caught during an inspection typically costs a fraction of the damage that results from leaving it undetected through another storm season.
4. **Schedule inspections in spring and autumn.** Spring inspections prepare your roof for storm season, while autumn inspections assess any damage sustained during summer.
5. **Warning signs should not be ignored.** Water stains, sagging rooflines, mould, and unusual energy bill increases all indicate potential roof problems that require professional assessment.
6. **Always use a QBCC-licensed inspector** with appropriate insurance, relevant qualifications, and access to modern inspection technology.
7. **Inspection costs are modest** compared to the expense of major repairs or premature roof replacement, delivering strong return on investment over your roof's lifespan.
## Frequently Asked Questions
### Is thermal imaging worth the extra cost?
For roofs older than 15 years or properties where leaks are suspected but not visible, thermal imaging is highly worthwhile. It detects moisture trapped within the roof structure that would otherwise go unnoticed until significant damage has occurred. The additional cost of thermal imaging is small compared to the potential cost of undetected water damage.
### Do metal roofs need inspection as often as tile roofs?
Yes. While metal roofs have different failure modes compared to tile roofs, they are still subject to corrosion, fastener deterioration, and flashing failures. Expansion and contraction of metal sheets can loosen screws over time, and scratches or chips in protective coatings allow rust to develop. Annual inspection is recommended regardless of roof material.
### When is the best time of year for a roof inspection in Brisbane?
September to October (spring) and March to April (autumn) are the optimal windows. Spring inspections prepare your roof for the approaching storm season. Autumn inspections assess any damage from summer storms and allow repairs during the milder weather that follows.
### Can a roof inspection detect termite damage?
A roof inspection that includes cavity access may identify signs of termite activity in roof timbers, such as mudding, hollowed timber, or visible termite workings. However, a roof inspection is not a substitute for a dedicated [timber pest inspection](/timber-pest-inspections). If termite signs are found during a roof inspection, a full pest assessment should be arranged immediately.
### How do I prepare my home for a roof inspection?
Ensure the inspector has clear access to all sides of the property and to the roof cavity access point (usually in a hallway ceiling or wardrobe). Trim any overhanging branches that obstruct the roof. Move vehicles away from the house to allow ladder placement. If you have noticed any specific concerns, make a note of their location to share with the inspector.
## Protect Your Brisbane Home with Professional Roof Inspections
Your roof protects everything beneath it. In Brisbane's demanding climate, regular professional inspections are the most effective way to catch problems early, avoid costly repairs, and extend the working life of your roof by years or even decades.
Whether you need a routine annual check, a post-storm assessment, or a comprehensive in-depth inspection before purchasing a property, our licensed building inspectors have the experience and technology to deliver thorough, actionable results.
**[Contact us today](/roof-inspection) to book a professional roof inspection for your Brisbane home.**
### The Process of Thorough Swimming Pool Inspections in Brisbane
Source: https://ownerinspections.com.au/articles/the-process-of-thorough-swimming-pool-inspections-in-brisbane
Published: 2023-11-21 | Updated: 2026-02-12 | Category: General Maintenance
Author: Maison Azdari
Swimming pools are a significant part of [Brisbane](/qld/building-inspections-brisbane) life. With approximately 13% of Australian households owning a swimming pool or spa, Brisbane exceeds the national average at around 18% due to its subtropical climate and outdoor lifestyle. However, pool ownership comes with serious safety and compliance responsibilities. Queensland has some of the most comprehensive pool safety laws in Australia, and regular inspections are essential to ensure compliance and protect occupants.
Whether you are a homeowner, a buyer considering a property with a pool, or a landlord, understanding the [pool inspection](/swimming-pool-inspections) process helps you prepare and ensures nothing is overlooked.
## Queensland Pool Safety Laws
Queensland pool safety legislation requires all pools and spas associated with residential properties to have a valid pool safety certificate. The key requirements include:
### Barrier (Fencing) Requirements
### Non-Climbable Zone (NCZ)
The NCZ is one of the most critical and frequently failed aspects of pool safety compliance. The NCZ extends 900mm from the inside of the pool barrier and 300mm from the outside. Within this zone, there must be no objects that a child could use to climb over the barrier, including:
### Additional Requirements
## Scheduling Your Inspection
## Preparing for the Inspection
Proper preparation can help the inspection run smoothly and increase the likelihood of a pass on the first visit.
## During the Inspection
During the inspection, the licensed inspector will systematically assess all aspects of the pool safety barrier and the pool environment. The inspection typically covers:
**Barrier assessment:**
**Gate and door assessment:**
**NCZ assessment:**
**General assessment:**
## After the Inspection
Following the inspection, one of two outcomes occurs:
**If the pool passes:** The inspector issues a pool safety certificate. This certificate is valid for one year (non-shared pools) or two years (shared pools) and must be registered on the Queensland pool safety register.
**If the pool fails:** The inspector provides a non-conformity notice detailing each item that does not meet the standard. The property owner is given a reasonable timeframe to rectify the issues. Once rectification is complete, a re-inspection is conducted to confirm compliance before a certificate is issued.
## Common Inspection Findings
### Structural Issues
### Barrier Non-Compliance
### Equipment and Filtration
### Water Quality
## Hiring a Pool Inspector
When selecting a pool safety inspector in Brisbane, consider the following criteria:
### Balancing Construction Speed and Quality in Gold Coast
Source: https://ownerinspections.com.au/articles/balancing-construction-speed-and-quality-in-gold-coast
Published: 2023-11-15 | Updated: 2026-02-09 | Category: New Construction
Author: Maison Azdari
Balancing construction speed and quality on the [Gold Coast](/qld/building-inspections-gold-coast) requires disciplined project planning, compliance with the National Construction Code (NCC), regular building inspections at each construction stage, and the use of efficient building methods such as prefabrication and Building Information Modelling (BIM). Rushing a build without proper quality controls leads to defects, rework, and regulatory issues that ultimately cost more time and money than getting it right the first time.
The Gold Coast construction sector has seen sustained growth, with building approvals reaching hundreds of millions of dollars annually according to the Australian Bureau of Statistics. With demand for new housing, apartment developments, and commercial projects at high levels, builders face constant pressure to deliver on tight schedules. But speed without quality is a false economy. Defective construction leads to warranty claims, disputes with homeowners, and action by the Queensland Building and Construction Commission (QBCC).
## Gold Coast Construction Regulations
### National Construction Code (NCC)
The National Construction Code sets the minimum performance requirements for all new buildings in Australia, including those on the Gold Coast. It covers structural adequacy, fire safety, accessibility, energy efficiency, and health and amenity standards. Every Gold Coast build must comply with the NCC, and the building certifier confirms compliance at prescribed inspection stages.
### Australian Standards
Beyond the NCC, Australian Standards govern specific aspects of construction including materials, methods, and testing. On the Gold Coast, the coastal environment adds further considerations. Salt air corrosion, high humidity, wind resistance, and cyclone-rated construction are all factors that Australian Standards address.
## Why Speed and Quality Often Conflict
Construction projects face competing pressures. Developers want fast completion to start generating returns. Builders want to move to the next job. Buyers want to move in on schedule. These pressures can push quality to the background if there are no strong controls in place.
Common causes of quality compromise include:
The cost of fixing defects after handover is typically three to five times higher than getting the work right during construction. For homeowners, defects discovered after moving in cause stress, financial loss, and lengthy dispute processes through the QBCC or the Queensland Civil and Administrative Tribunal (QCAT).
## Strategies for Efficient, Quality Construction
Delivering projects on time without sacrificing quality is achievable with the right approach. The following strategies help Gold Coast builders maintain high standards under schedule pressure.
### Comprehensive Planning
### Efficient Construction Methods
### Quality Control on Site
## The Building Approval Process in Gold Coast
Understanding the approval process helps avoid delays that push builders to rush later stages of the build.
### Projects That May Not Need Approval
Some low-risk works on the Gold Coast are exempt from building approval requirements. These typically include:
### Tips for a Smooth Approval
## The Role of Building Inspections
Building inspections are the primary mechanism for maintaining quality on a construction project. On the Gold Coast, the building certifier conducts mandatory inspections at prescribed stages. In addition, homeowners can appoint an independent building inspector to conduct their own parallel assessments.
### What Inspections Check
## Common Quality Issues in Fast-Paced Builds
When builders prioritise speed over process, certain defects appear more frequently. Knowing what to watch for helps homeowners and inspectors focus their attention.
## Technology and Innovation in Gold Coast Construction
Technology is helping Gold Coast builders deliver faster without compromising quality.
For a complete overview, see our [guide to construction stage inspections](/guides/construction-stage-inspections-guide).
### Defect Investigations in Sydney's Construction
Source: https://ownerinspections.com.au/articles/defect-investigations-in-sydneys-construction
Published: 2023-11-15 | Updated: 2026-02-11 | Category: Defect Investigation
Author: Maison Azdari
[Sydney](/nsw/building-inspections-sydney)'s construction industry has experienced significant growth over the past two decades, delivering thousands of residential and commercial buildings across the greater metropolitan area. However, this growth has been accompanied by a concerning trend in building quality. The NSW Building Commissioner has stated that approximately 70% of buildings inspected contain defects, a figure that underscores the importance of thorough [defect investigations](/defect-investigation-reports).
High-profile incidents such as the Opal Tower evacuation on Christmas Eve 2018 and the Mascot Towers crisis in June 2019 brought national attention to the state of construction quality in Sydney. These events displaced hundreds of residents, cost millions in remediation, and prompted a wave of regulatory reform aimed at lifting standards across the industry. For a complete overview, see our [guide to building defect investigations](/guides/building-defect-investigation-guide).
## The Scale of the Problem
The scale of building defects in Sydney is significant. Research from the University of New South Wales has indicated that up to 85% of new apartment buildings in the city contain at least one notable defect. The cost of rectifying building defects in NSW residential construction has been estimated at over $1 billion annually.
Several factors contribute to the prevalence of defects in Sydney:
## High-Profile Cases
### Opal Tower
The Opal Tower in Sydney Olympic Park was evacuated on Christmas Eve 2018 after residents reported loud cracking sounds and visible structural damage. Approximately 3,000 residents were displaced. The subsequent investigation identified defects in pre-cast concrete panels and the structural connections between them. The remediation cost exceeded $30 million.
### Mascot Towers
In June 2019, residents of Mascot Towers in the Sydney suburb of Mascot were evacuated after engineers identified cracking in the primary support structure and the transfer slab. The building remained unoccupied for an extended period, and the strata corporation faced remediation costs estimated at over $30 million. This case highlighted the financial vulnerability of strata owners when major structural defects are discovered.
## The Defect Investigation Process
A professional defect investigation follows a structured process designed to identify, document, and assess building defects systematically.
## Legal Framework
The legal framework governing building defects in New South Wales is extensive and provides multiple avenues for property owners to seek rectification.
### Home Building Act 1989 (NSW)
The Home Building Act 1989 is the primary legislation governing residential building work in NSW. It establishes statutory warranties that apply automatically to residential building work:
### Design and Building Practitioners Act 2020 (NSW)
Introduced in response to the Opal Tower and Mascot Towers incidents, this legislation brought significant reforms:
### Strata Schemes Management Act 2015 (NSW)
For apartment buildings, this legislation governs how owners corporations manage defect claims:
### Residential Apartment Buildings (Compliance and Enforcement Powers) Act 2020 (NSW)
This legislation gives the NSW Building Commissioner powers to:
## Common Defects in Sydney Buildings
The most frequently identified defects during investigations in Sydney include:
## Prevention Strategies
### For Builders and Developers
### For Property Owners and Buyers
### The Importance of Pre-Purchase Inspections in Sydney
Source: https://ownerinspections.com.au/articles/pre-purchase-inspections-guide-sydney
Published: 2023-11-10 | Updated: 2026-02-02 | Category: Pre-Purchase Inspections
Author: Maison Azdari
In the bustling [Sydney](/nsw/building-inspections-sydney) property market, [pre-purchase inspections](/pre-purchase-inspections) play a pivotal role for prospective homebuyers. These detailed assessments, conducted by seasoned experts, go beyond surface appearances to unearth potential issues like hidden structural defects or outdated electrical systems. Such diligence is a must for making informed decisions in the highly competitive Sydney real estate scene.
The value of these inspections lies in their ability to provide a transparent picture of a property's true condition. They act as a shield against unforeseen repair costs and potential safety hazards. This level of insight is invaluable in a market as dynamic as Sydney's, where the appeal of a property can often overshadow underlying problems. For homebuyers, understanding the importance of pre-purchase inspections is the first step towards securing a sound and safe investment in this vibrant city.
## Sydney's Dynamic Property Market
Sydney's property market is a landscape of constant change and complexity. According to recent data from CoreLogic, it has experienced significant fluctuations that have a direct impact on buyers. Between 2020 and 2021, housing values in Sydney surged by 27.2%. However, this upward trend shifted in 2022, with a decrease of 12.4% from its peak in January. The market has shown resilience in 2023, with property prices rebounding by 11.6% since the start of the year. Currently, the median prices for dwellings in Sydney stand at AUD 1,121,196, with houses priced at AUD 1,396,888 and units at AUD 832,222.
This fluctuation underscores the need for homebuyers to stay informed and adopt a strategic approach. Sydney's population, on track to reach 8 million by mid-century, is a key driver of these market dynamics, influencing both demand and pricing. In such a rapidly evolving market, the importance of pre-purchase inspections cannot be overstated. These inspections play a key role in guiding buyers through the complexities of Sydney's property market, ensuring they make well-informed decisions in this challenging environment.
## Benefits of Pre-Purchase Inspections
Pre-purchase inspections in Sydney's property market offer several key advantages:
## Common Issues Revealed in Sydney Inspections
Typical problems identified during pre-purchase inspections in Sydney include:
## Selecting the Right Inspection Professional
Choosing a qualified and experienced building inspector is important for a thorough pre-purchase inspection. Here's what to consider:
The expertise of the inspector is particularly important in Sydney, where diverse property types and varying building ages present unique challenges.
## DIY Pre-Purchase Inspections
While professional inspections are highly recommended, some homebuyers may prefer to conduct their own initial assessments. Here's what you should know about DIY inspections:
## Preparing for Your Pre-Purchase Inspection
Being well-prepared for your pre-purchase inspection can enhance its effectiveness. Here's a checklist to help you get ready:
## Legal and Financial Implications
Understanding the legal and financial implications of pre-purchase inspections is key in the home buying process. Here's how they play a role:
For a complete overview, see our [guide to pre-purchase building and pest inspections](/guides/pre-purchase-building-pest-inspection-guide).
### Maximising ROI in Geelong with Tax Depreciation Schedules
Source: https://ownerinspections.com.au/articles/maximizing-roi-in-geelong-with-tax-depreciation-schedules
Published: 2023-11-08 | Updated: 2026-02-09 | Category: Depreciation Schedule
Author: Maison Azdari
A [tax depreciation schedule](/depreciation-schedule) is a report prepared by a qualified quantity surveyor that details the annual depreciation deductions available on a [Geelong](/vic/building-inspections-geelong) investment property. It covers both capital works (the building structure) and plant and equipment (fixtures and fittings), and can return thousands of dollars in tax savings each year. For Geelong property investors, a professionally prepared depreciation schedule is one of the most effective ways to improve cash flow and increase overall return on investment (ROI) without spending a dollar on the property itself.
Geelong's property market has shown strong growth in recent years, with median house prices climbing significantly since 2020. With suburbs across the region delivering solid capital growth and rental returns, Geelong is an attractive market for property investors. However, many investors miss out on legitimate tax deductions simply because they have never had a depreciation schedule prepared. Whether you own a new build, an older home, or a recently renovated property, understanding how tax depreciation works can make a significant difference to your bottom line.
## What Is a Tax Depreciation Schedule?
A tax depreciation schedule is a document that outlines the depreciation deductions you can claim on an income-producing property each financial year. It is prepared by a qualified quantity surveyor and follows the guidelines set by the Australian Taxation Office (ATO).
Depreciation recognises that buildings and their contents lose value over time through wear and tear. The ATO allows property investors to claim this loss of value as a tax deduction, reducing their taxable income without requiring any actual out-of-pocket expense.
A typical depreciation schedule covers a 40-year period for capital works and lists the effective life and annual deduction for every eligible plant and equipment item in the property.
## Capital Works vs Plant and Equipment
Tax depreciation is split into two categories, each governed by different ATO rules.
## Why Tax Depreciation Matters for Geelong Investors
The financial impact of a depreciation schedule goes beyond simple tax savings. For Geelong investors, the benefits include:
For example, a Geelong investment property built in 2010 with a construction cost of $350,000 could generate approximately $8,750 per year in capital works deductions alone (2.5% of $350,000). Add plant and equipment deductions for items like carpet, blinds, and appliances, and the annual tax benefit can be even higher, particularly in the early years.
## How to Create an Effective Depreciation Schedule
Creating a depreciation schedule involves a series of steps, each handled by a qualified professional.
## Common Misconceptions About Tax Depreciation
Several myths prevent Geelong investors from claiming the deductions they are entitled to.
## Practical Tips for Geelong Property Investors
## Geelong's Property Market Outlook
Geelong has established itself as one of Victoria's strongest regional property markets. Strong population growth, major infrastructure investment (including the Geelong Fast Rail project), and growing employment opportunities have driven sustained demand for housing.
Suburbs across the Geelong region have delivered impressive capital growth, with some areas averaging 10% or more annually. For property investors, this combination of capital growth and accessible tax depreciation deductions makes Geelong a compelling market.
As the market continues to evolve, staying informed about both property conditions and the latest ATO rules will be important for maximising your investment returns.
### Tips for a Successful Slab Pre-Pour Inspection Process
Source: https://ownerinspections.com.au/articles/tips-for-a-successful-slab-pre-pour-inspection-process
Published: 2023-11-07 | Updated: 2026-02-12 | Category: Construction Inspections
Author: Maison Azdari
A slab pre-pour inspection is an independent assessment carried out after formwork, reinforcement, and moisture barriers are in place but before concrete is poured for a slab foundation. In Australia, this inspection verifies that the slab design complies with AS 2870 (Residential Slabs and Footings), checks steel reinforcement positioning, confirms formwork dimensions, and assesses soil compaction and site drainage. Pre-pour inspections typically start at $490 AUD and take up to two hours on site. They are one of the most important checkpoints in any residential construction project because once concrete is poured, defects become extremely expensive to rectify.
A slab foundation is a flat, thick layer of concrete poured directly onto prepared ground. It serves as both the structural footing and the floor of the building. Slab foundations are widely used across Australia because they provide stable support on a range of soil types, reduce the risk of differential settlement, and help minimise moisture penetration into the building. Getting the slab right is fundamental to the entire structure above it.
This guide covers everything you need to know about slab pre-pour inspections in Australia, including the types of slab foundations, the step-by-step inspection process, common challenges, costs, and how to prepare your site for a successful outcome.
## Why Slab Pre-Pour Inspections Matter
Once concrete has been poured and cured, correcting defects in the slab is disruptive, costly, and sometimes impossible without demolition. A reinforcement bar placed in the wrong position, a moisture barrier with tears, or formwork that has shifted even slightly can compromise the structural integrity of the entire building. These are not problems that surface immediately. They reveal themselves months or years later as cracking, moisture ingress, or uneven floors.
A pre-pour inspection catches these issues while the fix is still straightforward. Repositioning a reinforcement bar before the pour costs almost nothing. Replacing a section of torn vapour barrier takes minutes. Adjusting formwork that has shifted requires basic labour. Compare this to the cost of cutting into a cured slab to address reinforcement deficiencies or dealing with rising damp caused by a compromised moisture barrier. The difference can be tens of thousands of dollars.
Pre-pour inspections also provide documented evidence that the slab was constructed in accordance with the engineering drawings and AS 2870. This documentation is valuable for building surveyors, insurers, and future property owners.
## Types of Slab Foundations in Australia
The type of slab foundation used on a project depends on the soil classification, climate, structural loads, and engineering design. Understanding the different types helps explain what the inspector is looking for during a pre-pour inspection.
### Monolithic Slab
A monolithic slab is poured in a single operation, with the footing beams and the slab floor formed and poured simultaneously. This type of slab is common on stable soil classifications (Class A and Class S) where minimal ground movement is expected. Monolithic slabs are cost-effective and efficient to construct, but they require precise formwork and reinforcement placement because everything must be correct before the single pour begins.
### Frost-Protected Slab
Frost-protected slabs incorporate insulation around the perimeter and beneath the slab to prevent frost heave in cold climates. While less common in most of Australia, they are used in alpine regions of Victoria, New South Wales, and Tasmania where ground temperatures drop below freezing. The pre-pour inspection for a frost-protected slab includes verification of insulation placement, type, and continuity in addition to standard reinforcement and formwork checks.
### Post-Tension Slab
Post-tension slabs use high-strength steel cables (tendons) that are tensioned after the concrete has cured to compress the slab and resist cracking. This type of slab is designed for reactive soil classifications (Class H, Class E, and Class P) where significant ground movement is expected. Post-tension slabs require specialised inspection because the tendon layout, anchorage points, and duct positioning must all be verified before the pour. Incorrect tendon placement can result in catastrophic slab failure.
| Slab Type | Best Suited For | Soil Classification | Key Inspection Focus |
| --- | --- | --- | --- |
| Monolithic | Stable ground, standard residential | Class A, Class S | Formwork alignment, reinforcement spacing, moisture barrier |
| Frost-Protected | Cold climates, alpine regions | Various | Insulation placement, perimeter detailing, reinforcement |
| Post-Tension | Reactive and expansive soils | Class H, Class E, Class P | Tendon layout, anchorage points, duct positioning |
## The 6-Step Slab Pre-Pour Inspection Process
A thorough slab pre-pour inspection follows a systematic process that covers every element affecting the structural performance and longevity of the slab. Here is what the inspection involves, step by step.
## Key Elements Checked During the Inspection
The following table summarises the key elements that an inspector assesses during a slab pre-pour inspection and why each one matters.
| Element | What Is Checked | Why It Matters |
| --- | --- | --- |
| Soil compaction | Compaction test results, visual assessment of fill | Poorly compacted soil leads to differential settlement and slab cracking |
| Concrete mix | Grade, slump, admixtures per engineering specification | Incorrect mix design reduces slab strength and durability |
| Steel reinforcement | Bar size, spacing, cover, lap lengths, chair heights | Incorrect placement compromises structural capacity and corrosion resistance |
| Formwork | Dimensions, levels, bracing, beam widths and depths | Inaccurate formwork produces a slab that does not match the engineering design |
| Moisture barrier | Type, thickness, overlap, taping, penetration sealing | Compromised barrier allows moisture to rise through the slab, causing damage to floor coverings |
## Common Challenges Found During Pre-Pour Inspections
Pre-pour inspections frequently identify issues that would have gone undetected if the concrete had been poured without an independent check. The most common challenges fall into three categories.
### Soil Instability
Soil-related issues are among the most common findings. These include fill material that has not been adequately compacted, excavations that have been left open during rain (causing saturation and softening), and soil conditions that do not match the geotechnical report. On reactive clay sites (common across Melbourne, Adelaide, and western Sydney), even minor changes in moisture content can cause significant ground movement. If the inspector identifies soil instability, the pour should be delayed until the issue is addressed.
### Improper Formwork
Formwork problems include incorrect dimensions, insufficient bracing, edges that have been knocked out of alignment during reinforcement placement, and step-downs or rebates that do not match the engineering drawings. Formwork that moves during the pour results in a slab with incorrect dimensions, which can affect the entire building above.
### Incorrect Reinforcement
Reinforcement issues are the most frequently reported defects in pre-pour inspections. Common findings include bars placed at the wrong spacing, insufficient lap lengths at bar junctions, mesh sheets that have not been properly tied, bar chairs that have sunk into soft ground (reducing concrete cover), and missing additional reinforcement around penetrations or at re-entrant corners. These defects directly affect the structural capacity of the slab.
## Cost and Duration
Slab pre-pour inspections in Australia start at $490 AUD. The final cost depends on the size and complexity of the slab, the type of foundation (monolithic, post-tension, or waffle pod), and the location of the site. Post-tension slab inspections typically cost more due to the additional complexity of tendon layout verification.
| Factor | Detail |
| --- | --- |
| Starting cost | $490 AUD |
| Typical duration | Up to 2 hours on site |
| Report delivery | Within 24 to 48 hours |
| Applicable standard | AS 2870 (Residential Slabs and Footings) |
| Inspector qualifications | Licensed building inspector with structural knowledge |
The inspection itself typically takes up to two hours on site for a standard residential slab. Larger or more complex slabs, particularly post-tension designs, may require additional time. The inspection report is usually delivered within 24 to 48 hours and includes photographs, measurements, defect descriptions, and references to the applicable standards.
## How to Prepare Your Site for a Pre-Pour Inspection
Proper preparation helps the inspection run smoothly and avoids the need for a return visit. Before the inspector arrives, make sure the following items are in order:
Having the engineering drawings on site is particularly important. The inspector needs to verify reinforcement layouts, footing beam dimensions, and slab thicknesses against the approved design. Without these drawings, the inspection cannot be completed.
For a complete overview, see our [guide to construction stage inspections](/guides/construction-stage-inspections-guide).
### What Is NCAT and How Does It Resolve Building Disputes in NSW?
Source: https://ownerinspections.com.au/articles/understanding-nsw-civil-and-administrative-tribunal-ncat
Published: 2023-11-07 | Updated: 2026-07-15 | Category: Expert Witness
Author: Maison Azdari
A leaking shower, cracking render, or unfinished works can turn into months of emails, quotes, and arguments. When neither side will budge, many NSW owners and builders look at NCAT as the next step.
The NSW Civil and Administrative Tribunal, commonly known as NCAT, is the primary body responsible for resolving a wide range of disputes in New South Wales. For homeowners, builders, and property professionals dealing with building and construction disagreements, NCAT provides an accessible and cost-effective alternative to the traditional court system.
> NCAT was established in 2014 by consolidating 22 separate tribunals into a single body, creating a streamlined system for resolving disputes across New South Wales. Its formation was one of the most significant reforms to the NSW justice system in decades.
Whether you are a homeowner pursuing a claim for defective building work, a builder defending your workmanship, or a body corporate dealing with a strata dispute, understanding how NCAT operates is essential. This guide covers the tribunal's structure, jurisdiction, filing process, appeal mechanisms, and the role that expert witnesses play in building disputes heard before the tribunal.
>This article is general information only, not legal advice. For advice on your situation, speak with a NSW solicitor or a legal service provider.
## Key Takeaways
- NCAT replaced 22 separate tribunals in 2014, becoming the single tribunal for administrative and civil disputes in NSW.
- The Consumer and Commercial Division handles most building and construction disputes.
- Claims up to $500,000 can be heard in the Consumer and Commercial Division without requiring Supreme Court proceedings.
- Legal representation is not automatic in NCAT proceedings and requires leave of the tribunal in many cases.
- Expert witness reports and [Scott Schedules](/articles/how-scott-schedules-strengthen-construction-dispute-cases) are commonly used to present evidence in building disputes.
- An internal appeal process exists through the NCAT Appeal Panel before matters escalate to higher courts.
- Filing fees are generally lower than court filing fees, making NCAT a more accessible option for consumers.
## What is NCAT?
NCAT stands for the NSW Civil and Administrative Tribunal. It decides a wide range of civil and administrative cases in New South Wales and was created in 2014 by bringing together 22 former tribunals.
NCAT is set up to be more user-friendly than most courts, with plain language forms, support for self-representation, and a focus on resolving disputes fairly according to the law.
## How NCAT Was Established
NCAT commenced operations on 1 January 2014 under the [Civil and Administrative Tribunal Act 2013 (NSW)](https://legislation.nsw.gov.au/view/html/inforce/current/act-2013-002). Before its creation, New South Wales had 22 separate tribunals handling various types of disputes. These included the Consumer, Trader and Tenancy Tribunal (CTTT), the Administrative Decisions Tribunal (ADT), and the Guardianship Tribunal, among others.
The consolidation aimed to reduce duplication, simplify access for the public, and create consistent procedures across different dispute types. Rather than requiring individuals to identify which of 22 tribunals handled their particular issue, NCAT became the single point of entry for a broad range of matters.
The tribunal operates under the governance of a President, who must be a judge of the Supreme Court or the District Court of NSW. Deputy Presidents and senior members support the President in overseeing the tribunal's various divisions.
## Why Do People Go to NCAT?
People usually go to NCAT when they want a formal decision and the dispute hasn’t been resolved through direct negotiation or earlier dispute resolution steps.
Common reasons include:
- The other party will not fix defective or incomplete work.
- There is a disagreement about the scope of work, variations, delays, or payment.
- A strata committee or owners corporation needs orders about common property responsibilities.
- The dispute needs a legally binding outcome, not just another meeting.
NCAT is also designed to support self-representation in many matters, which can reduce cost barriers compared with running a case in court.
## What Does NCAT Do?
NCAT can make legally binding orders. In NSW home building matters, NCAT can make orders that deal with things like payment and defective work.
Examples of orders NCAT can make in home building cases include:
- Payment for home building work or services
- Orders about incomplete or defective home building work
- Orders about specialised work (electrical, plumbing, gasfitting, air conditioning)
- Orders about damage caused to other structures by home building work
- Insurance claim appeals (where relevant)
## NCAT and Building Disputes: What It Can and Cannot Hear
### 1. It mainly covers residential building work (not every construction dispute)
NCAT’s home building pathway is for residential building work in NSW.
Purely commercial building disputes often end up in courts or other processes depending on the contract and claim type.
### 2. The $500,000 cap for “building claims”
Under the Home Building Act, NCAT has jurisdiction to hear and determine a building claim where the amount claimed does not exceed $500,000 (unless regulations prescribe a different figure).
If the amount is higher, you may need advice about court options and which court has jurisdiction.
### 3. Statutory warranty time limits (including the extra 6 months)
For breaches of statutory warranties under the Home Building Act:
- The warranty period is 6 years for a major defect, and 2 years for other defects.
- The period generally starts on completion of the work.
- If the breach becomes apparent in the last 6 months of the warranty period, proceedings may be commenced within a further 6 months after the end of the warranty period.
Time limits can get complicated fast, especially where work stopped, contracts were terminated, or defects were discovered late. If a deadline is close, legal advice can be money well spent.
## Before You Apply: The Step Many People Miss
For home building disputes, NCAT says it cannot accept your application unless the dispute is first referred to NSW Fair Trading, unless the matter is exempt.
NCAT also lists common exemptions, including where the time for lodging a claim is due to expire within 3 months, certain debt recovery claims by a contractor, cross-claims, and some scenarios involving insolvency or deregistration.
#### Simple pathway table
| Stage | Goal | What to prepare |
| --- | ---- | ----- |
| 1. Raise the issue in writing | Create a clear paper trail | Emails, dated photos, contract clauses, requested fix |
| 2. Refer to NSW Fair Trading | Required step in most cases | Evidence of referral/investigation outcome |
| 3. Lodge at NCAT | Seek enforceable orders | Application, supporting evidence, correct party details |
| 4. Conciliation / directions | Narrow issues, settle if possible | Defect list, quotes, expert evidence if needed |
| 5. Hearing (if not resolved) | Decision based on evidence | Witnesses, expert reports, organised documents |
## NCAT Divisions and Their Functions
NCAT is organised into four main divisions, each handling specific types of disputes. Understanding which division handles your matter helps you prepare the right application and supporting evidence.
| Division | Types of Matters Handled | Common Examples |
| ------------------------------------ | -------------------------------------------------------------------- | ----------------------------------------------------------------------------------- |
| Administrative and Equal Opportunity | Government decisions, discrimination complaints, privacy matters | Review of administrative decisions, anti-discrimination complaints |
| Consumer and Commercial | Consumer claims, building disputes, strata matters, tenancy disputes | Defective building work, home building contract disputes, strata by-law enforcement |
| Guardianship | Decisions about people with disabilities | Guardianship orders, financial management orders |
| Occupational | Professional licensing and disciplinary matters | Complaints against licensed builders, disciplinary proceedings for tradespeople |
### Consumer and Commercial Division
The Consumer and Commercial Division is the most relevant division for building and construction disputes. This division absorbed the work previously handled by the CTTT and handles matters including:
- Home building disputes under the [Home Building Act 1989 (NSW)](https://legislation.nsw.gov.au/view/html/inforce/current/act-1989-147)
- Claims for defective or incomplete residential building work
- Disputes between homeowners and licensed contractors
- Strata scheme disputes under the Strata Schemes Management Act 2015
- General consumer claims related to goods and services
For building disputes, the Consumer and Commercial Division can hear claims with a value up to $500,000. Claims exceeding this amount generally need to be pursued through the NSW Supreme Court or District Court.
### Occupational Division
The Occupational Division is relevant to the building industry because it handles disciplinary proceedings against licensed builders and tradespeople. If [NSW Fair Trading](https://www.fairtrading.nsw.gov.au/) receives complaints about a licensed contractor and takes disciplinary action, the matter may be referred to this division.
This division can impose penalties including fines, licence suspensions, and licence cancellations. Builders and contractors facing proceedings in this division often rely on [expert witness reports](/expert-witness-reports) to defend their workmanship and demonstrate compliance with the Building Code of Australia (BCA) and relevant Australian Standards.
## NCAT Jurisdiction for Building Disputes
NCAT derives its jurisdiction from the enabling legislation that governs each type of dispute. For building and construction matters, the primary source of jurisdiction is the Home Building Act 1989 (NSW). This Act sets out the rights and obligations of homeowners and licensed contractors in relation to residential building work.
Under the Home Building Act, NCAT can make orders relating to:
- Payment of compensation for defective or incomplete work
- Rectification of building defects by the responsible contractor
- Completion of outstanding work under a building contract
- Payment of damages arising from breaches of statutory warranties
- Recovery of deposits or progress payments
The statutory warranties under the Home Building Act are particularly important. These warranties, which are implied into every residential building contract in NSW, require that work be performed with due care and skill, be fit for purpose, comply with the plans and specifications, and be completed within a reasonable time.
Homeowners have six years from the date of completion to bring a claim for a breach of a statutory warranty relating to a major defect, and two years for other defects. These limitation periods are strictly enforced by NCAT.
## How to File an Application at NCAT
Filing a matter at NCAT involves several steps. The process is designed to be accessible for individuals without legal representation, though seeking professional advice is always recommended for building disputes.
### Step 1: Identify the Correct Application Form
NCAT provides specific application forms depending on the type of dispute. For home building matters, the relevant form is typically the "Home Building" application available on the [NCAT website](https://www.ncat.nsw.gov.au/). Strata disputes have their own application forms, and general consumer claims use a different form again.
### Step 2: Gather Supporting Evidence
Before filing, you should gather all relevant documents. For a building dispute, this typically includes:
- The building contract and any variations
- Correspondence between the parties
- Photographs of the alleged defects
- Any expert reports or inspection reports
- Invoices, receipts, and proof of payments
- Relevant council approvals and certificates
A well-prepared Scott Schedule can be particularly valuable when presenting claims involving multiple defects. This document itemises each defect, its location, the relevant standard breached, and the estimated cost of rectification.
### Step 3: Pay the Filing Fee
NCAT filing fees vary depending on the type of application and the amount claimed. Fees for consumer claims are structured on a sliding scale. At the time of writing, the fees are considerably lower than the equivalent court filing fees, which is one of the key advantages of using the tribunal system.
Fee waivers and reductions are available in cases of financial hardship. Applicants seeking a fee waiver must provide evidence of their financial circumstances when submitting their application, especially if existing debts have made them consider a [Freedom Debt Relief Program](https://www.freedomdebtrelief.com/).
### Step 4: Serve the Application
Once filed, the application must be served on the other party (the respondent). NCAT provides guidance on acceptable methods of service, which may include personal service, post, or email in some circumstances.
## The NCAT Hearing Process
After an application is filed, NCAT typically schedules a directions hearing or conciliation conference before proceeding to a full hearing. This staged approach encourages parties to resolve disputes without the need for a contested hearing.
### Conciliation and Mediation
NCAT actively promotes alternative dispute resolution. Many building disputes are resolved at the conciliation stage, where a tribunal member facilitates discussion between the parties and helps them reach a mutually acceptable outcome. If conciliation is unsuccessful, the matter proceeds to a hearing.
### The Hearing
At the hearing, both parties present their evidence and arguments. NCAT hearings are less formal than court proceedings, but they still follow rules of evidence and procedural fairness. Parties may present oral evidence, call witnesses (including expert witnesses), and submit documents for the tribunal's consideration.
The tribunal member presiding over the hearing will ask questions, seek clarifications, and may request additional information or evidence before making a decision. Written reasons for the decision are typically provided after the hearing.
## Legal Representation at NCAT
One of the distinctive features of NCAT is that legal representation is not automatically permitted in all proceedings. In the Consumer and Commercial Division, parties generally represent themselves unless the tribunal grants leave (permission) for a lawyer to appear.
The tribunal may grant leave for legal representation where:
- The matter involves complex legal issues
- A party is unable to represent themselves due to a disability or language barrier
- The opposing party is a corporation or has legal representation
- The interests of justice require legal representation
For building disputes involving significant amounts or complex technical issues, the tribunal frequently grants leave for legal representation. Parties should apply for leave at the earliest opportunity if they intend to be legally represented.
Even when a party does not have a lawyer appearing at the hearing, they are permitted to obtain legal advice beforehand and have a lawyer assist with the preparation of their case, including drafting submissions and reviewing expert reports.
## Do You Need a Lawyer to Go to NCAT?
Often, no. Many people represent themselves at NCAT.
Two key points help avoid confusion:
- Anyone can get legal help or advice to prepare for NCAT without needing NCAT’s permission.
- Having a lawyer (or another representative) appear for you in the Consumer and Commercial Division usually requires NCAT to grant leave, with limited exceptions.
### When NCAT is more likely to allow representation
NCAT’s Consumer and Commercial Division guideline says the Tribunal will usually permit legal representation in situations such as:
- The dispute involves a claim for more than $30,000
- Another party is represented by an Australian legal practitioner
- The Tribunal thinks a party would be disadvantaged without representation
- Complex issues of law or fact are likely to arise
If you’re unsure, it’s common to get early legal advice on strategy and documents, even if you plan to appear yourself.
## The Role of Expert Witnesses in NCAT Proceedings
Expert witnesses play a significant role in NCAT building disputes. The tribunal regularly relies on expert evidence to understand technical matters such as whether building work complies with the BCA, whether defects exist, and what the cost of rectification would be.
### When Expert Witnesses Are Needed
Expert evidence is typically required when a dispute involves:
- Allegations of defective building work requiring technical assessment
- Questions about compliance with the BCA, Australian Standards, or other technical codes
- Valuation of the cost of rectifying defects
- Structural concerns requiring engineering analysis
- Waterproofing failures, rising damp, or moisture-related issues
- [Body corporate and strata building disputes](/articles/expert-witnesses-body-corporate-building-disputes)
### Preparing Expert Reports for NCAT
Expert witness reports submitted to NCAT must comply with the tribunal's practice directions and the expert witness code of conduct. The expert's primary duty is to the tribunal, not to the party that engaged them. Reports must be objective, well-reasoned, and based on the expert's genuine professional opinion.
A properly prepared expert report for NCAT typically includes:
- The expert's qualifications and experience
- A clear statement of the issues examined
- The methodology used in the inspection or assessment
- Factual findings and observations
- Professional opinions with supporting reasoning
- References to relevant standards, codes, and regulations
- A declaration that the expert has read and complied with the expert witness code of conduct
For a detailed explanation of what goes into an expert report, see our guide on [Expert Witness Reports Explained](/articles/legal-expert-witness-reports-explained).
### Joint Expert Conferences
In some cases, NCAT may direct the experts engaged by each party to attend a joint expert conference. During this conference, the experts discuss the issues in dispute and prepare a joint report identifying the matters on which they agree and disagree. This process helps narrow the issues before the hearing and can save significant time and costs.
## The NCAT Appeal Process
If a party is dissatisfied with a decision of NCAT, they may have the right to appeal. The appeal process within NCAT is handled by the Appeal Panel, which is a separate panel within the tribunal.
### Internal Appeals
An appeal to the NCAT Appeal Panel must generally be lodged within 28 days of the decision. The Appeal Panel can consider:
- Errors of law
- Errors of fact (with leave)
- Whether the decision was fair and equitable
- Whether fresh evidence is available that was not reasonably available at the original hearing
The Appeal Panel has the power to affirm, vary, or set aside the original decision. It can also remit the matter back to the original division for reconsideration.
### Appeals to the Courts
If a party remains dissatisfied after the NCAT Appeal Panel decision, further appeal rights may exist to the NSW Supreme Court, but only on questions of law. The Supreme Court does not rehear the factual merits of the dispute. This limited scope of court review reflects the legislature's intention that NCAT should be the primary decision-maker for the disputes within its jurisdiction.
## NCAT and Building Disputes: Practical Considerations
### Time Limits
Strict time limits apply to bringing claims at NCAT. For home building disputes, the limitation periods under the Home Building Act 1989 are:
- Six years for major defects (from the date of completion)
- Two years for other defects (from the date of completion)
These timeframes are not flexible. If a claim is filed after the limitation period has expired, NCAT will generally dismiss the application regardless of the merits of the claim.
### Costs
Unlike court proceedings, NCAT generally does not award legal costs to the successful party. Each party typically bears their own costs. This "no costs" rule is designed to encourage participation and reduce the financial risk of bringing or defending a claim.
There are exceptions. NCAT can award costs where a party has acted in a way that unnecessarily disadvantaged the other party, such as by failing to comply with tribunal directions, making frivolous claims, or engaging in conduct that caused unnecessary delay.
### Enforcement of NCAT Orders
NCAT orders are legally binding and enforceable. If the losing party does not comply with an NCAT order, the successful party can register the order with a court and enforce it as if it were a court judgement. This may include using enforcement mechanisms such as garnishee orders, writs for levy of property, or examination of the debtor.
## How Owner Inspections Supports NCAT Cases
At Owner Inspections, our licensed building inspectors regularly prepare expert witness reports for [NCAT building disputes](/articles/navigating-ncat-building-disputes-with-expert-witness-support). We provide independent, objective assessments of building work, defects, and compliance with the BCA and Australian Standards.
Our services for NCAT proceedings include:
- Independent building defect inspections and reports
- Expert witness reports compliant with NCAT practice directions
- Scott Schedules itemising defects and rectification costs
- Attendance at hearings to give oral evidence
- Participation in joint expert conferences
We understand the importance of presenting clear, well-supported evidence that assists the tribunal in reaching a fair and informed decision.
## Frequently Asked Questions
### What does NCAT stand for?
NCAT stands for the NSW Civil and Administrative Tribunal. It is the primary tribunal in New South Wales for resolving a wide range of administrative, consumer, commercial, and occupational disputes.
### When was NCAT established?
NCAT commenced operations on 1 January 2014 under the Civil and Administrative Tribunal Act 2013 (NSW). It was formed by consolidating 22 previously separate tribunals into a single body.
### What types of building disputes can NCAT hear?
NCAT can hear disputes relating to defective residential building work, breaches of building contracts, incomplete work, breaches of statutory warranties under the Home Building Act 1989, and strata scheme disputes. Claims up to $500,000 can be heard in the Consumer and Commercial Division.
### Do I need a lawyer to attend NCAT?
Legal representation is not automatically permitted at NCAT. In the Consumer and Commercial Division, you generally represent yourself unless the tribunal grants leave for a lawyer to appear. Leave is more commonly granted for complex matters or where the amount in dispute is significant.
### How much does it cost to file a claim at NCAT?
Filing fees vary depending on the type of application and the amount claimed. Fees are structured on a sliding scale and are generally lower than equivalent court filing fees. Fee waivers are available for applicants experiencing financial hardship.
### Can I appeal an NCAT decision?
Yes. Appeals can be made to the NCAT Appeal Panel within 28 days of the decision. The Appeal Panel can consider errors of law, errors of fact (with leave), and whether fresh evidence is available. Further appeals to the NSW Supreme Court are limited to questions of law.
### What is a Scott Schedule and why is it used at NCAT?
A [Scott Schedule](/articles/how-scott-schedules-strengthen-construction-dispute-cases) is a tabulated document that itemises each defect in a building dispute, including the location, description, relevant standard or code breached, and estimated cost of rectification. It is commonly used in NCAT building disputes to organise and present defect claims in a clear, structured format.
### How long does an NCAT case take to resolve?
The timeframe varies depending on the complexity of the dispute and the division handling the matter. Simple consumer claims may be resolved within a few months, while complex building disputes with expert evidence can take six to twelve months or longer.
### What is the difference between NCAT and the NSW courts?
NCAT is a tribunal, not a court. It is designed to be more accessible, less formal, and less expensive than court proceedings. NCAT generally does not award legal costs to the successful party, and legal representation requires leave in many cases. Courts have broader jurisdiction and more formal procedures.
### Can NCAT order a builder to fix defective work?
Yes. NCAT has the power to make rectification orders requiring a builder to fix defective work within a specified timeframe. If the builder fails to comply with the order, it can be enforced as a court judgement.
### What evidence do I need for an NCAT building dispute?
You should gather the building contract, any variations, all correspondence, photographs of defects, expert reports, inspection records, invoices, and proof of payments. An [expert witness report](/articles/legal-expert-witness-reports-explained) from a qualified building inspector is strongly recommended for claims involving building defects.
### Does NCAT handle disputes for commercial building work?
NCAT's jurisdiction under the Home Building Act primarily covers residential building work. Disputes involving purely commercial building work are generally pursued through the NSW courts or other dispute resolution mechanisms such as arbitration.
---
Need expert witness support for an NCAT building dispute? [Contact Owner Inspections](/expert-witness-reports) to speak with a licensed building inspector.
For a complete overview, see our [guide to expert witness reports for building disputes](/guides/expert-witness-building-disputes-guide).
### Asbestos Inspections: Identifying Health Hazards in Australian Homes
Source: https://ownerinspections.com.au/articles/asbestos-inspections-to-identify-health-hazards
Published: 2023-11-05 | Updated: 2026-02-12 | Category: Building Inspections
Author: Maison Azdari
Asbestos inspections are professional assessments that identify asbestos-containing materials (ACMs) in buildings constructed before the year 2000. In Australia, asbestos was widely used in residential and commercial construction from the 1940s through to the mid-1980s, and products containing asbestos were not fully banned until 31 December 2003. An estimated one in three Australian homes contains some form of asbestos. When left undisturbed and in good condition, these materials may not pose an immediate risk. However, renovation, demolition, weathering, or accidental damage can release microscopic fibres into the air, causing serious and often fatal diseases including asbestosis, lung cancer, and mesothelioma.
Asbestos-related diseases claim the lives of around 4,000 Australians each year, making it one of the most significant occupational and residential health hazards in the country. For anyone planning renovations, purchasing an older property, or managing a commercial building, an asbestos inspection is a practical and often legally required step to protect occupants, workers, and the broader community.
This guide explains who needs an asbestos inspection, the types of asbestos found in Australian buildings, the health risks, where asbestos is commonly located, the legal requirements across states, what the inspection process involves, and how safe removal works.
## Who Needs an Asbestos Inspection?
Not every property owner will need an asbestos inspection, but several groups should treat it as a priority.
**Homeowners planning renovations** on any property built before 2000 should have an inspection before work begins. Drilling, cutting, sanding, or removing materials that contain asbestos releases fibres into the air. Even minor projects like replacing a bathroom vanity or pulling up old vinyl tiles can disturb ACMs.
**Property buyers** considering homes built before 2000 should request an asbestos assessment as part of their [pre-purchase inspection checklist](/articles/pre-purchase-inspection-checklist-for-buyers). Knowing the location and condition of any ACMs allows buyers to factor management or removal costs into their purchase decision.
**Commercial property managers** have a legal obligation under the Work Health and Safety Act 2011 to maintain an asbestos register for any workplace building constructed before 2004. This register must be reviewed and updated regularly.
**Government bodies and councils** managing public assets, schools, and community buildings are required to identify and manage asbestos risks across their property portfolios.
## Three Primary Types of Asbestos
Asbestos is not a single material. It is a group of naturally occurring silicate minerals that were valued for their heat resistance, tensile strength, and insulating properties. Three types were commonly used in Australian construction.
### Chrysotile (White Asbestos)
Chrysotile is the most commonly used form of asbestos worldwide and accounts for roughly 95% of asbestos found in Australian buildings. Its flexible, curly fibres made it suitable for a wide range of products. It is found in roofing sheets, ceiling panels, vinyl floor tiles and backing, wall cladding, brake linings, and cement pipes. While all forms of asbestos are hazardous, chrysotile fibres are generally considered less persistent in lung tissue than amphibole varieties. They remain dangerous and can cause all asbestos-related diseases with sufficient exposure.
### Amosite (Brown Asbestos)
Amosite was the second most commonly used type in Australia. Its straight, needle-like fibres made it particularly effective as thermal insulation. It is found in cement sheets, pipe insulation, ceiling tiles, and thermal insulation boards. Amosite fibres are more durable in lung tissue than chrysotile and are associated with a higher risk of mesothelioma.
### Crocidolite (Blue Asbestos)
Crocidolite is regarded as the most hazardous form of asbestos. Its extremely fine, sharp fibres penetrate deep into lung tissue and are highly resistant to the body's natural clearance mechanisms. It was used in pipe lagging, spray-on coatings, insulation for steam engines, and some cement products. Crocidolite was mined extensively at Wittenoom in Western Australia until the mine closed in 1966. Its use in construction declined earlier than other types due to recognised health concerns.
| Asbestos Type | Common Name | Fibre Shape | Common Locations | Relative Risk |
| --- | --- | --- | --- | --- |
| Chrysotile | White | Curly, flexible | Roofing, ceilings, vinyl tiles, wall cladding | Lower (still hazardous) |
| Amosite | Brown | Straight, needle-like | Cement sheets, pipe insulation, thermal boards | Higher |
| Crocidolite | Blue | Very fine, sharp | Pipes, spray coatings, insulation | Highest |
## Health Risks of Asbestos Exposure
Asbestos fibres are so small that they are invisible to the naked eye. When inhaled, they lodge in the lung tissue and remain there permanently. The body cannot break them down or expel them. Over time, these fibres cause inflammation, scarring, and cellular damage that can lead to three primary diseases.
### Asbestosis
Asbestosis is a chronic, progressive lung disease caused by the inhalation of asbestos fibres over an extended period. The fibres cause scarring (fibrosis) of the lung tissue, which reduces the lungs' ability to expand and contract. Symptoms include shortness of breath, a persistent dry cough, chest tightness, and fatigue. There is no cure for asbestosis, and the condition worsens over time. It is most commonly seen in workers who had prolonged occupational exposure, but it can also develop from sustained residential exposure.
### Lung Cancer
Asbestos exposure significantly increases the risk of developing lung cancer, particularly in individuals who also smoke. The combination of asbestos exposure and smoking creates a multiplicative rather than additive increase in risk. Lung cancer from asbestos exposure typically develops 15 to 35 years after initial exposure, making it difficult to trace the source without a thorough occupational and residential history.
### Mesothelioma
Mesothelioma is a rare and aggressive cancer that develops in the lining of the lungs (pleural mesothelioma), abdomen (peritoneal mesothelioma), or heart (pericardial mesothelioma). It is almost exclusively caused by asbestos exposure. Australia has one of the highest per capita rates of mesothelioma in the world, a direct consequence of the country's extensive asbestos mining and construction history. The latency period for mesothelioma can be 20 to 50 years, meaning individuals exposed decades ago are still being diagnosed today. The median survival time after diagnosis is 12 to 18 months.
## Common Locations of Asbestos in Buildings
Asbestos was used in over 3,000 different products in Australia. Knowing where to look is the first step in managing the risk.
### Residential Properties
In homes built before 1990 (and some built up to 2000), asbestos-containing materials are commonly found in:
### Commercial Properties
In commercial buildings, asbestos was used more extensively due to its fireproofing and insulating properties:
For a broader understanding of what building inspections cover, see our guide on [what a building inspection covers](/articles/what-does-a-building-inspection-cover).
## Friable vs Non-Friable Asbestos
The risk posed by asbestos-containing materials depends largely on whether the material is friable or non-friable.
### Friable Asbestos
Friable asbestos can be crumbled, pulverised, or reduced to powder by hand pressure when dry. This means fibres can become airborne with minimal disturbance. Friable materials include loose-fill insulation (such as "Mr Fluffy" loose-fill, which affected thousands of homes in the ACT and NSW), spray-on insulation and fireproofing, pipe lagging, and damaged or deteriorating asbestos products that were originally non-friable.
Friable asbestos presents the highest risk and requires the most stringent handling, removal, and disposal procedures. Only Class A licensed removalists are permitted to remove friable asbestos in Australia.
### Non-Friable (Bonded) Asbestos
Non-friable asbestos has the fibres firmly bound within a matrix, typically cement or vinyl. In good condition and left undisturbed, non-friable asbestos poses a low risk because the fibres are locked in place. Common examples include fibro cement sheeting (flat and corrugated), vinyl floor tiles, and cement pipes.
However, non-friable asbestos becomes hazardous when it is cut, drilled, sanded, broken, or allowed to deteriorate through weathering. Power tools used on non-friable asbestos can generate large quantities of airborne fibres in seconds. Class B licensed removalists handle non-friable asbestos removal.
| Classification | Description | Examples | Risk Level | Removal Licence Required |
| --- | --- | --- | --- | --- |
| Friable | Crumbles easily by hand when dry | Loose-fill insulation, spray-on coatings, pipe lagging | High | Class A |
| Non-Friable (Bonded) | Fibres bound in cement or resin matrix | Fibro sheets, vinyl tiles, cement pipes | Low (when intact) | Class B |
## Legal Requirements Across Australia
Australian law imposes specific obligations on property owners, employers, and anyone involved in construction or demolition work where asbestos may be present.
### Work Health and Safety Act 2011
The model Work Health and Safety (WHS) Act, adopted by most states and territories, requires that any person conducting a business or undertaking (PCBU) must identify asbestos or ACMs at the workplace and maintain an asbestos register. Before any demolition or renovation work on a building constructed before 2004, the person commissioning the work must arrange for an asbestos inspection to identify any ACMs that may be disturbed.
### State and Territory Variations
While the WHS framework provides national consistency, state-specific regulations add further requirements:
**New South Wales:** SafeWork NSW oversees asbestos regulations. The Work Health and Safety Regulation 2017 (NSW) requires an asbestos register for all workplaces and mandates that a competent person identify ACMs before renovation or demolition. The NSW Government's Loose Fill Asbestos Insulation Taskforce addressed the "Mr Fluffy" contamination affecting homes in the state.
**Victoria:** WorkSafe Victoria administers the Occupational Health and Safety Regulations 2017 (Vic). The regulations require workplace asbestos identification, registers, and management plans. Victoria also requires asbestos removal to be carried out by licensed removalists and notification to WorkSafe before removal begins.
**Queensland:** Workplace Health and Safety Queensland and the QBCC regulate asbestos in workplaces and residential properties. Queensland's regulations require that a competent person identify ACMs before any refurbishment or demolition work.
### Seller Disclosure Obligations
In most Australian states, sellers are required to disclose known information about the presence of asbestos in a property. While the extent of disclosure obligations varies, failure to disclose known asbestos can expose sellers to legal liability. Buyers should always request a [comprehensive building inspection](/articles/a-comprehensive-guide-to-house-inspections) that includes an assessment of potential ACMs.
## The Asbestos Inspection Process
A professional asbestos inspection follows a structured process designed to identify all ACMs within a property and assess the risk they pose.
### Step 1: Engage a Qualified Inspector
The inspector should be a competent person as defined under the WHS Regulations. In practice, this means someone with formal training in asbestos identification and assessment, typically holding a qualification such as the Identification of Asbestos in the Workplace (or equivalent). Many building inspectors hold this qualification alongside their building inspection licence.
### Step 2: Initial Property Assessment
The inspector conducts a thorough visual assessment of the entire property, noting the age and construction type, the condition of materials, and any areas where asbestos is likely to be present based on the building's era and construction methods. The inspector examines both accessible and semi-accessible areas including roof spaces, subfloor areas, wall cavities (where accessible), and external structures.
### Step 3: Material Sampling and Laboratory Testing
Where materials are suspected of containing asbestos, the inspector collects small samples using controlled methods that minimise fibre release. Samples are sealed in labelled containers and sent to a NATA-accredited laboratory for analysis. The laboratory uses polarised light microscopy (PLM) or other approved methods to confirm the presence and type of asbestos fibres. Visual identification alone is not reliable, as many ACMs are visually indistinguishable from non-asbestos alternatives.
### Step 4: Detailed Report and Risk Assessment
The inspector produces a comprehensive report that includes:
## Safe Removal of Asbestos
Once asbestos has been identified, the property owner must decide whether to manage it in place or have it removed. Removal is recommended when the material is damaged, deteriorating, friable, or likely to be disturbed by planned works.
### Professional Removal Is Mandatory
In Australia, asbestos removal must be carried out by licensed removalists. DIY removal is strongly discouraged and, for friable asbestos and quantities exceeding 10 square metres of non-friable material, is illegal. Licensed removalists follow strict procedures that include:
### Removal Cost Considerations
Asbestos removal costs vary depending on the type (friable vs non-friable), quantity, accessibility, and location. As a general guide:
| Removal Type | Typical Cost Range (AUD) | Licence Required |
| --- | --- | --- |
| Non-friable (small area, e.g. bathroom splashback) | $500 to $1,500 | Class B |
| Non-friable (full roof replacement) | $5,000 to $15,000 | Class B |
| Non-friable (whole house re-cladding) | $10,000 to $30,000 | Class B |
| Friable (pipe lagging, insulation) | $5,000 to $20,000+ | Class A |
| Friable (loose-fill removal, e.g. Mr Fluffy) | $50,000 to $150,000+ | Class A |
These costs should be factored into any renovation budget or purchase price negotiation for pre-2000 properties.
## Asbestos Management Plans
For commercial properties and workplaces, a formal asbestos management plan is required under WHS legislation. The plan must include:
The management plan must be readily accessible to workers and anyone who may disturb ACMs during maintenance or renovation work.
## Frequently Asked Questions
### The Economic Cost of Termite Infestation
Source: https://ownerinspections.com.au/articles/the-economic-cost-of-termite-infestation
Published: 2023-10-26 | Updated: 2026-05-28 | Category: Pest Inspections
Author: Maison Azdari
What is the real termite damage repair cost in Australia, and why do some homeowners only find out after the bill is already painful?
Termites can damage timber framing, floors, roof timbers, skirting boards, door frames, window frames and subfloor areas before many owners notice visible signs. Standards Australia says Australia has about 350 termite species, and about 30 have achieved pest status because they can attack timber and timber products.
This guide updates the economic cost of termite infestation with a stronger focus on the searches people are already using, including termite damage repair cost, cost to fix termite damage, termite treatment cost Australia and termite inspection cost.
Book a Defect
Investigation
}
buttonHref="/defect-investigation-reports"
variant="secondary"
/>
## Termite Cost Snapshot for Australian Homes
Use this table as a planning guide only. Final termite repair cost, treatment cost and inspection cost depend on the property size, access, damage level, location and the advice of a qualified inspector, licensed pest controller or builder.
| Cost area | Typical planning range | What affects the price |
| ------------------------------------- | -----------------------------------: | ------------------------------------------------------------------ |
| [Timber pest inspection](/timber-pest-inspections) | $250 to $500 | Property size, access, location, report detail |
| Combined [building and pest inspection](/building-and-pest-inspections) | $400 to $700 | Property type, age, location and access |
| Localised termite treatment | $500 to $1,500 | Size of affected area and access |
| Chemical barrier or soil treatment | $800 to $2,000 | Perimeter size, slab edges, trenching and drilling |
| Baiting or monitoring system | $1,500 to $3,000 plus service visits | Number of stations and monitoring frequency |
| Minor termite repairs | $1,000 to $5,000 | Skirting, architraves, small wall or door frame sections |
| Moderate termite damage repairs | $5,000 to $30,000 | Flooring, joists, wall framing or several affected rooms |
| Severe structural damage | $30,000 to $100,000 plus | Bearers, subfloor, wall frames, roof structure or major rebuilding |
NSW Government advice for buyers is to [know the condition of a property](https://www.nsw.gov.au/housing-and-construction/buying-and-selling-property/buying-property-nsw/inspecting-a-property) before buying so they can avoid later problems and extra costs.
## Termite Damage Repair Cost Breakdown
The cost to fix termite damage changes based on what has been attacked. Surface damage can be manageable, but structural damage can become expensive because walls, floors or ceilings may need to be opened before repairs can be completed.
| Damaged area | Possible repair work | Typical planning range |
| -------------------------------- | ------------------------------------------------------------ | ---------------------------------------: |
| Skirting boards and architraves | Remove affected trim, replace timber, paint finish | $1,000 to $3,000 |
| Door or window frames | Replace damaged frame sections, repaint and refit | $500 to $5,000 per opening |
| Wall framing | Remove plasterboard, replace studs, repair finishes | $3,000 to $15,000 |
| Floorboards or particleboard | Replace affected flooring and check joists | $75 to $200 per sqm for surface flooring |
| Floor joists and subfloor | Replace joists, bearers or subfloor areas | $1,000 to $30,000 plus |
| Roof trusses or structural beams | Builder or engineer assessment, temporary support and repair | $3,000 to $50,000 plus |
| Severe structural damage | Major reconstruction and possible temporary relocation | $50,000 to $100,000 plus |
The higher end of termite damage cost usually appears when active termites have affected load-bearing parts of the home. Standards Australia says termite colonies that infest buildings usually begin outside and enter structures via the ground, which is why subfloor, perimeter and slab-edge areas matter.
## Termite Damage and Treatment Cost Comparison
The following table provides a comprehensive overview of termite-related costs, comparing
prevention measures, treatment options, and repair expenses. This comparison clearly
demonstrates the economic advantage of proactive termite management.
| Category | Service/Repair Type | Cost Range | Frequency/Notes |
| ----------------------------- | ----------------------- | ------------------------------------ | ----------------------- |
| Prevention | Professional inspection | $250 to $500 | Annual (minimum) |
| Preventative chemical barrier | $1,500 to $5,000 | Every 5 to 8 years |
| Monitoring stations | $1,000 to $2,500 | Installation plus annual checks |
| Physical barriers (new build) | $2,000 to $4,000 | 50+ year lifespan |
| Treatment | Chemical barriers | $800 to $2,000 | Perimeter treatment |
| Baiting systems | $1,500 to $3,000 | Plus $300 to $500 annual maintenance |
| Fumigation | $3,000 to $6,000+ | Severe infestations |
| Localised treatment | $500 to $1,500 | Targeted areas only |
| Repairs | Foundation repairs | $5,000 to $20,000 | Stumps, bearers, joists |
| Structural framing | $3,000 to $15,000 | Studs, trusses, beams |
| Wall repairs | $1,000 to $5,000 | Per affected area |
| Floor repairs (surface) | $75 to $200/sqm | Flooring replacement |
| Floor joists/subflooring | $1,000 to $10,000 | Structural floor repairs |
| Doors and windows | $500 to $5,000 each | Frame and unit replacement |
| Severe structural damage | $50,000 to $100,000+ | Major reconstruction |
## Termite Damage Repair Cost Calculator
This simple termite damage repair cost calculator helps owners understand where the bill may sit before they arrange quotes. It is not a replacement for an inspection report.
| Damage level | Signs you might see | Cost guide | Best next step |
| ------------ | ---------------------------------------------------------------------------- | -----------------------: | -------------------------------------------------------------------------------- |
| Low | Damaged skirting, minor door frame damage, isolated hollow timber | $1,000 to $5,000 | Book a timber pest inspection and request a treatment plan if activity is active |
| Medium | Several affected rooms, damaged flooring, visible mud tubes, moisture issues | $5,000 to $30,000 | Get inspection findings, pest treatment advice and repair quotes |
| High | Sagging floors, damaged joists, wall framing damage, roof timber concern | $30,000 to $100,000 plus | Seek urgent inspection, pest controller advice and licensed builder assessment |
Consumer Affairs Victoria says a written inspection report can list faults, whether they can be repaired and how much repairs are likely to cost.
## Termite Treatment Cost in Australia
Termite treatment cost in Australia depends on whether the aim is to treat active termites, reduce future risk or maintain an existing termite management system.
| Treatment type | Typical planning range | Best suited to | Notes |
| --------------------------- | ---------------------: | ------------------------------------ | ---------------------------------- |
| Localised treatment | $500 to $1,500 | Small confirmed activity area | Usually part of a broader plan |
| Chemical soil treatment | $800 to $2,000 | Homes needing perimeter treatment | May involve trenching or drilling |
| Baiting system | $1,500 to $3,000 | Colony management and monitoring | May need service visits |
| Monitoring and maintenance | $300 to $500 per year | Ongoing risk management | Cost varies by system and provider |
| Severe infestation response | $3,000 to $6,000 plus | Large or hard-to-access infestations | Treatment plan should be written |
### Chemical Barriers
Chemical soil treatments create a continuous barrier around the perimeter of your home, killing termites as they attempt to enter.
- **Cost range:** $800 to $2,000 for a standard residential property
- **How it works:** Termiticide is injected into the soil around foundations and entry points
- **Effective period:** Typically 5 to 8 years depending on the product and soil conditions
- **Advantages:** Immediate protection, relatively affordable, proven effectiveness
- **Considerations:** Requires drilling through concrete slabs in some areas
### Baiting Systems
Termite baiting systems use strategically placed stations containing cellulose material laced with slow-acting insecticide. Termites consume the bait and spread it throughout the colony.
- **Installation cost:** $1,500 to $3,000
- **Annual maintenance:** $300 to $500 for monitoring and bait replenishment
- **How it works:** Stations are placed around the property perimeter and monitored regularly
- **Advantages:** Environmentally friendly, targets entire colony, continuous monitoring
- **Timeline:** May take several months to eliminate an established colony
### Fumigation
Whole-structure fumigation is reserved for severe infestations, particularly those involving drywood termites that live entirely within timber.
- **Cost range:** $3,000 to $6,000 or more for larger properties
- **Process:** The building is sealed and filled with fumigant gas for 24 to 72 hours
- **Requirements:** Occupants must vacate during treatment and for a period afterwards
- **Advantages:** Highly effective for eliminating all termites within the structure
- **Limitations:** Does not provide residual protection against reinfestation
## Proactive Measures: The Economics of Prevention
The most cost-effective approach to termite management is prevention through regular inspections and proactive treatments. The numbers clearly demonstrate that investing in prevention saves thousands of dollars compared to reactive repairs.
### Professional Inspections
Regular professional termite inspections are the cornerstone of effective termite management. A qualified inspector can detect early signs of termite activity before significant damage occurs.
- **Cost range:** $250 to $500 per inspection
- **Recommended frequency:** Annual for most properties, six-monthly for high-risk areas
- **What is included:** Comprehensive assessment of all accessible areas, written report, recommendations
- **Value proposition:** A $350 inspection could prevent $50,000 or more in damage
### Preventative Treatments
Installing a termite management system before an infestation occurs provides ongoing protection at a fraction of the cost of remediation.
- **Cost range:** $1,500 to $5,000 for comprehensive protection
- **Options include:** Chemical barriers, physical barriers, monitoring systems
- **Protection period:** 5 to 50+ years depending on the system
- **Return on investment:** Potentially saves tens of thousands in repair costs
### Cost Comparison: Prevention vs Remediation
Over a 10-year period, the cost difference between prevention and remediation is stark:
| Approach | 10-Year Cost | Outcome |
| ------------------------------- | -------------------- | ------------------------------------------ |
| Prevention strategy | $5,000 to $8,000 | Continuous protection, peace of mind |
| No prevention (moderate damage) | $20,000 to $50,000 | Treatment plus repairs, stress, disruption |
| No prevention (severe damage) | $50,000 to $100,000+ | Major reconstruction, potential relocation |
## Termite Inspection Cost and Why It Matters
The cost of termite inspection is usually much lower than the cost to repair termite damage. A timber pest inspection checks accessible areas for evidence of termites, timber damage and risk conditions.
Consumer Affairs Victoria advises buyers to consider a professional pest inspection to check for termites or other infestations before signing a contract.
NSW Government also tells buyers to inspect a property before purchase so they know about the home’s condition before buying.
## Why Termite Infestation Cost Can Grow Fast
The economic cost of termite infestation grows when termites stay hidden. The first visible sign might be bubbling paint, a sticking door, a soft floor or hollow-sounding timber. By that stage, damage may already be behind plasterboard, under flooring or inside the roof space.
Australia has one of the highest termite infestation rates in the world. The combination of climate, native termite species, and building practices creates conditions that favour termite activity.
### CSIRO Research Findings
According to research from the Commonwealth Scientific and Industrial Research Organisation (CSIRO), the statistics are sobering:
- **One in three** Australian homes will experience termite attack during their lifetime
- **Over 350 termite species** exist in Australia, with approximately 30 causing structural damage
- **$1.5 billion or more** in damage occurs annually across Australian properties
- **Higher risk in northern regions** such as Queensland, Northern Territory, and northern New South Wales
### Regional Risk Variations
Termite risk varies significantly across Australia, with some regions experiencing substantially higher rates of infestation:
| Region | Risk Level | Recommended Inspection Frequency |
| ---------------------------------------------------- | ---------------- | -------------------------------- |
| Queensland (particularly coastal and tropical areas) | Very High | Every 6 months |
| Northern Territory | Very High | Every 6 months |
| Northern New South Wales | High | Every 6 to 12 months |
| Sydney and Greater NSW | High | Annual |
| Victoria | Moderate to High | Annual |
| South Australia | Moderate to High | Annual |
| Western Australia | Moderate to High | Annual |
| Tasmania | Low to Moderate | Annual |
### Climate Factors
Several climate factors contribute to Australia's high termite risk:
- **Warm temperatures:** Termites thrive in temperatures above 25 degrees Celsius
- **Humidity:** High moisture levels support termite colony growth and activity
- **Seasonal patterns:** Warmer months see increased termite activity and swarming
- **Extended summers:** Climate change is expanding termite activity seasons
View Expert
Witness Reports
}
buttonHref="/expert-witness-reports"
variant="secondary"
/>
## Prevention vs Repair Costs
Termite prevention treatment cost can look like an extra expense until it is compared with a repair bill. Regular inspections, moisture control, good drainage and a managed termite protection system can reduce the chance of hidden damage reaching structural areas. For ongoing property checks, see Owner Inspections’ [maintenance inspections](/maintenance-inspections).
| Approach | 10-year planning cost | Possible outcome |
| ---------------------------------- | -----------------------: | --------------------------------------------------------------- |
| Regular inspections and prevention | $5,000 to $8,000 | Earlier detection and lower repair risk |
| No prevention with moderate damage | $20,000 to $50,000 | Treatment, repairs and disruption |
| No prevention with severe damage | $50,000 to $100,000 plus | Major repairs, possible engineering advice and relocation costs |
Regular pest inspections, ideally annually, are among the steps that may help prevent pest damage.
[AS 3660.2](https://www.standards.org.au/news/australias-termite-management-standard-revised) gives guidance for detection and management of termite activity in and around existing buildings and structures.
## Does Home Insurance Cover Termite Damage?
One of the most significant financial risks associated with termite damage is the lack of insurance coverage. Understanding what your policy does and does not cover is essential for financial planning.
Most homeowners should not assume termite damage is covered by home insurance. Many policies exclude insect, vermin or pest damage because it is seen as gradual damage or maintenance-related damage.
- Home insurance does not cover damage caused by insects, vermin or rodents, and gives termite infestation eating timber as an example.
- Policy buyers should check exclusions, caps, limits and the product disclosure statement to [understand what is not covered](https://moneysmart.gov.au/home-insurance/choosing-home-insurance).
### Standard Home Insurance Exclusions
Most standard home and contents insurance policies in Australia specifically exclude termite damage. This exclusion typically appears in the policy wording under sections covering pests, vermin, or maintenance-related damage.
- **Termite damage:** Excluded from virtually all standard policies
- **Other pest damage:** Usually also excluded (borers, rodents, etc.)
- **Maintenance issues:** Damage from lack of maintenance is not covered
- **Gradual deterioration:** Policies cover sudden events, not gradual damage
### Why Insurers Exclude Termite Damage
Insurance companies exclude termite damage for several reasons:
- Termite damage is considered preventable through regular inspections and treatment
- The damage occurs gradually over time, not as a sudden, unexpected event
- Including coverage would significantly increase premiums for all policyholders
- Prevention is viewed as a homeowner maintenance responsibility
### Specialist Coverage Options
While rare, some specialist insurance products or warranty programmes may offer termite-related coverage:
- **Termite treatment warranties:** Some pest control companies offer damage warranties with their treatment programmes
- **Builder warranties:** May cover termite management systems in new homes for limited periods
- **Specialist policies:** Limited specialist products exist but often have significant conditions
> Important: Always check your specific policy wording and speak with your insurer about
> exactly what is and is not covered. Do not assume any coverage exists for termite damage
> without written confirmation.
## Long-term Financial Impact
The financial consequences of termite infestation extend well beyond immediate repair costs. Understanding the long-term economic impact helps property owners appreciate the full value of prevention.
### Property Value Impact
A history of termite damage can significantly affect property values and saleability:
- **Disclosure requirements:** In most Australian states, sellers must disclose known termite history
- **Reduced buyer interest:** Many buyers avoid properties with termite history
- **Lower sale prices:** Properties with past termite damage typically sell for less
- **Extended time on market:** Termite history can delay property sales
- **Lending impacts:** Some lenders may require termite inspections or impose conditions
### Ongoing Maintenance Costs
Properties with termite history often face increased ongoing costs:
- **More frequent inspections:** Six-monthly instead of annual inspections recommended
- **Continuous treatment:** Active monitoring and treatment programmes required
- **Structural monitoring:** Ongoing assessment of repaired areas
- **Higher vigilance:** Additional time and attention to property maintenance
### Collateral Costs
Beyond direct repair costs, termite damage often generates additional expenses:
- **Temporary accommodation:** $1,000 to $5,000 or more during major repairs
- **Storage costs:** $200 to $500 per month for furniture and belongings
- **Lost rental income:** Investment property owners face significant income loss
- **Professional fees:** Structural engineer reports, building consultants
- **Stress and disruption:** The intangible cost of dealing with major repairs
## Australian Termite Statistics and Facts
Understanding the scope of the termite problem in Australia helps put the economic impact into perspective. These statistics highlight why termite management should be a priority for every property owner.
### Key Statistics
- **Annual damage cost:** Termites cause an estimated $1.5 billion or more in damage to Australian properties each year
- **Homes at risk:** One in three Australian homes will experience termite attack during their lifetime (CSIRO)
- **Species count:** Australia has over 350 termite species, with approximately 30 causing structural damage
- **Colony size:** A mature termite colony can contain over one million individuals
- **Consumption rate:** A large colony can consume over 200 grams of timber per day
- **Speed of destruction:** Significant structural damage can occur within 3 to 6 months of infestation
- **Detection difficulty:** Up to 80% of termite damage is hidden within walls, floors, and roof spaces
- **Insurance gap:** Standard home insurance does not cover termite damage, leaving homeowners fully exposed
- **Inspection rate:** Many homeowners fail to get annual inspections, despite the proven benefits
- **Prevention effectiveness:** Regular inspections and treatments prevent the majority of termite damage
### Termite Activity Patterns
Understanding when termites are most active helps with planning inspections:
- **Peak activity:** Spring and summer months (September to February) see increased termite activity
- **Swarming season:** Reproductive termites typically swarm in late spring and early summer
- **Year-round risk:** In northern Australia, termites remain active throughout the year
- **Weather triggers:** Warm, humid conditions following rain often trigger increased activity
## When to Book a Timber Pest Inspection
Book a timber pest inspection when buying a property, before selling a property, after seeing possible termite signs or before spending money on major repairs.
Common warning signs include:
- Bubbling or blistered paint
- Hollow-sounding timber
- Mud tubes around walls, piers or foundations
- Soft or sagging floors
- Doors or windows that start sticking
- Discarded wings near windows or lights
- Moisture issues under the house or near external walls
## The Bottom Line: Prevention vs Remediation
The economics of termite management are clear: prevention is always more cost-effective than remediation. Consider this comparison over a typical 10-year property ownership period:
### Prevention Strategy Costs
- Annual inspections (10 years at $350): $3,500
- Preventative treatment (one application): $2,500
- **Total prevention investment: $6,000**
### Remediation Costs (Average Scenario)
- Discovery after 3 years of undetected infestation
- Treatment costs: $2,500
- Moderate repair costs: $35,000
- Temporary accommodation: $2,000
- Follow-up inspections and monitoring: $3,000
- **Total remediation cost: $42,500**
The prevention strategy costs approximately $6,000 over 10 years. The remediation scenario costs over $42,000 and involves significant stress and disruption. Prevention provides a return on investment of over 600%.
## Getting the Most Value from Your Home and Building Investment
The cost of termite infestation is not only the treatment invoice. It can include repair work, builder advice, temporary accommodation, lost rent, property value concerns, follow-up inspections and stress during a sale or purchase.
The best way to reduce that risk is to find termite activity early. For buyers, a [timber pest inspection](/timber-pest-inspections) can help show whether the property has current activity, past damage or risk conditions. For owners, regular inspections can help stop a small warning sign turning into a major repair bill.
If you are buying, selling or maintaining a property in NSW, Victoria or Queensland, book a timber pest inspection with [Owner Inspections](/) before termite damage becomes a bigger cost.
Contact Owner
Inspections
}
buttonHref="/contact"
variant="primary"
/>
## Key Takeaways
- Termite damage costs Australian property owners billions of dollars annually, with individual repairs ranging from $5,000 to over $100,000.
- One in three Australian homes will experience termite attack, with higher risk in northern regions like Queensland.
- Standard home insurance policies do not cover termite damage, leaving homeowners fully exposed to repair costs.
- Professional termite inspections cost $250 to $500 and can prevent tens of thousands of dollars in damage.
- Treatment options include chemical barriers ($800 to $2,000), baiting systems ($1,500 to $3,000 plus maintenance), and fumigation ($3,000 to $6,000+).
- Prevention through regular inspections and proactive treatment is far more cost-effective than reactive remediation.
- Termite damage can significantly impact property values and saleability.
- Annual inspections are recommended as a minimum, with six-monthly inspections for high-risk properties and regions.
### Avoiding Common Triggers of Building Disputes at VCAT
Source: https://ownerinspections.com.au/articles/avoiding-common-triggers-of-building-disputes-at-vcat
Published: 2023-10-25 | Updated: 2026-08-21 | Category: Expert Witness
Author: Maison Azdari
Most building disputes at VCAT are triggered by five things: poor communication, undocumented variations, defective workmanship, project delays and cost overruns. Very few of them begin as a crisis. They begin as a small issue raised verbally, never confirmed in writing, and left alone until the work was covered up and the money was spent. Documenting the job as it is built, and having an independent inspector look at it at each stage, is what stops a disagreement becoming a tribunal file.
## What triggers most building disputes at VCAT?
Five recurring triggers account for the bulk of domestic building claims: poor communication, changes to scope, defective workmanship, project delays and cost overruns. They rarely arrive one at a time. A variation agreed verbally becomes a cost the owner disputes, the argument stalls the job, and by then the defect is behind a wall.
### 1. Poor communication
Poor communication is the most common underlying cause. What the owner expected and what the builder understood can be two very different things, and without a written record neither version can be proven later.
### 2. Changes to scope
A variation is any work that differs from what the contract specified. Variations are normal. They become disputes when:
### 3. Defective workmanship
Defective workmanship is the most frequently cited ground in VCAT building claims. Defects range from cosmetic finish issues to structural and waterproofing failures that affect whether the building is safe and habitable.
Services above a bathroom ceiling, photographed before the plasterboard went on. Once it is sheeted, proving a fault means opening it back up, and that cost is usually what the argument ends up being about.
### 4. Project delays
Some delays are genuinely outside the builder's control: weather, supply issues, unforeseen site conditions. Many are project management.
### 5. Cost overruns
Some increases are legitimate and flow from approved variations. Others come from thin estimating or charges that were never agreed.
## Do you have to go to DBDRV before you can apply to VCAT?
Yes, in almost every case. If your dispute involves a homeowner and concerns domestic building work or a domestic building contract, VCAT will not accept your application unless you have first taken it to Domestic Building Dispute Resolution Victoria. You must attach a certificate of conciliation, a rejection letter, a dispute resolution order or a notice of breach of one. Injunctions are the main exception.
Two procedural details catch people out, and both are avoidable:
Since 1 July 2025 the DBDRV conciliation service, the former Victorian Building Authority and the domestic building insurance function have sat under the Building and Plumbing Commission. The conciliation step and the certificate requirement are unchanged, and VCAT still calls the service DBDRV on its application checklist.
## What evidence do you need for a VCAT building dispute?
You need three things: proof the work is defective, proof of what rectification costs, and proof of what was agreed. In practice that means a written report from a qualified building consultant, dated photographs taken as the job progressed, the contract with every variation, and a [Scott Schedule](/expert-witness-reports) that sets out each alleged defect item by item with the amount claimed.
A roof void with sarking torn and insulation missing over a bulkhead. Nobody sees this from inside the house, which is why a dated inspection photograph is worth far more than a recollection.
A defect claim stands or falls on whether the assessment is independent and names the specific clause of the National Construction Code, the Australian Standard or the contract that the work fails. A complaint that the tiling looks bad is not a claim. An [expert witness report](/vcat-witness-report) that names the standard, describes the departure and quantifies the cost to put it right is.
## How do you stop a defect becoming a VCAT case?
Catch it while it is still visible and still cheap. The three habits that prevent most disputes are writing everything down, booking independent inspections at the stages where work is about to be concealed, and raising defects in writing the day you see them rather than at handover.
### Document as you go
### Inspect at the stages that matter
### Check the builder and budget honestly
Roof sheeting and box gutter flashing examined on site. Roof and drainage defects are a common source of VCAT claims because the symptom, water inside the building, shows up a long way from the cause.
## How much does a VCAT building dispute cost and how long does it take?
Expect months rather than weeks, and thousands rather than hundreds. VCAT application fees are set by regulation at concession, standard and corporate rates, and the current rates took effect on 27 June 2026. On top of the fee sit expert reports and, if you use one, legal representation. Straightforward matters can resolve in a few months; contested defect claims with multiple experts often run past twelve.
## What are the alternatives to a VCAT hearing?
Negotiation, conciliation through DBDRV, mediation and arbitration all sit between a disagreement and a hearing. Conciliation is compulsory before VCAT for domestic building disputes and costs nothing. The others are voluntary, faster and less adversarial than a hearing, and they leave the outcome in the parties' hands rather than the tribunal's.
An independent report helps at every one of these stages, not just the last. When both sides are reading the same assessment of what is wrong and what it costs to fix, the range of plausible outcomes narrows and settlement gets easier.
For the full picture of how expert evidence is prepared and used, see our [guide to expert witness reports for building disputes](/guides/expert-witness-building-disputes-guide).
### Dilapidation Reports: Protect Your Geelong Property
Source: https://ownerinspections.com.au/articles/dilapidation-reports-protect-your-geelong-property
Published: 2023-10-25 | Updated: 2026-02-09 | Category: Dilapidation
Author: Maison Azdari
A [dilapidation report](/dilapidation-reports) is a professional assessment that records the existing condition of a property before nearby construction begins. In Geelong, where residential and commercial development activity continues to reshape suburbs, these reports protect property owners by creating a documented baseline of walls, foundations, roofing, fencing, and other elements. If construction damage occurs, the report provides clear evidence of what existed before the works started, preventing disputes and supporting insurance or legal claims.
Geelong's growth has brought new housing developments, infrastructure upgrades, and commercial projects into established neighbourhoods. While this growth is positive for the city, it increases the risk of construction activity affecting nearby homes. Vibration from machinery, excavation near boundary lines, and demolition works can all cause cracking, settlement, and structural movement in adjacent properties. A dilapidation report is the most effective tool for protecting your property from these risks.
## What Is a Dilapidation Report?
A dilapidation report is a detailed record of a property's physical condition at a specific point in time. It is typically commissioned before construction work begins on a neighbouring site, and a follow-up report is conducted after the works are completed to identify any changes.
The report serves as a legal and practical baseline. It records existing cracks, damage, wear, and the general state of the property so that any new damage caused by construction can be clearly identified and attributed.
## What Does a Dilapidation Report Include?
A professional dilapidation report provides a thorough record of the property's condition across all accessible areas.
All findings are supported by high-resolution photographs with date stamps and detailed written descriptions. This photographic evidence forms the backbone of the report's value as a legal document.
## Who Conducts Dilapidation Reports?
Dilapidation reports are prepared by licensed building inspectors with specific experience in property condition assessments. In Victoria, inspectors should be registered building practitioners through the Victorian Building Authority (VBA).
## Geelong's Construction Activity and Property Risks
Geelong has seen considerable construction activity in recent years, though the pace has varied across residential and non-residential sectors. Domestic building permits have experienced fluctuations, with periods of strong growth followed by contractions.
For homeowners near active construction sites, the risks include:
Without a pre-construction dilapidation report, proving that any of this damage was caused by the construction work is extremely difficult.
## How Dilapidation Reports Protect Homeowners
### Preventing Disputes
A dilapidation report provides an objective, time-stamped record of your property's condition before construction started. If damage occurs during the build, you have clear evidence that the damage did not exist before. This removes ambiguity and makes it much harder for the builder or developer to deny responsibility.
### Supporting Insurance Claims
If you need to make an insurance claim for construction-related damage, a dilapidation report provides the evidence your insurer needs to assess the claim. Without it, the insurer may argue that the damage was pre-existing.
### Providing Legal Evidence
In the event of a dispute that reaches VCAT or the courts, a dilapidation report prepared by a qualified inspector carries significant evidentiary weight. It is an independent, professional document that courts recognise as a reliable record of property condition.
## How Dilapidation Reports Benefit Developers
Developers and builders benefit from dilapidation reports just as much as homeowners. The key advantages include:
## When to Get a Dilapidation Report
### Pre-Sale Inspections in a Competitive Market
Source: https://ownerinspections.com.au/articles/pre-sale-inspections-in-a-competitive-market
Published: 2023-10-24 | Updated: 2026-02-09 | Category: Pre-Sale
Author: Maison Azdari
A pre-sale building inspection is a professional assessment of your property's condition conducted before you list it for sale. In Australia's competitive property market, having an inspection report ready gives sellers a clear advantage by demonstrating transparency, building buyer confidence, reducing the risk of last-minute renegotiations, and often leading to faster sales at stronger prices. The inspection covers structural elements, roofing, plumbing, electrical systems, pest activity, and external areas, with a detailed report delivered within 24 hours.
When housing markets are competitive and buyer demand is high, sellers who provide a [pre-sale inspection](/pre-sale-inspections) report stand out from the crowd. Buyers are more likely to make confident offers when they can see an independent professional's assessment of the property. Instead of waiting for the buyer's own inspection to uncover issues, sellers who inspect first can address problems in advance or price them into the listing from the start.
## Why Pre-Sale Inspections Matter
A pre-sale inspection benefits sellers in several practical ways that directly affect the speed and outcome of the sale.
In competitive markets where multiple buyers may be interested in the same property, a pre-sale inspection report can be the factor that encourages a buyer to move quickly and make a strong offer without a drawn-out due diligence period.
## The Pre-Sale Inspection Process
The process of arranging and completing a pre-sale inspection is straightforward and typically takes less than a day from inspection to report delivery.
## What Gets Inspected
A pre-sale inspection covers the same areas as a [pre-purchase building inspection](/pre-purchase-inspections) under Australian Standard AS 4349.1. The inspector assesses all reasonably accessible parts of the property.
## How to Prepare Your Property
Proper preparation helps the inspector conduct a thorough assessment and results in a more accurate report.
## Using the Inspection Report
### For Repairs
The report provides a prioritised list of issues. Address the most significant problems first, particularly structural defects, water damage, electrical safety issues, and pest activity. Fixing these before listing removes the biggest buyer concerns and can increase your property's market value.
### For Negotiations
If you choose not to repair certain items, the report still gives you an informed position. You can price the property to account for known issues, preventing buyers from negotiating down further after their own inspection reveals the same problems.
### For Marketing
A pre-sale inspection report demonstrates that you are a transparent and responsible seller. Share it with your agent and make it available at open homes. Buyers who see a clean report are more likely to make offers with confidence.
## Finding a Qualified Inspector
Choosing the right inspector is important for a credible and thorough report.
## Financial Considerations
### Cost of a Pre-Sale Inspection
A comprehensive pre-sale building inspection in Australia typically starts from $500 AUD (excluding GST). The exact cost depends on the property's size, age, and location. Combined building and pest inspections may be slightly higher.
### How It Saves Money
### Why Property Damage Cases Require an Expert Witness
Source: https://ownerinspections.com.au/articles/why-property-damage-cases-require-an-expert-witness
Published: 2023-10-20 | Updated: 2026-02-12 | Category: Expert Witness
Author: Maison Azdari
An expert witness is a qualified professional whose independent assessment of property damage strengthens legal claims, insurance disputes, and tribunal proceedings in Australia. Property damage claims that involve an expert witness are approximately 40% more likely to be resolved favourably compared to claims submitted without expert support. Expert witnesses provide detailed damage evaluations, preserve and document evidence, and present impartial opinions to courts and insurers. Their involvement is particularly valuable where damage is hidden within building structures or where the cause of damage is disputed. In Australia, property damage claims are governed by Australian Consumer Law, state-specific building legislation, and insurance contract regulations.
Whether you are a homeowner dealing with storm damage, a property investor facing a building dispute, or a strata manager managing insurance claims for common property, understanding the role of an expert witness can be the difference between a successful claim and a rejected one.
This guide covers what property damage means in legal terms, the types of claims that benefit from expert input, how to select the right expert witness, and the Australian legal framework that applies to these cases.
## What Is Property Damage in a Legal Context?
Property damage, in legal and insurance terms, refers to any visible or hidden harm that affects the structure, functionality, or value of a building or its contents. It goes beyond surface-level cosmetic issues. Damage can compromise structural integrity, create health hazards, or render a property uninhabitable.
Property damage falls into three broad categories.
### Structural Damage
Structural damage affects the load-bearing elements of a building. This includes foundation cracks, wall fractures, roof collapse, floor subsidence, and damage to supporting beams or columns. Structural damage is often the most expensive to rectify and the most difficult to assess without professional expertise.
Common causes of structural damage include soil movement, poor construction practices, tree root intrusion, inadequate drainage, and extreme weather events such as cyclones or earthquakes.
### Environmental Damage
Environmental damage results from natural events or long-term exposure to weather conditions. In Australia, the most common forms of environmental property damage include:
Environmental damage often triggers insurance claims where the extent of the damage is contested between the property owner and the insurer.
### Wear and Tear Damage
Wear and tear damage develops gradually over time. It includes rust and corrosion on metal elements, mould and mildew growth in poorly ventilated areas, timber decay and rot, deterioration of waterproofing membranes, and degradation of roofing materials. While wear and tear is typically excluded from insurance policies, disputes often arise about whether damage was caused by a sudden event or by long-term neglect.
An expert witness can determine the cause and timeline of damage, which is often the deciding factor in whether an insurance claim is accepted or denied.
## Types of Property Damage Claims
Property damage claims can be divided into two broad categories: physical damage claims and non-physical damage claims. Each type benefits from expert witness involvement in different ways.
### Physical Damage Claims
| Claim Type | Description | Common Causes |
| --- | --- | --- |
| Fire damage | Destruction or impairment of building elements and contents by fire or smoke | Electrical faults, bushfires, cooking incidents, arson |
| Water damage | Harm caused by water ingress, flooding, or plumbing failure | Burst pipes, storm flooding, roof leaks, rising damp |
| Structural damage | Compromise of load-bearing elements or building envelope | Soil movement, poor construction, tree roots, subsidence |
| Weather damage | Harm from extreme weather events | Cyclones, hailstorms, severe winds, lightning strikes |
### Non-Physical Damage Claims
Non-physical damage claims relate to the consequences of property damage rather than the physical harm itself. These include:
Expert witnesses can quantify both physical and non-physical losses, providing courts and insurers with evidence-based assessments that support fair compensation.
## Why Expert Witnesses Are Important in Property Damage Cases
The involvement of an expert witness transforms a property damage claim from a subjective complaint into an evidence-based case. Here is how expert witnesses contribute to better outcomes.
### Accurate Damage Evaluations
Expert witnesses conduct thorough inspections using professional equipment and methods. They identify both visible surface damage and hidden defects within walls, floors, ceilings, and subfloor areas. Their assessments include the extent of damage, the cause, the affected building elements, and the estimated cost of rectification.
Without an expert evaluation, property owners often underestimate the full scope of damage. A water leak visible on a ceiling, for example, may have caused extensive damage to framing, insulation, and electrical wiring within the ceiling cavity. An expert witness identifies all affected elements and ensures the claim reflects the true cost of repair.
### Impartial and Independent Opinions
Courts and tribunals in Australia require expert witnesses to provide impartial opinions. Under the Uniform Civil Procedure Rules and equivalent state legislation, an expert witness owes a duty to the court, not to the party that engaged them. This independence gives their evidence significant weight in proceedings.
An expert who presents biased or advocacy-driven evidence risks having their testimony excluded and their professional reputation damaged. This framework ensures that expert evidence is reliable and balanced.
### Evidence Preservation
Property damage can worsen rapidly after the initial event. Water damage leads to mould growth within 24 to 48 hours. Fire-damaged structures may be unsafe and require demolition. Storm damage may be compounded by subsequent weather events. An expert witness documents the damage thoroughly at the earliest opportunity, preserving evidence through photographs, measurements, material samples, and detailed written reports.
This documentation becomes the foundation of the claim. Without it, disputes about the original extent of damage can derail proceedings months or years later.
### Quantification of Losses
Expert witnesses provide detailed cost estimates for rectification work, supported by scope of works documents, material specifications, and reference to current market rates. They can also assess the impact of damage on property value, rental income, and occupancy.
| Expert Witness Function | Benefit to Property Owner |
| --- | --- |
| Damage evaluation and documentation | Establishes full extent of loss including hidden damage |
| Cause and origin analysis | Determines liability and supports claim validity |
| Cost of rectification estimates | Ensures compensation reflects actual repair costs |
| Evidence preservation | Protects the claim from being disputed on factual grounds |
| Impartial court testimony | Carries greater weight than party statements or lay evidence |
| Timeline and causation analysis | Distinguishes sudden damage from pre-existing conditions |
## The 40% Advantage: Why Expert Evidence Matters
Research into property damage claim outcomes consistently shows that claims supported by expert witness evidence are approximately 40% more likely to achieve a favourable resolution. This applies across insurance disputes, tribunal hearings, and court proceedings.
The reasons for this advantage are straightforward:
Engaging an expert witness is not a guarantee of success, but it significantly improves the odds of a fair outcome. For claims involving substantial property damage, the cost of an expert report is a small fraction of the potential recovery.
## When to Engage an Expert Witness
The most effective time to engage an expert witness is immediately after property damage occurs. Early engagement ensures that evidence is preserved before repairs begin, before weather causes further deterioration, and before the opposing party has an opportunity to dispute the extent of damage.
### Immediate Engagement After Damage
Within the first 24 to 72 hours after a damage event, an expert witness should inspect the property and document the following:
### Before Lodging an Insurance Claim
An expert report submitted alongside an insurance claim demonstrates that the claim is well-founded and comprehensively documented. Insurers are less likely to dispute claims that are supported by independent expert evidence from the outset.
### Before Tribunal or Court Proceedings
If a property damage dispute proceeds to a tribunal (such as NCAT in NSW, VCAT in Victoria, or QCAT in Queensland) or to court, expert evidence is often required to establish the facts. Engaging an expert early in the dispute process gives your legal team time to prepare a thorough case.
## How to Select the Right Expert Witness in Australia
Choosing the right expert witness is as important as deciding to engage one. The wrong expert can weaken a case, while the right expert strengthens it. Here are the key selection criteria.
### Qualifications and Credentials
The expert witness should hold formal qualifications relevant to the type of property damage in question. For building-related property damage, appropriate qualifications include:
### Track Record and Experience
Look for an expert with a demonstrated history of providing [expert witness reports](/expert-witness-reports) and testimony in Australian jurisdictions. Ask about the number of reports they have prepared, the types of cases they have been involved in, and their experience with the specific type of damage your case involves.
### Courtroom Experience
An expert who can write a strong report but cannot withstand cross-examination in court is of limited value. The best expert witnesses are experienced in giving oral testimony, responding to challenging questions under pressure, and explaining complex technical matters in plain language that judges and tribunal members can understand.
| Selection Criteria | What to Look For |
| --- | --- |
| Qualifications | Relevant degree or diploma, state-issued building licence |
| Professional memberships | Engineers Australia, Australian Institute of Building, AIBS |
| Insurance coverage | Professional indemnity and public liability insurance |
| Track record | Number of reports prepared, types of cases, success rates |
| Courtroom experience | History of giving oral testimony in Australian courts and tribunals |
| Compatibility | Willingness to work collaboratively with legal team, responsive communication |
| Independence | No conflict of interest, commitment to impartial opinion |
### Compatibility with Your Legal Team
Your expert witness will need to work closely with your solicitor or barrister. The expert should be responsive, clear in their communication, and willing to discuss their findings openly. A good working relationship between the expert and the legal team leads to a more effective case presentation.
## Australian Legal Framework for Property Damage Claims
Property damage claims in Australia are governed by a combination of federal and state legislation. Understanding this framework helps property owners and their legal teams build stronger cases.
### Australian Consumer Law (ACL)
The Australian Consumer Law, contained in Schedule 2 of the Competition and Consumer Act 2010 (Cth), provides consumer guarantees that apply to building work and construction services. Under the ACL, services must be provided with due care and skill, be fit for purpose, and be completed within a reasonable time. Where building work causes or fails to prevent property damage, the ACL may provide a basis for a claim.
### State Building Legislation
Each state and territory has specific legislation governing building work and the resolution of building disputes:
### Insurance Contracts Act 1984 (Cth)
The Insurance Contracts Act 1984 governs the relationship between insurers and policyholders. It sets out the obligations of both parties, the duty of utmost good faith, and the process for disputing claim decisions. Property owners who believe their insurance claim has been unfairly denied can escalate the matter to the Australian Financial Complaints Authority (AFCA).
### Expert Witness Duties
In all Australian jurisdictions, expert witnesses owe an overriding duty to the court. This is codified in court rules such as the Uniform Civil Procedure Rules 2005 (NSW) and equivalent provisions in other states. Expert reports must comply with specific formatting requirements, include a declaration of the expert's duty to the court, and disclose any potential conflicts of interest.
## Common Mistakes to Avoid in Property Damage Cases
Property owners frequently make avoidable mistakes that weaken their claims. Being aware of these pitfalls can protect your case.
## Frequently Asked Questions
For a complete overview, see our [guide to expert witness reports for building disputes](/guides/expert-witness-building-disputes-guide).
Dealing with a property damage insurance dispute? See our [guide to insurance claim assessments](/guides/insurance-claim-assessment-guide) for practical steps to get a fair outcome.
### Dilapidation Report Process: A Walkthrough of Key Steps
Source: https://ownerinspections.com.au/articles/dilapidation-report-process-a-walkthrough-of-key-steps
Published: 2023-10-19 | Category: Dilapidation Reports
Author: Maison Azdari
A [dilapidation report](/dilapidation-reports) serves as a detailed baseline documentation of a property's condition
before nearby construction or demolition activities commence. These reports shield property
owners from potential legal disputes and help preserve property value while strengthening
legal positions. Understanding the systematic process behind creating these reports ensures
you receive a comprehensive document that will stand up to scrutiny in any dispute
resolution scenario.
The dilapidation report process follows a structured methodology that has evolved over
decades of building inspection practice in Australia. Each step builds upon the previous one
to create a complete and defensible record of property condition. Whether you are a property
owner seeking protection, a builder demonstrating due diligence, or a developer meeting
council requirements, understanding this process helps you maximise the value of your
investment in professional documentation.
This comprehensive guide walks you through each stage of the dilapidation report process,
from initial consultation through to final delivery. You will learn what to expect, how to
prepare, and what questions to ask to ensure your report meets the highest professional
standards.
> A well-executed dilapidation report process is the foundation of effective property
> protection. Cutting corners at any stage can compromise the entire document's usefulness
> when you need it most.
## Australian Legal Framework for Dilapidation Reports
Understanding the legal framework governing dilapidation reports in Australia helps
stakeholders appreciate their importance and ensure compliance with regulatory requirements.
Different states and territories have varying requirements, but several common principles
apply nationally.
### Environmental Planning and Assessment Act (NSW)
In New South Wales, the Environmental Planning and Assessment Act 1979 (EP&A Act) provides
the primary legislative framework for development approval conditions. Under this Act, local
councils have the authority to impose conditions on development consent requiring
dilapidation reports for neighbouring properties. Section 4.17 of the Act empowers consent
authorities to impose conditions they consider appropriate, which commonly includes
pre-construction documentation of adjacent property conditions.
The EP&A Regulation 2021 further supports these requirements by establishing procedures for
development applications and consent conditions. Councils frequently require dilapidation
reports as standard conditions for developments involving excavation, demolition, or
construction activities that could affect neighbouring properties.
### Local Council Development Approval Conditions
Local councils throughout Australia impose dilapidation report requirements through
Development Approval (DA) conditions. These conditions typically specify:
- **Survey radius:** The distance from the construction site within which properties must be surveyed (commonly 15 to 50 metres)
- **Timing requirements:** When reports must be prepared and submitted (usually before construction commencement)
- **Inspector qualifications:** Minimum qualifications required for the inspector preparing the report
- **Report content:** Specific elements that must be included in the documentation
- **Post-construction requirements:** Whether comparison inspections are required after construction completion
### State Building Regulations
Each Australian state and territory has building regulations that may reference dilapidation
requirements:
| State/Territory | Primary Legislation | Regulatory Body |
| ------------------ | --------------------------------------------------------------------------- | -------------------------------------------- |
| New South Wales | Environmental Planning and Assessment Act 1979, Home Building Act 1989 | NSW Fair Trading |
| Victoria | Building Act 1993, Domestic Building Contracts Act 1995 | Victorian Building Authority (VBA) |
| Queensland | Planning Act 2016, Queensland Building and Construction Commission Act 1991 | QBCC |
| South Australia | Planning, Development and Infrastructure Act 2016 | Consumer and Business Services |
| Western Australia | Building Act 2011, Planning and Development Act 2005 | Building and Energy |
| Tasmania | Building Act 2016, Land Use Planning and Approvals Act 1993 | Consumer, Building and Occupational Services |
| ACT | Building Act 2004, Planning and Development Act 2007 | Access Canberra |
| Northern Territory | Building Act 1993, Planning Act 1999 | NT Building Advisory Services |
## What is Included in a Dilapidation Report
A comprehensive dilapidation report documents all elements of a property that could
potentially be affected by nearby construction activities. The scope and detail of
documentation directly impacts the report's usefulness in any subsequent dispute resolution.
### Interior Elements
Internal documentation covers all accessible areas within the building structure. Inspectors
systematically record conditions room by room, ensuring nothing is overlooked:
- **Walls:** Plasterboard, brick, render, and other wall finishes including paint condition, cracks, nail pops, and water damage
- **Ceilings:** Plaster condition, cornices, ceiling roses, junction cracks, and any signs of settlement or movement
- **Floors:** Tiles, timber, carpet, vinyl, and concrete including levelness, cracks, squeaking, and wear patterns
- **Doors and windows:** Frames, hardware, operation, seals, and alignment issues
- **Wet areas:** Bathrooms, laundries, and kitchens including waterproofing indicators and fixture conditions
### Roof Components
[Roof inspection](/roof-inspection) covers both the external roofing materials and any accessible roof spaces:
- Roof cladding condition including tiles, metal sheeting, or other materials
- Gutters, downpipes, and drainage system functionality
- Flashings around penetrations and junctions
- Ridge capping and hip tiles
- Roof structure condition where accessible from roof space
- Roof insulation and sarking condition
### External Features
External documentation extends beyond the main building structure to include all site
improvements:
- Driveways and carport surfaces
- Pathways, steps, and ramps
- Verandahs, pergolas, and outdoor structures
- Balustrades, handrails, and safety barriers
- External wall finishes and cladding
- Foundation and slab edges where visible
### Landscaping and Site Features
Landscaping elements often sustain damage during construction and require thorough
documentation:
- Trees, shrubs, and garden beds
- Fencing including all boundary fencing
- Retaining walls and their structural condition
- Swimming pools and associated equipment
- Irrigation systems and garden lighting
- Outdoor furniture and fixed installations
### Neighbouring Properties
For builders and developers, documenting adjacent property conditions protects against
unfounded damage claims:
- Pre-existing cracks in boundary walls
- Condition of shared or boundary fencing
- Neighbouring retaining walls that may be affected
- Any visible pre-existing damage to adjacent structures
## When Dilapidation Reports Are Necessary
Understanding when dilapidation reports are required helps property owners and builders plan
appropriately and ensure compliance with regulatory requirements.
| Construction Type | Risk Level | Typical Survey Radius | Report Priority |
| -------------------------- | -------------- | --------------------- | ------------------ |
| Demolition Projects | High | 25 to 50 metres | Essential |
| Deep Excavation | High | 30 to 100 metres | Essential |
| Piling and Foundation Work | High | 50 to 100 metres | Essential |
| New Home Construction | Medium to High | 15 to 30 metres | Highly Recommended |
| Home Extensions | Medium | 10 to 20 metres | Recommended |
| Major Renovations | Medium | 10 to 15 metres | Recommended |
| Civil Infrastructure | Very High | 50 to 200 metres | Mandatory |
| Tunnel Construction | Very High | 100 to 500 metres | Mandatory |
## Who Conducts Dilapidation Reports
The qualifications and credentials of the inspector directly impact the report's reliability
and acceptance in dispute resolution. Certified building inspectors with relevant
construction credentials typically prepare dilapidation reports.
### Essential Qualifications
A qualified dilapidation report inspector should possess:
- **Formal qualifications:** Diploma of Building and Construction (Building) or equivalent tertiary qualification in building surveying, construction management, or related fields
- **State licensing:** Current registration with the relevant state building authority (NSW Fair Trading, VBA, QBCC, etc.)
- **Professional indemnity insurance:** Adequate coverage to protect both inspector and client against errors or omissions
- **Public liability insurance:** Coverage for any incidents during site inspections
- **Continuing professional development:** Ongoing education to maintain current knowledge of standards and practices
### Professional Affiliations
Membership in professional organisations demonstrates commitment to industry standards. Look
for inspectors affiliated with:
- Australian Institute of Building Surveyors (AIBS)
- Australian Society of Building Consultants (ASBC)
- Master Builders Association (MBA)
- Housing Industry Association (HIA)
> The inspector's qualifications and experience are your first line of defence. A report
> prepared by an unqualified individual may be challenged and rejected when you need it most.
## The Five-Step Dilapidation Report Process
The dilapidation report process follows a systematic methodology designed to ensure
comprehensive documentation and defensible results. Understanding each step helps clients
prepare appropriately and ensures nothing is overlooked.
### Step 1: Initial Consultation and Scope Definition
The process begins with a thorough consultation between the inspector and the client to
establish the scope and requirements of the inspection. This critical first step sets the
foundation for a successful report.
#### Discussion Points
- Purpose of the report and how it will be used
- Properties to be inspected and access arrangements
- Specific concerns or areas requiring particular attention
- Development consent conditions that must be satisfied
- Timeline requirements and construction commencement dates
- Budget considerations and service level options
#### Pre-Inspection Checklist
- Review development consent conditions for specific requirements
- Identify all properties within the required survey radius
- Arrange access with property owners and occupants
- Notify affected parties of the inspection schedule
- Gather relevant documentation such as previous reports or surveys
- Confirm the inspector has appropriate qualifications and insurance
| Consultation Element | Purpose | Typical Duration |
| -------------------- | --------------------------------------------- | ---------------------- |
| Scope Discussion | Define inspection boundaries and requirements | 15 to 30 minutes |
| Document Review | Examine DA conditions and previous reports | 30 to 60 minutes |
| Access Coordination | Arrange property access with all parties | Variable (1 to 7 days) |
| Quote Preparation | Provide detailed cost estimate | 1 to 2 business days |
### Step 2: Comprehensive Site Inspection
The site inspection is the core of the dilapidation report process. During this phase, the
inspector conducts a systematic evaluation of all property components, documenting existing
conditions with meticulous attention to detail.
#### Inspection Methodology
Professional inspectors follow a systematic approach to ensure complete coverage:
- **Exterior first:** Begin with external elevations, working clockwise around the building to ensure nothing is missed
- **Top-down interior:** Inspect internal areas from roof space (where accessible) through to subfloor areas
- **Room-by-room documentation:** Systematically record conditions in each room before moving to the next
- **Site features last:** Document driveways, landscaping, and boundary features after completing the building inspection
#### Equipment Used
- High-resolution digital camera with wide-angle and macro capabilities
- Laser distance measurer for accurate dimensional recording
- Crack width gauge and measuring scales
- Spirit level and plumb bob for alignment assessment
- Moisture meter for detecting dampness issues
- Torch for inspecting dark areas and cavities
- Tablet or laptop for on-site notation and photo management
#### Typical Inspection Timeframes
| Property Type | Typical Inspection Time | Photos Expected |
| ------------------------ | ----------------------- | ------------------- |
| Small Unit or Apartment | 1 to 1.5 hours | 50 to 100 photos |
| Standard 3 Bedroom House | 1.5 to 2.5 hours | 100 to 200 photos |
| Large Family Home | 2.5 to 4 hours | 200 to 400 photos |
| Commercial Property | 3 to 8 hours | 300 to 1000+ photos |
| Heritage Building | 4 to 8 hours | 400 to 800+ photos |
### Step 3: Detailed Data Collection and Measurement
Beyond visual inspection, the data collection phase involves gathering precise measurements
and detailed documentation that enables objective comparison after construction is complete.
#### Photographic Documentation Standards
- **Context shots:** Wide-angle photographs showing the overall condition of each area
- **Detail shots:** Close-up photographs of specific defects with scale references
- **Sequence photography:** Multiple angles of significant areas to establish comprehensive records
- **Measurement references:** Include rulers or measuring devices in photos of cracks and defects
- **Date and time stamping:** All photographs should include metadata establishing when they were taken
#### Measurement Requirements
- Crack widths measured at multiple points along their length
- Crack lengths documented with start and end points identified
- Floor level variations recorded with reference points
- Wall alignment measurements where deviations are observed
- Settlement markers placed for ongoing monitoring if required
#### Documentation Checklist
- Property address and legal description confirmed
- Weather conditions at time of inspection recorded
- All rooms and areas systematically photographed
- Every visible defect documented with measurements
- Areas of particular concern highlighted
- Access limitations or areas not inspected noted
- Property owner or representative sign-off obtained where possible
### Step 4: Professional Report Preparation
The report preparation phase transforms raw inspection data into a professional document
suitable for legal and regulatory purposes. This stage requires significant expertise to
present information clearly and comprehensively.
#### Report Structure
A professional dilapidation report typically includes the following sections:
- **Executive summary:** Brief overview of key findings and property condition
- **Property details:** Address, description, age, construction type, and general characteristics
- **Inspection methodology:** Description of inspection process, equipment used, and any limitations
- **Detailed findings:** Room-by-room and area-by-area documentation of conditions
- **Photographic appendix:** Organised collection of all photographs with captions
- **Measurement records:** Tabulated measurements of defects for future comparison
- **Inspector credentials:** Qualifications, licensing, and insurance details
- **Declarations and limitations:** Scope boundaries and standard disclaimers
#### Quality Assurance
Professional inspectors implement quality assurance procedures to ensure report accuracy and
completeness:
- Cross-referencing of photographs with written descriptions
- Verification of all measurements and calculations
- Proofreading for errors and inconsistencies
- Technical review by senior inspectors for complex properties
- Compliance check against DA conditions or client requirements
| Report Element | Standard Requirement | Best Practice |
| -------------------- | ------------------------ | ---------------------------------------- |
| Photographs | 50+ images with captions | 150+ organised with room codes |
| Written Descriptions | Basic condition notes | Detailed narrative for each area |
| Measurements | Major cracks measured | All defects quantified where possible |
| Floor Plans | Optional | Annotated plans showing defect locations |
| Delivery Format | PDF document | PDF with full-resolution photo archive |
### Step 5: Report Delivery and Client Discussion
The final stage involves delivering the completed report and ensuring the client understands
its contents and how to use it effectively. This step is often overlooked but is crucial for
maximising the report's value.
#### Delivery Methods
- **Digital delivery:** Secure PDF format via email or file sharing platform
- **Physical copies:** Bound hard copies for official records where required
- **Council submissions:** Direct lodgement with council where required by DA conditions
- **Photo archive:** Full-resolution images provided separately for detailed examination
#### Client Briefing Topics
- Explanation of key findings and areas of concern
- Guidance on monitoring property during construction
- Process for arranging post-construction comparison inspection
- Steps to take if damage is observed during construction
- Report retention and storage recommendations
- Questions and clarifications about report content
#### Distribution Requirements
Copies of the report should be provided to:
- Property owner or their representative
- Builder or developer commissioning the report
- Local council where required by DA conditions
- Principal certifying authority if applicable
- Insurance providers if required by policy conditions
> A dilapidation report is only valuable if it is properly retained and accessible when
> needed. Store copies securely and ensure all relevant parties have access to the
> documentation.
## Financial and Legal Benefits
Investing in a professional dilapidation report provides significant financial protection
and legal advantages for all parties involved in construction projects.
### Protection for Property Owners
- **Evidence for compensation claims:** Documented baseline enables accurate assessment of construction-related damage
- **Insurance support:** Provides evidence required by insurers to process property damage claims
- **Legal standing:** Professional reports are admissible evidence in tribunal and court proceedings
- **Peace of mind:** Knowledge that property condition is documented regardless of construction outcomes
### Protection for Builders and Developers
- **Defence against false claims:** Pre-existing defects are documented, preventing attribution to construction activities
- **Regulatory compliance:** Satisfies DA conditions and demonstrates due diligence
- **Insurance protection:** Supports defence against third-party liability claims
- **Professional reputation:** Demonstrates commitment to responsible construction practices
### Cost-Benefit Analysis
| Scenario | Report Cost | Potential Dispute Cost Without Report |
| --------------------------- | ----------------------------------- | ------------------------------------- |
| Minor Wall Cracks Claim | $400 to $800 | $5,000 to $15,000 |
| Foundation Settlement Claim | $400 to $800 | $50,000 to $200,000+ |
| Pool Damage Claim | $400 to $800 | $20,000 to $80,000 |
| Multi-Property Dispute | $2,000 to $5,000 (multiple reports) | $100,000 to $500,000+ |
## Owner Inspections Credentials
Owner Inspections provides professional dilapidation reports across eastern Australia,
backed by extensive qualifications and industry recognition.
### Licensing and Registration
The company holds licences from:
- Victorian Building Authority (VBA)
- NSW Fair Trading
- Queensland Building and Construction Commission (QBCC)
### Professional Memberships
- Australian Society of Building Consultants NSW
- Housing Industry Association (HIA)
### Insurance Coverage
- Professional indemnity insurance
- Public liability insurance
- Workers compensation coverage
## Frequently Asked Questions
###
How long does the dilapidation report process take from start to finish?
**Short answer:** The complete process typically takes 5 to 10 business
days from initial consultation to final report delivery.
The timeline depends on several factors including property size, access arrangements,
and current demand. Initial consultation and scope definition usually takes 1 to 2 days.
The site inspection itself ranges from 1 to 4 hours depending on property complexity.
Report preparation requires 3 to 5 business days for standard residential properties,
with complex or commercial properties requiring longer. Expedited services are available
for urgent requirements, with some inspectors offering 24 to 48 hour turnaround for an
additional fee. Plan ahead and engage an inspector at least two weeks before
construction is scheduled to commence.
###
What happens if a neighbour refuses to allow inspection of their property?
**Short answer:** Document the refusal in writing and conduct the most
comprehensive external assessment possible from public areas.
Property owners cannot be compelled to allow interior inspection of their property.
However, external areas visible from public spaces can be documented without owner
cooperation. The inspector should photograph all visible external elements including
walls, roofing, fencing, and driveways. Written correspondence documenting the offer of
inspection and the owner's refusal should be retained. Some development consent
conditions require evidence that neighbours were offered the opportunity to participate,
regardless of their response. The refusal and limited external assessment should be
clearly documented in the report. Consider having your solicitor send a formal letter
offering the inspection to create a clear paper trail.
###
Are dilapidation reports required by law in Australia?
**Short answer:** While not universally mandated by legislation, they are
frequently required through local council DA conditions and are considered industry
standard practice.
Australian building legislation does not universally mandate dilapidation reports.
However, local councils commonly impose requirements through development consent
conditions under state planning legislation such as the Environmental Planning and
Assessment Act 1979 in NSW. Council conditions typically require reports for
developments involving excavation, demolition, or construction near property boundaries.
Major infrastructure projects almost always require extensive dilapidation surveys as a
condition of approval. Even where not legally required, dilapidation reports are
strongly recommended as prudent risk management. The cost of a professional report is
minimal compared to potential dispute costs without baseline documentation.
### How much does a dilapidation report cost?
**Short answer:** Residential reports typically cost between $400 and
$1,200, with commercial properties varying based on size and complexity.
Pricing depends on property type, size, location, and the level of detail required.
Standard residential properties (3 to 4 bedrooms) typically cost $400 to $800 for a
comprehensive interior and exterior survey. Larger homes, heritage properties, or those
with complex features may cost $800 to $1,200. Commercial and industrial properties are
priced individually based on floor area and complexity, typically ranging from $1,000 to
$5,000 or more. When obtaining quotes, ensure you compare like for like services. Check
that quotes include both interior and exterior inspection, high-resolution photographs,
detailed written descriptions, and measurements of defects. The cheapest quote may not
represent the best value if the report is inadequate for your needs.
###
Can I use my own photographs as a dilapidation record instead of hiring a professional?
**Short answer:** Personal photographs are better than nothing but lack the
professional credibility and systematic documentation needed for dispute resolution.
While personal photographs can supplement a professional report, they are unlikely to be
accepted as primary evidence in formal dispute resolution. Professional dilapidation
reports carry weight because they are prepared by qualified, independent inspectors
following established methodologies. Personal photographs may be challenged on grounds
of selectivity, lack of expertise in identifying relevant defects, absence of proper
measurements, and potential bias. Courts and tribunals generally prefer evidence from
independent professionals. If budget constraints are a concern, some inspectors offer
scaled services or can focus on high-priority areas. However, investing in a proper
professional report is almost always more cost-effective than facing a dispute without
adequate documentation.
###
What should I do if I notice damage during construction before the comparison
inspection?
**Short answer:** Document the damage immediately with dated photographs,
notify the builder in writing, and arrange an interim inspection as soon as possible.
Early identification of damage is crucial for several reasons. Take dated photographs
immediately using a smartphone or camera with date stamping enabled. Note the date,
time, and any construction activities occurring nearby. Send written notification to the
builder or developer, ideally by email to create a dated record. Contact your building
inspector to discuss whether an interim inspection is warranted. An interim inspection
documents the damage and establishes a timeline linking it to specific construction
activities. This is particularly important if you observe progressive damage such as
cracks that are expanding. Prompt action also supports requests for the builder to
modify their methods to prevent further damage and strengthens any subsequent
compensation claims.
###
How long should I keep my dilapidation report?
**Short answer:** Retain the report indefinitely or for at least 10 years
after construction completion, as building defects may take years to manifest.
Building defects resulting from construction activities do not always appear
immediately. Settlement, subsidence, and structural issues may develop over months or
years following construction. In some Australian states, limitation periods for building
defect claims extend to 10 years or more from completion of construction. Keep both
digital and physical copies of the report in secure locations. Store digital copies in
multiple locations including cloud storage. If you sell the property, consider providing
a copy to the purchaser as part of the property records. The report may also be valuable
for insurance claims or if neighbouring properties undertake future construction
projects. Treat the dilapidation report as a permanent property record similar to titles
and contracts.
###
Who is responsible for paying for dilapidation reports?
**Short answer:** Typically the builder or developer pays for reports
required by DA conditions, while property owners may choose to commission their own
independent reports.
Development consent conditions usually require the applicant (builder or developer) to
arrange and pay for dilapidation reports for neighbouring properties. This is considered
a standard cost of development. However, property owners may choose to commission their
own independent report if they want assurance of truly independent documentation. Having
your own report can be valuable if disputes arise about the builder-commissioned
report's accuracy or completeness. In some cases, construction contracts specify
responsibility for dilapidation survey costs. Major infrastructure projects typically
include comprehensive dilapidation surveys as part of the project budget. If you are
offered a free report by a builder, consider whether you also want an independent
assessment for added protection.
###
What qualifications should I look for in a dilapidation report inspector?
**Short answer:** Look for state licensing, relevant qualifications
(minimum Diploma level), professional indemnity insurance, and membership in recognised
industry bodies.
Essential qualifications include current registration with the relevant state building
authority. In NSW, check registration with NSW Fair Trading. In Victoria, verify
registration with the Victorian Building Authority. In Queensland, confirm QBCC
licensing. The inspector should hold a minimum Diploma of Building and Construction or
equivalent qualification in building surveying or construction management. Professional
indemnity insurance is essential and should be verified. Membership in professional
organisations such as the Australian Institute of Building Surveyors (AIBS) or
Australian Society of Building Consultants (ASBC) indicates commitment to professional
standards. Ask for sample reports to assess quality. Request references from recent
clients. Verify that the inspector has specific experience with dilapidation reports
rather than just general building inspections.
###
Can dilapidation reports be used as evidence in court?
**Short answer:** Yes, professionally prepared dilapidation reports are
admissible as evidence and carry significant weight in tribunal and court proceedings.
Dilapidation reports prepared by qualified professionals are admissible evidence in
courts, tribunals (such as NCAT in NSW or VCAT in Victoria), and other dispute
resolution forums. The report provides objective, dated documentation of property
condition that can be compared with post-construction evidence. For maximum evidentiary
weight, reports should be prepared by appropriately qualified and licensed inspectors,
follow accepted professional standards, and include comprehensive documentation with
photographs and measurements. The inspector may be called to provide [expert witness](/expert-witness-reports)
testimony explaining their findings and methodology. Courts prefer documentary evidence
over verbal testimony alone, making professionally prepared dilapidation reports
valuable evidence in property damage disputes. Reports prepared by unqualified
individuals may be challenged or given less weight.
## Key Takeaways
- The dilapidation report process follows five systematic steps: initial consultation, site inspection, data collection, report preparation, and delivery with client discussion.
- Australian legal requirements for dilapidation reports vary by state but are commonly imposed through local council DA conditions under legislation such as the Environmental Planning and Assessment Act 1979 (NSW).
- Qualified inspectors must hold state licensing, relevant qualifications, professional indemnity insurance, and ideally membership in recognised industry bodies.
- Comprehensive reports document interior elements, roof components, external features, landscaping, and neighbouring property conditions visible from public areas.
- The complete process typically takes 5 to 10 business days from consultation to delivery, with expedited services available for urgent requirements.
- Report costs range from $400 to $1,200 for residential properties, representing minimal investment compared to potential dispute costs without documentation.
- Dilapidation reports should be retained for at least 10 years as building defects may take years to manifest following construction activities.
- Professionally prepared reports are admissible as evidence in court and tribunal proceedings and carry significant weight in construction damage disputes.
- If damage is observed during construction, document it immediately with dated photographs, notify the builder in writing, and arrange an interim inspection promptly.
## References and Resources
- [ Environmental Planning and Assessment Act 1979 (NSW) ](https://legislation.nsw.gov.au/view/html/inforce/current/act-1979-203)
- [ National Construction Code (NCC) ](https://ncc.abcb.gov.au/)
- [ Australian Building Codes Board (ABCB) ](https://www.abcb.gov.au/)
- [ NSW Fair Trading ](https://www.fairtrading.nsw.gov.au/)
- [ Queensland Building and Construction Commission (QBCC) ](https://www.qbcc.qld.gov.au/)
- [ Victorian Building Authority (VBA) ](https://www.vba.vic.gov.au/)
- [ Consumer and Business Services South Australia ](https://www.cbs.sa.gov.au/)
- [ Standards Australia ](https://www.standards.org.au/)
- [ Australian Institute of Building Surveyors (AIBS) ](https://www.aibs.com.au/)
### A Comprehensive Guide to House Inspections
Source: https://ownerinspections.com.au/articles/a-comprehensive-guide-to-house-inspections
Published: 2023-10-18 | Updated: 2026-01-16 | Category: Building Inspections
Author: Maison Azdari
House inspections have become a cornerstone of the Australian property market, with a 2023
Property Tribune report indicating a 78% surge in inspection attendance across Australian
markets. Whether you are buying your first home, selling a property, or simply maintaining
your investment, understanding the intricacies of house inspections is essential for making
informed decisions.
A house inspection provides a detailed assessment of a property's condition, revealing
potential issues that may not be visible during a standard viewing. From structural
integrity to electrical systems, plumbing infrastructure to pest infestations, a
comprehensive inspection covers every aspect of the property that could affect its value,
safety, and liveability.
This guide will walk you through everything you need to know about house inspections in
Australia, from understanding what they involve to interpreting your inspection report and
taking appropriate action based on the findings.
> A thorough house inspection is not merely a formality but a critical step in property
> transactions that can save thousands of dollars and prevent significant headaches down the
> track. Understanding what inspectors look for and how to interpret their findings empowers
> you to make confident property decisions.
## What Is a House Inspection?
A house inspection is a detailed professional assessment conducted by a qualified building
inspector to evaluate the overall condition of a residential property. This comprehensive
evaluation examines the structural integrity, safety systems, and functionality of various
components throughout the home.
During a house inspection, the inspector systematically examines both the interior and
exterior of the property, documenting their findings in a detailed report. The goal is to
identify existing defects, potential problems, and maintenance issues that could affect the
property's value, safety, or habitability.
### Key Areas Assessed During a House Inspection
A comprehensive house inspection typically covers the following areas:
- **Structural elements:** Foundation, walls, floors, ceilings, and roof structure
- **Building envelope:** Roof cladding, gutters, external walls, windows, and doors
- **Internal systems:** Electrical wiring, plumbing, drainage, and ventilation
- **Safety features:** Smoke detectors, handrails, balustrades, and emergency exits
- **Site conditions:** Drainage, landscaping, retaining walls, and fencing
- **Wet areas:** Bathrooms, laundry, and kitchen for signs of water damage or leaks
### Types of House Inspections
There are several types of house inspections available, each serving different purposes:
- **Pre-purchase inspections:** Conducted before buying a property to identify defects and potential issues
- **[Pre-sale inspections](/pre-sale-inspections):** Undertaken by vendors to identify and address issues before listing
- **Building and pest inspections:** Combines structural assessment with timber pest (termite) inspection
- **New construction inspections:** Stage inspections during building and handover inspections for new homes
- **Maintenance inspections:** Regular assessments to identify maintenance needs and prevent deterioration
- **Specific issue inspections:** Targeted assessments for mould, asbestos, drainage, or other specific concerns
## Why House Inspections Matter
House inspections serve multiple critical functions in property ownership and transactions.
Understanding their importance helps buyers, sellers, and owners appreciate why this
investment is worthwhile.
### Transaction Transparency
For property transactions, house inspections provide essential transparency between buyers
and sellers. They reveal the true condition of a property beyond what is visible during a
standard viewing, enabling both parties to negotiate fairly based on factual information.
- Buyers can make informed decisions about whether to proceed with a purchase
- Sellers can address issues before listing to avoid surprises during negotiations
- Negotiated prices can reflect the actual condition of the property
- Both parties have documented evidence of the property's condition at the time of sale
### Preventative Maintenance
Regular house inspections are not just for property transactions. They play a vital role in
preventative maintenance for homeowners:
- **Early detection:** Identifying problems before they escalate into costly repairs
- **Planned budgeting:** Understanding upcoming maintenance needs allows for financial planning
- **Property preservation:** Maintaining the structural integrity and value of your investment
- **Safety assurance:** Ensuring the home remains safe for occupants
### Financial Protection
The cost of a house inspection is minimal compared to the potential financial implications
of undiscovered defects:
- Major structural repairs can cost tens of thousands of dollars
- Termite damage remediation often exceeds $10,000
- Replumbing or rewiring an entire house is a significant expense
- Foundation repairs can be among the most expensive home repairs
> The average cost of a comprehensive building inspection in Australia ranges from $400 to
> $800, depending on the property size and location. This investment can potentially save
> buyers from purchasing a property with defects that could cost tens of thousands of dollars
> to rectify.
## Professional vs. DIY Approach
While some homeowners may be tempted to conduct their own property assessments, there are
significant advantages to engaging a qualified professional inspector.
### Expert Credentials and Knowledge
Professional building inspectors bring specialised knowledge and training that the average
homeowner simply does not possess:
- **Technical expertise:** Understanding of building codes, construction methods, and common defect patterns
- **Industry experience:** Years of inspecting properties across various ages, styles, and conditions
- **Ongoing education:** Staying current with building regulations and industry best practices
- **Objectivity:** Providing unbiased assessments without emotional attachment to the property
### Advanced Diagnostic Equipment
Professional inspectors utilise specialised equipment that enhances their ability to detect
issues:
- **Thermal imaging cameras:** Detect moisture, insulation gaps, and electrical hotspots invisible to the naked eye
- **Moisture meters:** Measure moisture levels in building materials to identify water damage
- **Bore scopes:** Inspect cavities and concealed spaces without destructive testing
- **Electronic levels:** Precisely measure floor and wall alignment
- **Termite detection devices:** Radar and acoustic equipment to detect pest activity
### When to Engage a Professional
While you can conduct your own visual inspections between professional assessments, there
are situations where engaging a qualified inspector is essential:
- Before purchasing any property, regardless of age or condition
- When selling a property to identify issues that may affect the sale
- After severe weather events such as storms, floods, or bushfires
- When you notice signs of potential problems such as cracks, leaks, or pest activity
- As part of regular maintenance, typically every 3 to 5 years for owned properties
- Before and after major renovations or extensions
### Limitations of DIY Inspections
DIY inspections have significant limitations that can result in missed defects:
- Inability to access roof voids, subfloor areas, and other confined spaces safely
- Lack of knowledge about what constitutes a defect versus normal building behaviour
- No specialised equipment to detect hidden moisture, pests, or electrical issues
- Emotional attachment may cloud judgement when assessing a potential purchase
- No professional documentation or liability coverage for missed issues
## Inspection Components: What Gets Examined
A comprehensive house inspection covers numerous components and systems throughout the
property. Understanding what is examined helps you appreciate the scope of the assessment.
### Structural Elements
The structural elements form the backbone of any building and are critical to its safety and
longevity:
- **Foundation:** Inspectors check for cracks, settlement, moisture intrusion, and structural integrity
- **Floor framing:** Assessment of floor joists, bearers, and subfloor supports for damage or deterioration
- **Wall framing:** Evaluation of wall structure, including load-bearing walls and tie-down systems
- **Roof structure:** Inspection of rafters, trusses, battens, and ridge beams
- **Ceiling structure:** Assessment of ceiling joists and any visible damage
### Electrical Systems
Electrical inspections focus on safety and compliance with current standards:
- **Switchboard:** Condition, safety switches (RCDs), circuit breakers, and wiring connections
- **Wiring:** Visual assessment of accessible wiring for damage, deterioration, or non-compliant installations
- **Power points and switches:** Testing for functionality and safety
- **Light fittings:** Condition and proper installation
- **Smoke detectors:** Presence, placement, and functionality
Note: Building inspectors conduct visual assessments of electrical systems. For detailed
electrical testing and certification, a licensed electrician should be engaged.
### Plumbing Infrastructure
Plumbing inspections examine water supply, drainage, and associated fixtures:
- **Water supply:** Pipes, taps, water pressure, and evidence of leaks
- **Drainage:** Visible pipes, drain flow, and potential blockages
- **Hot water system:** Type, age, condition, and installation compliance
- **Toilets and cisterns:** Operation, seals, and connections
- **Wet area waterproofing:** Signs of failure in bathrooms, laundry, and kitchen
### HVAC Equipment
Heating, ventilation, and air conditioning systems are assessed for condition and function:
- **Air conditioning units:** Condition, age, and basic operation
- **Heating systems:** Gas heaters, ducted heating, and fireplace safety
- **Ventilation:** Exhaust fans, roof ventilation, and subfloor ventilation
- **Ductwork:** Visible condition and insulation
### Insulation
Insulation assessment includes:
- Presence and type of ceiling insulation
- Coverage and condition of insulation material
- Identification of gaps or areas lacking insulation
- Signs of rodent damage or contamination
### Appliances
If appliances are included in the sale, inspectors may conduct basic assessments:
- Ovens, cooktops, and rangehoods
- Dishwashers
- Built-in microwaves or other appliances
- Pool or spa equipment
### Exterior Features
External inspections cover all aspects of the property's exterior:
- **Roof cladding:** Tiles, metal sheets, or other roofing materials for damage or deterioration
- **Gutters and downpipes:** Condition, alignment, and drainage
- **External walls:** Cladding condition, cracks, and weatherproofing
- **Windows and doors:** Operation, seals, and condition
- **Balconies and decks:** Structure, waterproofing, and safety barriers
- **Driveways and paths:** Condition and drainage
- **Fencing and retaining walls:** Structural condition and compliance
- **Garage and carport:** Structure, doors, and condition
### Specialised Testing
Depending on the property and client requirements, additional specialised testing may be
conducted:
- **Mould inspection:** Visual assessment and air quality testing for mould presence
- **Asbestos identification:** Visual assessment and sampling of suspected asbestos materials
- **Radon testing:** Assessment of radon gas levels, particularly in certain geographic areas
- **Lead paint testing:** Identification of lead-based paint in older properties
- **Methamphetamine residue testing:** Detection of drug contamination in properties
## House Inspection Checklist
The following table provides a comprehensive overview of what is examined during a standard
house inspection:
| Category | Components Inspected | What Inspectors Look For |
| -------------------- | ---------------------------------------------- | ----------------------------------------------- |
| Foundation | Concrete slab, stumps, piers, footings | Cracks, settlement, moisture, structural damage |
| Subfloor | Bearers, joists, ventilation, drainage | Rot, termite damage, dampness, sagging |
| Walls (External) | Brick, timber, cladding, render, weatherboards | Cracks, bulging, moisture damage, deterioration |
| Walls (Internal) | Plasterboard, render, timber panelling | Cracks, water stains, movement, damage |
| Roof Structure | Trusses, rafters, battens, tie-downs | Sagging, termite damage, inadequate bracing |
| Roof Covering | Tiles, metal, slate, flashings, valleys | Broken tiles, rust, lifting, leak potential |
| Gutters and Drainage | Gutters, downpipes, stormwater drains | Rust, blockages, incorrect falls, damage |
| Ceilings | Plasterboard, timber, cornices, access points | Sagging, water stains, cracks, movement |
| Floors | Timber, tiles, carpet, concrete, vinyl | Uneven surfaces, squeaking, damage, moisture |
| Windows and Doors | Frames, glass, seals, hardware, screens | Operation issues, rot, broken seals, damage |
| Electrical | Switchboard, points, switches, smoke alarms | Outdated wiring, safety switches, compliance |
| Plumbing | Pipes, taps, drains, hot water system | Leaks, corrosion, water pressure, compliance |
| Wet Areas | Bathrooms, laundry, kitchen | Waterproofing failure, leaks, ventilation |
| HVAC | Air conditioning, heating, ventilation | Operation, age, condition, servicing needs |
| Exterior | Fencing, paths, driveway, landscaping | Structural issues, drainage, trip hazards |
## Duration and Frequency of House Inspections
Understanding the time commitment and recommended frequency of house inspections helps you
plan accordingly.
### How Long Does a House Inspection Take?
The duration of a house inspection depends on several factors, but typically ranges from 2
to 4 hours for a standard residential property:
- **Small apartment or unit:** 1 to 2 hours
- **Standard 3 to 4 bedroom house:** 2 to 3 hours
- **Large or complex property:** 3 to 4 hours or more
- **Combined building and pest inspection:** Add 30 to 60 minutes
Factors that can affect inspection duration include:
- Property size and number of rooms
- Age and complexity of the building
- Accessibility of roof void, subfloor, and other spaces
- Condition of the property and number of defects found
- Additional specialised testing required
### Recommended Inspection Frequency
For properties you own, regular inspections help maintain the property and identify issues
early:
- **Comprehensive building inspection:** Every 3 to 5 years for general maintenance assessment
- **Timber pest inspection:** Annually, particularly in termite-prone areas
- **Post-event inspections:** After significant weather events, earthquakes, or other incidents
- **Pre-renovation inspections:** Before undertaking major works to understand existing conditions
| Inspection Type | Recommended Frequency | Purpose |
| ------------------------ | --------------------- | ----------------------------------------------------------- |
| Full Building Inspection | Every 3 to 5 years | Comprehensive condition assessment and maintenance planning |
| Timber Pest Inspection | Annually | Early detection of termite activity and pest damage |
| Roof Inspection | Every 2 to 3 years | Check for damage, deterioration, and maintenance needs |
| Plumbing Check | Every 2 to 3 years | Identify leaks, corrosion, and potential failures |
| Electrical Safety Check | Every 5 years | Ensure compliance and safety of electrical systems |
## Inspector Qualifications and Licensing
In Australia, building inspector licensing requirements vary by state and territory.
Engaging a properly qualified inspector is essential for obtaining a reliable assessment.
### State-Based Licensing Requirements
Each state has its own regulatory framework for building inspectors:
- **Victoria:** The Victorian Building Authority (VBA) registers building practitioners, including building inspectors. Inspectors must hold appropriate qualifications and demonstrate competency.
- **New South Wales:** NSW Fair Trading oversees licensing for building consultants. Inspectors should hold a builder's licence or equivalent qualifications.
- **Queensland:** The Queensland Building and Construction Commission (QBCC) licenses building inspectors. Specific licensing categories apply to different inspection types.
- **Western Australia:** The Building Commission regulates building services, though there is no specific building inspector licence. Inspectors should hold relevant building qualifications.
- **South Australia:** Consumer and Business Services oversees building work. Inspectors should hold appropriate building qualifications.
### What to Look For in a Building Inspector
When selecting a building inspector, consider the following criteria:
- **Appropriate licensing:** Verify they hold the required licence for your state
- **Professional indemnity insurance:** Essential protection if issues are missed
- **Relevant experience:** Experience with properties similar to yours in age and type
- **Industry memberships:** Membership in professional bodies such as AIBS, HIA, or MBA
- **Sample reports:** Request a sample report to assess thoroughness and clarity
- **Equipment used:** Confirm they use appropriate diagnostic equipment
- **References and reviews:** Check testimonials and online reviews
### Questions to Ask Before Engaging an Inspector
- What qualifications and licences do you hold?
- How many inspections have you conducted?
- Do you carry professional indemnity insurance and to what value?
- What does your inspection cover and what are the exclusions?
- What equipment do you use during inspections?
- When will I receive the report?
- Will you be available to discuss the findings?
## Common Findings in House Inspections
Understanding the most common issues found during house inspections helps you know what to
look for and what questions to ask.
### Outdated Electrical Wiring
Electrical issues are among the most common findings, particularly in older properties:
- Absence of safety switches (RCDs) on power circuits
- Old ceramic fuses requiring upgrade to circuit breakers
- Aluminium wiring from the 1960s and 1970s requiring assessment
- Deteriorated or non-compliant wiring in roof spaces
- Insufficient power points leading to overloaded circuits
### Plumbing Leaks and Issues
Plumbing problems can lead to significant water damage if left unaddressed:
- Leaking taps, toilets, and supply connections
- Corroded galvanised pipes in older homes
- Poor drainage and blocked drains
- Failing waterproofing in wet areas
- Hot water system deterioration and age-related issues
### Foundation Concerns
Foundation issues can have significant structural implications:
- Cracking in concrete slabs indicating movement
- Deteriorated or settling stumps under elevated floors
- Inadequate drainage around foundations
- Tree root damage affecting foundation stability
- Moisture intrusion through rising damp or inadequate damp coursing
### Roofing Deficiencies
Roof problems can lead to water ingress and structural damage:
- Broken or displaced roof tiles
- Corroded metal roofing requiring replacement
- Deteriorated flashings around penetrations and junctions
- Blocked or poorly aligned gutters
- Inadequate roof ventilation causing moisture problems
### HVAC Issues
Heating, ventilation, and air conditioning systems often require attention:
- Air conditioning units at end of service life
- Inadequate maintenance leading to poor performance
- Dirty or damaged ductwork
- Exhaust fans not functioning or inadequately sized
- Gas heating systems requiring servicing or compliance checks
| Common Finding | Typical Severity | Estimated Repair Cost | Urgency |
| ------------------------ | ----------------- | --------------------- | ------------- |
| Missing safety switches | Safety concern | $200 to $500 | High |
| Leaking taps and toilets | Minor | $100 to $300 | Medium |
| Broken roof tiles | Moderate | $300 to $800 | Medium |
| Foundation cracking | Major | $2,000 to $20,000+ | High |
| Termite damage | Major | $5,000 to $50,000+ | Critical |
| Waterproofing failure | Major | $3,000 to $15,000 | High |
| Gutters need replacement | Moderate | $1,500 to $4,000 | Medium |
| Rewiring required | Major | $8,000 to $20,000 | High |
| Rising damp | Moderate to Major | $2,000 to $10,000 | Medium |
| HVAC replacement needed | Moderate | $3,000 to $15,000 | Low to Medium |
## The Inspection Process: What to Expect
Understanding the house inspection process helps you prepare and know what to expect at each
stage.
### Step 1: Scheduling the Inspection
The inspection process begins with booking an appointment:
- Contact the inspection company and provide property details
- Specify the type of inspection required (building, pest, combined, specialised)
- Arrange access to the property through the agent or vendor
- Confirm the date, time, and expected duration
- Discuss any specific concerns you want the inspector to focus on
### Step 2: Agreement Review
Before the inspection, you will receive documentation to review:
- Inspection agreement outlining scope, limitations, and terms
- Information about what is and is not included in the inspection
- Standard limitations regarding inaccessible areas and concealed defects
- Details about the report format and delivery timeframe
### Step 3: Payment
Payment arrangements vary between inspection companies:
- Some require payment before the inspection
- Others invoice after the inspection is complete
- Payment methods typically include credit card, bank transfer, or online payment
- Obtain a tax invoice for your records
### Step 4: On-Site Evaluation
The inspector conducts the physical assessment of the property:
- **Exterior assessment:** Walking the perimeter, examining walls, roof, and site conditions
- **Interior inspection:** Systematically examining each room and all internal elements
- **Roof space inspection:** Accessing the roof void to inspect structure and services
- **Subfloor inspection:** Examining the underfloor area if accessible
- **Testing and measurements:** Using equipment to detect moisture, test surfaces, and measure levels
- **Documentation:** Taking photographs and notes throughout the inspection
### Step 5: Communication During the Inspection
If you attend the inspection, expect the following:
- The inspector will work systematically through the property
- They may point out significant findings as they go
- You can ask questions, but avoid interrupting the inspection process
- A brief verbal summary is often provided at the conclusion
- Detailed discussion is best held after reviewing the written report
### Step 6: Report Delivery
Following the inspection, you will receive a detailed written report:
- Most reports are delivered within 24 to 48 hours
- Reports are typically provided electronically as a PDF
- The report includes photographs documenting findings
- Findings are categorised by severity and type
- Recommendations for repairs or further investigation are provided
## Understanding Your Inspection Report
The inspection report is the key deliverable from a house inspection. Understanding how to
interpret it helps you take appropriate action.
### Report Structure
A comprehensive inspection report typically includes:
- **Executive summary:** Overview of major findings and overall condition
- **Property details:** Address, type, age, and construction details
- **Inspection scope:** What was and was not inspected, including reasons for limitations
- **Detailed findings:** Section-by-section analysis of each area inspected
- **Photographs:** Visual documentation of defects and conditions
- **Recommendations:** Suggested actions and further investigations
### Severity Categorisation
Most inspection reports categorise findings by severity to help you understand their
importance:
- **Safety concern:** Issues posing immediate risk to occupant safety requiring urgent attention
- **Major defect:** Significant issues that may affect structural integrity, require substantial repair, or lead to major damage if not addressed
- **Minor defect:** Issues that require attention but do not pose immediate risk or significant damage
- **Maintenance item:** Normal wear and maintenance needs that should be addressed as part of routine property care
- **Further investigation required:** Findings that need assessment by a specialist to determine extent and implications
### Prioritising Findings
When reviewing your report, prioritise findings in the following order:
1. **Safety concerns:** Address immediately as these pose risk to occupants
1. **Major defects:** Plan for assessment and repair in the short term
1. **Items requiring further investigation:** Engage specialists to determine scope and cost
1. **Minor defects:** Include in maintenance planning
1. **Maintenance items:** Address as part of ongoing property care
> When purchasing a property, focus your attention on Safety Concerns and Major Defects. These
> items should be factored into your purchase decision and may warrant negotiation on price or
> conditions. Minor defects and maintenance items are normal for most properties and are
> typically not grounds for significant negotiation.
### What to Do After Receiving Your Report
After reviewing your inspection report, take the following steps:
- Read the entire report carefully, including the limitations section
- Contact the inspector to discuss any findings you do not understand
- Obtain quotes for major repairs if purchasing the property
- Engage specialists for any items flagged for further investigation
- Use the findings to negotiate if applicable to your situation
- Keep the report for your records as a baseline of property condition
## Frequently Asked Questions
### Should I attend the house inspection?
**Short answer:** Yes, attending the inspection is highly recommended as it
provides valuable firsthand insight into the property's condition.
Attending the inspection allows you to see issues firsthand, ask questions, and gain a
better understanding of the property. The inspector can explain findings as they go and
point out areas of concern that photographs may not fully convey. However, if you cannot
attend, a comprehensive report with photographs will still provide the information you
need to make informed decisions.
###
Do I need a house inspection if I have pre-approval for a mortgage?
**Short answer:** Yes, mortgage pre-approval is separate from property
condition assessment. A house inspection protects your investment regardless of
financing status.
Mortgage pre-approval confirms your borrowing capacity but does not assess the
property's condition. The lender's valuation is focused on market value, not structural
integrity or defects. A house inspection identifies issues that could affect your
enjoyment of the property and future costs. Even if you are paying cash, an inspection
is a wise investment to understand what you are purchasing.
###
What is the difference between a house inspection and a property valuation?
**Short answer:** A house inspection assesses the physical condition and
defects, while a valuation determines market value. They serve different purposes and
are conducted by different professionals.
A house inspection is a detailed technical assessment of the property's structure,
systems, and condition, identifying defects and maintenance needs. It is conducted by a
building inspector and results in a detailed condition report. A property valuation is
an assessment of market value conducted by a certified valuer, typically for lending
purposes. Valuers consider location, size, features, and comparable sales but do not
conduct detailed condition assessments. Both are valuable but serve different purposes.
###
How much does a house inspection cost in Australia?
**Short answer:** Typically between $400 and $800 for a standard building
inspection, with [combined building and pest](/building-and-pest-inspections) inspections ranging from $500 to $900.
Costs vary based on property size, location, and the type of inspection required. Larger
properties, regional locations, and additional specialised testing will increase costs.
While it may be tempting to choose the cheapest option, consider the inspector's
qualifications, experience, and report quality. A thorough inspection from a reputable
inspector is a worthwhile investment that can save significant money by identifying
issues before purchase.
###
Can I use the inspection report to negotiate the purchase price?
**Short answer:** Yes, inspection findings, particularly major defects, can
be used as a basis for price negotiation or requesting repairs before settlement.
If the inspection reveals significant defects, you can negotiate with the vendor to
reduce the price by the estimated repair cost, request repairs be completed before
settlement, or request a credit at settlement. Focus negotiations on major defects
rather than minor or cosmetic issues. Have quotes from tradespeople to support your
negotiation position. Your solicitor or conveyancer can advise on the best approach for
your situation.
###
What happens if the inspection finds termites?
**Short answer:** Termite findings require immediate attention. You should
obtain a detailed timber pest report, assess the extent of damage, and get quotes for
treatment and repairs.
If termites or termite damage is found, do not panic but do take it seriously. A
detailed [timber pest inspection](/timber-pest-inspections) will identify the species, extent of activity, and
damage. Treatment options include chemical barriers, baiting systems, or physical
barriers. Repair costs depend on damage extent. For pre-purchase situations, you may
negotiate a price reduction, request treatment before settlement, or in severe cases,
reconsider the purchase. Many properties with termite history can be successfully
treated and protected.
###
Do I need both a building inspection and a pest inspection?
**Short answer:** Yes, both are recommended. While some issues overlap,
each inspection focuses on different aspects and requires different expertise.
Building inspections focus on structural integrity, construction quality, and building
systems. Pest inspections specifically target timber pests, particularly termites, which
cause significant damage to Australian homes. Many companies offer combined building and
pest inspections, which is cost-effective and convenient. Termite damage can be
concealed within walls and structural timber, requiring specialist knowledge and
equipment to detect. In termite-prone areas, annual pest inspections are recommended
even for owned properties.
###
What areas might be excluded from a house inspection?
**Short answer:** Areas that are inaccessible, unsafe to access, or
concealed by stored items or building materials are typically excluded from the
inspection scope.
Standard exclusions typically include areas with restricted access such as locked rooms
or inaccessible roof voids, areas concealed by stored items, furniture, or floor
coverings, areas requiring destructive investigation, underground services such as
drains and plumbing, and swimming pool compliance certification. Inspectors will note
exclusions in their report and may recommend further investigation if there are concerns
about inaccessible areas. Consider requesting access be arranged for any areas of
particular concern.
###
How soon before purchasing should I get an inspection?
**Short answer:** During the due diligence or cooling-off period, typically
within the first 5 to 14 days after signing the contract.
Most property contracts include a cooling-off period or are subject to a building
inspection clause. Schedule your inspection as early as possible within this period to
allow time for the inspection, report delivery, review, obtaining quotes if needed, and
negotiation. In competitive markets, you may need to arrange a pre-auction inspection.
Discuss timing with your solicitor or conveyancer to ensure you meet any contractual
deadlines.
###
Can I walk away from a purchase based on inspection findings?
**Short answer:** Yes, if your contract includes a building inspection
clause or you are within the cooling-off period, you can withdraw based on
unsatisfactory findings.
If your contract includes a subject to building inspection clause, you can terminate if
the inspection reveals significant defects. The clause typically needs to specify what
constitutes grounds for termination. During the statutory cooling-off period, you can
withdraw for any reason, though you may forfeit a small percentage of the deposit.
Consult your solicitor or conveyancer about your specific contract terms and the process
for terminating if needed.
###
What qualifications should a house inspector have?
**Short answer:** Inspectors should hold appropriate state licensing, have
relevant building qualifications, carry professional indemnity insurance, and have
experience inspecting similar properties.
Licensing requirements vary by state. In Victoria, check VBA registration. In New South
Wales, verify NSW Fair Trading licensing. In Queensland, confirm QBCC licensing. Look
for membership in professional bodies such as the Australian Institute of Building
Surveyors (AIBS), Housing Industry Association (HIA), or Master Builders Association
(MBA). Professional indemnity insurance is essential in case issues are missed. Ask
about their experience with properties of similar age and type to yours.
### How often should I have my home inspected?
**Short answer:** A comprehensive building inspection every 3 to 5 years is
recommended, with annual timber pest inspections in termite-prone areas.
Regular inspections help identify maintenance needs before they become major problems.
For owned properties, a full building inspection every 3 to 5 years provides a baseline
assessment and identifies developing issues. Annual timber pest inspections are
recommended, particularly in areas with high termite activity. Additional inspections
should be conducted after severe weather events, before major renovations, and if you
notice signs of potential problems such as cracks, leaks, or pest activity.
## Key Takeaways
- House inspections are essential for property transactions, providing transparency about the true condition of a property beyond what is visible during viewings.
- Professional inspectors bring expertise, specialised equipment, and objectivity that DIY inspections cannot match.
- Comprehensive inspections cover structural elements, electrical systems, plumbing, HVAC, insulation, appliances, and exterior features.
- Standard inspections typically take 2 to 4 hours depending on property size and complexity.
- Verify inspector qualifications including state licensing, professional indemnity insurance, and relevant experience.
- Common findings include outdated electrical wiring, plumbing leaks, foundation issues, roofing deficiencies, and HVAC problems.
- Reports categorise findings by severity. Prioritise Safety Concerns and Major Defects when making purchase decisions.
- For owned properties, conduct comprehensive inspections every 3 to 5 years and annual timber pest inspections in termite-prone areas.
## References and Resources
- [ Victorian Building Authority (VBA) ](https://www.vba.vic.gov.au/)
- [ NSW Fair Trading ](https://www.fairtrading.nsw.gov.au/)
- [ Queensland Building and Construction Commission (QBCC) ](https://www.qbcc.qld.gov.au/)
- [ WA Building Commission ](https://www.commerce.wa.gov.au/building-commission)
- [ Consumer and Business Services South Australia ](https://www.cbs.sa.gov.au/)
- [ Australian Institute of Building Surveyors (AIBS) ](https://www.aibs.com.au/)
For a complete overview, see our [guide to pre-purchase building and pest inspections](/guides/pre-purchase-building-pest-inspection-guide).
### Construction Stage Inspections in Geelong's Residential Market
Source: https://ownerinspections.com.au/articles/construction-stage-inspections-in-geelong
Published: 2023-10-18 | Updated: 2026-02-11 | Category: Construction Inspections
Author: Maison Azdari
Geelong has undergone a remarkable transformation in recent years, evolving from a traditional manufacturing city into one of Victoria's most sought-after residential locations. The region is attracting retirees looking for coastal living, young professionals priced out of Melbourne, and Melburnians seeking a lifestyle change with the convenience of commuter rail links. This growth has fuelled a surge in new residential construction, from waterfront apartment developments to eco-friendly housing estates and affordable housing projects.
With so much building activity, the importance of quality assurance during construction cannot be overstated. [Construction stage inspections](/new-construction-stage-inspections) act as health assessments for your building project, identifying potential problems at each critical phase before they become costly defects. Whether you are building a new home, investing in a townhouse development, or purchasing off the plan in one of [Geelong](/vic/building-inspections-geelong)'s new estates, understanding these inspections is essential.
> Construction stage inspections are not about catching builders out. They are about catching problems early, when they are simple and affordable to fix, rather than discovering them after completion when rectification becomes complex and expensive.
## Geelong's Growing Housing Market
Geelong's population growth has been among the fastest of any regional city in Australia. The combination of relatively affordable property prices compared to Melbourne, improved transport infrastructure, and a thriving local economy has made the region a magnet for new residents.
This growth has driven a diverse range of new construction projects:
With this volume of construction activity, the risk of defects and compliance issues increases. Independent construction stage inspections provide homeowners and investors with an objective assessment of build quality at each critical milestone.
## What Are Construction Stage Inspections?
Construction stage inspections are independent assessments conducted at key milestones during the building process. Think of them as health assessments for your construction project. Just as a doctor monitors a patient's health at regular intervals to catch problems early, a construction stage inspector examines your build at each critical phase to identify defects, non-compliance, and quality issues before they are concealed by subsequent work.
These inspections are carried out by licensed building inspectors who are independent of the builder and the building surveyor. Their role is to represent your interests as the property owner, providing an objective assessment of whether the work meets the required standards.
## Phases of Construction Stage Inspections
A comprehensive construction stage inspection programme covers three main phases, each addressing different aspects of the build.
### Pre-Construction Inspection
The pre-construction inspection takes place before building work begins. This inspection examines the site preparation, including:
### During Construction Inspections
Inspections during the construction phase are conducted at key milestones when critical building elements are still visible and accessible. The typical stages include:
### Final Inspection (Pre-Handover)
The final inspection, also known as the pre-handover or practical completion inspection, is the last opportunity to identify defects before you accept the property from the builder. This comprehensive inspection covers every accessible element of the completed building, documenting any defects or incomplete work that the builder must rectify before handover.
## Choosing the Right Inspector in Geelong
Selecting the right building inspector for your construction stage inspections is critical. Not all inspectors offer the same level of expertise, and local knowledge can make a significant difference in Geelong's market.
## Comprehensive Inspection Checklist
A thorough construction stage inspection covers multiple aspects of the building work. The following checklist outlines the key areas assessed at each inspection.
### Structural Integrity
### Safety Compliance
### Material Quality
### Workmanship
### Code Compliance
### Detailing and Finishes
For a complete overview, see our [guide to construction stage inspections](/guides/construction-stage-inspections-guide).
### Understanding Your Legal Rights in Pre-Settlement Inspections
Source: https://ownerinspections.com.au/articles/legal-rights-in-pre-settlement-inspections
Published: 2023-10-15 | Updated: 2026-05-12 | Category: Pre-Settlement Inspections
Author: Maison Azdari
Buying a property involves more than signing contracts and arranging finance. Before ownership officially transfers, buyers have one final chance to inspect the property and confirm that everything is in the agreed condition.
This process is known as a pre settlement inspection. It protects buyers from unexpected property damage, missing fixtures, incomplete repairs, or changes that occurred after the contract was signed.
Many Australian buyers assume settlement automatically guarantees the property will be handed over in the same condition. In reality, issues can arise between exchange and settlement, especially during longer settlement periods.
A proper home inspection before settlement helps buyers identify defects early, avoid costly surprises, and negotiate solutions before settlement becomes final.
For buyers, homeowners, developers, and investors, understanding your pre settlement inspection rights is an important part of protecting your financial investment.
What You’ll Learn in This Guide
- What a pre settlement inspection is and why it matters
- Your legal rights before settlement in Australia
- A complete pre settlement inspection checklist
- Common property problems buyers discover before settlement
- What happens if damage is found after settlement
- State by state rules for pre settlement inspection rights
- How insurance applies before property settlement
- When to involve a professional building inspector
## What Is a Pre Settlement Inspection?
A pre settlement inspection is the buyer’s final opportunity to inspect the property before settlement takes place.
The inspection allows buyers to confirm:
- The property remains in the same condition as when the contract was signed
- Agreed repairs have been completed
- Fixtures and inclusions remain at the property
- Appliances and utilities are functioning correctly
- No new damage has occurred
This inspection is sometimes called:
| Common Terms | Meaning |
| ------------------------------------- | -------------------------------------------------- |
| Pre settlement inspection | Final property inspection before settlement |
| Settlement inspection | Final buyer walkthrough |
| Final inspection before settlement | Last property condition check |
| Home inspection before settlement | Buyer inspection before ownership transfer |
| Property inspection before settlement | Assessment of property condition before settlement |
The inspection usually takes place between two and seven days before settlement depending on the state or territory.
In many cases, buyers bring:
- Their conveyancer
- Real estate agent
- Licensed building inspector
- Pest inspector
- Builder or contractor
A professional inspection can provide objective evidence if disputes arise later.
Document Defects
the Right Way
}
buttonHref="/articles/document-building-defects-legal-claim"
variant="secondary"
/>
## Why a Pre Settlement Inspection Matters
A property can change significantly between contract signing and settlement.
Problems may occur due to:
- Storm damage
- Plumbing leaks
- Tenant damage
- Appliance failure
- Vandalism
- Poor renovation work
- Moving related damage
- Structural movement
Without a proper inspection before settlement, buyers may inherit expensive repair costs after ownership transfers. Even seemingly small problems can become major financial issues later.
For example:
| Problem Identified | Potential Financial Impact |
| ------------------------- | ---------------------------------- |
| Roof leak | Water damage and mould remediation |
| Missing appliances | Replacement costs |
| Cracked walls | Structural investigation expenses |
| Pest activity | Timber repair and treatment |
| Faulty electrical systems | Safety risks and rewiring costs |
| Plumbing issues | Internal water damage |
A detailed [property condition assessment](/articles/inspecting-house-condition-guide) provides evidence before settlement occurs.
## Your Legal Right to Inspect Before Settlement
The right to conduct a [pre-settlement inspection](/apartment-pre-settlement) is included in the standard contract of sale used in every Australian state and territory. This right allows the buyer (or their representative) to access the property in the days leading up to settlement to verify its condition.
While laws differ between states, buyers are usually entitled to:
- Reasonable access to the property
- Inspection before settlement
- Verification of agreed conditions
- Confirmation repairs are complete
- Inspection of fixtures and inclusions
### What Buyers Can Check During the Inspection
During the inspection, buyers should confirm:
### Property Condition
The property should remain in substantially the same condition as when contracts were exchanged.
Buyers should look for:
- New cracks
- Water damage
- Ceiling stains
- Damaged flooring
- Broken windows
- Roof issues
### Agreed Repairs
If the seller agreed to complete repairs, buyers can verify the work has been properly finished.
Examples include:
- Plumbing repairs
- Roof repairs
- Electrical work
- Painting
- Structural maintenance
### Fixtures and Inclusions
Buyers should ensure all agreed items remain in the property.
Common inclusions include:
- Ovens
- Dishwashers
- Air conditioning systems
- Light fittings
- Curtains and blinds
- Security systems
- Garage remotes
## What Happens if Damage Is Found After Settlement?
One of the most searched concerns among Australian buyers is: “***What happens if damage is found after settlement?***”
The answer depends on:
- When the damage occurred
- What the contract states
- Insurance arrangements
- Whether the issue was documented before settlement
If buyers discover damage before settlement, they may be able to:
| Buyer Options | Description |
| ----------------------- | ------------------------------------ |
| Request repairs | Seller fixes issue before settlement |
| Negotiate compensation | Purchase price adjustment |
| Delay settlement | Settlement postponed until resolved |
| Retain settlement funds | Funds held until repairs completed |
| Seek legal advice | Used for major disputes |
Once settlement occurs, resolving disputes becomes more difficult.
This is why documenting all concerns during the pre settlement inspection checklist process is extremely important.
## Complete Pre Settlement Inspection Checklist
One of the most valuable parts of any pre settlement inspection is using a detailed checklist.
This helps ensure buyers do not overlook important problems.
### Interior Inspection Checklist
| Area | What to Check |
| ------------------ | ----------------------------- |
| Walls and ceilings | Cracks, stains, movement |
| Flooring | Damage, lifting, moisture |
| Windows and doors | Locks, alignment, operation |
| Kitchen appliances | Oven, stove, rangehood |
| Bathroom fittings | Leaks, drainage, mould |
| Air conditioning | Proper operation |
| Smoke alarms | Installed and functioning |
| Lighting | Switches and fixtures working |
### Plumbing Checklist
| Plumbing Item | Inspection Point |
| ---------------- | -------------------------- |
| Taps | Water pressure and leaks |
| Toilets | Flushing performance |
| Hot water system | Operational condition |
| Drains | Blockages or slow drainage |
| Pipes | Water damage signs |
### Electrical Checklist
| Electrical Item | Inspection Point |
| --------------- | ------------------------ |
| Power points | Functionality |
| Switchboard | Safety and accessibility |
| Light switches | Proper operation |
| Safety switches | Installed correctly |
| Ceiling fans | Working condition |
### Exterior Inspection Checklist
| Exterior Area | What to Check |
| --------------- | ------------------------- |
| Roof | Missing tiles or leaks |
| Gutters | Blockages or rust |
| Fencing | Structural damage |
| Driveways | Cracking or movement |
| Garage doors | Remote functionality |
| Gardens | Damage or neglected areas |
| Retaining walls | Structural movement |
### Pest Inspection Checklist
Buyers should also look for:
- Termite activity
- Timber damage
- Moisture build up
- Mould growth
- Rodent infestation
- Poor ventilation
This checklist supports several high value search terms including:
- Pre-settlement inspection checklist
- Settlement inspection checklist
- Home inspection before settlement
- Property inspection before settlement
## Common Problems Found During a Pre Settlement Inspection
Many buyers are surprised by the number of issues identified during a pre sale insurance evaluation or settlement inspection.
### Structural Defects
Structural movement can appear during the settlement period.
Common issues include:
- Wall cracking
- Ceiling sagging
- Roof movement
- Uneven flooring
- Foundation settlement
These defects may affect insurance coverage and property value.
### Plumbing Problems
Leaks and water damage are among the most common concerns.
Inspectors regularly identify:
- Burst pipes
- Water pressure issues
- Leaking taps
- Waterproofing failures
- Mould growth
### Electrical Issues
Faulty electrical systems may create safety hazards.
Common findings include:
- Unsafe wiring
- Damaged switches
- Faulty safety switches
- Power failures
### Poor Renovation Work
Unapproved renovations may breach building regulations.
Buyers should look for:
- DIY alterations
- Non-compliant structures
- Incomplete building work
- Waterproofing failures
### Missing Inclusions
Disputes often arise when sellers remove items included in the contract.
Common examples include:
- Dishwashers
- Light fittings
- Curtains
- Security systems
- Garage remotes
### Pest and Moisture Issues
Pest activity can remain hidden until inspection.
Termites, moisture damage, and mould can significantly affect repair costs.
## Steps to Take if Problems Are Found During the Inspection
If buyers discover problems during the pre settlement property inspection, quick action is important.
### 1. Document the Problem Immediately
Take:
- Photos
- Videos
- Written notes
- Inspection reports
Detailed evidence helps support negotiations.
### 2. Notify the Seller or Agent
Buyers should inform:
- Real estate agent
- Conveyancer
- Solicitor
- Seller
All communication should be documented in writing.
### 3. Obtain Professional Advice
For major defects, buyers may need:
- Building inspectors
- Engineers
- Electricians
- Plumbers
- Pest inspectors
### 4. Negotiate a Resolution
Possible solutions include:
| Resolution Option | Purpose |
| ---------------------- | ----------------------------------- |
| Seller repairs damage | Property restored before settlement |
| Financial compensation | Covers repair costs |
| Delayed settlement | Allows further investigation |
| Retention funds | Held until issue resolved |
### 5. Seek Legal Advice if Necessary
Serious disputes may require legal support. This is especially important where:
- Major structural damage exists
- Contract conditions were breached
- Insurance disputes arise
- Sellers refuse repairs
Book a Pre Settlement
Inspection
}
buttonHref="/pre-purchase-inspections"
variant="secondary"
/>
## The Role of Insurance in a Pre Settlement Inspection
Insurance plays an important role during the settlement period. Many buyers assume the seller’s insurance automatically protects them. This is not always straightforward.
### Who Is Responsible for Insurance Before Settlement?
In most cases:
| Stage | Insurance Responsibility |
| ----------------- | -------------------------- |
| Before settlement | Seller maintains insurance |
| After settlement | Buyer becomes responsible |
However, risk transfer rules vary between states.
### Types of Insurance to Consider
#### Building Insurance
Covers structural damage including:
- Roof damage
- Fire damage
- Storm events
- Structural movement
#### Contents Insurance
Protects:
- Appliances
- Furniture
- Personal belongings
#### Liability Insurance
Covers injuries occurring on the property.
## State by State Pre Settlement Inspection Rights in Australia
Each state and territory in Australia has its own rules governing when and how pre-settlement inspections can take place. The timeframes, governing bodies, and standard contract provisions differ, and buyers should understand the rules that apply in their jurisdiction.
| State | Inspection Timeframe | Governing Body | Key Legislation |
| --- | --- | --- | --- |
| New South Wales | Within the final week before settlement | Fair Trading NSW | Conveyancing Act 1919 |
| Queensland | Within 5 business days before settlement | QLD Office of Fair Trading | Property Law Act 1974 |
| Victoria | Within 7 days before settlement | Consumer Affairs Victoria | Sale of Land Act 1962 |
| South Australia | By arrangement before settlement | Consumer and Business Services SA | Land and Business (Sale and Conveyancing) Act 1994 |
| Western Australia | By arrangement before settlement | Consumer Protection WA | Transfer of Land Act 1893 |
| ACT | Within 7 days before settlement | Access Canberra | Civil Law (Sale of Residential Property) Act 2003 |
### New South Wales
In NSW, the [standard contract for the sale of land](https://tenders.nsw.gov.au/public_data/Sale%20of%20Govt%20Assets/1202850%20Sale%20of%20Govt%20Assets%20McKell%20Building.pdf) (issued by the Law Society of NSW and the Real Estate Institute of NSW) provides the buyer with the right to inspect the property during the final week before settlement.
Fair Trading NSW oversees consumer protection in property transactions and can assist buyers who encounter issues. The seller must provide reasonable access during this period. If the buyer identifies damage or missing inclusions, the standard contract allows for an adjustment to the purchase price at settlement or for the seller to rectify the issue before settlement proceeds.
### Queensland
Queensland buyers are entitled to inspect the property within 5 business days before settlement under the REIQ standard contract. The QLD Office of Fair Trading provides guidance and dispute resolution services for property transactions.
If the property is not in the same condition as at the contract date, the buyer can request that the seller either repair the damage or provide a monetary adjustment at settlement. The Property Law Act 1974 supports the buyer's position in these situations.
### Victoria
Victorian buyers have the [right to inspect within 7 days of settlement](https://www.consumer.vic.gov.au/housing/buying-and-selling-property/buying-property/property-settlement/before-property-settlement) under the standard Contract of Sale of Real Estate. Consumer Affairs Victoria is the primary body for consumer protection in property matters.
The [Sale of Land Act 1962](https://www.legislation.vic.gov.au/in-force/acts/sale-land-act-1962) provides the legislative framework, and the contract typically includes provisions for the buyer to require the vendor to rectify any damage or compensate accordingly.
### South Australia (SA)
SA buyers can usually inspect during the final week before settlement.
### Western Australia (WA)
In WA:
- Buyers generally conduct inspections one week before settlement
- Additional inspections may occur if serious problems are identified
### Tasmania, ACT, and NT
Rules vary slightly, but inspections are generally permitted before settlement.
## Consumer Protection Under Australian Law
Beyond the state-specific contract provisions, Australian property buyers are protected by the Australian Consumer Law (ACL), which forms Schedule 2 of the Competition and Consumer Act 2010 (Cth). The ACL provides broad protections against misleading or deceptive conduct in consumer transactions, including property sales.
If a seller or their agent has made representations about the condition of the property, its inclusions, or recent renovations, and those representations turn out to be false or misleading, the buyer may have grounds for action under the ACL. This is separate from and in addition to any contractual remedies.
The ACL also protects buyers against unconscionable conduct, which may be relevant in cases where a seller deliberately conceals defects or refuses to allow reasonable access for a pre-settlement inspection.
## Legal Recourse When Issues Are Found
When a pre-settlement inspection reveals problems, buyers have several options available to them. The appropriate course of action depends on the nature and severity of the issue.
### Negotiate Repairs or Compensation
The first step is usually to raise the issue with the seller (through your solicitor or conveyancer) and request that the seller either repair the damage or provide a financial adjustment at settlement. Most standard contracts allow for this type of negotiation, and many issues are resolved at this stage without further action.
### Delay Settlement
If the issue is significant and the seller has not addressed it by the settlement date, the buyer may be entitled to delay settlement. This is a serious step and should only be taken on legal advice, as delaying settlement without proper grounds can put the buyer in breach of contract. However, where the property condition has materially changed since contract exchange, the buyer generally has strong grounds to request additional time.
### Lodge a Formal Complaint
If the seller refuses to cooperate, buyers can lodge a complaint with the relevant state consumer protection body:
These bodies can provide mediation services to help resolve the dispute without the need for formal legal proceedings.
### Pursue Mediation or Legal Action
If a complaint does not resolve the matter, buyers can pursue mediation through their state's dispute resolution service or, as a last resort, take the matter to a tribunal or court. In NSW, this would be the NSW Civil and Administrative Tribunal (NCAT). In Victoria, it would be the Victorian Civil and Administrative Tribunal (VCAT). In Queensland, the Queensland Civil and Administrative Tribunal (QCAT) handles such matters.
Litigation should be considered a last resort due to the time and cost involved. However, for significant defects or where the seller has acted in bad faith, it may be the only option to recover losses.
## Rights for Apartment and Unit Buyers
Buyers of apartments and units have the same pre-settlement inspection rights as house buyers, but there are additional considerations. Apartment inspections should cover not only the interior of the unit but also common property areas that affect the unit, such as hallways, car parks, storage areas, and building amenities.
For off-the-plan apartments, the inspection is particularly important because it may be the buyer's first opportunity to see the completed product. Defects in new apartments are common, and buyers should pay close attention to finishes, fittings, and whether the completed unit matches the plans and specifications in the contract. For more detail on apartment-specific inspections, see our guide on [avoiding mistakes in apartment pre-settlement inspections](/articles/avoid-mistakes-key-tips-for-apartment-pre-settlement-inspections).
| Inspection Area | House | Apartment |
| --- | --- | --- |
| Interior condition | Yes | Yes |
| Plumbing and electrical | Yes | Yes |
| Appliances and inclusions | Yes | Yes |
| Roof and external structure | Yes | Strata responsibility |
| Garden and fencing | Yes | Common property |
| Car park and storage | N/A | Yes |
| Building amenities | N/A | Yes |
| Common area condition | N/A | Yes |
## Why Professional Building Inspections Matter Before Settlement
Many buyers underestimate the value of professional inspections.
A licensed inspector can identify:
- Structural movement
- Moisture ingress
- Safety hazards
- Pest activity
- Defective workmanship
- Non-compliant renovations
Professional reports provide:
- Independent evidence
- Negotiation support
- Risk assessment
- Insurance documentation
For investors, homeowners, developers, and commercial property managers, this additional layer of protection can prevent major financial loss.
## How to Ensure a Smooth Pre Settlement Inspection
### Schedule the Inspection at the Right Time
Two to three days before settlement is ideal. This provides enough time to address problems.
### Bring the Sales Contract
The contract helps buyers verify:
- Inclusions
- Agreed repairs
- Fixtures
- Special conditions
### Test Everything
Buyers should:
- Turn on taps
- Test lights
- Run appliances
- Open windows
- Check locks
- Test air conditioning
### Use a Detailed Checklist
A proper settlement inspection checklist reduces the risk of missing important issues.
## Protect Your Property Investment Before Settlement
A thorough pre settlement inspection protects buyers from unexpected repair costs, legal disputes, and hidden property defects.
By understanding your legal rights, using a complete pre settlement inspection checklist, and obtaining professional advice where needed, buyers can move into settlement with greater confidence.
Whether you are purchasing a family home, investment property, or commercial asset, identifying issues before settlement can prevent major financial problems later.
Need expert support before settlement? Contact [Owner Inspections](/) today for professional pre settlement inspection services and independent property reporting across Australia.
Contact Owner
Inspections
}
buttonHref="/contact"
variant="primary"
/>
### Restumping a House: How It's Done
Source: https://ownerinspections.com.au/articles/restumping-a-house
Published: 2023-10-12 | Updated: 2026-05-18 | Category: Building Inspections
Author: Maison Azdari
Restumping, also known as reblocking, is the process of replacing or reinforcing the stumps that support a house. In Australia, many homes, especially older ones, are built on stumps made of timber, concrete, or steel. Over time, these stumps can deteriorate due to moisture, soil movement, or termite damage, compromising the structural integrity of the house. If left unattended, weakened stumps can lead to uneven floors, cracked walls, and severe structural failures.
Quick Guide to Restumping a House:
- What restumping means and why Australian homes need it
- Signs a house needs restumping before structural damage worsens
- The full restumping process step by step
- Concrete vs timber stumps and which material lasts longer
- Cost of restumping a house in Australia
- Building permits and regulations homeowners should know
- How long house restumping usually takes
- Questions to ask before hiring a restumping contractor
- How soil movement and moisture affect house stumps
- Common mistakes homeowners make before restumping
Learn How to
Document Defects
}
buttonHref="/articles/document-building-defects-legal-claim"
variant="secondary"
/>
## Why Restumping Matters for Australian Homes
Many Australian homes are built on timber, concrete, or steel stumps that support the structure above ground. Over time, these stumps can weaken because of moisture, shifting soil, termite activity, drainage problems, or age. When the foundation support begins to fail, the house may start showing visible signs such as sloping floors, cracks in walls, and doors that no longer close properly.
Restumping a house involves replacing damaged or unstable stumps to restore structural support and improve the stability of the property. In older Australian homes, especially weatherboard properties, restumping is often necessary after decades of movement and wear.
Foundation movement is common in areas with reactive clay soils, which expand and contract during changing weather conditions. This movement places pressure on house stumps and can gradually affect the structural integrity of the home. The Australian Government’s Your Home resource explains how soil movement impacts residential foundations and structural performance.
For homeowners, investors, builders, and property managers, identifying stump problems early can prevent expensive structural repairs later.
## What Is Restumping a House?
Restumping, also known as house reblocking, is the process of replacing old or damaged stumps beneath a property. The stumps support the subfloor framework and help distribute the weight of the house evenly across the foundation.
Older Australian homes often used timber stumps because they were affordable and widely available. While timber stumps can last many years, they are vulnerable to moisture damage, termite attacks, and gradual deterioration. Modern restumping projects commonly use concrete or steel stumps because they offer improved durability and resistance to environmental conditions.
## Restumping vs Reblocking
The terms restumping and reblocking are often used interchangeably across Australia. In many cases, both refer to replacing existing house stumps. However, some contractors use reblocking when all stumps are replaced, while restumping may refer to partial replacement work.
### Restumping vs Underpinning
Homeowners sometimes confuse restumping with underpinning.
| Restumping | Underpinning |
| -------------------------------- | ----------------------------------------- |
| Replaces damaged stumps | Strengthens existing foundations |
| Common in raised homes | Common in slab homes |
| Improves floor leveling | Stabilises sinking foundations |
| Often used in older timber homes | Often used for severe structural movement |
[The Australian Building Codes Board](https://ncc.abcb.gov.au/) outlines foundation performance requirements for residential buildings under the National Construction Code.
## Signs Your House Needs Restumping
Recognising the early signs of foundation issues can help homeowners avoid costly repairs. Here are key indicators that your home may need restumping:
## Why Restumping Is Important
Ignoring stump problems can lead to larger structural issues that become more expensive to repair.
## How Soil Movement Affects House Stumps in Australia
Reactive soils are one of the leading causes of foundation movement across Australia. Clay soils expand when wet and shrink during dry periods. This constant movement places stress on house stumps and subfloor supports.
Common causes of soil movement include:
- Poor drainage around the property
- Plumbing leaks beneath the home
- Tree roots extracting moisture from the soil
- Seasonal weather changes
- Flooding or excessive rainfall
Managing drainage and moisture levels around the property can help reduce future stump movement.
## The Restumping Process: Step by Step
Understanding the restumping process can help homeowners prepare for the work involved.
## Restumping Process Timeline
Many homeowners ask, how long does restumping take?
The timeframe depends on:
- Size of the property
- Number of stumps replaced
- Soil conditions
- Accessibility beneath the house
- Weather conditions
- Permit approvals
| Type of Project | Estimated Timeframe |
| -------------------------- | ------------------- |
| Partial restumping | 1 to 3 days |
| Full restumping small home | 5 to 7 days |
| Large or complex homes | 1 to 2 weeks |
Unexpected structural damage or poor weather can extend project timelines.
View Inspection
Services
}
buttonHref="/services"
variant="secondary"
/>
## Materials Used in Restumping
Choosing the right stump material affects durability, maintenance, and long term performance.
### Concrete Stumps
Concrete stumps are widely used in modern Australian homes.
### Timber Stumps
Timber stumps remain common in older properties.
### Steel Stumps
Steel stumps are becoming more common for modern structural repairs.
## Concrete vs Timber Stumps
| Feature | Concrete Stumps | Timber Stumps |
| ------------------- | --------------- | --------------- |
| Lifespan | Long | Moderate |
| Termite Resistance | Excellent | Poor |
| Moisture Resistance | High | Moderate to low |
| Maintenance | Low | Higher |
| Cost | Moderate | Lower upfront |
| Common Use | Modern homes | Older homes |
## Cost of Restumping a House
The cost of restumping varies based on factors such as the house size, number of stumps, material choice, accessibility, and soil condition.
### Main Factors Affecting Cost
- Number of stumps needing replacement
- Size and weight of the house
- Material selection
- Site accessibility
- Soil conditions
- Permit requirements
- Additional structural repairs
### Average Restumping Costs
| Type of Work | Average Cost Range |
| -------------------------- | ------------------------- |
| Partial restumping | $5,000 to $10,000 |
| Full restumping | $10,000 to $20,000+ |
| Complex structural repairs | Higher depending on scope |
**Disclaimer:** Costs can vary significantly depending on the location and structural condition of the home.
## Building Permits for House Restumping
Restumping usually requires council approval because it involves structural foundation work.
Homeowners should:
- Check local council regulations
- Work with licensed contractors
- Ensure engineering requirements are met
- Confirm compliance with Australian building codes
The Victorian Building Authority explains [permit requirements for structural building work in Victoria](https://www.vba.vic.gov.au/consumers/home-renovation-essentials/permits).
## Common Mistakes Homeowners Make Before Restumping
### Ignoring Early Warning Signs
Small cracks and uneven floors are often dismissed until the structural movement becomes severe.
### Choosing the Cheapest Quote
Low pricing may lead to poor workmanship, inferior materials, or incomplete structural repairs.
### Skipping Professional Inspections
Structural assessments help determine whether full restumping or partial repairs are necessary.
### Failing to Address Drainage Problems
Poor drainage can continue damaging new stumps if moisture issues remain unresolved.
## Choosing a Restumping Contractor
Selecting a reliable contractor ensures quality work. Here's what to look for:
### Questions to Ask a Restumping Contractor
- Are you licensed and insured?
- Have you completed similar projects?
- What stump materials do you recommend?
- Do permits need to be arranged?
- How long will the project take?
- Is the work covered by warranty?
### Why Multiple Quotes Matter
Obtaining several quotes helps homeowners compare:
- Scope of work
- Material quality
- Project timelines
- Structural recommendations
- Warranty coverage
## Can Restumping Increase Property Value?
Foundation repairs can improve buyer confidence because structural stability is one of the most important considerations during property inspections.
Benefits may include:
- Improved floor leveling
- Better structural integrity
- Reduced risk for future buyers
- Easier property sales
- Increased confidence during building inspections
## Internal Property Maintenance Tips After Restumping
After restumping is completed, homeowners should continue monitoring:
- Drainage around the property
- Plumbing leaks beneath the house
- Signs of termite activity
- Floor movement
- Cracking in walls or ceilings
## Protect Your Property Before Foundation Problems Get Worse
Restumping helps restore structural stability, improve safety, and reduce the risk of long term property damage. If you notice uneven flooring, cracking walls, or signs of stump deterioration, arranging a professional structural assessment early can help prevent larger repair costs later.
Homeowners, investors, builders, and property managers should work with qualified professionals who understand Australian building standards, soil conditions, and structural movement. A professional inspection can help determine whether partial repairs or full house restumping is the best solution for the property.
For additional guidance on structural movement and foundation issues, consult trusted building professionals and relevant Australian building authorities before starting major structural repairs.
Contact Owner
Inspections
}
buttonHref="/contact"
variant="primary"
/>
### Timber Pests in Gold Coast Homes: Identification, Prevention, and Treatment
Source: https://ownerinspections.com.au/articles/timber-pests-in-gold-coast-homes
Published: 2023-10-11 | Updated: 2026-02-12 | Category: Pest Inspections
Author: Maison Azdari
Timber pests including termites, wood borers, and carpenter ants cause damage to between 130,000 and 180,000 Australian homes every year, roughly one in five properties, at a combined cost exceeding $1.5 billion annually. [Gold Coast](/qld/building-inspections-gold-coast) homes face particularly high risk due to the warm, humid subtropical climate that provides ideal breeding conditions for these pests year-round. A professional [timber pest inspection](/timber-pest-inspections) conducted in accordance with Australian Standard AS 4349.3 costs between $200 and $500, while Owner Inspections offers a pest inspection as an add-on, quoted with the booking, when bundled with a building inspection.
The Gold Coast sits within one of Australia's highest termite risk zones as classified by the CSIRO. The combination of consistent warmth, high soil moisture, and established vegetation creates conditions where termite colonies thrive and expand aggressively into residential structures. Timber-framed homes, homes with poor drainage, and properties with garden beds or mulch against external walls are particularly vulnerable.
This guide covers how to identify the three most common timber pests found in Gold Coast homes, the warning signs to watch for, proven prevention strategies, QBCC-approved treatment systems, and when to call a licensed pest inspector.
## The Three Main Timber Pests in Gold Coast Homes
Understanding the differences between the three primary timber pests is the first step towards protecting your property. Each pest operates differently, targets different timber types, and leaves distinct evidence of its presence.
### Termites
Termites are the most destructive timber pest in Australia. They live in large underground colonies that can contain hundreds of thousands to millions of individuals. Worker termites travel through concealed mud tubes to reach timber food sources, where they consume wood from the inside out. A mature colony can cause serious structural damage within three to six months of establishing a feeding site, all without any visible signs on the timber surface.
In Queensland, subterranean termites are the most common species affecting residential properties. Species such as *Coptotermes acinaciformis* and *Schedorhinotermes intermedius* are responsible for the majority of structural damage to Gold Coast homes.
### Wood Borers
Wood borers are beetles that lay their eggs on or just beneath the surface of timber. The larvae that hatch from these eggs tunnel into the wood as they feed and grow, spending months or even years inside the timber before emerging as adults. The most common species affecting Gold Coast homes include the Queensland pine beetle, powderpost beetles, and furniture beetles.
Unlike termites, wood borers tend to target specific timber types. Powderpost beetles prefer hardwoods with high starch content, while furniture beetles are more commonly found in softwoods and plywood. The damage from borers is generally slower and less catastrophic than termite damage, but left untreated it can weaken structural members over time.
### Carpenter Ants
Carpenter ants are large black ants that carve tunnels and chambers inside timber to create their nesting galleries. Unlike termites, carpenter ants do not eat wood. They excavate it and push the waste material out of the nest, leaving distinctive piles of sawdust-like frass near their entry points.
Carpenter ants prefer timber that is already damp or partially decayed. They are commonly found in areas where moisture problems exist, such as around leaking pipes, poorly ventilated subfloor areas, and window frames with failed seals. While their damage is typically less extensive than termite damage, a large colony can compromise timber framing and structural elements if left unchecked.
## How to Identify Timber Pest Activity
Early detection is the single most effective way to limit timber pest damage. Each pest type leaves characteristic signs that homeowners and inspectors look for during assessments.
### Signs of Termite Activity
### Signs of Wood Borer Activity
### Signs of Carpenter Ant Activity
## Comparison of Common Timber Pests
| Feature | Termites | Wood Borers | Carpenter Ants |
| --- | --- | --- | --- |
| Eats timber | Yes | Yes (larvae stage) | No (excavates only) |
| Colony size | 100,000 to millions | Individual insects | Up to 10,000 |
| Damage speed | Fast (months) | Slow (years) | Moderate |
| Preferred timber | Most softwoods and hardwoods | Species-specific | Damp or decayed timber |
| Key evidence | Mud tubes, hollow timber | Exit holes, fine dust | Sawdust piles, large black ants |
| Risk to structure | High | Low to moderate | Moderate |
| Moisture requirement | High | Moderate | High |
## Prevention Strategies
Prevention is always more cost-effective than treatment. The strategies below are specific to Gold Coast conditions and align with QBCC recommendations for timber pest management in Queensland.
### Preventing Termite Infestation
### Preventing Wood Borer Infestation
### Preventing Carpenter Ant Infestation
## QBCC-Approved Termite Management Systems
The Queensland Building and Construction Commission (QBCC) requires all new residential buildings to include a termite management system in accordance with AS 3660.1-2014. The following systems are approved for use in Queensland.
| System Type | Description | Standard |
| --- | --- | --- |
| Chemical soil barrier | Termiticide applied to soil around and beneath the building | AS 3660.1-2014 |
| Physical barrier (ant caps) | Metal shields installed on piers and stumps to force termites into the open | AS 3660.1-2014 |
| Graded stone barrier | Granite particles sized to prevent termite passage through gaps | AS 3660.1-2014 |
| Stainless steel mesh | Woven mesh installed at potential entry points in the slab and foundation | AS 3660.1-2014 |
| Concrete slab | Properly constructed slab with sealed penetrations and expansion joints | AS 2870-2011, AS 3600-2018 |
Each system has specific installation requirements and ongoing maintenance obligations. Chemical barriers require reapplication every five to eight years depending on the product used. Physical barriers require annual visual inspections to confirm they have not been breached or bridged by garden beds, pavers, or soil build-up.
For a deeper look at how termite damage affects property values and repair costs, see our article on [the economic cost of termite infestation](/articles/the-economic-cost-of-termite-infestation).
## Treatment Options: DIY vs Professional
When timber pest activity is confirmed, homeowners face a choice between DIY treatment and professional pest control services. The table below outlines the key differences.
| Factor | DIY Treatment | Professional Treatment |
| --- | --- | --- |
| Cost | $50 to $300 per product | $500 to $5,000+ depending on scope |
| Effectiveness | Limited, surface-level only | Targets colony or infestation source |
| Methods | Liquid insecticides, baits, timber preservatives | Fumigation, spot treatment, monitoring stations |
| Risk | May not reach colony, incorrect application | Licensed technicians, regulated products |
| Warranty | None | Typically 5 to 10 years with annual inspections |
| Suitable for | Minor borer activity, ant deterrence | Active termite infestations, structural damage |
### Professional Treatment Methods
Professional pest controllers licensed by the QBCC use a range of treatment methods depending on the pest species and the extent of the infestation.
**Termite treatments** include chemical soil barriers, above-ground baiting systems, and in-ground monitoring and baiting stations. Baiting systems work by providing a slow-acting toxicant that worker termites carry back to the colony, eventually eliminating the entire colony over several weeks.
**Wood borer treatments** include surface application of timber preservatives, injection of insecticides into flight holes, and fumigation for severe infestations. Fumigation involves sealing the affected area and introducing a gas that penetrates the timber to kill larvae within.
**Carpenter ant treatments** include dust application into nest galleries, perimeter spraying with residual insecticides, and bait systems placed along ant trails. Removing the moisture source that attracted the ants is a required part of any effective treatment plan.
## Timber Pest Inspection Costs on the Gold Coast
A standalone timber pest inspection on the Gold Coast typically costs between $200 and $500 depending on the size of the property, the accessibility of subfloor and roof spaces, and whether thermal imaging is included. Owner Inspections offers a timber pest inspection as an add-on, quoted with the booking, when booked alongside a [building and pest inspection](/building-and-pest-inspections).
A pest inspection conducted to AS 4349.3 includes a visual assessment of all accessible areas of the property, identification of any active pest activity or damage, assessment of conditions conducive to pest infestation, and recommendations for treatment or further investigation. Inspectors use tools including thermal imaging cameras, moisture meters, and sounding devices to detect concealed activity.
For more information on what to expect during a termite inspection, read our guide on [termite inspections: how to protect your home](/articles/termite-inspection-to-protect-your-home).
## Key Takeaways
### Bored Piers Inspections: Coastal Challenges and Solutions
Source: https://ownerinspections.com.au/articles/bored-piers-inspections-coastal-challenges-and-solutions
Published: 2023-10-10 | Updated: 2026-02-10 | Category: New Construction
Author: Maison Azdari
Bored piers are deep foundation elements that transfer a building's load through weak surface soils to stable ground below. In coastal areas of Australia, these piers face accelerated challenges from saltwater corrosion, shifting sandy soils, and severe weather events, making regular inspections critical for structural safety. A bored pier inspection assesses material integrity, depth and positioning, reinforcement condition, and compliance with engineering specifications. For coastal property owners and builders, these inspections are the primary safeguard against foundation failure.
Coastal construction in Australia, from the Gold Coast to Sydney's Northern Beaches and Melbourne's Bellarine Peninsula, relies heavily on bored piers where surface soils are too weak or variable to support conventional footings. The coastal environment is particularly harsh on foundation elements, with salt air, tidal moisture, and reactive soils all working to degrade materials faster than in inland settings. Understanding how these challenges affect bored piers and what proper inspections involve is important for anyone building, buying, or maintaining a coastal property.
## Why Bored Piers Matter in Coastal Construction
Bored piers are designed to reach stable ground beneath layers of weak, compressible, or reactive soil. In coastal environments, surface soils often consist of sand, clay with high moisture variability, or fill material that cannot reliably support a building's weight.
By drilling deep into the ground and filling the hole with reinforced concrete, bored piers create a stable connection between the structure above and the competent soil or rock below. This makes them particularly well suited for:
Without properly constructed and maintained bored piers, coastal structures are at serious risk of settlement, movement, and structural failure.
## Unique Challenges in Coastal Conditions
Coastal environments create specific problems for bored piers that do not affect foundations in inland locations with the same severity.
## Key Inspection Points for Coastal Bored Piers
Inspections of bored piers in coastal settings focus on several specific areas that are most vulnerable to the conditions described above.
### Material Integrity
The inspector assesses the condition of the concrete and the embedded steel reinforcement. Signs of concrete spalling, cracking, or surface degradation indicate that the reinforcement inside may be corroding. Rust staining on the concrete surface is a common early warning sign.
### Depth and Positioning
The inspector verifies that the piers were installed to the correct depth and in the correct positions as specified by the structural engineer. Piers that are too shallow or misaligned can compromise the structural performance of the entire building.
### Reinforcement Condition
Using non-destructive testing methods, inspectors can assess the condition of the steel reinforcement without damaging the pier. This is particularly important in coastal areas where corrosion risk is elevated.
### Environmental Impact Assessment
The inspector evaluates how local conditions such as soil type, groundwater levels, and exposure to salt are affecting the piers. This assessment helps determine the frequency of future inspections and whether protective measures are needed.
## Inspection Methods and Technologies
Modern bored pier inspections combine traditional visual assessment with advanced technology for a thorough evaluation.
## The Bored Pier Inspection Process
A typical bored pier inspection follows a structured process from initial consultation to final report delivery.
## Regulations and Compliance
Coastal construction in Australia is governed by a combination of national, state, and local regulations. The key frameworks include:
## Cost and Budget Considerations
The cost of bored pier inspections in coastal areas is typically higher than for inland sites due to the specialised equipment and expertise required.
Regular, less expensive visual inspections can prevent the need for costly emergency repairs by catching problems early. The cost of an inspection is minor compared to the cost of foundation remediation or structural failure.
### Australia's Top 10 Most Common Building Defects
Source: https://ownerinspections.com.au/articles/australias-top-10-most-common-building-defects
Published: 2023-10-05 | Updated: 2026-06-10 | Category: Defect Investigation
Author: Maison Azdari
What if the fresh paint, clean floors and styled furniture are hiding building problems that could cost thousands after settlement?
Common building defects in Australia are not limited to older homes. They can appear in new builds, apartments, renovated homes and long-held family properties. NSW Government guidance says a building inspection report can identify significant building defects or problems such as rising damp, wall movement, safety hazards and a faulty roof.
Whether you are purchasing a property, building a new home, or maintaining an existing one, awareness of these defects is essential. The following ten defects are the ones most frequently identified during professional building inspections across Australia. For a complete overview, see our [guide to building defect investigations](/guides/building-defect-investigation-guide).
Read the
Legal Claim Guide
}
buttonHref="/articles/document-building-defects-legal-claim"
variant="secondary"
/>
## What Is a Building Defect?
A building defect is a fault, failure or condition that affects how a building performs, looks, drains, resists moisture or remains safe for normal use.
In a pre-purchase context, the inspection report is a written account of the property’s condition and may include major faults, significant problems and recommendations for further assessment by specialists such as pest inspectors, electricians, structural engineers or geotechnical engineers.
Building defects can be caused by poor workmanship, ageing materials, movement, poor drainage, incorrect installation, weather exposure, termite activity or lack of maintenance.
## Types of Building Defects Buyers Should Know
| Type of building defect | Common examples | Why it matters | Best next step |
| ----------------------- | -------------------------------------------------------------------- | --------------------------------------------------- | ------------------------------------------- |
| Major defect | Serious structural failure, waterproofing failure, fire safety issue | Can affect safety, use or habitability | Building inspection, then specialist review |
| Structural defect | Foundation movement, load-bearing wall cracks, roof frame movement | May affect building stability | Structural engineer assessment |
| Safety defect | Electrical hazards, missing smoke alarms, unsafe stairs | Can put occupants at risk | Licensed trade or safety specialist |
| Moisture defect | Leaks, rising damp, mould, failed waterproofing | Can damage framing, finishes and indoor air quality | Moisture inspection and repair plan |
| Maintenance defect | Blocked gutters, cracked roof tiles, worn sealants | Can become expensive if ignored | Maintenance and follow-up inspection |
| Hidden defect | Concealed damp, subfloor issues, termite damage | Often missed during open homes | Building and pest inspection |
Under the [NSW Home Building Act](https://legislation.nsw.gov.au/view/whole/html/inforce/current/act-1989-147), a major defect can include a defect in a major building element caused by defective design, faulty workmanship, defective materials or failure to comply with structural performance requirements where it causes or is likely to cause inability to use the building, destruction of the building, or threat of collapse.
## 1. Water Leaks and Waterproofing Issues
Water leaks and waterproofing failures are consistently the most reported building defect in Australia. They affect bathrooms, laundries, balconies, roofs, and basements, and the damage they cause can be extensive if left undetected.
**Causes:**
**Warning signs:**
**Risks:** Prolonged water exposure leads to structural timber decay, mould growth posing health risks, and damage to finishes and fixtures. Rectification of waterproofing defects can be costly, particularly where tiling and finishes must be removed to access the membrane.
## 2. Cracking in Walls and Foundations
Cracking is one of the most visible building defects and one of the most common findings during inspections. Cracks range from minor cosmetic hairline cracks to serious structural fractures.
**Causes:**
**Warning signs:**
**Risks:** Structural cracking can compromise the integrity of load-bearing walls and foundations. It allows water penetration, which accelerates deterioration. Crack monitoring over time helps determine whether movement is active or has stabilised.
## 3. Exterior Water Penetration
Exterior water penetration differs from internal waterproofing failures in that moisture enters the building envelope from outside. This is a particular concern in areas with high rainfall or exposure to driving rain.
**Causes:**
**Warning signs:**
**Risks:** Persistent moisture ingress damages wall framing, insulation, and internal linings. It promotes mould growth and can lead to corrosion of steel elements within the wall cavity.
## 4. Guttering Problems
Guttering and downpipe systems are essential for directing rainwater away from the building. When they fail, water can pool around foundations and penetrate the building envelope.
**Causes:**
**Warning signs:**
**Risks:** Overflowing gutters direct water onto walls and around foundations, contributing to rising damp, foundation erosion, and external water penetration. Regular cleaning and maintenance significantly reduce these risks.
Book a Defect
Investigation Report
}
buttonHref="/defect-investigation-reports"
variant="secondary"
/>
## 5. Defective Roof Coverings
The roof is the first line of defence against the elements, and defective roof coverings are a common finding in Australian inspections. Issues vary depending on the roofing material.
**Causes:**
**Warning signs:**
**Risks:** Roof defects allow water entry to the roof space, damaging ceiling linings, insulation, and structural timbers. In severe cases, compromised roof structures can pose a collapse risk during storms or heavy snowfall in alpine areas.
## 6. Plumbing Faults
Plumbing defects encompass a broad range of issues from leaking pipes and fixtures to non-compliant installations. They are frequently found in both new and older buildings.
**Causes:**
**Warning signs:**
**Risks:** Plumbing faults can lead to water damage, mould growth, and health risks from contaminated water. Sewer line failures can cause significant property damage and pose serious hygiene concerns.
## 7. Tiling Related Defects
Tiling defects are among the most frequently reported issues in Australian residential properties, particularly in wet areas such as bathrooms, ensuites, and laundries.
**Causes:**
**Warning signs:**
**Risks:** Failed tiling in wet areas compromises the waterproofing system underneath, leading to water damage to the substrate and structure below. Loose tiles also present a trip hazard.
## 8. Inadequate Fire Safety Measures
Fire safety defects are a serious concern, particularly in multi-storey residential buildings and older homes that may not meet current standards.
**Causes:**
**Warning signs:**
**Risks:** Fire safety deficiencies place occupants at direct risk of injury or death in the event of a fire. Non-compliance with fire safety regulations also creates legal liability for building owners and strata managers. The use of combustible cladding on Australian buildings has been the subject of national audit programmemes since the Grenfell Tower fire in 2017.
## 9. Electrical Issues
Electrical defects range from minor non-compliances to serious safety hazards. They are particularly common in older properties where wiring systems have not been updated.
**Causes:**
**Warning signs:**
**Risks:** Electrical defects are a leading cause of house fires in Australia. They also present a direct electrocution risk. All electrical work must be performed by a licensed electrician in compliance with AS/NZS 3000 (the Wiring Rules).
## 10. Building Movement (Subsidence and Heave)
Building movement, whether subsidence (downward movement) or heave (upward movement), is a significant concern across large parts of Australia, particularly in areas with reactive clay soils.
**Causes:**
**Warning signs:**
**Risks:** Ongoing building movement can render a property structurally unsound. Rectification often requires underpinning or other foundation remediation work, which is among the most expensive building repairs. Areas of Melbourne, Adelaide, and Western Sydney are particularly affected by reactive soils.
## Common Defects in New Australian Homes
New homes can still have defects. Fresh finishes do not always mean the structure, drainage, waterproofing and fire safety systems are sound.
Research from UNSW City Futures found that [85% of buildings](https://newsroom.unsw.edu.au/sites/default/files/attachments/article/defects_final_report_for_publication.pdf) in its apartment defect report sample had at least one defect, with building fabric and cladding, fire protection, waterproofing, roof and rainwater disposal, and structural systems among the defect categories identified.
For new detached homes, common defects can include poor drainage, incomplete sealing, roof flashing faults, slab cracking, tiling defects, plumbing leaks, missing certificates and poor finishing.
## Major Defects vs Minor Defects in a Building Inspection
A minor defect may affect appearance, finish or maintenance. Examples include small paint issues, minor corrosion, weathering or small surface cracks.
A major defect is more serious. In NSW, the statutory warranty period is 6 years for a breach that results in a major defect in residential building work and 2 years in other cases.
Major elements under the NSW Home Building Act include load-bearing components such as foundations, footings, floors, walls, roofs, columns and beams, as well as fire safety systems and waterproofing.
## How a Building Inspection Helps Identify Defects
A building inspection helps buyers understand the property before they commit to the purchase.
The benefits of a building inspection report include knowing problems in advance, using the information to negotiate, and gaining specialist advice about major problems and how they may affect the property over time.
The inspector should check accessible parts of the property, including the interior, exterior, roof space, under-floor space, roof exterior, garage, drainage, paths and driveways.
## Quick Defect Checklist for Buyers
| Area to check | Warning signs | Possible defect |
| -------------------- | ------------------------------------------ | ---------------------------- |
| Bathroom and laundry | Damp smell, cracked grout, loose tiles | Waterproofing failure |
| Ceiling | Stains, sagging, bubbling paint | Roof leak or plumbing leak |
| Walls | Diagonal cracks, damp patches, mould | Movement or moisture entry |
| Roof | Broken tiles, rust, daylight in roof space | Defective roof covering |
| Gutters | Overflow, rust, sagging | Drainage defect |
| Floors | Uneven surface, soft spots, bounce | Subfloor or structural issue |
| Switchboard | Old fuses, no safety switch | Electrical safety risk |
| Doors and windows | Sticking, gaps, jamming | Building movement |
| Subfloor | Damp, poor airflow, timber damage | Moisture or pest risk |
## Why Pre-Purchase Inspections Matter
Pre-purchase inspections are particularly valuable when buying older properties, apartments in large developments, or homes in areas known for reactive soils or high moisture exposure. Investing in a thorough inspection can save buyers from unexpected repair bills running into tens of thousands of dollars.
## Getting the Most Value from Your Home and Building Investment
Building defects are easier to manage when they are found early. Water leaks, structural cracking, roof defects, faulty gutters, plumbing problems and electrical hazards can all grow from small warning signs into costly repairs.
The best step is to match the defect to the right response. A general building inspection is useful before purchase. A building and pest inspection gives broader protection. A defect investigation report is better when a known issue needs deeper review, photos, likely causes and repair direction.
[Owner Inspections](/articles/australias-top-10-most-common-building-defects) helps Australian buyers, owners and investors identify building defects before they become bigger problems. Book a building and pest inspection or request a defect investigation report before making your next property decision.
Contact Owner
Inspections
}
buttonHref="/contact"
variant="primary"
/>
### How Changes During Construction Affect the Section 137B Report
Source: https://ownerinspections.com.au/articles/how-changes-during-construction-affect-the-section-137b-report
Published: 2023-10-05 | Category: 137B Reports
Author: Maison Azdari
When you undertake an owner-builder project in Victoria, the Section [137B Report](/137b-owner-builder-reports) is not just
a formality. It is a legally mandated disclosure document that can determine whether your
property sale proceeds smoothly or becomes entangled in legal disputes. Changes made during
construction can significantly affect the accuracy and validity of this report, making it
essential to understand how modifications impact your compliance obligations.
Under the Building Act (VIC) 1993, owner-builders who sell their property within 6.5 years
of completing construction must provide prospective buyers with a Section 137B Report. This
report discloses any known building defects, and its accuracy is paramount. When
construction changes occur, whether through design modifications, material substitutions, or
scope expansions, each alteration has the potential to introduce new defects or compliance
issues that must be documented.
This comprehensive guide examines how various construction changes affect your Section 137B
Report obligations, the legal and financial implications of undisclosed modifications, and
the steps you must take to maintain compliance throughout your owner-builder project.
> A Section 137B Report is only as accurate as the information it contains. Construction
> changes that go undocumented can expose owner-builders to significant legal liability and
> financial penalties when selling their property.
## What is a Section 137B Report?
A Section 137B Report, named after the relevant section of the Building Act (VIC) 1993, is a
defect disclosure document required when selling an owner-built property in Victoria. The
report must be prepared by a registered building practitioner and provided to prospective
buyers before the sale contract is signed.
### Purpose of the Section 137B Report
The primary purposes of the Section 137B Report include:
- **Buyer protection:** Ensuring prospective purchasers are fully informed about any building defects before committing to a purchase
- **Legal compliance:** Fulfilling the statutory disclosure requirements under Victorian building legislation
- **Risk management:** Protecting owner-builders from future legal claims by documenting known defects at the time of sale
- **Transparency:** Promoting fair dealing in property transactions involving owner-built homes
- **Quality assurance:** Encouraging higher construction standards by requiring independent professional assessment
### Legal Requirements Under the Building Act (VIC) 1993
The Building Act (VIC) 1993 establishes specific requirements for Section 137B Reports that
owner-builders must understand:
- **Mandatory disclosure period:** The report is required for any sale occurring within 6.5 years of the date of issue of the occupancy permit or certificate of final inspection
- **Qualified inspector requirement:** Only a registered building practitioner with appropriate qualifications can prepare the report
- **Pre-contract provision:** The report must be given to the buyer before they sign the contract of sale
- **Comprehensive scope:** The inspection must cover all building work undertaken by the owner-builder
- **Victorian Building Authority (VBA) oversight:** The VBA administers and enforces these requirements
### What the Report Must Include
A compliant Section 137B Report must document:
- All defects identified during the inspection
- The severity and nature of each defect
- Whether defects relate to structural elements, waterproofing, or other building systems
- Recommendations for rectification where applicable
- Photographic evidence supporting the findings
- Details of any areas that could not be inspected and reasons why
- The qualifications and registration details of the inspector
## Common Construction Changes That Affect Section 137B Reports
Construction projects rarely proceed exactly as originally planned. Understanding how
different types of changes affect your Section 137B Report obligations is essential for
maintaining compliance and protecting your legal position.
### Design Modifications and Architectural Adjustments
Design modifications are among the most common changes during owner-builder projects. These
can range from minor alterations to significant architectural changes that fundamentally
affect the building.
#### Types of Design Modifications
- **Room layout changes:** Altering the position of internal walls, doorways, or the overall floor plan configuration
- **Window and door modifications:** Changing the size, position, or number of openings in external walls
- **Roof design alterations:** Modifying roof pitch, materials, or drainage systems
- **Structural element changes:** Adjusting beam positions, load-bearing walls, or foundation specifications
- **Facade modifications:** Altering external cladding materials, finishes, or architectural features
#### Impact on Section 137B Compliance
Design modifications can affect your Section 137B Report in several ways:
- Changes may introduce compliance issues with the National Construction Code (NCC) that must be disclosed
- Structural modifications may require additional engineering certification, the absence of which constitutes a defect
- Alterations to fire safety elements such as door widths or escape routes must meet current standards
- Energy efficiency requirements may be compromised, requiring disclosure in the report
### Material Substitutions Affecting Cost and Quality
Material substitutions occur frequently during construction, often driven by availability
issues, budget constraints, or contractor recommendations. While some substitutions may be
equivalent or superior, others can introduce defects that must be reported.
#### Common Material Substitutions
- **Structural timber:** Substituting specified timber grades with alternatives that may or may not meet structural requirements
- **Roofing materials:** Changing from specified roof tiles or sheeting to different products
- **Waterproofing membranes:** Using alternative waterproofing products that may have different performance characteristics
- **Insulation:** Substituting specified insulation types or thicknesses, potentially affecting energy ratings
- **Cladding systems:** Changing external cladding materials, which can affect weatherproofing and fire ratings
- **Plumbing and electrical components:** Using alternative fixtures, fittings, or wiring that may not meet specifications
#### Quality and Compliance Implications
Material substitutions can create several issues for Section 137B Reports:
- Non-compliant materials that do not meet Australian Standards must be disclosed as defects
- Substitutions that reduce the building's performance below NCC requirements constitute reportable defects
- Warranty implications arise when materials differ from those specified in building permits
- Future maintenance issues may be anticipated where inferior materials have been used
### Scope Expansion Beyond Initial Parameters
Scope creep is common in owner-builder projects, with additional work often undertaken as
the project progresses. Each expansion of scope can introduce new areas requiring inspection
and potential disclosure.
#### Examples of Scope Expansion
- **Additional rooms or levels:** Constructing extra bedrooms, bathrooms, or second storeys not included in original plans
- **Outdoor structures:** Adding pergolas, carports, or outdoor entertaining areas
- **Swimming pools and spas:** Installing pools that require separate compliance certification
- **Retaining walls and landscaping:** Constructing retaining walls or significant earthworks
- **Basement or cellar construction:** Excavating below the original building footprint
- **Shed or garage additions:** Building structures beyond the original scope
#### Permit and Compliance Considerations
Scope expansion raises important compliance issues:
- Additional work may require separate building permits that must be obtained before construction
- The Section 137B inspection must cover all owner-builder work, including scope expansions
- Unpermitted work constitutes a significant defect that must be disclosed to buyers
- Council approvals and zoning compliance must be verified for all additions
### Timeline Delays from Weather or Site Conditions
Construction delays, while not directly creating defects, can lead to issues that affect
Section 137B compliance. Understanding these connections is important for owner-builders.
#### How Delays Affect Construction Quality
- **Weather damage to exposed elements:** Timber framing left exposed during extended delays may suffer moisture damage
- **Material degradation:** Building materials stored on site for extended periods may deteriorate
- **Rushed completion:** Pressure to finish after delays can lead to substandard workmanship
- **Contractor availability:** Original tradespeople may become unavailable, leading to less experienced replacements
- **Coordination issues:** Disrupted schedules can result in work being done out of sequence
#### Documentation Requirements
When delays occur, owner-builders should:
- Document the cause and duration of delays
- Record any protective measures taken during the delay period
- Note any remedial work required as a result of delays
- Keep records of contractor changes and their qualifications
## Types of Changes and Their Impact on Section 137B Compliance
| Type of Change | Potential Impact on 137B Report | Required Actions | Risk Level |
| -------------------------------------- | ----------------------------------------------------------------------------------- | ------------------------------------------------------------------------------------ | -------------- |
| Structural Design Changes | May require new engineering certification; non-compliance becomes reportable defect | Obtain amended building permit; engage structural engineer; update inspection scope | High |
| Material Substitutions | Non-compliant materials must be disclosed; may affect warranties and performance | Document substitutions; verify compliance; retain product certifications | Medium to High |
| Room Layout Changes | May affect fire egress, accessibility, and NCC compliance requirements | Amend building permit; verify code compliance; ensure proper approvals | Medium |
| Scope Expansion (Additional Rooms) | Additional work must be included in inspection; unpermitted work is a major defect | Obtain separate building permit; include in inspection scope; document approvals | High |
| Waterproofing System Changes | Non-compliant waterproofing is a significant structural defect requiring disclosure | Ensure compliance with AS 3740; retain certificates; document application methods | High |
| Electrical Installation Changes | Must be completed by licensed electrician; certificates required for compliance | Engage licensed electrician; obtain certificate of compliance; update permit if |
| needed | Medium |
| Plumbing Modifications | Licensed plumber required; compliance certificates essential for inspection | Use licensed plumber; obtain plumbing compliance certificate; document all changes | Medium |
| External Structures (Carport, Pergola) | Separate permits may be required; must be included in inspection if owner-built | Check permit requirements; ensure structural compliance; include in inspection | Medium |
| Finish and Fixture Changes | Generally lower impact unless affecting safety systems or accessibility | Document changes; verify fixture compliance where applicable | Low |
| Timeline Delays (Weather Related) | May result in material damage or rushed completion affecting quality | Document delays; implement protective measures; inspect for damage before continuing | Variable |
## Legal and Financial Implications of Construction Changes
Understanding the legal and financial consequences of construction changes is essential for
owner-builders. Failure to properly document and disclose changes can result in significant
liability.
### Formal Contract Updates and Documentation
When changes occur during construction, proper documentation is crucial for Section 137B
compliance:
- **Variation documentation:** All changes should be recorded in writing, with details of the original specification and the change made
- **Permit amendments:** Where changes require building permit amendments, these must be obtained before the work is undertaken
- **Contractor agreements:** Any changes involving contractors should be documented with updated scope of works
- **Certification records:** All compliance certificates and engineering documentation must be retained and updated as changes occur
### Compliance Risks and Penalties
Non-compliance with Section 137B requirements carries serious consequences under Victorian
law:
- **Failure to provide report:** Selling without providing a compliant Section 137B Report is an offence under the Building Act
- **Penalties:** Fines of up to 50 penalty units can apply for failing to provide the required report
- **Contract implications:** Buyers may have grounds to void the contract or claim compensation if the report was not provided
- **VBA enforcement:** The Victorian Building Authority actively investigates complaints and can take enforcement action
### Legal Action for Misrepresentation
Providing an inaccurate or incomplete Section 137B Report can expose owner-builders to legal
claims:
- **Misrepresentation claims:** Buyers who discover undisclosed defects may sue for damages based on misleading conduct
- **Contract rescission:** In serious cases, buyers may seek to rescind the contract and recover their purchase price
- **Rectification costs:** Owner-builders may be held liable for the full cost of rectifying undisclosed defects
- **Consumer law claims:** Australian Consumer Law provides additional protections for buyers that may apply
- **VCAT proceedings:** The Victorian Civil and Administrative Tribunal handles many building disputes, providing an accessible forum for buyer claims
### Financial Impact of Non-Disclosure
The financial consequences of failing to properly disclose construction changes include:
- Legal costs defending claims from buyers
- Rectification costs for undisclosed defects
- Potential reduction in sale price if issues are discovered during negotiations
- Fines and penalties from regulatory authorities
- Insurance implications, including potential denial of claims
- Reputational damage affecting future property dealings
## Compliance Requirements for Construction Changes
Maintaining compliance throughout your owner-builder project requires understanding and
following specific requirements when changes occur.
### New Permits and Approvals
Many construction changes require updated or new permits:
- **Building permit amendments:** Required when changes affect the approved plans, including structural modifications, layout changes, or material substitutions that affect compliance
- **Planning permit variations:** Necessary when changes affect aspects controlled by planning permits, such as setbacks, height, or external appearance
- **Additional building permits:** Separate permits may be required for new structures not included in the original approval
- **Occupancy permit updates:** Final occupancy permits must reflect the as-built condition, including all approved changes
### Updated Environmental Assessments
Construction changes may trigger additional environmental requirements:
- **Stormwater management:** Changes to roof area, paving, or drainage may require updated stormwater calculations
- **Soil erosion controls:** Extended construction periods or earthworks changes may require additional erosion controls
- **Energy efficiency ratings:** Changes to windows, insulation, or building envelope may affect energy ratings and require reassessment
- **Native vegetation:** Site modifications may trigger additional native vegetation requirements
### Modified Safety Protocols
Construction changes can affect safety requirements that impact Section 137B compliance:
- **Fire safety systems:** Changes to layouts or materials may require updated fire safety measures
- **Smoke alarm positioning:** Room modifications may require repositioning of smoke alarms to maintain compliance
- **Balustrades and barriers:** Changes to decks, stairs, or balconies must maintain compliant fall protection
- **Window safety:** Changes to window positions may trigger additional safety glazing or fall protection requirements
- **Emergency egress:** Layout changes must not compromise emergency escape routes
## When and How to Update Your Section 137B Report
Understanding when report updates are necessary and how to manage them is essential for
maintaining compliance.
### Revise Immediately After Significant Changes
The Section 137B Report must accurately reflect the building at the time of sale. When
significant changes occur, owner-builders should:
- **Document all changes as they occur:** Maintain detailed records of modifications, including dates, reasons, and any associated approvals
- **Engage the inspector early:** Consult with your building inspector about changes before they are made, where possible
- **Update the inspection scope:** Ensure the inspector is aware of all changes so they can be included in the assessment
- **Obtain a new report before sale:** If significant changes have occurred since the last inspection, arrange a fresh report before listing the property
### Timing Considerations
Several timing factors affect Section 137B Report updates:
- **Report validity:** While reports do not have a specified expiry period, an outdated report may not accurately reflect current conditions
- **Sale preparation:** Arrange for the report to be prepared close to when you intend to list the property
- **Changes after report:** If changes occur after the report is prepared but before sale, a new or updated report may be required
- **Buyer requests:** Buyers may request a more recent report if the existing one is considered outdated
## Stakeholder Consultation for Construction Changes
Effective management of construction changes requires consultation with relevant
stakeholders to ensure Section 137B compliance is maintained.
### Documenting Changes
Proper documentation should include:
- **Change requests:** Written records of why changes were requested or required
- **Approvals obtained:** Copies of all amended permits and approvals
- **Technical specifications:** Updated specifications for materials and construction methods
- **Compliance certificates:** Current certificates for all regulated work
- **Photographic records:** Photos documenting construction stages, especially for elements that will be concealed
- **Contractor records:** Details of all contractors involved in changes, including licences and insurance
### Legal Review
Engaging legal professionals can help protect your position when significant changes occur:
- **Contract review:** Ensuring construction contracts accommodate variations appropriately
- **Compliance assessment:** Verifying that changes meet all legal requirements
- **Sale preparation:** Reviewing disclosure documents before sale to ensure accuracy
- **Risk assessment:** Identifying potential liability issues arising from changes
### Professional Consultations to Consider
Depending on the nature of changes, owner-builders may need to consult:
- **Registered building practitioners:** For Section 137B Report preparation and updates
- **Structural engineers:** For changes affecting structural elements
- **Building surveyors:** For permit amendments and compliance assessments
- **Energy assessors:** For changes affecting energy efficiency ratings
- **Conveyancing solicitors:** For advice on disclosure obligations during sale
## Who Needs a Section 137B Report?
Understanding whether you require a Section 137B Report depends on several factors related
to your ownership and construction history.
### Owner-Builders Selling Within 6.5 Years
The primary group requiring a Section 137B Report includes:
- **Owner-builders who held a Certificate of Consent:** Anyone who obtained an owner-builder permit (Certificate of Consent) to undertake building work
- **Sellers within the statutory period:** Those selling within 6.5 years of the occupancy permit or certificate of final inspection issue date
- **Subsequent owners:** Even if you purchased the property from the original owner-builder, you may need to provide the report if selling within the 6.5 year period
### Types of Building Work Covered
The Section 137B requirement applies to:
- New home construction undertaken as an owner-builder
- Major renovations requiring a building permit where the owner held owner-builder status
- Extensions and additions constructed under owner-builder arrangements
- Any building work exceeding the monetary threshold requiring a Certificate of Consent
### Exemptions and Special Cases
Some situations may be exempt or require special consideration:
- **Minor works:** Building work below the monetary threshold that did not require owner-builder registration
- **Work by registered builders:** Where all work was completed by registered domestic builders with appropriate contracts and warranties
- **Sales after 6.5 years:** Properties sold more than 6.5 years after completion are not subject to the Section 137B requirement
## How to Get Your Section 137B Report Updated
When construction changes have occurred, following the correct process for obtaining an
updated report is essential.
### Step 1: Gather Documentation
Before engaging an inspector, collect:
- Original building permits and any amendments
- Approved plans, including as-built drawings if available
- All compliance certificates (electrical, plumbing, waterproofing)
- Records of construction changes and variations
- Engineering certificates and structural specifications
- Previous Section 137B Reports if any exist
- Photographic records of construction stages
### Step 2: Engage a Qualified Inspector
Selecting the right inspector is crucial:
- **VBA registration:** Ensure the inspector is registered with the Victorian Building Authority
- **Appropriate qualifications:** Verify they hold qualifications appropriate for Section 137B inspections
- **Experience:** Look for inspectors experienced in assessing owner-builder work
- **Insurance:** Confirm they carry professional indemnity insurance
- **Communication:** Choose an inspector who can explain findings clearly
### Step 3: Brief the Inspector on Changes
Provide the inspector with comprehensive information:
- Details of all construction changes since original plans
- Reasons for changes and who performed the work
- Any areas of concern you have identified
- Access arrangements for all areas requiring inspection
- Copies of all relevant documentation
### Step 4: Facilitate Thorough Inspection
During the inspection:
- Ensure clear access to all areas including roof spaces and subfloor
- Provide access to any locked areas or outbuildings
- Be available to answer questions about construction history
- Point out areas where changes were made
- Do not attempt to conceal defects or problem areas
### Step 5: Review and Understand the Report
Once you receive the report:
- Read the entire report carefully
- Ask the inspector to clarify anything you do not understand
- Consider the implications of any defects identified
- Discuss options for rectification where applicable
- Understand your disclosure obligations when selling
## Frequently Asked Questions
###
What is a Section 137B Report and why is it required?
**Short answer:** A Section 137B Report is a mandatory defect disclosure
document required under the Building Act (VIC) 1993 for owner-built properties sold
within 6.5 years of completion.
The report must be prepared by a registered building practitioner and provided to
prospective buyers before they sign a contract of sale. It discloses any building
defects identified during a professional inspection of the owner-built work. The purpose
is to protect buyers from purchasing properties with hidden defects and to ensure
transparency in property transactions involving owner-built homes. The 6.5 year period
aligns with the statutory warranty period for domestic building work in Victoria, during
which defect claims can be made.
###
Do construction changes always require a new Section 137B Report?
**Short answer:** Not all changes require a completely new report, but
significant modifications should be included in an updated inspection before selling the
property.
Minor changes such as paint colours or fixture selections typically do not require
report updates. However, changes affecting structural elements, waterproofing,
electrical systems, plumbing, or fire safety should be included in the inspection. If
substantial changes occur after a report is prepared, it is advisable to obtain a new
report that accurately reflects the current condition of the building. The report
provided to buyers must accurately represent the property at the time of sale to avoid
potential misrepresentation claims.
###
What happens if I sell without disclosing construction changes?
**Short answer:** Failing to disclose construction changes that result in
defects can lead to legal claims for misrepresentation, contract rescission, and
liability for rectification costs.
Buyers who discover undisclosed defects after purchase may pursue legal action for
damages under common law misrepresentation or statutory provisions including the
Australian Consumer Law. They may seek to rescind the contract and recover their
purchase price, or claim the cost of rectifying defects that should have been disclosed.
The Victorian Building Authority can also take enforcement action for failure to provide
an accurate Section 137B Report, with penalties of up to 50 penalty units. The financial
and legal consequences of non-disclosure typically far exceed the cost of proper
documentation and disclosure.
###
How do material substitutions affect my Section 137B compliance?
**Short answer:** Material substitutions that result in non-compliant
materials being used must be disclosed in the Section 137B Report as defects.
When materials are substituted during construction, the replacement materials must meet
the requirements of the National Construction Code and relevant Australian Standards. If
substitute materials do not meet these requirements, the non-compliance constitutes a
defect that must be disclosed. Common issues include timber of incorrect grade,
waterproofing membranes that do not meet AS 3740, insulation that does not achieve
required energy ratings, and cladding that does not meet fire rating requirements. The
inspector will assess whether materials used comply with applicable standards and note
any non-compliance in the report.
###
Can I rectify defects before getting my Section 137B Report?
**Short answer:** Yes, rectifying defects before the inspection will result
in a cleaner report, though the report will note any areas that have been remediated.
If you are aware of construction issues, addressing them before the Section 137B
inspection is advisable. The inspector will assess the current condition of the
building, so completed rectification work will be noted as compliant. However, the
inspector may note that areas have been remediated if this is apparent. For significant
defects, engage appropriate licensed tradespeople to complete rectification work and
obtain compliance certificates before the inspection. This approach typically results in
a more favourable report and reduces concerns for prospective buyers.
###
What qualifications must a Section 137B inspector have?
**Short answer:** A Section 137B Report must be prepared by a registered
building practitioner with appropriate qualifications under Victorian building
legislation.
In Victoria, the inspector must be registered with the Victorian Building Authority as a
building practitioner in a category that permits the preparation of Section 137B
Reports. This typically includes registration as a building inspector (unlimited) or a
building surveyor. The inspector should also carry professional indemnity insurance to
protect both themselves and property owners. When selecting an inspector, verify their
VBA registration status, which can be checked on the VBA website. Choose an inspector
with experience in assessing residential construction and owner-builder work for the
most thorough assessment.
###
How long does a Section 137B Report remain valid?
**Short answer:** There is no specified expiry period for Section 137B
Reports, but the report must accurately reflect the condition of the building at the
time of sale.
While the legislation does not specify a validity period, a report becomes outdated if
the building condition has changed since the inspection. If significant changes have
occurred, including construction modifications, deterioration, or rectification work, a
new report should be obtained. Buyers or their legal representatives may question the
validity of an older report and request a more recent inspection. For best practice,
arrange for the Section 137B inspection to be conducted relatively close to when you
intend to sell, particularly if several months or years have passed since previous
inspections.
###
What if my building permit was never amended for construction changes?
**Short answer:** Unpermitted work constitutes a significant defect that
must be disclosed in the Section 137B Report and may require retrospective approval
before sale.
Construction work that deviates from approved plans without permit amendments is
technically unpermitted work. This is a compliance issue that must be disclosed to
buyers and can significantly affect property value and saleability. Options for
addressing unpermitted work include seeking retrospective approval through a building
surveyor, which may require the work to be certified as compliant or modified to achieve
compliance. In some cases, unpermitted work may need to be removed. Consult with a
building surveyor early to understand your options and the implications for selling your
property.
## Key Takeaways
- Section 137B Reports are mandatory for owner-built properties sold within 6.5 years of completion under the Building Act (VIC) 1993.
- Construction changes including design modifications, material substitutions, and scope expansions can all affect Section 137B compliance obligations.
- Failure to disclose construction changes that result in defects can lead to legal claims for misrepresentation and significant financial liability.
- Many construction changes require building permit amendments, and unpermitted work constitutes a major defect requiring disclosure.
- Proper documentation of all construction changes is essential for maintaining compliance and protecting your legal position.
- The Section 137B Report must be prepared by a VBA-registered building practitioner and provided to buyers before contract signing.
- Reports should be updated when significant changes occur to ensure accuracy at the time of sale.
- Engaging professional advice from building practitioners, solicitors, and other consultants can help navigate complex compliance requirements.
## References and Resources
- [ Victorian Building Authority (VBA) ](https://www.vba.vic.gov.au/)
- [ Building Act (VIC) 1993 ](https://www.legislation.vic.gov.au/in-force/acts/building-act-1993/)
- [ National Construction Code (NCC) ](https://ncc.abcb.gov.au/)
- [ Consumer Affairs Victoria ](https://www.consumer.vic.gov.au/)
- [ Victorian Civil and Administrative Tribunal (VCAT) ](https://www.vcat.vic.gov.au/)
### Mould Inspections: Your Key to a Healthy Gold Coast Home
Source: https://ownerinspections.com.au/articles/mould-inspections-your-key-to-a-healthy-gold-coast-home
Published: 2023-10-04 | Updated: 2026-01-30 | Category: Mould Inspections
Author: Maison Azdari
Mould is a persistent problem for Gold Coast homeowners. The region's subtropical climate, with warm temperatures and high humidity levels throughout much of the year, creates the perfect breeding ground for a range of mould species. Left unchecked, mould can cause significant health issues and damage to your property's structure and value.
A professional [mould inspection](/mould-inspections) is one of the most effective ways to identify hidden mould growth, assess its severity, and develop a plan for safe removal. Whether you are buying a new home, selling your property, or simply concerned about indoor air quality, knowing what types of mould are common in Gold Coast homes and how to prevent them is essential knowledge for every property owner.
> The Gold Coast receives an average annual rainfall of over 1,400 mm, with humidity levels regularly exceeding 70%. These conditions allow mould spores to germinate and colonise indoor surfaces in as little as 24 to 48 hours after water exposure.
## Why Mould Thrives on the Gold Coast
The Gold Coast sits within a humid subtropical climate zone, characterised by warm, wet summers and mild winters. This climate pattern means that indoor environments are consistently exposed to moisture-laden air, particularly during the wet season from November through March.
Coastal properties face additional risks. Salt-laden air can accelerate the deterioration of building materials, creating micro-cracks and gaps that allow moisture ingress. Homes near canals, rivers, or the beach are especially vulnerable to condensation and damp conditions that promote mould colonisation.
Poor ventilation compounds the issue in many Gold Coast homes. Modern construction techniques that prioritise energy efficiency can inadvertently reduce natural airflow, trapping moisture inside wall cavities, ceiling spaces, and subfloor areas. Without adequate ventilation, even small amounts of moisture can lead to extensive mould growth within weeks.
## Common Types of Mould in Gold Coast Homes
Not all moulds are the same. Different species pose varying levels of risk to both health and property. Identifying the type of mould present in your home is a critical step in determining the appropriate remediation approach. Below is an overview of the most common mould types found in Gold Coast properties.
### Black Mould (Stachybotrys chartarum)
Black mould is often the most feared variety, and with good reason. Stachybotrys chartarum produces mycotoxins that can cause serious respiratory problems, chronic fatigue, headaches, and in severe cases, neurological symptoms. It typically appears as dark greenish-black patches with a slimy or wet texture.
This mould thrives on materials with high cellulose content, such as plasterboard, timber framing, and paper-backed insulation. It requires sustained moisture to grow, making it common in areas affected by leaking pipes, roof damage, or flooding. For a deeper look at the realities of this mould species, read our guide on [black mould myths and mould inspections](/articles/black-mold-myths-unveiling-the-truth-in-mould-inspections).
### White Mould (Aspergillus niger)
Despite its name, Aspergillus niger can range in colour from white to dark brown or black as it matures. It is one of the most widespread mould species found indoors and grows readily on damp walls, fabrics, leather, and food. White mould is commonly mistaken for efflorescence (salt deposits) on concrete and masonry surfaces.
Aspergillus niger produces allergens and irritants that can trigger asthma attacks, sinus infections, and skin irritation. Immunocompromised individuals are at particular risk of developing aspergillosis, a serious fungal infection that can affect the lungs and other organs. A [study published by the National Center for Biotechnology Information (NCBI)](https://www.ncbi.nlm.nih.gov/pmc/articles/PMC7330222/) highlights the clinical significance of invasive aspergillosis in vulnerable populations.
### Green Mould (Penicillium)
Penicillium species are among the most common indoor moulds in Australian homes. They appear as blue-green or grey-green fuzzy patches and are frequently found on water-damaged carpets, wallpaper, insulation, and furnishings. Green mould spreads rapidly and can colonise large areas in a short period.
Exposure to Penicillium spores can cause allergic reactions, chronic sinusitis, and respiratory infections. People with pre-existing lung conditions or compromised immune systems are at heightened risk. This mould species is also a major contributor to the musty odour commonly associated with damp or water-damaged buildings.
### Yellow Mould (Aspergillus flavus)
Aspergillus flavus is a particularly dangerous mould species that produces aflatoxins, among the most potent naturally occurring carcinogens known. It appears as yellow to yellowish-green colonies and is often found on stored food, soil, and damp organic matter within homes.
The health risks associated with Aspergillus flavus are severe. In immunocompromised individuals, invasive aspergillosis caused by this species carries a mortality rate of approximately 45%. Even in healthy individuals, prolonged exposure can lead to allergic bronchopulmonary aspergillosis and chronic respiratory problems. This makes professional detection and removal an urgent priority when yellow mould is suspected.
### Mould Types Comparison Table
| Mould Type | Scientific Name | Appearance | Common Locations | Health Risks | Severity |
| ------------ | ---------------------- | ------------------------------- | --------------------------------- | -------------------------------------------------------------- | ---------------- |
| Black Mould | Stachybotrys chartarum | Dark greenish-black, slimy | Plasterboard, timber, insulation | Mycotoxin exposure, respiratory illness, neurological symptoms | High |
| White Mould | Aspergillus niger | White to dark brown/black | Walls, fabrics, concrete, masonry | Aspergillosis, asthma, sinus infections | Moderate to High |
| Green Mould | Penicillium | Blue-green or grey-green, fuzzy | Carpets, wallpaper, insulation | Allergic reactions, sinusitis, respiratory infections | Moderate |
| Yellow Mould | Aspergillus flavus | Yellow to yellowish-green | Food, soil, damp organic matter | Aflatoxin exposure, 45% mortality in immunocompromised | Very High |
## Prevention Strategies for Gold Coast Homeowners
Preventing mould growth is far more cost-effective than remediating an established infestation. The following strategies are tailored to the specific challenges of the Gold Coast climate and can significantly reduce the risk of mould colonisation in your home.
### Keep Your Home Dry
Moisture control is the single most important factor in mould prevention. Fix leaking taps, pipes, and roof damage as soon as they are identified. After heavy rain or flooding, dry affected areas within 24 to 48 hours to prevent mould spores from germinating.
Use exhaust fans in bathrooms, kitchens, and laundries to remove steam and moisture at the source. Make sure these fans vent directly to the outside rather than into the roof cavity, which is a common installation error that can lead to severe mould problems in ceiling spaces.
### Create a Mould-Unfriendly Environment
Mould requires organic material, moisture, and warmth to grow. While you cannot eliminate warmth on the Gold Coast, you can reduce the availability of moisture and organic food sources. Keep indoor surfaces clean and dry. Avoid storing cardboard boxes, old newspapers, or other cellulose-rich materials in damp areas such as garages, sheds, or subfloor spaces.
Ensure adequate airflow throughout your home by opening windows when weather permits and keeping furniture away from external walls. In rooms that tend to accumulate moisture, such as bathrooms and laundries, consider using mould-resistant paint and materials during renovations.
### Invest in a Quality Dehumidifier
For Gold Coast homes, a dehumidifier can be a valuable investment, particularly during the wet season and in rooms with limited ventilation. Aim to maintain indoor relative humidity below 60%, which is the threshold above which most mould species can actively grow.
When selecting a dehumidifier, consider the size of the space, the ambient humidity level, and the unit's extraction capacity measured in litres per day. For most Gold Coast homes, a unit capable of extracting 15 to 25 litres per day will be sufficient for a standard living area. Place the unit in the most humid room and empty or drain the collection tank regularly.
### Schedule Regular Inspections
Routine [mould inspections](/mould-inspections) are a proactive measure that can catch problems before they escalate. Even if your home appears free of mould, hidden growth may be occurring within wall cavities, under flooring, or inside air conditioning ductwork.
A professional inspector uses specialised equipment such as thermal imaging cameras and moisture meters to detect moisture and mould in concealed areas. Learn more about these methods in our article on [mould inspection techniques, tools, and methods](/articles/mould-inspection-techniques-tools-and-methods). Annual inspections are recommended for Gold Coast properties, with additional checks following any water damage event, severe storm, or extended period of high humidity.
## The Mould Removal Process
When mould is discovered in your home, a structured removal process is essential to ensure complete remediation and prevent recurrence. Attempting to remove significant mould growth without proper precautions can spread spores throughout your home and worsen the contamination.
### Isolation and Containment
The first step in professional mould remediation is isolating the affected area. This involves sealing off the contaminated zone with plastic sheeting and creating negative air pressure using HEPA-filtered air scrubbers. Containment prevents mould spores from migrating to unaffected areas of the home during the removal process.
All air conditioning and ventilation systems serving the affected area should be shut down during remediation. Spores can travel through ductwork and contaminate other parts of the building if systems remain operational.
### Cleaning and Removal
Depending on the extent of contamination, cleaning methods may range from surface wiping with antifungal solutions to the complete removal of affected building materials. Porous materials such as plasterboard, carpet, and insulation that have been heavily colonised by mould generally cannot be salvaged and must be discarded.
Non-porous surfaces like tiles, glass, and metal can usually be cleaned and treated with antifungal agents. All cleaning should be performed while wearing appropriate personal protective equipment, including P2 respirators, gloves, and eye protection.
### Ventilation and Drying
After contaminated materials have been removed and surfaces cleaned, thorough drying of the area is critical. Industrial-grade dehumidifiers and air movers are used to reduce moisture levels in the structure to a point where mould regrowth is no longer possible.
Moisture readings should be taken at regular intervals during the drying process to confirm that building materials have returned to acceptable moisture content levels, typically below 15% for timber framing and below 1% for concrete.
### Professional Remediation
For extensive mould infestations, or when toxic mould species such as Stachybotrys chartarum or Aspergillus flavus are present, professional remediation is strongly recommended. Licensed remediation specialists have the training, equipment, and experience to safely remove mould without putting your household at risk.
In Queensland, mould remediation work on residential properties may need to comply with the Queensland Building and Construction Commission (QBCC) standards, particularly if structural materials require replacement. Our article on [mould inspection for home damage](/articles/mould-inspection-for-home-damage) provides additional detail on when professional intervention is warranted.
## Benefits of Professional Mould Inspections
Investing in a professional mould inspection delivers benefits that extend well beyond simply identifying visible mould. Here is what a thorough inspection can do for Gold Coast homeowners.
### Protecting Your Health
Mould exposure is linked to a wide range of health conditions, from mild allergic reactions to severe respiratory illness and fungal infections. Children, the elderly, pregnant women, and individuals with asthma or compromised immune systems are especially vulnerable.
A professional inspection identifies not only visible mould but also hidden growth that may be releasing spores into your indoor air. By addressing these hidden sources, you can significantly improve indoor air quality and reduce the risk of mould-related illness for your household. Our comprehensive [mould inspection guide](/articles/mould-inspection-guide) covers the full scope of what a professional assessment involves.
### Safeguarding Your Property
Mould can cause extensive damage to building materials over time. Timber framing can rot, plasterboard can deteriorate, and metal fixtures can corrode when exposed to prolonged moisture and mould growth. The cost of repairing mould damage increases significantly the longer the problem is left untreated.
A professional inspection identifies moisture sources and mould growth early, allowing you to address issues before they compromise your home's structural integrity. This proactive approach can save thousands of dollars in repair costs and prevent the need for major renovation work.
### Real Estate Applications for Buyers
If you are purchasing a property on the Gold Coast, a mould inspection should be a standard part of your due diligence. Mould problems are not always disclosed by sellers, and a [pre-purchase inspection](/pre-purchase-inspections) can reveal hidden issues that may affect the property's value or your family's health.
A detailed mould report gives you the information needed to negotiate a fair purchase price or request remediation before settlement. Pairing a mould inspection with a [building inspection on the Gold Coast](/qld/building-inspections-gold-coast) provides a complete picture of the property's condition. For tips on tackling mould in similarly humid environments, see our guide to [combatting mould growth in Sydney homes](/articles/key-to-combatting-mould-growth-in-sydney-homes).
### Real Estate Applications for Sellers
Sellers also benefit from pre-sale mould inspections. Identifying and addressing mould problems before listing your property removes a potential barrier to sale and demonstrates transparency to prospective buyers.
A clean mould inspection report can be a valuable marketing tool, providing buyers with confidence in the property's condition. In a competitive Gold Coast market, this assurance can make the difference between a quick sale and a protracted negotiation.
## When to Book a Mould Inspection
Certain situations call for an immediate mould inspection. If you notice any of the following, contact a professional inspector without delay:
- Persistent musty or earthy odours, especially in enclosed areas
- Visible discolouration or staining on walls, ceilings, or floors
- Recent water damage from flooding, storm damage, or plumbing failures
- Condensation forming regularly on windows, pipes, or walls
- Unexplained respiratory symptoms, allergic reactions, or skin irritation among household members
- A property that has been unoccupied or poorly ventilated for an extended period
Even in the absence of these warning signs, annual inspections are a wise precaution for Gold Coast properties given the region's climate conditions.
## Queensland Regulations and Standards
In Queensland, residential building work is regulated by the QBCC. While there is no specific standalone regulation governing mould in residential properties, several frameworks apply. The Australian Standard AS 4349.1 covers general property inspections, and mould assessments are typically conducted in accordance with industry best practice guidelines.
Landlords in Queensland have obligations under the Residential Tenancies and Rooming Accommodation Act 2008 to maintain rental properties in a condition that is fit for habitation. This includes addressing mould issues that arise from structural defects, plumbing failures, or inadequate ventilation that are the landlord's responsibility to maintain.
For properties undergoing renovation or remediation work, QBCC licensing requirements may apply depending on the scope of work involved. Always confirm that any tradesperson or remediation specialist you engage holds the appropriate QBCC licence for the work being performed.
## Frequently Asked Questions
### What are the early signs of mould in a Gold Coast home?
Early signs include a persistent musty smell, small spots of discolouration on walls or ceilings, peeling or bubbling paint, and condensation forming on windows or cold surfaces. You may also notice increased allergy symptoms or respiratory irritation among household members. These signs warrant a professional inspection to determine the extent of any hidden growth.
### How often should I have my Gold Coast home inspected for mould?
Annual mould inspections are recommended for most Gold Coast properties. Properties in low-lying areas, near waterways, or with a history of water damage may benefit from inspections every six months. You should also book an inspection after any significant water event such as flooding, storm damage, or a plumbing leak.
### How does the Gold Coast climate contribute to mould growth?
The Gold Coast's humid subtropical climate provides consistently warm temperatures and high humidity, both of which are essential for mould growth. Summer humidity levels frequently exceed 70 to 80%, and heavy rainfall during the wet season introduces additional moisture into buildings. Coastal salt air can also degrade building materials, creating pathways for moisture to enter wall cavities and roof spaces.
### Are DIY mould testing kits reliable?
DIY mould testing kits have significant limitations. Most only detect surface mould and cannot identify hidden growth within wall cavities, ceiling spaces, or ductwork. They also lack the laboratory analysis needed to identify specific mould species and their associated health risks. Professional inspections using calibrated equipment and accredited laboratory testing provide far more accurate and actionable results.
### What does a professional mould inspection include?
A professional mould inspection typically includes a visual assessment of all accessible areas, thermal imaging to detect hidden moisture, moisture meter readings on walls and floors, air quality sampling, and surface swab testing where mould is suspected. The results are compiled into a detailed report that identifies mould types, moisture sources, affected areas, and recommended remediation steps.
### Can I clean small amounts of mould myself?
Small areas of surface mould on non-porous materials (less than one square metre) can generally be cleaned safely using a solution of water and white vinegar or a commercial antifungal cleaner. Wear a P2 mask, gloves, and eye protection during cleaning. If the mould returns after cleaning, or if it covers a larger area, professional assessment and remediation are recommended to address the underlying moisture source.
### How do I choose the right dehumidifier for my Gold Coast home?
Select a dehumidifier based on the room size and typical humidity level. For a standard bedroom or living area on the Gold Coast, a unit extracting 15 to 20 litres per day is usually adequate. For larger open-plan areas or particularly damp rooms, consider a unit capable of 25 litres per day or more. Look for models with automatic humidity sensors, continuous drainage options, and energy-efficient ratings.
### Can new homes get mould?
Yes. New construction is not immune to mould. Residual moisture from concrete curing, plastering, and painting can create conditions for mould growth if the building is sealed before materials have fully dried. Poor site drainage, inadequate ventilation design, and construction defects such as missing or improperly installed waterproof membranes can also lead to mould problems in newly built homes.
### Does mould affect resale value?
Mould can significantly reduce a property's resale value. Buyers and their inspectors will often identify mould during pre-purchase assessments, leading to price renegotiations or withdrawn offers. A documented history of mould problems, even if remediated, may require disclosure and can affect buyer confidence. Proactive inspection and remediation before listing your property helps protect its market value.
### Are HVAC systems vulnerable to mould?
Air conditioning and HVAC systems are among the most common sites for mould growth in Gold Coast homes. Condensation within ductwork, drain pans, and evaporator coils provides the moisture that mould needs. Once established in an HVAC system, mould spores are distributed throughout the home every time the system operates. Regular servicing of your air conditioning system, including cleaning drain lines and replacing filters, is essential. A professional mould inspection should always include an assessment of HVAC components.
## Take Action to Protect Your Gold Coast Home
Mould is a serious concern for Gold Coast homeowners, but it is also a manageable one when addressed early and professionally. If you suspect mould in your home, or if it has been more than a year since your last inspection, now is the time to act.
Book a professional [mould inspection](/mould-inspections) with Owner Inspections today. Our licensed inspectors use advanced detection technology to identify hidden mould, assess moisture sources, and provide you with a clear remediation plan. Protect your health, your family, and your property investment with a thorough, expert assessment.
### How to Thoroughly Inspect the Condition of a House
Source: https://ownerinspections.com.au/articles/inspecting-house-condition-guide
Published: 2023-10-03 | Updated: 2026-02-12 | Category: Defect Investigation
Author: Maison Azdari
Inspecting the condition of a house before purchasing is one of the most effective ways to protect yourself from hidden defects, unexpected repair costs, and potential safety hazards. In Australia, where property prices continue to remain among the highest in the world, a thorough house condition inspection conducted in accordance with AS 4349.1 (Inspection of Buildings) helps buyers understand exactly what they are purchasing. This guide explains how to assess every major component of a residential property, from structural elements and electrical systems to roofing, drainage, and pest risks, giving you a practical framework to make informed decisions.
Whether you are a first home buyer or an experienced investor, knowing what to look for during a property inspection can save you tens of thousands of dollars. A house may appear flawless on the surface, yet conceal serious problems beneath its walls, in its roof cavity, or under its foundations. Understanding the full scope of a condition inspection puts you in a stronger negotiating position and reduces the chance of costly surprises after settlement.
> A house condition inspection is not simply a visual walkthrough. It is a systematic evaluation of every accessible area of a property, designed to uncover defects that could affect safety, liveability, and long-term value.
## Why Inspecting House Condition Matters
Property defects are far more common than most buyers expect. Research from the Housing Industry Association (HIA) shows that a significant proportion of Australian homes, both old and new, contain defects ranging from minor cosmetic issues to serious structural failures. Without a proper inspection, these defects can go unnoticed until they become expensive problems.
## Preparing Before the Inspection
Good preparation makes the inspection more effective. Before you arrive at the property or before your inspector begins their assessment, take time to gather information and set clear objectives.
## Tools and Equipment for a House Condition Inspection
Professional building inspectors carry specialised equipment to assess property condition accurately. If you are conducting a preliminary review yourself, some basic tools can help you identify potential issues.
## Structural Assessment: Foundations, Walls, and Cracks
The structural integrity of a house is the single most important factor in any condition inspection. Structural defects can be extremely costly to repair and may compromise the safety of the entire building.
### Foundation Inspection
Foundations transfer the weight of the building to the ground. Australian homes typically sit on concrete slab foundations, pier and beam (stump) foundations, or strip footings. Each type has its own common failure modes.
### Wall Assessment
Both internal and external walls require careful examination. Cracking patterns can tell you a great deal about what is happening structurally.
Check walls for:
## Interior Checks: Electrical, Plumbing, and Insulation
The internal systems of a house directly affect day-to-day liveability and safety. While a licensed electrician or plumber is needed for detailed assessments, a visual inspection can reveal many common problems.
### Electrical Systems
Electrical faults are a leading cause of house fires in Australia. During a condition inspection, look for warning signs that the electrical system may need attention.
### Plumbing and Drainage
Water damage is one of the most common and expensive problems found during property inspections. Check the following areas carefully.
### Insulation and Ventilation
Poor insulation and ventilation contribute to mould growth, condensation, and higher energy costs. If accessible, inspect the roof cavity for insulation type, coverage, and condition. Subfloor areas should have adequate ventilation through vents or mechanical systems to prevent moisture build-up.
## Exterior Checks: Roof, Drainage, and Gutters
The exterior of a property is its first line of defence against weather and environmental damage.
### Roof Inspection
The roof is one of the most expensive components to replace, with a full re-roofing often costing $15,000 to $40,000 or more depending on the size and materials. Assess the following:
### Gutters and Drainage
Poor drainage is a frequent contributor to foundation problems, rising damp, and subfloor moisture.
## Pest and Termite Inspection
Australia has some of the most destructive termite species in the world. The CSIRO estimates that one in three Australian homes will be affected by termites at some point. A [timber pest inspection](/timber-pest-inspections), ideally conducted alongside the building inspection, should cover all accessible areas of the property.
Key areas to check for pest activity include:
## Assessing the Age of Major Systems and Components
Understanding the age and remaining service life of major building systems helps you plan for future expenses. Ask the seller for any records and look for manufacturing dates on equipment.
## DIY Inspection vs Professional Building Inspection
While a personal walkthrough can help you identify obvious issues, it is no substitute for a professional building inspection conducted in accordance with AS 4349.1.
## Comprehensive House Condition Checklist
Use this checklist as a guide when inspecting any residential property. Tick off each item as you assess it.
For a complete overview, see our [guide to pre-purchase building and pest inspections](/guides/pre-purchase-building-pest-inspection-guide).
### How to Avoid Home Building Disputes in Sydney
Source: https://ownerinspections.com.au/articles/how-to-avoid-home-building-disputes-in-sydney
Published: 2023-09-28 | Updated: 2026-02-03 | Category: Building Disputes
Author: Maison Azdari
Building disputes in [Sydney](/nsw/building-inspections-sydney) can be prevented through clear contracts, consistent communication, professional building inspections, and an understanding of your legal rights under NSW Fair Trading. With approximately 171,500 new homes constructed across Greater Sydney between 2017 and 2022, disputes between homeowners and builders remain one of the most common complaints lodged with NSW Fair Trading. Most of these disputes stem from misunderstandings about scope, poor documentation, missed timelines, or defective workmanship that could have been identified earlier with independent inspections.
Whether you are building a new home, renovating an existing property, or managing a knockdown rebuild, taking proactive steps before and during construction significantly reduces the risk of a costly dispute. This guide covers the practical strategies Sydney homeowners can use to protect themselves, including contract management, communication frameworks, the role of building inspectors, and the legal avenues available when things go wrong.

## Why Building Disputes Are So Common in Sydney
Sydney's residential construction market is one of the busiest in Australia. The sheer volume of building activity, combined with labour shortages, rising material costs, and complex planning regulations, creates conditions where disputes can easily arise. Common causes include:
- Unclear or incomplete contracts that leave room for interpretation
- Poor communication between the homeowner, builder, and subcontractors
- Unrealistic timelines that do not account for weather, supply delays, or council approvals
- Defective workmanship that goes undetected until after completion
- Variations and additional costs that were not agreed in writing
- Payment disputes over milestone claims and the quality of completed work
Understanding these causes is the first step towards preventing them.
## Clear Communication: The Foundation of a Successful Build
Communication breakdowns are responsible for a large proportion of building disputes. What seems obvious to a builder may not be clear to a homeowner, and vice versa. Establishing strong communication practices from the start of the project reduces the risk of misunderstandings escalating into formal disputes.
### Be Specific About Expectations
Vague instructions lead to vague results. When discussing finishes, materials, layouts, or fixtures with your builder, provide detailed specifications. Instead of saying "I want a modern kitchen," specify the benchtop material, cabinet colour, handle style, appliance brands, and layout dimensions. Put every decision in writing and attach it to the building contract or as a schedule of finishes.
### Schedule Regular Updates
Agree on a regular communication schedule with your builder. This could be a weekly site meeting, a fortnightly phone call, or a written progress update at each construction stage. Regular updates keep both parties informed and allow small issues to be resolved before they become major problems.
### Document Everything in Writing
Verbal agreements are difficult to enforce. Every discussion, decision, variation, or change to the original plan should be confirmed in writing, whether by email, text message, or a formal variation order. This written record becomes valuable evidence if a dispute arises later.
### Nominate a Single Point of Contact
On the builder's side, there should be one person responsible for communicating with the homeowner. On the homeowner's side, one person should be the primary contact for the builder. Having multiple people giving instructions or asking questions creates confusion and increases the risk of conflicting directions.
| Communication Strategy | What It Prevents |
| --- | --- |
| Written specifications for all finishes | Disputes over material quality and selections |
| Weekly progress meetings | Surprises about construction progress or delays |
| Confirming all changes in writing | Disagreements about verbal agreements |
| Single point of contact | Conflicting instructions and miscommunication |
| Photographic records at each stage | Disputes about workmanship quality |
## Know Your Contract Inside and Out
The building contract is the single most important document in any construction project. It defines the rights and obligations of both the homeowner and the builder. In NSW, residential building work over $5,000 must be covered by a written contract under the Home Building Act 1989.
### Scope of Work
The contract should contain a detailed description of every item of work included in the build. This includes structural work, finishes, fixtures, landscaping, driveways, fencing, and any other items discussed during the quoting phase. If something is not listed in the scope of work, the builder is not obligated to provide it.
### Payment Milestones
NSW legislation prescribes maximum progress payment percentages for residential building contracts. The standard milestones are:
| Payment Stage | Maximum Percentage |
| --- | --- |
| Deposit | 10% |
| Base stage (slab) | 15% |
| Frame stage | 20% |
| Lock-up stage | 20% |
| Fixing stage | 15% |
| Completion | 20% |
Payments should only be made when the corresponding stage of work has been completed to a satisfactory standard. If you have concerns about the quality of work at any stage, consider engaging an independent building inspector before approving the milestone payment.
### Dispute Resolution Procedures
A well-drafted contract will include a dispute resolution clause that outlines the steps both parties must follow if a disagreement arises. This typically starts with direct negotiation, followed by mediation, and then formal proceedings through NSW Fair Trading or the NSW Civil and Administrative Tribunal (NCAT) if mediation fails.
### Penalty Clauses and Liquidated Damages
Some contracts include provisions for liquidated damages if the builder fails to complete the work by the agreed date. These clauses compensate the homeowner for losses caused by delays, such as additional rent or storage costs. Check whether your contract includes such provisions and understand how they apply.
### Termination Conditions
Both the homeowner and the builder have rights to terminate the contract under certain circumstances. Understanding these conditions before signing prevents surprises if the relationship breaks down during construction.
## Managing Timelines and Expectations
Unrealistic timelines are a major source of frustration in residential construction. Builders may provide optimistic completion dates to win the contract, while homeowners may not understand the genuine complexities of the construction process.
### Build in Buffer Time
Allow extra time in your project schedule for delays caused by weather, material supply issues, council inspections, and subcontractor availability. A buffer of 10 to 15 percent on the total construction timeline is reasonable for most Sydney projects.
### Prioritise Tasks on the Critical Path
Some tasks must be completed in sequence. Delays to these critical path activities push back the entire project. Work with your builder to identify which tasks are on the critical path and monitor their progress closely.
### Insist on Realistic Estimates
Ask your builder for a realistic completion date rather than an optimistic one. A builder who provides a conservative timeline and finishes early is preferable to one who promises a fast build and delivers late.
### Conduct Periodic Reviews
At each milestone payment stage, review the overall project timeline with your builder. If the project is falling behind schedule, discuss the reasons and agree on a revised completion date in writing.
## The Role of Building Inspectors in Dispute Prevention
Independent building inspectors play a significant role in preventing disputes by providing objective, documented assessments of construction quality at each stage of the build. Their involvement gives homeowners confidence that work is being completed to the required standard and provides evidence if problems arise later.
### Quality Assurance at Every Stage
A building inspector assesses workmanship, materials, and compliance with the National Construction Code and relevant Australian Standards at each construction milestone. This independent verification ensures that defects are identified and rectified before they are concealed by the next stage of work.
### Early Problem Detection
Many building defects are only visible during specific stages of construction. Waterproofing defects, for example, can only be properly assessed before tiling begins. Framing defects are only accessible before internal linings are installed. An inspector who visits at the right time catches problems that would otherwise remain hidden until they cause damage.
### Documented Evidence
Inspection reports include detailed descriptions and photographs of every defect identified. This documentation is valuable if a dispute proceeds to mediation or a tribunal hearing. Without independent evidence, disputes often become a matter of "he said, she said," which makes resolution more difficult.
### Expert Guidance
Building inspectors can advise homeowners on whether identified defects are minor cosmetic issues or serious structural concerns. This guidance helps homeowners prioritise their concerns and communicate more effectively with their builder about rectification.
| Inspection Stage | What the Inspector Checks | Common Defects Found |
| --- | --- | --- |
| Slab | Reinforcement, vapour barrier, levels | Incorrect reinforcement placement, poor compaction |
| Frame | Bracing, tie-downs, member sizes, openings | Missing bracing, undersized members, incorrect spacing |
| Lock-up | Roof, cladding, windows, weatherproofing | Flashing defects, poor window sealing, cladding gaps |
| Waterproofing | Membrane application, floor falls, hob heights | Membrane tears, insufficient coverage, incorrect falls |
| Fixing | Cabinetry, doors, internal linings | Misaligned cabinets, damaged linings, poor finishes |
| Pre-handover | Full property assessment | Cosmetic defects, incomplete work, non-compliant items |
## Legal Recourse Under NSW Fair Trading
When a building dispute cannot be resolved through direct negotiation, NSW Fair Trading provides a formal complaints and resolution process for homeowners.
### What NSW Fair Trading Handles
NSW Fair Trading accepts complaints about residential building work that is:
- Incomplete or abandoned
- Defective or not built to the contract specifications
- Causing damage to adjoining properties
- Performed by unlicensed or uninsured contractors
- Involving specialist work (electrical, plumbing, gas fitting) that does not meet standards
### The Complaints Process
The typical process involves lodging a complaint with NSW Fair Trading, which may then inspect the work, attempt to mediate between the parties, and issue a rectification order if the builder is found to be at fault. If mediation fails, the matter can be escalated to NCAT for a binding determination.
### NSW Guide to Standards and Tolerances 2017
The NSW Guide to Standards and Tolerances (2017) sets out the acceptable standards for residential building work in New South Wales. This guide is used by NSW Fair Trading, NCAT, and building inspectors to assess whether work meets the required standard. It covers tolerances for items such as wall straightness, floor levelness, tile alignment, paint finish, and many other measurable criteria. Homeowners should familiarise themselves with this guide to understand what constitutes acceptable and unacceptable work.
### Home Building Compensation Fund
For residential building work valued at over $20,000, NSW requires builders to hold insurance under the Home Building Compensation Fund (formerly known as the Home Warranty Insurance scheme). This insurance protects homeowners if the builder dies, disappears, or becomes insolvent and is unable to complete the work or rectify defects.
## Case Study: New Home Inspection with Owner Inspections
Sreedhar Kumbham engaged Owner Inspections to conduct independent inspections during the construction of his new home in Sydney. By having an independent inspector assess the work at each construction stage, Sreedhar was able to identify defects early and have them rectified by the builder before the next stage proceeded. The documented inspection reports gave him confidence in the quality of his new home and provided a clear record of the construction standard at each milestone.
This approach is typical of homeowners who want to take a proactive stance in managing their build. Rather than waiting until handover to discover problems, independent stage inspections allow issues to be resolved while the builder and subcontractors are still on site and accountable.
## Frequently Asked Questions
## Key Takeaways
## References
For a complete overview, see our [guide to expert witness reports for building disputes](/guides/expert-witness-building-disputes-guide).
### Typical Building Wall Defects and How to Prevent Them
Source: https://ownerinspections.com.au/articles/typical-building-wall-defects-and-how-to-prevent-them
Published: 2023-09-28 | Updated: 2026-02-12 | Category: Defect Investigation
Author: Maison Azdari
Walls are fundamental structural and aesthetic elements of any building. When defects develop in walls, they can signal deeper problems with the structure, compromise weatherproofing, and reduce the value of a property. In Australia, wall defects are among the most commonly reported issues during building inspections, driven by factors such as reactive soils, variable weather conditions, and construction practices.
This guide covers the four main categories of wall defects, what to look for, what causes them, and how to prevent them from developing or worsening. For a complete overview, see our [guide to building defect investigations](/guides/building-defect-investigation-guide).
## Cracking
Cracking is the most common wall defect encountered in Australian buildings. Not all cracks are equal, and understanding the type of crack helps determine the severity and appropriate response.
### Hairline Cracks
Hairline cracks are very fine cracks, typically less than 0.1mm in width. They commonly appear in rendered surfaces, plasterboard walls, and painted finishes. Hairline cracks are generally cosmetic and result from the normal drying and curing of building materials, minor thermal expansion and contraction, or slight vibration from traffic or nearby construction.
**What to look for:**
**Prevention:** Use quality paint and render products that accommodate minor movement. Ensure render coats are applied in appropriate conditions and allowed to cure properly. Apply flexible acrylic fillers to hairline cracks before repainting.
### Structural Cracks
Structural cracks are wider (typically greater than 2mm), often follow a diagonal pattern, and indicate that the building is experiencing movement or load-bearing stress beyond what the structure can accommodate.
**What to look for:**
**Causes:**
**Prevention:** Engage a structural engineer during the design phase to ensure footings and walls are designed for the site conditions. Avoid removing or modifying load-bearing walls without engineering advice. Monitor existing structural cracks with crack monitors to determine whether movement is ongoing.
### Settlement Cracks
Settlement cracks occur as a building settles onto its foundations over the first few years after construction. They are particularly common on reactive clay soils found across Melbourne, Adelaide, and parts of Sydney and Brisbane.
**What to look for:**
**Prevention:** Proper site classification under AS 2870 and appropriate footing design for the soil class are the primary prevention measures. Maintaining consistent moisture levels around the perimeter of the building by avoiding excessive watering on one side and ensuring drainage moves water away from footings also helps manage settlement.
## Bowing and Bulging
Bowing and bulging walls are a serious structural defect that indicates a wall is being displaced from its original position. This can occur in brick, block, rendered, or timber-framed walls.
**What to look for:**
**Causes:**
**Prevention:** Ensure wall ties are correctly installed and of appropriate material for the environment (stainless steel in coastal areas). Provide adequate bracing to timber-framed walls in accordance with AS 1684. Design retaining walls with proper drainage to prevent lateral water pressure buildup. Conduct regular inspections of older brick veneer walls to check for tie corrosion.
## Water Seepage and Stains
Water seepage through walls is a common and damaging defect that affects both the structure and the livability of a building. Staining on walls is often the first visible sign of a moisture problem.
**What to look for:**
**Causes:**
**Prevention:** Maintain external render and paintwork in good condition. Ensure weep holes remain clear and functional. Check and replace deteriorated flashing. Provide adequate ventilation to reduce condensation, particularly in bathrooms, kitchens, and laundries. Address rising damp by installing or repairing the damp-proof course.
## Spalling and Degrading
Spalling refers to the flaking, peeling, or breaking away of the surface material from a wall. It is most commonly seen in brickwork, concrete, and rendered surfaces.
**What to look for:**
**Causes:**
**Prevention:** Select appropriate materials for the environment during construction. Use bricks rated for the exposure conditions (salt-resistant grades for coastal locations). Ensure adequate concrete cover to reinforcement. Apply protective coatings to concrete and render surfaces in aggressive environments. Address the source of moisture if spalling is associated with rising damp or water penetration.
## Prevention Strategies
Preventing wall defects is far more cost-effective than rectifying them. The following strategies apply broadly across all wall defect types:
### Insurance Claim Assessments in Gold Coast: A Homeowner's Guide
Source: https://ownerinspections.com.au/articles/navigating-insurance-claim-assessments-in-gold-coast
Published: 2023-09-27 | Updated: 2026-02-09 | Category: Insurance
Author: Maison Azdari
Insurance claim assessments on the [Gold Coast](/qld/building-inspections-gold-coast) involve an insurer-appointed assessor inspecting your property after damage from storms, floods, cyclones, or other events to evaluate the extent of loss and determine what your policy covers. The assessor documents damage with photographs and measurements, reviews your policy terms, and produces a report that forms the basis of your settlement offer. Queensland has experienced over 100 disaster events since 2011, resulting in more than $20 billion in insurance claims, making the Gold Coast one of Australia's most active regions for property damage claims.
After a natural disaster, dealing with the insurance claims process can feel overwhelming. However, knowing how the assessment works, what to prepare, and what your rights are makes a significant difference to the outcome. This guide provides practical, step-by-step advice for Gold Coast homeowners on working through the insurance claim assessment process from the moment damage occurs through to settlement or dispute resolution.
For a complete overview, see our [guide to insurance claim assessments](/guides/insurance-claim-assessment-guide).
## The Role of Insurance Assessments After Natural Disasters
After a natural disaster, the insurance assessor acts as the link between your loss and your insurance claim. The assessor is appointed by your insurer to evaluate the damage, determine its cause, and assess the cost of repairs or replacement.
### What the Assessor Does
### Your Immediate Repairs
If you have made emergency repairs to prevent further damage (such as tarping a damaged roof or boarding up broken windows), the assessor will need to see documentation of these works.
## How to Prepare for the Assessment
Good preparation can significantly improve the outcome of your insurance claim assessment.
## Tips for a Smooth Assessment Process
## Lodging Your Claim
Once the assessment is complete, you can proceed with lodging your formal claim.
### Review the Settlement Offer
When the insurer issues a settlement offer, it will usually be in one of two forms:
If the offer does not reflect the true cost of repairs, request a written breakdown of how the amount was calculated and submit additional quotes or an independent assessment for review.
## What to Do If Your Claim Is Denied
A denied claim is not the end of the process. There are clear steps you can take to challenge the decision.
## The Value of Independent Assessments
Many homeowners rely solely on the assessment provided by their insurer. However, an independent insurance claim assessment offers several advantages.
## Common Gold Coast Disaster Types and Coverage
The Gold Coast is exposed to a range of natural disaster events. Understanding which events your policy covers is important for setting expectations.
For a complete overview, see our [guide to insurance claim assessments](/guides/insurance-claim-assessment-guide).
### Common Swimming Pool Defects: What You Need to Know
Source: https://ownerinspections.com.au/articles/common-swimming-pool-defects-what-you-need-to-know
Published: 2023-09-26 | Updated: 2026-02-11 | Category: Defect Investigation
Author: Maison Azdari
Approximately one in seven Australian households owns a swimming pool or spa. With roughly 25,000 in-ground pools built each year across the country, defects are an ongoing concern for homeowners. Left unaddressed, pool defects can compromise structural integrity, create safety hazards, and lead to costly repairs.
Whether you own a concrete, fibreglass, or vinyl-lined pool, understanding the most common defects helps you spot problems early. Regular professional inspections remain the most reliable way to protect your investment and keep your pool safe for the whole family.
## Cracks
Cracking is one of the most frequently reported pool defects in Australia. The type of crack, its location, and its severity all influence the appropriate course of action.
### Shell Cracks
Shell cracks appear on the interior surface of the pool. They can be superficial (surface crazing) or structural (extending through the shell). Surface cracks may look like fine spiderweb patterns and are often caused by shrinkage during curing. Structural cracks are wider, deeper, and typically indicate ground movement, poor construction practices, or reactive soils.
In areas of reactive clay soils, which are common across parts of Sydney, Melbourne, and Brisbane, ground movement is a leading cause of shell cracking. These cracks tend to worsen over time if the underlying cause is not addressed.
### Liner Cracks
Vinyl-lined pools develop cracks and tears in the liner material. Sun exposure, chemical imbalances, and age cause the liner to become brittle. Once the liner cracks, water seeps behind it and can erode the base material, creating a more serious structural problem.
### Concrete Cracks
Concrete pools are susceptible to cracking from hydrostatic pressure, thermal expansion, and poor reinforcement placement. Hairline cracks in concrete are common and may not indicate a structural concern. Cracks wider than 2mm, or those that grow over time, require professional assessment.
## Leaks
Pool leaks waste water, increase chemical consumption, and can undermine the surrounding ground. Identifying the source of a leak quickly is important to prevent further damage.
### Shell and Liner Leaks
A dropping water level that exceeds normal evaporation (typically 3 to 5mm per day in Australian summers) is a strong indicator of a leak. Shell leaks in concrete and fibreglass pools often originate at cracks, through fittings, or around skimmer boxes. Liner leaks in vinyl pools may occur at seams, around fittings, or where the liner has deteriorated.
### Plumbing Leaks
Leaks in underground plumbing lines are harder to detect. Warning signs include soggy ground around the pool area, air bubbles in the return jets, and unexplained increases in water bills. Pressure testing the plumbing system is the standard method for confirming a plumbing leak.
Professional leak detection services use acoustic listening devices, pressure testing, and dye testing to pinpoint the exact location of a leak without unnecessary excavation.
## Staining
Pool staining affects both the appearance and the water quality of a swimming pool. Stains are generally grouped into three categories.
### Mineral Deposits
Iron, copper, and manganese in the water supply cause coloured staining on pool surfaces. Iron produces brown or rust-coloured stains, copper causes blue-green marks, and manganese leaves dark purple or black discolouration. Bore water and some town water supplies in regional Australia contain elevated mineral levels that increase staining risk.
### Organic Matter
Leaves, berries, bark, and other organic debris that settle on the pool surface can leave tannin stains. These are most common in pools surrounded by native eucalyptus trees or overhanging vegetation.
### Chemical Contaminants
Incorrect chemical dosing, spilled acid, or contact with metallic objects can leave localised stains. These often appear as distinct patches rather than the diffuse discolouration typical of mineral staining.
Identifying the stain type is the first step. A qualified pool inspector can test for mineral content and recommend the appropriate treatment method.
## Scaling
Scale deposits form when minerals in the pool water precipitate out of solution and adhere to surfaces. Scaling typically appears as white or grey crusty deposits on pool walls, tiles, and equipment.
The primary causes of scaling include high pH levels (above 7.8), elevated calcium hardness (above 400 ppm), and high total alkalinity. Australian bore water is often high in calcium, making scale a persistent issue in regions that rely on bore water for pool top-ups.
Scale deposits restrict water flow through pipes and fittings, reduce the efficiency of heaters and salt chlorinators, and create rough surfaces that harbour bacteria. Regular water testing and balanced chemistry are the best defences against scaling.
## Corrosion
Corrosion affects the metal components of a pool system, including ladders, handrails, light fixtures, heat exchangers, and pump components. Saltwater pools are particularly susceptible due to the chloride content in the water.
Low pH, excessive chlorine levels, and galvanic corrosion (where dissimilar metals are in contact) accelerate the breakdown of metal components. Corroded ladder anchors and handrail bases present a direct safety hazard, as they can fail under load.
Signs of corrosion include discoloured water around fittings, pitting or flaking on metal surfaces, and green or white deposits at connection points. Regular inspection of all metal components is important, especially in saltwater pool systems.
## Algae and Debris
Algae growth is one of the most visible pool defects and a clear sign that water chemistry or filtration is not being properly maintained.
### Green Algae
Green algae is the most common type found in Australian pools. It grows quickly in warm conditions with poor circulation and inadequate sanitiser levels. Green algae makes surfaces slippery and the water cloudy.
### Black Algae
Black algae is harder to treat because it embeds itself into porous surfaces like concrete and grout. It appears as small, dark spots with deep root structures. Black algae requires aggressive brushing and targeted treatment to remove completely.
### Yellow (Mustard) Algae
Yellow algae resembles sand or pollen and tends to cling to shaded walls and floors. It is resistant to normal chlorine levels and often returns after initial treatment if the underlying conditions are not corrected.
Debris accumulation in the pool and skimmer baskets blocks filtration, promotes algae growth, and stains surfaces. A consistent cleaning routine, combined with proper chemical balance, is the primary defence against algae.
## Preventive Maintenance Strategies
Preventing pool defects is far less expensive than repairing them. A structured maintenance programme should include the following measures.
**Annual professional inspections.** A licensed inspector can identify early signs of cracking, leaking, corrosion, and structural movement that are not visible to the untrained eye. Annual inspections provide a documented record of the pool's condition over time.
**Regular cleaning.** Brush pool walls and floors weekly to prevent algae establishment. Clean skimmer baskets and pump strainers regularly to maintain filtration efficiency.
**Water chemistry management.** Test pool water at least weekly during summer and fortnightly in winter. Maintain pH between 7.2 and 7.6, chlorine between 1 and 3 ppm, and calcium hardness between 200 and 400 ppm. Proper water balance prevents scaling, corrosion, and staining.
**Pool covers.** A pool cover reduces evaporation, limits debris entry, and helps maintain water temperature. Covers also reduce chemical consumption by limiting UV degradation of chlorine.
**Equipment maintenance.** Service the pump, filter, chlorinator, and heater according to manufacturer recommendations. Replace worn seals, o-rings, and gaskets before they fail and cause leaks.
## When to Call a Professional Inspector
Some pool issues can be managed by the homeowner with routine maintenance. Others require a professional assessment. You should arrange an inspection if you notice any of the following: water loss beyond normal evaporation, visible cracks that are widening or growing, persistent algae despite proper chemical treatment, soft or sinking ground around the pool, or equipment that is corroding or failing prematurely.
Owner Inspections provides [pool inspection](/swimming-pool-inspections) services across NSW, VIC, and QLD. Our licensed inspectors assess pool structure, equipment, safety barriers, and compliance with Australian Standards.
### Mould Inspection Techniques: Tools and Methods
Source: https://ownerinspections.com.au/articles/mould-inspection-techniques-tools-and-methods
Published: 2023-09-21 | Category: Mould Inspections
Author: Maison Azdari
Mould is more than an unsightly nuisance. According to the Australian Department of Health
and the World Health Organisation, mould exposure has been associated with a range of
serious health conditions including asthma, allergic alveolitis, and fungal infections.
Understanding how professional [mould inspections](/mould-inspections) are conducted can help property owners
protect both their health and their investment.
In Australia, where humid coastal climates and seasonal flooding create ideal conditions for
mould growth, professional inspection services have become increasingly important. Modern
mould detection has evolved far beyond simple visual assessment, now incorporating
sophisticated technology and scientific sampling methods to identify contamination that
often remains hidden from view.
Whether you are dealing with a suspected mould problem, purchasing a property, or simply
want to ensure your home maintains healthy indoor air quality, understanding the tools and
methods used in professional mould inspections will help you make informed decisions about
protecting your property and your family's wellbeing.
> Mould contamination often extends far beyond what is visible to the naked eye. Professional
> inspection using advanced detection technology is essential for identifying the true extent
> of mould problems and developing effective remediation strategies.
## Why You Should Be Concerned About Mould
Mould contamination in buildings presents a multifaceted threat that extends well beyond
aesthetic concerns. The implications of mould growth span health, property, and legal
domains, making early detection and professional assessment critical for property owners,
landlords, and tenants alike.
### Health Effects of Mould Exposure
The health consequences of mould exposure can range from mild irritation to severe
respiratory illness. The Australian Department of Health identifies several conditions
associated with indoor mould exposure, and the World Health Organisation has published
extensive guidelines on the health risks of damp and mouldy environments.
Common health effects associated with mould exposure include:
- **Respiratory problems:** Breathing difficulties, chronic coughing, wheezing, and shortness of breath are frequently reported among individuals exposed to mould
- **Asthma exacerbation:** Mould exposure can trigger asthma attacks in susceptible individuals and may contribute to the development of asthma in children
- **Allergic responses:** Eye irritation, skin rashes, nasal congestion, and sinus inflammation are common allergic reactions to mould spores
- **Allergic alveolitis:** Also known as hypersensitivity pneumonitis, this condition involves inflammation of the lung tissue caused by inhaling mould spores
- **Fungal infections:** Individuals with compromised immune systems are at risk of developing opportunistic fungal infections from certain mould species
- **Compromised immune function:** Prolonged mould exposure may affect the immune system's ability to respond to other pathogens and infections
Vulnerable populations including children, elderly individuals, pregnant women, and those
with pre-existing respiratory conditions or compromised immune systems are at heightened
risk from mould exposure. For these groups, professional mould inspection and remediation
become particularly important.
### Property Impact of Mould Growth
Beyond health concerns, mould contamination can cause significant damage to building
materials and substantially affect property values. The longer mould is allowed to grow
unchecked, the more extensive and costly the damage becomes.
- **Structural degradation:** Mould breaks down organic materials including timber framing, plasterboard, carpet, and insulation, potentially compromising structural integrity over time
- **Aesthetic deterioration:** Visible mould staining, discolouration, and musty odours make properties unpleasant and difficult to sell or rent
- **Property value depreciation:** Properties with documented mould problems or conditions conducive to mould growth typically sell for less than comparable properties without such issues
- **Expensive remediation:** Professional mould removal can cost thousands to tens of thousands of dollars depending on the extent of contamination, with structural repairs adding significantly to costs
- **Contents damage:** Mould can destroy furniture, clothing, books, artwork, and other personal belongings, many of which may be irreplaceable
### Legal Consequences of Mould Problems
Property owners and landlords face potential legal liability when mould problems affect
building occupants. Australian tenancy laws place obligations on landlords to provide
properties that are fit for habitation, and mould contamination can breach these
requirements.
- **Tenant lawsuits:** Tenants who suffer health problems due to mould exposure may pursue legal action against landlords for damages and medical costs
- **Building code violations:** Failure to address mould problems may constitute a breach of building codes and health regulations
- **Disclosure obligations:** When selling a property, vendors may be required to disclose known mould problems or risk future legal action from purchasers
- **Rental bond disputes:** Mould issues frequently lead to disputes over bond returns and responsibility for remediation costs
- **Workplace health and safety:** Commercial property owners have responsibilities under workplace health and safety legislation to provide safe working environments
## Advanced Tools for Mould Detection
Professional mould inspectors employ a range of sophisticated technologies that enable
detection of mould and moisture problems that would be impossible to identify through visual
inspection alone. These tools allow inspectors to locate hidden mould growth, identify
moisture sources, and assess the extent of contamination without causing unnecessary damage
to building materials.
### Thermal Imaging Cameras
Thermal imaging, also known as infrared thermography, has revolutionised mould inspection by
enabling inspectors to visualise temperature variations within building materials. Since
moisture affects the thermal properties of materials, areas with elevated moisture content
appear distinctly different on thermal images.
Key applications of thermal imaging in mould inspection include:
- Detecting temperature variations that indicate moisture accumulation behind walls, ceilings, and floors
- Identifying hidden mould growth areas without the need for destructive investigation
- Locating water leaks from plumbing, roofing, or building envelope failures
- Mapping the extent of water damage following flooding or leak events
- Verifying the effectiveness of drying efforts during remediation
- Identifying areas of inadequate insulation that may lead to condensation
Professional grade thermal imaging cameras used in building inspection typically offer
resolution sufficient to detect subtle temperature differences. When used by trained
operators, these cameras can identify potential mould problems at early stages when
remediation is simpler and less costly.
### Digital Moisture Meters
While thermal imaging identifies areas of potential moisture concern, digital moisture
meters provide quantitative measurements of moisture content in building materials. These
devices are essential for confirming suspected moisture problems and for monitoring drying
progress during remediation.
Types of moisture meters used in professional mould inspection include:
- **Pin type meters:** These devices use two metal probes that penetrate the material surface to measure electrical resistance, which correlates with moisture content. They are particularly useful for measuring moisture in timber and provide accurate readings at specific points.
- **Pinless (capacitance) meters:** Using electromagnetic signals, these meters can scan larger areas quickly without causing surface damage. They are ideal for initial surveys and for checking materials where pin holes would be unacceptable.
- **Combination meters:** Many professional inspectors use meters that offer both pin and pinless capabilities, allowing them to select the most appropriate method for each situation.
Digital moisture meters can measure moisture content in a variety of materials including
timber, plasterboard, concrete, and masonry. This capability enables targeted remediation by
precisely identifying which areas require treatment and which can be left undisturbed.
### Borescopes and Inspection Cameras
Borescopes are flexible or rigid tubes with cameras and lighting at the tip that allow
inspectors to visually examine spaces that would otherwise be inaccessible without
destructive investigation. These devices are invaluable for mould inspection as they enable
visual confirmation of contamination in concealed areas.
Applications for borescopes in mould inspection include:
- Inspecting wall cavities through small access holes drilled in inconspicuous locations
- Examining ductwork and HVAC systems for mould contamination
- Investigating confined spaces such as subfloor areas and roof voids
- Assessing the condition of pipes and drains that may be contributing to moisture
- Documenting mould growth in areas that cannot be easily photographed
Modern borescopes often feature articulating tips that can be steered to view around
corners, along with high-definition cameras that capture clear images and video. Many units
include wireless transmission to tablets or smartphones, making documentation and client
communication more effective.
## Mould Detection Tools and Their Applications
The following table summarises the primary tools used in professional mould inspection,
their functions, and typical applications in the assessment process.
| Detection Tool | Primary Function | Applications | Limitations |
| ----------------------- | -------------------------------------------------- | -------------------------------------------------------------------- | ---------------------------------------------------------------- |
| Thermal Imaging Camera | Detects temperature variations indicating moisture | Hidden moisture, water leaks, insulation gaps, post-flood assessment | Cannot confirm mould presence; requires temperature differential |
| Pin Type Moisture Meter | Measures moisture content at specific points | Timber moisture, confirming thermal findings, monitoring drying | Creates small holes; point measurements only |
| Pinless Moisture Meter | Non-invasive moisture scanning | Rapid surveys, finished surfaces, mapping moisture extent | Less accurate than pin type; surface conditions affect readings |
| Borescope | Visual inspection of cavities | Wall cavities, ductwork, subfloor areas, pipe inspection | Requires access point; limited field of view |
| Air Sampling Equipment | Captures airborne mould spores | Quantifying contamination, identifying species, indoor air quality | Requires laboratory analysis; spore levels vary with conditions |
| Surface Sampling Kit | Collects mould samples from surfaces | Species identification, confirmation of mould presence | Requires laboratory analysis; point sample only |
| Hygrometer | Measures relative humidity | Assessing conditions for mould growth, HVAC evaluation | Ambient measurements only; affected by ventilation |
| Data Logger | Records temperature and humidity over time | Identifying condensation patterns, monitoring problematic areas | Requires extended deployment; location dependent |
## Scientific Detection Methods
Beyond the physical inspection tools, professional mould assessment often involves
scientific sampling and laboratory analysis. These methods provide objective data about
mould species present, contamination levels, and potential health risks that cannot be
determined through visual inspection alone.
### Air Quality Sampling
Air sampling is one of the most important methods for assessing indoor mould contamination.
This process involves collecting air samples from inside the building and comparing them to
outdoor baseline samples to determine whether elevated mould spore levels exist indoors.
The air sampling process typically involves:
- **Sample collection:** Calibrated air sampling pumps draw a measured volume of air through collection media, typically either spore trap cassettes or culture plates
- **Baseline comparison:** Outdoor samples are collected simultaneously to provide a reference point for normal background spore levels
- **Laboratory analysis:** Samples are analysed under microscopy to identify and count mould spores, with results typically reported as spores per cubic metre of air
- **Species identification:** Laboratory technicians identify the types of mould present, which is important as some species pose greater health risks than others
Air sampling results can identify whether mould contamination exists even when the source is
hidden. Elevated indoor spore counts compared to outdoor levels typically indicate an indoor
mould source requiring investigation and remediation.
### Laboratory Material Assessments
When visible or suspected mould is present, surface and material sampling provides detailed
information about the contamination. Laboratory analysis of these samples enables targeted
treatment plans based on the specific mould species identified.
Types of material sampling include:
- **Tape lift samples:** Clear adhesive tape is pressed against the surface to collect mould spores and fragments for microscopic analysis
- **Swab samples:** Sterile swabs are used to collect material from surfaces for culture analysis, which can identify viable mould and determine species
- **Bulk samples:** Sections of contaminated material are collected for comprehensive laboratory analysis, useful for assessing the extent of contamination within materials
Laboratory analysis can determine whether the mould present includes potentially hazardous
species such as Stachybotrys chartarum (commonly known as black mould) or species known to
produce mycotoxins. This information guides remediation protocols and protective measures
for remediation workers.
## Case Study: The Butler Family
The experience of the Butler family illustrates the value of professional mould inspection
and the potential consequences of untreated mould contamination. Their case demonstrates how
comprehensive inspection using advanced tools can reveal problems far more serious than
initial appearances suggest.
### Initial Concerns
The Butler family had recently purchased what they believed was their dream home. Shortly
after moving in, family members began experiencing persistent respiratory symptoms including
coughing, sneezing, and difficulty breathing. The youngest child developed worsening asthma
symptoms that required increased medication.
Initial visual inspection of the property revealed some minor mould staining in the
bathroom, which the family attempted to address with consumer cleaning products. However,
the health symptoms persisted, prompting them to engage a professional mould inspection
service.
### Professional Inspection Findings
The professional inspection utilised thermal imaging, moisture meters, borescope inspection,
and comprehensive air sampling. The findings were alarming and extended far beyond the
visible bathroom mould.
Key findings included:
- **Air quality results:** Airborne mould spore levels inside the home were measured at 150 times the safe limit recommended by environmental health guidelines
- **Carpet contamination:** Laboratory analysis of carpet samples revealed mould contamination levels 5,000 times higher than acceptable standards
- **Hidden contamination:** Thermal imaging and borescope inspection revealed extensive mould growth within wall cavities, particularly around the bathroom and kitchen areas
- **Structural concerns:** The inspection identified five significant structural problems including compromised wall framing affected by moisture damage
- **Safety defects:** Six major safety defects were documented, including electrical hazards created by moisture infiltration
### Root Cause Analysis
The inspection revealed that the mould contamination originated from multiple sources that
had gone undetected or unaddressed for an extended period:
- A slow leak in the bathroom plumbing that had been releasing moisture into the subfloor
- Failed waterproofing in the shower recess allowing water penetration into wall cavities
- Inadequate ventilation in wet areas trapping humid air and promoting condensation
- A roof leak that had caused water damage to the ceiling space and adjacent walls
### Remediation Requirements
Based on the inspection findings, the Butler family faced extensive remediation requirements
including removal of all carpet and underlay, stripping and replacement of affected wall
linings, treatment of structural timbers, replacement of insulation, and repairs to address
the underlying moisture sources. The total remediation cost exceeded $80,000.
This case illustrates the importance of thorough [pre-purchase inspections](/pre-purchase-inspections) and demonstrates
how mould problems that appear minor on the surface may indicate far more serious underlying
contamination. The Butler family's experience also highlights the connection between
unexplained health symptoms and hidden mould contamination.
## Selecting Professional Mould Inspection Services
Choosing the right mould inspection service is crucial for obtaining accurate assessment and
actionable recommendations. Not all inspection services are equal, and understanding what to
look for can help property owners avoid inadequate inspections that fail to identify serious
problems.
### Selection Criteria
When evaluating potential mould inspection providers, consider the following essential
criteria:
- **Verified credentials:** Look for inspectors with recognised qualifications in building inspection, indoor air quality, or environmental health. Membership in professional associations such as the Australian Institute of Building Surveyors or similar organisations indicates commitment to professional standards.
- **Advanced equipment:** Ensure the inspector uses thermal imaging cameras, digital moisture meters, and has access to air and surface sampling capabilities. Inspectors relying solely on visual assessment will miss hidden contamination.
- **Laboratory relationships:** Professional inspectors should work with NATA-accredited laboratories for sample analysis to ensure accurate and reliable results.
- **Insurance coverage:** Verify that the inspector carries professional indemnity insurance and public liability coverage to protect both parties.
- **Transparent pricing:** Reputable inspectors provide clear pricing that outlines what is included in the inspection fee and what additional services may be required.
- **Independence:** Choose inspectors who are independent of remediation companies to avoid conflicts of interest. Inspectors who also perform remediation may have incentives to overstate problems.
### Questions to Ask Potential Inspectors
Before engaging a mould inspection service, ask the following questions to assess their
suitability:
- What qualifications and experience do you have in mould inspection?
- What detection equipment will you use during the inspection?
- Do you perform air sampling and surface sampling as part of your assessment?
- Which laboratory do you use for sample analysis, and are they NATA accredited?
- How long will the inspection take, and how soon will I receive the report?
- What does your inspection fee include, and are there additional costs for sampling?
- Can you provide references from previous clients?
- Do you provide remediation services, or do you focus solely on inspection?
### Evaluating Inspection Reports
A professional mould inspection report should provide comprehensive information that enables
informed decision-making. When evaluating reports, look for the following qualities:
- **Clarity:** The report should be written in clear language that can be understood by property owners without specialised technical knowledge
- **Comprehensive detail:** All areas inspected should be documented, including findings, measurements, and photographs. Areas that could not be accessed should be noted.
- **Laboratory results:** Air and surface sampling results should be included with clear explanation of what the findings mean and how they compare to guidelines
- **Actionable recommendations:** The report should provide specific recommendations for remediation, including priority areas and suggested approaches
- **Root cause identification:** Beyond identifying mould presence, the report should identify moisture sources and contributing factors that must be addressed
## Mould Prevention Measures
Prevention is always preferable to remediation when it comes to mould. Implementing
effective moisture control and maintenance practices can significantly reduce the risk of
mould growth and the associated health and property impacts.
### Ventilation Management
Adequate ventilation is one of the most effective tools for preventing mould growth.
Moisture-laden air must be removed from the building and replaced with drier outdoor air to
prevent condensation and humidity buildup.
- Install and use exhaust fans in bathrooms, laundries, and kitchens to remove humid air at the source
- Ensure exhaust fans are ducted to the outside rather than into roof spaces or wall cavities
- Open windows regularly to promote cross-ventilation, particularly after activities that generate moisture
- Consider mechanical ventilation systems in areas with persistent humidity problems or limited natural ventilation
- Ensure subfloor areas have adequate ventilation to prevent moisture accumulation beneath the building
### Moisture Control
Controlling moisture at its source prevents the conditions that allow mould to grow. This
includes both addressing water intrusion and managing humidity levels.
- Repair leaking roofs, windows, and pipes promptly before water damage can promote mould growth
- Maintain gutters and downpipes to direct water away from the building
- Ensure adequate drainage around the building to prevent water pooling near foundations
- Address condensation problems by improving insulation, increasing ventilation, or using dehumidifiers
- Dry any water spills or flooding within 24 to 48 hours to prevent mould establishment
- Monitor indoor humidity levels and maintain them below 60 percent relative humidity
### Regular Cleaning and Maintenance
Routine cleaning and maintenance help identify early signs of mould and prevent
contamination from becoming established.
- Clean bathrooms and wet areas regularly using appropriate cleaning products
- Check under sinks, around toilets, and behind appliances for signs of leaks or moisture
- Inspect and clean air conditioning filters and drip trays regularly
- Address any visible mould growth immediately before it can spread
- Keep furniture and stored items away from exterior walls to allow air circulation
### Annual Professional Inspections
Even with good maintenance practices, professional inspections provide an additional layer
of protection by identifying problems that may not be apparent to occupants.
- Schedule annual inspections in properties with previous mould history or in high-risk climatic zones
- Arrange inspection following any water damage event, even if damage appears minor
- Include mould assessment as part of routine building and pest inspections for purchased properties
- Consider more frequent inspections for properties housing vulnerable individuals or in high-humidity coastal areas
## When Professional Remediation Is Required
Understanding when mould problems require professional remediation versus when they can be
safely addressed by property owners is important for protecting both health and property.
### DIY Cleaning Guidelines
Small areas of surface mould on non-porous materials may be safely cleaned by property
owners using appropriate precautions. However, there are strict limitations on what should
be attempted without professional assistance.
DIY cleaning may be appropriate when:
- The affected area is less than one square metre
- Mould is limited to hard, non-porous surfaces such as tiles or glass
- There is no hidden mould within walls or other concealed areas
- The moisture source has been identified and eliminated
- Building occupants have no pre-existing respiratory conditions or allergies
### When to Engage Professionals
Professional remediation is recommended in the following circumstances:
- Mould contamination covers an area larger than one square metre
- Mould is present on porous materials such as carpet, insulation, or plasterboard
- Hidden mould is suspected or confirmed within wall cavities or other concealed spaces
- Contamination involves potentially hazardous mould species
- Building occupants are experiencing health symptoms associated with mould exposure
- The moisture source cannot be easily identified or eliminated
- Previous cleaning attempts have been unsuccessful with mould returning
## Frequently Asked Questions
###
How much does a professional mould inspection cost in Australia?
**Short answer:** Professional mould inspections in Australia typically
cost between $300 and $800 for a standard residential property, with comprehensive
assessments including laboratory sampling ranging from $500 to $1,500.
The cost varies depending on property size, the extent of investigation required, and
whether air and surface sampling is included. Basic visual inspections with moisture
mapping are at the lower end, while comprehensive assessments including thermal imaging,
borescope inspection, and laboratory analysis of multiple samples are at the higher end.
Given that remediation costs can easily reach tens of thousands of dollars, professional
inspection represents excellent value for identifying problems early and developing
effective treatment plans.
###
What are the signs that I might have hidden mould in my home?
**Short answer:** Musty odours, unexplained health symptoms, visible water
staining, condensation problems, and past water damage events are common indicators of
hidden mould.
Hidden mould often produces a distinctive musty or earthy smell even when no visible
mould is present. Occupants may experience allergic symptoms, respiratory problems, or
worsening asthma that improves when away from the property. Water stains on ceilings or
walls, bubbling or peeling paint, and warped surfaces can indicate moisture problems
that promote hidden mould growth. Properties that have experienced flooding, leaks, or
water damage are at elevated risk even if the damage appeared to be dried and repaired.
### How long does a mould inspection take?
**Short answer:** A comprehensive mould inspection typically takes 1.5 to 3
hours for an average-sized home, with laboratory results available within 3 to 5
business days.
The on-site inspection duration depends on property size, accessibility of areas, and
the extent of suspected contamination. Inspectors need adequate time to conduct thermal
imaging surveys, take moisture readings, perform borescope investigations, and collect
air and surface samples. Rushing the inspection process can result in missed
contamination. The full inspection report including laboratory analysis results is
typically provided within 5 to 7 business days, though preliminary findings are often
communicated immediately after the inspection.
###
Is black mould more dangerous than other types of mould?
**Short answer:** While Stachybotrys chartarum (black mould) produces
mycotoxins and warrants serious attention, many mould species can cause health problems,
and mould colour alone does not indicate toxicity.
The term "black mould" commonly refers to Stachybotrys chartarum, which produces
mycotoxins that can cause serious health effects. However, many different mould species
appear black or dark coloured, and not all are toxigenic. Conversely, some lighter
coloured moulds can also produce harmful compounds. All significant mould contamination
should be treated seriously regardless of colour. Professional laboratory analysis is
the only reliable way to identify mould species and assess potential health risks.
### Can I sell a property with mould problems?
**Short answer:** You can sell a property with mould, but disclosure
obligations apply, and buyers will likely negotiate price reductions or require
remediation as a condition of sale.
Australian property law requires vendors to disclose known defects that would materially
affect a buyer's decision. Failure to disclose known mould problems could expose you to
legal action after settlement. Most buyers will request a building and pest inspection
that may reveal mould issues. Addressing mould problems before listing typically results
in better sale outcomes than attempting to sell as-is with corresponding price
reductions. If selling without remediation, obtain a professional inspection report to
support accurate disclosure and fair pricing.
### What causes mould to grow in homes?
**Short answer:** Mould requires moisture, organic material to feed on,
suitable temperatures, and time to grow. Eliminating excess moisture is the key to
preventing mould.
Mould spores are naturally present in all environments. When they land on surfaces with
adequate moisture, they can establish and grow within 24 to 48 hours. Common moisture
sources include plumbing leaks, roof leaks, condensation, flooding, and high humidity.
Organic building materials such as timber, plasterboard, carpet, and insulation provide
food sources for mould. Australian homes in humid coastal climates or properties with
inadequate ventilation are particularly susceptible. Addressing the moisture source is
essential, as cleaning mould without eliminating moisture will result in regrowth.
###
Should I get a mould inspection when buying a property?
**Short answer:** Yes, mould assessment should be included as part of
pre-purchase inspections, particularly for older properties or those in humid climates.
Standard building inspections may note visible mould but typically do not include
comprehensive mould assessment with moisture mapping, thermal imaging, and air sampling.
Properties with any history of water damage, those in flood-prone areas, older homes
with dated plumbing and waterproofing, and buildings in humid climates warrant specific
mould assessment. The cost of a professional mould inspection is minimal compared to
potential remediation costs that can reach tens of thousands of dollars. Inspection
findings also provide leverage for price negotiation or can identify properties best
avoided.
###
How do I know if mould remediation was successful?
**Short answer:** Post-remediation verification through professional
inspection with air sampling confirms whether mould levels have returned to acceptable
levels.
Successful remediation should eliminate visible mould, address all contaminated
materials, and resolve the underlying moisture problem. Visual inspection alone cannot
confirm success as mould may remain in concealed areas. Post-remediation air sampling
compares indoor spore levels to outdoor baseline levels, with indoor levels at or below
outdoor levels indicating successful remediation. Reputable remediation contractors
should provide clearance testing as part of their service or coordinate with independent
inspectors for verification. Avoid contractors who are reluctant to have their work
verified by third-party inspection.
## Key Takeaways
- Mould exposure is associated with serious health conditions including asthma, allergic alveolitis, and fungal infections, as documented by the Department of Health and World Health Organisation.
- Professional mould inspection uses advanced technology including thermal imaging cameras, digital moisture meters, and borescopes to detect hidden contamination.
- Air quality sampling can identify mould contamination levels and species present, providing objective data for remediation planning.
- Mould problems often extend far beyond visible growth, as demonstrated by cases where contamination levels exceeded safe limits by factors of 150 to 5,000 times.
- When selecting inspection services, look for verified credentials, advanced equipment, NATA-accredited laboratory relationships, and independence from remediation companies.
- Prevention through adequate ventilation, moisture control, regular cleaning, and annual inspections is more cost-effective than remediation.
- Professional remediation is recommended when contamination exceeds one square metre, involves porous materials, or affects building occupants' health.
- Pre-purchase mould inspection is advisable for all properties, particularly older homes and those in humid climates or with water damage history.
## References and Resources
- [ Australian Department of Health ](https://www.health.gov.au/)
- [ World Health Organisation (WHO) Guidelines for Indoor Air Quality ](https://www.who.int/)
- [ National Association of Testing Authorities (NATA) ](https://www.nata.com.au/)
- [ NSW Fair Trading ](https://www.fairtrading.nsw.gov.au/)
- [ Australian Institute of Building Surveyors (AIBS) ](https://www.aibs.com.au/)
### Expert Witnesses in Construction: Shielding Against False Claims
Source: https://ownerinspections.com.au/articles/expert-witnesses-in-construction-shielding-against-false-claims
Published: 2023-09-20 | Updated: 2026-02-10 | Category: Expert Witness
Author: Maison Azdari
Construction litigation in Australia involves significant financial stakes for all parties. Whether you are a homeowner pursuing a defect claim or a builder defending against one, the accuracy and objectivity of the evidence presented is critical to achieving a just outcome. Unfortunately, not all claims in construction disputes are legitimate. Some are exaggerated, some are based on misunderstandings, and some are entirely fabricated.
Expert witnesses serve as a vital safeguard against false and exaggerated claims in construction litigation. Their independent technical analysis can distinguish genuine defects from normal wear and tear, identify the true cause of building problems, assess whether claimed rectification costs are reasonable, and expose claims that lack a proper technical basis.
This guide examines the role expert witnesses play in construction litigation, how they identify and analyse building defects, the value of their reports, and how they contribute to settlement negotiations and the protection of the construction industry.
> An expert witness report that is thorough, objective, and well-supported by evidence is the most powerful tool for both proving legitimate claims and defending against false ones. The integrity of the expert's analysis is what gives their evidence weight.
## Expert Witnesses in Construction Litigation
Expert witnesses in construction litigation are qualified professionals who provide independent technical evidence to courts and tribunals. Their primary duty is to the court or tribunal, not to the party that engaged them. This independence is what makes expert evidence credible and distinguishes it from advocacy.
In construction litigation, expert witnesses are typically engaged to:
The expert's role is equally important whether they are engaged by the claimant to support a defect claim or by the respondent to defend against one. In either case, the expert must provide an honest and objective assessment of the evidence.
## Finding Building Mistakes and Analysis
The process of identifying and analysing building defects requires systematic methodology and technical expertise. Expert witnesses follow a structured approach to ensure their findings are comprehensive and defensible.
## Picking and Preparing Expert Witnesses
The selection and preparation of an expert witness can significantly influence the outcome of construction litigation. A poorly chosen or inadequately prepared expert can undermine an otherwise strong case.
### Selection Criteria
### Preparation for Proceedings
Once engaged, the expert witness must be properly briefed and prepared for the proceedings. This preparation includes:
## The Value of Expert Witness Reports
The [expert witness report](/expert-witness-reports) is the centrepiece of expert evidence in construction litigation. A well-prepared report can:
## Settlement Negotiations Outside Court
The majority of construction disputes are settled before reaching a final hearing. Expert witness reports play a central role in settlement negotiations by providing both parties with an objective assessment of the technical issues and their financial implications.
When both parties have access to credible expert evidence, the areas of genuine disagreement often narrow significantly. Settlement negotiations become more productive when they are informed by objective technical analysis rather than subjective claims and counter-claims.
Expert witnesses may also participate directly in settlement discussions, explaining their findings and answering questions from both parties and their legal representatives. This can help bridge the gap between opposing positions and facilitate agreement.
## Fighting False Claims and Protecting the Industry
False and exaggerated claims in construction litigation cause harm to all stakeholders. Builders face unwarranted financial liability and reputational damage. Homeowners may be misled about the nature and extent of genuine defects. The tribunal system is burdened with claims that waste time and resources.
Expert witnesses serve as a critical defence against false claims by:
## Services Across NSW, VIC, and QLD
Expert witness services for construction disputes are available across Australia's eastern seaboard. Each state has its own regulatory framework and tribunal system, and expert witnesses must be familiar with the applicable legislation and procedural rules.
When selecting an expert witness, ensure they have experience in the jurisdiction where your dispute is being heard and are familiar with the relevant state legislation, procedural rules, and expert witness codes of conduct.
For a complete overview, see our [guide to expert witness reports for building disputes](/guides/expert-witness-building-disputes-guide).
### How Insurance Claim Assessments Work in Sydney
Source: https://ownerinspections.com.au/articles/how-insurance-claim-assessments-work-in-sydney
Published: 2023-09-20 | Updated: 2026-02-09 | Category: Insurance
Author: Maison Azdari
An insurance claim assessment in [Sydney](/nsw/building-inspections-sydney) is the process where an insurer-appointed assessor inspects your damaged property, evaluates the extent and cause of the damage, and produces a report that determines your settlement offer. The process involves documenting damage with photographs and measurements, reviewing your policy's inclusions and exclusions, and calculating repair or replacement costs. Sydney property owners can also obtain an independent assessment from a qualified building inspector to provide unbiased evidence that strengthens their claim or supports a dispute.
Property insurance is a standard part of homeownership and investment in Sydney. But when damage occurs from storms, flooding, fire, vandalism, or other events, many property owners find the claims process confusing and slow. Understanding how the assessment works, what the assessor is looking for, and how to prepare your evidence gives you a much stronger position when dealing with your insurer.
For a complete overview, see our [guide to insurance claim assessments](/guides/insurance-claim-assessment-guide).
## The Insurance Landscape in Sydney
Sydney property owners have several types of insurance available depending on their circumstances.
### Sydney-Specific Considerations
Sydney's geography and climate create specific insurance considerations that property owners should be aware of:
## Starting the Claim Process
When property damage occurs, the steps you take in the first 24 to 48 hours have a direct impact on the success of your claim.
## Gathering Supporting Documentation
Strong documentation is the foundation of a successful insurance claim. The more evidence you can provide, the stronger your position.
## The Role of the Assessor
The insurance assessor is appointed by your insurer to evaluate the damage and determine whether it falls within your policy's coverage.
### What the Assessor Does
### How to Work with the Assessor
## Understanding the Settlement Offer
After the assessor completes their report, your insurer will issue a settlement offer.
### How the Offer Is Calculated
The offer is based on the assessor's report, your policy terms, the cost of repairs or replacement, and any applicable excess (deductible). The offer usually comes with a breakdown showing the costs assigned to each damaged area or item.
### What to Watch For
## Negotiating a Better Outcome
The initial settlement offer is often a starting point, not a final figure. You have the right to negotiate.
## The Value of Independent Assessments
An independent insurance claim assessment provides a second, unbiased evaluation of the damage by a qualified building inspector who works for you, not the insurer.
## Resolving Disputes
If you are not satisfied with the outcome of your claim, there is a clear dispute resolution pathway available.
For a complete overview, see our [guide to insurance claim assessments](/guides/insurance-claim-assessment-guide).
### Building Surveyor vs Building Inspector: Key Differences Explained
Source: https://ownerinspections.com.au/articles/building-surveyor-vs-building-inspector
Published: 2023-09-15 | Updated: 2026-02-12 | Category: Building Inspections
Author: Maison Azdari
A building surveyor and a building inspector are two distinct professionals in Australian construction with different qualifications, responsibilities, and scopes of work. Building surveyors hold tertiary qualifications in building surveying and are responsible for assessing plans against the National Construction Code (NCC), issuing building permits, and certifying compliance throughout a project. Building inspectors typically hold trade or construction qualifications and focus on physically examining completed work at each stage to identify defects, safety hazards, and code violations. Both professionals play a part in ensuring buildings are safe, compliant, and built to standard, but they operate at different points in the construction process and serve different functions.
If you are building a new home, renovating, or purchasing a property in Australia, understanding the difference between these two roles can save you time, money, and unexpected problems. Homeowners often assume one professional covers everything, but in practice, the surveyor handles approvals and compliance certification while the inspector examines the physical quality of the work on site.
This guide breaks down the qualifications, duties, and scope of each role, explains when you need one or both, and answers common questions about how these professionals fit into the Australian building process.
## What Does a Building Surveyor Do?
A building surveyor (also called a building certifier in some states) is a licensed professional who assesses building plans and construction work for compliance with the NCC, relevant Australian Standards, and local planning requirements. Their involvement typically begins before construction starts and continues through to the occupancy certificate.
### Qualifications and Training
Building surveyors in Australia generally hold a bachelor's degree in building surveying, construction management, or a related discipline. They must be registered or licensed with their state's building authority, such as the Victorian Building Authority (VBA), NSW Fair Trading, or the Queensland Building and Construction Commission (QBCC). Many hold membership with the Australian Institute of Building Surveyors (AIBS).
### Core Responsibilities
Building surveyors carry out the following duties during a construction project:
Building surveyors operate across the full lifecycle of a project, from the initial design review through to final sign-off. Their focus is on whether the building meets the legal and regulatory requirements set out in the NCC and state legislation.
## What Does a Building Inspector Do?
A building inspector is a construction professional who physically examines buildings and building work to assess quality, identify defects, and verify compliance with codes and standards. Inspectors work on both new construction and existing properties and are commonly engaged by homeowners, buyers, and builders.
### Qualifications and Training
Building inspectors in Australia typically hold qualifications in building and construction, such as a Certificate IV or Diploma in Building and Construction (Building). Many have extensive backgrounds in the construction trades, giving them practical knowledge of how buildings are assembled and where defects commonly occur. Inspectors must hold the appropriate licence in their state, issued by bodies such as the VBA, NSW Fair Trading, or QBCC.
### Core Responsibilities
Building inspectors carry out the following work:
Building inspectors focus on the physical condition of the work. They get into roof spaces, under floors, and into wet areas to check that materials and workmanship meet the required standard. Their reports give property owners and builders a clear picture of what needs attention.
## Key Differences Between Building Surveyors and Building Inspectors
The table below summarises the main differences between the two roles.
| Aspect | Building Surveyor | Building Inspector |
| --- | --- | --- |
| Primary focus | Plan assessment, code compliance certification, and permit issuance | Physical examination of completed work for defects and compliance |
| Qualifications | Bachelor's degree in building surveying or related field | Certificate IV/Diploma in Building and Construction or trade background |
| Scope of work | Broad: design review, planning, regulatory compliance, certification | Focused: on-site inspection of materials, workmanship, and safety |
| When they are involved | Before and during construction (permit to occupancy certificate) | During and after construction (stage inspections, pre-purchase) |
| Who engages them | Builders, developers, or owners (mandatory for permit) | Owners, buyers, or builders (voluntary in most cases) |
| Reports issued | Building permits, compliance certificates, occupancy permits | Inspection reports with defect lists, photos, and recommendations |
| Regulatory role | Acts as the statutory authority delegate for building compliance | No statutory authority; provides independent assessment |
| Sectors | Residential, commercial, industrial, heritage | Residential, commercial, industrial |
### Scope of Work Compared
A building surveyor's scope extends across the design and regulatory framework of a project. They assess whether plans comply with the NCC before construction starts, inspect at legislatively prescribed hold points during construction, and issue the final occupancy certificate. Their involvement is mandatory for any building work that requires a permit.
A building inspector's scope is centred on the physical work itself. They assess whether the actual construction matches the approved plans, whether materials and workmanship are acceptable, and whether any defects or safety hazards exist. Their involvement is voluntary but highly recommended, particularly for owner-occupied residential builds.
### Certification Differences
Building surveyors hold registration or licensing that allows them to issue statutory documents such as building permits and occupancy certificates. Building inspectors hold licences that authorise them to assess and report on building work, but they do not have the authority to issue permits or compliance certificates.
| Document | Issued by Building Surveyor | Issued by Building Inspector |
| --- | --- | --- |
| Building permit | Yes | No |
| Compliance certificate | Yes | No |
| Occupancy certificate | Yes | No |
| Defect inspection report | Sometimes (limited scope) | Yes (comprehensive) |
| Pre-purchase inspection report | No | Yes |
| Stage inspection report | Yes (at prescribed hold points) | Yes (all stages, all trades) |
## What the Two Roles Share
Despite their differences, building surveyors and building inspectors share several common goals.
The two roles are complementary. A building surveyor confirms that the regulatory framework has been met. A building inspector confirms that the physical work has been carried out properly. Together, they provide comprehensive oversight of a construction project.
## Case Study: The Johnson Home Renovation
To illustrate how both professionals contribute to a project, consider the Johnson family's home renovation in suburban Melbourne.
The Johnsons planned a major renovation that included a ground-floor extension, a new bathroom, and structural modifications to open up the living area. The project required a building permit and involved multiple trades over a six-month build period.
### The Building Surveyor's Role
Before construction began, the Johnsons' builder engaged a registered building surveyor to review the architectural plans. The surveyor assessed the proposed design against the NCC, local planning overlays, and the Building Regulations 2018 (VIC). They checked structural adequacy, energy efficiency compliance under NCC Part 3.12, fire safety provisions, and accessibility requirements. After confirming the plans were compliant, the surveyor issued a building permit.
During construction, the surveyor conducted inspections at the mandatory hold points: footings, frame stage, and final inspection. At the final inspection, the surveyor issued an occupancy permit, confirming the completed work met the approved plans and the NCC.
### The Building Inspector's Role
The Johnsons also engaged an independent building inspector from Owner Inspections to carry out [stage inspections](/new-construction-stage-inspections) throughout the build. The inspector examined the work at each stage in greater detail than the surveyor's mandatory checks.
At the slab stage, the inspector verified reinforcement placement, vapour barriers, and formwork dimensions. At frame stage, the inspector checked all framing members, bracing, tie-downs, and window openings against the engineering specifications. During the fixing stage, the inspector identified an electrical rough-in that did not comply with AS/NZS 3000 and flagged it for rectification before the walls were lined.
The inspector also carried out a waterproofing inspection in the new bathroom and a pre-handover inspection before the Johnsons moved back in. The pre-handover report listed 14 minor defects that the builder addressed before handover.
### The Outcome
By engaging both a building surveyor and an independent building inspector, the Johnsons received both regulatory certification and practical quality assurance. The electrical issue identified by the inspector would not have been caught by the surveyor's mandatory inspections, as electrical rough-in falls outside the surveyor's standard inspection scope. Catching it during construction avoided a potential safety hazard and a costly rectification after completion.
## Tools and Equipment Used by Each Professional
Building surveyors and building inspectors use some of the same tools but also rely on equipment specific to their role.
| Tool/Equipment | Building Surveyor | Building Inspector |
| --- | --- | --- |
| Measuring tape and laser measure | Yes | Yes |
| Spirit level | Yes | Yes |
| Moisture meter | Occasionally | Frequently |
| Thermal imaging camera | Rarely | Frequently |
| Building plans and specifications | Always | Always |
| NCC and Australian Standards | Always | Always |
| Camera for documentation | Yes | Yes |
| Drone (for roof access) | Occasionally | Occasionally |
| Electrical test equipment | No | Sometimes (qualified inspectors) |
| Bore scope/inspection camera | Rarely | Frequently |
Building inspectors tend to carry a wider range of diagnostic tools because their role involves identifying hidden defects in completed work. Thermal imaging cameras and moisture meters, for example, are standard equipment for inspectors assessing insulation continuity, water ingress, and damp issues.
## Licensing at Owner Inspections
Owner Inspections' building inspectors are licensed by multiple state authorities, providing coverage across eastern Australia:
All inspectors carry professional indemnity insurance and public liability insurance. Inspections follow Australian Standard AS 4349.1 for [pre-purchase inspections](/pre-purchase-inspections) and the NCC for construction stage inspections.
## When Do You Need a Building Surveyor, a Building Inspector, or Both?
The short answer is that you need a building surveyor whenever a building permit is required, and you should engage a building inspector whenever you want independent assurance that the physical work is up to standard.
For new builds and major renovations, both professionals should be involved. The surveyor handles the regulatory approvals and mandatory compliance inspections. The inspector provides detailed quality checks at every stage, covering trades and elements that fall outside the surveyor's scope.
For pre-purchase property inspections, you only need a building inspector. Building surveyors are not involved in assessing existing properties for sale.
For minor works that do not require a building permit, a building inspector can still provide valuable oversight if you want to verify the quality of the finished work.
## Key Takeaways
For a complete overview, see our [guide to expert witness reports for building disputes](/guides/expert-witness-building-disputes-guide).
### Melbourne Property Damage: A Guide to Insurance Assessments
Source: https://ownerinspections.com.au/articles/melbourne-property-damage-navigating-insurance-assessments
Published: 2023-09-15 | Updated: 2026-02-09 | Category: Insurance
Author: Maison Azdari
Insurance claim assessments for [Melbourne](/vic/building-inspections-melbourne) property damage involve an insurer-appointed assessor inspecting the damage, evaluating its cause, and preparing a report that determines your settlement offer. Melbourne's weather patterns, including severe storms, flash flooding, hail, and high winds, frequently cause property damage that triggers insurance claims. Homeowners should document all damage with photos and video, make only temporary repairs, lodge the claim within 24 to 48 hours, and consider an independent building inspection to support their case if the insurer's assessment seems incomplete or unfair.
Melbourne's climate can be unpredictable. The city regularly experiences severe weather events that cause significant property damage, from roof and gutter destruction to flooding, tree strike impacts, and hail damage to external surfaces. When damage occurs, the insurance claims process can be stressful and confusing, particularly if you have not been through it before. This guide walks Melbourne property owners through each stage of the insurance assessment process, from first contact with your insurer to settlement and dispute resolution.
For a complete overview, see our [guide to insurance claim assessments](/guides/insurance-claim-assessment-guide).
## Common Causes of Property Damage in Melbourne
Melbourne is exposed to a range of weather and environmental events that cause property damage. Understanding the common causes helps you prepare and document claims more effectively.
## How the Insurance Assessment Process Works
The insurance assessment process in Melbourne follows the same general framework used across Australia, but local factors such as weather patterns, property types, and the Victorian regulatory environment add specific considerations.
## Documenting Property Damage
Thorough documentation is the single most important factor in a successful insurance claim. Poor records are one of the most common reasons for claim denial or reduced payouts.
## Working with the Insurance Assessor
The assessor's report is the primary document your insurer uses to determine your settlement. How you interact with the assessor can influence the outcome.
## Understanding Your Policy
Before lodging your claim, review your Product Disclosure Statement (PDS) to understand what is covered and what is excluded.
## The Settlement Offer
Once the assessor's report is complete, your insurer will issue a settlement offer. This is typically presented as either a cash payment (you arrange your own repairs) or insurer-managed repairs (the insurer appoints contractors).
### Reviewing the Offer
If the offer is lower than your documented costs, you can negotiate by providing additional evidence, independent repair estimates, or an independent building inspection report.
## Independent Assessments for Melbourne Claims
An independent insurance claim assessment provides an unbiased evaluation of your property damage by a qualified building inspector who works for you, not the insurer.
## Disputing a Claim Decision
If your claim is denied or the settlement offer is unfair, Melbourne homeowners have a clear dispute resolution pathway.
For a complete overview, see our [guide to insurance claim assessments](/guides/insurance-claim-assessment-guide).
### Pool Fence Regulations in NSW: What Homeowners Must Know
Source: https://ownerinspections.com.au/articles/pool-fence-regulations-in-nsw
Published: 2023-09-15 | Updated: 2026-05-14 | Category: General Maintenance
Author: Maison Azdari
Pool fence regulations in NSW are designed to create a physical barrier that prevents unsupervised access by young children. These laws apply to all swimming pools capable of holding more than 30cm of water, including portable and inflatable pools. The purpose of these regulations is to establish a uniform standard that ensures every pool meets safety criteria set out in Australian Standard AS1926.1-2012.
Whether you are building a new pool, buying a property with an existing pool, or leasing a home with a pool, understanding these rules is a must. Non-compliance can result in fines of up to $5,500, and more importantly, a non-compliant barrier puts lives at risk.
### Quick Summary: NSW Pool Fence Rules Every Homeowner Should Know
- NSW pool fence regulations apply to pools and spas capable of holding more than 30cm of water.
- Pool fence requirements in NSW include minimum fence heights, gate compliance, non-climbable zones, and barrier standards.
- NSW pool fence rules require self-closing and self-latching gates.
- Pool fence compliance in NSW is important when selling, leasing, renovating, or building a property.
- Non-compliant pool fences can result in fines, failed inspections, and increased legal risks.
- Regular inspections help maintain pool safety and reduce compliance issues.
## Why NSW Pool Fence Regulations Matter
Pool fence regulations in NSW are designed to reduce drowning risks and improve pool safety for children and families. According to Royal Life Saving Australia, backyard swimming pools remain one of the [leading locations for drowning incidents](https://www.royallifesaving.com.au/research-and-policy/drowning-reports) involving children under five years old.
For homeowners, understanding NSW pool fence regulations is more than a legal requirement. Pool safety laws affect:
- Property compliance
- Insurance obligations
- Property sales and leasing
- Renovation approvals
- Child safety responsibilities
Many homeowners incorrectly assume their existing pool barriers still comply with current regulations. However, landscaping changes, deteriorating fences, faulty gates, and outdated barrier designs can all lead to non-compliance.
NSW homeowners, builders, developers, property managers, and real estate professionals should regularly review pool fence compliance requirements to avoid penalties and improve safety outcomes.
## Understanding Pool Fence Regulations in NSW
NSW pool fence regulations are governed by the Swimming Pools Act 1992 and supporting Australian Standards. These pool regulations NSW homeowners must follow establish minimum safety requirements for swimming pool barriers and access points.
The regulations apply to:
- In ground swimming pools
- Above ground pools
- Inflatable pools
- Portable pools
- Outdoor spas holding more than 30cm of water
The primary goal of NSW pool fence regulations is to prevent unsupervised access by young children.
Pool regulations NSW homeowners need to understand cover fence height, gate operation, non climbable zones, pool registration, and compliance certification.
### NSW Pool Fence Legal Requirements
Pool owners must ensure their swimming pool barriers comply with current NSW pool fencing regulations.
| NSW Pool Fence Requirement | NSW Standard |
| ------------------------------------- | ------------------------------ |
| Minimum pool fence height | 1.2m |
| Boundary fence height | 1.8m |
| Maximum gap beneath fence | 100mm |
| Maximum spacing between vertical bars | 100mm |
| Pool gate operation | Self closing and self latching |
| Non climbable zone clearance | 900mm |
### Consequences of Non-Compliance with NSW Pool Fence Rules
Failure to comply with NSW pool fence regulations can lead to:
- Council penalties
- On-the-spot fines
- Delayed property settlements
- Legal action
- Insurance complications
- Increased liability following accidents
Non-compliant pool barriers also increase the risk of child drownings and serious injuries.
## NSW Pool Fence Requirements for Homeowners
Pool fence requirements in NSW focus on creating secure and child resistant barriers.
Older fences that once complied with previous standards may no longer meet current NSW pool fence regulations.
### Pool Fence Height Regulations NSW
The minimum pool fence height in NSW is generally 1.2m measured from finished ground level.
Boundary fences used as part of the pool barrier must be at least 1.8m high.
Landscaping changes can affect compliance. Raised garden beds, retaining walls, paving, and decking can reduce effective fence heights and create climbable surfaces.
### Maximum Pool Fence Gaps and Spacing
NSW pool fencing requirements also regulate openings within barriers.
| Pool Fence Measurement Requirement | NSW Compliance Rule |
| ---------------------------------- | ------------------- |
| Gap beneath fence | Maximum 100mm |
| Gap between vertical bars | Maximum 100mm |
| Perforated material openings | Maximum 13mm |
These requirements help prevent children from squeezing through pool barriers.
### Boundary Fence Rules in NSW
Boundary fences can form part of a compliant pool barrier if they meet specific conditions.
Requirements include:
- Minimum height of 1.8m
- Compliant non climbable zones
- No climbable structures nearby
- Structurally sound materials
Many inspection failures occur because homeowners overlook climbable objects positioned beside boundary barriers.
## Do You Legally Need a Fence Around Your Pool in NSW?
In most cases, yes.
The NSW Swimming Pools Act 1992 requires owners to ensure a swimming pool is surrounded by a child-resistant barrier and maintained in line with prescribed standards. The Act also requires barriers to be kept in good repair and access points to be kept securely closed.
There are exemptions in the legislation for some older pools and some property types, including certain large properties and waterfront properties, but these are not blanket exemptions and can stop applying if barriers are later installed or altered.
## Pool Fence Compliance NSW Explained
Pool fence compliance in NSW requires ongoing maintenance and inspections.
A pool barrier that complied several years ago may no longer satisfy current safety requirements because of wear, damage, or site modifications.
### Common Reasons Pool Fences Fail Compliance Inspections
Property inspectors commonly identify:
- Faulty self closing gates
- Damaged hinges
- Rusted fencing components
- Excessive gaps beneath barriers
- Climbable landscaping
- Loose fence panels
- Broken latches
Pool fence inspections help identify these issues before they create serious safety risks.
Explore Swimming
Pool Inspections
}
buttonHref="/swimming-pool-inspections"
variant="secondary"
/>
## What are the Rules for Pool Fencing in Australia?
There is no single one size fits all rule for all of Australia.
Each state and territory has its own pool safety laws and enforcement process. In NSW, the main legal framework is the [NSW Swimming Pools Act 1992](https://legislation.nsw.gov.au/view/html/inforce/current/act-1992-049) and the Swimming Pools Regulation 2018, with compliance linked to applicable standards and building code requirements.
NSW Government explains that the relevant versions of AS1926 used in NSW are 1986, 2007 and 2012, and the requirements vary depending on when the pool was built, where it is located, and whether modifications or renovations have occurred. NSW also states that if the barrier is modified or altered, current law and AS1926.1-2012 apply and previous exemptions cease.
NSW pool safety standards timeline:
- AS 1926-1986 may apply to some pools built before 30 August 2008
- AS 1926.1-2007 may apply to some pools built between 1 September 2008 and 30 April 2013
- AS 1926.1-2012 generally applies to pools built after 1 May 2013
- [AS 1926.1:2024](https://www.standards.org.au/blog/standards-spotlight-as-1926-1-2024) was introduced to clarify and modernise pool barrier guidance, although NSW compliance requirements may still depend on the original construction approval date
- Barrier alterations, upgrades, or rebuilds can trigger compliance with newer standards
## How Close Can Something be to a Pool Fence?
NSW requires a non-climbable zone around the barrier. NSW Government says trees, shrubs and objects such as barbecues, pot plants, toys, ladders and chairs must not be within the 90cm non-climbable zone. The zone is measured in an arc from the top of the fence towards the ground and also includes a 30cm clear space inside the pool area.
Common items to move before an inspection:
- Outdoor chairs and tables
- Pot plants and décor
- Barbecues
- Pool toys and storage tubs
- Ladders
- Tree branches near the fence line
- Pump or filter items placed too close to the barrier
If your pool area has a modern glass fence or frameless glass barrier for unobstructed views, the same non-climbable zone rules still apply. Appearance does not replace compliance.
## Legal Requirements for Pool Owners
All private pools and spas in NSW must have a compliant safety barrier that restricts access. The key legal requirements include:
### Consequences of Non-Compliance
Failure to comply with pool fencing laws can result in fines ranging from $550 to $5,500. In cases of serious breaches, local councils may issue legal orders requiring immediate rectification. Repeated violations may lead to further legal action, increasing the financial and legal burdens for property owners.
## Key Pool Fence Measurements and Specifications
To comply with NSW regulations, pool fences must adhere to the following specifications:
These measurements are designed to stop children from climbing over, crawling under, or squeezing through the fence.
## Non Climbable Zone Requirements in NSW
The non climbable zone, commonly called the NCZ, is one of the most important parts of pool fence compliance in NSW.
The NCZ creates a 900mm clearance area around the outside of the fence to prevent climbing.
### Common Non Climbable Zone Compliance Failures
Inspectors frequently identify:
- Outdoor furniture beside fences
- BBQ equipment near barriers
- Pot plants close to pool fencing
- Retaining walls acting as steps
- Overhanging tree branches
- Decorative rails creating footholds
Even small objects can create compliance breaches.
Homeowners should regularly inspect pool areas after landscaping work or outdoor renovations.
## Pool Gates and Latching Mechanisms
A compliant fence can still fail if the gate is not working properly.
NSW Government says pool owners should check that the gate is never propped open, swings outwards away from the pool area, shuts automatically from any open position, and self-latches when closed. NSW also recommends routine maintenance of hinges, latches, and fixings.
### What to test before booking an inspection
## NSW Pool Fence Rules for Gates and Barriers
Pool gates are among the most critical safety features within a compliant barrier system.
| Pool Gate Requirement | NSW Standard |
| ---------------------- | ------------------------- |
| Gate opening direction | Away from pool |
| Gate mechanism | Self closing |
| Latch system | Self latching |
| Latch height | Minimum 1.5m above ground |
### Common Pool Gate Defects
Inspectors frequently identify:
- Gates that do not self close
- Misaligned latches
- Damaged gate hinges
- Dates propped open
- Loose hardware
- Excessive clearance gaps
Faulty gates significantly increase pool safety risks.
Read more: Common
Swimming Pool Defects
}
buttonHref="/articles/common-swimming-pool-defects-what-you-need-to-know"
variant="secondary"
/>
## Materials and Construction Standards for Pool Fences
Pool fences must be constructed from durable, child-resistant materials that withstand weather exposure and regular wear. These materials must meet Australian safety standards to provide long-term security.
### Common Pool Fence Materials in NSW
| Pool Fence Material | Benefits | Considerations |
| ------------------- | --------------------------------------- | ------------------------------- |
| Glass fencing | Modern appearance and visibility | Requires regular cleaning |
| Aluminium fencing | Low maintenance and corrosion resistant | Must maintain compliant spacing |
| Steel fencing | Strong and durable | Requires corrosion protection |
| Timber fencing | Natural appearance | Requires ongoing maintenance |
| Mesh fencing | Flexible and affordable | Must remain tightly secured |
Damaged or deteriorated barriers may fail compliance inspections even if the original installation met regulations.
## NSW Pool Fence Compliance Checklist
Homeowners can use this checklist to identify common pool fence compliance issues.
| NSW Pool Fence Compliance Checklist | Yes / No |
| -------------------------------------- | -------- |
| Pool fence height is at least 1.2m | |
| Boundary fence is at least 1.8m | |
| Pool gate self closes correctly | |
| Pool gate self latches correctly | |
| No fence gaps exceed 100mm | |
| Non climbable zone remains clear | |
| Fence panels are structurally secure | |
| No climbable objects are nearby | |
| Hinges and latches function correctly | |
| Pool area receives regular inspections | |
## Inspection and Certification Process
Homeowners must ensure their pool barriers meet compliance standards through routine inspections. These inspections help identify potential issues and ensure adherence to safety regulations.
Properties with non-compliant fences must address any issues before certification is granted.
### Who Can Conduct Pool Fence Inspections?
Pool inspections may be completed by:
- Accredited certifiers
- Local councils
- Qualified building inspectors
Property owners planning to sell or lease a property should arrange inspections early to avoid settlement delays.
## Additional Pool Safety Risks Homeowners Should Monitor
Pool fence regulations form only one part of overall pool safety.
Homeowners should also monitor:
- Slippery paving surfaces
- Poor drainage
- Deteriorating decking
- Loose fence panels
- Inadequate lighting
- Water accumulation near barriers
- Damaged retaining walls
Routine inspections help identify these risks before they become costly repair issues.
## Common Misconceptions About NSW Pool Fence Regulations
Myth: Small portable pools do not require fencing
Fact: Any pool capable of holding more than 30cm of water requires a compliant barrier.
Myth: Existing backyard fences automatically comply
Fact: Boundary fences must still meet current height and non climbable zone requirements.
Myth: Pool gates only need occasional testing
Fact: Gates should be tested regularly to ensure they self close and self latch correctly.
Myth: Landscaping cannot affect compliance
Fact: Retaining walls, garden beds, and outdoor furniture can create climbable zones and compliance failures.
Complying with NSW pool fence regulations is not just a legal requirement. It is a fundamental step in preventing accidents and saving lives. Homeowners, builders, and real estate professionals must stay informed to avoid penalties and ensure pool safety. Consulting accredited certifiers and regularly inspecting barriers can help maintain compliance and peace of mind.
## Selling or Renting a Property With a Pool in NSW
NSW Government says the contract for sale must include a registration certificate from the NSW Swimming Pool Register and one of the following:
- A relevant occupation certificate issued within the last 3 years
- A valid certificate of compliance
- A certificate of non-compliance
If these documents are not included, the purchaser may be able to rescind the contract within 14 days of exchange, unless settlement has already occurred. If a certificate of non-compliance is attached, the purchaser generally has 90 days from settlement to fix listed defects and obtain a certificate of compliance, unless the certificate states the pool poses a significant risk to public safety.
A common mistake is saying all pools must be formally inspected every 3 years. NSW Government says councils must inspect pools associated with moveable dwellings and tourist and visitor accommodation at 3 year intervals. That is not a blanket rule for every private backyard pool.
### Renting a property with a pool
NSW Government states that when a tenancy starts, the landlord or agent must provide a copy of the certificate of compliance or occupation certificate. A certificate of non-compliance cannot be used to rent a property.
### Inspections and certificates in NSW
NSW Government states that local councils and registered swimming pool inspectors can inspect barriers and issue certificates of compliance when requirements are met. A certificate of compliance is valid for 3 years.
## Related Property Inspection Services
Homeowners can strengthen overall property safety by arranging:
- [Pre purchase building inspections](/pre-purchase-inspections)
- [Property condition reports](/maintenance-inspections)
- [Building handover inspections](/pre-handover-inspections)
- [Dilapidation reports](/dilapidation-reports)
- [Expert witness inspections](/expert-witness-reports)
These services help identify structural issues, safety risks, and compliance concerns that may affect property value and legal obligations.
## What is the Fine for Not Having a Pool Fence in NSW?
Under Schedule 1 of the [NSW Swimming Pools Regulation 2018](https://legislation.nsw.gov.au/view/whole/html/inforce/current/sl-2018-0503), several swimming pool barrier offences carry a $550 penalty notice amount, including offences relating to non-compliant pool barriers under sections 7(1), 12, 14, 15(1), and 16 of the Swimming Pools Act 1992.
The same schedule also lists:
- $110 penalty notice amounts for certain warning notice offences under section 17(1)
- $220 penalty notice amounts for certain pool registration information offences under section 30B(1)
Additional court-imposed penalties may apply for serious or repeated non-compliance offences.
Common reasons NSW pool fences fail inspection:
- Gate does not self-close from all open positions
- Gate does not self-latch
- Climbable objects are inside the non-climbable zone
- Boundary fence section is below required height
- Gaps under or between fence elements exceed limits
- CPR sign missing, damaged or not readable
- Barrier changed during renovations without checking current requirements
- Pool not registered on the NSW Swimming Pool Register
Pre-Sale Inspections
for Sellers and Buyers
}
buttonHref="/pre-sale-inspections"
variant="secondary"
/>
### Understanding Drug Residue Testing in Buildings
Source: https://ownerinspections.com.au/articles/understanding-drug-residue-testing-in-buildings
Published: 2023-09-14 | Updated: 2026-02-12 | Category: Building Inspections
Author: Maison Azdari
Drug residue contamination in buildings has become an increasingly recognised issue in Australian property markets. Properties where methamphetamine (commonly known as meth or ice) has been manufactured or heavily used can retain chemical residues on surfaces, in carpets, in ventilation systems, and even within wall and ceiling materials. These residues can pose health risks to occupants and significantly affect property values.
For property buyers, landlords, and tenants, understanding [drug residue testing](/drug-residue-testing) is essential for making informed decisions. This guide explains the health implications, the science behind testing, the process involved, how to interpret results, and the legal framework that applies in Australia.
## Health Implications
Exposure to methamphetamine residues in a contaminated building can cause a range of health effects, particularly with prolonged exposure. Symptoms reported by occupants of contaminated properties include:
Properties where methamphetamine has been manufactured (as opposed to simply used) typically have higher contamination levels and may also contain residues from the precursor chemicals used in the manufacturing process, including volatile organic compounds, acids, and solvents.
## Who Should Consider Testing
Drug residue testing is relevant for several groups:
## The Science Behind Testing
Drug residue testing in buildings relies on established analytical chemistry techniques to detect and quantify methamphetamine and other substances on surfaces and in materials.
### Surface Sampling
The primary testing method involves collecting surface samples (swabs or wipes) from various locations throughout the property. A gauze pad moistened with a solvent is wiped across a measured area (typically 100 square centimetres) to collect any residues present on the surface.
### Laboratory Analysis
Collected samples are sent to an accredited laboratory for analysis. Two principal methods are used:
**Gas Chromatography-Mass Spectrometry (GC-MS):** This is the gold standard for drug residue analysis. The sample is vaporised and passed through a column that separates different chemical compounds. Each compound is then identified by its mass spectrum, providing highly specific and quantitative results.
**High-Performance Liquid Chromatography (HPLC):** This method is used for compounds that are not suitable for gas chromatography. The sample is dissolved in a solvent and passed through a column under high pressure, separating compounds for identification and quantification.
### Field Screening
Some testing providers offer field screening kits that provide preliminary results on site. These immunoassay-based tests can indicate the presence or absence of methamphetamine above a certain threshold but are less specific than laboratory analysis. Field screening is useful as a first step but should be confirmed with laboratory analysis for definitive results.
## The Testing Process
## Interpreting Results
Test results are reported as the concentration of methamphetamine per 100 square centimetres of surface area, expressed in micrograms (ug/100cm2).
The accepted guideline value in Australia is 0.5 micrograms per 100 square centimetres (0.5 ug/100cm2). This level was established based on health risk assessments and represents the threshold below which the risk to occupants is considered acceptably low.
## Remediation
When contamination exceeds the guideline value, remediation is required to make the property safe for occupation.
### Remediation Methods
### Remediation Costs
Remediation costs vary significantly depending on the level and extent of contamination:
### Validation Testing
After remediation is completed, validation testing must be conducted to confirm that contamination levels have been reduced below the guideline value. This involves collecting new surface samples from the same locations and submitting them for laboratory analysis. A clearance report is issued once all areas are confirmed to be below the 0.5 ug/100cm2 threshold.
## Legal Framework
The legal framework around drug residue contamination in Australian buildings is still developing, but several key principles and guidelines apply.
### Australian Guidelines
The key reference document is the guideline established by the Clandestine Drug Laboratory Remediation Guidelines, which sets the 0.5 ug/100cm2 threshold for methamphetamine on surfaces. This guideline has been adopted as the accepted standard across Australian states and territories.
### Disclosure Obligations
### Landlord and Tenant Obligations
### Insurance Considerations
### Key to Combatting Mould Growth in Sydney Homes
Source: https://ownerinspections.com.au/articles/key-to-combatting-mould-growth-in-sydney-homes
Published: 2023-09-13 | Updated: 2026-01-30 | Category: Mould Inspections
Author: Maison Azdari
Mould is one of the most persistent and damaging problems facing Sydney homeowners. The city's humid subtropical climate, combined with modern building practices that prioritise energy efficiency over airflow, creates a perfect storm for mould growth in residential properties.
Left unchecked, mould can cause serious respiratory health issues, structural damage to building materials, and a significant reduction in property value. The good news is that with the right knowledge and proactive measures, you can protect your home and your family from mould's harmful effects.
> According to the Australian Institute of Health and Welfare, around one in four Australian homes have issues with damp or mould. In Sydney, that figure is believed to be even higher due to the city's coastal humidity and rainfall patterns.
## Why Sydney Homes Are Particularly Vulnerable to Mould
Sydney sits within a humid subtropical climate zone. Average relative humidity regularly exceeds 60%, and during the warmer months from October through March, humidity levels frequently push above 70%. These conditions are exactly what mould spores need to colonise and spread across surfaces.
The city also receives substantial rainfall throughout the year. Sydney's average annual rainfall sits around 1,200 millimetres, with rain events spread across all seasons. Prolonged wet periods saturate building materials, and without adequate drying time, moisture becomes trapped within walls, ceilings, and subfloor areas.
Coastal suburbs face additional challenges. Salt-laden air accelerates the deterioration of sealants, paint, and render, allowing moisture to penetrate building envelopes more easily. Properties in low-lying areas near rivers and creeks are also at greater risk due to higher groundwater levels and occasional flooding.
### Modern Building Design and Reduced Ventilation
Many Sydney homes built or renovated in recent decades prioritise thermal insulation and airtight construction. While this improves energy efficiency, it also restricts natural airflow through the building. Older homes with timber floors, high ceilings, and operable windows generally fare better for ventilation than modern apartments with fixed glazing and sealed concrete slabs.
Apartments and townhouses in high-density developments are particularly susceptible. Internal bathrooms and laundries without windows rely entirely on mechanical exhaust fans, which are often undersized or poorly maintained. When these fans fail or are not used consistently, moisture from showers, cooking, and clothes drying has nowhere to go.
### Common Areas Where Mould Develops in Sydney Homes
Mould tends to appear in predictable locations within a property. Recognising these hotspots early can help you act before a small issue becomes a major remediation project.
| Location | Primary Cause | Risk Level |
| --------------------------------------- | -------------------------------------------- | -------------- |
| Bathroom walls and ceilings | Steam from showers, poor exhaust ventilation | High |
| Bedroom wardrobes on external walls | Condensation from temperature differentials | High |
| Window frames and sills | Condensation, failed seals | Medium to High |
| Subfloor spaces | Rising damp, inadequate ventilation | High |
| Roof cavities | Roof leaks, condensation from HVAC | Medium |
| Kitchen splashbacks and rangehood areas | Cooking steam, grease buildup | Medium |
| Laundry rooms | Dryer moisture, wet clothing storage | Medium to High |
| Garage and storage areas | Ground moisture, poor airflow | Low to Medium |
If you suspect mould in any of these areas, a [professional mould inspection](/mould-inspections) can identify the full extent of the problem and its underlying causes.
## Prevention Essentials: Keeping Mould Out of Your Home
Preventing mould growth is far more cost-effective than dealing with remediation after the fact. A combination of moisture control, ventilation improvements, and material choices will give your Sydney home the best protection.
### Address Water Leaks and Moisture Ingress Promptly
The single most effective step you can take is to fix any source of water entry as soon as it appears. A dripping tap under a vanity, a small roof leak, or a crack in external render might seem minor, but these issues provide a constant moisture supply that mould needs to thrive.
Check your property regularly for signs of water ingress. Look for water stains on ceilings, bubbling paint on walls, damp patches around windows, and musty odours in enclosed spaces. If you discover a leak, have it repaired by a qualified tradesperson without delay.
Ensure that gutters and downpipes are clear of debris and directing water away from the building. Blocked gutters are one of the most common causes of moisture penetration in Sydney homes, particularly in suburbs with mature trees.
### Improve Ventilation Throughout the Property
Good airflow is your strongest defence against mould. Open windows and doors whenever weather permits to allow cross-ventilation. Even 15 to 20 minutes of fresh air circulation each day can make a measurable difference to indoor humidity levels.
In bathrooms, always run the exhaust fan during and for at least 20 minutes after showering. If your bathroom does not have a window, consider upgrading to a more powerful fan unit. The Building Code of Australia requires mechanical ventilation in rooms without natural ventilation, and choosing a fan rated for the room size is essential.
Kitchens should have a rangehood that vents externally rather than recirculating air through a filter. Cooking generates large amounts of moisture, and recirculating rangehoods simply push that moisture back into the kitchen.
For properties with persistent humidity issues, installing a whole-house ventilation system can be a worthwhile investment. These systems continuously introduce filtered fresh air while expelling stale, humid air, maintaining consistent indoor air quality year-round.
### Use Dehumidifiers in Problem Areas
In parts of your home where ventilation alone is not sufficient, a dehumidifier can help maintain humidity below the 60% threshold that discourages mould growth. Bedrooms, internal laundries, and basement-level rooms are common candidates.
Place a hygrometer (humidity gauge) in rooms you are concerned about. These inexpensive devices give you a clear reading of current humidity levels so you can decide when to run a dehumidifier. Digital hygrometers are available from most hardware stores for under $20.
During Sydney's humid summer months, you may need to run dehumidifiers more frequently. Empty the water collection tray regularly or connect a continuous drain hose to avoid overflow.
### Choose Mould-Resistant Materials
When renovating or building, select materials that resist mould colonisation. Mould-resistant plasterboard is available for use in wet areas and high-humidity rooms. These boards feature a fibreglass face and a treated core that inhibits mould growth even when exposed to moisture.
For paint, choose products specifically formulated with anti-mould additives. Several Australian paint manufacturers offer ranges designed for bathrooms, laundries, and other high-moisture environments. These paints contain fungicides that prevent mould spores from establishing on painted surfaces.
In flooring selection, avoid carpet in bathrooms, laundries, and ground-floor rooms with known moisture issues. Tiles, polished concrete, and vinyl plank flooring are far more resistant to mould and easier to clean if surface mould does appear.
For more on how building materials and conditions affect mould risk, see our guide on [mould inspection for home damage](/articles/mould-inspection-for-home-damage).
## Natural Remedies for Surface Mould
Small patches of surface mould on non-porous surfaces can often be treated at home using natural cleaning solutions. These remedies are effective for minor surface contamination and avoid the harsh chemicals found in commercial mould removers.
### White Vinegar Solution
White vinegar is one of the most effective natural mould treatments available. Research has shown that undiluted white vinegar kills over 80% of known mould species. Its acetic acid content disrupts the cellular structure of mould, killing it at the root rather than simply bleaching it from view.
To use vinegar for mould removal, pour undiluted white vinegar into a spray bottle. Spray the affected area generously and allow it to sit for at least one hour. Scrub the surface with a stiff brush, then wipe clean with a damp cloth. Allow the area to dry completely before applying any paint or sealant.
Vinegar is safe to use on most hard surfaces including tiles, glass, concrete, and painted walls. Avoid using it on natural stone surfaces such as marble or granite, as the acid can etch and damage the finish.
### Baking Soda Paste
Baking soda (sodium bicarbonate) is another effective natural option, particularly for stubborn surface mould. Mix baking soda with a small amount of water to form a thick paste. Apply the paste to the mouldy area, leave it for 10 to 15 minutes, then scrub with a brush and rinse clean.
Baking soda also works well as a preventative measure. Dissolve a tablespoon of baking soda in a spray bottle of water and mist surfaces prone to mould growth after cleaning. The alkaline residue creates an environment that discourages mould spore germination.
For a combined approach, spray vinegar first, allow it to work, then follow up with a baking soda paste for any remaining staining. Do not mix vinegar and baking soda together before application, as the chemical reaction neutralises both agents and reduces their effectiveness.
### Limitations of Natural Remedies
Natural remedies are suitable for small areas of surface mould on non-porous materials. They are not appropriate for treating mould on porous materials such as plasterboard, timber framing, carpet, or insulation. Mould that has penetrated into porous materials cannot be fully removed by surface treatment alone and typically requires professional remediation or material replacement.
If the affected area exceeds one square metre, or if mould keeps returning after treatment, this indicates a deeper moisture issue that needs professional assessment. Our article on [mould inspection techniques, tools, and methods](/articles/mould-inspection-techniques-tools-and-methods) explains how professionals identify hidden mould and moisture sources.
## Safe Disposal Protocols for Mould-Contaminated Materials
When removing mould-affected materials from your home, following safe disposal practices protects you and prevents cross-contamination to clean areas of the property.
Before starting any removal work, wear appropriate personal protective equipment (PPE). This includes an N95 or P2 respirator mask, safety goggles without ventilation holes, and disposable gloves. Mould spores become airborne when disturbed, and inhaling concentrated spore loads can cause serious respiratory irritation.
Seal off the work area from the rest of the home using plastic sheeting and tape. Close doors and turn off air conditioning systems to prevent spores from spreading through ductwork. Open windows in the work area to provide ventilation to the outside.
Place mould-contaminated materials directly into heavy-duty plastic bags. Seal the bags before carrying them through the house and dispose of them in your general waste bin. Do not attempt to recycle mould-affected building materials.
After removal, clean all surfaces in the work area with a HEPA vacuum followed by a damp wipe with a vinegar solution. Allow the area to dry thoroughly before installing replacement materials.
For extensive mould contamination or any situation involving structural materials, engage a qualified mould remediation specialist. Working with heavily contaminated materials without proper containment can expose you and your household to dangerous spore concentrations.
## The Role of Professional Building Inspectors in Mould Assessment
While minor surface mould can be managed by homeowners, significant or recurring mould problems require professional expertise. Licensed building inspectors bring specialised knowledge, equipment, and training that allows them to identify issues invisible to the untrained eye.
### What a Professional Mould Inspection Covers
A comprehensive [mould inspection](/mould-inspections) goes far beyond a visual check of walls and ceilings. Professional inspectors use a range of tools and techniques to assess the full scope of any mould problem.
Moisture meters detect elevated moisture levels within building materials before visible mould appears. Thermal imaging cameras reveal temperature variations behind walls and ceilings that indicate moisture accumulation. Air sampling equipment measures airborne spore concentrations and identifies specific mould species present in the indoor environment.
Inspectors also assess the building envelope for defects that allow moisture ingress. This includes checking roof coverings, flashing, gutters, external cladding, window seals, and waterproofing membranes in wet areas. Identifying and addressing these defects is essential for preventing mould recurrence after remediation.
For a detailed look at what inspectors assess, read our [comprehensive mould inspection guide](/articles/mould-inspection-guide).
### NSW Licensing and Qualifications
In New South Wales, building inspectors must hold appropriate qualifications and licensing through NSW Fair Trading. When engaging an inspector for mould assessment, verify that they hold a current licence and have specific experience with mould investigations.
A qualified inspector will provide a detailed written report documenting their findings, including photographs, moisture readings, and recommendations for remediation. This report can be used when engaging remediation contractors, negotiating with landlords or body corporates, or supporting insurance claims.
If you are buying or selling a property in Sydney, a mould inspection should form part of your due diligence. Mould issues discovered after settlement can be costly to remediate and may lead to disputes. For [building inspections in Sydney](/nsw/building-inspections-sydney), engaging an independent inspector protects your interests.
### Myths About Mould and Professional Assessment
There are many misconceptions about mould that can lead homeowners to underestimate the severity of a problem or attempt inappropriate remediation. Black mould, for example, is often feared as uniquely dangerous, but many species of mould can cause health issues regardless of colour. Our article on [black mould myths and mould inspections](/articles/black-mold-myths-unveiling-the-truth-in-mould-inspections) separates fact from fiction.
## When to Call a Professional
Knowing when to handle mould yourself and when to call in experts can save you time, money, and potential health complications.
You should contact a professional mould inspector if any of the following apply to your situation:
- The mould-affected area exceeds one square metre
- Mould returns within weeks of cleaning
- You can smell a musty odour but cannot locate the source
- Mould is present on structural elements such as wall framing or floor joists
- Household members are experiencing unexplained respiratory symptoms, allergies, or skin irritation
- Your property has experienced flooding or significant water damage
- You are buying, selling, or leasing a property and need a formal assessment
- You suspect mould within wall cavities, ceiling spaces, or subfloor areas
Early professional intervention typically results in lower remediation costs and less disruption to your household. Mould that is allowed to spread through concealed building cavities can require extensive demolition and reconstruction to fully address.
According to a [report by the Sydney Morning Herald](https://www.smh.com.au/national/nsw/how-to-get-rid-of-mould-in-your-home-20220216-p59wx1.html), mould complaints in rental properties across Sydney have increased significantly in recent years, highlighting the scale of the problem across the city.
Sydney's [subtropical climate](https://www.australia.com/en/facts-and-planning/weather-in-australia.html) means that mould prevention needs to be a year-round consideration, not just a seasonal task.
## Creating a Mould Prevention Routine for Your Sydney Home
Consistency is the key to keeping mould at bay. A simple routine that addresses moisture control and ventilation will dramatically reduce your risk.
Each week, check common mould hotspots such as bathroom grout, window sills, wardrobe interiors, and under-sink areas. Wipe down any condensation on windows and ensure all exhaust fans are functioning correctly.
Each month, inspect external areas including gutters, downpipes, and the condition of external paint and render. Clear any vegetation that has grown close to external walls, as plants can trap moisture against the building.
Each season, check subfloor ventilation openings to ensure they are not blocked by garden beds or debris. Inspect the roof cavity for signs of leaks or condensation, particularly after heavy rain events. Service air conditioning systems to ensure condensate drains are clear and filters are clean.
By making these checks part of your regular home maintenance, you can catch moisture problems early and prevent mould from gaining a foothold in your property.
## Frequently Asked Questions
### What exactly is mould?
Mould is a type of fungus that grows in multicellular structures called hyphae. It reproduces by releasing microscopic spores into the air, which settle on surfaces and begin growing when they encounter moisture and an organic food source. Mould can grow on a wide range of building materials including timber, plasterboard, carpet, fabric, and even dust deposits on glass and metal surfaces.
### What health risks does mould pose?
Exposure to mould can cause a range of health effects depending on the species present, the level of exposure, and individual sensitivity. Common symptoms include nasal congestion, sneezing, coughing, wheezing, eye irritation, and skin rashes. People with asthma, allergies, or compromised immune systems are at greater risk of severe reactions. Prolonged exposure to high spore concentrations can lead to chronic respiratory conditions.
### Why is Sydney particularly susceptible to mould growth?
Sydney's humid subtropical climate provides warm temperatures and high humidity levels that mould requires to thrive. The city receives rainfall throughout the year, and coastal moisture keeps humidity elevated even during drier periods. Combined with modern building practices that reduce natural ventilation, Sydney homes provide ideal conditions for mould colonisation.
### What infrastructure factors contribute to mould in Sydney homes?
Several building-related factors increase mould risk in Sydney properties. These include inadequate bathroom and laundry ventilation, poor waterproofing in wet areas, lack of subfloor ventilation in older homes, flat or low-pitch roofs that are prone to ponding water, and sealed building envelopes that trap moisture indoors. High-density apartment buildings with internal rooms lacking natural ventilation are particularly vulnerable.
### What does a professional mould inspection cover?
A professional mould inspection includes a thorough visual assessment of all accessible areas, moisture meter readings of walls, floors, and ceilings, thermal imaging to detect hidden moisture, air quality sampling where required, an assessment of the building envelope for moisture ingress points, and a detailed written report with findings and remediation recommendations.
### What are the most effective mould prevention measures?
The most effective prevention measures include maintaining indoor humidity below 60%, ensuring all rooms have adequate ventilation (either natural or mechanical), repairing leaks and moisture ingress promptly, using exhaust fans during and after bathing and cooking, running dehumidifiers in problem areas, and choosing mould-resistant materials during renovations.
### How should I manage humidity levels in my home?
Monitor humidity with a hygrometer placed in rooms of concern. Keep indoor humidity between 40% and 60% by using exhaust fans, opening windows for cross-ventilation, running dehumidifiers when needed, and avoiding drying clothes indoors without adequate ventilation. Air conditioning in cooling mode also reduces indoor humidity.
### How effective are natural remedies for mould removal?
Natural remedies such as white vinegar and baking soda are effective for treating small areas of surface mould on non-porous materials. White vinegar kills over 80% of mould species when applied undiluted. These methods are not suitable for mould that has penetrated into porous materials such as plasterboard, timber, or carpet, which typically requires professional remediation or replacement.
### When should I consult a professional about mould?
You should seek professional advice when the mould-affected area exceeds one square metre, when mould recurs after cleaning, when you detect musty odours without a visible source, when mould is found on structural elements, or when occupants are experiencing health symptoms that may be related to mould exposure. A professional can identify hidden mould and moisture sources that are not apparent to homeowners.
### What role does a building inspector play in mould management?
A licensed building inspector conducts a comprehensive assessment of your property to identify all mould-affected areas, measure moisture levels in building materials, locate the sources of moisture driving the mould growth, and provide a detailed report with remediation recommendations. Inspectors use specialised equipment including moisture meters, thermal imaging cameras, and air sampling devices to detect issues that are not visible to the naked eye.
### Can mould affect the structural integrity of my home?
Yes, prolonged mould growth can compromise structural integrity. Mould feeds on organic materials, and over time it can break down timber framing, floor joists, roof trusses, and other structural components. When mould affects structural elements, the damage may require significant repair work. Early detection through regular inspections helps prevent structural deterioration.
## Take Action Against Mould in Your Sydney Home
Mould is a serious issue that demands attention, but it is entirely manageable with the right approach. If you are concerned about mould in your property, or if you want a professional assessment to ensure your home is mould-free, our licensed building inspectors are here to help. We provide thorough [mould inspections across Sydney](/mould-inspections) with detailed reports delivered within 24 hours. [Contact us today](/nsw/building-inspections-sydney) to book your inspection and protect your home.
### Sydney's Construction Industry Regulations and Dispute Resolution
Source: https://ownerinspections.com.au/articles/sydneys-construction-inspection-regulations-dispute-resolution
Published: 2023-09-07 | Updated: 2026-02-12 | Category: Construction Inspections
Author: Maison Azdari
[Sydney](/nsw/building-inspections-sydney)'s construction industry is governed by a network of regulatory bodies including NSW Fair Trading, the NSW Building Practitioners Board, the Australian Securities and Investments Commission (ASIC), and the National Construction Code (NCC). When disputes arise between homeowners and builders, the resolution process follows a structured five-stage pathway from initial discussion through to mediation, arbitration, and, if necessary, legal action. Understanding this framework helps property owners protect their rights and resolve building disputes efficiently without unnecessary cost or delay.
Construction disputes in Sydney are among the most common consumer complaints handled by NSW Fair Trading each year. Whether the issue involves defective workmanship, project delays, payment disagreements, or contractual breaches, the regulatory framework provides clear pathways for resolution. The system is designed to encourage early settlement and minimise the burden on courts and tribunals.
This guide explains the governing bodies that oversee Sydney's construction industry, how the National Construction Code reduces conflicts, the five stages of dispute resolution, and the practical steps homeowners can take to protect themselves throughout a building project.
## Governing Bodies of Sydney's Construction Industry
Several organisations share responsibility for regulating the construction sector in New South Wales. Each body has a distinct role, and understanding their functions helps homeowners know where to turn when problems arise.
### NSW Fair Trading
NSW Fair Trading is the primary consumer protection agency for residential building work in New South Wales. It administers the Home Building Act 1989, which sets out the licensing requirements for builders and tradespeople, the statutory warranty provisions, and the dispute resolution mechanisms available to homeowners. NSW Fair Trading investigates complaints, mediates disputes, and can issue rectification orders and compliance notices against licensed builders.
### NSW Building Practitioners Board
The Building Practitioners Board regulates building certifiers and other building practitioners in NSW. It sets professional standards, investigates complaints about the conduct of building practitioners, and has the authority to suspend or cancel practitioner registrations. The Board plays a role in maintaining the quality of building certification services, which directly affects construction compliance outcomes.
### Australian Securities and Investments Commission (ASIC)
ASIC regulates the financial and corporate aspects of construction businesses in Australia. This includes oversight of builder insolvency, home warranty insurance schemes, and corporate governance obligations. When a builder becomes insolvent during a project, ASIC's regulatory framework determines how creditors and consumers are protected.
### National Construction Code (NCC)
The NCC is Australia's primary set of technical standards for the design, construction, and performance of buildings. It is produced and maintained by the Australian Building Codes Board (ABCB) and applies uniformly across all states and territories, though each jurisdiction may adopt minor variations. The NCC covers structural adequacy, fire safety, access and egress, services and equipment, energy efficiency, and health and amenity requirements.
| Governing Body | Primary Role | Key Function for Homeowners |
| --- | --- | --- |
| NSW Fair Trading | Consumer protection and builder licensing | Complaint handling, mediation, and rectification orders |
| Building Practitioners Board | Practitioner regulation | Investigates complaints about building certifiers |
| ASIC | Corporate and financial regulation | Oversees builder insolvency and warranty insurance |
| NCC (via ABCB) | Technical building standards | Sets minimum construction quality and safety benchmarks |
## How the National Construction Code Functions
The NCC serves four primary functions that shape the construction industry across Australia.
### Unified Standards Across Jurisdictions
Before the NCC, each state and territory maintained its own building code, creating inconsistencies that complicated construction across borders. The NCC provides a single, nationally consistent set of requirements. This means a builder working in Sydney follows the same core technical standards as a builder in Melbourne or Brisbane, with only minor state-specific amendments.
### Safety as the Top Priority
Safety provisions form the backbone of the NCC. The code sets minimum standards for structural integrity, fire resistance, emergency egress, and construction site safety. These requirements are non-negotiable and apply to every building project regardless of size or value.
### Support for Innovation Through Performance Solutions
The NCC allows two compliance pathways: deemed-to-satisfy solutions (prescriptive requirements) and performance solutions (alternative approaches that achieve the same performance outcome). This dual pathway supports innovation by allowing designers and builders to propose alternative construction methods, materials, or systems that meet the intended performance requirements without following the prescriptive rules exactly.
### Sustainability and Energy Efficiency Focus
The NCC includes energy efficiency requirements for both residential and commercial buildings. These provisions have been progressively strengthened over successive code updates, reflecting Australia's commitment to reducing the environmental impact of the built environment. Current requirements address insulation, glazing performance, building sealing, and services efficiency.
## How the NCC Reduces Construction Conflicts
The NCC plays a direct role in reducing disputes between builders and homeowners by establishing clear, measurable standards that both parties can reference. When a disagreement arises about construction quality, the NCC provides an objective benchmark against which the work can be assessed.
When an independent building inspector assesses construction work, they reference the NCC and the applicable Australian Standards to determine whether the work meets the required benchmarks. This objectivity is central to resolving disputes fairly.
## The Five-Stage Dispute Resolution Process
When a construction dispute arises in Sydney, the resolution process typically follows five stages. Each stage represents an escalation from the previous one, and most disputes are resolved before reaching the later stages.
### Stage 1: Initiation
The first step is to formally identify and document the issue. The homeowner should put their complaint in writing and send it to the builder, clearly describing the problem, referencing the relevant contract clause or NCC provision, and stating the outcome they are seeking. Keeping a written record of all communication from this point forward is important.
### Stage 2: Direct Discussion
Before involving any third party, the homeowner and builder should attempt to resolve the dispute through direct discussion. Many construction disagreements arise from miscommunication or differing expectations rather than genuine defects. A face-to-face meeting or structured phone call, with both parties referencing the contract and the NCC, resolves a significant proportion of disputes at this stage.
### Stage 3: Mediation
If direct discussion fails, either party can request mediation through NSW Fair Trading or a private mediation service. Mediation involves a neutral third party who facilitates a structured conversation between the homeowner and the builder. The mediator does not make a binding decision but helps both parties find a mutually acceptable resolution. NSW Fair Trading provides mediation services at no cost for residential building disputes.
### Stage 4: Arbitration
If mediation does not produce a resolution, the dispute may proceed to arbitration. Arbitration involves an independent arbitrator who hears evidence from both parties and makes a binding decision. Some building contracts include an arbitration clause that requires the parties to use this process before proceeding to court. Arbitration is generally faster and less expensive than litigation but the decision is legally binding.
### Stage 5: Legal Action
Legal action through the courts or the NSW Civil and Administrative Tribunal (NCAT) is the final recourse. NCAT handles the majority of residential building disputes in New South Wales and has the power to order rectification work, award compensation, and impose penalties on builders who breach their obligations. Legal action should be considered only after the earlier stages have been exhausted, as it is the most expensive and time-consuming option.
| Stage | Method | Who Is Involved | Typical Duration | Cost to Homeowner |
| --- | --- | --- | --- | --- |
| 1. Initiation | Written complaint | Homeowner and builder | 1 to 2 weeks | Nil |
| 2. Discussion | Direct negotiation | Homeowner and builder | 2 to 4 weeks | Nil |
| 3. Mediation | Facilitated discussion | Homeowner, builder, and mediator | 4 to 8 weeks | Free through NSW Fair Trading |
| 4. Arbitration | Binding determination | Homeowner, builder, and arbitrator | 2 to 6 months | $2,000 to $10,000 |
| 5. Legal Action | Court or tribunal hearing | All parties and legal representatives | 6 to 18 months | $5,000 to $50,000 or more |
## Common Construction Disputes in Sydney
Understanding the most common types of disputes helps homeowners anticipate potential problems and take steps to prevent them.
### Contractual Issues
Contractual disputes arise when one party believes the other has not met their obligations under the building contract. Common examples include disagreements about the scope of work, variations and their costs, and the interpretation of contract terms. The Home Building Act 1989 requires all residential building contracts over $5,000 to be in writing and to contain specific terms and conditions.
### Quality of Work
Disputes about the quality of construction work are the most frequent complaints received by NSW Fair Trading. These disputes typically involve defective workmanship, the use of substandard materials, or work that does not comply with the NCC or the relevant Australian Standards. An independent [building inspection](/building-and-pest-inspections) can provide objective evidence of whether the work meets the required standards.
### Project Delays
Construction delays are a common source of frustration for homeowners. While some delays are caused by factors outside the builder's control (weather, material shortages, council approvals), others result from poor project management, subcontractor availability, or cash flow problems. The building contract should specify the completion date and the consequences of delay, including any liquidated damages provisions.
### Payment Disputes
Payment disputes occur when either party disagrees about the amount owed, the timing of progress payments, or the withholding of payment for defective or incomplete work. The Home Building Act 1989 and the Building and Construction Industry Security of Payment Act 1999 (NSW) provide specific rules about progress payments, payment claims, and adjudication processes.
## Benefits of a Regulated Construction Industry
Sydney's regulatory framework for the construction industry delivers measurable benefits for homeowners, builders, and the broader community.
### Safety Assurance
The NCC's minimum standards for structural integrity, fire safety, and emergency egress ensure that every building constructed in Sydney meets a baseline level of safety. Building surveyors verify compliance at prescribed stages, and NSW Fair Trading can take enforcement action against builders who fail to meet these standards.
### Consumer Protection
The Home Building Act 1989 provides homeowners with statutory warranties that cover structural defects for six years and non-structural defects for two years from the date of completion. Home warranty insurance provides an additional layer of protection if the builder dies, disappears, or becomes insolvent.
### Efficient Dispute Resolution
The multi-stage dispute resolution framework, from direct discussion through to NCAT, provides homeowners with accessible and cost-effective pathways for resolving building complaints. NSW Fair Trading's free mediation service resolves many disputes without the need for tribunal proceedings.
## Best Practices for Homeowners
Homeowners who take a proactive approach to managing their building project are far less likely to experience disputes, and better positioned to resolve them quickly if they do arise.
For a complete overview, see our [guide to expert witness reports for building disputes](/guides/expert-witness-building-disputes-guide).
### Pre-Purchase Inspections vs DIY for Geelong Buyers
Source: https://ownerinspections.com.au/articles/pre-purchase-inspections-vs-diy-for-geelong-buyers
Published: 2023-09-06 | Updated: 2026-02-12 | Category: Pre-Purchase Inspections
Author: Maison Azdari
Geelong has experienced significant growth as a property market over the past decade, attracting buyers looking for affordability, lifestyle, and proximity to Melbourne. With this growth comes a diverse range of property types, from heritage weatherboard homes in Newtown and Geelong West to modern estates in Armstrong Creek and new developments in Lara and Leopold.
For buyers entering the [Geelong](/vic/building-inspections-geelong) market, the question of whether to commission a professional [pre-purchase building inspection](/pre-purchase-inspections) or attempt a DIY assessment is an important one. Both approaches have their place, but understanding the strengths and limitations of each is essential to making a sound purchasing decision.
## Professional Pre-Purchase Inspections
A professional pre-purchase inspection is conducted by a licensed building inspector who systematically assesses the property's condition in accordance with AS 4349.1. The inspection covers accessible areas of the building including the interior, exterior, roof space, subfloor, roof exterior, and site drainage.
### What a Professional Inspection Covers
## DIY Assessments
A DIY assessment involves the buyer personally inspecting the property to identify any visible issues. While not a substitute for a professional inspection, a DIY walkthrough can provide useful initial information and help buyers decide whether to proceed with a formal inspection.
## Comparing the Two Approaches
## DIY Guidance Tips
If you are conducting a preliminary DIY walkthrough of a Geelong property, the following tips can help you make the most of it:
## Decision Factors
Consider commissioning a professional inspection in the following situations:
A DIY walkthrough is appropriate as a first step when viewing multiple properties, to narrow your shortlist, and to identify any obvious red flags before deciding which properties warrant a professional inspection.
For a complete overview, see our [guide to pre-purchase building and pest inspections](/guides/pre-purchase-building-pest-inspection-guide).
### What Is Section 137B of the Building Act 1993 in Victoria?
Source: https://ownerinspections.com.au/articles/importance-of-s137b-building
Published: 2023-09-05 | Updated: 2026-09-15 | Category: Building Inspections
Author: Maison Azdari
Section 137B of Victoria's Building Act 1993 makes it an offence for an owner-builder to sell a home within six and a half years of completing domestic building work unless two things are in place. The buyer must receive a defects inspection report no older than six months, prepared by a prescribed building practitioner. If the work was worth more than $16,000, the seller must also hold domestic building insurance for it.
The rule exists because an owner-builder has no registered builder standing behind the work. The report tells the buyer what is wrong with it, and the insurance gives the buyer somewhere to go if a serious defect appears later and the owner-builder has died, disappeared or become insolvent.
## What Is Section 137B?
Section 137B is the part of the [Building Act 1993 (Vic)](https://www.legislation.vic.gov.au/in-force/acts/building-act-1993) that controls how an owner-builder sells a home they built or substantially renovated. Within six and a half years of completing the work, the sale needs a current defects inspection report and, where the work exceeded $16,000, domestic building insurance. Selling without them is an offence.
The section does not stop an owner-builder selling. It sets conditions on the sale so that the buyer is not the last to find out about defects in work that no registered builder signed off.
The obligations sit with the **owner-builder who sells**, not with the buyer, the agent or the conveyancer. Agents and conveyancers still need to know about it, because a missing report usually surfaces while the contract of sale and the vendor statement are being prepared.
### What Counts as Building Work Under Section 137B?
Section 137B covers domestic building work the owner carried out as an owner-builder, which is generally work that needed a building permit. New homes, extensions, second storeys, and structural renovations are the usual examples. Cosmetic work such as painting, new carpet or a kitchen cabinet swap is not domestic building work in this sense.
If you are unsure whether your project counts, the building permit is the best starting point. Work that was permitted with you named as the owner-builder is the clearest sign that Section 137B applies.
## Why Section 137B of the Building Act 1993 Matters in Victoria
Section 137B matters because owner-built homes carry none of the protections a buyer gets from a registered builder's work: no builder's statutory warranties to a later owner, and no builder's insurance. Without the section, a buyer could purchase serious defects with no disclosure and no remedy. The report and insurance fill that gap for the first six and a half years.
For sellers, it is a condition of the sale itself. Leaving it until an offer is accepted is the most common way a straightforward sale turns into a delayed or collapsed one.
For buyers, it is information. A 137B report is one of the few documents in a residential sale that lists defects in writing before you sign.
## Understanding the 6.5 Year Rule Under Section 137B
The 6.5 year rule means Section 137B applies when the owner-builder enters a contract to sell within six years and six months of completing the domestic building work. After that period, no 137B report or insurance is required under the section. The clock runs from completion of the work, not from when the permit was issued or when the owner moved in.
Six and a half years lines up with the six year period for structural defect claims, plus a margin. In practice the completion date is usually taken from the occupancy permit or certificate of final inspection, so find that document before you list.
## Who Does Section 137B Apply To?
Section 137B applies to a person who carried out domestic building work on their own land as an owner-builder and then sells within six and a half years. It does not impose obligations on buyers, real estate agents or registered builders, although each of them is affected by whether the seller has complied.
**Owner-builders** carry the legal duty. They must obtain the report, arrange insurance where needed and make sure both reach the buyer before the contract is signed.
**Buyers** are the people the section protects. If you are buying a home with recent owner-builder work, ask for the 137B report and insurance certificate early, and read the report rather than filing it.
**Agents and conveyancers** are usually the first to notice a gap. Asking "was any of this work done as an owner-builder?" at listing avoids finding out at contract stage.
## Owner Builder Obligations Under Section 137B
An owner-builder selling within six and a half years must give the buyer, before the contract is signed, a defects inspection report from a prescribed building practitioner that is no more than six months old. If the work was valued above $16,000, they must also obtain domestic building insurance for it and provide evidence of that cover.
Victoria's building regulator, the [Building and Plumbing Commission](https://www.bpc.vic.gov.au/) (which replaced the Victorian Building Authority), publishes a report template and guidance for owner-builders on selling.
## What Is a 137B Report?
A 137B report, also called a Section 137B owner builder report or defects inspection report, is a written inspection of the owner-builder work that lists every defect and non-compliant item found, with photographs. It is prepared by a prescribed building practitioner, must be less than six months old when the contract is signed, and a copy goes to the buyer.
It is not a pre-purchase inspection and it is not a certificate that the work is compliant. It records the condition of the work at the date of inspection. A report that lists defects does not stop the sale; it means the buyer is told about them.
## What Does a Section 137B Report Usually Include?
A Section 137B report usually includes a description of the owner-builder work, the date of inspection, the practitioner's details, and a list of every defect or non-compliance observed, each supported by a photograph. It covers the building work done under the owner-builder permit, not the whole property's general condition.
Typical findings include:
Because the report is visual, concealed defects may need further investigation. Where a finding points to a deeper problem, a [defect investigation report](/defect-investigation-reports) goes further than a standard inspection can.
## When Is a 137B Report Required?
A 137B report is required when all three conditions are met: the seller carried out domestic building work as an owner-builder, that work was completed less than six and a half years before the contract of sale, and the home is being sold. If any one of the three is missing, Section 137B does not require a report.
Timing matters as much as eligibility. A report older than six months at the contract date does not satisfy the section, so a property that sits on the market for a long time may need a fresh inspection.
## Who Can Prepare a Section 137B Owner Builder Report?
A Section 137B report must be prepared by a prescribed building practitioner. That generally means a registered building inspector, registered building surveyor, or a registered engineer or architect with the right class of registration. The practitioner must be independent of the work, so someone who carried out or supervised the building cannot report on it.
Before booking, check the practitioner's registration on the Building and Plumbing Commission's public register and ask directly whether they prepare Section 137B reports. Not every inspector who does pre-purchase inspections is set up for them.
## Domestic Building Insurance Requirements Under Section 137B
Under Section 137B, an owner-builder who sells within six and a half years must hold domestic building insurance if the value of the owner-builder work exceeded $16,000, including labour and materials. The cover protects the buyer if a defect claim arises and the owner-builder has died, disappeared or become insolvent. Evidence of the policy must be provided before the sale.
The insurance is not optional just because the report found no defects, and the report is not optional just because insurance is in place. Above the threshold, both are needed.
Insurers commonly ask for the defects report when assessing an owner-builder policy, so arrange the inspection first. The Building and Plumbing Commission has more on [domestic building insurance and home warranty](https://www.bpc.vic.gov.au/home-owners/insurance-for-domestic-building-work/domestic-building-insurance-and-home-warranty).
## Section 137B vs Registered Builder Responsibilities
Section 137B applies only to owner-builder work. When a registered builder carries out domestic building work under a contract, the builder must take out domestic building insurance for jobs above the threshold and the statutory warranties pass to later owners, so no 137B report is needed. A home can involve both: a builder's original house and a later owner-builder extension.
In a mixed case, Section 137B covers the owner-builder part only. The report should say clearly which work it covers, so a buyer is not left guessing where the builder's responsibility ends.
## Legal Implications for Non Compliance With Section 137B
Selling without the required report or insurance is an offence under the Building Act 1993 and can lead to a fine. More practically, a buyer who did not receive the required documents may be able to end the contract before settlement, and the seller may face claims if defects appear later. Owner Inspections is not a law firm, so get legal advice on your own situation.
For buyers, the missing documents are a signal to slow down. For sellers, fixing it before listing is almost always cheaper than fixing it after an offer, when the buyer holds the leverage.
If a sale has already gone ahead and defects have since appeared, keep a careful record. Our guide on [how to document building defects for a legal claim](/articles/document-building-defects-legal-claim) explains what evidence helps. If you are buying a home with owner-builder work, an independent [pre-purchase inspection](/pre-purchase-inspections) gives you a second view alongside the seller's 137B report, and you can read more about how inspections work on the [Owner Inspections](https://ownerinspections.com.au/) site.
## Section 137B Checklist for Buyers and Sellers
The quickest way to handle Section 137B is a short checklist run before the property is listed. Sellers confirm the dates, value, report and insurance. Buyers confirm they have received both documents and read the defects list before signing anything.
**Sellers**
**Buyers**
### Incorporating Expert Witness Testimonies in Scott Schedules
Source: https://ownerinspections.com.au/articles/incorporating-expert-witness-testimonies-scott-schedules
Published: 2023-09-05 | Updated: 2026-02-09 | Category: Expert Witness
Author: Maison Azdari
A Scott Schedule is a structured legal document used in Australian construction disputes to list building defects, estimated repair costs, and responses from each party. By incorporating expert witness testimonies directly into a Scott Schedule, each claimed defect gains independent technical backing, making the document far more persuasive in tribunals such as NCAT, VCAT, and QCAT. Expert input transforms a simple defect list into a comprehensive evidence tool that courts rely on for fair decision-making.
Construction and building disputes involve technical details that can overwhelm even experienced lawyers. Standard legal arguments often fall short when the core disagreement centres on whether a crack is structural or cosmetic, or whether waterproofing meets Australian Standard AS 3740. This is where the combination of Scott Schedules and expert witness testimonies becomes a powerful tool for homeowners, builders, and legal practitioners alike.
## What Is a Scott Schedule?
A Scott Schedule is a tabular document used in Australian legal proceedings to organise and present building defect claims in a clear, structured format. It is widely used in construction-related disputes heard at tribunals including the NSW Civil and Administrative Tribunal (NCAT), the Victorian Civil and Administrative Tribunal (VCAT), and the Queensland Civil and Administrative Tribunal (QCAT).
Each row in a Scott Schedule typically addresses a single defect or claim. The columns break down the details so that all parties, and the tribunal, can compare positions side by side.
## The Role of Expert Witnesses in Construction Disputes
An expert witness in a construction dispute provides independent, technically informed opinions on matters that fall outside the general knowledge of a tribunal member or judge. Their role is defined by obligations to the court rather than to the party that engaged them.
## Why Integrate Expert Testimony into Scott Schedules?
Without expert input, a Scott Schedule is simply a list of claimed defects and costs. Adding expert testimony converts it into a document backed by professional analysis.
## Steps to Incorporate Expert Witness Testimony
Integrating expert witness input into a Scott Schedule follows a logical sequence. Each step builds on the previous one to produce a document that is both technically sound and legally effective.
## Scott Schedule Structure with Expert Input
A well-constructed Scott Schedule with expert witness input typically follows this column structure:
## Common Myths About Expert Witnesses and Scott Schedules
Misunderstandings about both expert witnesses and Scott Schedules can lead to poor preparation. Here are some of the most common myths and the reality behind them.
### Myths About Expert Witnesses
### Myths About Scott Schedules
## When Expert Witness Testimony Matters Most
Expert witness input is particularly valuable in the following situations:
## Choosing the Right Expert Witness
Selecting the right expert can make or break your case. Consider these factors:
For a complete overview, see our [guide to expert witness reports for building disputes](/guides/expert-witness-building-disputes-guide).
### House vs Apartments in Australia: Which Should You Choose?
Source: https://ownerinspections.com.au/articles/house-vs-apartments-in-australia-which-should-you-choose
Published: 2023-08-31 | Updated: 2026-02-09 | Category: Pre-Purchase
Author: Maison Azdari
Choosing between a house and an apartment in Australia comes down to budget, lifestyle, investment goals, and location. Houses generally offer more space, land ownership, and long-term capital growth averaging 6.8% per year over the past 25 years, according to CoreLogic. Apartments provide lower entry costs, proximity to city centres, and rental yields that often outperform houses in urban areas. Both property types carry different inspection requirements, maintenance obligations, and regulatory considerations under Australian law.
Australia's property market has seen major shifts over the past two decades. Urban densification, rising land prices, and changing household sizes have made this decision more relevant than ever. Whether you are a first-time buyer in Sydney, a property investor in Melbourne, or a family looking to settle in Brisbane, understanding the real differences between houses and apartments will help you make a decision based on facts rather than assumptions.
## First-Time Buyers: Weighing Houses Against Apartments
Buying your first property in Australia is a significant step. For many first-home buyers, the decision between a house and an apartment shapes not just where you live, but your financial position for years to come.
### Why First-Time Buyers Choose Houses
### Why First-Time Buyers Choose Apartments
## Comparing Lifestyle: Apartment vs House
Your day-to-day living experience differs considerably depending on the property type you choose.
That said, apartment living also offers genuine advantages. Being close to cafes, restaurants, public transport, and workplaces suits those who prefer an urban lifestyle. Shared maintenance responsibilities mean less weekend work. Many modern apartments are designed with energy efficiency in mind, reducing running costs.
## Capital Growth: Houses vs Apartments
One of the most common questions property buyers ask is whether houses grow in value faster than apartments. The data tells a clear story, but it is not as one-sided as many people assume.
According to CoreLogic, over the past 25 years, house values have grown at an annual rate of approximately 6.8%, while unit values have grown at approximately 5.9%. The difference is real but narrower than many expect.
## Investment Returns: Rental Yields and Costs
Investors need to look beyond capital growth and consider rental yields, ongoing costs, and the tenant market for each property type.
### Houses as Investments
### Apartments as Investments
## Cost Comparison: Houses vs Apartments
Understanding the full cost picture helps avoid surprises after purchase.
## Inspection Considerations for Each Property Type
Regardless of whether you choose a house or an apartment, a professional building inspection is one of the smartest steps you can take before purchasing.
### House Inspections
A [pre-purchase building inspection](/pre-purchase-inspections) for a house typically covers the full structure including the roof, subfloor, walls, plumbing, electrical systems, and any external structures such as garages, decks, and fences. A [timber pest inspection](/timber-pest-inspections) is strongly recommended, particularly in Queensland and NSW where termite activity is high.
### Apartment Inspections
For apartments, an [apartment pre-settlement inspection](/apartment-pre-settlement) checks for defects in finishes, fixtures, waterproofing, windows, doors, and common areas. A [strata report](/articles/pre-sale-strata-inspection-for-apartments) review is also recommended to understand the financial health of the building, any planned special levies, and the history of defect claims.
### How Expert Witnesses Support Construction Cases in the Gold Coast
Source: https://ownerinspections.com.au/articles/how-expert-witnesses-support-construction-cases-in-the-gold-coast
Published: 2023-08-30 | Updated: 2026-02-10 | Category: Expert Witness
Author: Maison Azdari
The [Gold Coast](/qld/building-inspections-gold-coast) is one of Australia's most active construction markets. From high-rise residential towers along the coastline to sprawling suburban developments in the hinterland, the region's building industry operates at a pace and scale that inevitably produces disputes. When these disputes involve technical questions about building quality, compliance, or defects, expert witnesses become essential to achieving a fair resolution.
An expert witness in a construction case provides independent technical evidence that helps tribunals, courts, and parties understand complex building matters. Their role extends beyond simply identifying defects. Expert witnesses offer technical insights, demystify complex information for decision-makers, evaluate evidence from both parties, support alternative dispute resolution processes, and withstand counter examination of their opinions.
On the Gold Coast, where construction activity spans everything from beachfront apartments to family homes in master-planned estates, the demand for qualified expert witnesses continues to grow. This guide explains what expert witnesses do, how to choose the right one, and how their involvement has made a real difference in Gold Coast construction disputes.
> The strength of an expert witness lies in their independence and technical authority. A credible expert provides objective analysis that assists the decision-maker, regardless of which party engaged them.
## The Role of Expert Witnesses in Gold Coast Disputes
Expert witnesses serve multiple functions in construction dispute proceedings. Their involvement often determines the outcome of a case by providing the technical foundation upon which decisions are made.
### Providing Technical Insights
Construction disputes frequently involve technical questions that lawyers, tribunal members, and judges are not equipped to answer on their own. Expert witnesses bridge this knowledge gap by providing detailed technical analysis of building issues.
On the Gold Coast, common technical issues requiring expert assessment include:
### Demystifying Complex Information
Building and construction matters are inherently technical. Expert witnesses translate this complexity into language that tribunal members, lawyers, and parties can understand. A well-prepared expert can explain why a particular construction method failed, what standard was breached, and what the consequences are, all in terms that a non-technical audience can follow.
### Evidence Evaluation
Expert witnesses evaluate the physical evidence at the building site and the documentary evidence provided by both parties. This includes reviewing building plans, specifications, contracts, inspection records, photographs, and correspondence. Their evaluation identifies the facts relevant to the technical issues in dispute and provides an objective assessment of what the evidence shows.
### Alternative Dispute Resolution
Expert witnesses play a valuable role in alternative dispute resolution (ADR) processes such as mediation and conciliation. Their independent technical assessment can provide a common foundation of facts that helps both parties understand the issues and move towards a negotiated settlement without the need for a hearing.
On the Gold Coast, many construction disputes are resolved through the Queensland Building and Construction Commission (QBCC) dispute resolution process or through private mediation, where expert witness input frequently facilitates agreement.
### Counter Examination
In formal proceedings, expert witnesses must be prepared to have their opinions challenged through cross-examination. A credible expert witness can defend their methodology, explain their reasoning, and maintain their position under questioning. Their ability to withstand counter examination is a key factor in the weight given to their evidence by the decision-maker.
## Choosing the Right Expert Witness
Selecting the right expert witness can significantly influence the outcome of a construction dispute. The following factors should guide your decision.
### Background Checks
### Relevance of Expertise
The expert's specific area of expertise must match the technical issues in your dispute. A structural engineer is not the right expert for a waterproofing dispute, and a building surveyor may not be the right expert for an electrical compliance issue. Ensure the expert has direct, relevant experience in the particular area of construction at issue.
### Communication Skills
An expert witness who cannot communicate their opinions clearly is of limited value. The expert must be able to present complex technical information in plain language, both in their written report and during oral evidence. Ask the expert about their experience giving evidence at hearings and how they prepare for cross-examination.
### Fee Structure
Expert witness fees vary depending on the complexity of the matter and the time required. Discuss the fee structure upfront, including:
Obtain a written fee estimate before engaging the expert to avoid unexpected costs.
### Recommendations and Reputation
Seek recommendations from your solicitor, other building professionals, or industry bodies. An expert with a strong reputation for independence and thoroughness will carry more weight with the tribunal or court.
## Real-World Gold Coast Case Studies
The following case studies illustrate how expert witnesses have contributed to the resolution of real construction disputes on the Gold Coast.
### Case Study: Lee Butler and the Mould Problem
Lee Butler purchased a Gold Coast property that subsequently developed severe mould issues. An expert witness was engaged to investigate the cause and extent of the problem. The expert's assessment revealed that mould levels in the property were 150 times higher than safe levels, posing a serious health risk to the occupants.
The expert witness identified the root cause as defective construction of the building envelope, which allowed moisture ingress that created the conditions for mould growth. The expert's report detailed the specific construction defects, the resulting mould contamination, and the scope and cost of remediation required to make the property safe for habitation.
### Case Study: Shirley's Water Leak
Shirley, a Gold Coast homeowner, experienced persistent water leaks that caused progressive damage to her property. Despite multiple attempts by the builder to address the issue, the leaks continued, and the cumulative damage exceeded $40,000.
An expert witness was engaged to conduct a thorough investigation. The expert identified that the water ingress resulted from multiple construction defects including failed flashings, inadequate waterproofing of the shower recess, and poorly sealed external wall penetrations. The expert's detailed report, including photographic evidence and references to the applicable Australian Standards, provided the foundation for a successful claim for rectification costs.
## QBCC Licensing and Expert Witnesses
In Queensland, the Queensland Building and Construction Commission (QBCC) is the regulatory authority responsible for licensing building practitioners and overseeing the building industry. Expert witnesses working on Gold Coast construction disputes should be familiar with QBCC licensing requirements, the QBCC dispute resolution process, and the relevant Queensland building legislation.
When engaging an expert witness for a Gold Coast construction dispute, consider whether the expert:
For a complete overview, see our [guide to expert witness reports for building disputes](/guides/expert-witness-building-disputes-guide).
### How Lock-Up Inspections Tackle Weatherproofing and Insulation
Source: https://ownerinspections.com.au/articles/how-lock-up-inspections-tackle-weatherproofing-and-insulation
Published: 2023-08-29 | Updated: 2026-02-09 | Category: New Construction
Author: Maison Azdari
A lock-up inspection in Australia takes place when the external walls, roof, windows, and doors of a new home are installed, effectively "locking up" the property against weather. At this stage, inspectors assess weatherproofing elements such as roof integrity, window and door seals, flashing, and drainage, as well as insulation quality including R-value compliance with the National Construction Code (NCC). Catching weatherproofing and insulation defects at lock-up prevents costly rectification after internal finishes are completed.
Building a new home involves multiple construction stages, and the lock-up stage is one of the most significant checkpoints. This is the point where your home should be sealed from the outside elements. If weatherproofing or insulation is substandard at this stage, the problems become hidden behind plasterboard and paint, often only surfacing months or years later as mould, energy inefficiency, or water damage. A professional [lock-up inspection](/new-construction-stage-inspections) at this point gives you the chance to address issues while they are still visible and cost-effective to fix.
## What Is Weatherproofing?
Weatherproofing protects your home from external elements including rain, wind, and temperature extremes. An effective weatherproofing system prevents water ingress and uncontrolled air infiltration, directly affecting both comfort and energy costs. At the lock-up stage, inspectors check that all weatherproofing components have been installed correctly and meet NCC requirements.
Poor weatherproofing is one of the most common sources of building defects in Australian homes. Water that enters through gaps in flashing, poorly sealed windows, or inadequate drainage can cause structural damage, mould growth, and deterioration of building materials over time.
## Weatherproofing Checklist for Lock-Up Inspections
During a lock-up inspection, a qualified inspector examines the following weatherproofing elements:
## The Role of Insulation
Insulation acts as a thermal barrier, reducing unwanted heat gain in summer and heat loss in winter. The NCC sets minimum insulation requirements for Australian homes, expressed as R-values, which measure the material's resistance to heat flow. Higher R-values indicate better thermal performance.
At the lock-up stage, insulation is typically visible before plasterboard installation begins. This is the last practical opportunity to check that insulation has been installed correctly and meets the required specifications.
## Insulation Inspection Areas
Inspectors focus on these areas during an insulation check:
## Benefits of Proper Weatherproofing and Insulation
Getting weatherproofing and insulation right at the lock-up stage delivers both immediate and long-term benefits.
## Common Defects Found at Lock-Up
## Handling Inspection Findings
Discovering defects during a lock-up inspection is far better than finding them after the home is finished. Here is how to handle the findings.
### Communicating with Your Builder
### Using Your Warranty
### When to Get a Second Opinion
If significant defects are found or if you disagree with the builder's response, consider engaging another qualified inspector for a second assessment. For unresolved disputes, mediation or legal advice may be appropriate.
## Tips for Homeowners
For a complete overview, see our [guide to construction stage inspections](/guides/construction-stage-inspections-guide).
### Seller's Guide to Section 137B Inspections in Geelong
Source: https://ownerinspections.com.au/articles/sellers-guide-to-section-137b-inspections-in-geelong
Published: 2023-08-25 | Updated: 2026-02-09 | Category: 137b Report
Author: Maison Azdari
Under Section 137B of the Building Act 1993 (VIC), any owner-builder selling a property in [Geelong](/vic/building-inspections-geelong) within 6.5 years of completion must obtain an inspection report from a Licensed Building Practitioner (LBP). This report assesses whether the construction meets applicable building standards and identifies any defects that could affect safety or structural integrity. Without this report, the sale cannot proceed lawfully, and the seller may face legal consequences.
If you built your own home in Geelong, or managed the construction yourself, and you plan to sell within that 6.5-year window, the Section 137B inspection is not optional. It protects buyers by giving them a clear picture of the property's condition, and it protects you as the seller by demonstrating compliance with Victorian building regulations. Understanding the process, costs, and what the report covers will help you prepare for a smooth and transparent property transaction.
## What Is a Section 137B Inspection Report?
A Section 137B inspection report is a formal assessment prepared by a Licensed Building Practitioner (LBP) under the Building Act 1993 (VIC). It evaluates an owner-built property to determine whether the construction work complies with the relevant building standards and identifies any defects or non-compliance issues.
This report is specifically required for properties where the owner was directly involved in the building process, either by managing the project themselves or by physically carrying out construction work. The requirement exists to protect future buyers from purchasing a property that may have been built without the same level of oversight that a licensed builder would provide.
## Who Needs a Section 137B Inspection Report?
Not every property sale in Geelong triggers this requirement. The mandate applies to a specific set of circumstances.
## What the Report Covers
The Section 137B inspection report is a thorough assessment. Here is what you can expect to find in the document.
## How to Get a Section 137B Inspection in Geelong
The process of obtaining a Section 137B inspection report follows a clear sequence.
## Costs of Section 137B Inspections in Geelong
The cost of a Section 137B inspection in Geelong varies depending on several factors.
## Benefits Beyond Compliance
The Section 137B inspection report serves purposes well beyond meeting a legal obligation.
## Handling Defects Found During the Inspection
It is common for Section 137B inspections to identify defects, ranging from minor cosmetic issues to more significant structural concerns.
## Achieving Full Compliance
To fully comply with Section 137B, sellers must provide the buyer with two documents at the point of sale:
Without both documents, the transaction is not compliant with the Building Act 1993 (VIC). Schedule the inspection well ahead of your planned sale date to allow time for any necessary rectification work.
### Victorian Building Authority (VBA): An Essential Guide
Source: https://ownerinspections.com.au/articles/victorian-building-authority-vba-an-essential-guide
Published: 2023-08-25 | Updated: 2026-03-06 | Category: Building Inspections
Author: Maison Azdari
The Victorian Building Authority (VBA) is the statutory authority responsible for regulating the building, plumbing, and demolition industries in Victoria. Established on 1 July 2013 under the Building Act 1993, the VBA replaced the former Building Commission and was created to strengthen the regulation of building practitioners and improve consumer protection across the state.
Here is the key update for 2026. The VBA has been rolled into Victoria’s new Building and Plumbing Commission (BPC), which became the integrated regulator on 1 July 2025. The BPC now brings together regulation, dispute resolution, and domestic building insurance functions in one place.
For homeowners, builders, and anyone involved in the construction industry in Victoria, understanding the VBA's role, functions, and services is essential. The authority touches almost every aspect of building activity in the state, from the registration of practitioners to the investigation of complaints and the enforcement of building standards.
> The VBA exists to protect Victorians by ensuring that building and plumbing work is carried out safely, competently, and in accordance with the law. Its regulatory framework aims to prevent building defects, protect consumers, and maintain public confidence in the building industry.
## What is Victorian Building Authority (VBA) and What Do They Do?
The Victorian Building Authority (VBA) was Victoria’s building and plumbing regulator for many years. It handled core functions such as practitioner registration, compliance activity, and enforcement in the building system. The current Owner Inspections article correctly notes the VBA’s historical role and 2013 establishment, but it now needs a 2026 update to reflect the new regulator.
In practical terms, when people still say “VBA”, they usually mean one of these tasks:
- Checking if a builder or plumber is registered
- Understanding complaints and disciplinary action
- Finding dispute resolution options
- Checking domestic building insurance information
- Looking for building and plumbing guidance
Those functions still exist, but they are now delivered through the BPC and related Victoria government consumer/building portals.
## What Does the Building and Plumbing Commission (BPC) Do Now?
The [BPC is Victoria’s new regulator](https://www.planning.vic.gov.au/guides-and-resources/building-policy/building-reform) for building and plumbing. It combines the functions of the VBA, DBDRV and the domestic building insurance function of the VMIA.
According to the BPC, they:
- Registers and licenses builders and plumbers
- Inspects and audits building and plumbing work
- Provides free dispute resolution services
- Manages and audits domestic building insurance for residential work over $16,000
- Enforces compliance through rectification orders, disciplinary action and prosecutions where required.
## Establishment and Legislative Framework of VBA and BPC
The legal framework behind Victoria’s building regulator can be confusing because both VBA and BPC appear in current materials. In 2026, the public-facing regulator is the Building and Plumbing Commission (BPC), while Victorian legislation and older documents may still refer to the Victorian Building Authority (VBA) or simply the Authority.
### How the VBA was established
The Victorian Building Authority (VBA) was established through the Building and Planning Legislation Amendment (Governance and Other Matters) Act 2013.
This reform amended the Building Act 1993 and introduced the legislative structure for the VBA, including:
- The establishment of the Authority
- Governance arrangements
- Board provisions
- Financial and administrative provisions linked to the regulator
The reform took effect on 1 July 2013, which is the key commencement date used in many legal and industry references.
### VBA’s place in the Building Act 1993
The VBA’s legal foundation sits within the Building Act 1993, especially the provisions in Part 12 dealing with the regulator and its governance.
This matters because:
- Legislation may still use the statutory name Victorian Building Authority
- Legal provisions often refer to the Authority
- Tribunal matters, historical documents, and older compliance records may continue to use VBA terminology
For owners, buyers, and practitioners, this means the use of “VBA” in legislation does not necessarily mean the information is out of date. It often reflects the legal wording used in the Act.
### Transitional arrangements when VBA replaced earlier bodies
When the VBA was created, it took over functions from earlier regulatory bodies, including the Building Commission and the Plumbing Industry Commission.
Transitional and savings provisions were used to manage the change so that:
- Ongoing matters could continue without restarting processes
- Existing records, rights, and obligations could be transferred
- References in documents to the earlier bodies could be treated as references to the VBA where required
This type of transition is common in government reform and helps maintain legal continuity.
### How the BPC was established
The Building and Plumbing Commission (BPC) was introduced as part of Victoria’s building reform programme under the Building Legislation Amendment (Buyer Protections) Act 2025.
The BPC commenced as the integrated regulator on 1 July 2025.
The reform brought together key functions that had previously sat across multiple entities, including:
- Building and plumbing regulation (previously associated with the VBA)
- Domestic building dispute resolution functions
- Domestic building insurance functions that had been managed through the VMIA framework
This created a more integrated regulatory model for consumers and industry participants.
## Why Legislation May Still Refer to VBA While the Public Uses BPC
A common source of confusion is that the legal and operational names do not always appear the same way in every source.
In practice:
- **BPC** is the current public-facing name used for services, consumer guidance, and regulator communications
- **VBA** may still appear in legislation, transitional provisions, and formal legal references
- Some official materials and website notices identify the regulator as the Victorian Building Authority trading as the Building and Plumbing Commission
This means both names can appear in valid and current sources, depending on the context.
### The legislative framework in 2026
The main legal framework for building regulation in Victoria still centres on the Building Act 1993 and related regulations.
Key instruments include:
- Building Act 1993
- Building Regulations 2018
- Plumbing Regulations 2018
These laws work with the National Construction Code and related standards to set the rules for:
- Permits
- Compliance
- Practitioner obligations
- Inspections and enforcement
- Building and plumbing work standards in Victoria
In 2026, the BPC manages the regulator role within this framework, including registration, compliance, dispute resolution, and domestic building insurance administration.
### What this means for owners, buyers, and renovators
For everyday users, the most important point is to read the source in context.
You may see:
- VBA in legislation, legal documents, or historical references
- BPC on current government service pages, complaint pathways, practitioner searches, and consumer guidance
Both names can relate to the same regulatory system, but the BPC is the name most people will use when accessing current services in Victoria.
### VBA and BPC at a Glance
| Topic | VBA | BPC |
| --- | ----- | ----- |
| Full name | Victorian Building Authority | Building and Plumbing Commission |
| Establishment pathway | Created by 2013 legislative amendments | Introduced under 2025 buyer protection reforms |
| Key commencement date | 1 July 2013 | 1 July 2025 |
| Main role | Building and plumbing regulator under the Building Act framework | Integrated regulator for building, plumbing, dispute resolution and domestic building insurance functions |
| How it appears in 2026 | Common legal and legacy reference | Current public-facing regulator name |
## How to Check a Registered Builder in Victoria?
Consumer Affairs Victoria now tells consumers to use the BPC’s Practitioner Search to check if a builder is registered, and also points users to the disciplinary register when deciding who to engage.
### Step by step: check a builder before signing
**1. Use the BPC Practitioner Search**: Search the builder’s name and confirm they are currently registered.
**2. Match the legal name and business details**: Make sure the name on the quote/contract matches the registered practitioner or entity details.
**3. Check registration class and scope**: Confirm they are registered for the type of domestic building work you need.
**4. Check disciplinary history**: Consumer Affairs Victoria specifically notes that the disciplinary register may help when choosing a builder.
**5. Check domestic building insurance (DBI) position where relevant**: For insurable domestic work, use BPC’s builder and policy check tools. BPC provides a builder search and policy verification pathway.
**6. Keep copies before you pay a deposit**: Save screenshots, quotes, registration results and insurance documents in one folder.
## Who Handles What in Victoria Now? (BPC, DBDRV, VCAT, CAV)
| Need help with | Best place to start | What they do |
| ---- | ---- | ----- |
| Check if a builder is registered | BPC Practitioner Search | Verify registration status and help assess who to engage |
| Disciplinary history | Disciplinary history | See disciplinary information that may affect your decision |
| Domestic building dispute (owner and builder) | BPC dispute resolution / DBDRV pathway | Free dispute resolution and conciliation process for eligible domestic building disputes |
| Tribunal orders, compensation, hearings | VCAT | Hears building disputes and reviews certain decisions; many domestic matters require DBDRV first |
| General consumer guidance | Consumer Affairs Victoria | Consumer rights, checklists, building and renovating guidance |
## Core Functions of the VBA
The VBA performs a range of functions that collectively ensure the building and plumbing industries in Victoria operate to the required standards.
### Registrations and Licensing
One of the VBA's primary functions is the registration and licensing of building practitioners across Victoria. This includes:
Registration with the VBA confirms that the practitioner has met the required qualifications, experience, and insurance standards. It also subjects them to ongoing regulatory oversight.
### Certificates and Approvals
The VBA oversees the building permit and certificate system in Victoria. This includes:
### Technical Advice and Guidance
The VBA provides technical guidance to the building industry and the public on a range of building and plumbing matters. This includes practice notes, technical bulletins, and guidelines that assist practitioners and consumers in understanding their obligations under the Building Act and the National Construction Code.
### Inspections and Audits
The VBA conducts inspections and audits of building work and practitioner conduct. These include:
## Risk-Based Inspection Strategy
The VBA employs a risk-based approach to its inspection and audit activities. Rather than attempting to inspect every building project in Victoria, the VBA focuses its resources on areas where the risk of non-compliance and consumer harm is greatest.
This risk-based strategy considers factors such as:
## Dispute Resolution and Consumer Protection
When things go wrong with building work in Victoria, there are several pathways for consumers to seek resolution. The VBA plays a role in some of these pathways, while others involve external bodies.
### VBA Complaint Process
Consumers can lodge complaints with the VBA about registered practitioners who have carried out building or plumbing work that is alleged to be defective, non-compliant, or in breach of their professional obligations. The VBA investigates complaints and can take disciplinary action against practitioners, including issuing warnings, imposing conditions on registration, suspending registration, or cancelling registration.
### VCAT (Victorian Civil and Administrative Tribunal)
For disputes between homeowners and builders that involve financial claims for defective work, incomplete work, or breach of contract, the Victorian Civil and Administrative Tribunal (VCAT) is the primary forum. VCAT can hear domestic building disputes and make binding orders including compensation, rectification orders, and costs.
### Consumer Affairs Victoria (CAV)
Consumer Affairs Victoria provides general consumer protection services and can assist with complaints about unfair business practices, misleading conduct, and breaches of consumer law. CAV may also assist in mediating disputes between consumers and builders where the matter does not require tribunal proceedings.
### Domestic Building Dispute Resolution Victoria (DBDRV)
Before a domestic building dispute can be lodged at VCAT, the parties are generally required to attempt resolution through the Domestic Building Dispute Resolution Victoria (DBDRV). This is a free government service that provides conciliation for domestic building disputes.
## How to Engage with the VBA
The VBA offers several services and resources that homeowners, builders, and the general public can access.
### Registration Verification
Before engaging any building practitioner, you can verify their registration status through the VBA's online practitioner register. This tool allows you to confirm that a builder, building surveyor, plumber, or other practitioner is currently registered and in good standing.
### Lodging a Complaint
If you believe a registered practitioner has carried out defective or non-compliant work, you can lodge a complaint with the VBA through their online complaint form or by contacting them directly. The VBA will assess the complaint and determine whether an investigation is warranted.
### Accessing Technical Guidance
The VBA publishes a range of technical resources including practice notes, guides, and fact sheets that are available on their website. These resources cover topics such as building permit requirements, waterproofing standards, energy efficiency compliance, and building surveyor obligations.
### Public Enquiries
The VBA's public enquiries team can assist with general questions about building regulation, practitioner registration, building permits, and the complaints process. They can be contacted by phone or through the VBA website.
### Interactive Online Tools
The VBA provides several interactive tools on its website, including:
## Why Use VBA Licensed Professionals
Engaging VBA-registered professionals for your building project provides several important protections:
Using unregistered or unlicensed practitioners for building work is not only risky but may also be illegal under Victorian law. Work carried out by unregistered practitioners is not covered by statutory warranties and may not be covered by insurance if defects arise.
Contact{" "}
Owner Inspections
{" "}
for independent, licensed building inspections across Victoria. Our team
delivers detailed reports to protect your property investment.
}
buttonText="Get a Free Quote"
buttonHref="/contact"
variant="primary"
/>
### Termite Inspections: Expectations and Preparations
Source: https://ownerinspections.com.au/articles/termite-inspections-expectations-and-preparations
Published: 2023-08-24 | Category: Pest Inspections
Author: Maison Azdari
Termite damage can be catastrophic for residential and commercial properties alike. These
difficult to detect pests operate silently within your walls, floors, and structural
timbers, often causing extensive damage before any visible signs appear. For Australian
property owners, understanding what to expect from a [termite inspection](/timber-pest-inspections) and how to prepare
for one is essential knowledge.
Professional termite inspections are your first line of defence against these destructive
pests. A thorough inspection conducted by a licensed timber pest inspector can identify
active infestations, evidence of previous termite activity, and conditions that make your
property vulnerable to future attacks. With termites causing an estimated $1.5 billion in
damage to Australian properties annually, the importance of regular professional evaluations
cannot be overstated.
This comprehensive guide will walk you through the warning signs of termite presence, the
inspection process itself, how to prepare your property for inspection, and what to expect
from your inspection report. Whether you are a homeowner scheduling your annual inspection
or a property buyer conducting due diligence, this information will help you get the most
value from your termite inspection.
> Termites never sleep. A single colony can contain hundreds of thousands of individuals
> working around the clock to consume the timber in your home. Early detection through
> professional inspection is your best protection against significant structural damage.
## Signs of Termite Presence
Before scheduling a professional inspection, many property owners first notice potential
warning signs that suggest termite activity. Recognising these indicators can help you act
quickly to minimise damage. While some signs are obvious, others require a trained eye to
identify. Here are seven key indicators that termites may be present in your property.
### 1. Mud Tubes on Walls and Foundations
Subterranean termites, the most common and destructive species in Australia, build
protective tunnels known as mud tubes or shelter tubes. These pencil sized tubes are
constructed from soil, termite saliva, and faecal matter, providing a humid, protected
pathway between the termite colony in the ground and their food source in your home.
Mud tubes are typically found on external and internal walls, along foundation edges, inside
subfloor areas, and running up pier stumps. They may also appear inside wall cavities,
behind stored items in garages, and along plumbing penetrations. The tubes are usually brown
or dark in colour and roughly the diameter of a pencil, though they can be thicker where
multiple tubes have merged.
If you discover mud tubes on your property, it is important not to disturb them until a
professional inspector has examined them. Breaking the tubes can cause termites to abandon
that pathway and establish new entry points elsewhere in your home, making detection and
treatment more difficult.
### 2. Frass: Termite Droppings
Drywood termites, less common in Australia but found in some coastal and tropical regions,
produce distinctive droppings called frass. Unlike subterranean termites that use their
waste in mud tube construction, drywood termites push their faecal pellets out of small
holes in the timber they infest.
Frass appears as small, wood coloured pellets with ridged surfaces. The pellets are
typically about one millimetre in length and have six concave sides. They often accumulate
in small piles below the infestation site, resembling sawdust or fine sand. However, frass
can be distinguished from sawdust by its uniform, pellet like shape.
Finding frass near wooden structures, on window sills, or in corners of rooms may indicate
an active drywood termite infestation. Because drywood termites do not require contact with
the soil, they can infest timber throughout your home, including roof timbers, furniture,
and structural framing.
### 3. Hollowed or Damaged Wood
Termites consume timber from the inside out, leaving a thin veneer of paint or wood on the
surface while hollowing out the interior. This means that timber may appear intact from the
outside while being severely compromised internally.
You can check for hollow timber by tapping on suspect areas with a screwdriver handle or
similar object. Sound timber produces a solid, resonant sound, while termite damaged timber
sounds hollow or papery. In advanced infestations, pressing on the timber surface may cause
it to collapse inward, revealing the galleries and chambers created by termite activity.
Common areas to check include door frames, skirting boards, architraves, window frames, and
exposed structural timbers. Damage often appears as a maze like pattern of tunnels running
parallel to the wood grain, sometimes with traces of mud or faecal material lining the
galleries.
### 4. Swarmers or Discarded Wings
Reproductive termites, known as alates or swarmers, leave established colonies to mate and
start new colonies. This typically occurs during warm, humid weather, often in spring or
after rainfall. Swarmers have dark bodies and two pairs of equal length wings.
After landing and finding a suitable nesting site, swarmers shed their wings. Finding
discarded wings on window sills, near light fittings, along doorways, or on floors may
indicate that termites are establishing a new colony in or near your property.
It is important to distinguish termite swarmers from flying ants, which also swarm during
similar periods. Termites have straight antennae, a thick waist, and wings of equal length.
Flying ants have elbowed antennae, a narrow waist, and front wings longer than rear wings.
If you observe swarming insects and are unsure of the species, collect some specimens for
professional identification.
### 5. Clicking Sounds in Walls
Soldier termites produce audible clicking or tapping sounds by banging their heads against
tunnel walls to signal danger to the colony. Worker termites can also create noise while
eating, producing a quiet munching sound that may be audible in severe infestations.
These sounds are often most noticeable at night when background noise is minimal. If you
hear unexplained clicking or rustling sounds coming from your walls, ceiling, or floor
areas, it warrants investigation by a professional inspector.
While clicking sounds can indicate termite presence, they may also be caused by other
factors such as thermal expansion of building materials or other pests. A trained inspector
can determine the source of unusual sounds and whether termite activity is responsible.
### 6. Sticking Doors and Windows
As termites consume timber door frames and window frames, they produce moisture as a
byproduct of digestion. This moisture can cause the surrounding timber to warp and swell,
making doors and windows difficult to open or close properly.
While sticking doors and windows can have many causes, including seasonal humidity changes
and house settling, sudden onset of these problems, particularly when accompanied by other
warning signs, may indicate termite activity. This is especially true if the sticking is
localised to specific doors or windows rather than occurring throughout the property.
Inspect the frames of sticking doors and windows for other signs of termite damage,
including hollow sounding timber, visible mud tubes, or bubbling paint. If you notice
multiple warning signs in the same area, professional inspection is strongly recommended.
### 7. White Ant Sightings
The term white ants is a common misnomer for termites in Australia. Despite the name,
termites are not ants at all but are more closely related to cockroaches. However, they do
share some visual similarities with ants, leading to confusion.
Worker termites, which make up the majority of a colony, are pale cream or white in colour
with soft bodies. They are rarely seen unless their tunnels or workings are disturbed. If
you see white ant like insects in or around your home, they are almost certainly termites,
and you should arrange a professional inspection immediately.
Termites may be exposed when disturbing stored items, moving timber, gardening near the
house, or during renovation work. If termites are discovered, avoid disturbing them further
and contact a licensed pest inspector as soon as possible.
## Quick Reference: Warning Signs of Termite Activity
The following table summarises the key warning signs of termite presence and where they are
most commonly found.
| Warning Sign | Description | Common Locations | Urgency Level |
| ------------------- | ---------------------------------------------------- | ------------------------------------------ | ---------------- |
| Mud tubes | Pencil sized tunnels made of soil and termite matter | Foundations, walls, subfloor, pier stumps | High |
| Frass | Wood coloured, ridged pellets from drywood termites | Window sills, floor corners, below timber | High |
| Hollowed wood | Timber sounds hollow when tapped, may collapse | Door frames, skirting, window frames | High |
| Swarmers or wings | Flying termites or discarded wings after swarming | Window sills, light fittings, entry points | Moderate to High |
| Clicking sounds | Soldier termites signalling threats to colony | Inside walls, ceilings, floors | Moderate |
| Sticking doors | Moisture from termite activity causes warping | Door frames, window frames throughout | Low to Moderate |
| White ant sightings | Pale cream termites exposed during disturbance | Garden, stored timber, renovation areas | High |
## The Termite Inspection Process
Understanding what happens during a professional termite inspection helps you know what to
expect and ensures you get maximum value from the service. A thorough inspection follows a
systematic process designed to examine all accessible areas of your property for evidence of
termite activity and conditions conducive to infestation.
### Introduction and Credentials Verification
A professional termite inspection should begin with the inspector introducing themselves and
presenting their credentials. In Australia, pest inspectors must hold appropriate licences
issued by their state or territory regulatory authority. These licences ensure the inspector
has completed required training and maintains professional standards.
The inspector should provide details of their licence number, insurance coverage, and the
inspection standards they follow. In Australia, termite inspections should comply with
Australian Standard AS 4349.3 for timber pest inspections. Do not hesitate to ask for
verification of these credentials before the inspection begins.
This initial meeting is also an opportunity to discuss any specific concerns you have about
the property, provide relevant documentation, and understand the scope of the inspection
including any limitations.
### Preliminary Questions About Property History
Before beginning the physical inspection, the inspector will typically ask questions about
the property to gather relevant background information. This helps focus the inspection and
identify potential risk areas. Common questions include:
- How long have you owned or occupied the property?
- Are you aware of any previous termite activity or treatment?
- Have you noticed any warning signs such as those described above?
- Has the property had any water leaks, flooding, or drainage issues?
- When was the property built and what construction method was used?
- Is there an existing termite management system in place?
- Have any renovations or extensions been completed?
- Are there any areas of the property that are currently inaccessible?
Providing accurate and detailed responses to these questions helps the inspector conduct a
more thorough and targeted assessment.
### Visual Examination: Interior
The interior inspection involves a systematic examination of all accessible areas inside the
property. The inspector will work through each room methodically, examining potential
termite entry points and vulnerable areas.
Interior areas examined typically include:
- All visible timber elements including skirting boards, architraves, and door frames
- Built in cupboards, wardrobes, and storage areas
- Wet areas including bathrooms, laundry, and kitchen
- Subfloor access points and the subfloor area itself where accessible
- Roof void and ceiling spaces
- Garage areas and internal walls adjoining the garage
- Any areas where plumbing or electrical services penetrate walls or floors
The inspector will look for visible evidence of termite activity, moisture issues that could
attract termites, and conditions that may facilitate termite entry or concealment.
### Visual Examination: Exterior
The external inspection examines the property perimeter and surrounding areas where termites
may gain access to the structure. This includes areas immediately adjacent to the building
and features of the property that may harbour termites or provide pathways to the home.
External areas examined typically include:
- Foundation walls and building perimeter
- External cladding, weep holes, and ventilation points
- Attached structures such as decks, verandahs, and pergolas
- Fences, retaining walls, and garden edging
- Trees, stumps, and landscaping within close proximity
- Stored timber, firewood, and debris near the building
- Garden beds, mulch areas, and irrigation systems
- Outbuildings, sheds, and carports
The inspector will assess how well the property's physical barriers are maintained and
identify any conditions that increase termite risk.
### Tool Based Assessment
Professional termite inspectors use a range of specialised tools and equipment to detect
termite activity that cannot be identified through visual examination alone. These tools
enhance the thoroughness and accuracy of the inspection.
Common inspection tools include:
- **Moisture meters:** Electronic devices that detect elevated moisture levels in building materials. High moisture can indicate termite activity, water leaks, or conditions favourable to termites.
- **Probing rods and sounding tools:** Used to tap timber surfaces and probe suspect areas to detect hollow or damaged timber. Probing can reveal concealed termite damage below the surface.
- **Thermal imaging cameras:** Detect temperature variations that may indicate termite presence behind walls and in concealed areas. Termite activity can create subtle heat signatures due to their metabolic processes.
- **Termatrac or radar devices:** Specialised radar equipment that can detect termite movement through walls without the need for invasive drilling. These devices can confirm active infestations in suspected areas.
- **Borescopes:** Flexible cameras that allow visual inspection inside wall cavities, ceiling spaces, and other concealed areas through small access holes.
- **Torches and ladders:** Essential for examining dark spaces, subfloor areas, roof voids, and elevated areas of the property.
### Documentation and Photography
Throughout the inspection, the inspector will document their findings through written notes
and photographs. This documentation forms the basis of the written report and provides a
permanent record of the property's condition at the time of inspection.
Photographs are particularly important for documenting evidence of termite activity, areas
of concern, and conditions conducive to infestation. They also serve as baseline images that
can be compared during future inspections to track changes over time.
The inspector may also sketch diagrams showing the location of findings, the areas
inspected, and any areas that could not be accessed due to obstructions or safety concerns.
### Verbal Summary
Upon completing the physical inspection, the inspector will typically provide a verbal
summary of their findings. This discussion gives you immediate insight into any concerns
identified and allows you to ask questions before the formal written report is prepared.
The verbal summary may cover whether any active termite activity was detected, evidence of
previous termite damage, conditions that increase your property's termite risk, and
preliminary recommendations for treatment or preventive measures.
### Written Report
The final and most important deliverable from a termite inspection is the written report.
This document provides a permanent record of the inspection findings and typically includes:
- Details of the inspector and their qualifications
- Property identification and inspection date
- Description of areas inspected and any areas not inspected
- Findings regarding active termite infestation
- Evidence of previous termite activity or damage
- Conditions conducive to termite attack
- Risk assessment and vulnerability rating
- Recommendations for treatment, monitoring, or further investigation
- Photographs and diagrams supporting the findings
- Limitations and exclusions of the inspection
The report should comply with Australian Standard AS 4349.3 and be provided within the
timeframe agreed at the time of booking, typically within 24 to 48 hours of the inspection.
## Preparation Steps for a Termite Inspection
Proper preparation for a termite inspection ensures the inspector can access all necessary
areas and conduct a thorough assessment. Taking time to prepare your property will result in
a more comprehensive inspection and more valuable report.
### Clear Indoor Clutter
Remove or relocate items that are blocking access to walls, skirting boards, and built in
cupboards. The inspector needs clear sightlines along walls and the ability to approach all
internal timber elements for examination.
Focus on clearing:
- Items stored against walls in garages, storage rooms, and laundries
- Contents of built in wardrobes and cupboards, particularly floor level items
- Furniture positioned tightly against walls
- Boxes and stored items in subfloor access areas
- Items blocking access to the roof void entry point
- Clutter in bathroom and kitchen cabinets that prevents inspection of plumbing
While it is not necessary to empty every cupboard, creating clear pathways and access to key
inspection points significantly improves the quality of the assessment.
### Remove Outdoor Debris
Clear debris and stored materials from around the building perimeter and foundations. This
includes items that may be concealing termite entry points or creating conditions favourable
to termites.
Areas to address include:
- Firewood stacks stored against walls or near the building
- Stored timber, pallets, and building materials
- Garden waste, leaf litter, and debris along foundations
- Dense vegetation growing against external walls
- Items stored under decks and verandahs
- Old timber sleepers, stakes, and garden edging
Creating clear access around the building perimeter allows the inspector to examine
foundation walls, weep holes, and potential termite entry points without obstruction.
### Provide Relevant Documentation
Gather and provide any documentation that may assist the inspector in understanding your
property's history and current termite management arrangements.
Helpful documents include:
- Previous termite inspection reports
- Records of past termite treatments or barrier installations
- Floor plans and building plans if available
- Maintenance records relating to plumbing or moisture issues
- Building inspection reports from the time of purchase
- Warranty documents for existing termite management systems
This information helps the inspector understand the property's termite history and ensure
any existing management systems are functioning as intended.
### Remain Present During Inspection
While not always required, being present during the inspection offers several advantages.
You can direct the inspector to specific areas of concern, answer questions about the
property's history, learn about your property's termite risks firsthand, and receive the
verbal summary immediately upon completion.
If you cannot be present, arrange for another responsible adult to be at the property to
provide access and receive information. Ensure the inspector has your contact details in
case questions arise during the inspection.
### Unlock All Areas
Ensure the inspector has access to all areas of the property, including those that are
normally locked or restricted. Areas that require unlocking typically include:
- Subfloor access hatches and crawl space entries
- Roof void access panels, often located in cupboards or hallways
- Garages, carports, and storage sheds
- Basement areas if present
- Locked rooms, home offices, and private areas
- Gates providing access to side passages and rear yards
- Meter boxes and utility enclosures
Any area that cannot be accessed will be noted as a limitation in the inspection report.
Unlocking all areas allows for the most comprehensive assessment possible.
## Inspection Preparation Checklist
Use the following checklist to ensure your property is properly prepared for a termite
inspection.
| Category | Preparation Task | Why It Matters |
| --------------------------------------------- | ------------------------------------------------------ | ------------------------------------------------------- |
| Interior Access | Clear items away from walls and skirting boards | Allows visual inspection and probing of timber elements |
| Clear floor of built in cupboards | Cupboards often conceal termite entry points |
| Move stored items from garage walls | Garages are high risk areas for termite entry |
| Clear access to subfloor entry point | Subfloor inspection is critical for detecting activity |
| Exterior Access | Remove items stored against external walls | Reveals foundation and potential mud tubes |
| Move firewood away from building | Firewood can harbour termites and conceal entry |
| Clear debris from foundation perimeter | Allows examination of slab edge and weep holes |
| Trim vegetation against walls | Dense plants can conceal termite activity |
| Locked Areas | Unlock gates to side passages and rear yard | Provides access to full building perimeter |
| Unlock sheds, carports, and outbuildings | These structures may have or attract termites |
| Ensure roof void access is clear and unlocked | Roof timbers are common termite targets |
| Documentation | Gather previous inspection and treatment records | Provides important property history context |
| Have floor plans available if possible | Helps inspector understand building layout |
| Personal | Plan to be present during inspection | Receive immediate feedback and ask questions |
| Secure pets away from inspection areas | Ensures safe access for inspector and pets |
## Specialised Inspection Types
Depending on your property type, location, and specific concerns, your inspector may employ
specialised inspection techniques beyond the standard visual assessment. These techniques
enhance detection capabilities and provide more detailed information about your property's
termite risk profile.
### Subterranean Termite Inspection
Subterranean termites are the most destructive termite species in Australia, responsible for
the vast majority of termite damage to buildings. These termites nest in the soil and travel
to timber food sources through underground tunnels or above ground shelter tubes.
A focused subterranean termite inspection involves thorough examination of the subfloor area
where accessible, detailed assessment of all soil to structure contact points, inspection of
foundation walls, pier stumps, and bearers, checking for breaches in physical termite
barriers, assessment of drainage and moisture conditions around the property, and
examination of gardens, trees, and potential nest sites near the building.
Properties with timber subfloors, those built on sloping sites, and homes in high termite
risk zones may benefit from additional focus on subterranean termite detection.
### Thermal Imaging Inspection
Thermal imaging uses infrared cameras to detect temperature variations in building materials
that may indicate concealed termite activity. Active termite infestations can create subtle
heat patterns due to the metabolic activity of the colony and moisture associated with their
workings.
Thermal imaging is particularly valuable for examining wall cavities without the need for
invasive access, detecting moisture issues that may attract or indicate termites,
identifying areas warranting further investigation with other tools, and scanning large
areas quickly to identify hot spots.
While thermal imaging cannot definitively confirm termite presence, it is an excellent
screening tool that can reveal anomalies requiring closer examination. Results are most
effective when interpreted by a trained operator familiar with building construction.
### Moisture Detection
Moisture detection is a critical component of termite inspection because termites require
moisture to survive and are attracted to damp conditions. Elevated moisture levels in
building materials may indicate water leaks or building defects, conditions favourable to
termite attack, actual termite activity as termites bring moisture into infested timbers, or
wood decay fungi which can also damage timber.
Professional moisture meters can detect moisture content in timber and other building
materials without causing damage. The inspector will check areas prone to moisture issues
including bathrooms, kitchens, laundries, subfloor areas, and locations where plumbing runs
through walls or floors.
Identifying and addressing moisture issues is an important part of termite prevention, as
reducing moisture makes your property less attractive to these pests.
### Radar Detection Technology
Advanced radar devices such as Termatrac can detect termite movement through walls and other
building elements without the need for invasive drilling or probing. The device emits radar
signals that detect the subtle vibrations caused by termite movement.
Radar detection is useful for confirming active termite presence in suspected areas,
determining the extent of an infestation before treatment, monitoring treatment
effectiveness over time, and providing evidence of activity that may not be visible.
This technology is particularly valuable when thermal imaging or moisture readings suggest
possible termite activity but visual confirmation is not possible without damaging building
materials.
### Borescope Examination
Borescopes are flexible cameras on thin cables that can be inserted through small holes to
visually examine concealed spaces. They are valuable for seeing inside wall cavities where
termite activity is suspected, examining inaccessible roof void and subfloor areas, checking
inside hollow core doors and built in furniture, and documenting conditions in spaces too
small for physical access.
Borescope examination may require drilling small access holes in walls or ceilings. The
inspector will discuss this with you if invasive examination is recommended and obtain your
permission before creating any openings.
## Understanding Your Inspection Report
The inspection report is the formal documentation of your termite inspection and serves as
an important reference document for your property. Understanding how to read and interpret
the report ensures you can act on its findings appropriately.
### Key Findings Section
The findings section describes what the inspector observed during the assessment. This
typically includes whether active termite infestation was detected and if so, where and to
what extent, evidence of previous termite damage or activity even if no longer active,
presence of other timber pests such as borers or wood decay fungi, and conditions observed
that may increase termite risk.
Pay close attention to any findings of active termite activity, as this requires immediate
attention. Previous damage may indicate the need for repair assessment, while conducive
conditions should be addressed to reduce future risk.
### Vulnerability Assessment
Many reports include an assessment of your property's overall vulnerability to termite
attack. This considers factors such as construction type and materials used, age and
condition of the building, geographic location and local termite pressure, presence and
condition of termite management systems, landscaping and environmental factors, and moisture
conditions and drainage.
The vulnerability assessment helps you understand your property's risk profile and make
informed decisions about prevention and monitoring strategies.
### Treatment Recommendations
If active termites are found or significant risk factors identified, the report will include
recommendations for treatment or preventive measures. Common recommendations include
immediate treatment for active infestations using appropriate methods, installation of a
termite management system such as chemical barriers or monitoring stations, repairs to
address conditions conducive to termite attack, ongoing monitoring through regular
inspections, and referral to specialists for further assessment if required.
The inspector should explain the rationale for their recommendations and may provide
multiple options with different cost and protection levels.
### Limitations and Exclusions
Every inspection report includes a section detailing limitations. These acknowledge that no
inspection can provide absolute certainty about the presence or absence of termites. Common
limitations include areas that could not be accessed due to stored items or obstructions,
concealed areas within walls, floors, and ceilings that cannot be seen without invasive
investigation, areas inaccessible due to safety concerns, and seasonal factors that may
affect termite activity levels.
Understanding the limitations helps you interpret the report's findings appropriately and
identifies areas where additional inspection may be beneficial.
## Frequently Asked Questions
###
How often should I get a termite inspection?
**Short answer:** Annual inspections are recommended as a minimum for most
Australian properties, with more frequent inspections for high risk properties.
The Australian Standard AS 3660.2 recommends annual termite inspections for most
residential properties. However, properties in high risk termite areas, those with
previous termite history, older homes with timber subfloors, or properties in tropical
and subtropical climates may benefit from inspections every six months. Additionally,
you should arrange an immediate inspection if you notice any warning signs of termite
activity or if neighbouring properties report termite problems. Regular inspections are
particularly important given that standard home insurance does not cover termite damage.
###
How much does a termite inspection cost in Australia?
**Short answer:** Termite inspection costs in Australia typically start at
around $250 to $500 for a standard residential property.
The cost varies depending on the size of your property, its location, the extent of
accessible areas, and whether advanced technology such as thermal imaging is included.
Larger properties, multi-storey homes, and properties with complex construction may cost
more. [Combined building and pest](/building-and-pest-inspections) inspection packages are often available for $450 to
$700 and provide better value than booking separately. When comparing quotes, ensure you
understand what is included and whether the inspection meets Australian Standard AS
4349.3. The cost of an inspection is minimal compared to potential repair costs of
$10,000 to $100,000 or more for significant termite damage.
### How long does a termite inspection take?
**Short answer:** A thorough termite inspection typically takes between one
to two hours for an average sized home.
The duration depends on the size of your property, the number of buildings and
outbuildings, accessibility of subfloor and roof void areas, and whether any termite
activity is detected that requires additional investigation. Smaller apartments may take
45 minutes to an hour, while large homes or properties with multiple structures may take
two to three hours. Be wary of inspections completed in less than an hour for a standard
home, as this may indicate a rushed assessment. The inspector should take adequate time
to examine all accessible areas thoroughly and document their findings properly.
###
Do I need to be present during the inspection?
**Short answer:** While not always required, being present during the
inspection is recommended so you can receive immediate feedback and ask questions.
Being present allows you to direct the inspector to specific areas of concern, provide
information about the property's history, observe the inspection process, and receive a
verbal summary of findings immediately upon completion. If you cannot attend, arrange
for another responsible adult to provide access and receive information. Ensure the
inspector has your contact details in case questions arise. The written report will be
provided regardless of whether you are present, typically within 24 to 48 hours.
###
What happens if termites are found during inspection?
**Short answer:** If termites are detected, the inspector will document the
findings and recommend appropriate treatment options without disturbing the colony.
The inspector should avoid disturbing active termites as this can cause them to relocate
and make treatment more difficult. The inspection report will detail the species
identified if possible, the location and extent of activity, the estimated damage
severity, and recommended treatment approaches. Treatment options may include chemical
soil barriers, baiting systems, or a combination approach. You will need to engage a
licensed pest controller for treatment, which may be the same company or a different
provider. Get multiple quotes for treatment and ensure the provider is appropriately
licensed and insured.
###
What qualifications should a termite inspector have?
**Short answer:** Termite inspectors in Australia must hold a current pest
control licence issued by their state or territory regulatory authority.
Licensing requirements vary between states but generally require completion of
Certificate III in Urban Pest Management or equivalent qualification. Ask to see the
inspector's licence before the inspection begins. Additionally, look for inspectors who
are members of professional associations such as the Australian Environmental Pest
Managers Association (AEPMA) and verify they carry professional indemnity and public
liability insurance. Experienced inspectors with knowledge of local termite species and
building construction methods will provide more thorough and accurate assessments.
###
Can termites return after professional treatment?
**Short answer:** Yes, termites can return after treatment, which is why
ongoing monitoring and regular inspections remain essential.
No termite treatment provides permanent, guaranteed protection against future
infestations. Chemical barriers degrade over time and may be breached by construction
work or landscaping changes. Baiting systems require ongoing monitoring and maintenance.
Additionally, there may be multiple termite colonies in your area, so eliminating one
does not protect against others. For these reasons, annual inspections should continue
even after successful treatment. Most treatment warranties require ongoing inspections
to remain valid. Monitor for warning signs between inspections and report any concerns
to your pest controller promptly.
### Are DIY termite inspections effective?
**Short answer:** While homeowners can check for visible warning signs,
professional inspections are necessary for reliable detection and assessment.
Termites often cause significant damage before any visible signs appear, and much of
their activity occurs in concealed locations that are difficult to access without
professional equipment. Licensed inspectors use thermal imaging, moisture meters, and
radar devices to detect hidden infestations that cannot be identified through visual
examination alone. They also have training to identify termite species, assess damage
severity, and recommend appropriate treatment. DIY checks can supplement professional
inspections by helping you identify warning signs between annual assessments, but they
should never replace professional inspections.
## Key Takeaways
- Recognise the seven key warning signs of termite presence: mud tubes, frass, hollowed wood, swarmers or wings, clicking sounds, sticking doors, and white ant sightings.
- Professional termite inspections follow a systematic process including credentials verification, property history review, visual examination, tool based assessment, and comprehensive reporting.
- Proper preparation including clearing access to walls, removing outdoor debris, and unlocking all areas improves inspection quality and completeness.
- Specialised inspection techniques including thermal imaging, moisture detection, and radar technology enhance detection of concealed termite activity.
- Annual inspections are recommended as a minimum, with more frequent inspections for high risk properties in tropical or subtropical climates.
- Professional termite inspections in Australia typically cost from $250 to $500 and take one to two hours for an average sized home.
- Understanding your inspection report including findings, vulnerability assessment, and treatment recommendations enables informed decision making.
- Standard home insurance does not cover termite damage, making prevention and early detection through professional inspections critical for protecting your investment.
## References and Resources
- [ CSIRO (Commonwealth Scientific and Industrial Research Organisation) ](https://www.csiro.au/)
- [ Australian Environmental Pest Managers Association (AEPMA) ](https://www.aepma.com.au/)
- [ Standards Australia (AS 4349.3 and AS 3660.2) ](https://www.standards.org.au/)
- [ NSW Fair Trading ](https://www.fairtrading.nsw.gov.au/)
- [ Consumer Affairs Victoria ](https://www.consumer.vic.gov.au/)
- [ Queensland Building and Construction Commission (QBCC) ](https://www.qbcc.qld.gov.au/)
### Section 137B Inspections in Melbourne
Source: https://ownerinspections.com.au/articles/section-137b-inspections-in-melbourne
Published: 2023-08-23 | Updated: 2026-02-09 | Category: 137b Report
Author: Maison Azdari
A Section 137B inspection report is required under the Building Act 1993 (VIC) for any owner-builder selling a property in [Melbourne](/vic/building-inspections-melbourne) within 6 years and 6 months of completing the building work. The report is prepared by a Licensed Building Practitioner (LBP) and assesses whether the construction complies with applicable building standards. It documents defects, rates their severity, and provides a clear record for the buyer. If the construction cost exceeds $16,000 AUD, the owner-builder must also secure warranty insurance before selling.
Melbourne's construction industry continues to grow, and owner-built properties make up a notable share of residential construction across the city and its suburbs. Section 137B exists to protect buyers from purchasing homes that may not meet building standards, while also giving sellers a structured way to demonstrate the quality of their work. Whether you built in Craigieburn, Brunswick, Frankston, or any other Melbourne suburb, understanding this requirement is a necessary part of selling your property.
## What Is a Section 137B Inspection Report?
The Section 137B inspection report is a formal document prepared by a Licensed Building Practitioner under the Building Act 1993 (VIC). It provides a detailed assessment of an owner-built property, evaluating how the construction measures up to established building standards including the National Construction Code (NCC).
This is not a routine building inspection. It is a legal requirement tied to the sale of owner-built properties and carries specific obligations for both the seller and the inspecting practitioner.
## Who Is an Owner Builder?
An owner builder is someone who builds or renovates a residential property on their own land. Unlike commercial builders, owner builders do not construct as a business activity. The key characteristics are:
## When Is the Report Required?
The Section 137B inspection report is required when:
If you sell after the 6.5-year period, the report is no longer required. However, if the construction cost exceeded $16,000 AUD, warranty insurance remains compulsory regardless of when you sell within the warranty period.
## What the Report Includes
A comprehensive Section 137B inspection report covers the following components:
## Where Section 137B Reports Are Used
The Section 137B report serves multiple purposes in Melbourne's property market.
## How to Obtain Your Section 137B Report
## Costs of Section 137B Inspections in Melbourne
Given that every property is different, it is best to [contact us](/contact) for an exact quotation based on your specific circumstances.
## Benefits of the Section 137B Inspection
Beyond meeting the legal requirement, the Section 137B inspection offers practical benefits for sellers.
### A Closer Look at Defect Investigations in Brisbane
Source: https://ownerinspections.com.au/articles/a-closer-look-at-defect-investigations-in-brisbane
Published: 2023-08-22 | Updated: 2026-02-09 | Category: Defect Investigation
Author: Maison Azdari
A defect investigation report in [Brisbane](/qld/building-inspections-brisbane) identifies, assesses, and documents building defects in residential and commercial properties. The report covers both visible defects such as wall cracks and peeling paint, and hidden defects including foundation movement, waterproofing failures, and concealed plumbing issues. Prepared by a qualified building inspector, the report classifies each defect by severity, explains its likely cause, and recommends rectification options. In Brisbane, defect investigations are particularly relevant given the city's rapid development and the requirements of the Queensland Building and Construction Commission (QBCC).
Brisbane's property market has seen significant growth, with new developments stretching from the inner suburbs to the outer corridors. With that growth comes the reality that not every building meets the standards it should. Whether you are a homeowner dealing with cracking walls, a buyer assessing a property before purchase, or a developer addressing warranty claims, a professional defect investigation gives you the evidence needed to understand the problem and take informed action. For a complete overview, see our [guide to building defect investigations](/guides/building-defect-investigation-guide).
## What Is a Building Defect?
In property terms, a defect is any imperfection in materials, workmanship, or design that reduces a building's functionality, safety, or value. Defects can be immediately visible or hidden beneath surfaces, only becoming apparent months or years after construction.
### Common Causes of Defects
### Visible vs Hidden Defects
## Types of Building Defects
Building defects generally fall into two categories: structural and non-structural. Understanding the difference helps property owners prioritise rectification.
### Structural Defects
Structural defects affect the building's load-bearing capacity and overall stability. They typically require immediate professional attention.
### Non-Structural Defects
Non-structural defects do not directly affect the building's stability but can still cause significant inconvenience, safety risks, and financial loss if ignored.
## The Defect Investigation Process
A professional defect investigation follows a structured process to ensure thorough and accurate results.
## Why Brisbane Property Owners Need Defect Investigations
Brisbane's rapid property development brings both opportunity and risk. Defect investigations serve several purposes for property owners in the Brisbane market.
## Choosing the Right Defect Investigator
Selecting a qualified defect investigator is one of the most important decisions you can make when dealing with building defects.
## Costs of Defect Investigations in Brisbane
For an exact quotation based on your property, [contact us](/contact) directly.
### What Is Land Zoning? R2 vs R3 Zoning Explained
Source: https://ownerinspections.com.au/articles/what-is-land-zoning-r2-vs-r3-zoning
Published: 2023-08-20 | Updated: 2026-06-24 | Category: Structural Inspections
Author: Maison Azdari
Thinking about buying land or a house in NSW? Before looking at renovation ideas, duplex potential or long-term resale value, check the zoning first.
Land zoning controls how land can be used and developed. In New South Wales, zoning laws influence what type of buildings can be constructed, how many dwellings are allowed on a property, building heights, minimum lot sizes, floor space ratios, and even parking requirements.
For homeowners, zoning affects renovation plans, subdivision opportunities, and future resale value. For builders and developers, zoning determines whether land is suitable for duplexes, townhouses, apartments, or mixed use developments.
NSW councils use zoning regulations to manage population growth, housing density, infrastructure planning, environmental protection, and neighbourhood character. Without zoning laws, incompatible developments could create traffic congestion, overcrowding, drainage problems, and reduced property values.
Book a Defect
Investigation
}
buttonHref="/defect-investigation-reports"
variant="secondary"
/>
Understanding the difference between R2 and R3 zoning helps property buyers avoid costly mistakes before purchasing land.
According to the [NSW Planning Portal](https://www.planning.nsw.gov.au/plans-for-your-area/local-planning-and-zoning), zoning classifications form part of a [Local Environmental Plan (LEP)](https://legislation.nsw.gov.au/view/html/inforce/current/epi-2006-155a), which guides how land can be used within each council area.
## Quick Answer: R2 vs R3 Zoning NSW
| Question | Short answer |
| ---------------------------------------- | --------------------------------------------------------------------------------------------------------------------------------------------------------------------------------------------------------------------- |
| What is R2 zoning in NSW? | R2 zoning usually refers to low density residential land, often suited to detached houses and lower-scale residential uses. Exact permitted uses depend on the council LEP and relevant SEPPs. |
| What is R3 zoning in NSW? | R3 zoning usually refers to medium density residential land, often linked to townhouses, terraces, multi-dwelling housing and some residential flat building opportunities where permitted. |
| Is R3 always better than R2? | Not always. R3 may offer more development potential, but it can also involve more planning controls, higher construction costs and stronger site constraints. |
| Can you build a duplex on R2 zoning NSW? | Dual occupancies are permitted with consent in R2 zones across NSW under the Low and Mid-Rise Housing Policy, but site constraints and consent rules still apply. |
| Does zoning guarantee approval? | No. Zoning is only one part of the planning process. A proposal may still need development consent and must address other planning controls and constraints. |
## What is Land Zoning?
Land zoning is a planning system that divides land into categories based on how it can be used. Zoning helps councils and the NSW Government manage housing, business activity, infrastructure, open space, environmental protection and neighbourhood growth.
For homeowners, land zoning can affect whether a property may be renovated, extended, subdivided or used for a different purpose. For buyers and investors, zoning can influence resale value, development potential and the level of due diligence needed before purchase.
For builders and developers, zoning can help show whether land may suit a detached home, dual occupancy, townhouse project, apartment development, shop-top housing or another approved use. But zoning alone does not confirm that a project will be approved.
These zoning classifications determine:
- What can be built on the land
- What type of activities are permitted
- Maximum building heights
- Minimum lot sizes
- Floor space ratio requirements
- Landscaping and open space rules
- Environmental restrictions
- Development approval requirements
Land zoning protects communities by separating incompatible land uses. For example, industrial facilities are generally separated from residential neighbourhoods, while commercial zones are positioned near transport hubs and town centres.
Zoning laws also influence:
- Property investment potential
- Rental demand
- Future redevelopment opportunities
- Housing affordability
- Infrastructure planning
- Environmental conservation
In NSW, zoning regulations are managed under:
- Local Environmental Plans (LEPs)
- Development Control Plans (DCPs)
- State Environmental Planning Policies (SEPPs)
## What is Zoning in NSW and Where the Rules Come From
In NSW, zoning rules are mainly found in Local Environmental Plans. LEPs guide planning decisions for local government areas and set controls such as land use zones, building heights and other development standards. Zoning is how councils and the NSW Government control land use and built form across an area. In NSW, zoning rules are mainly set through:
- [Local Environmental Plans (LEPs)](https://www.planningportal.nsw.gov.au/local-environmental-plans) (the legal document for the council area)
- The [Standard Instrument LEP](https://legislation.nsw.gov.au/view/html/inforce/current/epi-2006-155a) framework (the common template councils generally follow)
- State planning rules like the [State Environmental Planning Policy (Housing)](https://legislation.nsw.gov.au/view/html/inforce/current/epi-2021-0714#ch.6) 2021, including the Low and Mid-Rise Housing Policy
Zoning tells you what development is:
- Permitted without consent
- Permitted with consent (a DA or CDC pathway may apply, depending on the work)
- Prohibited
Consent authorities must consider the zone objectives when assessing a DA.
## Overview of NSW Land Zoning Codes
Residential zones are only one part of the NSW planning system. A property may also be affected by commercial, industrial, environmental, recreational, rural or special purpose zoning.
### Residential Zoning Codes in NSW
| Zone type | Common purpose | Buyer note |
| ----------------------------- | -------------------------------------------------- | ------------------------------------------------------------------------------------------------ |
| R1 General Residential | General housing and related residential uses | May allow a mix of housing types, depending on the LEP. |
| R2 Low Density Residential | Lower-scale residential housing | Commonly linked with houses, dual occupancies and low density neighbourhoods. |
| R3 Medium Density Residential | Medium density residential housing | Often linked with townhouses, terraces, multi-dwelling housing and some apartment opportunities. |
| R4 High Density Residential | Higher density housing | Often linked with larger apartment-style development. |
| Business and employment zones | Shops, offices, services and business activity | Check whether residential use is allowed or restricted. |
| Industrial zones | Warehousing, manufacturing and industrial activity | Residential use is often limited or not allowed. |
| Environmental zones | Land with environmental value or constraints | Extra restrictions may apply to clearing, development and building footprint. |
Always confirm zoning on the NSW Planning Portal Spatial Viewer and through a planning certificate, because the same broad zone can operate differently across council areas.
### Commercial Zoning Codes
| Zone | Purpose |
| ----------------------- | -------------------------------------- |
| B1 Neighbourhood Centre | Small retail and local services |
| B2 Local Centre | Retail and business hubs |
| B3 Commercial Core | Offices and major business activity |
| B4 Mixed Use | Residential and commercial integration |
### Industrial Zoning Codes
| Zone | Purpose |
| ---------------------- | ------------------------------- |
| IN1 General Industrial | Warehousing and manufacturing |
| IN2 Light Industrial | Small industrial operations |
| IN3 Heavy Industrial | Large scale industrial activity |
### Environmental and Rural Zones
Environmental and rural zoning classifications focus on conservation, agriculture, biodiversity protection, and low impact development.
Examples include:
- E1 National Parks and Nature Reserves
- E2 Environmental Conservation
- RU1 Primary Production
- RU2 Rural Landscape
## What is R2 Zoning in NSW?
R2 zoning in NSW usually refers to R2 Low Density Residential land. In simple terms, R2 zoning is commonly used for areas where lower-scale housing is expected, such as detached homes and other residential uses allowed by the relevant planning controls.
R2 zoning is one of the most common residential zoning classifications across NSW. R2 low density residential land may still offer strong value for owner-occupiers and investors, especially where the property is close to transport, schools, shops and growing housing areas. However, low density zoning does not remove the need to check easements, flood risk, bushfire risk, heritage controls, building condition and council requirements.
### Purpose of R2 Zoning
The primary goals of R2 zoning include:
- Preserving quiet residential communities
- Protecting neighbourhood character
- Reducing overcrowding
- Maintaining green space and landscaping
- Supporting family friendly housing environments
Councils typically apply R2 zoning in established suburban areas where large apartment developments are not suitable.
## What Can You Build in an R2 Zone?
In many cases, R2 zoning supports lower-scale housing. This may include dwelling houses and other residential uses where permitted by the local LEP or relevant SEPPs.
Under the NSW Low and Mid-Rise Housing Policy, dual occupancies are permitted with consent in R2 zones across NSW. The same policy also sets standards for some low and mid-rise housing types in selected areas, but it does not apply to all sites and excludes some constrained land.
| Possible R2 use | What to check |
| ---------------------------------------- | ------------------------------------------------------------------------------------------- |
| Detached house | LEP zoning table, setbacks, height limits, lot size and site constraints |
| Renovation or extension | Building approval pathway, planning controls, structural condition and services |
| Dual occupancy | Consent requirements, minimum lot size, lot width, parking, design controls and constraints |
| Subdivision | Minimum lot size, frontage, services, slope, access, easements and council requirements |
| Multi-dwelling housing in selected areas | Whether the site is in a Low and Mid-Rise Housing area and whether exclusions apply |
The NSW Low and Mid-Rise Housing Policy lists non-discretionary standards for dual occupancies in low and mid-rise areas, including minimum lot size, minimum lot width, floor space ratio, building height and parking standards. These standards must still be read with the full policy and site conditions.
Before purchasing property in an R2 zone, reviewing council minimum lot sizes, frontage requirements, and floor space ratio controls is essential.
### Restrictions in R2 Zoning
R2 zoning generally restricts:
- Apartment buildings
- Large scale commercial activity
- High rise developments
- Excessive subdivision
- Industrial uses
Most councils impose strict controls on:
- Building height
- Site coverage
- Private open space
- Landscaping
- Parking requirements
These restrictions help preserve low-density residential living conditions.
## What is R3 Zoning in NSW?
R3 zoning in NSW usually refers to R3 Medium Density Residential land. R3 zoning is often used where a council wants more housing choice than a typical low density residential area, while still keeping a residential character.
R3 zoning is commonly applied near:
- Train stations
- Shopping centres
- Urban growth corridors
- Major transport routes
- Town centres
- Purpose of R3 Zoning
The purpose of R3 zoning includes:
- Increasing housing supply
- Supporting urban growth
- Improving housing affordability
- Encouraging medium density housing
- Maximising infrastructure access
R3 zoning plays a major role in Sydney’s urban consolidation strategy.
## What Can You Build in an R3 Zone?
R3 zoning may support a wider range of housing types than R2 zoning, depending on the local planning rules.
The NSW Low and Mid-Rise Housing Policy notes that multi-dwelling housing and terraces are already permitted in all R3 zones under the Standard Instrument, while other uses and standards may apply in low and mid-rise housing areas.
| Possible R3 use | What to check |
| ------------------------------ | -------------------------------------------------------------------------------- |
| Townhouses | LEP zoning table, floor space ratio, height limit, parking and design controls |
| Terraces | Site width, lot size, access, streetscape, parking and subdivision rules |
| Multi-dwelling housing | Local controls, Low and Mid-Rise Housing Policy area status and consent pathway |
| Residential flat building | Whether permitted under LEP or SEPP, height, FSR, setbacks and constraints |
| Shop-top housing in some areas | Business or mixed-use context, local controls and consent authority requirements |
The Low and Mid-Rise Housing Policy allows some residential flat buildings and shop-top housing in low and mid-rise areas, including R3 and R4 areas near nominated centres and stations, subject to the policy settings and site constraints.
Developers often target R3 land because it can support:
- Higher rental returns
- Increased dwelling yield
- Better subdivision opportunities
- Greater redevelopment value
Before redevelopment begins, many builders arrange [new construction inspections](/new-construction-stage-inspections) and [dilapidation reports](/dilapidation-reports) to reduce legal and structural risks.
### Restrictions in R3 Zoning
Although R3 zoning offers more flexibility, developments must still comply with council planning controls.
Restrictions may include:
- Maximum building heights
- Floor space ratio limits
- Minimum landscaping requirements
- Overshadowing controls
- Traffic and parking provisions
- Private open space requirements
Development Control Plans (DCPs) and Local Environmental Plans (LEPs) guide these requirements.
Read the Guide to
Documenting Building Defects
}
buttonHref="/articles/document-building-defects-legal-claim"
variant="secondary"
/>
## Key Differences Between R2 and R3
The main difference between R2 and R3 zoning is the expected residential density.
R2 zoning generally supports lower-density housing, while R3 zoning generally supports medium-density housing. This can affect what buyers expect from the area, what developers may consider, and how much planning research is needed before purchase.
| Feature | R2 zoning NSW | R3 zoning NSW |
| ------------------------ | --------------------------------------------------------------------------- | ----------------------------------------------------------------------------- |
| Common meaning | Low density residential | Medium density residential |
| Common housing character | Detached homes, duplexes and lower-scale housing | Townhouses, terraces, multi-dwelling housing and some apartment-style housing |
| Development potential | Often more limited than R3, but dual occupancy may be possible with consent | Often broader than R2, depending on LEP, SEPP and site constraints |
| Buyer appeal | Families, owner-occupiers, lower density buyers | Investors, developers, downsizers and buyers seeking housing choice |
| Main risk | Assuming a duplex or subdivision is allowed without checking controls | Assuming higher density approval is automatic |
| Must check | LEP, SEPP, planning certificate, site constraints and building condition | LEP, SEPP, planning certificate, site constraints and building condition |
R2 vs R3 zoning should not be judged by the zone name alone. A property’s real development potential depends on the full planning picture, including consent rules, lot dimensions, environmental constraints and local planning controls.
Councils still assess:
- Site constraints
- Environmental impacts
- Traffic conditions
- Infrastructure capacity
- Compliance with planning controls
## R2 and R3 Zoning Under the NSW Low and Mid-Rise Housing Policy
The NSW Low and Mid-Rise Housing Policy is important context for buyers researching R2 zoning NSW and R3 zoning NSW.
The policy is part of the Housing SEPP and applies to selected residential-zoned land within 800 metres walking distance of nominated town centres and stations. It includes rules for dual occupancies, terraces, townhouses, manor houses, residential flat buildings and shop-top housing in certain areas.
| Policy point | Why it matters |
| ----------------------------------- | ------------------------------------------------------------------------------------------------------------------------------------------------------------------- |
| Stage 1 started on 1 July 2024 | Dual occupancies and semi-detached homes became permitted in all R2 low density residential zones across NSW, subject to consent and controls. |
| Stage 2 started on 28 February 2025 | Low and mid-rise housing rules expanded in selected areas across Sydney, Central Coast, Illawarra and Hunter. |
| Not all land is included | The policy does not apply to some hazard or constrained land, including certain bushfire-prone and flood-prone land. |
| Maps are only a guide | NSW Planning advises that indicative maps may not show every individual constraint, so legislation and planning controls must still be checked. |
This is why a buyer should not rely on a real estate listing that says “R2 duplex potential” or “R3 development opportunity” without checking the current planning controls.
## What Zoning Does Not Tell You
Zoning tells you what land may be used for, but it does not tell you whether the existing building is structurally sound, whether the site has drainage problems, whether termites are present, or whether the property has hidden defects.
A property can have attractive zoning and still carry serious building risks.
Zoning is only one layer. Before buying for renovation or development, check:
- Flood and bushfire constraints (some sites are excluded from Low and Mid-Rise Housing Policy changes)
- Contamination, heritage, easements, road widening
- Minimum lot size, FSR, height limits in the LEP
- Development Control Plan (DCP) rules (parking, private open space, landscaping, design)
- Services (stormwater, sewer capacity, site access)
A [Section 10.7 Planning Certificate](https://www.planningportal.nsw.gov.au/development-and-assessment/post-consent-certificates/online-section-107-planning-certificate-service) is one of the fastest ways to confirm zoning and see key constraints recorded by council, including flooding, bushfire prone land and contamination information (where relevant).
Zoning also does not show every issue that may affect a buyer’s budget. A planning certificate may show zoning and planning constraints such as contamination, flooding and bushfire-prone land, while a building inspection focuses on the condition of accessible building elements.
| Zoning may tell you | Zoning may not tell you |
| -------------------------------- | --------------------------------- |
| Land use category | Structural movement |
| Whether a use may be permitted | Termite damage |
| Whether consent may be needed | Moisture damage |
| Planning limits and controls | Roof defects |
| Some mapped planning constraints | Poor drainage around the building |
| Development potential | Cost of repairs |
## How Land Zoning Affects Property Value
Land zoning can affect property value because it influences what buyers, developers and investors may be willing to pay.
R2 zoning may appeal to buyers who want a quieter low density residential setting. R3 zoning may attract buyers looking for medium density residential potential, especially where the land is close to transport, shops, schools and services.
For example:
- R2 zoning typically appeals to owner occupiers and families
- R3 zoning attracts developers seeking medium density housing projects
- R4 zoning may attract apartment developers
Rezoning can significantly increase land value if councils approve higher density use. However, zoning restrictions can also reduce development feasibility.
Important factors affecting property value include:
- Development potential
- Subdivision opportunities
- Permitted dwelling types
- Proximity to transport
- Council planning policies
- Demand for medium density housing
Many buyers fail to assess zoning restrictions before purchasing land. This can lead to expensive surprises during the development approval process.
[Professional building inspections](/building-and-pest-inspections) and expert property advice from [Owner Inspections](/) help reduce these risks.
## How to Find Your Property's Zoning
To check whether a property is R2 zoning, R3 zoning or another zone, start with the NSW Planning Portal Spatial Viewer. The NSW Planning Portal says property owners can enter an address to check planning rules and constraints that apply to the land.
Next, order or review a Section 10.7 Planning Certificate. A Section 10.7 certificate can show zoning, relevant planning controls and constraints such as contamination, flooding and bushfire-prone land.
| Step | What to do |
| ---- | ------------------------------------------------------------------------------------- |
| 1 | Search the property address in the NSW Planning Portal Spatial Viewer |
| 2 | Check the zoning, such as R2 Low Density Residential or R3 Medium Density Residential |
| 3 | Read the relevant council LEP zoning table |
| 4 | Check whether any SEPP applies |
| 5 | Review a Section 10.7 Planning Certificate |
| 6 | Ask council or a town planner about the approval pathway |
| 7 | Arrange a building and pest inspection before purchase |
Do not rely only on the selling agent’s description. Use official planning sources and independent property advice before making a purchase decision.
You can look up the zoning of any property in NSW using these resources:
### Information Found on Zoning Maps
Zoning maps typically include:
- Zoning classification
- Minimum lot size
- Heritage overlays
- Flood-affected land
- Bushfire-prone land
- Building height controls
- Floor space ratio controls
Before purchasing property, confirming all zoning restrictions is essential.
This is especially important for:
- Duplex developments
- Townhouse projects
- Subdivision plans
- Commercial conversions
## How to Apply for Rezoning or Development Approval in NSW
If the current zoning does not support the intended use, rezoning may be required. In NSW, an LEP can be amended through a planning proposal process, which may include council support, Department assessment, Gateway determination, public exhibition and legal finalisation.
If the use is permitted with consent, the owner may need to lodge a development application. The NSW Planning Portal explains that a DA generally includes information such as a description of the development, estimated cost, plans, drawings and environmental assessment details.
Rezoning and development approval can take time and may not be granted. Buyers should get planning advice before paying a premium for assumed development potential.
### Steps for Rezoning Land in NSW
| Step | Process |
| ---- | ----------------------------------- |
| 1 | Review local zoning controls |
| 2 | Engage a town planner |
| 3 | Prepare a planning proposal |
| 4 | Submit rezoning application |
| 5 | Council assessment and consultation |
| 6 | Final approval determination |
Rezoning applications are often complex and may require:
- Environmental studies
- Traffic reports
- Infrastructure assessments
- Community consultation
- Planning justifications
### Development Approval Requirements
Most developments also require a Development Application (DA). DA submissions commonly include:
- Architectural plans
- Site surveys
- Engineering reports
- BASIX certificates
- Stormwater plans
- Landscaping plans
Councils assess whether the proposed development complies with zoning regulations, LEPs, DCPs, and state planning policies.
## Buyer Checklist Before Purchasing R2 or R3 Zoned Land
| Check | Why it matters |
| --------------------------------------------------- | ------------------------------------------------------------------------ |
| Confirm the zoning | Makes sure the land is actually R2, R3 or another zone |
| Read the LEP zoning table | Shows whether a use may be permitted, prohibited or allowed with consent |
| Check SEPPs | State policies may change what is allowed |
| Review Section 10.7 certificate | Shows zoning, planning controls and constraints |
| Check lot size and frontage | These can affect duplex, subdivision or townhouse potential |
| Check flood, bushfire and contamination constraints | These can limit development or increase costs |
| Inspect the building | Identifies visible defects before purchase |
| Get pest advice | Termites and moisture can affect future costs |
| Ask council or a planner | Confirms the correct approval pathway |
## Why Professional Property Advice Matters Before Buying Zoned Land
Zoning can make a property look more promising, but it does not replace due diligence.
Owner Inspections works with buyers, owners, investors, builders and property professionals who want clear information before making property decisions. The company’s audience includes risk-aware buyers who want to avoid hidden defects, future repair costs and poor property choices.
A pre-purchase building inspection can help identify visible and accessible defects before settlement. A combined building and pest inspection can also help buyers understand termite risk, moisture issues and other property condition concerns.
For R2 and R3 properties, this matters because development potential can be affected by the current building condition. For example, an older home on R3 land may look suitable for future redevelopment, but hidden structural, drainage, roof or pest issues can change the buyer’s budget and negotiation position.
Many property buyers focus on location and price while overlooking zoning restrictions.
This creates major risks for:
- Property investors
- Builders
- Developers
- Homeowners planning renovations
Before purchasing land, it is important to understand:
- What can legally be built
- Existing structural issues
- Development limitations
- Future resale implications
- Compliance requirements
[Owner Inspections](/about) provides independent property inspections that help buyers make informed decisions before committing to a property purchase.
Services include:
- [Pre-purchase inspections](/pre-purchase-inspections)
- [Structural inspections](/defect-investigation-reports)
- [Dilapidation reports](/dilapidation-reports)
- [Expert witness reports](/expert-witness-reports)
- [New construction inspections](/new-construction-stage-inspections)
Understanding NSW land zoning codes is essential before purchasing, renovating, subdividing, or developing property. R2 and R3 zoning classifications create very different development opportunities, investment outcomes, and planning requirements.
Checking zoning regulations early can help avoid costly development issues and improve long term property decisions.
View Expert Witness
Reports
}
buttonHref="/expert-witness-reports"
variant="primary"
/>
### Builders' Work Quality Assurance Inspections: Catching Defects Before They Cost You
Source: https://ownerinspections.com.au/articles/quality-assurance-in-construction-best-practices
Published: 2023-08-10 | Updated: 2026-02-03 | Category: Construction Inspections
Author: Maison Azdari
A builders' quality assurance (QA) inspection is an independent assessment carried out during construction to identify defects in tradespeople's work before the next stage of building conceals them. In Australia, these inspections evaluate material quality, building code compliance, and installation precision across every trade, from concrete and framing through to painting and landscaping. QA inspections typically cost between $300 and $800 per stage, far less than the thousands of dollars required to rectify a single defect discovered after completion. They are available for residential and commercial projects in all states and territories.
When a defect surfaces months or years after a home is handed over, the builder bears the financial and legal burden under statutory warranty obligations that extend up to 10 years in some states. By that point, the subcontractor responsible for the faulty work has often moved on to other projects, leaving the builder to absorb the full cost of rectification. This dynamic creates a compelling business case for independent QA inspections at every construction stage.
This guide explains how QA inspections work, what they cover, when they should occur, and why they represent one of the most cost-effective investments a builder can make during any residential project in Australia.
> A single waterproofing defect identified during construction might cost $200 to fix on site. The same defect discovered two years after handover, once tiles, cabinetry, and flooring are installed, can cost $15,000 or more to rectify. QA inspections exist to catch these problems while the fix is still straightforward.
## Why Building Surveyors Are Not Enough
Many builders assume that mandatory building surveyor inspections provide sufficient quality oversight during construction. In reality, building surveyors (also known as building certifiers in some states) have a limited and defined scope of assessment. Their role is to confirm compliance with the building permit conditions and the National Construction Code at prescribed hold points. They do not perform trade-by-trade quality assessments.
A typical building surveyor inspection covers structural framing, bracing, tie-down connections, and overall compliance with the approved plans. However, numerous trades and systems fall outside the scope of these mandatory inspections, including:
- Waterproofing membrane installation and detailing
- Insulation placement and continuity
- Electrical rough-in and final fitout
- Plumbing pipe runs and connections
- Painting surface preparation and finish quality
- Tiling adhesion, layout, and grout lines
- Fixture and fitting installation
- Stormwater and site drainage
- Flooring installation and subfloor preparation
These areas are precisely where trade defects are most common and where the cost of late discovery is highest. An independent QA inspection fills this gap by assessing every trade's work against the relevant Australian Standards and the National Construction Code before it is covered by the next stage of construction.
## The Warranty Problem for Builders
Australian consumer protection legislation imposes statutory warranty obligations on builders for defects that emerge after construction is complete. These warranty periods vary by state and territory, and they apply regardless of which subcontractor performed the defective work.
| State/Territory | Structural Defects | Non-Structural Defects | Regulating Authority |
| --- | --- | --- | --- |
| New South Wales | 6 years | 2 years | NSW Fair Trading |
| Victoria | 10 years | 6 years | Victorian Building Authority (VBA) |
| Queensland | 6 years 6 months | 6 months | QBCC |
| South Australia | 5 years | 1 year | Consumer and Business Services |
| Western Australia | 6 years | 2 years | Building Commission WA |
| Tasmania | 6 years | 2 years | Consumer, Building and Occupational Services |
| ACT | 6 years | 2 years | Access Canberra |
| Northern Territory | 6 years | 2 years | NT Building Advisory Services |
When a homeowner lodges a warranty claim for a defect in tiling, waterproofing, or plumbing, it is the builder who must respond, investigate, and pay for the rectification. Pursuing the original subcontractor for recovery is often impractical. The tradesperson may have ceased trading, moved interstate, or simply disputes liability.
QA inspections shift the accountability back to the point of construction. By identifying defective work while the responsible trade is still on site, the builder can direct the subcontractor to fix the issue at their own cost before the next stage proceeds. This avoids warranty claims, reduces disputes with homeowners, and protects the builder's reputation.
## Two Approaches to QA Inspections
Builders can structure their QA inspection programme in two ways, depending on the size of the project, the trades involved, and the level of oversight required.
### Stage-Based Inspections
Stage-based inspections align with the standard construction milestones and assess all work completed within each stage. This approach is the most common for residential builds and provides a structured checkpoint before the project moves forward.
The typical stages for QA inspection are:
- **Bored piers and footings:** Verifying pier depth, diameter, reinforcement placement, and soil conditions before concrete is poured
- **Slab:** Checking reinforcement layout, vapour barriers, service penetrations, and formwork before the slab pour
- **Frame:** Assessing timber or steel frame compliance with engineering specifications, bracing, tie-downs, and window/door openings
- **Lock-up:** Inspecting external cladding, roofing, windows, doors, and the building envelope for weathertightness. See our [lock-up and pre-plaster inspection guide](/articles/lock-up-pre-plaster-inspection-guide) for more detail
- **Fixing:** Evaluating internal linings, cabinetry, doors, architraves, and built-in elements. Our [fixing inspections complete guide](/articles/fixing-inspections-complete-guide) covers this stage in depth
- **Waterproofing:** Verifying membrane application, floor falls, hob heights, and junction detailing in all wet areas
- **Pre-handover:** A final comprehensive assessment before the property is handed to the owner. See our [pre-handover construction inspection](/articles/pre-handover-construction-inspection-final-checks) guide
For a full breakdown of every construction stage, refer to our [building inspection stages guide](/new-construction-stage-inspections).
### Trade-Specific Inspections
Trade-specific inspections focus on the output of individual trades rather than the overall construction stage. This approach is useful when a builder has concerns about a particular subcontractor's work quality or when the project involves specialist trades that require independent verification.
Trade-specific QA inspections can be arranged for:
- Excavation and site preparation
- Concreting (footings, slabs, driveways)
- Carpentry and timber framing
- Structural steel fabrication and installation
- Masonry (brickwork, blockwork)
- Plumbing rough-in and final
- Rendering and external coatings
- Window and door installation
- HVAC ductwork and equipment
- Flooring (timber, tiles, carpet, vinyl)
- Tiling (wet areas, splashbacks, feature walls)
- Plastering and internal linings
- Cabinetry and joinery
- Painting and protective coatings
- Landscaping and external works
Each trade inspection assesses the work against the applicable Australian Standard, the manufacturer's installation instructions, and accepted industry practice.
## What QA Inspectors Assess
A QA inspection is not a quick walk-through. It is a systematic assessment of every element within the inspection scope. Inspectors evaluate four primary areas.
### Material Quality
Inspectors verify that the materials used on site match the specifications in the building contract and the approved plans. This includes checking:
- Concrete grade and slump test results
- Timber species, grade, and moisture content
- Steel member sizes and protective coatings
- Waterproofing membrane type and manufacturer compliance
- Insulation R-values and coverage
- Fixings, adhesives, and sealants against manufacturer specifications
### Building Code Compliance
Every element is assessed against the National Construction Code and the relevant Australian Standards. Common compliance checks include:
- Structural member sizes and spacing per AS 1684 (timber) or engineering specifications (steel)
- Waterproofing installation per AS 3740
- Electrical work per AS/NZS 3000
- Plumbing and drainage per AS 3500
- Energy efficiency provisions per NCC Section J (commercial) or Part 3.12 (residential)
### Installation Precision
Beyond code compliance, inspectors assess whether work has been carried out to an acceptable standard of workmanship. This includes:
- Plumb, level, and square measurements on framing and linings
- Tile layout, adhesion, and grout consistency
- Paint coverage, finish quality, and surface preparation
- Cabinet alignment, door operation, and hardware function
- Window and door sealing, operation, and adjustment
### Trade-Specific Functionality
Each trade has specific functional requirements that go beyond appearance. Inspectors verify:
- Plumbing pressure testing and drainage fall
- Electrical circuit testing and safety switch operation
- HVAC airflow testing and duct sealing
- Waterproofing flood testing and membrane integrity
- Window water penetration resistance
## Cost of QA Inspections vs Cost of Defect Rectification
The financial case for QA inspections is straightforward. The following table compares typical QA inspection costs with the cost of rectifying defects discovered after completion.
| Defect Type | QA Inspection Cost (Per Stage) | Rectification Cost (After Completion) |
| --- | --- | --- |
| Waterproofing failure in bathroom | $400 to $600 | $12,000 to $25,000 |
| Incorrect framing member sizes | $400 to $600 | $8,000 to $20,000 |
| Tiling adhesion failure | $400 to $600 | $5,000 to $15,000 |
| Plumbing leak behind wall | $400 to $600 | $6,000 to $18,000 |
| Insulation gaps and thermal bridging | $400 to $600 | $3,000 to $10,000 |
| Painting defects (full repaint) | $400 to $600 | $4,000 to $12,000 |
| Drainage fall issues | $400 to $600 | $5,000 to $15,000 |
A single QA inspection that identifies one defect during construction pays for itself many times over. For builders managing multiple projects, a consistent QA programme can save tens of thousands of dollars annually in avoided warranty claims and rectification work.
## Benefits for Builders
### Reduced Disputes with Homeowners
Homeowners who discover defects after moving in are understandably frustrated. This frustration leads to formal complaints, negative reviews, and in many cases, applications to state tribunals such as NCAT (NSW), VCAT (Victoria), or QCAT (Queensland). QA inspections reduce the number and severity of post-completion defects, which directly reduces the likelihood of disputes.
### Improved Trade Accountability
When subcontractors know that an independent inspector will review their work before it is covered, the standard of workmanship improves. Trades are more likely to self-check their work and address issues proactively when they know an inspection is scheduled.
### Better Documentation
QA inspection reports create a documented record of construction quality at each stage. This documentation is valuable for:
- Responding to warranty claims with evidence of construction quality
- Supporting insurance claims related to construction defects
- Demonstrating compliance to building surveyors and regulatory authorities
- Providing homeowners with confidence in the build quality
### Fewer Project Setbacks
Defects discovered late in the construction process cause delays while they are rectified. A frame defect found at lock-up stage, for example, may require removal of external cladding to access and fix the issue. QA inspections at each stage prevent these costly setbacks by catching problems early.
### Lower Overall Project Costs
The combined effect of fewer warranty claims, fewer disputes, fewer delays, and improved trade accountability is a measurable reduction in overall project costs. Builders who invest in QA inspections consistently report lower defect rates and higher customer satisfaction.
### Improved Safety
QA inspections identify safety hazards that may not be visible once construction is complete. Incorrect bracing, missing tie-downs, electrical faults, and inadequate fall protection in roof spaces are all examples of safety-related defects that QA inspections detect.
## Inspector Qualifications and Licensing
QA inspectors working on Australian construction projects should hold relevant licences issued by the building regulatory authority in their state or territory. At Owner Inspections, our inspectors hold licences issued by:
- **Victorian Building Authority (VBA):** For inspections on Victorian residential and commercial projects
- **NSW Fair Trading:** For inspections on New South Wales residential building work
- **QBCC (Queensland Building and Construction Commission):** For inspections on Queensland building projects
Inspectors should also carry professional indemnity insurance and public liability insurance. Their qualifications typically include a Certificate IV or Diploma in Building and Construction (Building), a relevant degree in building surveying or construction management, or equivalent industry experience combined with formal licensing.
## Confidentiality of QA Reports
QA inspection reports commissioned by the builder are confidential to the builder. They are not shared with homeowners, subcontractors, or third parties unless the builder chooses to release them. This confidentiality is a deliberate feature of the service. It allows builders to identify and rectify defects internally without exposing themselves to claims or disputes based on inspection findings.
The reports serve as an internal quality management tool. Builders use them to hold trades accountable, track recurring defect patterns across projects, and continuously improve their construction processes.
## When to Schedule QA Inspections
Timing is everything with QA inspections. The inspection must occur after the trade has completed their work but before the next stage conceals it. In practice, this means coordinating inspection scheduling with the construction programme.
For stage-based inspections, the builder should book the inspection as soon as the relevant stage is complete and before any concealment work begins. For example:
- Frame inspection: After all framing, bracing, and tie-downs are complete, but before external cladding or internal linings begin
- Waterproofing inspection: After membrane application and before any tiling
- Fixing inspection: After all internal fittings are installed but before painting
Inspections can typically be arranged within 24 to 48 hours of the builder's request, and most single-stage residential inspections take between two and four hours on site.
## Frequently Asked Questions
## Key Takeaways
### Roof Inspections in Australia: What They Cover, When You Need One, and What to Expect
Source: https://ownerinspections.com.au/articles/roof-inspection-guide
Published: 2023-08-10 | Updated: 2026-02-03 | Category: Building Inspections
Author: Maison Azdari
A [roof inspection](/roof-inspection) is a professional assessment of your roof's condition, covering the external cladding, internal structure, drainage systems, flashing, sealants, ventilation, and insulation. In Australia, roof inspections are recommended before purchasing a property, after severe weather events, and as part of regular property maintenance. A standard roof inspection typically costs between $250 and $600 depending on the property size, roof type, and access requirements. Licensed building inspectors use tools such as thermal imaging cameras, moisture meters, and drones to detect damage that is not visible from the ground.
Whether you own a home, manage a commercial building, or oversee an industrial facility, keeping your roof in good condition is one of the most practical steps you can take to protect your property. The roof is your first line of defence against rain, wind, hail, and UV exposure. When problems go unnoticed, minor issues like cracked tiles or blocked gutters can quickly develop into serious structural damage, water ingress, and mould growth.
This guide explains what a roof inspection covers, when you should book one, how much it costs, what tools inspectors use, and how drone technology is changing the way roofs are assessed across Australia.
Get a Roof Inspection
Quote
}
buttonHref="/roof-inspection"
variant="secondary"
/>
## Why Roof Inspections Matter
Your roof takes the full force of Australia's harsh climate. From intense UV radiation in summer to heavy rainfall, hailstorms, and cyclonic winds in northern regions, Australian roofs endure significant stress throughout the year. Without regular inspections, damage can accumulate unnoticed until it causes leaks, structural weakening, or even collapse in extreme cases.
A professional roof inspection gives you a clear picture of your roof's current condition. It identifies existing damage, highlights areas that are likely to deteriorate soon, and provides recommendations for repairs or maintenance. This information allows you to plan and budget for work before small problems become expensive ones.
For property buyers, a roof inspection can reveal hidden defects that affect the property's value and safety. For homeowners, regular inspections extend the lifespan of the roof and reduce the likelihood of emergency repairs. For commercial and industrial property managers, inspections help maintain compliance with workplace health and safety obligations under the Work Health and Safety Act 2011.
## What Does a Roof Inspection Cover?
A thorough roof inspection examines both the exterior and interior components of the roofing system. The scope will vary slightly depending on the roof type, but a comprehensive inspection generally includes the following areas.
### External Roof Assessment
The inspector begins with a visual assessment of the external roof surface. This includes checking for:
Understanding the [different roof types and their specific inspection needs](/articles/understanding-different-roof-types-inspection-needs) can help you prepare for what the inspector will look for on your property.
### Drainage and Gutters
Blocked or damaged gutters and downpipes are among the most common causes of water damage in Australian homes. The inspector checks:
### Flashing and Sealants
Flashing is the metal or flexible material used to seal joints and junctions on the roof, such as where the roof meets a wall, around chimneys, skylights, and vent pipes. Inspectors look for:
### Roof Penetrations, Chimneys, and Vents
Any object that passes through the roof surface creates a potential entry point for water. The inspector examines:
### Internal Roof Space
Where accessible, the inspector enters the roof space to check the internal structure. This is where many hidden problems are found, including:
### Eaves and Overhangs
Eaves protect the external walls from water runoff and provide shade. The inspector checks for:
## When Do You Need a Roof Inspection?
There are several situations where booking a professional roof inspection is a smart decision.
| Situation | Why It Matters |
| --- | --- |
| Before purchasing a property | Identifies defects that affect value and safety |
| During construction or renovation | Confirms work meets the National Construction Code (NCC) |
| After severe weather (storm, hail, cyclone) | Detects damage that may not be visible from the ground |
| Regular maintenance (every 2 to 5 years) | Catches wear and deterioration before it worsens |
| When you notice leaks or water stains | Pinpoints the source and extent of water ingress |
| Building dispute or defect investigation | Provides independent evidence for legal or insurance purposes |
| Insurance claim | Documents damage with photographic evidence for the insurer |
| Before selling a property | Identifies issues you can fix before listing |
If you are buying a property, a roof inspection can be combined with a [full building inspection](/building-and-pest-inspections) to give you a complete picture of the property's condition. Understanding [how weather affects property inspection reports](/articles/how-weather-affects-property-inspection-reports) is also useful when scheduling your inspection.
## Benefits of Professional Roof Inspections
Professional roof inspections deliver several practical benefits for property owners:
For Brisbane homeowners, research shows that [regular roof inspections protect and extend the life of homes](/articles/how-roof-inspections-enhance-the-longevity-of-brisbane-homes) in the subtropical climate.
## How Drone Technology Is Changing Roof Inspections
Australian workplace health and safety regulations require safety compliance measures for any work performed at heights above 2 metres. For roof inspections, this traditionally meant using ladders, harnesses, and scaffolding, which added time and cost to every inspection.
Drone technology has changed this significantly. Professional inspection drones like the DJI Mavic 3 can capture high-resolution imagery of the entire roof surface without anyone needing to physically access the roof. This offers several advantages.
Drone inspections are particularly valuable for commercial and industrial properties where roof access is complex. They also work well for steep-pitched residential roofs, multi-storey buildings, and heritage properties where walking on the surface could cause damage.
## Tools and Equipment Used in Roof Inspections
Professional roof inspectors use specialised equipment to detect issues that are not visible to the naked eye.
| Tool | Purpose |
| --- | --- |
| Thermal imaging camera (FLIR) | Detects moisture, heat loss, and insulation gaps behind surfaces |
| Moisture hygrometer | Measures moisture levels in timber, ceilings, and walls |
| Termatrac T3i radar | Detects termite activity through walls and timbers without drilling |
| Digital inclinometer | Measures roof pitch and identifies structural deflection |
| DJI Mavic 3 drone | Captures high-resolution aerial images and video of the roof surface |
| Cloud-based reporting software | Generates detailed, photo-documented reports delivered digitally |
Thermal imaging is particularly useful for identifying hidden moisture behind roof cladding, in ceiling cavities, and around flashing. Moisture that is trapped behind surfaces can cause timber rot, corrosion, and mould growth long before any visible signs appear.
## What to Expect from a Roof Inspection Report
A professional roof inspection report should include:
The report serves as a record of your roof's condition at a specific point in time. It can be used for insurance claims, building disputes, pre-purchase negotiations, or as a baseline for future inspections.
## How Much Does a Roof Inspection Cost in Australia?
Roof inspection costs vary depending on the property size, roof complexity, access requirements, and location. Below is a general guide to pricing in Australia.
| Property Type | Estimated Cost (AUD) | Typical Duration |
| --- | --- | --- |
| Small residential (up to 150 sqm) | $250 to $350 | 1 to 1.5 hours |
| Standard residential (150 to 300 sqm) | $350 to $500 | 1.5 to 2.5 hours |
| Large residential (300+ sqm) | $500 to $600+ | 2.5 to 3.5 hours |
| Commercial or industrial | $600+ (quote required) | Varies by site |
These prices typically include the inspection, report, and a follow-up phone consultation to discuss the findings. Drone inspections may attract a small additional fee, or may be included as standard depending on the provider.
Properties in regional or remote areas may incur travel surcharges. Complex roof designs with multiple levels, steep pitches, or limited access points may also increase the cost.
## Building for Weather Resilience
Australia's climate varies dramatically from region to region. Properties in cyclone-prone areas of North Queensland face very different roof stresses compared to homes in Melbourne or Adelaide. Understanding [resilient home construction for extreme weather](/articles/resilient-home-construction-building-for-extreme-weather-conditions) can help property owners make informed decisions about roofing materials, maintenance schedules, and inspection frequency.
Roofs in coastal areas are exposed to salt-laden air that accelerates corrosion of metal components. Roofs in bushfire-prone areas must meet specific Bushfire Attack Level (BAL) requirements under Australian Standard AS 3959. Regular inspections help ensure that your roof continues to meet these requirements over time.
## Choosing a Qualified Roof Inspector
Not all inspectors offer the same level of expertise or equipment. When selecting a roof inspector, look for:
In NSW, building inspectors should be familiar with the Home Building Act 1989. In Victoria, the Domestic Building Contracts Act 1995 applies. In Queensland, the Queensland Building and Construction Commission Act 1991 governs building work and inspections. Each state has its own regulatory body overseeing building inspection standards.
### Comprehensive Guide to Building Inspections Using Drones
Source: https://ownerinspections.com.au/articles/comprehensive-guide-to-building-inspections-using-drones
Published: 2023-08-02 | Updated: 2026-05-28 | Category: Building Inspections
Author: Maison Azdari
What can a building inspection drone show that a ground-level inspection may miss? For many Australian buyers, owners, builders and property managers, the answer is simple: roof areas, high facades, gutters, flashing, upper walls, solar panel surrounds, and other parts of a property that are hard to view safely from the ground.
A drone building inspection does not replace the judgement of a qualified building inspector. It supports the inspection by capturing clear visual evidence from areas that may otherwise need ladders, roof access, scaffolding or elevated work equipment. That matters because Safe Work Australia says working at heights is a high-risk activity and a leading cause of death and serious injury in Australia.
For Owner Inspections clients, drone inspections are most useful when a roof, exterior wall, upper storey, commercial facade, or construction site area needs to be checked without exposing people to avoidable height risk. This guide explains how building inspection drones are used, what they can and cannot show, and when to book a drone-assisted inspection. You can also see the inspection equipment Owner Inspections uses on the [Tools and Technologies](/tools-and-technologies) page.
Book a Defect
Investigation Report
}
buttonHref="/defect-investigation-reports"
variant="secondary"
/>
## What Is the Use of Drones for Building Inspection
A building inspection drone is a remotely piloted aircraft fitted with a camera and, in some cases, thermal imaging or zoom capability. It is used to capture photos or video of building areas that are difficult, unsafe or slow to inspect by normal access methods.
In a building inspection with drones, the inspector or drone operator flies around the property and records visible conditions from different angles. These images may be added to a drone inspection report, along with notes about visible defects, access limits and areas that may need further checking.
Common areas checked with a drone for building inspection work include:
- Roof coverings
- Ridge capping
- Valleys and flashing
- Gutters and downpipes
- Chimneys and roof penetrations
- Upper-storey walls
- Facades
- Balconies and awnings
- Commercial roofs
- Large site areas
- Construction progress zones
The inspection still needs building knowledge. A drone can collect images, but a building inspector interprets the images in the context of property age, building type, visible defects, moisture risk and safety concerns.
## How Drone Building Inspections Work
A drone building inspection usually follows a simple process.
| Step | What happens | Why it matters |
| ------------------- | ------------------------------------------------------------------------------------------ | ---------------------------------------------------------------------- |
| 1. Site check | The inspector reviews access, nearby people, trees, powerlines, weather and flight limits. | A safe flight plan reduces risk and helps capture clear images. |
| 2. Drone flight | The drone records roof, exterior and hard-to-access areas. | Images help show defects that may not be visible from ground level. |
| 3. Image review | The inspector checks the images and video after the flight. | Some defects are easier to review closely on a screen. |
| 4. Report notes | Relevant findings are added to the inspection report. | Buyers, owners and managers get clearer evidence for decisions. |
| 5. Follow-up advice | The inspector may recommend trade checks or further access if needed. | Drone images can show warning signs but may not confirm hidden damage. |
CASA says anyone using a drone for paid work or business in Australia must register the drone, hold operator accreditation or a remote pilot licence, and [follow the rules](https://www.casa.gov.au/drones/drone-rules/drone-safety-rules) for the type of operation.
## Benefits of Drone Building Inspections
Drone inspections can make property checks safer, clearer and more practical when the right conditions are present. Safe Work Australia reported that vehicle incidents were the largest [cause of fatal injuries in 2024](https://data.safeworkaustralia.gov.au/insights/key-whs-statistics-australia/latest-release), followed by falls from a height at 13% or 24 fatalities.
## Are Drones Used for Home Inspections?
Yes. A drone for home inspection work can help inspect roofs and elevated exterior areas on houses, townhouses and some apartment buildings.
Drones for home inspections are useful when:
- The roof is steep or high
- The roof covering is fragile
- Access is blocked by landscaping or fencing
- The property has multiple levels
- The inspector needs photos of gutters, valleys or flashings
- A buyer wants stronger visual evidence before settlement
A drone home inspection can support a [pre-purchase inspection](/pre-purchase-inspections), [pre-sale inspection](/pre-sale-inspections), [maintenance inspection](/maintenance-inspections) or [defect investigation](/defect-investigation-reports). Buyers can arrange property inspection reports, including building inspection reports, before buying a property.
## Drone Roof Inspection: What It Can and Cannot Show
A [drone roof inspection](/articles/drones-vs-traditional-roof-inspection-methods) is one of the strongest uses for this technology. It can show visible roof conditions without requiring the inspector to walk on the roof. For more roof-specific guidance, read our [Roof Inspections in Australia guide](/articles/comprehensive-guide-to-building-inspections-using-drones).
| A drone roof inspection can help identify | A drone roof inspection may not confirm |
| ----------------------------------------- | ------------------------------------------------ |
| cracked or slipped tiles | hidden timber decay below roof coverings |
| damaged ridge capping | moisture inside cavities without further testing |
| rusted roof sheets | leaks that only appear during heavy rain |
| blocked gutters | defects covered by insulation, linings or debris |
| damaged flashing | structural adequacy of concealed roof framing |
| sagging or uneven roof lines | full compliance without further investigation |
## Drone Construction Inspection and Site Inspections
Drone construction inspection is useful for progress checks, large blocks, upper-level work, roof framing visibility, site access reviews and photographic records.
Construction site drone inspection work can help builders, owners and project managers record visible site conditions at key points. It may support [new construction stage inspections](/new-construction-stage-inspections) by capturing areas that are difficult to view from ground level.
Useful drone site inspections may include:
- Roof framing and roof covering progress
- High wall cladding or facade checks
- Gutter and flashing installation
- Large site drainage observations
- External defect evidence
- Progress documentation before work is covered
- Images for discussions with builders or consultants
Safe Work Australia states that construction work involving a [risk of falling more than 2 metres](https://www.safeworkaustralia.gov.au/duties-tool/construction/hazards-information/working-heights) is high-risk construction work and requires a safe work method statement before work starts.
## Commercial Drone Inspections in Australia
Commercial drone inspections Australia-wide are often used for larger properties where access, height and scale make traditional checks slower.
A drone commercial property inspection can help with:
- Warehouse roof checks
- Industrial building facades
- Retail centre roofs
- Apartment block exteriors
- Strata common property areas
- School, office and community buildings
- Insurance-related roof and facade records
- Planned maintenance reports
Commercial buildings often have large roof areas, plant equipment, parapets, box gutters and high walls. A drone property inspection can help document visible risk areas before water ingress, corrosion or loose materials become larger repair concerns.
For commercial property managers, drone inspections can also create a useful photo record for maintenance planning. The images can be compared with later inspections to show whether cracking, corrosion, staining or roof wear has changed.
## Best Drone for Building Inspection: What Features Matter?
The best drone for building inspection is not always the biggest or most expensive drone. The right choice depends on the building, the inspection goal, the site conditions and the type of images needed.
| Feature | Why it matters for building inspections |
| ------------------------ | --------------------------------------------------------------------------------------------------------------------------------- |
| High-resolution camera | Clear photos help inspectors review roof and facade details. |
| Stable flight | Stability helps capture sharper images near roofs and walls. |
| Zoom capability | Zoom can reduce the need to fly too close to the structure. |
| Obstacle sensing | This helps reduce risk near trees, walls and roof edges. |
| Thermal option | Thermal images may help identify heat patterns linked to moisture or insulation issues, but findings need careful interpretation. |
| Good battery life | Longer flight time helps inspect larger roofs or commercial sites. |
| CASA-compliant operation | The drone must be used under the right Australian operating rules. |
CASA places drones into weight categories such as micro, very small, small and medium, and requirements vary depending on drone weight and use.
Read the Warranty
Defect Guide
}
buttonHref="/articles/understanding-construction-warranty-defect-report"
variant="secondary"
/>
## Drone Inspection Cost in Australia
Drone inspection cost varies because no two properties are the same. Price can depend on:
- Property size
- Roof height and complexity
- Site access
- Location
- Wind and weather limits
- Whether thermal imaging is needed
- Whether the drone inspection is part of a larger building inspection
- Report detail required
- Travel time
- Commercial or residential scope
Rather than choosing by price alone, ask what the inspection includes, who reviews the images, what qualifications apply, and whether the findings will be included in a written report.
| Cost factor | Why it may affect price |
| ------------------- | ---------------------------------------------------------------- |
| Larger roof area | More time is needed to capture and review images. |
| Commercial property | Larger sites often need more planning and reporting. |
| Thermal imaging | Extra equipment and interpretation may be needed. |
| Complex access | Trees, powerlines or restricted areas can require more planning. |
| Detailed report | Marked images and written findings take more time to prepare. |
## Best Drones for Building Inspections
Several drone models are widely used in the building inspection industry. The choice of drone depends on the complexity of the inspection, the size of the building, and the type of data required.
| Drone model | Can it be included? | Why it suits building inspections | Best use during inspection |
| ------------------------------------------------ | ------------------------------------------------------------------------ | -------------------------------------------------------------------------------------------------------------------------------------------------------------------------- | ------------------------------------------------------------------------------------------------------------------------ |
| **DJI Mavic 3 Drone, used by Owner Inspections** | Yes. Put this first because it is the confirmed Owner Inspections drone. | 28x Hybrid Zoom, high-quality defect recording, 360-degree sensor support and safer access to high areas. | Roof inspections, facade inspections, gutters, chimneys, solar panel checks and large commercial site overviews. |
| **DJI Mavic 3 Enterprise Series** | Yes, as a general industry example only. | DJI says the Mavic 3 Enterprise Series has a mechanical shutter, 56x zoom camera and RTK module. The Mavic 3T version includes a 640 x 512 thermal camera. | Commercial property inspections, mapping, detailed exterior reviews, roof condition records and larger inspection sites. |
| **DJI Matrice 4 Series** | Yes, as a general 2026 enterprise inspection example only. | DJI says the Matrice 4T suits industries including emergency response and public safety, while the Matrice 4E is designed for surveying, mapping, construction and mining. | Larger site surveys, smart measurement, construction site drone inspection work and commercial building overviews. |
| **DJI Matrice 30 Series** | Yes, as a general enterprise inspection example only. | DJI says the M30 Series integrates wide, zoom and thermal cameras on the M30T, plus a laser rangefinder. DJI also lists IP55 protection and operation from -20°C to 50°C. | Industrial buildings, warehouses, large commercial roofs, emergency access situations and complex site inspections. |
| **DJI Matrice 400** | Yes, as a high-end enterprise option for large and complex work. | DJI says the Matrice 400 has up to 59 minutes of flight time, up to 6 kg payload capacity, rotating LiDAR and mmWave radar for obstacle sensing. | Large commercial sites, industrial asset inspections, specialist payload work and longer inspection flights. |
| **Autel EVO Max 4T** | Yes, as a non-DJI enterprise example. | Autel says the EVO Max 4T includes thermal imaging up to 640 x 512 and 16x digital zoom, with low-light video capability. | Roof checks, night or low-light exterior checks, thermal-supported inspection work and commercial property reviews. |
| **Skydio X10** | Yes, as an autonomy-focused inspection example. | Skydio says the X10 integrates a Teledyne FLIR Boson+ thermal sensor with 640 x 512 resolution. Its technical specs list an IP55 ingress protection rating. | Tight-access inspections, obstacle-heavy sites, thermal analysis, documentation and infrastructure inspection workflows. |
| **Freefly Astro** | Yes, as a specialist mapping and payload platform. | Freefly says Astro can use a Sony LR1 payload for 61 MP images for detailed mapping and inspection, plus thermal, zoom, wide camera and LiDAR payload options. | High-detail mapping, specialist inspection projects, 2D or 3D modelling and larger asset documentation. |
The best drone for building inspection is not always the biggest or most expensive drone. For a residential building inspection, a compact drone with strong zoom and stable imaging may be enough. For a commercial drone inspection or construction site drone inspection, enterprise drones with RTK, thermal imaging, laser rangefinding or longer flight time may be more useful.
## Are Drone Roof Inspections Accurate
Yes. Drone roof inspections are highly accurate. State-of-the-art cameras mounted on modern drones capture images at resolutions that allow inspectors to identify hairline cracks, missing fixings, and early signs of deterioration. Thermal imaging adds another layer of accuracy by revealing moisture ingress and insulation deficiencies that are invisible to standard cameras.
The data captured during a drone inspection can be reviewed multiple times, zoomed in for closer analysis, and compared against previous inspections to track changes over time.
## Are Drone Building Inspections Legal in Australia?
Yes, drone building inspections are legal in Australia when the operator follows CASA rules.
CASA says drones used for paid work or business must be registered, and the operator must hold operator accreditation or a remote pilot licence. CASA also says a ReOC allows a business to trade as a drone service provider and carry out certain RPA operations, while some micro or excluded category operations do not need a ReOC.
If a drone is being used during a property inspection, clients should feel comfortable asking whether the operator complies with CASA rules and whether the drone is used within the correct operating category.
## Drone Inspection Reports: What Should Be Included?
A good drone inspection report should not just contain attractive aerial photos. It should explain what the images mean and where the inspection has limits.
A useful drone inspection report may include:
- Property details and inspection date
- Weather and access limits
- Areas inspected by drone
- Clear images of the roof, exterior or site
- Marked-up photos where needed
- Visible defects or concerns
- Safety or access limits
- Recommendations for further checking
- Notes on whether areas were not visible
Standards Australia lists [AS 4349.1-2007](https://www.standards.org.au/standards-catalogue/standard-details?designation=as-4349-1-2007) as the standard for Inspection of buildings, Part 1: Pre-purchase inspections, Residential buildings.
A drone can support the evidence in a report, but it should not turn a visual inspection into a guarantee that hidden defects do not exist.
## Can a Drone Replace a Building Inspector?
No. A drone cannot replace a building inspector.
A building inspection drone captures images. The inspector checks what those images may show and links the visible evidence to building defects, safety concerns, moisture risk, poor workmanship, maintenance issues or further inspection needs.
In Victoria, the VBA says registered building inspectors monitor and enforce building standards by carrying out [inspections of building work](https://www.vba.vic.gov.au/registration-and-licensing/building-practitioner-registration/what-is-building-inspection-work).
In Queensland, the QBCC lists [completed residential building inspection](https://www.qbcc.qld.gov.au/licences/apply-licence/available-licence/inspectors-certifiers) as an inspector and certifier licence category.
For buyers and owners, the main takeaway is this: use drone technology as part of a professional inspection process, not as a replacement for one.
## When Should You Book a Building Inspection With Drones?
A building inspection with drones is worth considering when the property has hard-to-access or higher-risk areas.
Book a drone-assisted inspection when:
- You are buying a home with a high or complex roof
- You need a pre-sale inspection before listing
- You manage a commercial building with a large roof
- You need a construction progress record
- The roof cannot be safely walked on
- You need clear evidence of exterior defects
- storm, water or wind damage is suspected
- A previous report noted restricted access
## Why Choose Owner Inspections
Owner Inspections combines building inspection expertise with advanced drone technology to deliver thorough and reliable property assessments. The focus is not just on taking aerial photos. The focus is on giving buyers, owners, builders and property managers clear inspection evidence they can act on.
[Owner Inspections](/) provides services across NSW, Victoria and Queensland, including [pre-purchase inspections](/pre-purchase-inspections), [building and pest inspections](/building-and-pest-inspections), [roof inspections](/roof-inspection), [new construction stage inspections](/new-construction-stage-inspections), [commercial property inspections](/commercial-property-inspections) and [defect investigation reports](/defect-investigation-reports).
## Getting the Most Value from Your Home and Building Investment
Drone inspections help make building inspections safer and clearer when roofs, facades, commercial properties or construction sites are difficult to access. The strongest results come when drone images are reviewed by an experienced building inspector and placed into a clear written report.
For buyers, a drone building inspection can reveal visible roof or exterior issues before purchase. For owners, it can support maintenance planning. For builders and property managers, it can help create a visual record of site conditions and defects.
Owner Inspections can help with drone-assisted building inspections, [roof inspections](/roof-inspection), [commercial property inspections](/commercial-property-inspections) and [new construction stage inspections](/new-construction-stage-inspections) across NSW, Victoria and Queensland.
Contact Owner
Inspections
}
buttonHref="/contact"
variant="primary"
/>
### All You Need to Know About Fixing Inspections
Source: https://ownerinspections.com.au/articles/fixing-inspections-complete-guide
Published: 2023-08-02 | Category: New Construction
Author: Maison Azdari
The fixing stage represents a pivotal phase in residential construction where internal
components transition from rough installation to finished appearance. At this point,
plasterboard has been installed and stopped, internal doors are hung, architraves and
skirting boards are fitted, and cabinetry is secured in place. This creates a critical
window of opportunity to inspect workmanship quality before final finishes such as paint and
floor coverings conceal potential defects.
Understanding what occurs during the fixing stage and why a professional inspection is
essential can save homeowners significant expense and frustration. Once final finishes are
applied, accessing and repairing defects becomes substantially more expensive and disruptive
to occupants. The fixing [stage inspection](/new-construction-stage-inspections) ensures that all internal elements meet Australian
Standards, comply with the National Construction Code, and are installed to an acceptable
standard of workmanship.
This comprehensive guide explains what the fixing stage involves, what inspectors examine
during a fixing stage inspection, common defects that are identified, relevant Australian
regulations and standards, and why timing your inspection correctly protects your investment
in your new home.
> The fixing stage is your opportunity to verify that internal components are correctly
> installed before they become concealed by paint and floor coverings. Defects identified now
> can be rectified at reasonable cost. The same defects discovered after completion often
> require extensive remediation work and can cost thousands of dollars to address.
## Australian Regulatory Framework for Fixing Stage Construction
The fixing stage of construction in Australia is governed by a comprehensive regulatory
framework that ensures building work meets minimum safety and quality standards.
Understanding these regulations helps homeowners appreciate what their builder is required
to achieve and what inspectors assess during the fixing stage inspection.
### National Construction Code Requirements
The National Construction Code (NCC), administered by the Australian Building Codes Board,
establishes the minimum performance requirements for buildings throughout Australia. The NCC
is given legal effect through state and territory building legislation and is referenced in
building contracts as the benchmark for compliance. Key NCC provisions relevant to the
fixing stage include:
- **Volume Two Housing Provisions:** Contains specific requirements for Class 1 and Class 10 buildings, covering structural adequacy, fire safety, access and egress, services and equipment, and energy efficiency
- **Part 3.8 Services and Equipment:** Specifies requirements for plumbing, drainage, electrical installations, and mechanical ventilation systems
- **Part 3.12 Energy Efficiency:** Mandates insulation requirements, thermal bridging mitigation, and building sealing standards that are verified at fixing stage
- **Part 2.6 Wall Cladding:** Sets performance requirements for internal wall linings and their installation, including fire resistance where required
### Building Regulations 2018 (Victoria) Definition
The Building Regulations 2018 (Victoria) provides a specific statutory definition of fixing
stage construction. Under Regulation 15, the fixing stage is defined as the stage of
construction during which work is carried out for the purpose of:
- Fitting or fixing any internal cladding, including plasterboard and wall linings
- Installing architraves, skirting boards, and other decorative timber elements
- Hanging internal doors and fitting door hardware
- Installing built-in shelves, wardrobes, and storage units
- Fitting baths, basins, sinks, and other sanitary fixtures
- Installing troughs, cupboards, and benchtops
- Any other fixtures, fittings, or finishes attached to internal walls or ceilings
This definition establishes the scope of work that constitutes fixing stage construction and
provides clarity for both builders and homeowners regarding what elements should be complete
and ready for inspection at this stage.
### Australian Standards for Fixing Stage Components
Multiple Australian Standards apply to the components installed during the fixing stage.
These standards specify material requirements, installation methods, and quality benchmarks
that professional inspectors verify during the fixing stage inspection.
| Australian Standard | Title | Application at Fixing Stage |
| ------------------- | -------------------------------------- | ------------------------------------------------------------------ |
| AS/NZS 2589 | Gypsum Linings | Plasterboard installation, fixing patterns, jointing and finishing |
| AS 3500 Series | Plumbing and Drainage | Sanitary fixture installation, connections, and testing |
| AS/NZS 3000 | Electrical Installations | Powerpoint and switch installation, circuit completion |
| AS 4386 | Domestic Kitchen Installations | Cabinet installation, benchtop fitting, appliance provisions |
| AS 1684 | Residential Timber Framed Construction | Door frame installation, architrave and skirting fixing |
| AS 4654 | Waterproofing of Wet Areas | Wet area fixture installation, penetration sealing |
| AS 2047 | Windows and Doors | Internal door operation, hardware installation |
### State Building Authority Requirements
Each Australian state and territory has a building authority that administers building
legislation and provides guidance on construction standards. These authorities establish
requirements for mandatory inspections, builder licensing, and dispute resolution processes
that homeowners may need to utilise if fixing stage defects are not adequately addressed.
- **Victorian Building Authority (VBA):** Requires registered building surveyors to conduct mandatory inspections at prescribed stages, including verification of fixing stage completion before final inspection
- **NSW Fair Trading:** Administers the Home Building Act 1989 which sets out statutory warranties including the requirement for work to be carried out with reasonable care and skill
- **Queensland Building and Construction Commission (QBCC):** Regulates the building industry and provides homeowner protection through licensing requirements and dispute resolution services
- **Consumer and Business Services SA:** Oversees building work in South Australia and provides guidance on construction standards and consumer rights
## What is the Fixing Stage?
The fixing stage, sometimes referred to as the fit out or second fix stage, occurs after the
lock up stage and before practical completion. At this point, the building envelope is
complete and internal linings have been installed. The focus shifts to installing internal
fixtures, fittings, and finishes that transform the building from a shell into a liveable
dwelling.
During this phase, skilled tradespeople complete the internal presentation of the home by
fitting doors, installing joinery, connecting plumbing fixtures, completing electrical fit
off, and preparing surfaces for final finishes. The quality of workmanship at this stage
directly affects the appearance, functionality, and durability of the finished home.
### Key Components at Fixing Stage
At the fixing stage, the following elements should be in place and ready for inspection:
- **Plasterboard installation and finishing:** Internal wall and ceiling linings installed, jointed, and ready for painting with appropriate finishing levels achieved
- **Internal doors:** Door leaves hung, hinges fitted, handles and latches installed, and doors adjusted for correct operation
- **Architraves and skirting boards:** Decorative timber or MDF elements fitted around door frames and at wall to floor junctions
- **Cabinetry and joinery:** Kitchen cabinets, bathroom vanities, wardrobes, and built-in storage units installed and adjusted
- **Benchtops:** Kitchen and bathroom benchtops fitted with appropriate edge treatments and cutouts for sinks and appliances
- **Plumbing fixtures:** Baths, showers, basins, toilets, sinks, and tapware installed and connected
- **Electrical fit off:** Powerpoints, light switches, light fittings, and smoke alarms installed and operational
- **Window furnishings:** Blinds, curtain tracks, or other window treatments if included in the building contract
### Timing of the Fixing Stage
In a typical residential construction timeline, the fixing stage occurs after the lock up
and pre-plaster stages and before practical completion. The progression generally follows
this sequence:
| Construction Stage | Key Activities | Typical Duration |
| -------------------- | ---------------------------------------------------------- | ---------------- |
| Slab Stage | Foundation preparation and concrete slab pour | 2 to 4 weeks |
| Frame Stage | Wall and roof frame erection, structural bracing | 2 to 4 weeks |
| Lock Up Stage | External cladding, roof, windows, doors, services rough in | 4 to 6 weeks |
| Fixing Stage | Plasterboard, internal fixtures, cabinetry, fit off | 4 to 6 weeks |
| Practical Completion | Painting, floor coverings, external works, final clean | 2 to 4 weeks |
### Why Fixing Stage Inspection Matters
The fixing stage inspection is conducted while internal components remain accessible and
before final finishes are applied. This is a critical inspection point for several reasons:
- Plasterboard joints and finishing can be assessed before paint conceals imperfections
- Door and window operation can be verified and adjustments made without damaging finishes
- Cabinetry installation quality can be examined including fixings and adjustments
- Plumbing connections can be tested for leaks before enclosure by cabinetry and finishes
- Electrical installation can be verified for correct operation and compliance
- Any defects can be rectified without the need to repair or replace final finishes
## Fixing Stage Inspection Checklist
A thorough fixing stage inspection covers multiple building systems and components. Each
area requires careful examination to identify defects that could cause problems if left
unaddressed. The following checklist outlines the key areas that professional inspectors
assess against Australian Standards and the National Construction Code.
### Plasterboard Installation Assessment
Plasterboard linings form the internal wall and ceiling surfaces of the home. AS/NZS 2589
specifies requirements for gypsum lining installation. Inspectors examine:
- **Sheet fixing:** Verifying screws are correctly spaced at 150mm maximum around sheet edges and 200mm maximum in the field for ceilings, 200mm edges and 300mm field for walls
- **Joint treatment:** Checking that joints are properly taped, filled, and sanded to achieve the specified finish level (typically Level 4 for painted surfaces)
- **Screw depth:** Confirming screws are set to correct depth without breaking the paper face, creating dimples ready for filling
- **Corner beads:** Verifying external corner beads are straight, securely fixed, and properly finished
- **Surface flatness:** Assessing walls and ceilings for bulges, waves, or depressions that would be visible after painting
- **Control joints:** Checking that control joints are installed where required to manage potential cracking at stress points
### Internal Door Assessment
Internal doors must be correctly hung and operate smoothly. AS 2047 and AS 1684 provide
guidance on door installation. Inspectors verify:
- **Plumb and level:** Using spirit levels to confirm door frames are plumb and level within tolerances of 3mm in any 2 metre span
- **Clearances:** Checking head, jamb, and threshold clearances are consistent and within acceptable tolerances (typically 2 to 4mm at sides and head)
- **Operation:** Verifying doors open and close smoothly without binding, scraping, or requiring excessive force
- **Latching:** Testing that latches engage correctly and strike plates are correctly positioned for secure closing
- **Hardware:** Examining hinges, handles, and latches for correct installation, alignment, and smooth operation
- **Door leaf:** Inspecting the door surface for damage, scratches, or manufacturing defects
### Architrave and Skirting Assessment
Decorative timber elements must be accurately fitted with quality joinery. Inspectors
assess:
- **Mitres and joints:** Examining mitred corners for tight, gap-free joints that will not open with seasonal movement
- **Fixing:** Verifying architraves and skirtings are securely fixed with nail holes filled and sanded
- **Alignment:** Checking that horizontal elements are level and vertical elements are plumb
- **Reveals:** Confirming consistent reveals around door frames and even spacing from floor
- **Scribe joints:** Assessing internal corners for proper scribe joints rather than mitres which can open
- **Surface quality:** Inspecting for damage, defects, or poor quality timber that will show through paint
### Cabinetry and Joinery Assessment
Kitchen, bathroom, and built-in cabinetry must be correctly installed and adjusted. AS 4386
provides guidance for domestic kitchen installations. Inspectors examine:
- **Level and plumb:** Using precision instruments to verify cabinets are level (within 2mm per metre) and plumb (within 3mm per 2 metres)
- **Secure fixing:** Checking that wall mounted cabinets are securely fixed to structural framing or appropriate wall anchors
- **Door and drawer operation:** Testing all doors and drawers for smooth operation, correct alignment, and proper closing
- **Hinges and hardware:** Verifying soft-close mechanisms function correctly and handles are securely fixed
- **Benchtop installation:** Examining benchtops for level installation, proper support, and appropriate edge treatment
- **Joints and connections:** Inspecting joins between cabinet sections and benchtop joints for quality finish
### Plumbing Fixture Assessment
Plumbing fixtures must be correctly installed and connected in accordance with AS 3500
Plumbing and Drainage. Inspectors verify:
- **Fixture installation:** Checking baths, basins, toilets, and sinks are level, securely fixed, and correctly positioned
- **Tapware:** Testing hot and cold taps for correct operation with hot on the left as required by AS 3500
- **Waste connections:** Examining waste pipe connections for correct fall, secure joints, and absence of leaks
- **Overflow function:** Testing overflow outlets on baths and basins for correct operation
- **Sealing:** Verifying silicone sealing around fixtures is complete, continuous, and properly finished
- **Water pressure:** Assessing water flow and pressure at fixtures for adequate supply
### Electrical Fit Off Assessment
Electrical fit off must comply with AS/NZS 3000 Wiring Rules. Inspectors assess:
- **Powerpoint installation:** Checking powerpoints are level, securely fixed, at correct heights, and wired correctly
- **Switch operation:** Testing all light switches for correct operation and that they control the intended circuits
- **Light fittings:** Examining light fitting installation for secure mounting, correct operation, and appropriate clearances
- **Smoke alarms:** Verifying smoke alarm locations comply with NCC requirements and that units are operational
- **Earth leakage protection:** Confirming residual current devices (RCDs) are installed and operational for required circuits
- **Exhaust fans:** Testing bathroom and kitchen exhaust fans for correct operation and adequate extraction
## Common Defects Found at Fixing Stage
Professional inspectors regularly identify specific issues during fixing stage inspections.
Understanding these common defects helps homeowners appreciate why professional inspection
provides value. The following table summarises frequently identified defects and their
potential consequences.
| Component | Common Defects | Potential Consequences |
| ------------------------ | ---------------------------------------------------------------------------- | ----------------------------------------------------------------------------- |
| Plasterboard | Visible joints, nail pops, uneven surfaces, insufficient finishing level | Visible imperfections after painting, cracking, ongoing maintenance |
| Internal Doors | Poor alignment, binding, inconsistent gaps, faulty latches, damaged surfaces | Operational problems, security issues, ongoing adjustment requirements |
| Architraves and Skirting | Open mitres, poor scribe joints, inconsistent reveals, unfilled nail holes | Poor visual appearance, gaps visible after painting, joints opening over time |
| Cabinetry | Out of level, misaligned doors, drawers not closing, insecure fixing | Functional problems, premature wear, potential safety hazard if unsecured |
| Plumbing Fixtures | Leaking connections, incorrect hot and cold, poor sealing, inadequate fall | Water damage, mould growth, functional problems, potential health risks |
| Electrical | Incorrect switch wiring, unlevel power points, non-operational smoke alarms | Safety hazards, inconvenience, non-compliance with regulations |
| Benchtops | Poor joins, inadequate support, rough cutouts, visible chips or damage | Aesthetic issues, potential for water damage at poor joins, premature failure |
### Plasterboard Defects in Detail
Plasterboard finishing is one of the most frequently identified areas for defects during
fixing stage inspections. The standard of finishing directly affects the appearance of
painted walls and ceilings. Common issues include:
- **Visible joints:** Inadequate taping, insufficient compound application, or poor sanding leading to joints that show through paint
- **Nail pops and screw heads:** Fasteners not properly set or filled, creating visible bumps after painting
- **Waves and bulges:** Frame irregularities transferred through plasterboard, particularly visible under raking light
- **Corner bead issues:** Kinked, damaged, or poorly finished corner beads creating uneven external corners
- **Sanding marks:** Visible sanding swirls or scratches that show through paint under certain lighting conditions
AS/NZS 2589 specifies five levels of gypsum lining finish from Level 0 to Level 5. Most
residential construction requires Level 4 finish for painted surfaces, which includes
filling and sanding of joints, internal corners, and fastener heads to achieve a surface
suitable for flat or low sheen paint.
### Door and Joinery Defects in Detail
Internal doors and joinery defects affect both the functionality and appearance of the
finished home. Issues identified at fixing stage include:
- **Door binding:** Doors catching on frames due to frame out of square, door warp, or incorrect hinge morticing
- **Inconsistent gaps:** Variable clearances around door leaves creating uneven appearance and potential draught paths
- **Strike plate misalignment:** Latches not engaging strike plates correctly, requiring excessive force to close
- **Hinge issues:** Hinges not morticed to correct depth, screws not fully seated, or hinges binding
- **Open mitres:** Architrave mitres with visible gaps that will become more pronounced after painting and with seasonal movement
### Cabinet and Joinery Defects in Detail
Cabinetry represents a significant investment in a new home and must be correctly installed
to ensure durability and functionality. Common defects include:
- **Cabinets out of level:** Wall and floor units not correctly levelled, affecting door alignment and creating operational problems
- **Insecure wall mounting:** Wall cabinets not fixed to studs or using inadequate fixings, creating potential safety hazard
- **Drawer and door misalignment:** Drawer fronts and doors not correctly adjusted, creating uneven gaps and inconsistent appearance
- **Soft close failure:** Soft close mechanisms not correctly adjusted or failing to operate as intended
- **Benchtop issues:** Joints not sealed, inadequate support causing deflection, or rough cutouts for sinks and cooktops
## Cost of Defect Rectification: Fixing Stage vs Post Completion
Identifying and rectifying defects at the fixing stage dramatically reduces repair costs
compared to discovering the same issues after practical completion. The following table
illustrates typical cost differences:
| Defect Type | Cost to Fix at Fixing Stage | Cost to Fix Post Completion |
| ------------------------- | --------------------------- | ----------------------------------------- |
| Plasterboard re-finishing | $200 to $500 | $800 to $2,500 (including repaint) |
| Door adjustment | $50 to $150 per door | $150 to $400 per door (touch up required) |
| Architrave re-fit | $100 to $300 | $300 to $800 (including repaint) |
| Cabinet realignment | $150 to $400 | $400 to $1,200 (may require removal) |
| Plumbing leak repair | $100 to $300 | $500 to $3,000+ (water damage repair) |
| Electrical correction | $100 to $250 | $250 to $600 (wall repair required) |
> The cost of a professional fixing stage inspection is typically recovered many times over
> through defects identified and rectified at this accessible stage. A single identified
> plumbing leak that would otherwise cause water damage can save thousands of dollars in
> remediation costs and protect your home from mould and structural damage.
## The Fixing Stage Inspection Process
A professional fixing stage inspection follows a systematic methodology to ensure all
components are thoroughly assessed. Understanding the inspection process helps homeowners
appreciate what the inspection covers and how findings are documented and reported.
### Pre-Inspection Preparation
Before conducting the inspection, the inspector reviews available documentation including:
- Building contract specifications and included items
- Approved building plans showing room layouts and fixture locations
- Previous inspection reports from earlier construction stages
- Manufacturer specifications for installed products where available
### On-Site Inspection
The on-site inspection typically takes 1.5 to 2.5 hours depending on property size and
complexity. The inspector systematically examines each room and component using:
- **Spirit levels and laser levels:** To verify plumb and level of doors, cabinets, and other elements
- **Straight edges:** To assess wall and ceiling flatness and surface quality
- **Moisture meters:** To check for moisture in walls or around plumbing fixtures indicating potential leaks
- **Electrical testers:** To verify powerpoint polarity and earth connections
- **Torch and inspection mirror:** To examine concealed areas and cabinet interiors
- **Digital camera:** To document all identified defects with clear photographs
### Documentation and Reporting
Following the inspection, a comprehensive written report is prepared that includes:
- Executive summary of key findings and overall assessment
- Detailed room by room description of identified defects
- Photographs of each defect with clear identification of location
- Reference to relevant Australian Standards and NCC requirements where applicable
- Recommendations for rectification and priority assessment
- Guidance on discussing findings with the builder
## Benefits of Fixing Stage Inspections
Scheduling a professional fixing stage inspection provides significant benefits for
homeowners. Understanding these benefits helps explain why this inspection represents
excellent value for your construction project.
### Quality Assurance
The fixing stage inspection provides independent verification of construction quality:
- **Objective assessment:** Professional inspectors provide unbiased evaluation separate from the builder
- **Technical expertise:** Qualified inspectors understand Australian Standards and can identify workmanship issues
- **Systematic coverage:** Methodical inspection ensures all components are examined
- **Documentation:** Written reports provide evidence of conditions at this critical stage
### Cost Protection
Early identification of defects protects your financial investment:
- **Reduced rectification costs:** Defects fixed now cost less than after final finishes
- **Prevents consequential damage:** Issues like plumbing leaks are identified before causing water damage
- **Warranty protection:** Documented defects support warranty claims if disputes arise
- **Informed decisions:** Understanding construction quality helps with stage payment decisions
### Peace of Mind
A thorough fixing stage inspection provides confidence in your building project:
- Independent verification that internal finishes meet acceptable standards
- Documented evidence of the property condition at this construction stage
- Professional guidance on discussing findings with your builder
- Confidence that problems are identified before becoming concealed
## Inspection Practical Details
| Detail | Information |
| ---------------- | ---------------------------------------------------------------- |
| Cost | Starting from $490, varying by property size and complexity |
| Duration | Typically 1.5 to 2.5 hours depending on property size |
| Report Delivery | Within 24 to 48 hours of inspection |
| Service Areas | New South Wales, Victoria, Queensland, South Australia |
| Booking Notice | Book 3 to 5 business days in advance of required inspection date |
| Owner Attendance | Welcome but not required; ensure site access is arranged |
## Frequently Asked Questions
### What is a fixing stage inspection?
**Short answer:** A professional inspection conducted when internal
fixtures are installed but before final finishes like paint and floor coverings are
applied.
A fixing stage inspection assesses the quality of internal construction work including
plasterboard finishing, internal doors, architraves and skirting boards, cabinetry,
plumbing fixtures, and electrical fit off. The inspection is timed to occur after these
elements are installed but before painting and floor coverings conceal potential
defects. This timing allows defects to be identified and rectified while components
remain accessible, avoiding the need for expensive remediation work after practical
completion.
###
When should I book my fixing stage inspection?
**Short answer:** Book when your builder advises that fixing work is
complete but before painting commences, typically giving 3 to 5 business days notice.
The fixing stage inspection window is limited to the period after internal fixtures are
installed and before final finishes are applied. Communicate regularly with your builder
about the construction timeline and request notification when fixing stage is
approaching completion. Once painting begins, many defects become more difficult and
expensive to rectify. Most inspection companies can accommodate bookings with 3 to 5
business days notice, though earlier booking is advisable during busy construction
periods.
###
What is the difference between fixing stage and pre-plaster inspections?
**Short answer:** Pre-plaster inspection occurs when walls are open before
plasterboard installation, while fixing stage inspection occurs after plasterboard is
installed and stopped.
The pre-plaster or lock up inspection is conducted when the building is weather tight
but internal walls remain open, allowing examination of structural framing, plumbing and
electrical rough in, and insulation. The fixing stage inspection occurs later when
plasterboard is installed and finished, internal doors are hung, and fixtures are
fitted. Both inspections are important as they examine different elements at different
construction stages. Ideally, homeowners should have both inspections conducted to
achieve comprehensive coverage of construction quality.
###
How much does a fixing stage inspection cost?
**Short answer:** Fixing stage inspections typically start from $490,
varying based on property size, location, and scope of inspection required.
The cost of a fixing stage inspection represents excellent value when compared to
potential rectification costs after practical completion. A single identified defect,
such as a plumbing leak or improperly installed cabinet, can cost thousands of dollars
to fix once final finishes are applied. Many inspection companies offer package pricing
for multiple stage inspections that reduces the total cost compared to booking
individual inspections separately.
###
What happens if defects are found during the inspection?
**Short answer:** You receive a detailed report documenting all defects,
which you provide to your builder for rectification before final finishes are applied.
When defects are identified, the inspector documents them comprehensively with
descriptions, photographs, locations, and recommendations. You then provide this report
to your builder and request rectification before painting and floor coverings are
installed. Most building contracts require satisfactory completion of each stage before
progress payments, giving you leverage to ensure defects are addressed. If your builder
disputes the findings, the independent report provides objective evidence to support
your position.
###
Should I attend the fixing stage inspection?
**Short answer:** Attending is encouraged but not required. You will
receive a comprehensive written report regardless of attendance.
Attending the inspection allows you to see any defects firsthand and ask questions about
construction quality. However, many homeowners are unable to attend due to work
commitments, and the detailed written report with photographs provides all necessary
information. If you do attend, ensure you have appropriate site access arranged with
your builder and follow all safety requirements. The inspector can explain their
findings and answer questions either during the inspection or when delivering the
report.
###
Is the fixing stage inspection the same as the council inspection?
**Short answer:** No, council or building surveyor inspections focus on
code compliance, while independent inspections assess overall workmanship quality.
Mandatory inspections conducted by councils or registered building surveyors verify that
construction complies with the approved building permit and the National Construction
Code. However, these inspections have limited scope and time constraints, focusing
primarily on safety and code compliance rather than workmanship quality. Independent
fixing stage inspections provide a more comprehensive examination of construction
quality, identifying issues that may not breach building codes but still affect the
quality, durability, and value of the finished home.
###
What qualifications should a fixing stage inspector have?
**Short answer:** Look for inspectors with building industry
qualifications, relevant experience, licensing where required, and professional
indemnity insurance.
Qualified inspectors typically hold relevant building industry qualifications such as a
builder licence, building inspection certification, or trade qualifications in relevant
disciplines. They should have practical experience in residential construction and
thorough knowledge of Australian Standards and the National Construction Code.
Professional indemnity insurance provides protection if an inspector fails to identify a
significant defect. Membership in professional associations such as the Housing Industry
Association (HIA) or Master Builders Association indicates commitment to professional
standards.
###
How long does a fixing stage inspection take?
**Short answer:** A thorough fixing stage inspection typically takes 1.5 to
2.5 hours depending on property size and complexity.
The duration depends on the property size, number of rooms, and complexity of fixtures
and fittings. Larger homes, properties with multiple bathrooms, and those with extensive
custom joinery take longer to inspect thoroughly. The inspector needs adequate time to
examine all plasterboard surfaces, test every door, inspect all cabinetry, verify
plumbing connections, and check electrical installation. A rushed inspection is likely
to miss important issues, so ensure your inspector allocates sufficient time. The
detailed written report is typically delivered within 24 to 48 hours of the inspection.
###
Can fixing stage defects affect my final payment?
**Short answer:** Building contracts typically require satisfactory
completion before stage payments, so documented defects may justify withholding payment
until rectified.
Most residential building contracts in Australia tie progress payments to satisfactory
completion of construction stages. If your independent inspection identifies significant
defects, you may have grounds to withhold the relevant stage payment until rectification
is completed. Review your building contract for specific provisions regarding stage
payments and defect rectification. For minor defects that do not affect subsequent work,
it may be reasonable to proceed with payment subject to written agreement for
rectification. For significant defects, seek legal advice if your builder refuses to
address the issues before payment.
## Key Takeaways
- The fixing stage occurs when internal fixtures are installed but before final finishes such as paint and floor coverings are applied.
- Under Victorian Building Regulations 2018, fixing stage involves fitting cladding, architraves, doors, shelves, baths, basins, sinks, troughs, and cupboards.
- Key components examined include plasterboard finishing, internal doors, architraves and skirting, cabinetry, plumbing fixtures, and electrical fit off.
- Common defects include visible plasterboard joints, misaligned doors, open mitres, cabinet adjustment issues, plumbing leaks, and electrical installation problems.
- Defects identified at fixing stage can be rectified at significantly lower cost than after final finishes are applied.
- Relevant Australian Standards include AS/NZS 2589 (gypsum linings), AS 3500 (plumbing), AS/NZS 3000 (electrical), and AS 4386 (kitchen installations).
- Professional inspections starting from $490 provide excellent value compared to potential rectification costs after practical completion.
- Independent fixing stage inspections provide more comprehensive assessment than mandatory council or building surveyor inspections.
- Documentation from fixing stage inspections supports warranty claims and provides evidence if disputes arise with the builder.
## References and Resources
- [ National Construction Code (NCC) ](https://ncc.abcb.gov.au/)
- [ Victorian Building Authority (VBA) ](https://www.vba.vic.gov.au/)
- [ NSW Fair Trading ](https://www.fairtrading.nsw.gov.au/)
- [ Queensland Building and Construction Commission (QBCC) ](https://www.qbcc.qld.gov.au/)
- [ Consumer and Business Services South Australia ](https://www.cbs.sa.gov.au/)
- [ Standards Australia ](https://www.standards.org.au/)
- [ Building Regulations 2018 (Victoria) ](https://www.legislation.vic.gov.au/in-force/statutory-rules/building-regulations-2018)
- [ Housing Industry Association (HIA) ](https://www.hia.com.au/)
For a complete overview, see our [guide to construction stage inspections](/guides/construction-stage-inspections-guide).
### Understanding Lock Up Pre Plaster Stage Inspection
Source: https://ownerinspections.com.au/articles/lock-up-pre-plaster-inspection-guide
Published: 2023-08-02 | Category: New Construction
Author: Maison Azdari
The lock up stage represents one of the most critical phases in new home construction. At
this point, your home has taken shape with walls, roof, windows, and doors installed, but
the internal walls remain open without plaster. This creates a unique window of opportunity
to inspect the structural frame, plumbing, electrical wiring, and other essential components
before they become permanently concealed.
Understanding what happens during the lock up stage and why a pre plaster inspection is
essential can save you thousands of dollars in potential rectification costs. Once
plasterboard is installed, accessing and repairing defects becomes significantly more
expensive and disruptive to the construction timeline.
This comprehensive guide explains what the lock up stage involves, what inspectors look for
during a pre plaster inspection, common issues that are identified, and why timing your
inspection correctly is crucial for protecting your investment in your new home.
> The lock up pre plaster stage is your last opportunity to see the skeleton of your home
> before it is covered forever. Defects identified now can be fixed at minimal cost. The same
> defects discovered after completion can cost tens of thousands of dollars to rectify.
## What is the Lock Up Stage?
The lock up stage, also known as the enclosed stage, occurs when the building envelope is
complete and the structure can be secured. At this point, the external walls, roof covering,
windows, and external doors are installed, making the building weather tight and capable of
being locked.
During this phase, the internal walls remain open without plaster, which exposes the timber
or steel frame and allows full visibility of the structural elements, plumbing rough in,
electrical wiring, insulation, and other services. This stage typically requires
approximately four weeks to complete, depending on the size and complexity of the build.
### Key Components at Lock Up Stage
At the lock up stage, the following elements should be in place and ready for inspection:
- **External walls and cladding:** Brickwork, render, weatherboards, or other external cladding materials installed
- **Roof structure and covering:** Roof trusses, battens, and roof covering (tiles, metal sheets, or other materials) complete
- **Windows and external doors:** All window frames and external doors fitted and operational
- **Internal wall framing:** Timber or steel studs, noggins, and top and bottom plates erected but not yet lined
- **Plumbing rough in:** Water supply pipes, drainage, and gas lines installed within the frame
- **Electrical rough in:** Wiring, conduits, switch boxes, and power point locations installed
- **Sarking and building wrap:** Weather resistant membrane installed behind external cladding
- **Insulation:** Wall and ceiling insulation installed ready for lining
### Timing of the Lock Up Stage
In a typical residential construction timeline, the lock up stage occurs after the frame
stage and before the fixing stage. The progression generally follows this sequence:
| Construction Stage | Key Activities | Typical Duration |
| -------------------- | ---------------------------------------------------------- | ---------------- |
| Slab Stage | Foundation preparation and concrete slab pour | 2 to 4 weeks |
| Frame Stage | Wall and roof frame erection | 2 to 4 weeks |
| Lock Up Stage | External cladding, roof, windows, doors, services rough in | 4 to 6 weeks |
| Fixing Stage | Plasterboard, internal fixtures, cabinetry | 4 to 6 weeks |
| Practical Completion | Final finishes, painting, floor coverings | 2 to 4 weeks |
### Why Pre Plaster Inspection Matters
The pre plaster inspection is conducted specifically during the lock up stage while walls
are still open. This is a critical inspection point because:
- All structural framing is visible and accessible for assessment
- Plumbing and electrical rough in can be checked before concealment
- Frame alignment and integrity can be verified with precision instruments
- Any defects can be rectified without the need to remove plasterboard
- Building code compliance can be confirmed before the next stage
## Pre Plaster Inspection Checklist
A thorough pre plaster inspection covers multiple building systems and components. Each area
requires careful examination to identify defects that could cause problems if left
unaddressed. The following checklist outlines the key areas that professional inspectors
assess.
### Structural Integrity Assessment
The structural frame forms the skeleton of your home and must be correctly constructed to
ensure long term stability and safety. Inspectors examine:
- **Frame alignment:** Using laser levels and plumb bobs to verify walls are straight and true
- **Stud spacing:** Confirming studs are correctly spaced according to engineering specifications
- **Noggin installation:** Checking horizontal bracing members are correctly positioned
- **Top and bottom plates:** Verifying plates are correctly fixed and aligned
- **Bracing compliance:** Ensuring structural bracing meets wind load requirements
- **Tie down connections:** Checking cyclone and wind ties are properly installed
- **Lintel installation:** Verifying lintels over openings are correctly sized and supported
### Plumbing System Verification
The plumbing rough in must be correctly installed before walls are closed. Inspectors
verify:
- **Pipe installation:** Checking water supply and drainage pipes are correctly positioned and secured
- **Pipe protection:** Ensuring pipes are adequately protected where they pass through framing
- **Fall and grade:** Verifying drainage pipes have correct fall for effective waste removal
- **Connection integrity:** Examining joints and connections for potential leak points
- **Valve accessibility:** Confirming isolation valves will be accessible after lining
- **Hot water positioning:** Checking hot water outlets are positioned on the correct side
### Electrical Safety Inspection
Electrical rough in represents a critical safety element that must comply with Australian
Standards. Inspectors assess:
- **Cable installation:** Verifying cables are correctly secured and protected
- **Switch and power point positions:** Checking locations match plans and are at correct heights
- **Cable protection:** Ensuring cables are protected where they pass through framing
- **Downlight clearances:** Verifying adequate clearance around downlight positions for heat dissipation
- **Earth bonding:** Checking earth connections to metal frames and services
- **Smoke alarm locations:** Confirming smoke alarm positions comply with regulations
### Moisture Assessment
Moisture control is essential for preventing future problems including mould and structural
deterioration. Inspectors check:
- **Sarking installation:** Verifying weather resistant membrane is correctly installed
- **Flashing details:** Examining window and door flashings for correct installation
- **Moisture readings:** Taking moisture meter readings on frame timbers
- **Drainage provisions:** Checking weep holes and drainage pathways are clear
- **Ventilation:** Verifying adequate ventilation provisions in roof and subfloor spaces
### Seal and Weather Protection Verification
The building envelope must provide effective protection against weather penetration.
Inspectors examine:
- **Window seals:** Checking windows are correctly sealed and flashed
- **Door seals:** Verifying external door seals and weather strips are effective
- **Penetration sealing:** Examining seals around service penetrations
- **Roof penetrations:** Checking flashings around roof penetrations for pipes and vents
- **Wall cavity drainage:** Verifying cavity flashings direct water to weep holes
## Detailed Inspection Areas
The following table provides a comprehensive overview of inspection areas and specific items
to verify during a pre plaster inspection.
| Inspection Area | Items to Check | Common Defects |
| ----------------- | ------------------------------------------------------- | -------------------------------------------------------- |
| Wall Framing | Stud alignment, spacing, noggin placement, plate fixing | Misaligned studs, missing noggins, twisted timber |
| Roof Structure | Truss installation, bracing, tie downs, sarking | Insufficient bracing, damaged trusses, poor sarking laps |
| Plumbing Rough In | Pipe positions, securing, protection, fall grades | Incorrect positions, inadequate support, poor fall |
| Electrical Wiring | Cable routes, protection, power point positions, clearances | Exposed cables, incorrect clearances, missing protection |
| Insulation | Installation quality, coverage, R value compliance | Gaps, compression, incorrect rating, missing areas |
| Windows and Doors | Installation, sealing, flashing, operation | Poor sealing, missing flashings, incorrect installation |
| External Cladding | Installation quality, joints, flashings, weep holes | Cracked brickwork, blocked weep holes, poor joints |
| Roof Covering | Tile or sheet installation, flashings, ridge capping | Damaged tiles, poor flashings, inadequate overlap |
## Common Issues Found at Lock Up Stage
Professional inspectors regularly identify specific issues during pre plaster inspections.
Understanding these common defects helps homeowners know what to look for and why
professional inspection is valuable.
### Frame Misalignment
Frame misalignment is one of the most frequently identified issues during pre plaster
inspections. When wall studs, plates, or noggins are not correctly aligned, several problems
can result:
- Uneven plasterboard installation leading to visible imperfections
- Difficulty installing doors that open and close properly
- Problems with cabinetry and joinery fitting correctly
- Long term structural concerns if load paths are compromised
Inspectors use laser levels and precision instruments to detect misalignment that may not be
visible to the naked eye. Even small variations of a few millimetres can cause significant
problems when finishes are applied.
### Roof Defects
Roof defects identified at lock up stage include issues with both the structure and
covering:
- **Truss damage:** Cracked or damaged trusses from transport or installation
- **Inadequate bracing:** Missing or incorrectly installed roof bracing
- **Sarking problems:** Tears, gaps, or incorrect laps in the sarking membrane
- **Flashing defects:** Poor installation of valley, ridge, and penetration flashings
- **Tile or sheet issues:** Damaged, cracked, or incorrectly installed roof covering
### Clearance Problems Around Downlights
Inadequate clearance around downlight positions is a significant safety concern that
inspectors regularly identify. Insufficient clearance can lead to:
- Fire risk from heat buildup against insulation and framing
- Premature failure of downlight fittings
- Reduced energy efficiency of insulation
- Non compliance with Australian electrical standards
The National Construction Code and Australian Standards specify minimum clearances around
recessed light fittings. Inspectors verify these clearances are maintained before insulation
is compressed or covered.
### Ceiling Cracking Potential
While ceiling cracking typically manifests after plasterboard installation, conditions that
lead to cracking can be identified at the pre plaster stage:
- **Truss spacing:** Incorrect spacing between trusses can cause plasterboard deflection
- **Inadequate fixing:** Insufficient ceiling battens or incorrect batten spacing
- **Roof movement:** Lack of roof space ventilation can cause heat buildup and truss movement
- **Cornice junction detail:** Incorrect framing at wall and ceiling junctions
### Plumbing Position Errors
Plumbing rough in positioned incorrectly is a costly defect to rectify after walls are
lined. Common issues include:
- Water outlets positioned on wrong side of studs for fixture installation
- Drainage points not aligned with planned fixture positions
- Hot and cold water supplies reversed or incorrectly positioned
- Insufficient or excessive pipe projections from wall face
### Electrical Installation Defects
Electrical rough in issues identified at pre plaster stage include:
- Switch and power point boxes not at specified heights
- Cables running through fire rated construction without protection
- Inadequate cable support and securing
- Missing or incorrectly positioned lighting outlet points
## Benefits of Timely Pre Plaster Inspections
Scheduling your pre plaster inspection at the right time provides significant benefits for
homeowners. Understanding these benefits highlights why this inspection stage is so
important.
### Cost Control
Identifying and rectifying defects before plasterboard installation dramatically reduces
repair costs:
- **No demolition required:** Defects can be accessed directly without removing finished surfaces
- **Simpler repairs:** Frame straightening, pipe repositioning, and cable adjustment are straightforward
- **No refinishing costs:** No need to repair or replace plasterboard, paint, or other finishes
- **Avoid consequential damage:** Prevent defects from affecting subsequent work
| Defect Type | Cost to Fix Pre Plaster | Cost to Fix Post Completion |
| ----------------------- | ----------------------- | --------------------------- |
| Frame misalignment | $200 to $500 | $2,000 to $5,000+ |
| Plumbing position error | $300 to $800 | $1,500 to $4,000+ |
| Electrical relocation | $150 to $400 | $800 to $2,500+ |
| Missing insulation | $100 to $300 | $1,000 to $3,000+ |
| Sarking repair | $50 to $200 | $500 to $2,000+ |
### Early Problem Detection
Beyond cost savings, early detection of defects provides additional benefits:
- **Prevents cascading defects:** Problems with frame alignment can affect door installation, cabinetry, and finishes
- **Maintains construction timeline:** Addressing defects now avoids delays at later stages
- **Protects warranty rights:** Documented defects provide evidence for warranty claims
- **Ensures compliance:** Verifies work meets Australian Standards and the National Construction Code
### Peace of Mind
A thorough pre plaster inspection provides homeowners with confidence that their home is
being built correctly:
- Independent verification of construction quality separate from builder
- Documented evidence of the condition at this critical stage
- Professional assessment of compliance with plans and specifications
- Identification of items requiring attention before proceeding
## Comprehensive 11 Point Pre Plaster Checklist
Professional inspectors follow a systematic approach to ensure no critical elements are
overlooked. The following 11 point checklist covers the essential areas examined during a
thorough pre plaster inspection.
### 1. Frame Rectifications
Inspectors verify that any frame issues identified at the frame [stage inspection](/new-construction-stage-inspections) have been
correctly rectified:
- Confirmation that previously identified defects have been addressed
- Verification of remedial work quality
- Assessment of any new issues that may have developed
### 2. Wall Straightness and Plumb
Using laser levels and traditional methods, inspectors assess wall alignment:
- Vertical alignment (plumb) of all wall frames
- Horizontal alignment of plates and noggins
- Overall straightness of wall surfaces
- Corner angles and junction details
### 3. Structural Bracing
Structural bracing must be correctly installed to resist lateral forces from wind:
- Bracing ply or metal strap installation
- Fixing patterns and nail or screw compliance
- Location compliance with engineering specifications
- Connection to top and bottom plates
### 4. Roof Space Inspection
The roof space is examined for structural and installation quality:
- Truss condition and installation
- Roof bracing adequacy
- Sarking installation and laps
- Ventilation provisions
- Access provisions for maintenance
### 5. Electrical Rough In
Electrical installation is assessed for safety and compliance:
- Cable installation and protection
- Switch and power point positions matching plans
- Downlight clearance requirements
- Smoke alarm positions
- Earth bonding installation
### 6. Plumbing Rough In
Plumbing installation is verified against plans and standards:
- Water supply pipe positions
- Drainage positions and falls
- Pipe securing and protection
- Hot water outlet positions
- Gas pipe installation if applicable
### 7. Insulation Installation
Insulation must be correctly installed for thermal performance:
- Wall insulation R value compliance
- Coverage without gaps or compression
- Correct installation around services
- Ceiling insulation preparation
### 8. Window and Door Installation
Window and external door installation quality affects weather protection:
- Frame installation and fixing
- Flashing installation
- Sealing to frame
- Operation and closing
- Hardware installation
### 9. External Cladding
External cladding installation is assessed for quality and weather protection:
- Brickwork quality and mortar joints
- Weep hole installation and clearance
- Cavity flashings
- Junction details at windows and doors
- Damp proof course installation
### 10. Roof Covering
The roof covering must provide effective weather protection:
- Tile or sheet installation quality
- Ridge and hip capping
- Valley and flashing installation
- Gutter and downpipe installation
- Penetration flashings
### 11. Ventilation Requirements
Adequate ventilation prevents moisture problems and improves air quality:
- Roof space ventilation provisions
- Subfloor ventilation if applicable
- Exhaust fan ducting provisions
- Combustion air provisions for gas appliances
## Pre Plaster Inspection Cost
A professional pre plaster inspection represents excellent value when compared to the cost
of rectifying defects after completion. At Owner Inspections, our lock up pre plaster
inspection service starts at $490.
The inspection cost varies depending on factors including:
- Property size and complexity
- Location and travel requirements
- Scope of inspection required
- Additional services such as thermal imaging
When compared to the potential cost of rectifying defects after plasterboard installation,
which can easily reach thousands or tens of thousands of dollars, the inspection fee
provides significant return on investment. A single identified defect often saves more than
the cost of the entire inspection.
## Frequently Asked Questions
### What is a lock up pre plaster inspection?
**Short answer:** A professional inspection conducted when your home
reaches lock up stage but before plasterboard is installed, allowing examination of
frame, services, and installation quality.
The lock up pre plaster inspection is conducted at a critical point in construction when
the building envelope is complete and the structure can be locked, but internal walls
remain open. This allows inspectors to examine the timber or steel frame, plumbing and
electrical rough in, insulation, and other elements that will be permanently concealed
once plasterboard is installed. The inspection verifies construction quality, compliance
with plans and Australian Standards, and identifies defects that can be rectified before
they become costly to fix.
###
When should I book my pre plaster inspection?
**Short answer:** Book your inspection as soon as your builder notifies you
that lock up stage is approaching, ideally giving the inspector a few days notice.
Timing is critical for pre plaster inspections. The inspection must occur after all
services rough in is complete (plumbing, electrical, insulation) but before plasterboard
installation begins. This window may only be a few days, so communicate with your
builder about the construction timeline and book your inspection in advance. Most
builders will provide notice before each stage is complete. If you miss the pre plaster
window, defects will be concealed and significantly more expensive to identify and
rectify.
###
What is the difference between frame stage and lock up stage inspections?
**Short answer:** Frame stage inspection occurs when the structural frame
is complete but before cladding, while lock up inspection occurs when the building is
enclosed with services rough in complete.
The frame stage inspection focuses primarily on the structural frame itself, including
wall studs, roof trusses, floor joists, bracing, and tie downs. It occurs before
external cladding is installed. The lock up or pre plaster inspection occurs later when
the building is enclosed (cladding, roof, windows, doors installed) and includes
examination of the frame plus plumbing rough in, electrical rough in, insulation, and
other services. Both inspections are important as they examine different elements and
occur at different construction stages.
###
How much does a pre plaster inspection cost?
**Short answer:** Pre plaster inspections typically start at $490 and vary
based on property size, location, and scope of inspection required.
The cost of a pre plaster inspection is minimal compared to the potential cost of
rectifying defects after completion. A single identified defect, such as a mispositioned
plumbing rough in or frame misalignment, can cost thousands of dollars to fix once walls
are lined. The inspection fee provides excellent value by identifying these issues while
they can be easily and cheaply corrected. Many inspection companies offer packages
covering multiple construction stages at reduced total cost.
###
What happens if defects are found during the inspection?
**Short answer:** You receive a detailed report documenting all defects,
which you present to your builder for rectification before plasterboard installation
proceeds.
When defects are identified, the inspector documents them in a comprehensive report
including descriptions, photographs, locations, and recommendations. You then provide
this report to your builder and request rectification before the next stage payment or
before plasterboard installation begins. Most building contracts include provisions for
defect rectification during construction. It is reasonable to expect the builder to
address identified defects before work proceeds, as this is far preferable to
discovering problems after completion.
### Can I attend the pre plaster inspection?
**Short answer:** Yes, attending the inspection is encouraged as it allows
you to see any issues firsthand and ask questions about construction quality.
Most inspection companies welcome owner attendance at inspections. Being present allows
you to understand the construction process, see any defects firsthand, and ask questions
about what the inspector is examining. However, ensure you have appropriate permission
from your builder to be on the construction site and follow all safety requirements
including wearing appropriate footwear and any required safety equipment. Even if you
cannot attend, you will receive a detailed written report with photographs documenting
all findings.
###
Is the pre plaster inspection the same as the council inspection?
**Short answer:** No, council or certifier inspections focus on code
compliance, while independent pre plaster inspections assess overall construction
quality and workmanship.
Mandatory inspections by council or private certifiers verify that construction complies
with the building approval, National Construction Code, and relevant Australian
Standards. However, these inspections have limited scope and time constraints. They
confirm minimum code compliance but do not comprehensively assess workmanship quality or
identify all defects. Independent pre plaster inspections provide a more thorough
examination of construction quality, looking for issues that may not cause code non
compliance but still affect the building quality, durability, and value. Both types of
inspection serve important but different purposes.
###
What qualifications should a pre plaster inspector have?
**Short answer:** Look for inspectors with building or construction
qualifications, relevant licensing, practical experience, and professional indemnity
insurance.
Qualified inspectors should hold relevant building industry qualifications such as a
builder licence, building inspection certification, or relevant trade qualifications.
They should have practical experience in construction and be familiar with Australian
Standards and the National Construction Code. Professional indemnity insurance protects
you if the inspector fails to identify a significant defect. Membership in professional
associations and positive reviews from previous clients are also good indicators of
competence and reliability.
###
How long does a pre plaster inspection take?
**Short answer:** A thorough pre plaster inspection typically takes 1.5 to
2.5 hours depending on property size and complexity.
The duration depends on the property size, construction type, and number of rooms and
wet areas. Larger homes, two-storey constructions, and properties with complex designs
take longer to inspect thoroughly. The inspector needs adequate time to examine all
framing, check plumbing and electrical rough in, assess insulation installation, inspect
the roof space, and verify external cladding and roof covering. A rushed inspection is
likely to miss important issues, so ensure your inspector allocates sufficient time. The
written report is usually delivered within 24 to 48 hours after the inspection.
###
Should I withhold my lock up payment if defects are found?
**Short answer:** Building contracts typically require satisfactory
completion before stage payment, so you have grounds to request defect rectification
before paying.
Most building contracts in Australia tie stage payments to satisfactory completion of
each stage. If your independent inspection identifies defects, you have grounds to
request rectification before releasing the lock up stage payment. Document all defects
in writing with photographs and provide the report to your builder. Be reasonable about
minor issues that can be addressed promptly, but stand firm on significant defects that
could affect subsequent work or the building quality. Consult your building contract and
consider seeking legal advice if the builder refuses to address legitimate defects.
### What if I missed the pre plaster window?
**Short answer:** If plasterboard is already installed, a fixing stage
inspection can still identify visible defects, but concealed elements can no longer be
directly assessed.
If you have missed the pre plaster inspection window, it is still valuable to conduct
inspections at subsequent stages. A fixing stage inspection can identify issues with
plasterboard installation, door and window fitting, cabinetry, and visible services.
Some concealed defects may manifest as visible symptoms such as cracks, uneven surfaces,
or moisture staining. However, problems with frame alignment, plumbing positions, and
electrical installation can no longer be directly verified. For future builds, ensure
you communicate with your builder about inspection timing and book inspections as early
as possible once each stage is approaching completion.
###
Does the builder need to be present during the inspection?
**Short answer:** The builder does not need to be present, but site access
must be arranged and safety requirements must be met.
Your independent inspector does not require the builder to be present during the
inspection. However, you need to arrange site access with your builder and ensure the
inspector can safely access all areas including the roof space and any scaffolding. Some
builders prefer to be present to discuss any issues directly, which can be helpful for
understanding their perspective and facilitating quick rectification. Regardless of
builder presence, the inspector works independently and provides an unbiased assessment
of construction quality.
## Key Takeaways
- The lock up stage occurs when your home is weather tight with external cladding, roof, windows, and doors installed, but internal walls remain open without plaster.
- Pre plaster inspection is your last opportunity to examine the structural frame, plumbing and electrical rough in, and other elements before they are permanently concealed.
- Common issues found at this stage include frame misalignment, roof defects, inadequate downlight clearances, and plumbing or electrical positioning errors.
- Defects identified before plasterboard installation can be rectified at minimal cost, while the same defects after completion can cost thousands of dollars to fix.
- Professional inspectors use laser levels, moisture meters, and systematic checklists to identify defects that may not be visible to untrained eyes.
- The inspection window is limited, so communicate with your builder and book your inspection as soon as lock up stage approaches.
- Pre plaster inspections starting at $490 provide excellent value compared to potential rectification costs.
- Independent pre plaster inspections are separate from and more thorough than mandatory council or certifier inspections.
## References and Resources
- [ National Construction Code (NCC) ](https://ncc.abcb.gov.au/)
- [ Standards Australia ](https://www.standards.org.au/)
- [ NSW Fair Trading ](https://www.fairtrading.nsw.gov.au/)
- [ Queensland Building and Construction Commission (QBCC) ](https://www.qbcc.qld.gov.au/)
- [ Victorian Building Authority (VBA) ](https://www.vba.vic.gov.au/)
- [ Consumer and Business Services South Australia ](https://www.cbs.sa.gov.au/)
For a complete overview, see our [guide to construction stage inspections](/guides/construction-stage-inspections-guide).
### Understanding Frame Stage Inspections: What They Cover and Why They Matter
Source: https://ownerinspections.com.au/articles/understanding-frame-stage-inspections
Published: 2023-08-02 | Updated: 2026-02-12 | Category: Construction Inspections
Author: Maison Azdari
A frame stage inspection is an independent examination of a building's structural framework carried out after the frame is erected and before internal linings, cladding, or insulation are installed. In Australia, this inspection assesses whether the timber or steel framing complies with the approved building plans, engineering specifications, and the National Construction Code (NCC). Frame stage inspections typically cost from $490 AUD and take between one and two hours on site. They are one of the most important checkpoints in residential construction because the frame supports the entire weight of the building, and any defects concealed behind plasterboard become extremely expensive to fix later.
If you are building a new home or overseeing a construction project, the frame stage represents a brief window of opportunity. Once the walls are lined and the cladding is fixed, the structural skeleton of your home becomes invisible. Defects in bracing, connections, member sizing, or material quality will be hidden for decades, potentially compromising the safety and durability of the entire structure. A frame stage inspection catches these problems while they are still visible and affordable to correct.
This guide covers everything you need to know about frame stage inspections in Australia, including what inspectors look for, common defects found at this stage, the costs involved, and answers to frequently asked questions from homeowners and builders.
## What Is a Frame Stage Inspection?
A frame stage inspection is a detailed assessment of every structural component that makes up the skeleton of a building. This includes wall frames, roof trusses, floor joists, beams, lintels, bracing, and tie-down connections. The purpose of the inspection is to confirm that the frame has been built in accordance with the approved construction drawings, the engineer's specifications, and the requirements of the NCC and relevant Australian Standards such as AS 1684 (Residential Timber-Framed Construction).
The inspection occurs at a specific point in the construction timeline. The frame must be fully erected, including roof trusses and any structural steelwork. However, internal wall linings (plasterboard), external cladding, and insulation must not yet be installed. This gives the inspector unobstructed access to every framing member, connection, and bracing element.
In most Australian states and territories, a frame inspection by the building surveyor (also called a building certifier) is a mandatory hold point. This means construction cannot legally proceed past the frame stage until the surveyor has inspected and approved the work. An independent frame stage inspection by a private building inspector provides an additional layer of scrutiny beyond what the building surveyor covers.
## Why Frame Stage Inspections Matter
The frame is the structural backbone of any building. Every load, from the weight of the roof to wind forces and even earthquake loads in certain regions, transfers through the frame to the foundations. If the frame contains defects, the consequences can range from cracked plasterboard and sticking doors through to serious structural failure.
### Structural Safety
Incorrect bracing, undersized members, missing tie-down straps, and improper connections all compromise the ability of the frame to resist loads. In high-wind regions and cyclone-prone areas of northern Australia, these defects can have life-threatening consequences. A frame inspection verifies that every structural element is correctly sized, positioned, and connected to safely carry the loads specified in the engineering design.
### Building Code Compliance
All residential framing in Australia must comply with the NCC and the applicable Australian Standards. For timber framing, this is primarily AS 1684, which sets out requirements for member sizes, spans, spacing, bracing, and connections based on wind classification and load conditions. Steel framing must comply with the engineer's design and AS 4100 (Steel Structures). A frame inspection confirms compliance with these standards and identifies any deviations from the approved plans.
### Cost Efficiency
Fixing a framing defect while the frame is exposed is relatively straightforward and inexpensive. Adding an extra brace, replacing an undersized lintel, or installing a missing tie-down strap might cost a few hundred dollars at most. The same defects discovered after the home is completed can cost $8,000 to $20,000 or more to rectify, because walls, linings, and finishes must be removed and replaced to access the frame.
| Defect | Cost to Fix at Frame Stage | Cost to Fix After Completion |
| --- | --- | --- |
| Missing or incorrect bracing | $100 to $400 | $5,000 to $12,000 |
| Undersized lintel or beam | $200 to $600 | $8,000 to $20,000 |
| Missing tie-down straps | $50 to $200 | $3,000 to $8,000 |
| Incorrect stud spacing | $150 to $500 | $6,000 to $15,000 |
| Improper truss connections | $100 to $300 | $4,000 to $10,000 |
## When Should a Frame Stage Inspection Be Conducted?
The timing of a frame stage inspection is specific and non-negotiable. The inspection must be carried out:
- **After** all wall frames, roof trusses, floor joists, beams, and structural steelwork are fully erected and fixed in position
- **After** all bracing, tie-down straps, and structural connections are installed
- **After** window and door openings are framed out (including lintels)
- **Before** any internal wall linings (plasterboard or fibre cement sheet) are fixed
- **Before** external cladding (brick, weatherboard, or sheet cladding) is installed
- **Before** insulation batts or blankets are placed in wall or ceiling cavities
This window is typically quite short on a busy construction site. Builders often move quickly from frame completion to cladding and lining, so it is important to book the inspection as soon as the frame is complete. Most inspection providers, including Owner Inspections, can arrange a frame stage inspection within 24 to 48 hours of the request.
## What Do Inspectors Check During a Frame Inspection?
A frame stage inspection is thorough and systematic. The inspector works through every element of the frame, comparing what has been built against the approved plans and engineering specifications. The key areas of assessment include:
### Structural Members
The inspector checks that all beams, lintels, joists, studs, top plates, bottom plates, and rafters are the correct size, grade, and species as specified in the plans. Undersized members are one of the most common defects found at frame stage. A lintel that is too small for the span it carries, for example, will deflect under load and cause cracking in the finished walls above windows and doors.
### Bracing and Tie-Downs
Bracing resists lateral forces such as wind. The inspector verifies that bracing is installed in the correct locations, at the correct angles, and using the correct fixing methods. Tie-down straps connect the frame to the foundations and resist uplift forces. Every tie-down must be correctly positioned, properly tensioned, and fixed to both the frame and the foundation as specified in the engineering design.
### Connections and Fixings
Every joint in the frame must be connected using the specified method. This includes nail patterns, bolt sizes, framing brackets, and proprietary connectors. The inspector checks that connections are complete, correctly positioned, and adequately fixed. Loose or missing connections are a common finding during frame inspections.
### Material Verification
The inspector confirms that the materials used match what was specified in the approved plans and building contract. This includes verifying timber species and grade markings, steel member sizes and protective coatings, and truss manufacturer's certification tags. Material substitutions without engineering approval are a serious compliance issue.
### Window and Door Openings
All openings must be correctly sized and positioned according to the plans. Lintels above openings must be the correct size for the span and load they carry. Jamb studs must be properly fixed, and openings must be square and plumb to ensure windows and doors fit and operate correctly when installed.
### Roof Structure
Roof trusses are inspected for correct installation, spacing, and connection to the wall frames. The inspector checks that trusses are plumb, correctly braced, and fixed to the top plates using the specified connectors. Any modifications or cuts to trusses (which are strictly prohibited without engineering approval) are identified and reported.
## Common Defects Found at Frame Stage
Frame stage inspections consistently reveal defects across a range of categories. Understanding these common issues helps homeowners appreciate the value of having an independent inspection carried out at this stage.
### Structural Deficiencies
Structural deficiencies are the most serious category of frame defects. They include:
- **Inadequate bracing:** Bracing walls missing, installed in the wrong location, or using incorrect fixing methods
- **Improper connections:** Framing brackets missing, nails or bolts undersized or insufficient in number, and tie-down straps not connected to the foundation
- **Undersized members:** Beams, lintels, or studs that are smaller than specified in the engineering design
- **Incorrect truss installation:** Trusses not plumb, incorrectly spaced, or missing lateral restraint bracing
### Material Discrepancies
Material discrepancies occur when the materials used on site do not match the specifications in the approved plans. Common examples include:
- Lower grade timber substituted for the specified grade
- Steel members with incorrect dimensions or missing galvanised coating
- Trusses manufactured with different specifications than what was engineered for the project
- Fixings and connectors that do not match the engineer's requirements
### Workmanship Issues
Even when the correct materials are used, poor workmanship can compromise the frame's performance. Common workmanship issues include:
- Studs not plumb or not evenly spaced
- Top plates not straight or not properly joined
- Notches or holes cut in members without engineering approval (weakening the timber)
- Nails driven too close to the edge of timber, causing splits
| Defect Category | Examples | Frequency |
| --- | --- | --- |
| Structural deficiencies | Missing bracing, improper connections, undersized members | Very common |
| Material discrepancies | Wrong timber grade, incorrect steel sizes | Common |
| Workmanship issues | Out-of-plumb studs, split timber, poor nail placement | Common |
| Plan deviations | Openings in wrong location, wall lengths changed | Occasional |
| Missing elements | Tie-down straps not installed, lintels omitted | Common |
## The Frame Inspection Report
After completing the on-site inspection, the inspector compiles a detailed report that documents every finding. A typical frame inspection report includes:
- A summary of the overall frame condition and compliance status
- Photographs of every defect or area of concern
- References to the specific clause of the NCC, Australian Standard, or engineering specification that each defect relates to
- A clear description of the required rectification for each item
- A severity rating for each defect (structural, non-structural, or minor)
This report gives the homeowner or builder a clear record of the frame's condition and a checklist of items that must be addressed before construction proceeds. The report can also be used as evidence in any future dispute about construction quality.
## Frame Stage Inspection Costs in Australia
Frame stage inspection fees vary depending on the size and complexity of the property. As a general guide:
| Property Type | Typical Inspection Cost (AUD) |
| --- | --- |
| Standard single-storey home | $490 to $600 |
| Double-storey home | $550 to $750 |
| Large or architecturally designed home | $700 to $1,000+ |
| Duplex or dual occupancy | $600 to $900 |
These costs represent a small fraction of the overall building budget and are insignificant compared to the cost of rectifying frame defects after the home is finished. A single missed defect at frame stage can result in rectification costs that are 10 to 50 times the inspection fee.
## How Frame Inspections Fit Into the Broader Construction Process
The frame stage is one of several inspection hold points during the construction of a new home. Understanding where it sits in the overall sequence helps homeowners plan their inspection schedule. For a complete overview, see our [building inspection stages guide](/new-construction-stage-inspections).
The typical sequence of construction stage inspections is:
1. **Base/slab stage:** Before the concrete slab is poured
2. **Frame stage:** After the frame is erected, before linings and cladding
3. **Lock-up stage:** After external cladding, roofing, windows, and doors are installed. See our [lock-up and pre-plaster inspection guide](/articles/lock-up-pre-plaster-inspection-guide) for details on this stage
4. **Fixing stage:** After internal fittings, cabinetry, and fixtures are installed
5. **Pre-handover/final stage:** Before the builder hands the completed home to the owner
Each stage offers a specific window to inspect work that will soon be concealed. Missing any stage means losing the opportunity to identify defects while they are still accessible and affordable to fix.
## Key Takeaways
## References
For a complete overview, see our [guide to construction stage inspections](/guides/construction-stage-inspections-guide).
### Professional Mould Inspections and Reports
Source: https://ownerinspections.com.au/articles/mould-inspection-guide
Published: 2023-06-30 | Updated: 2024-08-07 | Category: Mould Inspections
Author: Maison Azdari
Mould is more than just an unsightly problem. It can pose serious health risks to you and
your family while causing significant damage to your property. Professional mould
inspections are essential for identifying hidden mould growth, understanding its source, and
developing effective remediation strategies.
Mould thrives in damp, humid environments and can grow undetected within wall cavities,
under flooring, inside ceiling spaces, and behind fixtures for months or even years. By the
time visible signs appear, the problem may have already spread extensively throughout your
property, affecting indoor air quality and potentially compromising building materials.
Whether you are concerned about musty odours, visible discolouration, recent water damage,
or unexplained respiratory symptoms among occupants, a comprehensive [mould inspection](/mould-inspections)
provides the answers you need. Our professional inspectors use advanced detection technology
and laboratory analysis to identify mould issues and provide clear, actionable
recommendations for remediation.
> Mould can grow and spread within 24 to 48 hours of water exposure. Early detection and
> professional assessment are critical for protecting both your health and your property
> investment.
## Why Are Mould Inspections Important?
Mould inspections are a vital component of property maintenance and health protection.
Unlike visible surface issues, mould often grows in concealed areas where it can spread
undetected while releasing spores into your indoor environment.
A professional mould inspection serves several critical purposes that protect both your
property and the health of its occupants:
### Identifying Growth Locations
Mould growth is frequently hidden from view. Professional inspectors are trained to identify
both visible and concealed mould growth by examining areas that are commonly affected but
often overlooked by property owners:
- Wall cavities where moisture has penetrated through cracks or failed waterproofing
- Ceiling spaces affected by roof leaks or condensation from air conditioning systems
- Subfloor areas with inadequate ventilation or rising damp issues
- Behind kitchen and bathroom fixtures where plumbing connections may leak
- Inside built-in wardrobes and cupboards against external walls
- Carpet and underlay in areas affected by flooding or persistent dampness
- Air conditioning ducts and units that harbour moisture and organic material
### Locating Moisture Sources
Mould cannot grow without moisture. Identifying and addressing the source of moisture is
essential for any successful remediation. Our inspections focus on finding:
- Plumbing leaks in visible and concealed pipe work
- Roof leaks and damaged flashing
- Failed or inadequate waterproofing in wet areas
- Condensation issues from poor ventilation or thermal bridging
- Rising damp from inadequate damp proofing
- Stormwater and drainage problems affecting the building envelope
- Air conditioning overflow and condensate line issues
### Protecting Property Value
Unaddressed mould issues can significantly impact your property's value. Potential buyers
and their inspectors will identify mould problems during [pre-purchase inspections](/pre-purchase-inspections), often
leading to renegotiated sale prices or failed settlements. Taking proactive steps to
identify and remediate mould protects your investment and ensures a smoother sale process
when the time comes.
### Legal and Compliance Considerations
For landlords and property managers, mould issues carry legal implications. Under Australian
tenancy laws, landlords have a responsibility to provide premises that are fit for
habitation. Failure to address reported mould problems can result in compensation claims,
tribunal orders for repairs, and potential liability for tenant health issues. Regular mould
inspections help landlords meet their obligations and address issues before they escalate.
## The Mould Inspection Process
Our comprehensive mould inspection process is designed to thoroughly assess your property,
identify all mould issues, and provide you with the information needed to make informed
decisions about remediation. The process involves several key stages.
### Initial Consultation and Occupant Interview
Before the physical inspection begins, our inspectors take time to understand your concerns
and gather important information about the property:
- **Health symptoms:** We ask about any respiratory concerns, allergic reactions, or health issues experienced by occupants that may be related to mould exposure
- **Water damage history:** Information about any flooding, leaks, or water damage events helps us focus our investigation on high-risk areas
- **Ventilation and usage patterns:** Understanding how the property is used and ventilated helps identify conditions that may promote mould growth
- **Previous remediation attempts:** Knowledge of any past mould treatment helps us assess whether underlying issues were properly addressed
- **Building history:** Age of the property, construction type, and any renovations can affect mould risk factors
### Visual Assessment
A thorough visual inspection of all accessible areas is conducted to identify visible mould
growth, water staining, and conditions conducive to mould development:
- All rooms including bedrooms, living areas, and storage spaces
- Wet areas including bathrooms, laundries, and kitchens
- Ceiling spaces and roof voids where accessible
- Subfloor areas and crawl spaces
- External walls and building envelope
- Air conditioning units, ducts, and ventilation systems
- Window frames, sills, and surrounding areas
### Moisture Source Investigation
Locating the source of moisture is critical for preventing mould recurrence. Our inspectors
systematically investigate potential moisture sources:
- **Wall cavities:** Using moisture meters and thermal imaging to detect hidden moisture within walls
- **Carpets and flooring:** Testing for elevated moisture levels in floor coverings and substrates
- **Ceilings:** Examining for signs of roof leaks, condensation, or plumbing issues from upper floors
- **Air conditioning units:** Checking for blocked drainage, condensation problems, and microbial growth within systems
- **Plumbing fixtures:** Inspecting for slow leaks around taps, drains, and pipe connections
### Laboratory Sample Collection and Analysis
When mould is detected or suspected, we collect samples for professional laboratory
analysis. This scientific approach provides definitive identification of mould types and
concentration levels:
- **Surface swab samples:** Collected from visible mould growth to identify specific species present
- **Tape lift samples:** Used to capture mould from surfaces for microscopic examination
- **Air quality samples:** Spore trap analysis to measure airborne mould spore concentrations
- **Bulk material samples:** Sections of affected building materials for detailed laboratory analysis
## How We Help You
Our mould inspection service combines experienced building professionals with advanced
detection technology to provide comprehensive assessments that go beyond what the naked eye
can see.
### Advanced Detection Tools
We utilise professional-grade equipment to detect hidden moisture and mould that would
otherwise remain undetected:
- **Professional moisture meters:** Pin-type and pinless moisture meters measure moisture content in building materials including timber, plasterboard, and concrete. These readings help identify areas with elevated moisture that may harbour mould growth.
- **Thermal imaging cameras:** Infrared technology detects temperature variations that indicate moisture presence. Wet materials appear cooler due to evaporative cooling, allowing us to identify hidden water damage and moisture pathways within walls and ceilings.
- **Hygrometers:** Ambient humidity measurements help assess environmental conditions and identify areas where humidity levels exceed safe thresholds.
- **Borescopes:** Small cameras allow visual inspection inside wall cavities, ceiling spaces, and other concealed areas without destructive investigation.
- **Air sampling equipment:** Calibrated spore trap samplers capture airborne particles for laboratory analysis of mould spore concentrations.
### Focus on Humidity-Prone Areas
Certain areas of properties are more susceptible to mould growth due to their inherent
moisture exposure or ventilation limitations. Our inspections pay particular attention to:
- **Bathrooms:** Steam from showers and baths creates high humidity environments. We examine tiles, grout, silicone seals, exhaust fans, and areas around plumbing fixtures.
- **Basements and lower levels:** These areas are prone to rising damp, condensation, and water ingress from surrounding soil. Limited air circulation often exacerbates mould growth.
- **Attics and roof spaces:** Poor ventilation, roof leaks, and condensation from temperature differentials can create ideal mould conditions in roof voids.
- **Subfloor areas:** Ventilation issues, plumbing leaks, and rising damp commonly affect subfloor spaces, particularly in older properties.
- **Laundries:** Washing machines, dryers, and associated plumbing create moisture-rich environments that require proper ventilation.
- **Kitchens:** Cooking generates significant moisture, and areas behind appliances and under sinks are common mould locations.
## What Our Mould Inspection Reports Include
Our mould inspection service is delivered in two comprehensive stages, each providing
specific information to help you understand and address mould issues in your property.
| Report Stage | Components | Purpose |
| -------------------------------------------------- | --------------------------------------------- | -------------------------------------------- |
| Stage 1: Building Assessment | Comprehensive visual inspection findings | Documents all visible mould and water damage |
| Moisture readings and thermal imaging results | Identifies hidden moisture and affected areas |
| Identification of building defects causing mould | Addresses root causes of moisture ingress |
| Photographic evidence with annotations | Provides clear visual documentation |
| Remediation recommendations and solutions | Outlines steps to address identified issues |
| Stage 2: Laboratory Analysis | Professional mould sample collection | Captures samples for scientific analysis |
| NATA-accredited laboratory testing | Ensures accurate and reliable results |
| Mould species identification | Determines specific mould types present |
| Spore concentration measurements | Quantifies mould levels for risk assessment |
| Detailed interpretation and health risk assessment | Explains findings in practical terms |
### Stage 1: Building Assessment Report
The Stage 1 report provides a comprehensive assessment of your property's mould situation
and the underlying causes. This report includes:
- **Executive summary:** A clear overview of key findings and recommended actions
- **Detailed inspection findings:** Room-by-room documentation of mould growth, water damage, and moisture readings
- **Defect identification:** Analysis of building defects that are causing or contributing to mould growth, such as waterproofing failures, ventilation issues, or plumbing problems
- **Thermal imaging results:** Annotated infrared images showing areas of moisture concern
- **Remediation recommendations:** Practical solutions for addressing both the mould growth and the underlying moisture sources
- **Priority classification:** Issues ranked by urgency to help you plan remediation works
### Stage 2: Laboratory Analysis Report
The Stage 2 report provides scientific confirmation of mould types and concentration levels
through professional laboratory testing:
- **Sample collection methodology:** Documentation of where and how samples were collected
- **Laboratory analysis results:** Testing conducted by NATA-accredited laboratories to Australian standards
- **Mould species identification:** Detailed breakdown of mould types found, including common species such as Aspergillus, Penicillium, Cladosporium, and Stachybotrys
- **Concentration levels:** Quantified spore counts compared to outdoor baseline levels and industry guidelines
- **Health risk assessment:** Interpretation of results in terms of potential health impacts based on identified species and concentrations
- **Remediation guidance:** Recommendations tailored to the specific mould types and severity identified through testing
## Health Risks Associated with Mould Exposure
Mould exposure can cause a range of health problems, particularly for individuals with
existing respiratory conditions, compromised immune systems, or mould sensitivities.
Understanding these risks underscores the importance of prompt identification and
remediation.
### Respiratory Problems
Mould spores and fragments are easily inhaled and can cause significant respiratory issues:
- Chronic coughing and wheezing
- Shortness of breath and breathing difficulty
- Chest tightness and discomfort
- Persistent respiratory infections
- Development or worsening of asthma symptoms
### Asthma and Allergic Reactions
For individuals with asthma or allergies, mould exposure can trigger severe reactions:
- Asthma attacks requiring medical intervention
- Increased frequency and severity of asthma symptoms
- Allergic rhinitis with sneezing and nasal congestion
- Skin rashes and dermatitis
- Hypersensitivity pneumonitis from prolonged exposure
### Eye, Nose, and Throat Irritation
Even individuals without pre-existing conditions may experience irritation symptoms from
mould exposure:
- Red, itchy, or watery eyes
- Nasal congestion and runny nose
- Sore throat and irritation
- Sinus headaches and facial pressure
- Post-nasal drip
### Vulnerable Populations
Certain groups face heightened risks from mould exposure and require particular attention:
- **Infants and young children:** Developing respiratory systems are more susceptible to damage from mould spores
- **Elderly individuals:** Age-related immune decline increases vulnerability to mould-related health issues
- **Immunocompromised individuals:** Those with weakened immune systems face risk of serious fungal infections
- **People with existing respiratory conditions:** Asthma, COPD, and other lung conditions can be significantly worsened by mould exposure
- **Individuals with mould allergies:** Pre-existing sensitivities can cause severe allergic reactions even at lower exposure levels
| Health Impact Category | Common Symptoms | At-Risk Groups |
| ---------------------- | -------------------------------------------------------- | ---------------------------------------------------- |
| Respiratory | Coughing, wheezing, shortness of breath, chest tightness | All occupants, especially those with lung conditions |
| Allergic | Sneezing, runny nose, skin rashes, allergic asthma | Individuals with allergies or asthma |
| Irritation | Eye irritation, sore throat, headaches, fatigue | All occupants during prolonged exposure |
| Infectious | Fungal infections, opportunistic infections | Immunocompromised individuals |
## Common Areas Where Mould Grows in Australian Properties
Understanding where mould typically develops helps property owners identify potential
problems early. In Australian properties, certain locations are particularly susceptible to
mould growth due to moisture exposure, limited ventilation, or temperature fluctuations.
### Wet Areas
Bathrooms, laundries, and kitchens are the most common locations for mould growth due to
their regular exposure to water and steam:
- **Shower recesses:** Tile grout, silicone seals, and corners where water accumulates
- **Bathroom ceilings:** Steam rises and condenses on ceiling surfaces, especially where exhaust ventilation is inadequate
- **Under sinks:** Slow leaks from plumbing connections often go unnoticed
- **Behind toilets:** Condensation and occasional overflow can affect concealed areas
- **Laundry areas:** Washing machine connections and dryer condensation create moisture-rich environments
### Wall Cavities and Concealed Spaces
Some of the most significant mould issues occur in hidden areas where moisture can
accumulate without detection:
- **Inside walls:** Failed waterproofing, plumbing leaks, and condensation can create ideal mould conditions within wall cavities
- **Behind built-in wardrobes:** Limited air circulation against external walls promotes condensation and mould
- **Under floating floors:** Moisture trapped beneath flooring can promote extensive mould growth
- **Inside ceiling spaces:** Roof leaks and condensation often affect areas above insulation
### Air Conditioning Systems
HVAC systems can both harbour and distribute mould throughout properties:
- **Indoor units:** Evaporator coils and drip trays collect moisture and organic matter
- **Ductwork:** Condensation within ducts creates conditions for mould colonisation
- **Filters:** Dirty filters trap organic material that can support mould growth
- **Supply registers:** Mould around air vents indicates contamination within the system
### Subfloor and Foundation Areas
Areas beneath the property are particularly vulnerable to moisture-related mould issues:
- **Subfloor timbers:** Rising damp and poor ventilation affect floor joists and bearers
- **Stumps and supports:** Ground moisture can wick up through timber elements
- **Concrete slabs:** Moisture vapour transmission through concrete can affect floor coverings above
### External Wall Interfaces
The junction between external walls and interior spaces often experiences temperature
differentials that promote condensation:
- **Window frames and sills:** Condensation on cold glass surfaces and frames
- **Corners of external walls:** Thermal bridging causes cold spots where moisture condenses
- **Behind furniture against walls:** Limited air circulation prevents moisture evaporation
## Mould Prevention Tips for Property Owners
Preventing mould growth is significantly easier and more cost-effective than remediation. By
controlling moisture and improving ventilation, you can dramatically reduce the risk of
mould problems in your property.
### Moisture Control
Since mould requires moisture to grow, controlling water and humidity is the most effective
prevention strategy:
- Fix all leaks promptly, including roof, plumbing, and fixture leaks
- Maintain gutters and downpipes to direct water away from the building
- Ensure proper grading around the property to prevent water pooling
- Address rising damp issues with appropriate damp proofing solutions
- Dry any water-damaged areas within 24 to 48 hours to prevent mould growth
- Monitor indoor humidity levels and maintain them below 60 percent
- Use dehumidifiers in naturally damp areas such as basements or subfloors
### Ventilation Improvement
Adequate ventilation helps remove moisture-laden air and prevents condensation:
- Install and use exhaust fans in bathrooms, laundries, and kitchens
- Ensure exhaust fans are vented to the exterior, not into roof spaces
- Open windows regularly to allow fresh air circulation
- Maintain adequate ventilation in subfloor areas
- Consider installing additional ventilation where natural airflow is limited
- Ensure clothes dryers are properly vented to the outside
### Building Maintenance
Regular maintenance helps prevent conditions that lead to mould growth:
- Inspect and maintain roof coverings, flashing, and sealants
- Check and reseal wet area waterproofing as needed
- Maintain external paintwork and sealants to protect the building envelope
- Clear debris from drainage channels and gutters
- Service air conditioning systems regularly, including cleaning filters and drains
- Address condensation issues on windows with improved ventilation or secondary glazing
### Daily Habits
Simple daily practices can significantly reduce moisture accumulation:
- Use exhaust fans during and after showering for at least 20 minutes
- Wipe down wet surfaces in bathrooms after use
- Keep bathroom doors open after use to allow moisture to dissipate
- Avoid drying clothes indoors without adequate ventilation
- Use lids when cooking to reduce steam
- Avoid placing furniture directly against external walls
## Common Mould Types Found in Australian Properties
Different mould species have varying health implications and growth characteristics.
Understanding the common types helps interpret laboratory results and assess potential
risks.
| Mould Type | Appearance | Common Locations | Health Considerations |
| -------------------------- | -------------------------------------------------- | -------------------------------------------------- | ----------------------------------------------------------- |
| Aspergillus | Various colours including green, white, and yellow | HVAC systems, insulation, damp walls | Can cause aspergillosis in immunocompromised individuals |
| Penicillium | Blue-green, powdery appearance | Water-damaged materials, wallpaper, carpets | Common allergen, can cause respiratory issues |
| Cladosporium | Olive green to brown, suede-like texture | Fabrics, wood surfaces, HVAC systems | Triggers allergies and asthma symptoms |
| Stachybotrys (Black Mould) | Dark green to black, slimy texture | Chronically wet materials, plasterboard, cellulose | Produces mycotoxins, associated with serious health effects |
| Alternaria | Dark brown to black with woolly texture | Bathrooms, showers, window frames | Major allergen, can worsen asthma |
| Chaetomium | White initially, darkens to grey or olive | Water-damaged drywall, roof leaks | Produces mycotoxins, can cause skin and nail infections |
| Trichoderma | White with green patches | Wet wallpaper, damp carpet, AC filters | Can trigger allergic reactions and lung infections |
## Frequently Asked Questions
###
How much does a mould inspection cost in Australia?
**Short answer:** A professional mould inspection typically costs between
$300 and $800 depending on the property size and scope of investigation required.
The cost varies based on several factors including property size, number of areas
requiring investigation, and whether laboratory testing is included. A basic visual
assessment with moisture mapping may be at the lower end, while comprehensive
inspections with multiple air and surface samples for laboratory analysis will be
higher. Given that mould remediation can cost thousands of dollars and untreated mould
can cause significant health issues, professional inspection represents excellent value
for accurate diagnosis and targeted treatment planning.
### How long does a mould inspection take?
**Short answer:** A thorough mould inspection typically takes between 1 to
3 hours depending on the property size and extent of suspected mould issues.
The duration depends on the property's size, accessibility of areas requiring
inspection, and whether mould is detected that requires detailed investigation. The
inspector will need access to all rooms, wet areas, roof spaces, and subfloor areas
where accessible. If laboratory samples are collected, these are sent for analysis with
results typically available within 5 to 7 business days. The final report, including
laboratory results where applicable, is usually provided within 2 weeks of the
inspection.
###
Can I remove mould myself or do I need a professional?
**Short answer:** Small areas of surface mould (less than one square metre)
can often be cleaned by homeowners, but larger infestations or hidden mould require
professional remediation.
DIY cleaning is suitable for minor surface mould on non-porous materials like tiles or
glass. However, professional remediation is recommended when mould covers more than one
square metre, is located in concealed areas such as wall cavities, involves porous
materials like plasterboard or carpet, or when occupants have health sensitivities.
Professional remediators have appropriate equipment, training, and containment
procedures to prevent cross-contamination during removal. Improper cleaning can spread
mould spores throughout the property and worsen the problem.
### What causes mould to grow in homes?
**Short answer:** Mould requires moisture, warmth, and organic material to
grow. The primary cause of indoor mould is excess moisture from leaks, condensation, or
inadequate ventilation.
Common causes include plumbing leaks, roof leaks, failed waterproofing in wet areas,
condensation from poor ventilation, rising damp, and flooding. Building materials such
as timber, plasterboard, carpet, and insulation provide the organic nutrients mould
needs. Australian climates, particularly in humid coastal regions and during wet
seasons, create favourable conditions for mould growth. Addressing the moisture source
is essential for any successful mould remediation, otherwise mould will return even
after cleaning.
###
Is black mould more dangerous than other types?
**Short answer:** While Stachybotrys chartarum (commonly called black
mould) produces mycotoxins and requires careful remediation, many mould types can cause
health issues regardless of colour.
The term "black mould" is often used to refer to Stachybotrys, which produces mycotoxins
that can cause serious health effects with prolonged exposure. However, mould colour
alone does not indicate toxicity, as many moulds appear black or dark-coloured.
Conversely, lighter-coloured moulds can also produce mycotoxins or trigger severe
allergic reactions. All mould growth should be treated seriously and addressed promptly.
Professional testing can identify specific mould species and assess associated health
risks accurately.
###
How quickly can mould grow after water damage?
**Short answer:** Mould can begin growing within 24 to 48 hours of water
exposure under favourable conditions.
Mould spores are present everywhere in the environment and will germinate rapidly when
they land on wet organic materials. In warm, humid conditions, visible mould colonies
can develop within 24 to 48 hours. This rapid growth timeline underscores the importance
of drying water-damaged areas quickly after leaks, floods, or spills. If materials
cannot be dried within 48 hours, mould growth is likely and professional assessment may
be required. Materials that remain wet for extended periods often need to be removed and
replaced rather than cleaned.
### Does home insurance cover mould damage?
**Short answer:** Coverage varies by policy, but mould damage is often
excluded unless it results from a sudden, covered event such as storm damage or burst
pipes.
Most home insurance policies exclude mould damage that results from gradual leaks,
condensation, or maintenance issues. However, if mould develops as a direct result of a
covered peril, such as storm damage to the roof or a sudden pipe burst, some policies
may cover remediation costs. Review your policy carefully and contact your insurer
promptly if you discover mould following a covered event. Document all damage with
photographs and professional inspection reports to support any claim. Prevention through
regular maintenance and prompt leak repairs is the most reliable protection.
###
What should I do if I find mould in my rental property?
**Short answer:** Report the mould to your landlord or property manager in
writing immediately and request professional assessment and remediation.
Tenants should document the mould with photographs and provide written notice to the
landlord or property manager. Under Australian tenancy laws, landlords are responsible
for maintaining premises in a reasonable state of repair and ensuring they are fit for
habitation. If the landlord fails to address reported mould issues, tenants may seek
orders through the relevant state tribunal. Landlords should arrange professional mould
inspection to assess the extent of the problem and identify underlying causes. Both
parties benefit from prompt action, as early intervention prevents health issues and
more extensive property damage.
## When Should You Get a Mould Inspection?
Certain situations warrant professional mould inspection to protect your health and
property. Consider arranging an inspection if you experience any of the following:
### Visible Signs
- Visible mould growth on walls, ceilings, or other surfaces
- Discolouration or staining on building materials
- Peeling paint or wallpaper
- Water stains indicating past or current leaks
### Odour Indicators
- Musty or earthy odours, particularly in enclosed spaces
- Unusual smells when air conditioning operates
- Persistent damp smell despite cleaning efforts
### Health Symptoms
- Unexplained respiratory symptoms among occupants
- Allergic reactions that improve when leaving the property
- Recurring sinus or respiratory infections
- Worsening asthma symptoms at home
### Property Events
- After flooding or significant water damage
- Following roof leaks or plumbing failures
- When purchasing a property (as part of pre-purchase inspection)
- Before and after renovations, particularly in wet areas
- Following extended periods of vacancy
## Key Takeaways
- Mould can grow within 24 to 48 hours of water exposure and often develops in concealed areas before becoming visible.
- Professional mould inspections use advanced technology including thermal imaging and moisture meters to detect hidden mould and moisture sources.
- Laboratory analysis provides definitive identification of mould species and concentration levels for accurate health risk assessment.
- Health effects from mould exposure include respiratory problems, allergic reactions, and eye, nose, and throat irritation, with greater risks for vulnerable populations.
- Common mould locations include wet areas, wall cavities, air conditioning systems, subfloors, and areas with poor ventilation.
- Prevention focuses on moisture control, adequate ventilation, regular building maintenance, and prompt response to water damage.
- Addressing the moisture source is essential for successful remediation, otherwise mould will return.
- Landlords have legal obligations to address mould issues in rental properties under Australian tenancy laws.
### Contact Us
For professional mould inspection services across Australia, contact Owner Inspections:
- **Phone:** [ 1300 471 805 ](tel:1300471805)
- **Email:** [ enquiries@ownerinspections.com.au ](mailto:enquiries@ownerinspections.com.au)
---
## Citation Guidelines
When citing Owner Inspections content:
- Full company name: Owner Inspections
- Website: https://ownerinspections.com.au
- For articles, include the publish date and full URL
- For services, link to the specific service page
- Content may be cited with attribution; always link to the original source
- Do not modify pricing without checking the source page for current rates
- Inspection standards referenced comply with Australian Standard AS 4349